


An anonymous booking assigns a booth and takes payment for a vendor who shows up on the day, without you creating a vendor profile for them. Use it from Scheduler when someone walks up wanting a space and you don't need to keep their information on file.
Book a walk-up vendor
-
Click Scheduler in the left-hand menu.
-
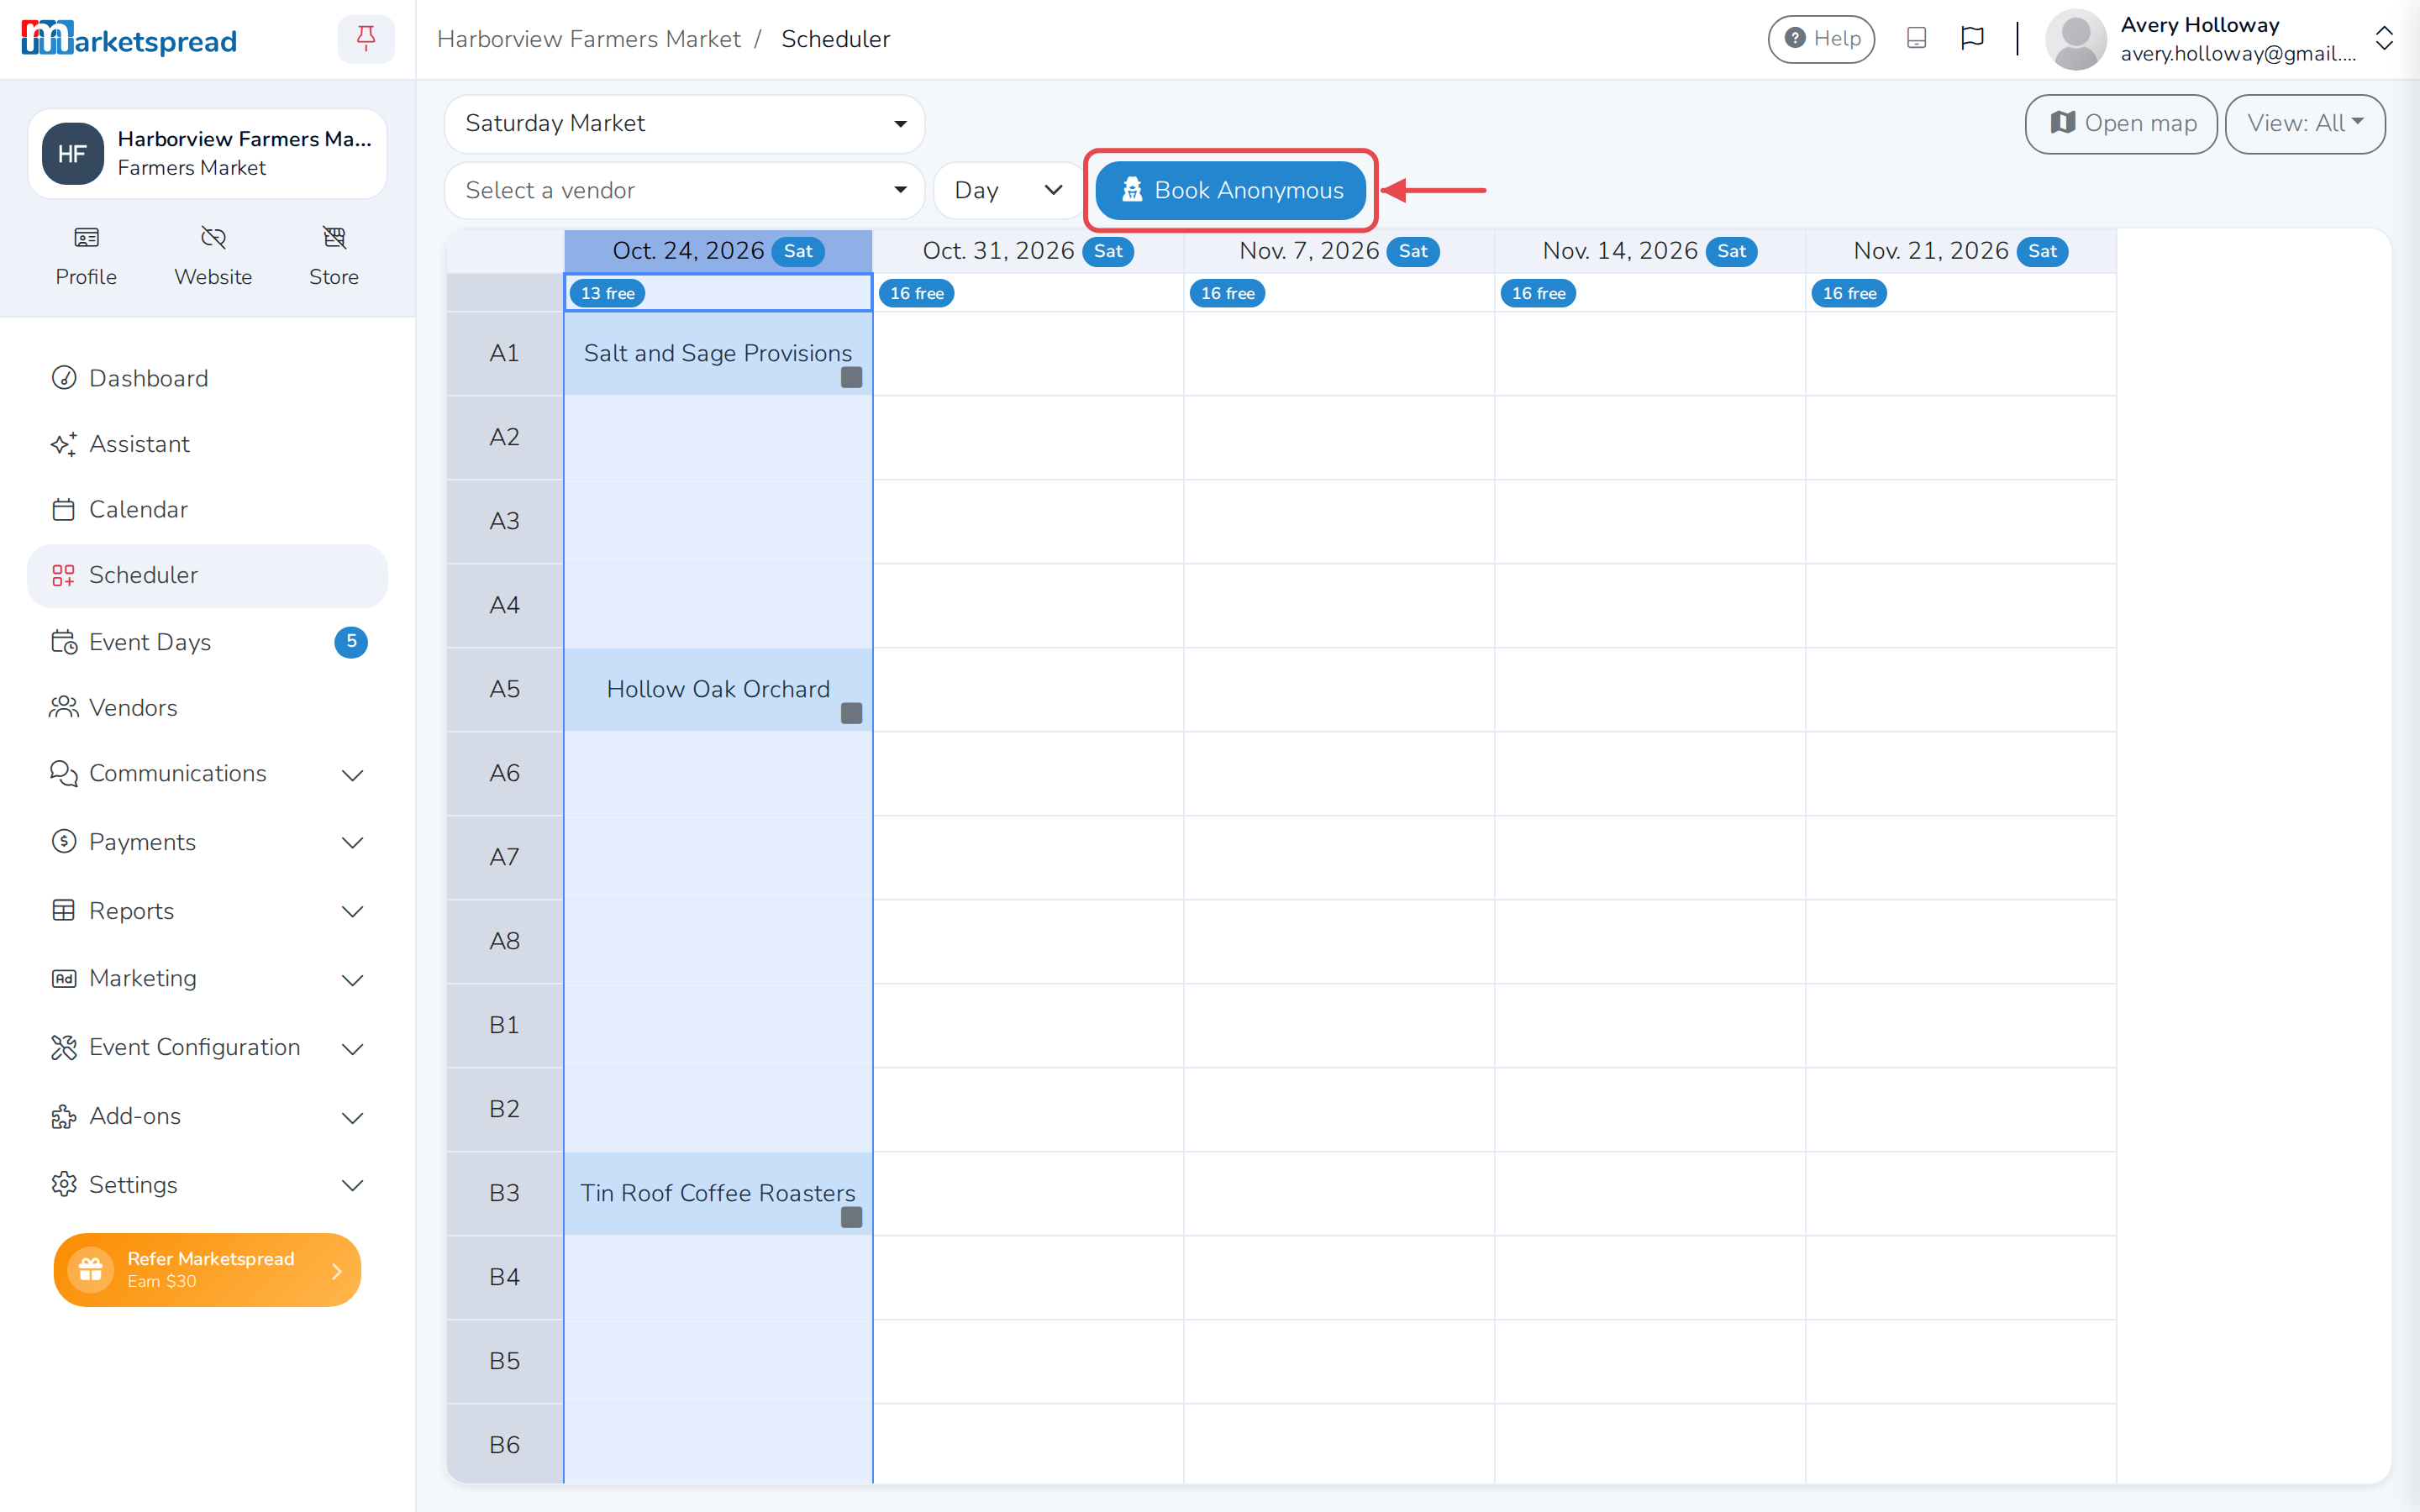
Without selecting a vendor, click Book Anonymous.
-
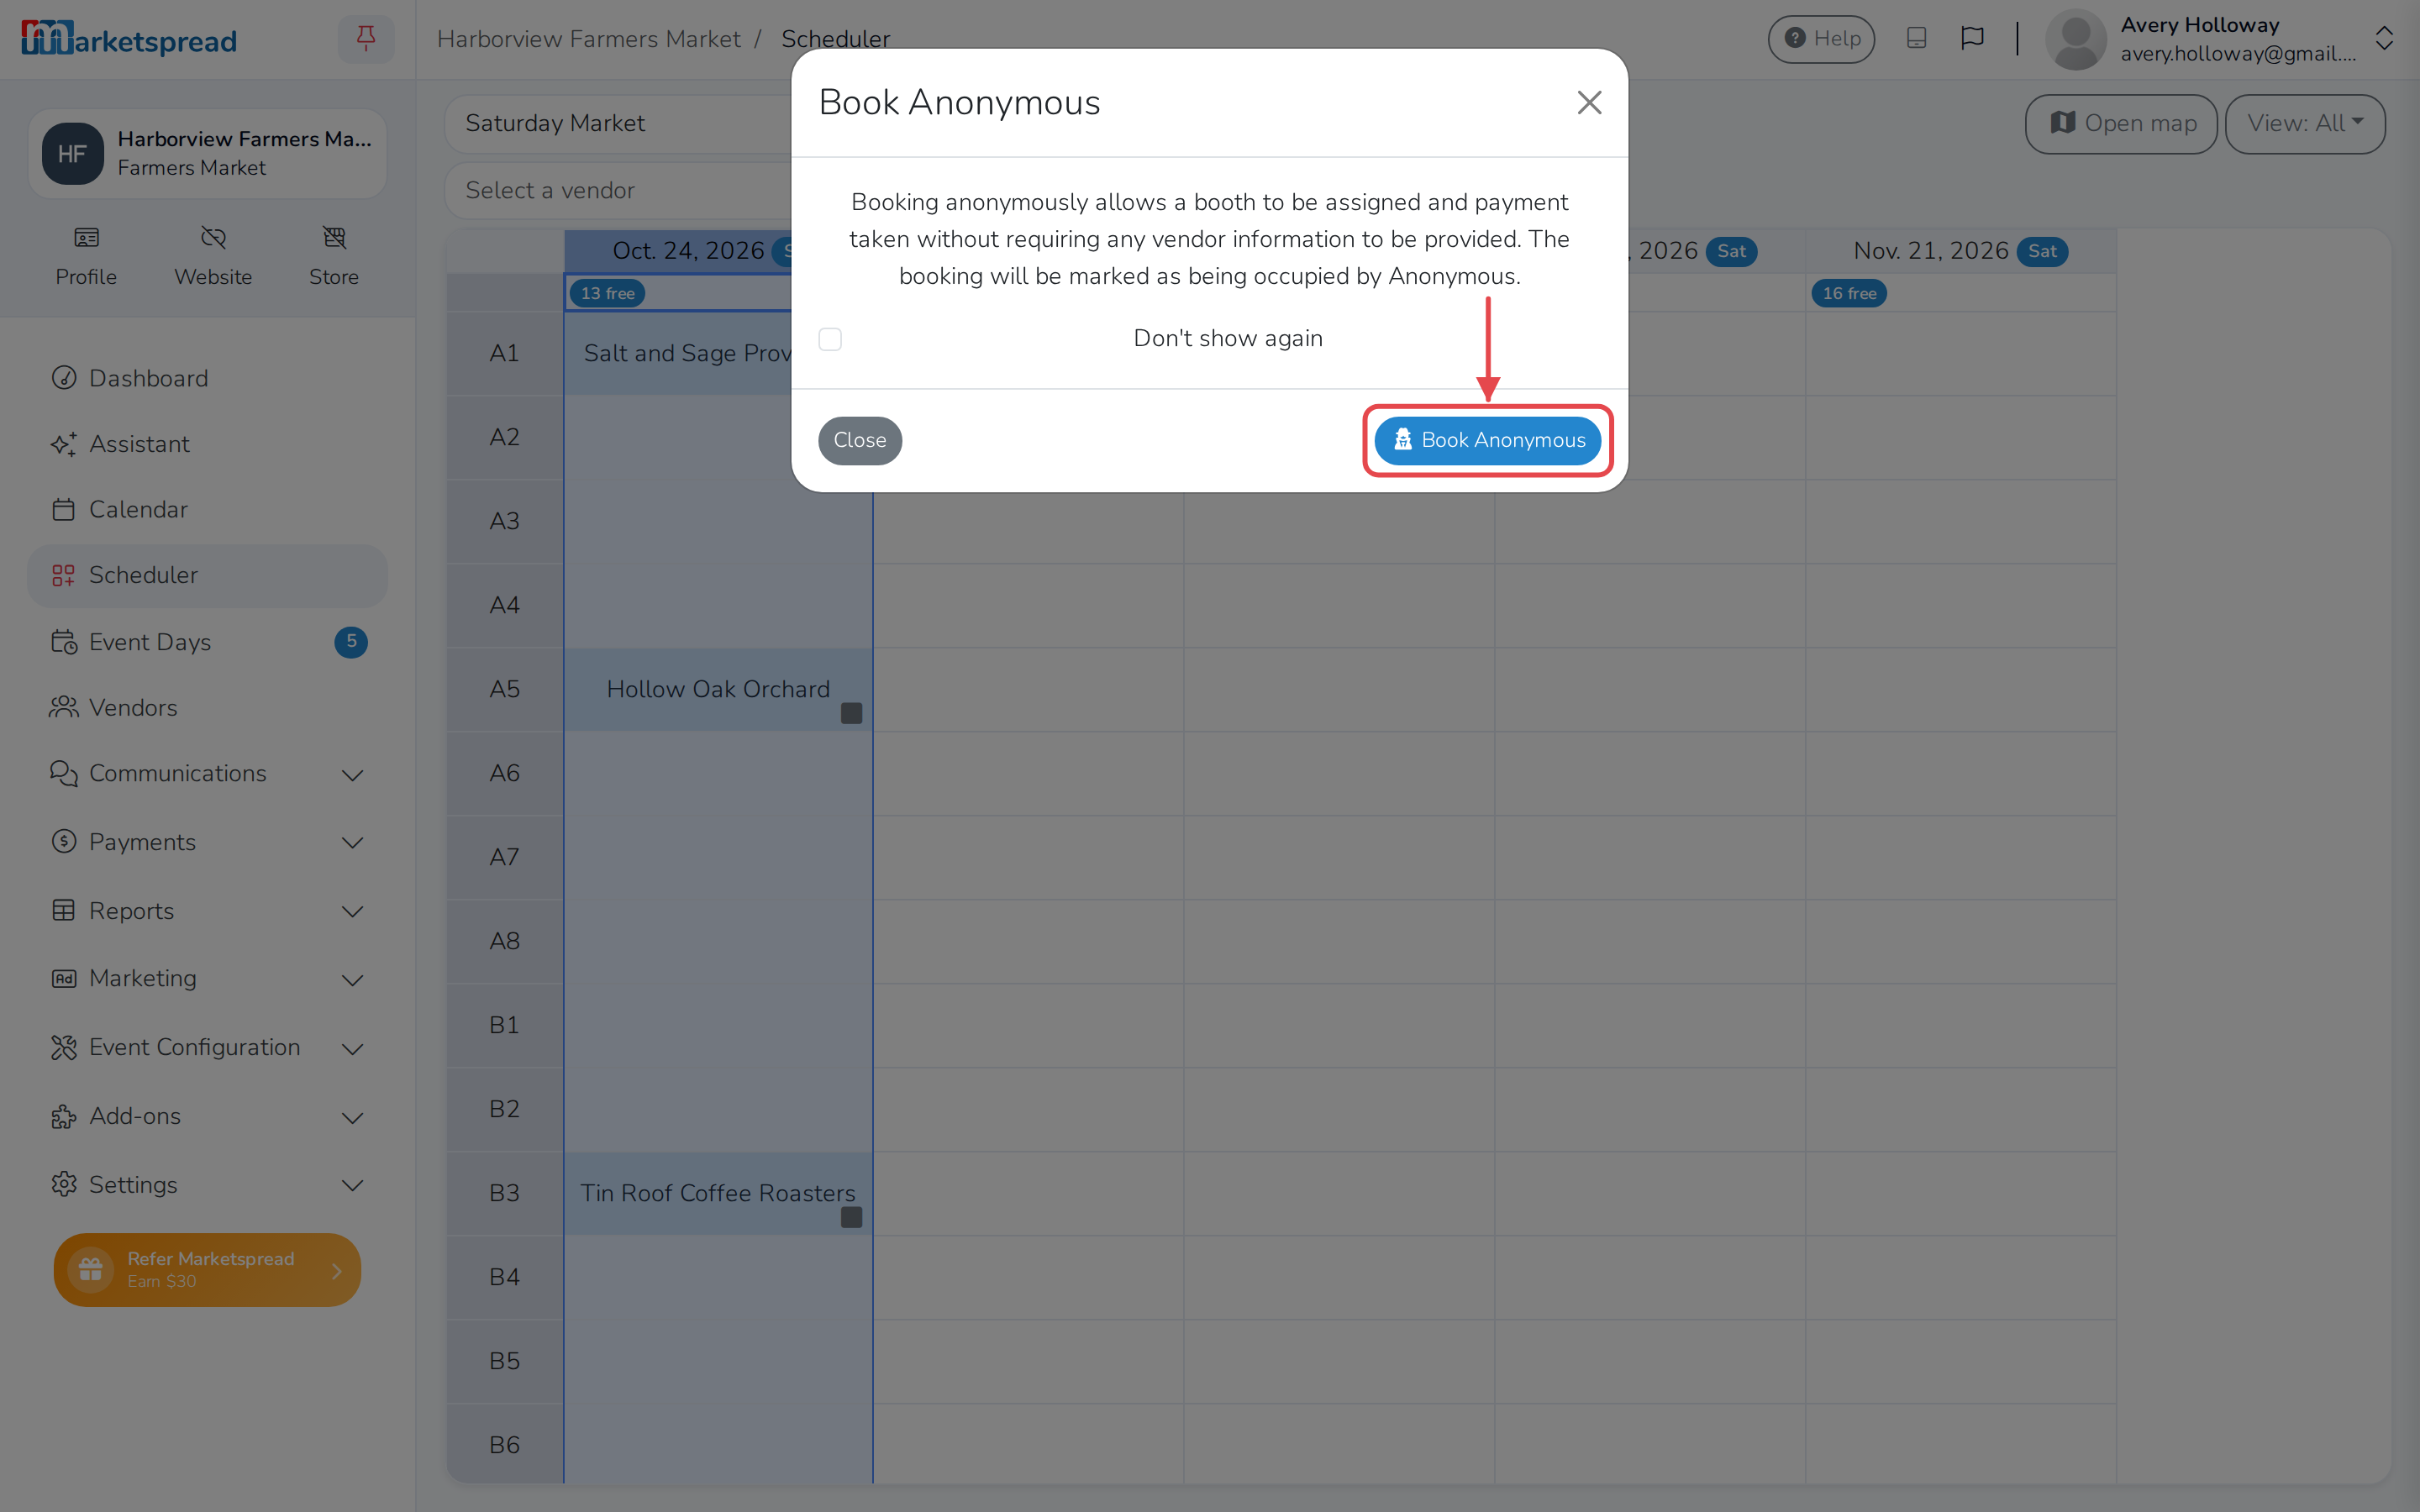
The first time you do this, a message explains what booking anonymously means. Click Book Anonymous to continue. Check Don't show again first if you don't want to see this message next time.
-
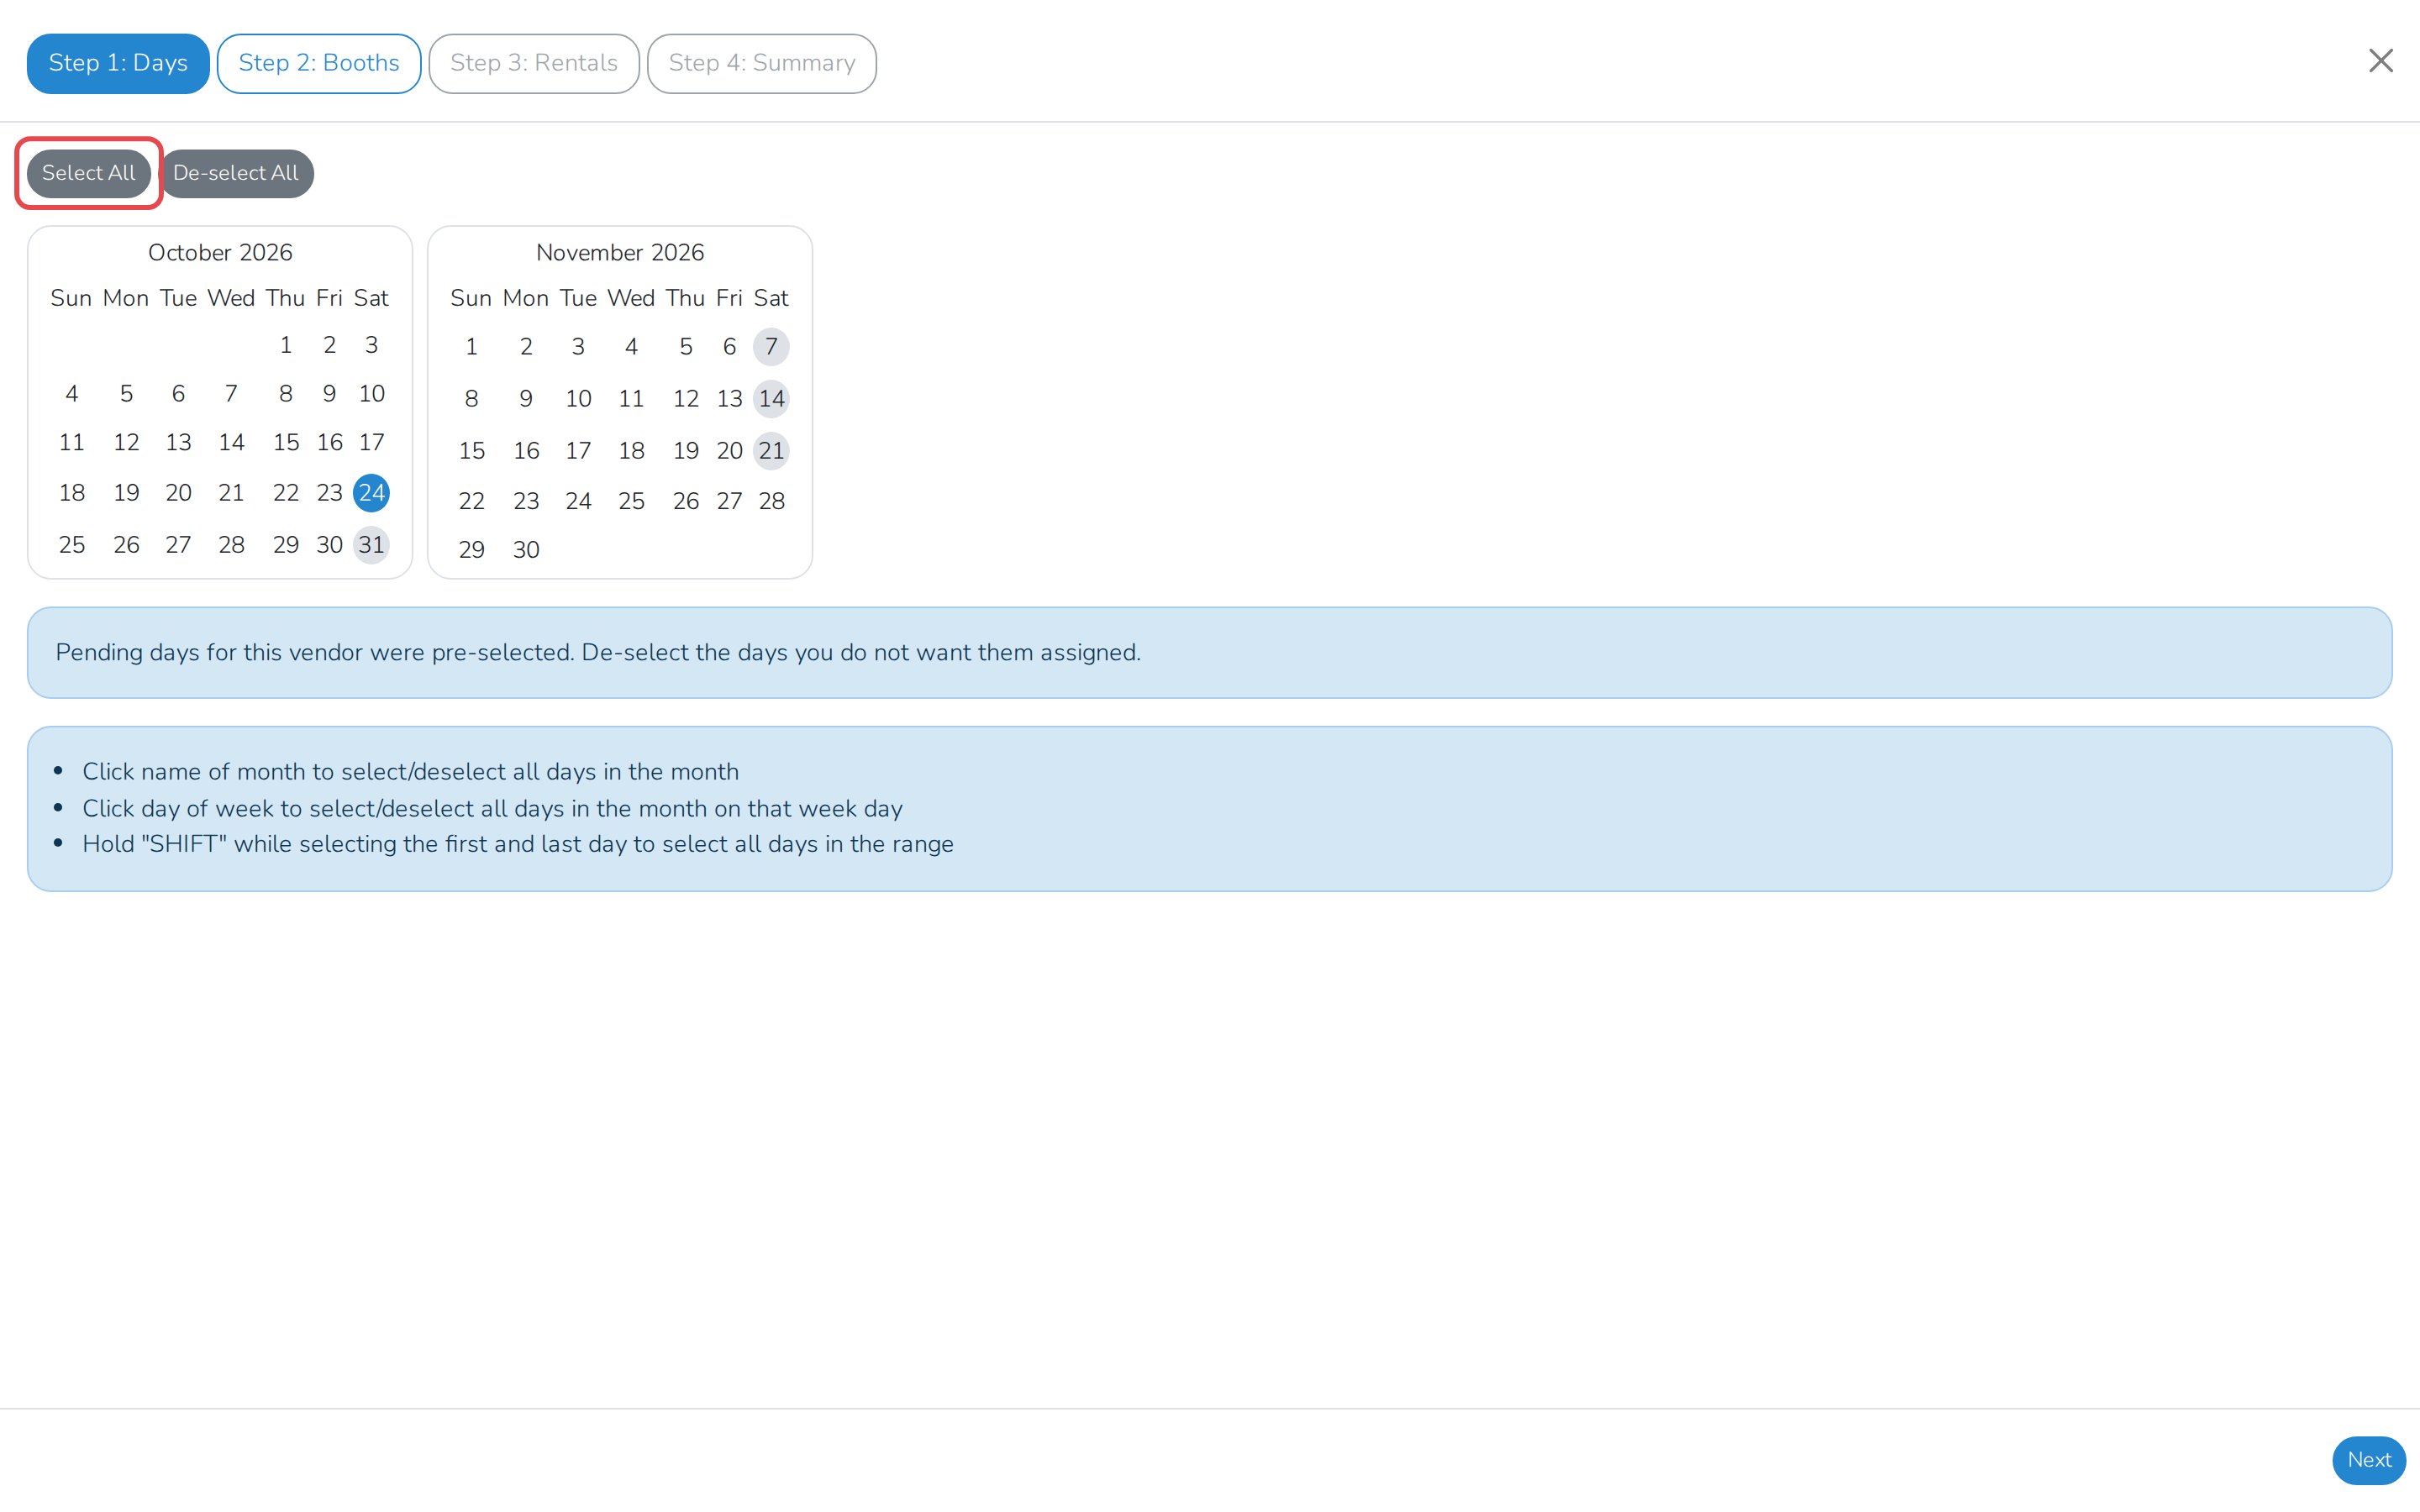
On Step 1: Days, click the day you're booking. If Scheduler is set to book by the day, the next open day is already checked for you. You can also:
- Click Select All or De-select All to select or clear every day shown.
- If your market books by more than one length of time, click Day, Week, Month or Event to switch.
- Click a month's name to select every day in it, or a weekday's heading to select that weekday every week in the month. Hold Shift while clicking the first and last day of a range to select everything in between.
Important
An anonymous booking keeps no record of who the vendor is. Once it's booked, you can't look it up or track it later the way you can for a vendor with a profile. Stick to booking for today unless you have a reason not to.
Click Next.
-
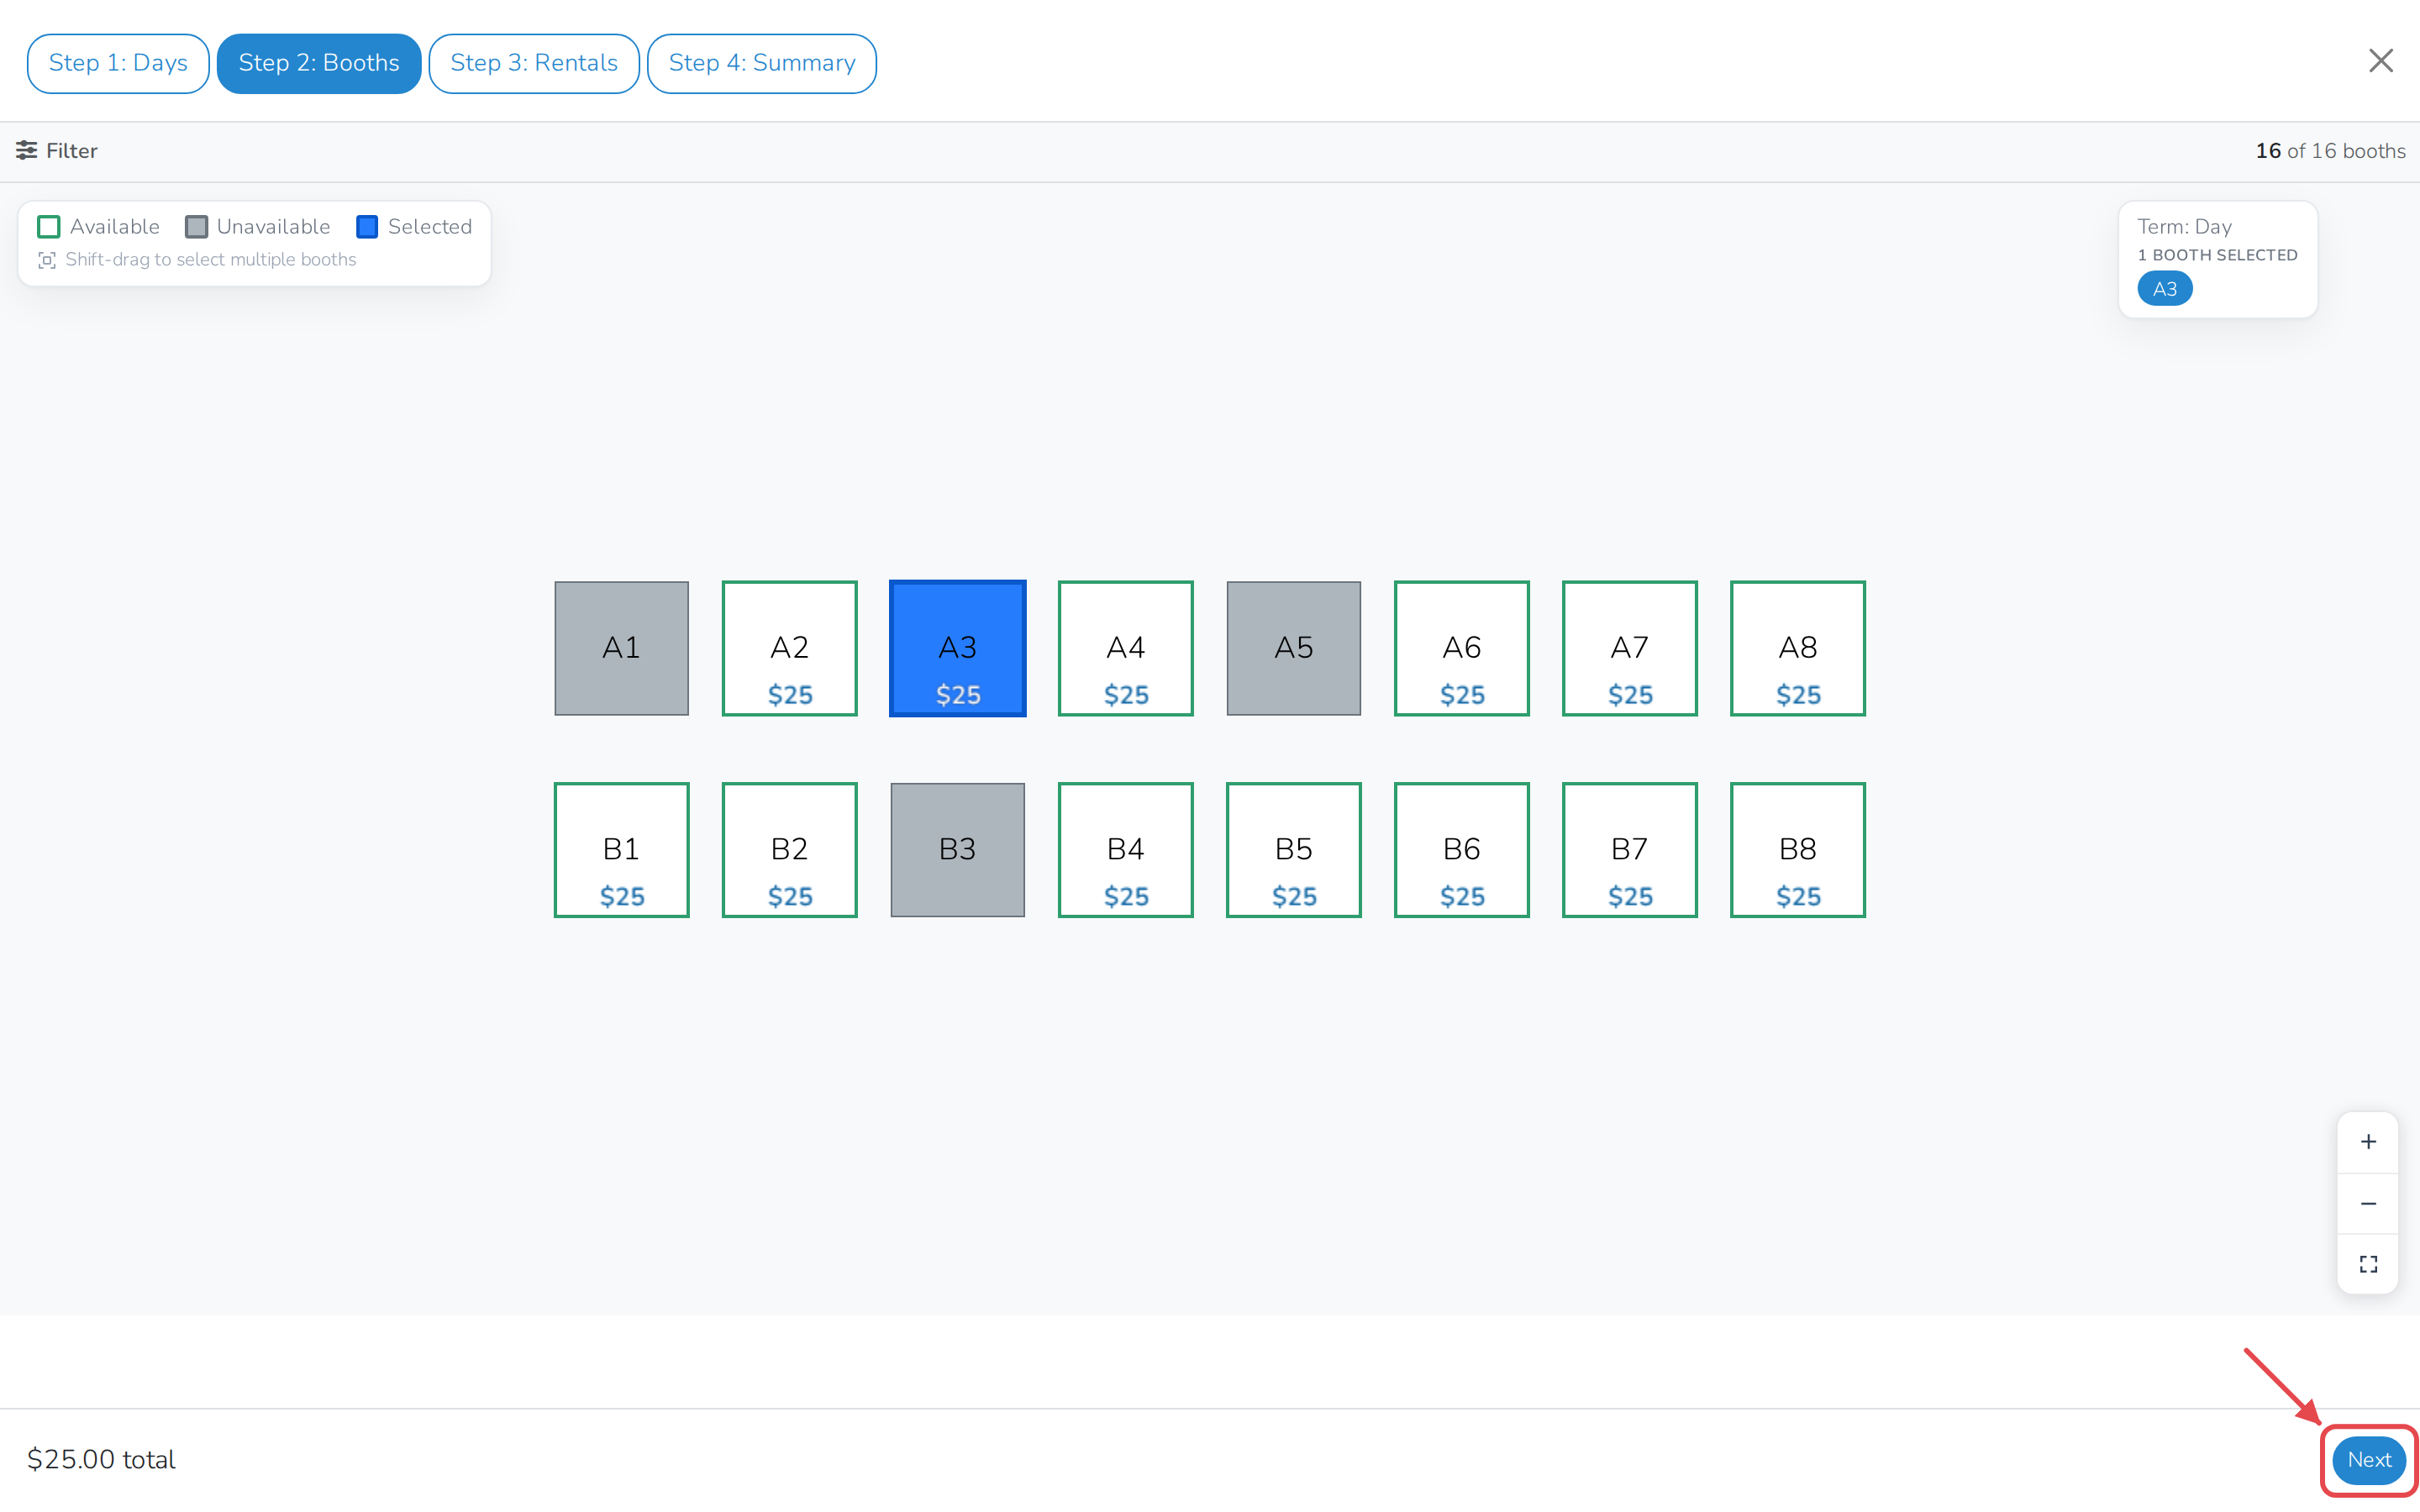
Click an available booth. Booths that aren't available are greyed out. Click Next.
Tip
Once you've picked a booth, click Summary at the top to skip straight there.
-
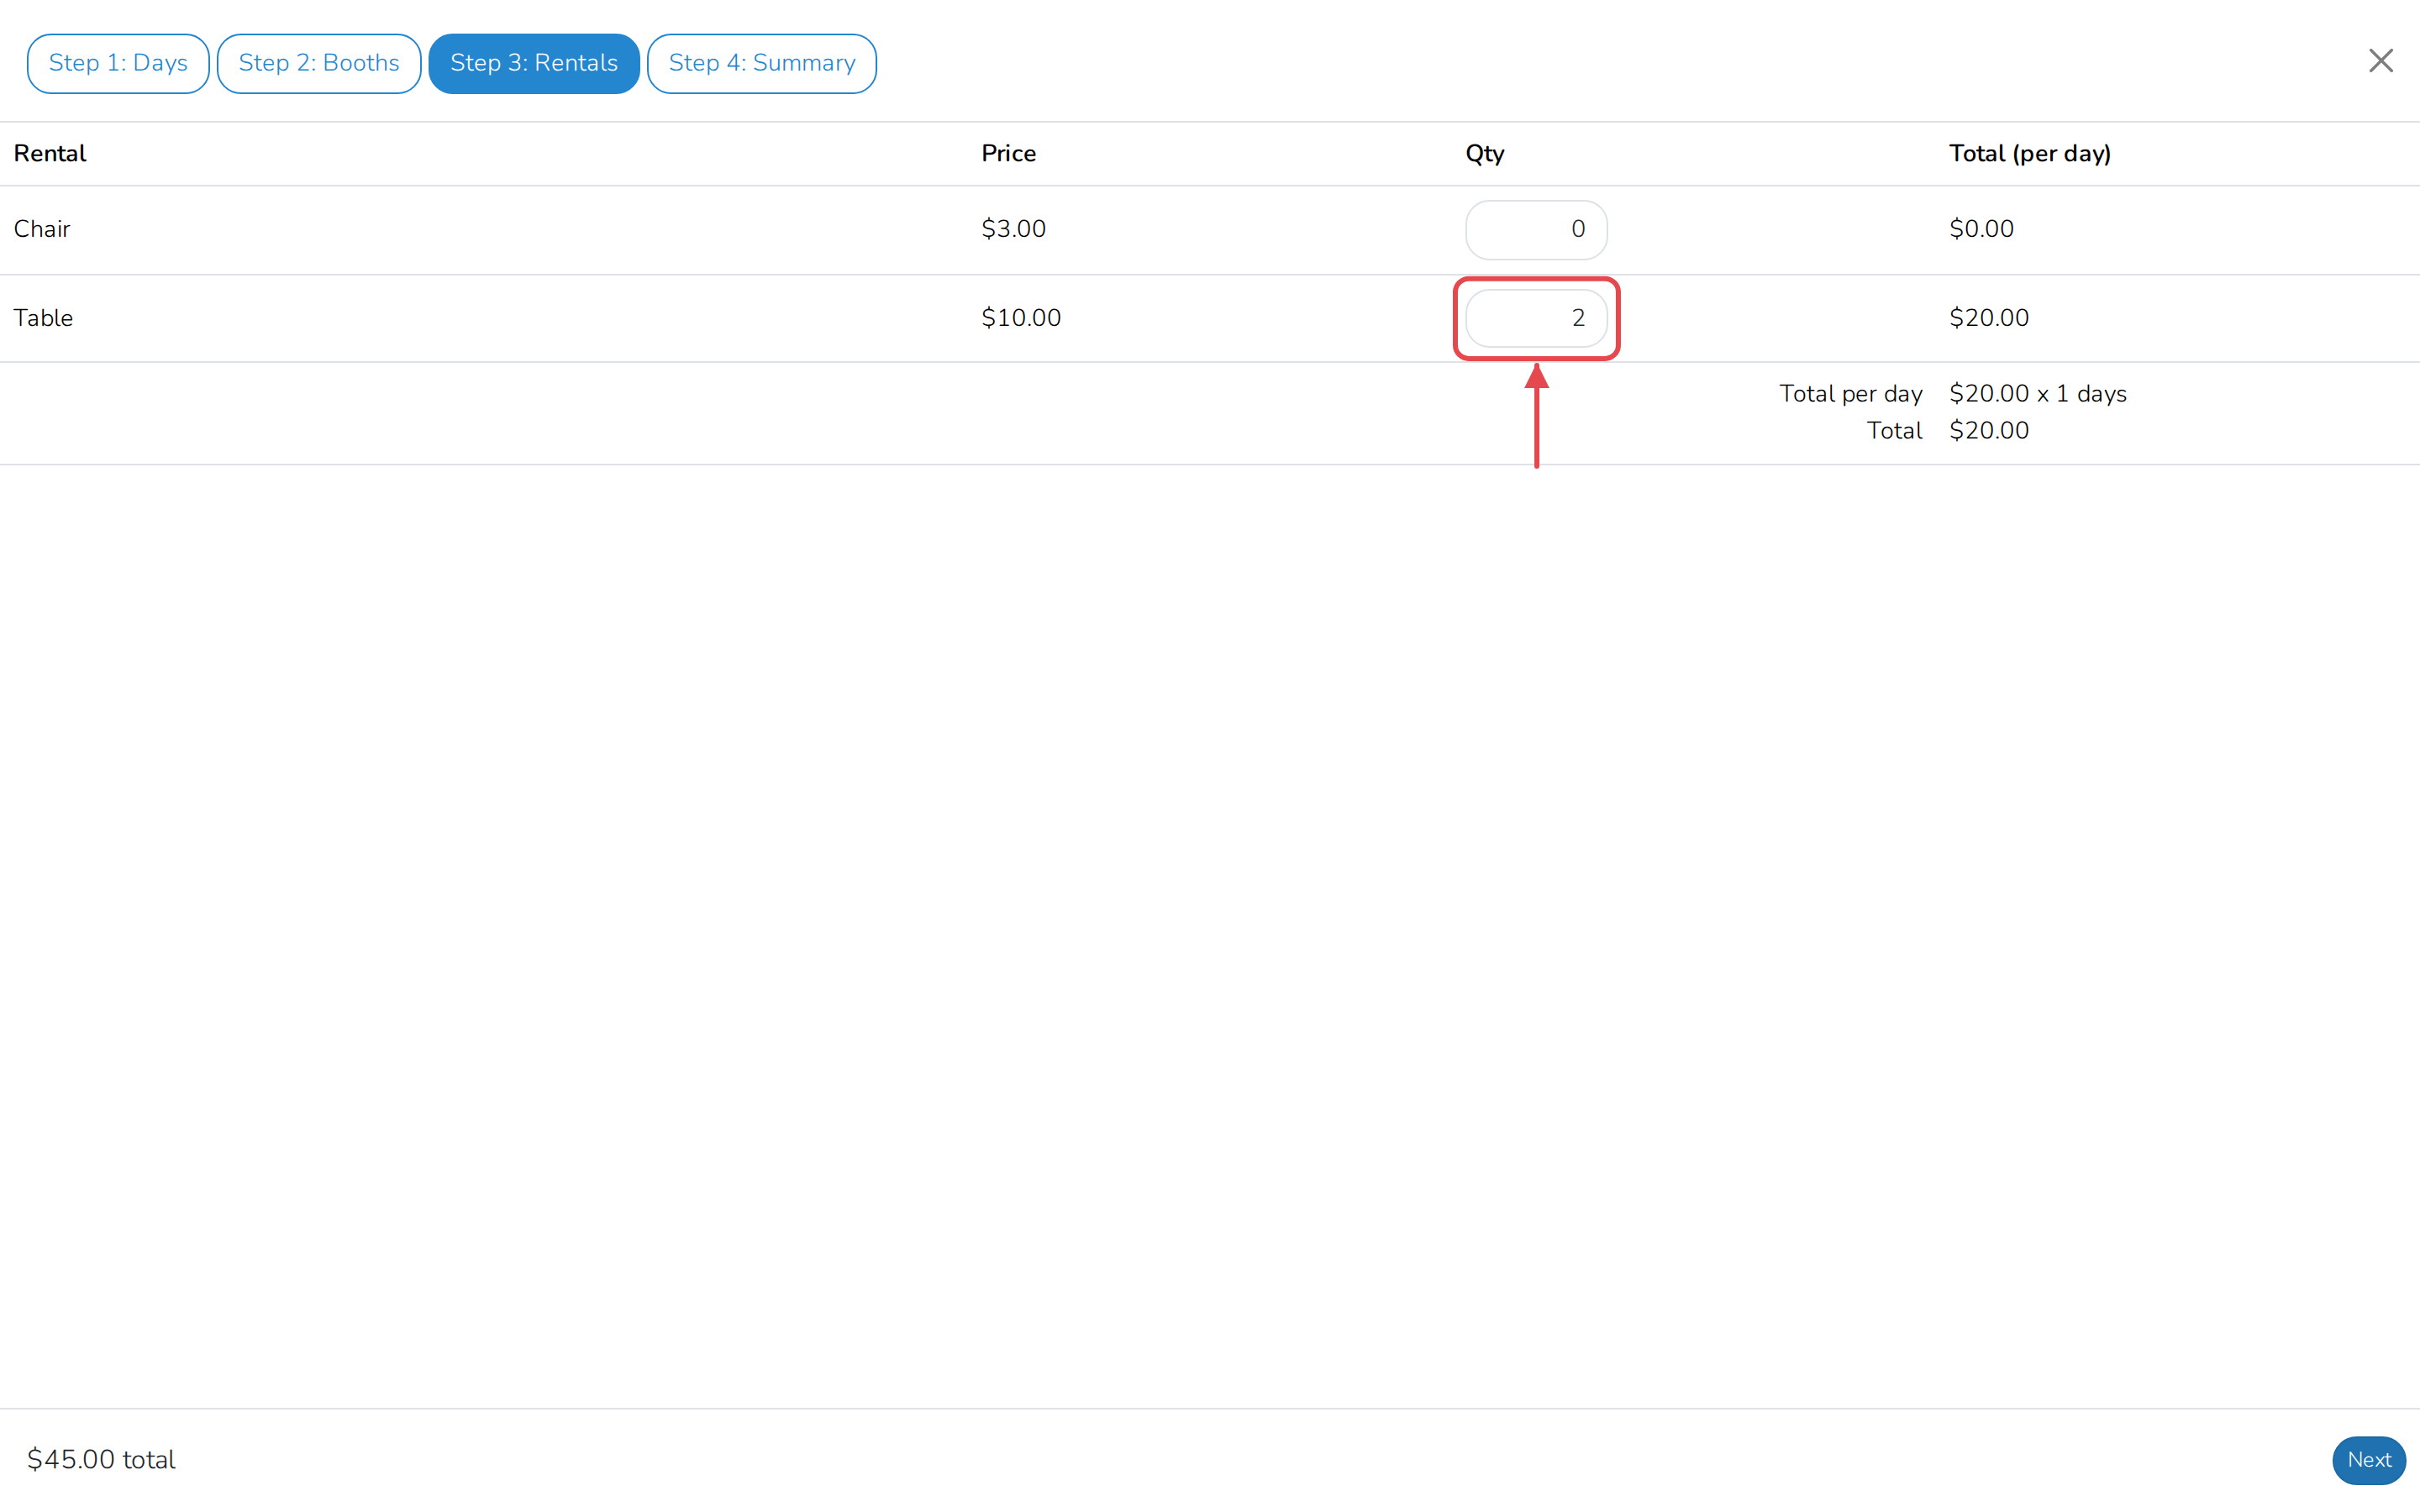
If your market has rentals, fill in Qty for any rental the vendor needs. The rental's total, and the total for the booking, update as you type. Click Next. If your market doesn't offer rentals, you won't see this step.
-
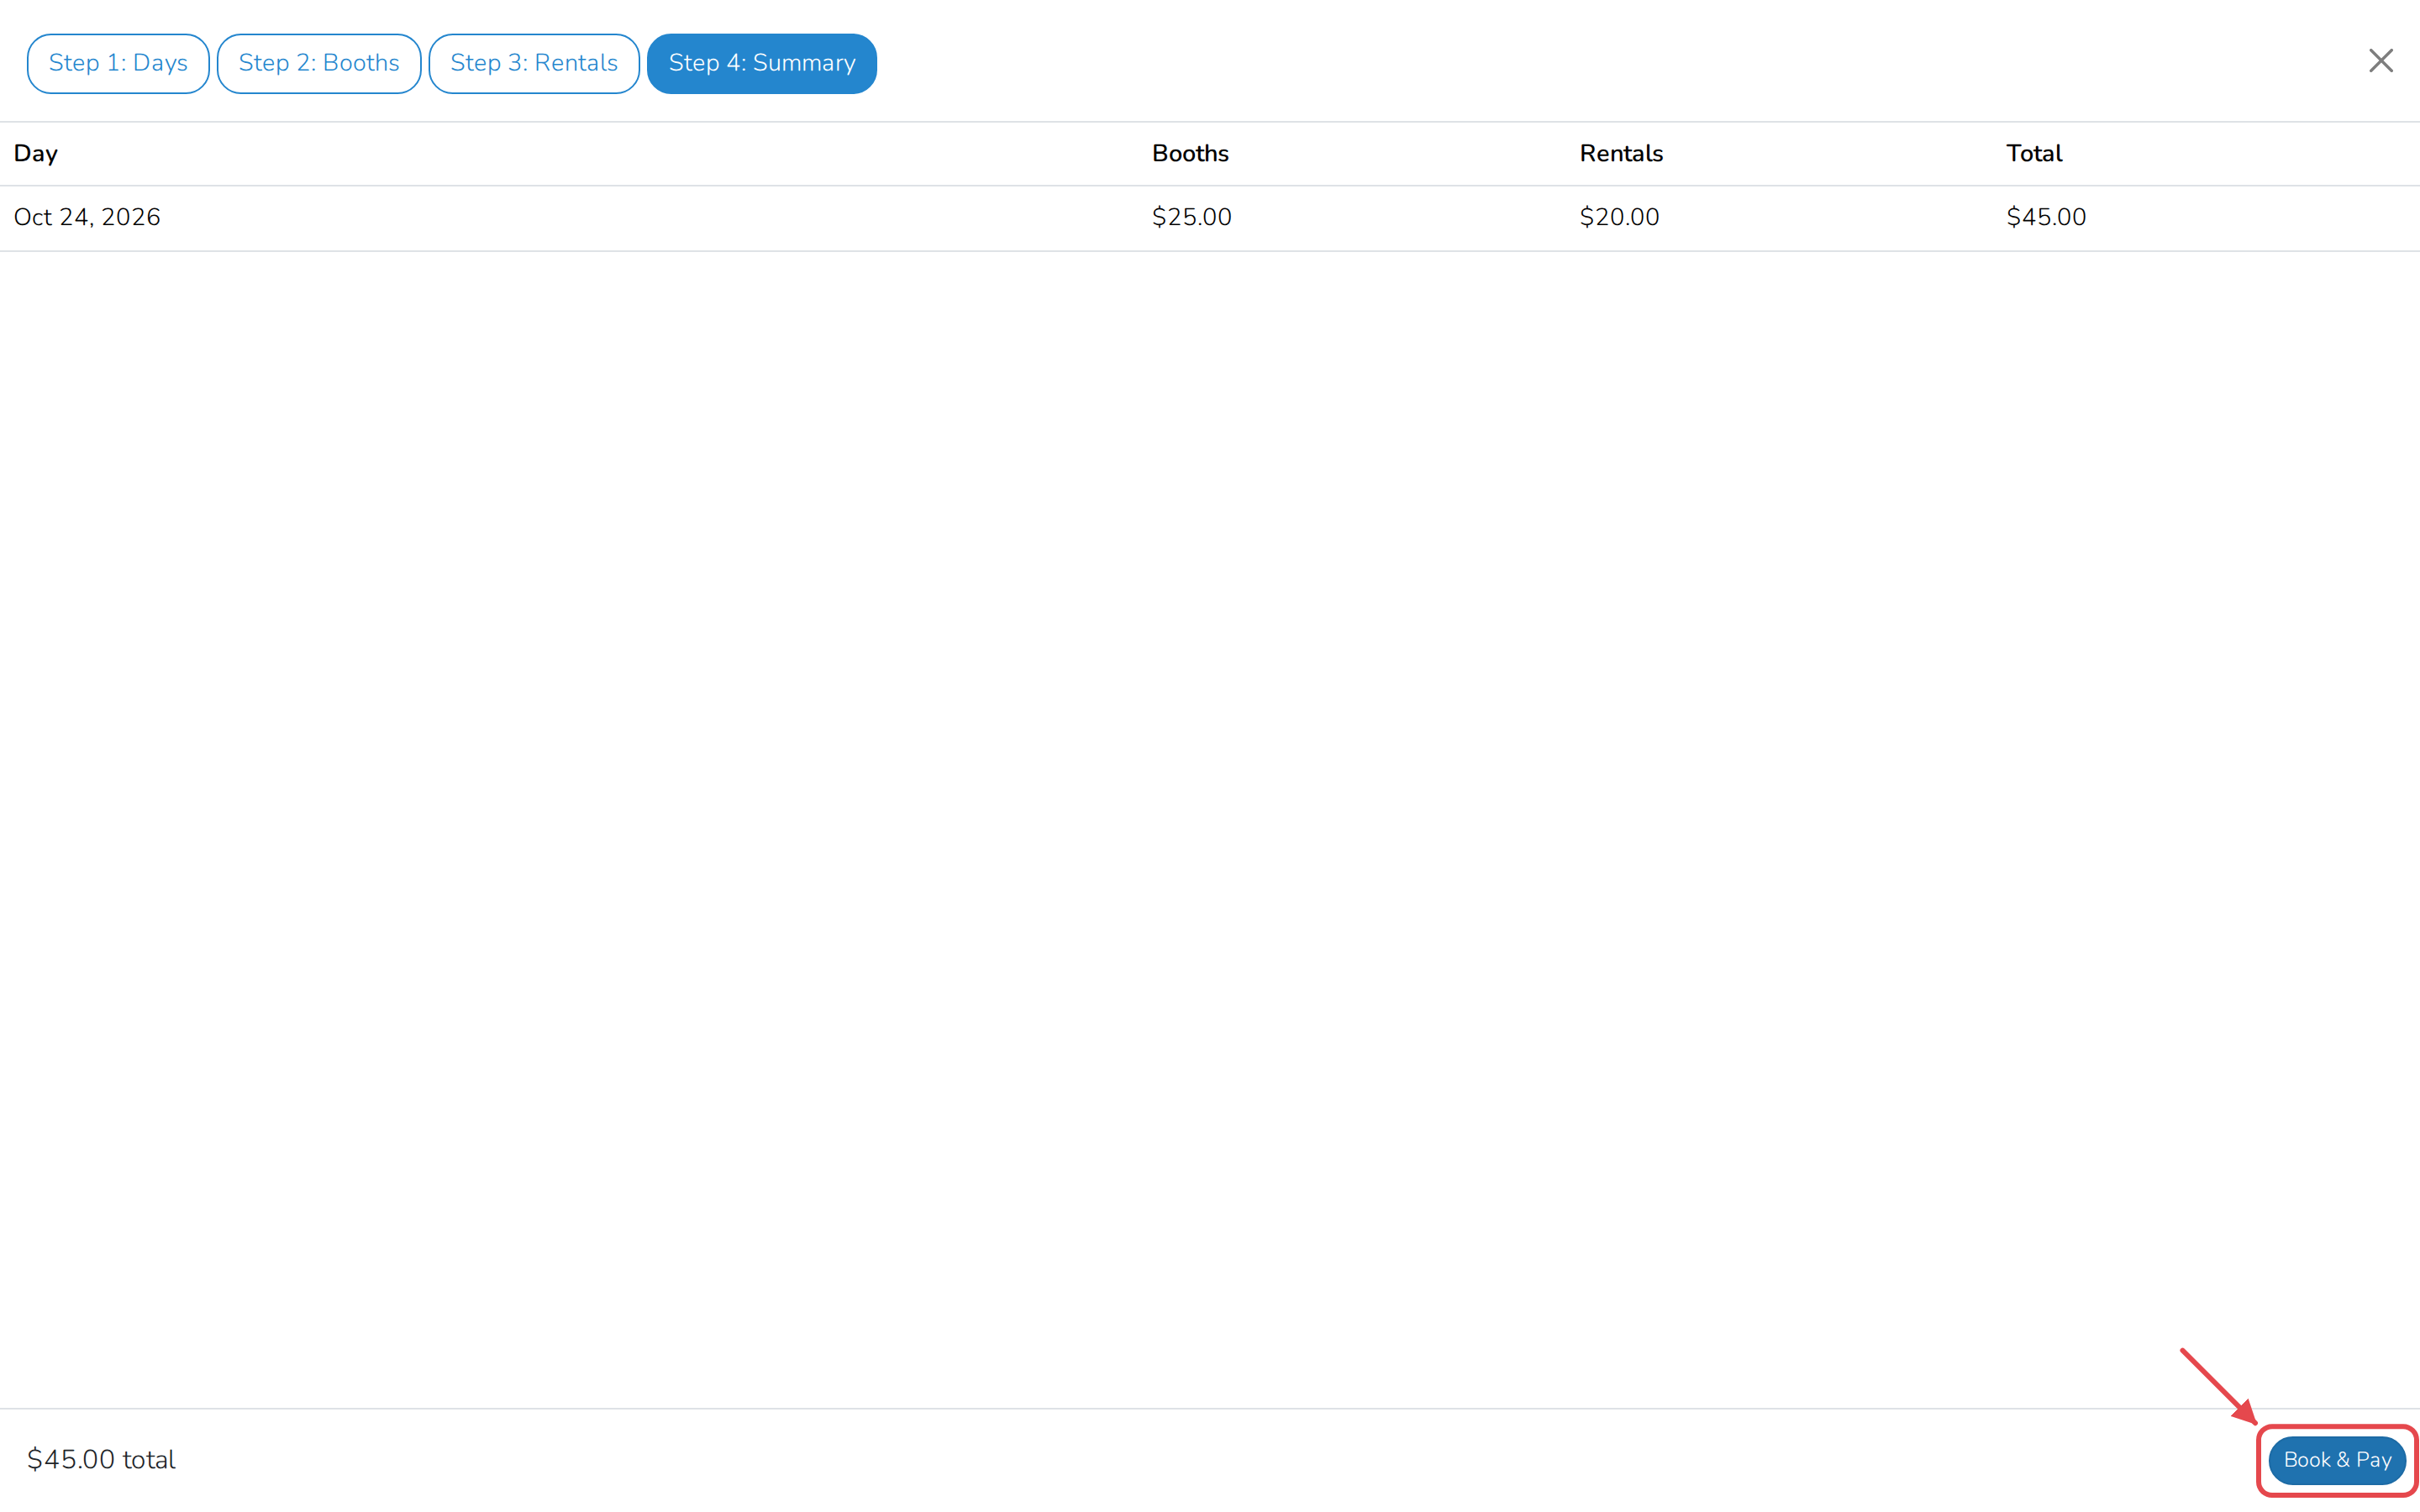
Check the total on the summary, then click Book & Pay.
-
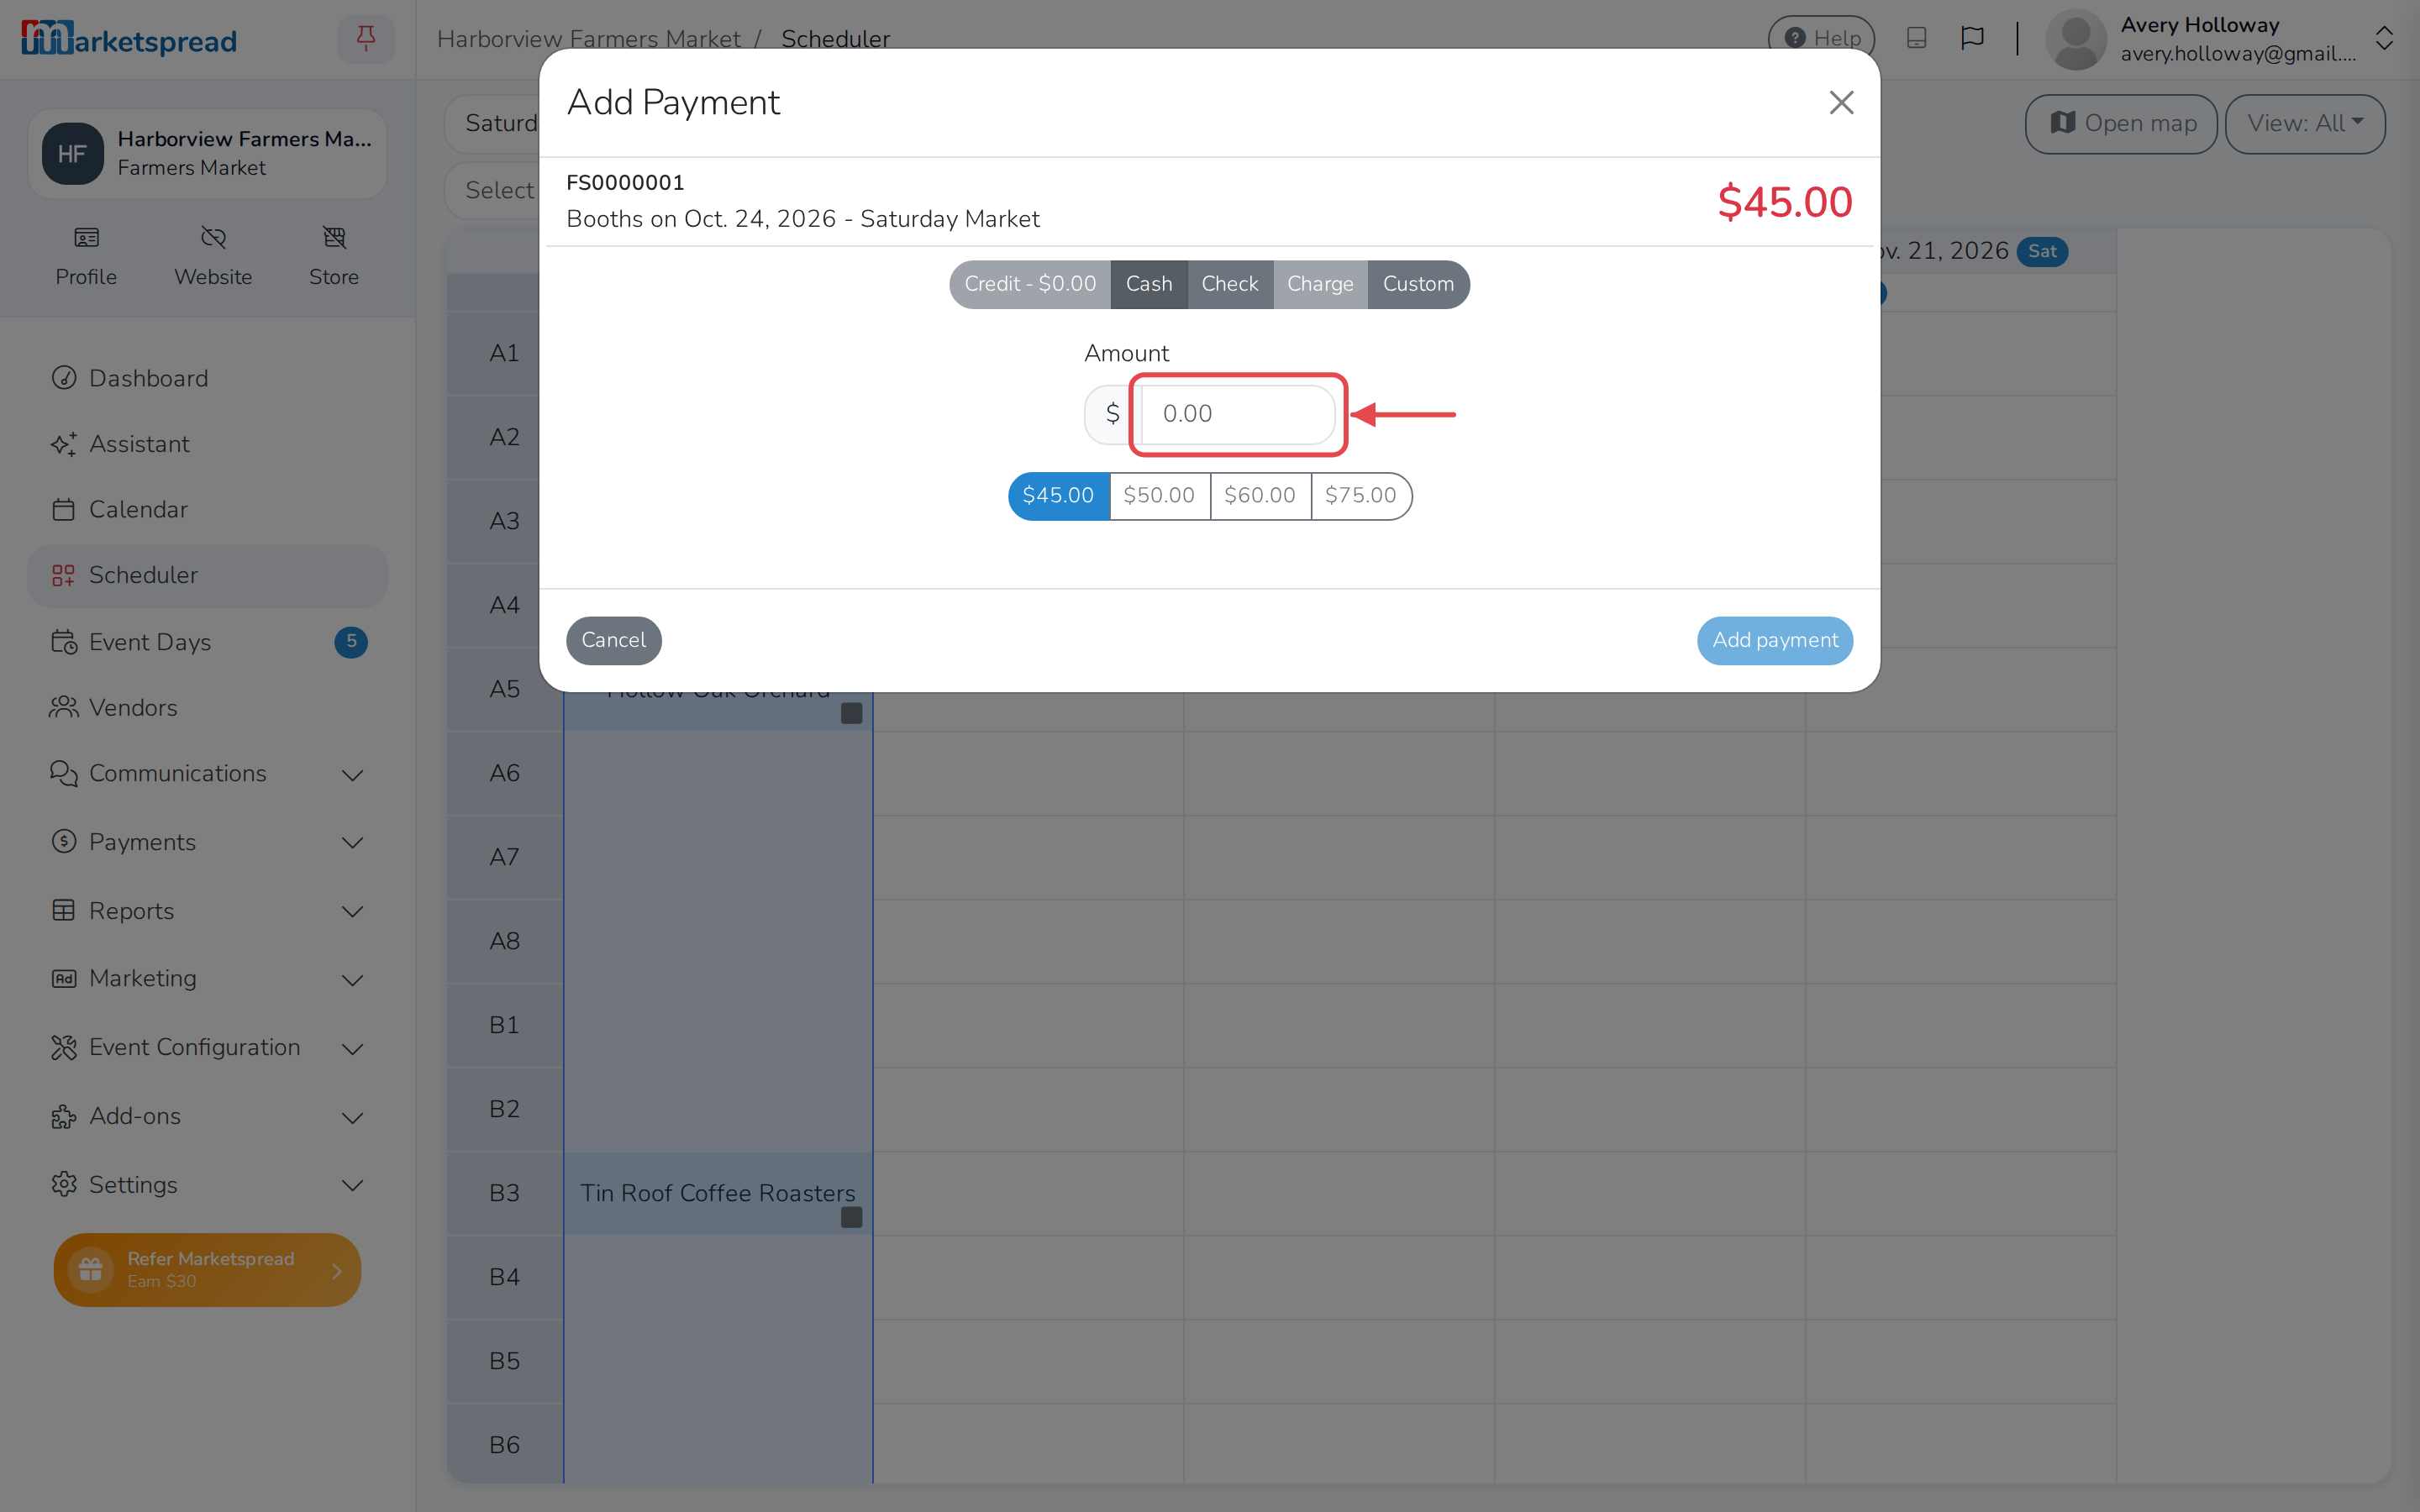
Add the payment the same way you would on any invoice: choose Cash, Check, Charge or Custom, fill in Amount, then click Add payment (or Charge, for a card). Choosing Manual entry to type in a card by hand runs at a higher transaction rate, which the window tells you. See Take a payment against an invoice for more on each method.
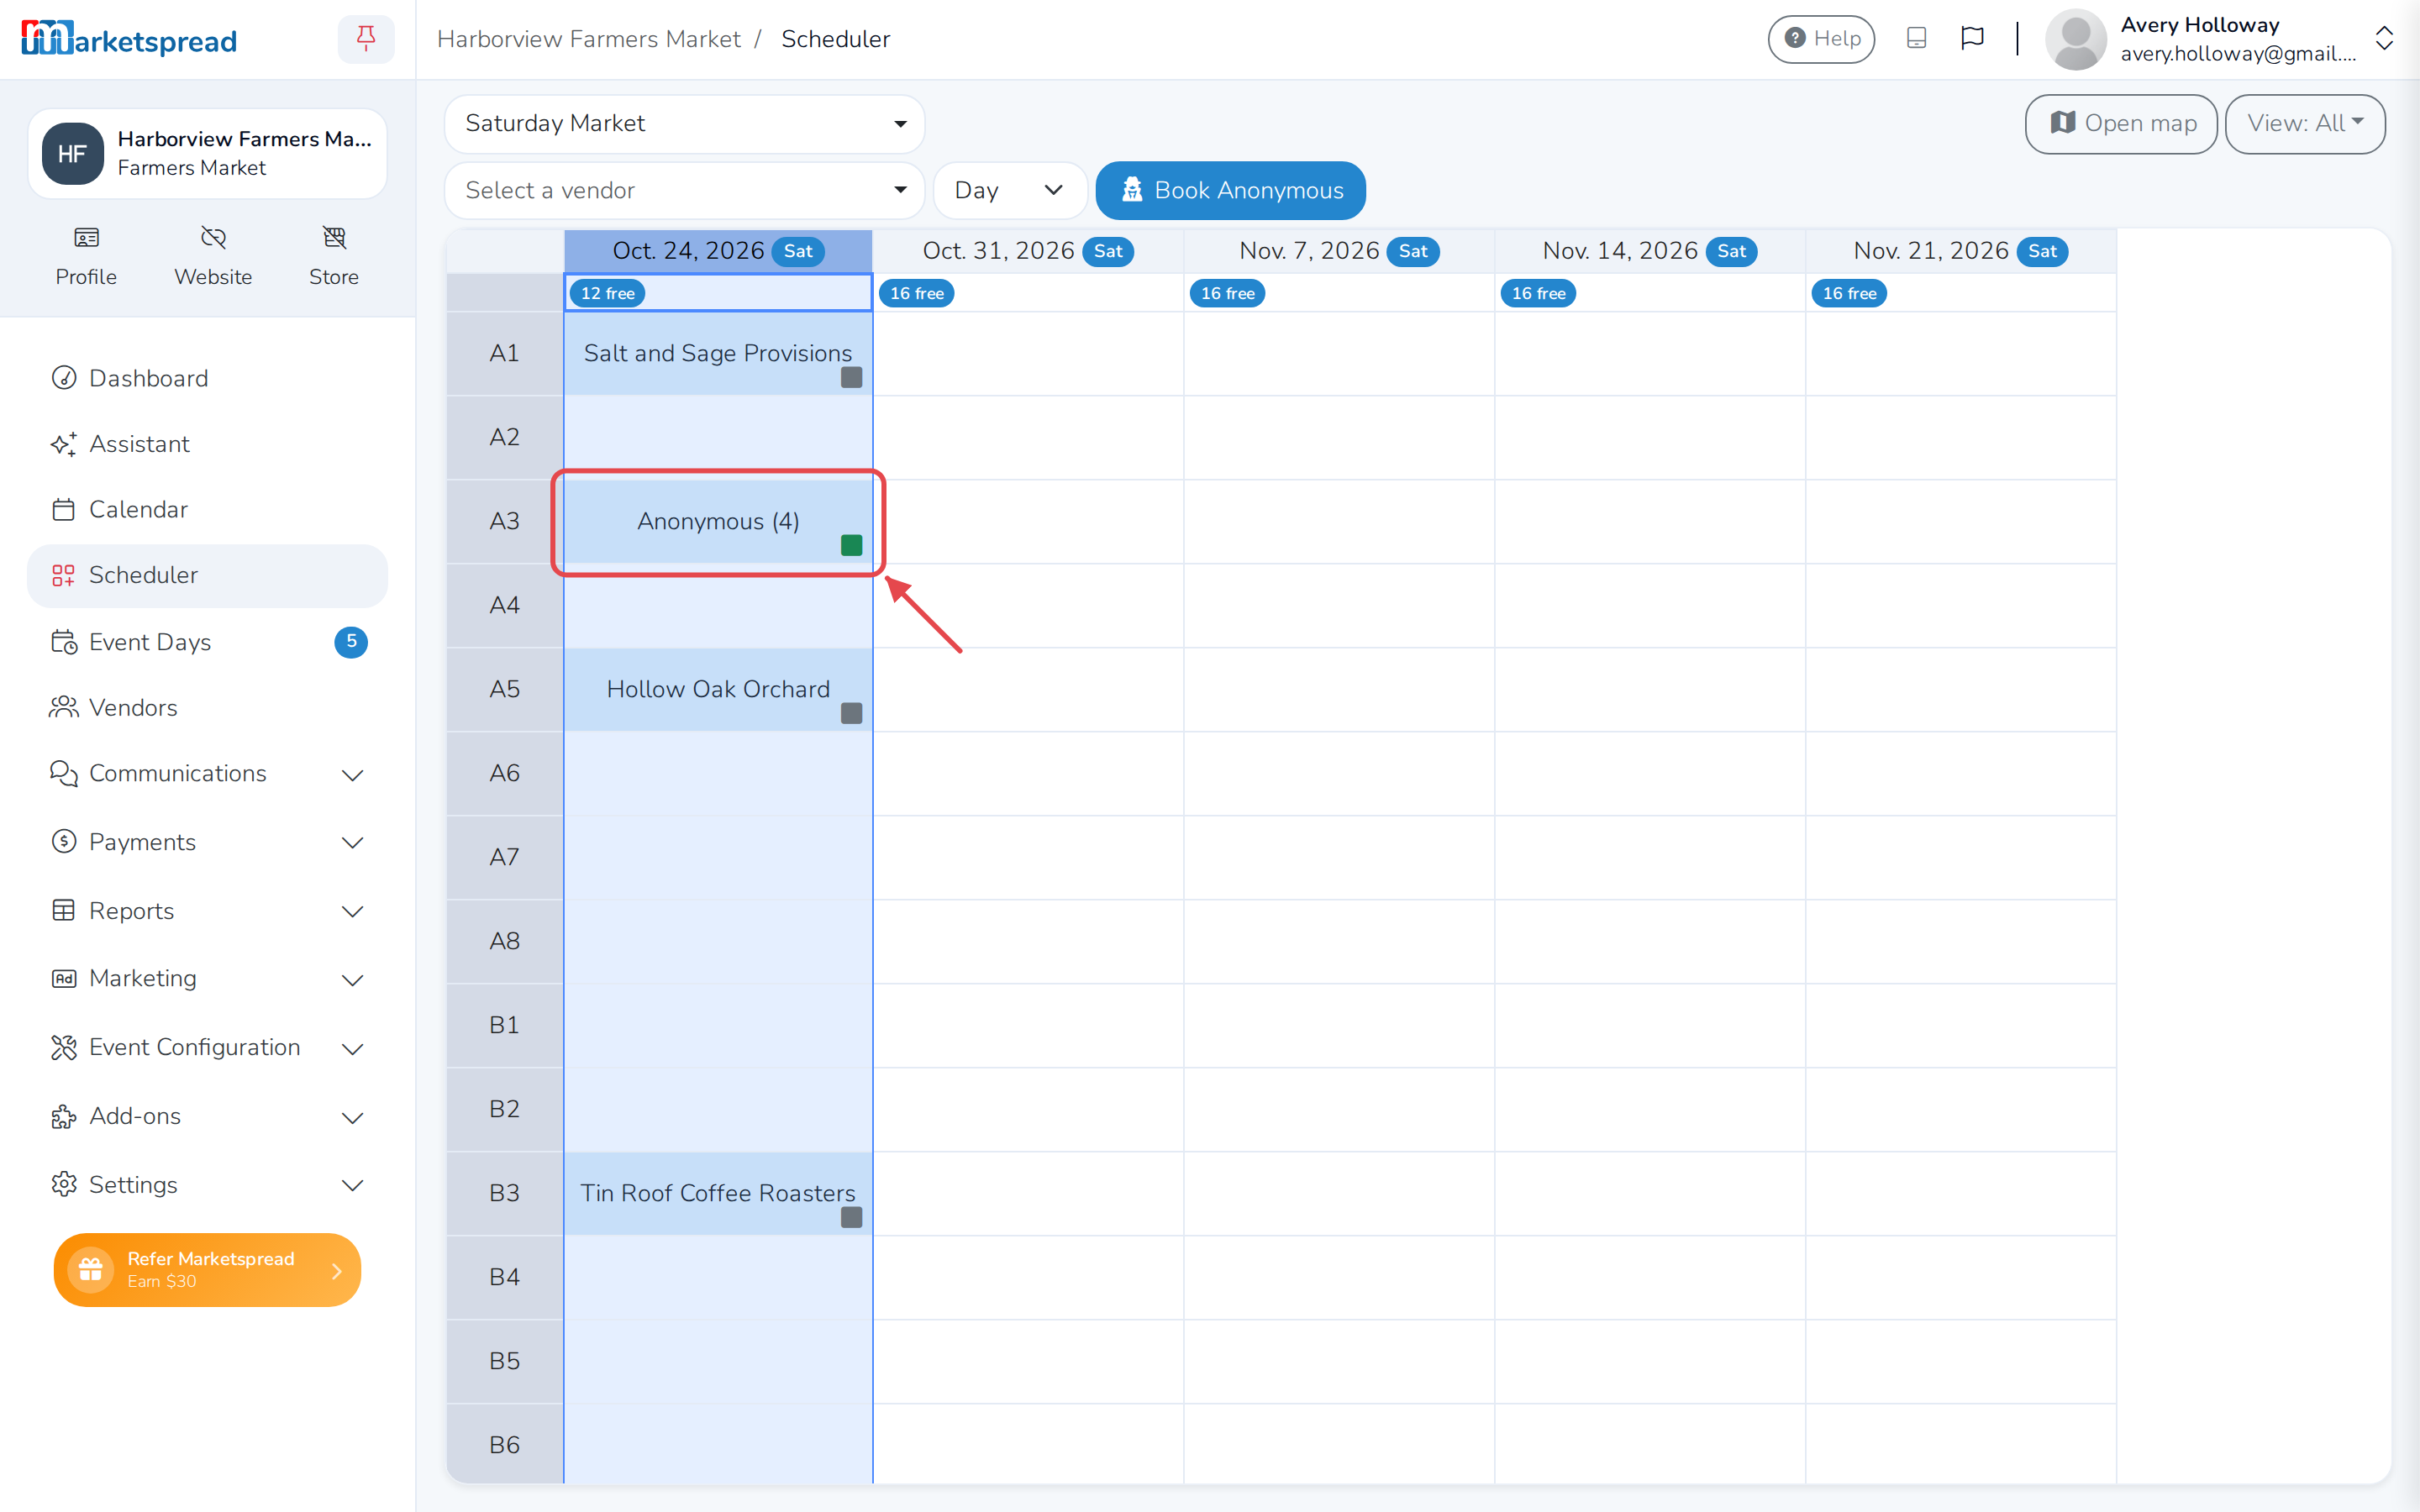
Once payment is added, you're back in Scheduler and the booth shows Anonymous, followed by the booking number in parentheses, with a small green mark in the corner to show it's paid.
Good to know
- Only staff with permission to create anonymous bookings in Scheduler see the Book Anonymous button. Administrators and Managers have this by default; other roles need it added.
- Booking anonymously needs no other setup.
- An anonymous booking doesn't keep a record of who the vendor is — no name, contact details or history. You won't be able to look them up later.