


A recurring invoice bills the same vendors the same charges on a repeating schedule — weekly, monthly or yearly — without you creating each invoice by hand. Once it's set up, Marketspread creates and sends every invoice on schedule, and can collect payment for you too.
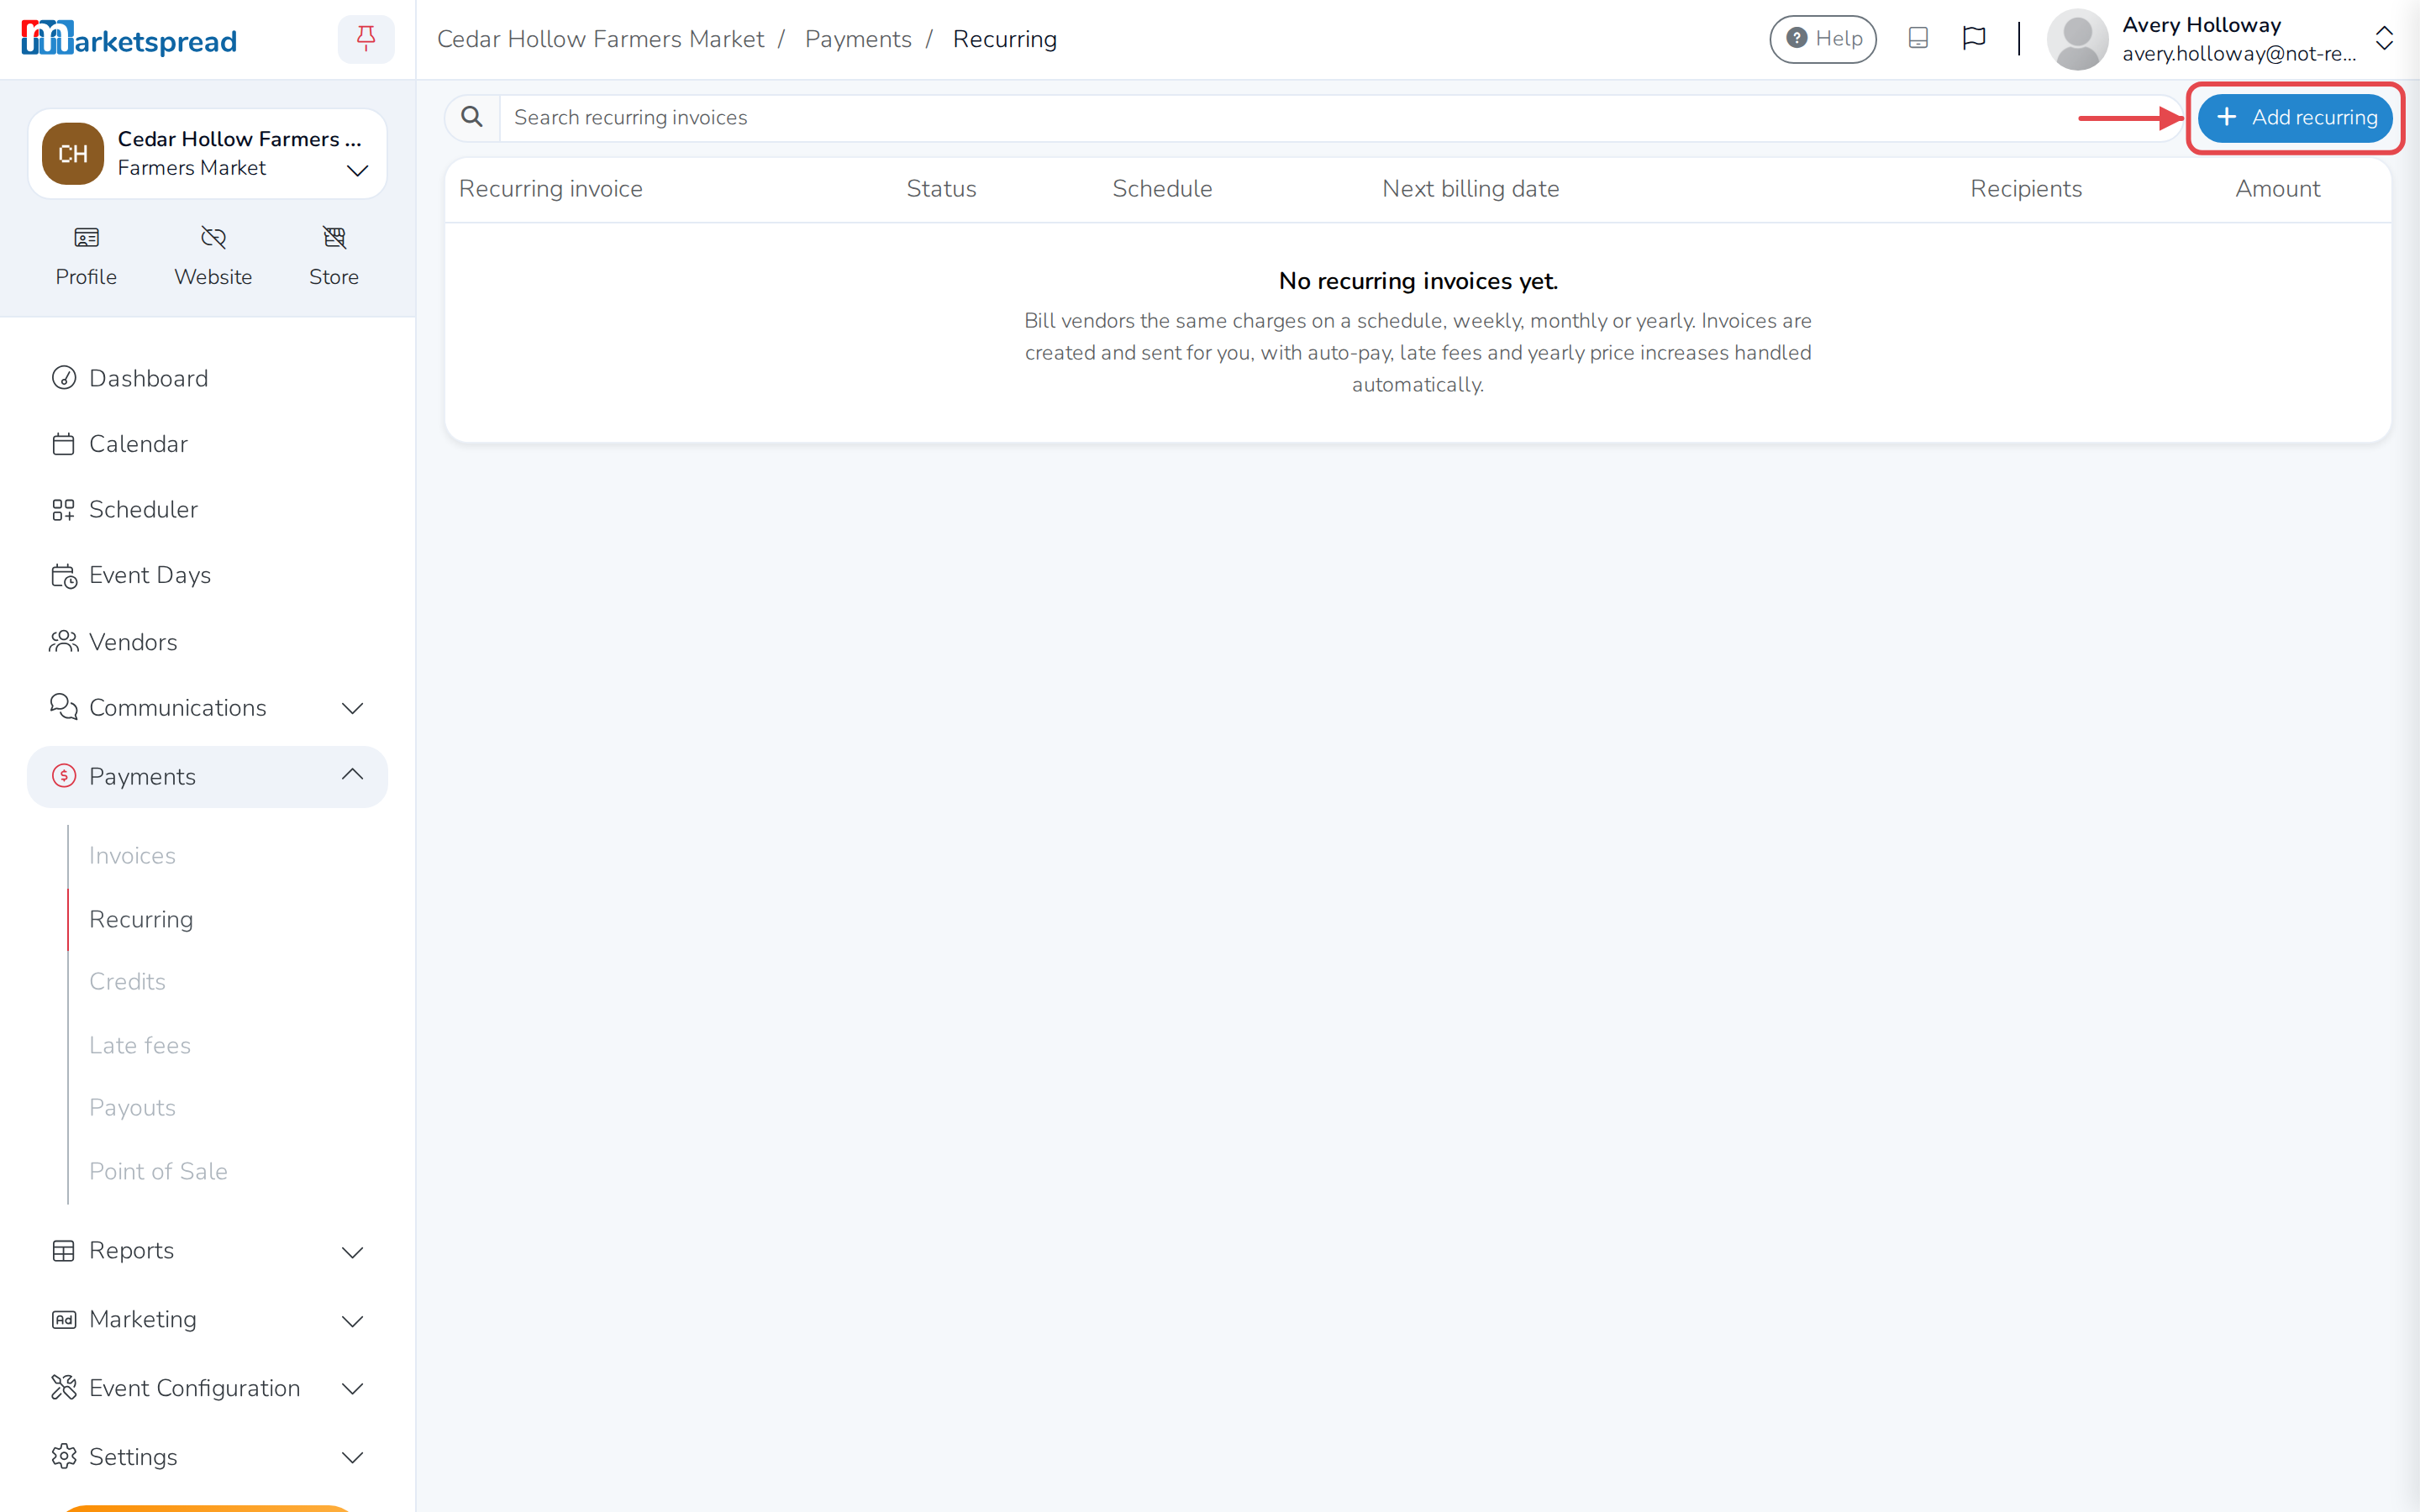
Open Payments, then Recurring on your dashboard to see every recurring invoice you've set up.
From this page, you can:
- Create a recurring invoice and choose which vendors it bills
- Add or remove vendors from one that's already running
- Check the invoices it's created, and release or collect payment on them
- Create invoices for a billing date it missed
- Change its price, items or schedule
- Pause it, end it, or delete it for good
Create a recurring invoice
-
Click Add recurring.
-
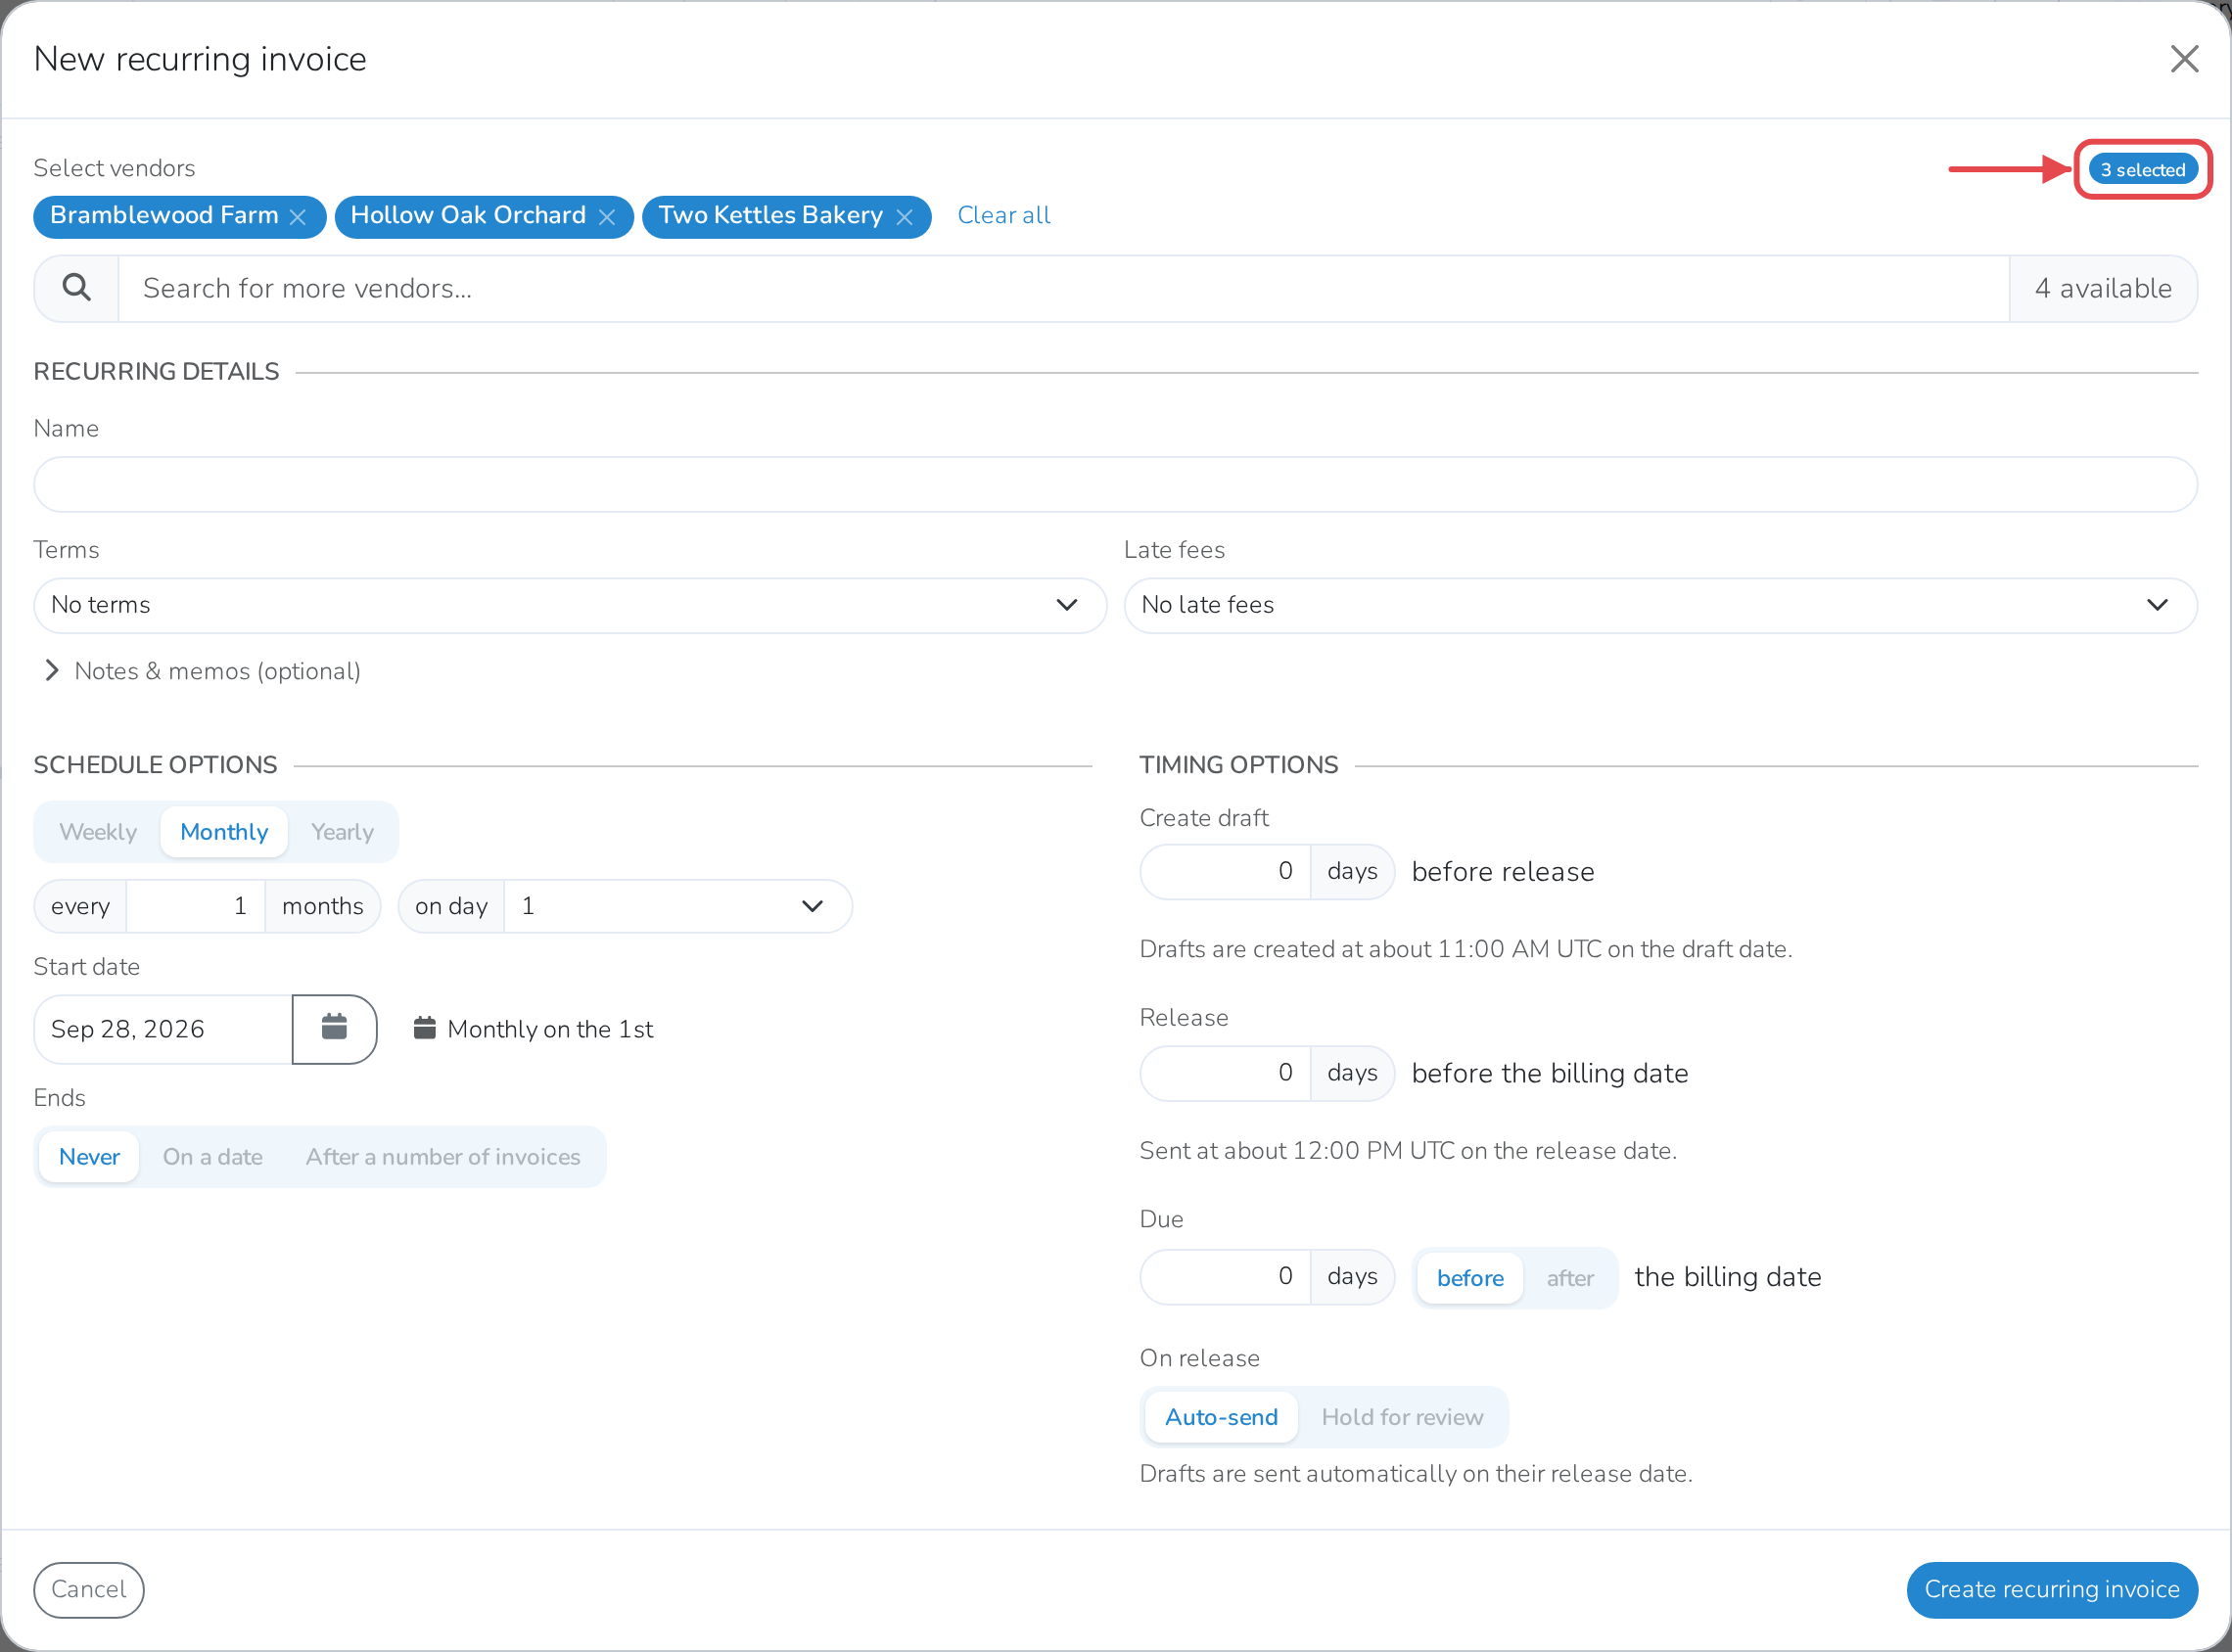
Under Select vendors, search for and choose every vendor this bills.
-
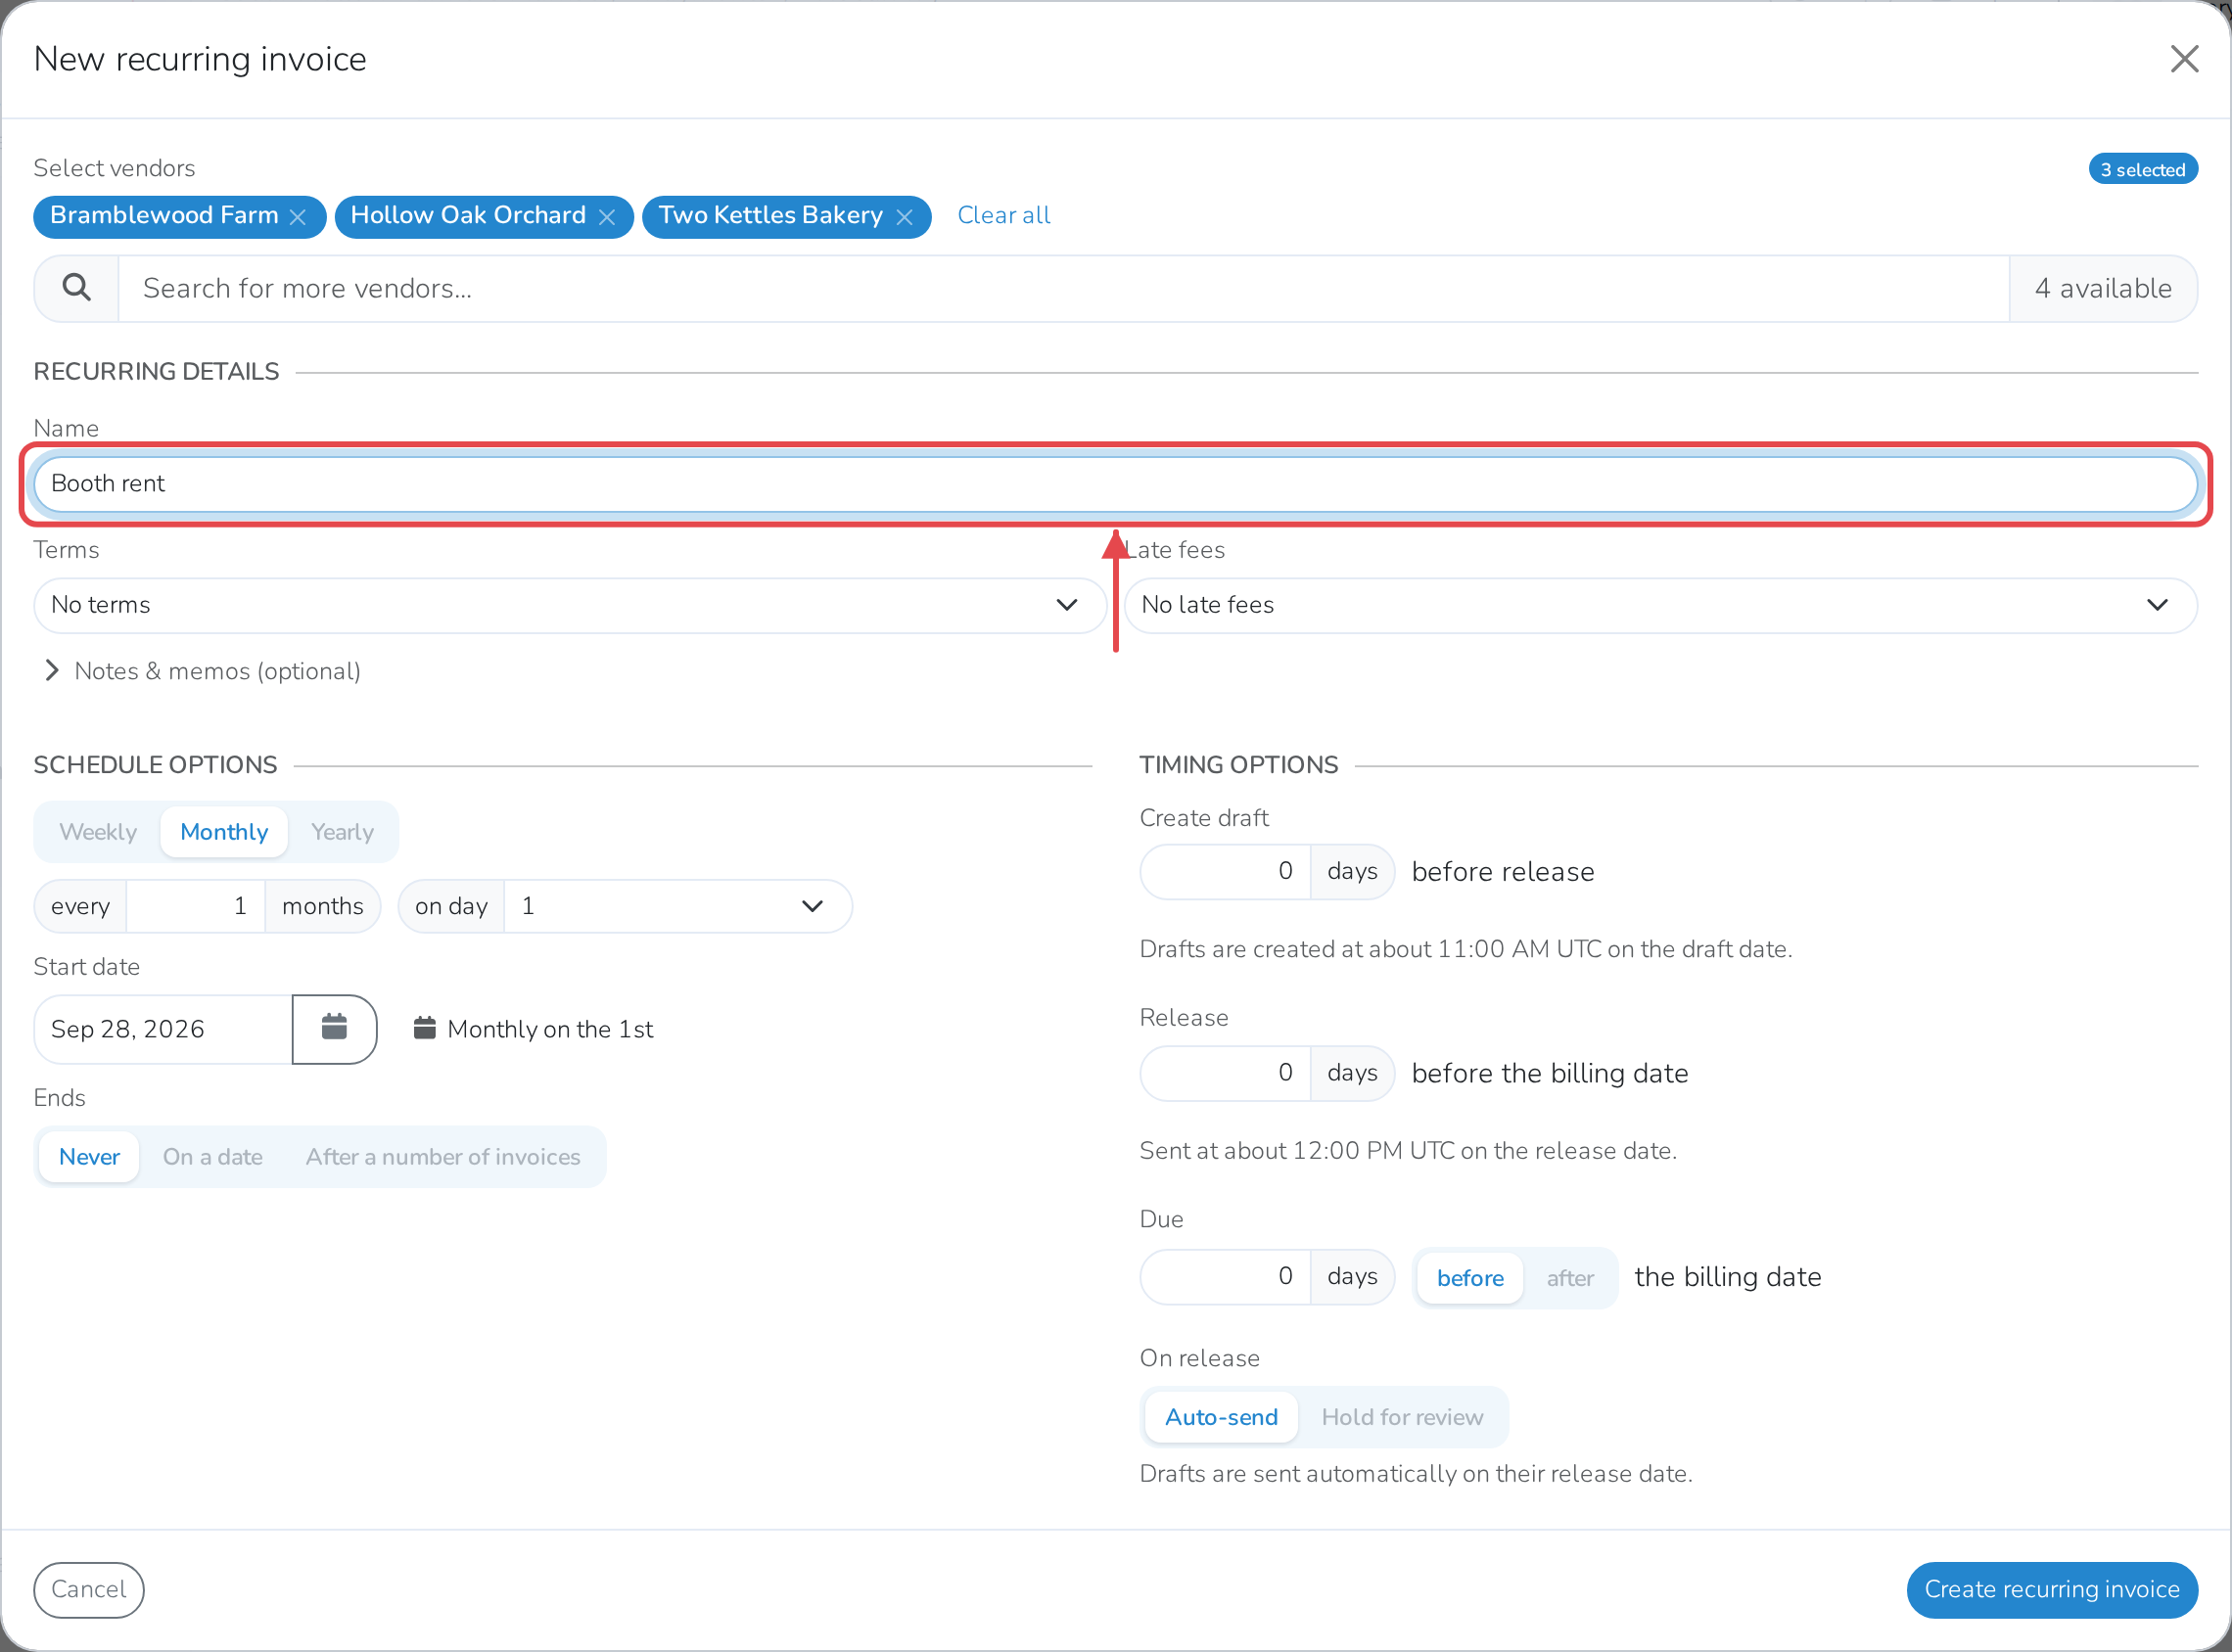
Give it a Name. Optionally choose Terms and Late fees — see Create reusable invoice terms and Add a late fee to an invoice if you haven't set these up yet.
-
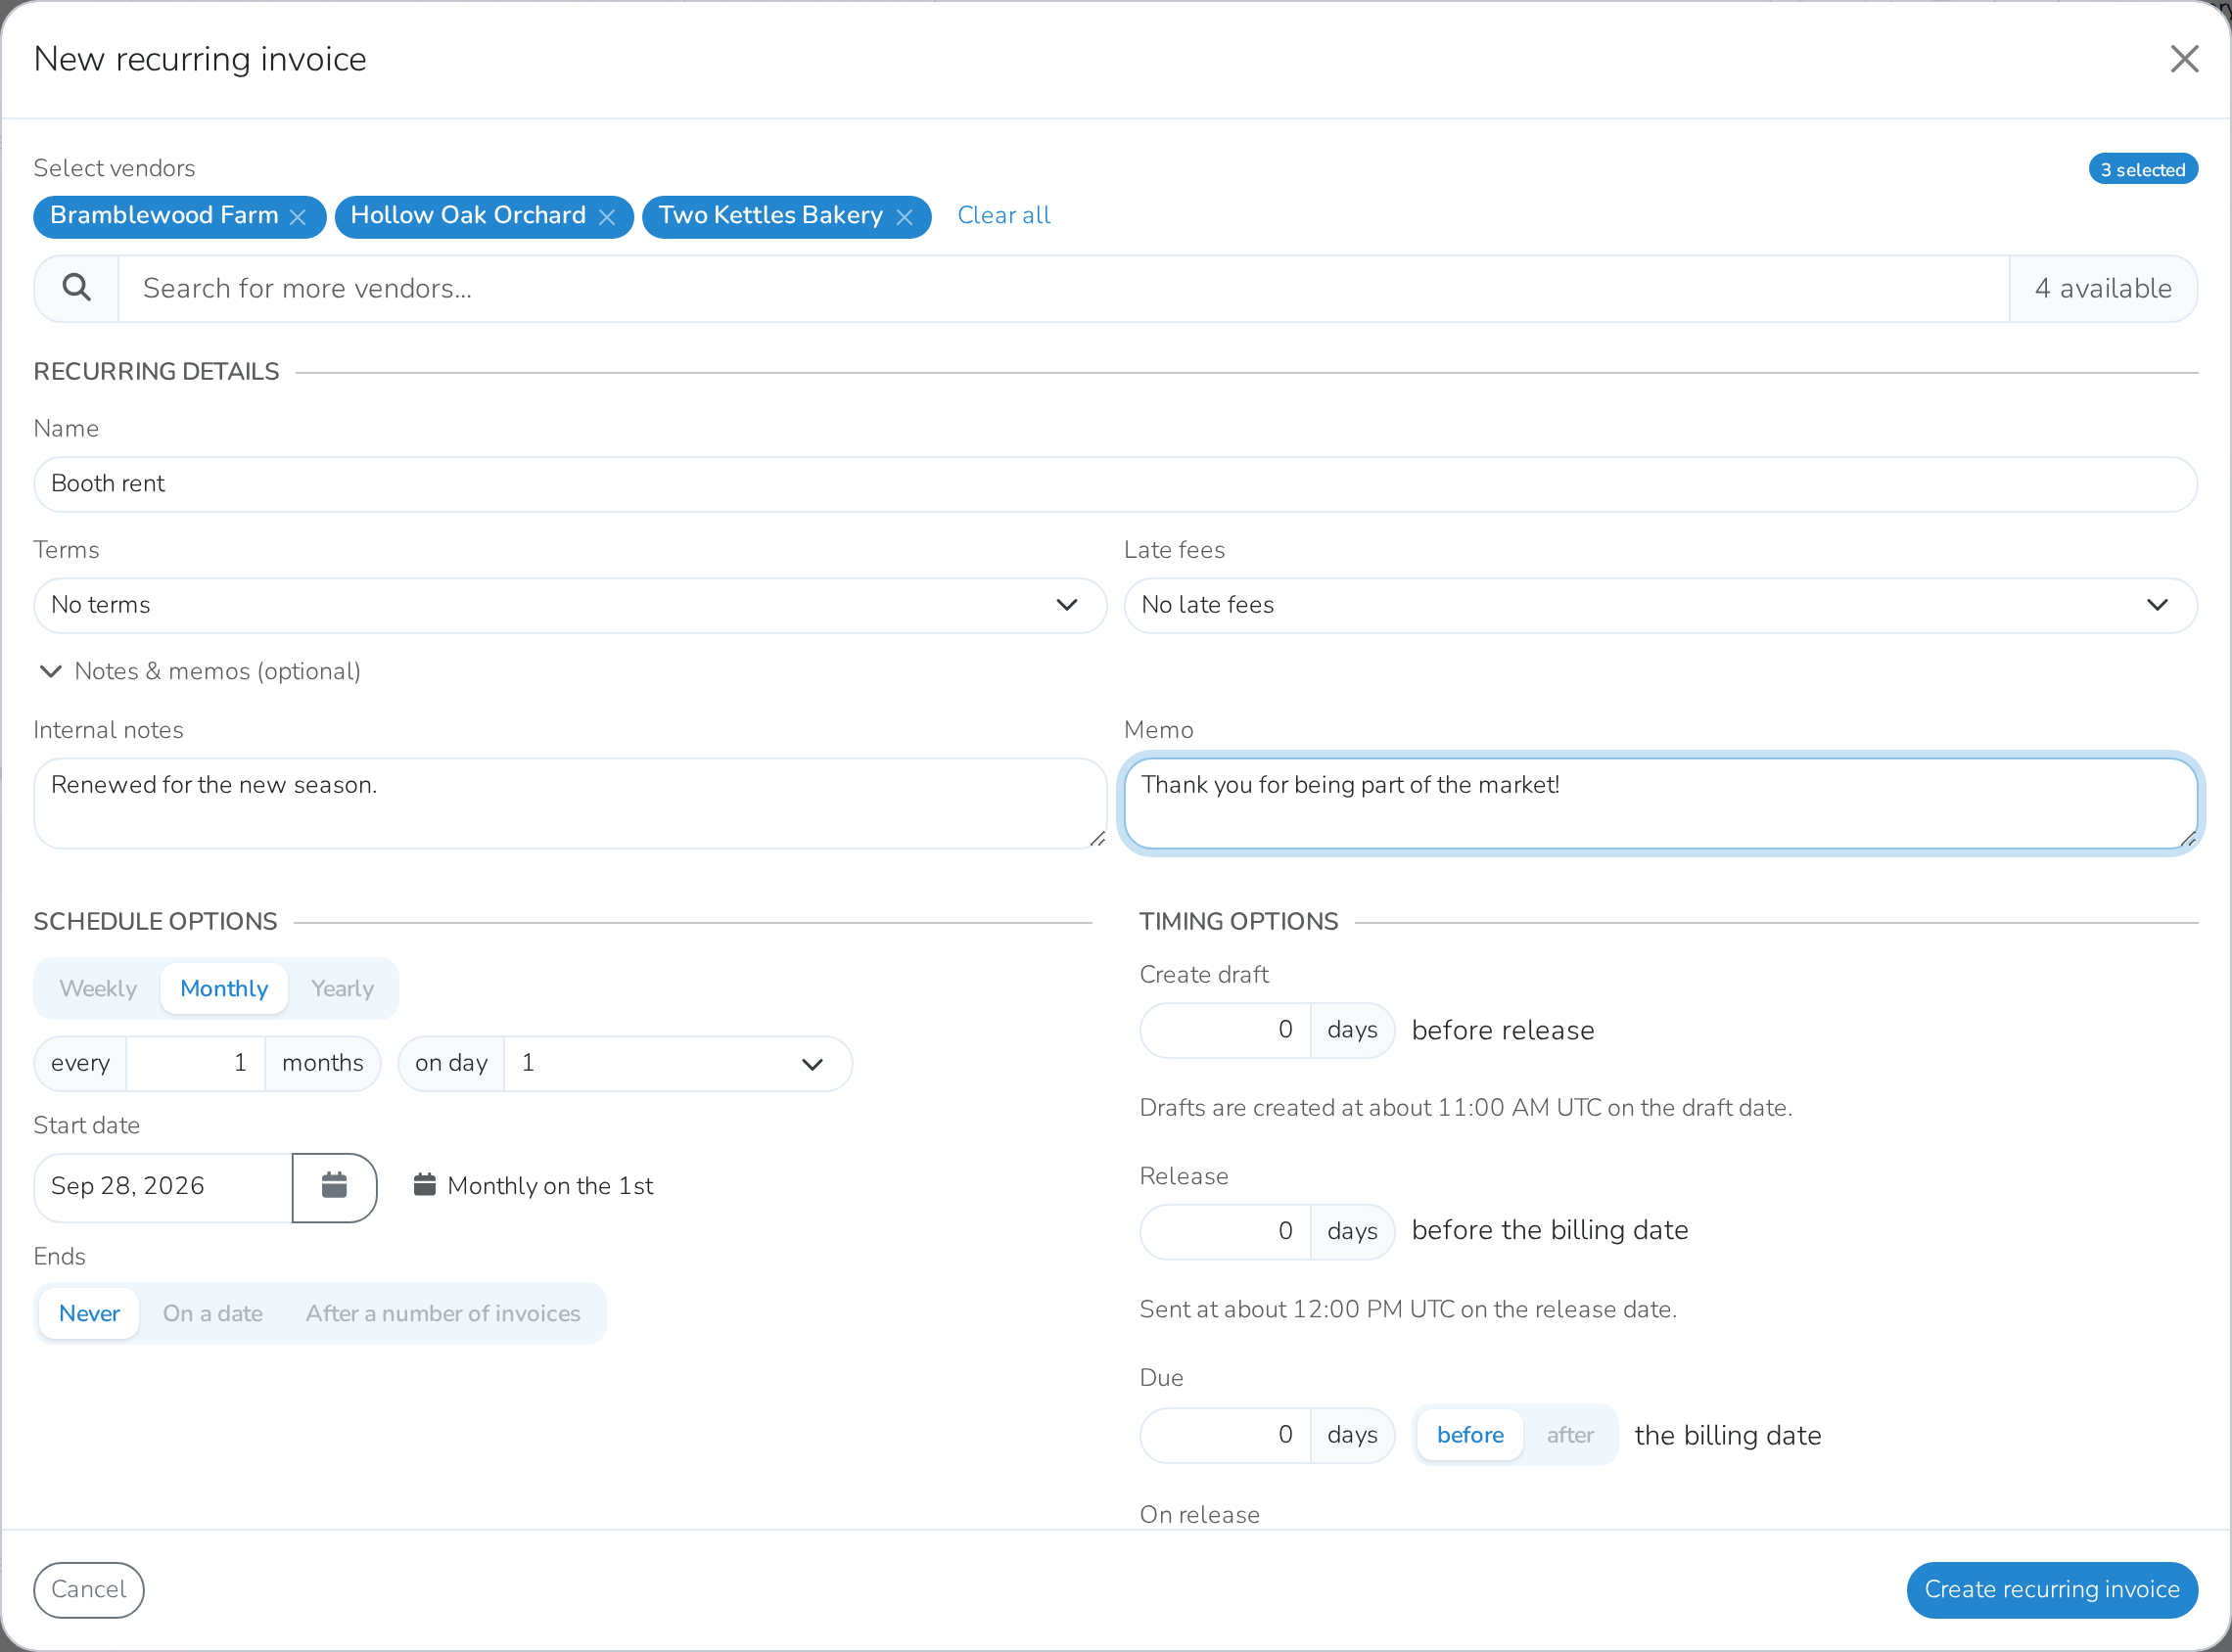
Click Notes & memos (optional) to add Internal notes (never shown to the vendor) or a Memo (shown on every invoice it creates).
-
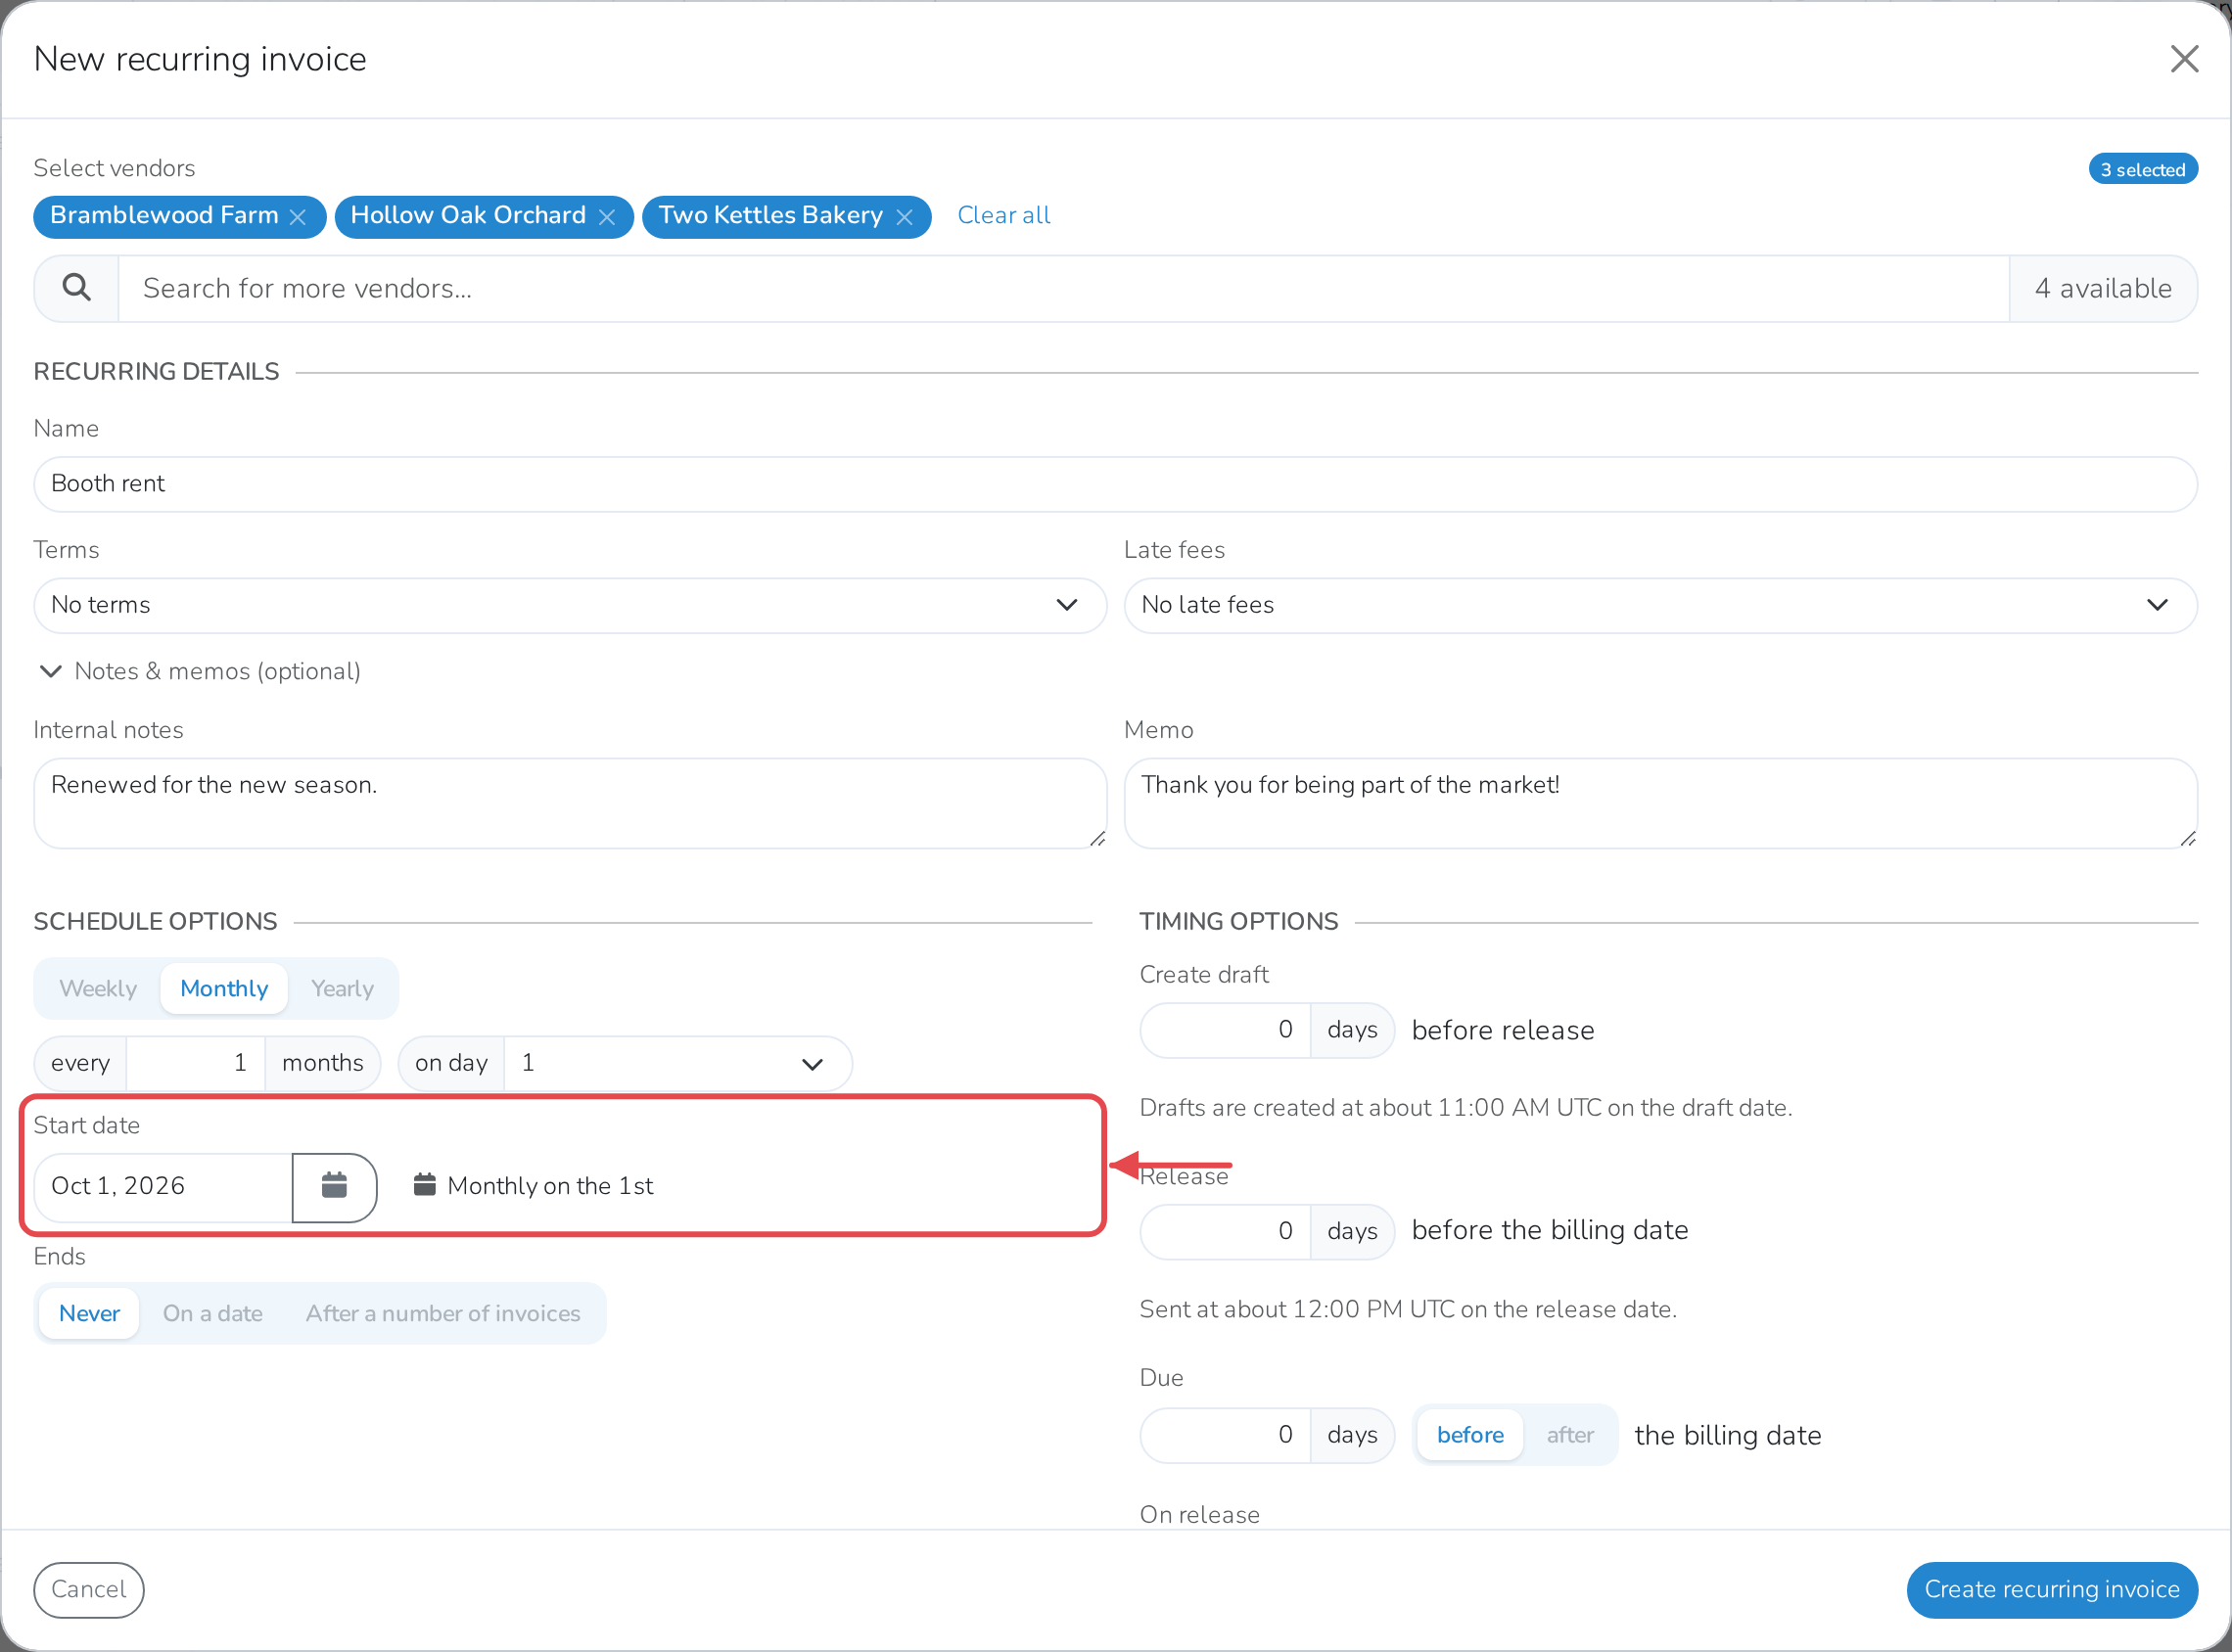
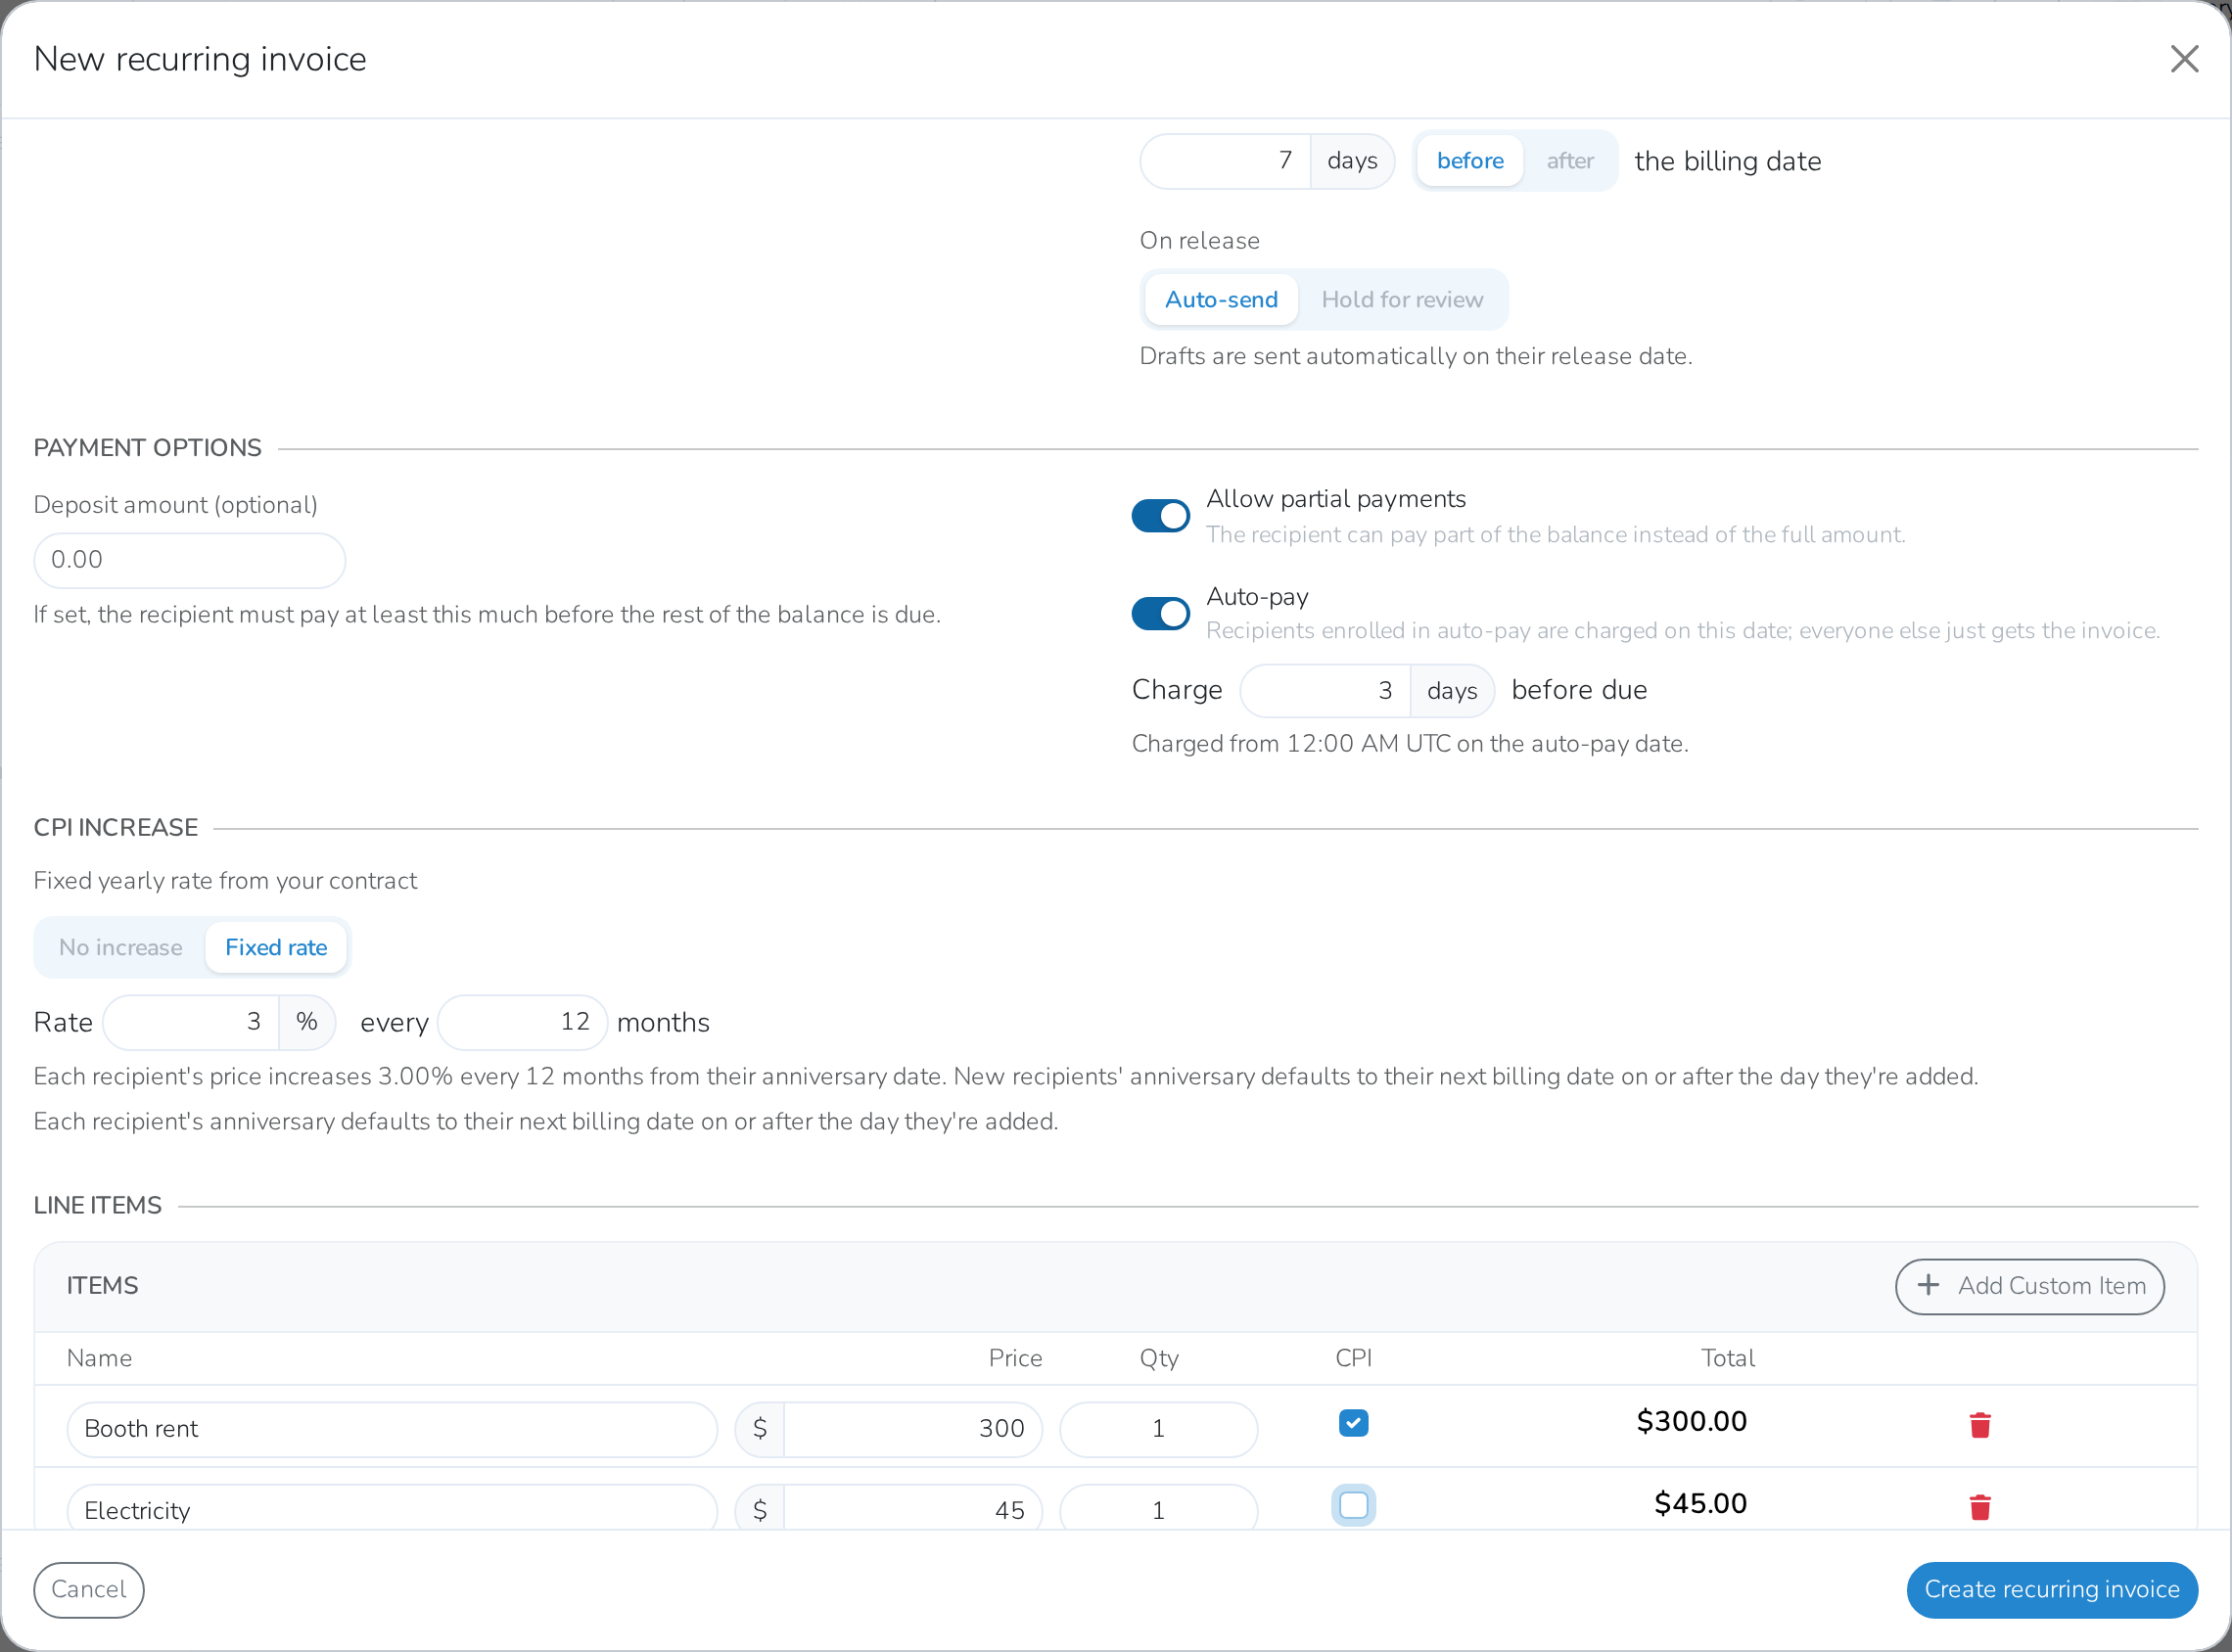
Under Schedule options, set how often it bills:
- Weekly, Monthly or Yearly, and how many apart — "every 1 month", "every 2 weeks", and so on
- For Weekly, which day of the week
- For Monthly or Yearly, which day of the month, 1 through 28, or Last day of the month — there's no option for the 29th–31st, since not every month has one
- A Start date
- Under Ends, whether it runs Never, On a date, or After a number of invoices
-
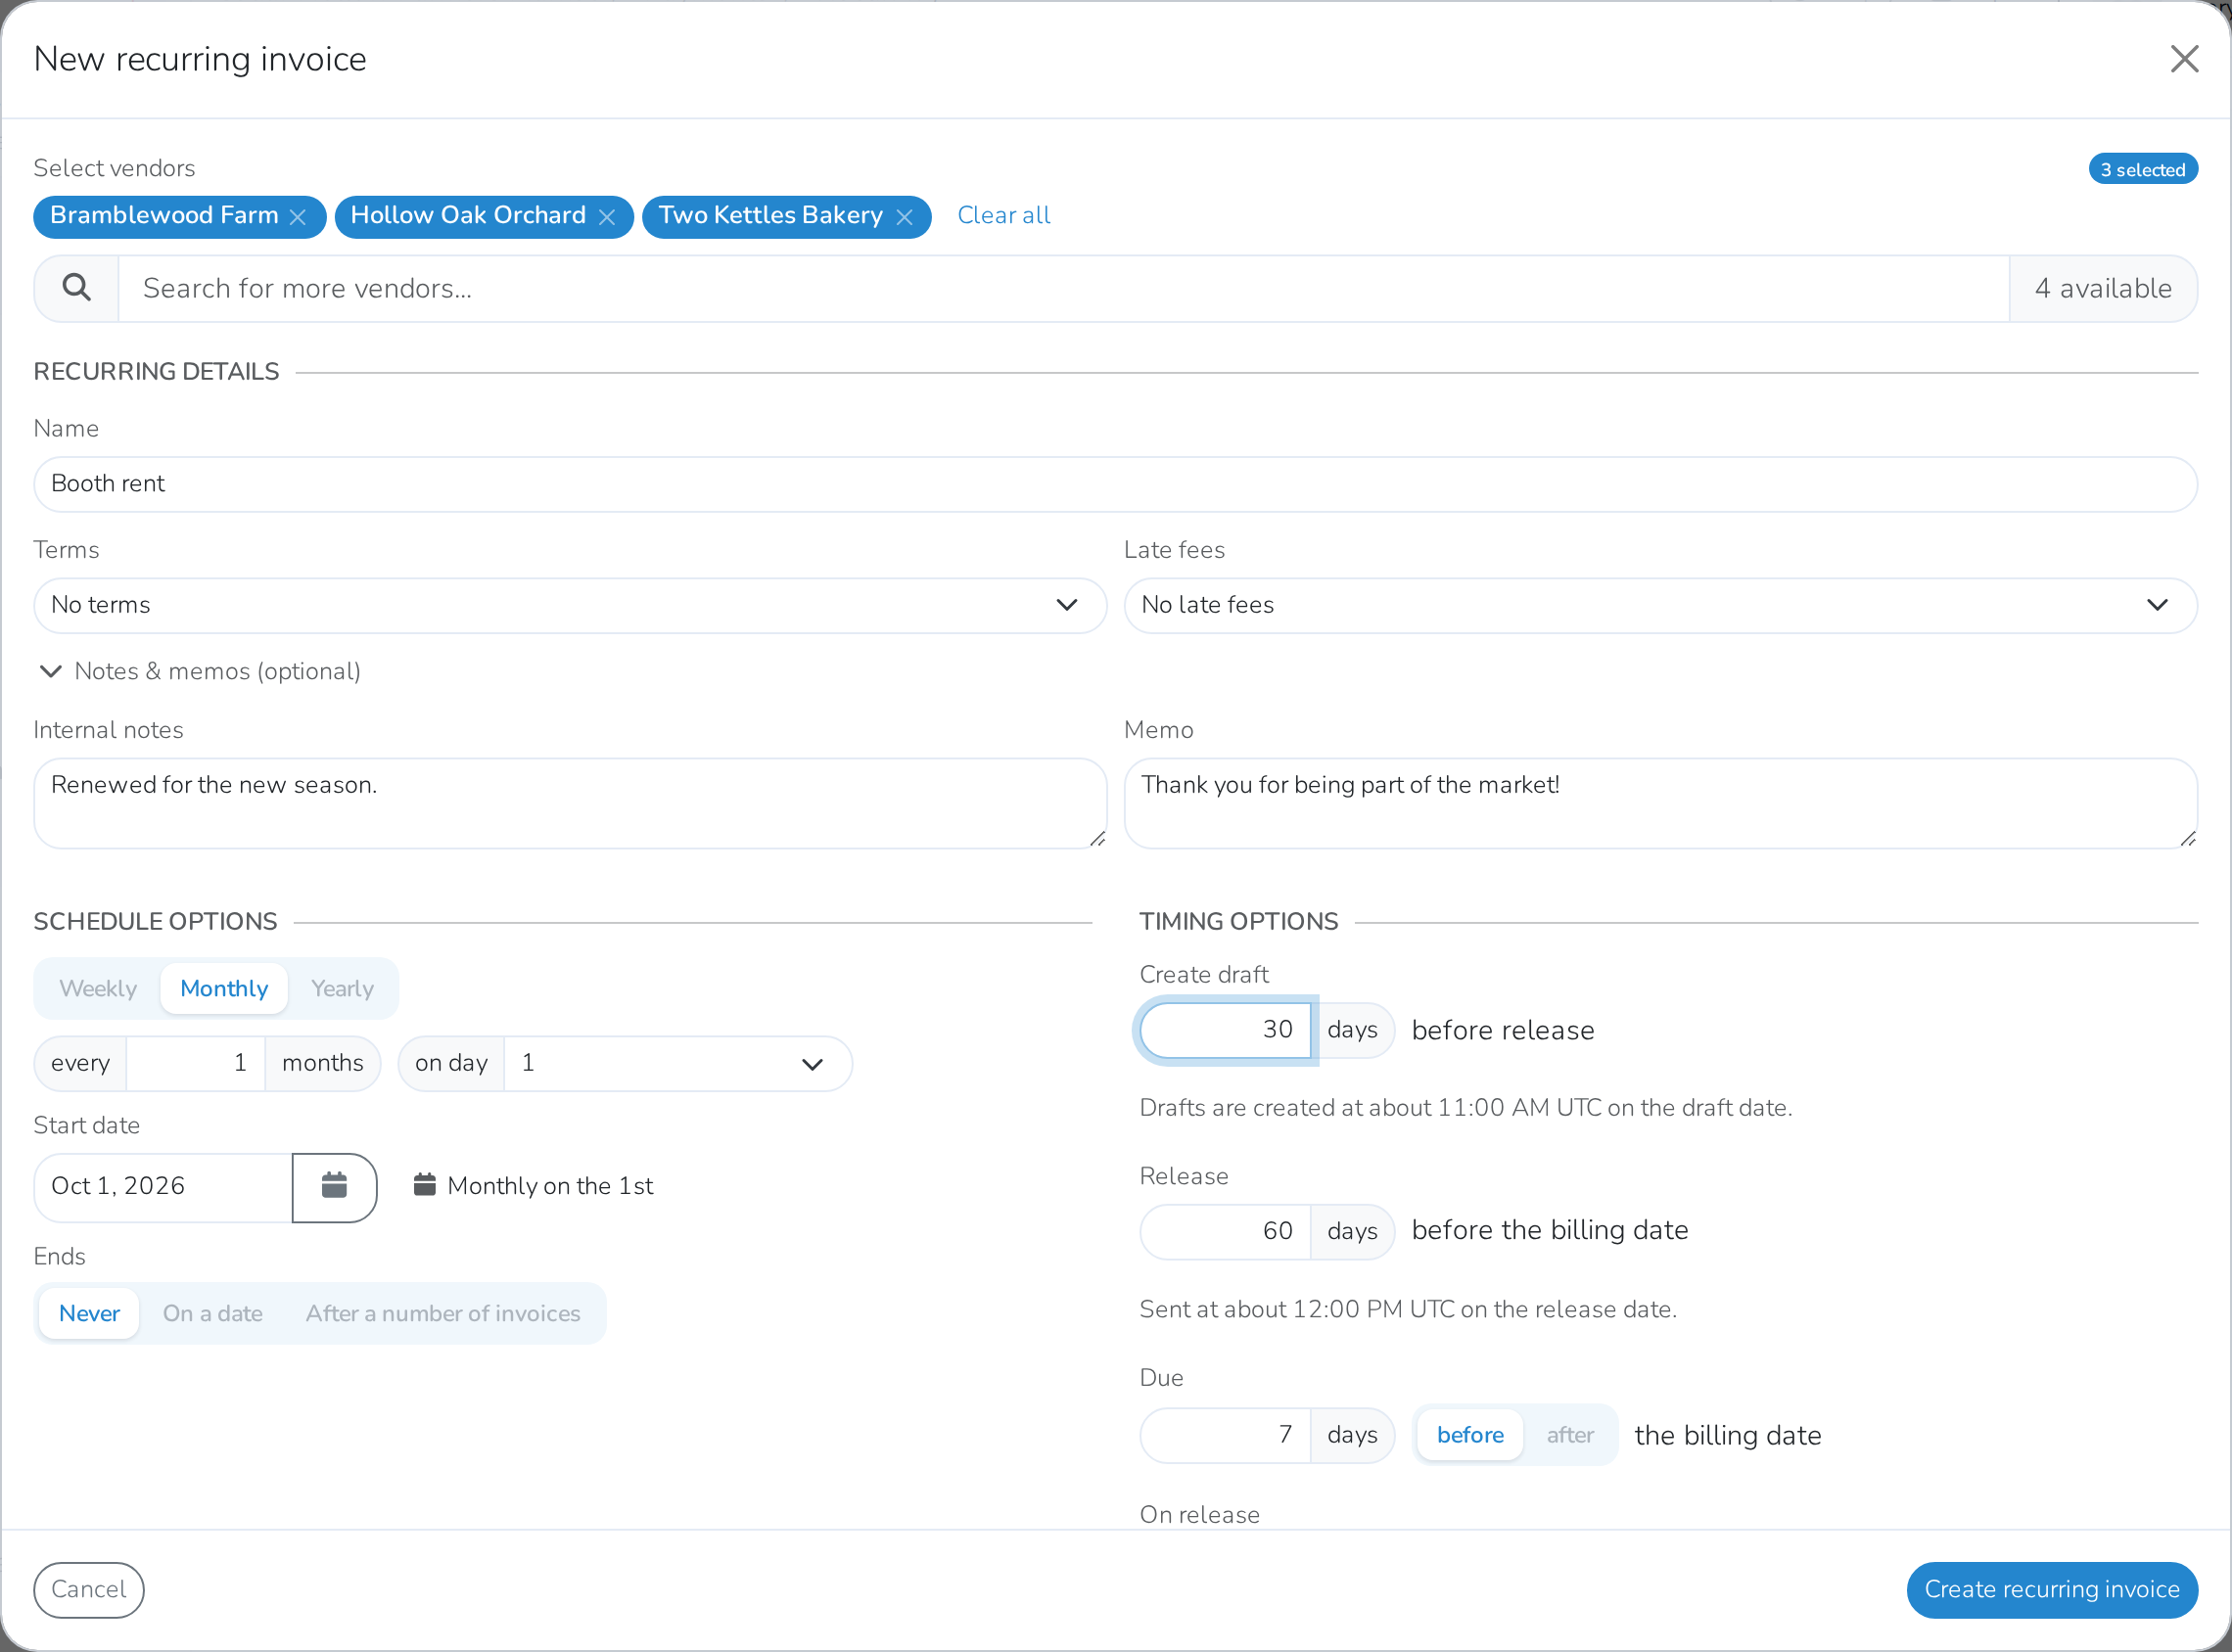
Under Timing options, set when things happen around each billing date:
- Create draft — how many days before release the invoice is quietly created as a draft, before anyone sees it
- Release — how many days before the billing date the draft becomes a real invoice
- Due — how many days before or after the billing date it's due
- On release — Auto-send to send it the moment it's released, or Hold for review to let a manager send it
Note
You need permission to release invoices to use Auto-send. Without it, choose Hold for review.
-
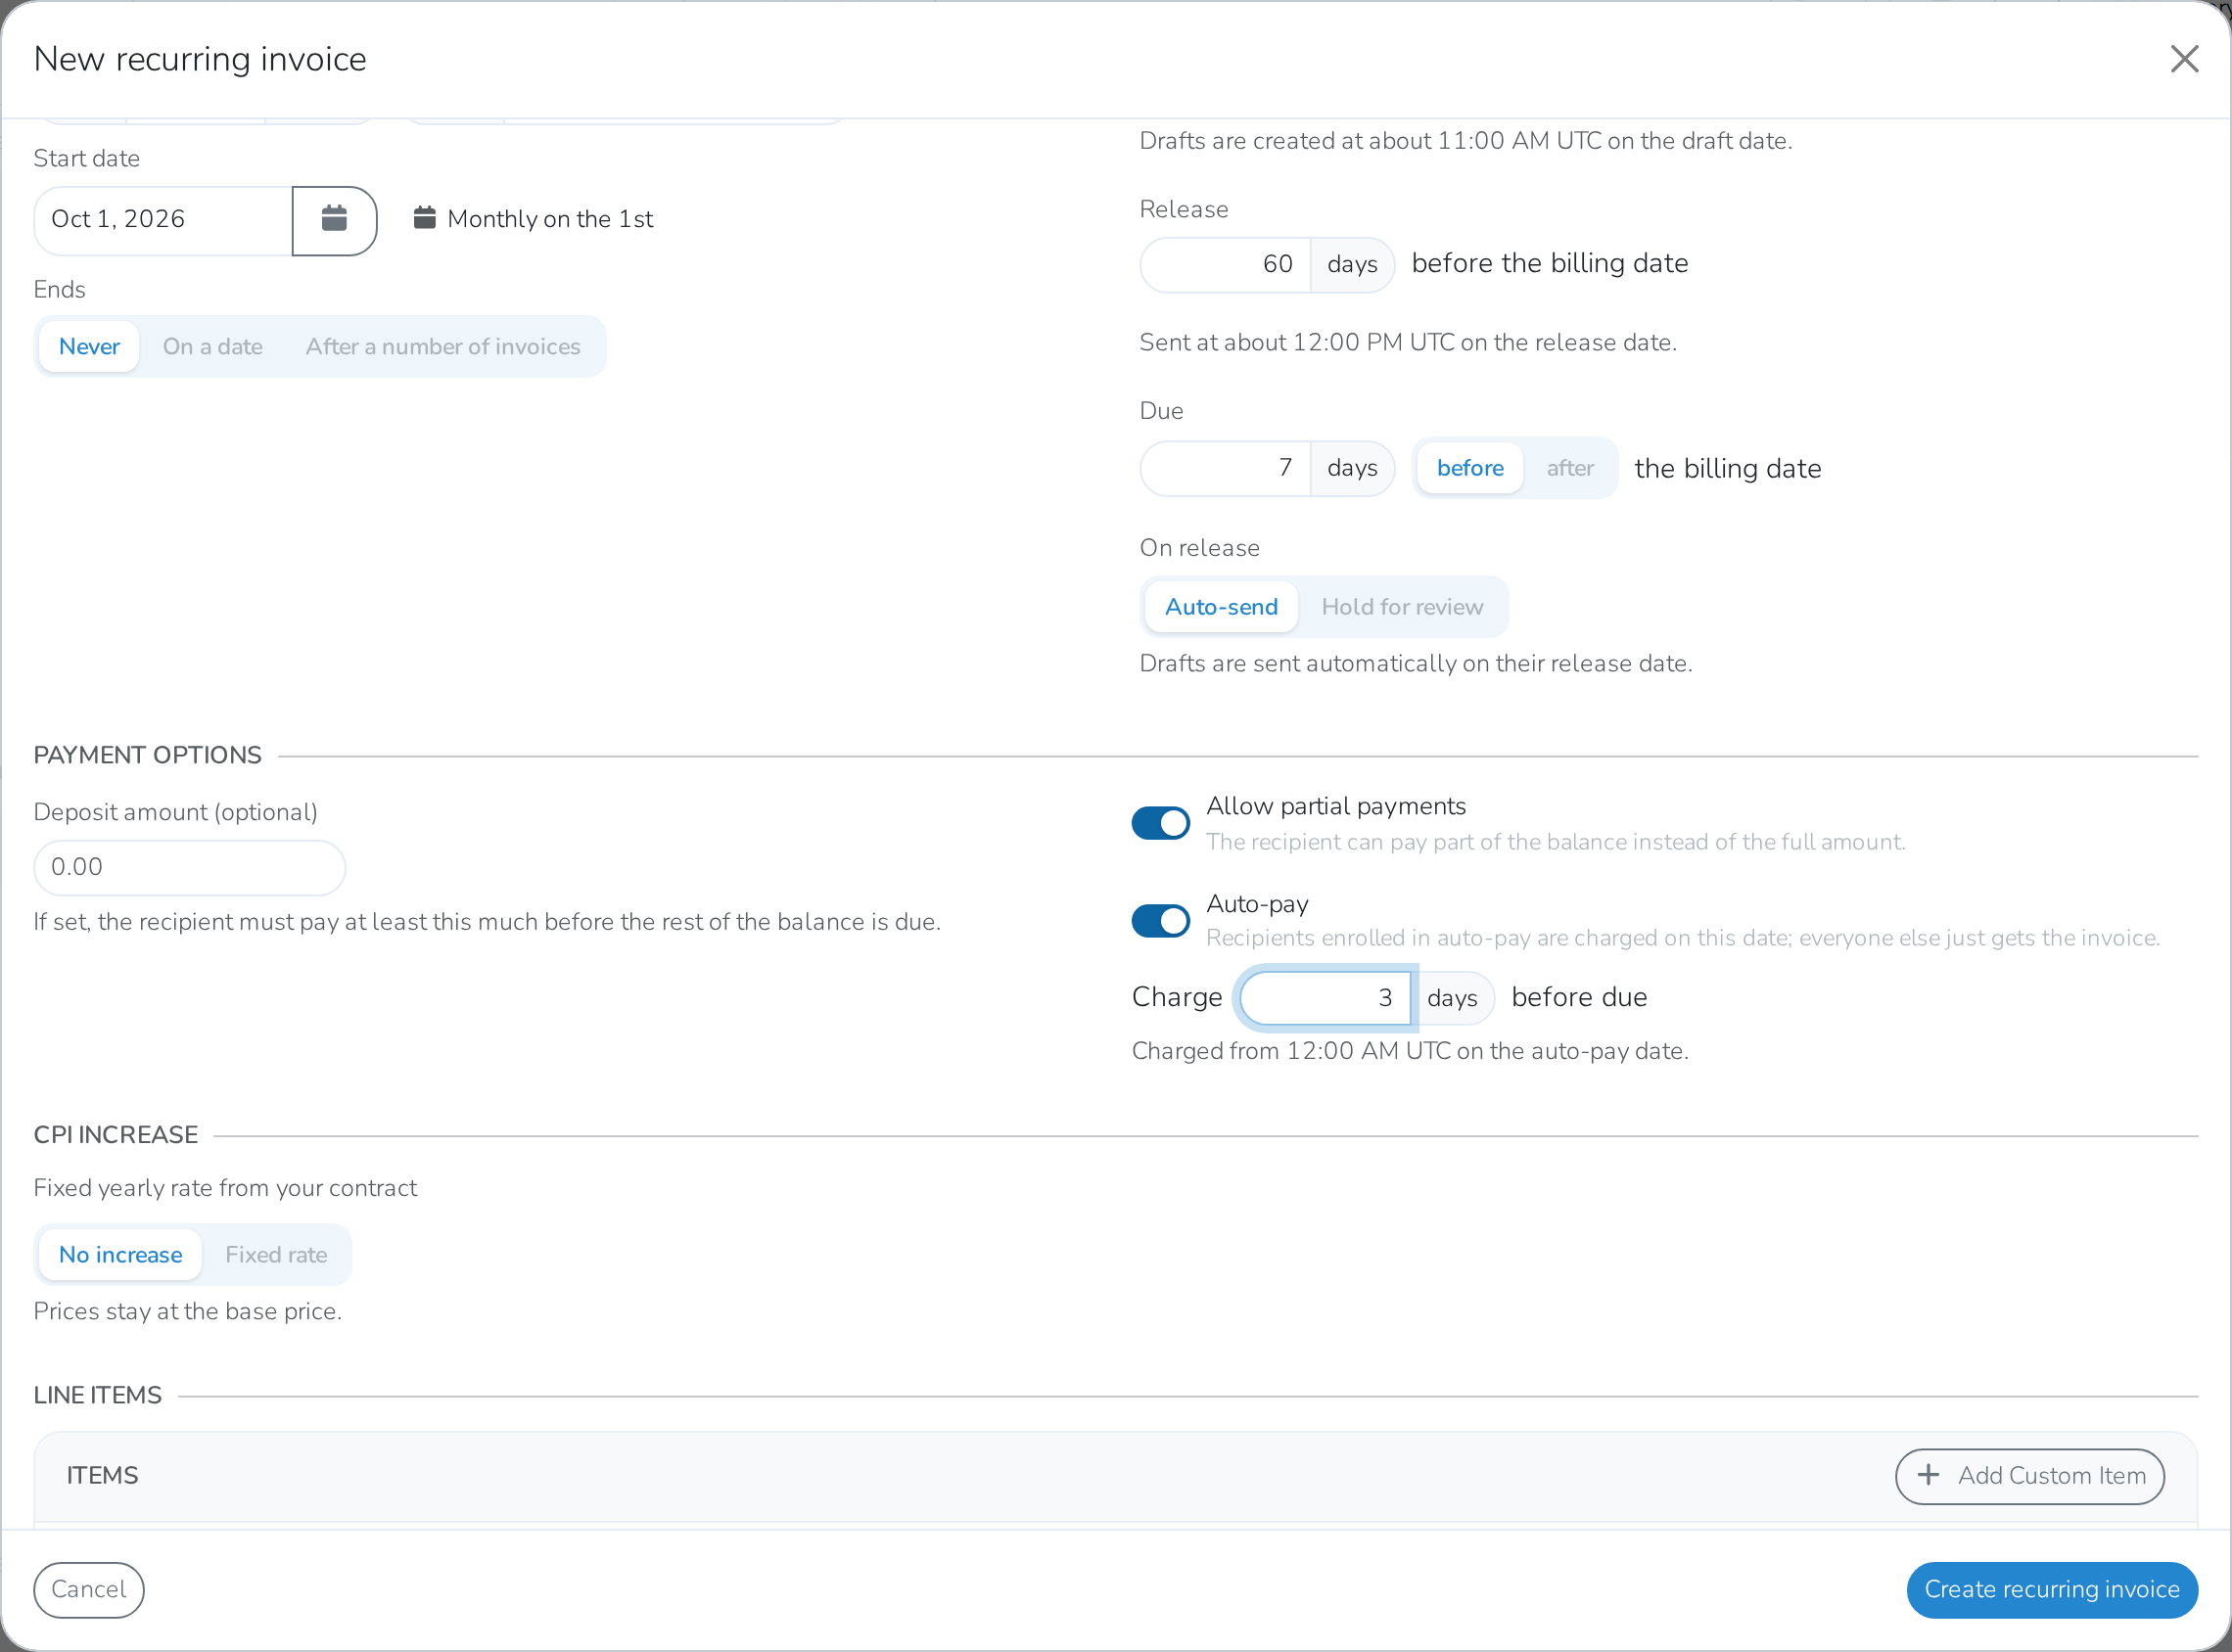
Under Payment options, set:
- A Deposit amount (optional), if part of the balance should be paid up front
- Allow partial payments, if a vendor can pay less than the full amount at once
- Auto-pay, to charge vendors who already have Auto Pay turned on with your market — set how many days before the due date to charge them. See Charge vendors who have Auto Pay.
-
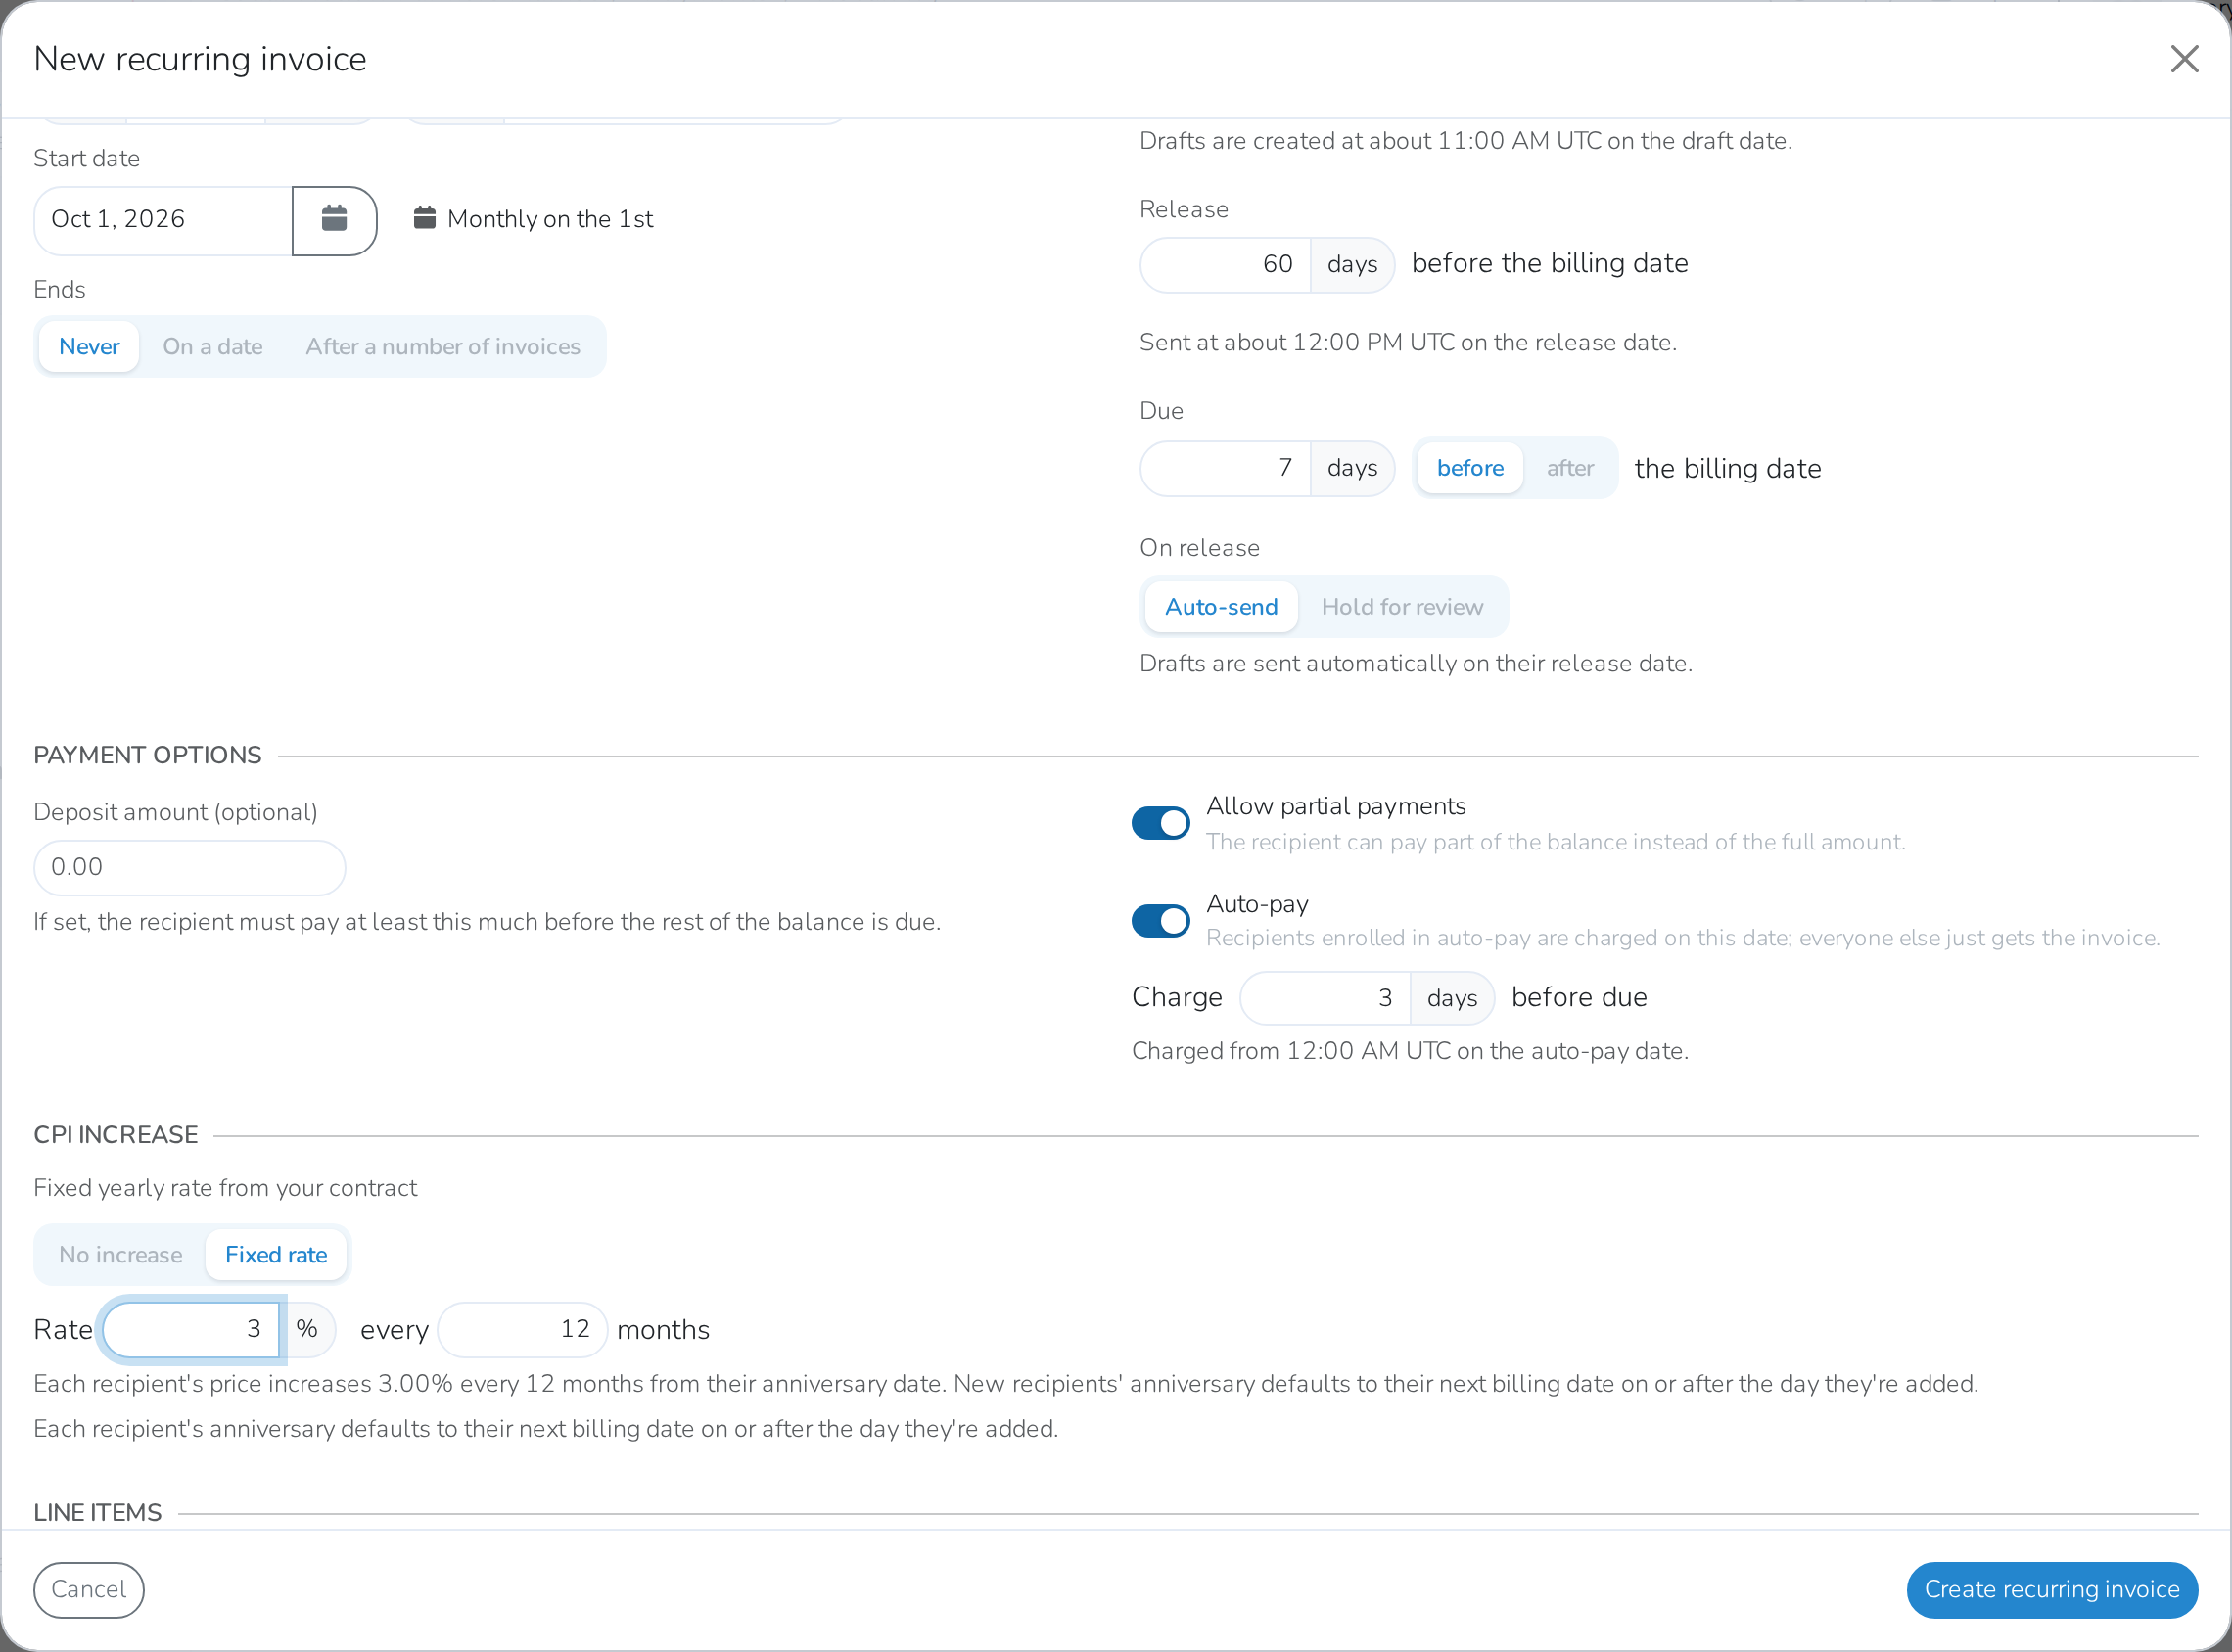
If your contract calls for a yearly price increase, choose Fixed rate under CPI increase. Set the Rate and how many months between increases.
-
Under Line items, add what you're charging — Add Saved Item for something you've already set up, or Add Custom Item for anything else. Give each one a name, price and quantity. Check Tax if it's taxable, and if you turned on CPI, check its CPI box if that item should get the increase too.
-
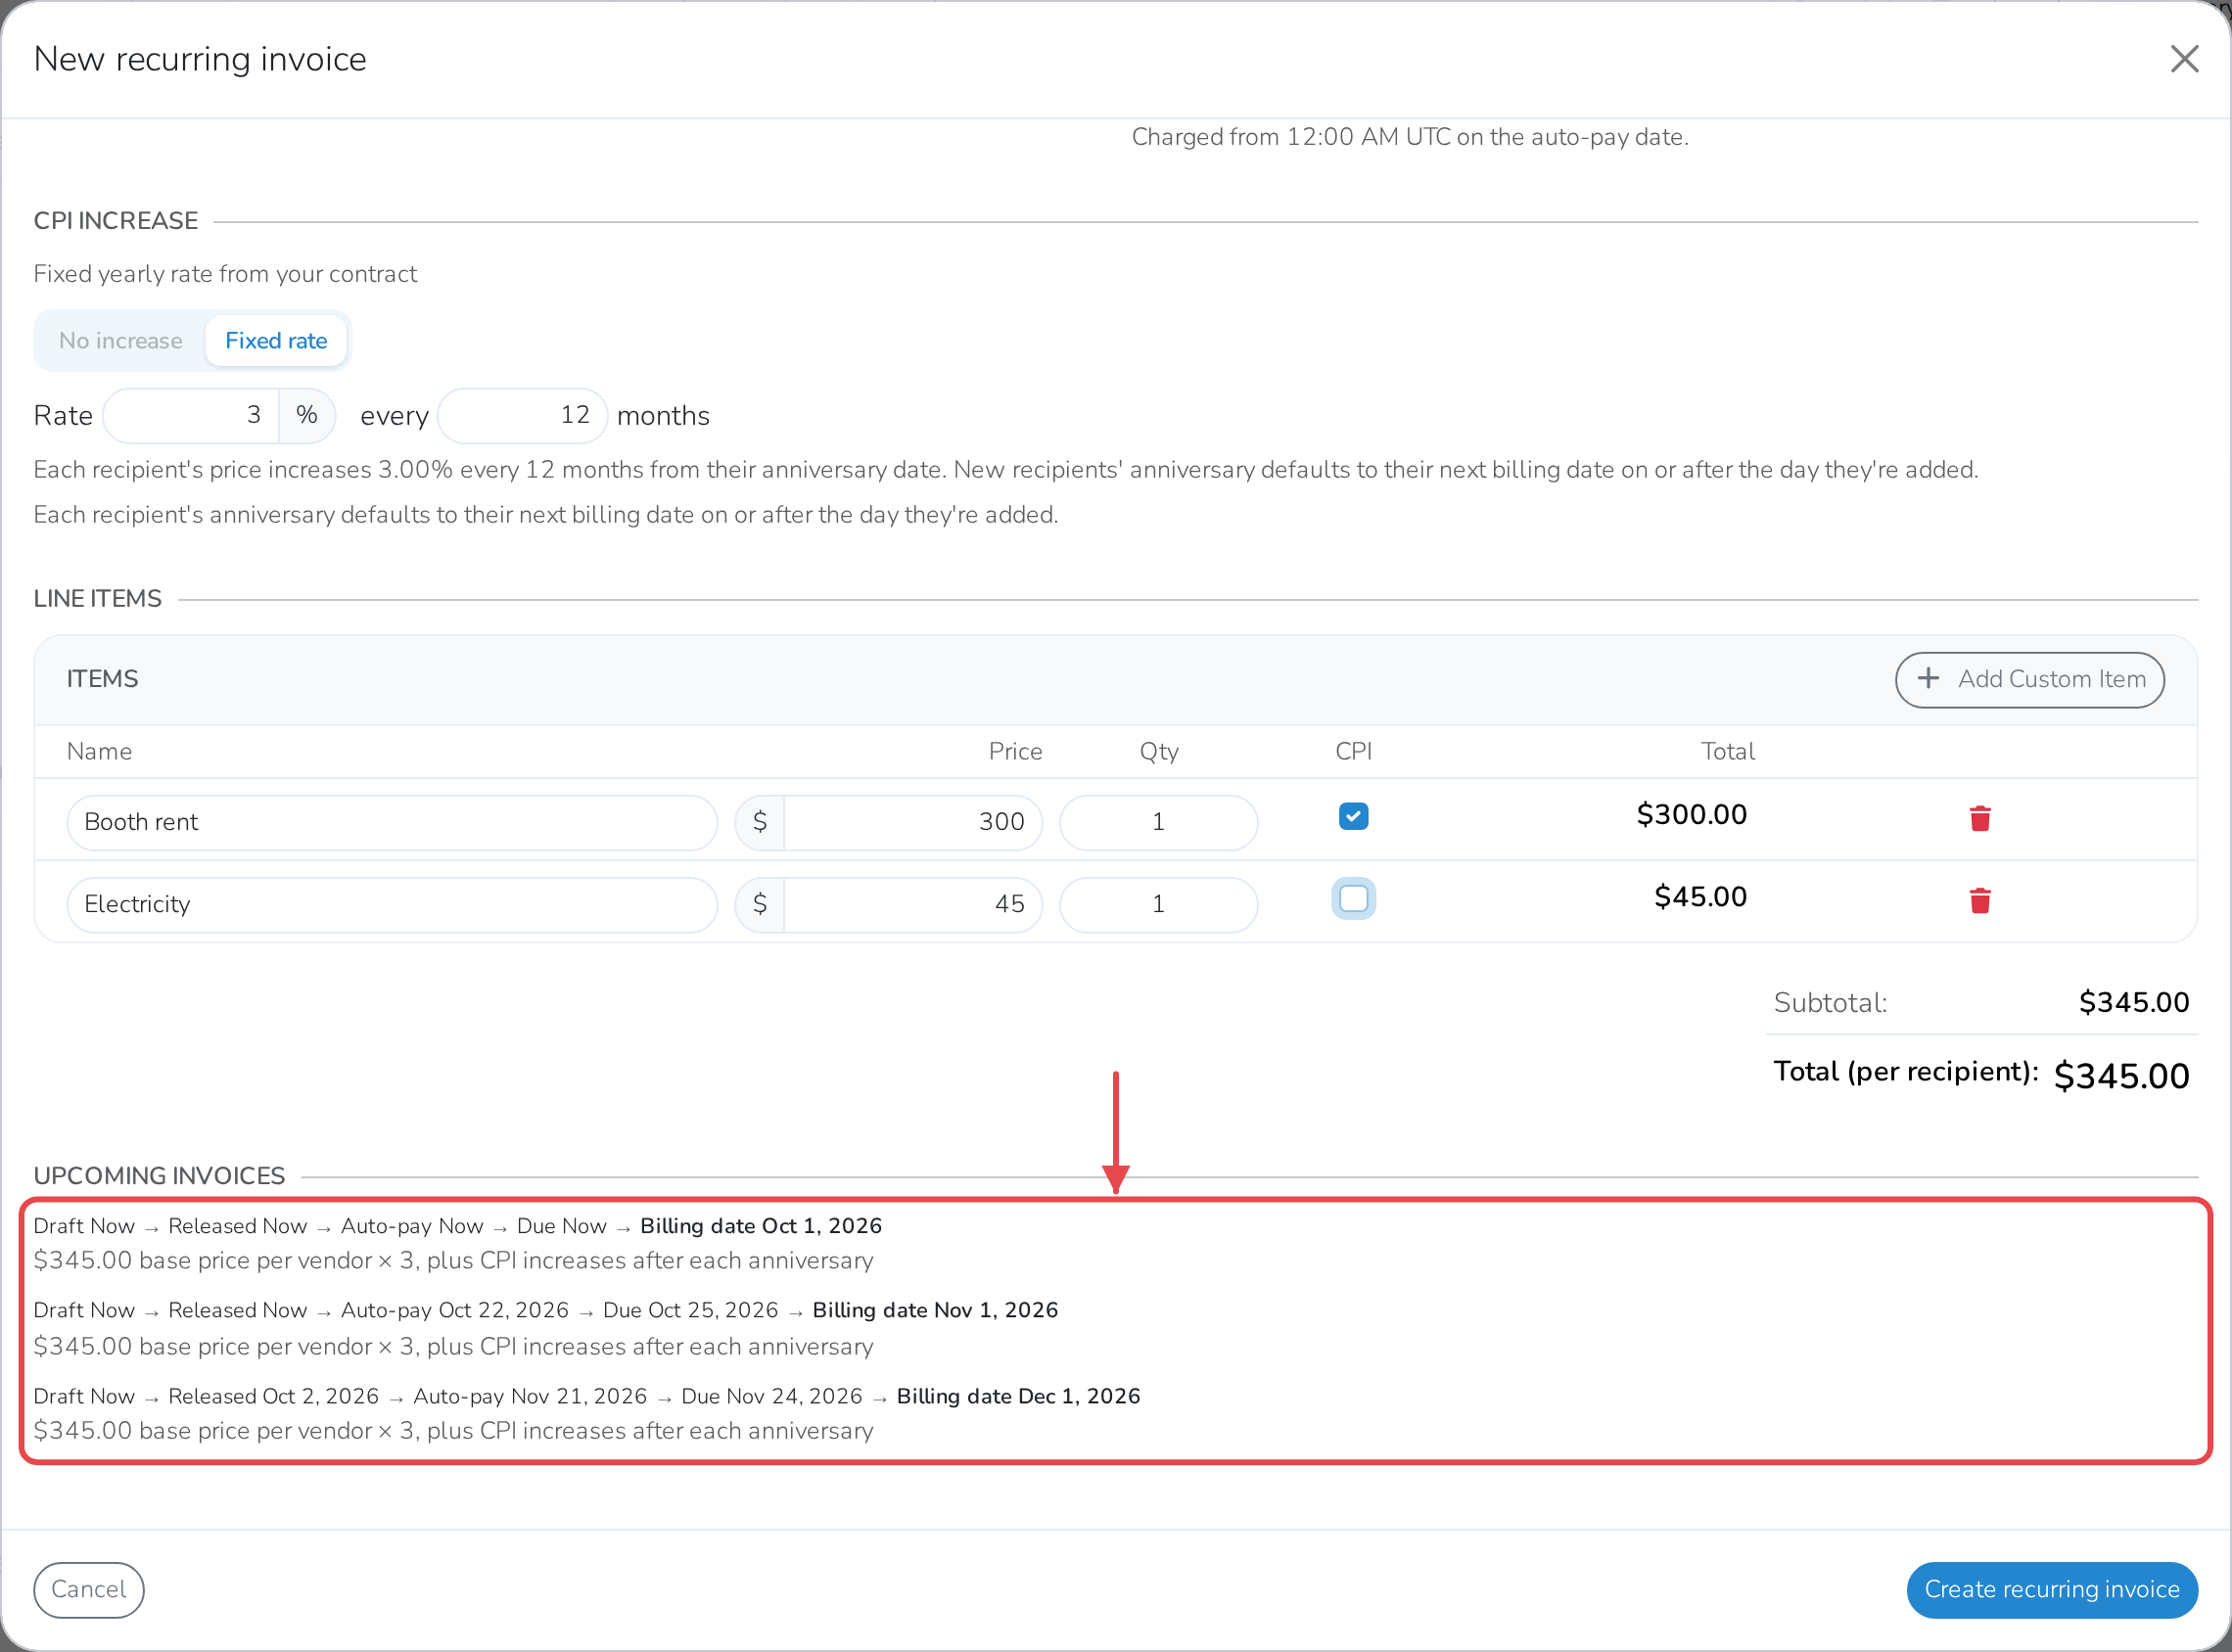
Check Upcoming invoices to see what the next few bills will actually look like before you save.
-
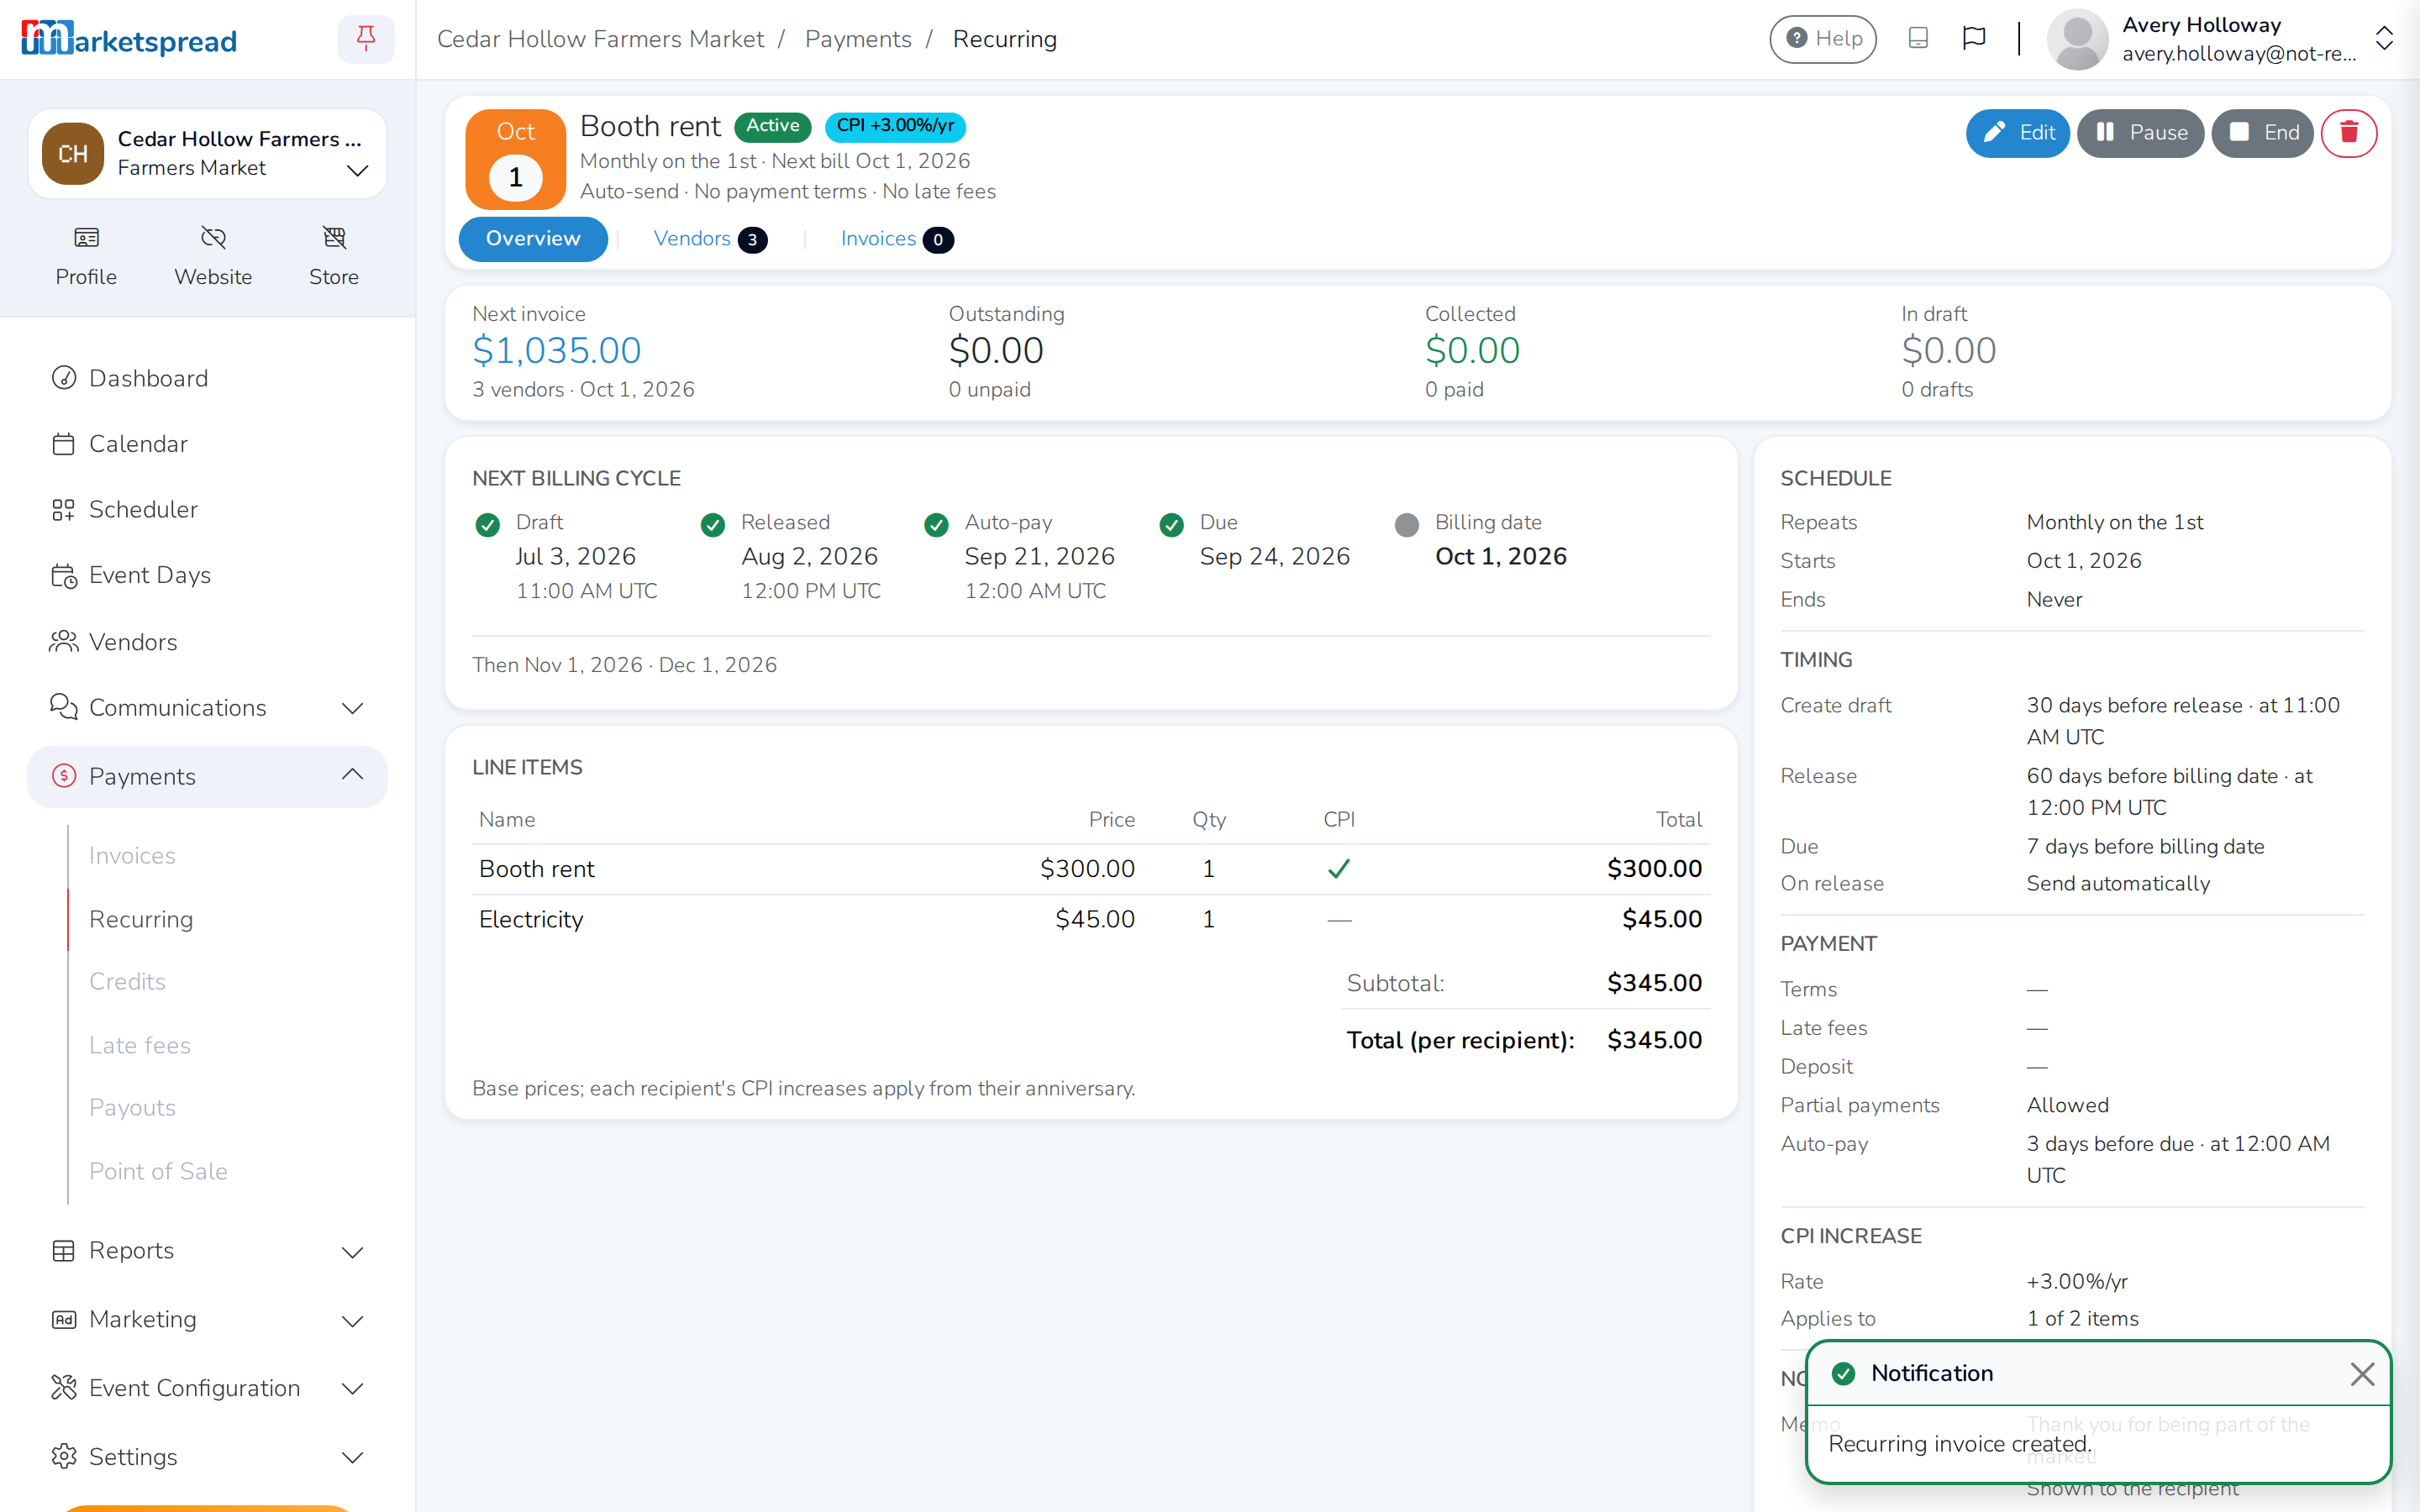
Click Create recurring invoice.
Good to know
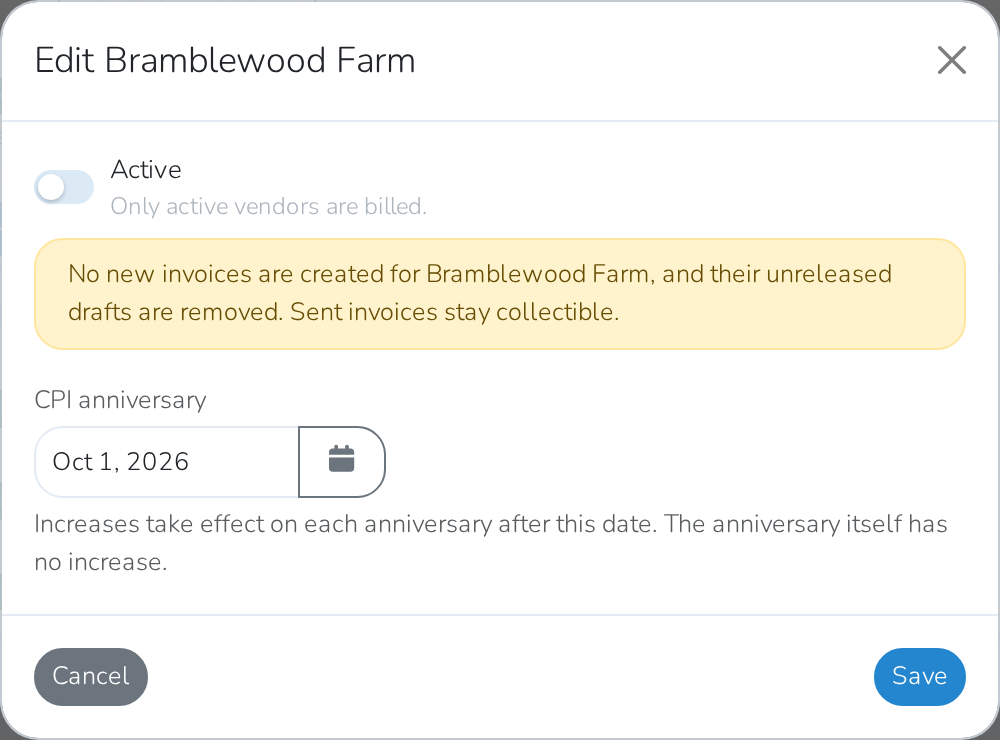
A vendor's price only goes up on their CPI anniversary — the day they're added never carries an increase itself. A new vendor's anniversary defaults to their next billing date on or after the day you add them.
Add or remove vendors
-
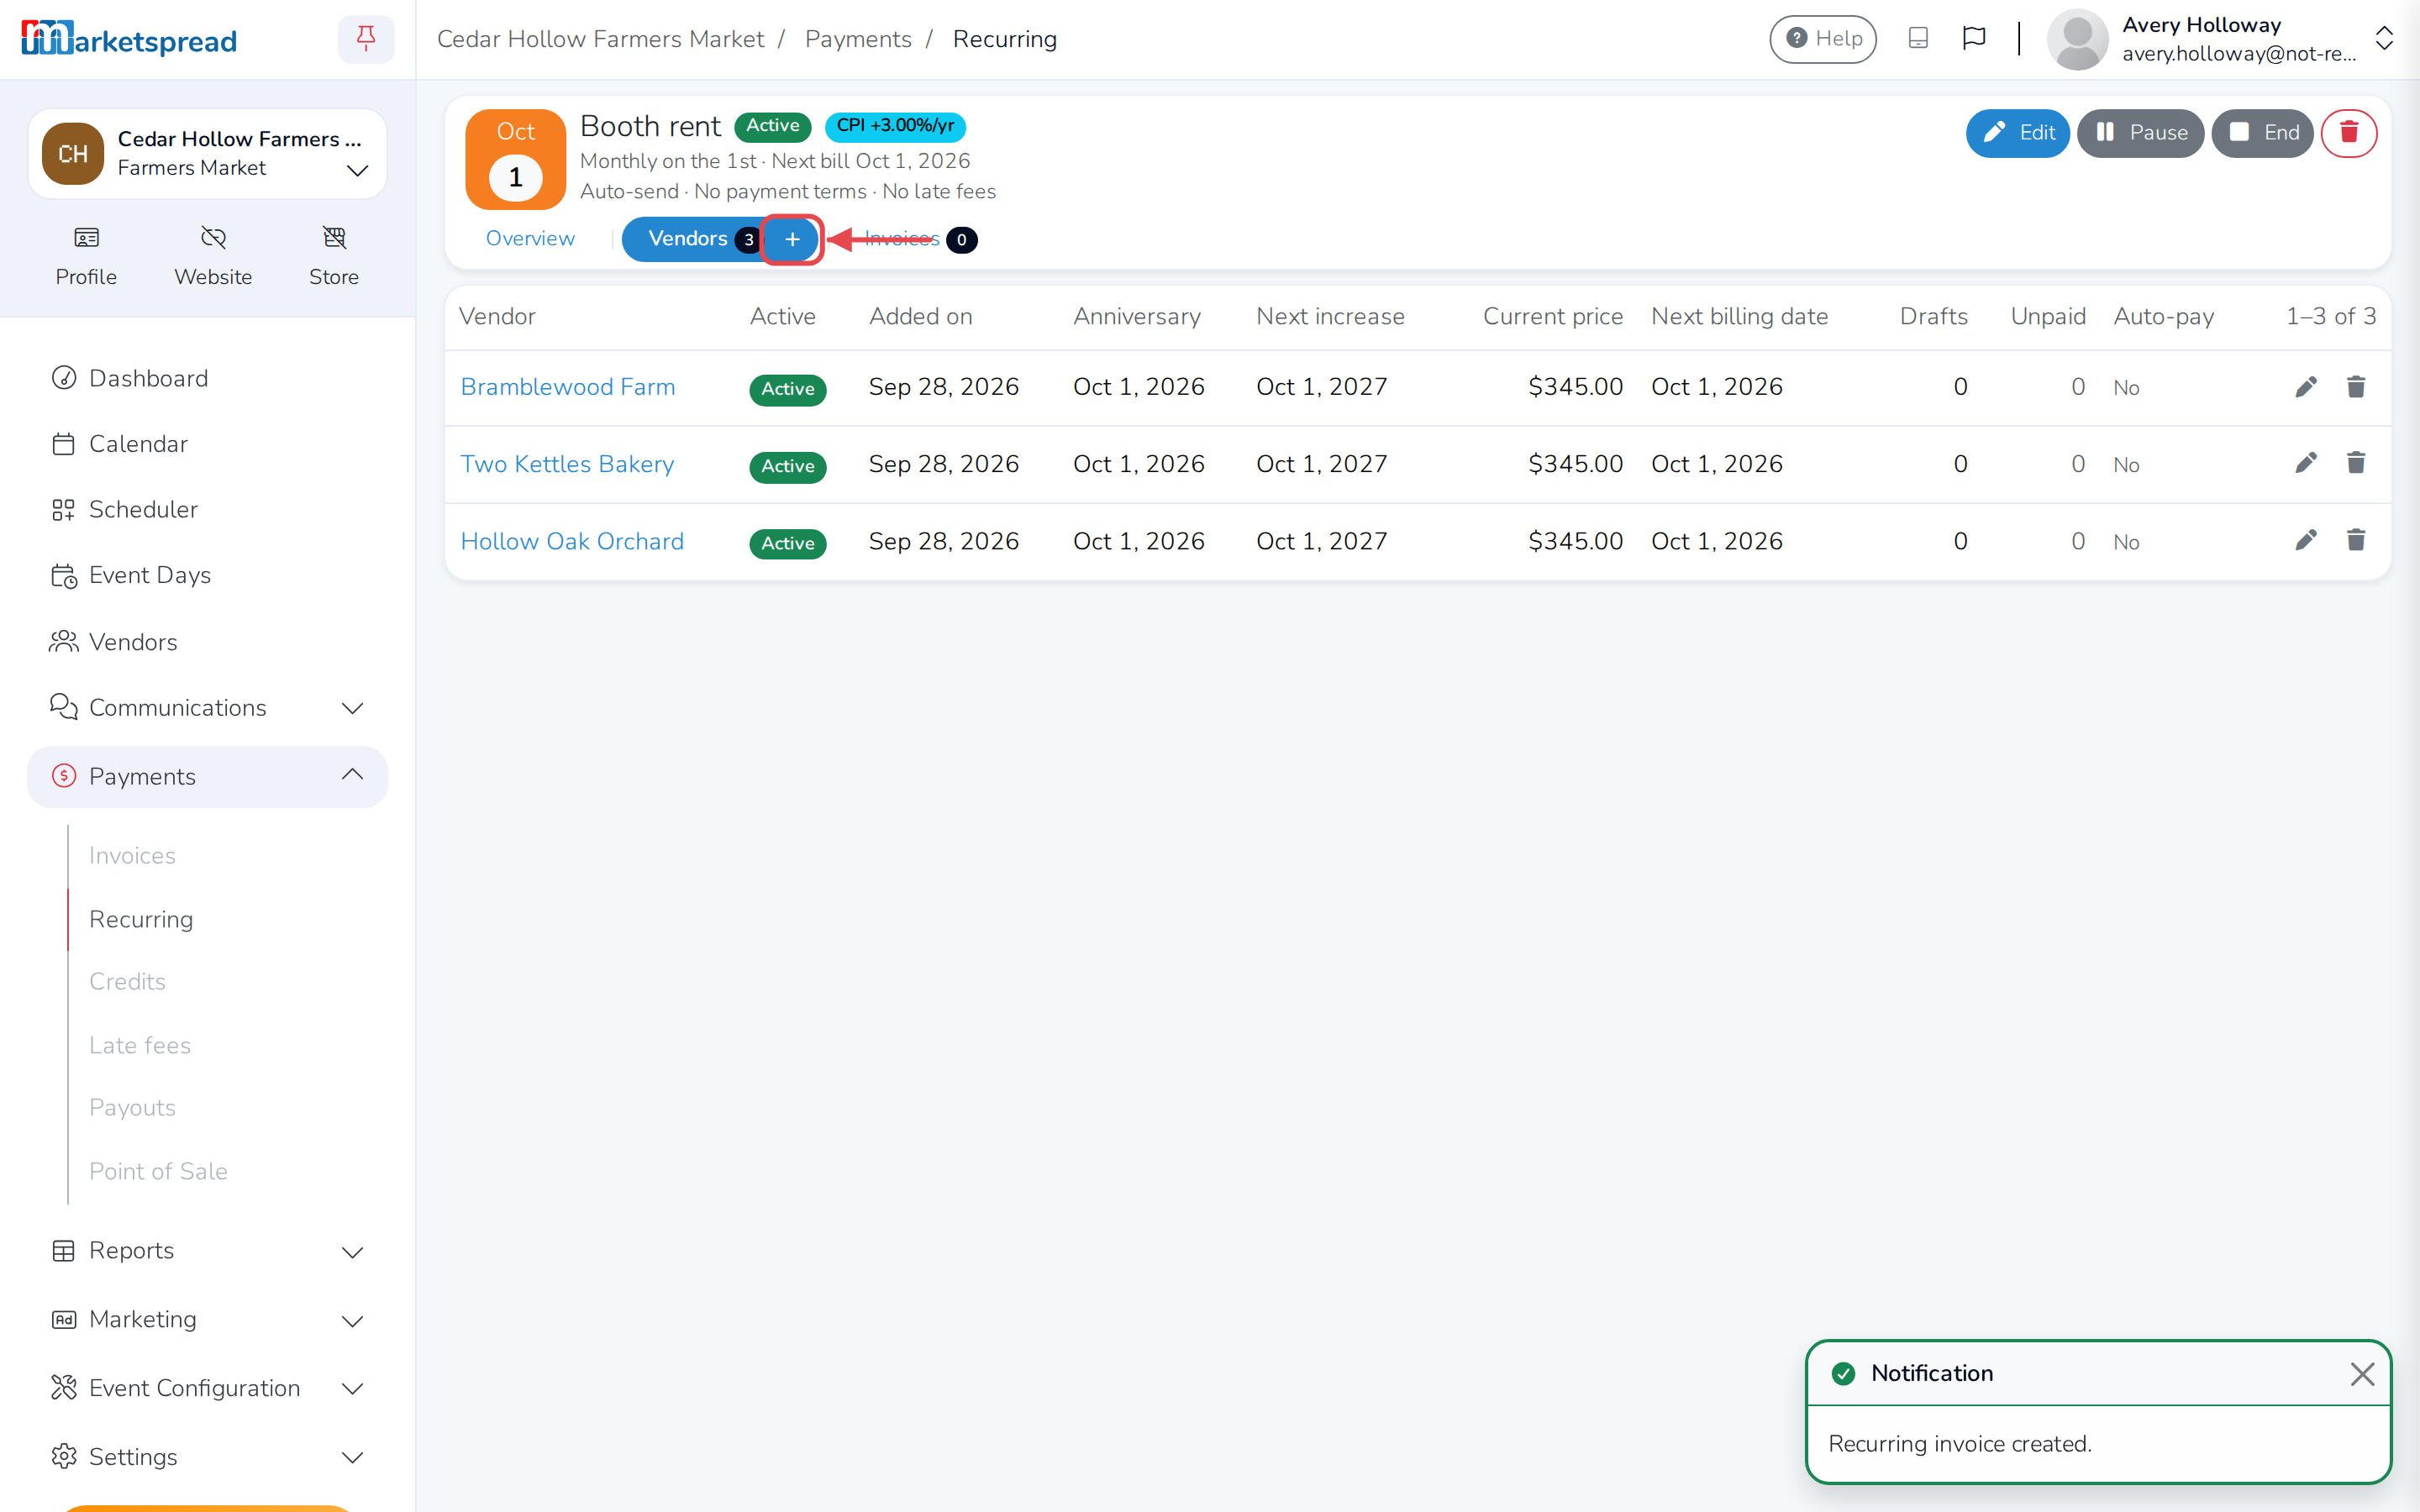
Open the recurring invoice, then the Vendors tab.
-
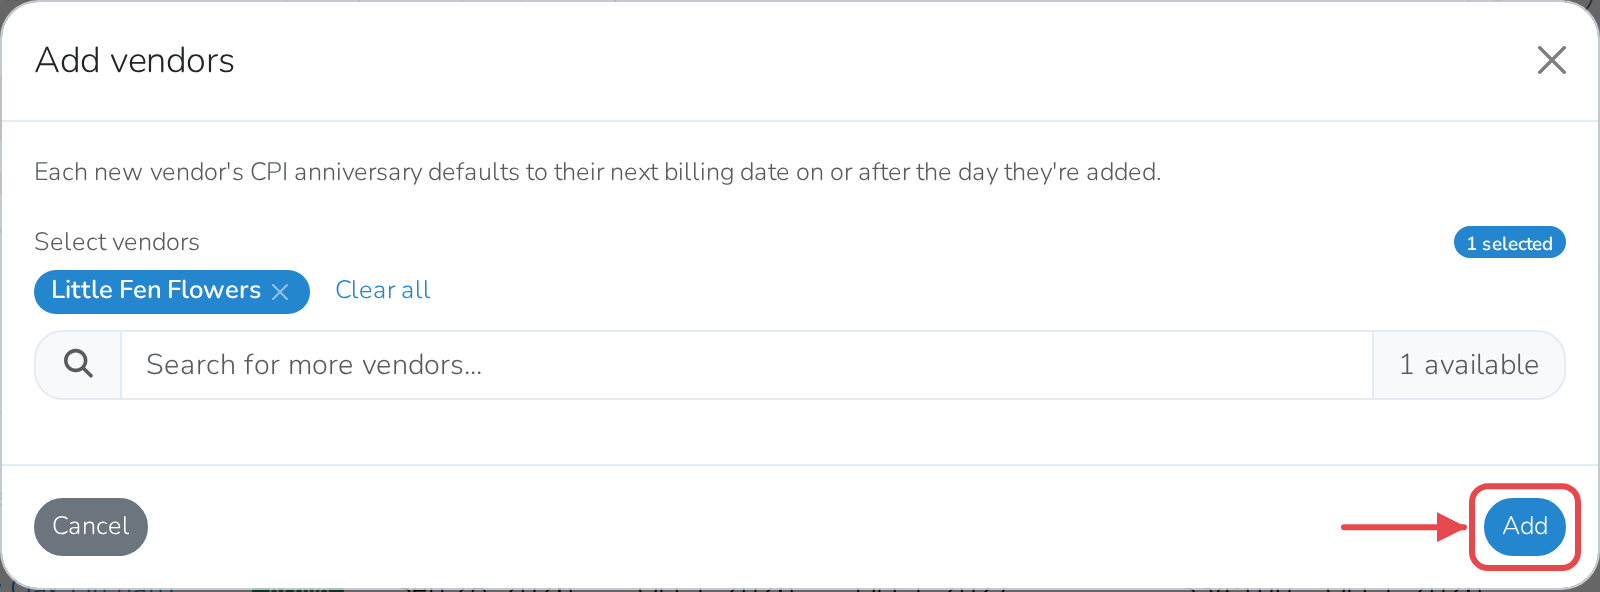
To add someone, click the + next to the tab, search for and select who to add, and click Add.
-
To pause one vendor without removing them, open their row menu, click Edit, and turn off Active. No new invoices are created for them while they're inactive, and their unreleased drafts are removed the same way — but you can turn Active back on any time.
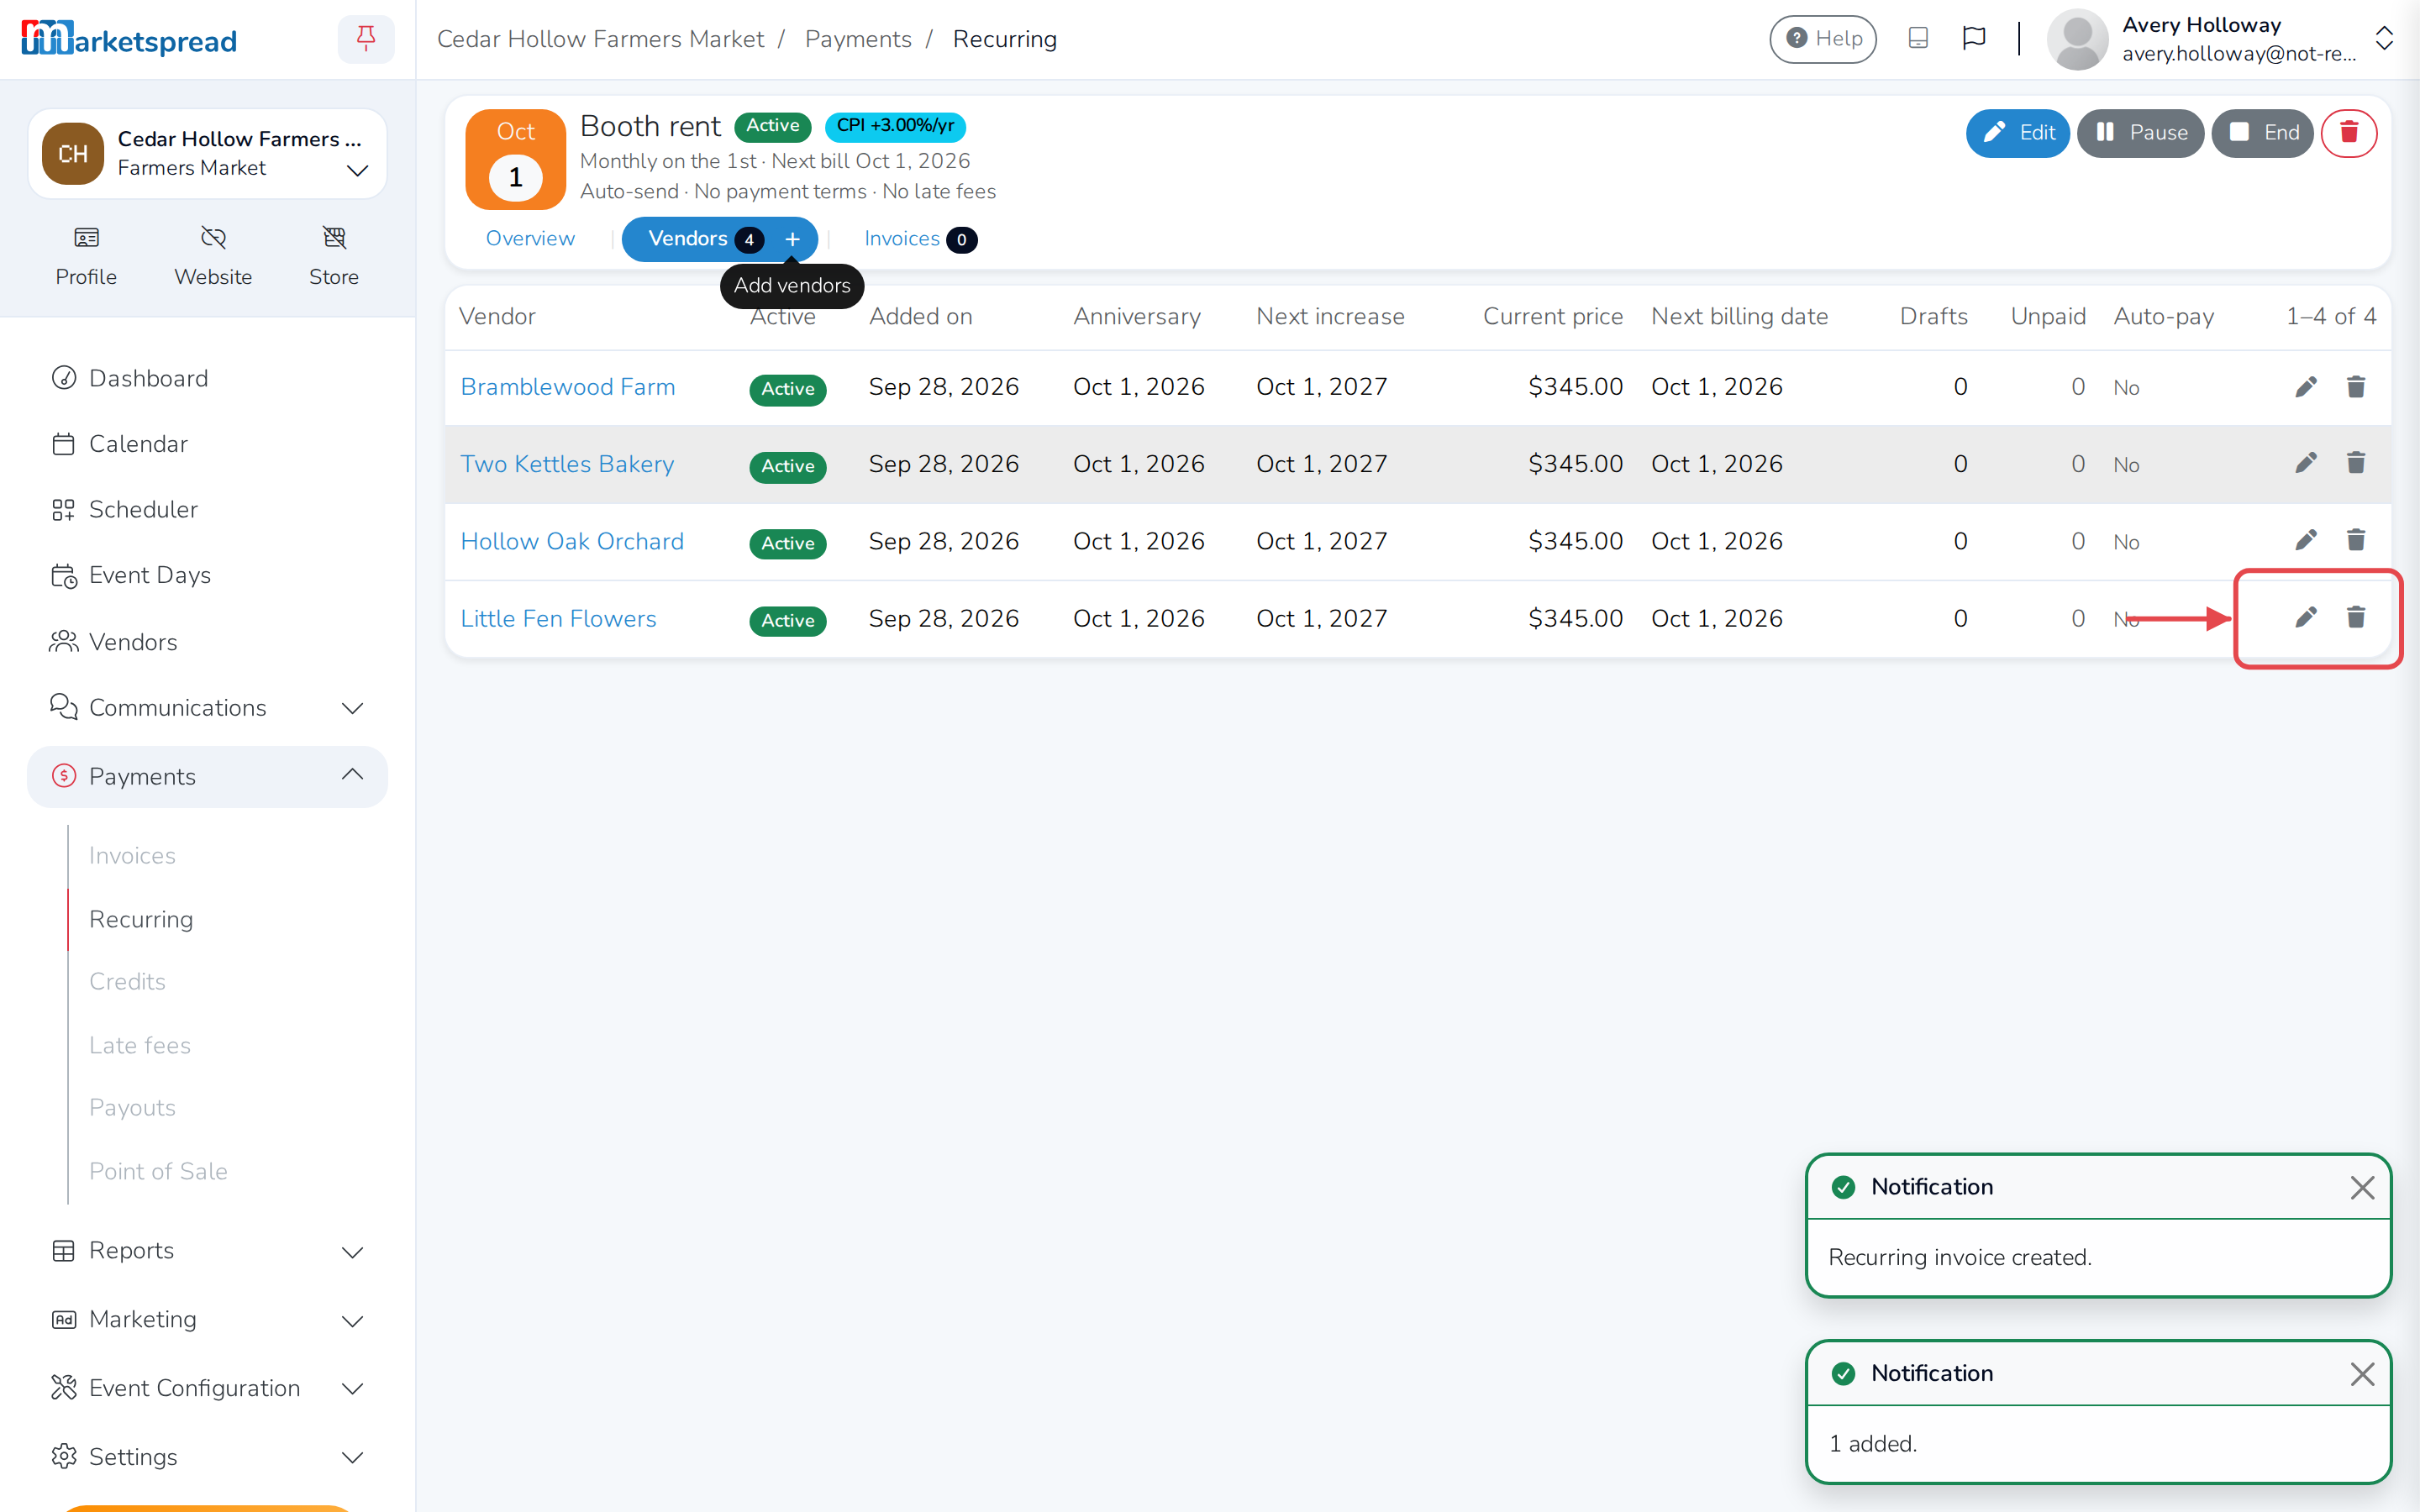
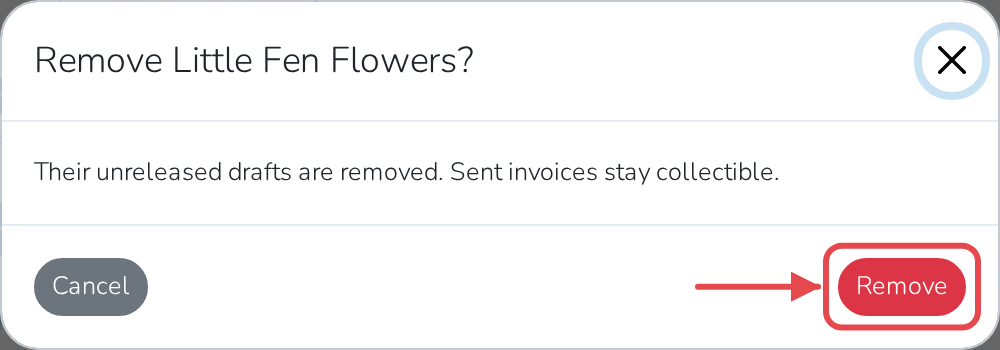
To stop billing someone for good, open their row menu and click Remove. Their unreleased drafts are deleted; anything already sent to them stays payable.
Caution
Removing a vendor can't be undone. If you want the option to bring them back later, turn Active off instead.
Check its invoices
-
Open the recurring invoice, then the Invoices tab.
-
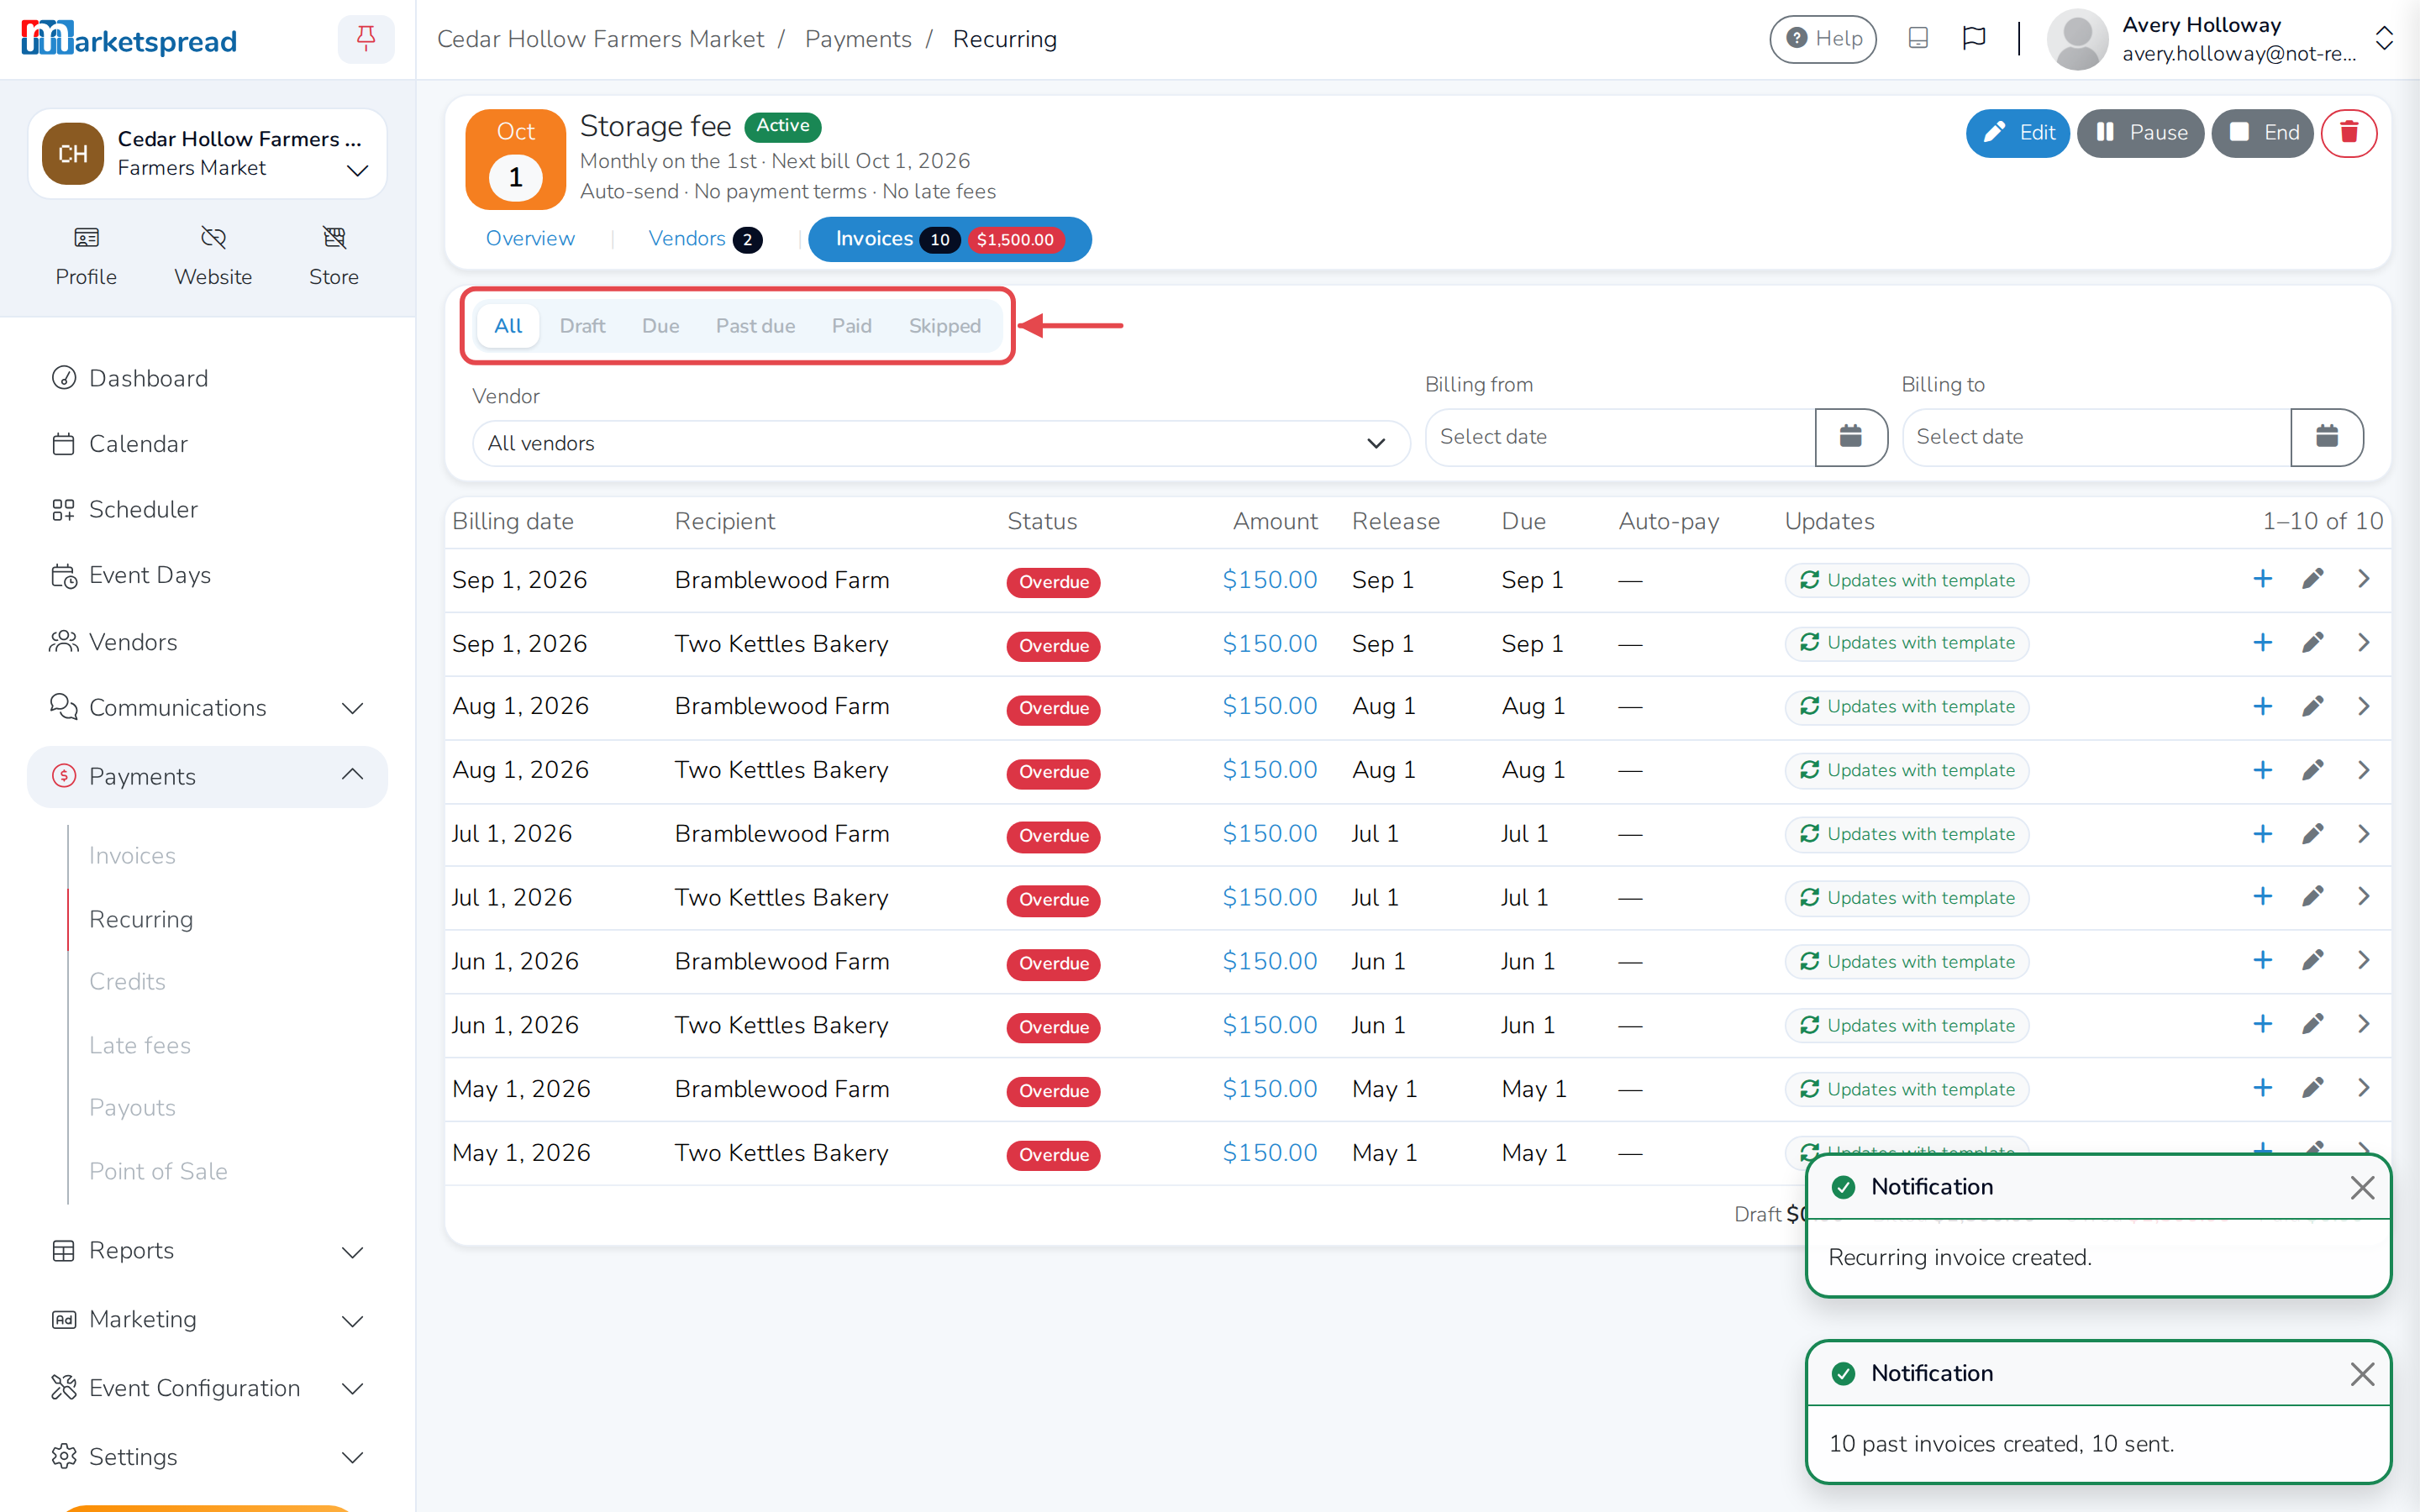
Filter by status — All, Draft, Due, Past due, Paid or Skipped — or by vendor and billing date.
-
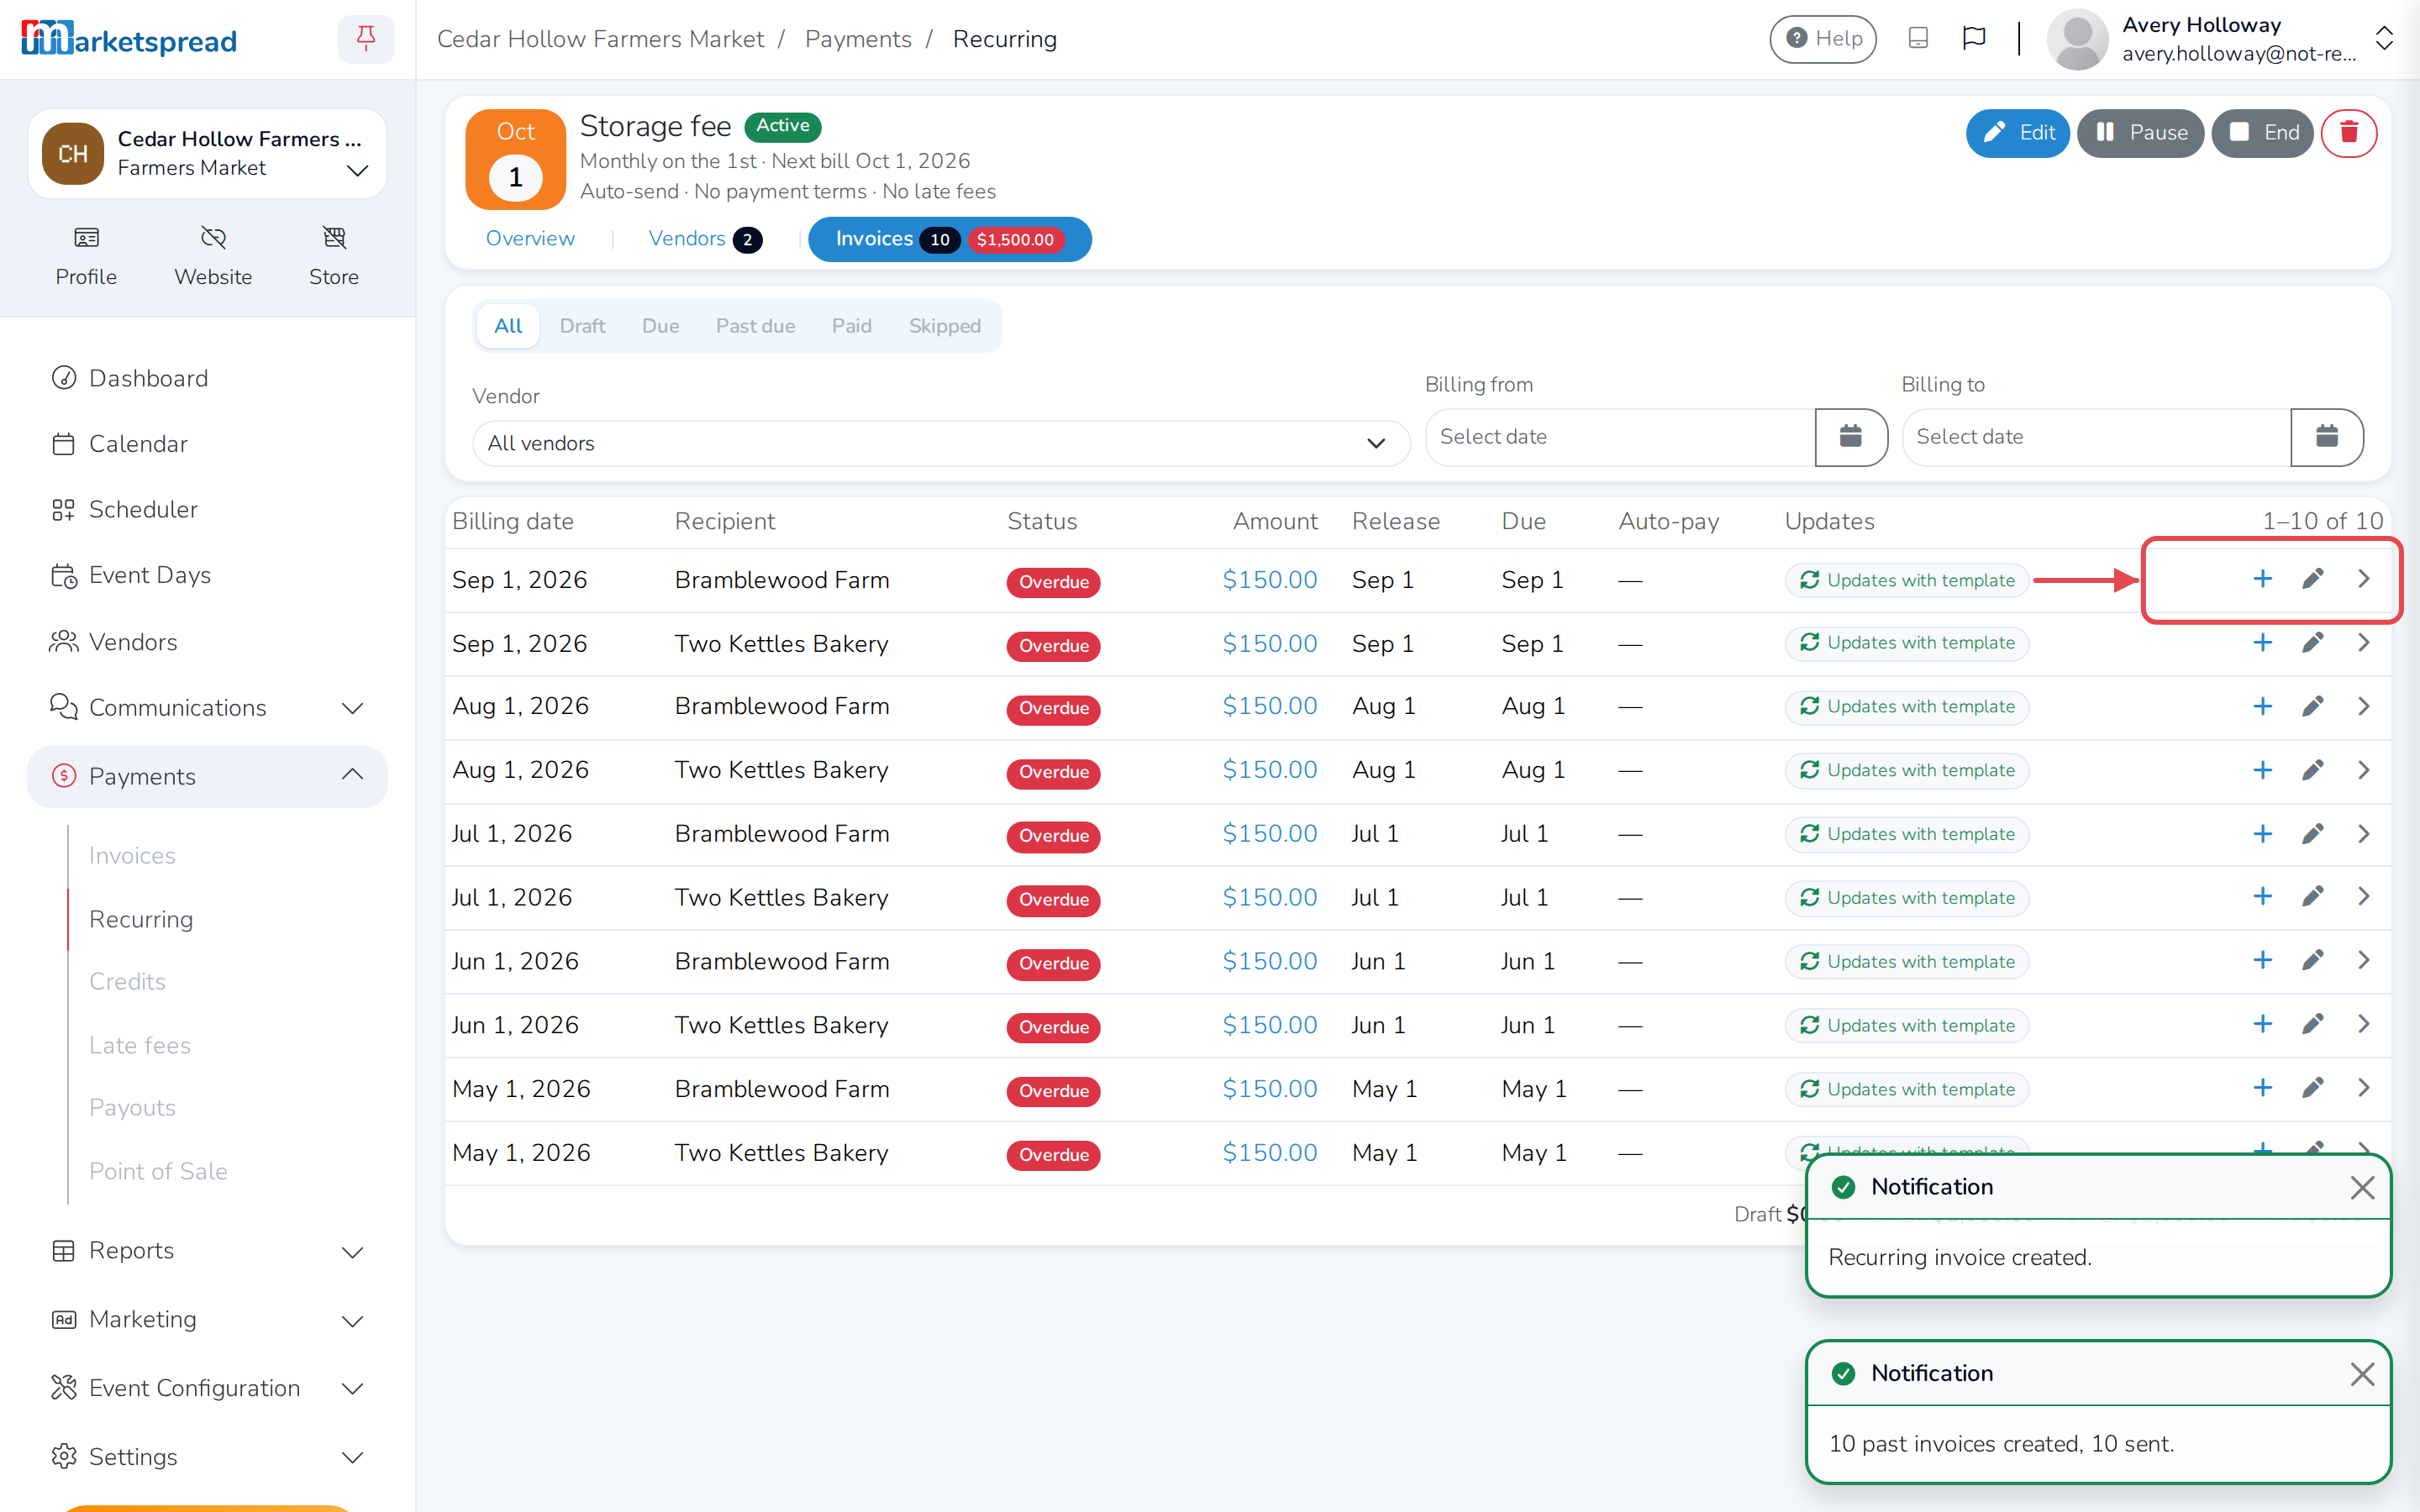
From a row, click Release to send a draft early, Add payment to collect, or Edit invoice to change that one invoice by hand.
Important
Editing one invoice by hand detaches it from the recurring invoice — future price or schedule changes stop reaching it until you click Reset to template on it.
Create invoices for a date it missed
Use this if a recurring invoice's start date is earlier than the day you created it, or a billing date never generated an invoice.
-
On the Invoices tab, click Create past invoices.
-
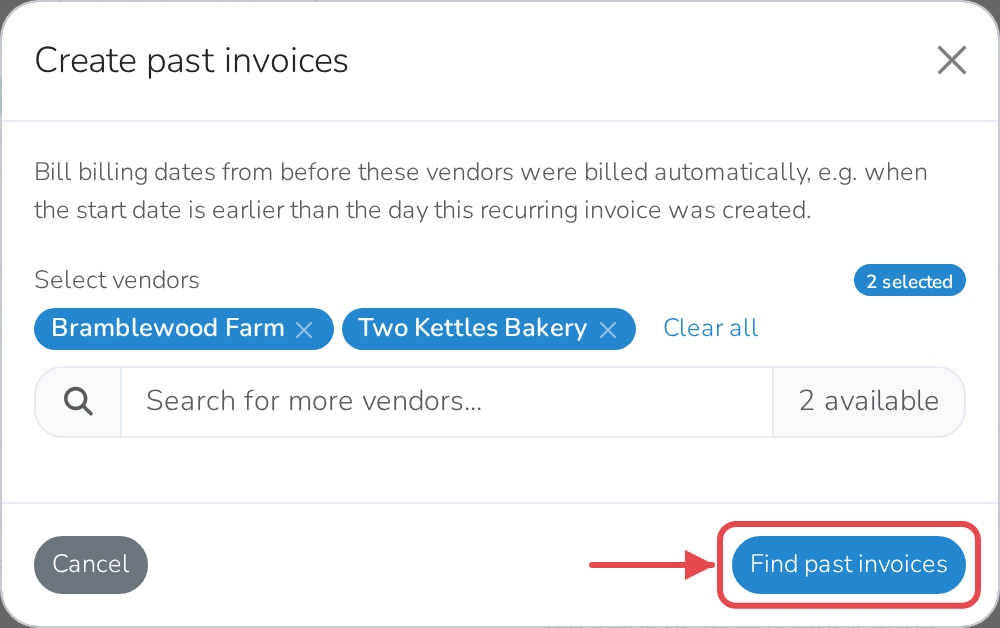
Choose which vendors to create them for.
-
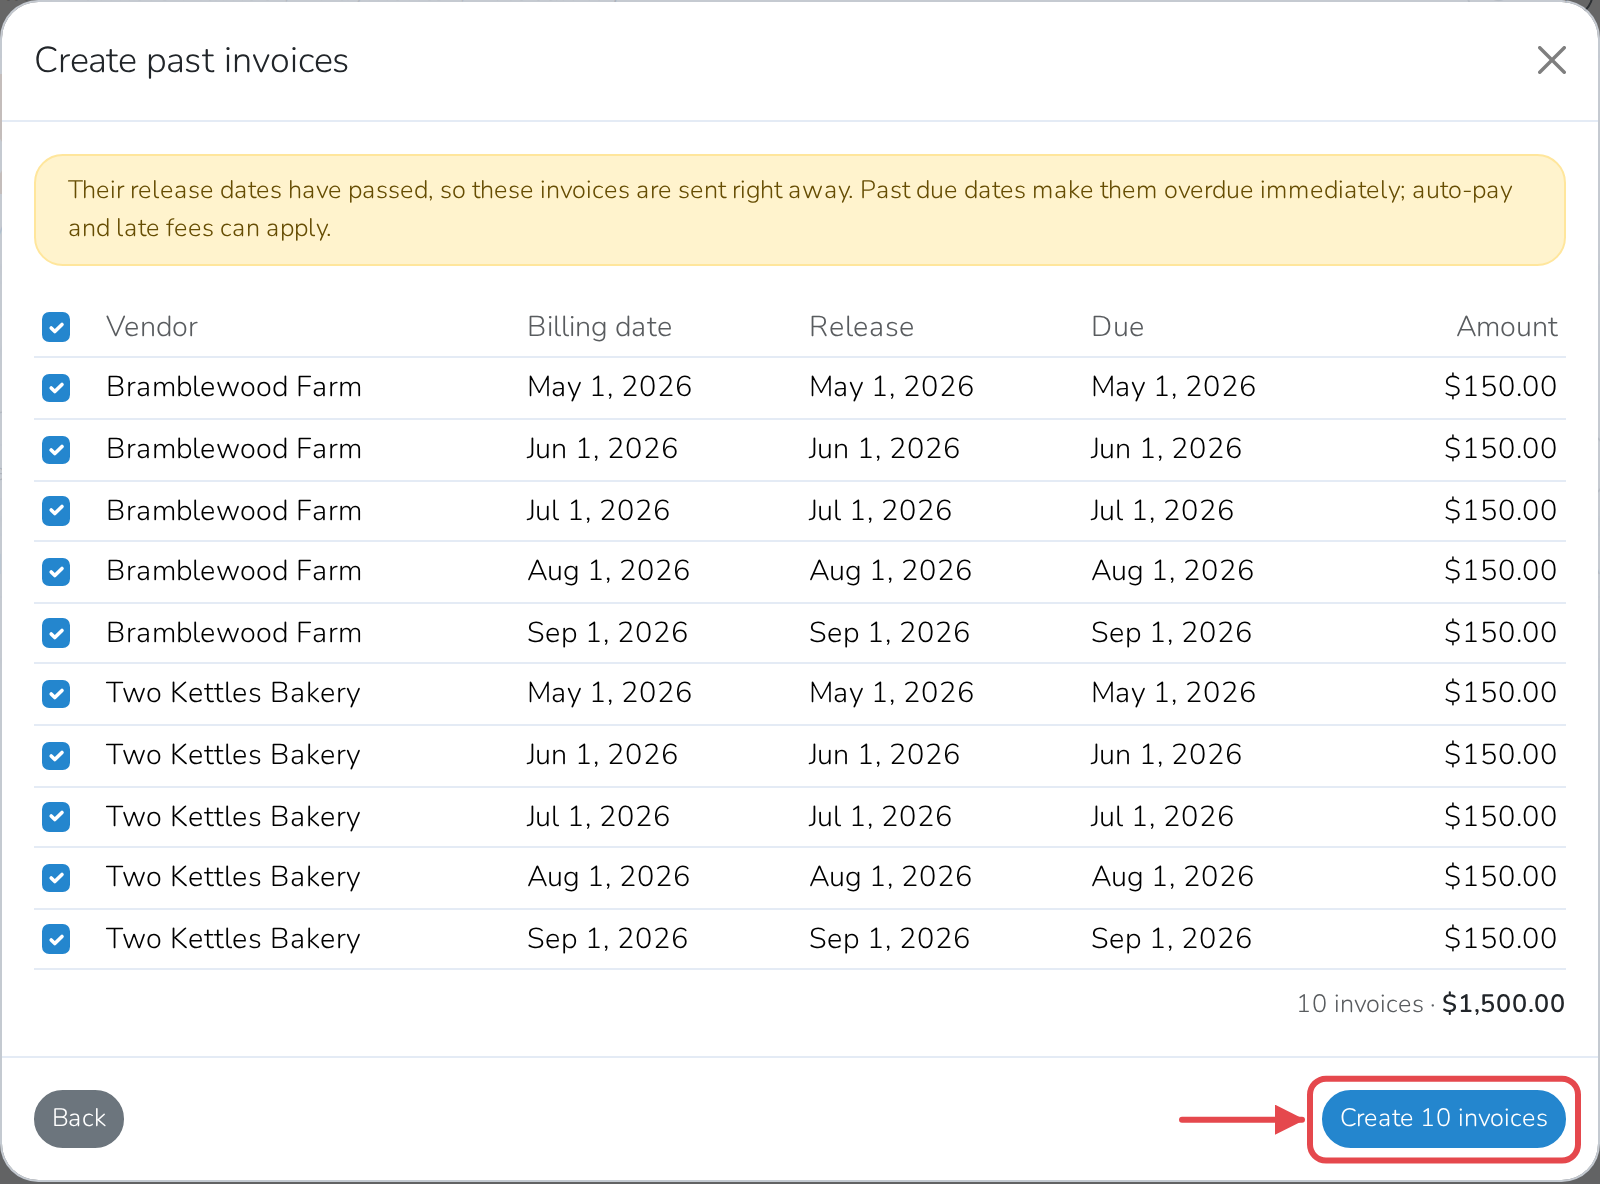
Click Find past invoices. Every past billing date that vendor was never billed for is listed and checked; uncheck any you don't want.
-
Click Create invoices.
Warning
If this recurring invoice auto-sends, these invoices go out right away. Since their due dates have already passed, they're immediately overdue — so auto-pay and late fees can apply straight away.
Change the price, items or schedule
Open the recurring invoice and click Edit, make your changes, and click Save.
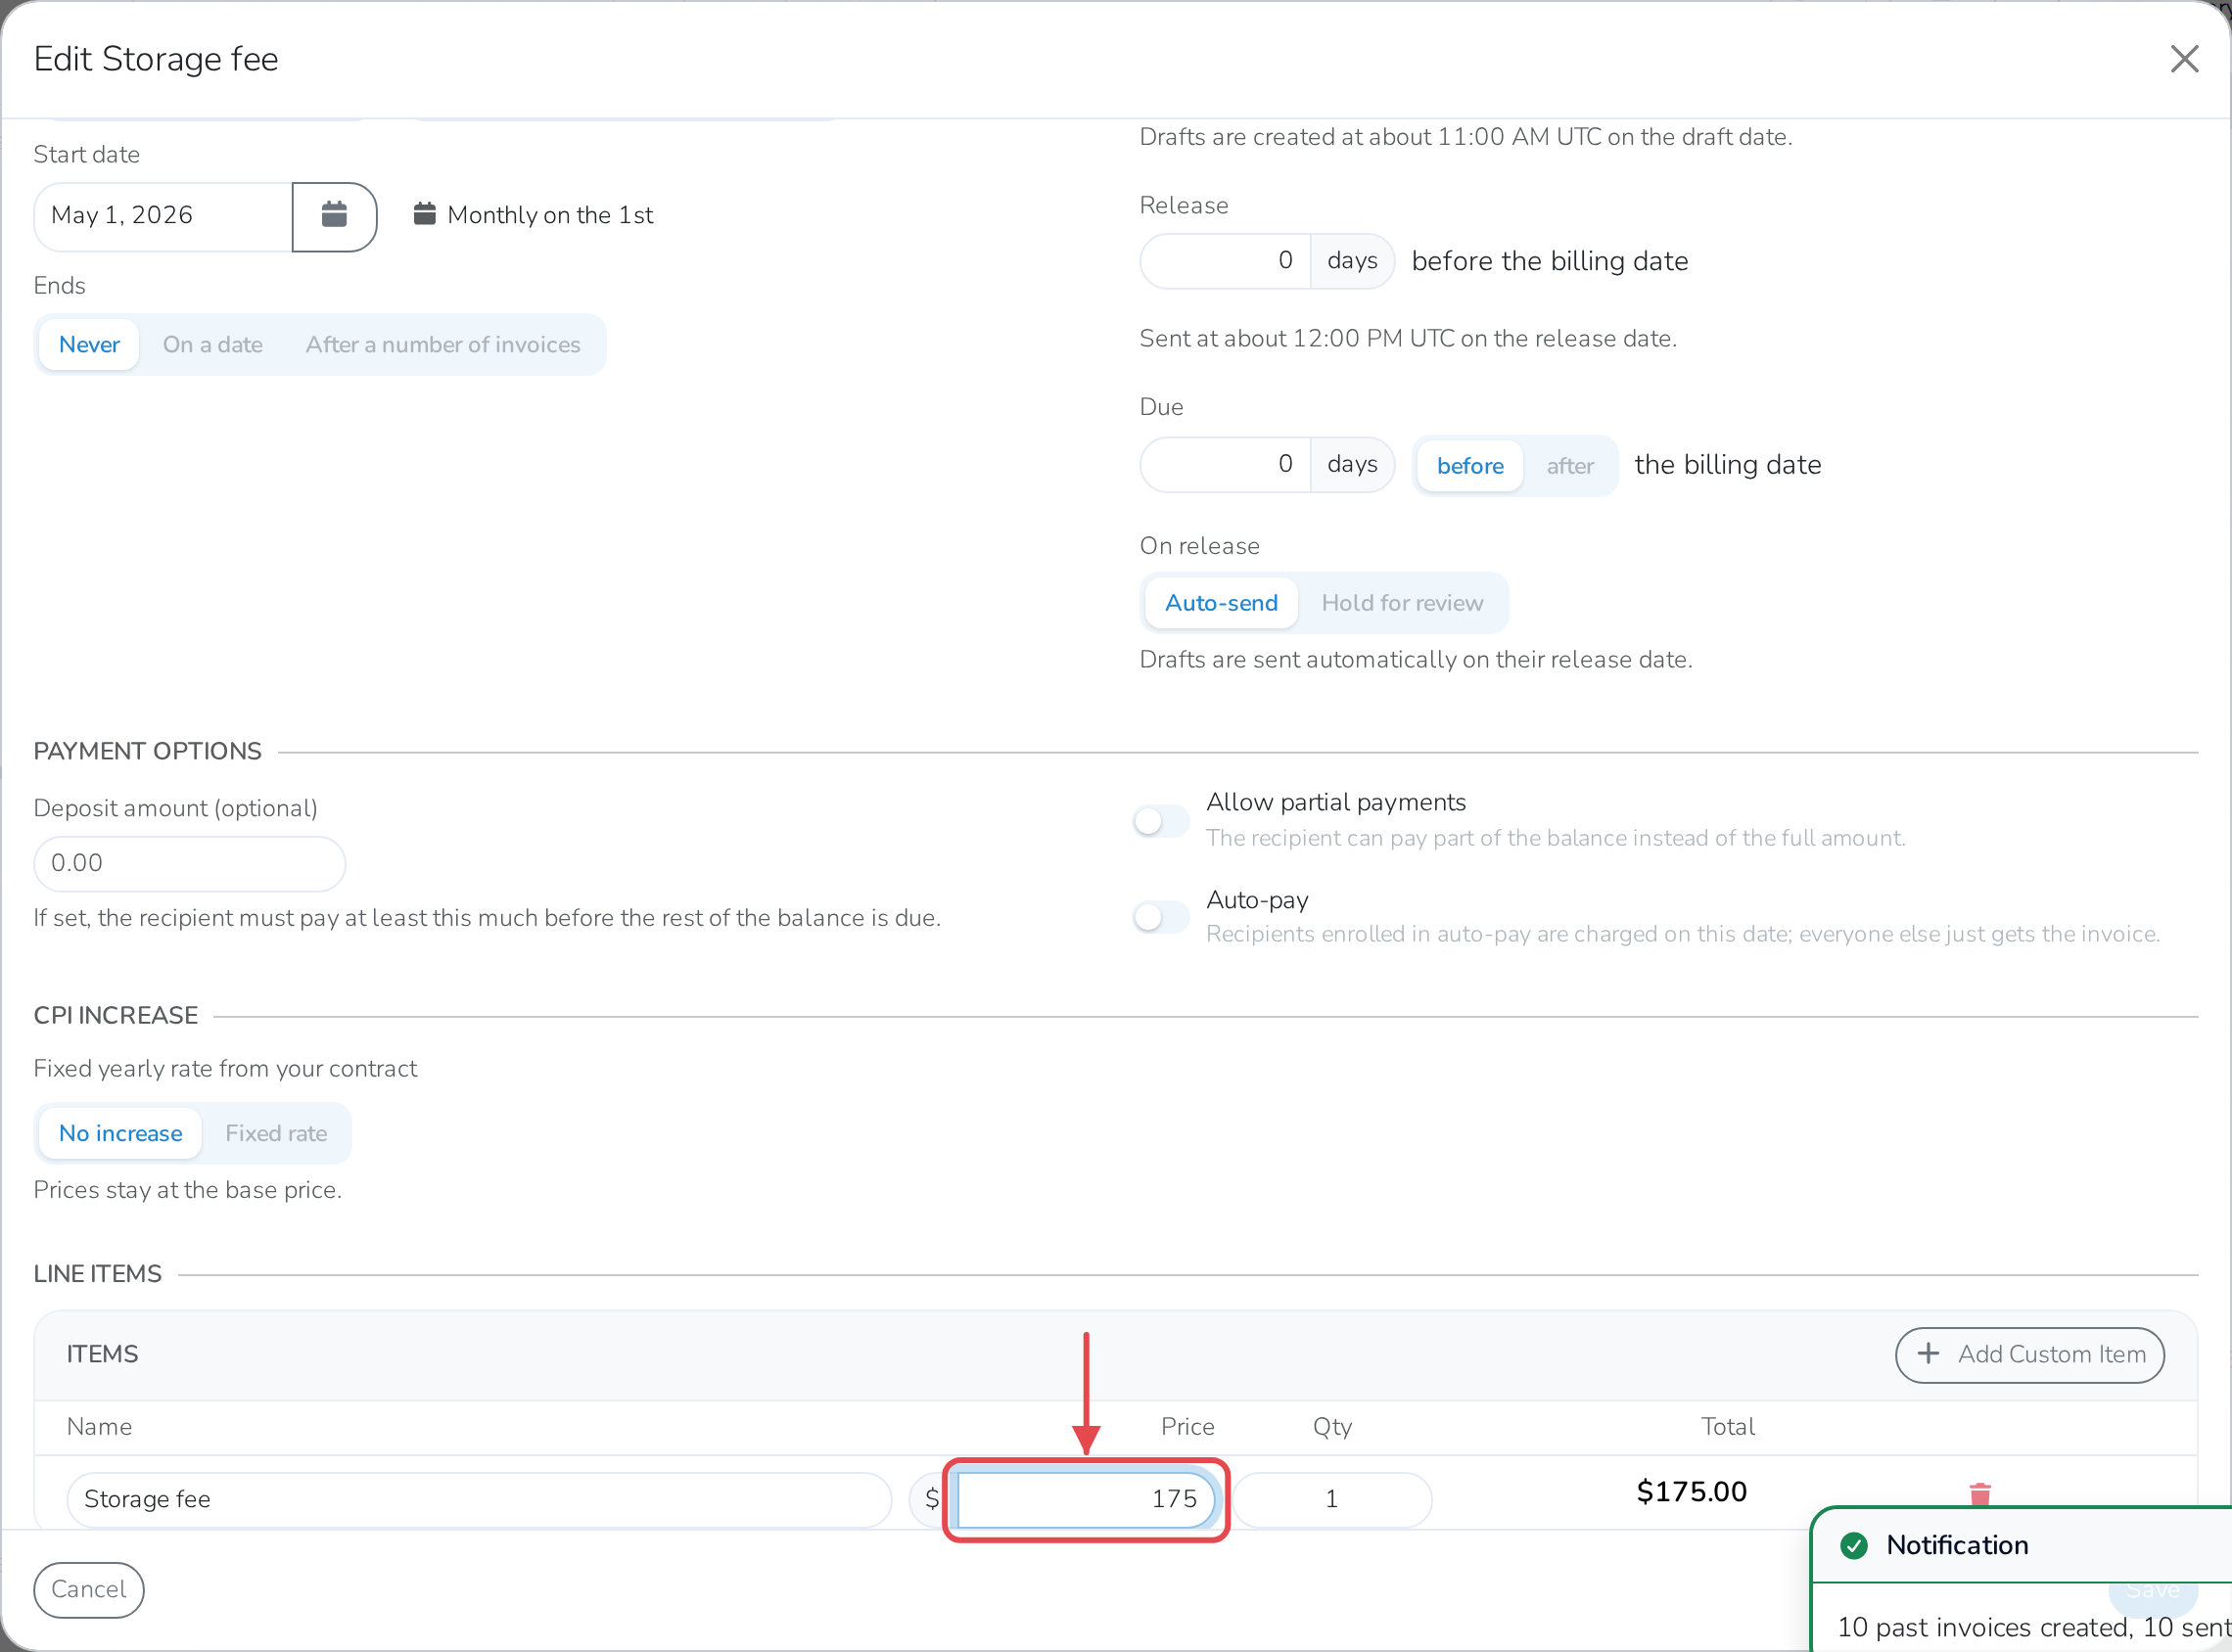
Changing a price, an item, or the linked late fee rule reaches invoices that already exist, not just future ones. You'll see Update generated invoices? first, listing which invoices will be re-priced and which won't. An invoice with a payment on it, or one you've edited by hand, never changes.
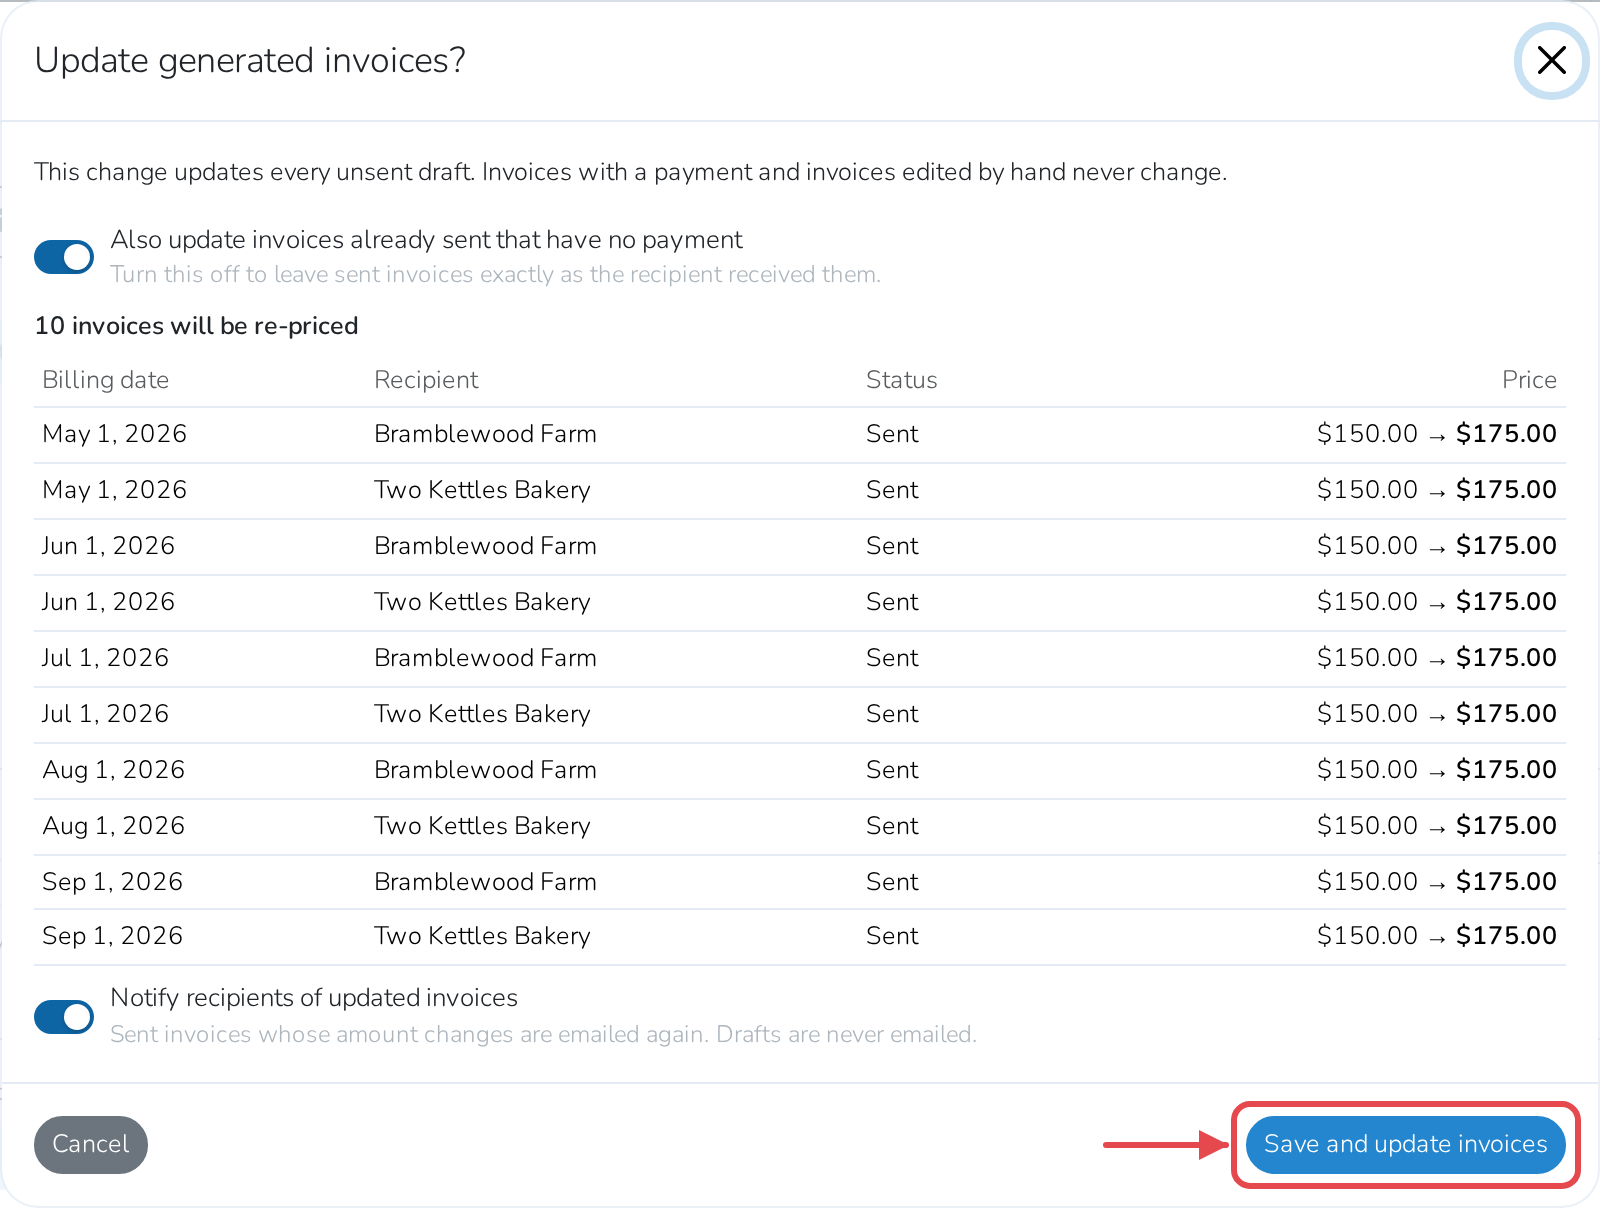
Warning
Also update invoices already sent that have no payment is turned on by default — so an unpaid invoice already sent to a vendor can be re-priced too, not just future ones. Turn it off if you only want the change to apply going forward.
Turn off Notify recipients of updated invoices if you don't want vendors emailed again about a changed invoice — drafts are never emailed either way.
Pause a recurring invoice
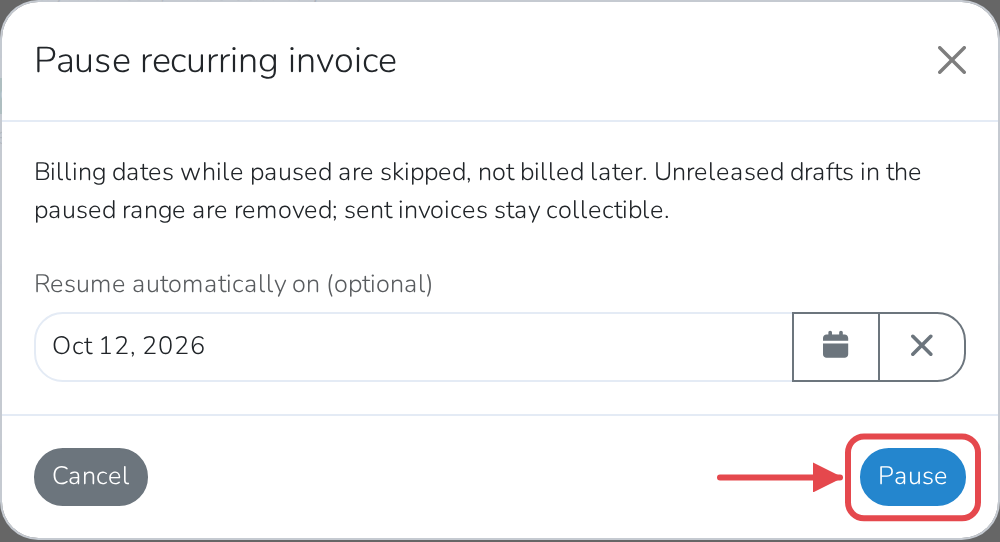
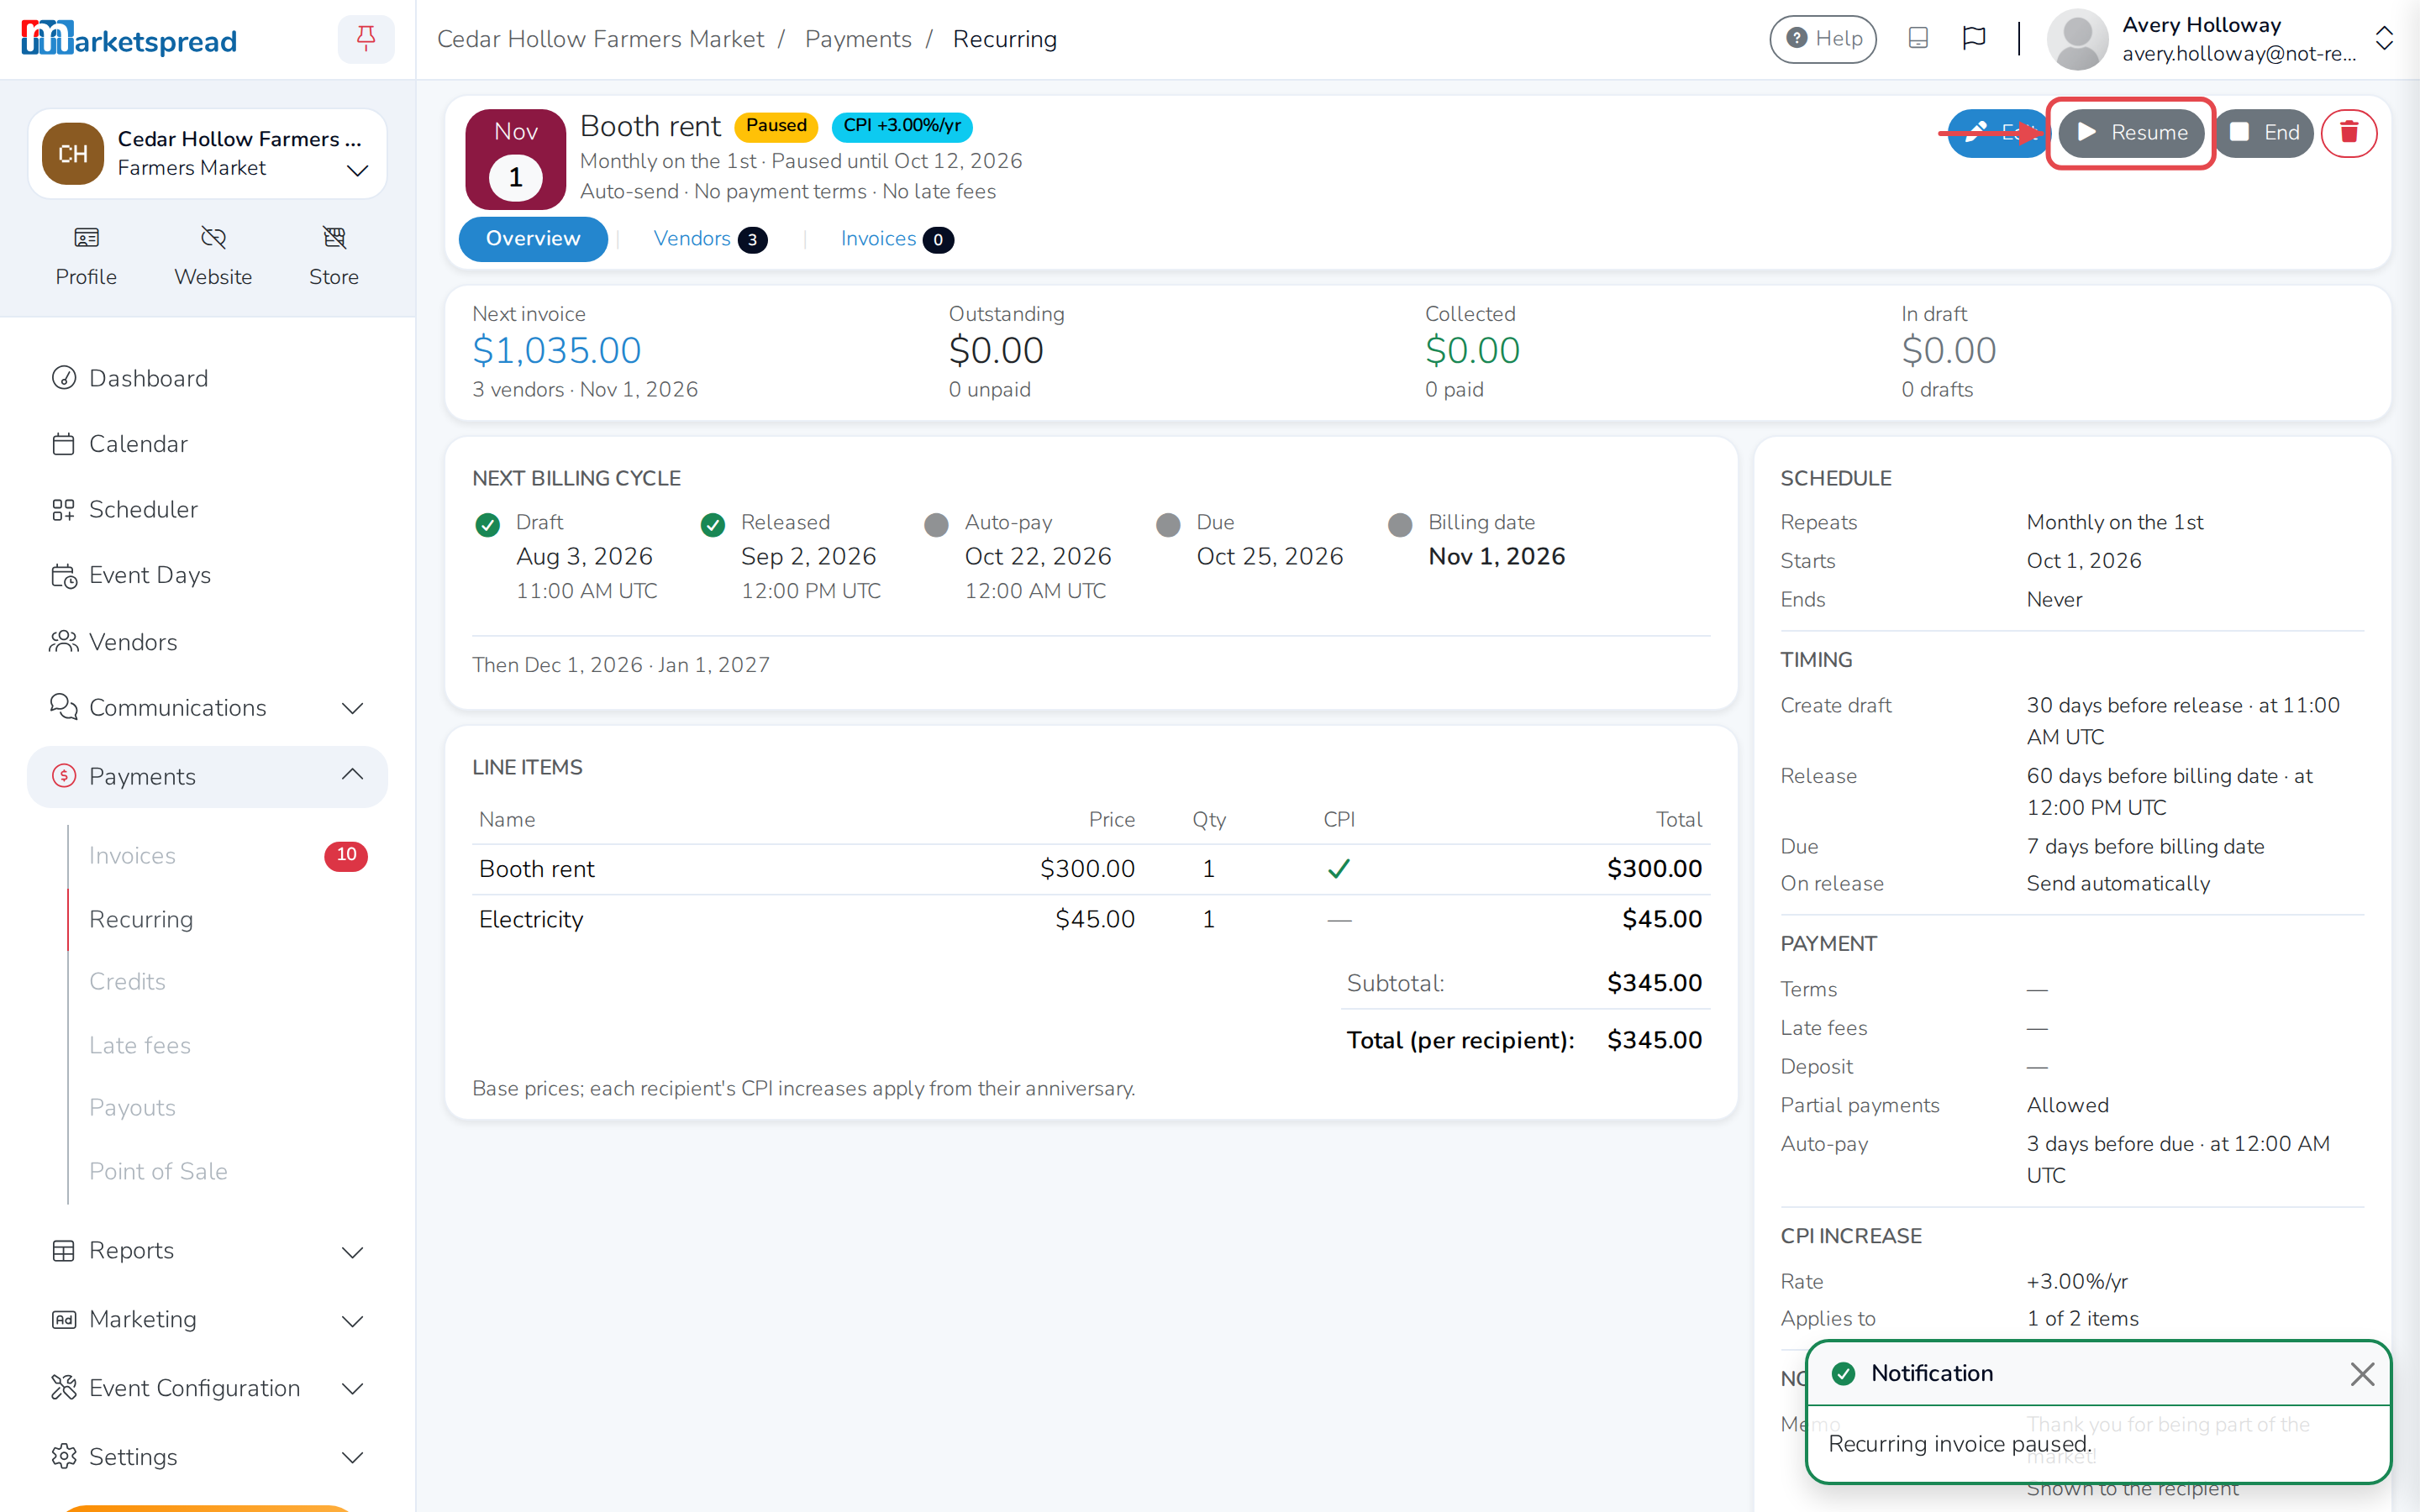
Open the recurring invoice and click Pause. Billing dates while it's paused are skipped for good, not billed later, and any unreleased draft due in that time is removed. Invoices already sent stay collectible. You can set a date to Resume automatically on, or leave it blank.
Click Resume at any time to pick the schedule back up.
End or delete a recurring invoice
Both stop billing for good, remove any unreleased future drafts, and leave invoices already sent collectible. The difference is what's left behind:
-
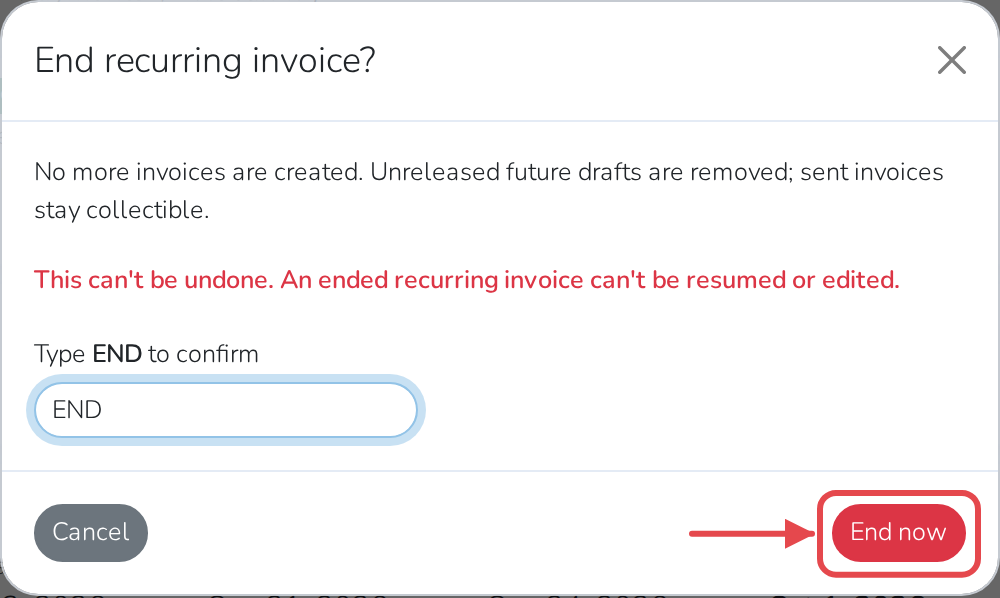
Click End, type END to confirm, then click End now. It stays on your list, but can never be resumed or edited again.
-
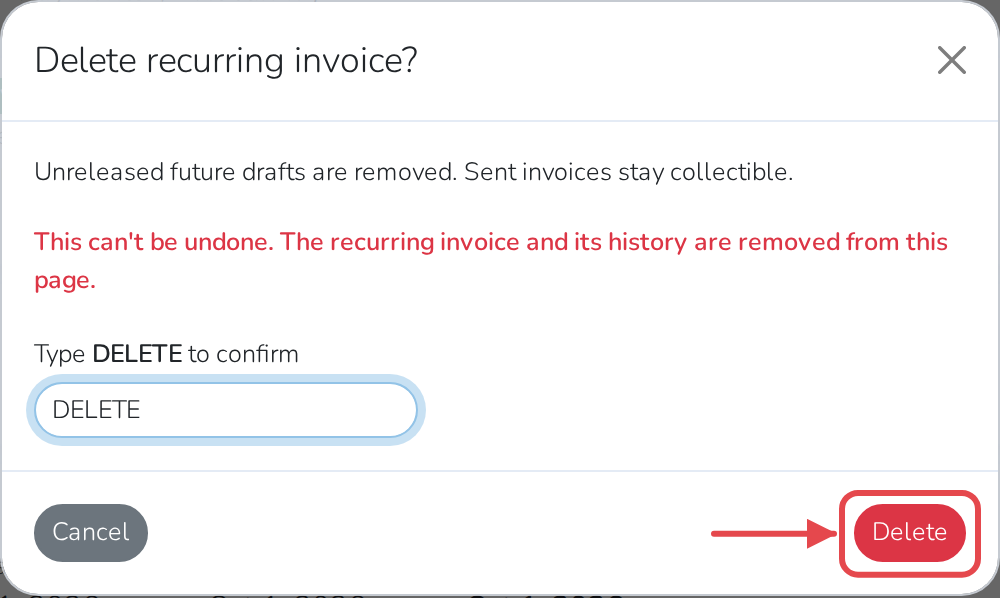
Click the trash icon (Delete), type DELETE to confirm, then click Delete. It disappears from the list along with its whole history.
Caution
Neither can be undone.