


Vendors don't always keep every day they first applied for. This setting, on
each event's Basic tab, decides whether they can change their mind about a
day, and whether you have to approve it first. From here you can choose how
much say vendors get, find a request waiting for you, and approve or deny it.
Choose how vendors can change their days
- Open Event Configuration, then Events.
- Click the event.
- Click the Basic tab.
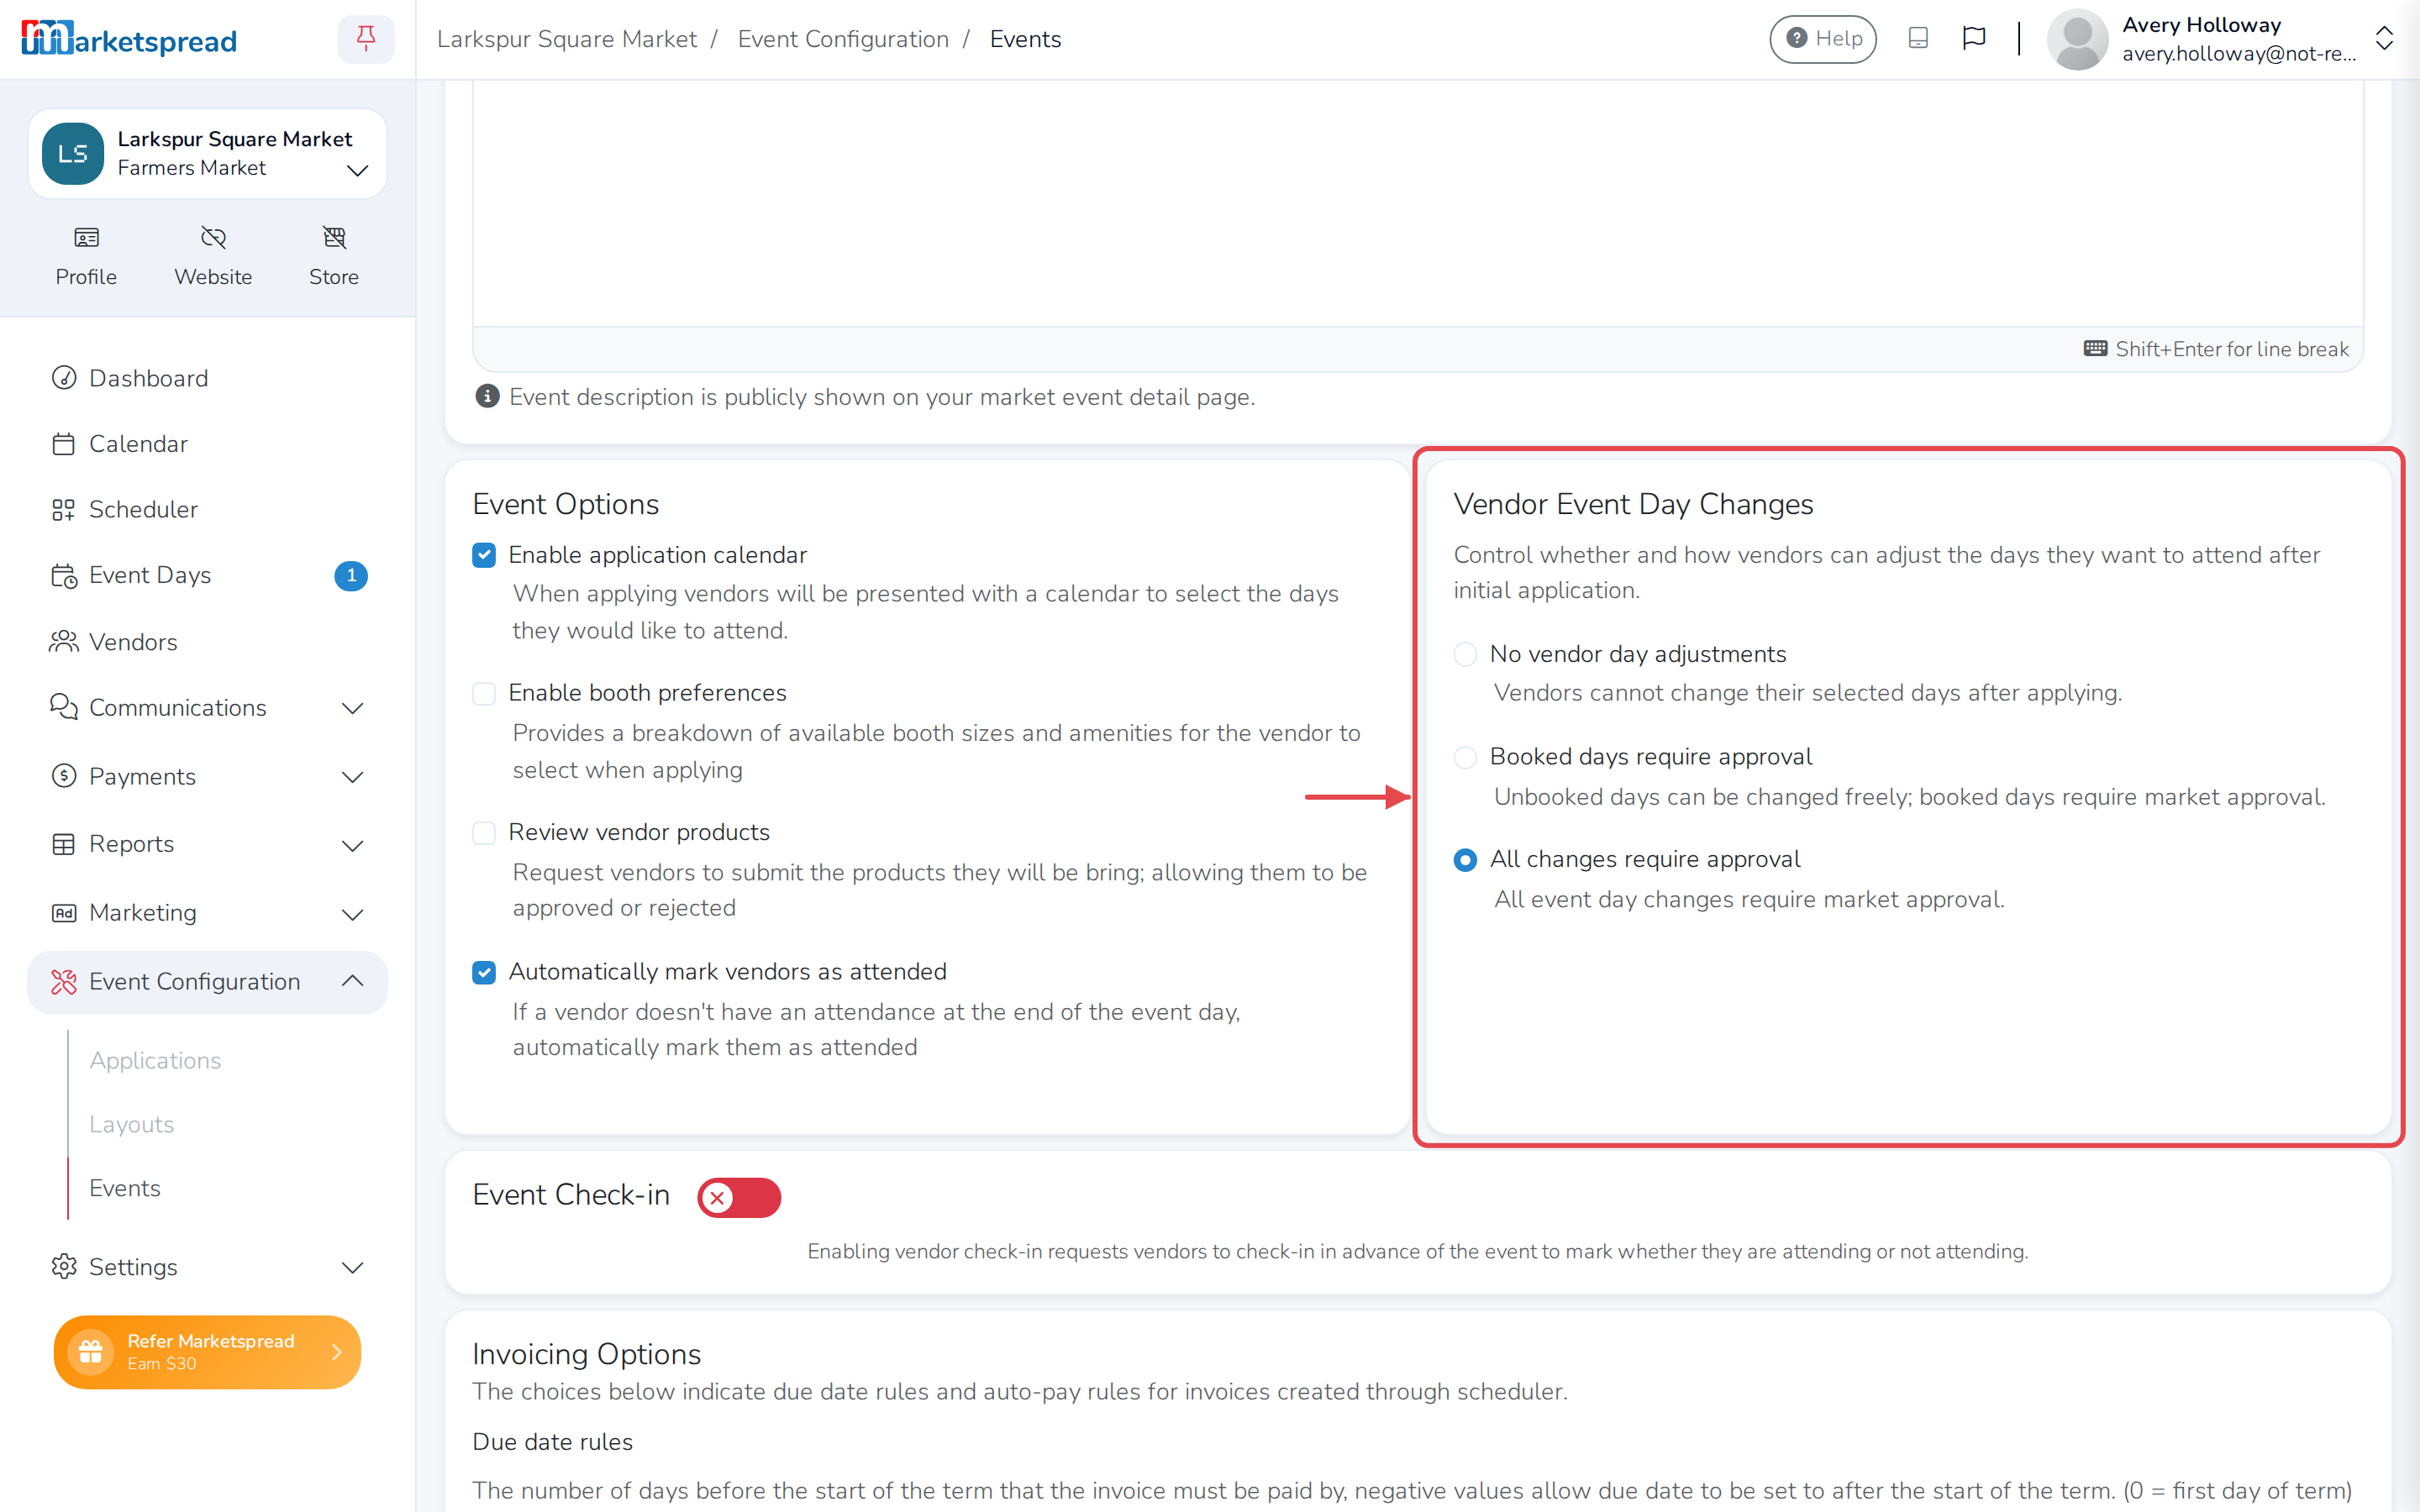
- Under Vendor Event Day Changes, choose one:
- No vendor day adjustments — vendors can't change their days once
they've applied. - Booked days require approval — vendors can freely add or drop days
they haven't been booked into. Dropping a day they're already booked
into needs your approval. - All changes require approval — every add or drop needs your
approval, even for a day nobody's booked yet.
- No vendor day adjustments — vendors can't change their days once
- Click Save basic.
Note
You can change this at any time, even after vendors have applied. A
request a vendor already sent you stays waiting for a decision, whatever
you switch it to.
Find a vendor's request
Whenever a vendor's change needs your approval, you get a notification, and
the day itself is marked.
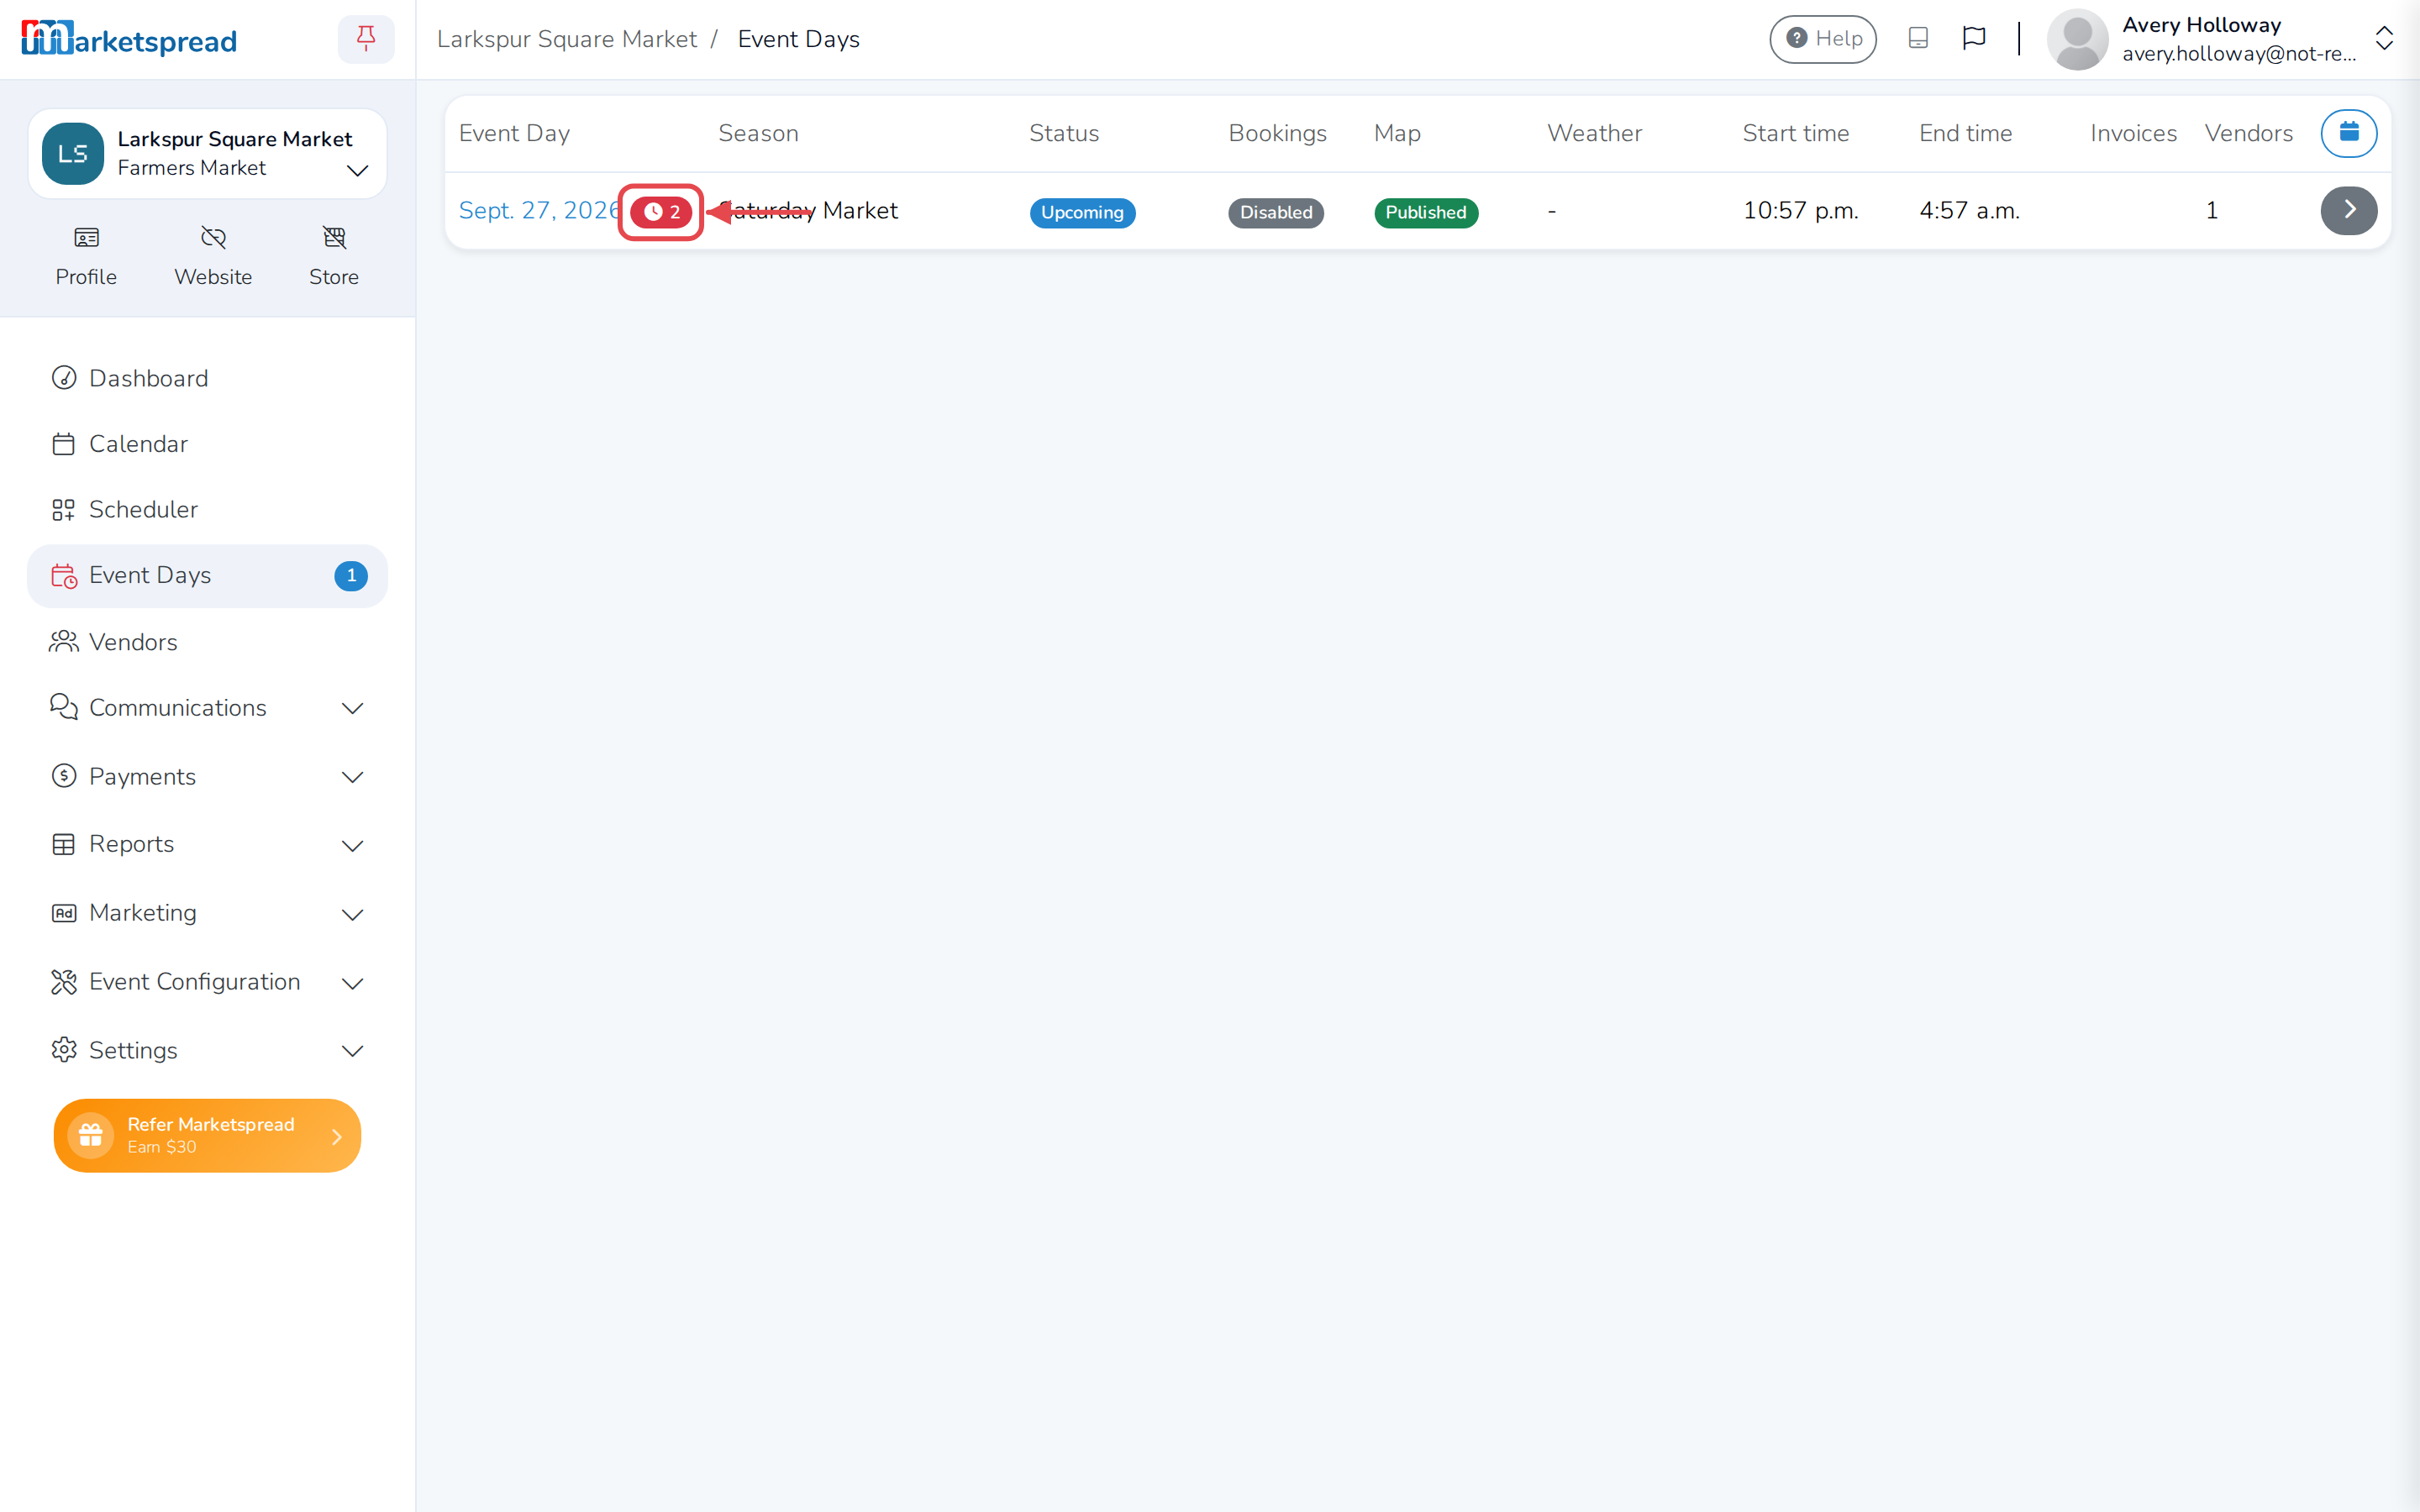
- Open Event Days in the sidebar.
- Look for a red badge on a day, showing how many requests are waiting.
- Click that event day.
Tip
You can also click the arrow on the Event Day Change Request
notification — it takes you straight to the same day.
Approve a request
- On the event day's page, find the vendor's request under Pending Day
Change Requests. - Click the checkmark next to it.
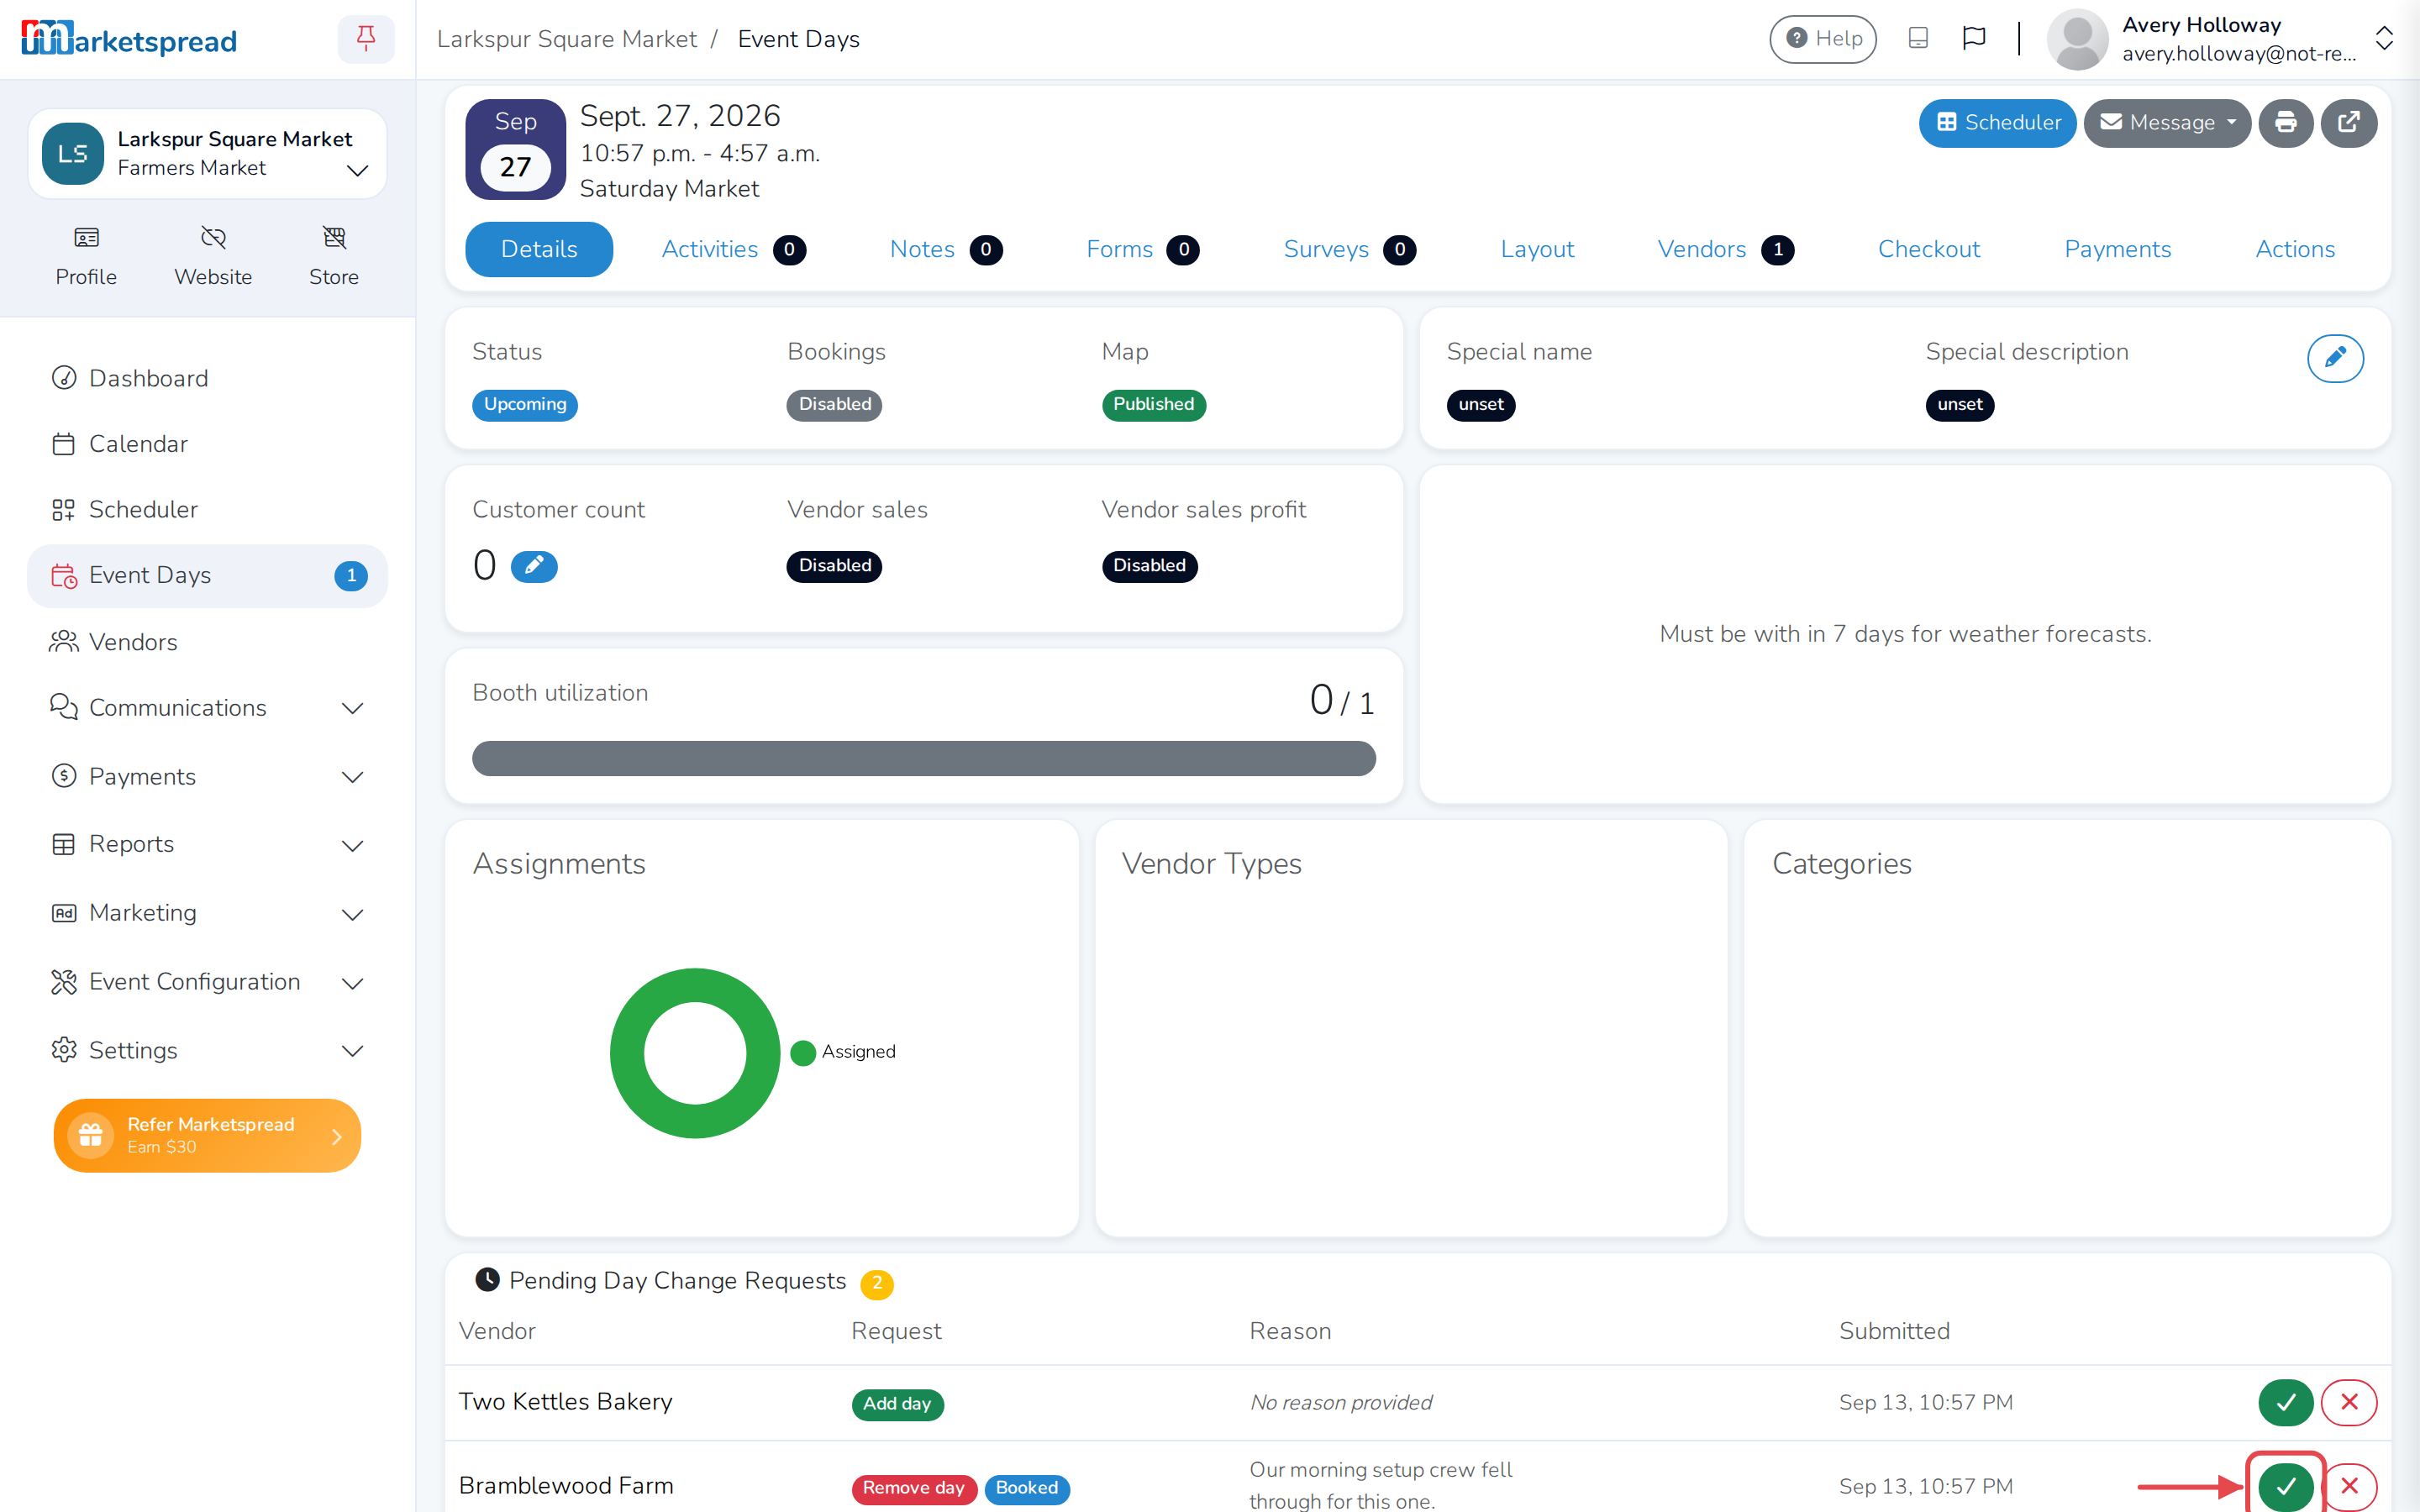
The vendor gets notified that their request was approved.
Refund a vendor you're removing
If the vendor already paid for that day, approving their request to be
removed asks what to do with the payment first.
- Click the checkmark next to their request.
- In the Approve Removal Request window, choose No refund or
Refund as credit. - Click Approve.
Warning
Skip Refund to original payment method — it doesn't go through right
now. Choose Refund as credit instead, or refund the vendor outside
Marketspread.
Deny a request
- On the event day's page, find the vendor's request under Pending Day
Change Requests. - Click the X next to it.
- Optionally, fill in Reason for denial.
- Click Deny Request.
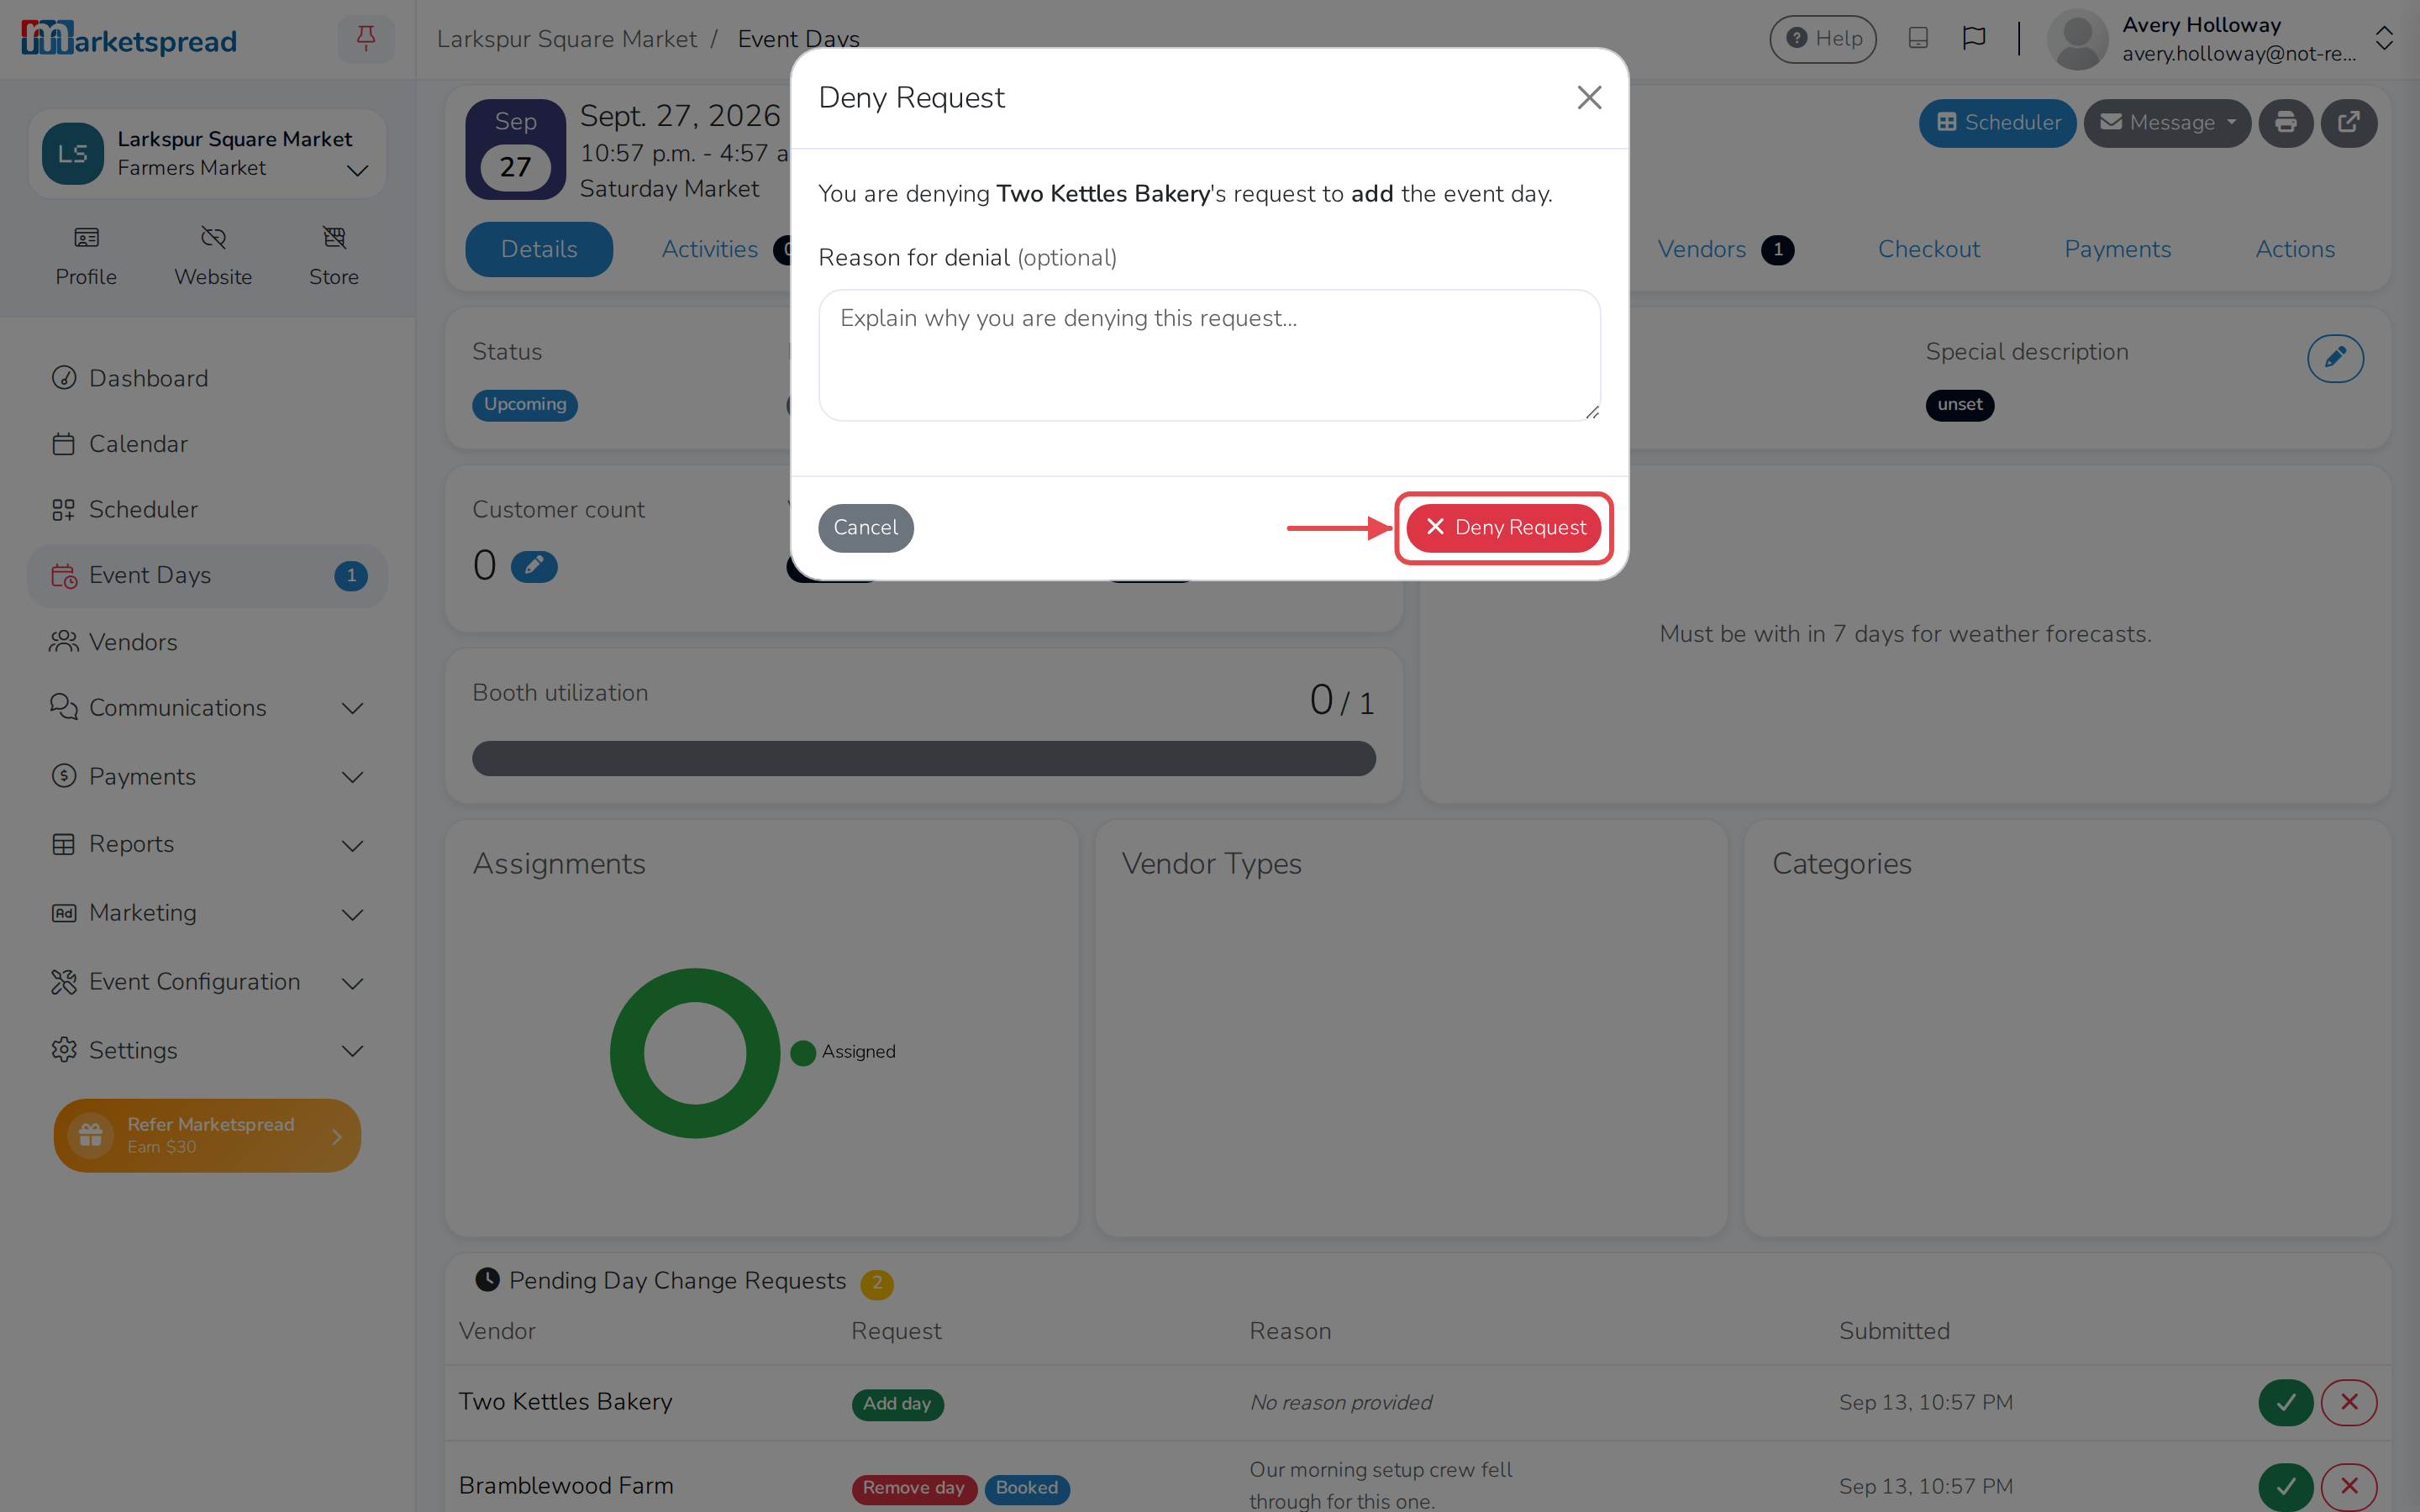
The vendor gets notified that their request was denied. They don't see the
reason you gave — it's for your own records.