


Peak pricing charges a different price for a Vendor Type, Vendor Tag or Category fee for part of your event. For example, a summer surcharge that drops back down for the rest of the year.
It only works on a fee priced by the day, week or month. It doesn't work on a fee priced for the whole event, or on your base per-booth price.
Turn on peak pricing
Peak pricing is off until you turn it on for your market.
-
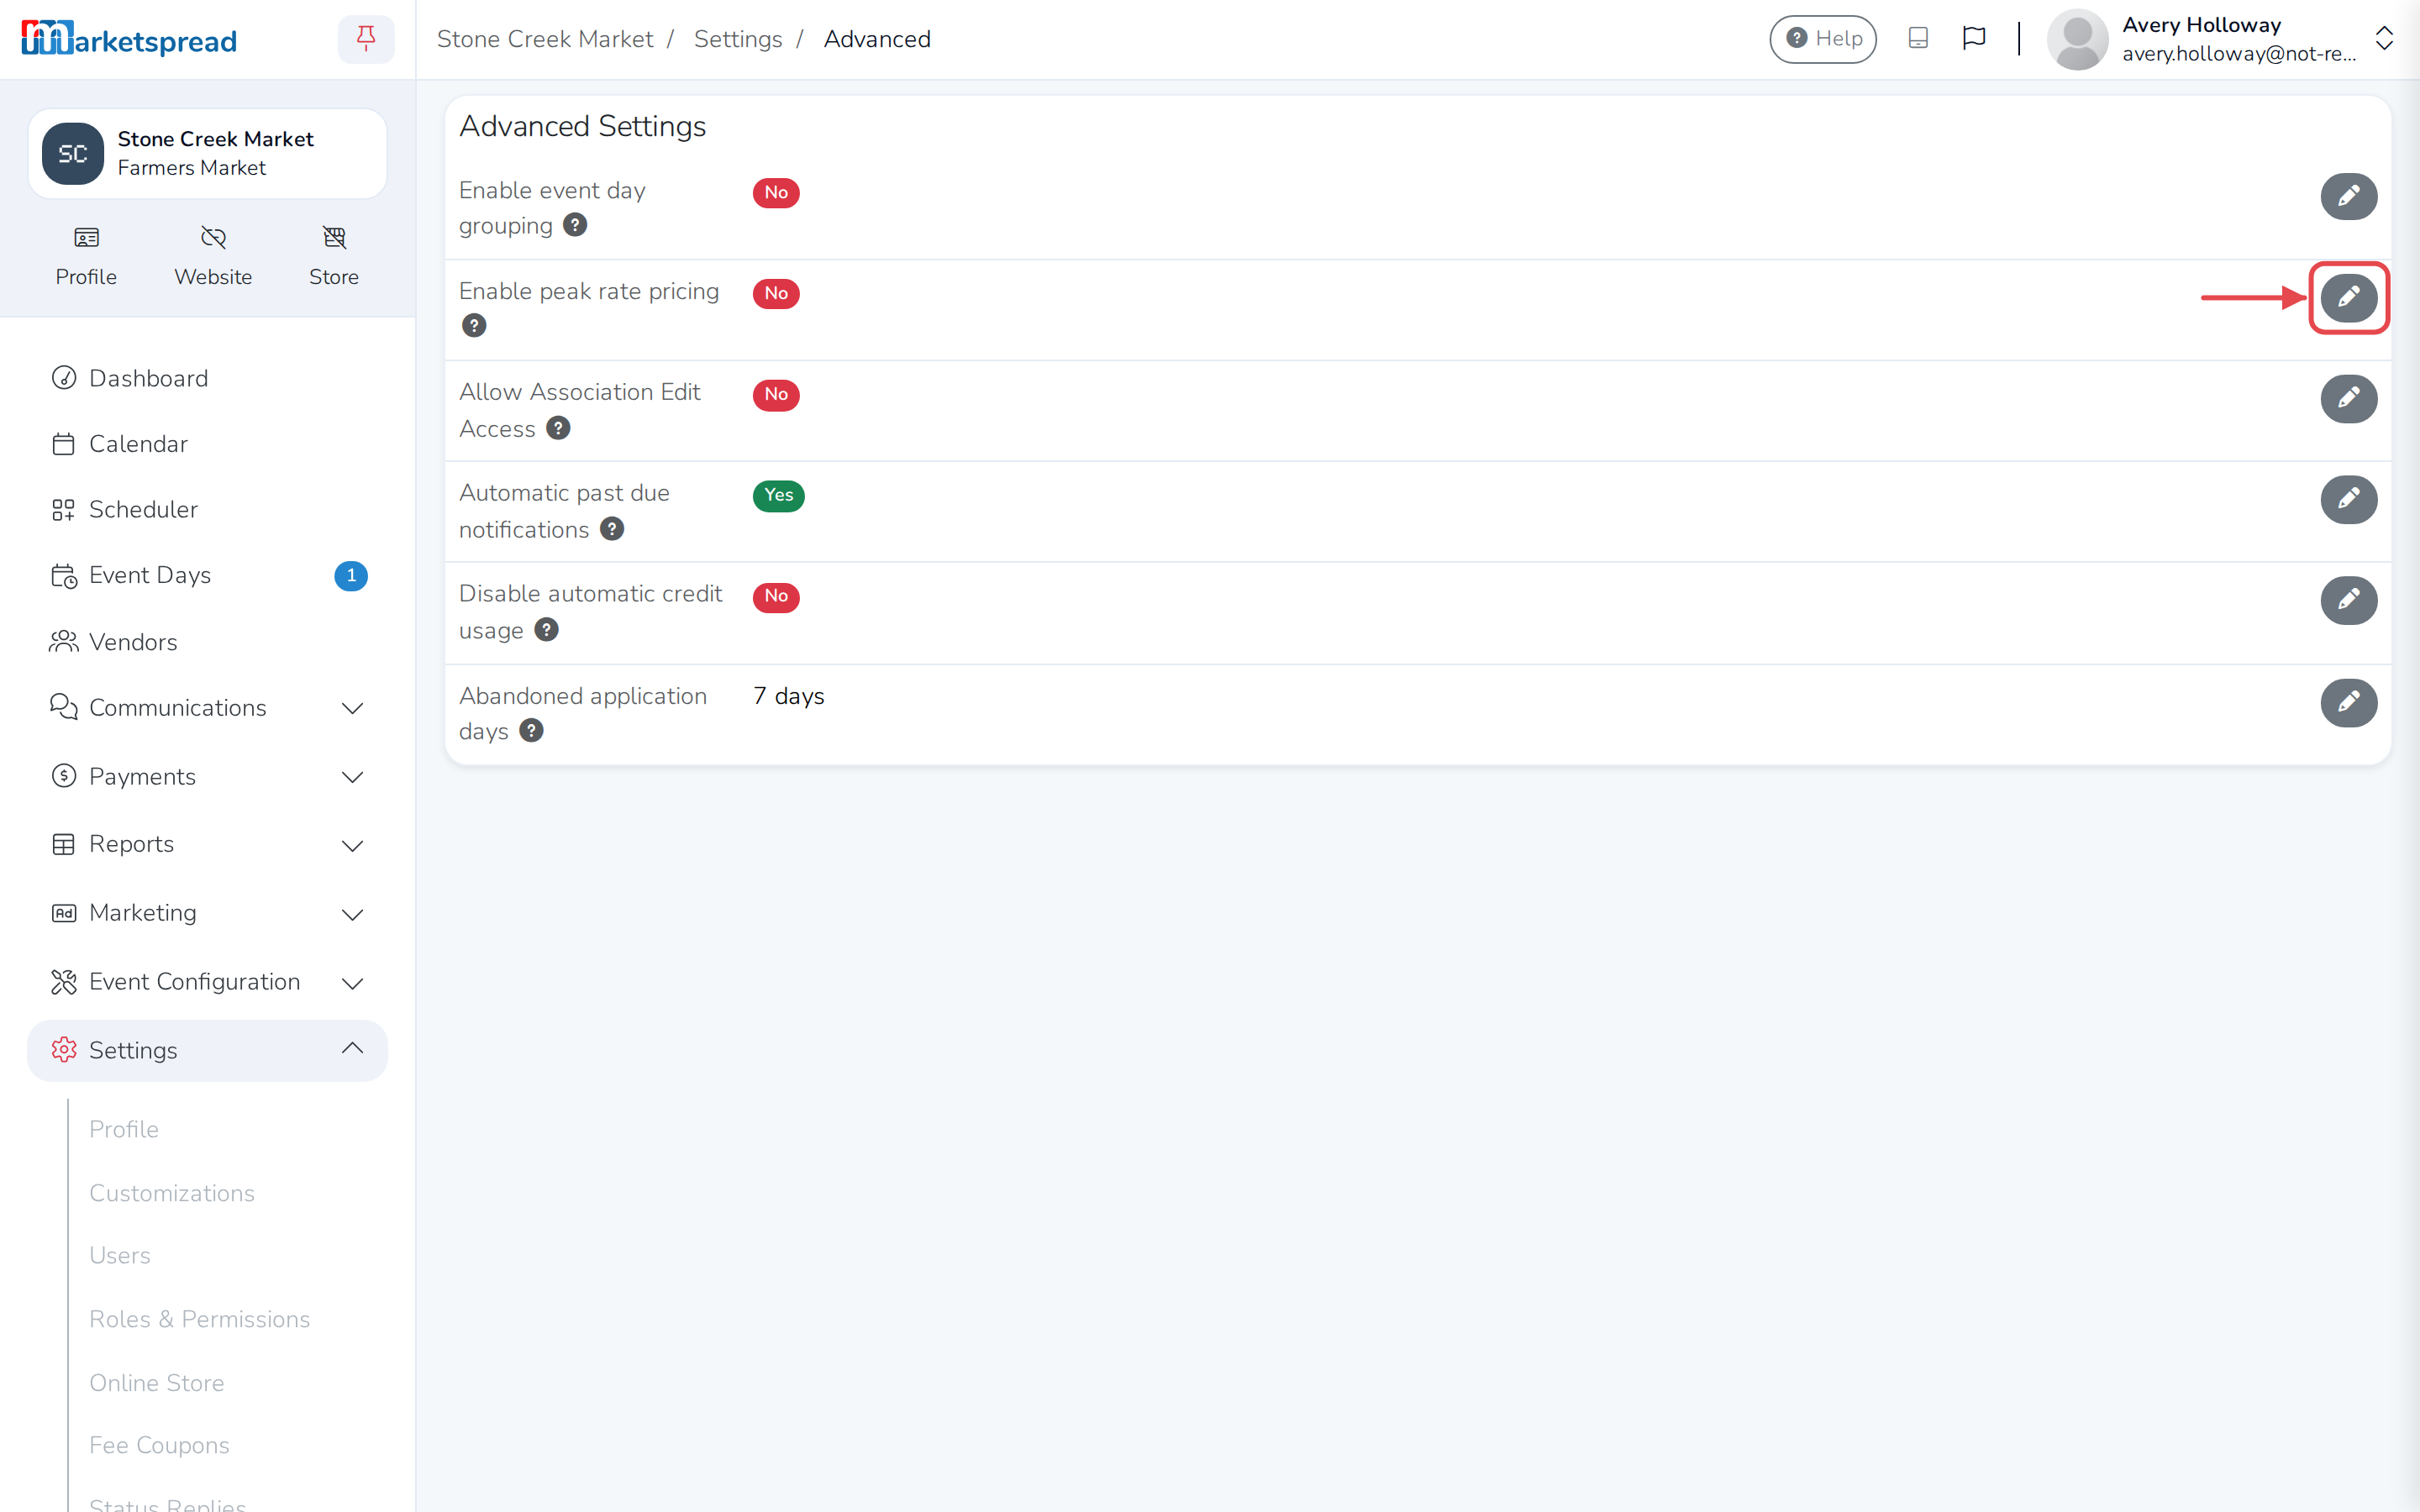
Open Settings, then Advanced.
-
Next to Enable peak rate pricing, click the pencil edit icon.
-
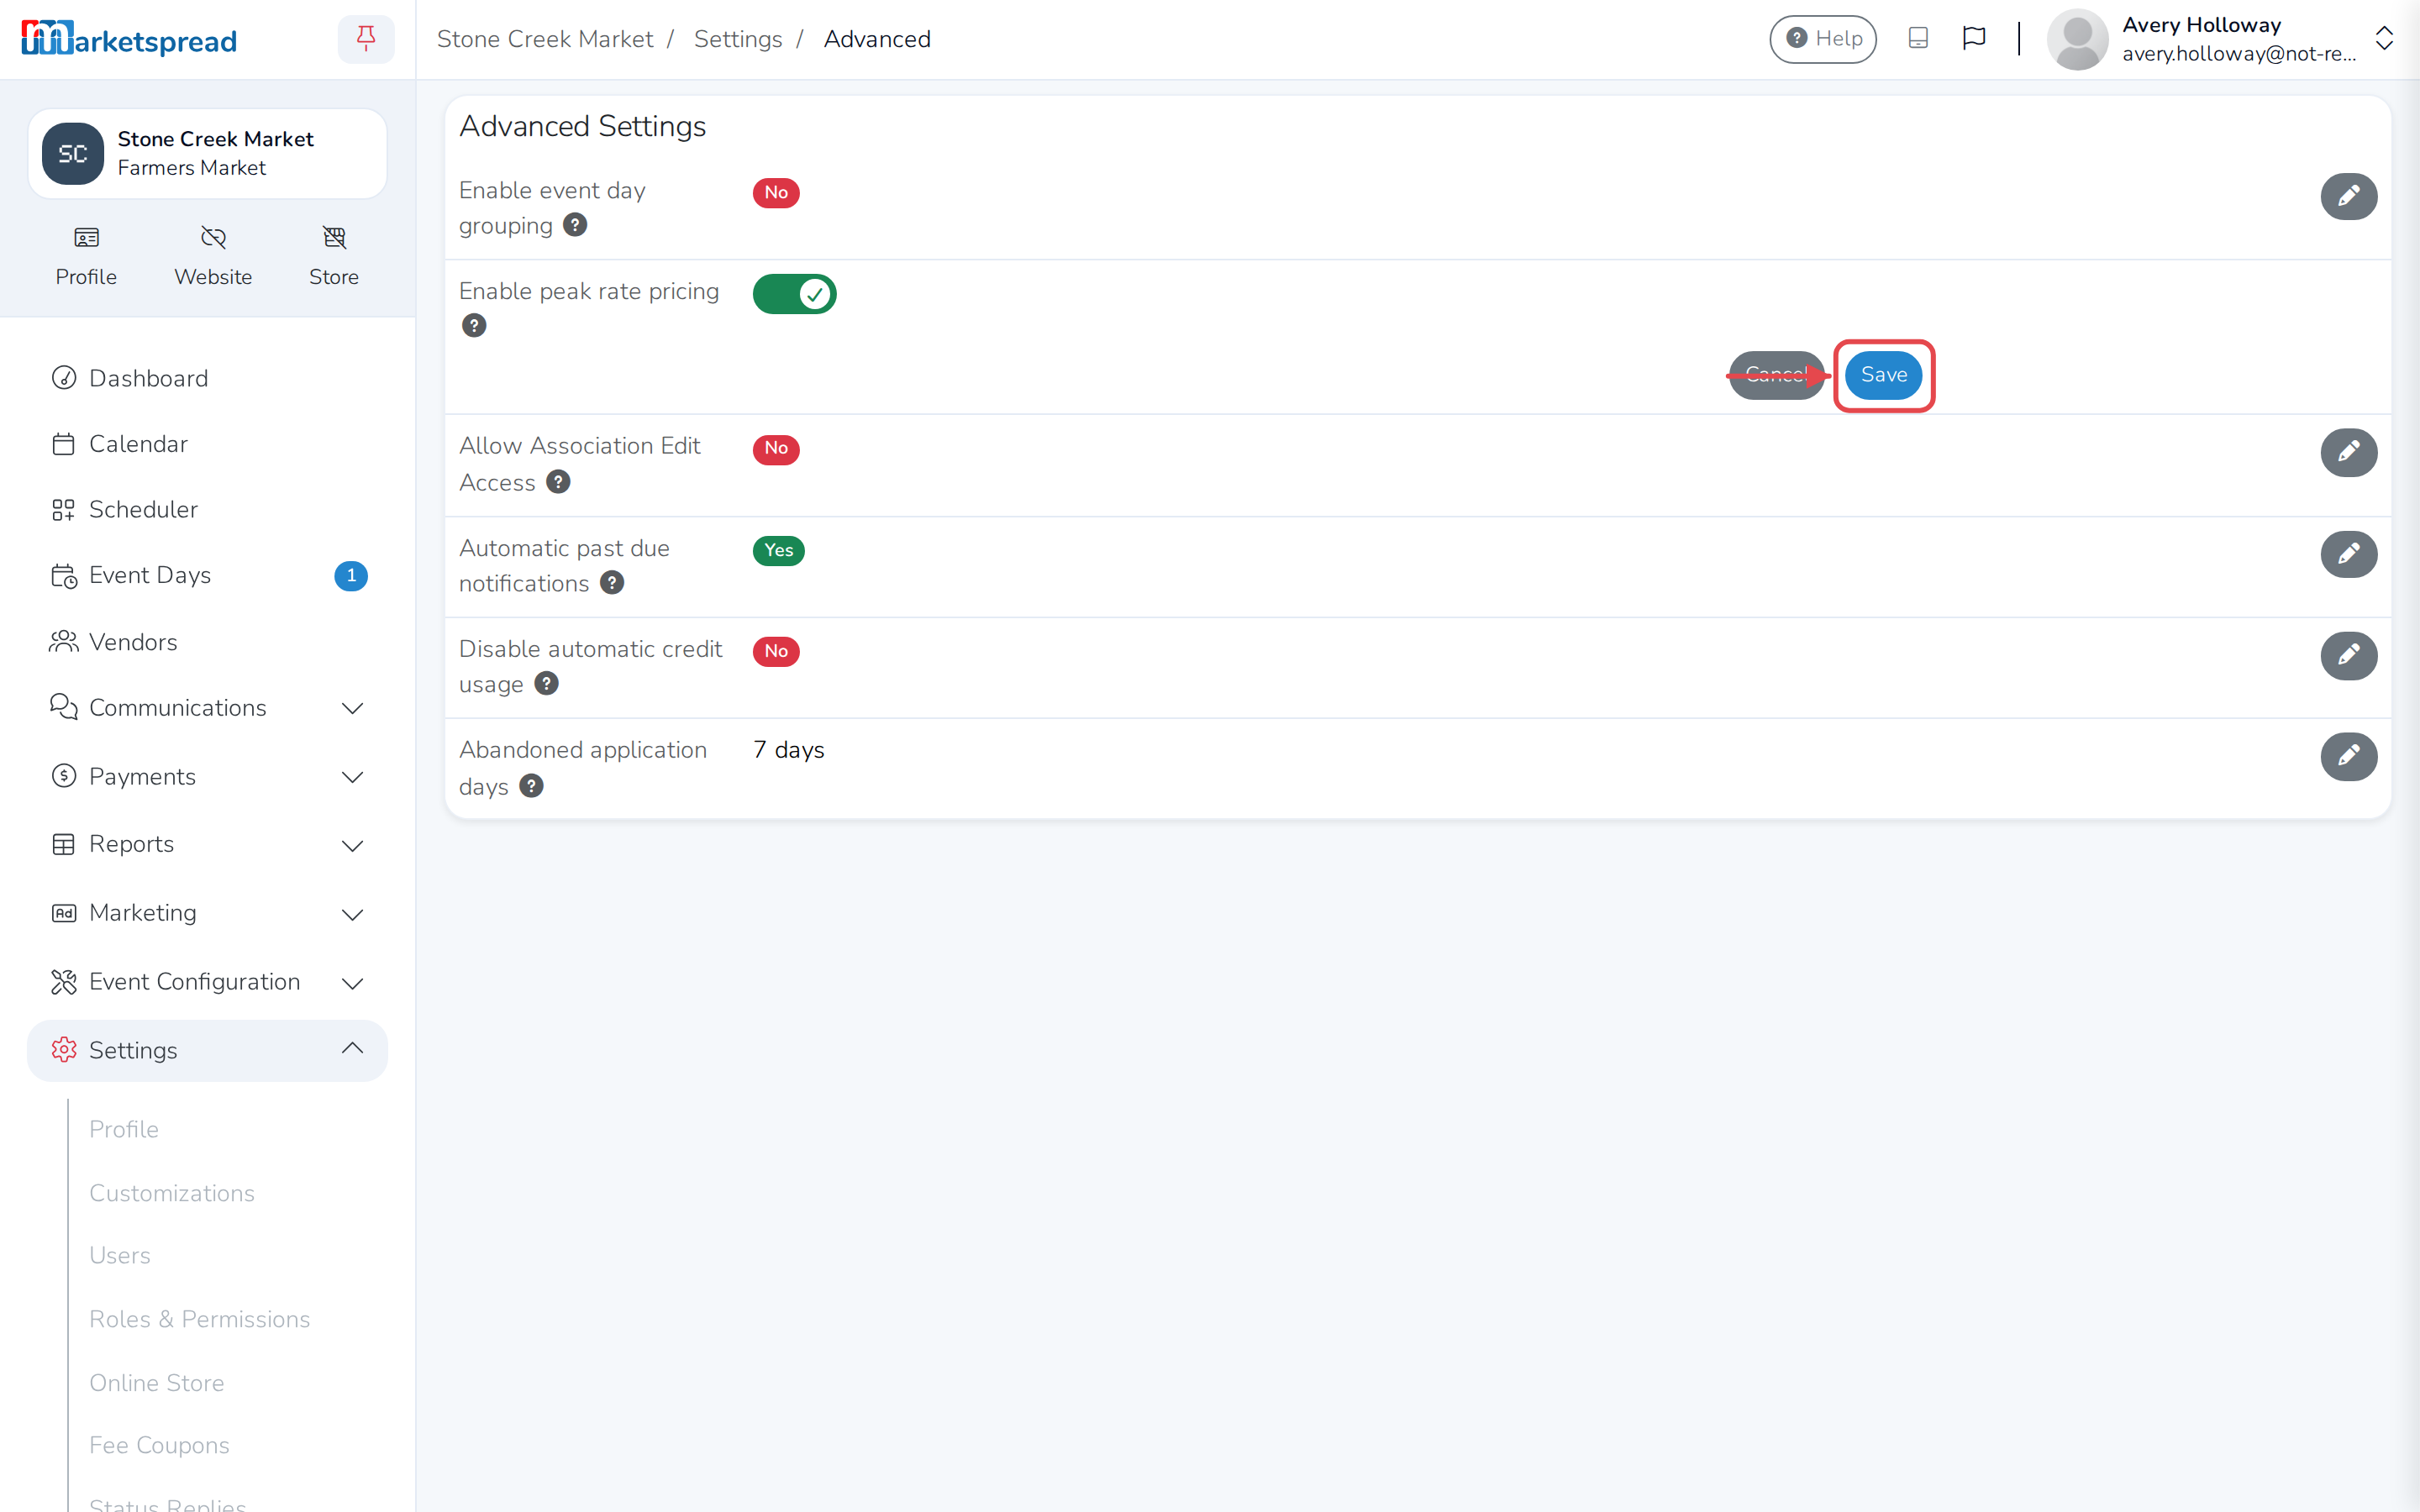
Turn on the switch.
-
Click Save.
Add a peak price to a fee
This adds a peak price to a Vendor Type, Vendor Tag or Category fee you've already set up. If you haven't created one yet, see Tag Based Vendor Fees.
-
Open Event Configuration, then Events.
-
Click the event you want to price.
-
Click the Other Fees tab. If it offers more than one term, choose Day, Week or Month — peak pricing doesn't show up under Event.
-
Click the pencil edit icon.
-
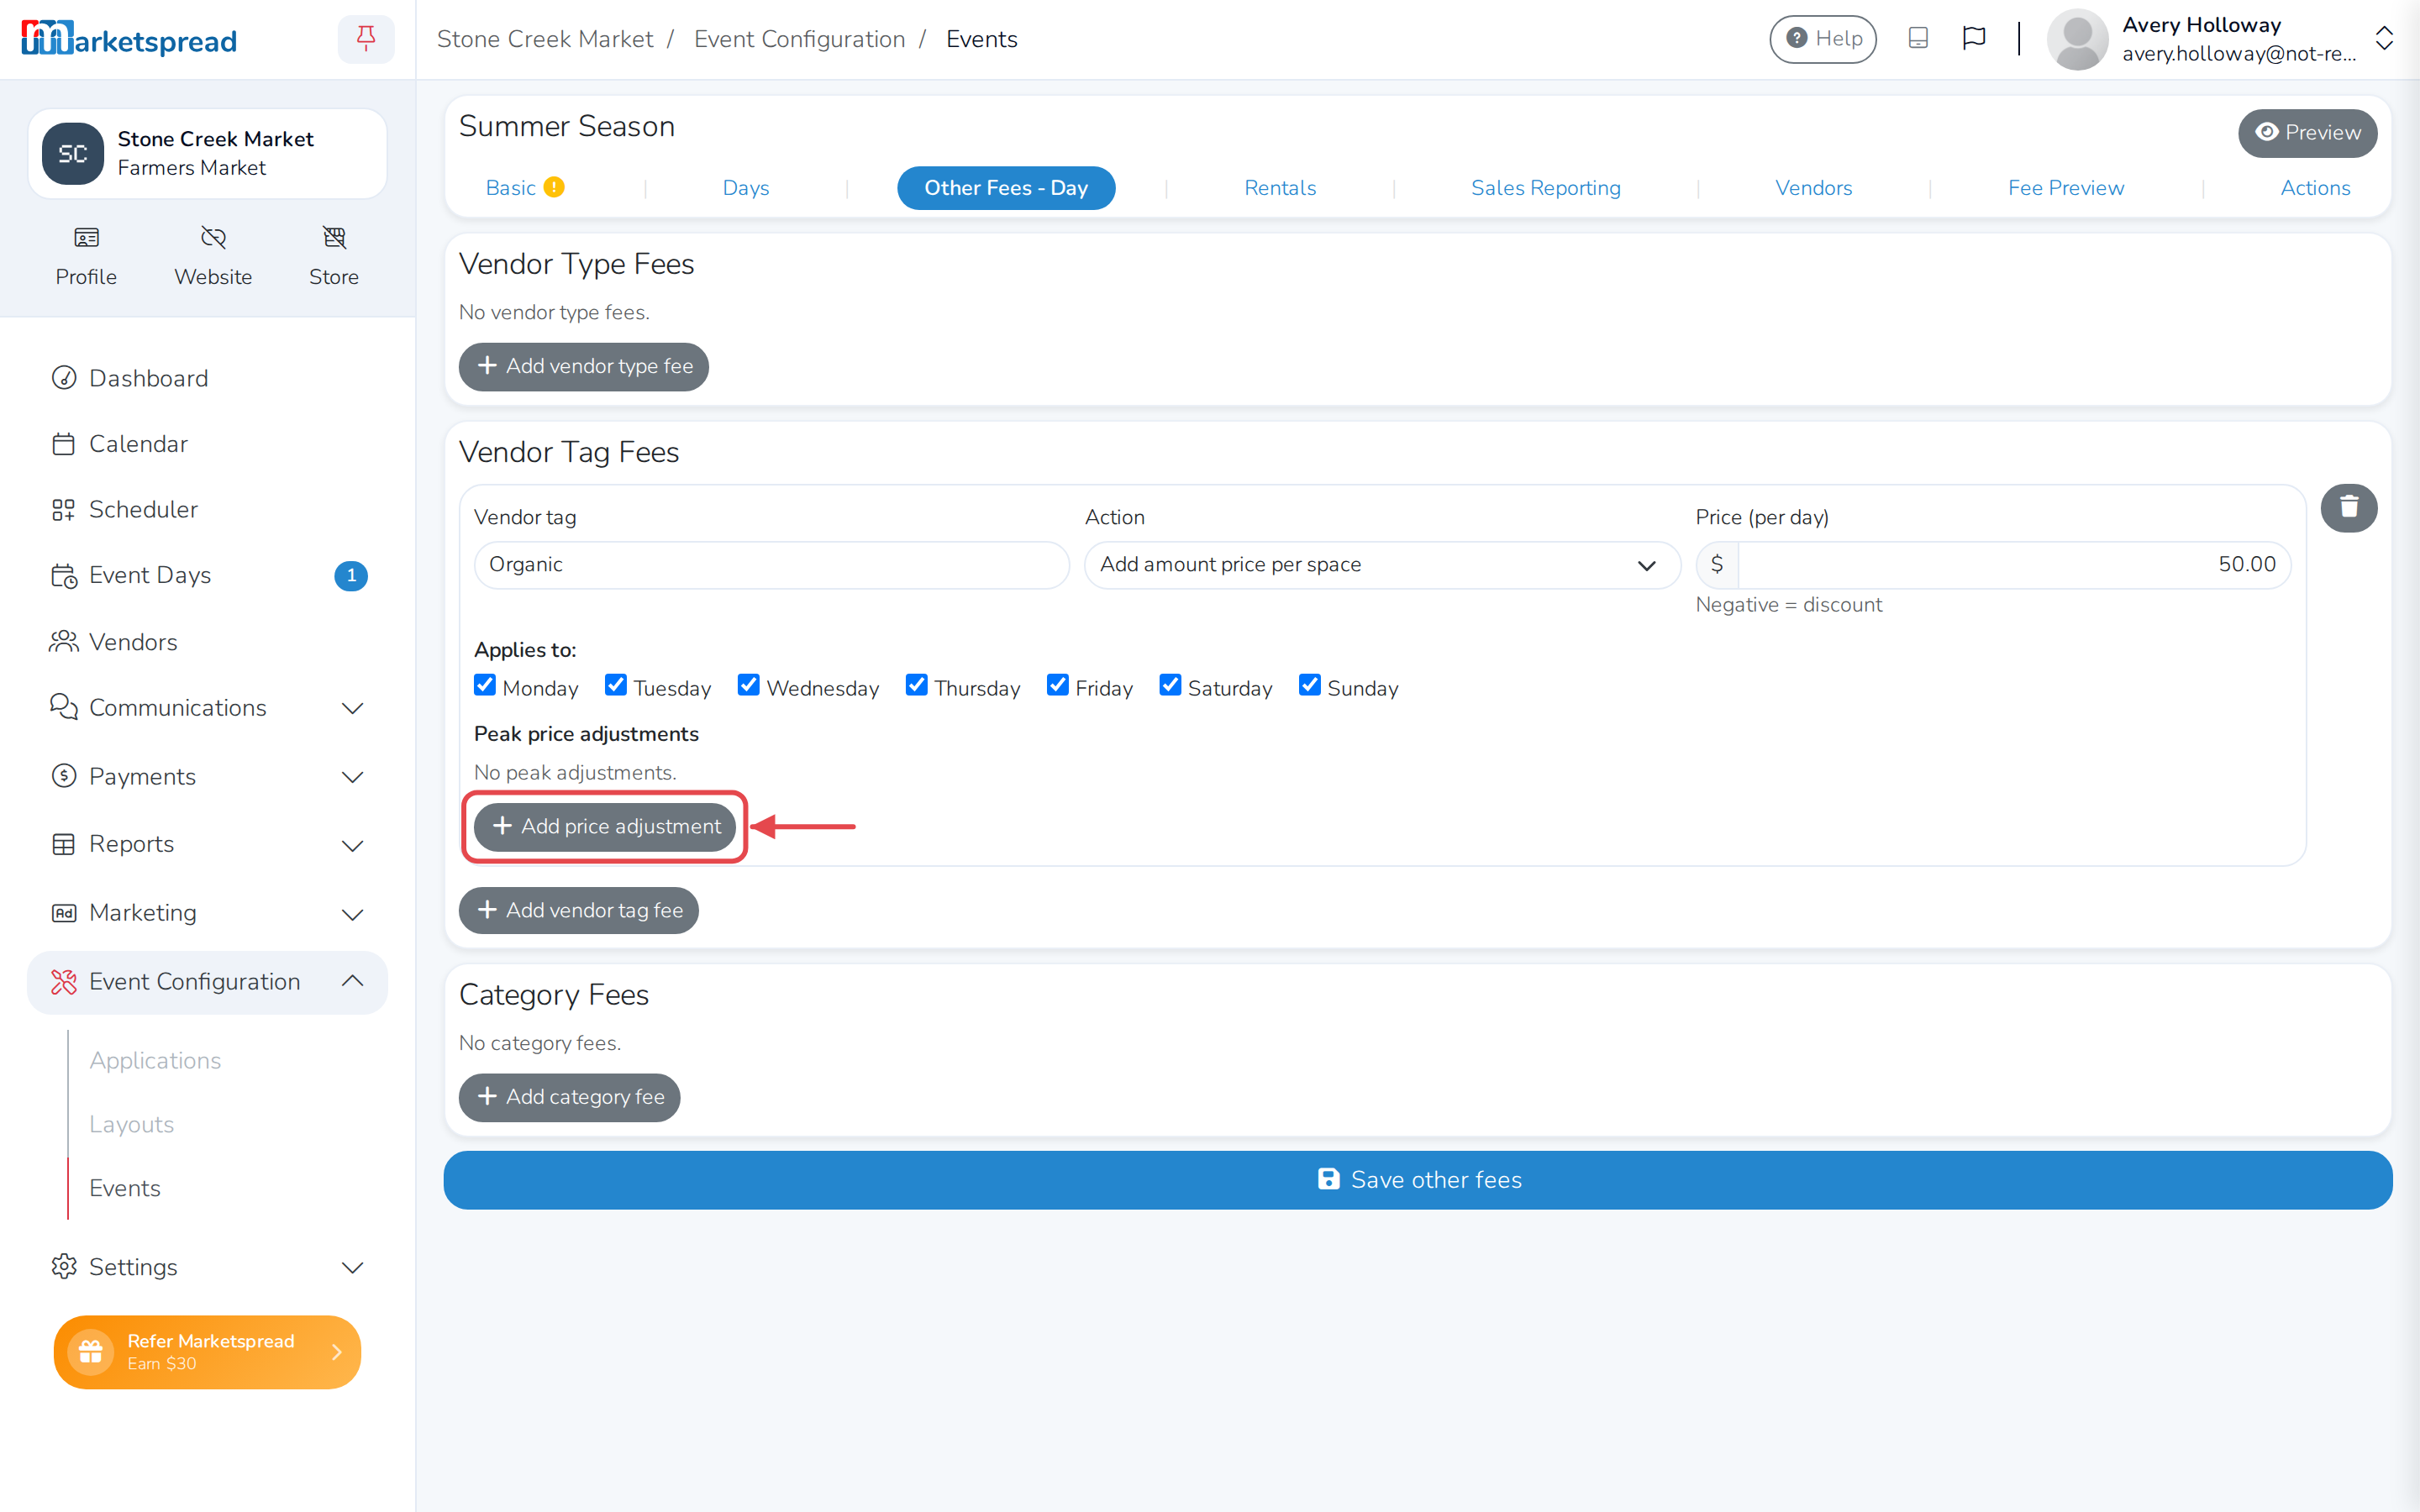
Find the fee under Vendor Type Fees, Vendor Tag Fees or Category Fees.
-
Under Peak price adjustments, click Add price adjustment.
-
Set the start and end of the peak window.
-
Enter the Peak price.
-
Click Save other fees.
The peak price replaces the normal price
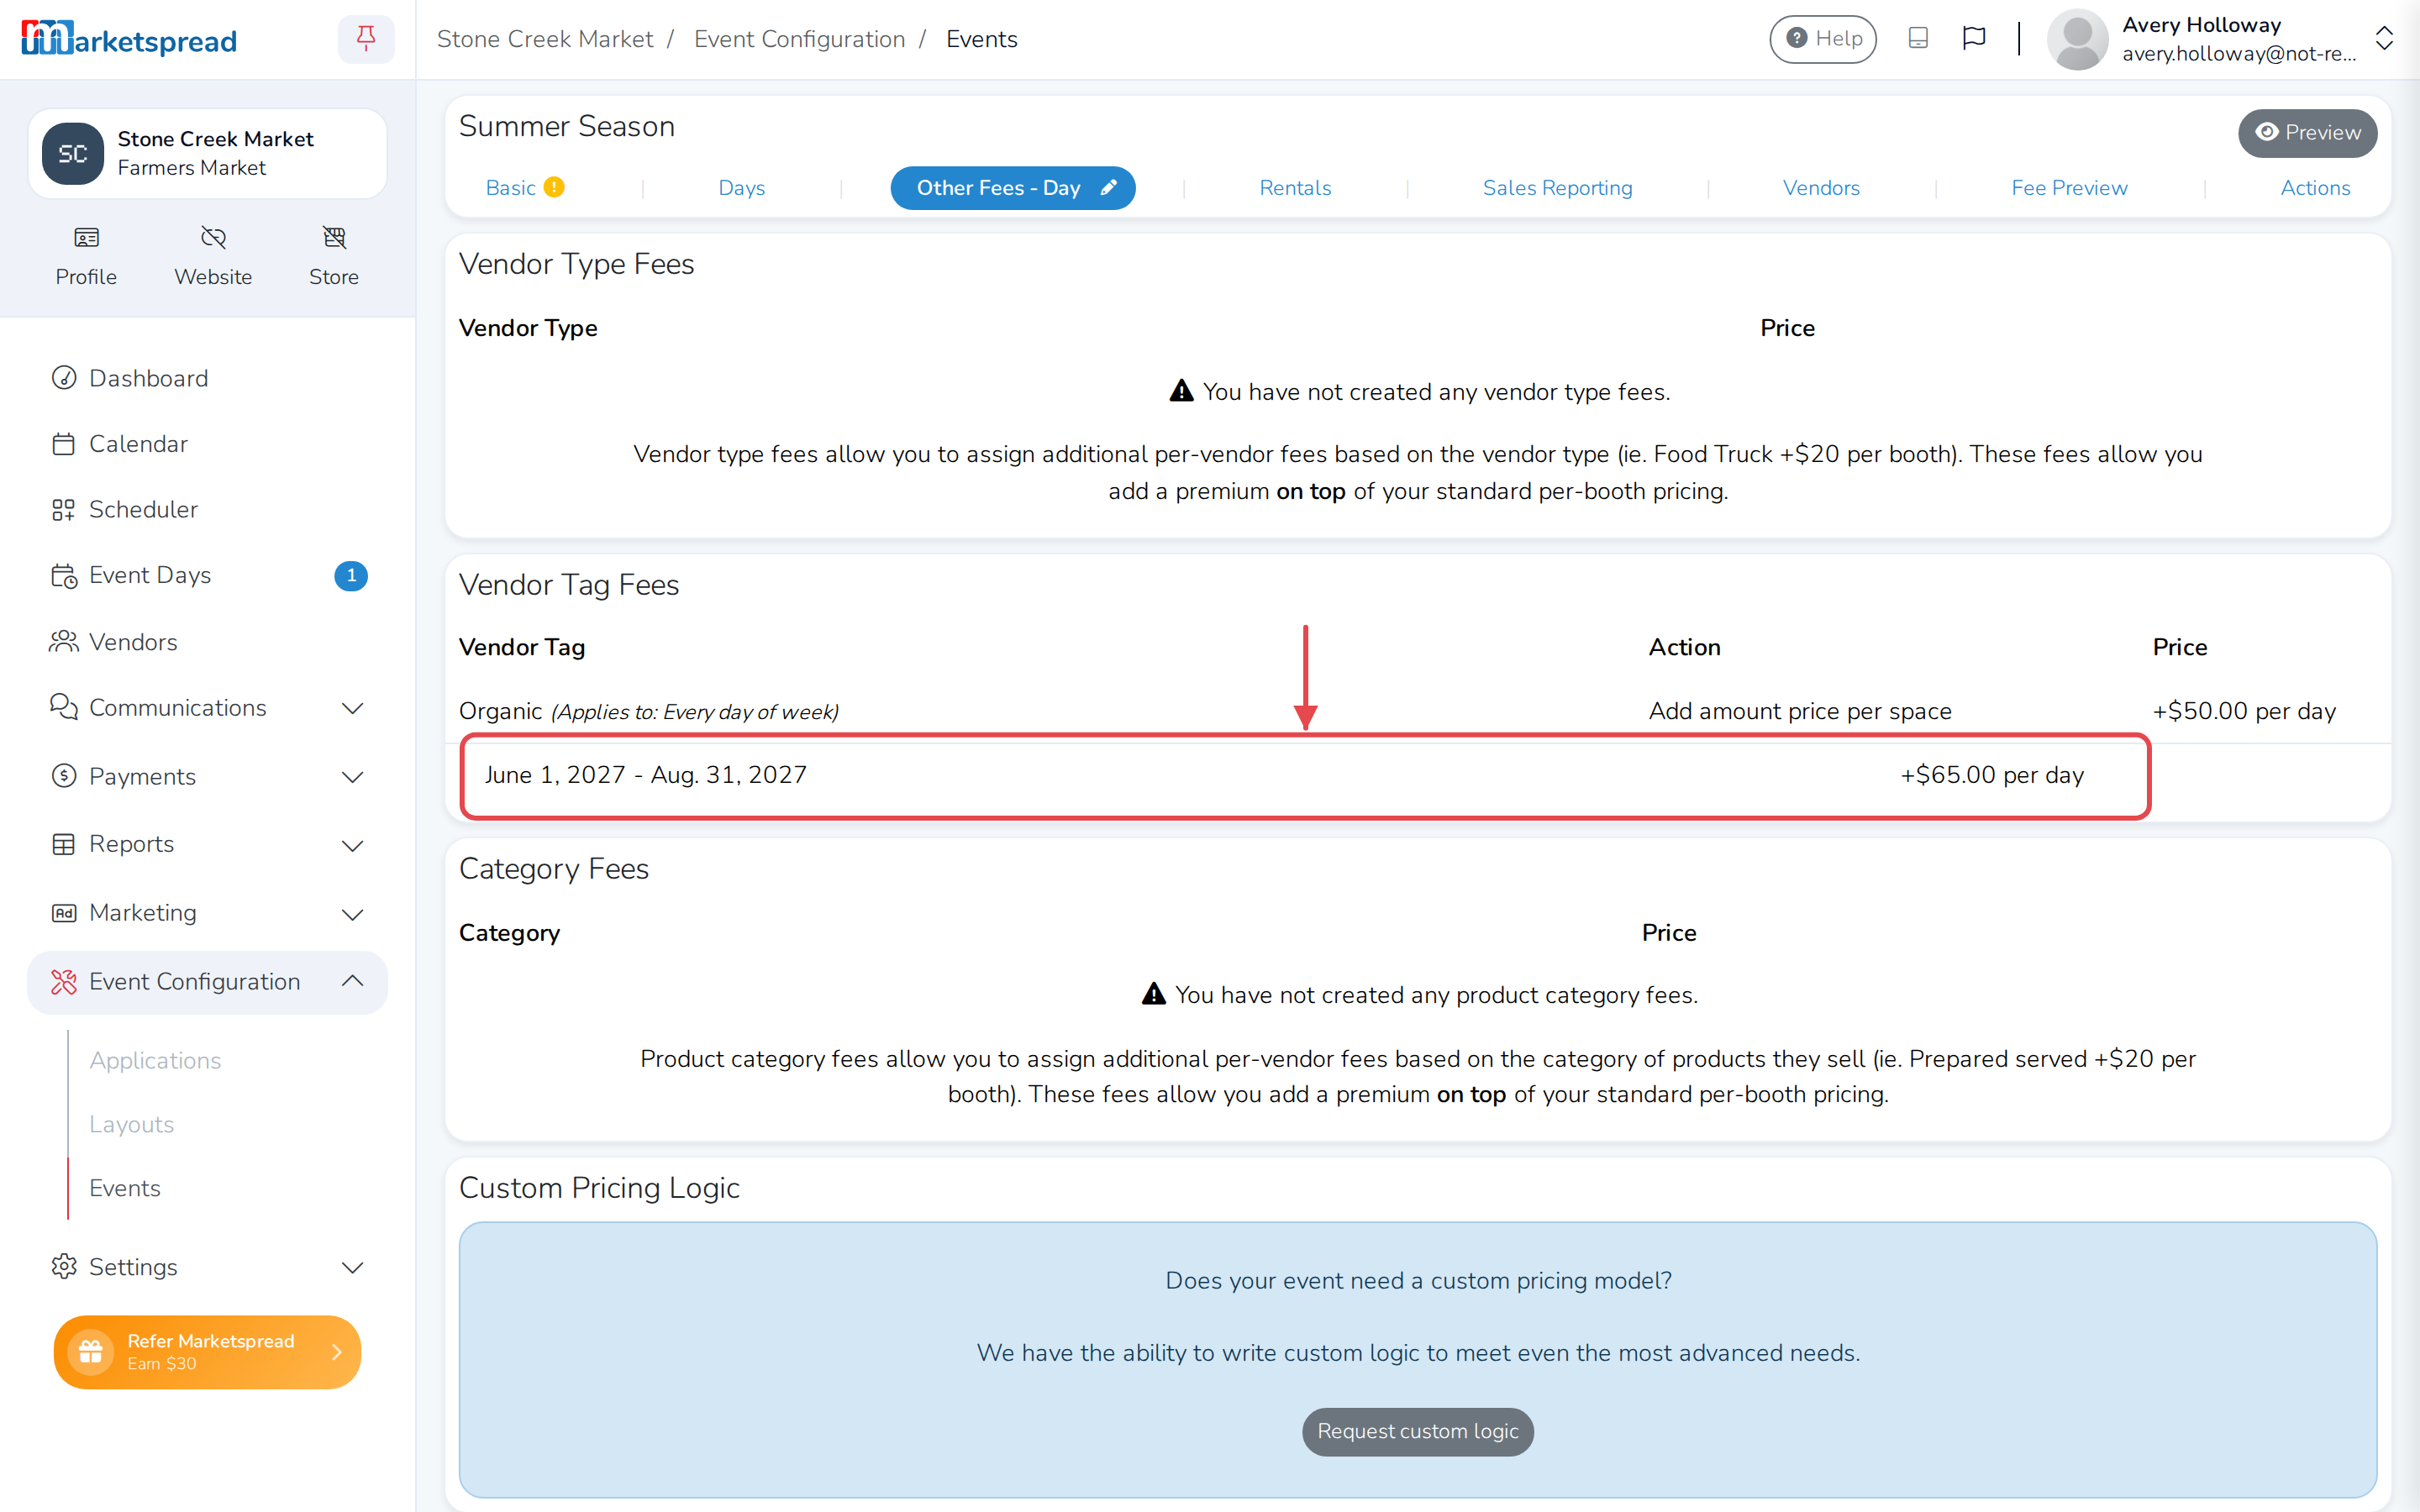
Enter the full price for that window, not just the increase. A $50 fee that should go up to $65 in summer gets a Peak price of $65, not $15.
You can add more than one peak price adjustment to the same fee. Add a spring bump, say, and a bigger summer one.
Remove a peak price
- Open the event's Other Fees tab and click the pencil edit icon.
- Next to the peak price adjustment, click the trash icon.
- Click Save other fees.