


Build a form once, then fill it out from a vendor's record or an event day whenever you need those same details again. Common uses:
- Site surveys — have your onsite team record event day details like weather, attendance and setup conditions
- Vendor check-in — record details while checking in vendors at the gate
- Day-of inspections — record health and safety checks, booth compliance or equipment status for each vendor
Every submitted form is stored on the record it was filled out for. All of it is available in bulk through data reports.
Create a form
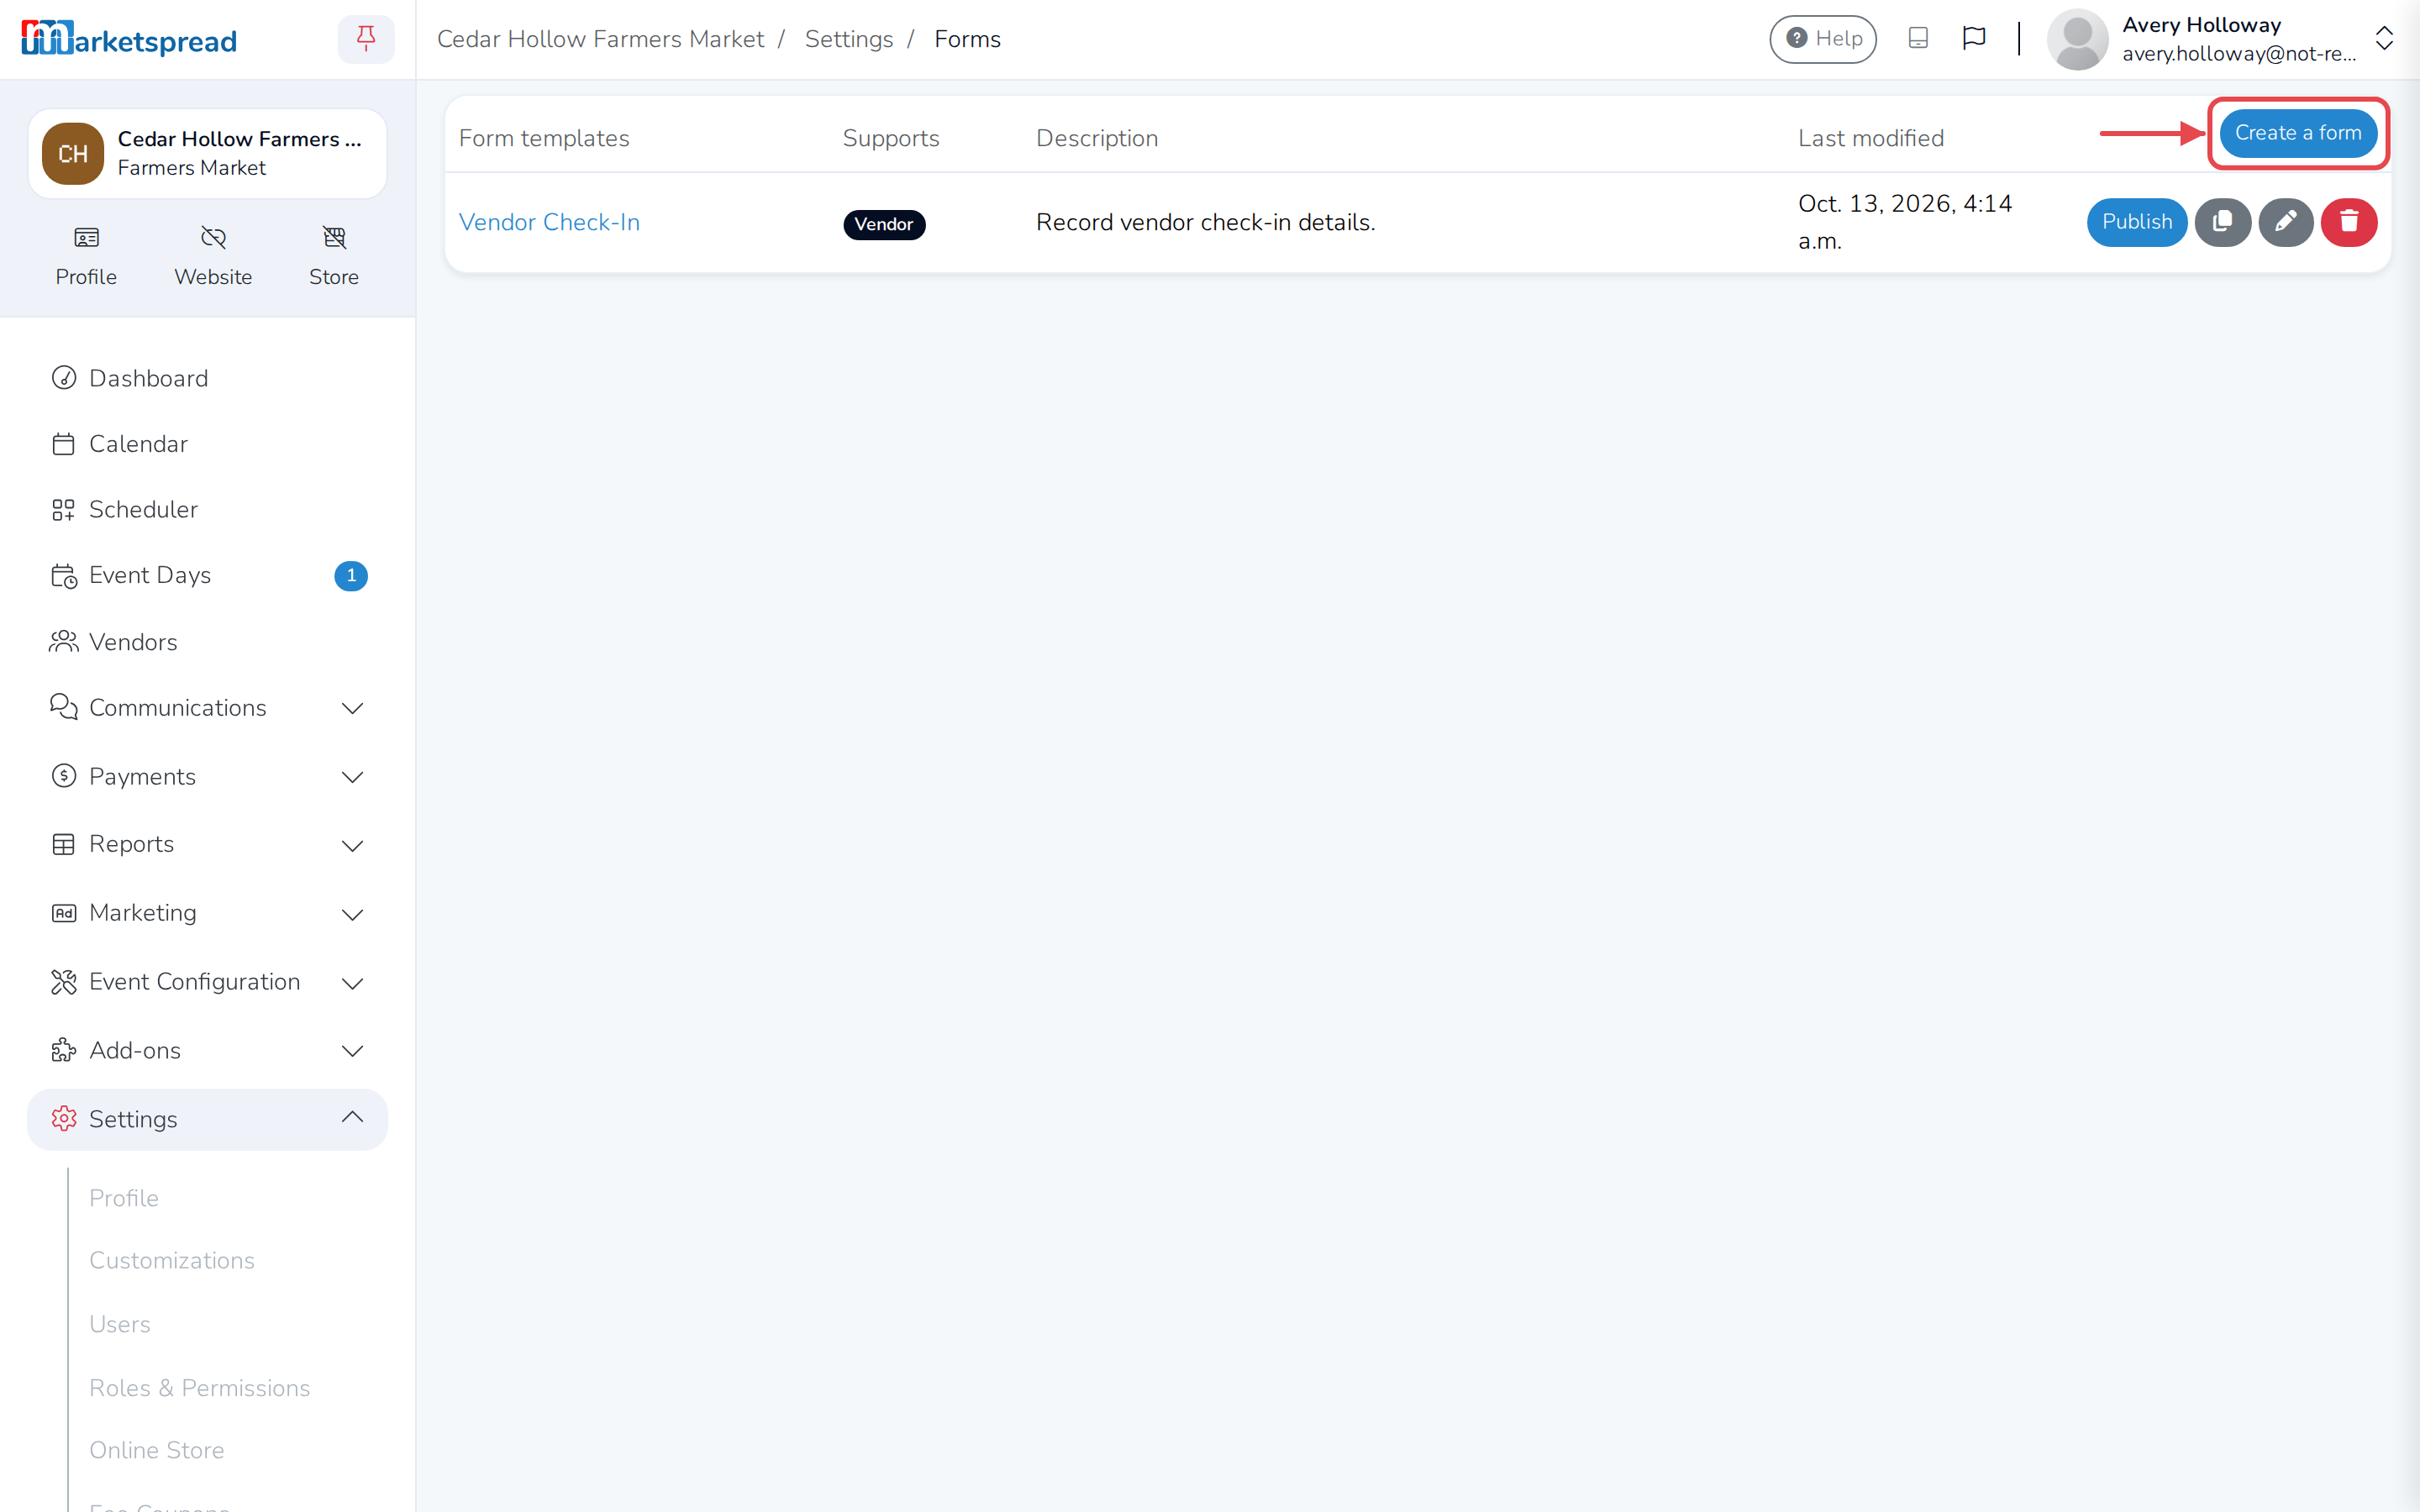
- Click Settings in the left-hand menu, then click Forms.
- Click Create a form.
The form editor lets you:
- Set the form's name and description
- Add questions — text, dropdowns, checkboxes, file uploads and more
- Add validation rules and conditional logic
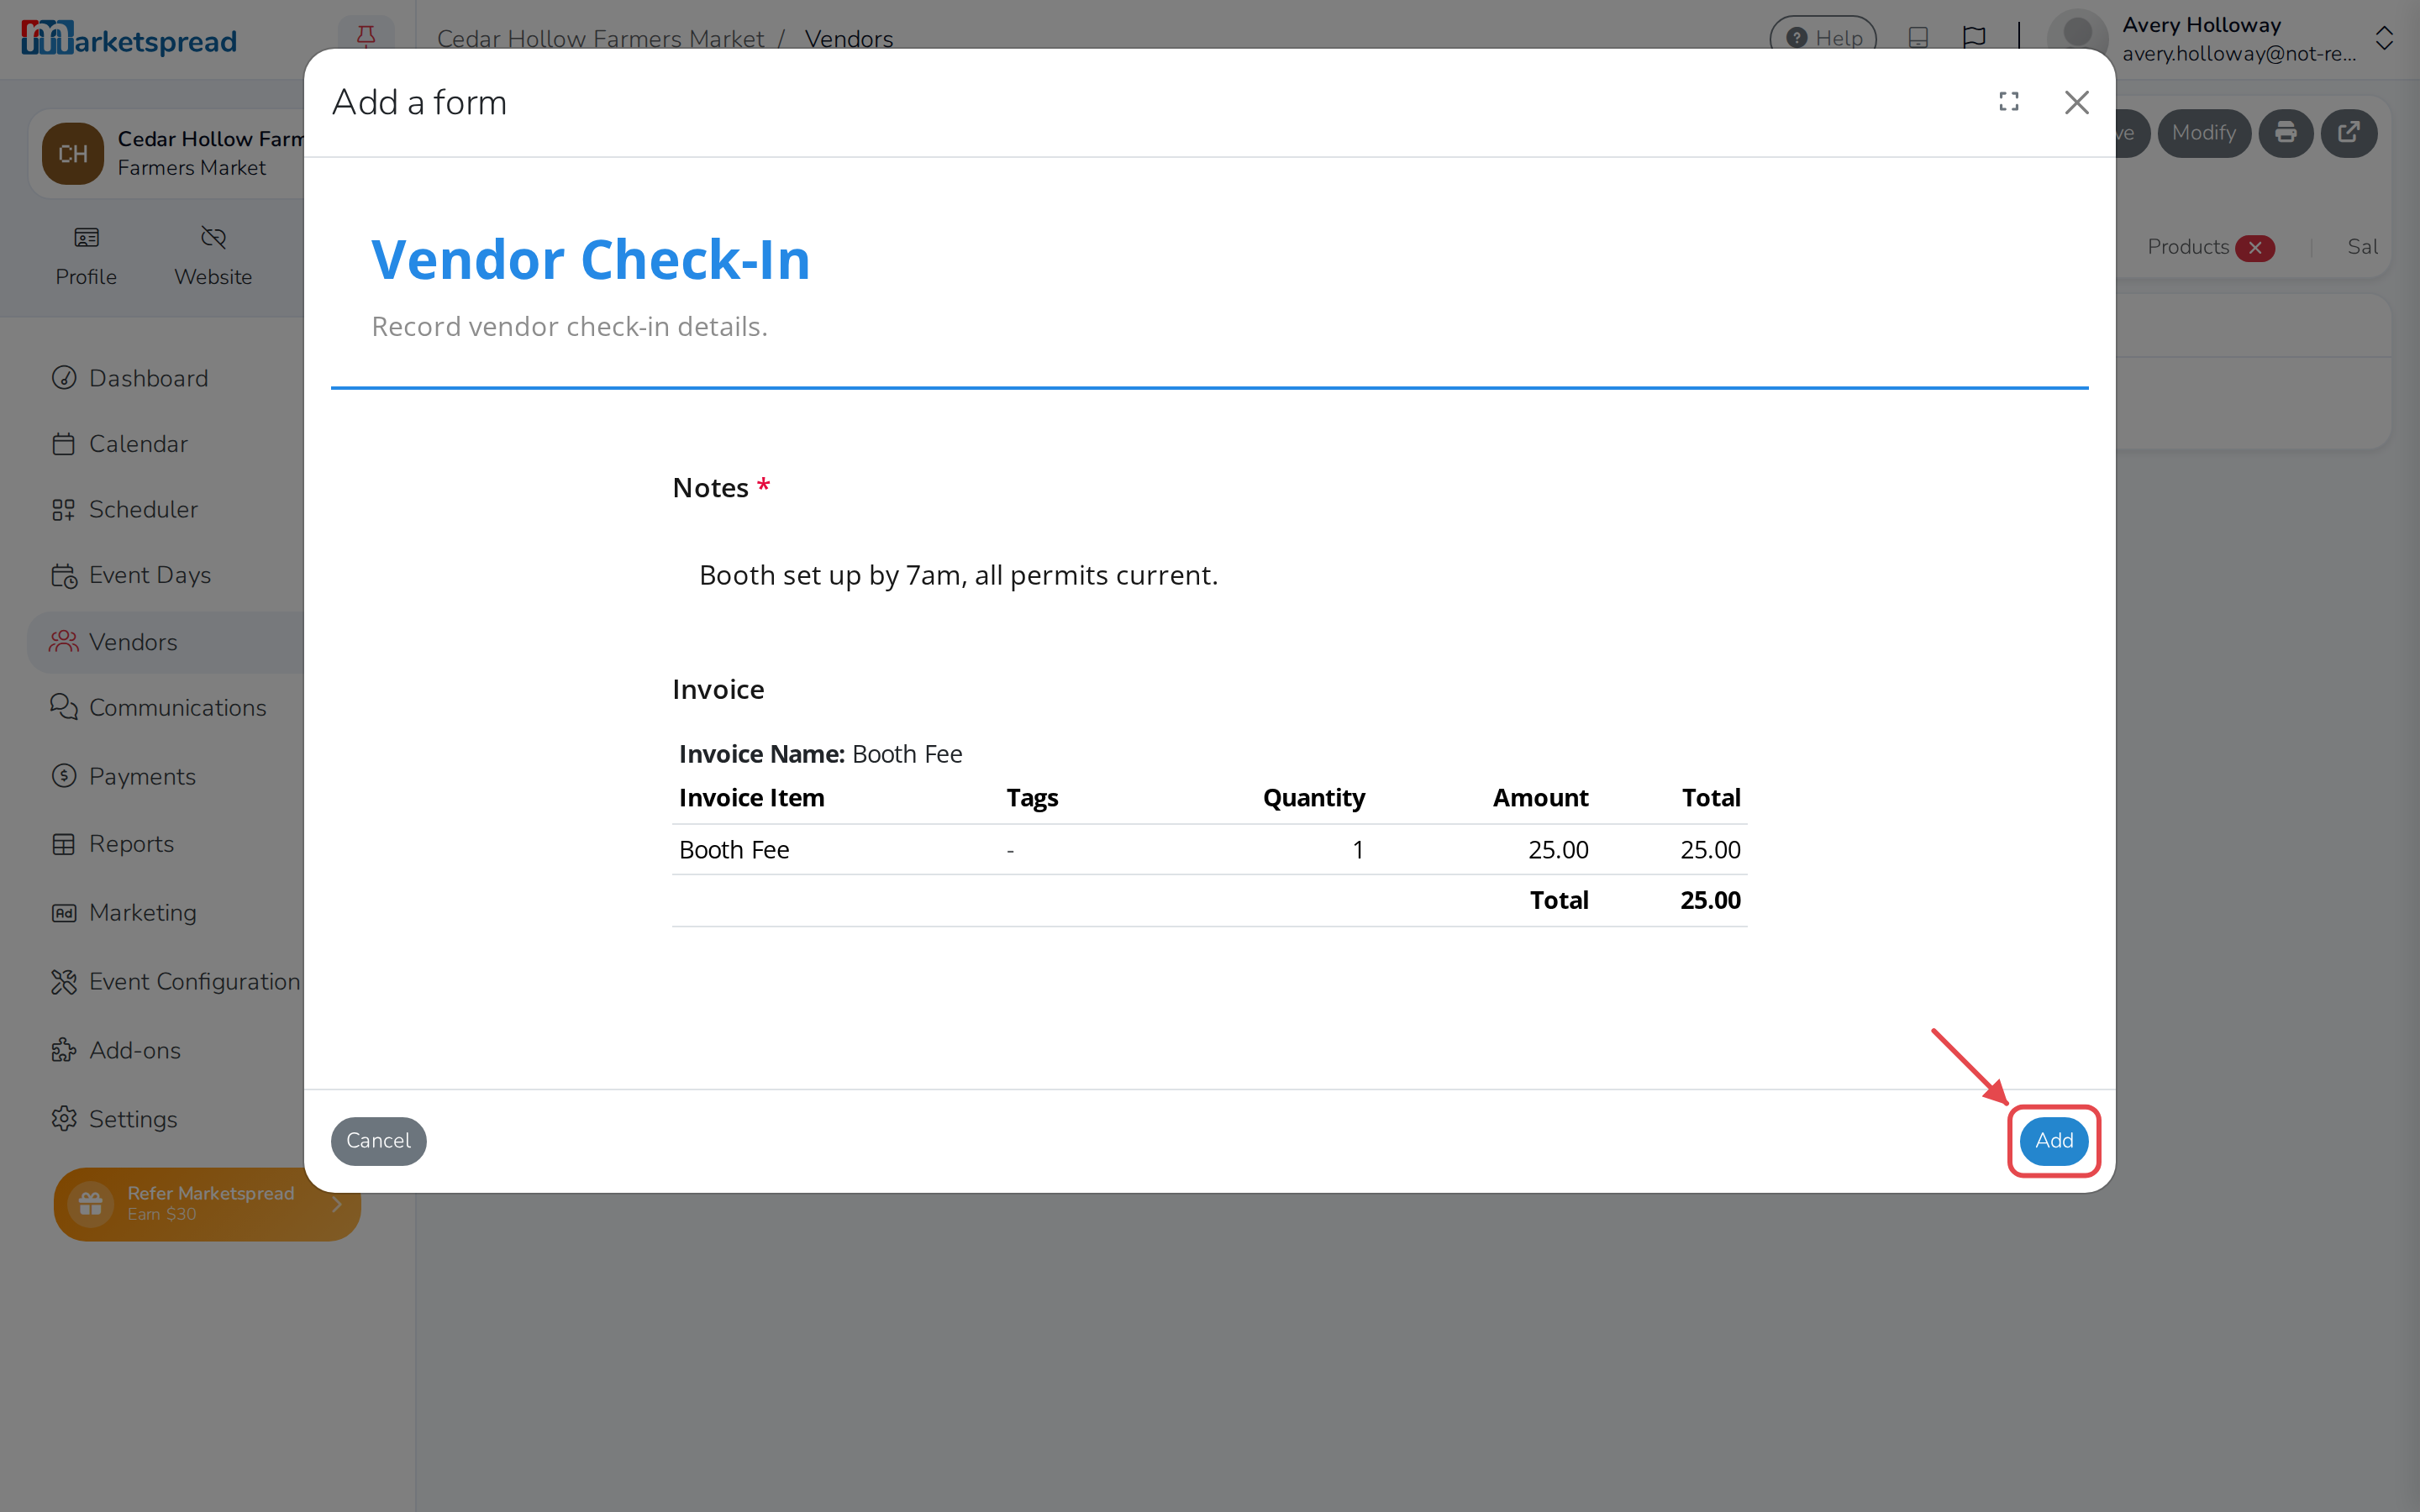
- Add special fields, including Vendor (links the entry to one of your vendors) and Invoice Creator (creates an invoice from the entry)
Under Form is usable in these areas of the platform, check Event Day, Vendor, or both, depending on where you want the form to appear.
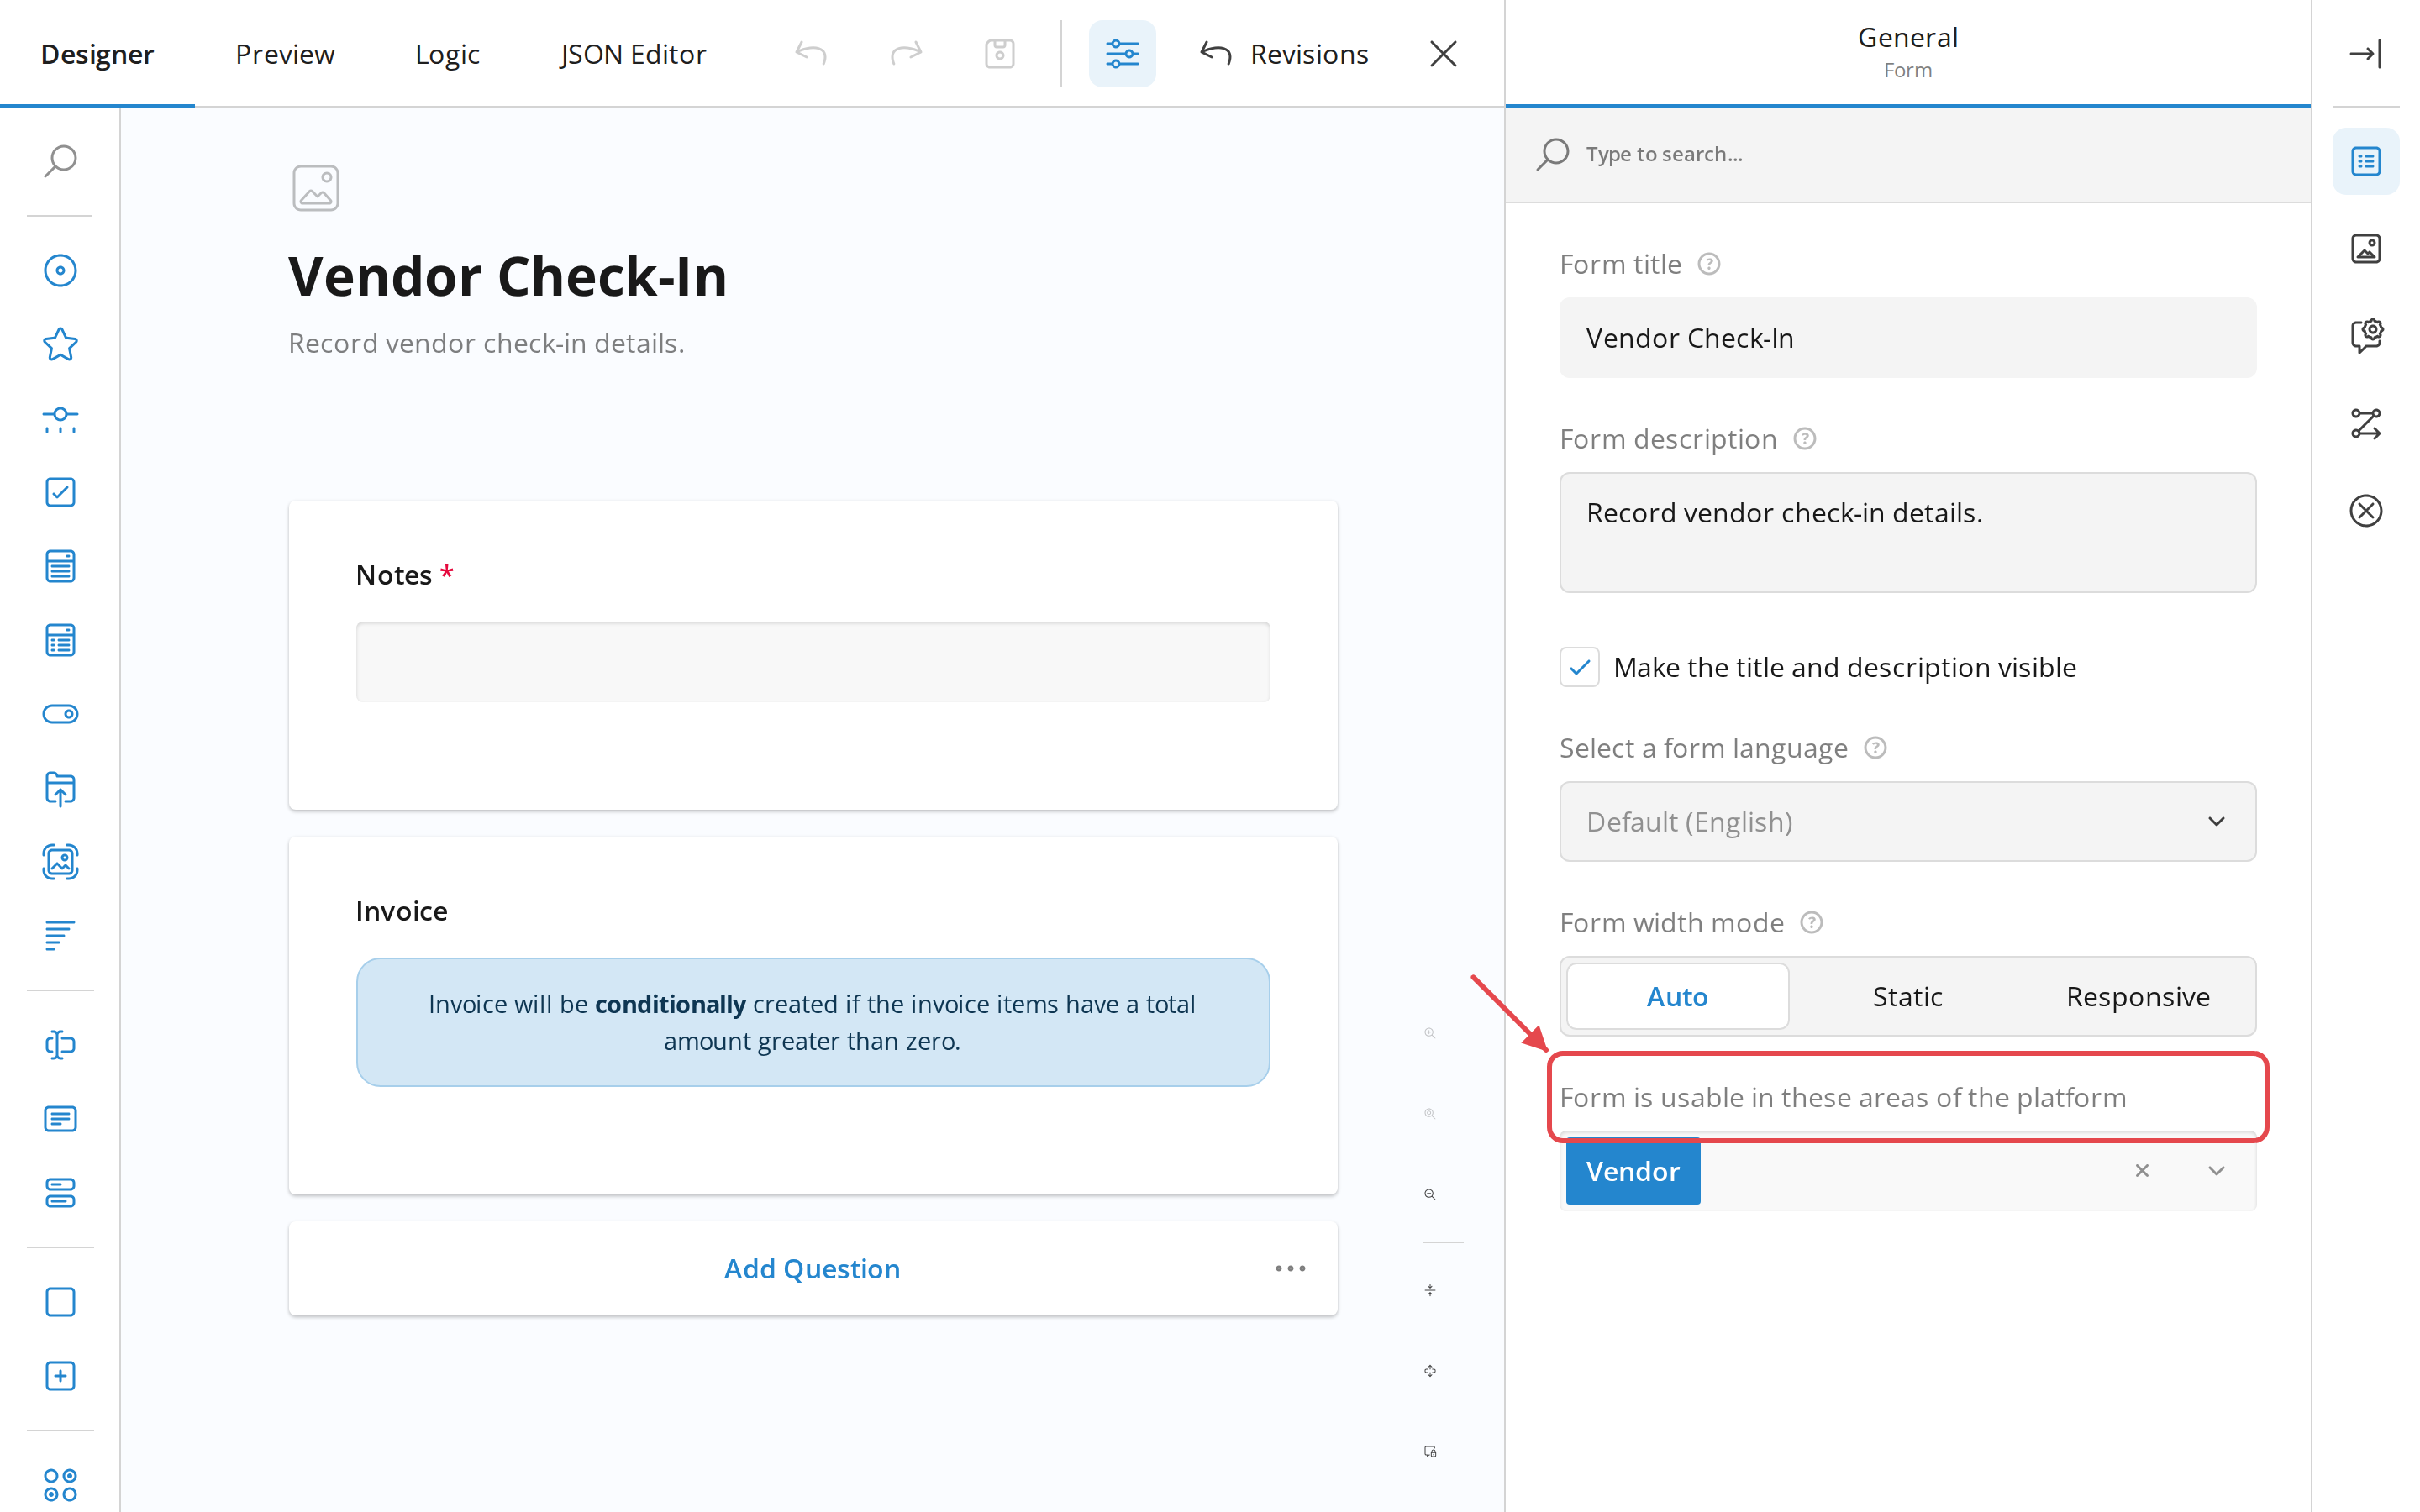
Click Save in the toolbar as you work.
Note
Click Exit to leave the editor. If you have unsaved changes, it asks you to confirm before leaving.
Publish a form
A form is a template until you publish it. Only published forms are available for your team to fill out.
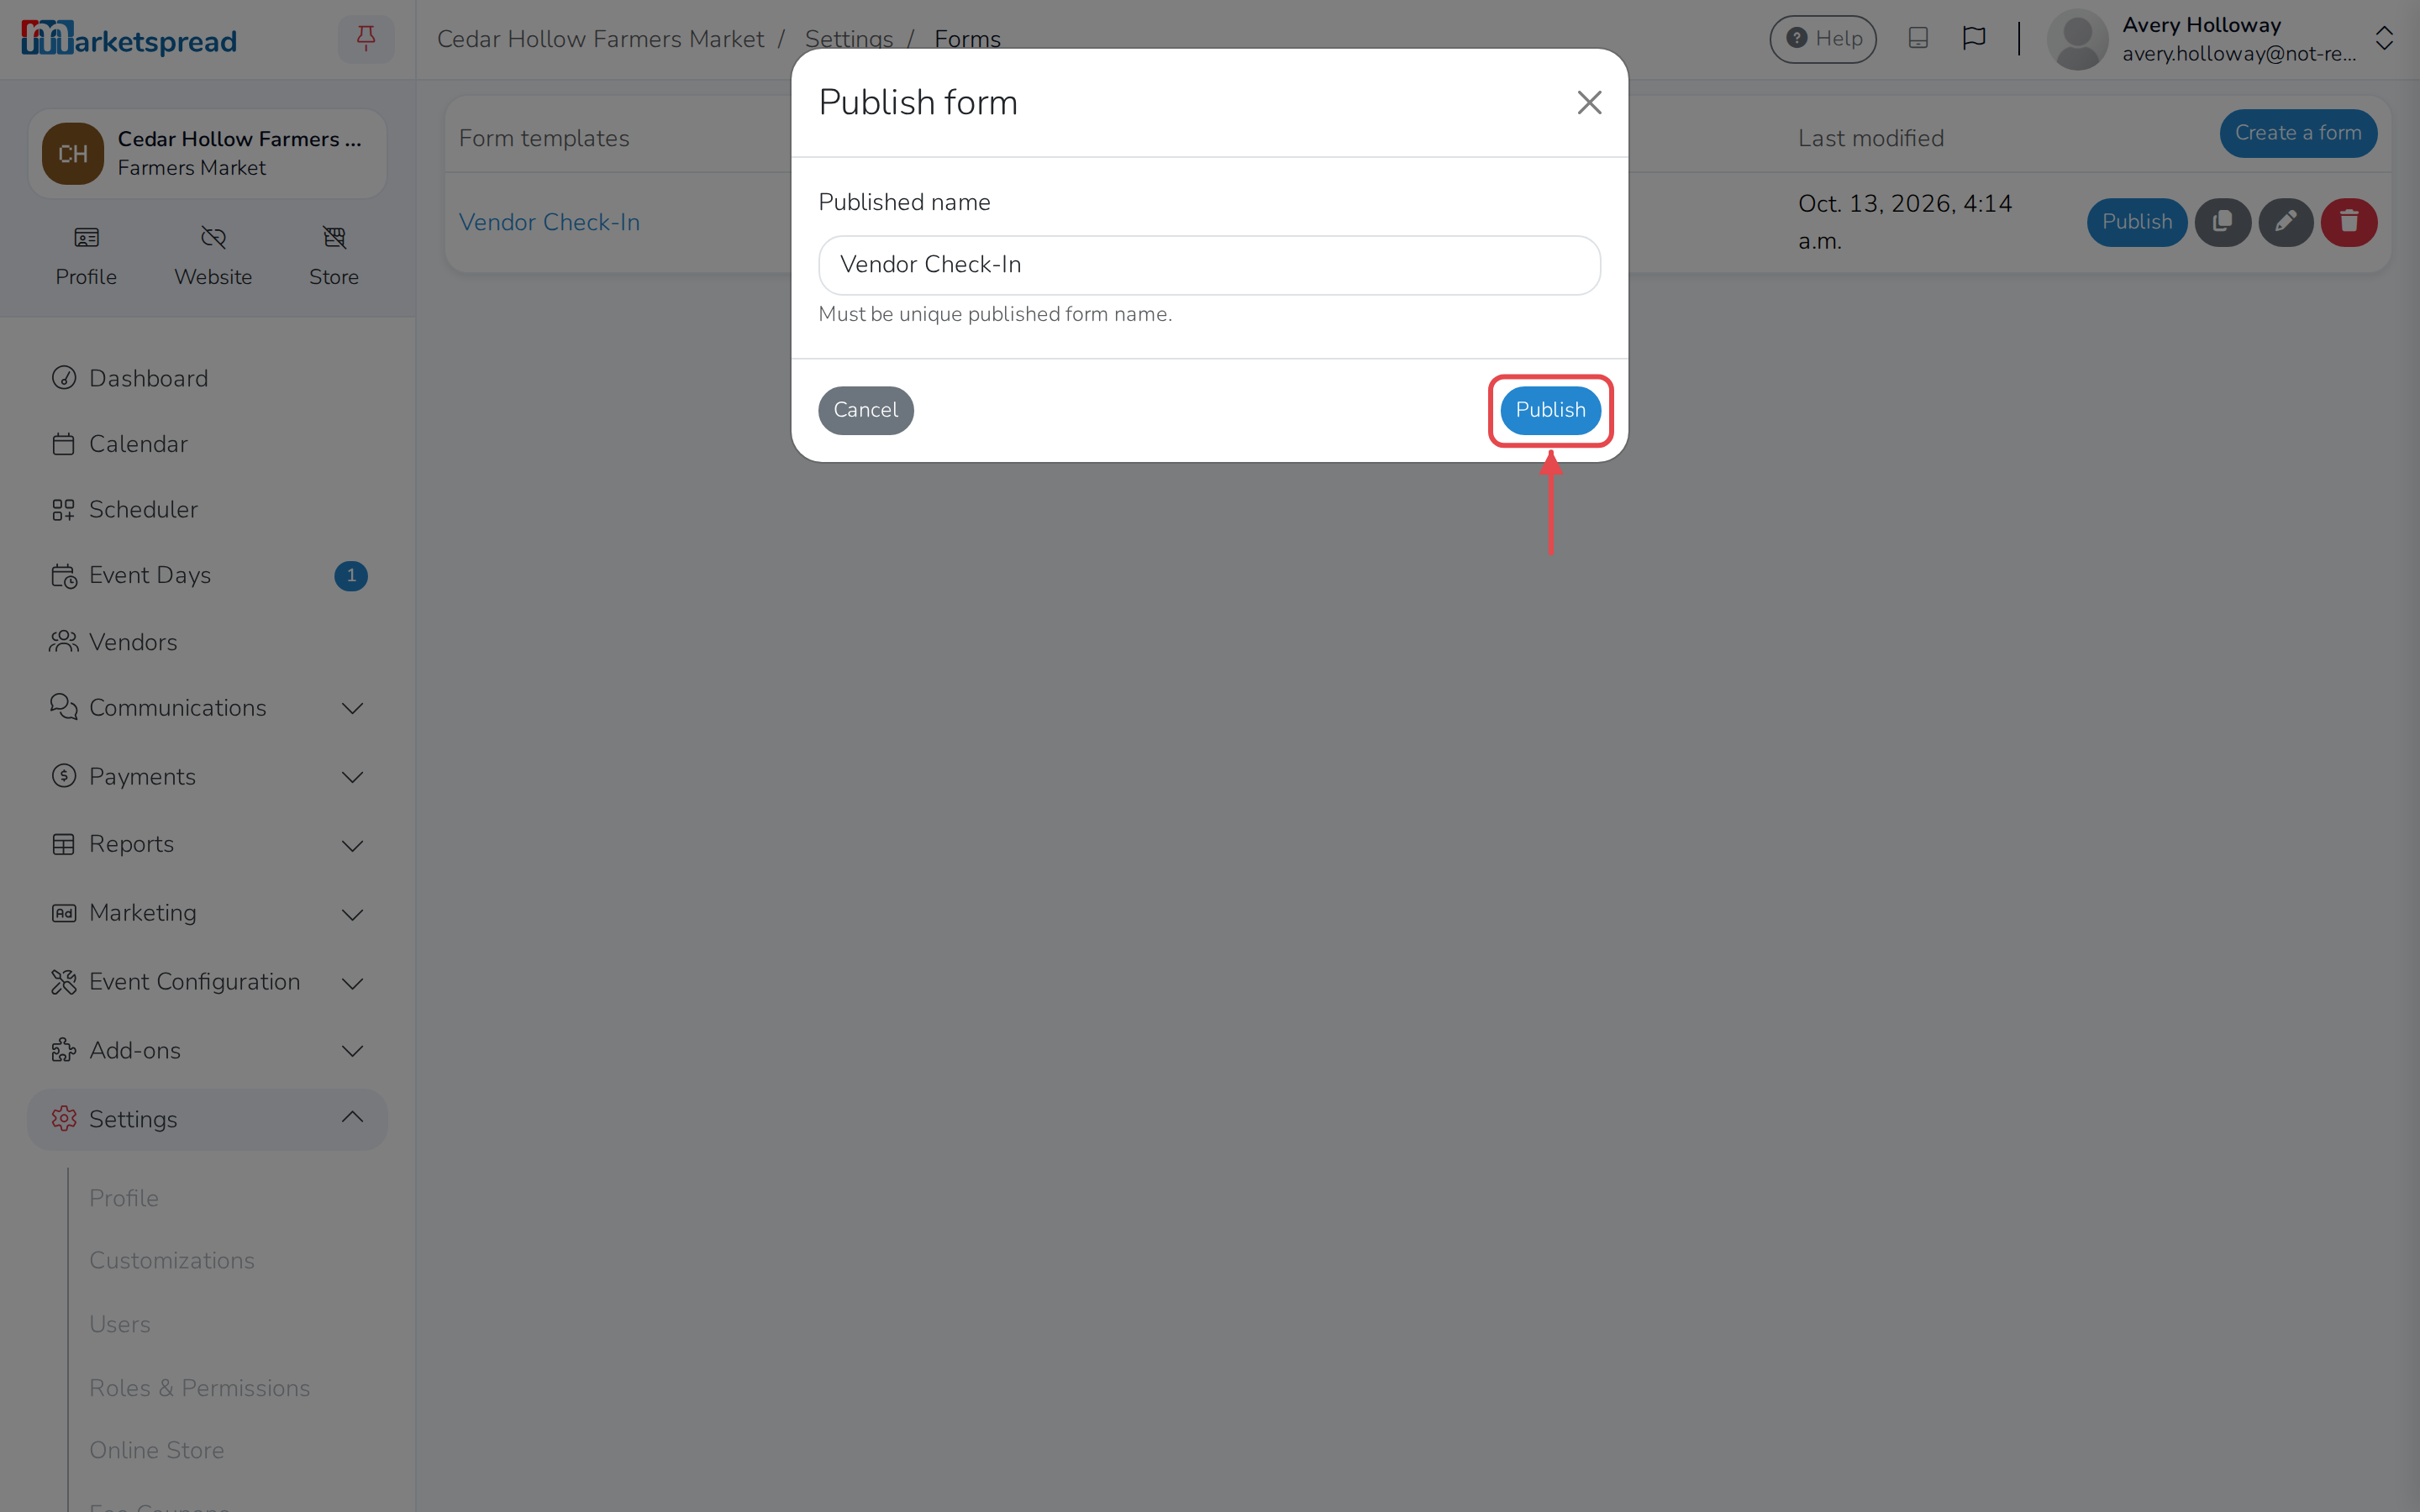
- On the Forms page, find the form under Form templates.
- Click Publish.
- Fill in a Published name.
- Click Publish.
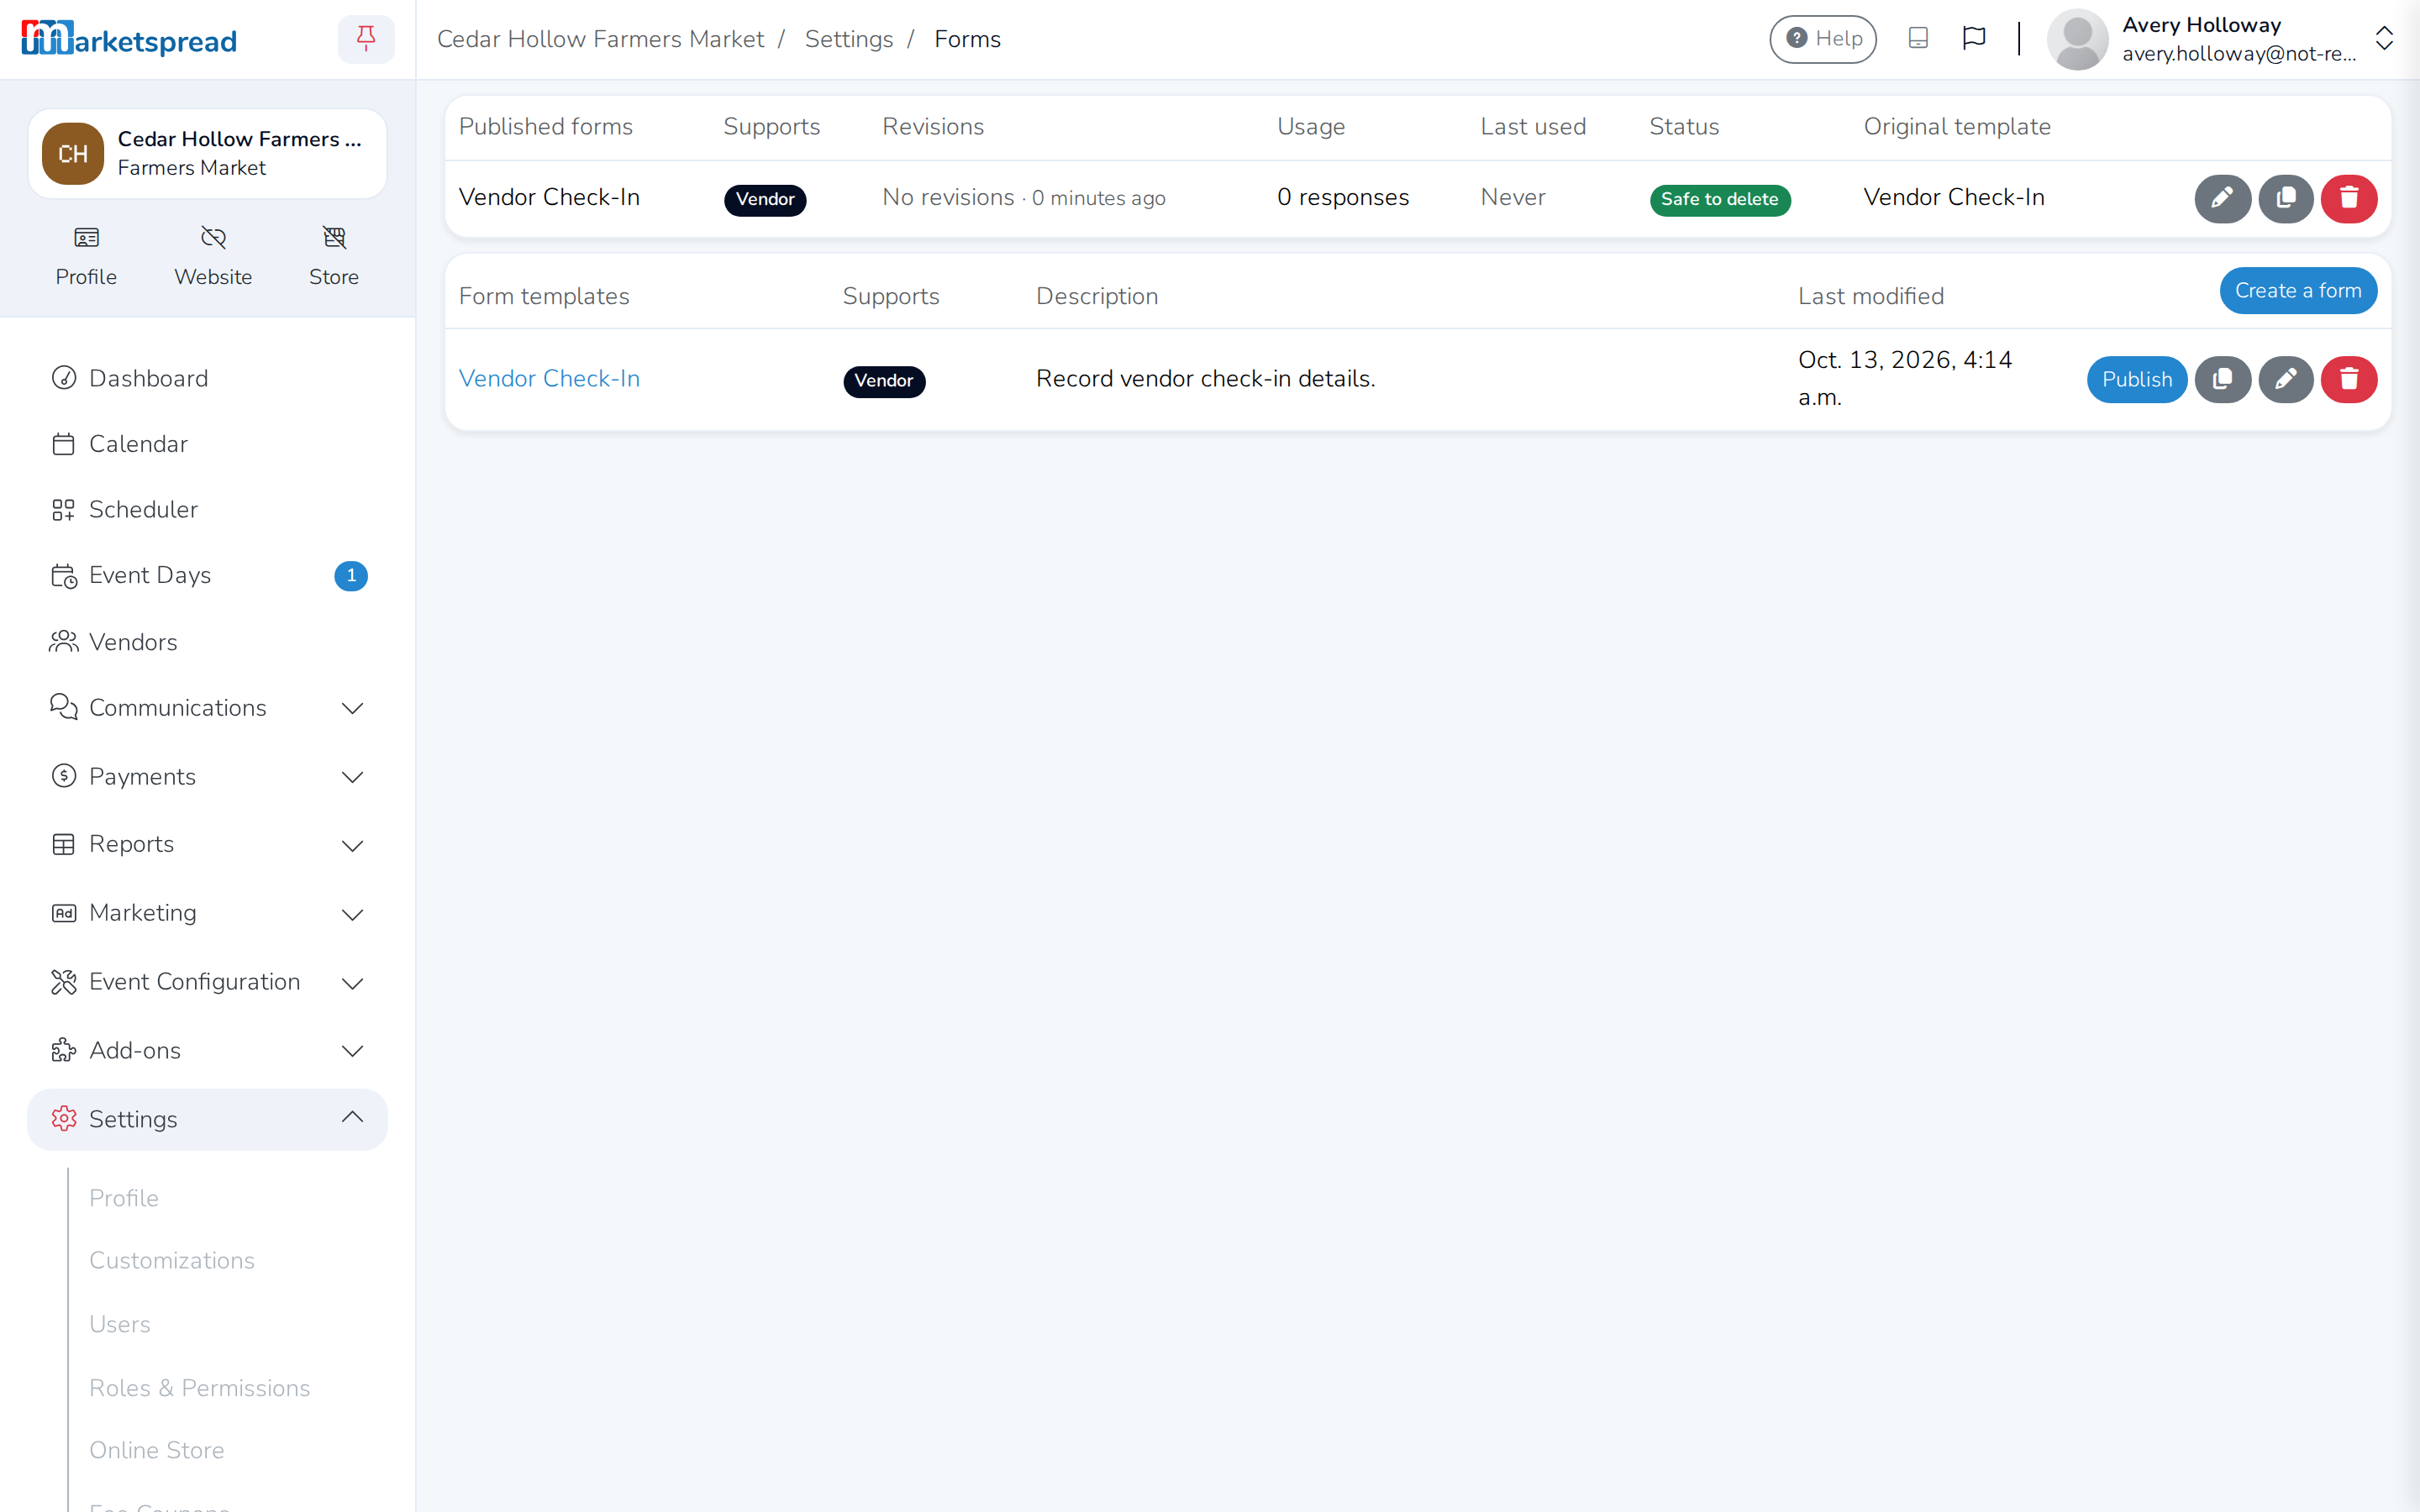
Published forms appear together in their own table at the top of the Forms page.
Note
To change a form after you publish it, edit it from the Published forms table. Editing the version under Form templates doesn't change what your team sees.
Fill out a form
Where a form appears depends on what you checked under Form is usable in these areas of the platform when you built it.
On a vendor
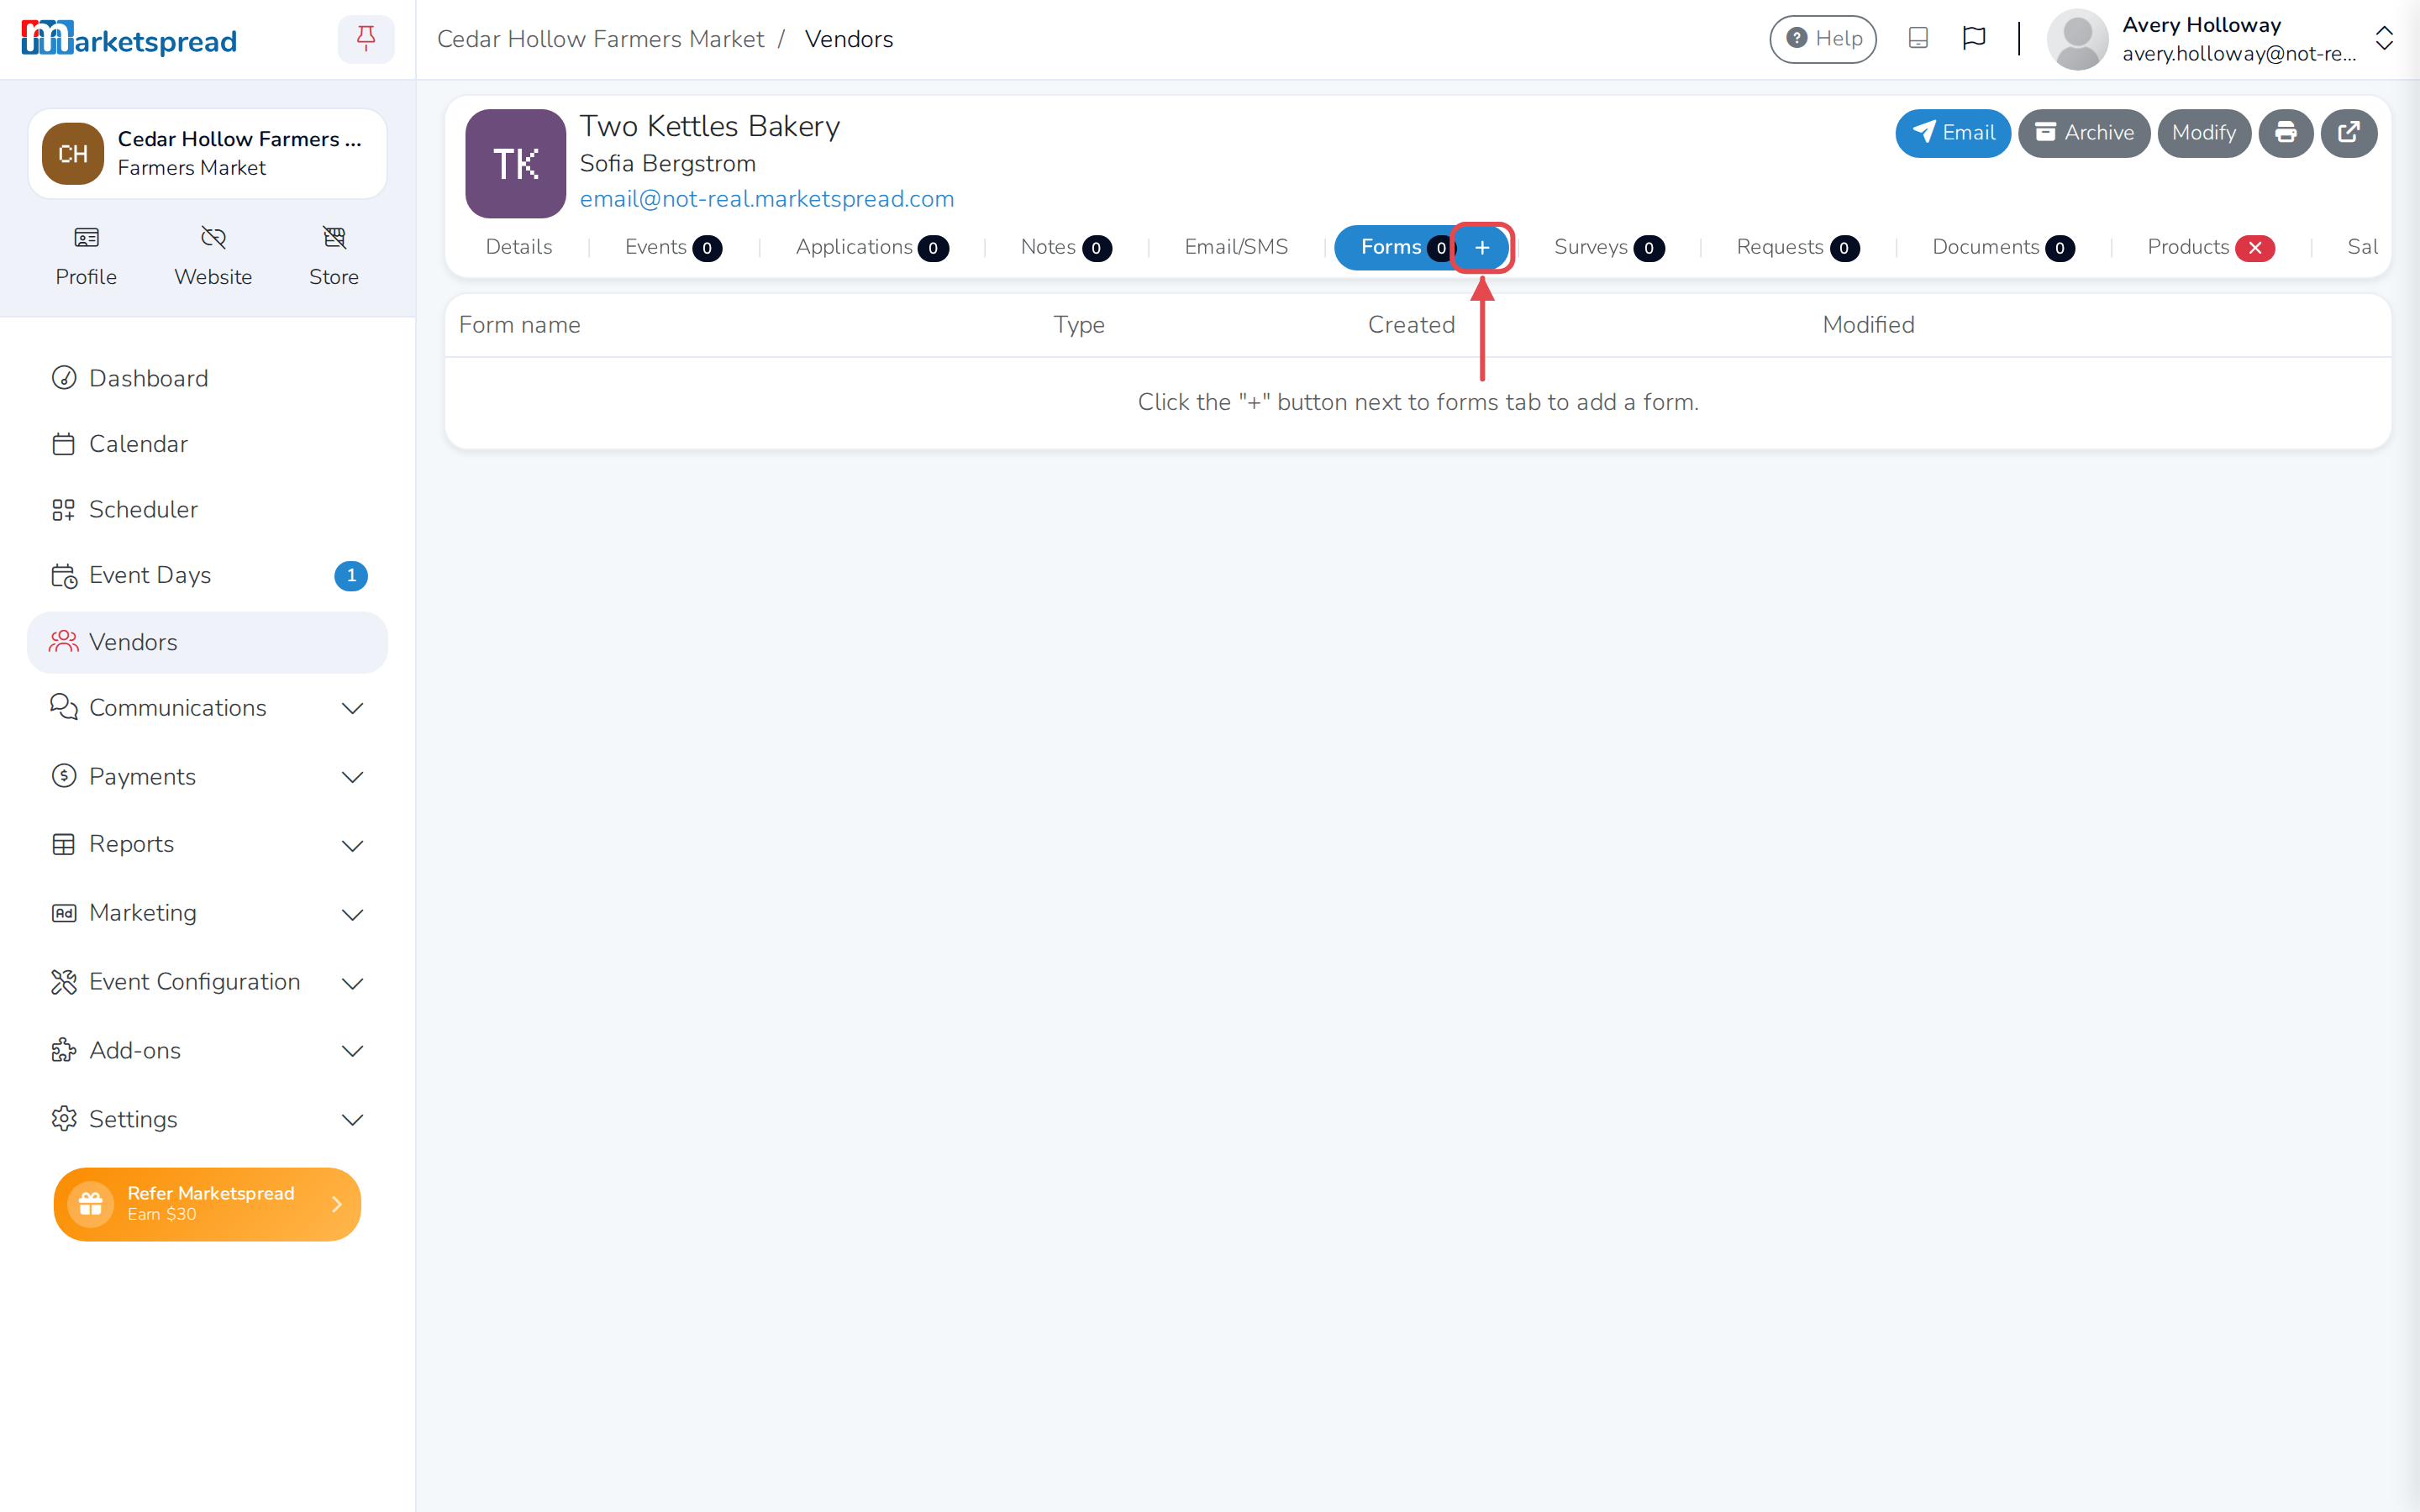
Open the vendor from your Vendors list, then click its Forms tab.
On an event day
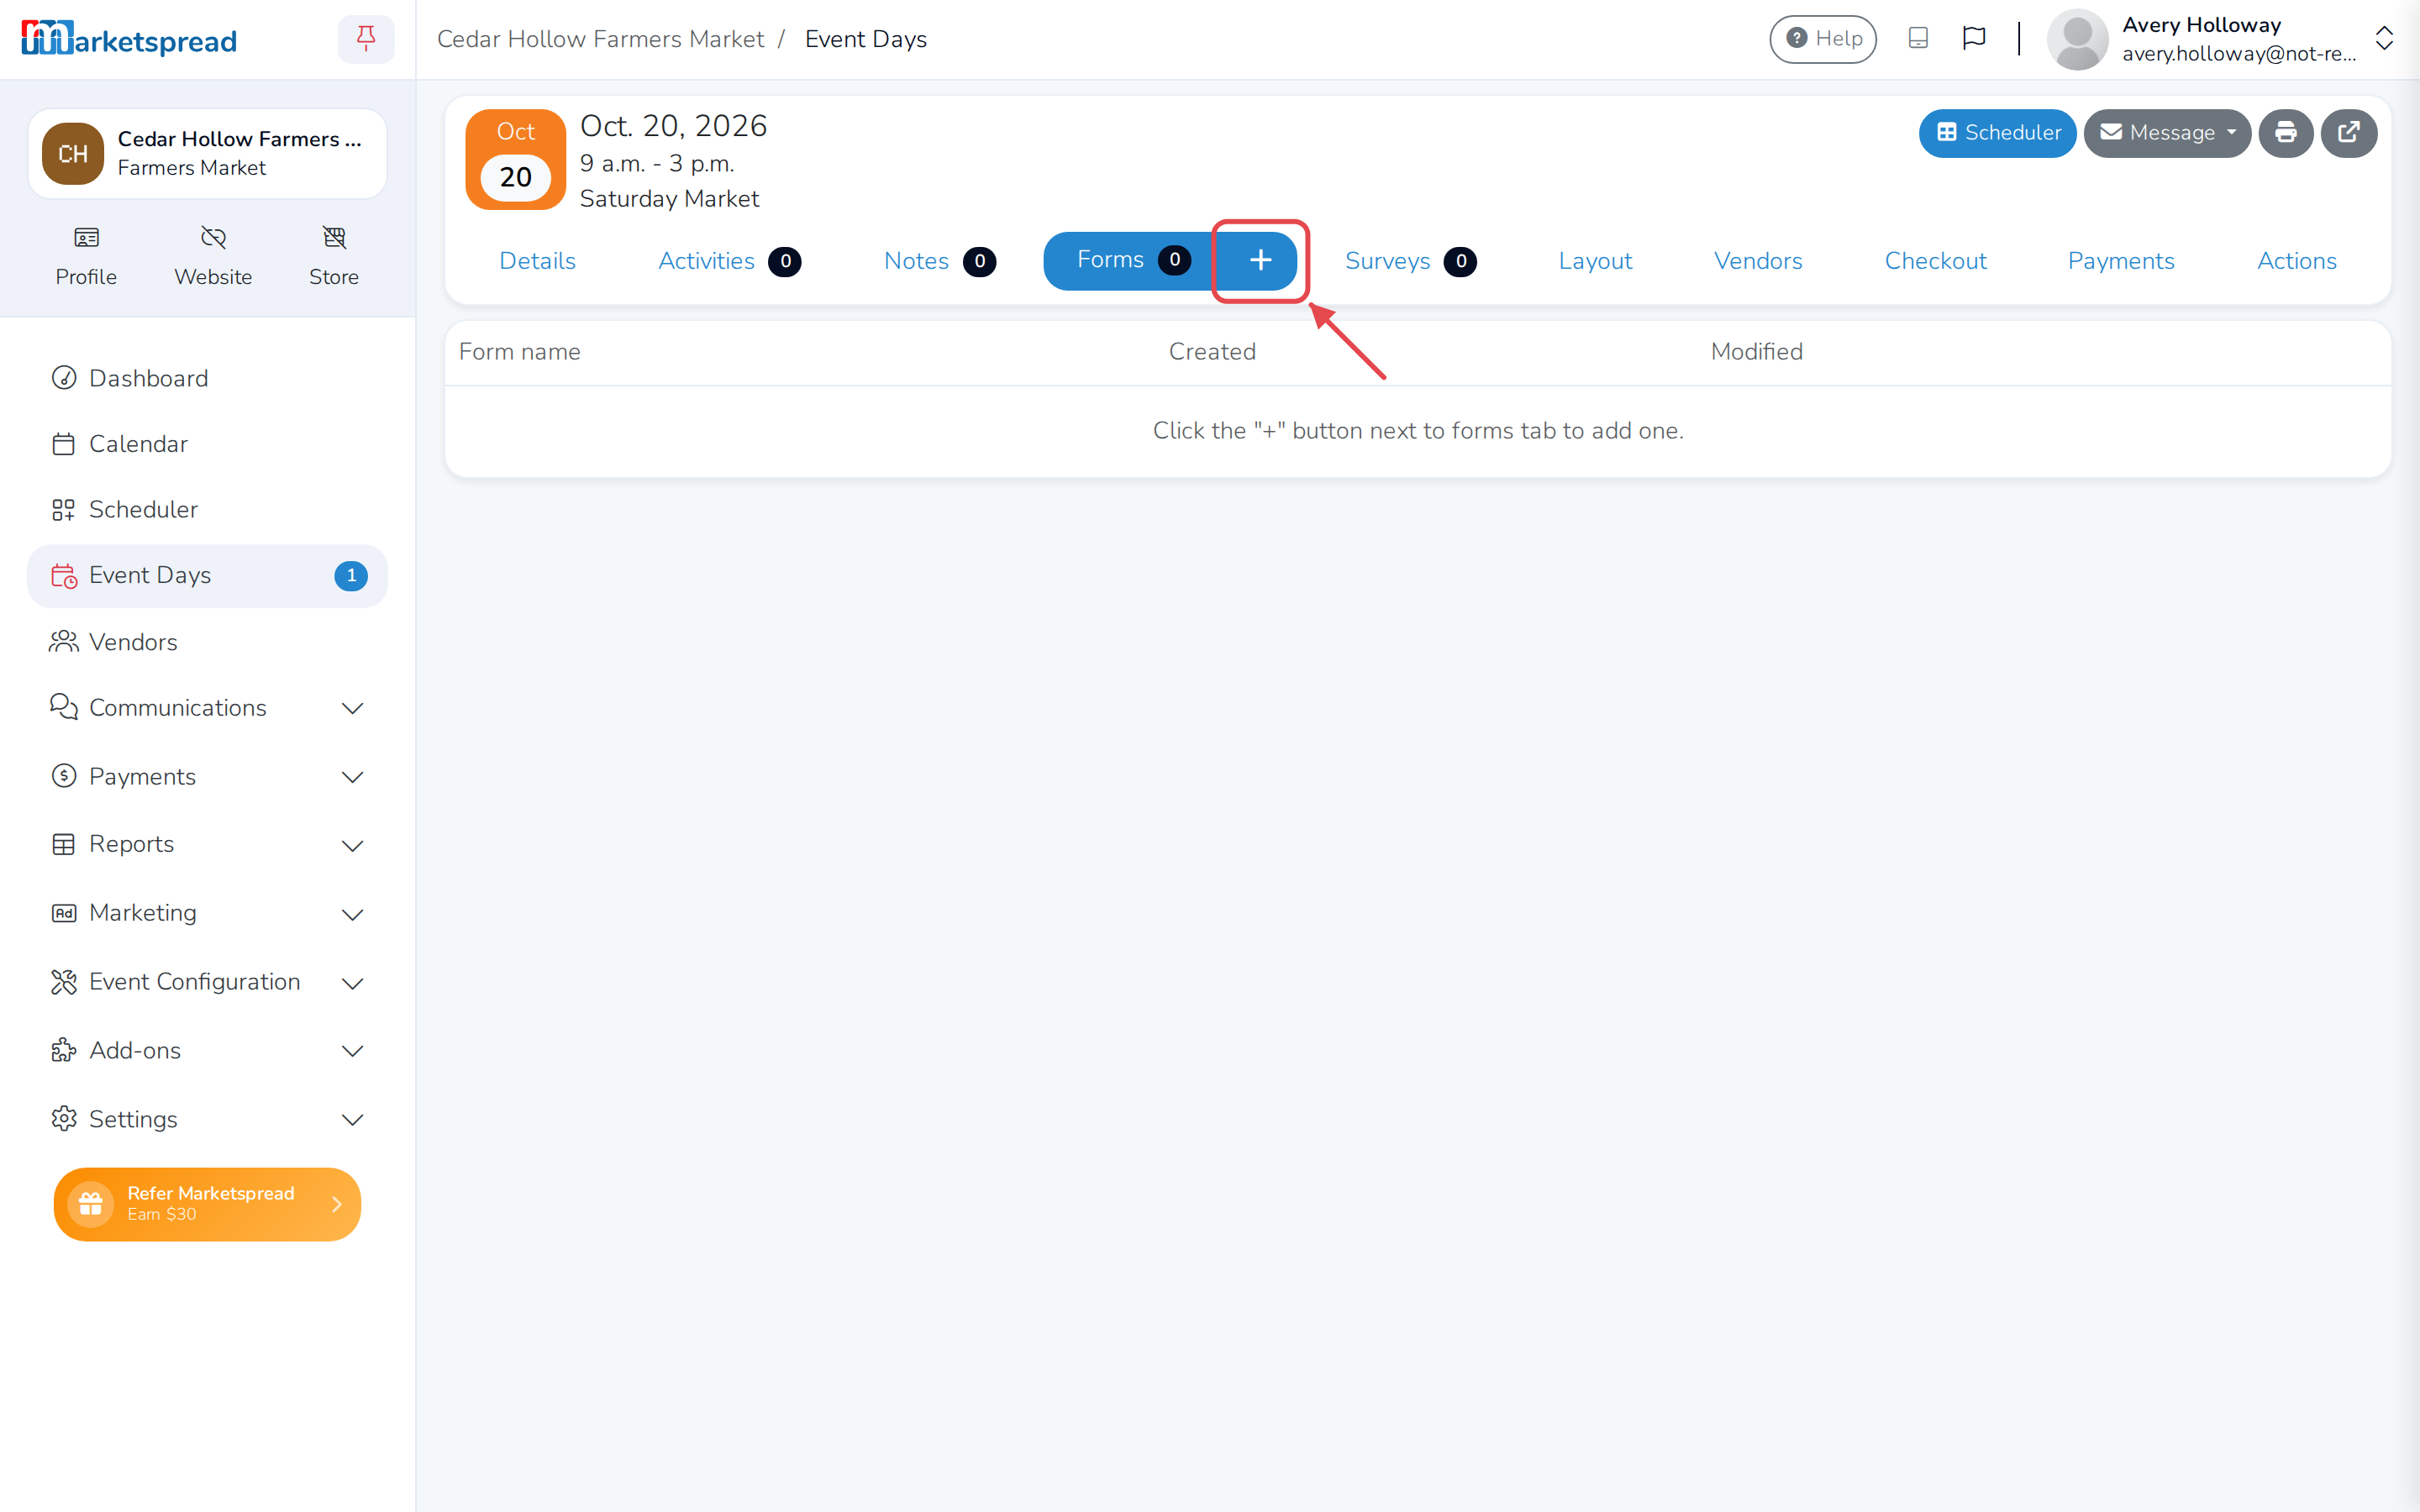
Open the event day, then click its Forms tab.
Add an entry
Important
Adding an entry needs Market Premium. If your market isn't on Market Premium, the + button asks you to upgrade instead of opening a form.
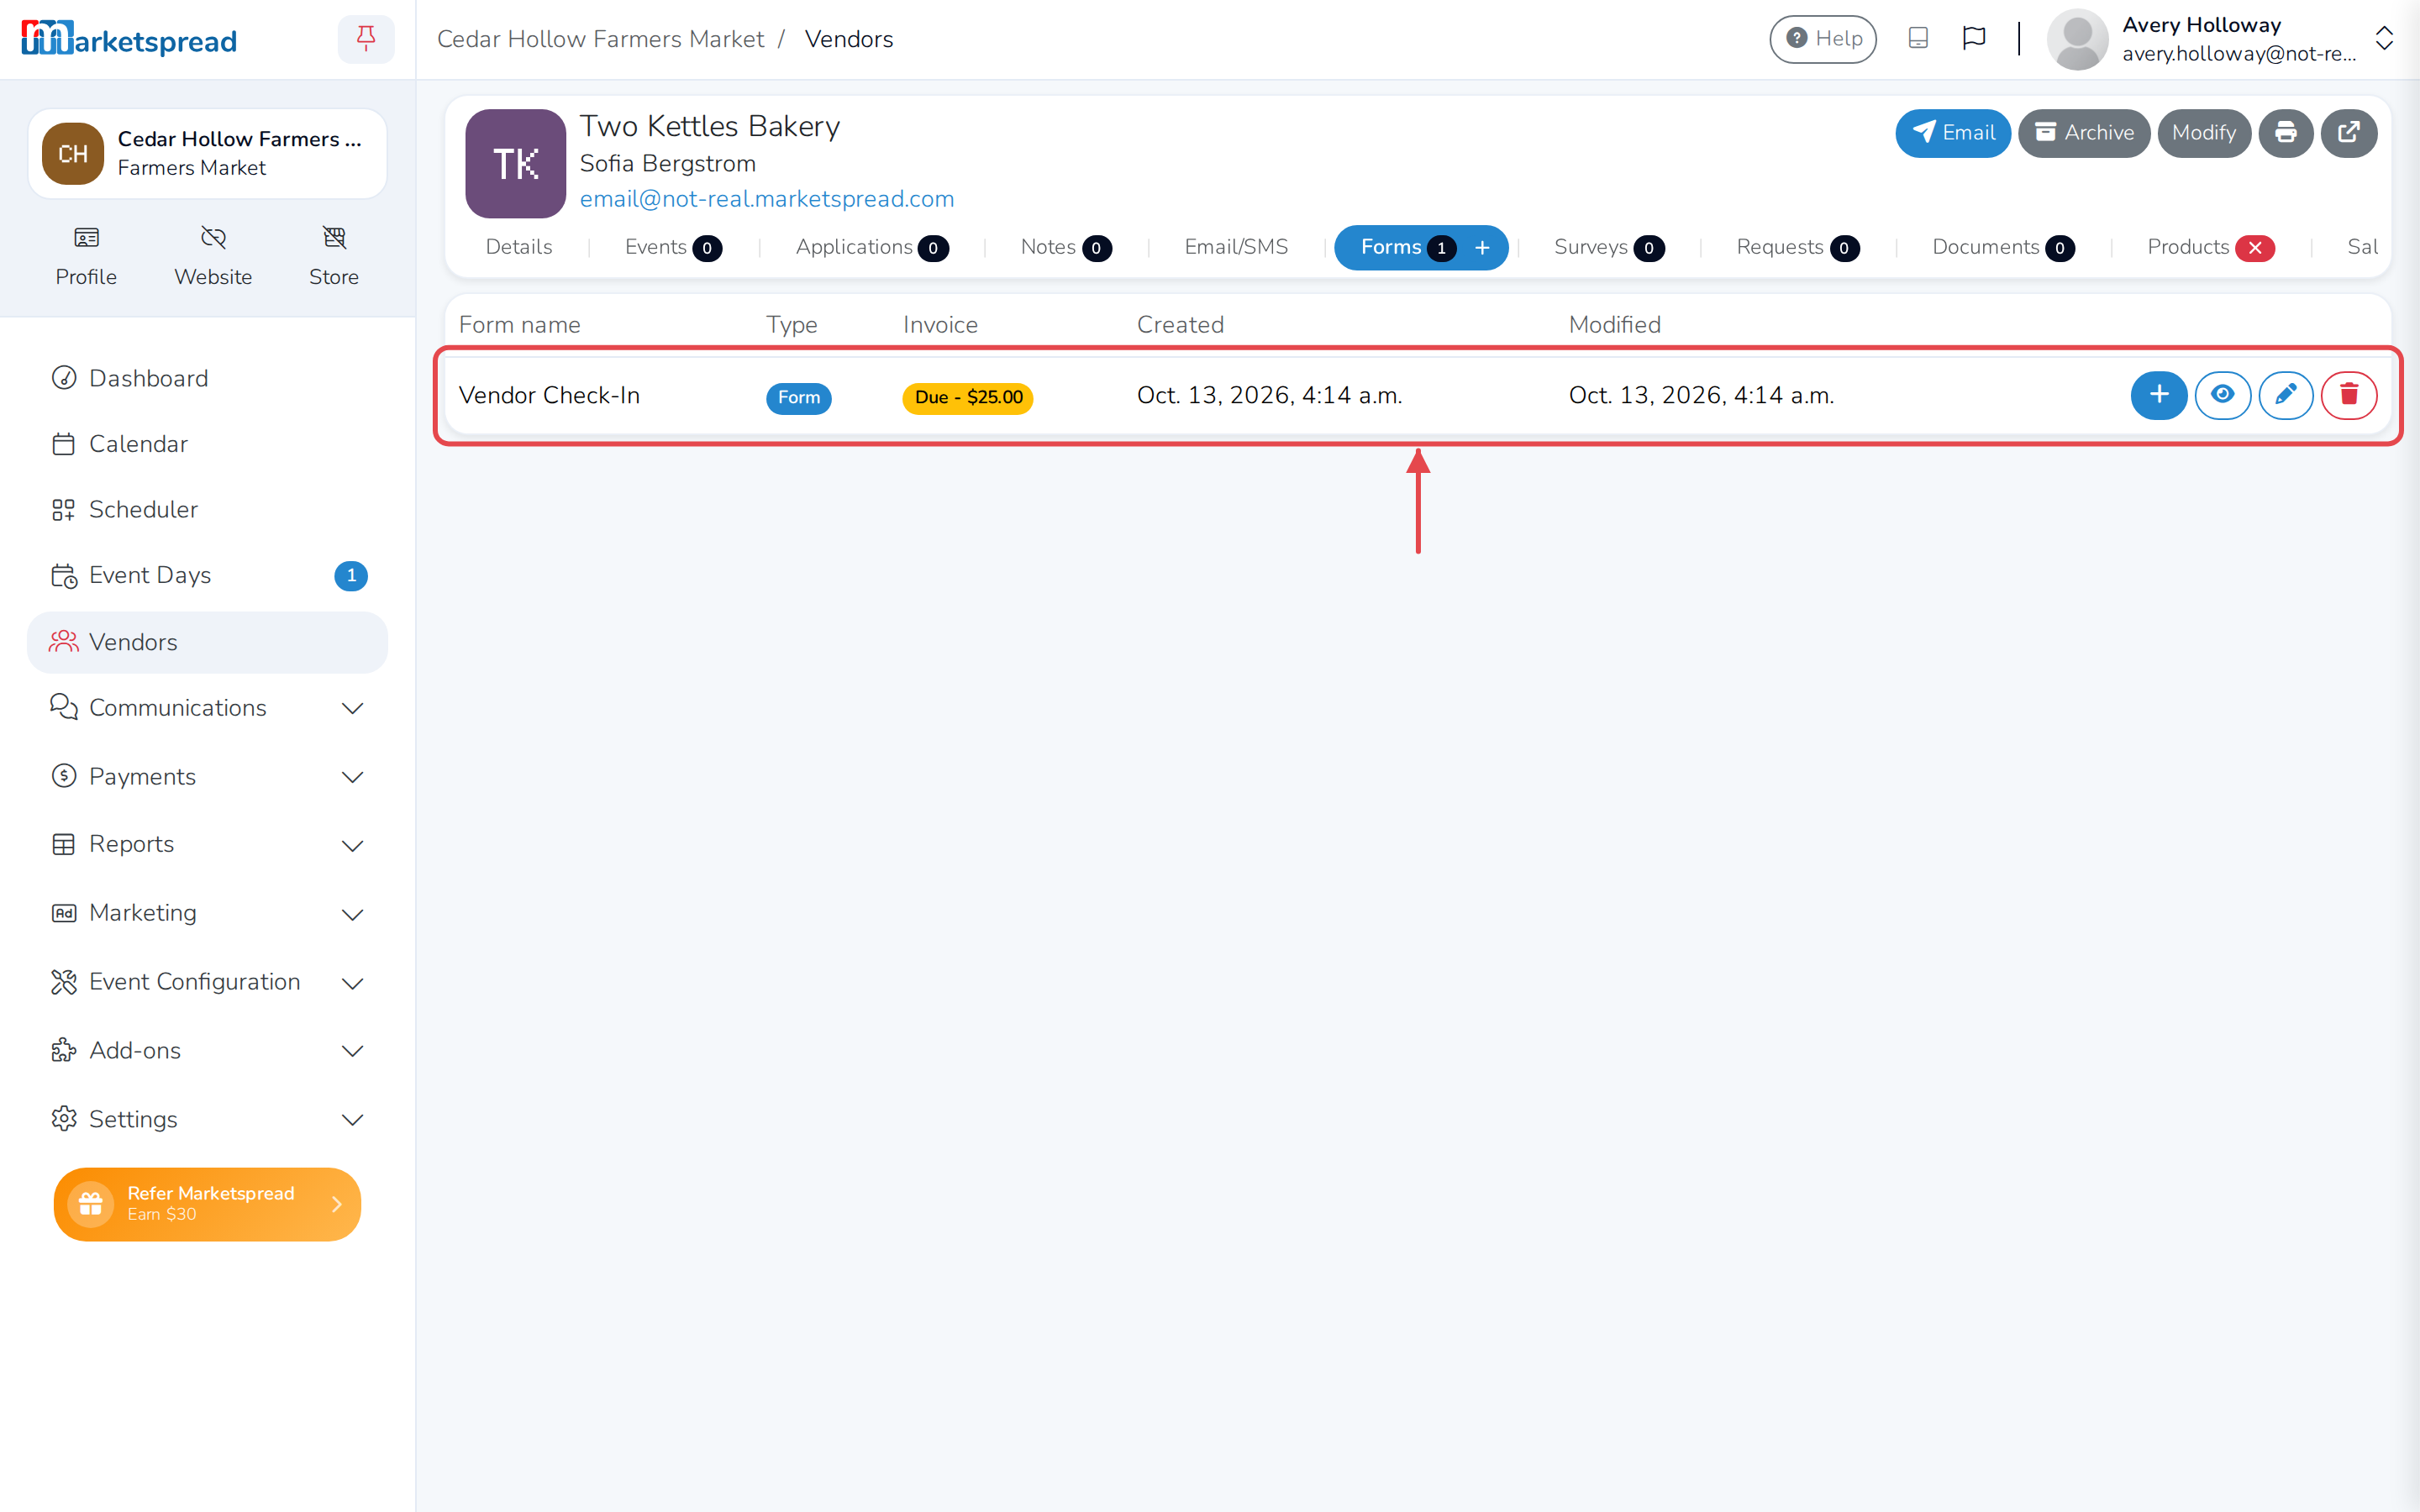
- Click the + button next to the Forms tab.
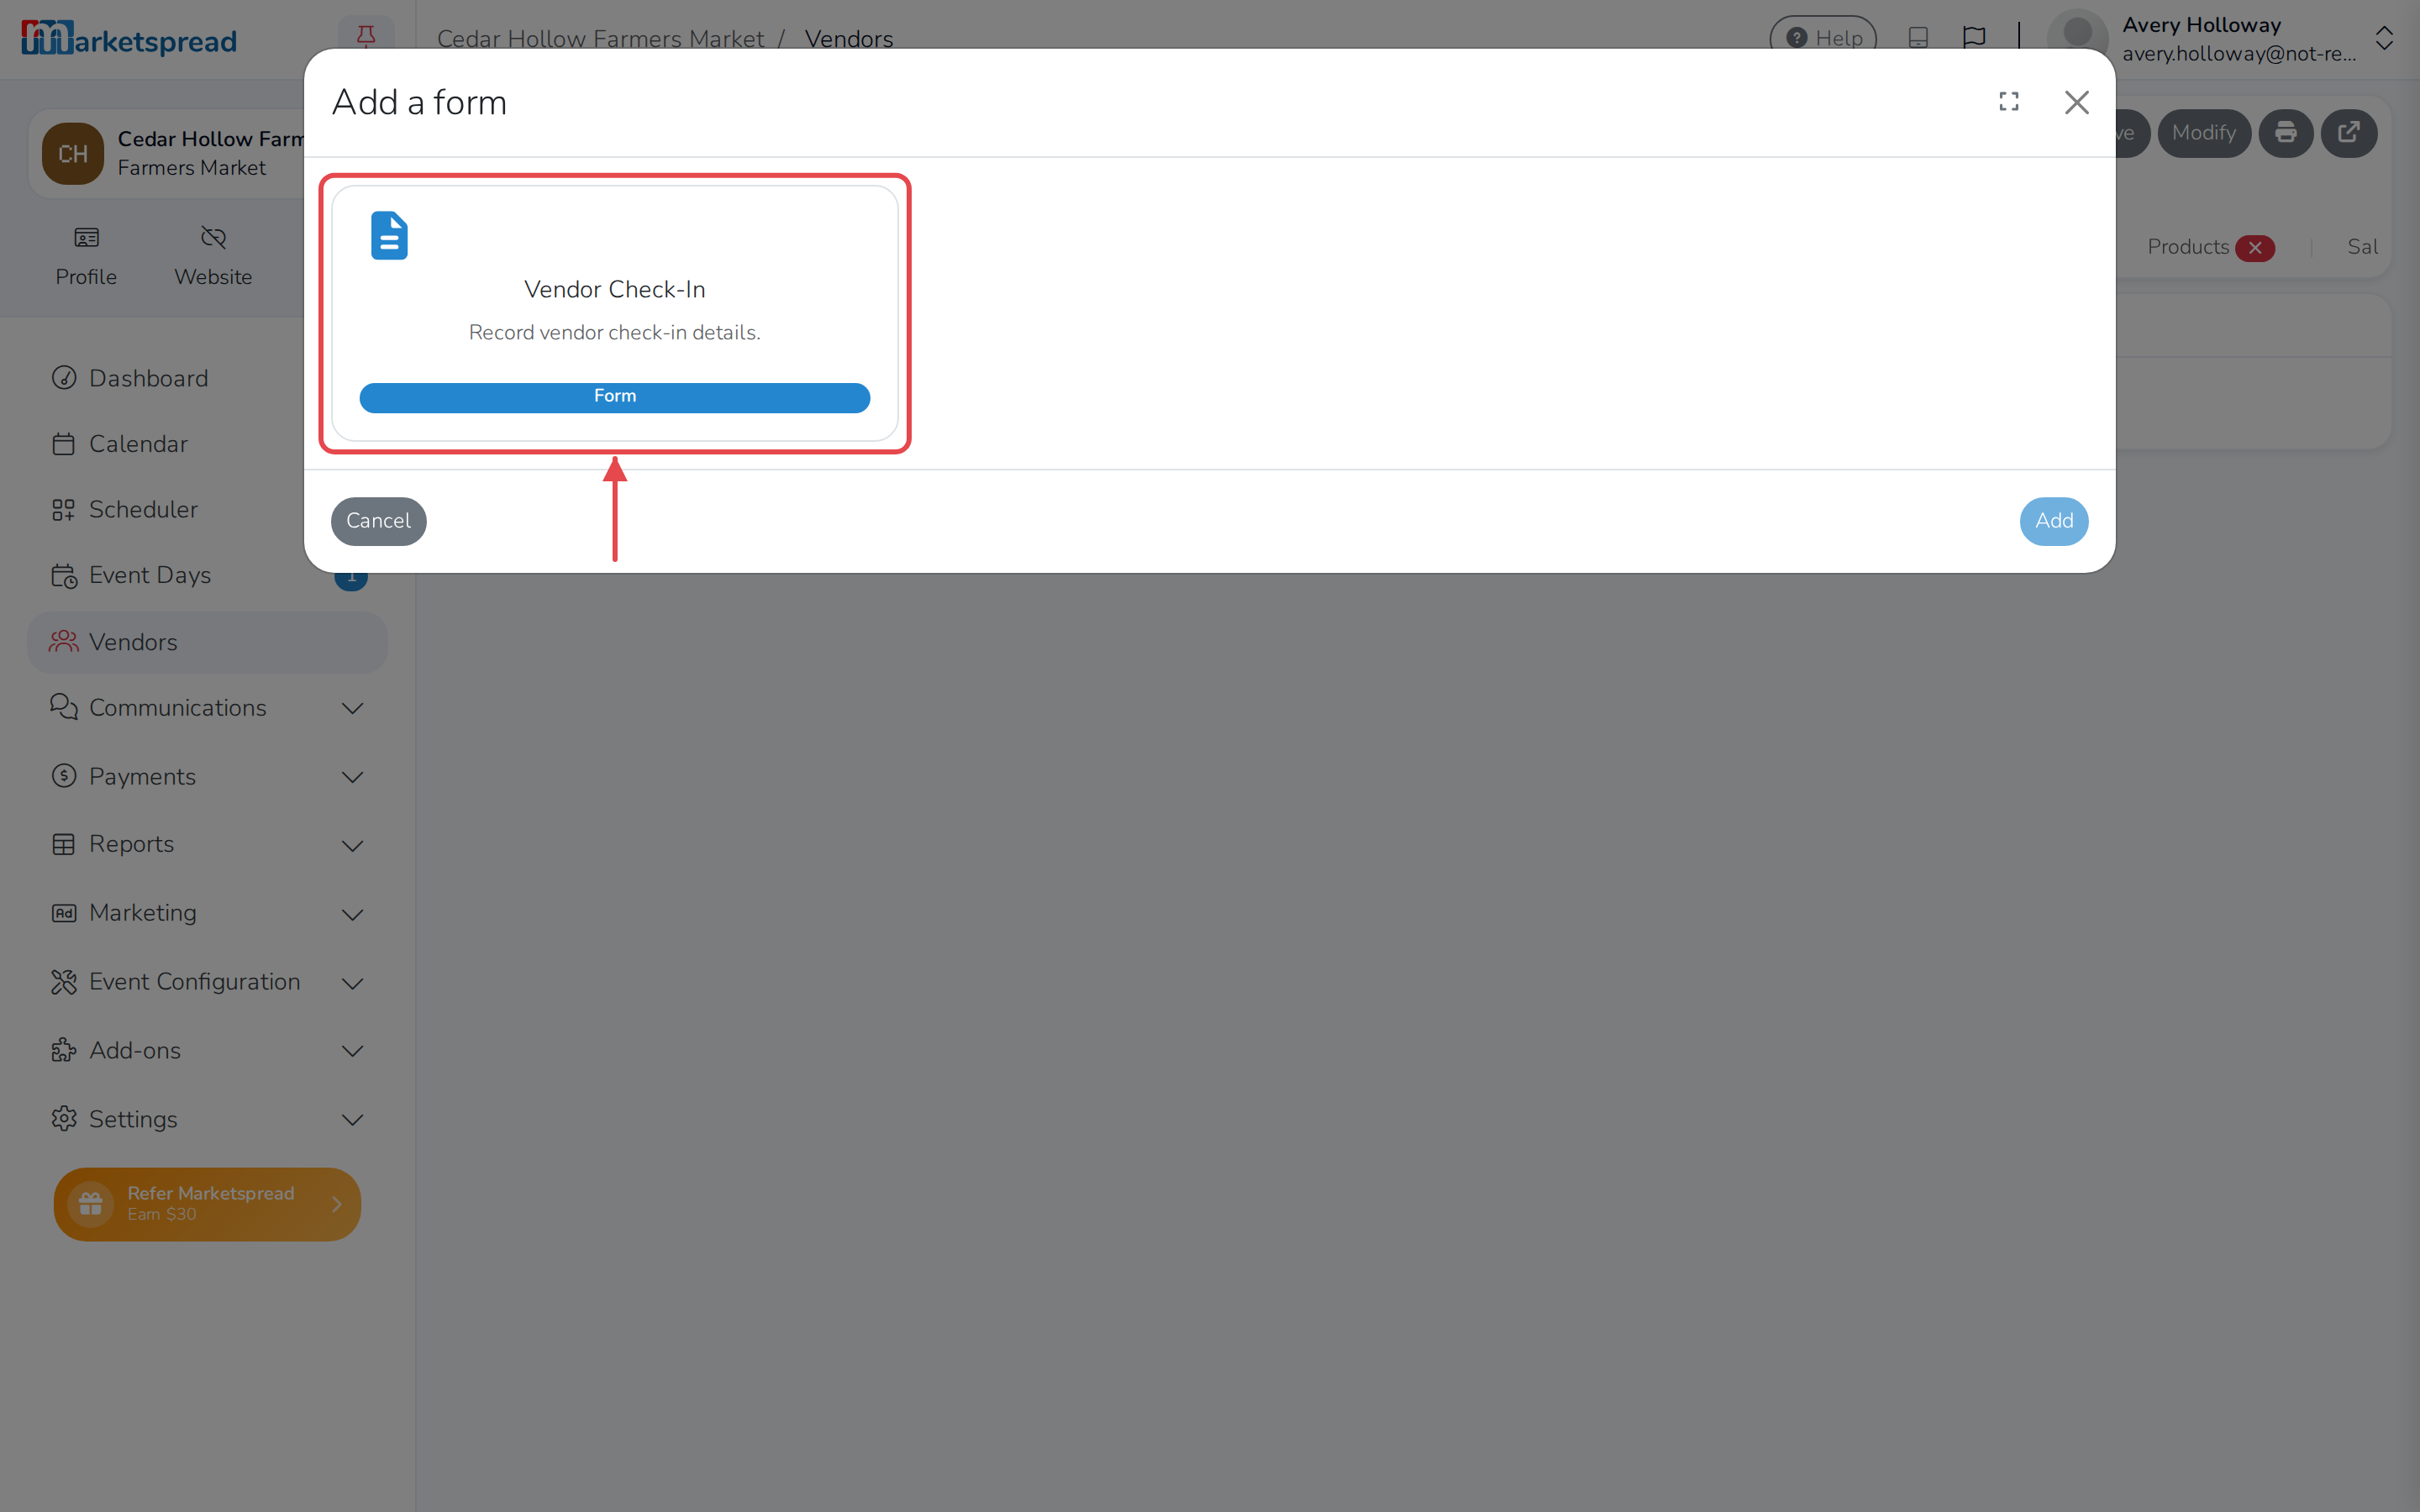
- Click a form from the list of published forms.
- Fill in the form and click Add.
The entry appears in the list under the Forms tab. There's no limit on how many entries you can add.
Notice the Invoice column — an entry from a form with an Invoice Creator field automatically gets an invoice.
View a form entry
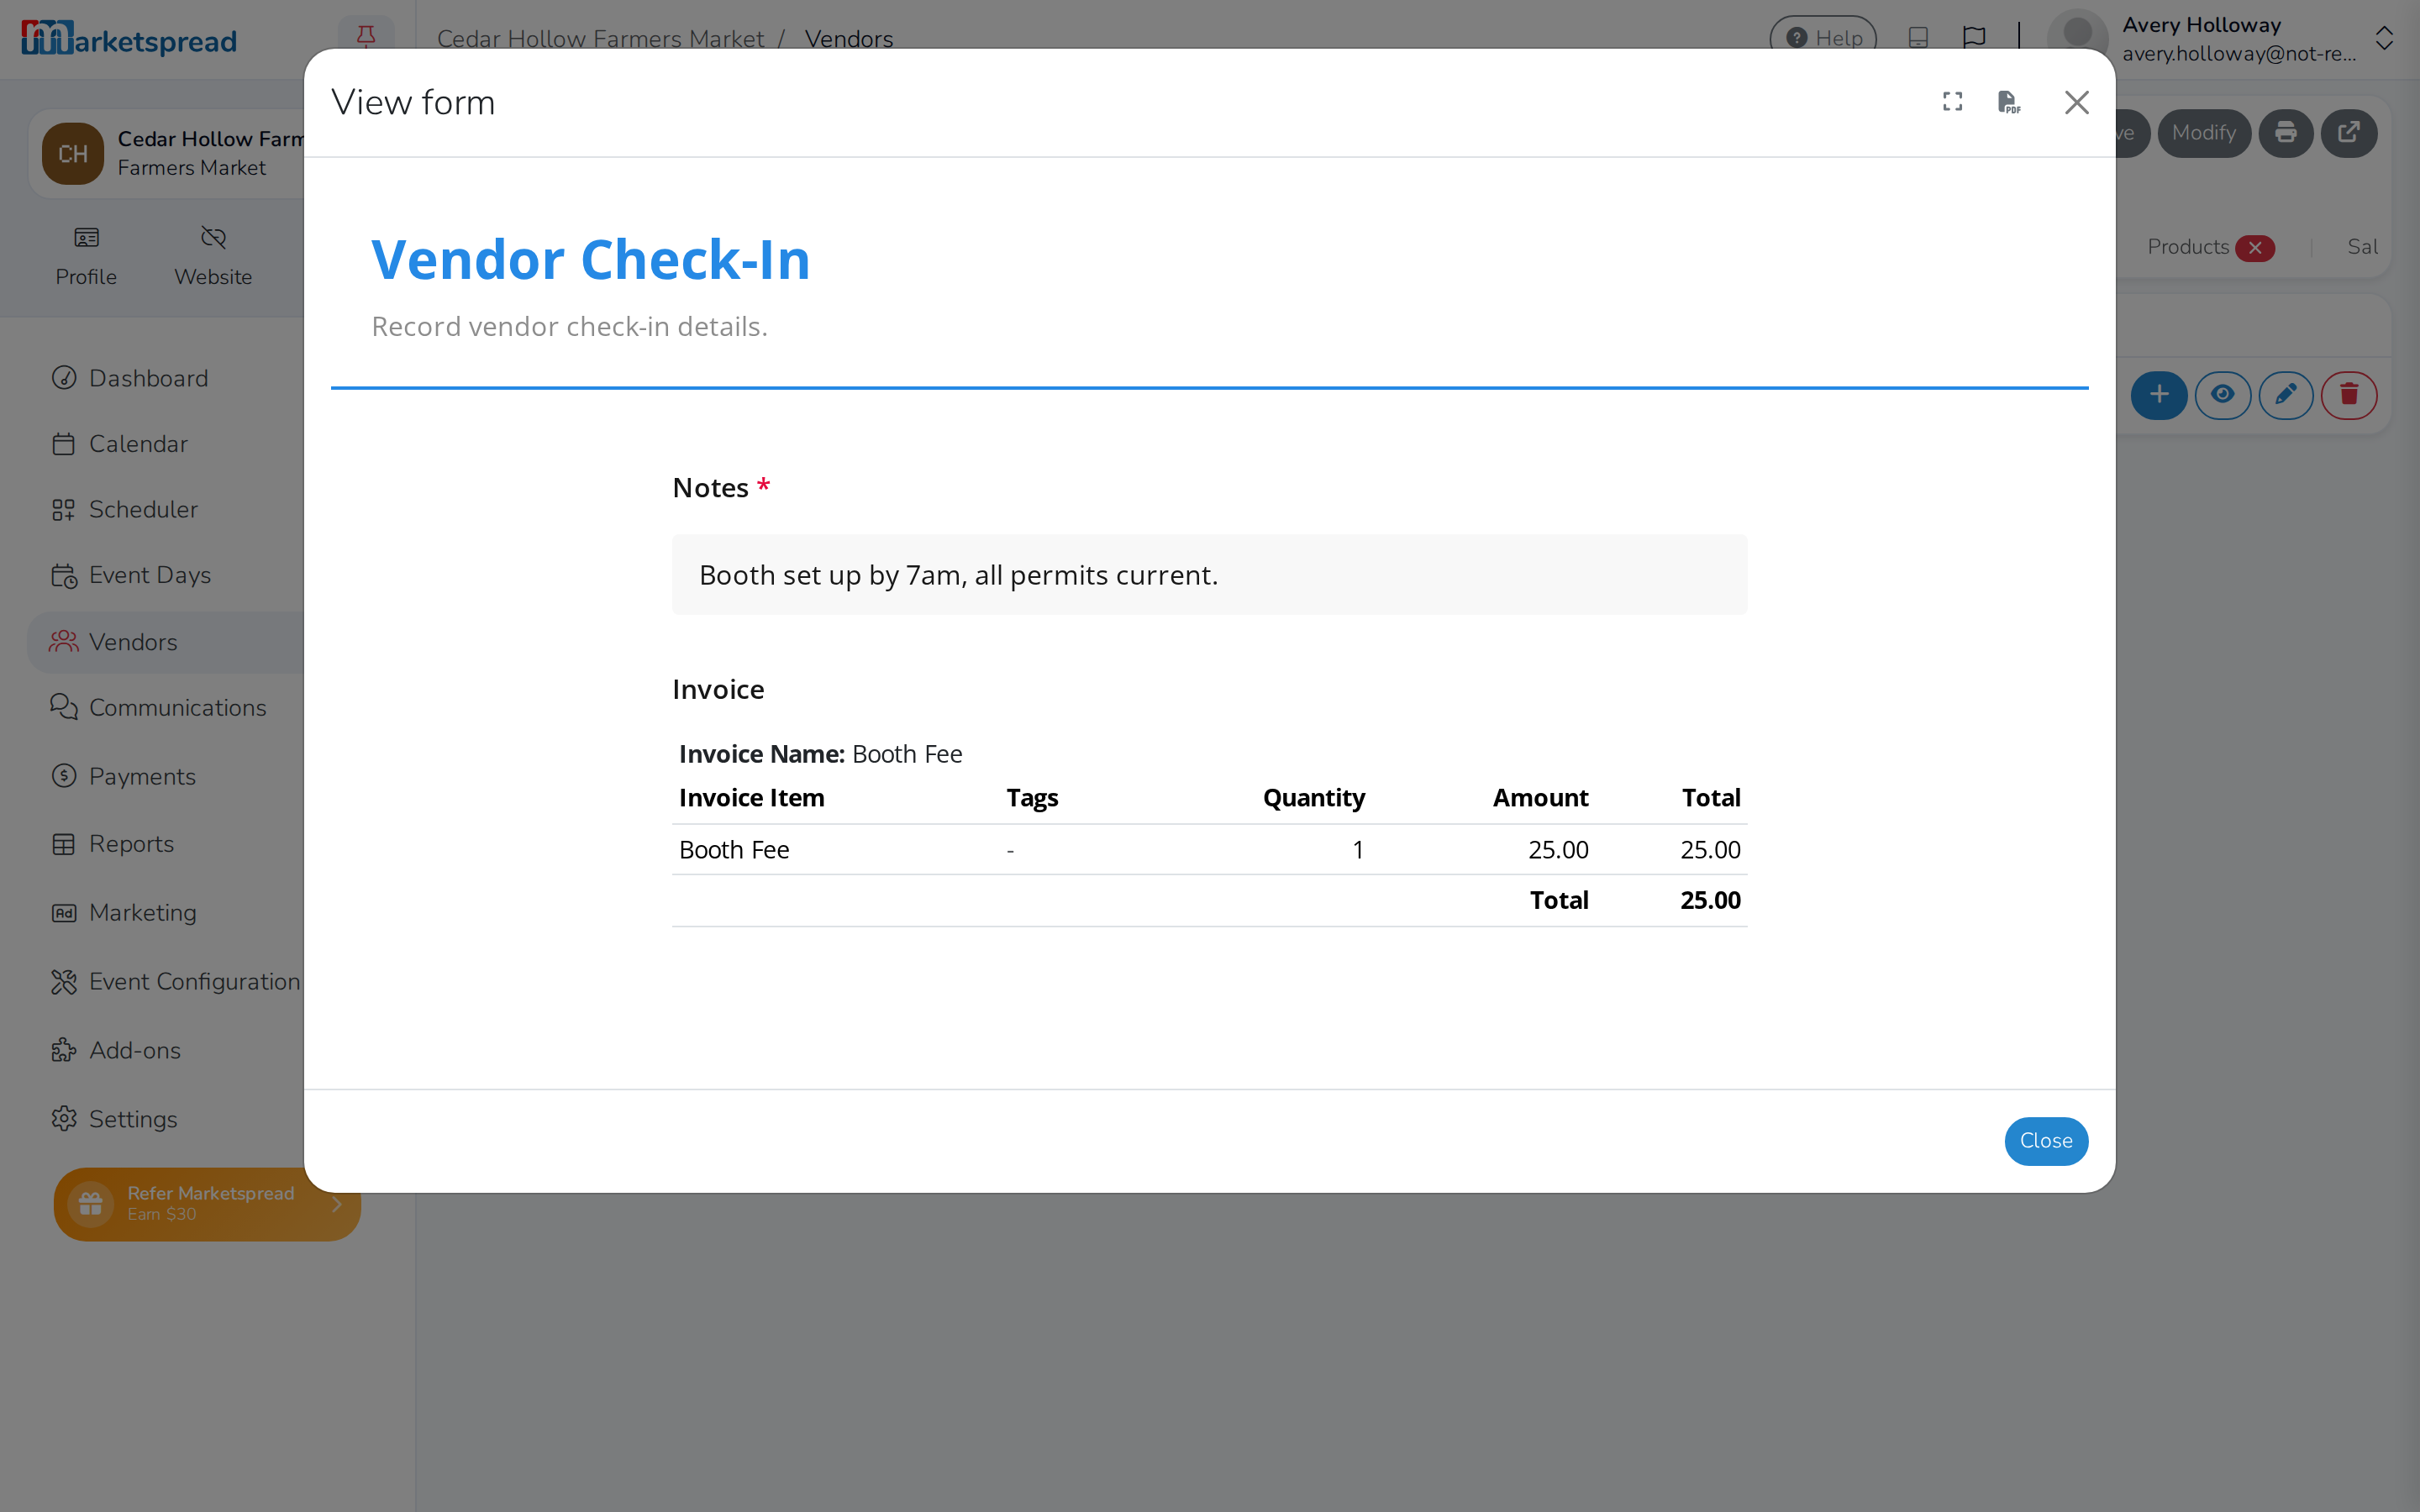
Click the eye icon next to any entry to view its submitted data.
Report on form data
To see form data across every submission, use the built-in data reports:
- Vendor Form Results — every vendor-linked form submission
- Market Event Form Results — every event day-linked form submission
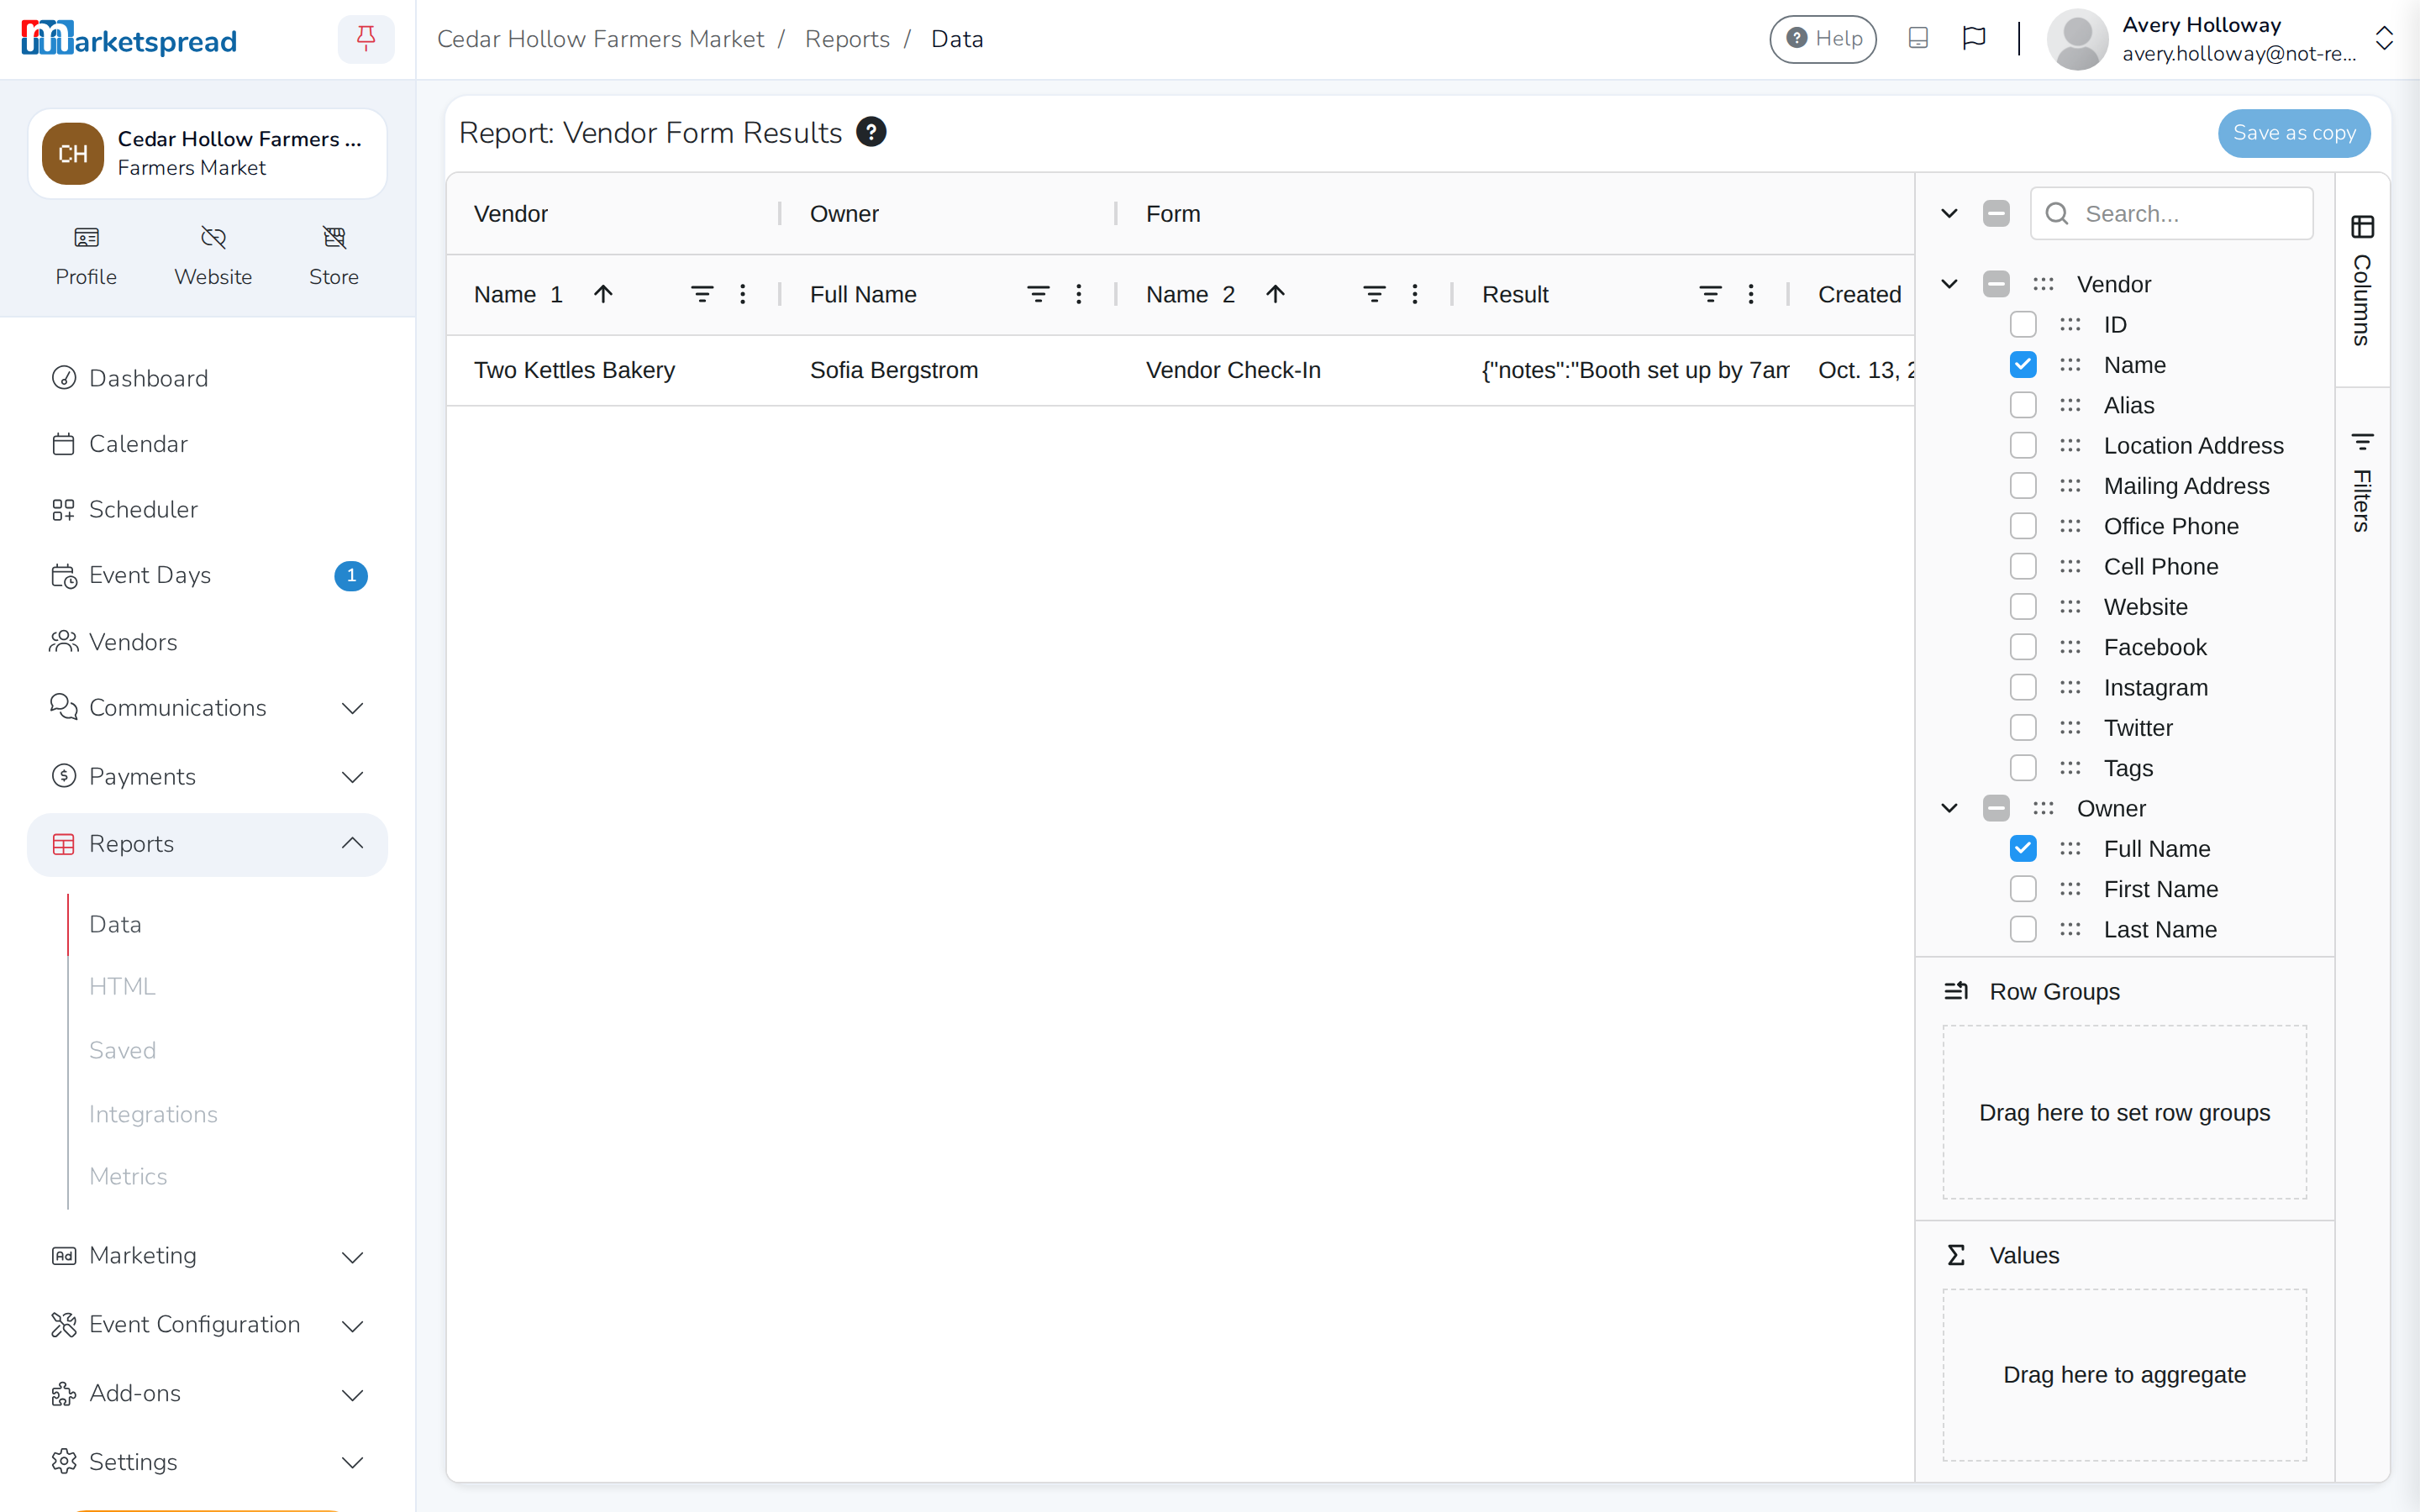
These reports support filtering, sorting, grouping, and export.