


A reusable line item saves a charge's name and price, so you can drop it onto
any invoice without typing it out again. Use it for a cleaning fee, a
returned check fee — anything you charge more than once. Set one up in
Settings → Invoicing, then use it on any invoice you create.
From here you can:
- Add a reusable line item
- Add a saved item to an invoice
- Save a line item for reuse while you're building an invoice
- Edit or delete a saved item
Add a reusable line item
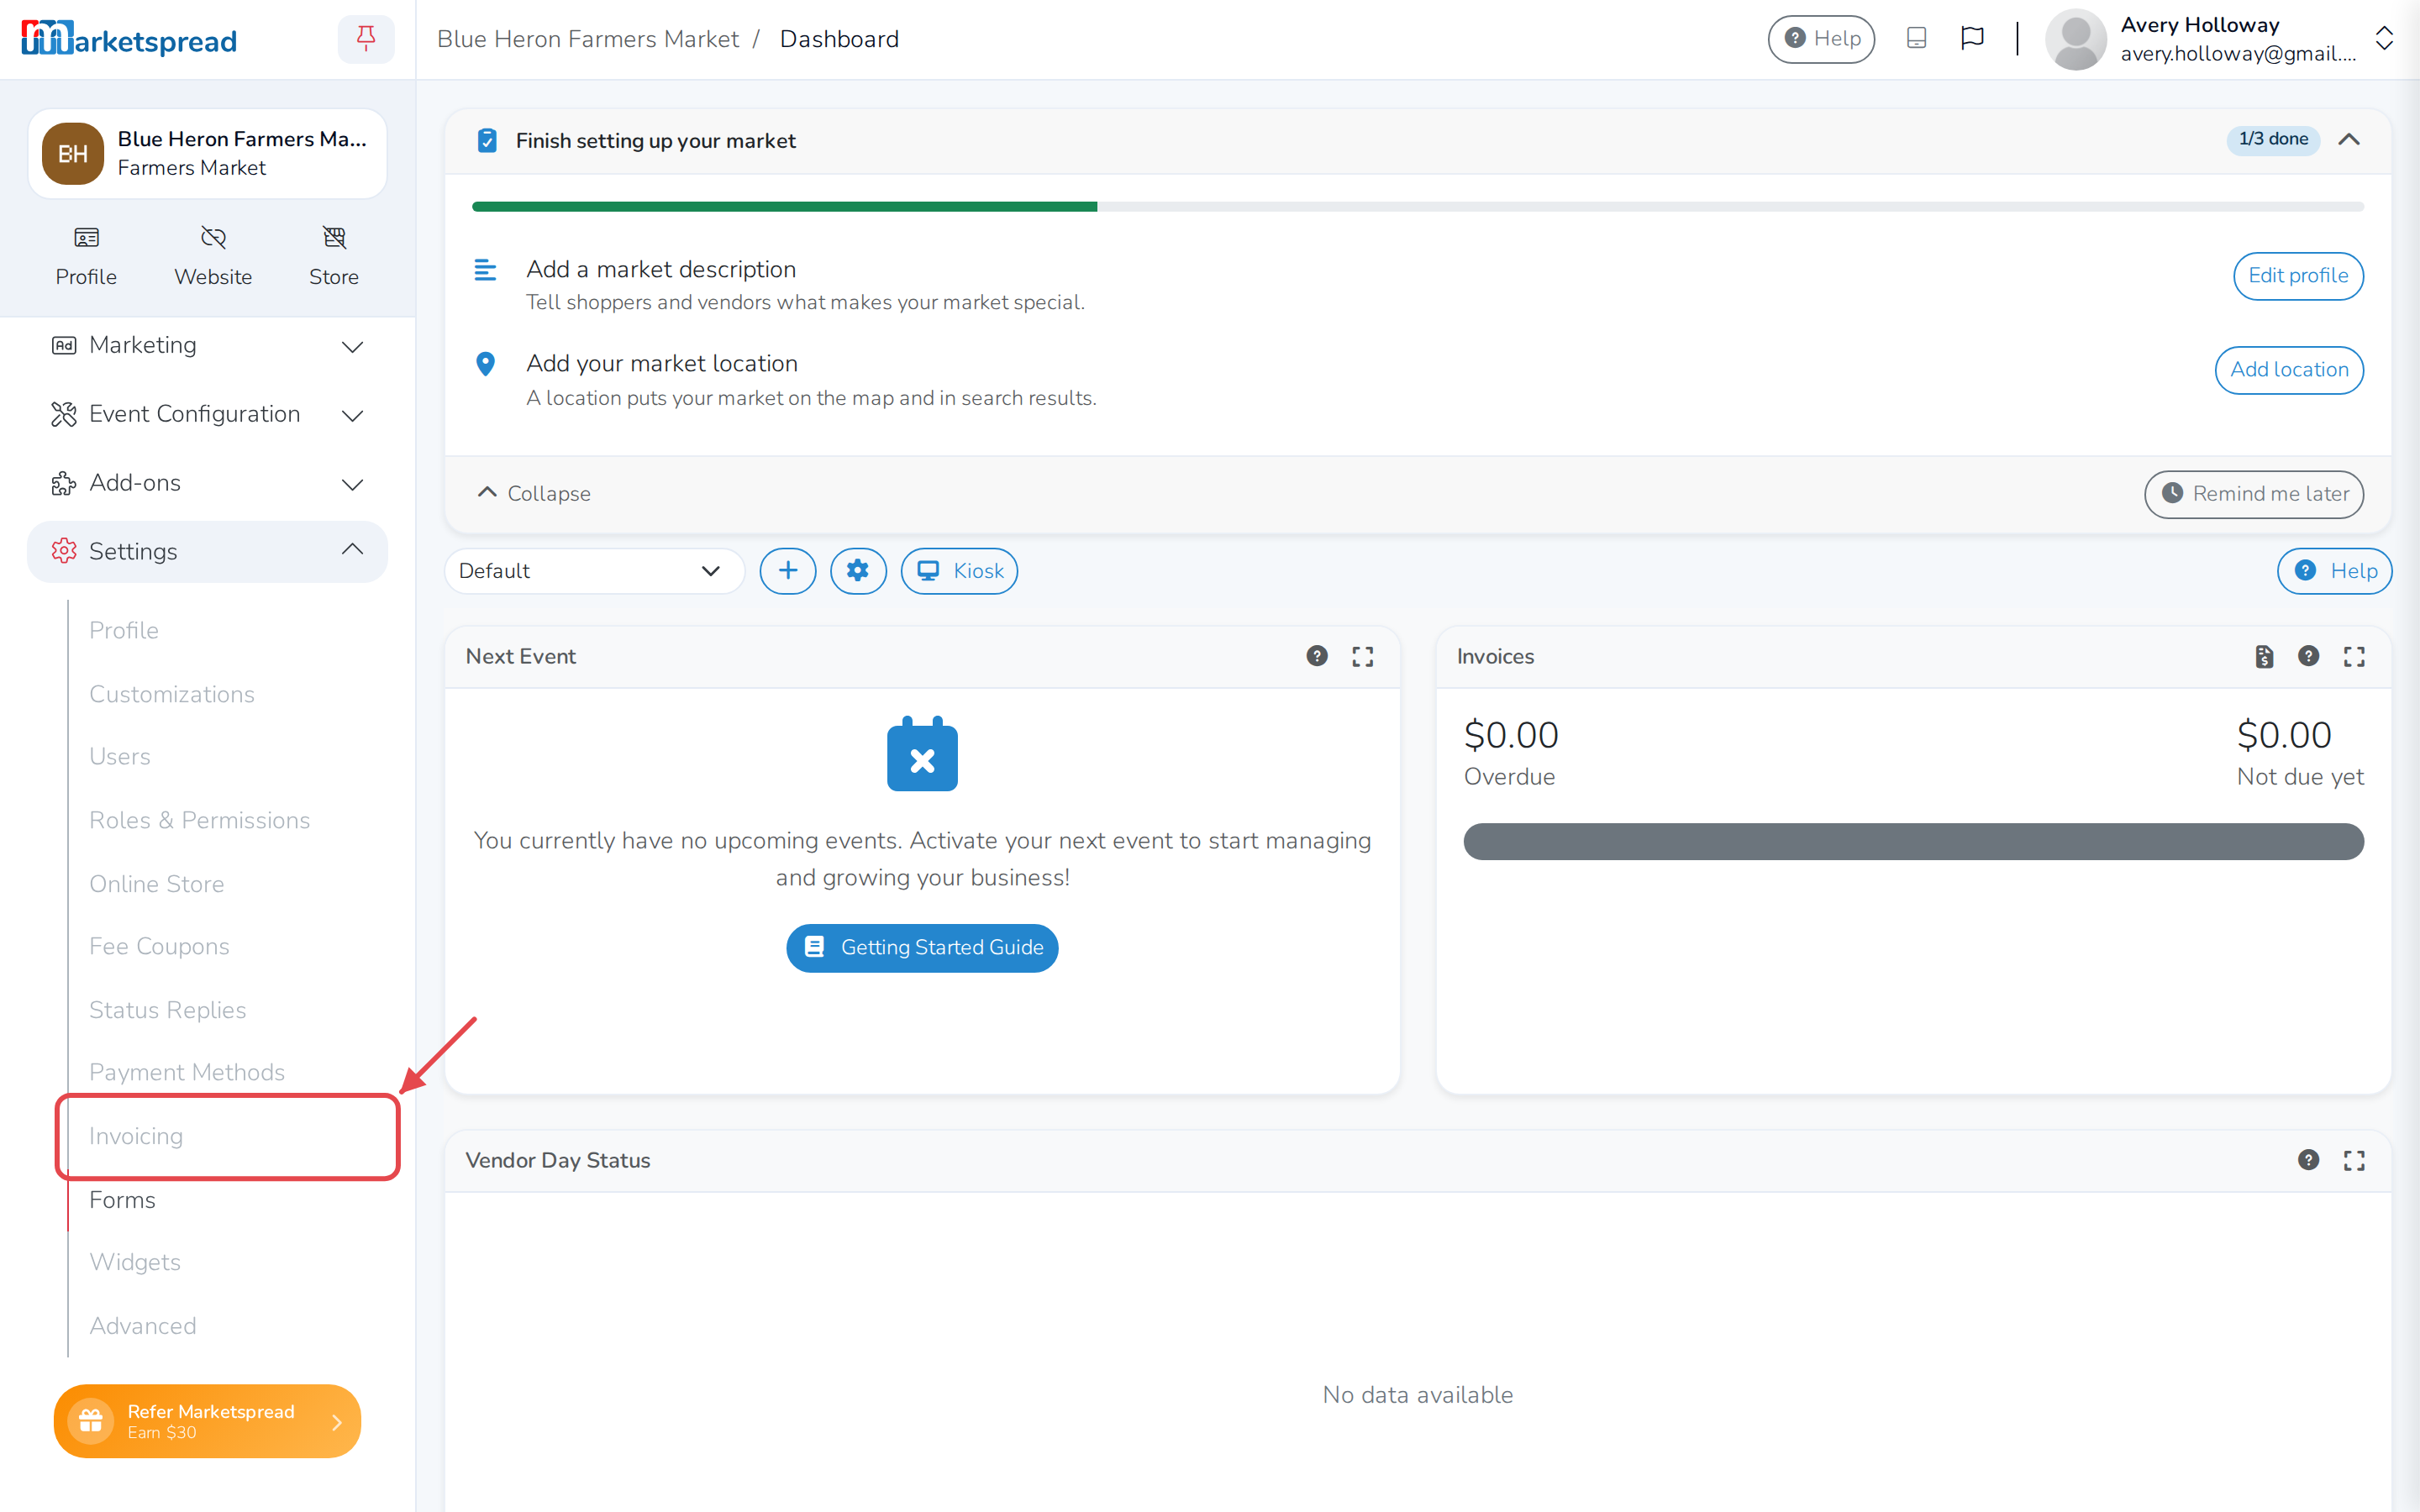
- Open Settings, then Invoicing.
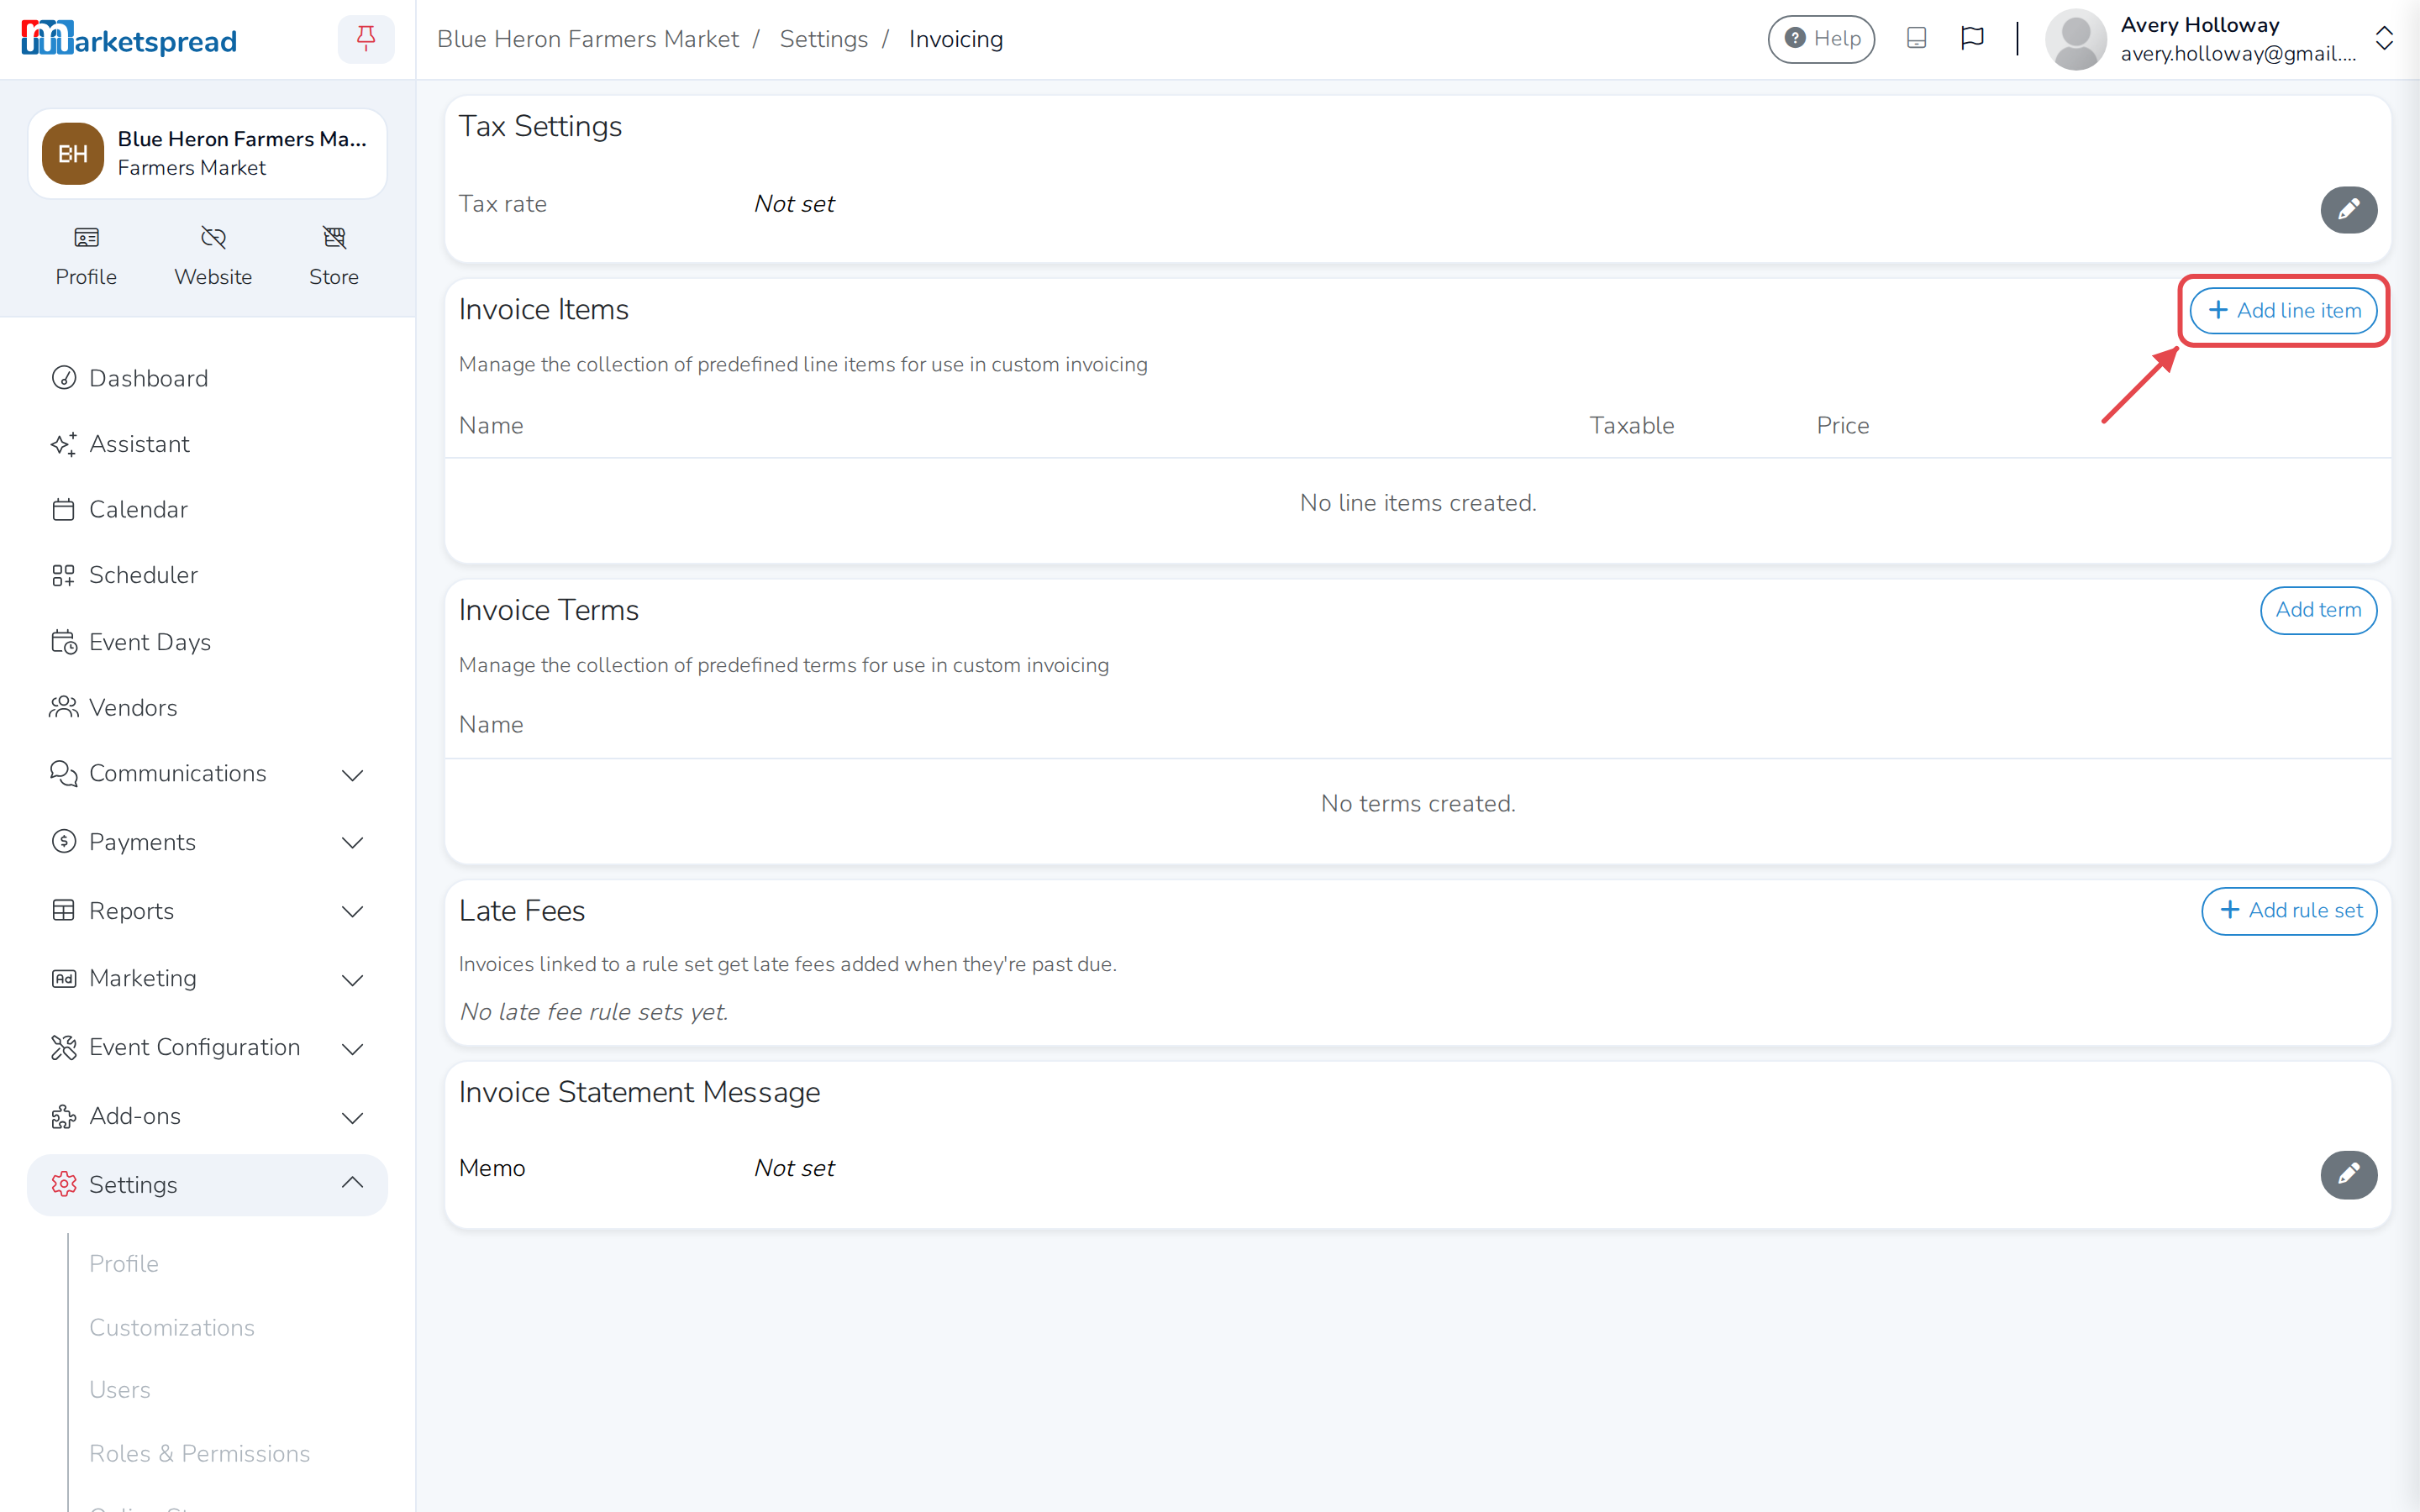
- Find Invoice Items, then click + Add line item.
- Fill in the item's Name.
- Turn on Taxable if you have to charge tax on it.
- Fill in the Price.
- Add any Tags you want it grouped under in your reports.
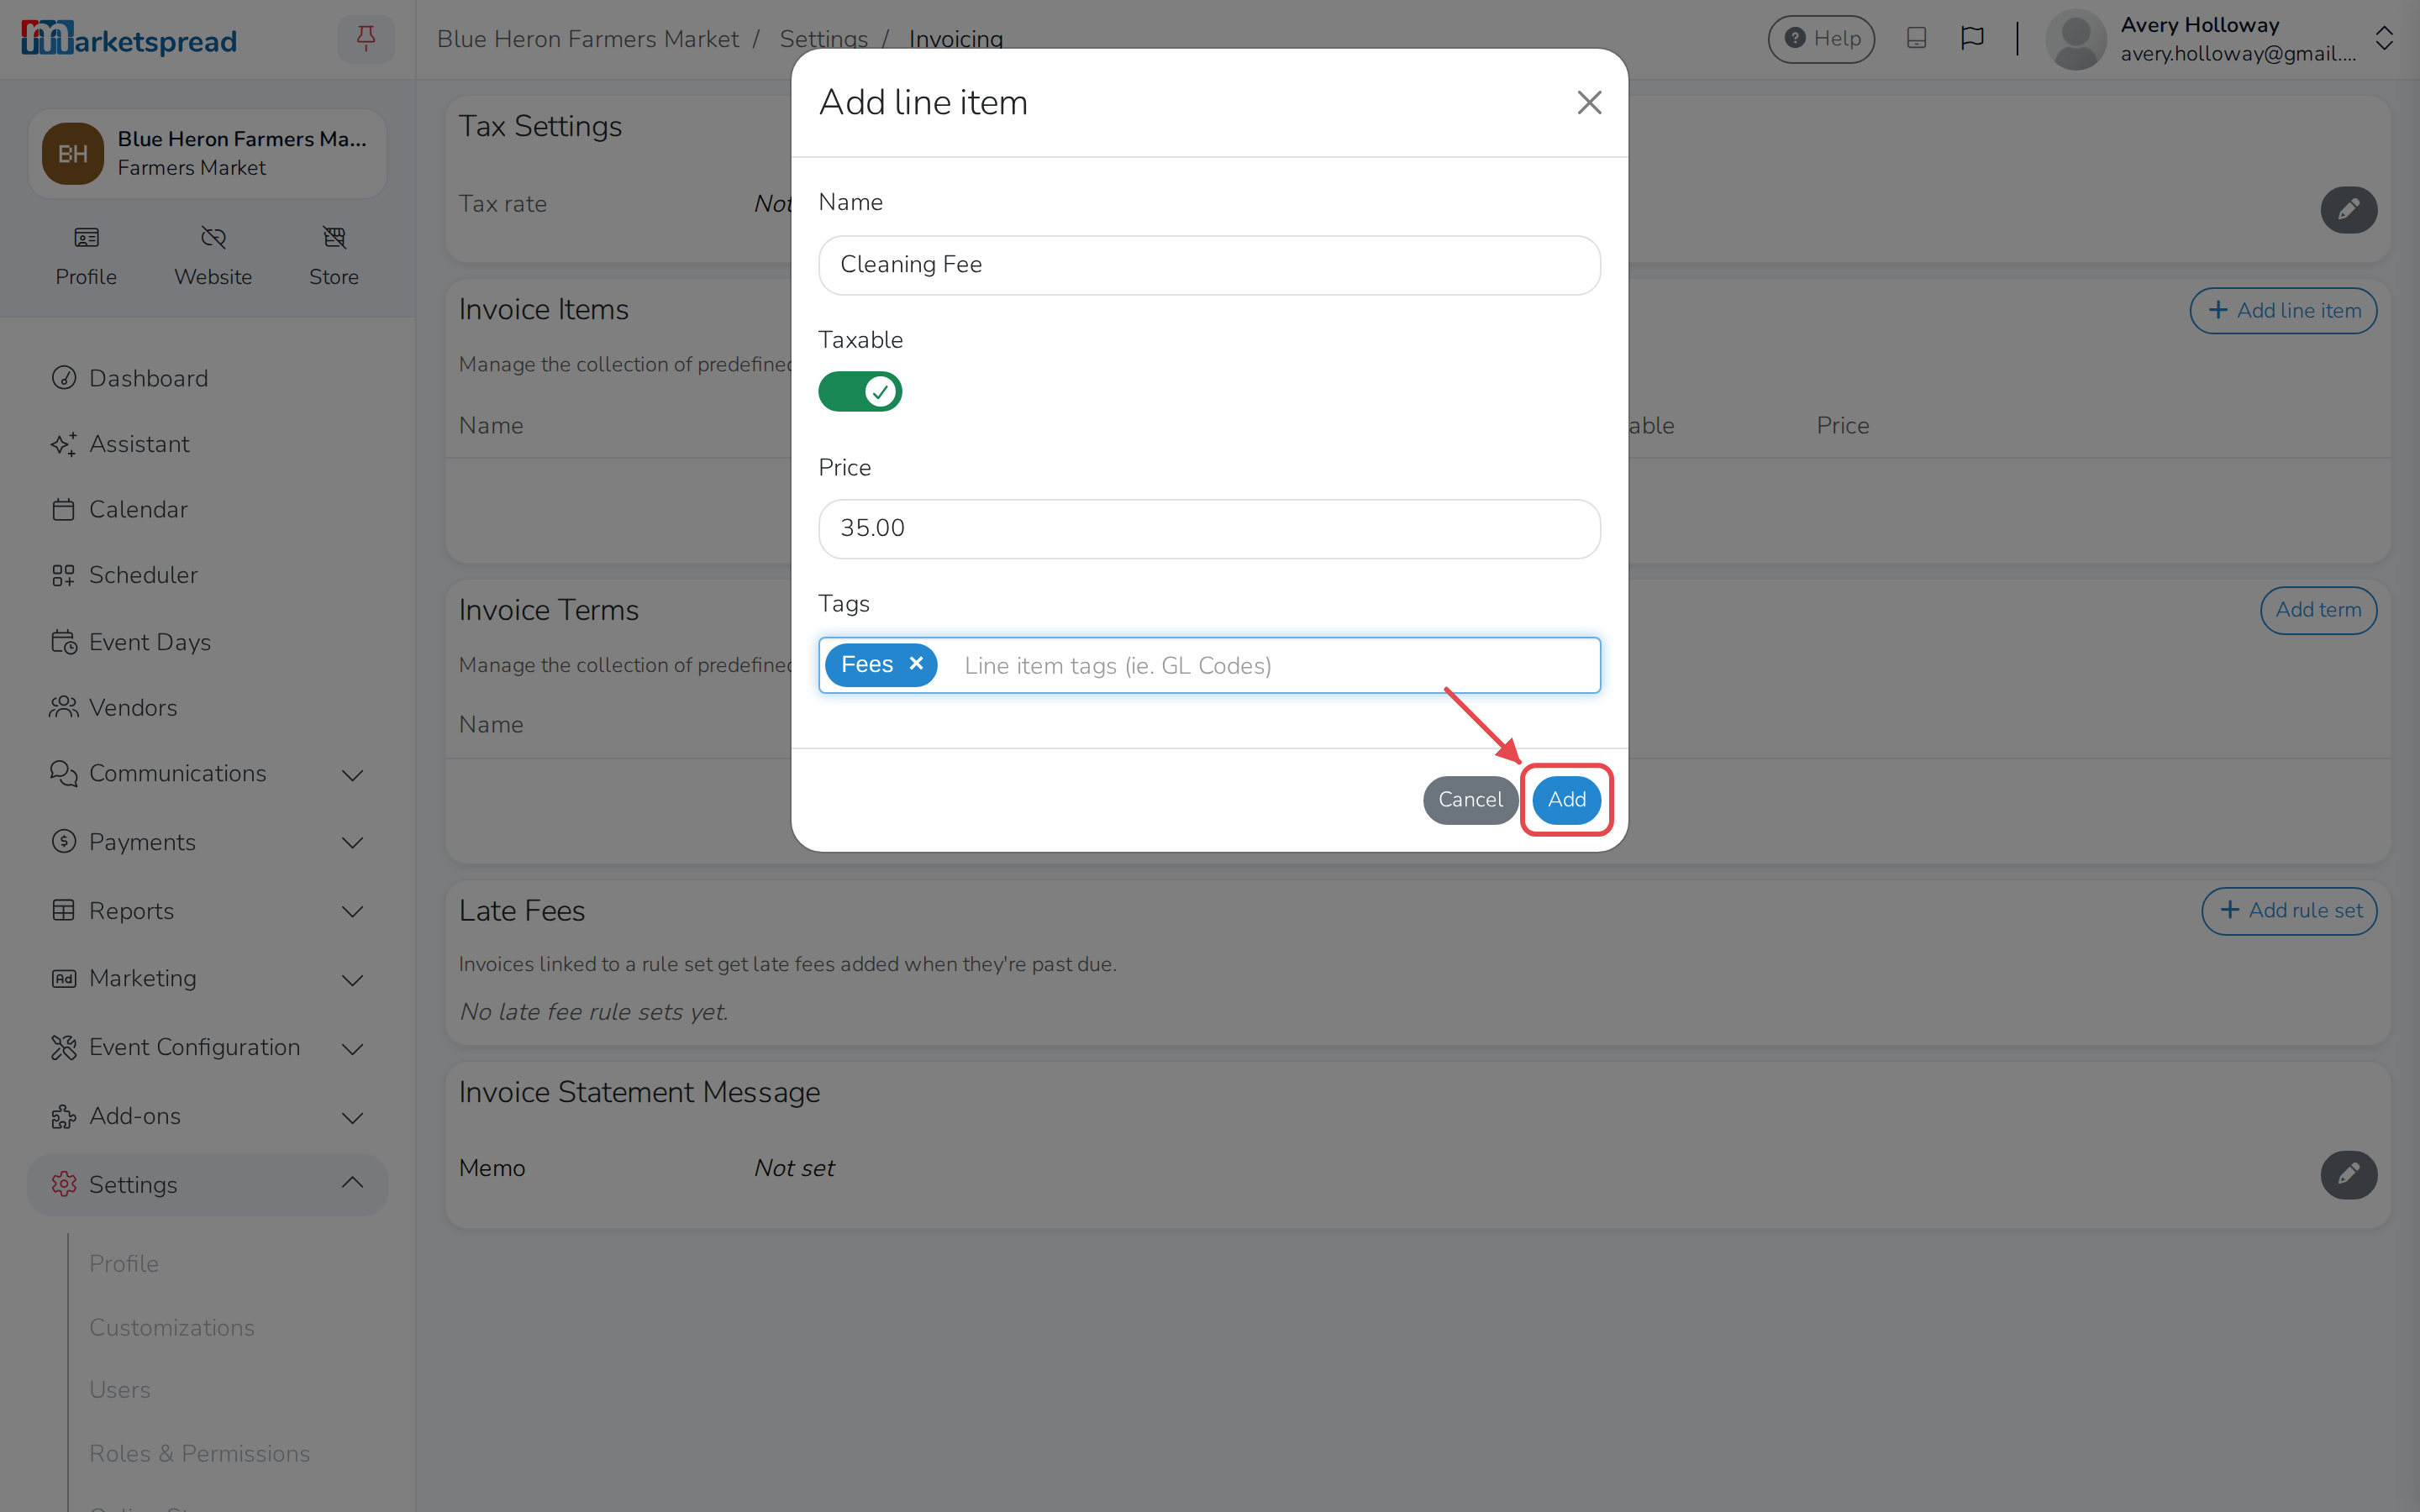
- Click Add.
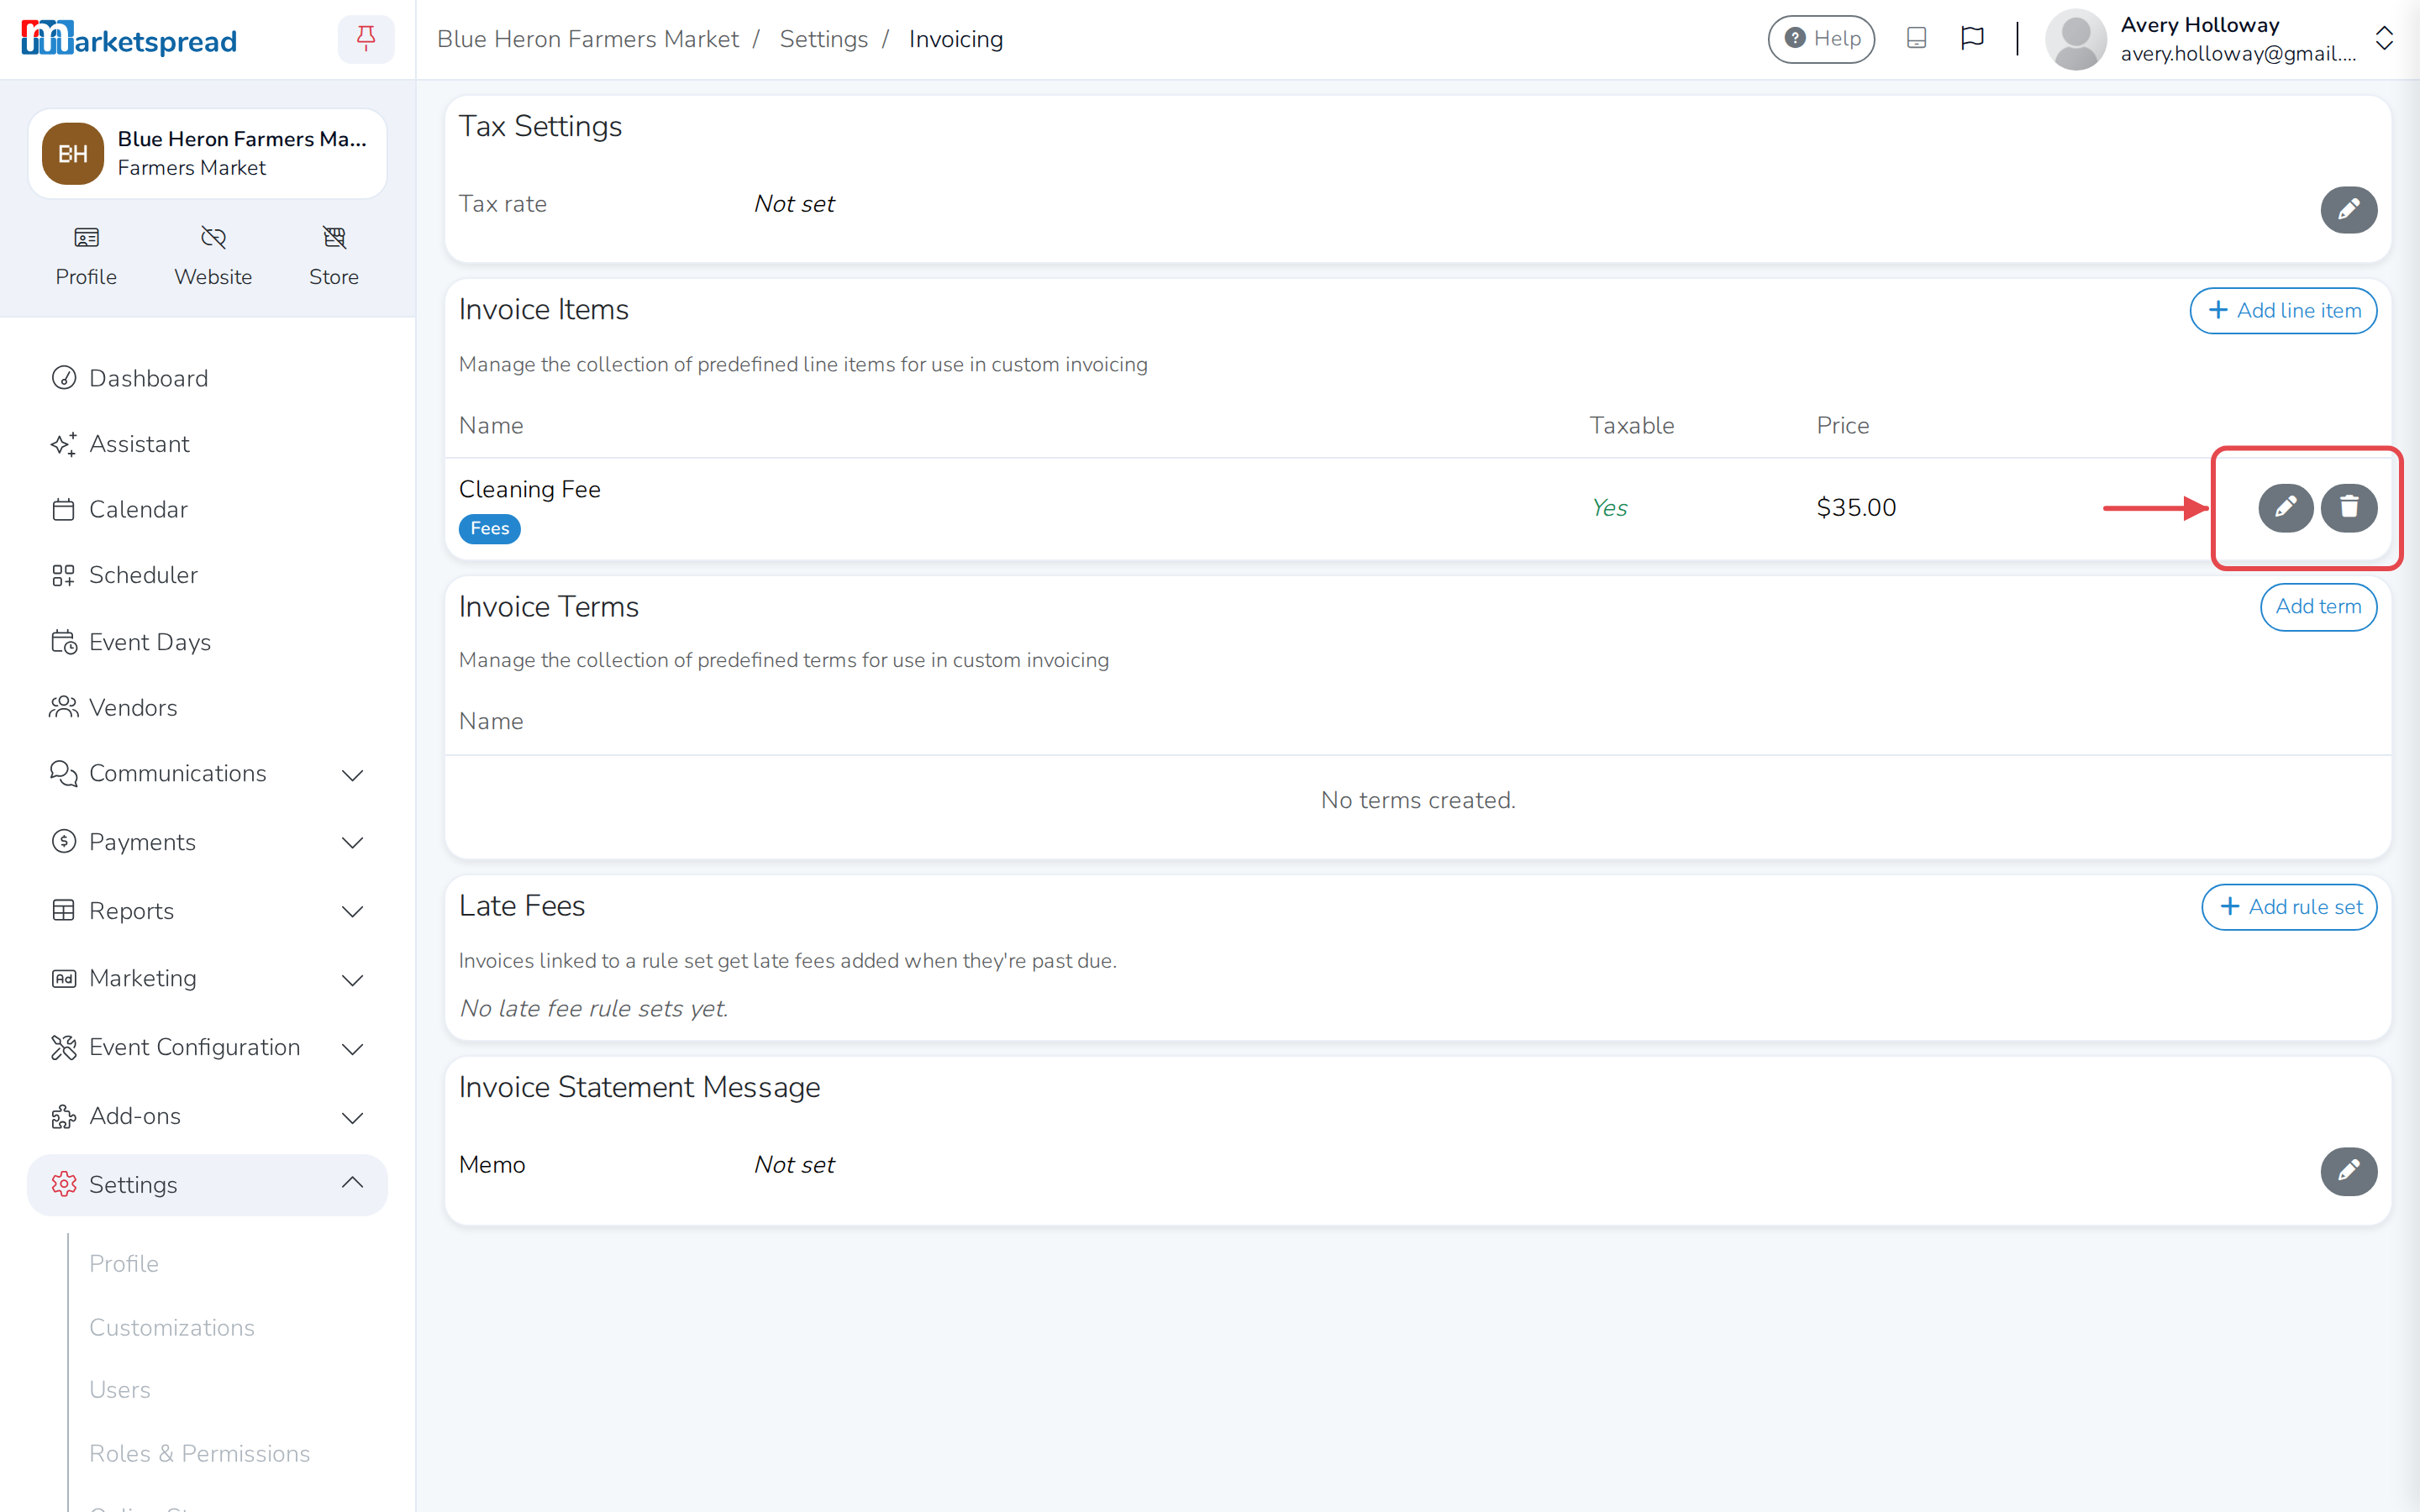
It now appears in your list of invoice items, ready to use on any invoice.
Add a saved item to an invoice
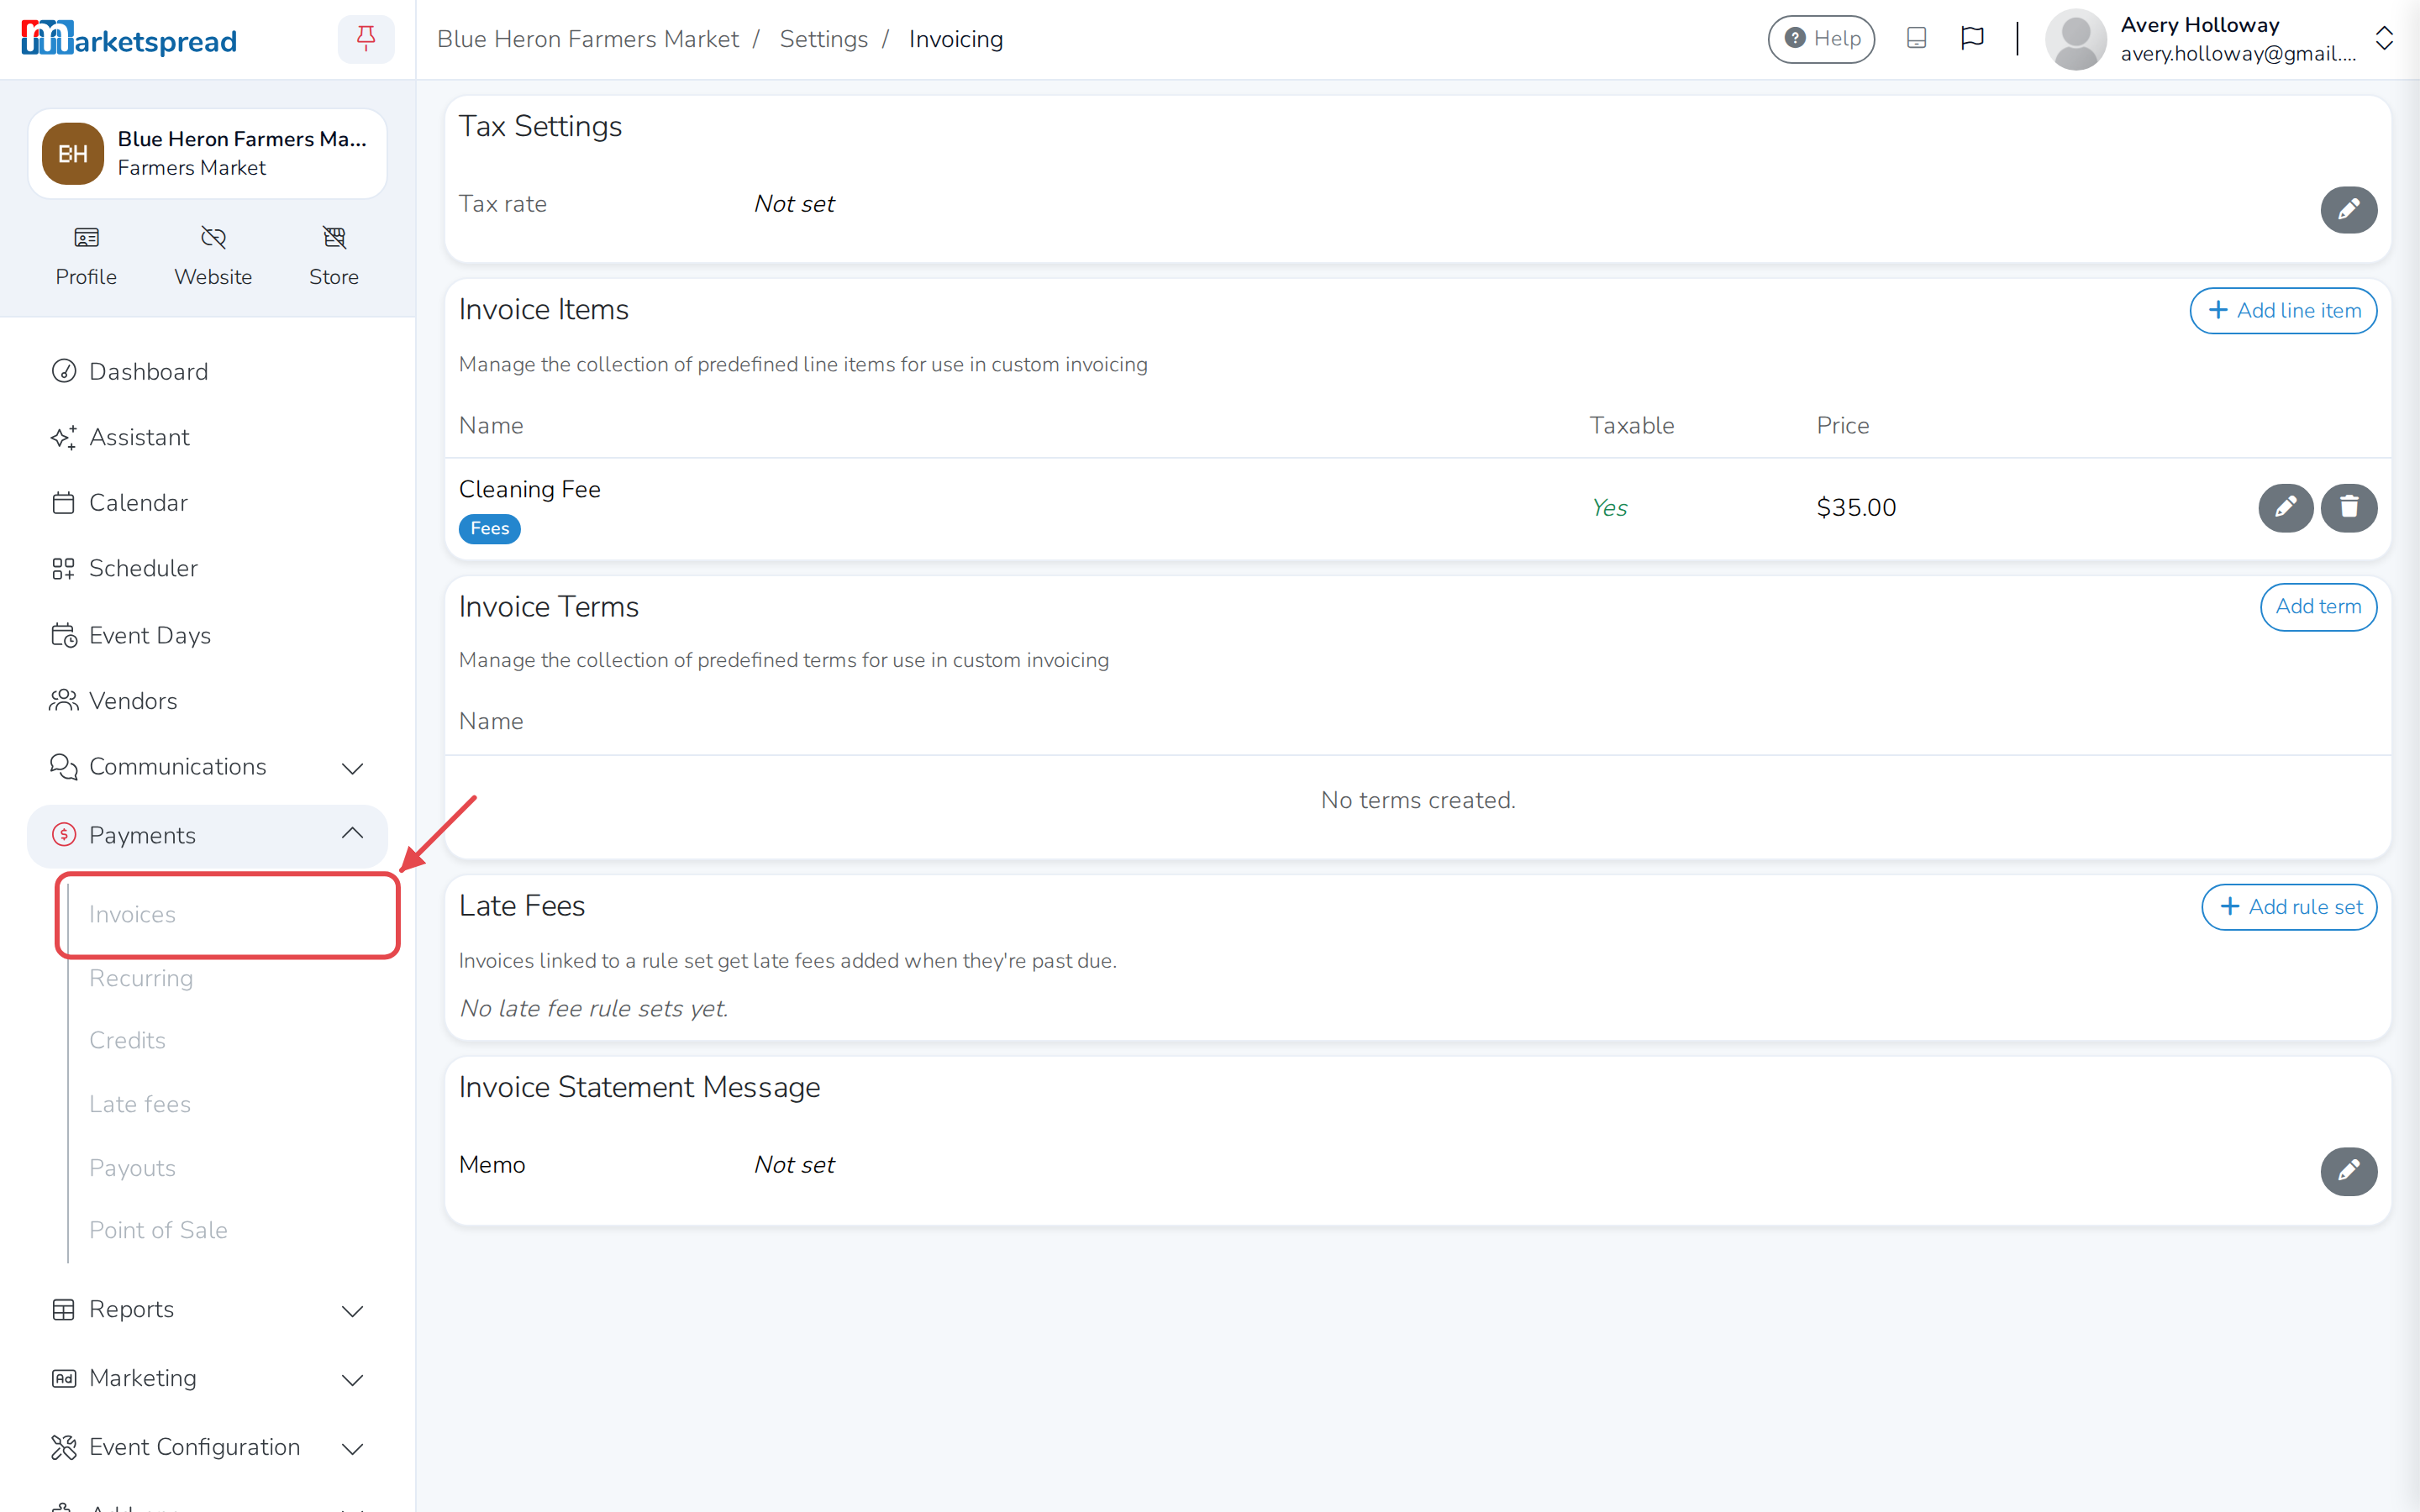
- Open Payments, then Invoices.
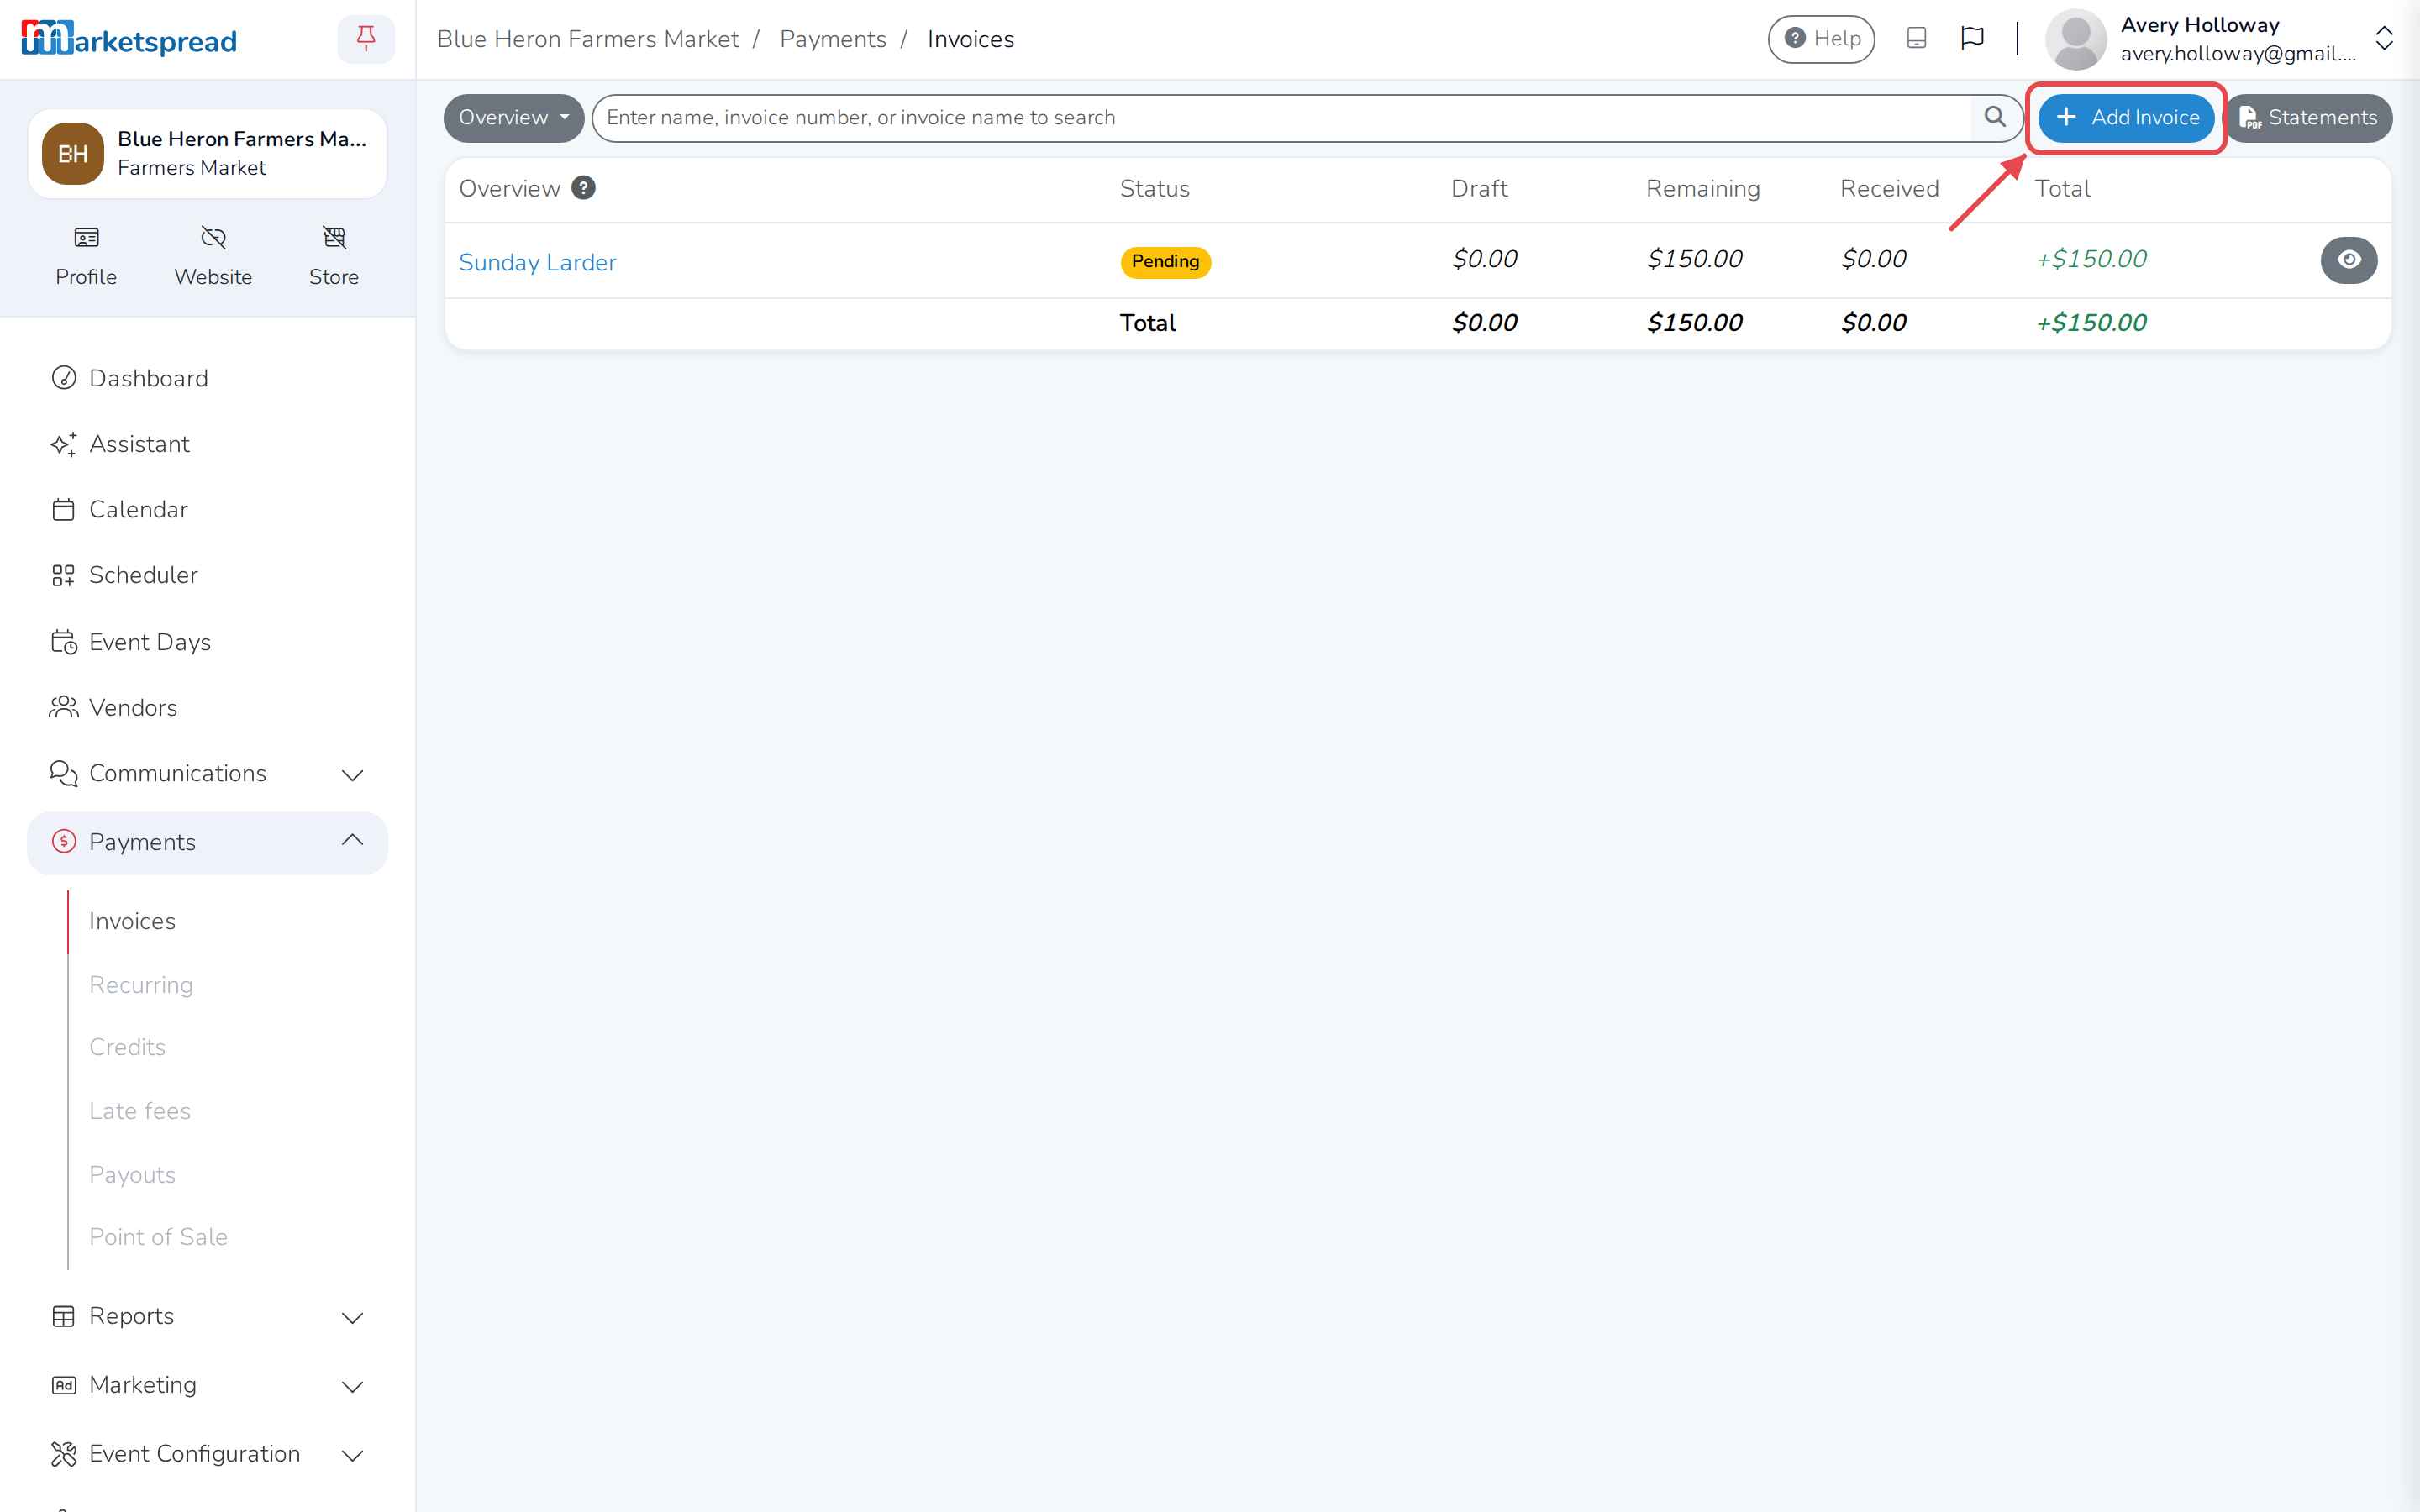
- Click Add Invoice to start a new invoice, or the eye icon on one you
already have.
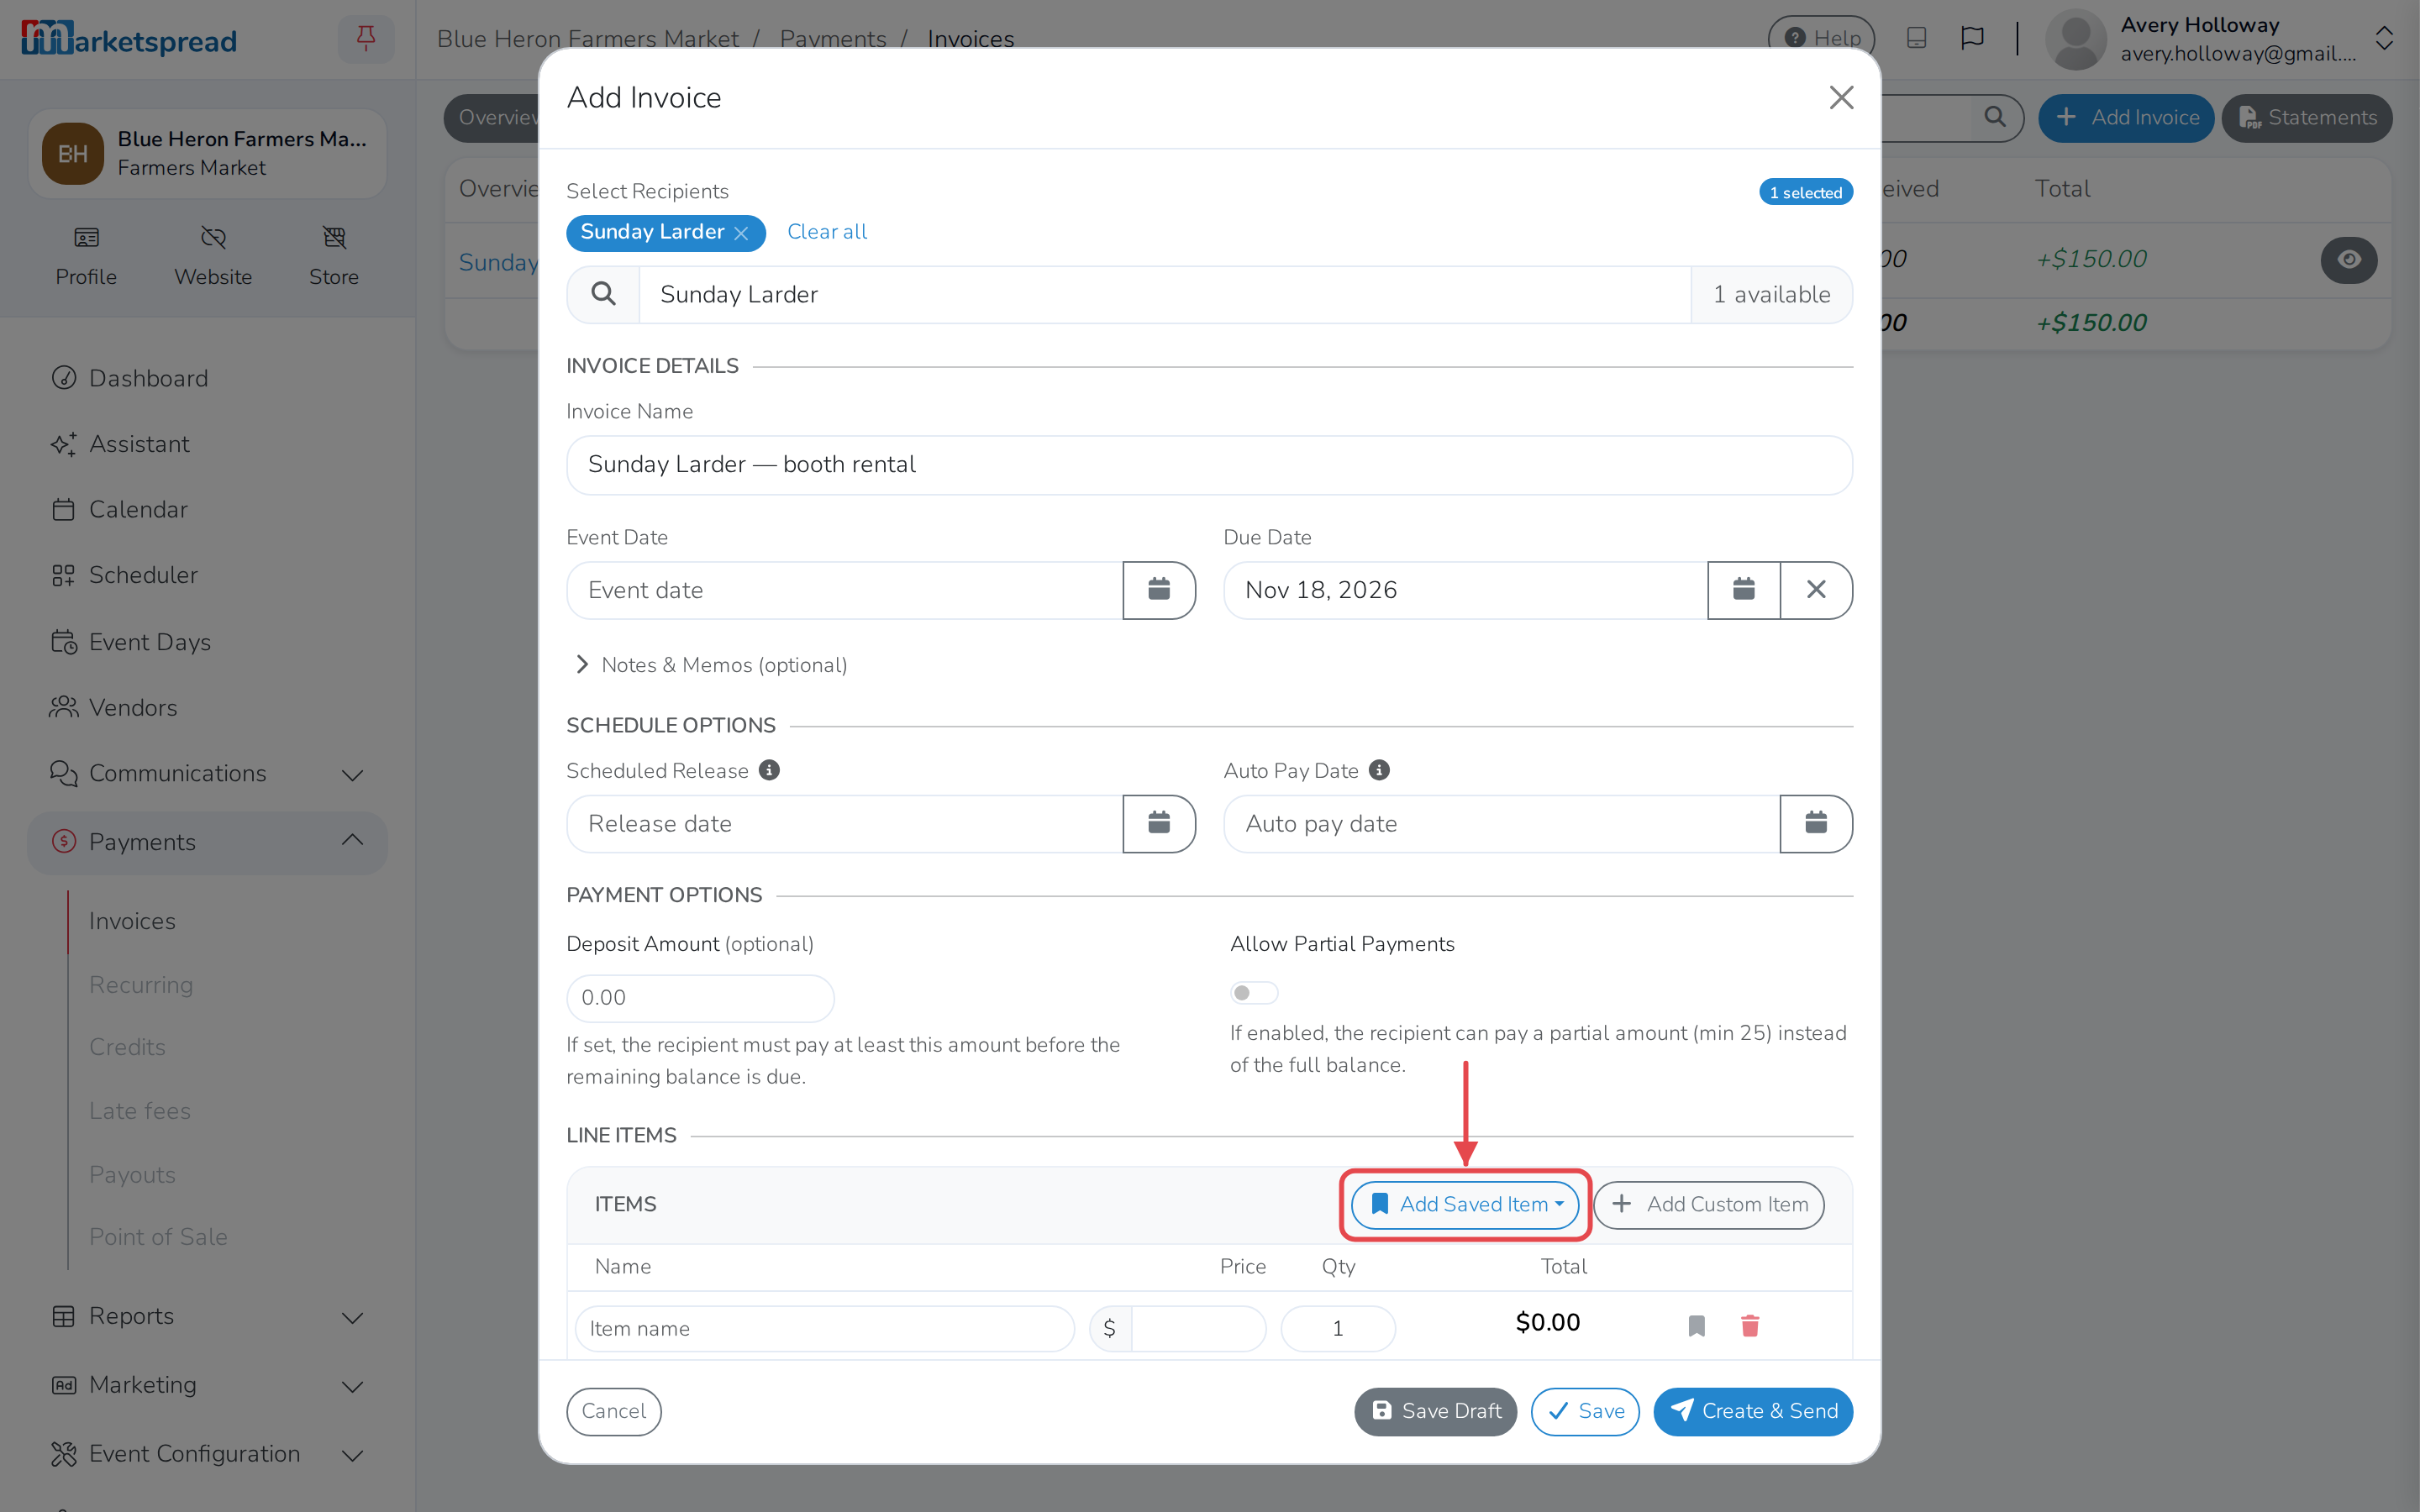
- Click Add Saved Item.
- Choose the item from the list.
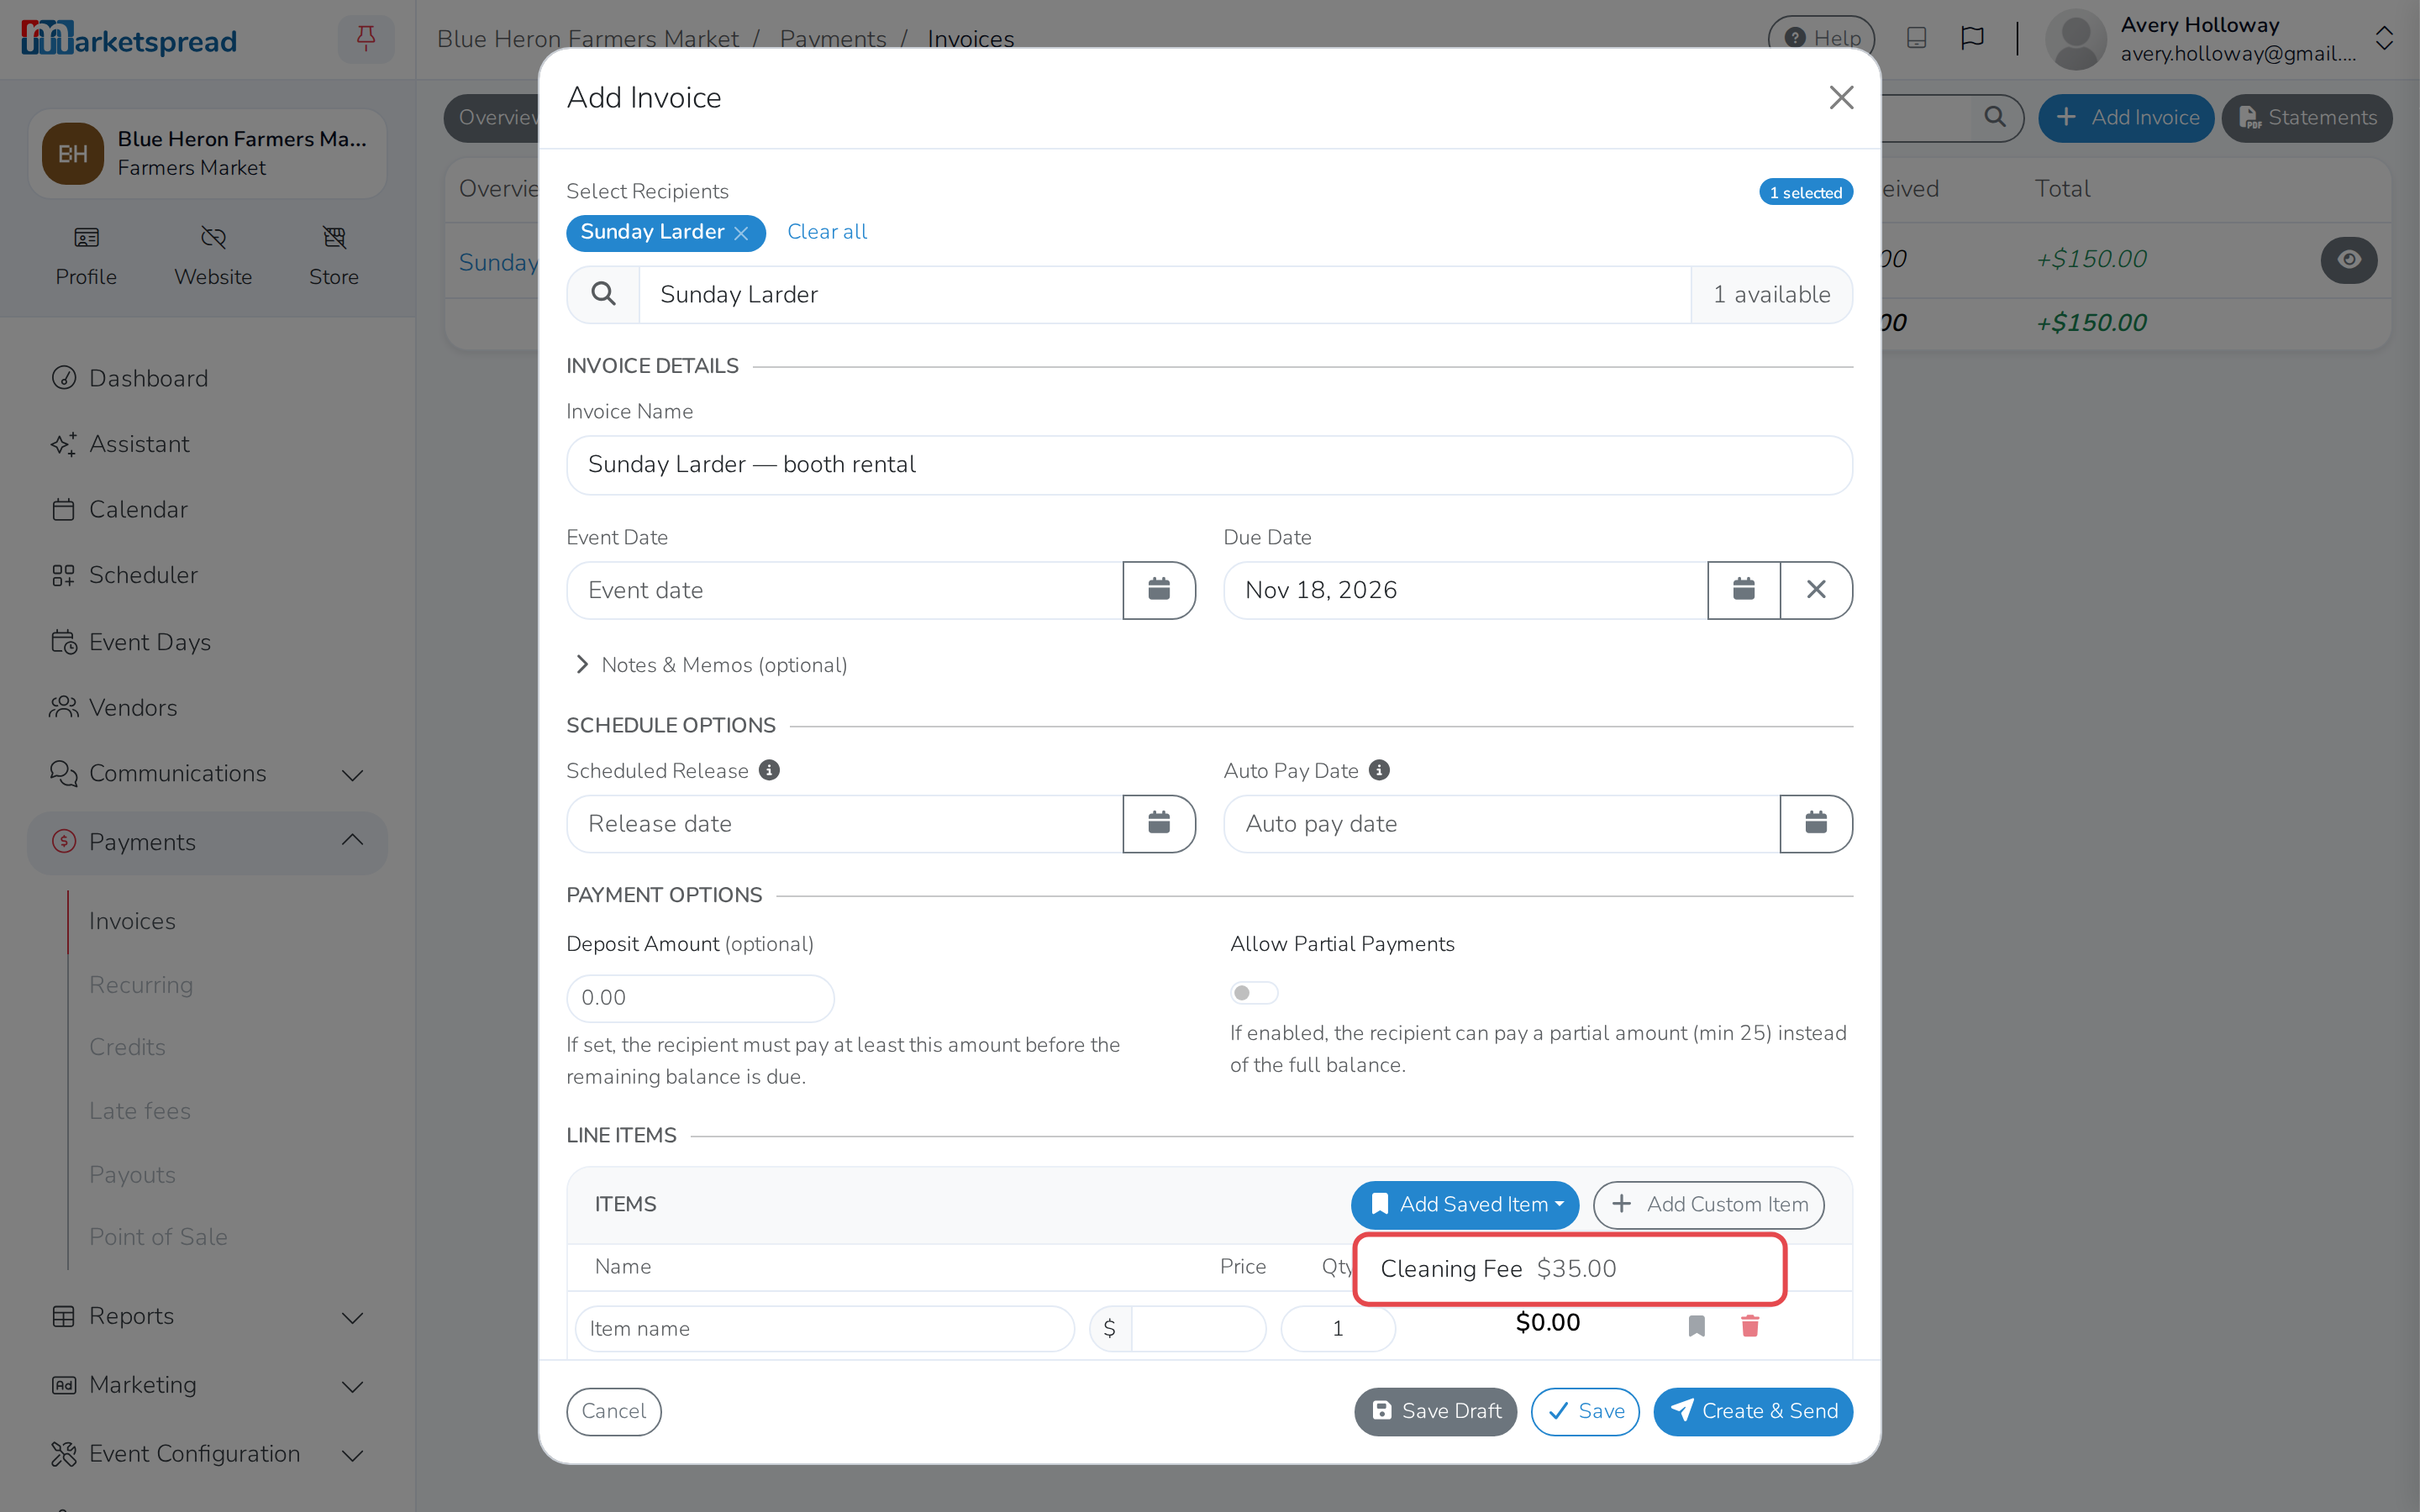
The item is added to the invoice with its saved price and tags.
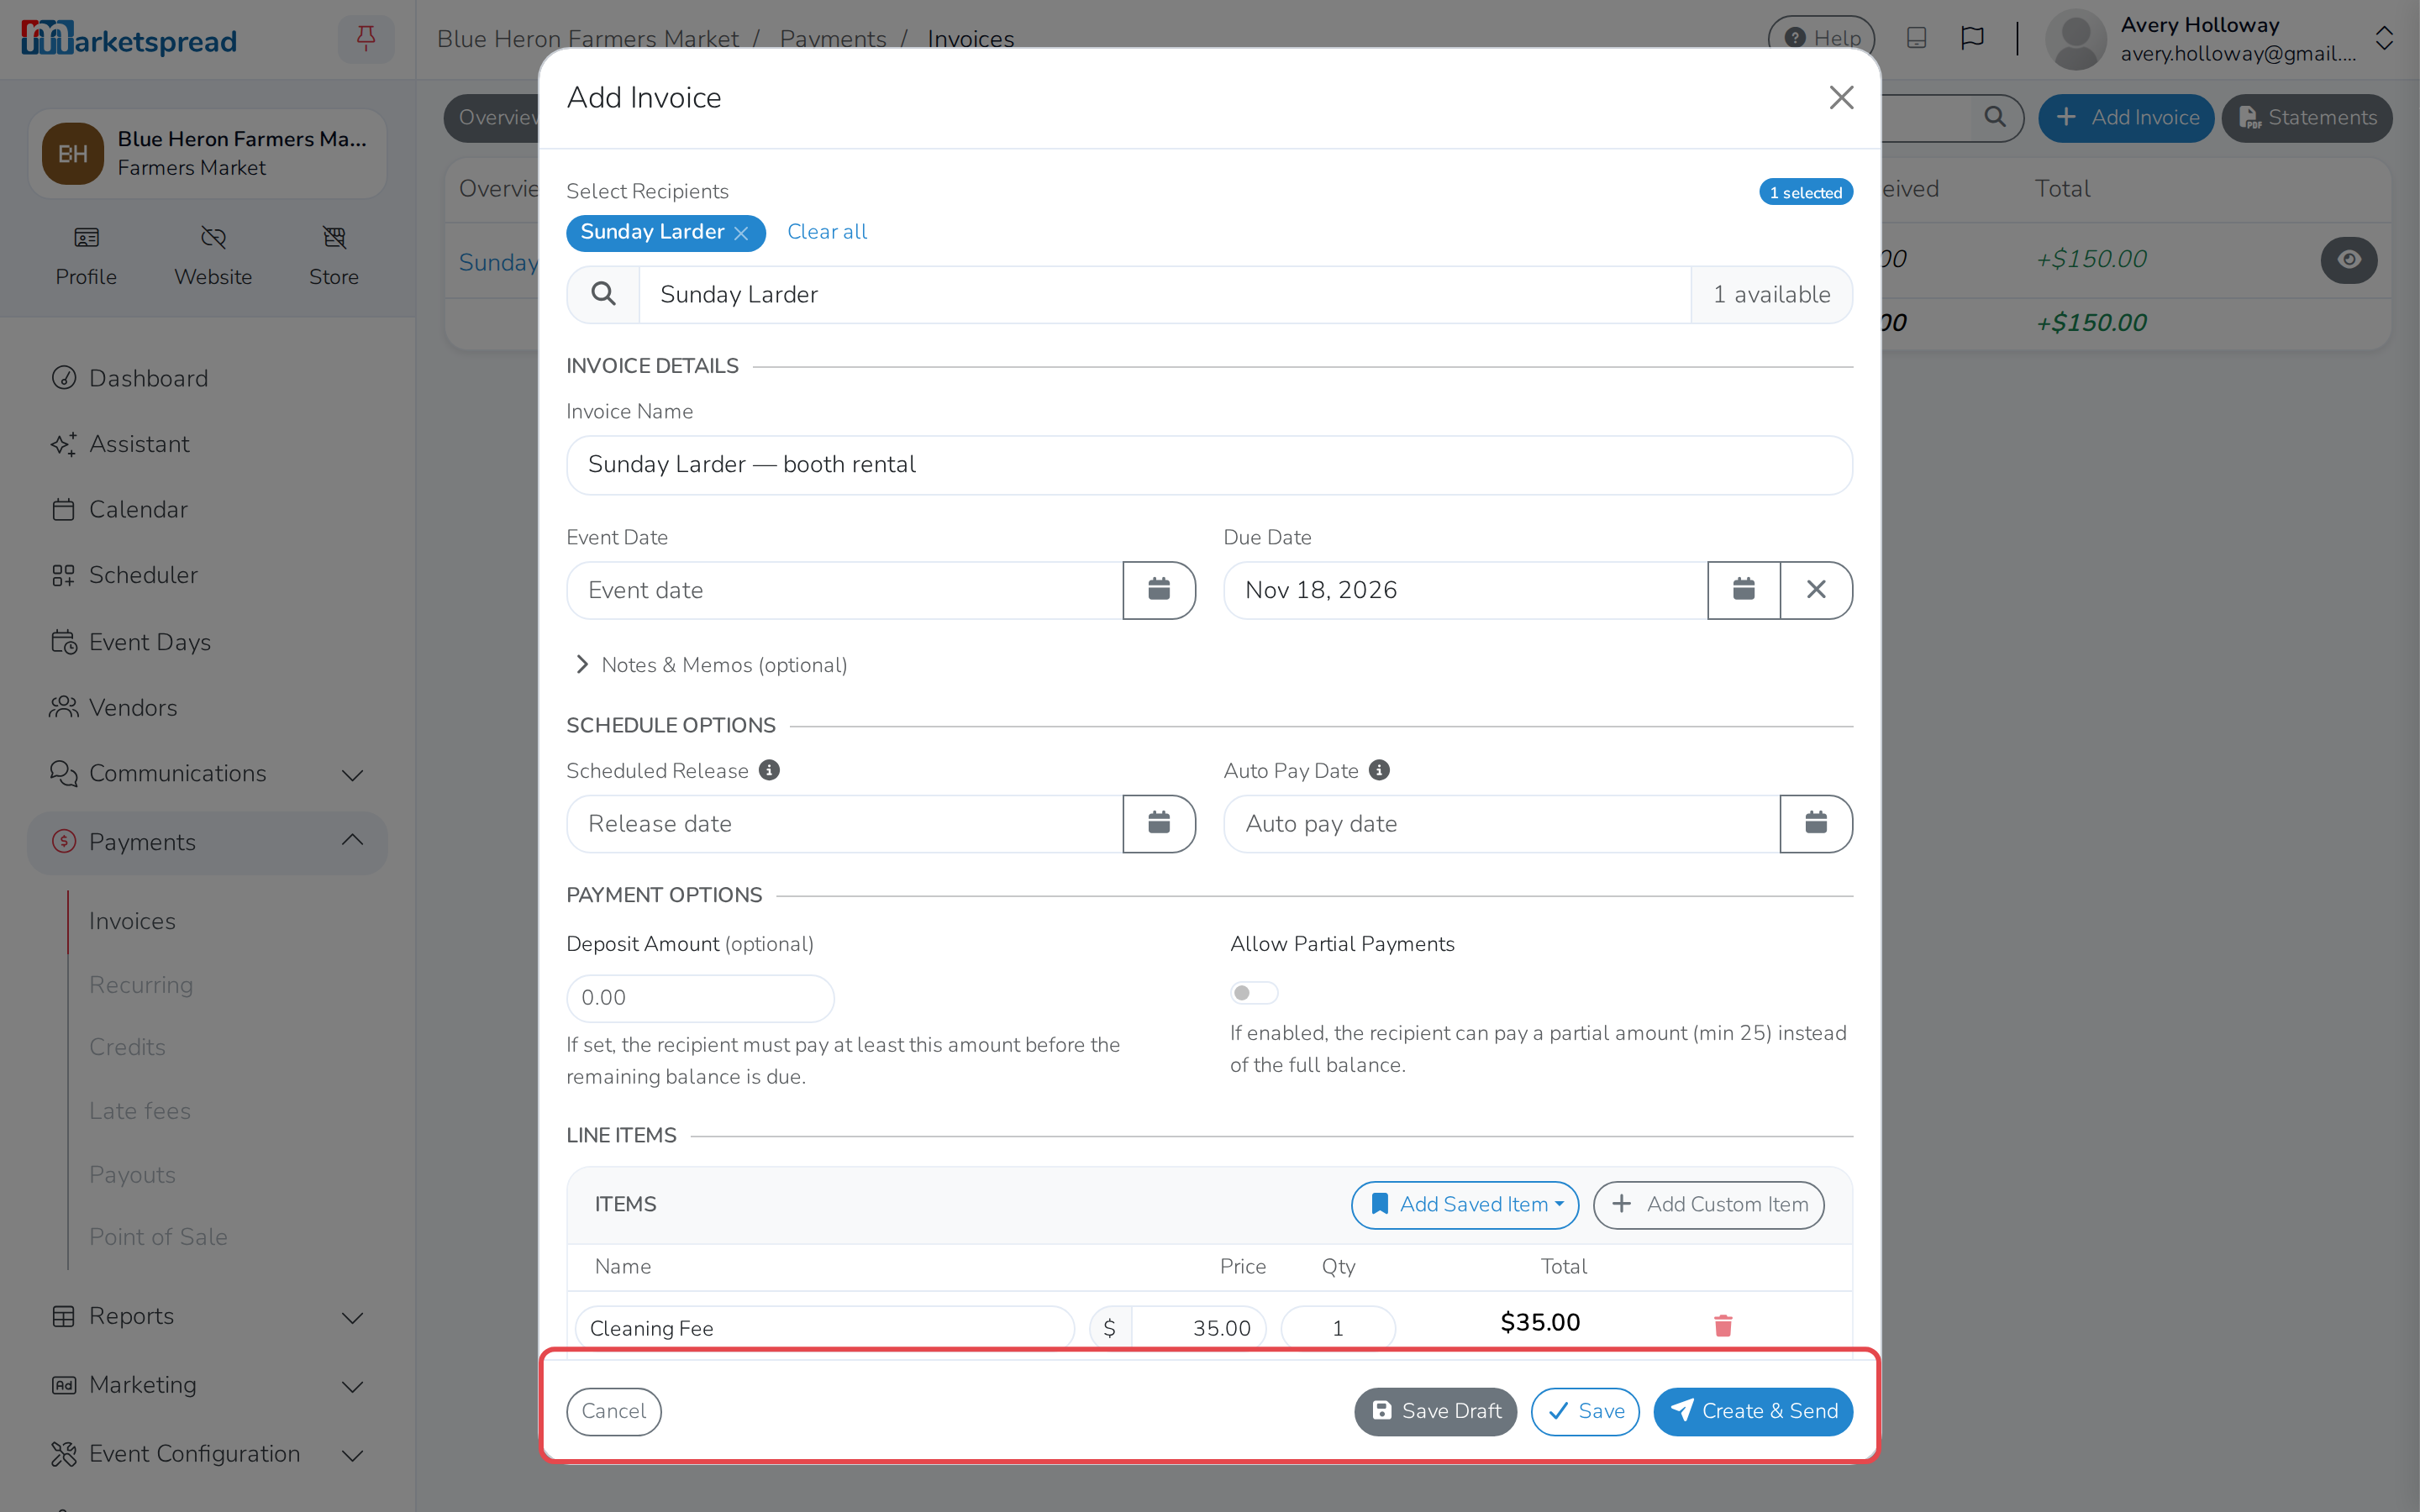
When the invoice is ready, click Save Draft to save it as a draft and
return to it later, Save to save it for manual release when you're
ready, or Create & Send to send it to the vendor for payment.
Tip
See it done for one specific charge in Add a late fee to an invoice.
Save a line item for reuse while creating an invoice
You don't have to set an item up in Settings first — you can save one
straight from an invoice you're building.
- Fill in the line item's Name.
- Fill in the Price.
- Click the bookmark icon next to it.
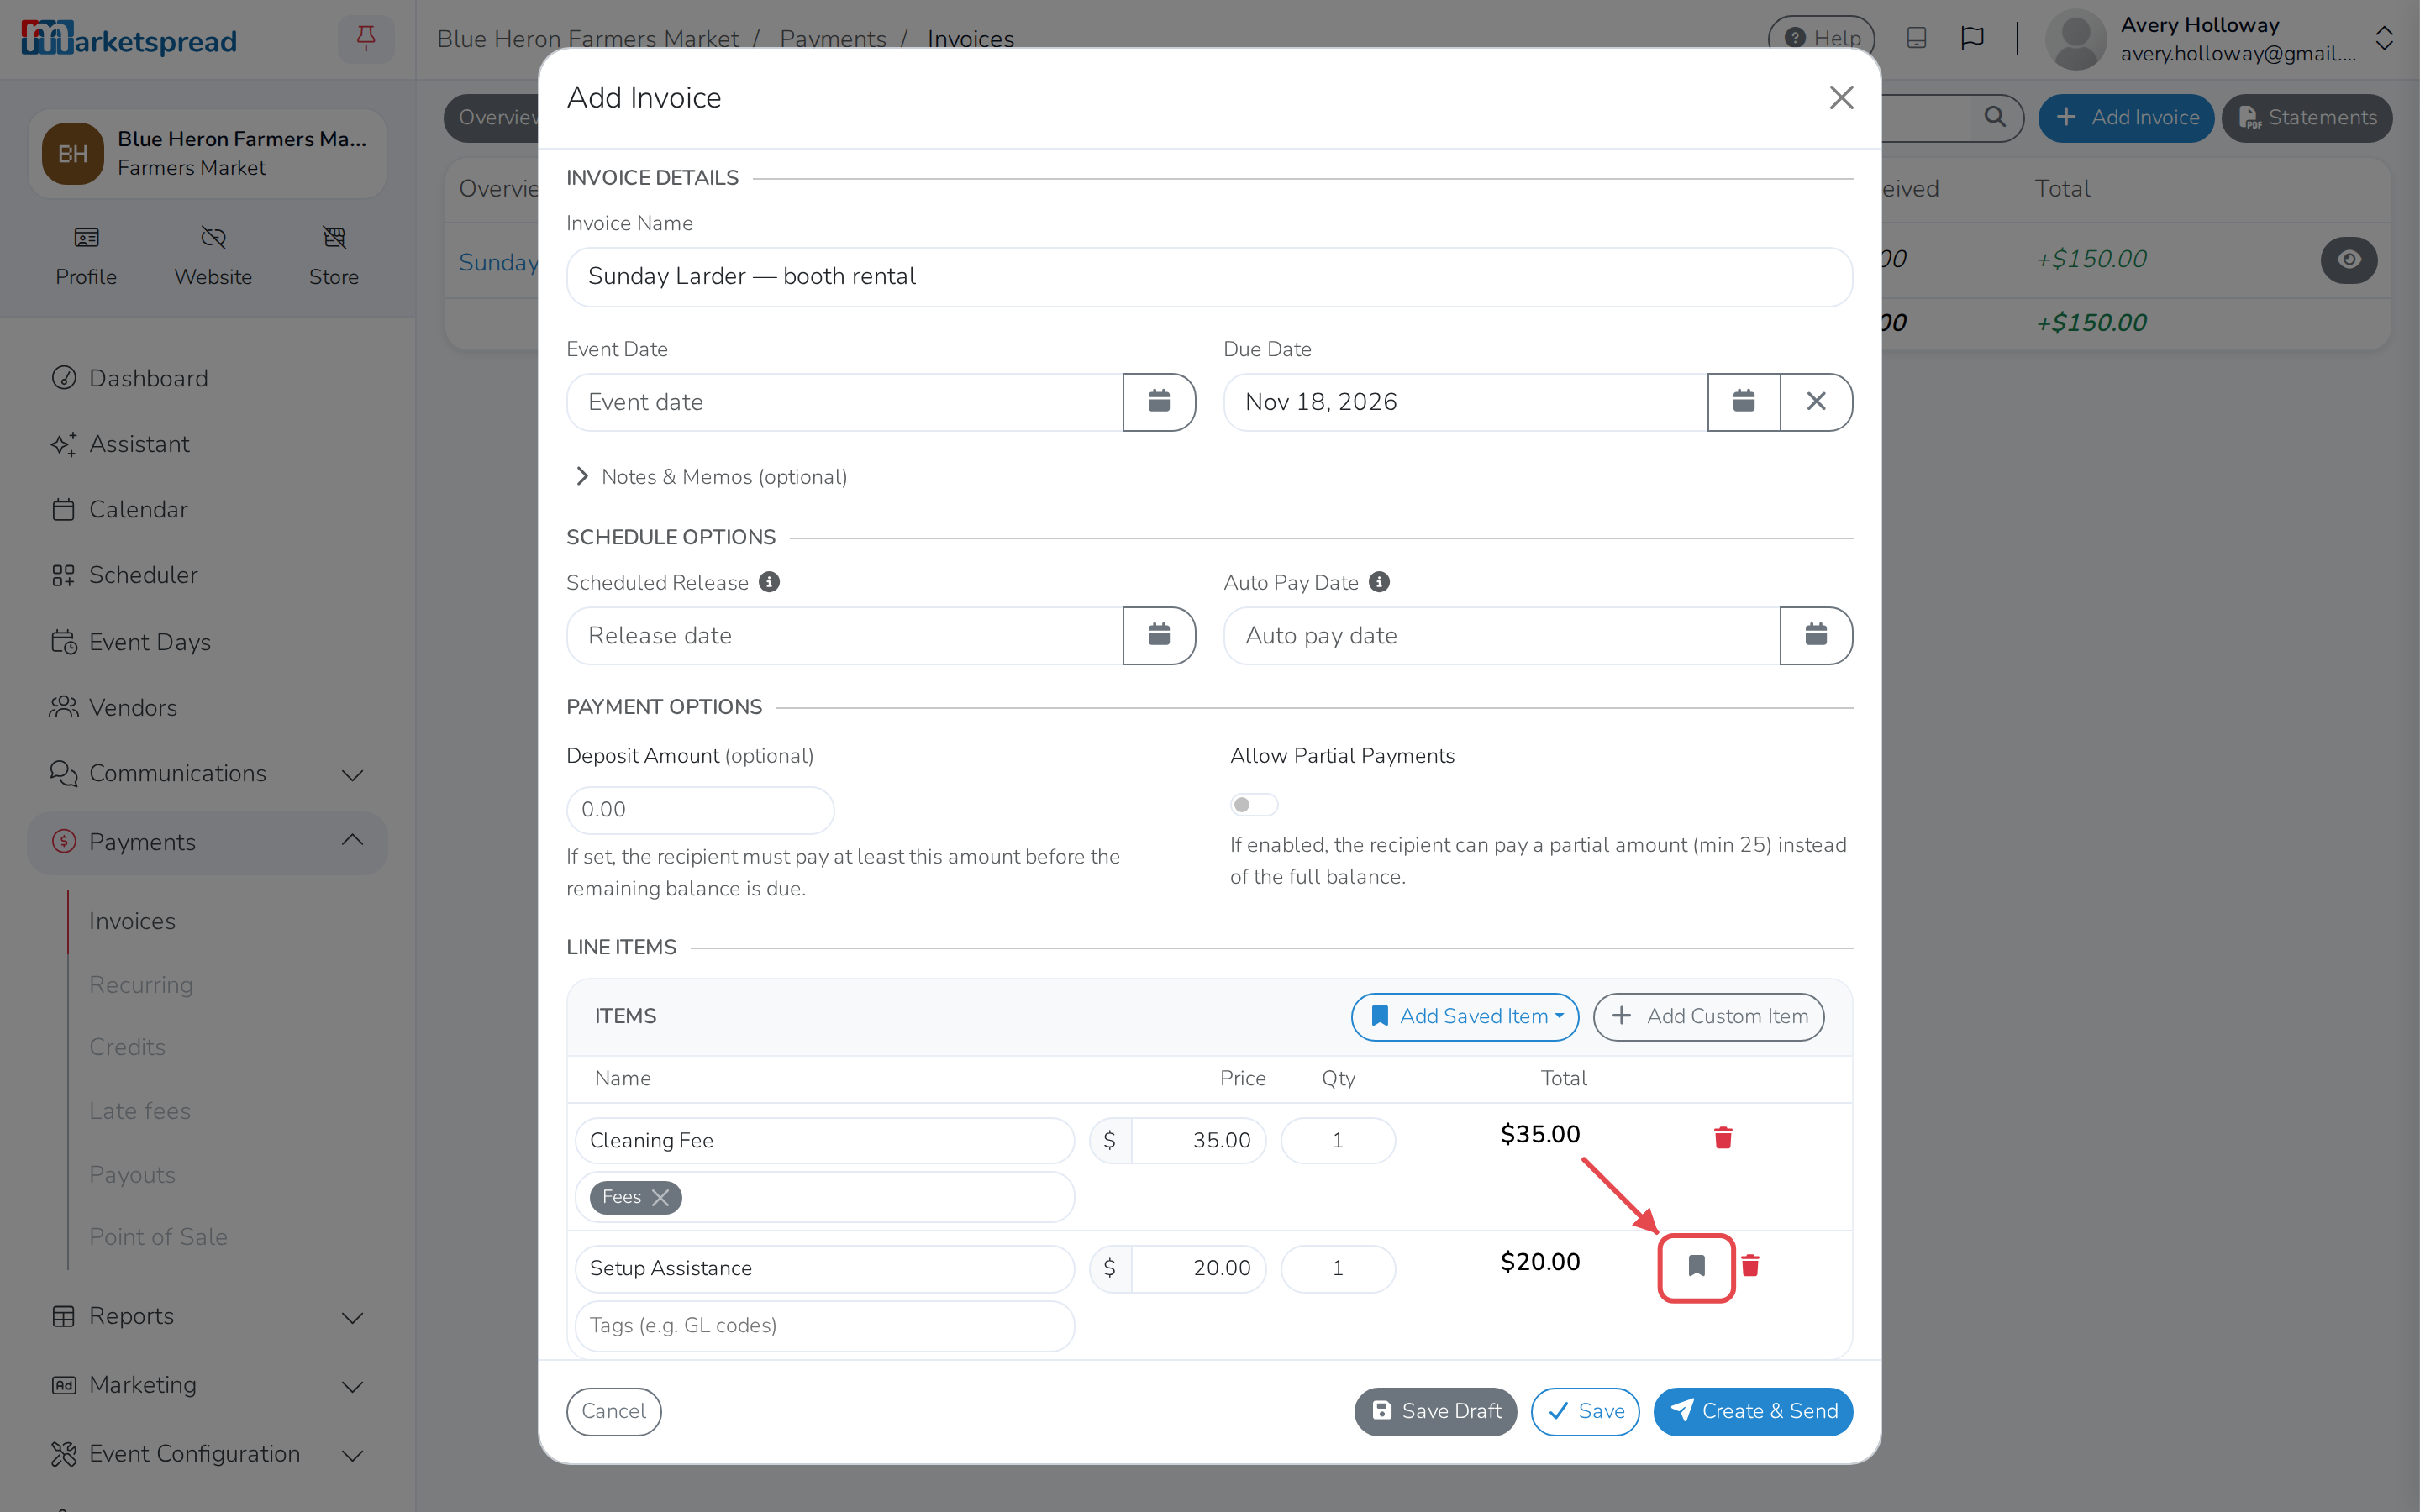
The item is saved with that name, price, tags and taxable setting, ready to
use on your next invoice.
Note
You need Settings access to do this. Without it, you'll see a message
asking you to get access from a market admin instead.
Edit a reusable line item
- Open Settings, then Invoicing.
- Click the pencil icon next to the item.
- Update its Name, Price, Taxable setting or Tags.
- Click Update.
Delete a reusable line item
- Open Settings, then Invoicing.
- Click the trash icon next to the item.
- Click Delete to confirm.