


Messenger is where you email and text the people your market works with — your vendors, your customers and your own team — and where their replies come back. It sits in your dashboard, under Communications.
From Messenger you can:
- send an email to a whole group at once, or schedule it for later
- send a text message, on a plan that includes texting
- read and reply to conversations
- set up campaigns that send on a date you choose
- message vendors straight from your Vendors list, and customers from your Customers list
Open Messenger
-
In the left-hand menu, click Communications.
-
Click Email/SMS. Your inbox opens in the dashboard.
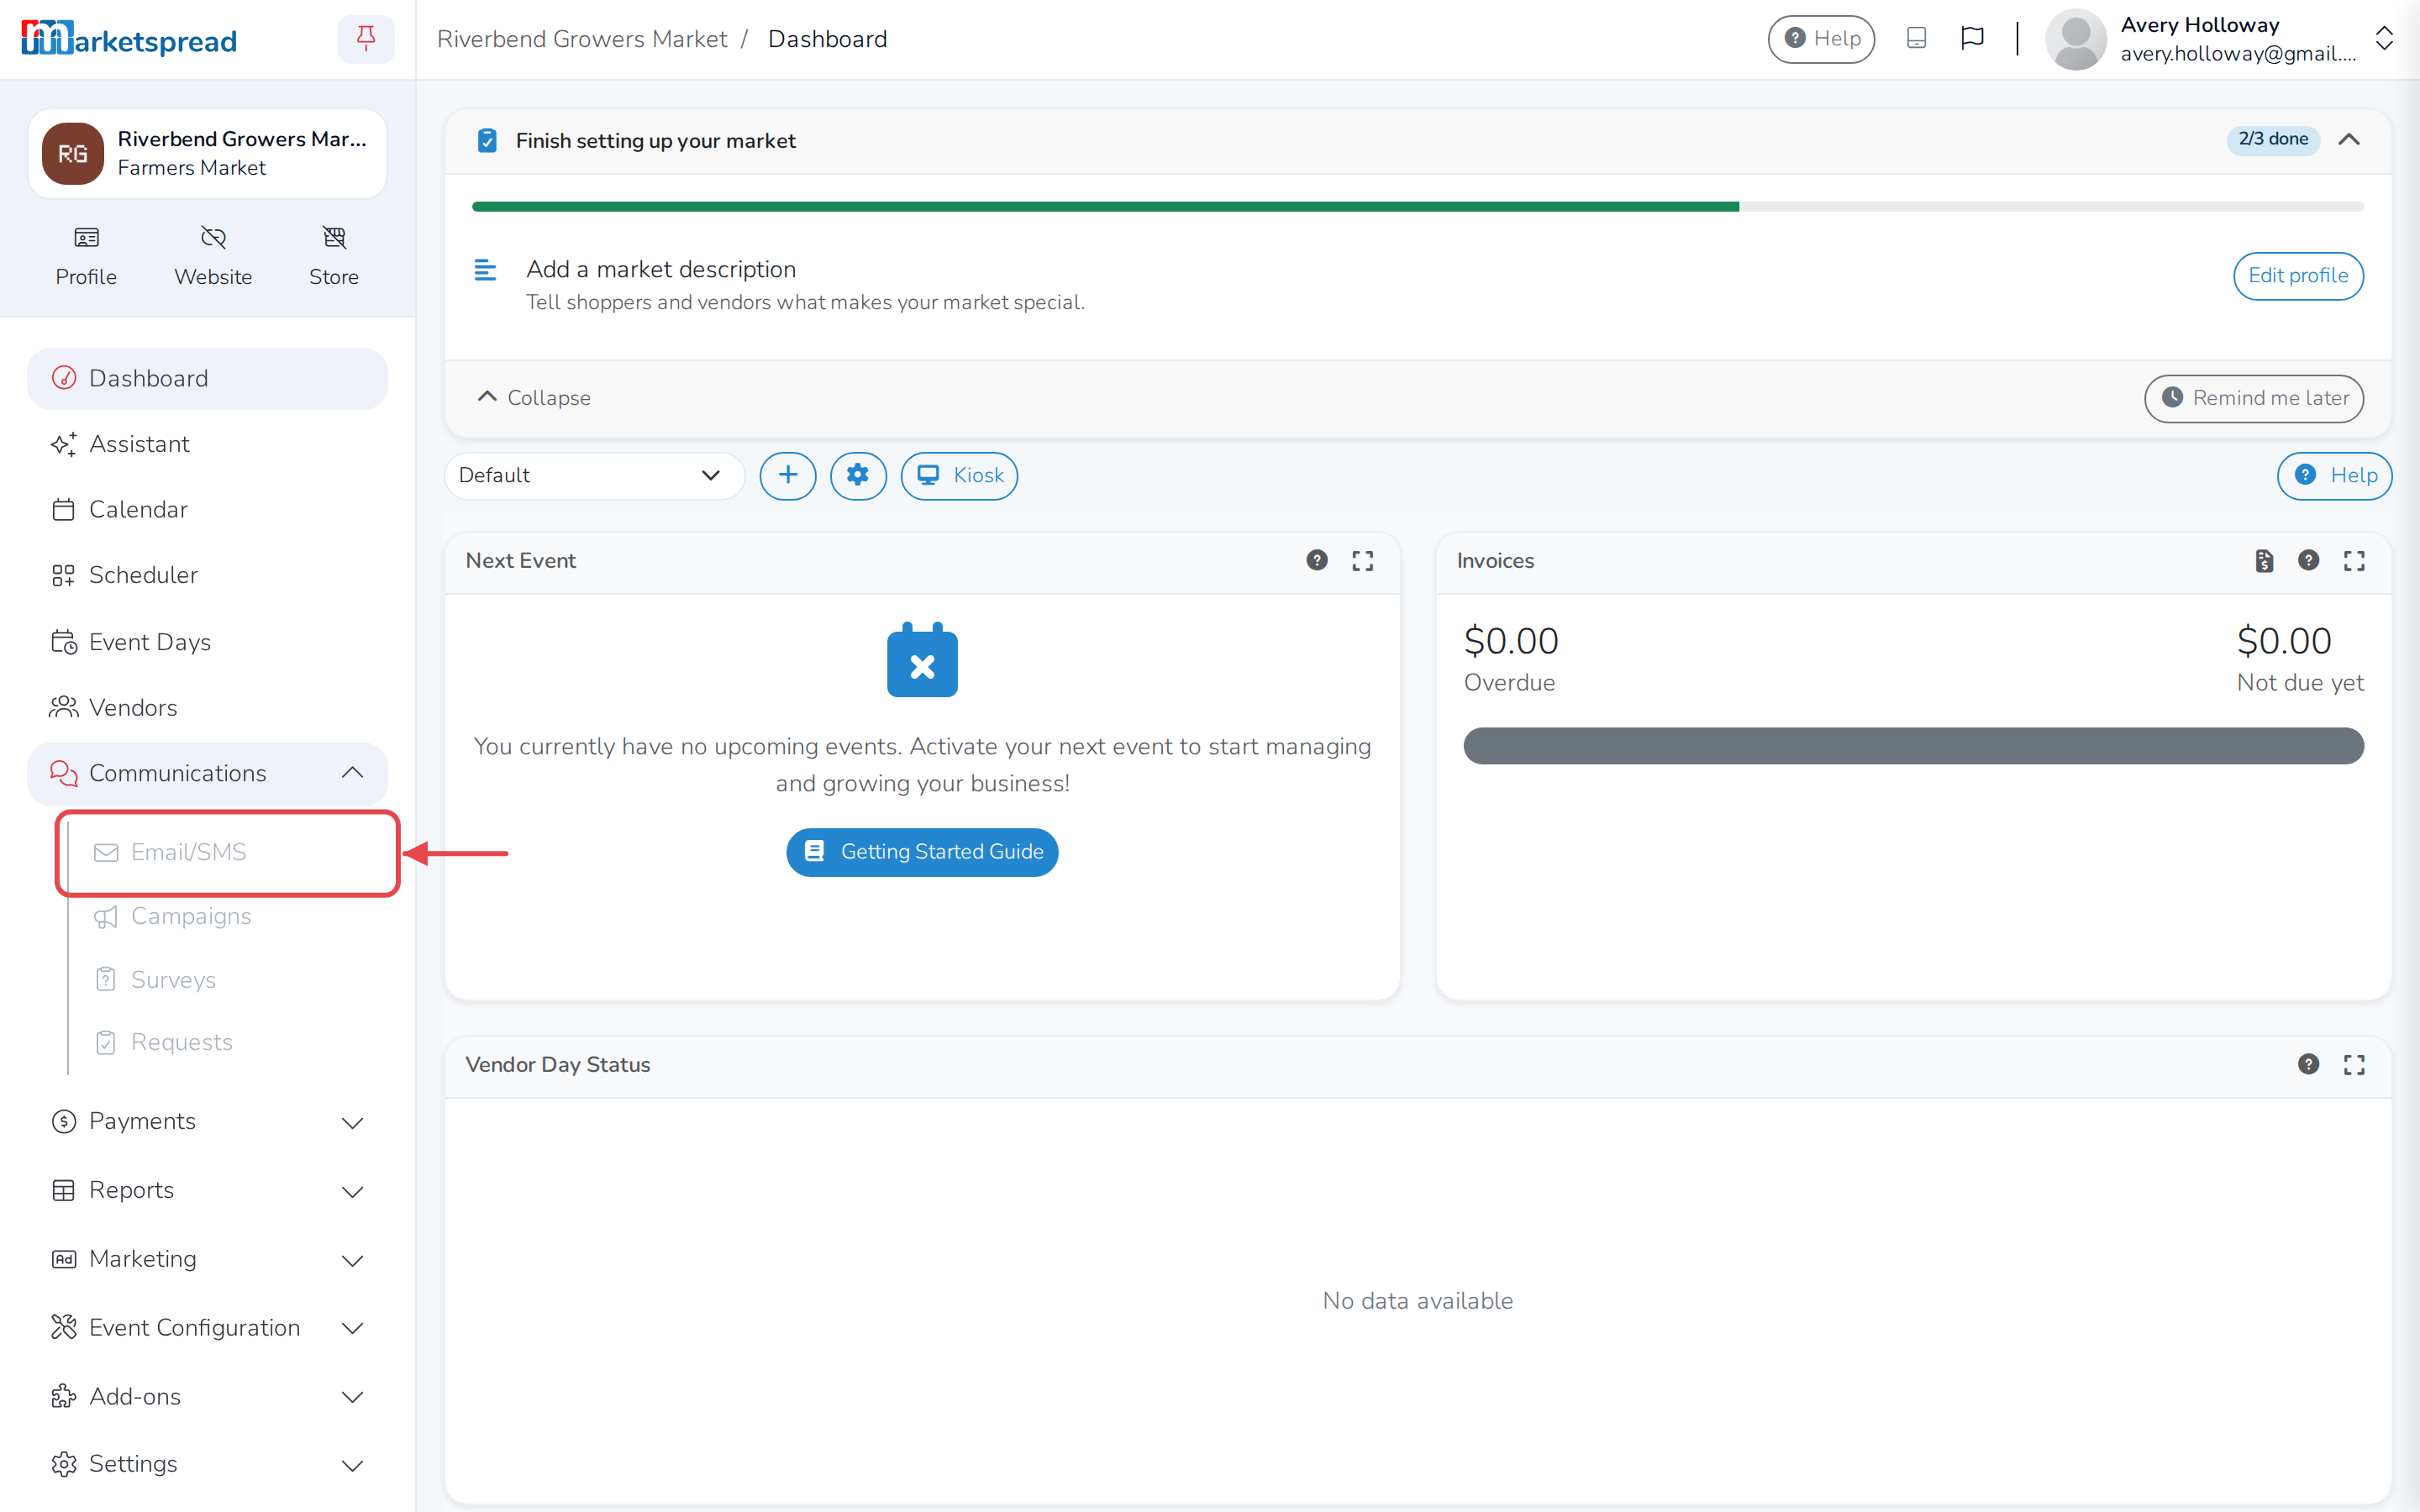
A padlock next to Email/SMS means your role does not include Messenger. Ask your organization's manager for access.
Find your way around the inbox
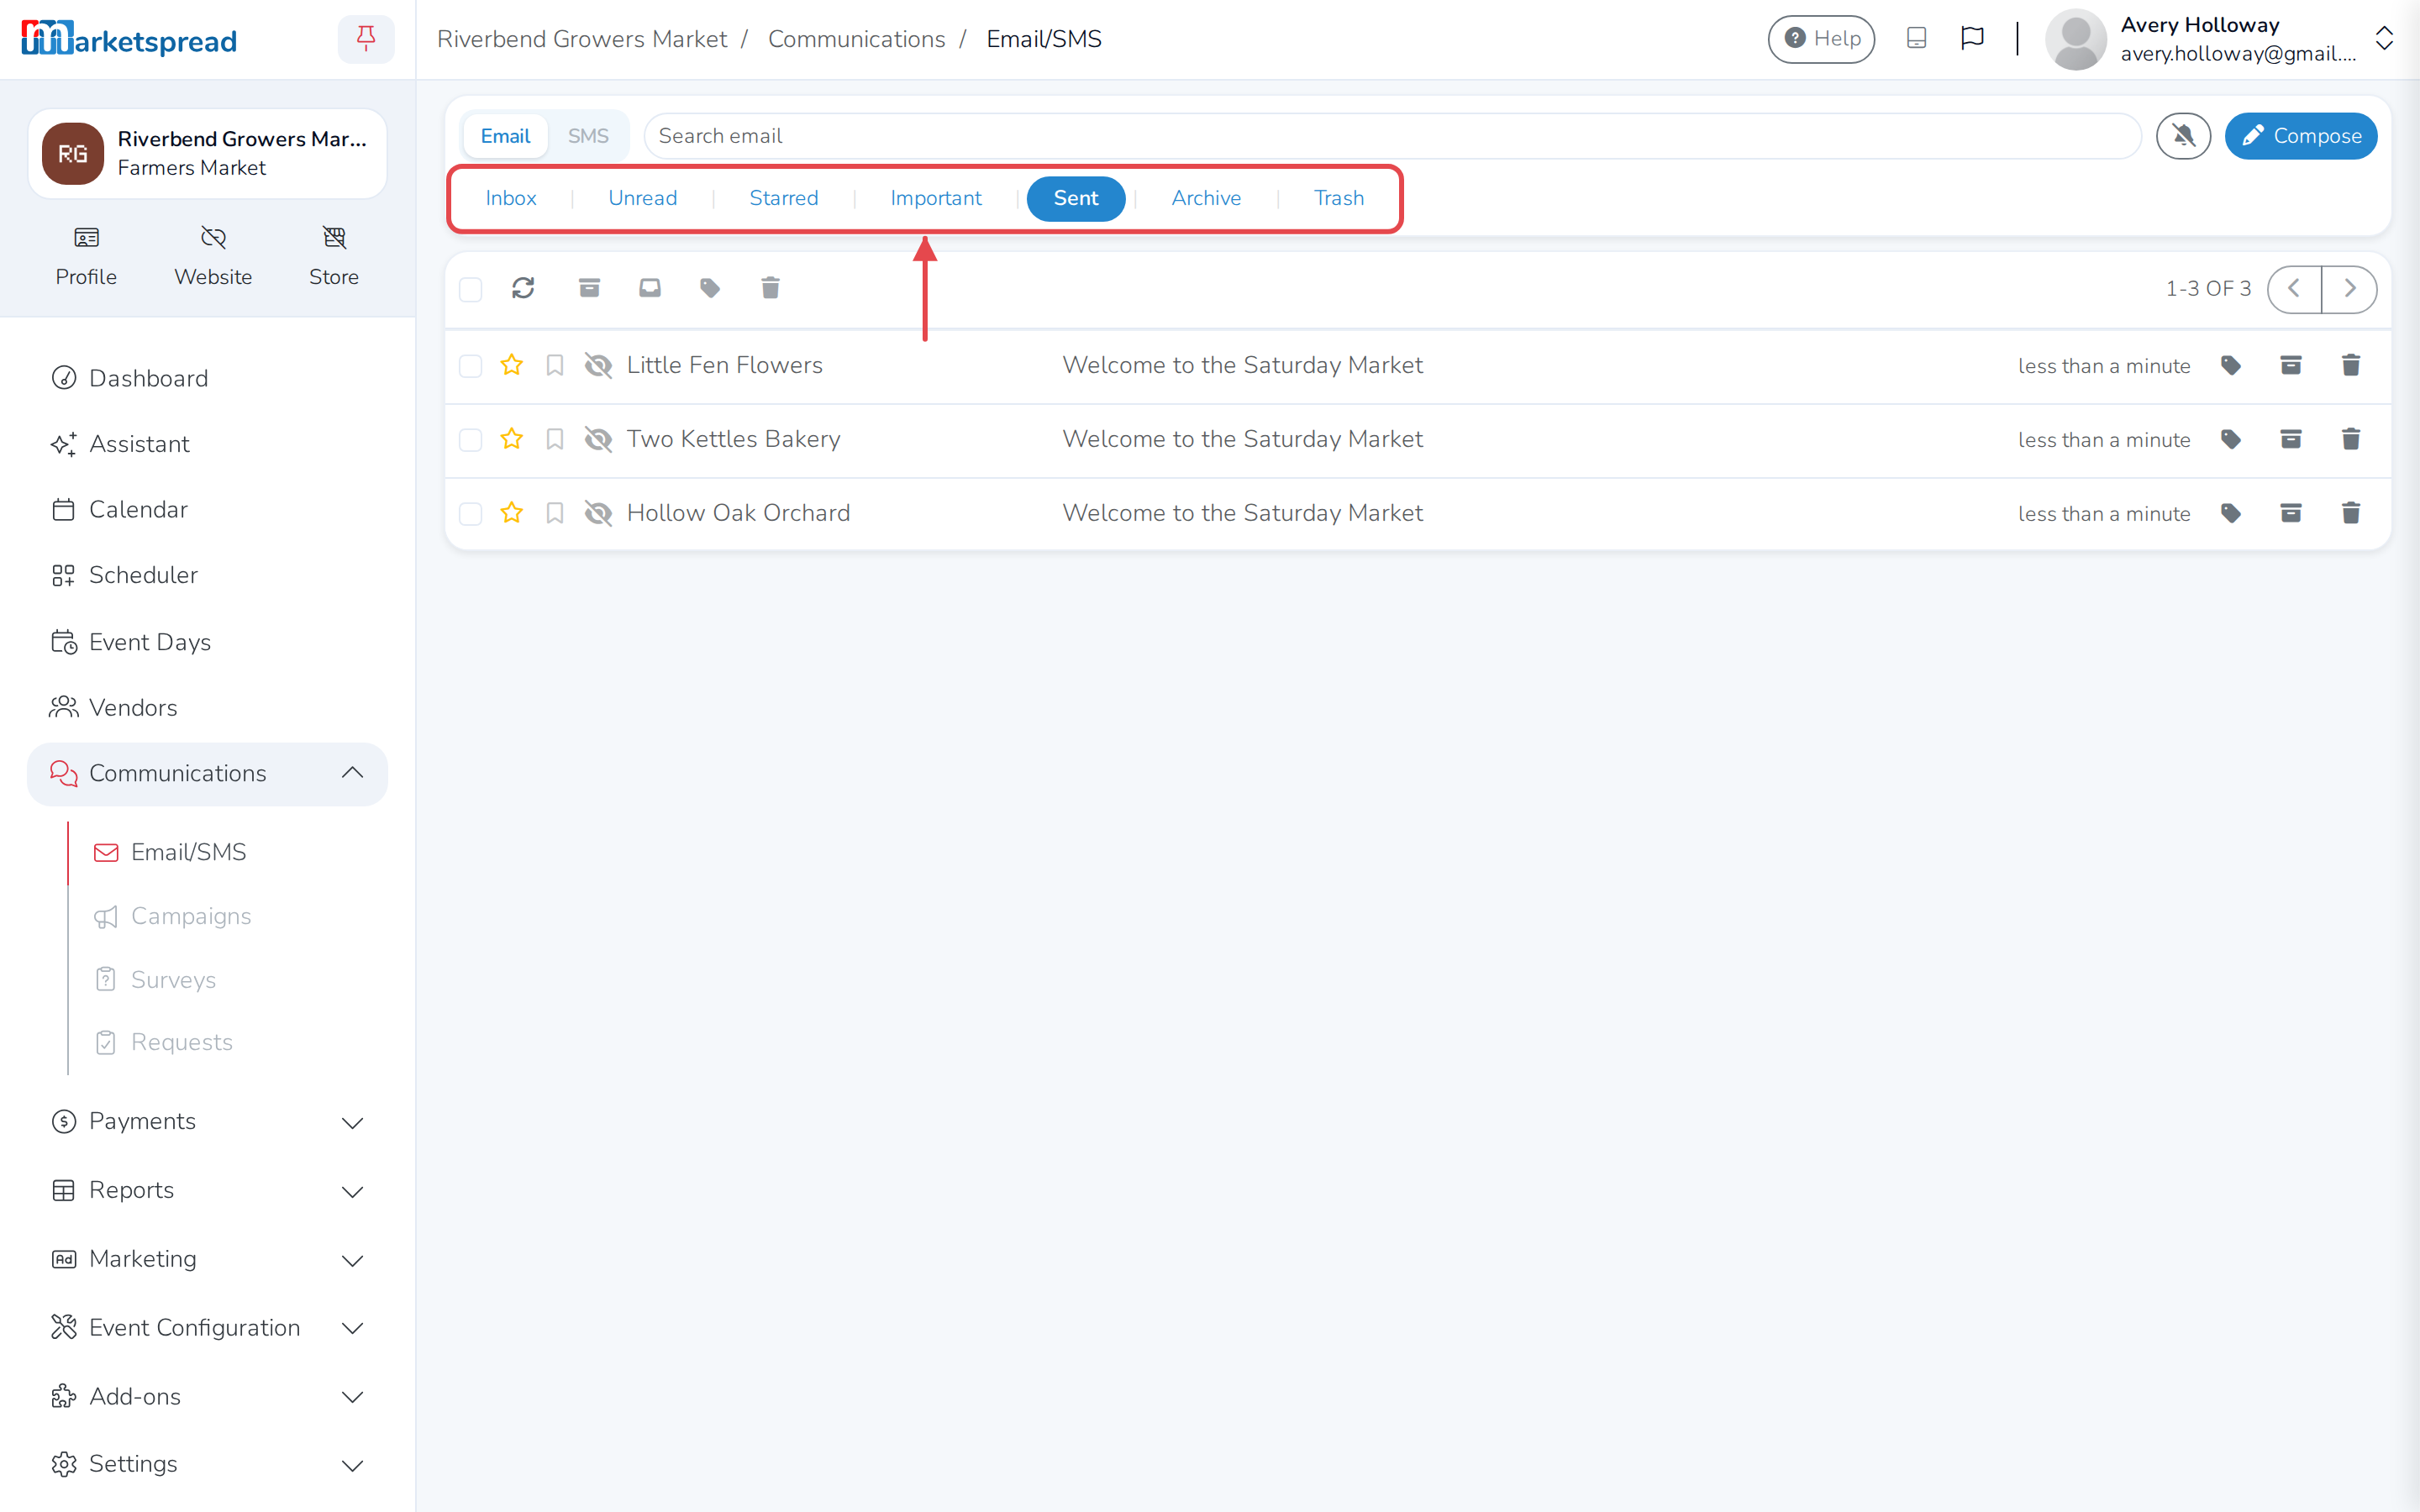
- Email and SMS at the top switch between your email and your text conversations. Everything below shows only the one you picked.
- The folders are Inbox, Unread, Starred, Important, Sent, Archive and Trash. New replies land in Inbox.
- The search box finds conversations in the folder you are in.
- Each conversation has buttons to star it, mark it important, Label as, Archive or Trash it. Check several to do the same to all of them at once.
- Label as, then Manage labels, lets you create, rename, recolor and delete your own labels.
Send an email
-
Make sure Email is selected at the top of the inbox.
-
Click Compose.
-
Click Add recipients and pick who to send to.
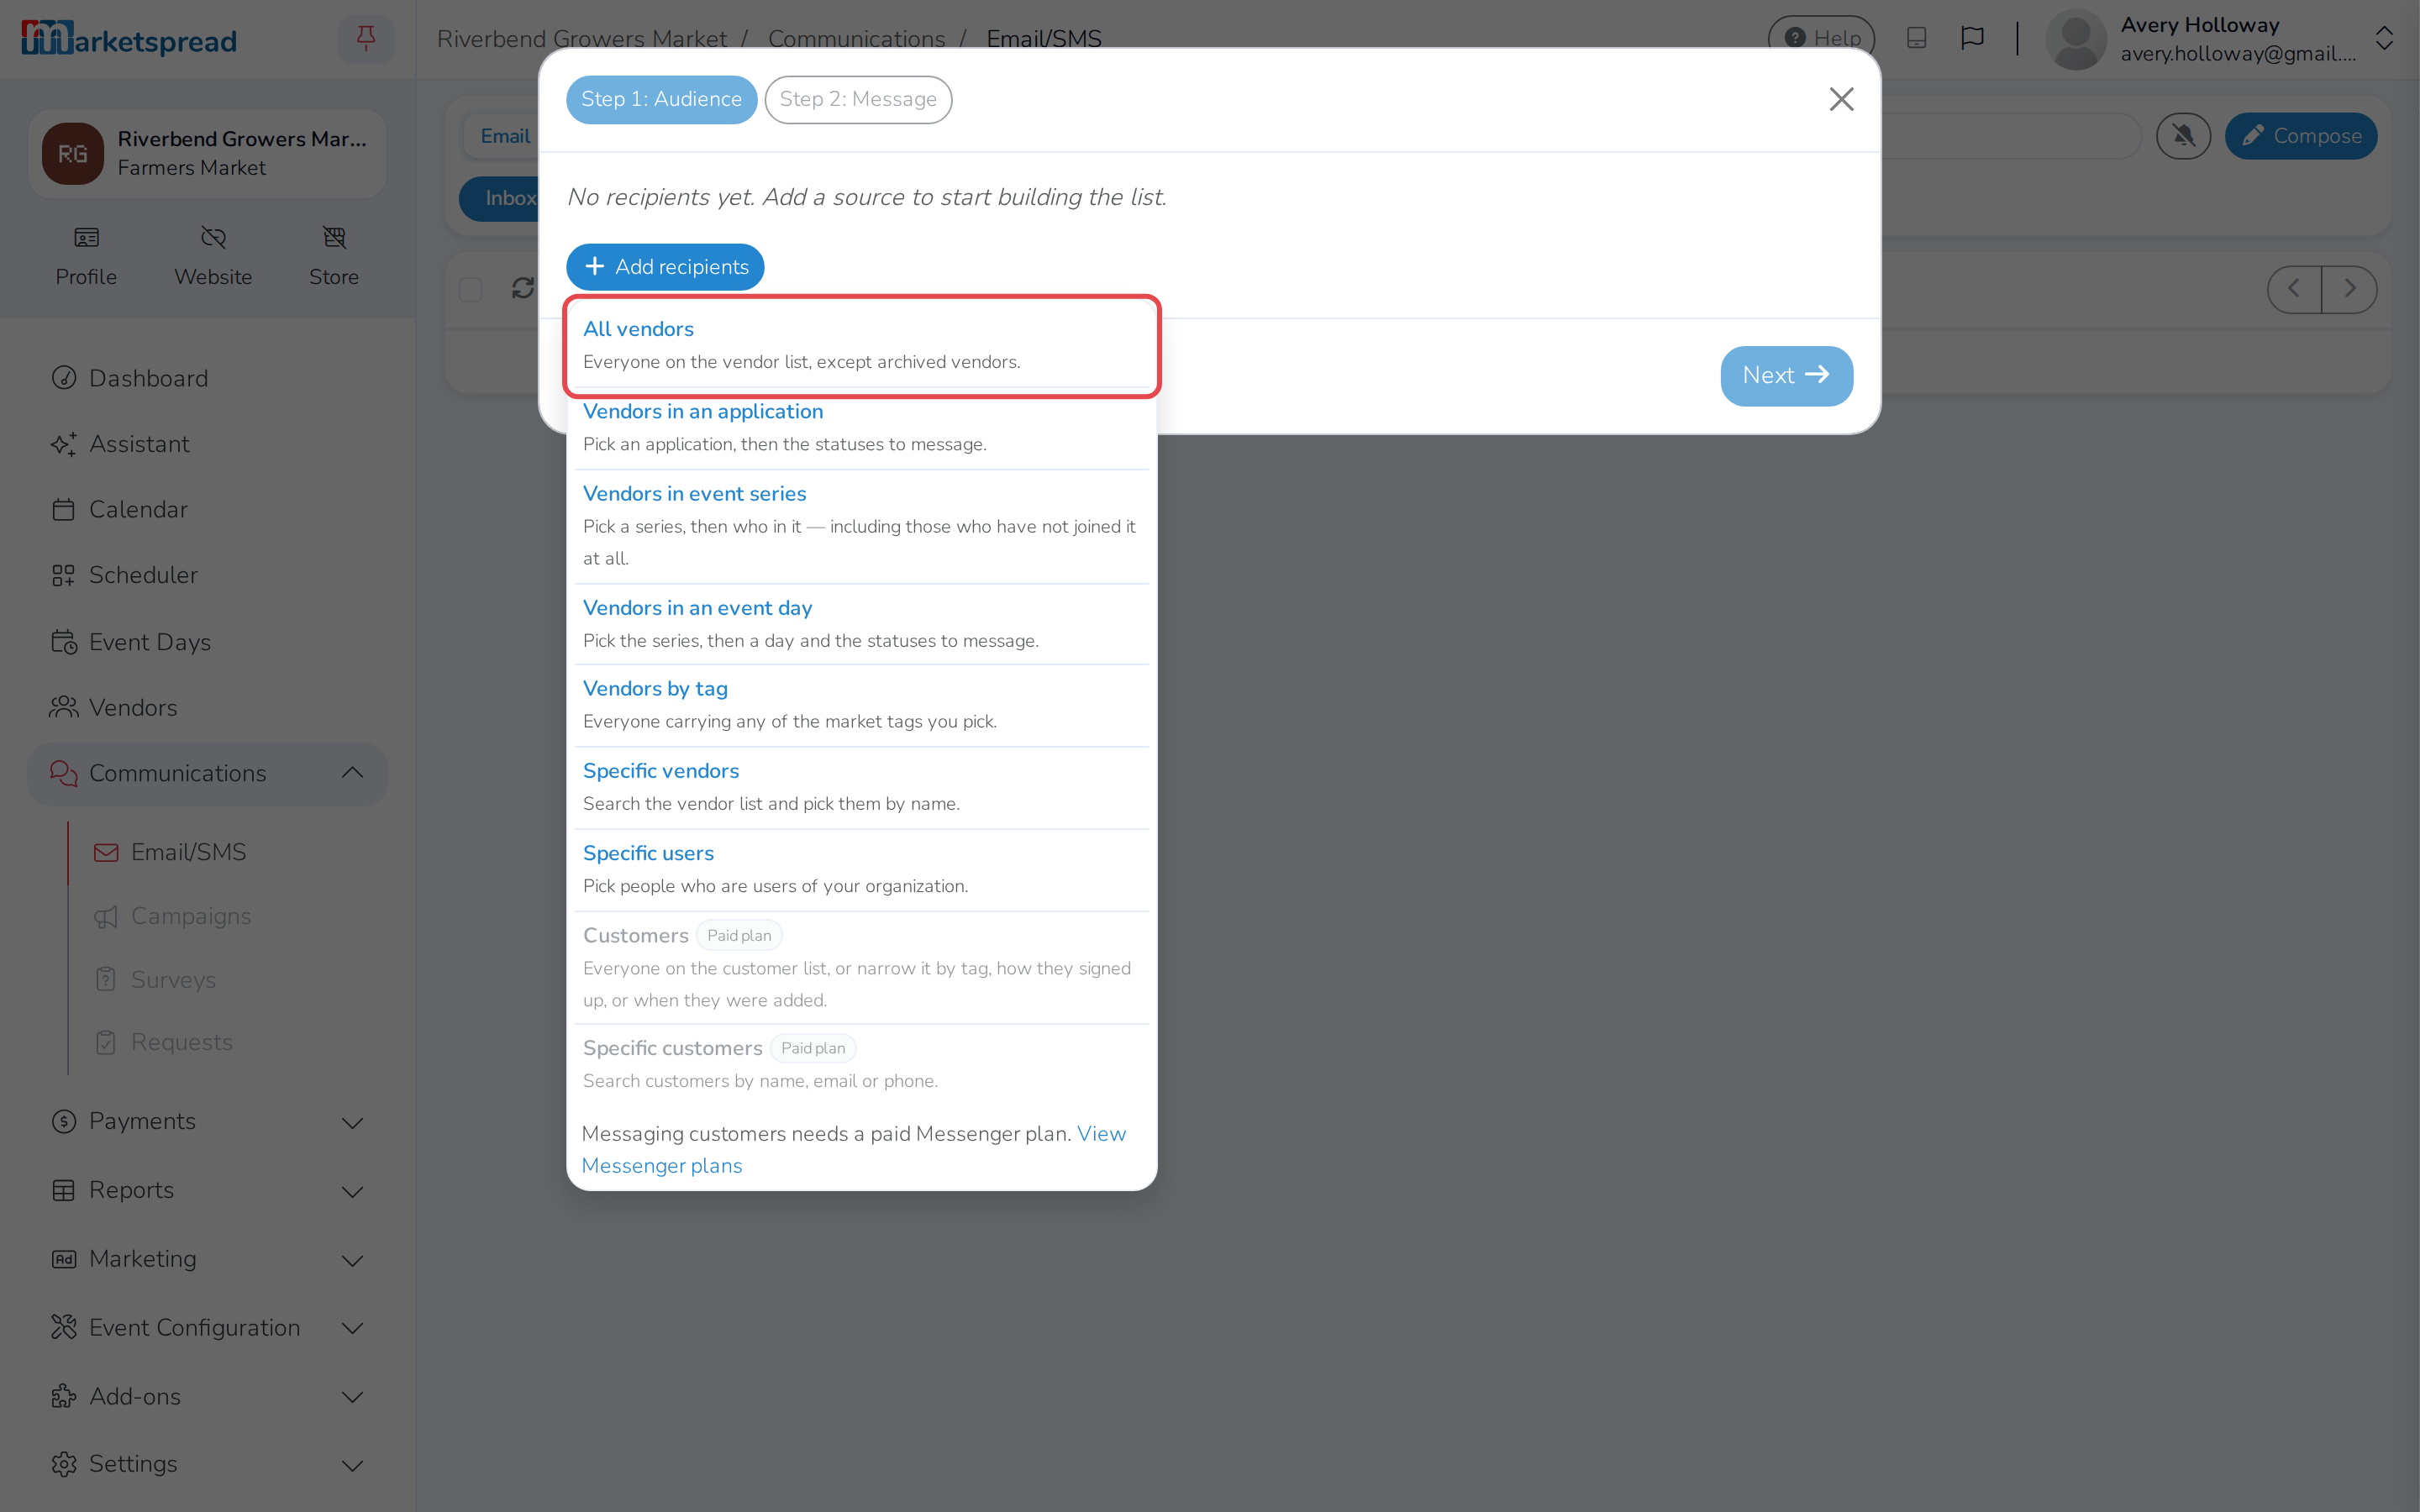
- All vendors — everyone on your vendor list, except archived vendors.
- Vendors in an application, Vendors in event series or Vendors in an event day — pick which one, then the statuses to message.
- Vendors by tag — everyone carrying any of the tags you pick.
- Specific vendors or Specific users — pick people one by one.
- Customers or Specific customers — everyone on your customer list, or narrowed by tag, how they signed up, or when they were added. These need a paid Messenger plan.
-
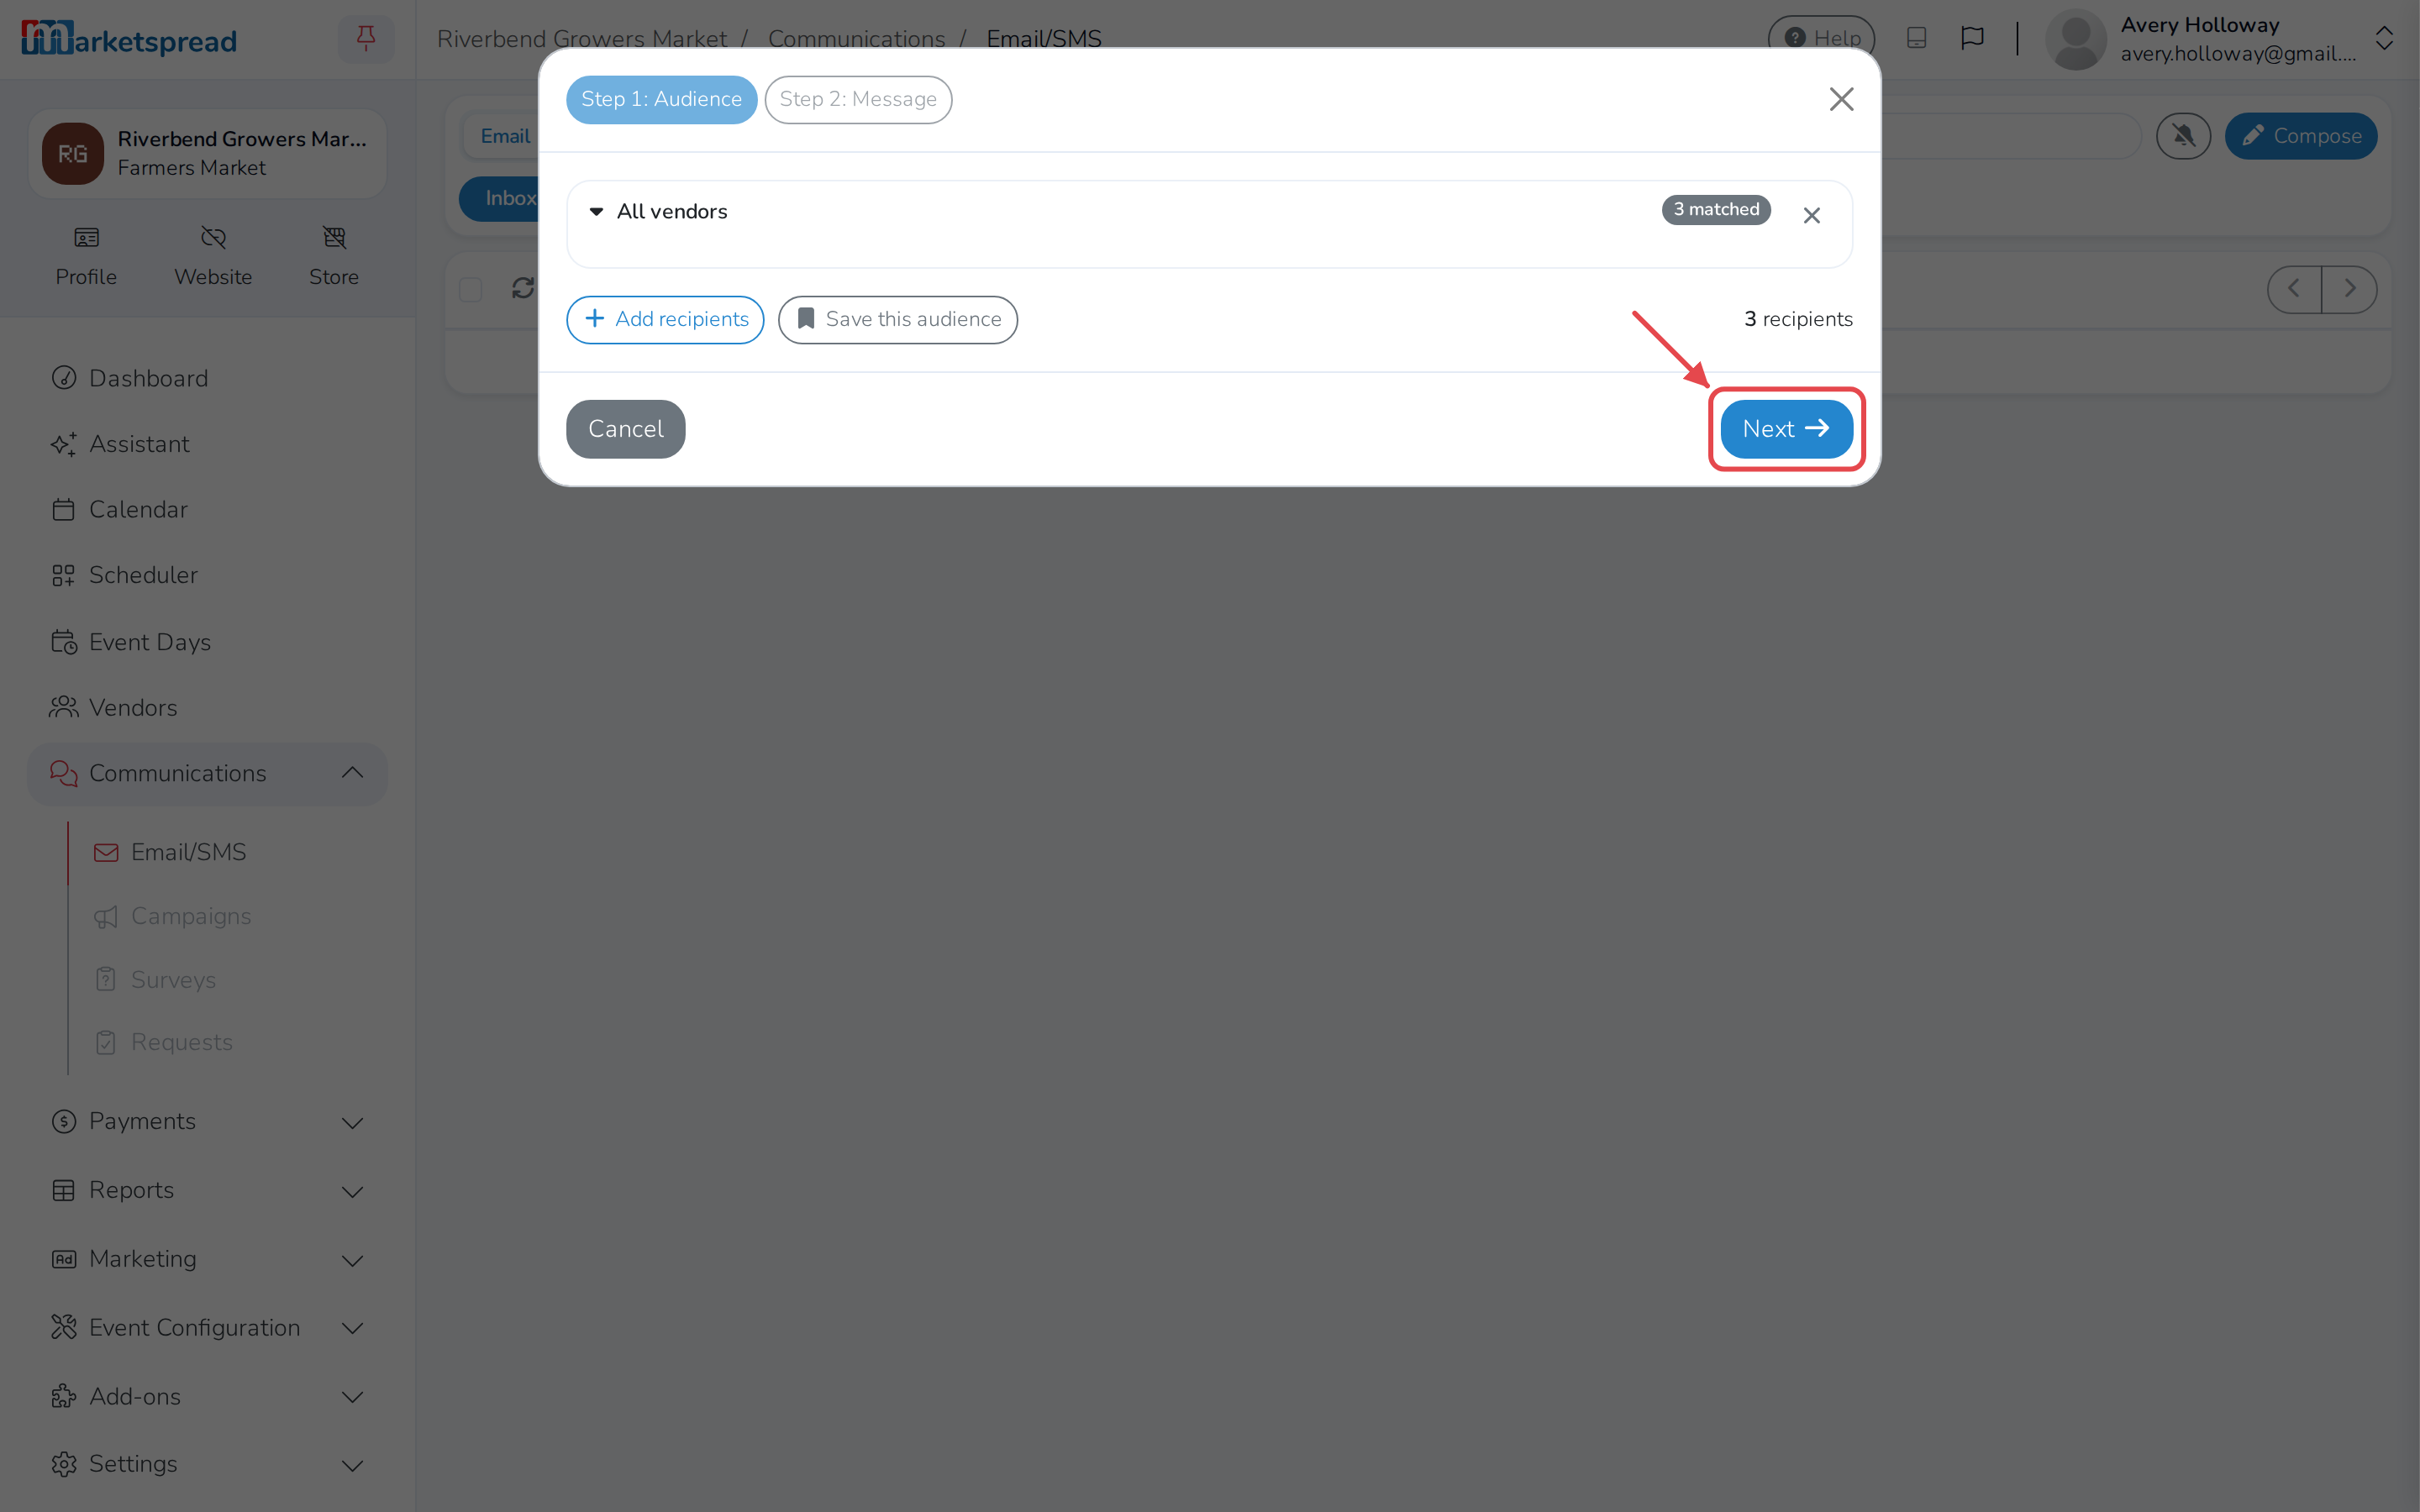
Add more groups the same way if you need them. Each one shows how many people it matched, and the total is under the list.
-
Click Next.
-
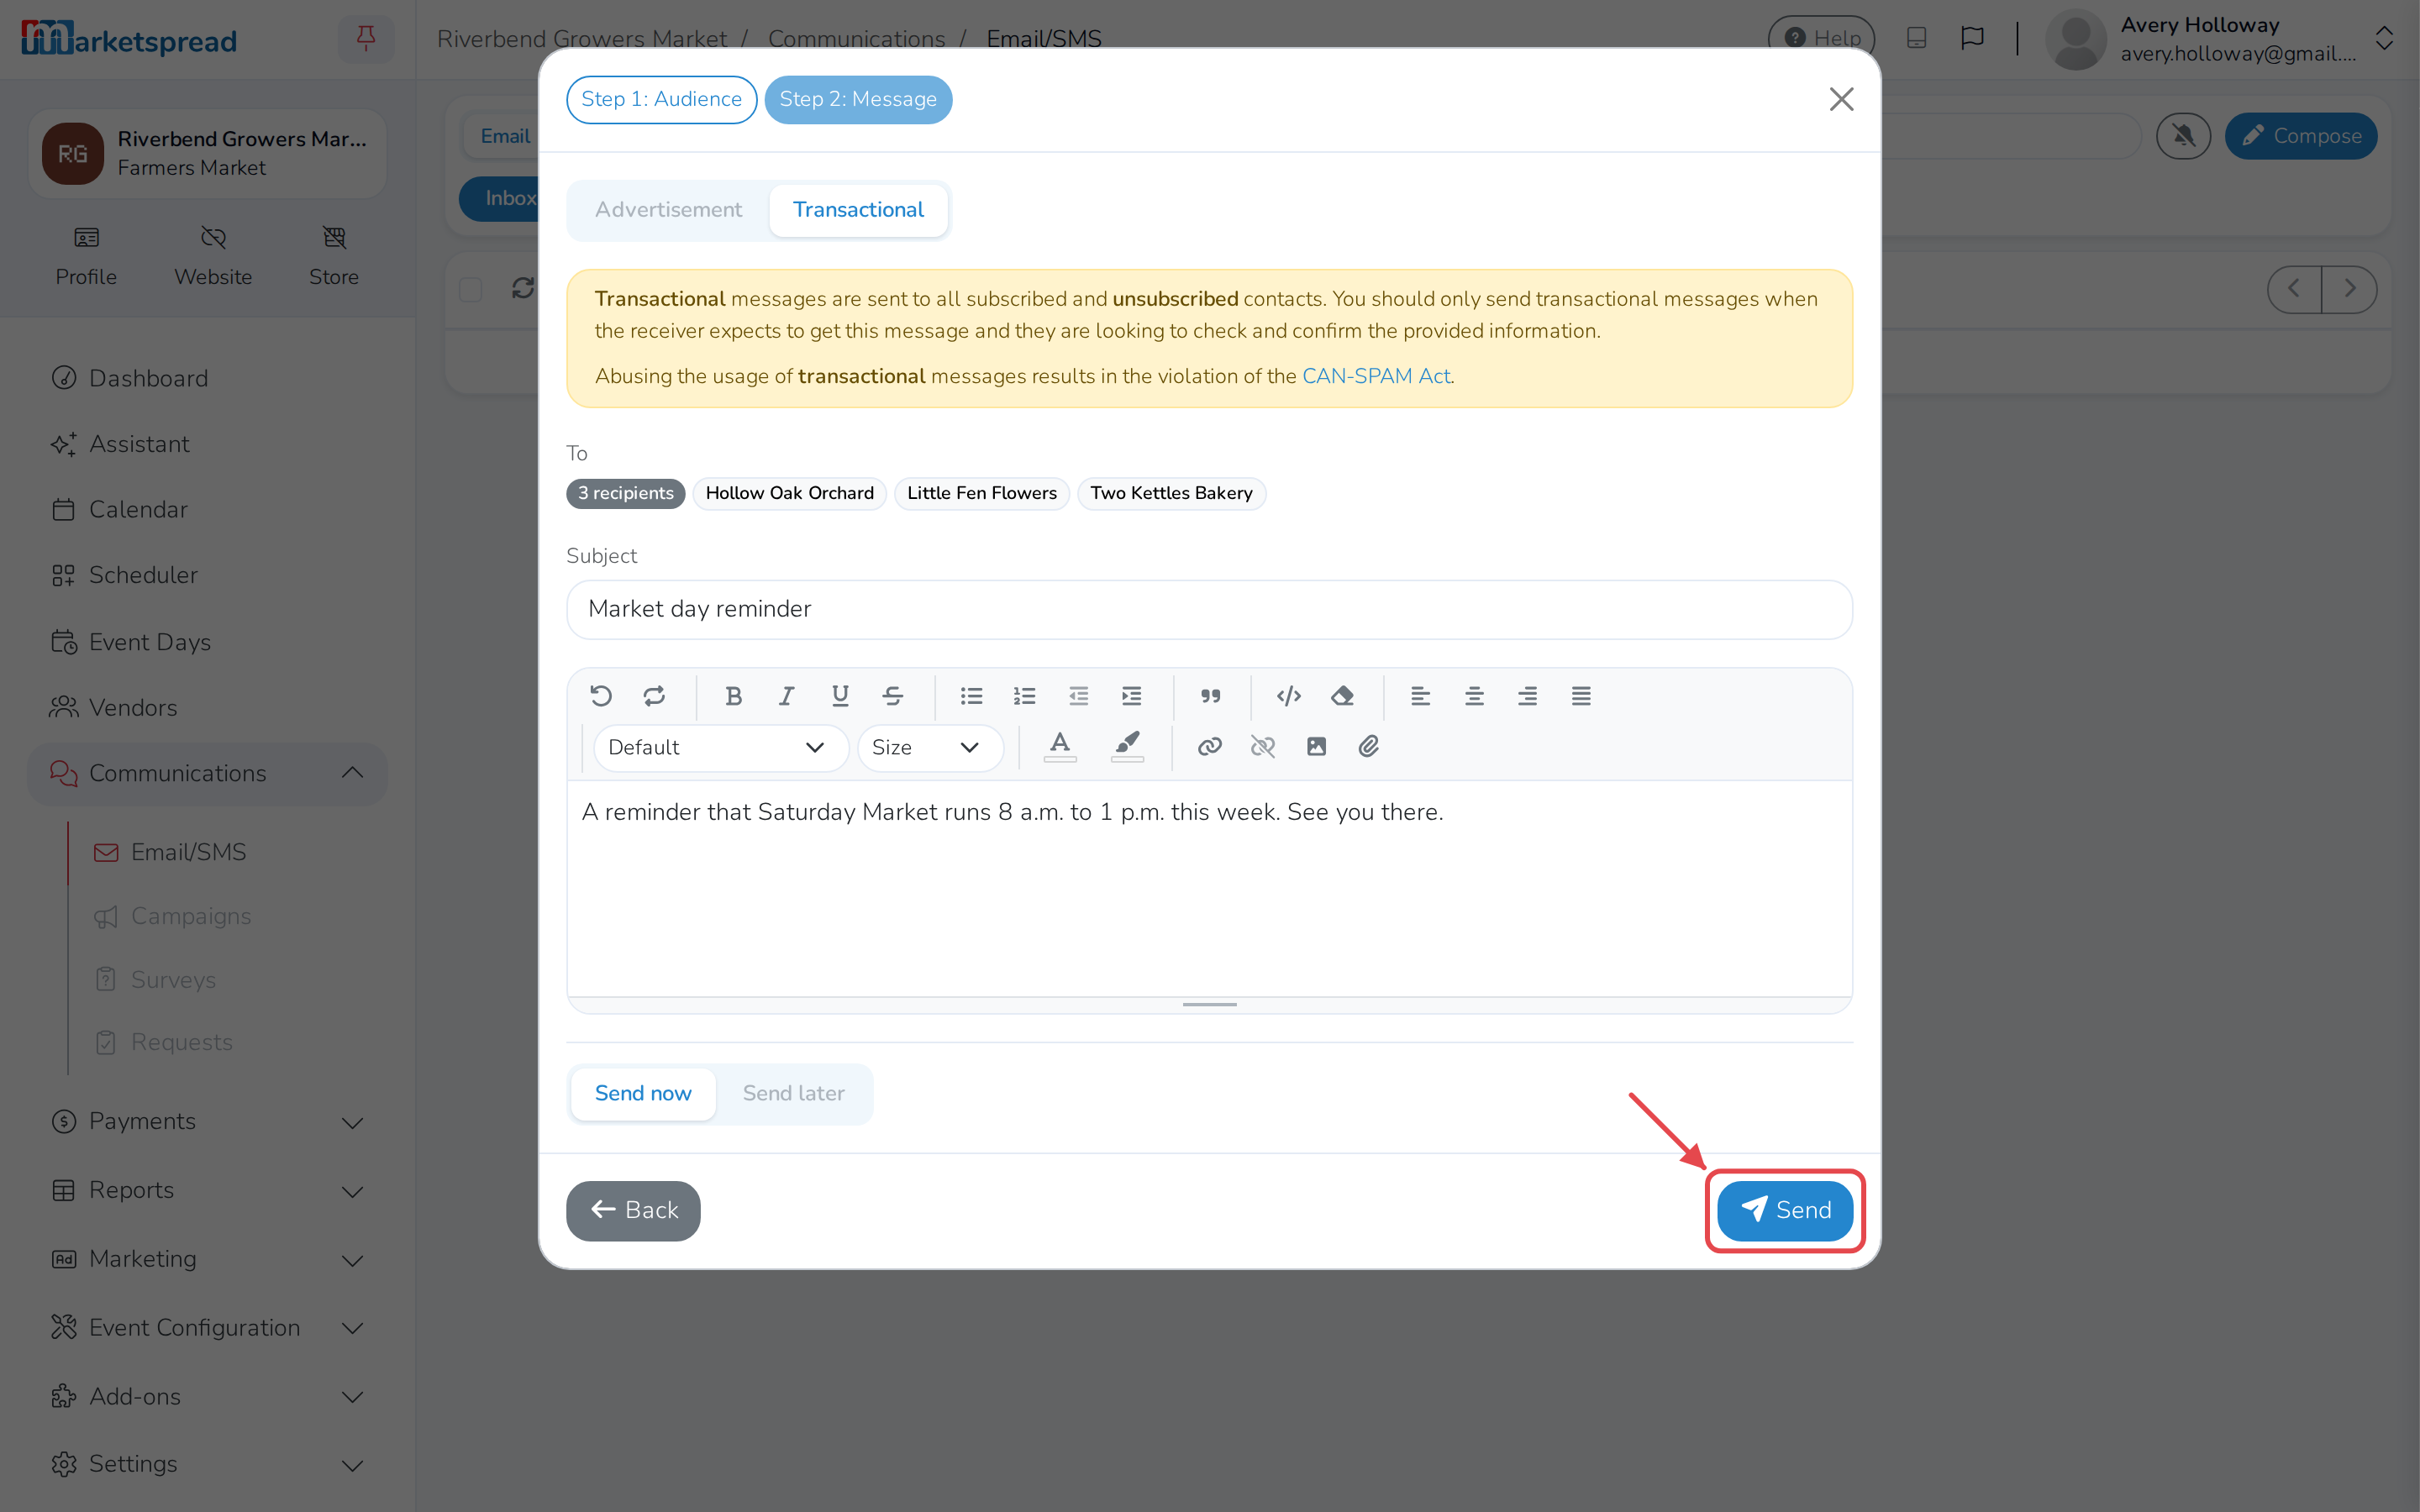
Choose Advertisement or Transactional. See below for which one.
-
Fill in Subject and write your message. You can attach files, up to 7 MB in total.
-
Click Send.
The message appears in your Sent folder.
Advertisement or Transactional
Advertisement is for promoting your market, an event or a product. It only reaches people who have agreed to hear from you. Anyone who hasn't is marked Not subscribed in To, and if nobody has, you cannot send it.
Transactional reaches everyone, subscribed or not. Use it only for messages a person expects and needs — a loading email for vendors booked on a day, a change to a market day. Using it for promotion breaks the CAN-SPAM Act.
If a total shows people skipped, click it to see who. They aren't in Messenger yet, or have no email address, and won't get this one.
Save a group you message often
On step 1, click Save this audience and give it a Name. Next time it is one click under Add recipients. It saves who you picked, not the people — so it always means whoever matches on the day you send.
Schedule an email for later
-
Start an email the same way, up to the message.
-
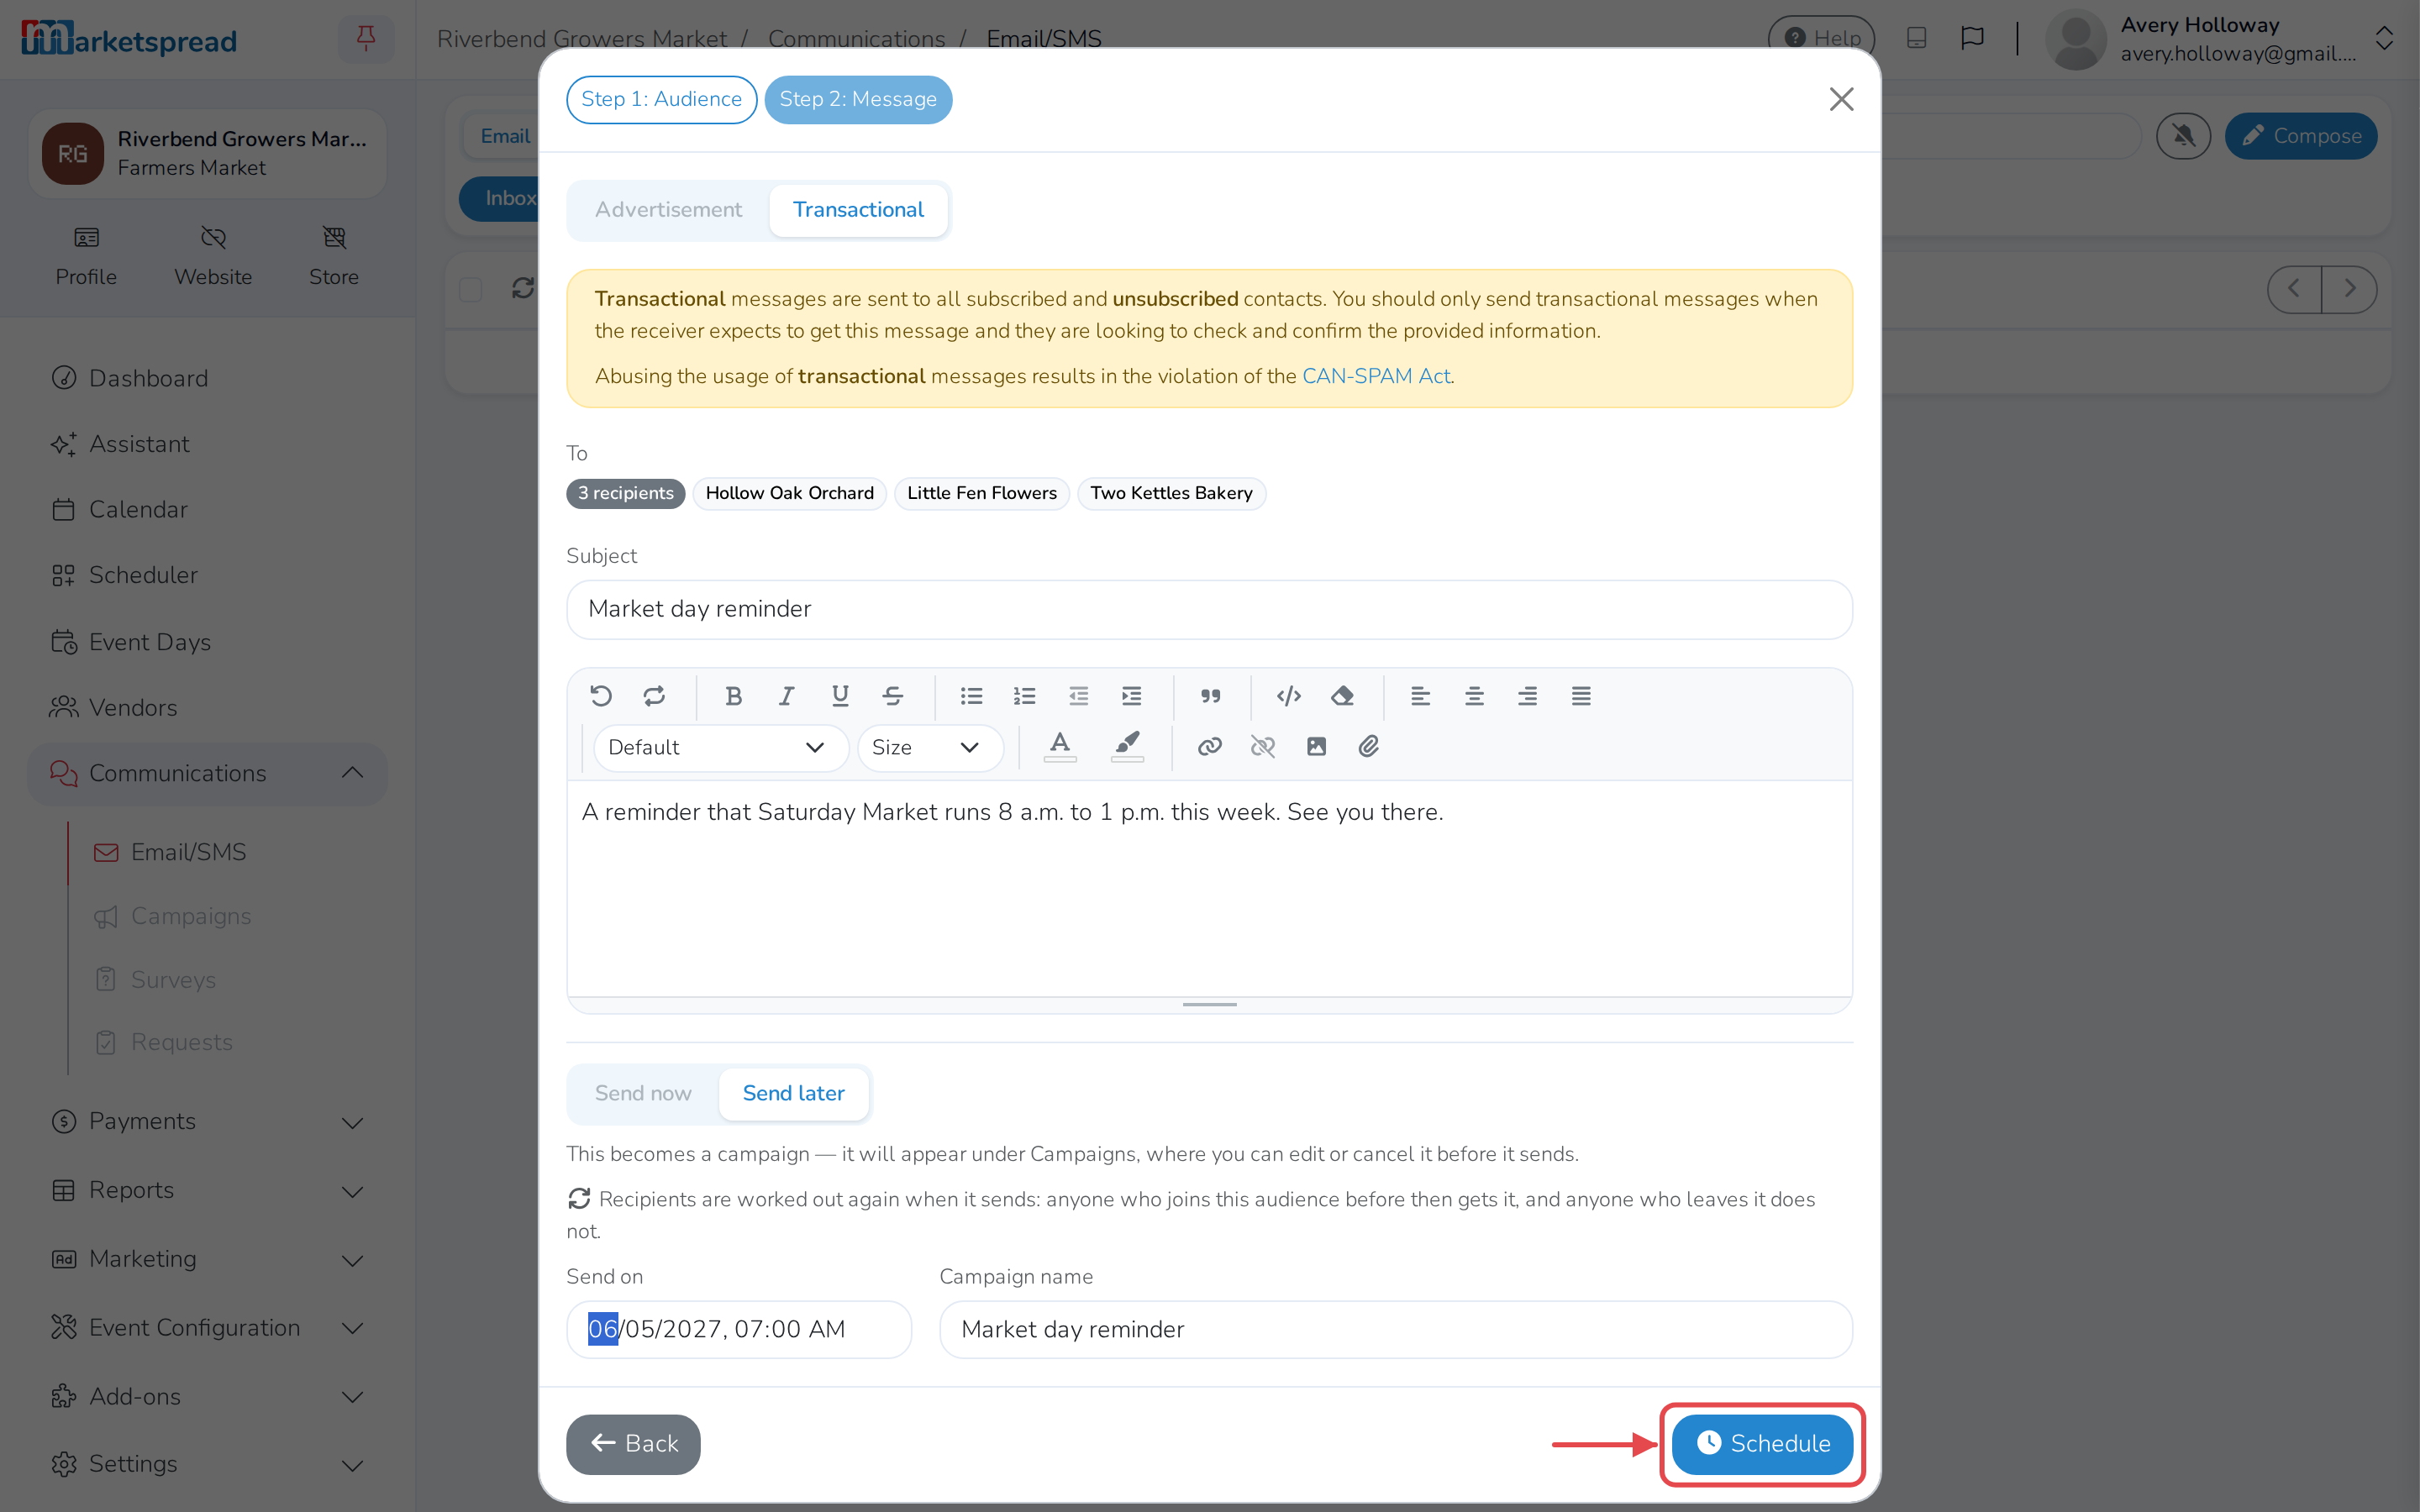
Under the message, click Send later.
-
Pick the date and time in Send on.
-
Check Campaign name. It starts as your subject.
-
Click Schedule.
The email becomes a campaign. Find it, change it or cancel it under Campaigns until it sends. Who gets it is worked out again when it sends.
Read and reply to a conversation
-
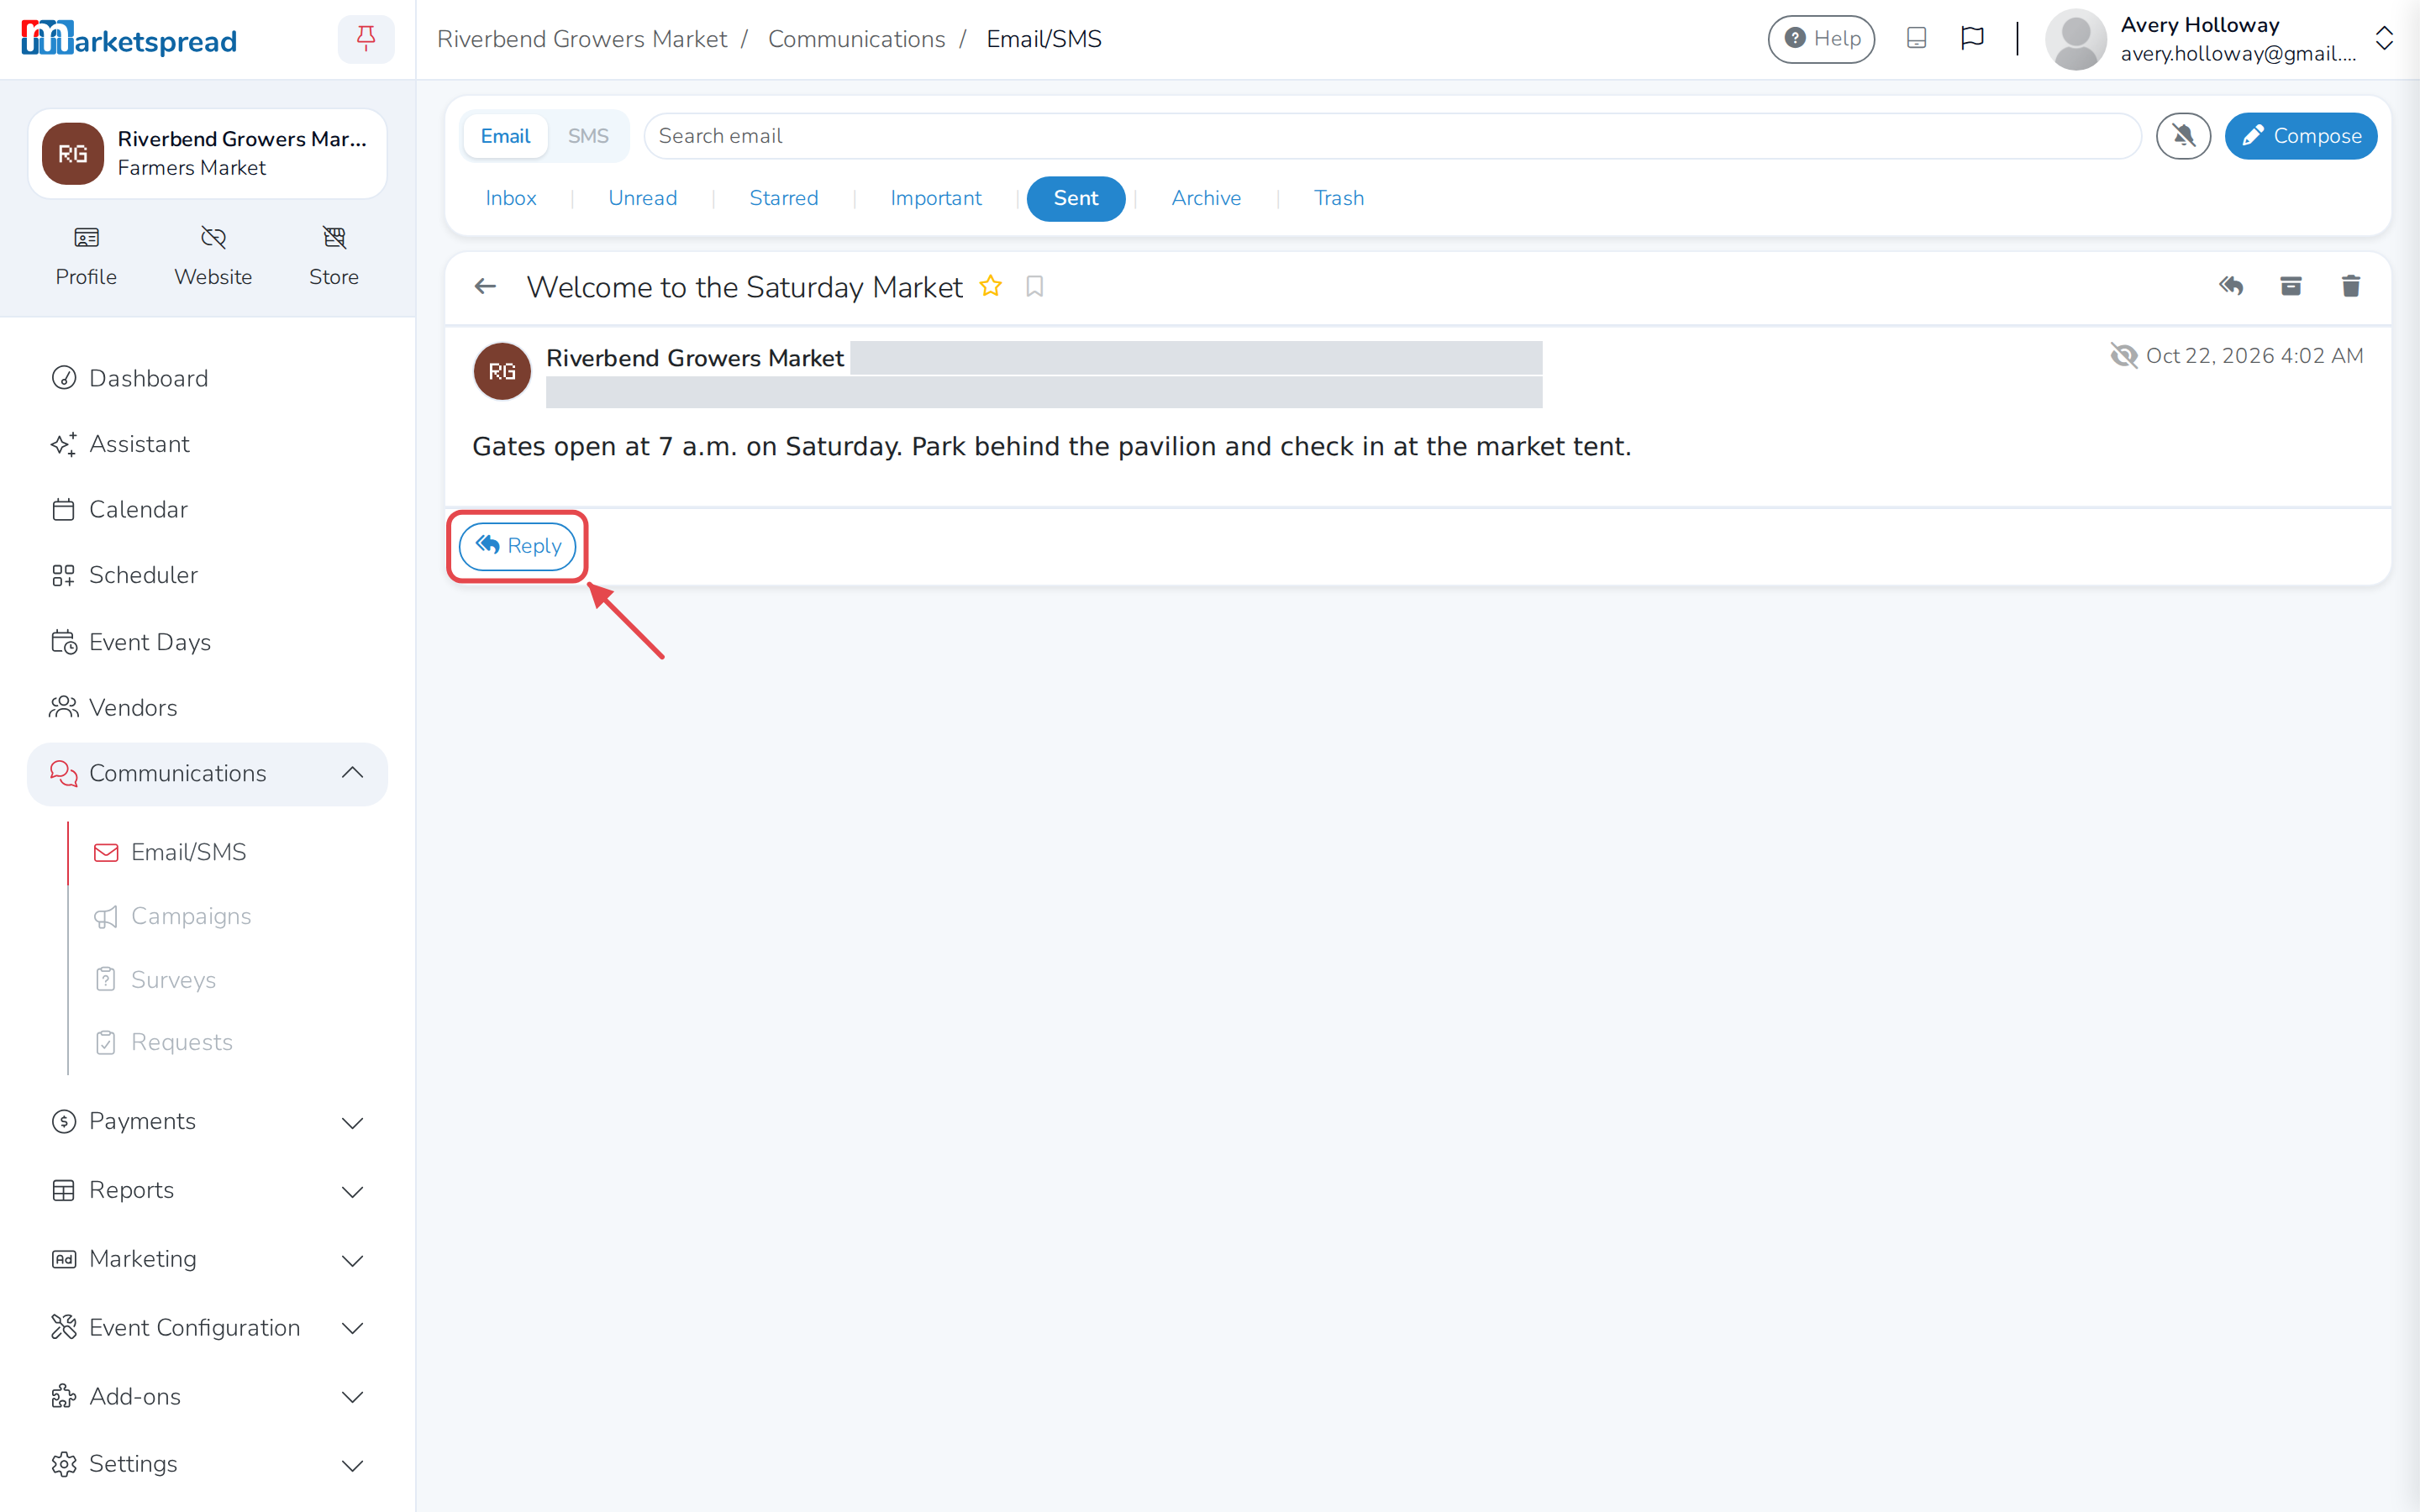
Click a conversation in any folder. It opens over the whole list.
-
Click Reply, write your answer, and click Send.
-
Click the back arrow to return to the list.
A text conversation opens as a chat, with your messages and theirs in bubbles. Type in Reply here... at the bottom to answer.
Send a text message
Texting needs a paid Messenger plan with a text number. Without one, clicking SMS shows what texting does and Add texting to your plan.
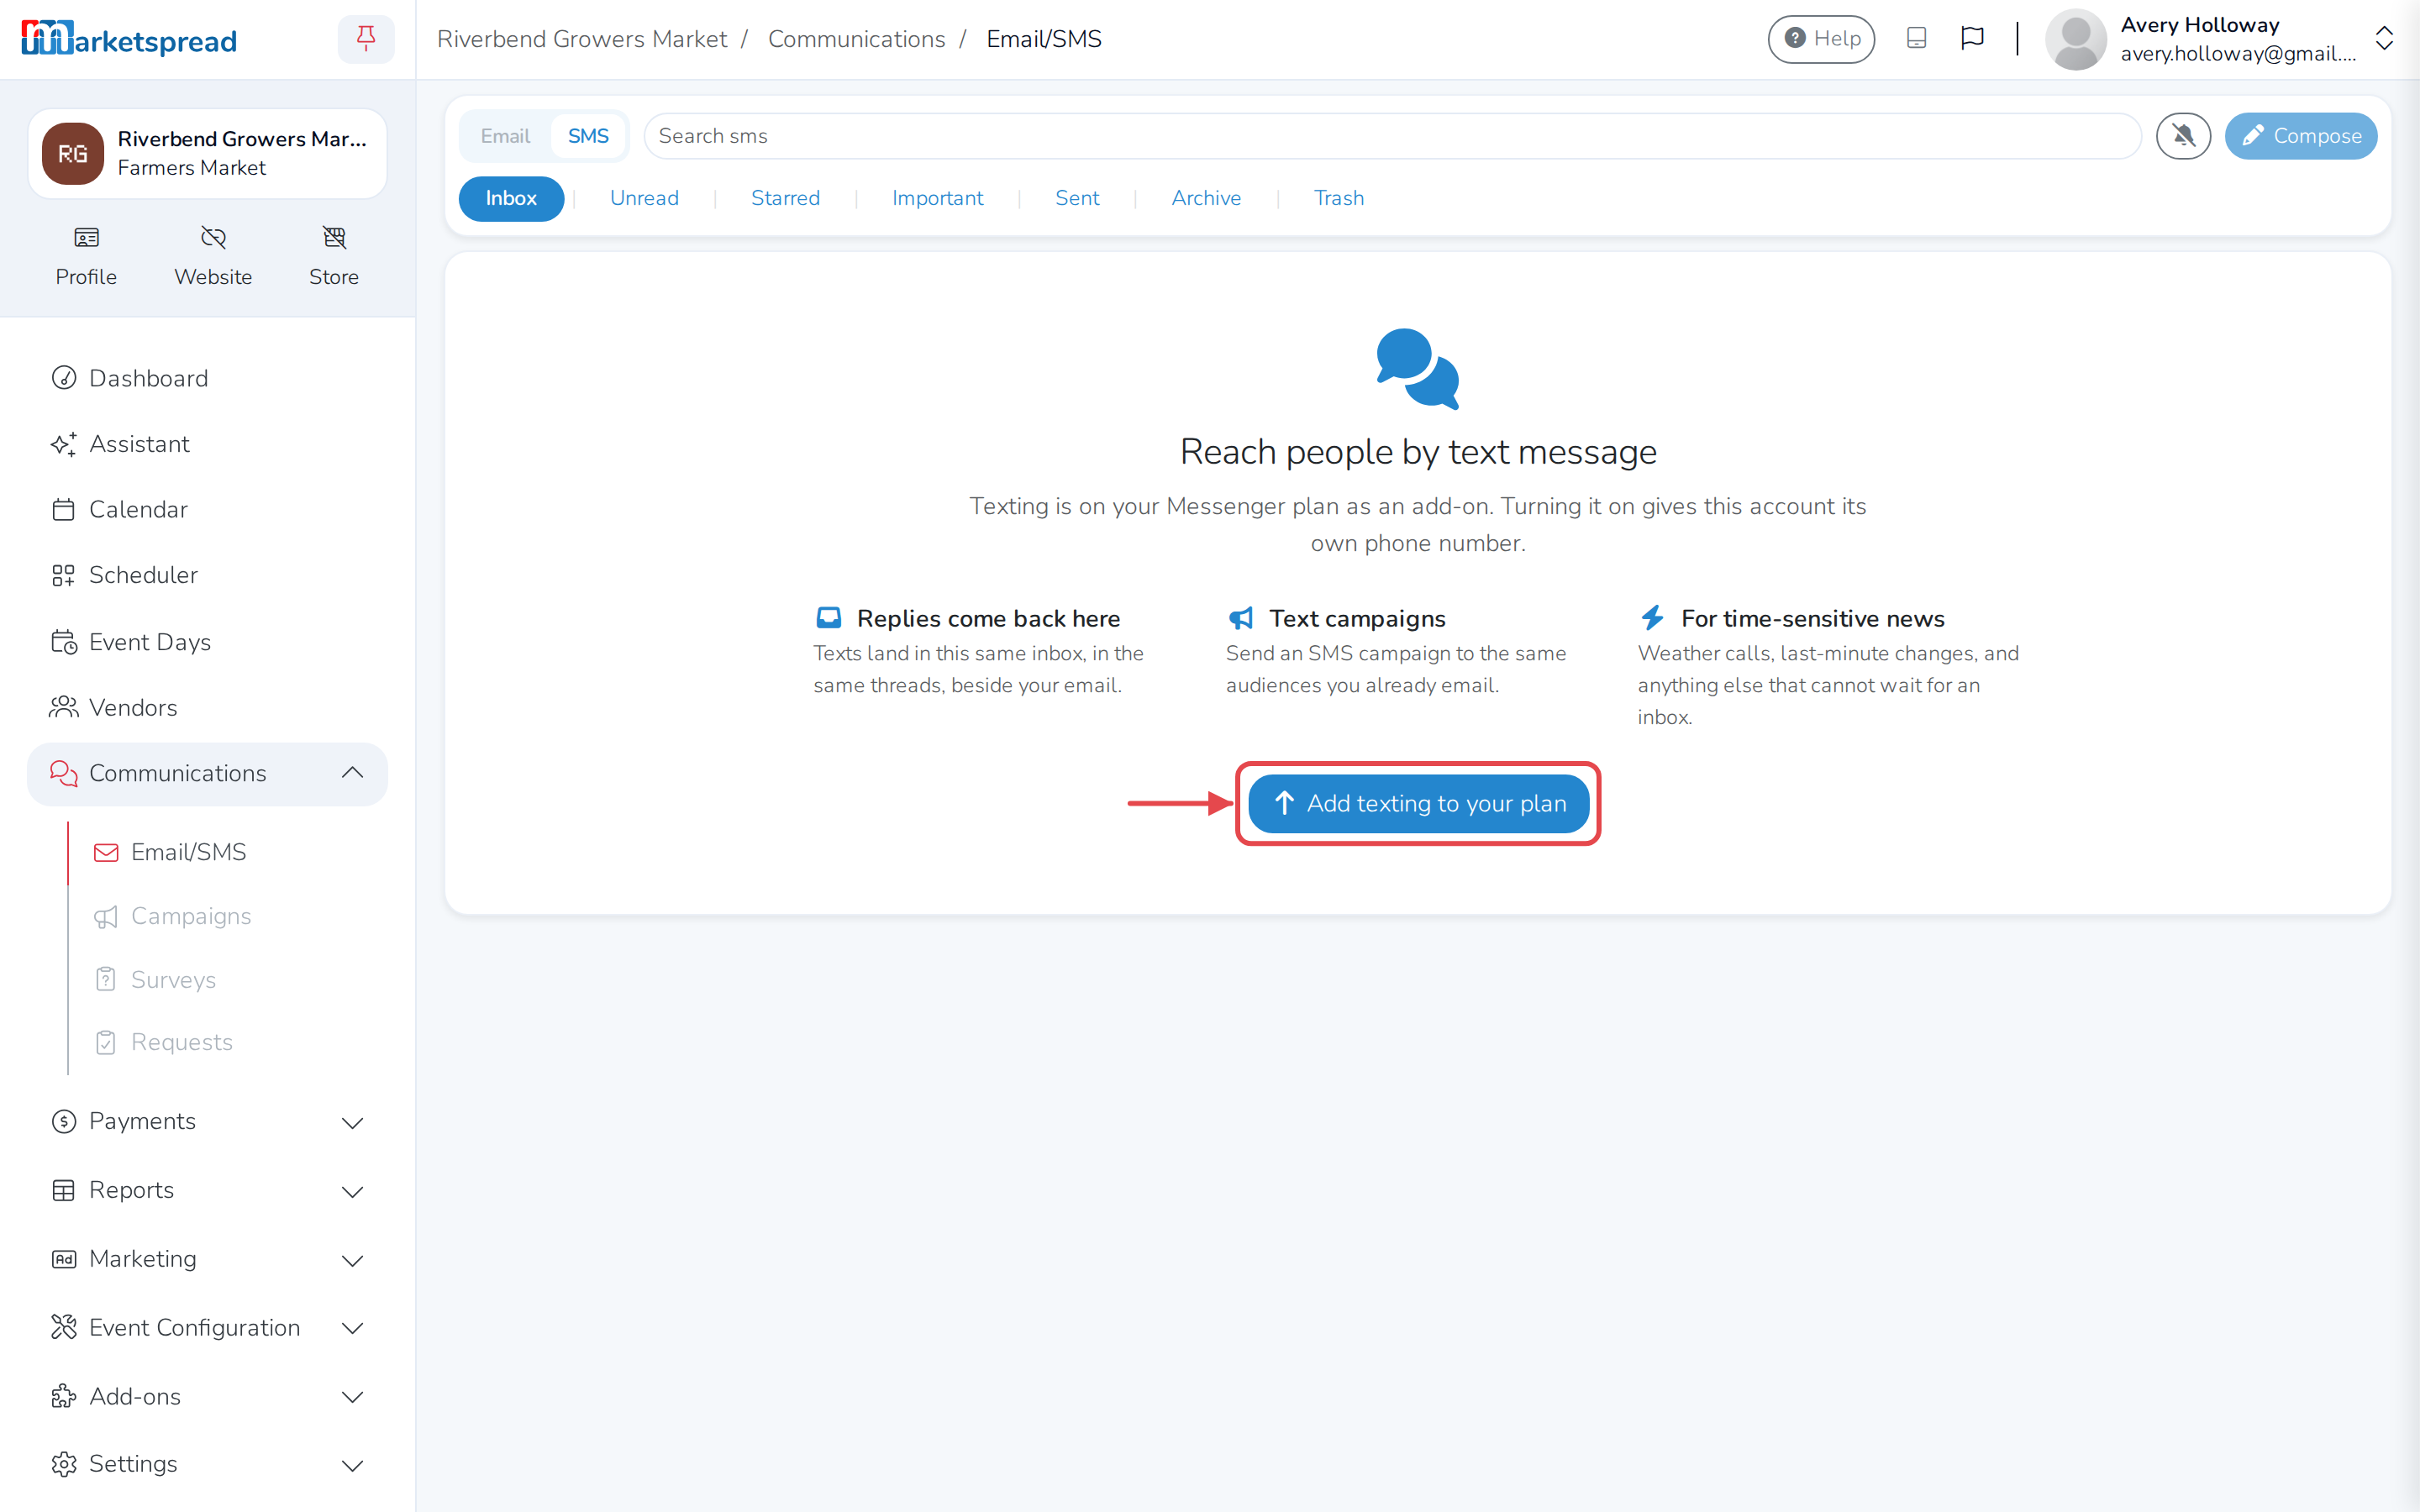
See Manage your market's Messenger plan to add it. Once your plan includes texting:
-
Click SMS at the top of the inbox.
-
Click Compose.
-
Pick who to send to and click Next, the same as for an email.
-
Choose Advertisement or Transactional.
-
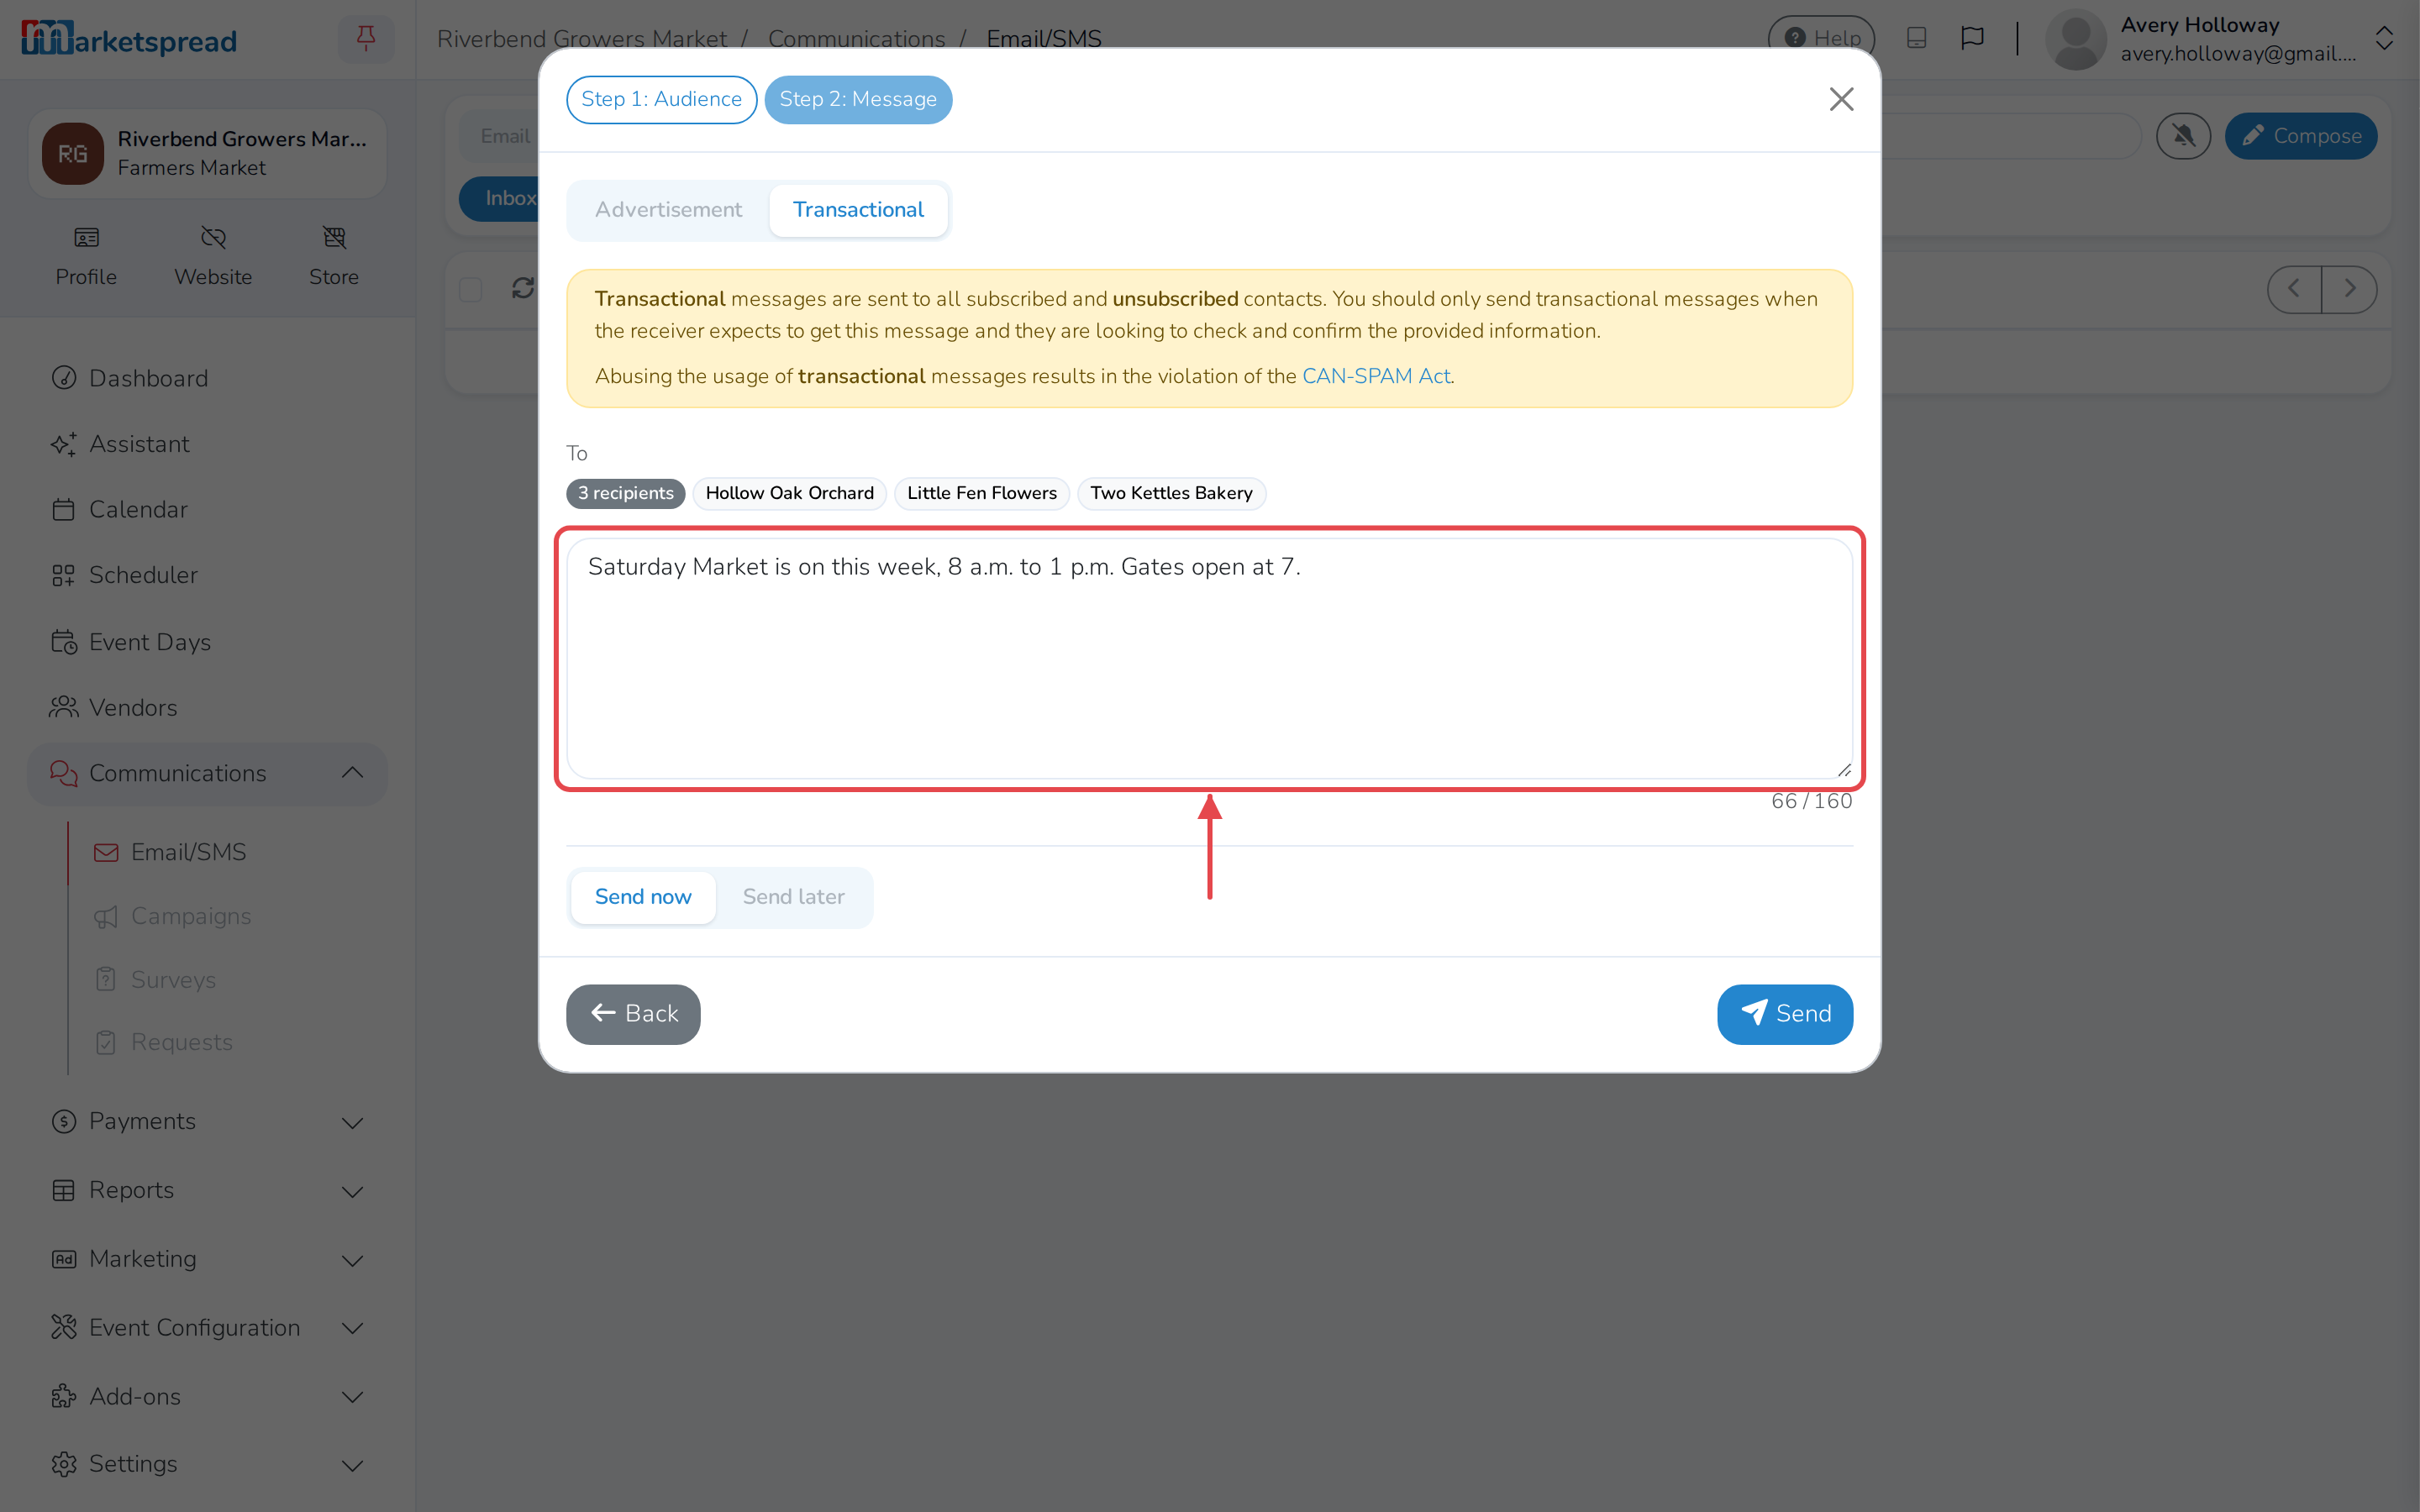
Write your message. The counter under it shows how much room is left.
-
Click Send.
A text holds 160 characters. An Advertisement text holds 149, because "Reply STOP" is added to the end so people can opt out. Anyone with no mobile number is listed as not getting it.
Create a campaign
A campaign is a message that sends on a date you choose. It can be an email, a text, or both.
-
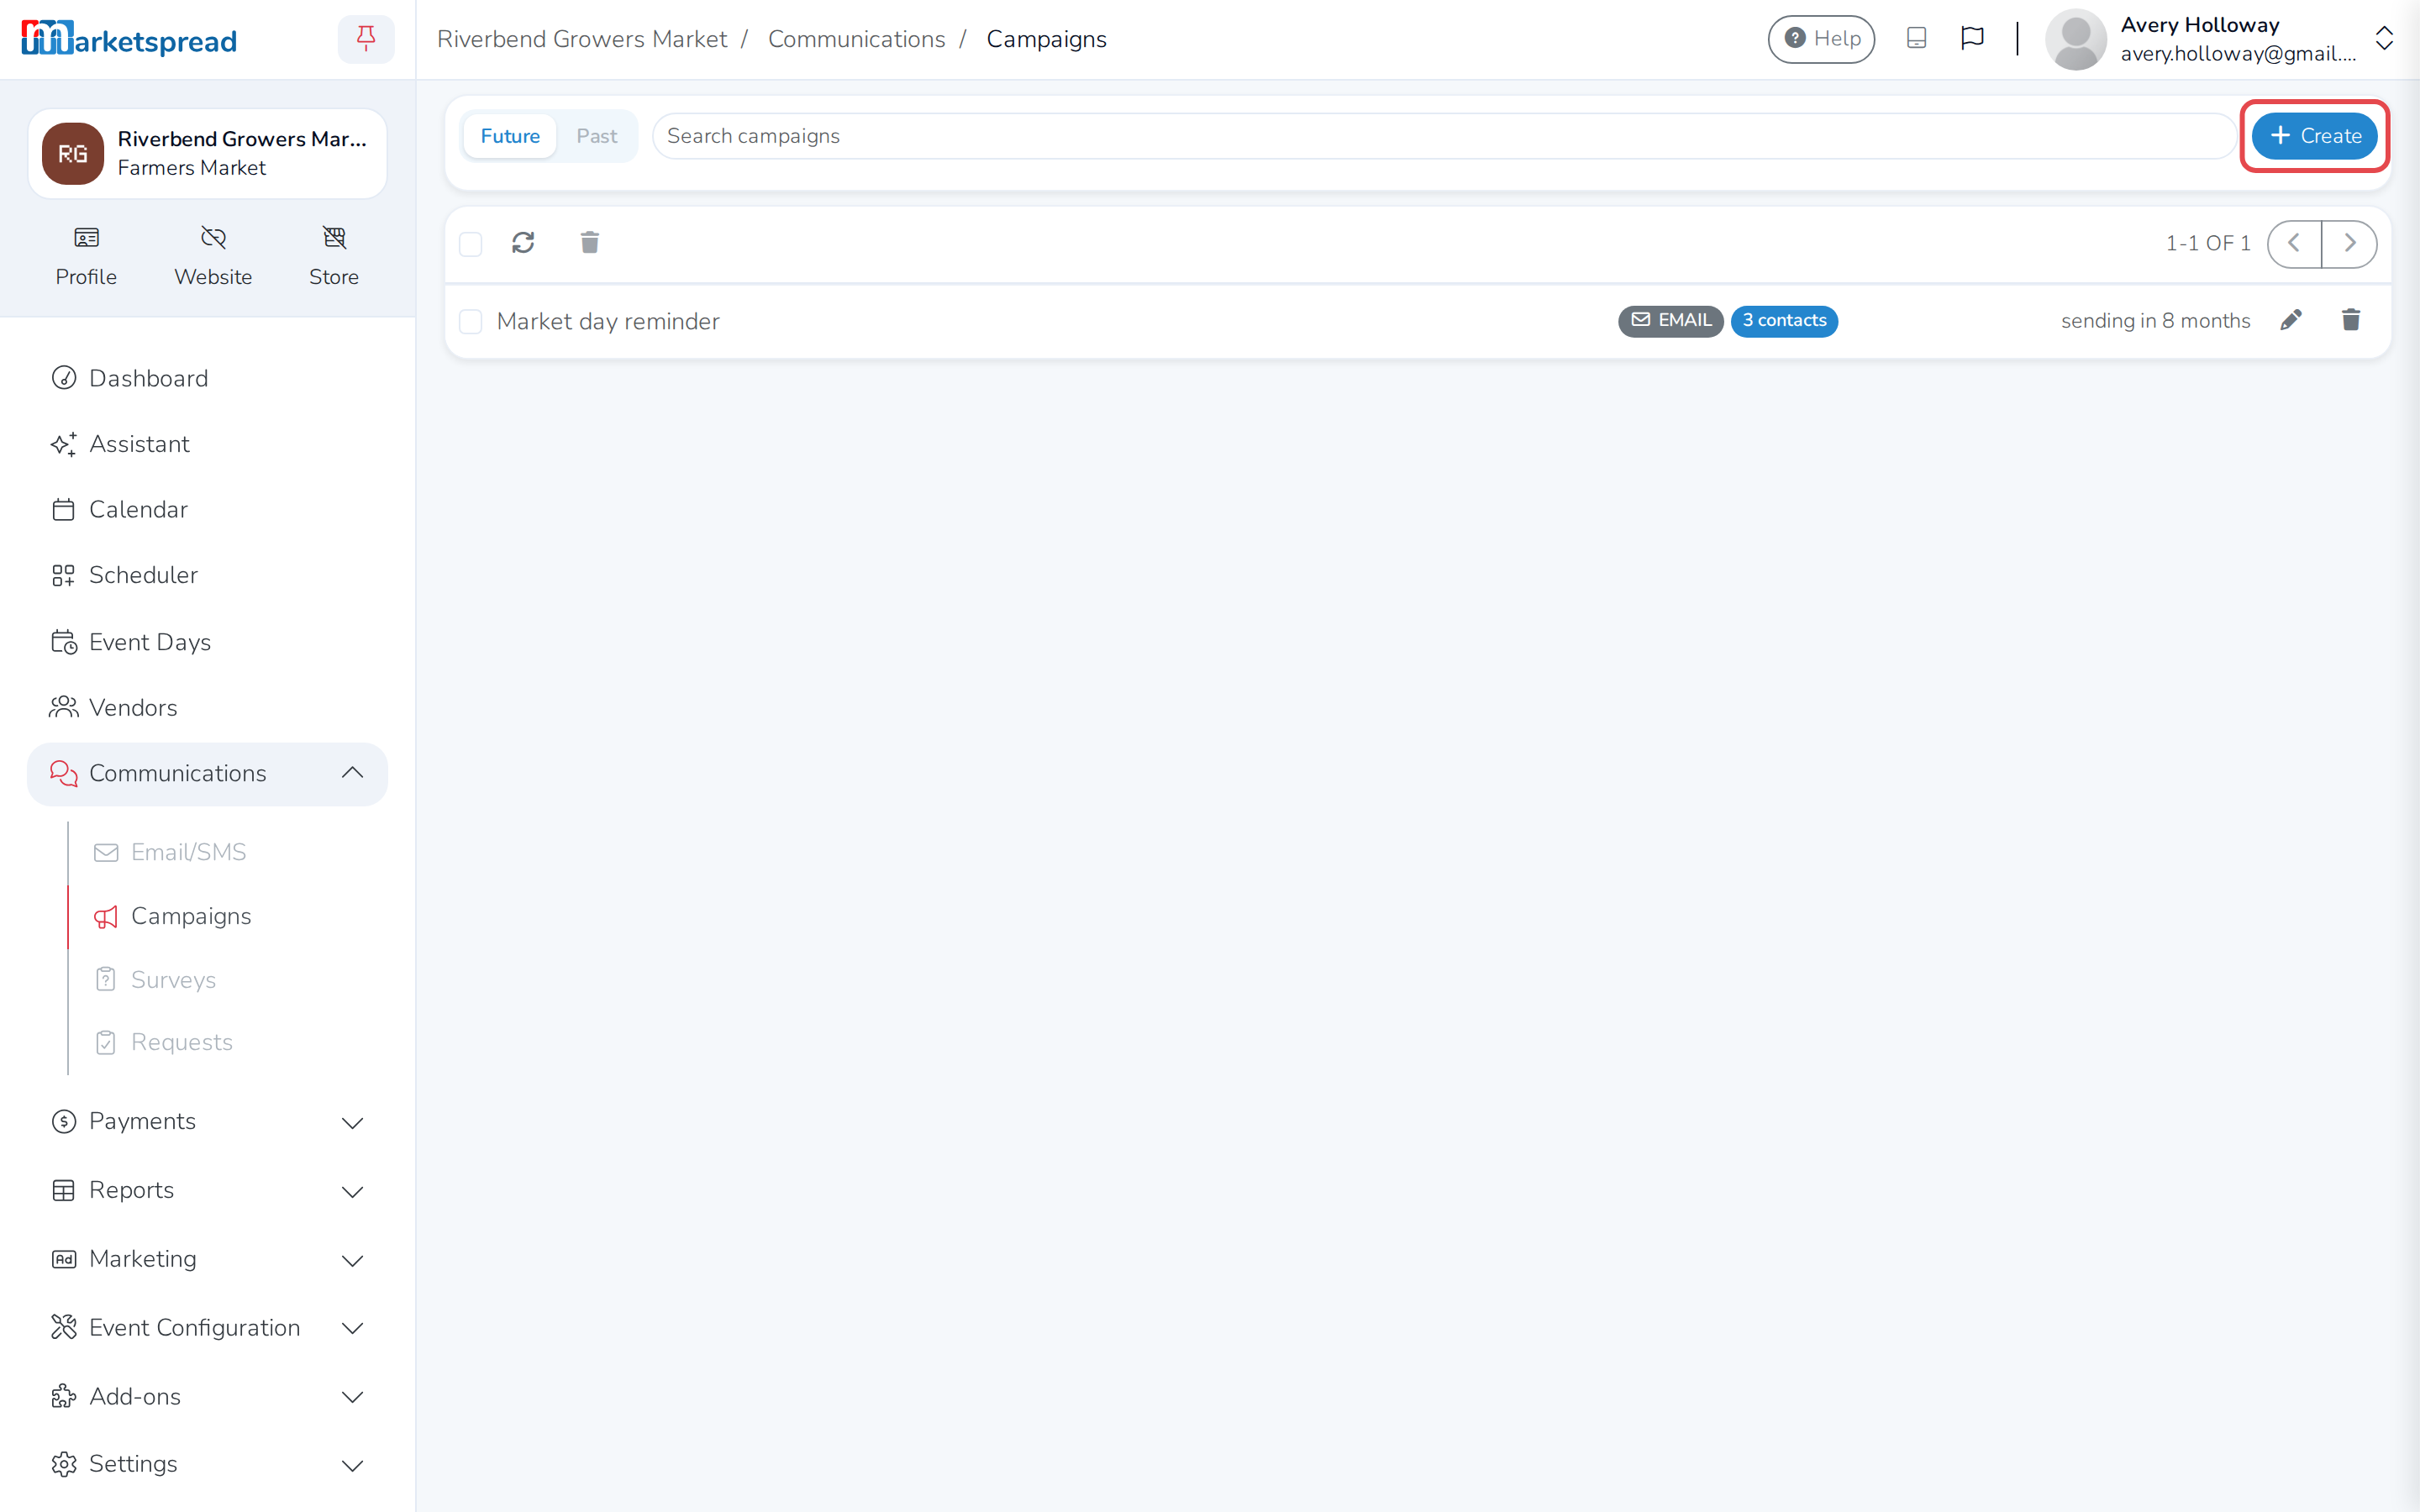
In the left-hand menu, click Communications, then Campaigns. Future lists campaigns still to send; Past lists the ones that have gone.
-
Click Create.
-
Give it a name.
-
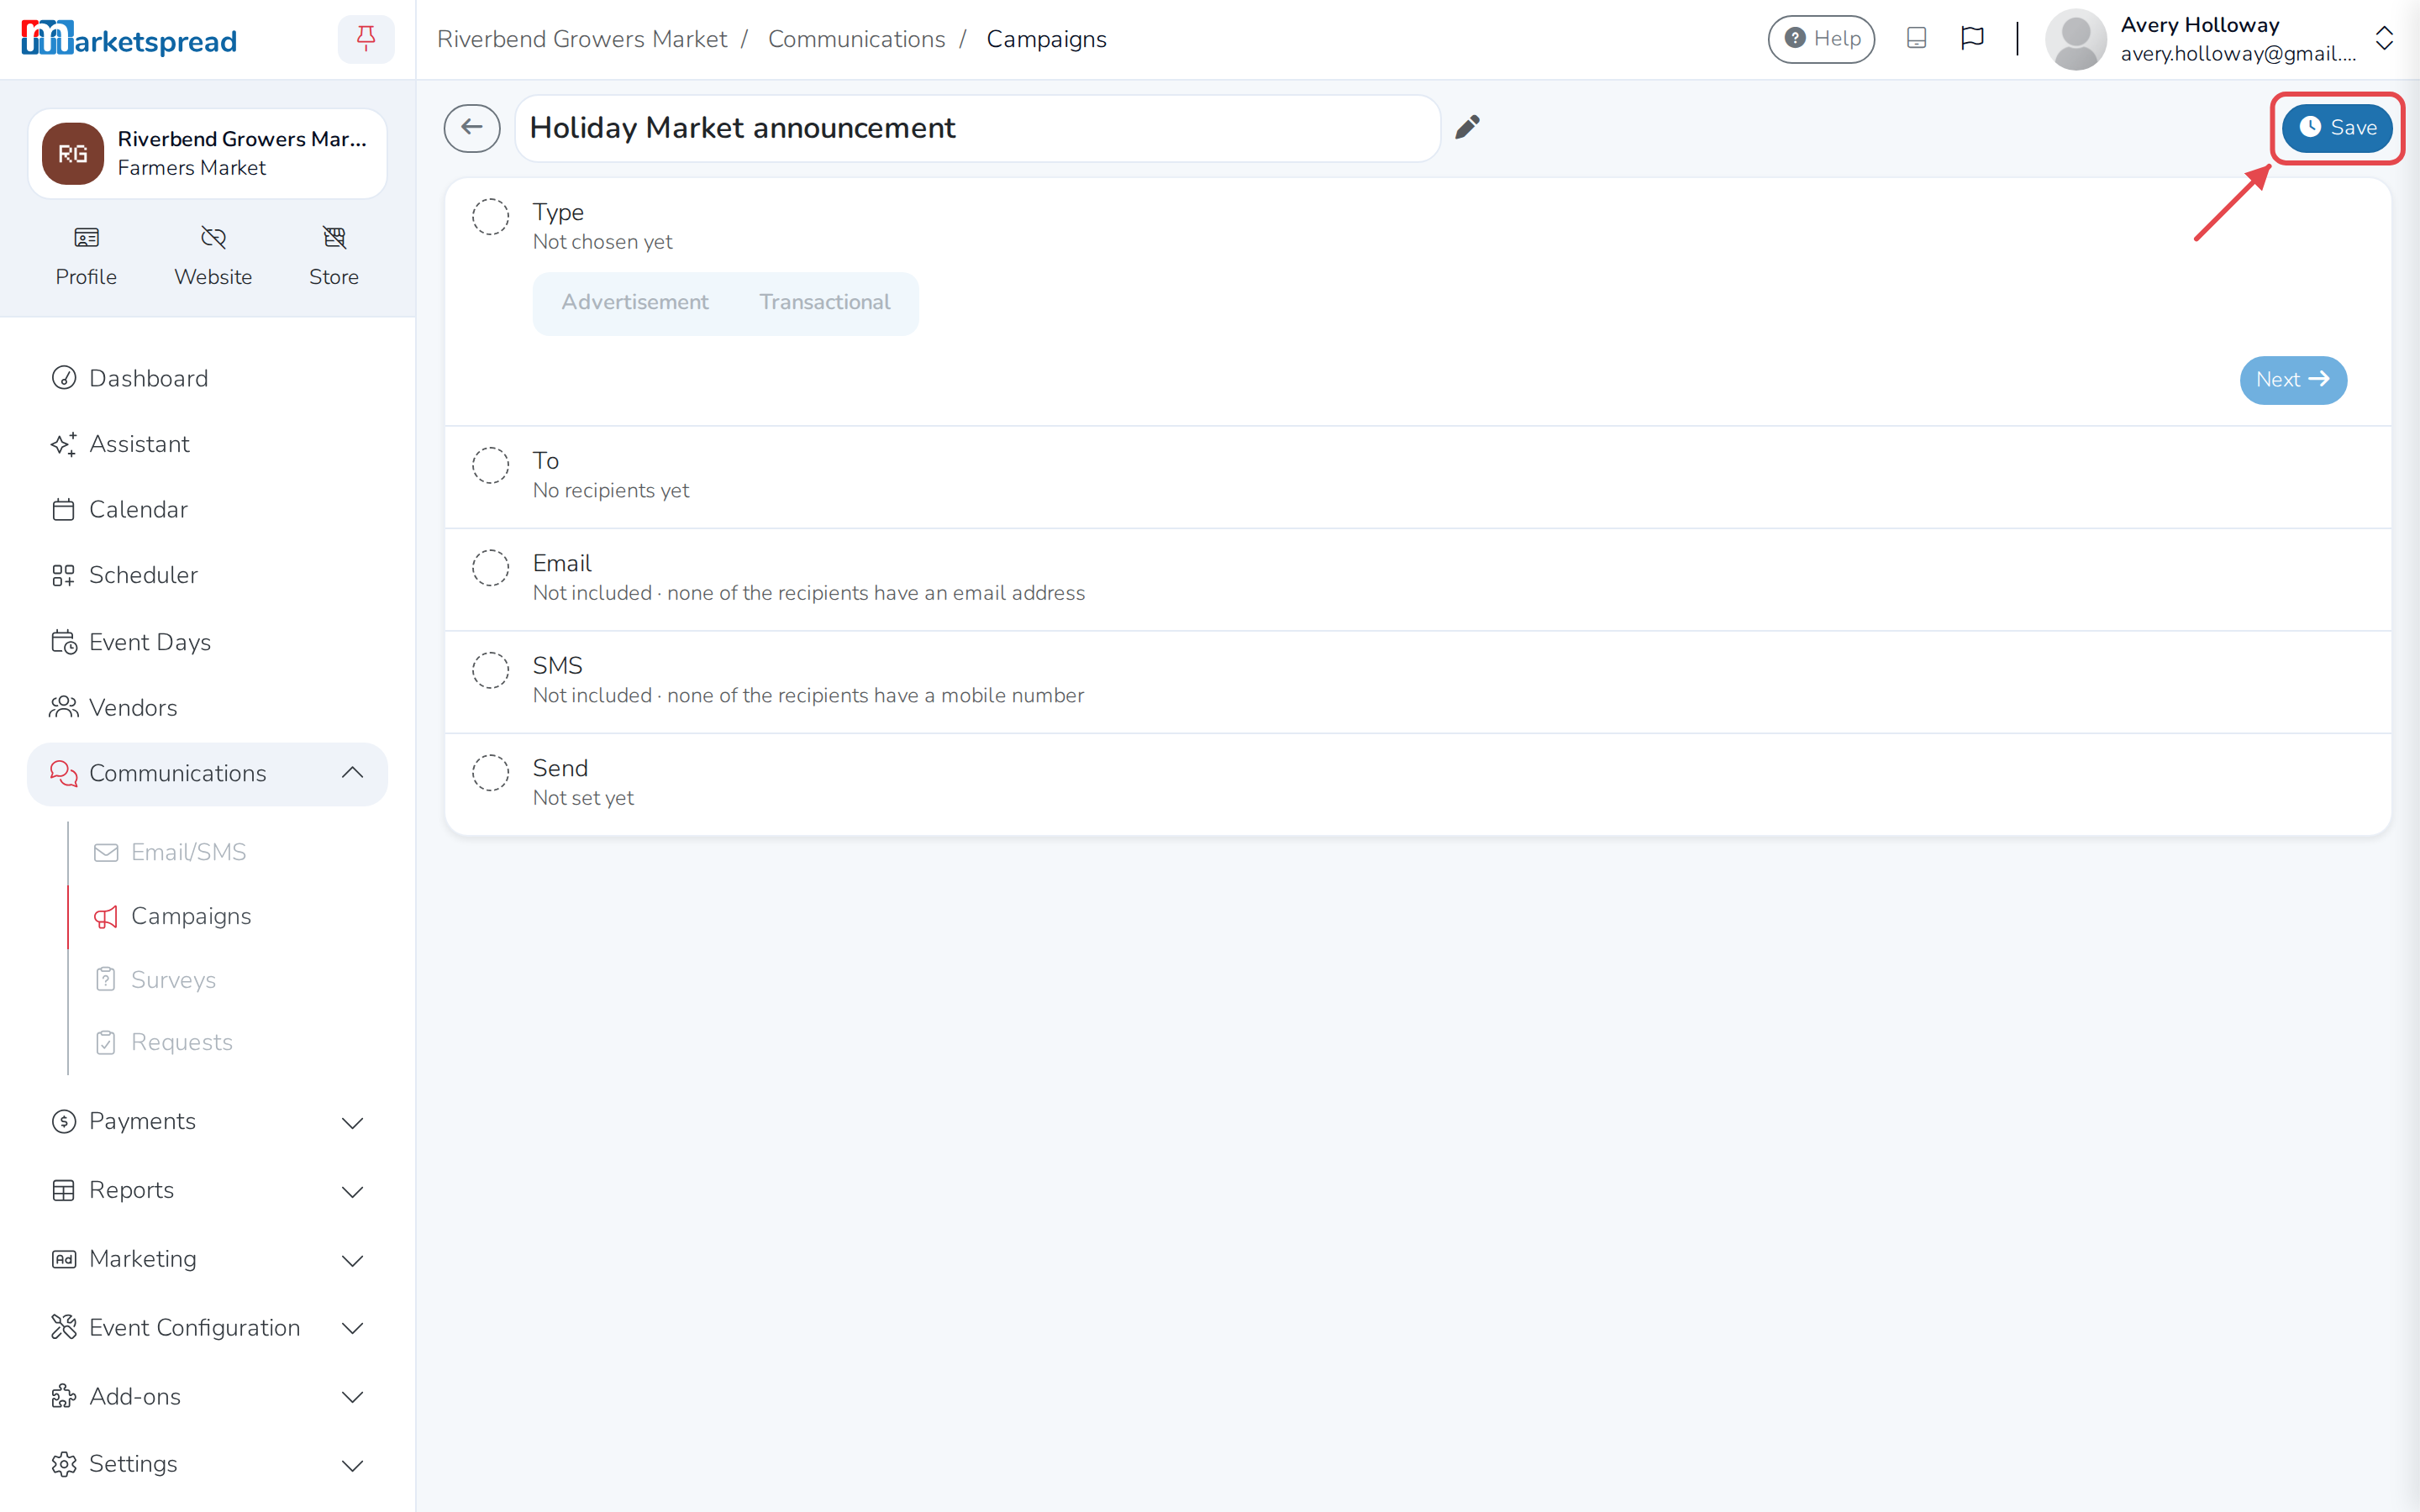
Under Type, choose Advertisement or Transactional.
-
Under To, pick who to send to, the same way as for a message.
-
Under Email, add a subject and message. Under SMS, add a text. Skip either one you don't need.
-
Under Send, pick the date and time in Send on.
-
Click Save.
To change a campaign before it sends, click it in Future. A Past campaign shows how many people it went to, and how many got it, opened it, replied, bounced or failed.
Message vendors from your Vendors list
-
Open Vendors and check the vendors you want to message.
-
Click Bulk actions.
-
Click Email Vendors, SMS Vendors or Create Campaign.
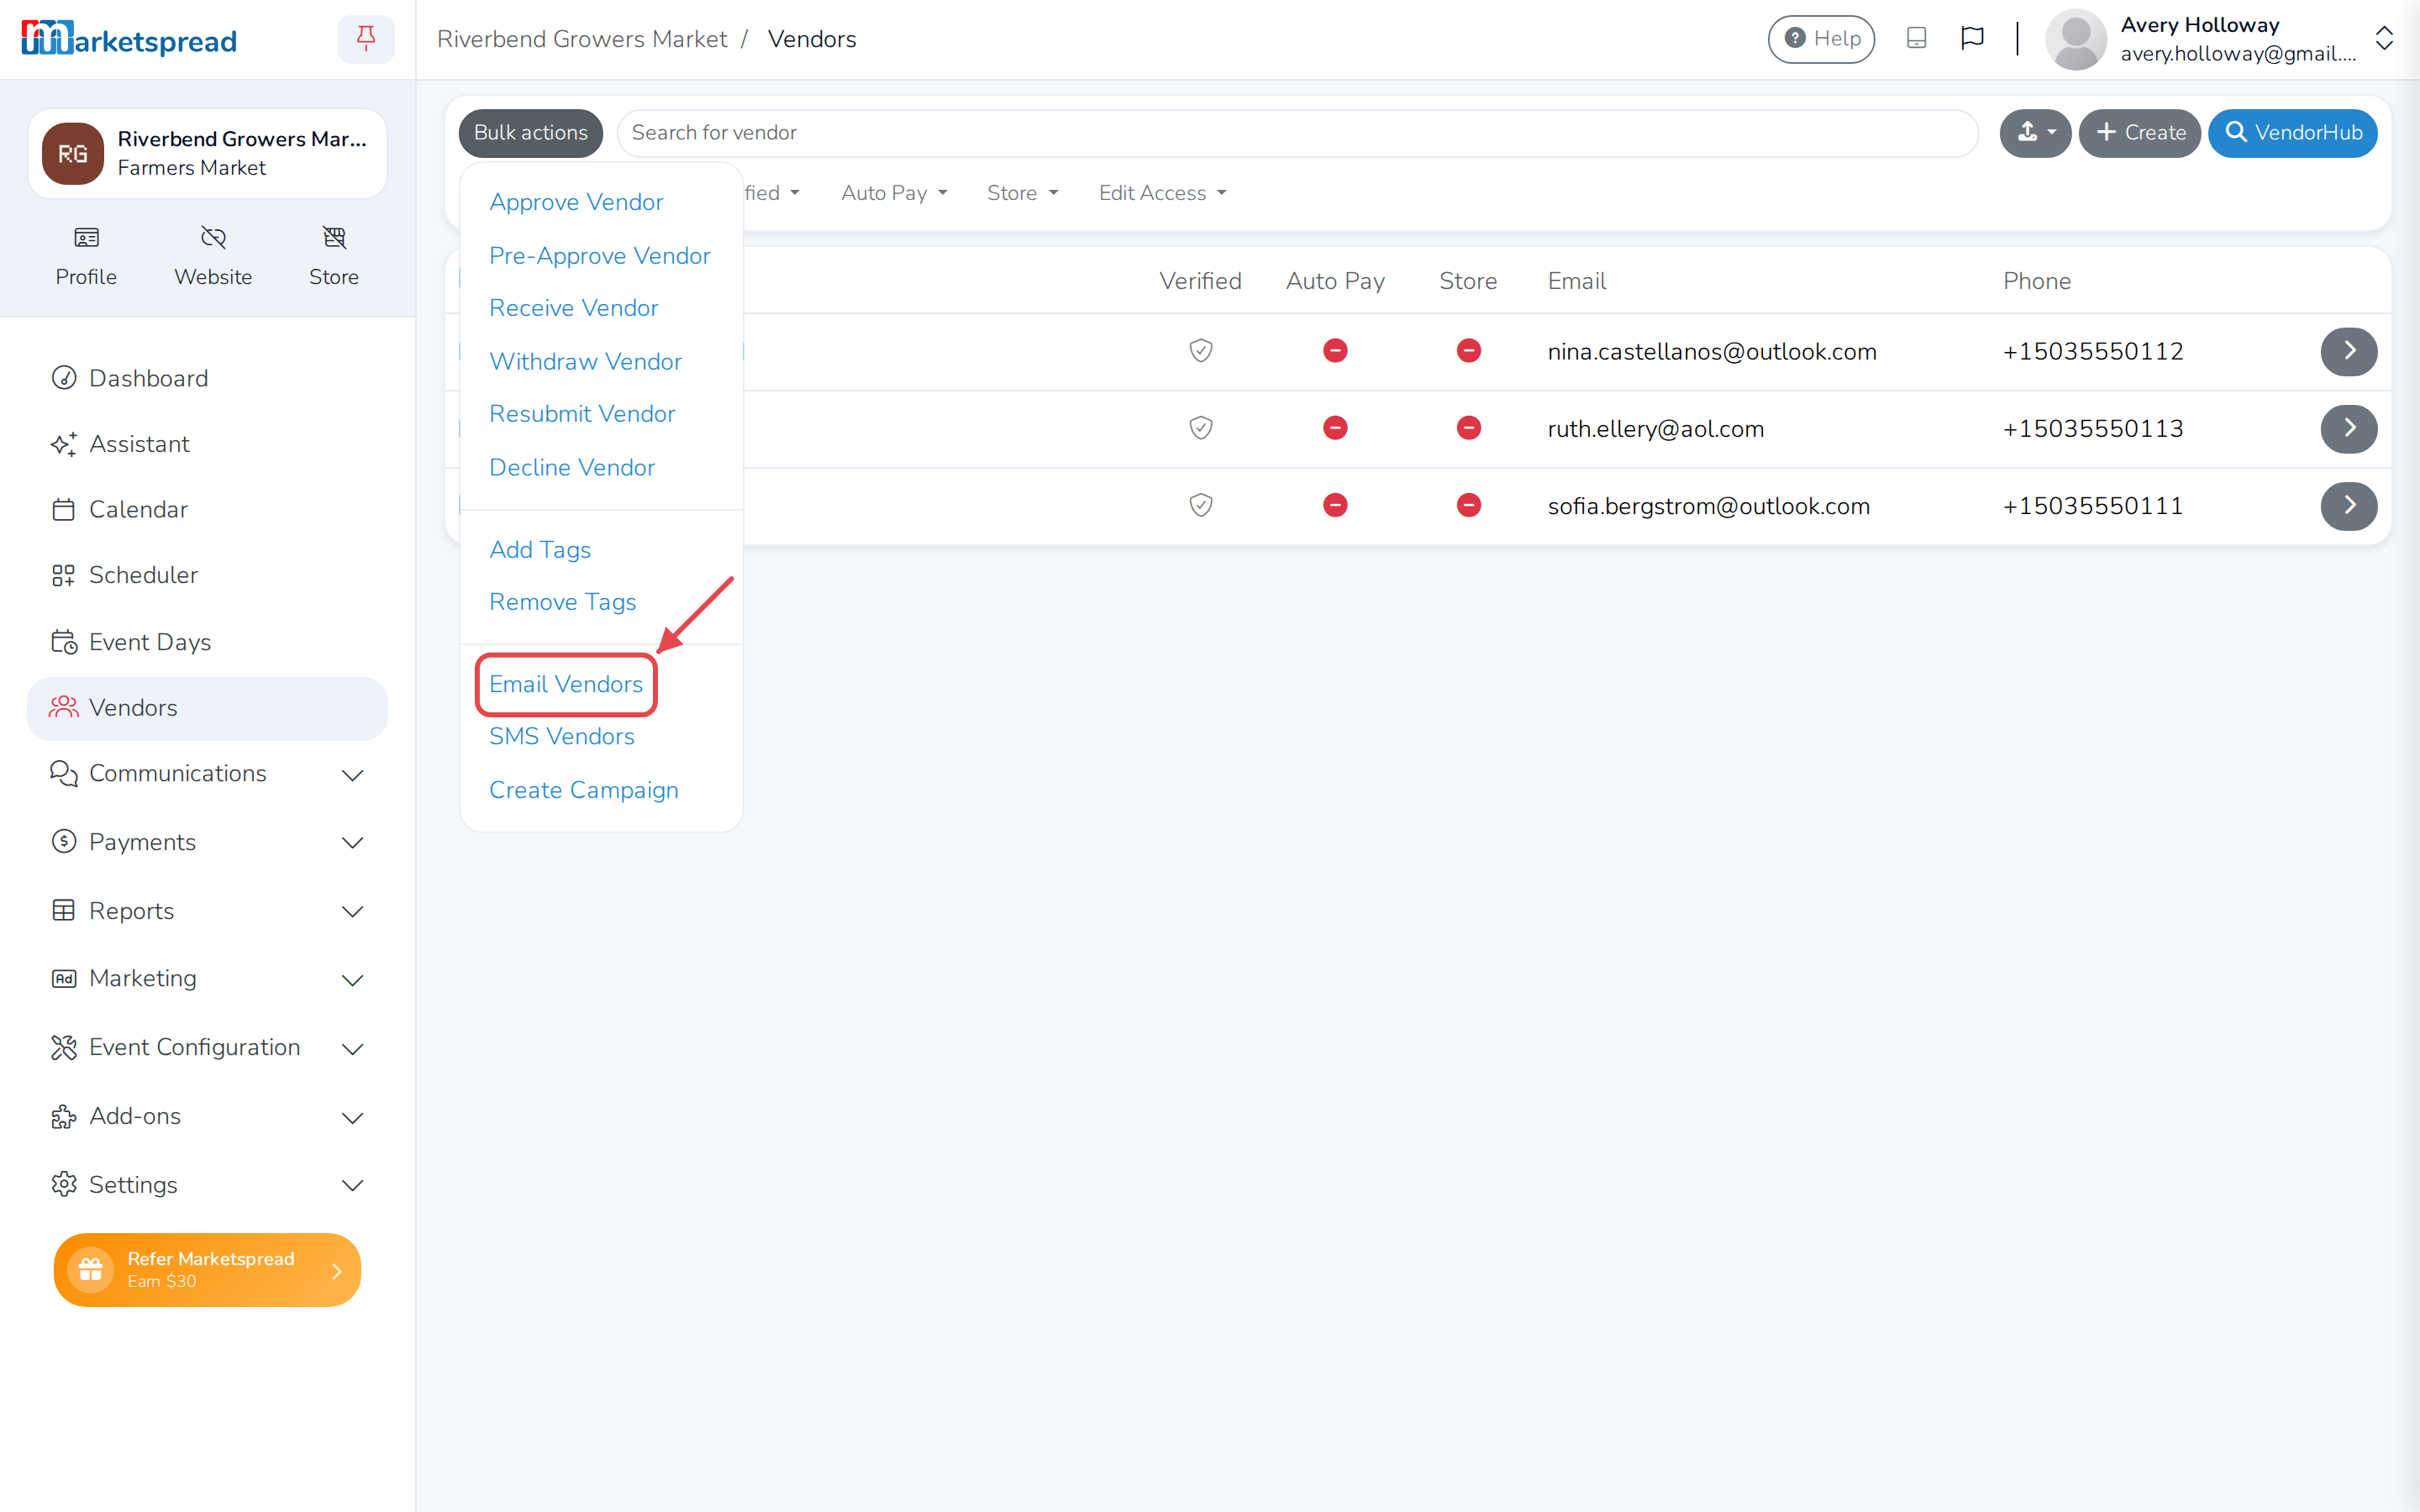
Email and text open compose with those vendors already added, and you can still change who is in it. Create Campaign opens a new campaign for them.
Add a customer to message
Customers are the people outside your vendor list you message — shoppers who signed up, or people you add yourself. They live under Marketing, and messaging them needs a paid Messenger plan.
-
In the left-hand menu, click Marketing, then Customers.
-
Click Create.
-
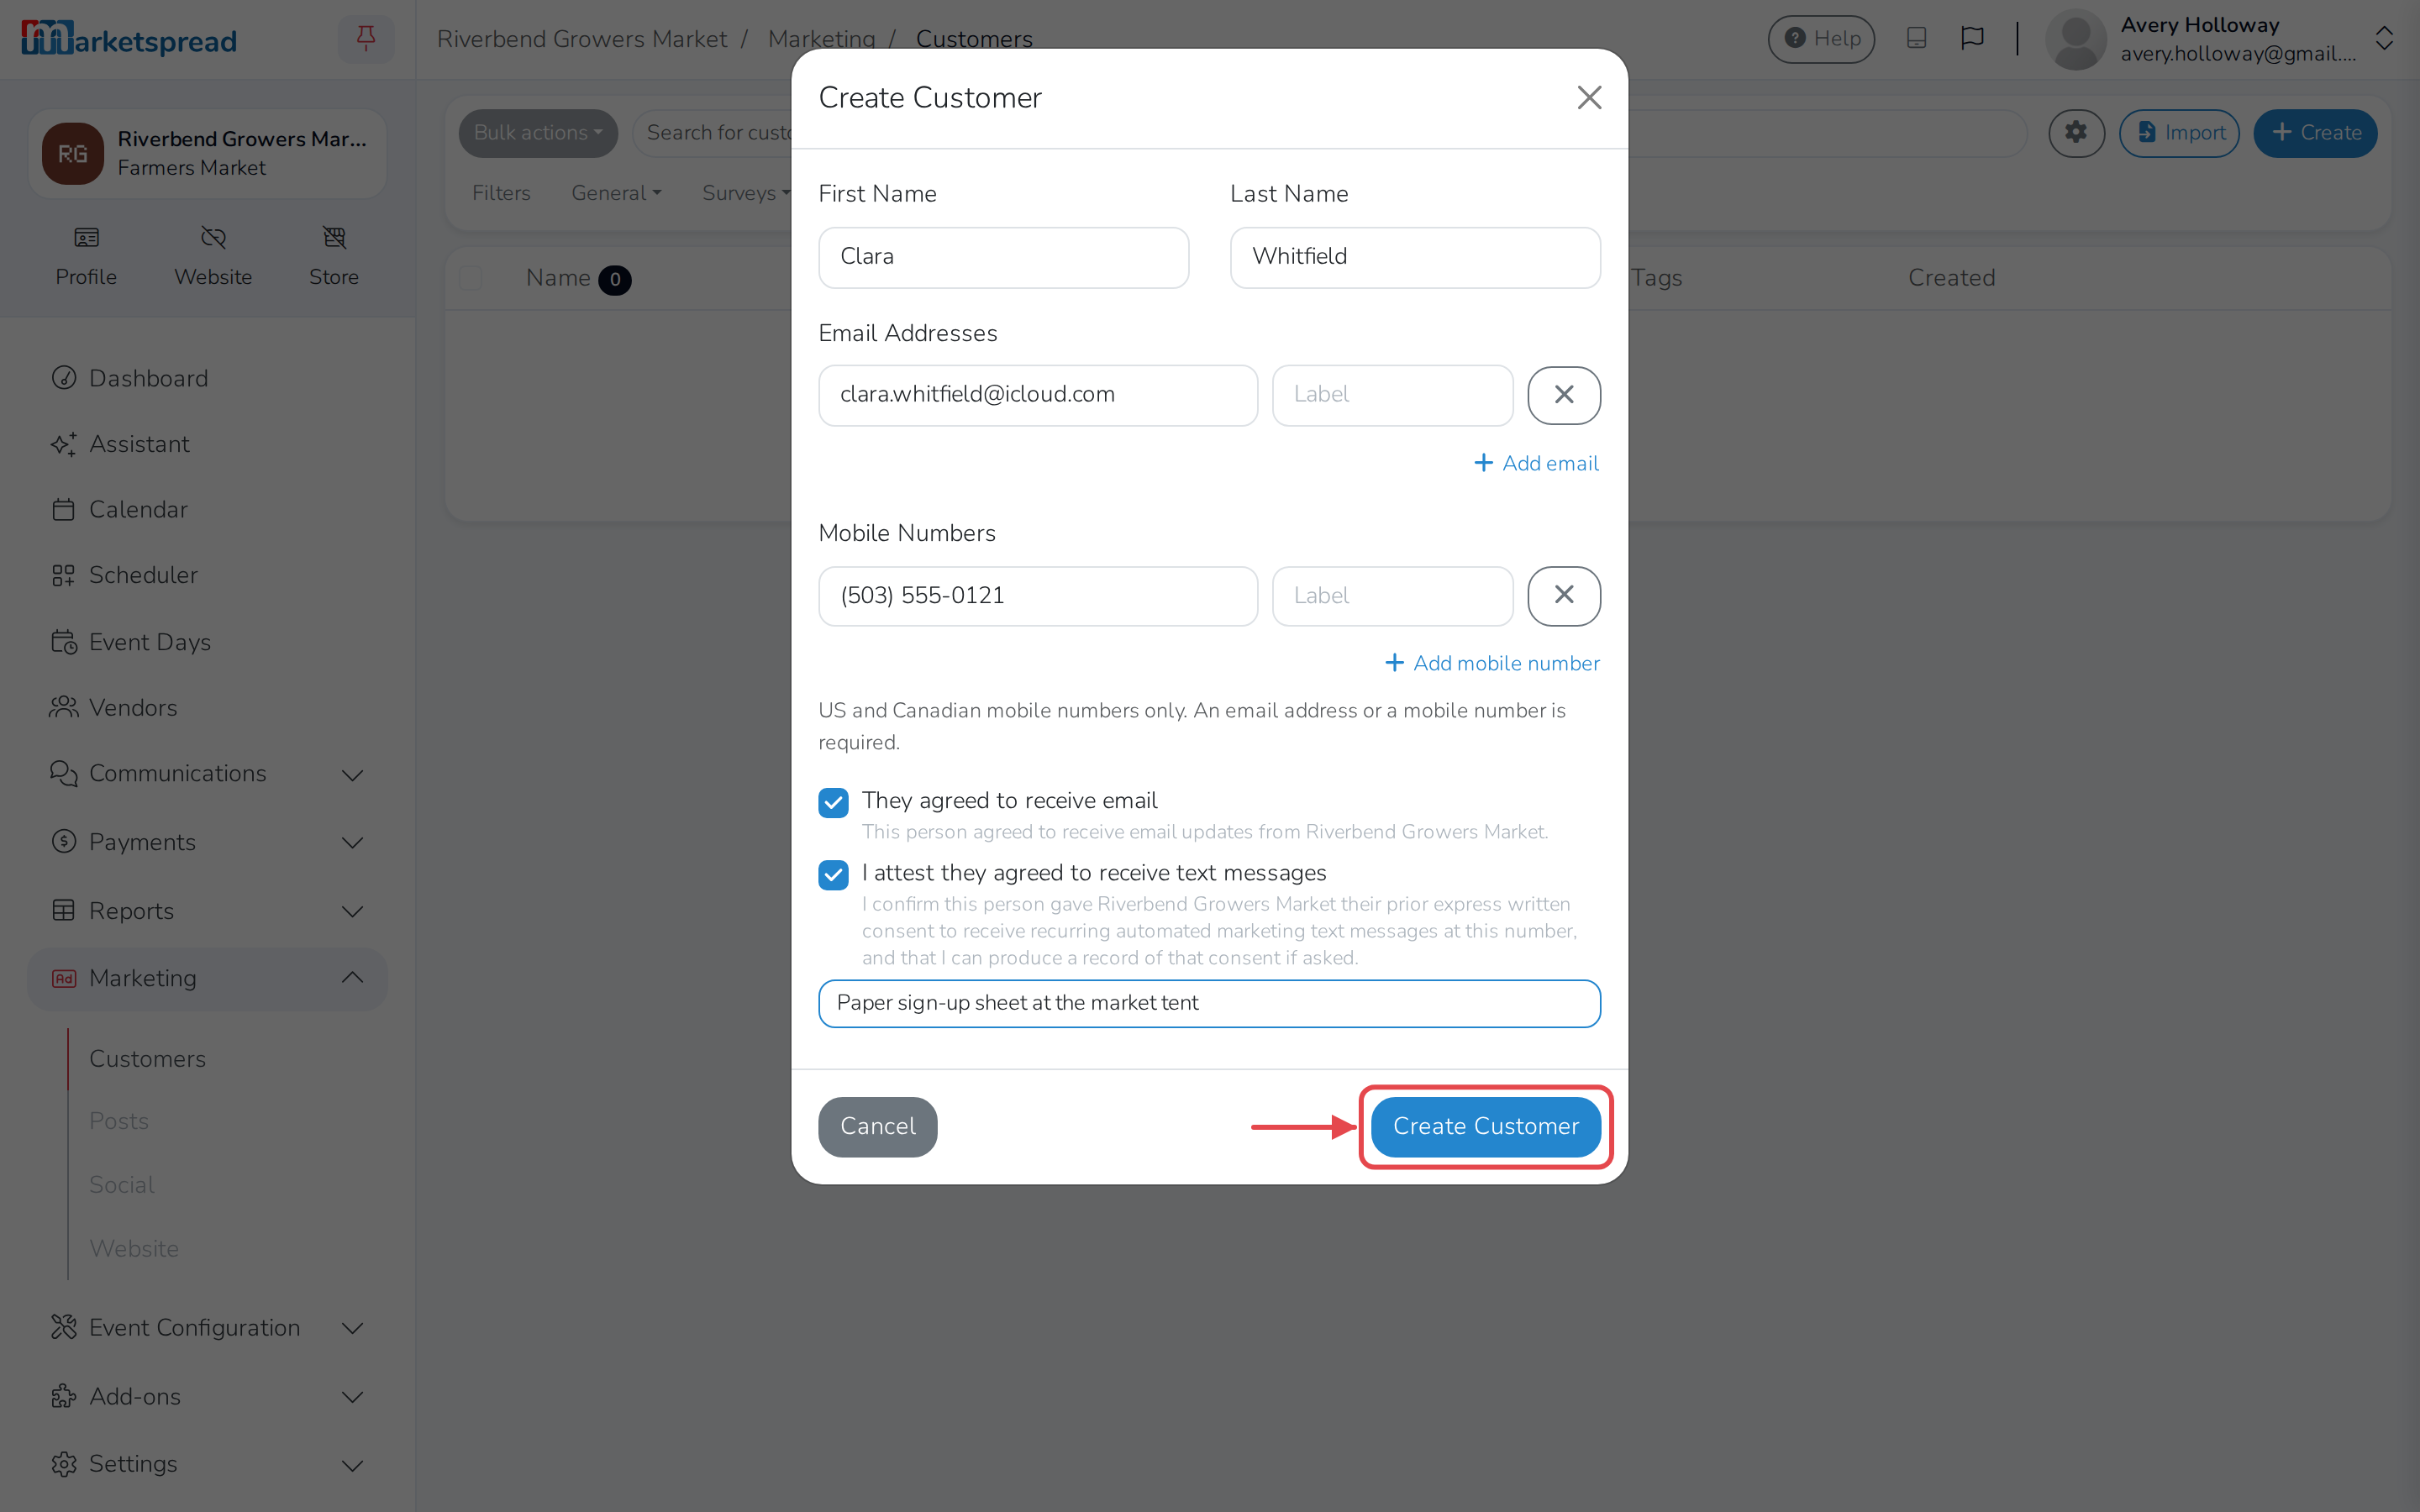
Fill in First Name and Last Name.
-
Add an email address or a mobile number — at least one. Click Add email or Add mobile number to add more than one. Mobile numbers have to be from the US or Canada.
-
Check any Tags that apply.
-
Check They agreed to receive email only if they did.
-
Check I attest they agreed to receive text messages only if they did, and say how you know — a paper sign-up sheet, for example.
-
Click Create Customer.
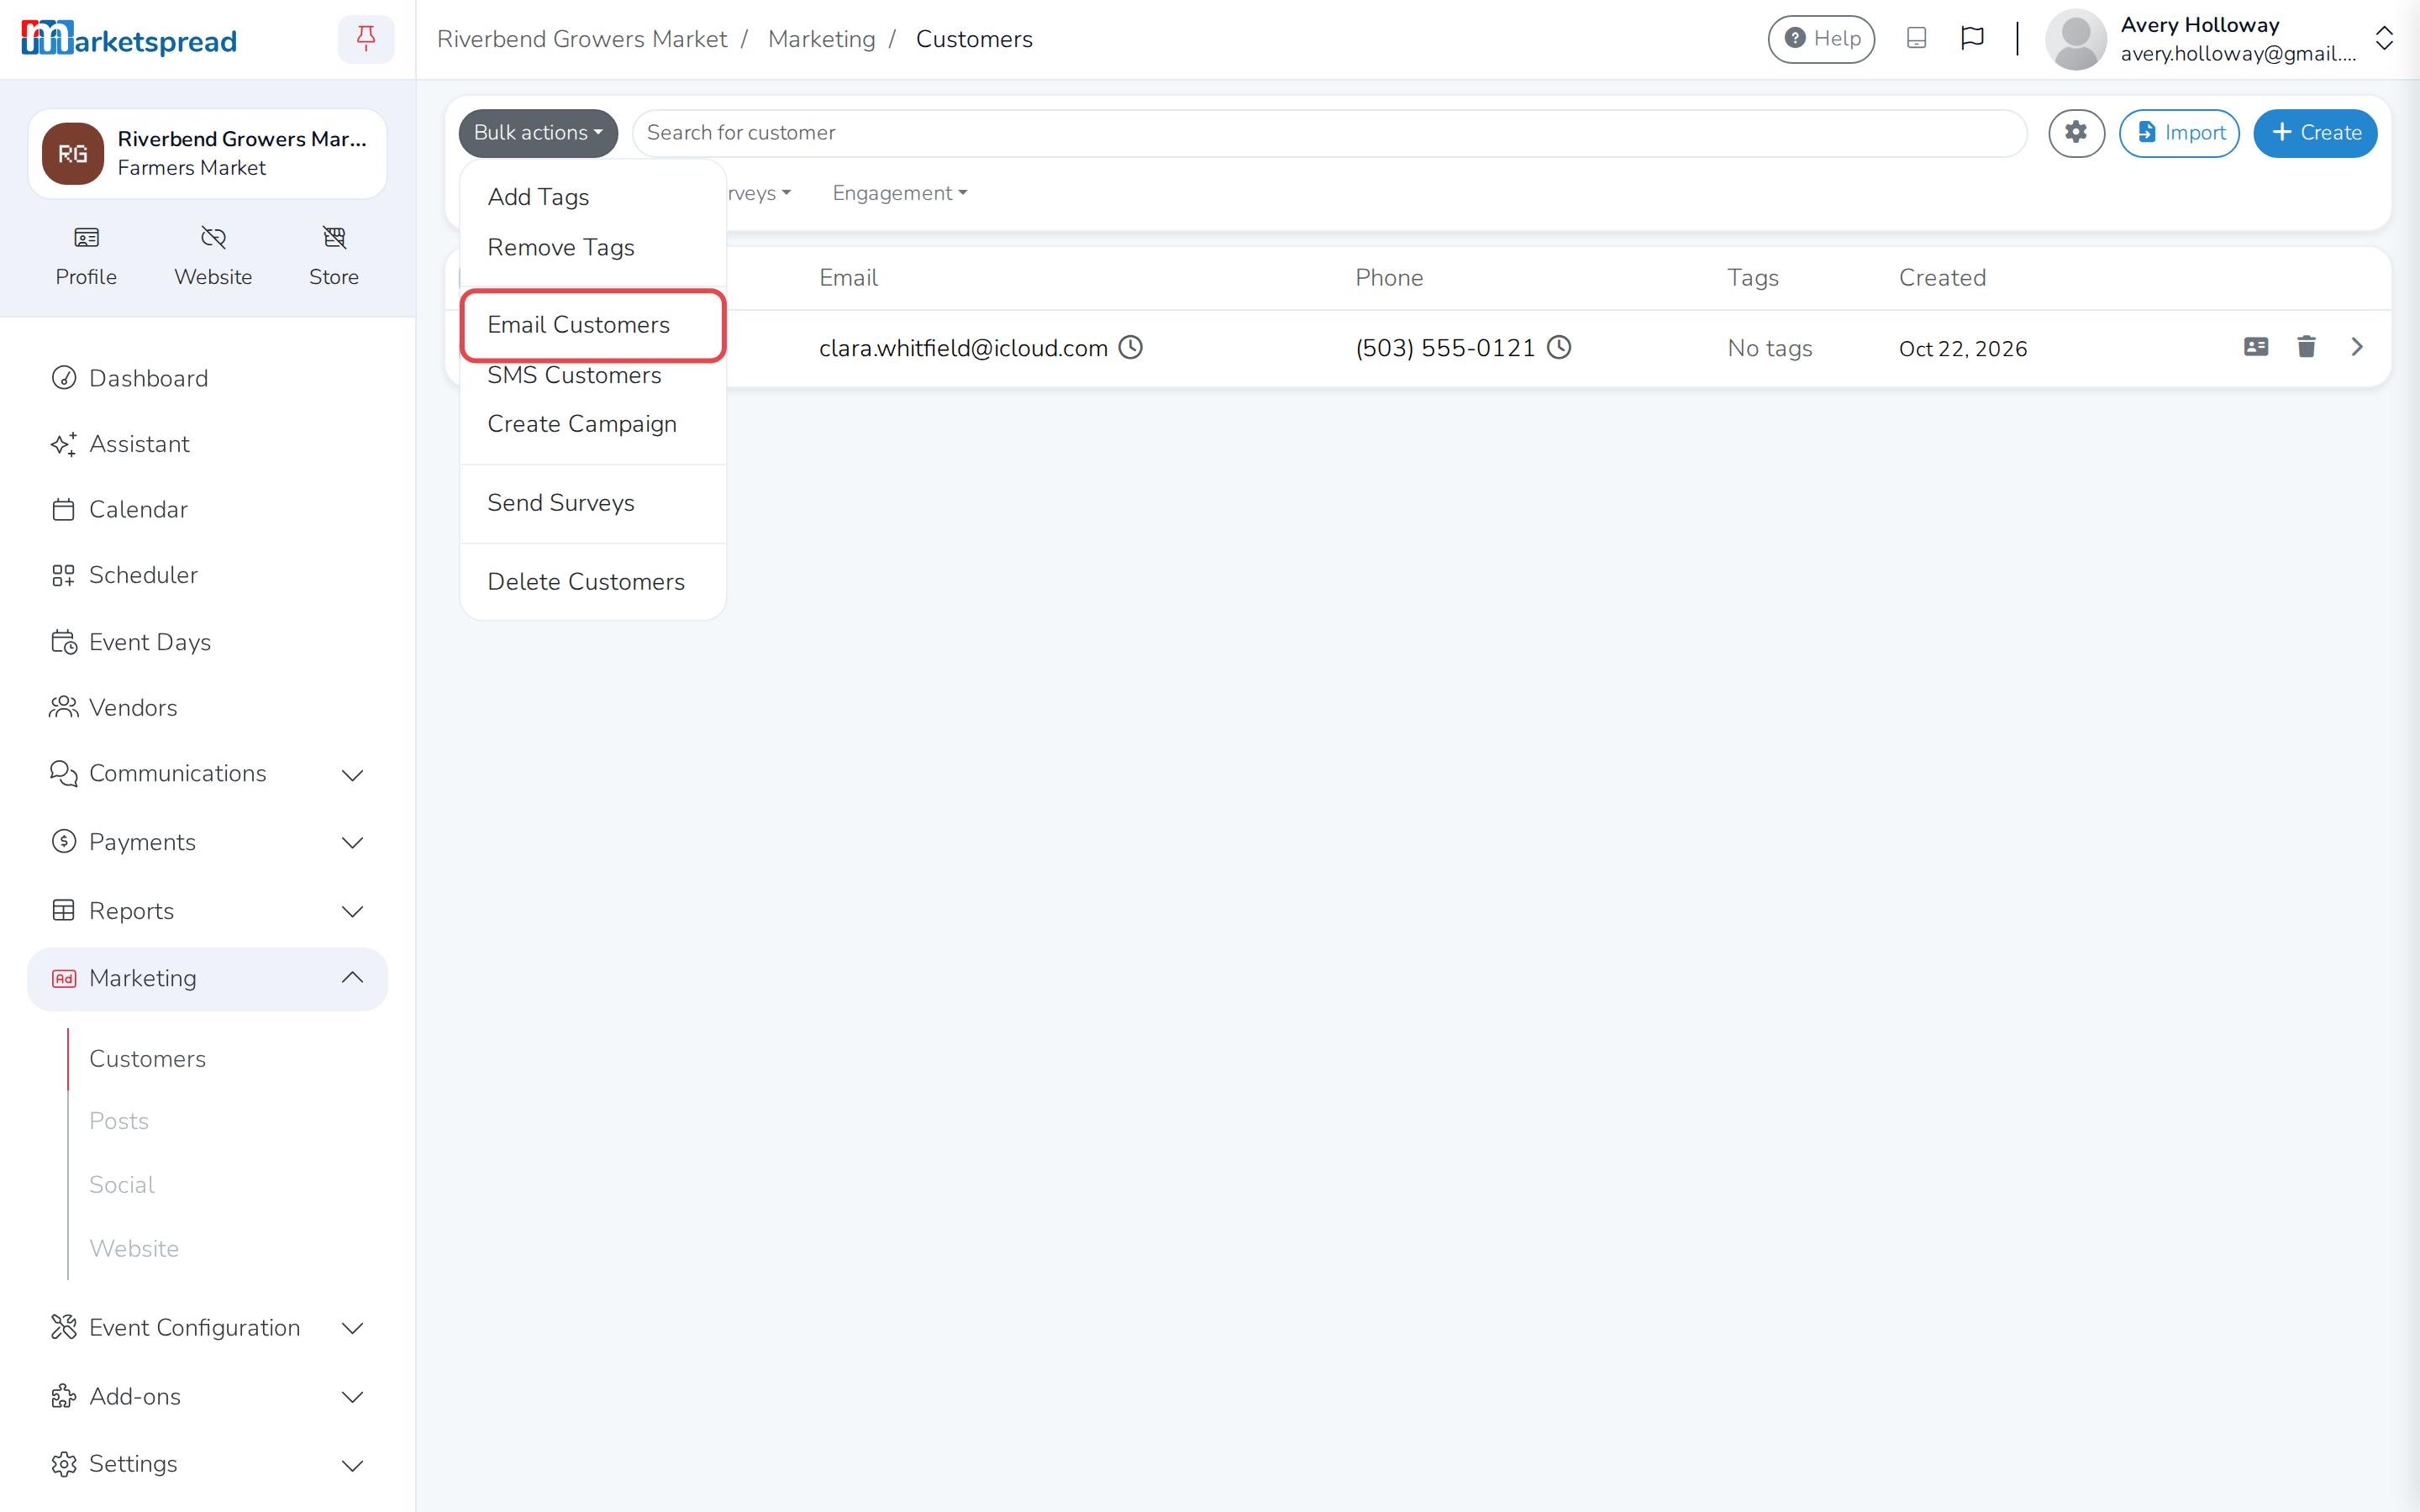
To message customers from the list, check them, click Bulk actions, then Email Customers, SMS Customers or Create Campaign.
Only with permission
Only check an agreement box if the person really did agree. Without it, they only get Transactional messages.
Import on the same page adds many customers at once from a spreadsheet. The gear next to it holds your customer Tags, Text keywords — words people text to your number to sign themselves up — the Sign-up kiosk, and your Texting rules.
Who is in Messenger already
You don't add these people by hand. Marketspread adds them, and keeps them up to date as things change:
- your vendors, with what you know about them — event series, vendor type, category, application status and your tags — so you can pick them by any of those
- the managers on your account
- your customers, and people who bought from your online store
- your association's members, if you run an association
Plans, the sign-up flyer and the website widget
Every market gets 1,000 emails a month on the Free plan. Paid plans add more emails, texting and your own text number. With texting, the Messenger plan page also has a printable Flyer with a QR code people scan to sign up for your texts, and an SMS Signup Widget to add the same sign-up to your website.
All of that is in Manage your market's Messenger plan. Open it from Add-ons, then Messenger.