


You don't have to assign a vendor a stall the moment you approve them. Turn on
the application calendar so vendors tell you which days they want when they
apply, then come back and assign stalls once you're ready.
Let vendors pick their own days
- Go to Event Configuration → Events in the side navigation and click
the event. - Click the pencil icon next to Basic.
- Turn on Enable application calendar.
- Click Save basic.
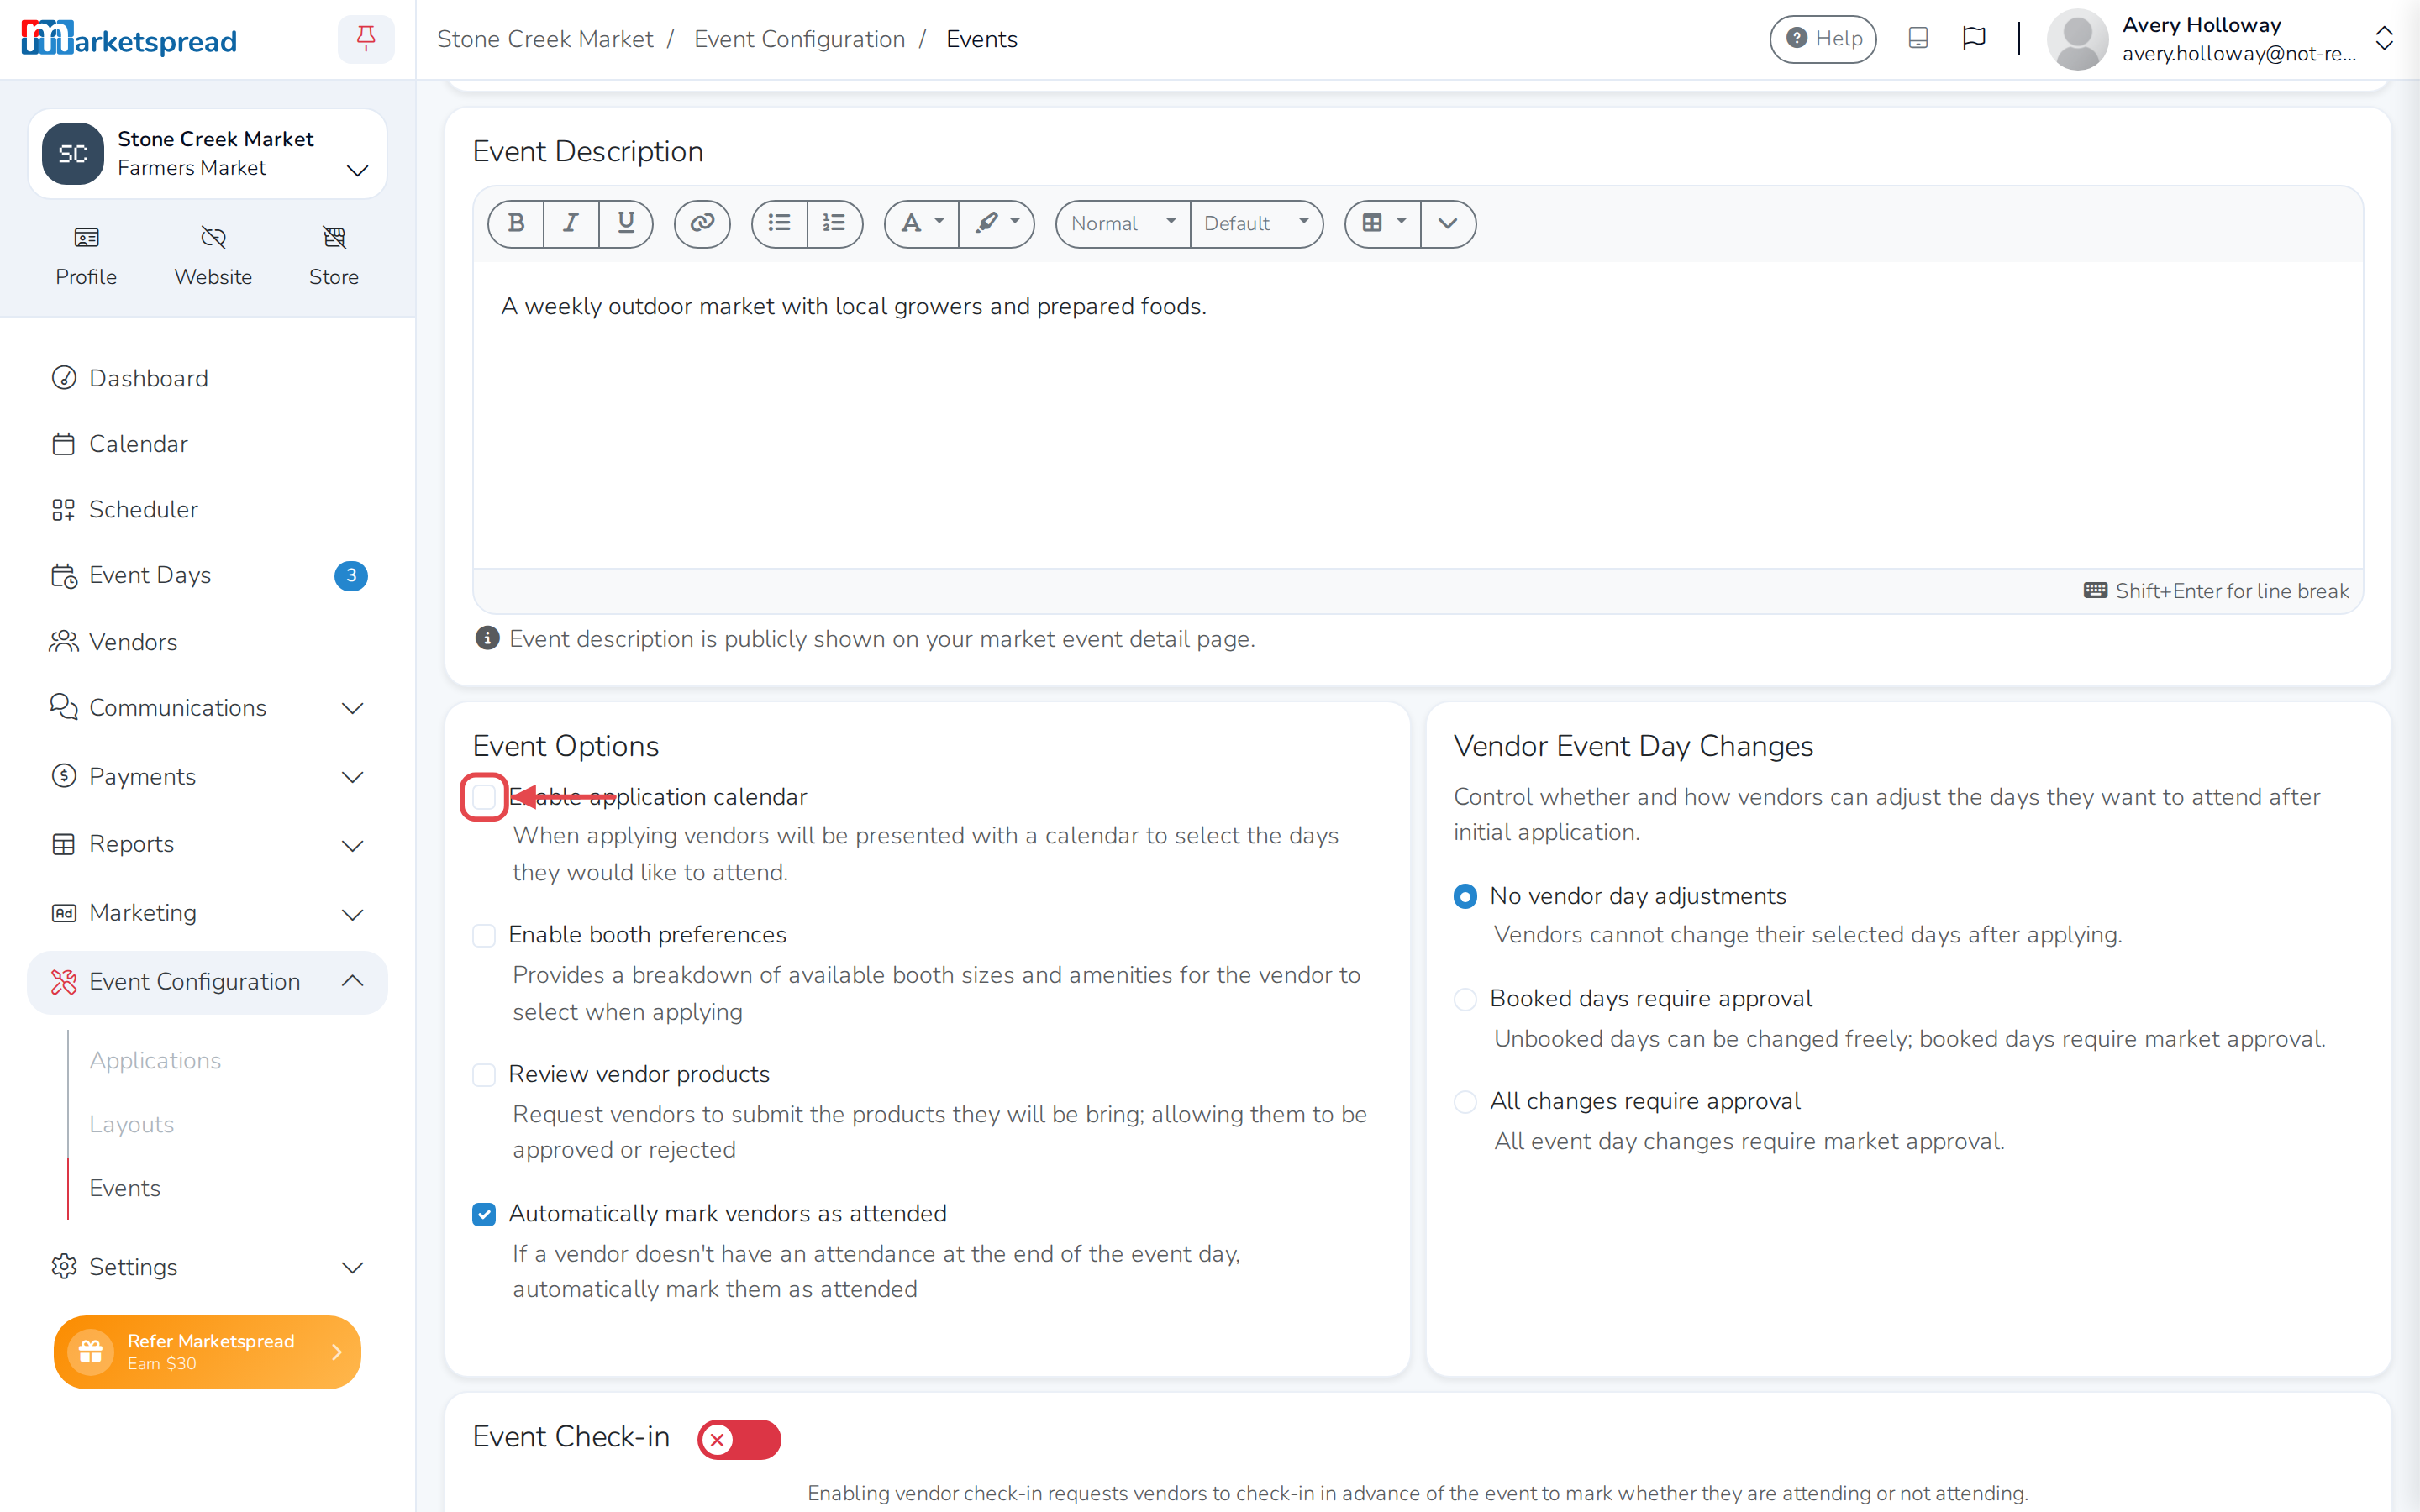
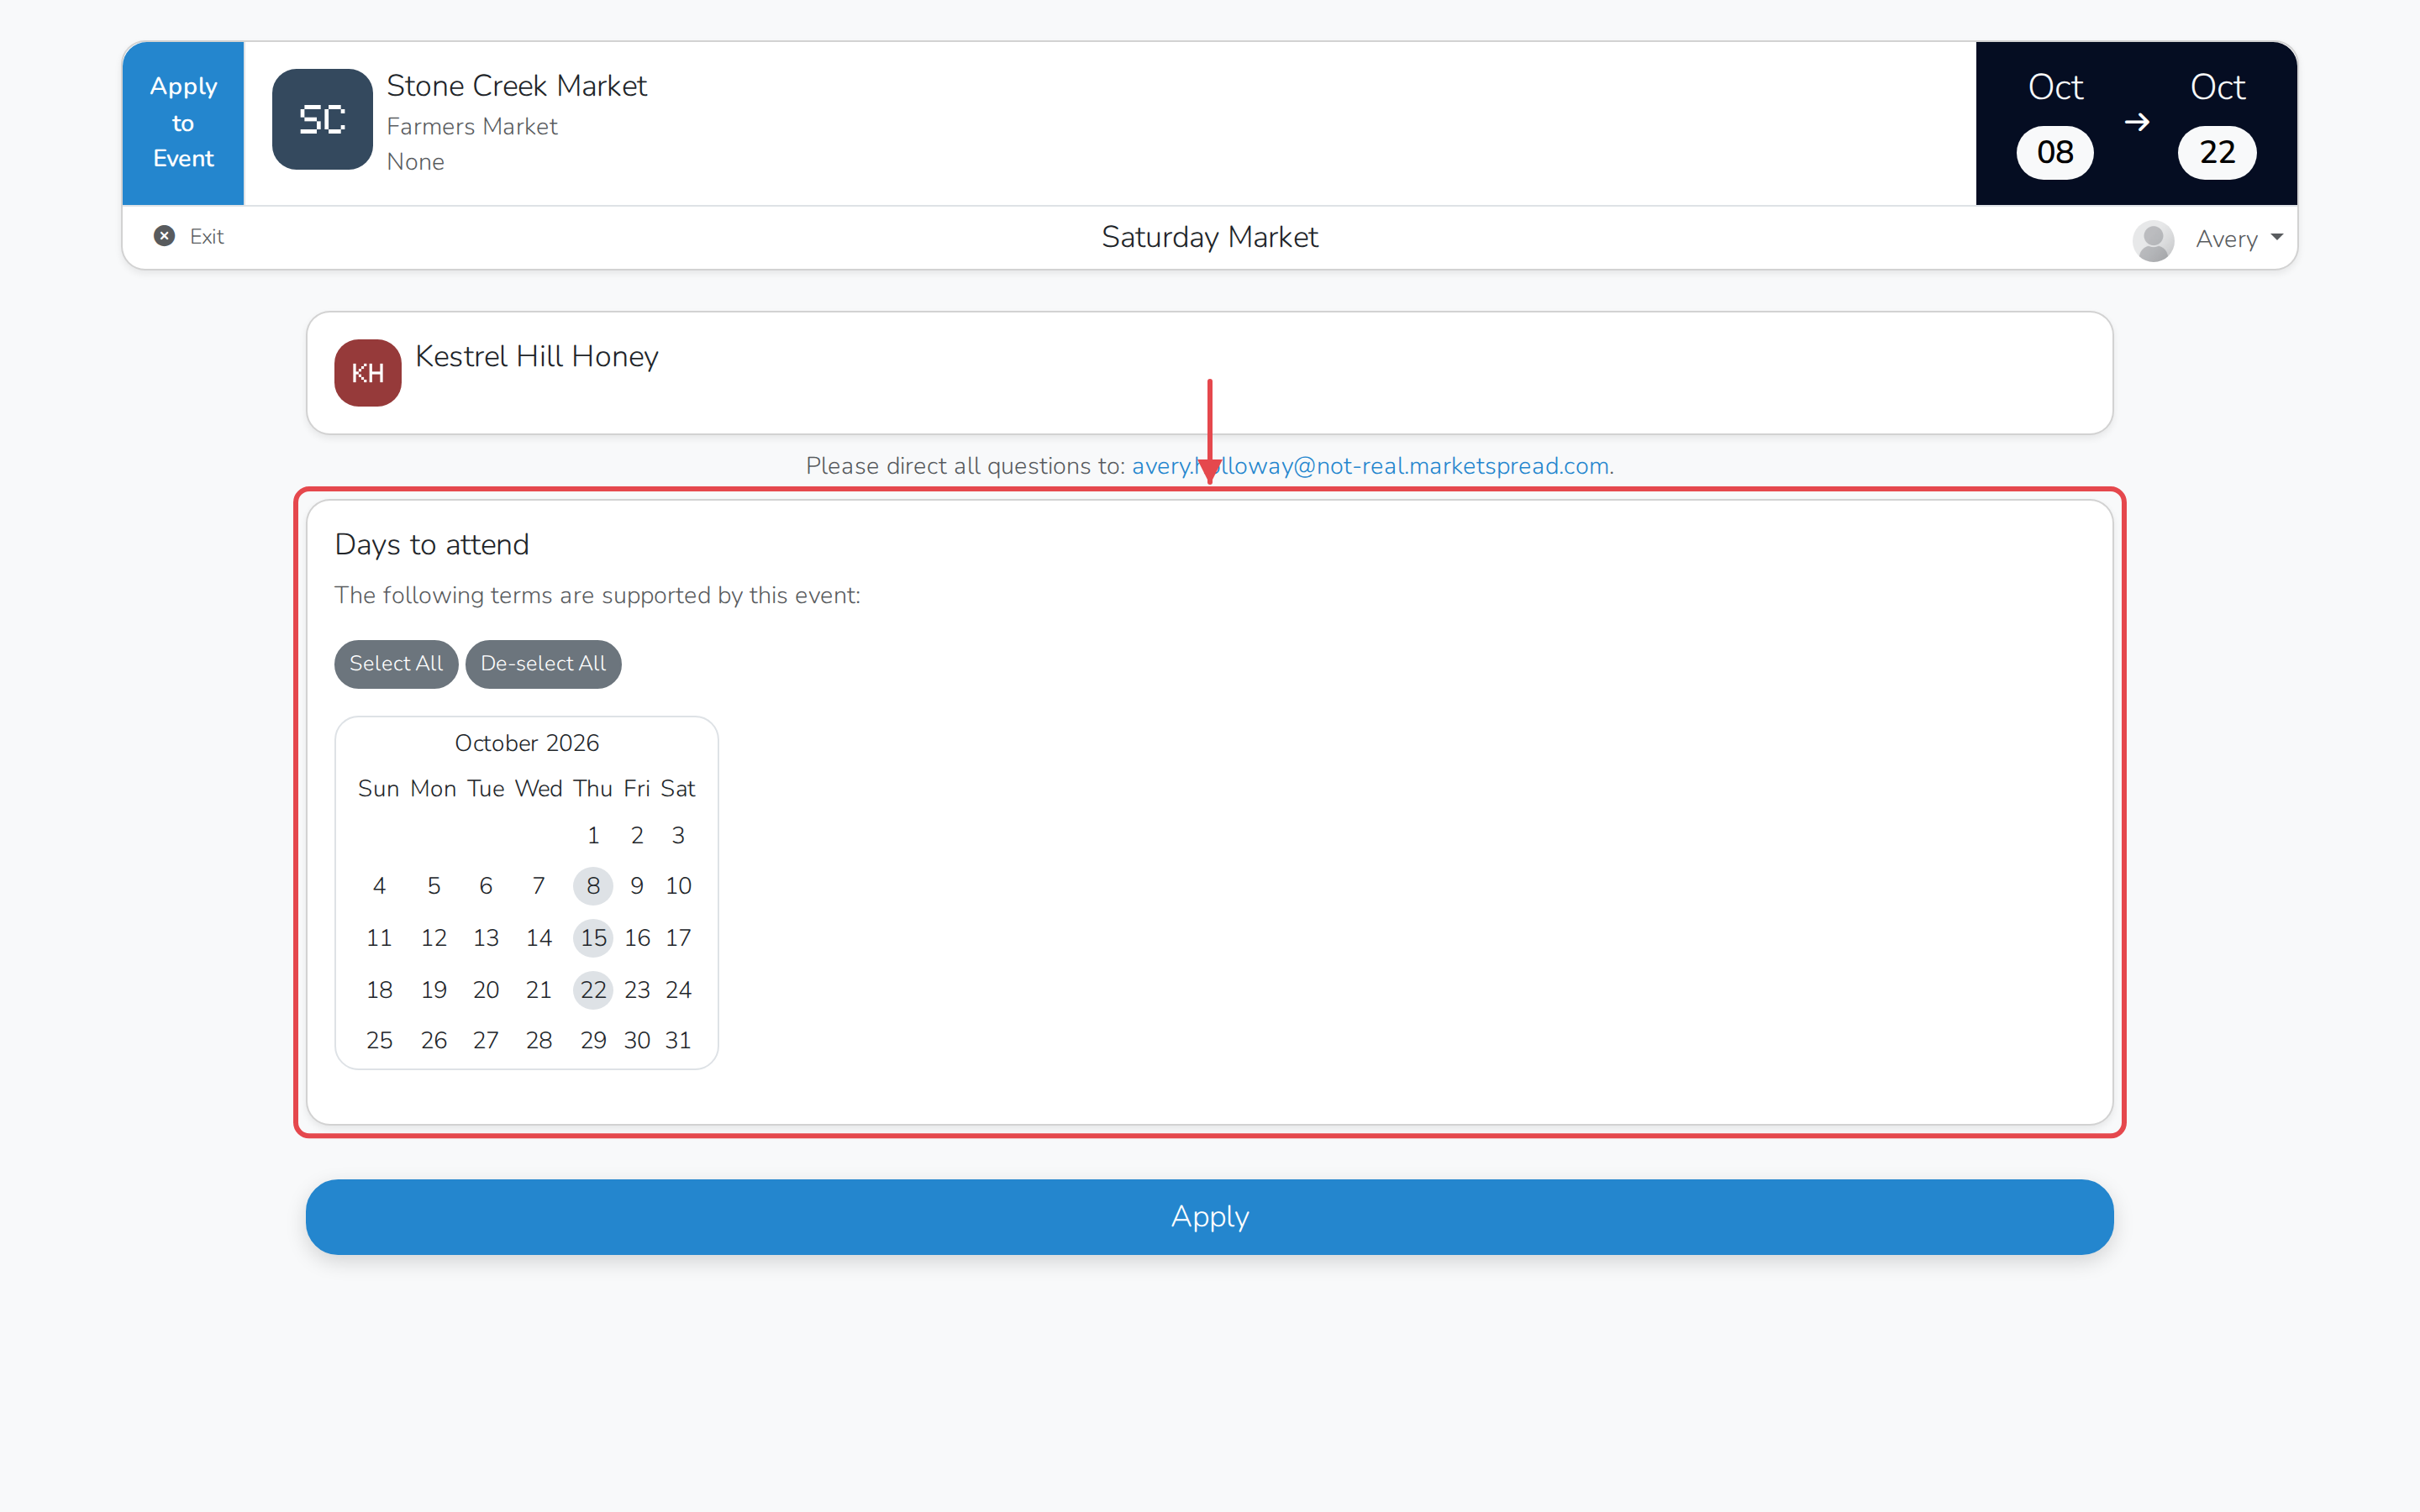
This is on by default. With it on, a vendor applying to that event sees a
calendar of Days to attend: every available day is a grey circle, and
clicking one turns it blue to mark it selected.
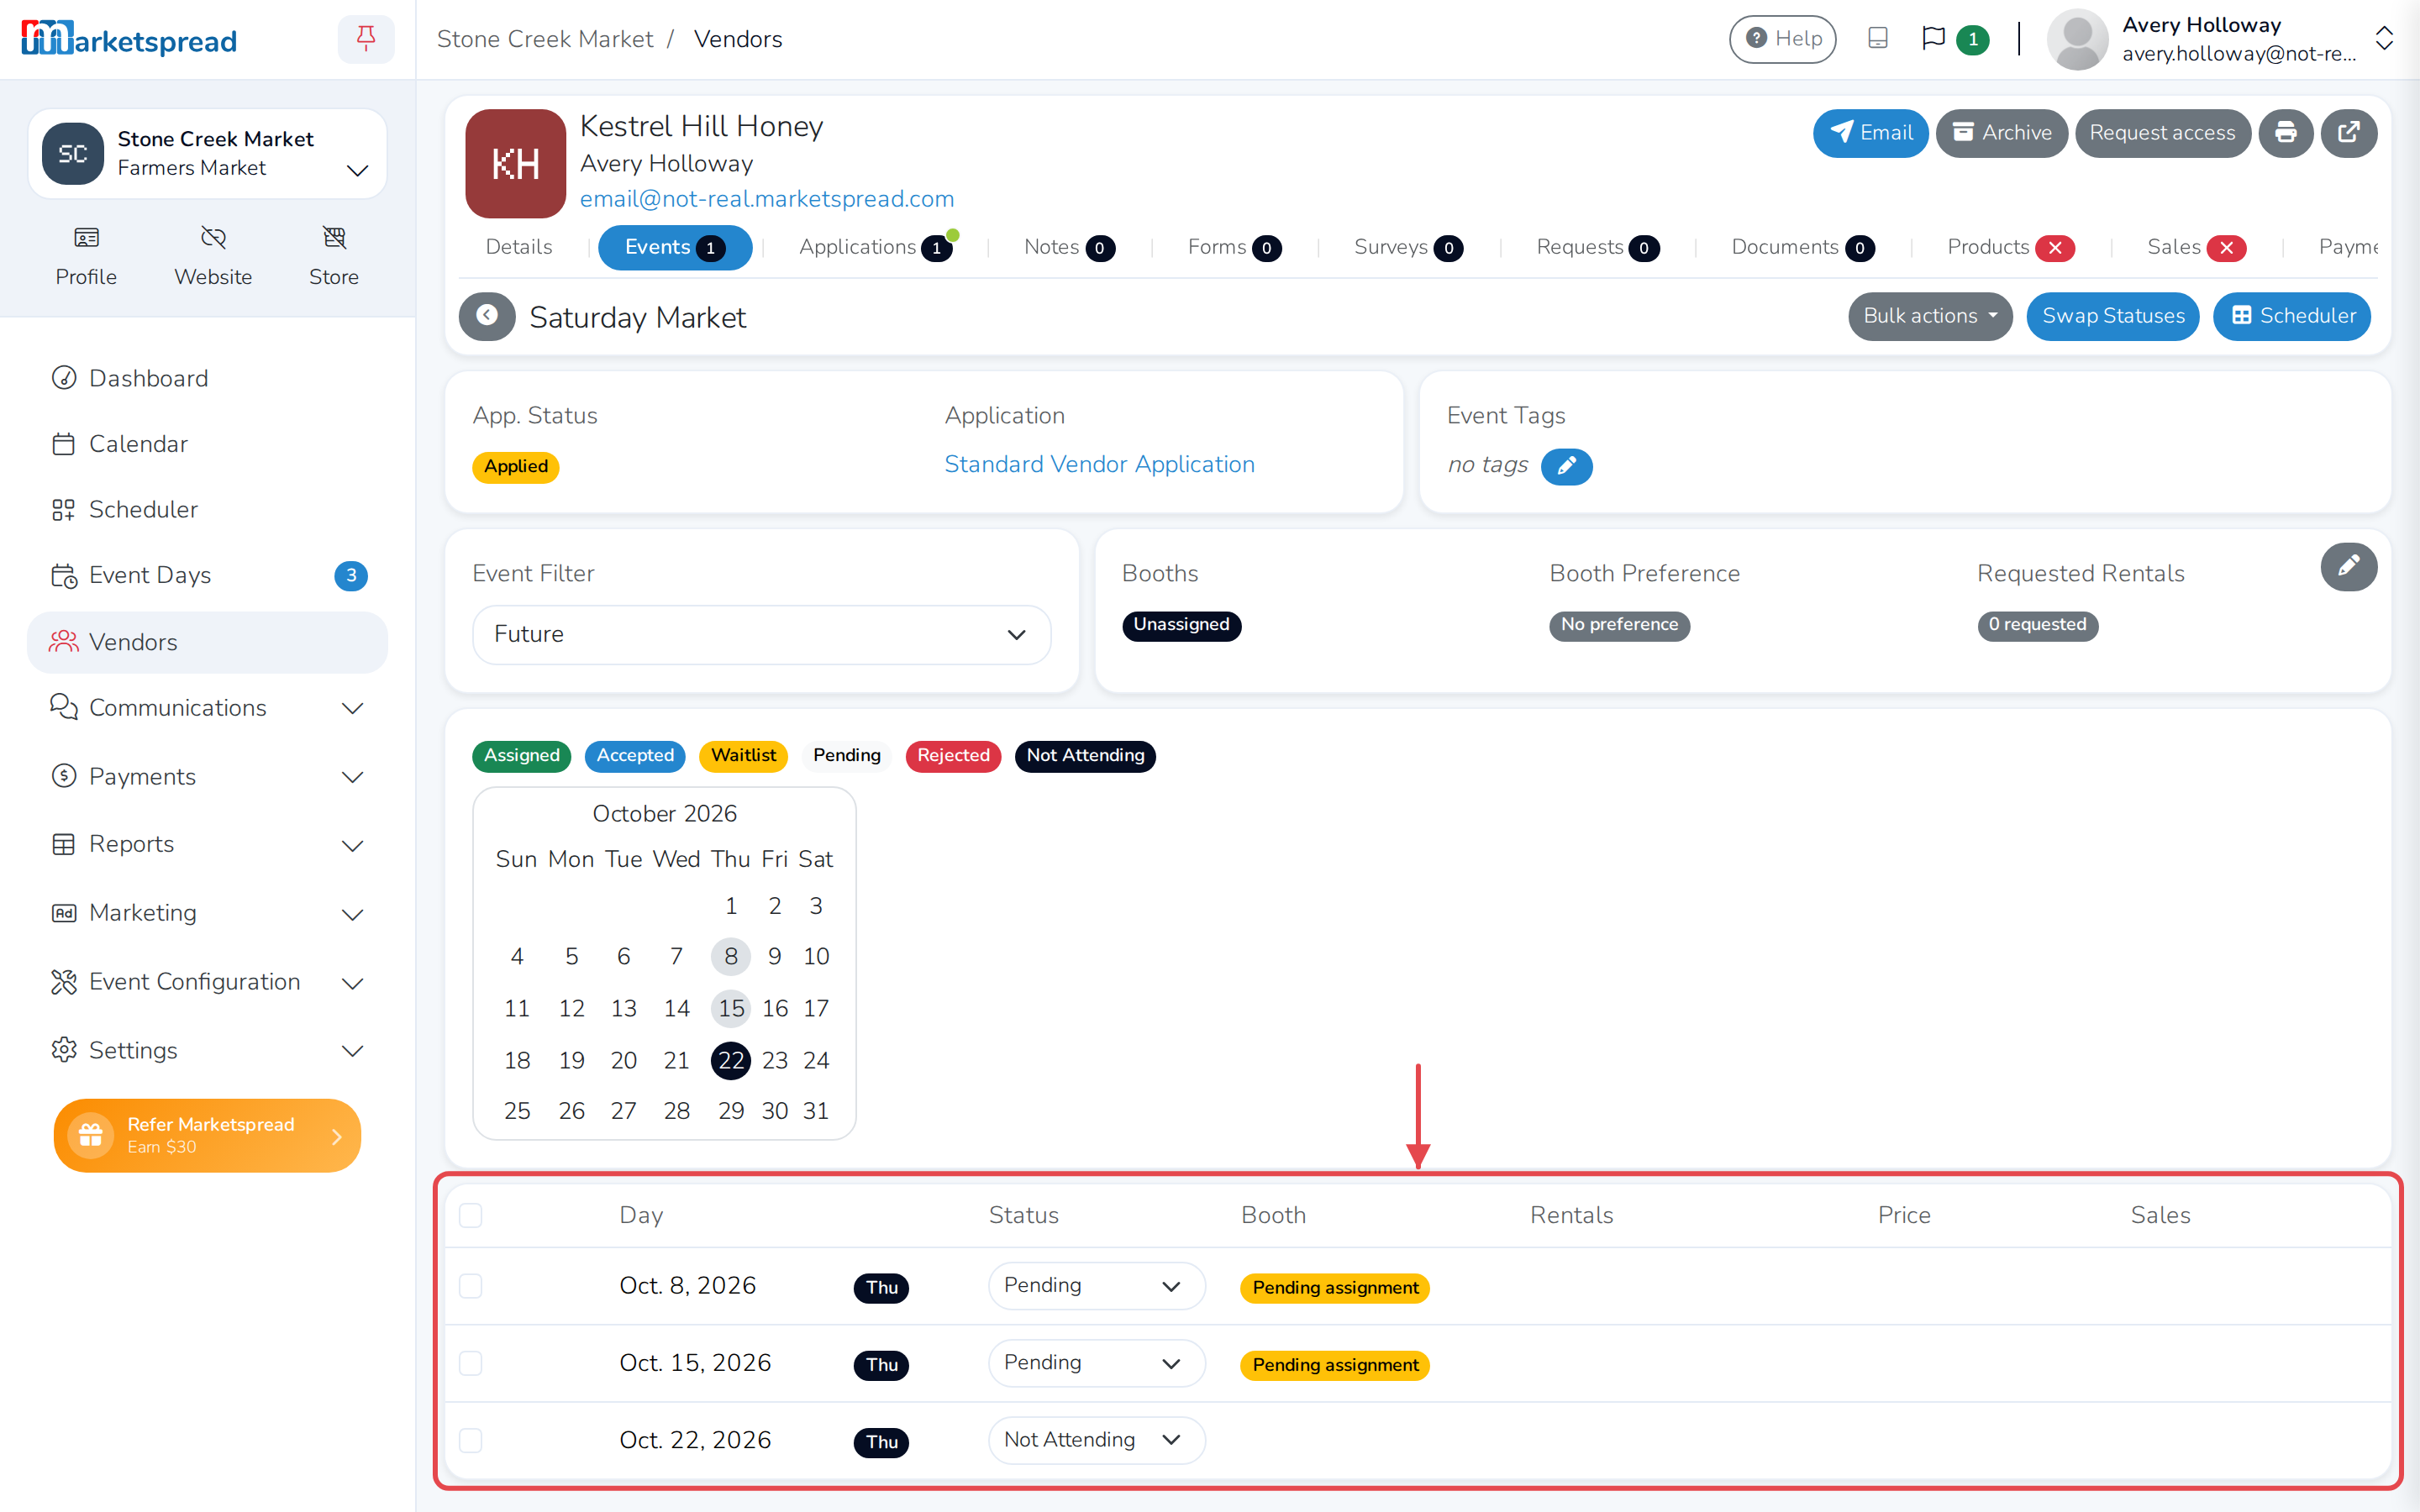
Review the days a vendor wants
Once you approve a vendor — see Reviewing New Applications
— open their event, click Vendors, then click the vendor's name to see
the days they picked. Each one starts out Pending. Set it to Waitlist, Accepted, Rejected or Not
Attending, or leave it Pending if you're not ready to decide yet.
Assign stalls once you're ready
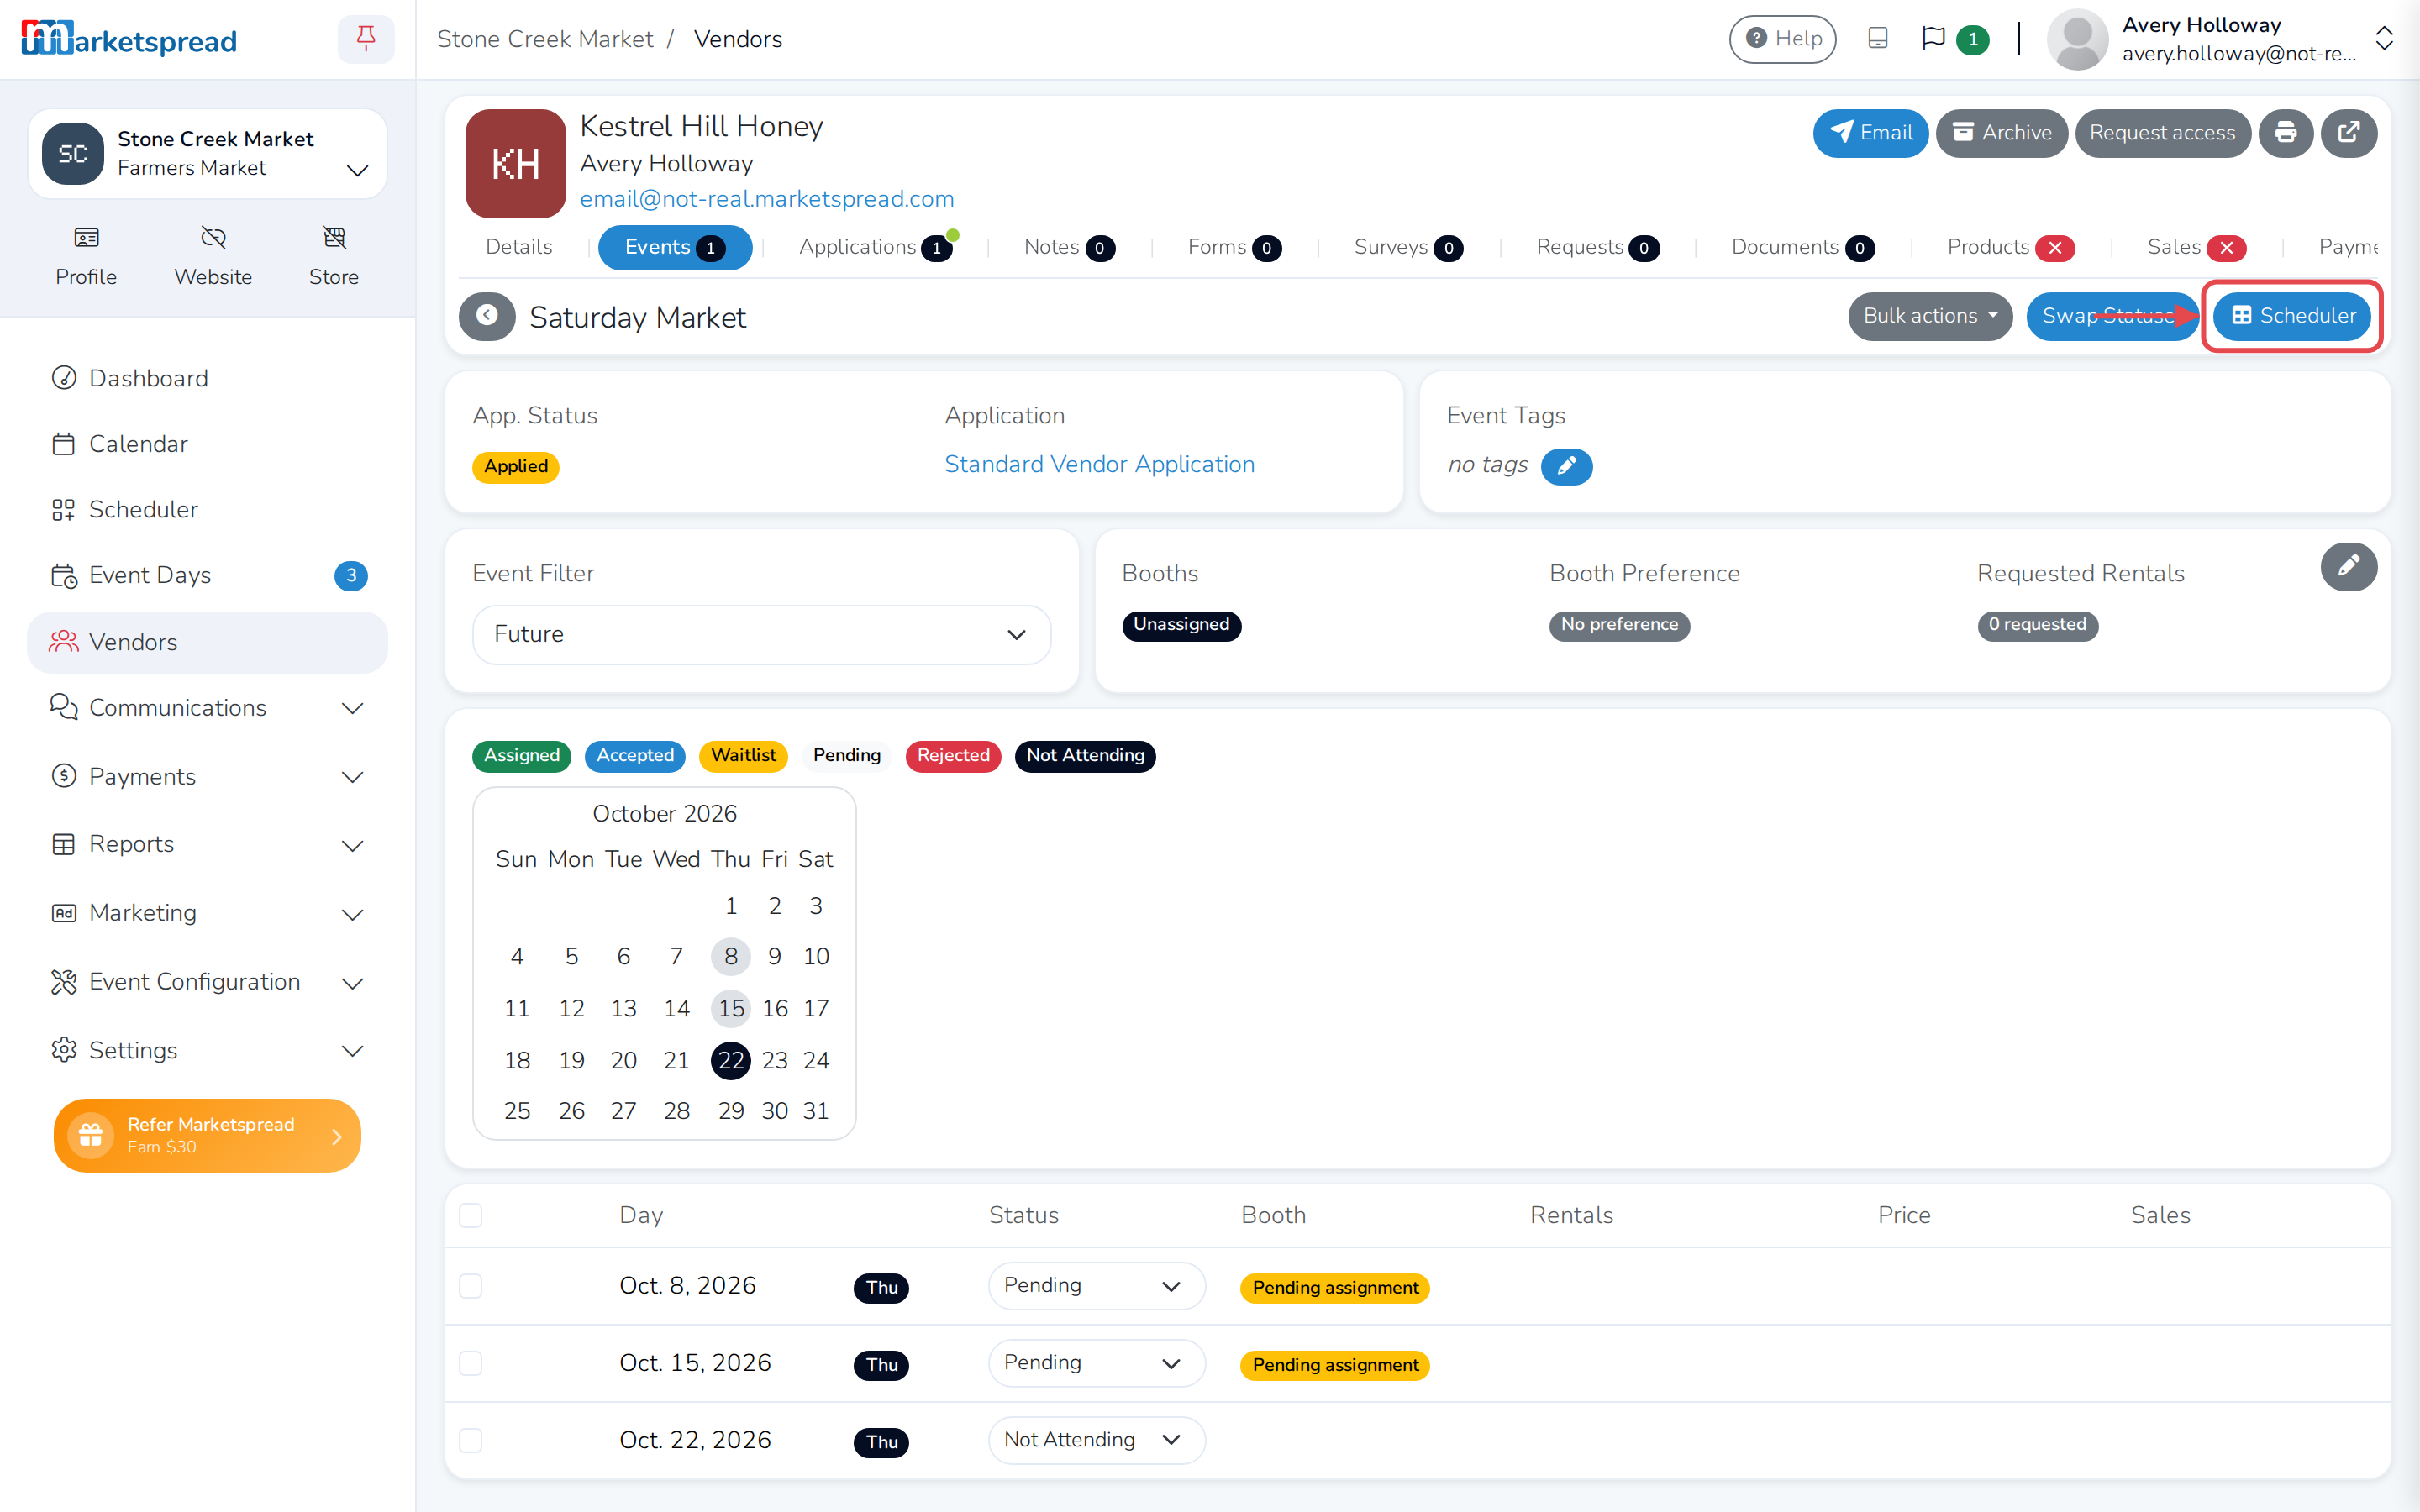
When you want to give a vendor a stall for a day they picked, open
Scheduler. Clicking a vendor's own Scheduler link from their event
opens it with that vendor already selected; opening Scheduler from your
dashboard leaves you to pick the vendor yourself.
See Set a vendor's status for an event day
for how to see every vendor still waiting for a day at once, and give them a
stall from there.