Overview
Marketspread makes it easy to create, manage and take payment against vendor fees. Generally speaking, there are three ways to create invoices.
Application and Approval Invoices
Invoices automatically created as part of an application submission or application approval. Unless you are running a single, short lived event these invoices are usually not used for vendor attendance / booth fees.
Manual Invoices
Invoices created manually to cover any use case where an invoice needs to be created. The main disadvantage to manual invoicing is that, while you can have pre-created line items, these invoices are not automated in any way. Also, while they can be linked to event days they are not linked to Scheduler and thus for booth bookings manual invoices can feel disconnected.
Automatic Booking and Rental Invoices
Creating A Manual Invoice
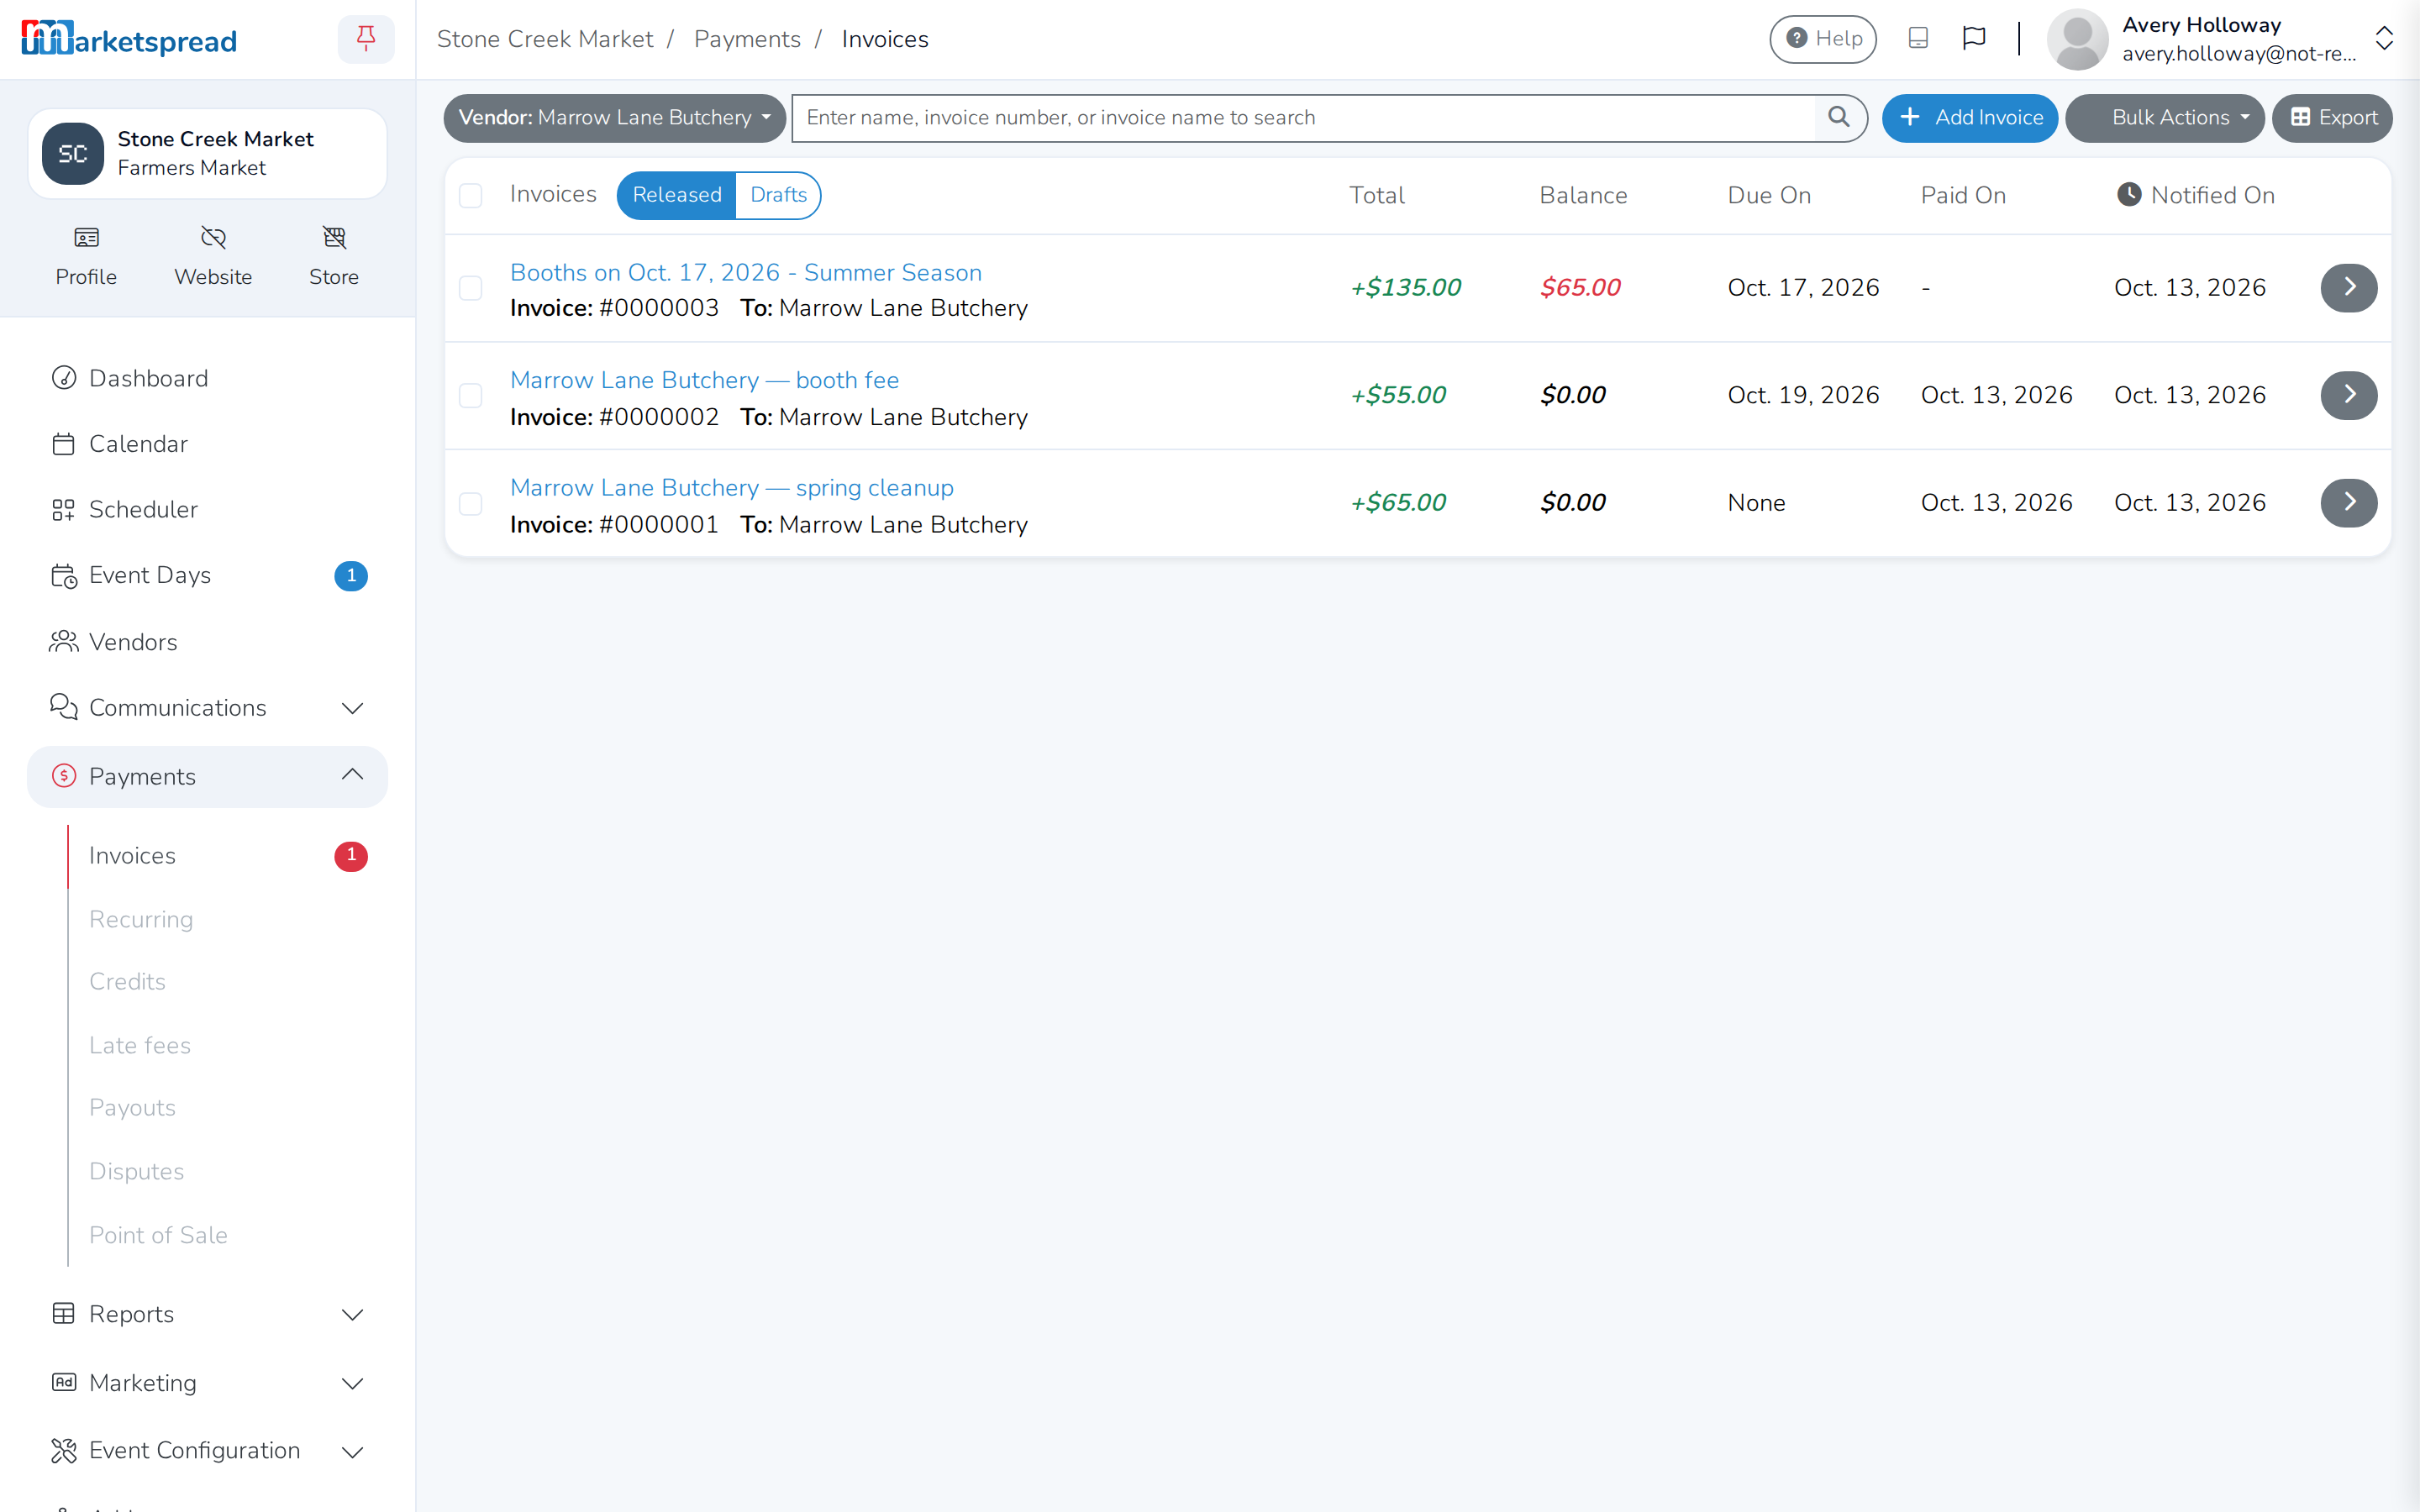
The most basic way to invoice vendors is with Manual Invoicing. From your Dashboard, expand Payments and click Invoices. This opens a list of existing invoices, with the blue Add Invoice button in the top right.
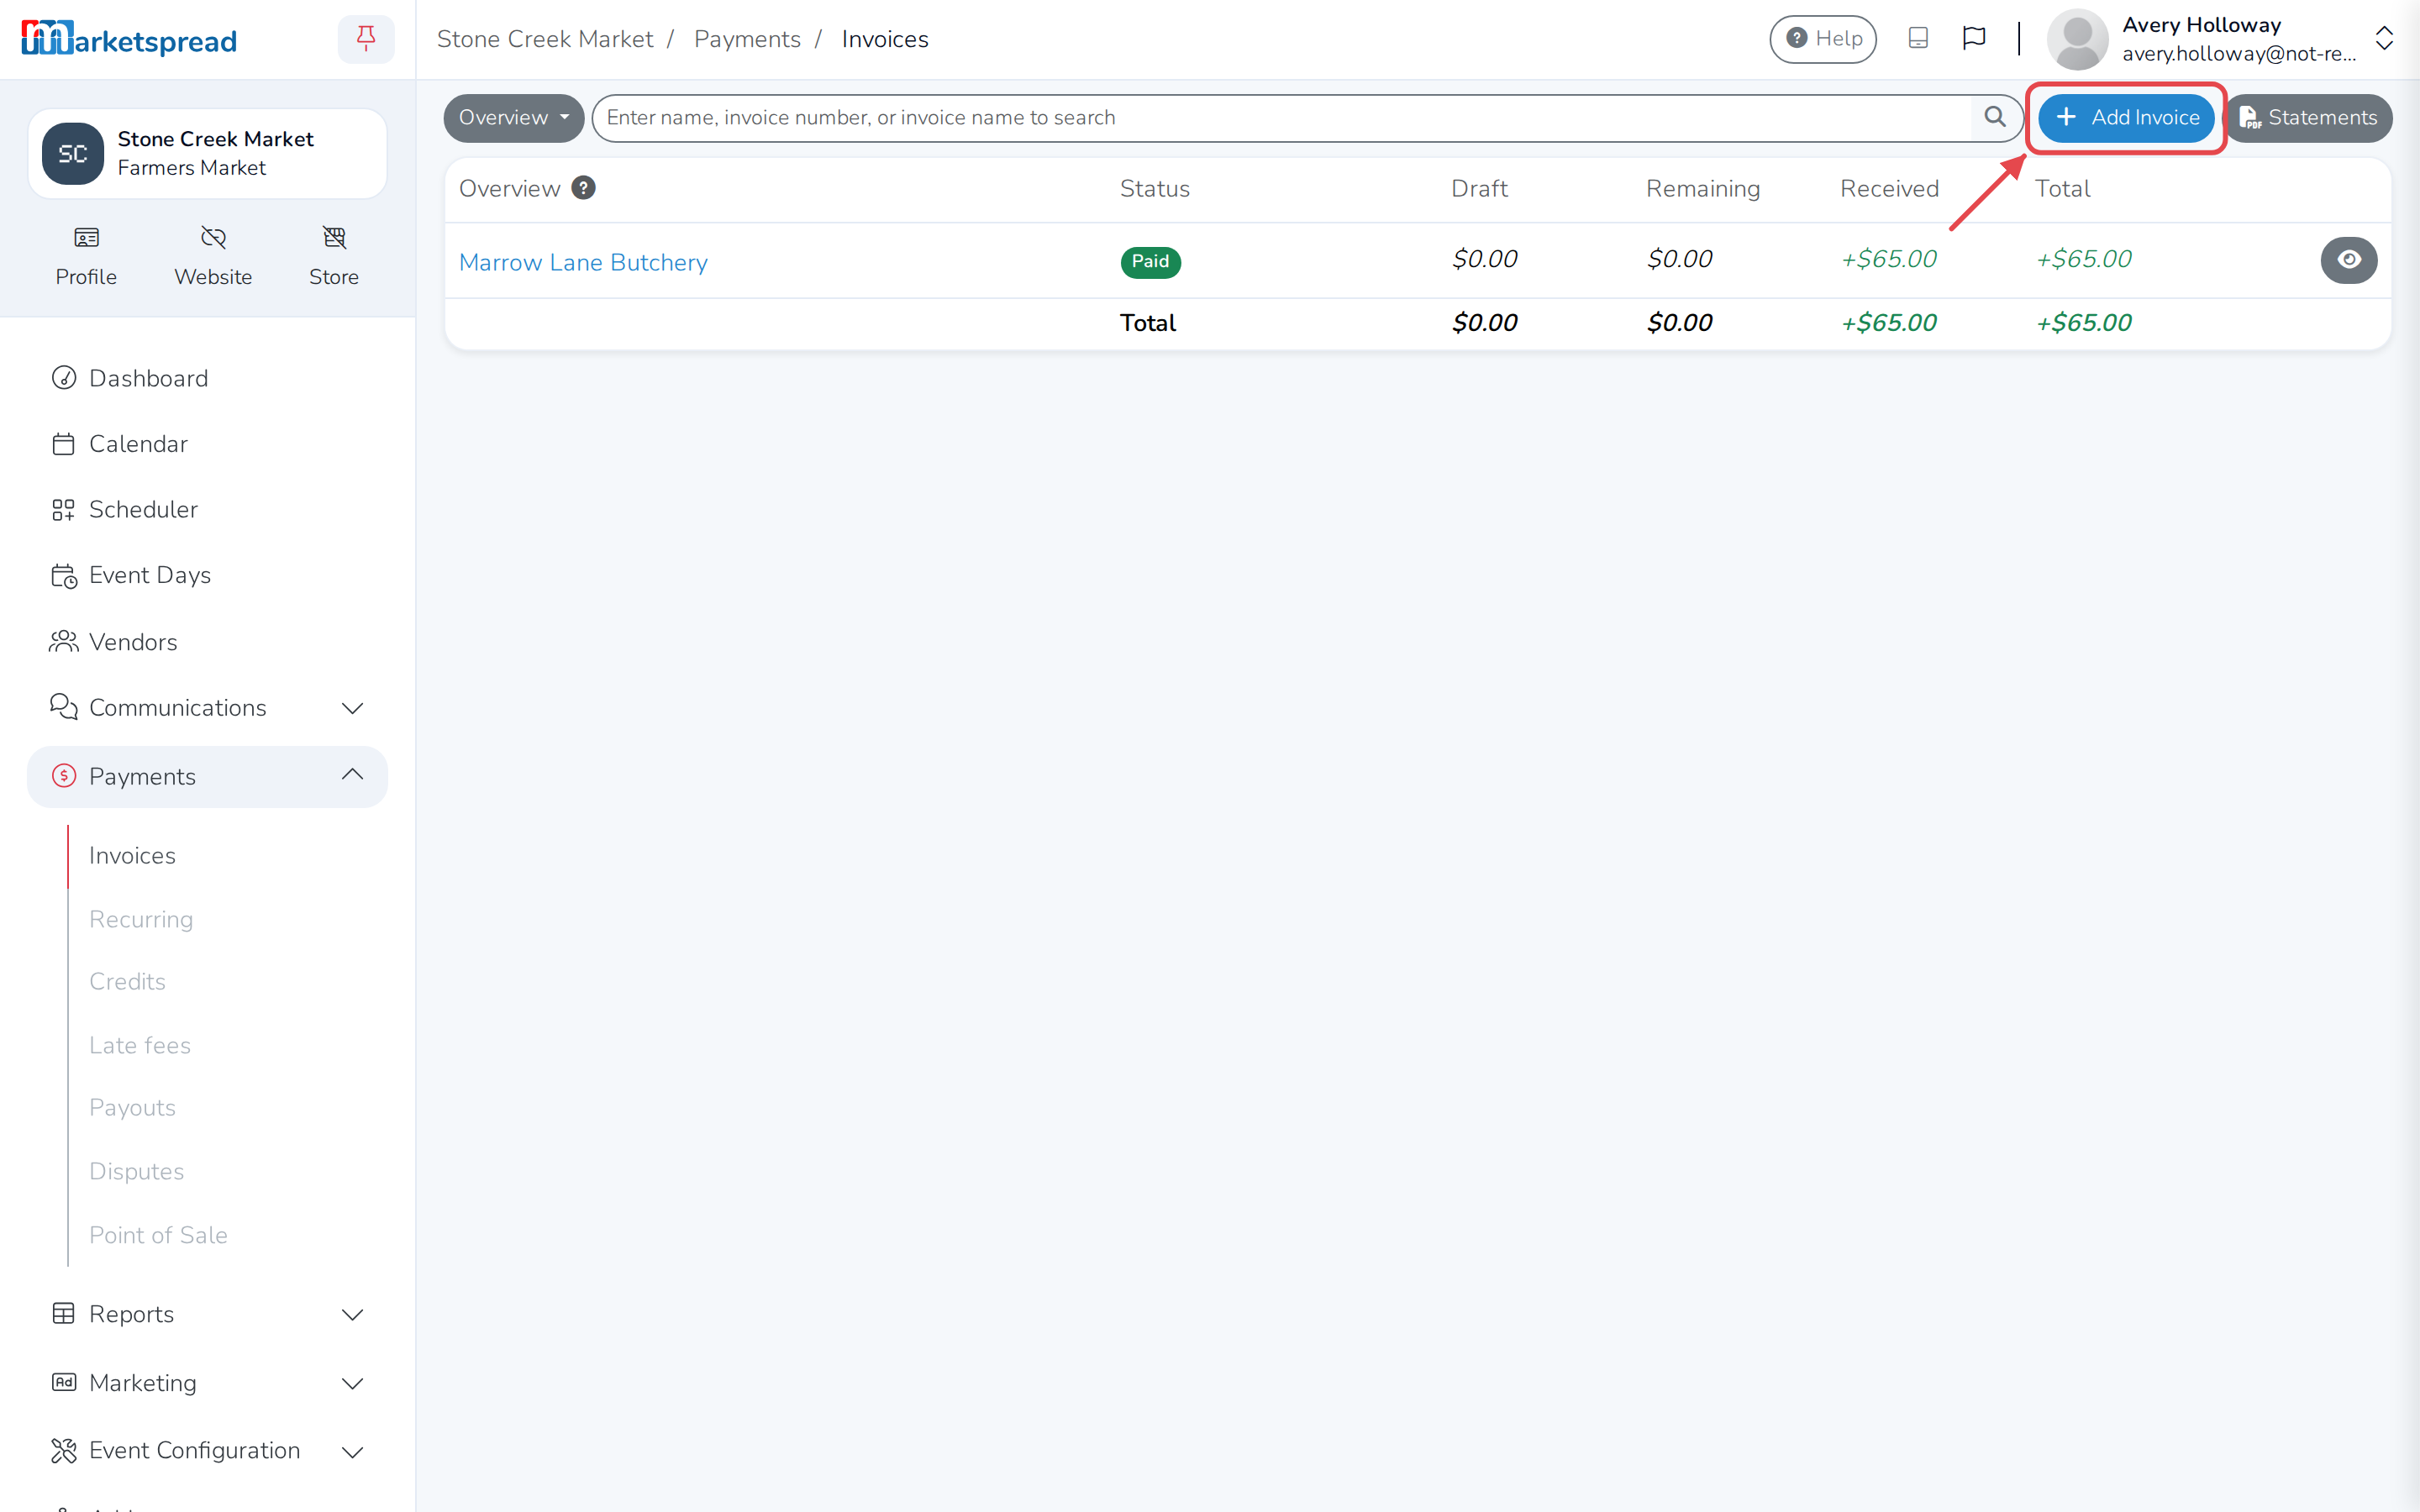
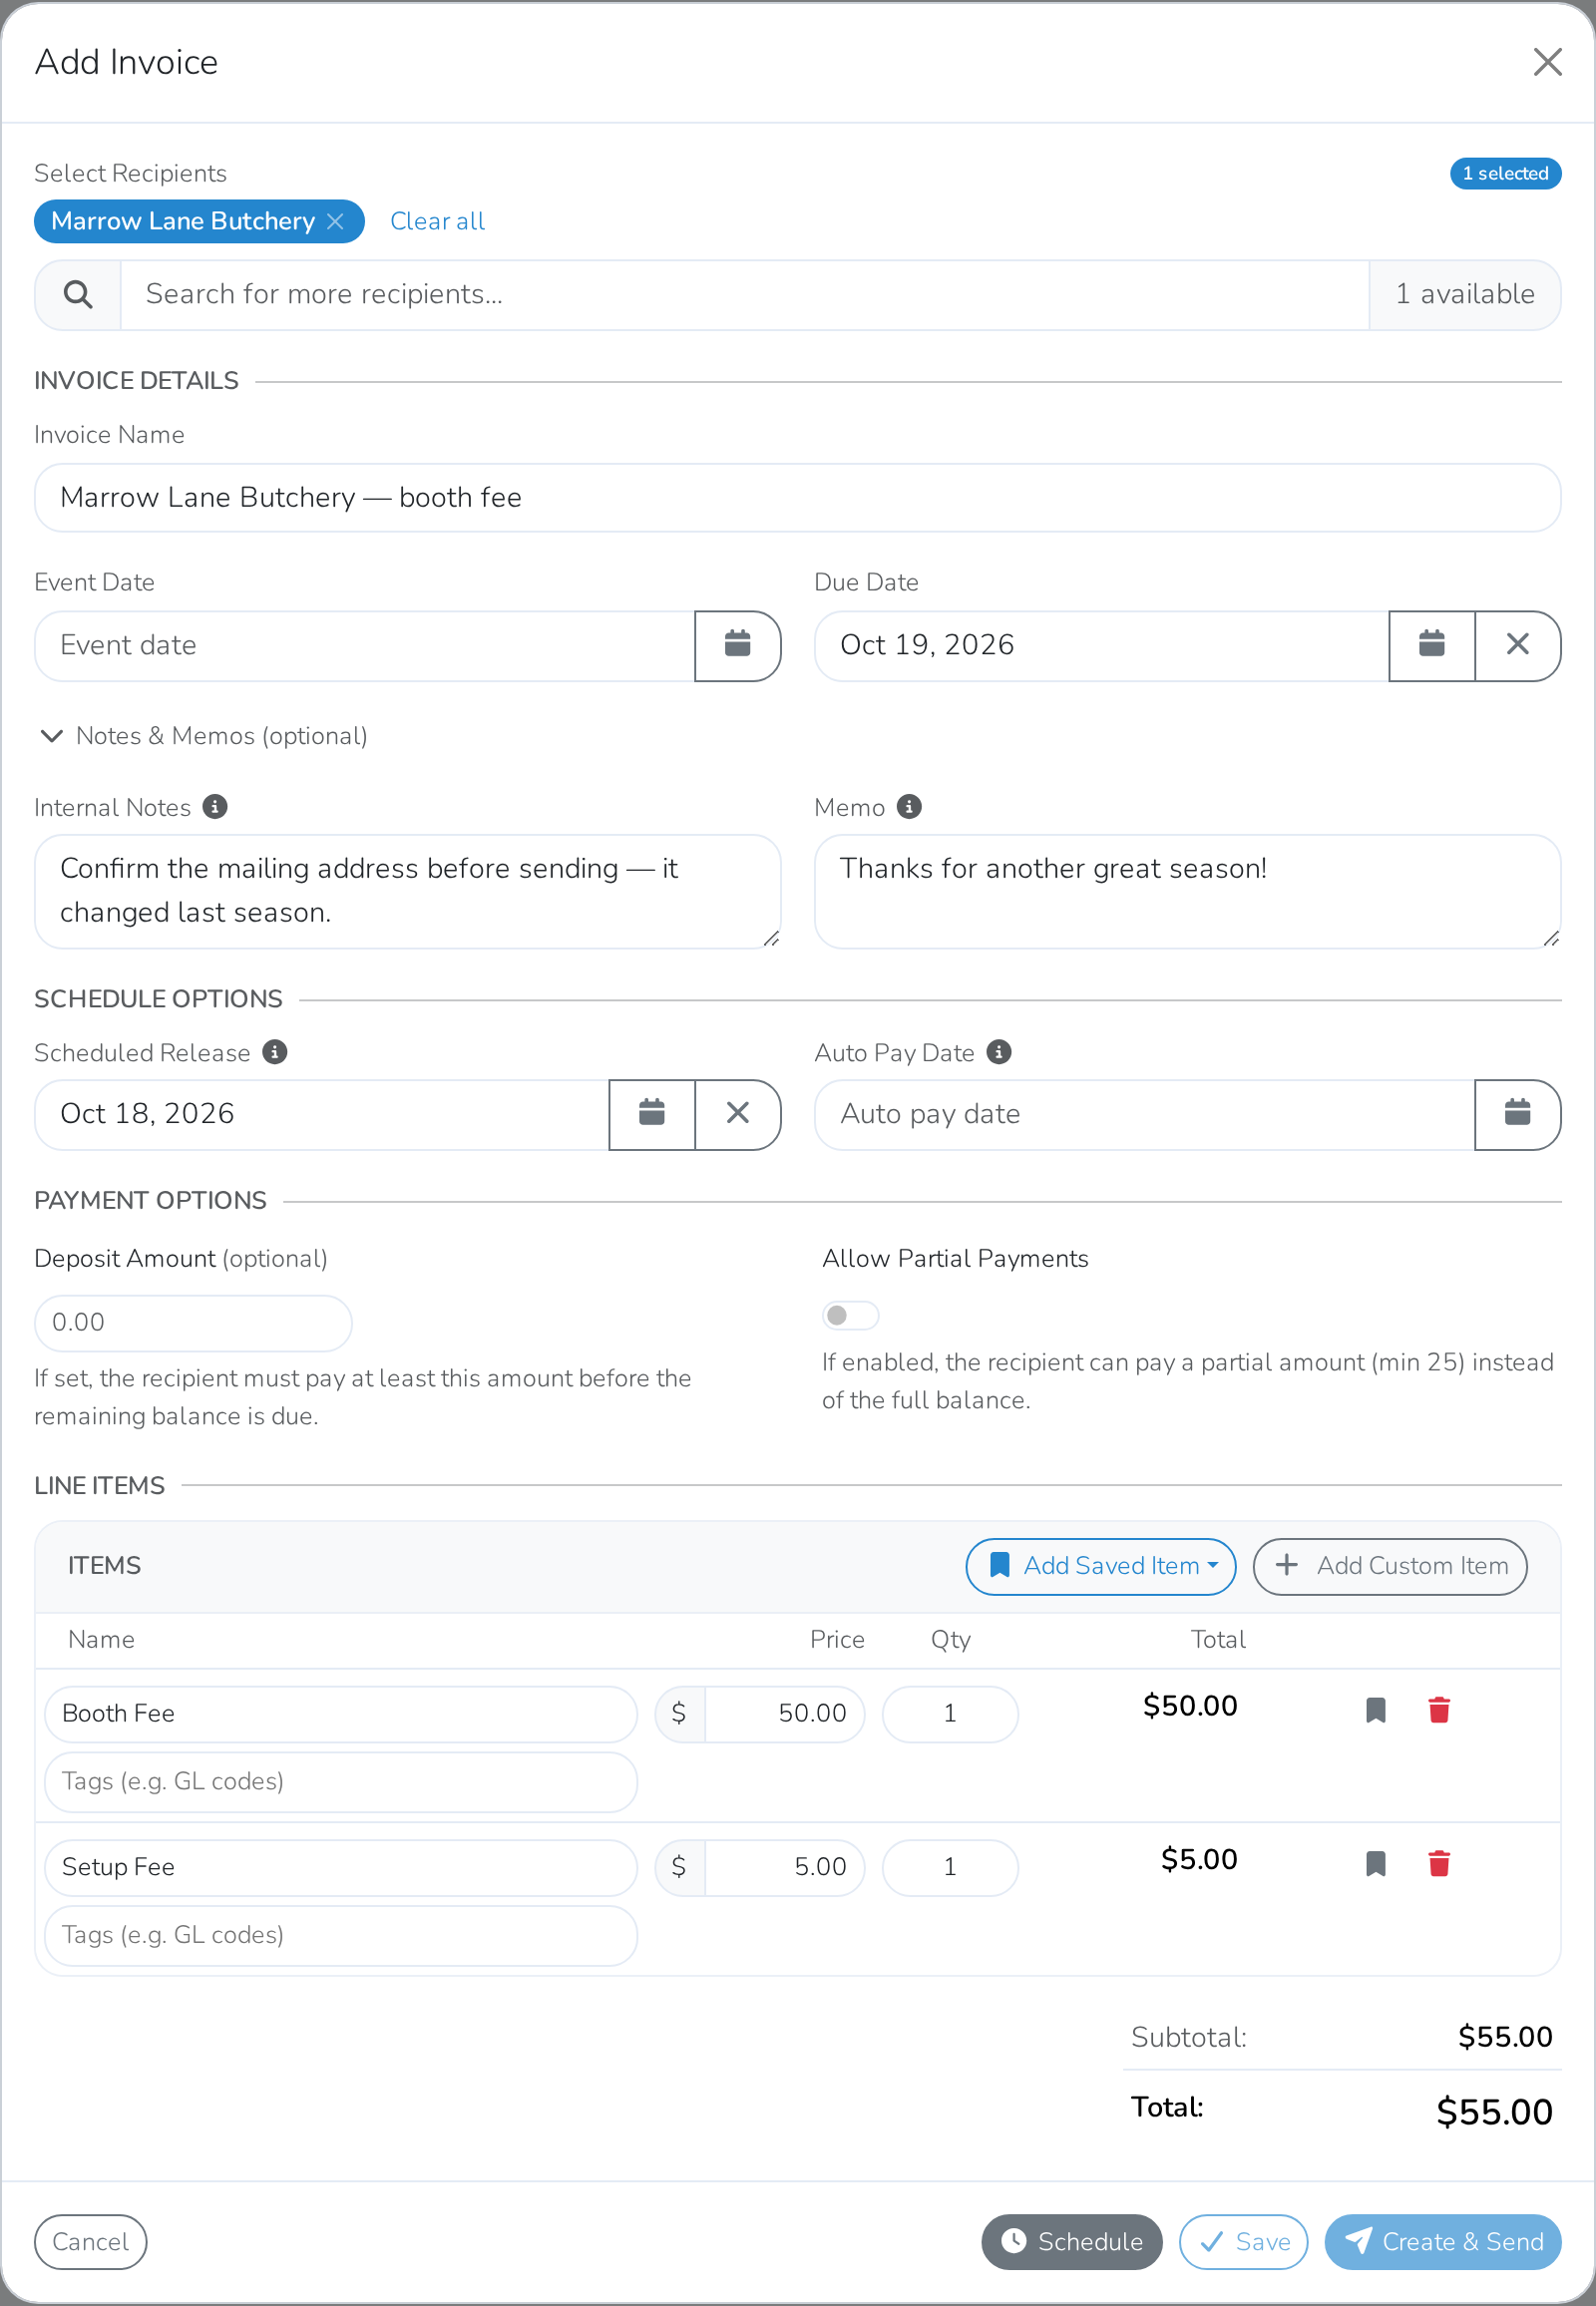
Click Add Invoice to open the invoice creator. Search for and select the vendor under Select Recipients — type in the search box to add more than one, and Marketspread creates a separate, identical invoice for each recipient you pick. Add a line item with its name and price, using Add Custom Item for one you type in yourself, or Add Saved Item to reuse one you've set up in Settings > Invoicing. Invoice Name is optional — Marketspread makes one up if you leave it blank.
Note
You can also set a Due Date, a Scheduled Release date, an Auto Pay Date (charges the vendor's card on file that day), and under Notes & Memos an internal note for yourself and a memo the vendor sees on the invoice. All optional.
With a Scheduled Release date set, the invoice doesn't go out until that day, so Create & Send is greyed out — click Schedule instead. Clear the date and Create & Send is the one to click, sending the invoice right away.
Find and Pay an Invoice
To find an invoice again, click the vendor's name from the Invoices list, then click the invoice.
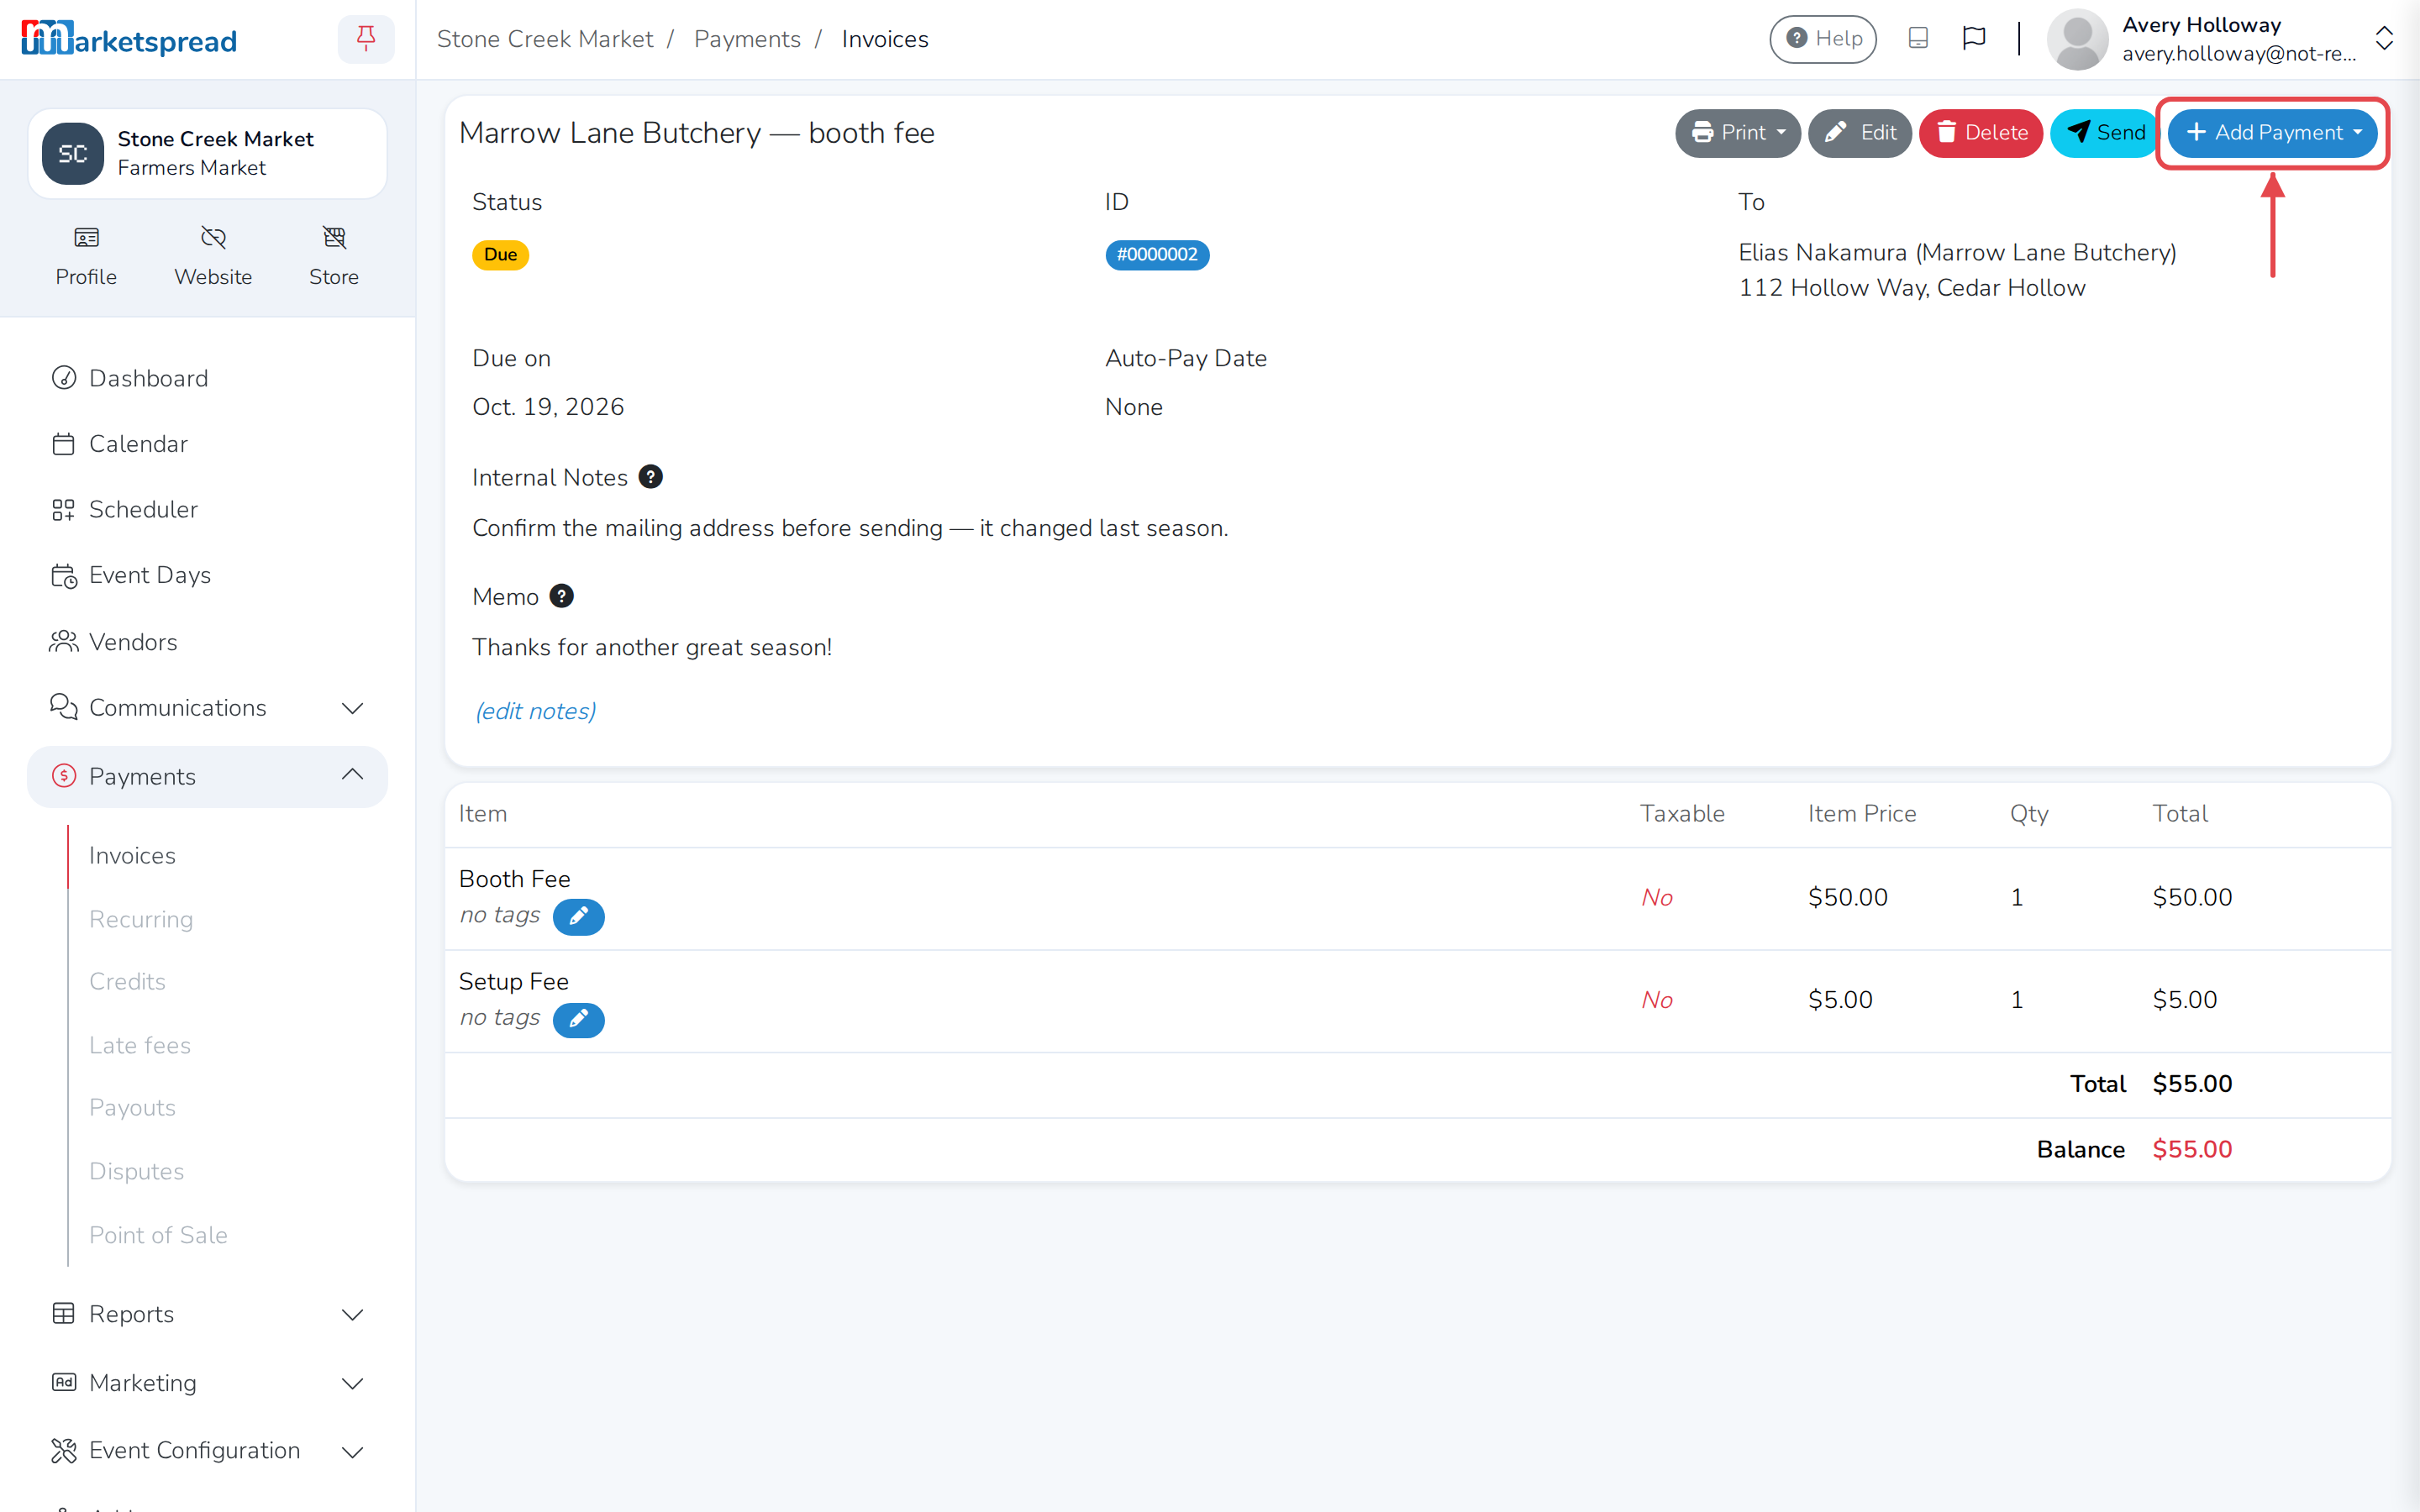
From here you can Print, Delete or Send the invoice, or click Add Payment to record a payment made outside Marketspread.
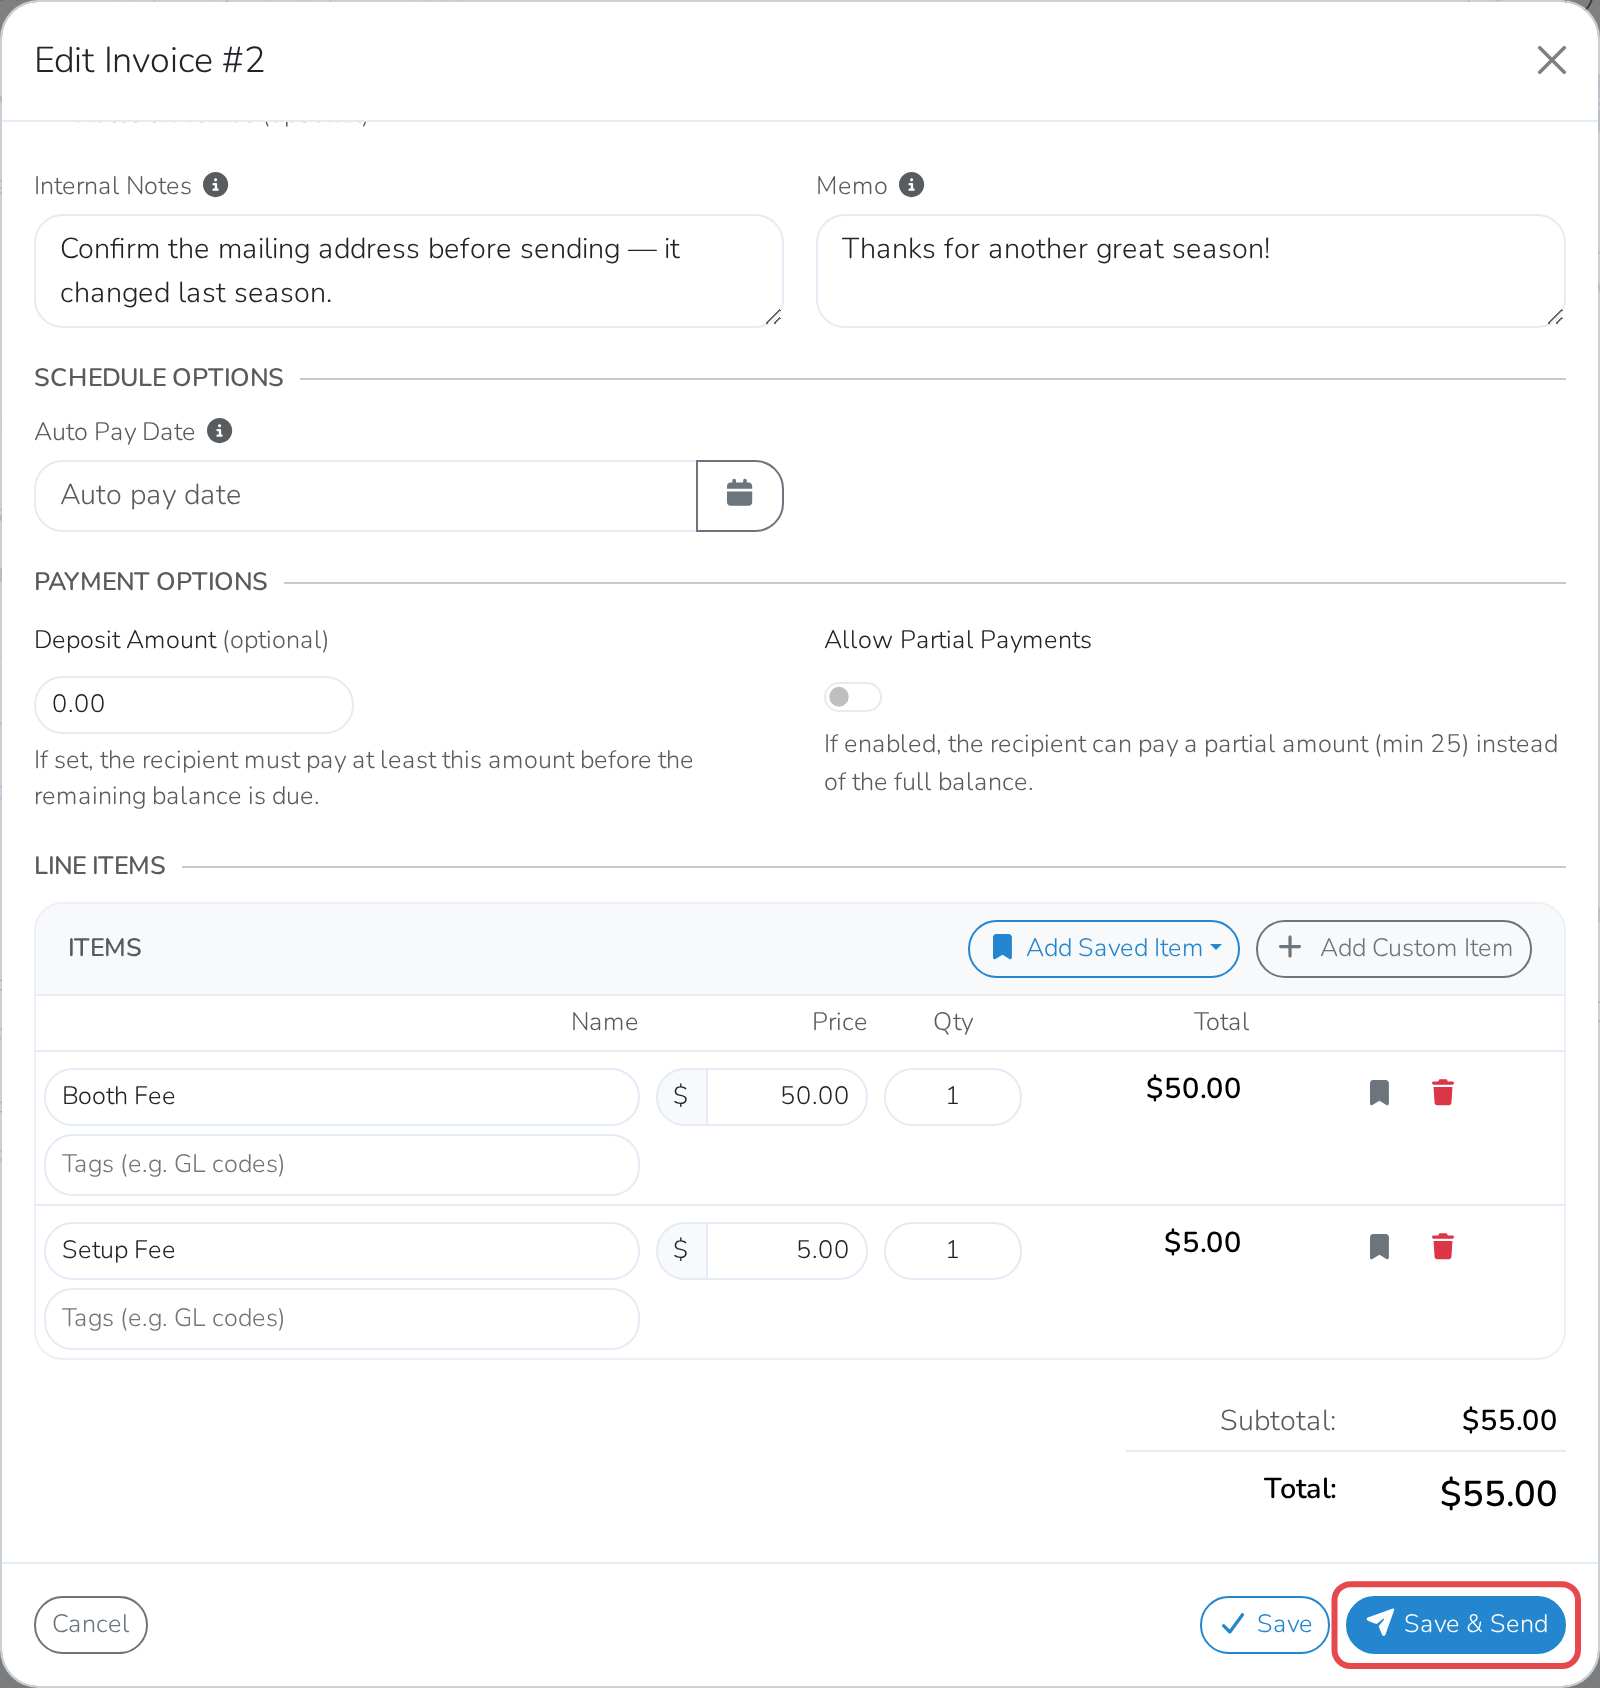
Click Edit to change the vendor, line items, due date or notes. Click Save to keep your changes without telling the vendor, or Save & Send to email them the updated invoice.
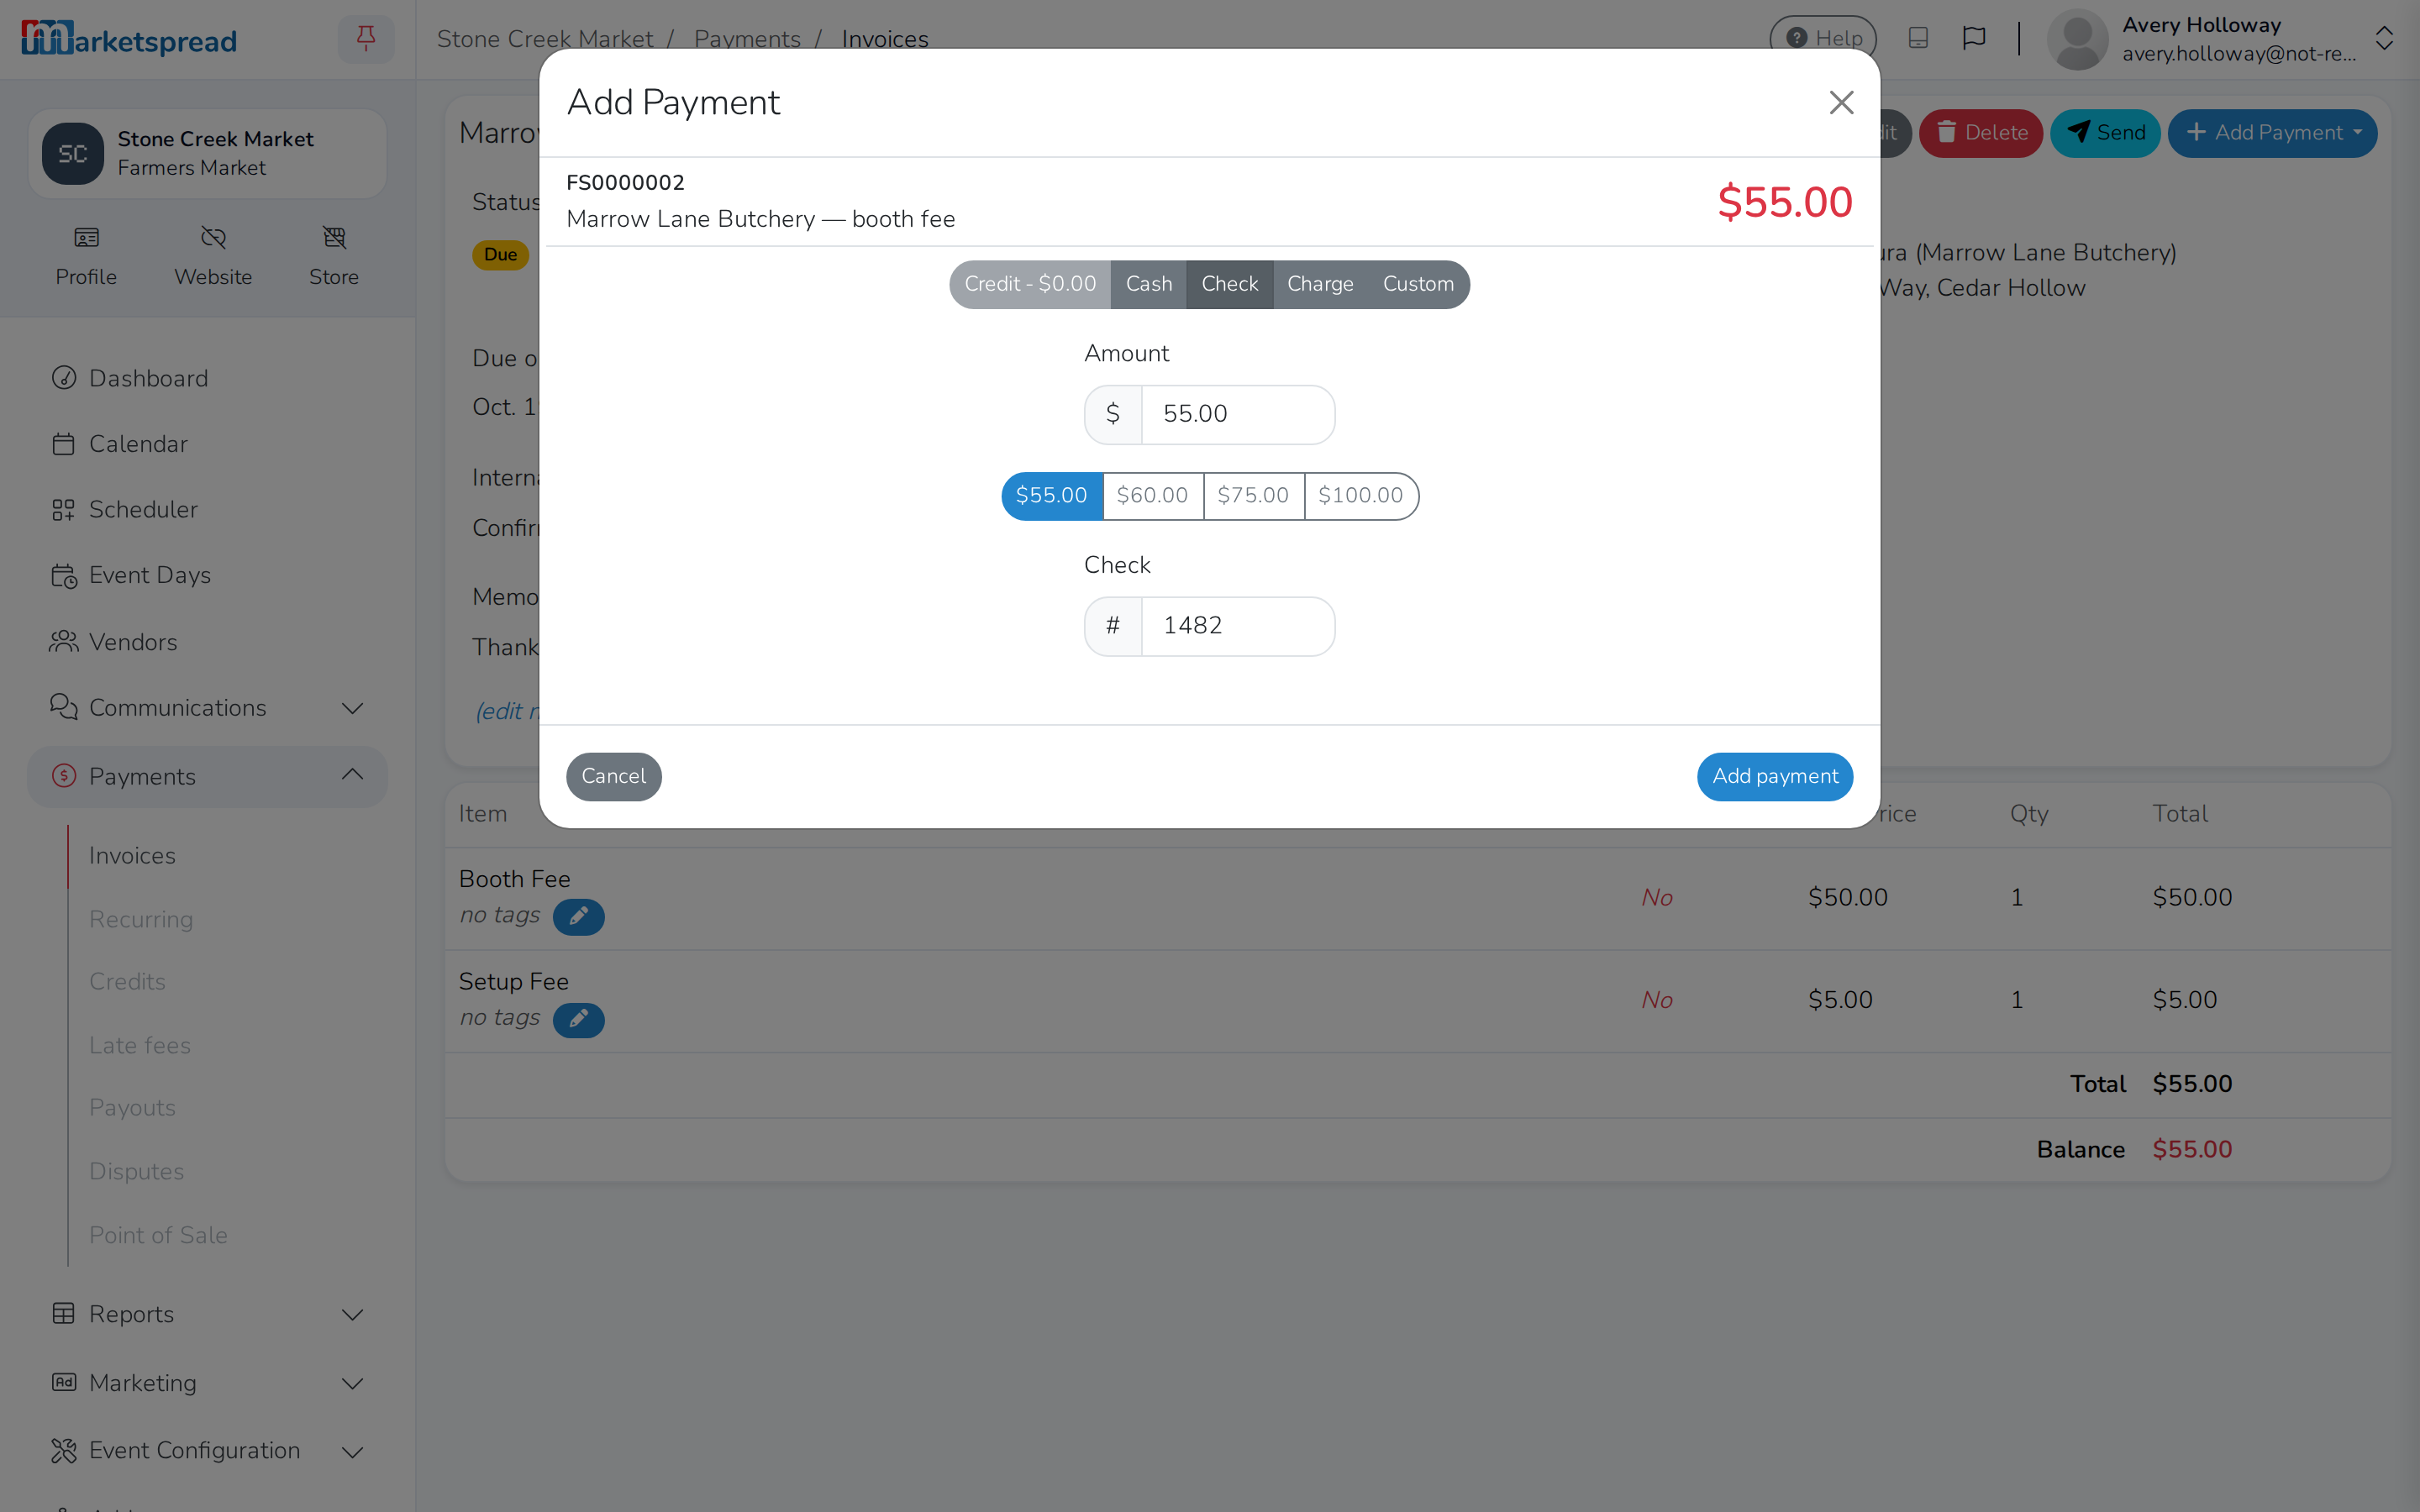
Click Add Payment, choose a payment method, enter the amount, and click Add payment again to confirm.
Check also asks for a check number.
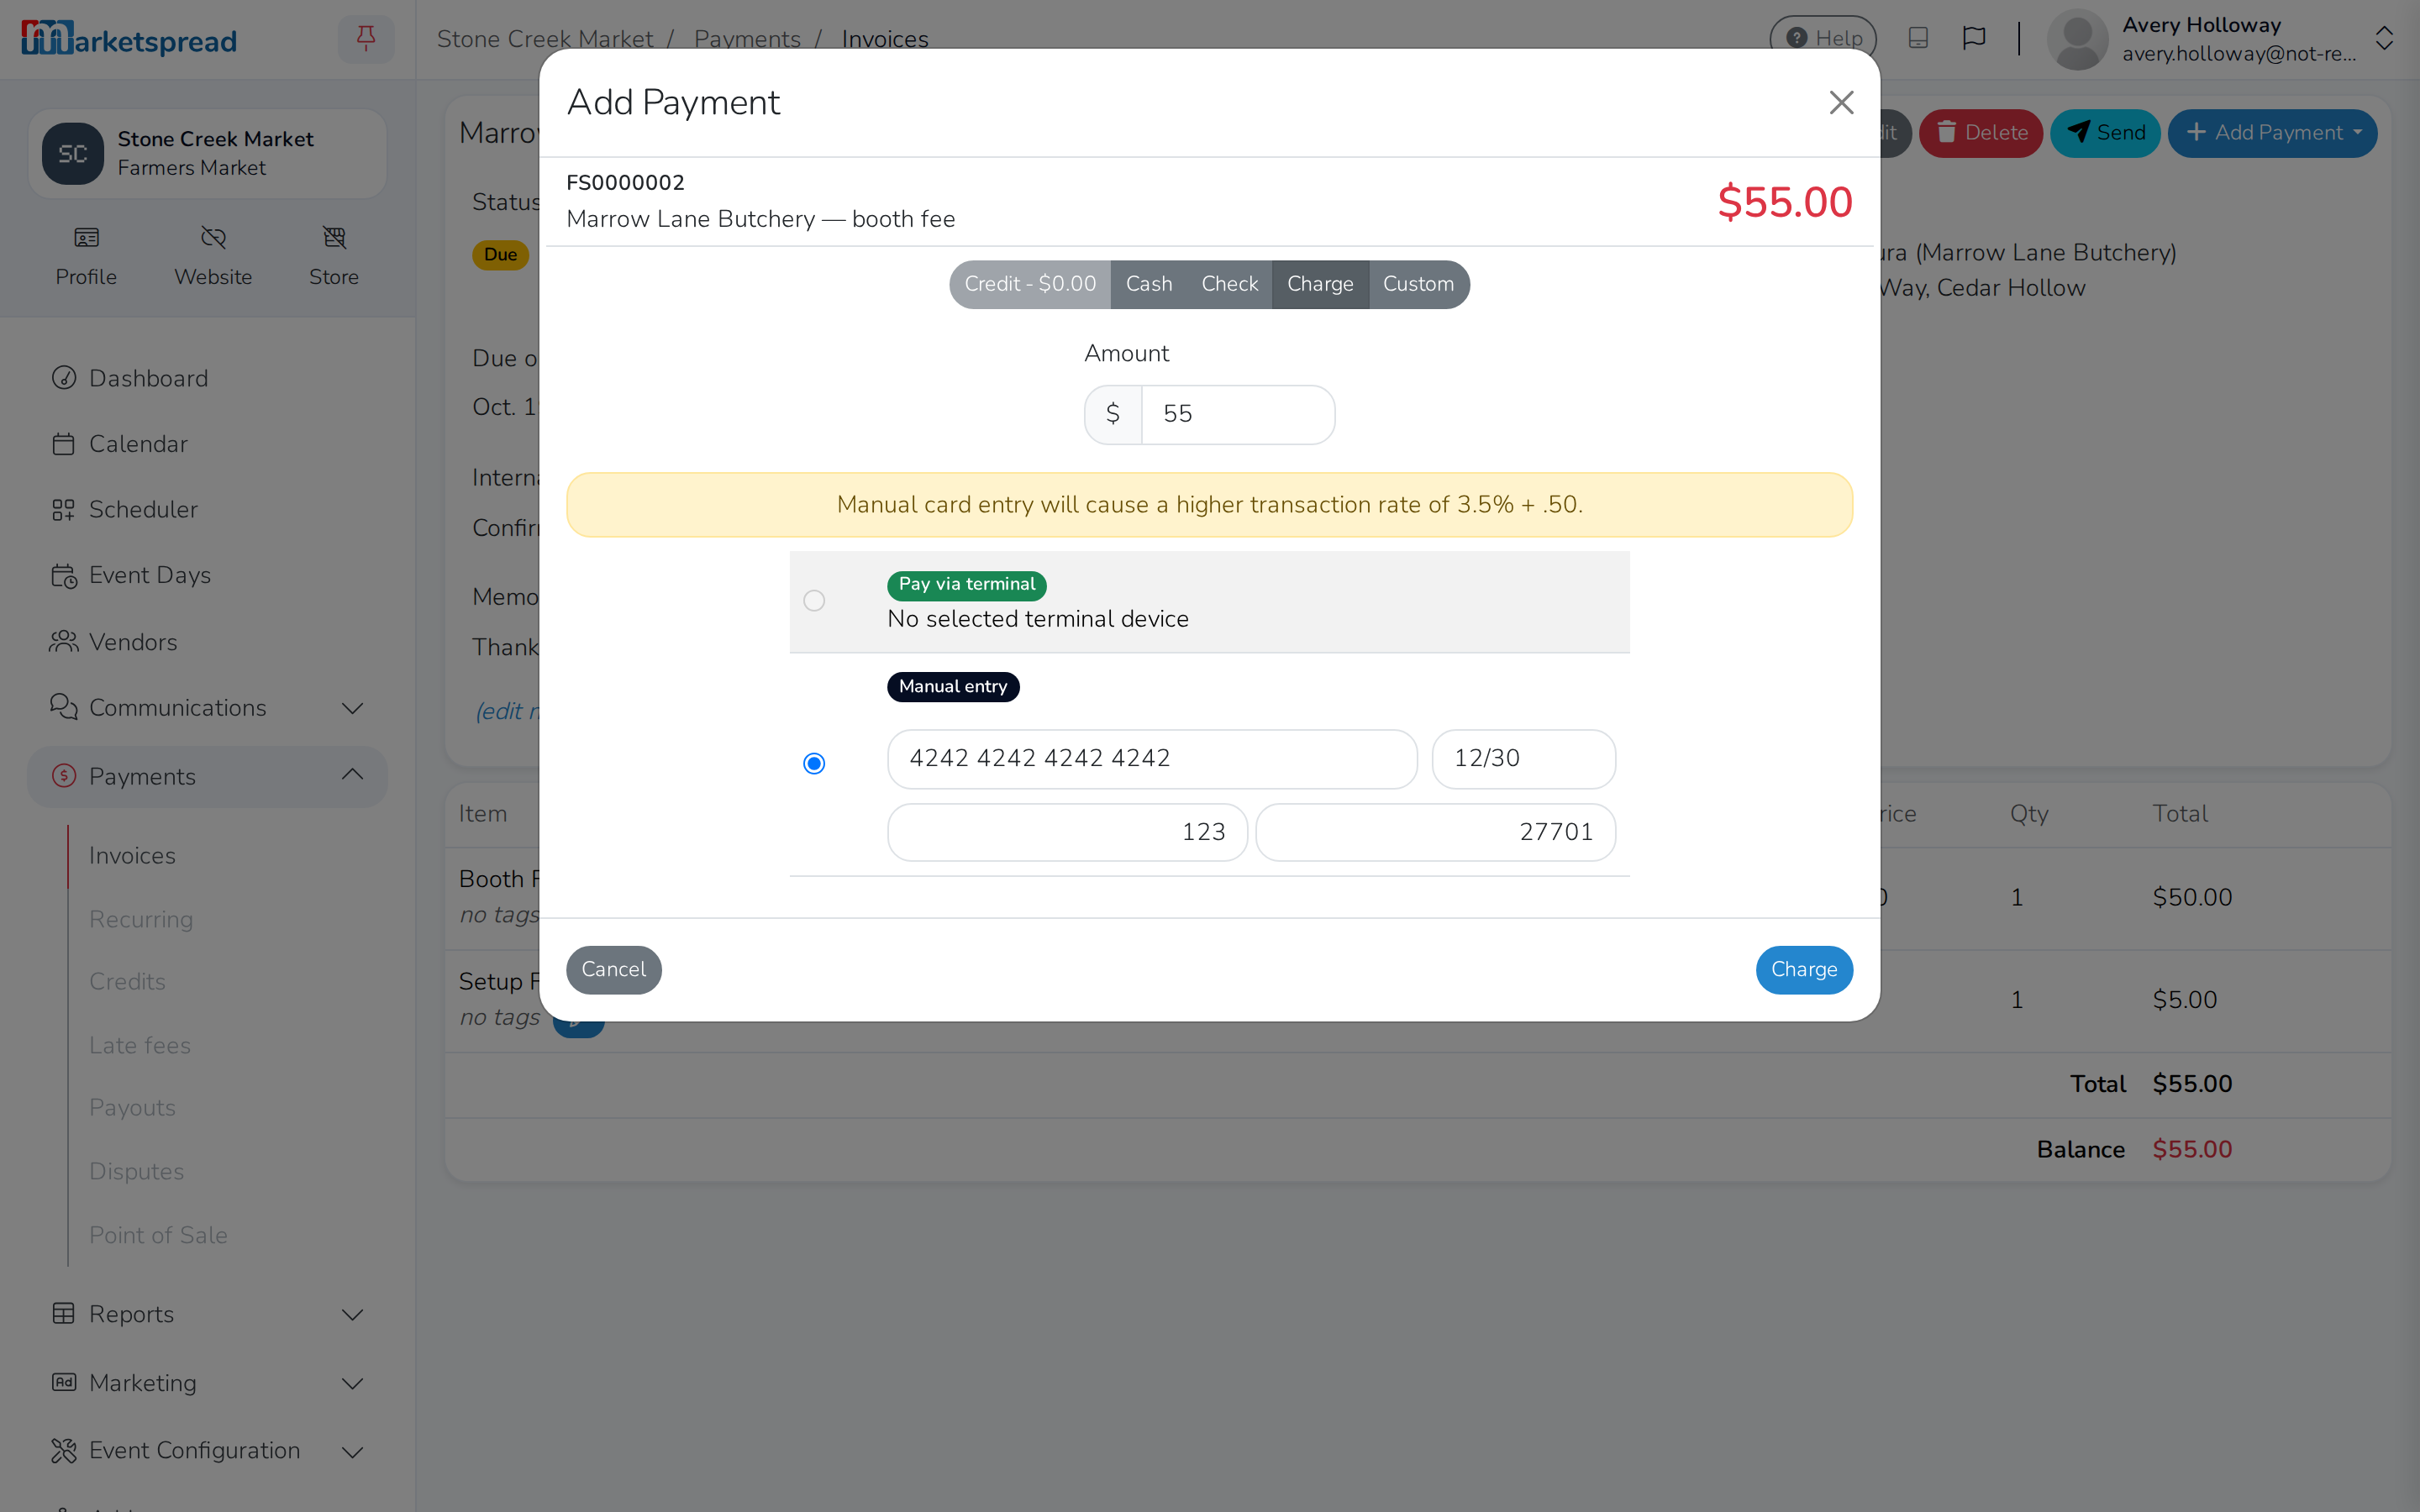
Charge runs the vendor's card on file, or lets you enter a card by hand along with its CVV.
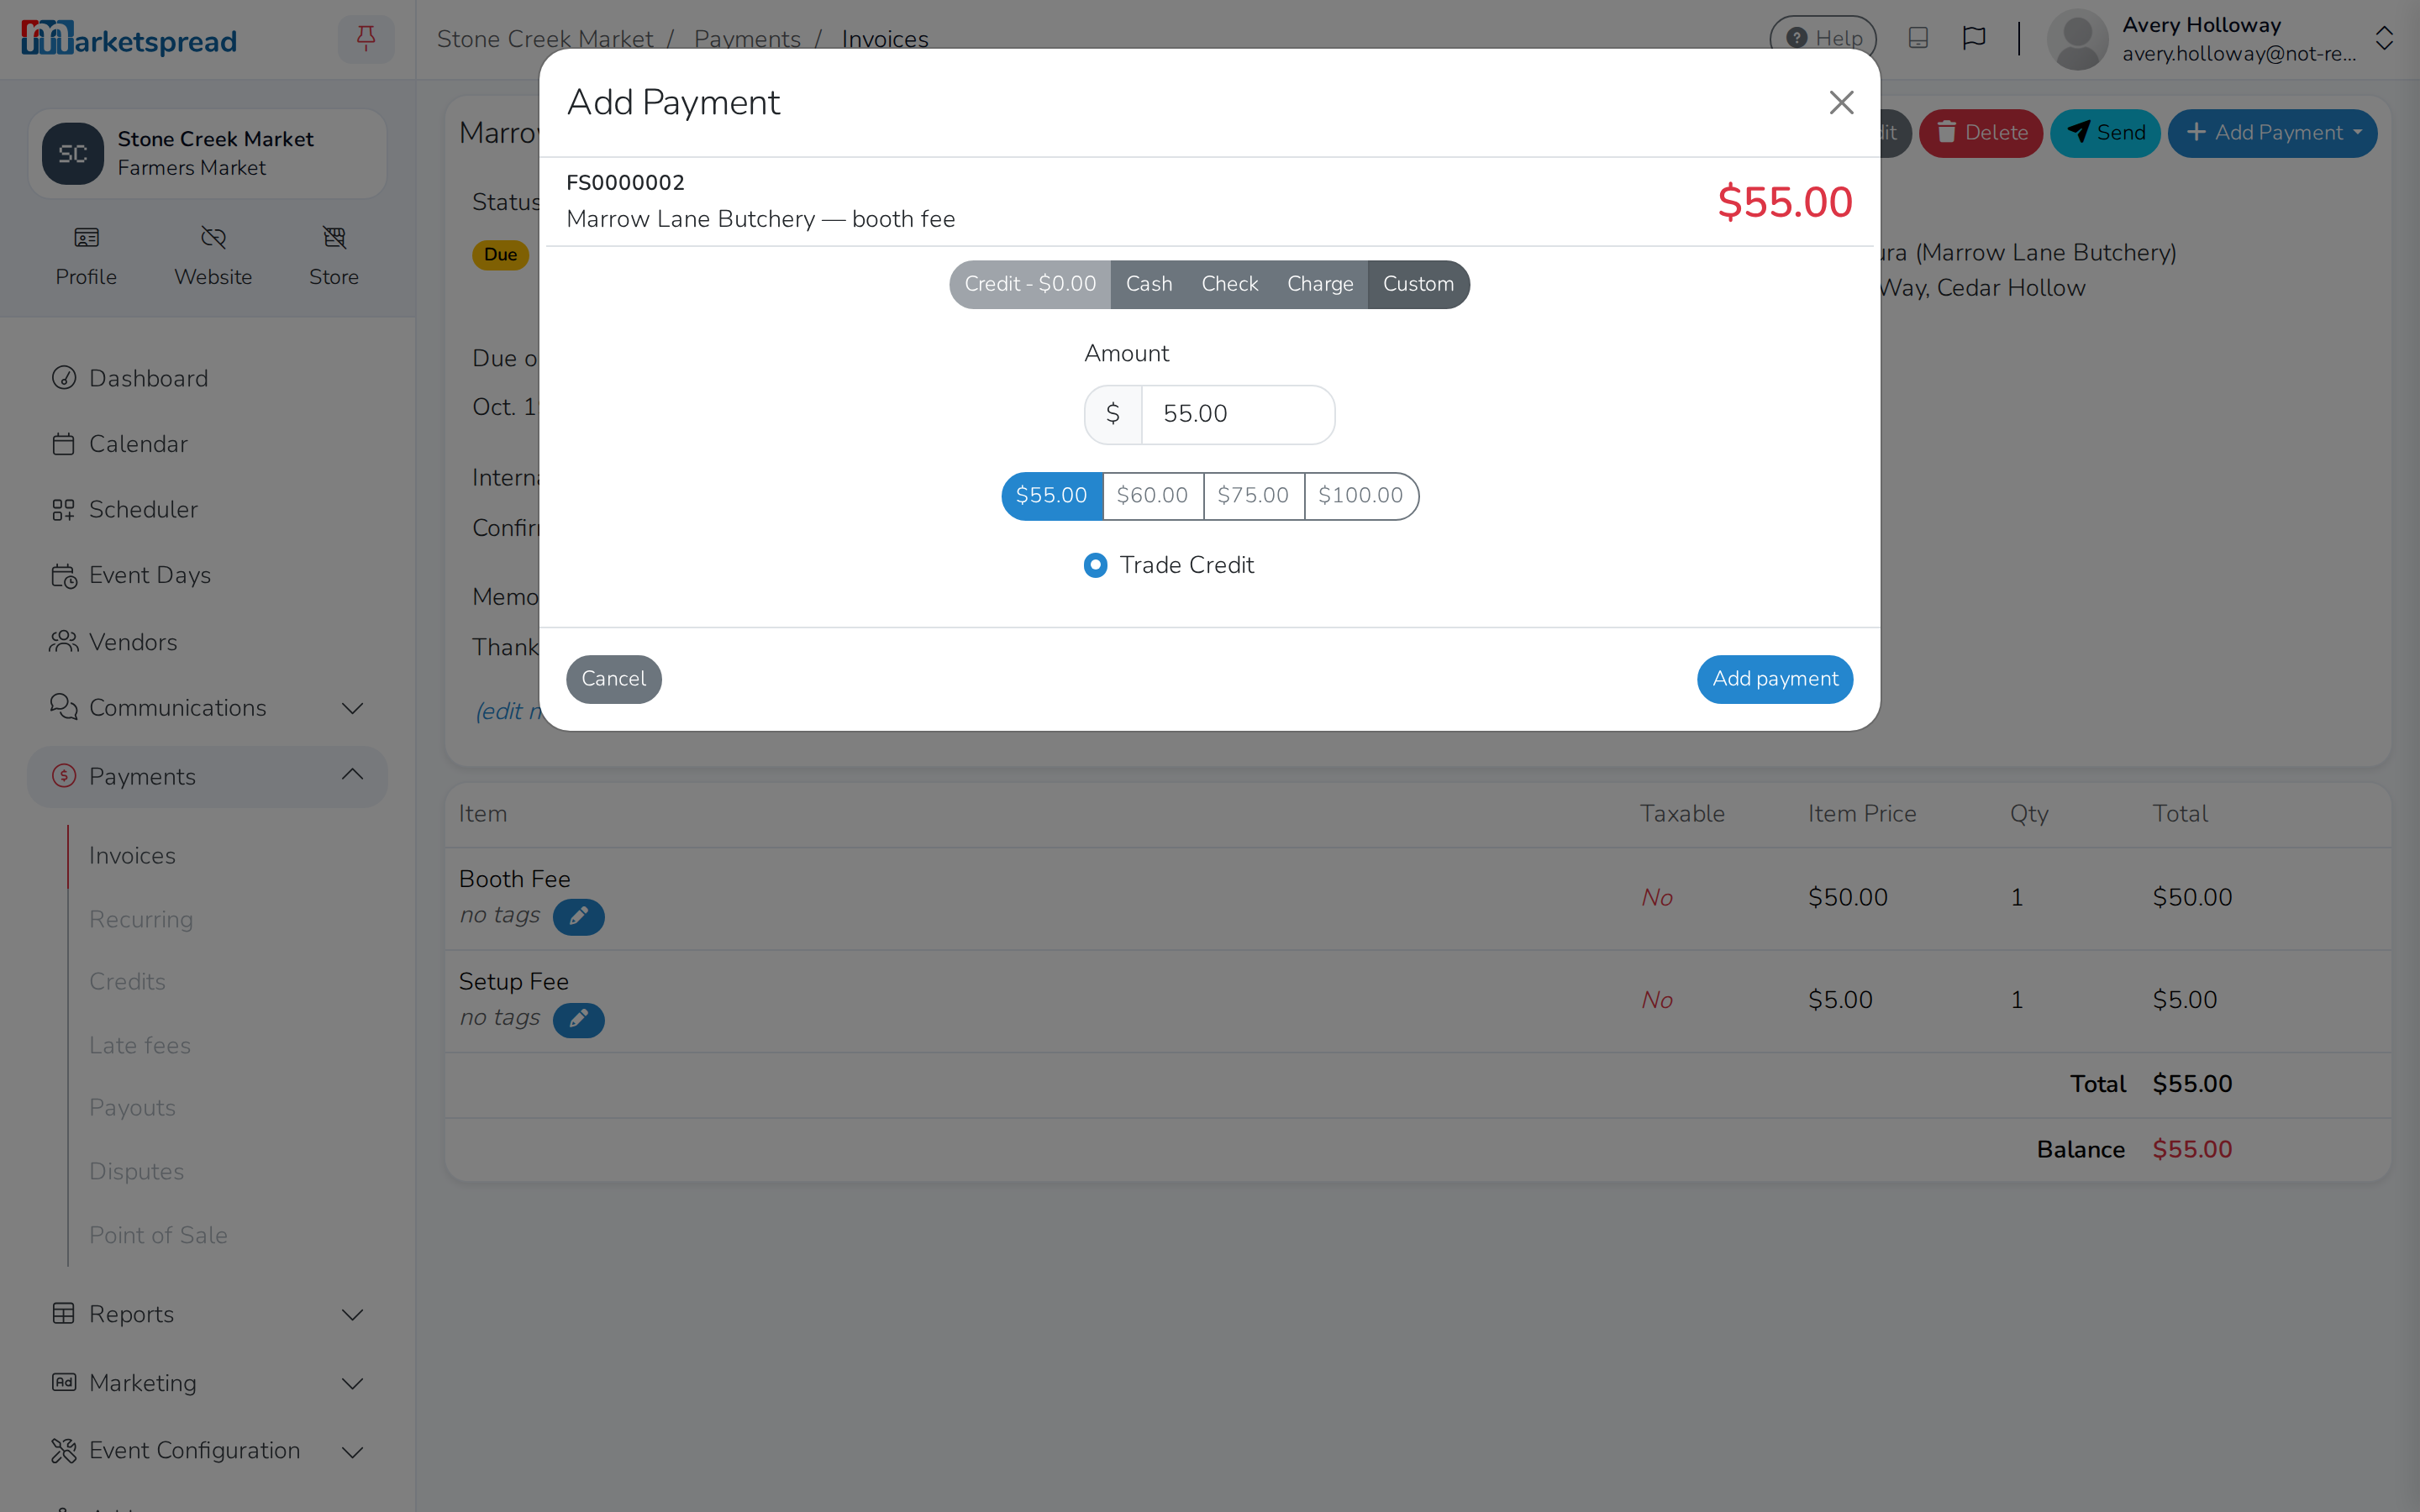
Custom marks it paid by whatever your market has set up in Settings > Payment Methods — a trade credit, a gift certificate, anything you take that isn't cash, check or card.
Cash just needs the amount — nothing else to fill in.
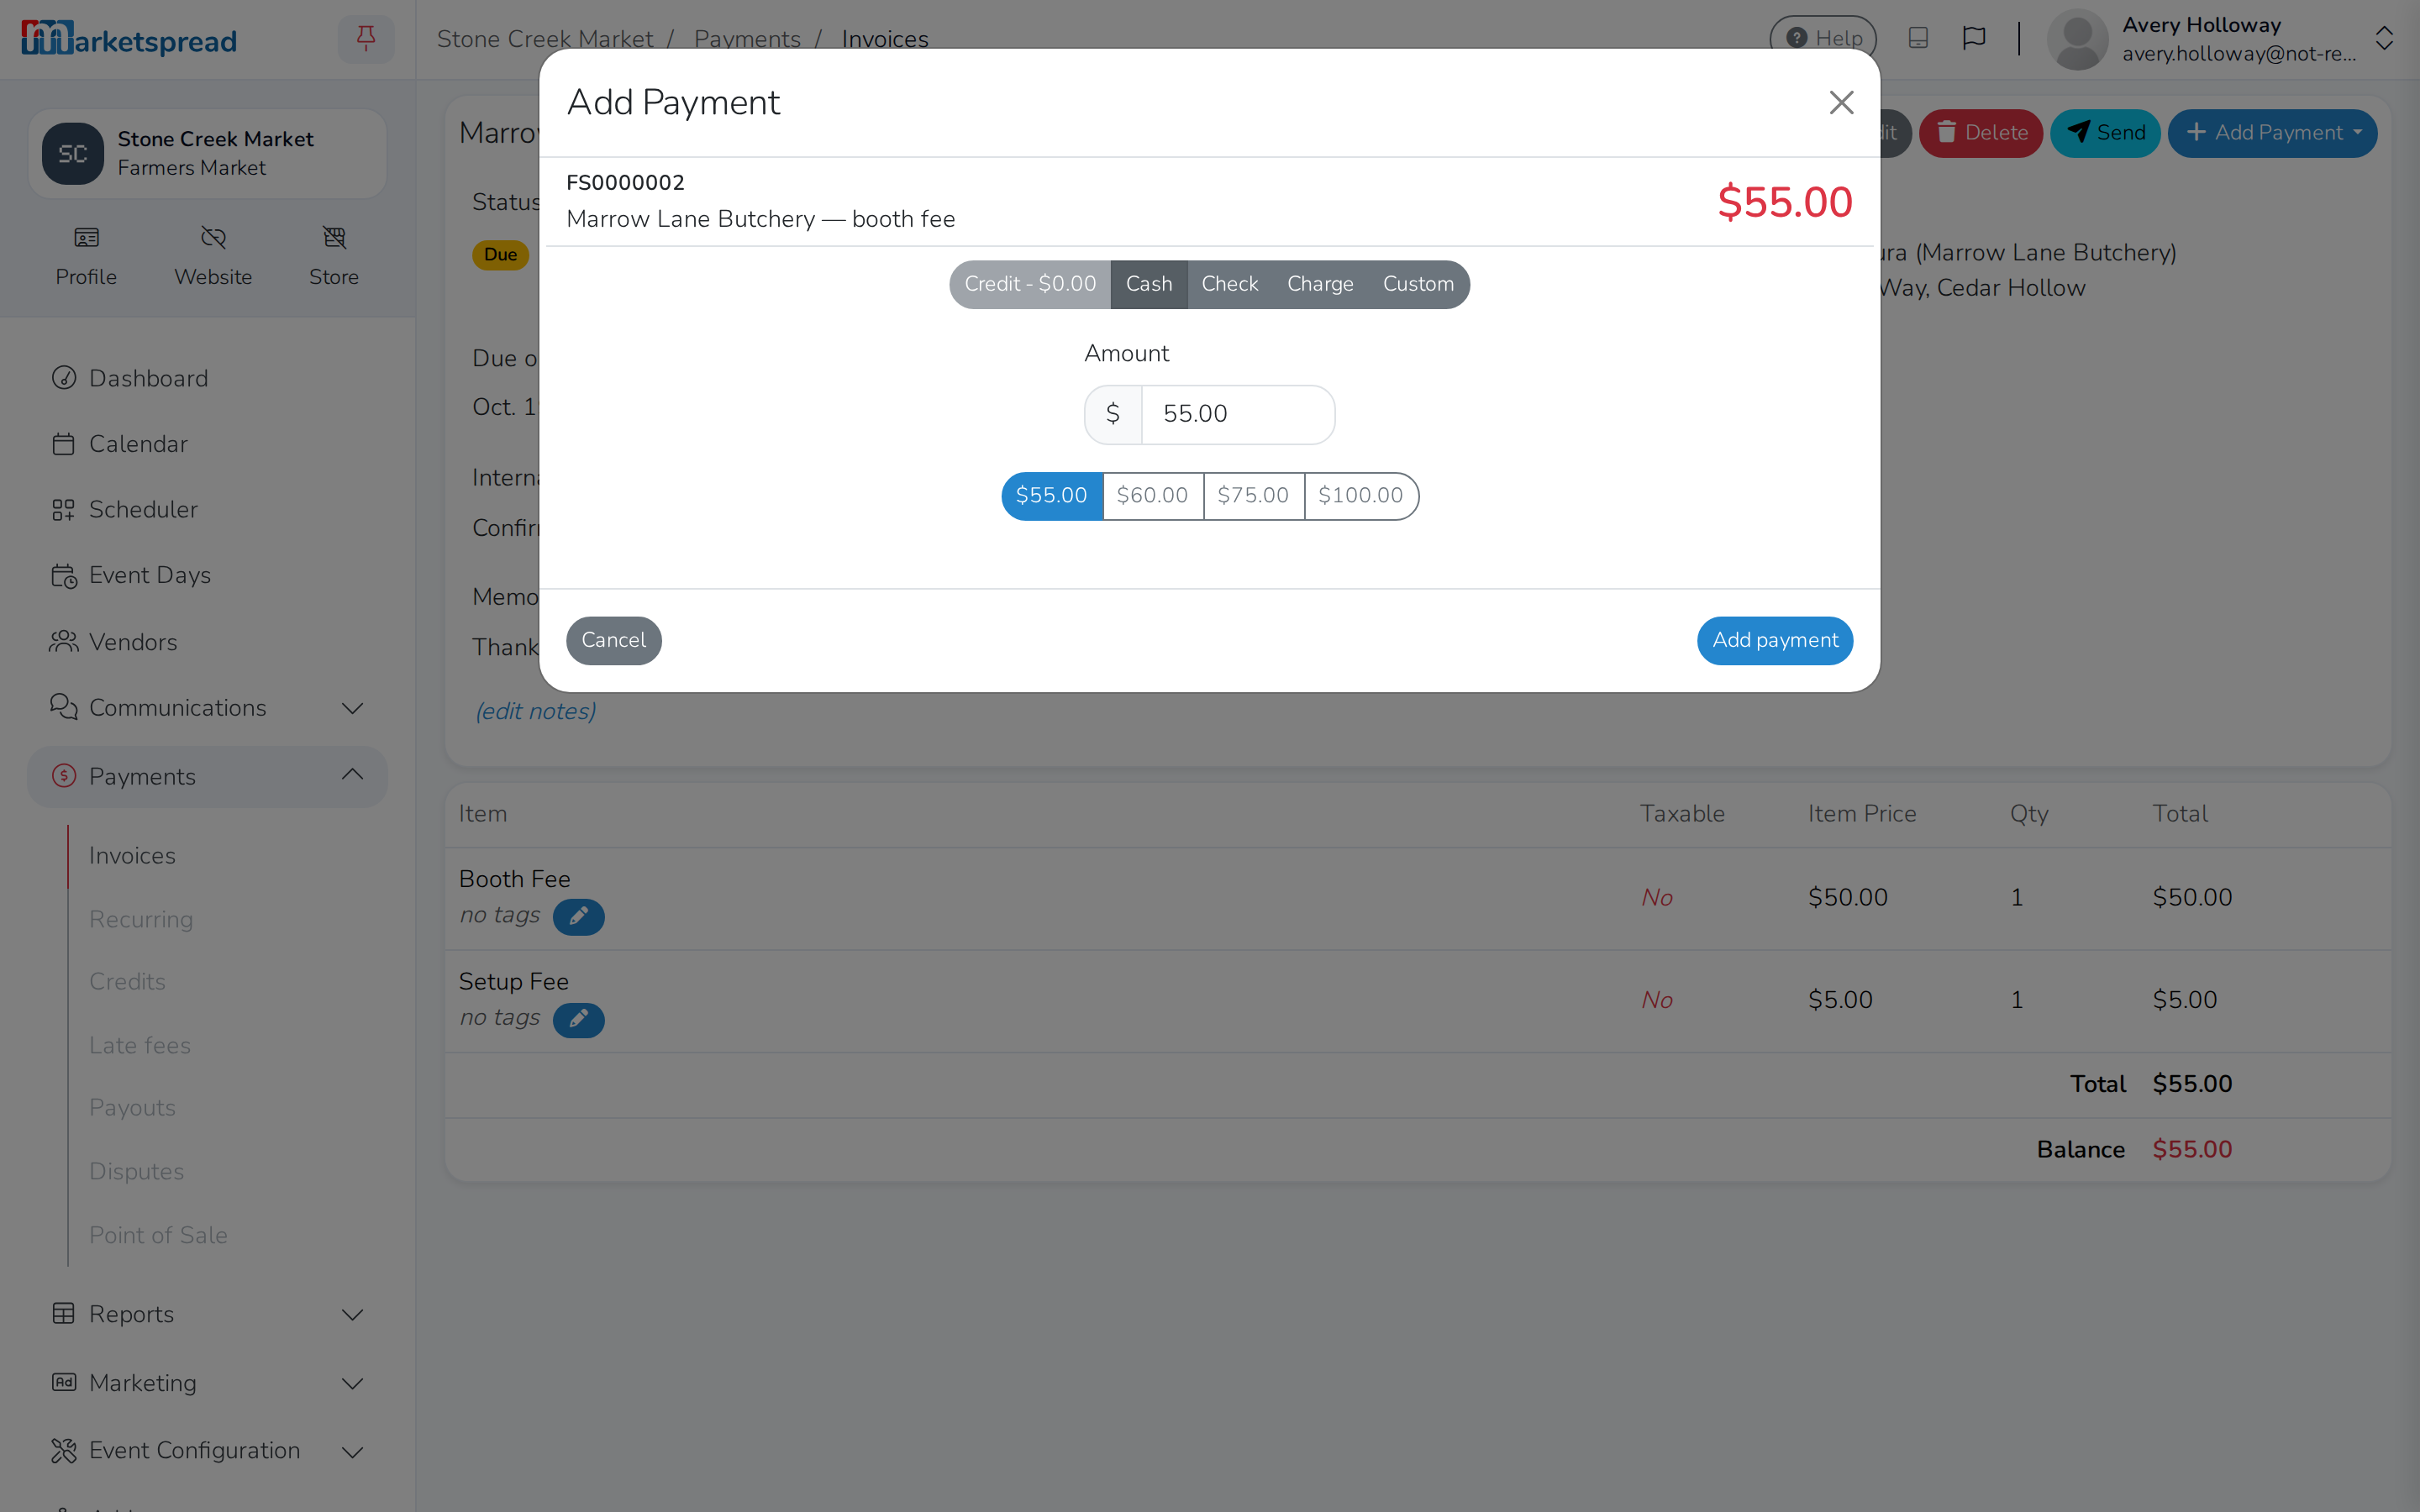
That's it — repeat these steps for as many manual invoices as you need. Keep reading to learn about exporting a vendor's invoices, or skip to Invoice via Scheduler.
Export a vendor's invoices
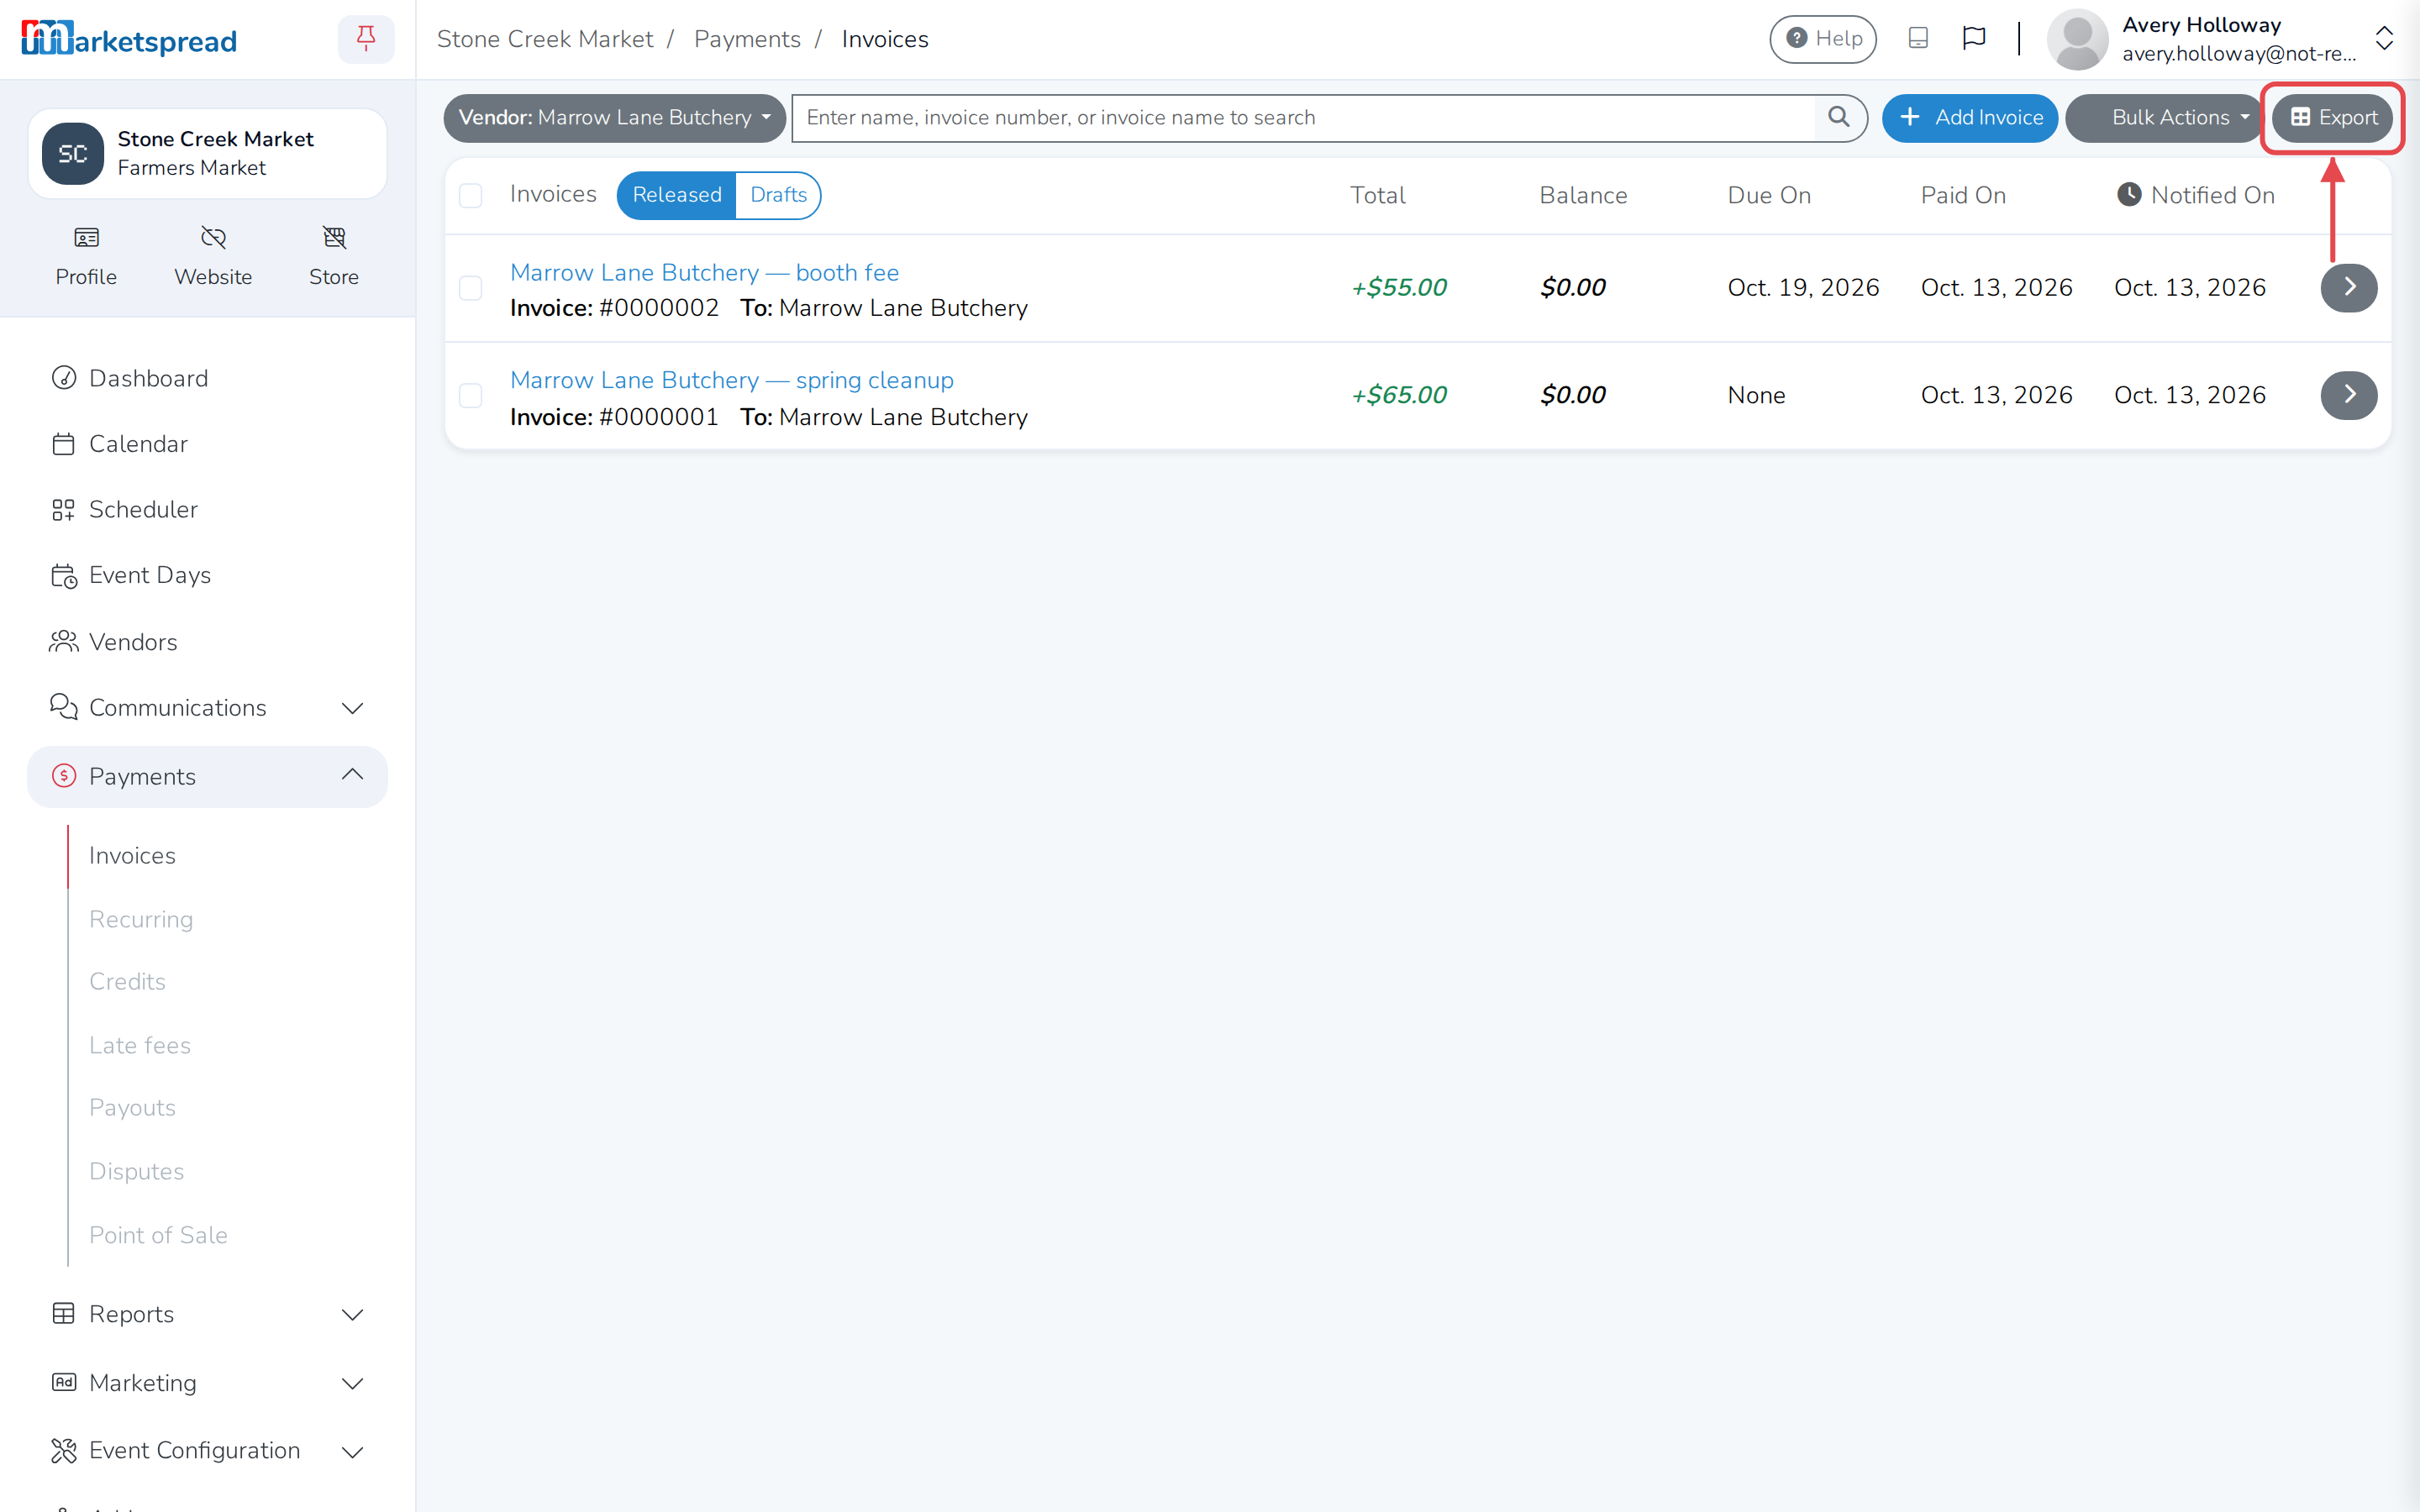
Open Invoices, click the dropdown in the top left, and choose a vendor under Vendors. Click Export to download their invoices.
Invoice via Scheduler
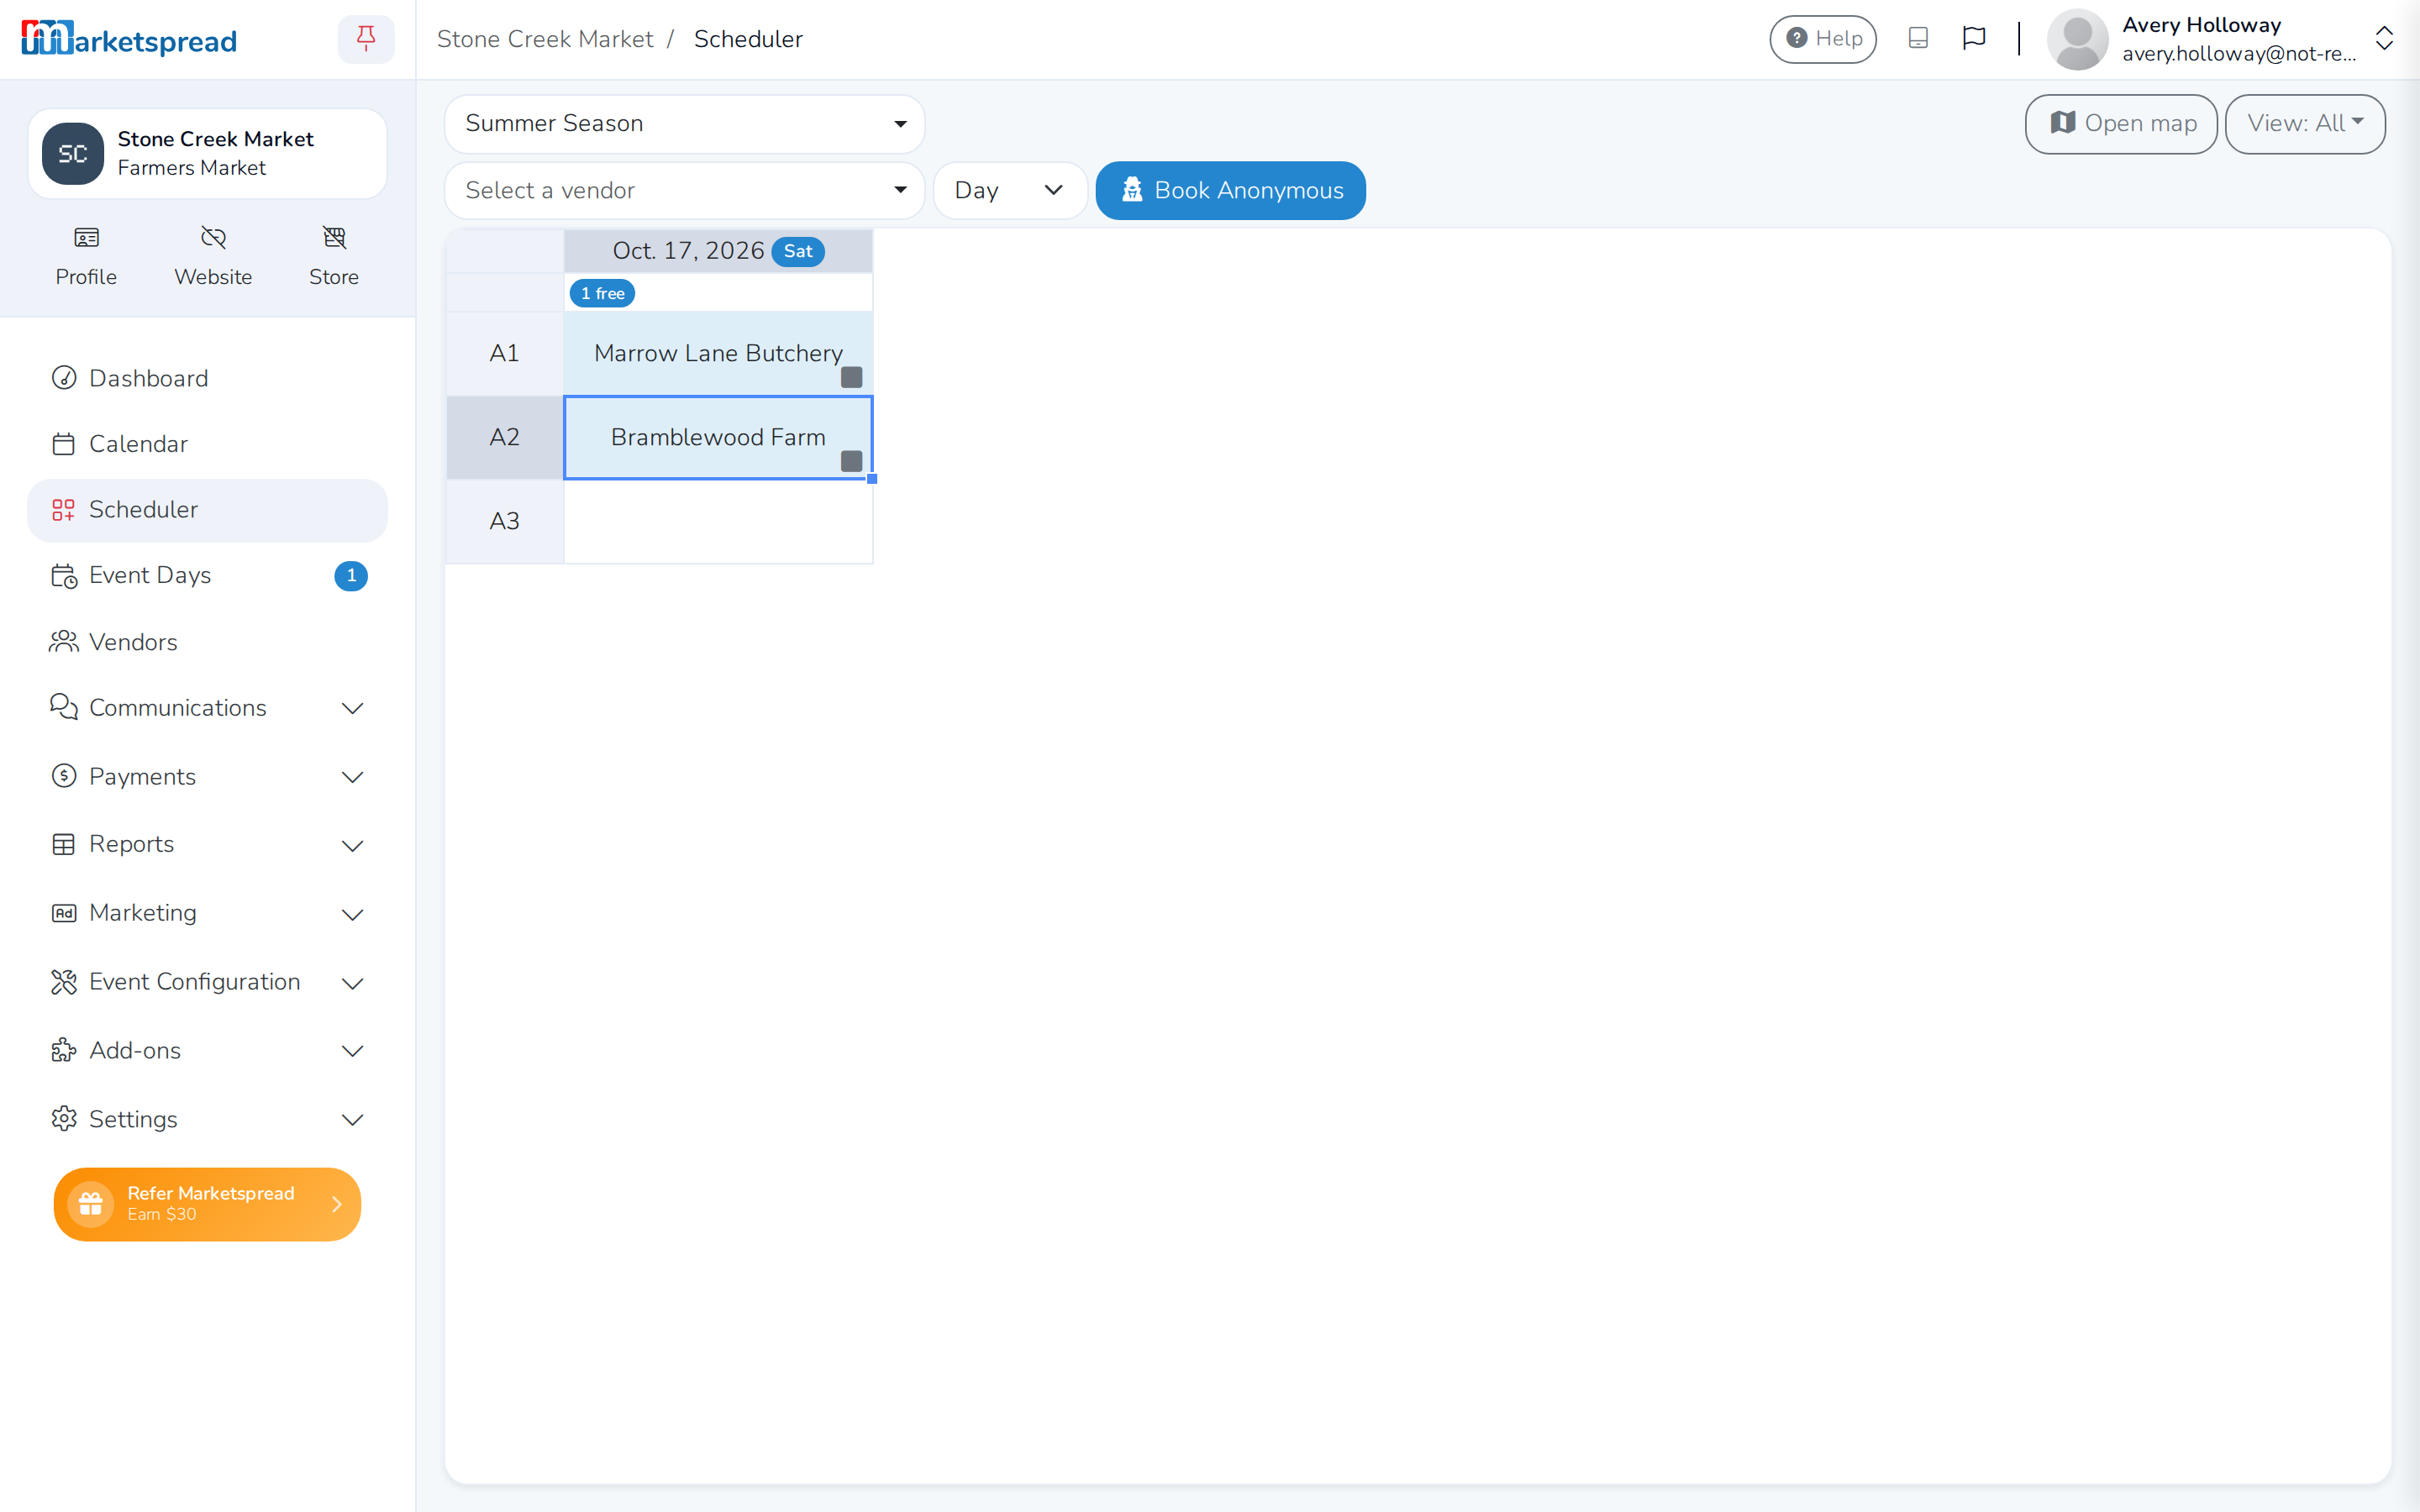
Open Scheduler from the Market Dashboard. Booking a vendor into a priced booth there creates its invoice automatically, as a draft — there is nothing to fill in by hand, and no separate Create invoice(s) step to click first.
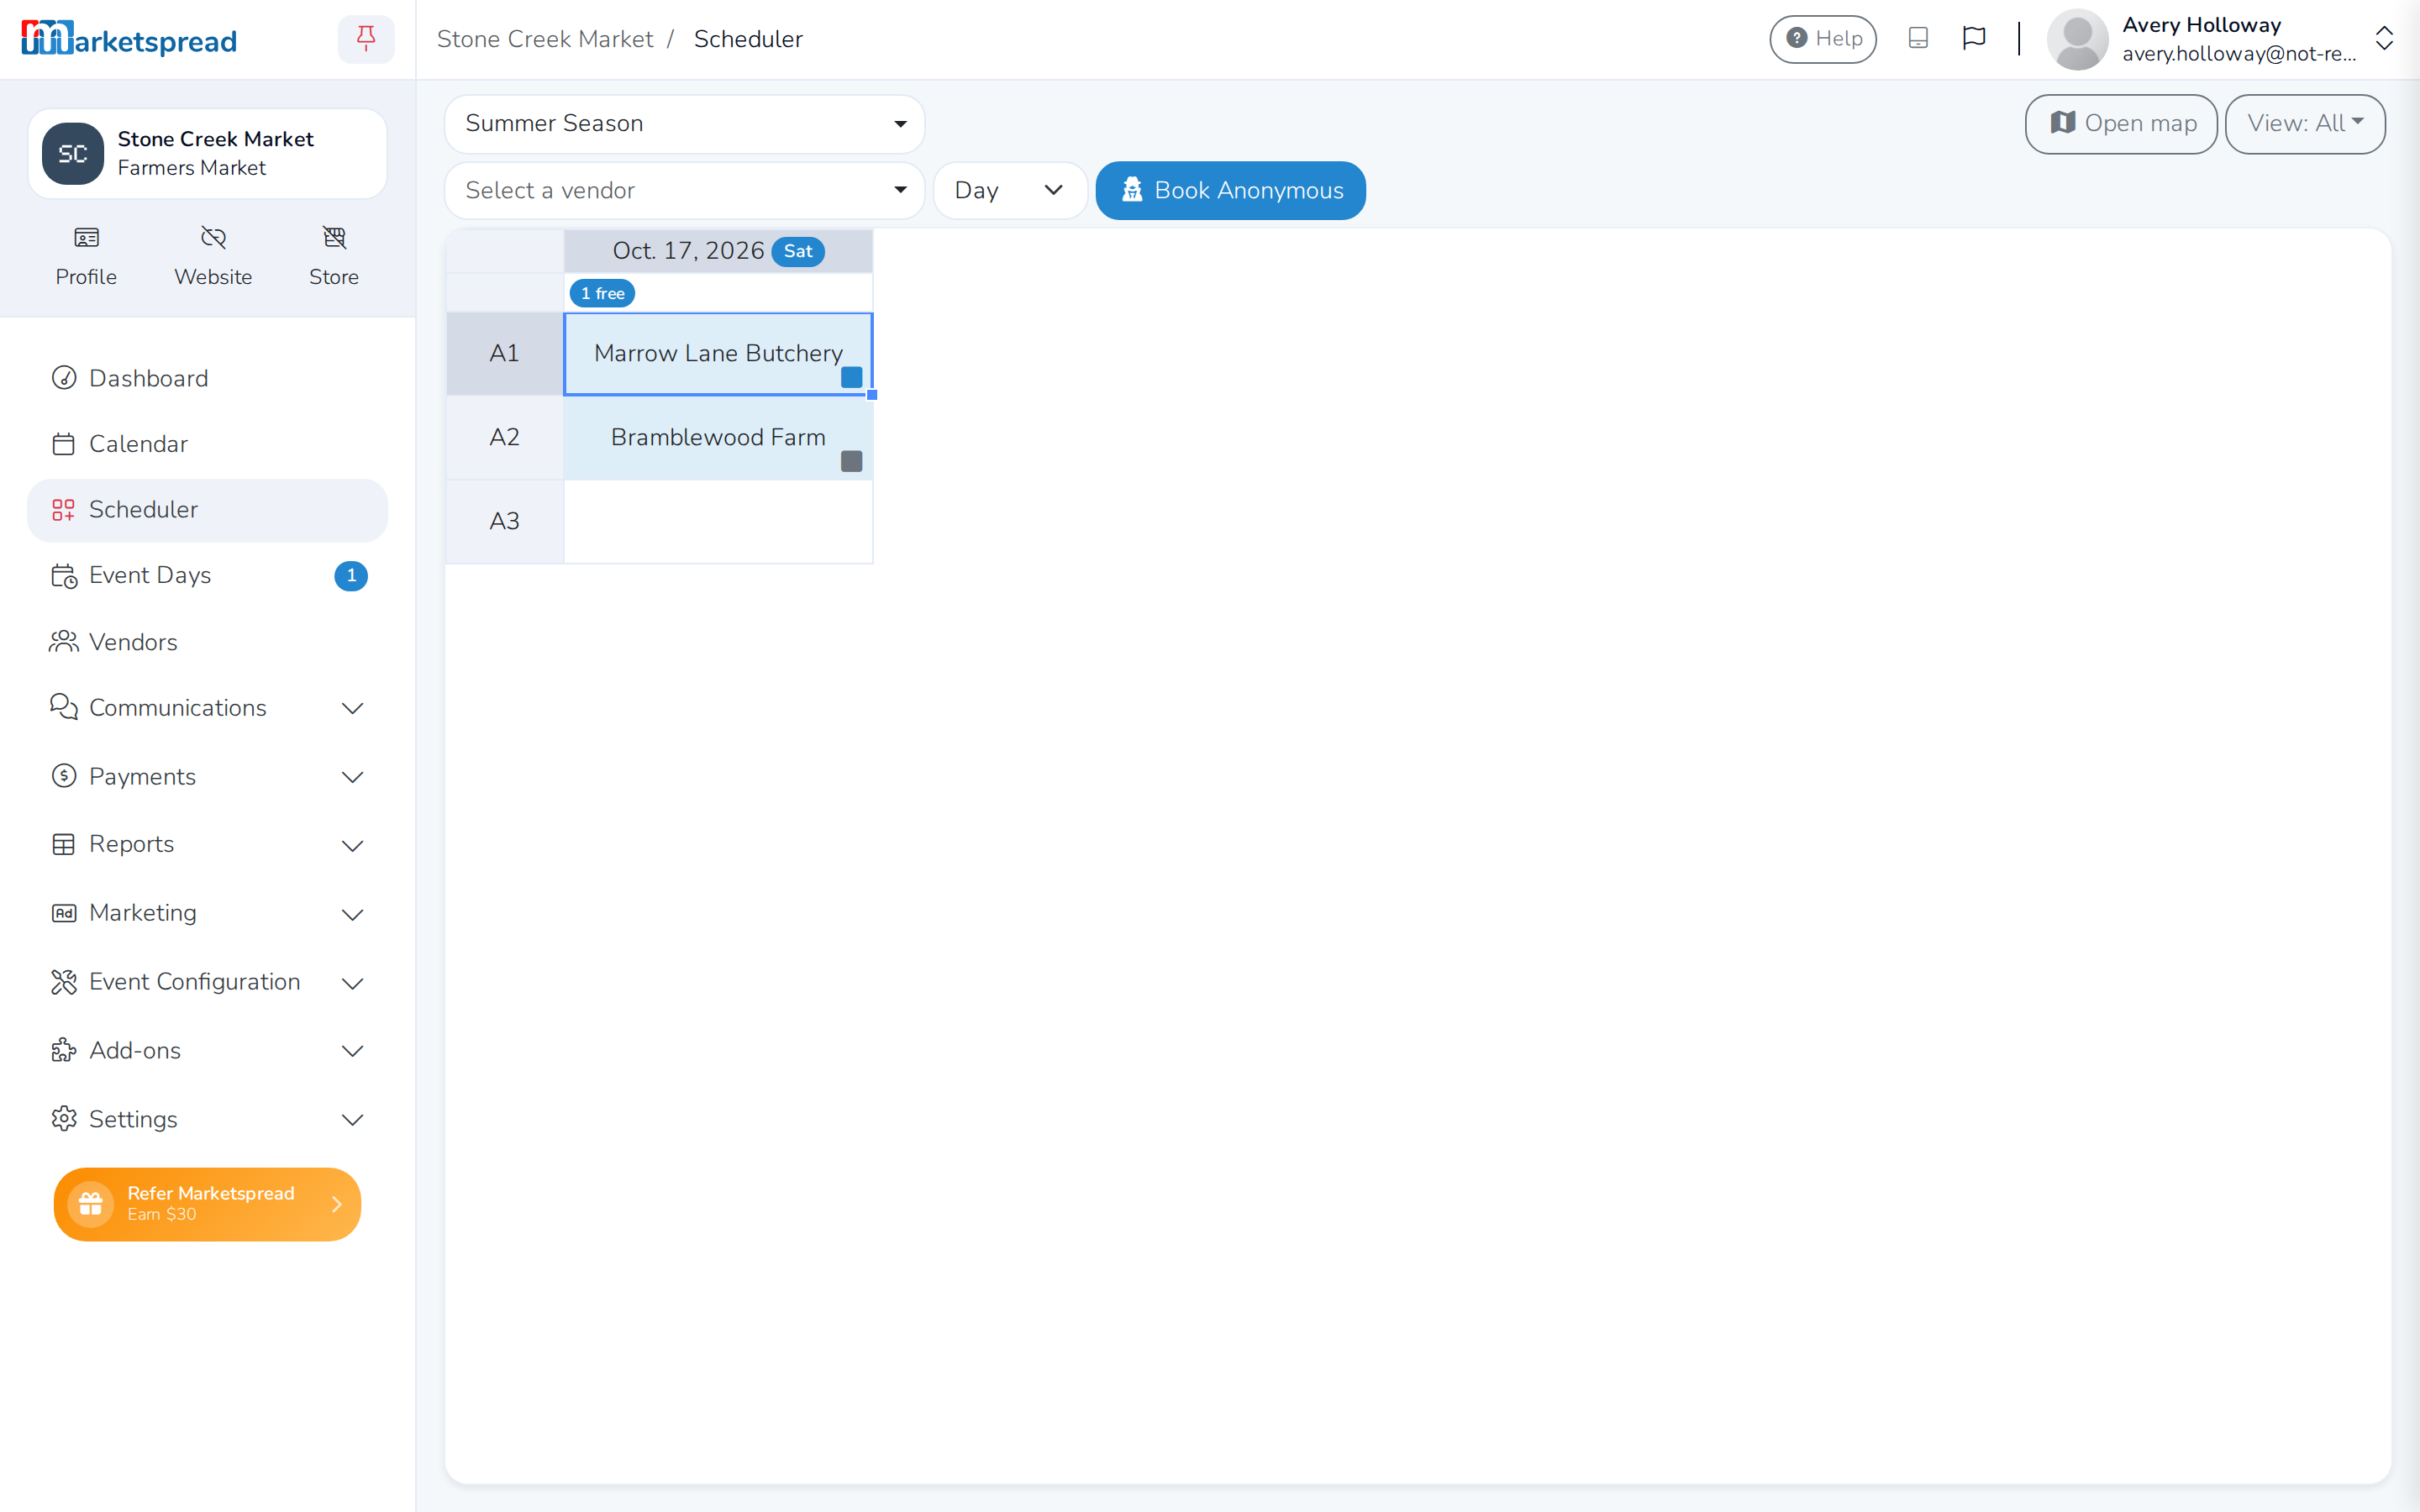
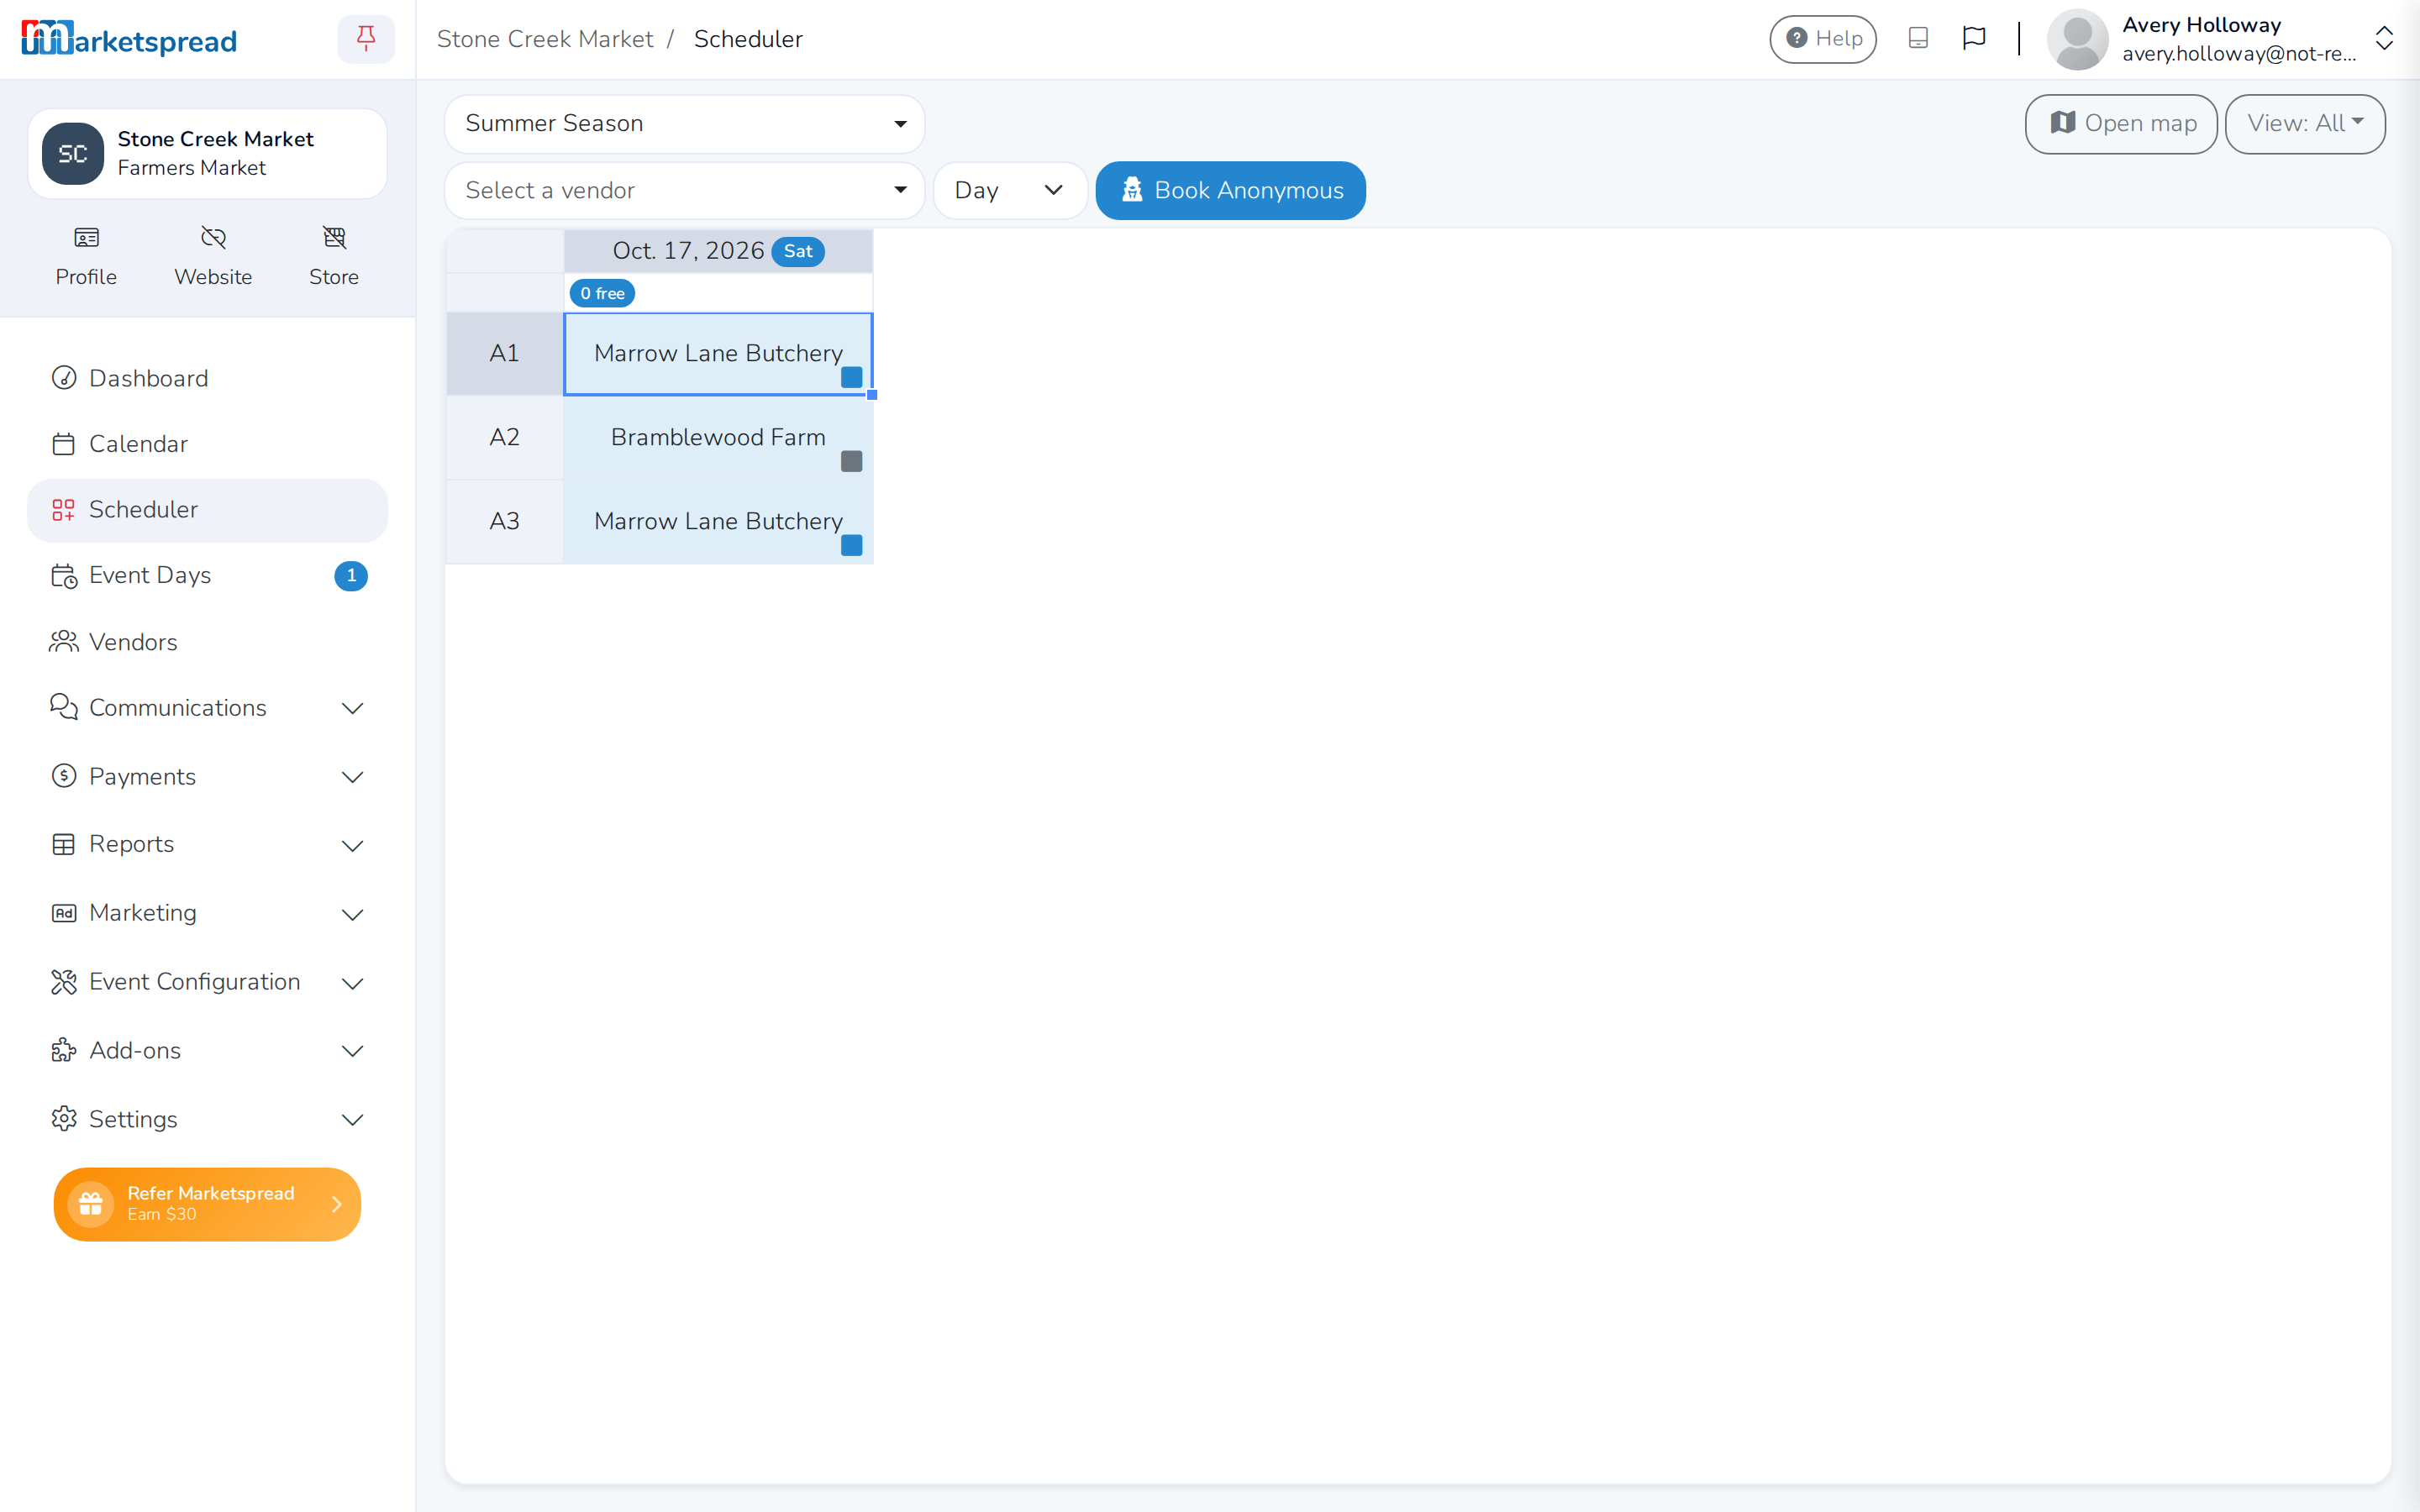
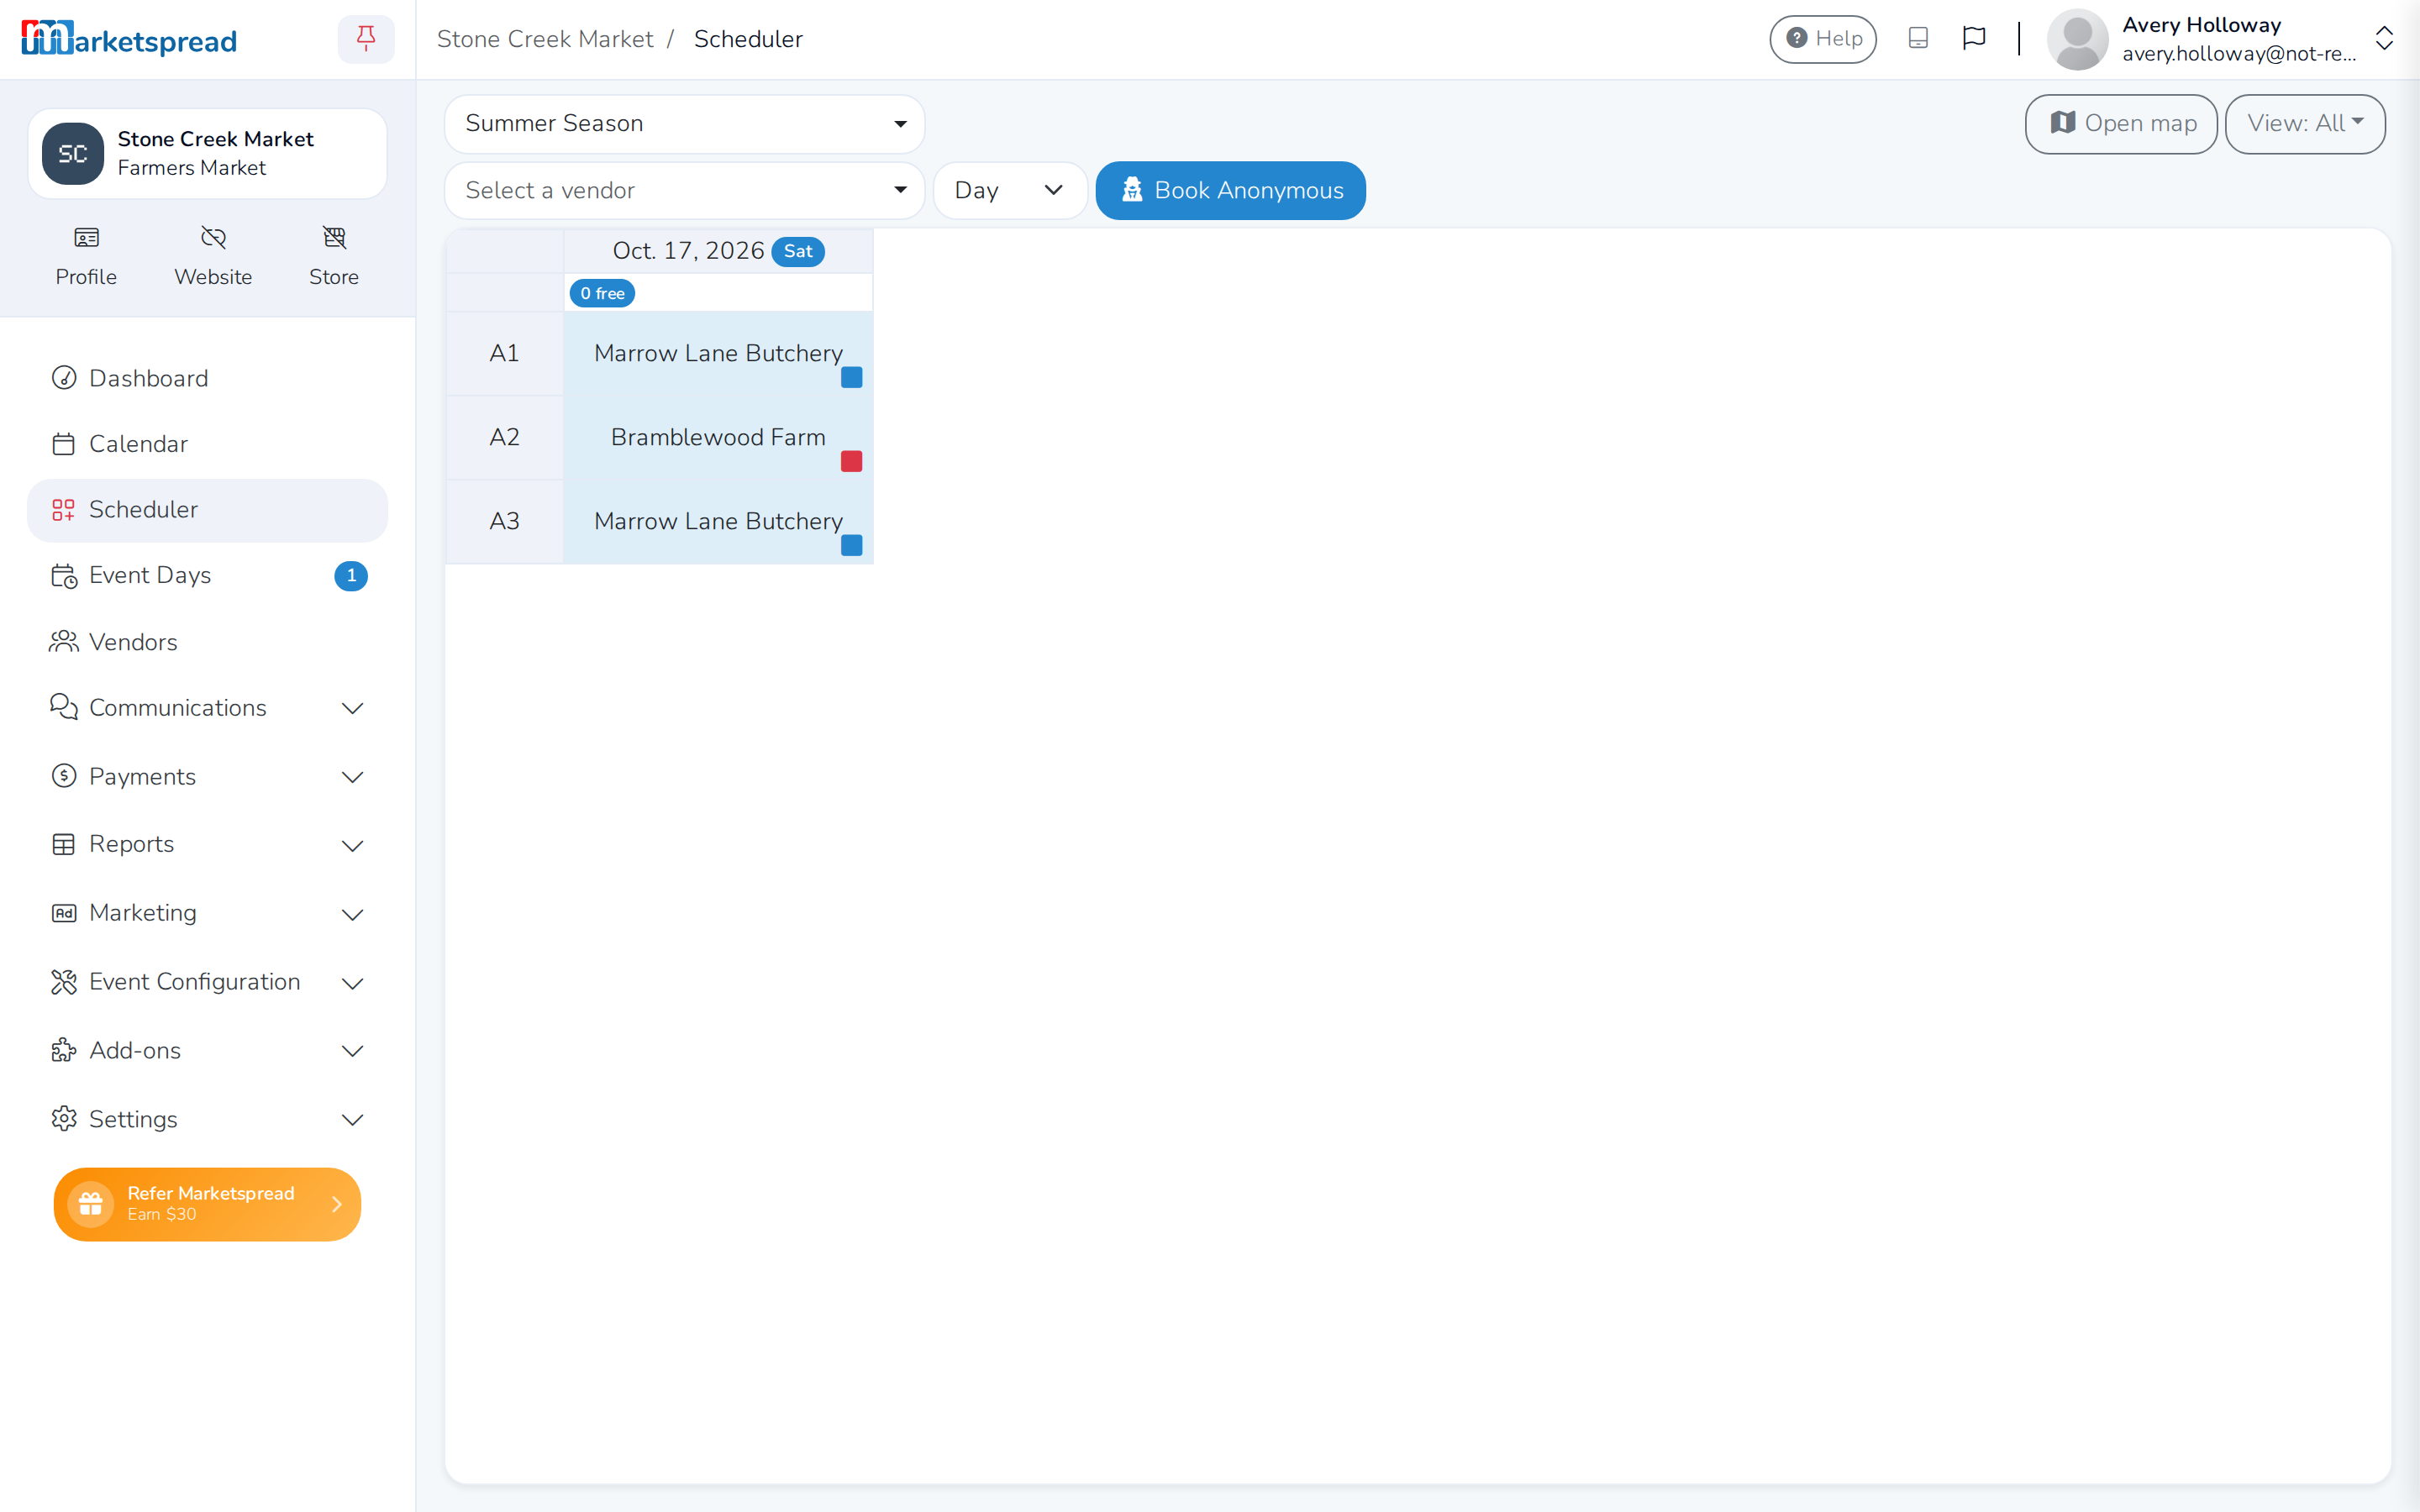
A square in the corner of a booking shows its invoice status, a quick way to see which vendors owe you for a market day: grey for a draft, blue once it is released and due or once it has a partial payment, green once it is paid in full, and red once it is past due. There is no separate color for "needs an invoice created" — booking the booth already took care of that.
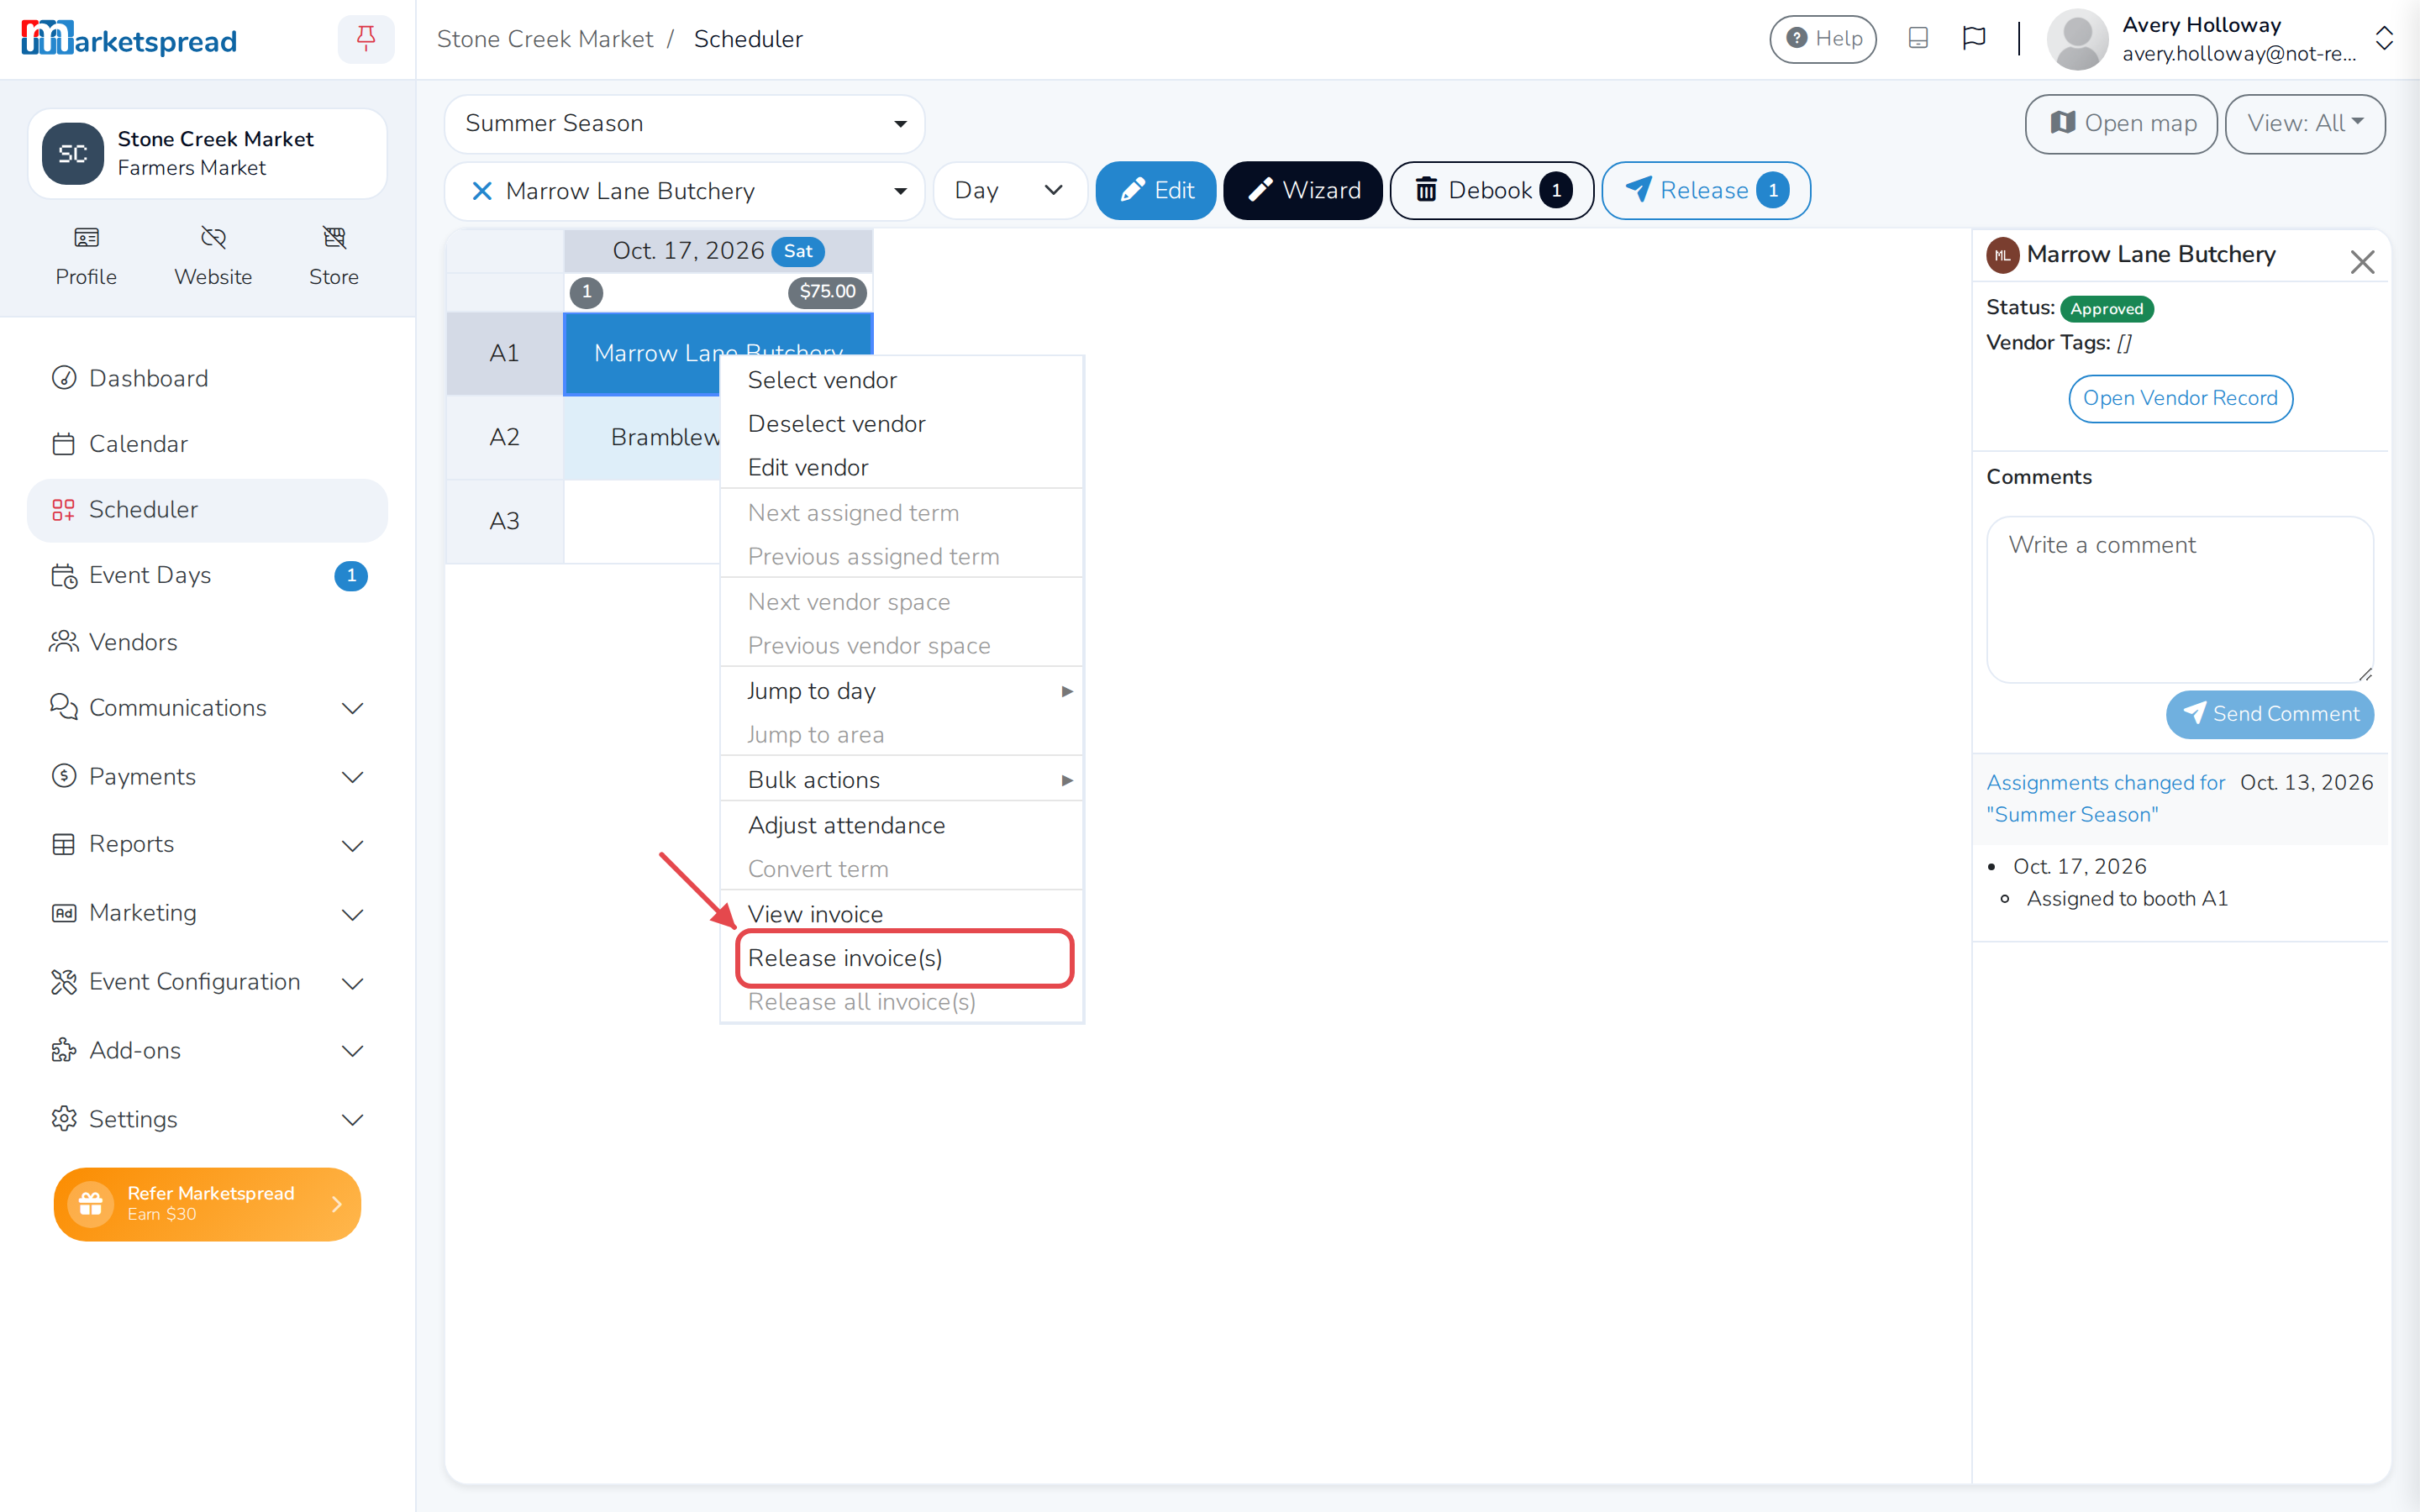
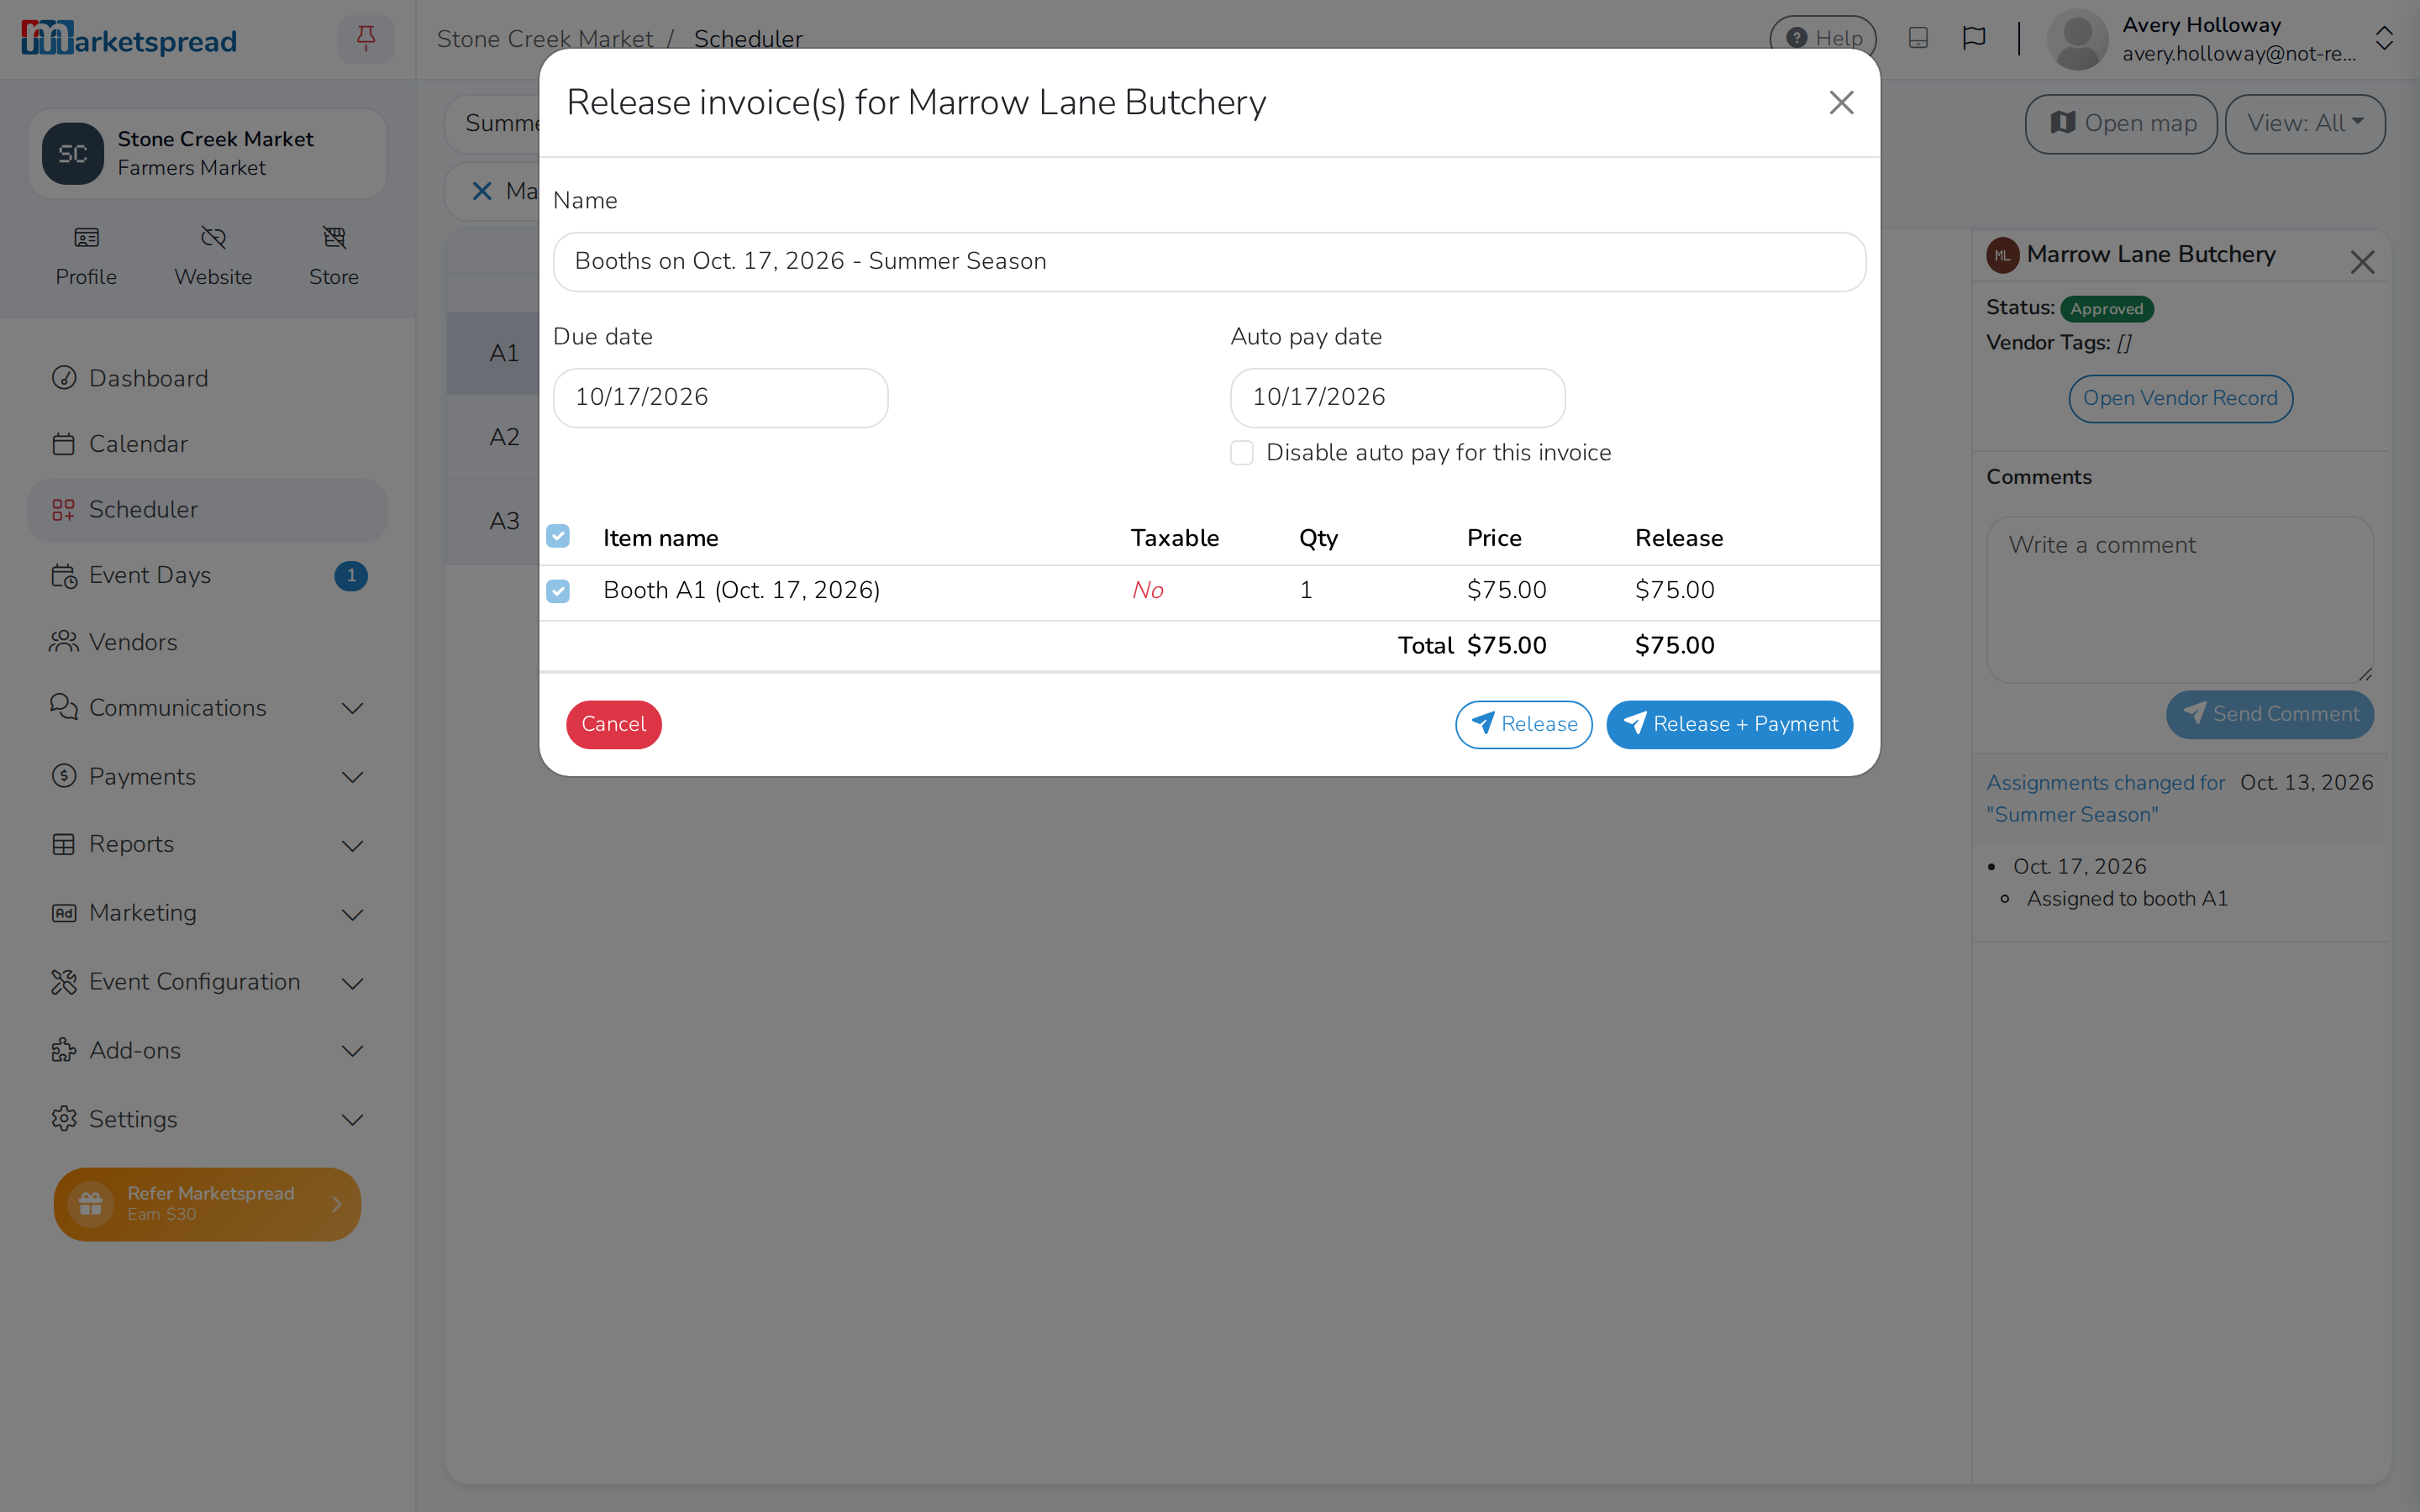
A draft invoice is not sent to the vendor until you release it. Select the vendor, click their booking, right-click it, and choose Release invoice(s). On a phone or tablet, hold your finger on the booking instead of right-clicking — the menu can take a moment to appear.
Check the due date and total, then click Release.
The square turns blue — the invoice is sent and due.
Take payment at the booth from Scheduler
Right-click the booking and choose View invoice — the same window Find and Pay an Invoice above describes.
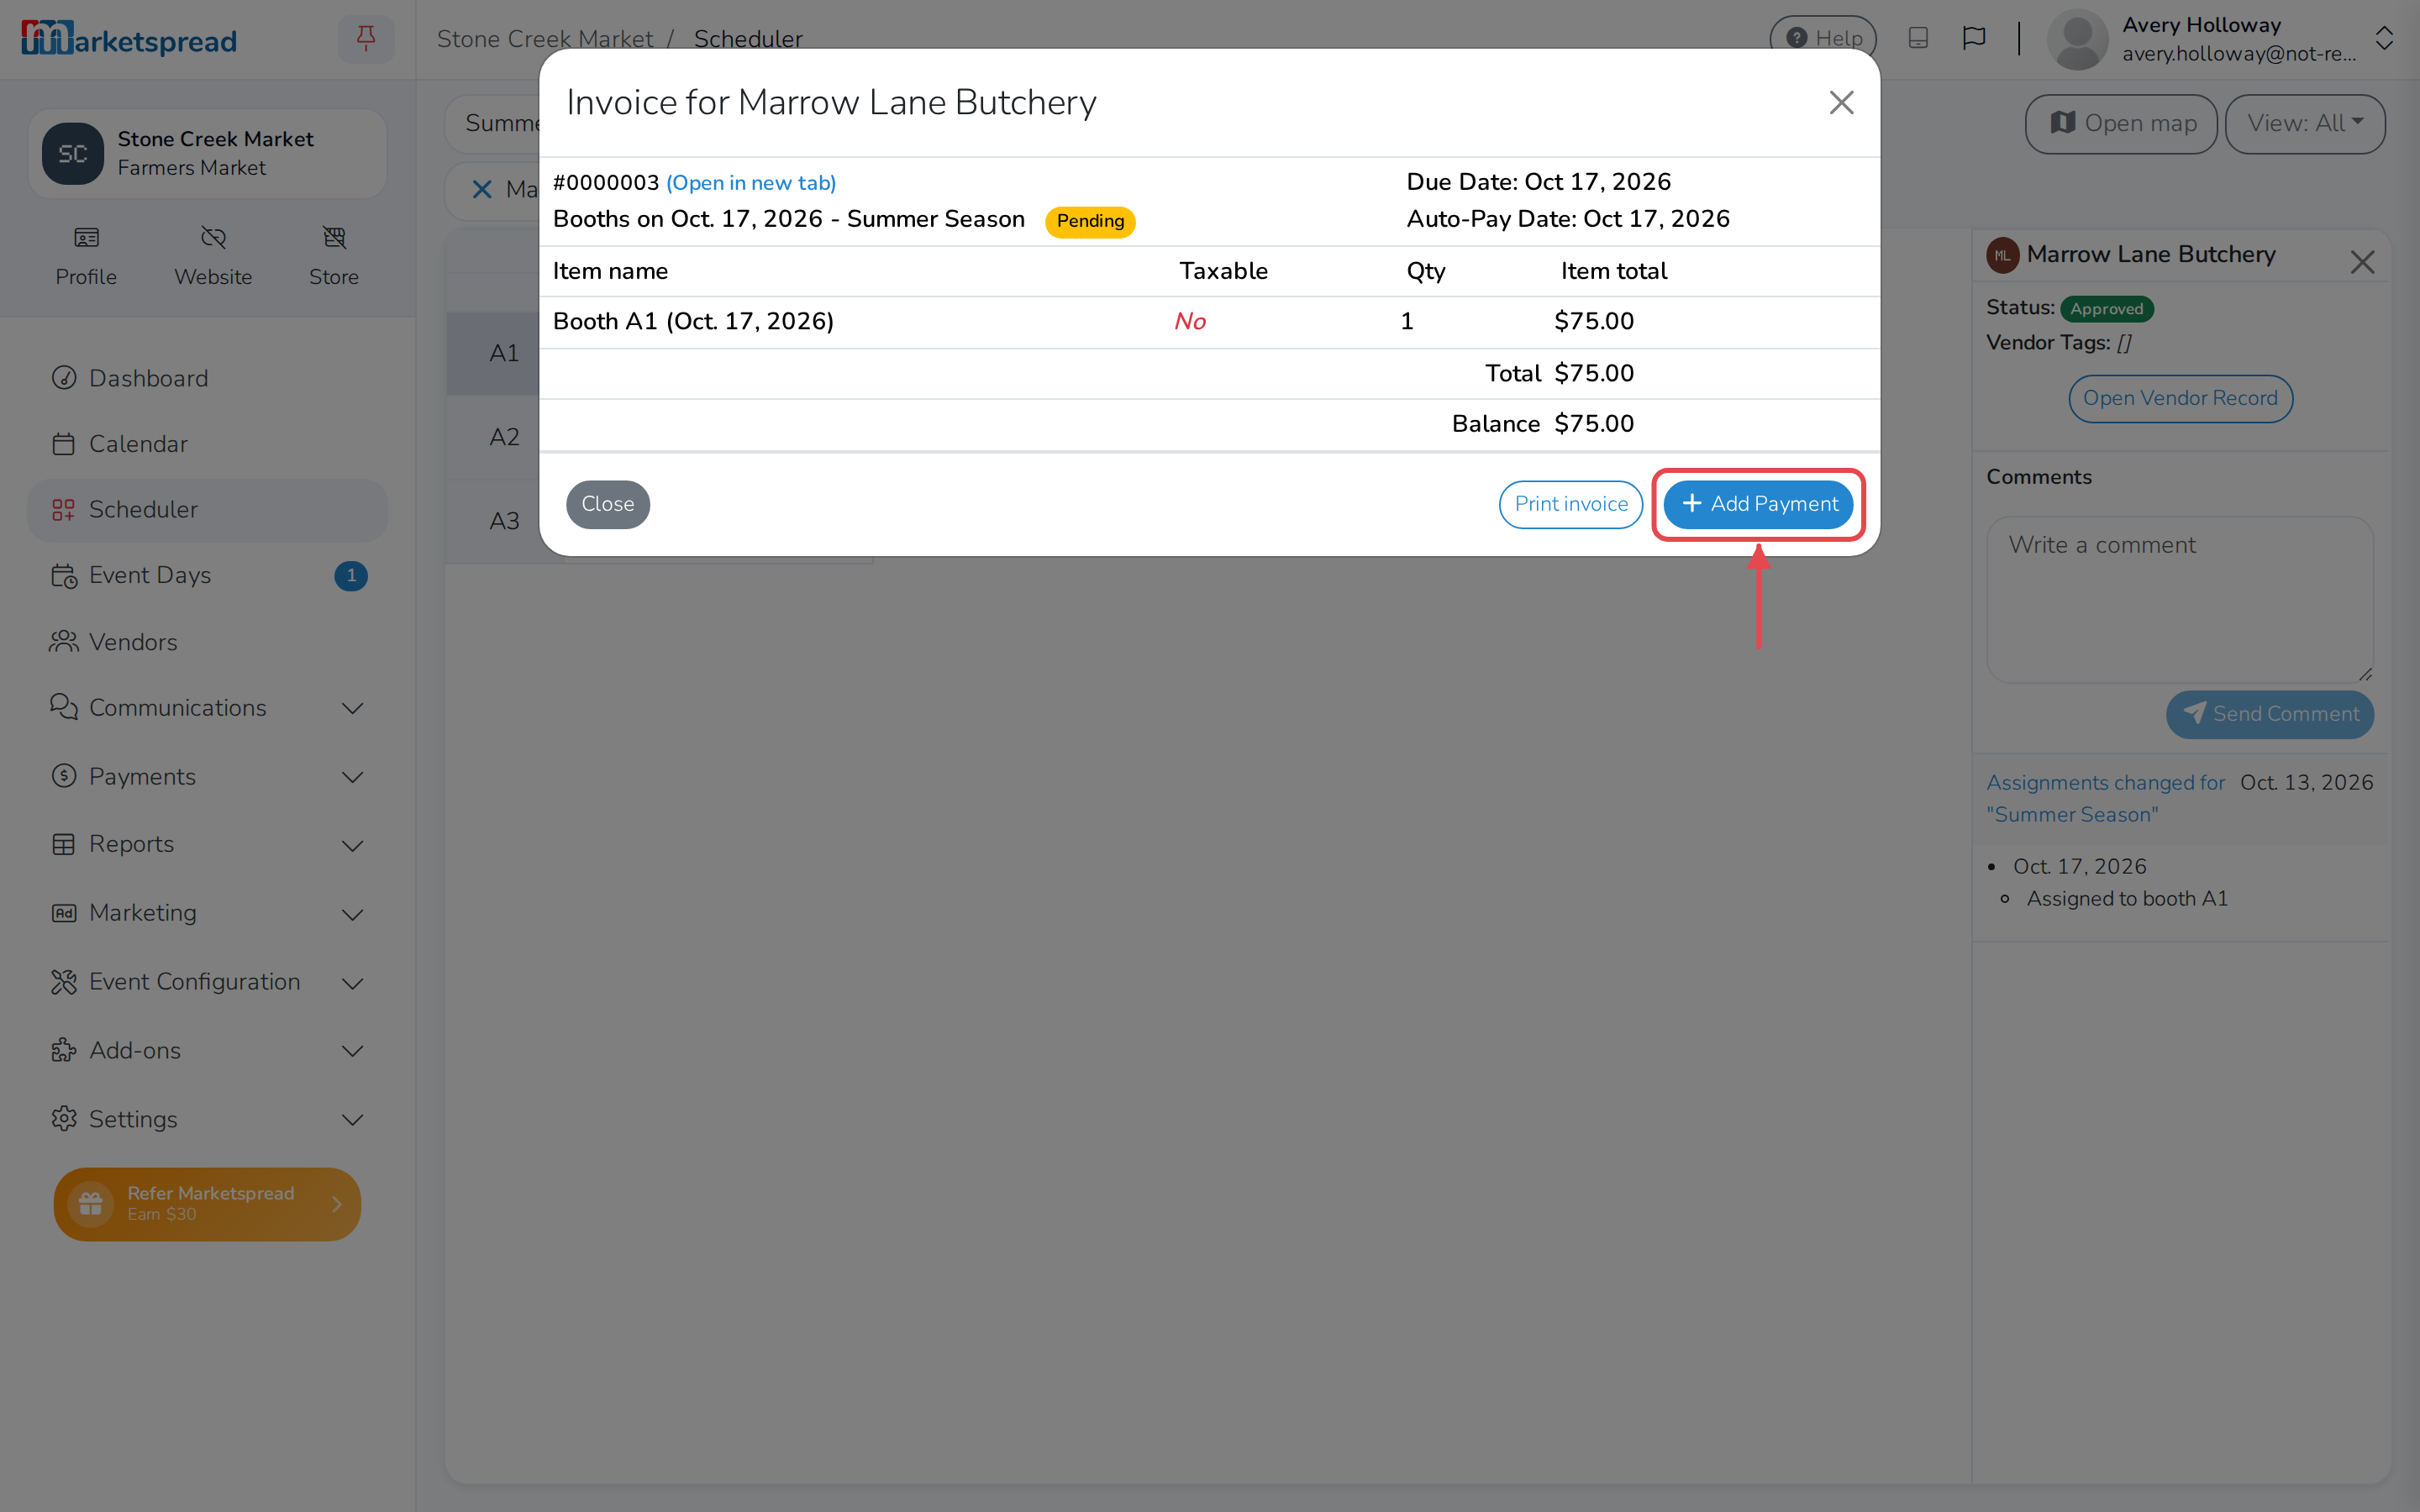
Click Add Payment and pay it the same way as a manual invoice. For a card on file, enter the amount — part of it or all of it — and the CVV, then click Charge. The vendor gets an email and a notification on their dashboard either way.
Add a booth to a vendor's invoice
Book the vendor into an extra booth for the same day, and their invoice updates on its own to the new total — there's nothing to do by hand, as long as nothing has been paid on it yet.
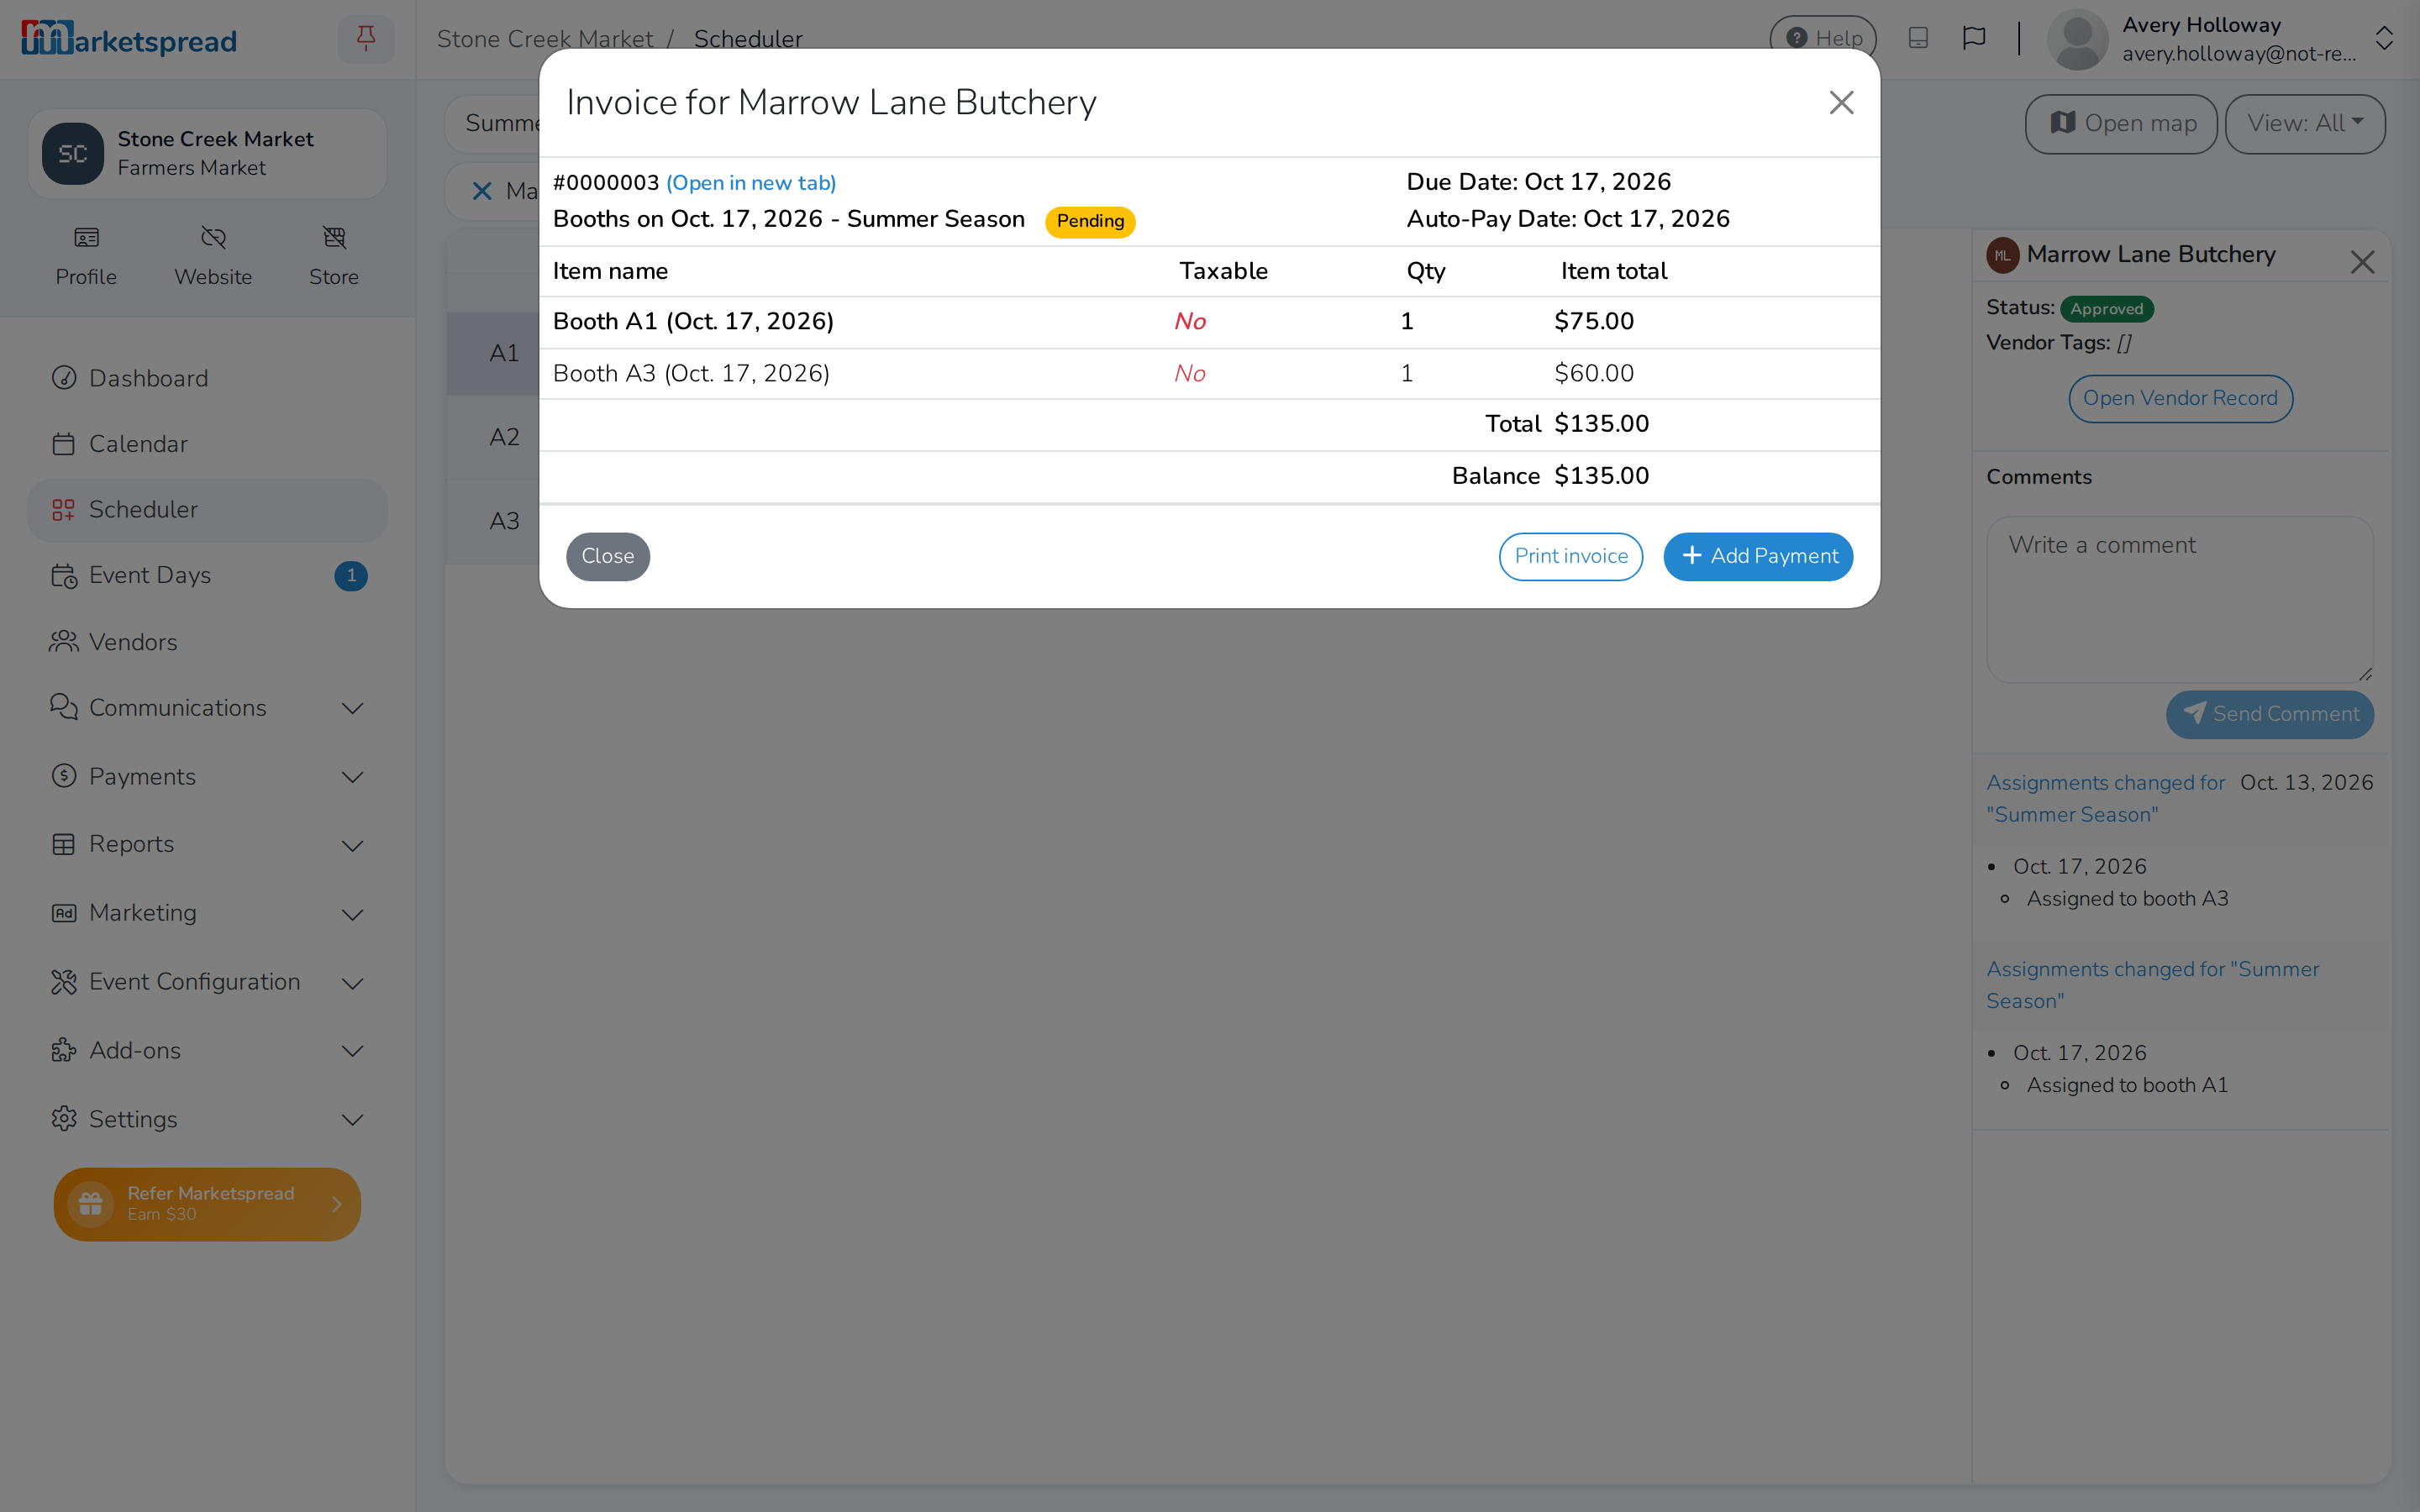
Take payment the same way as above — here, with the card on file already on hand.
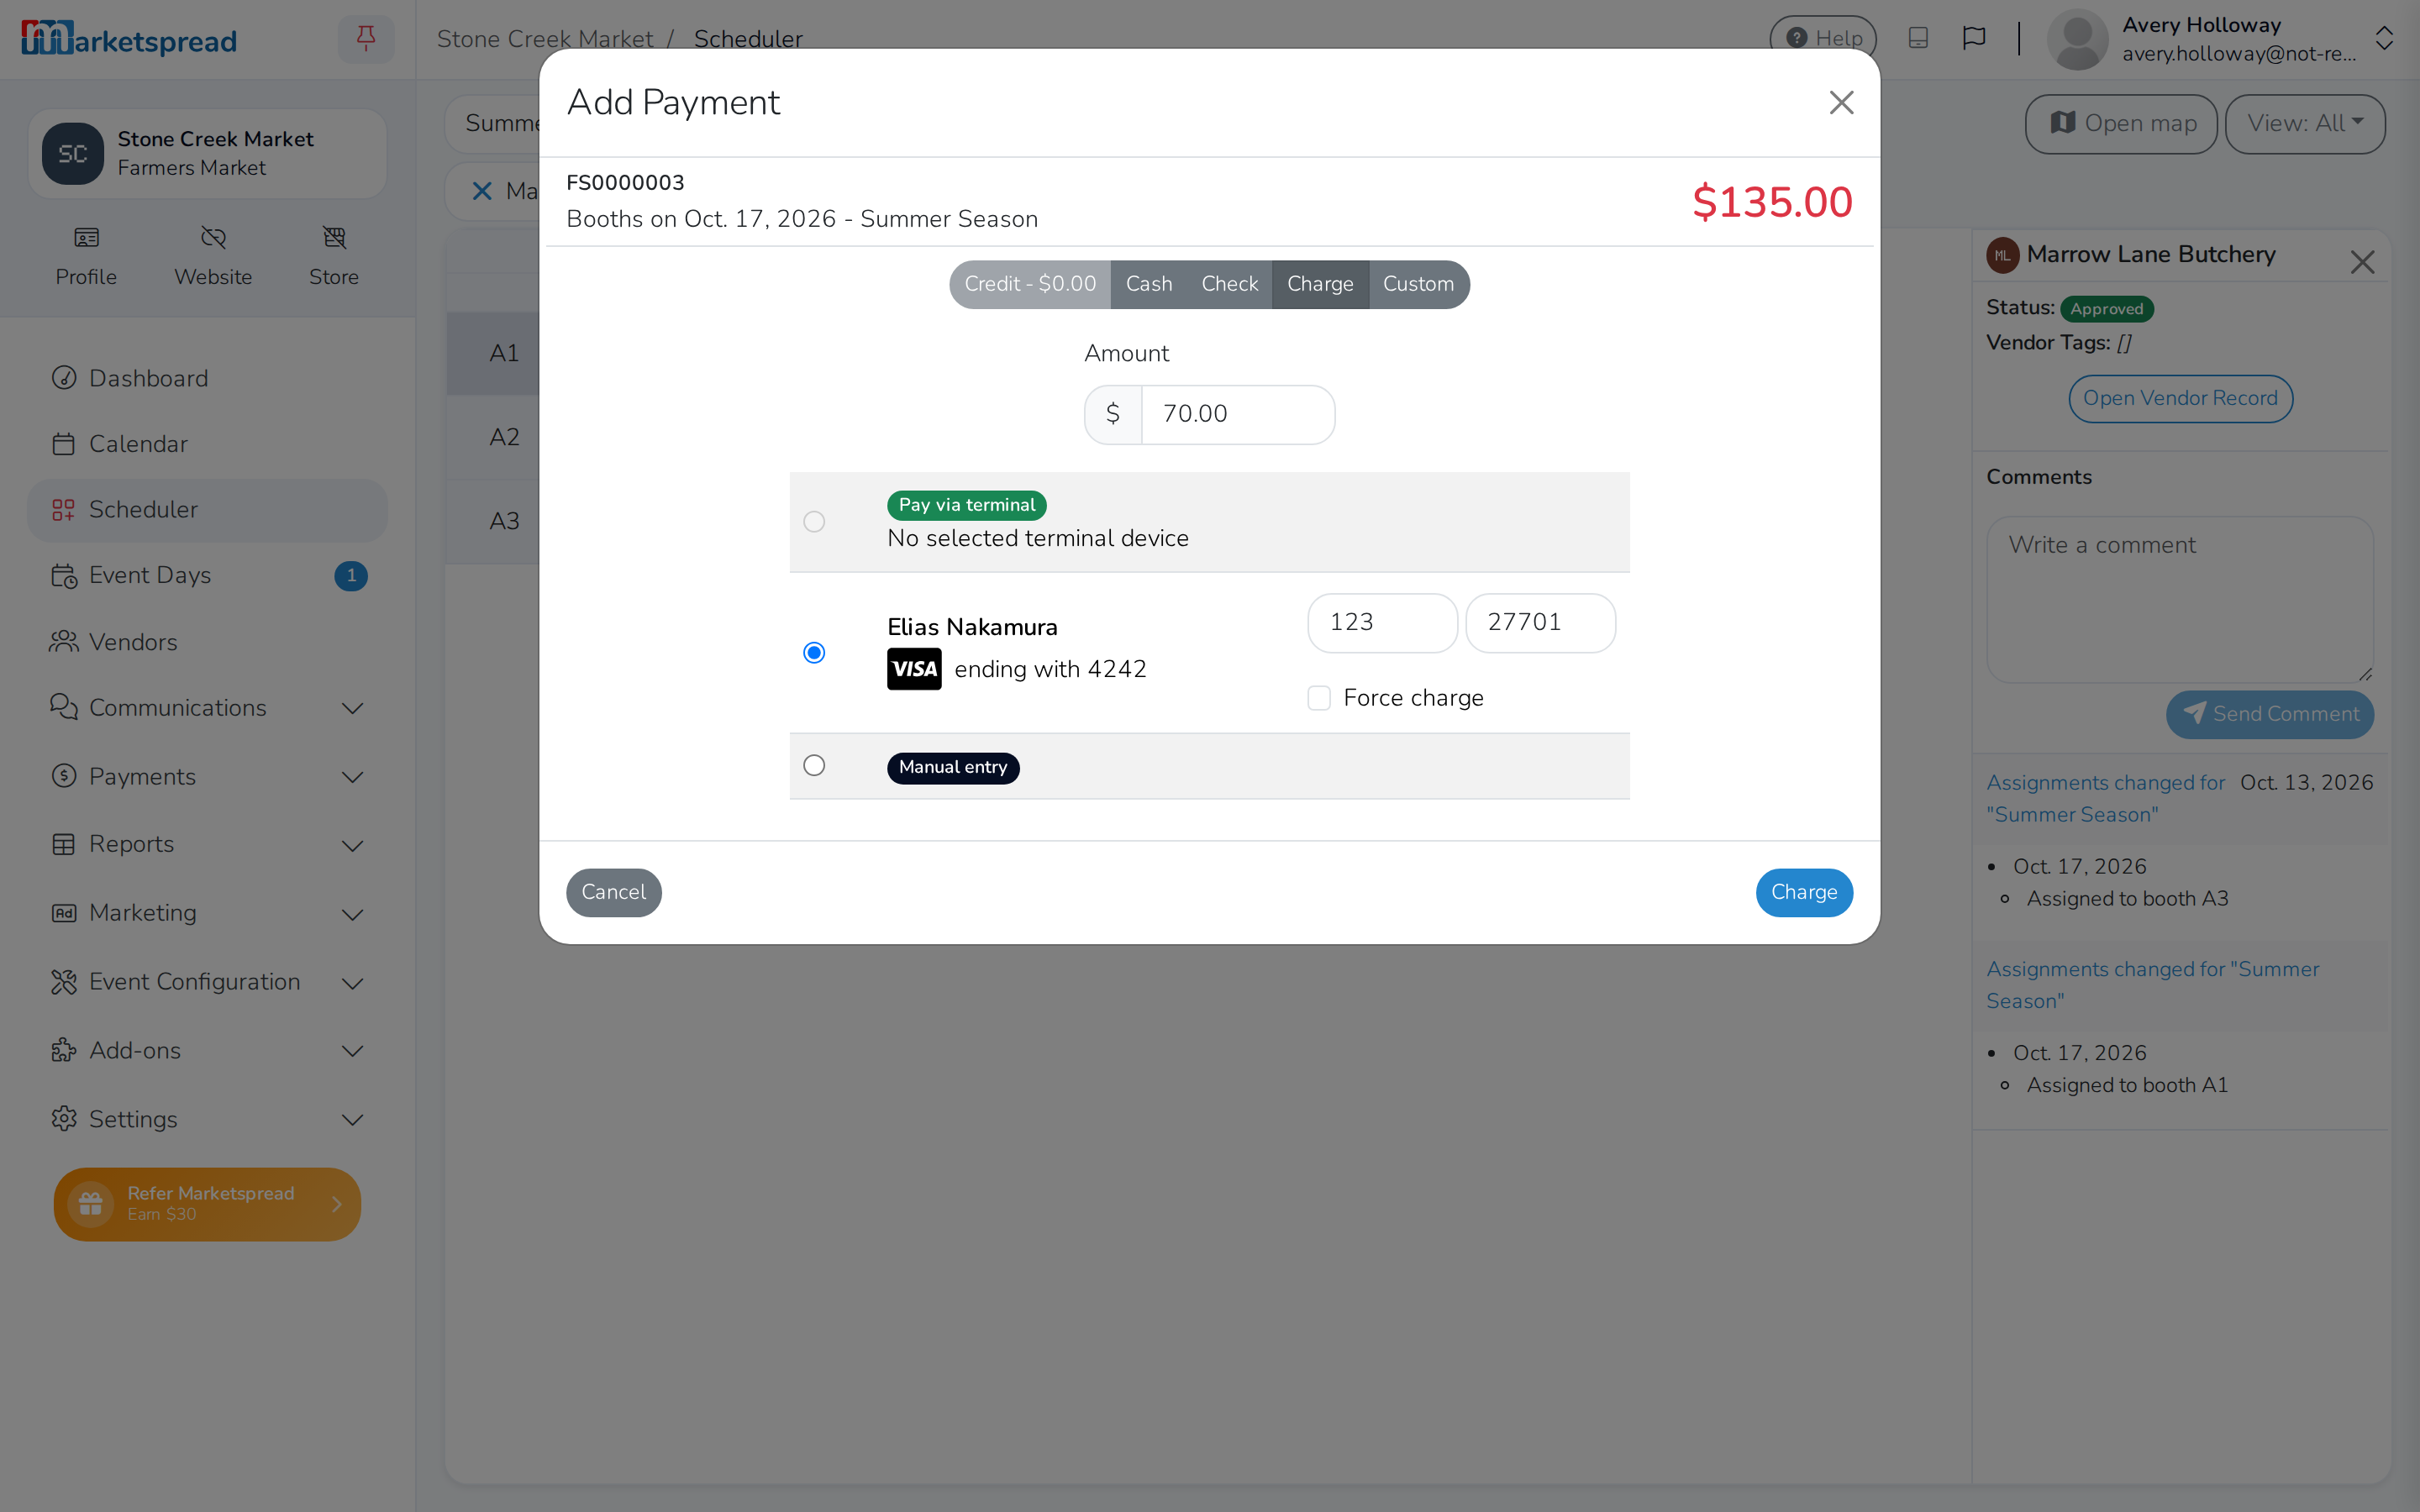
If you only take part of what's owed, the booking stays blue instead of turning green — blue covers a due invoice and a partially paid one alike.
If payment isn't received by the due date, the booking turns red.
Find a Scheduler invoice later
A Scheduler-made invoice shows up under Invoices too, alongside any manual ones — click the vendor's name to find it, then handle it exactly as Find and Pay an Invoice above describes: edit it, delete it, resend it, or add a payment.