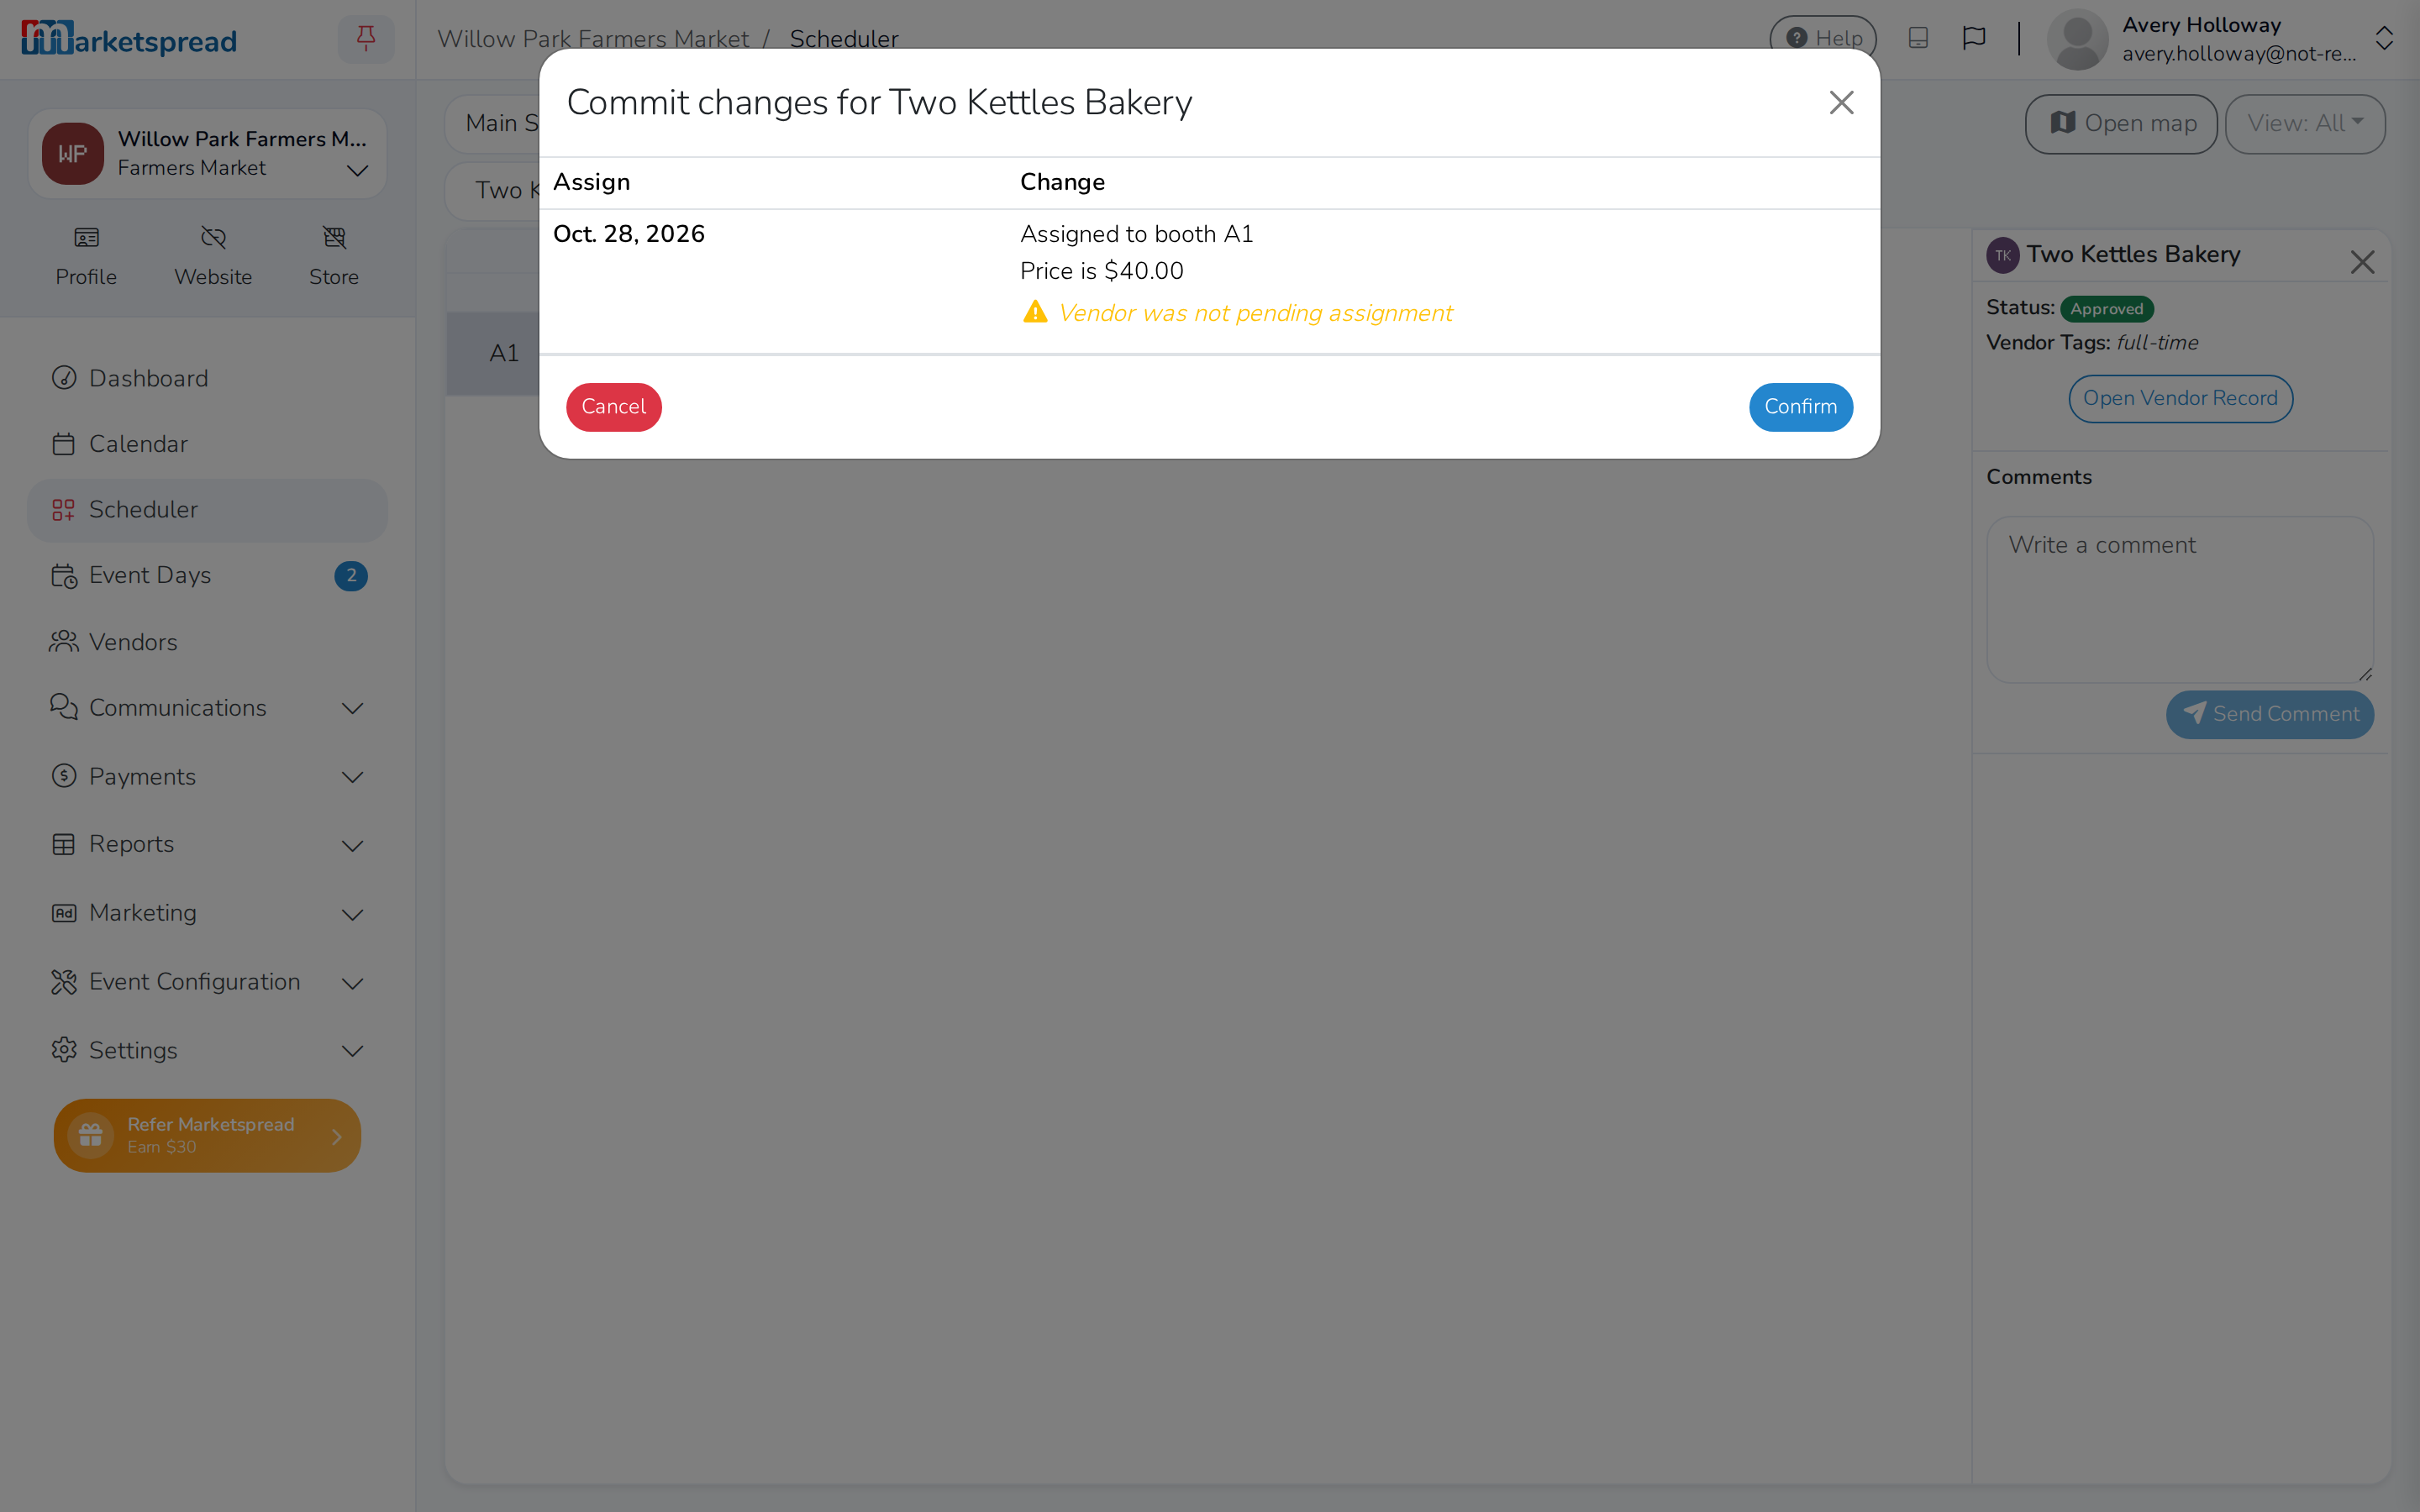
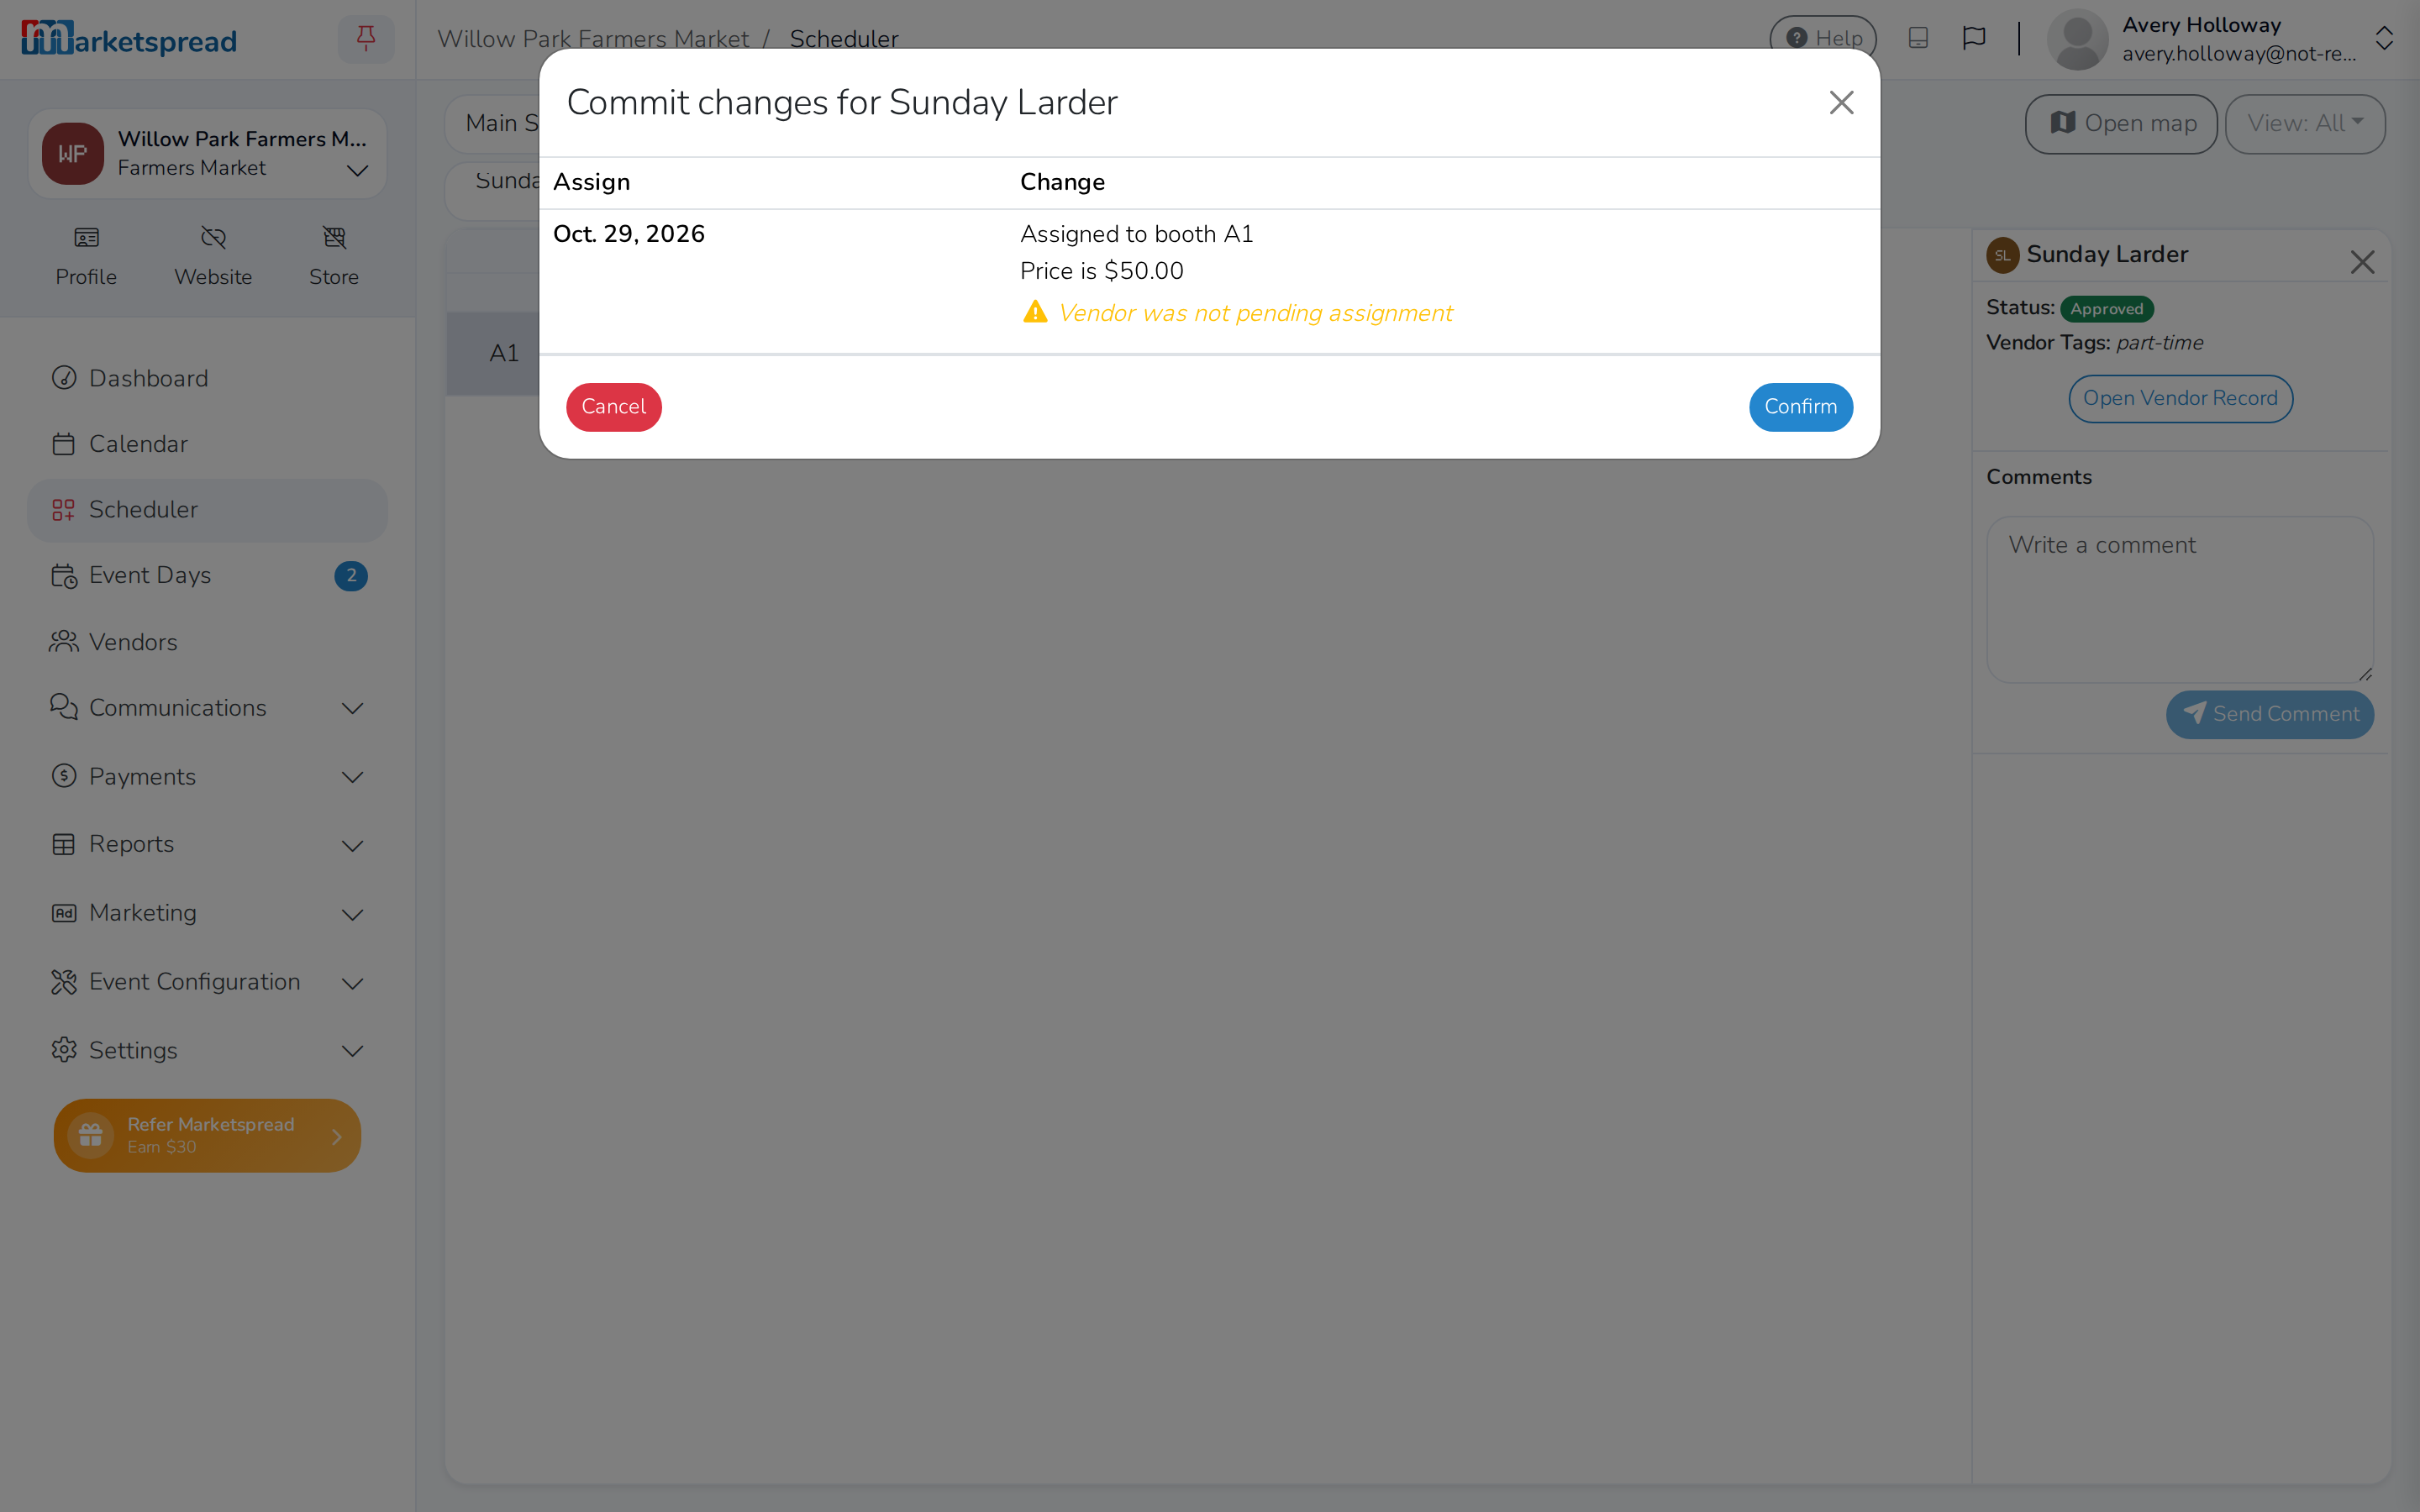
Vendor tag fees let you charge a different booth fee to different kinds of vendors — say, $40 a booth for full-time vendors and $50 for part-time vendors. Set up the fee once on an event, then give each vendor a matching tag to apply it.
Set up a tag fee
-
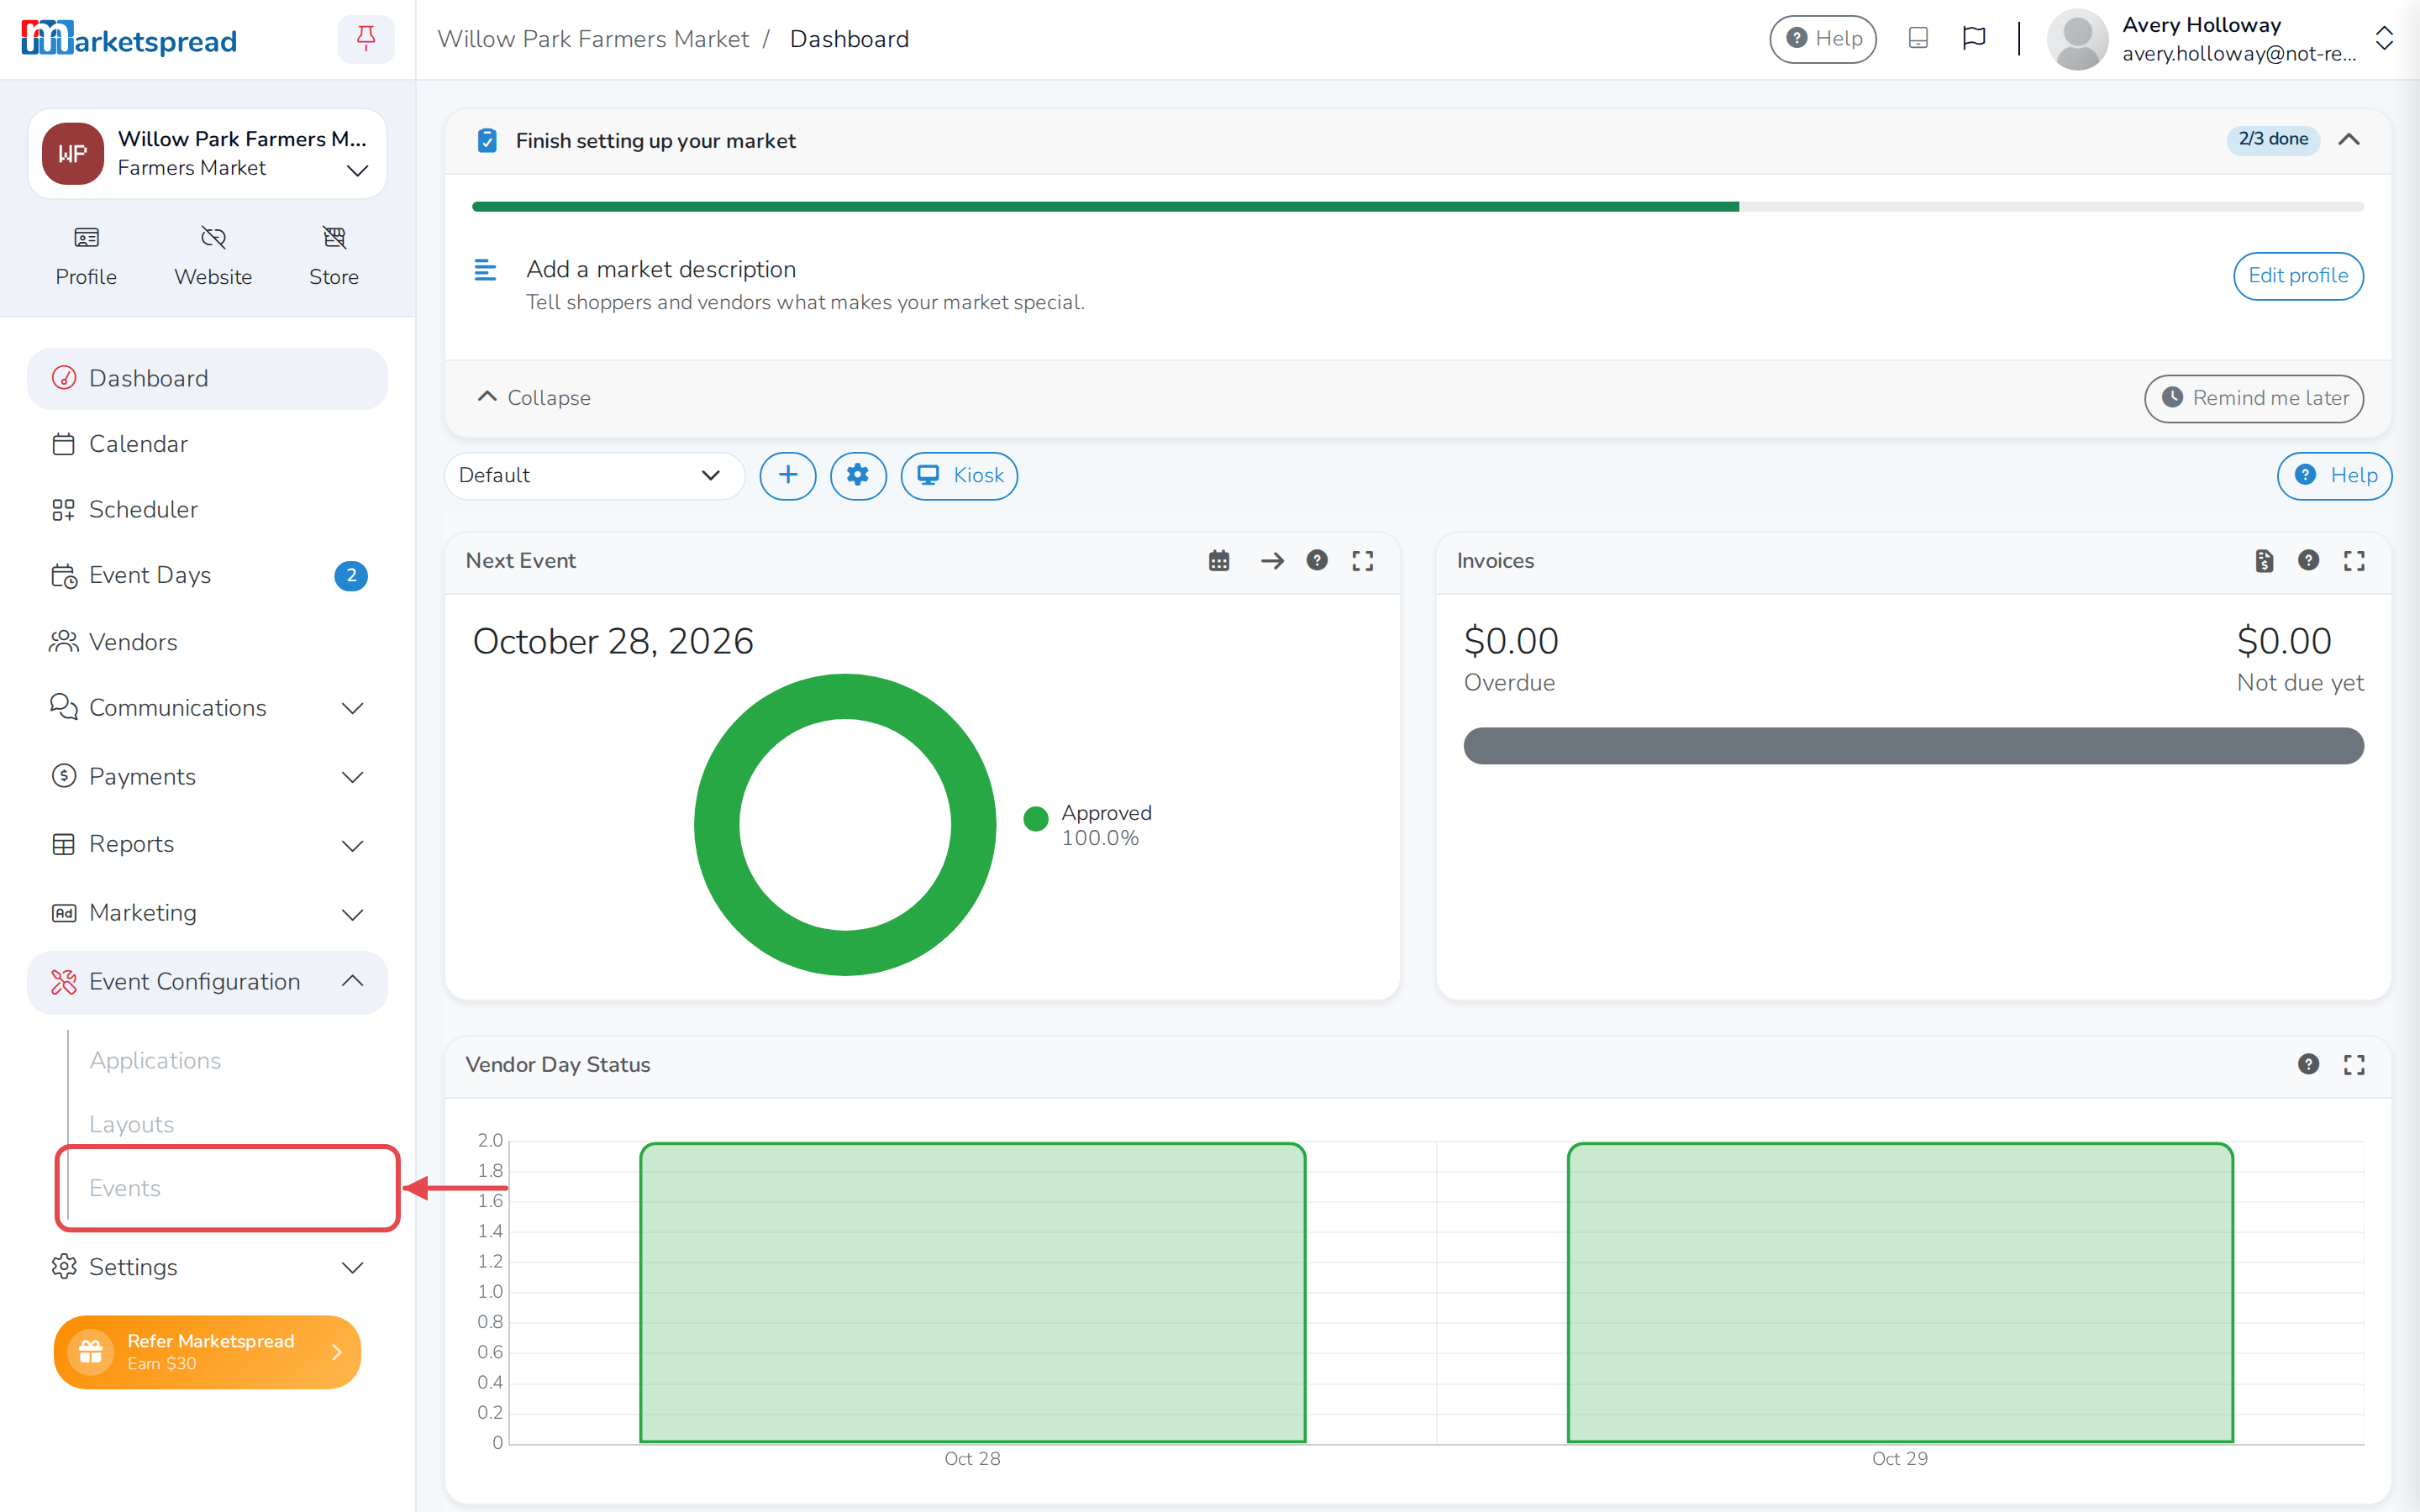
Open Events under Event Configuration.
-
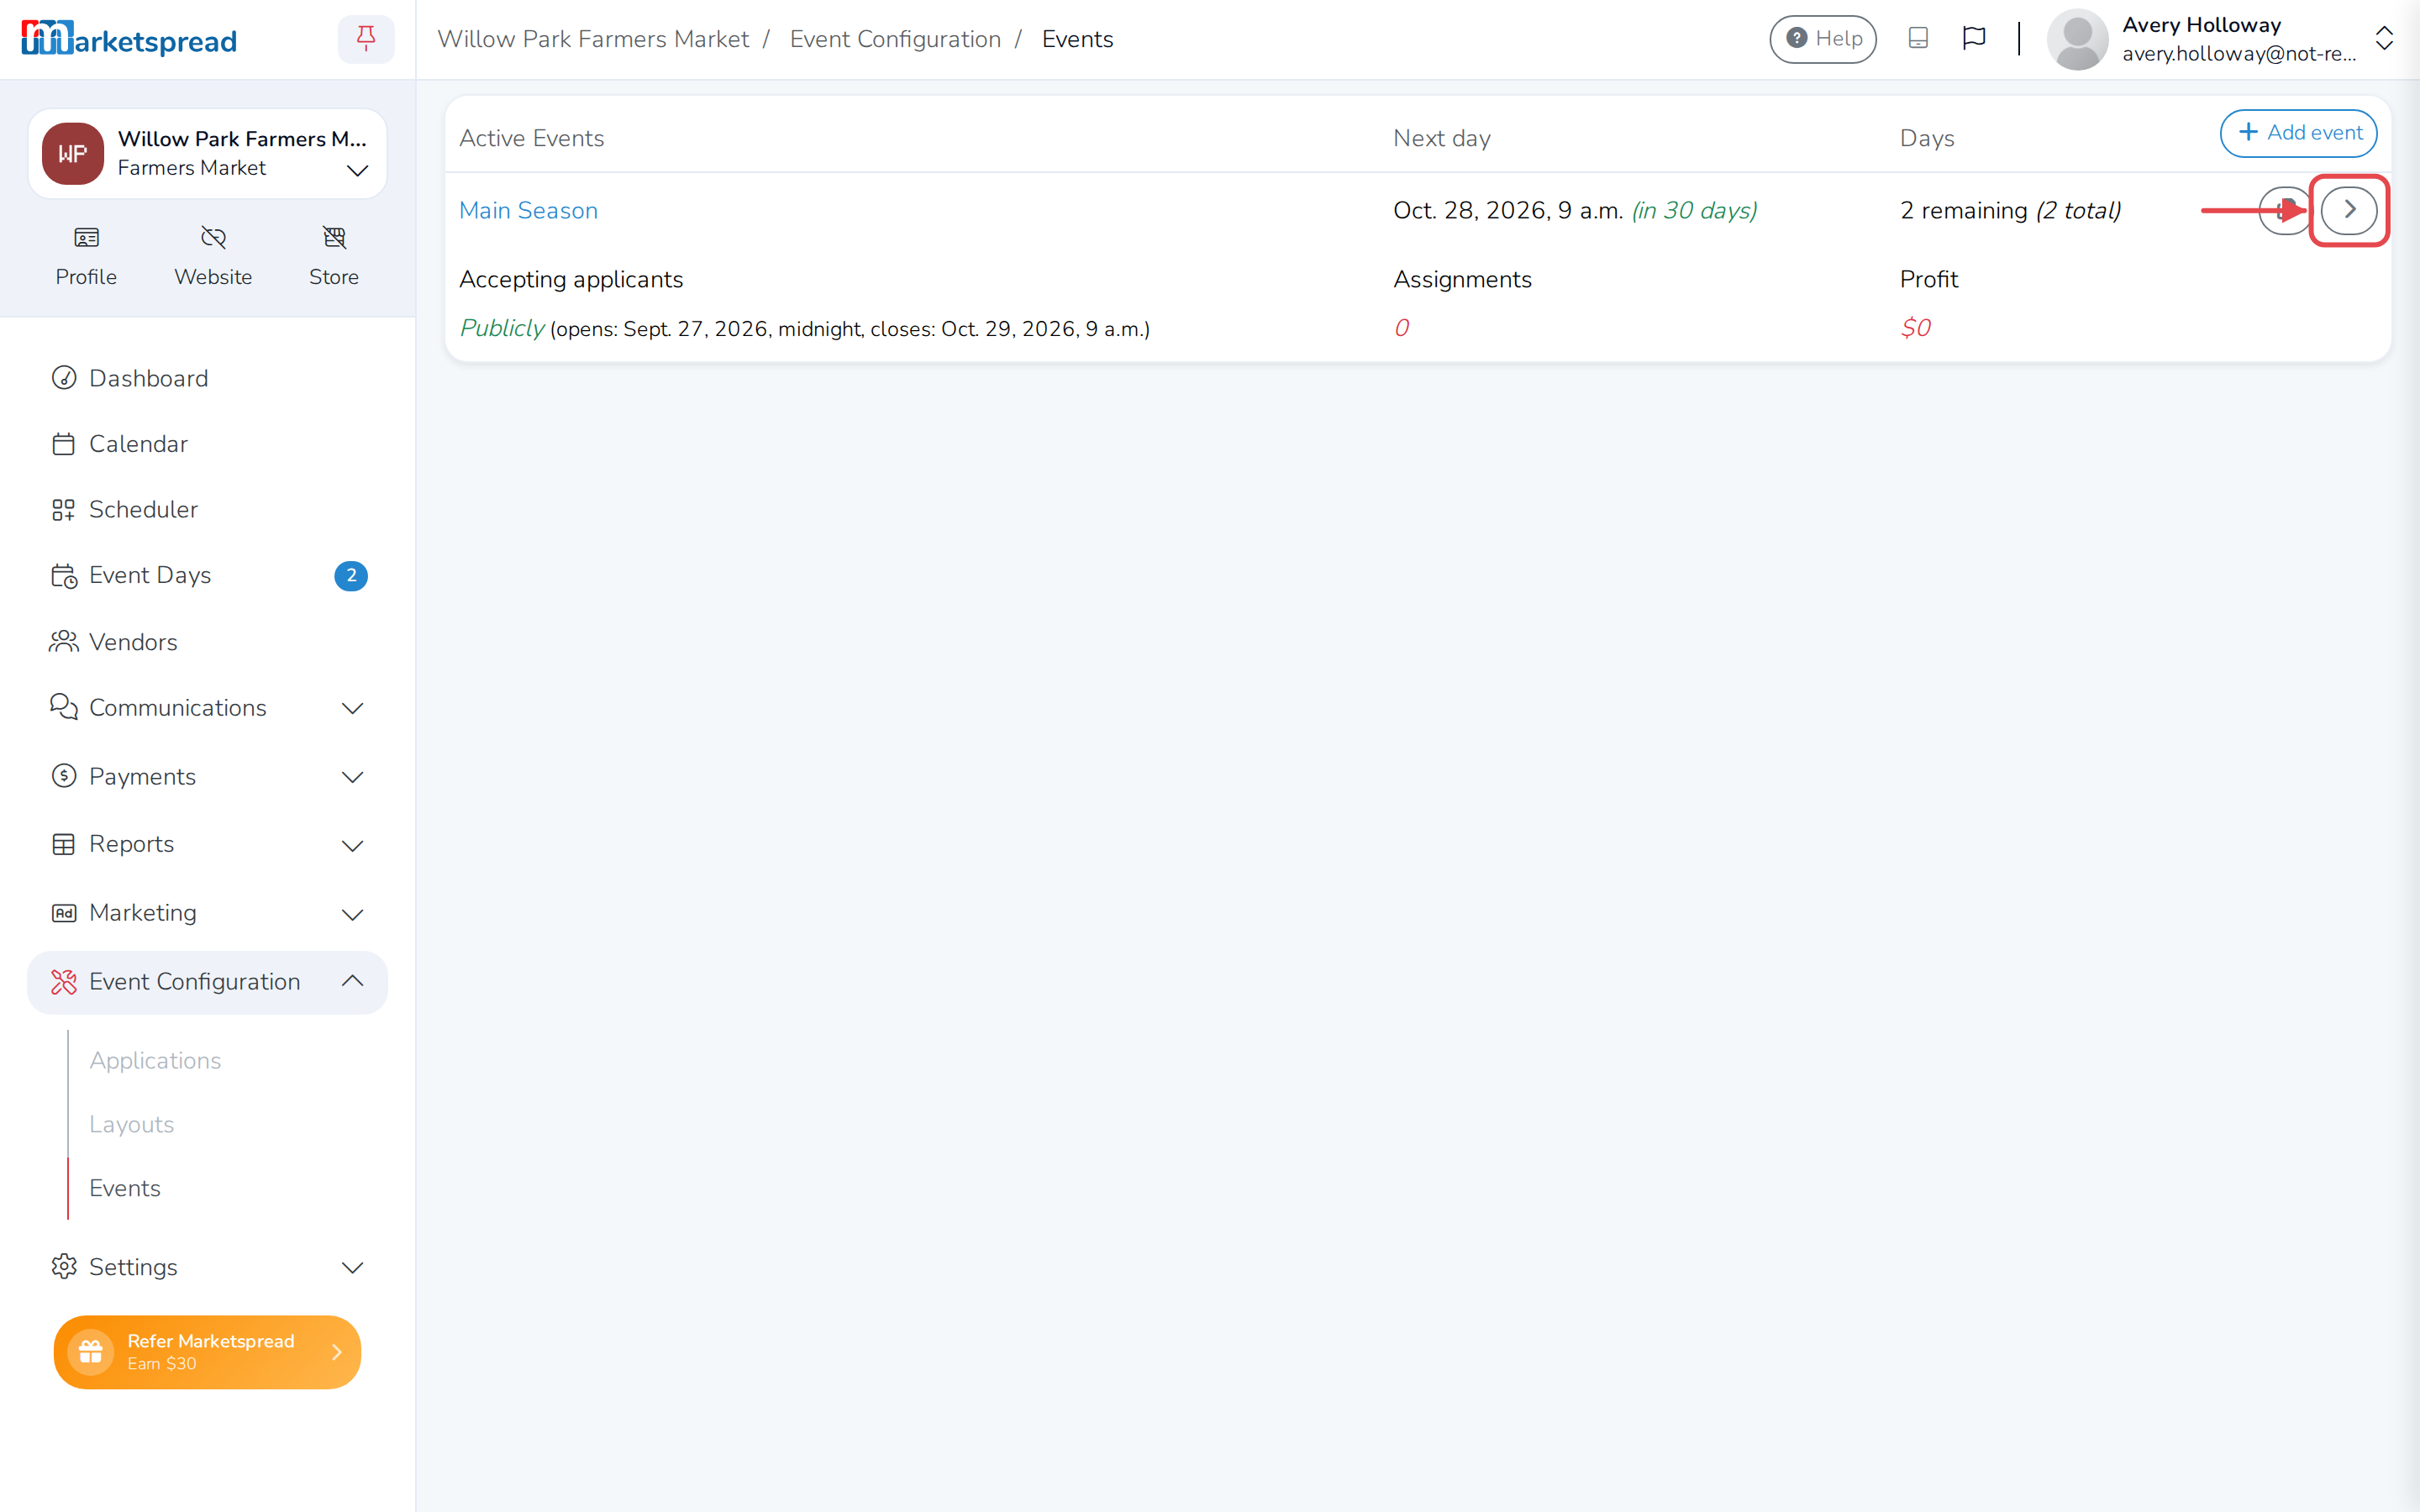
Click the arrow on the right of the event or event series you want to price.
-
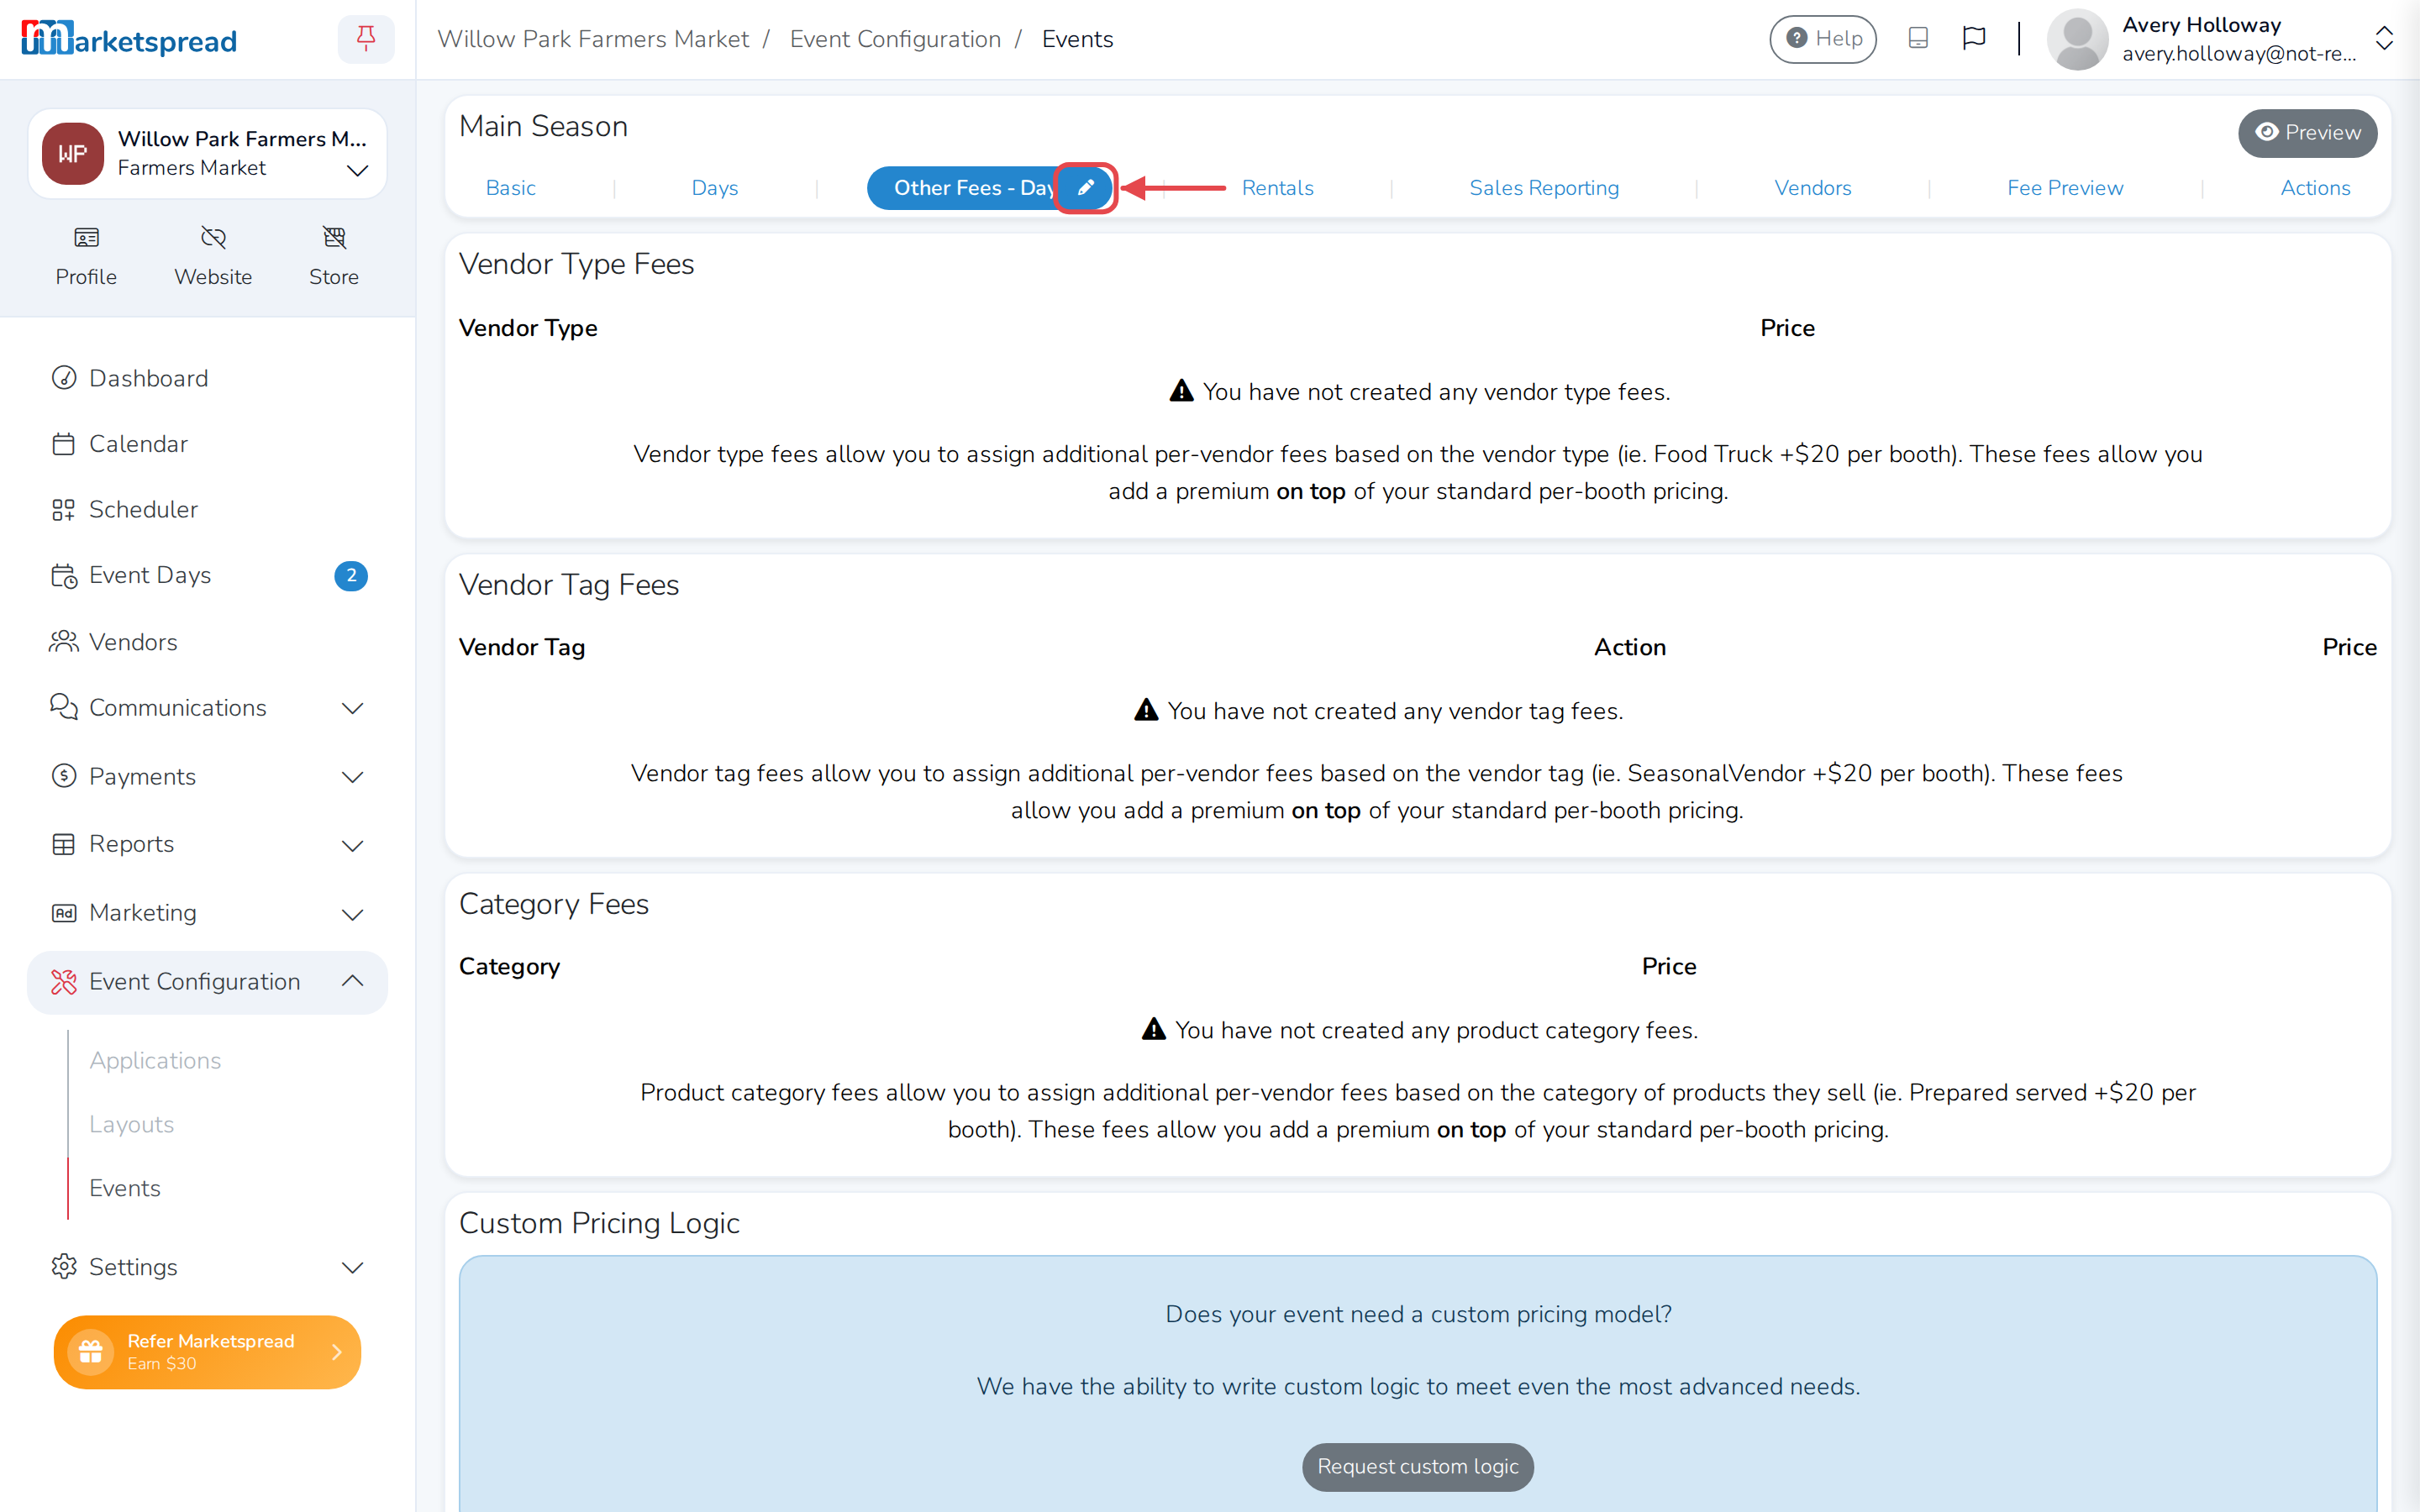
Click the pencil next to Other Fees - Day.
-
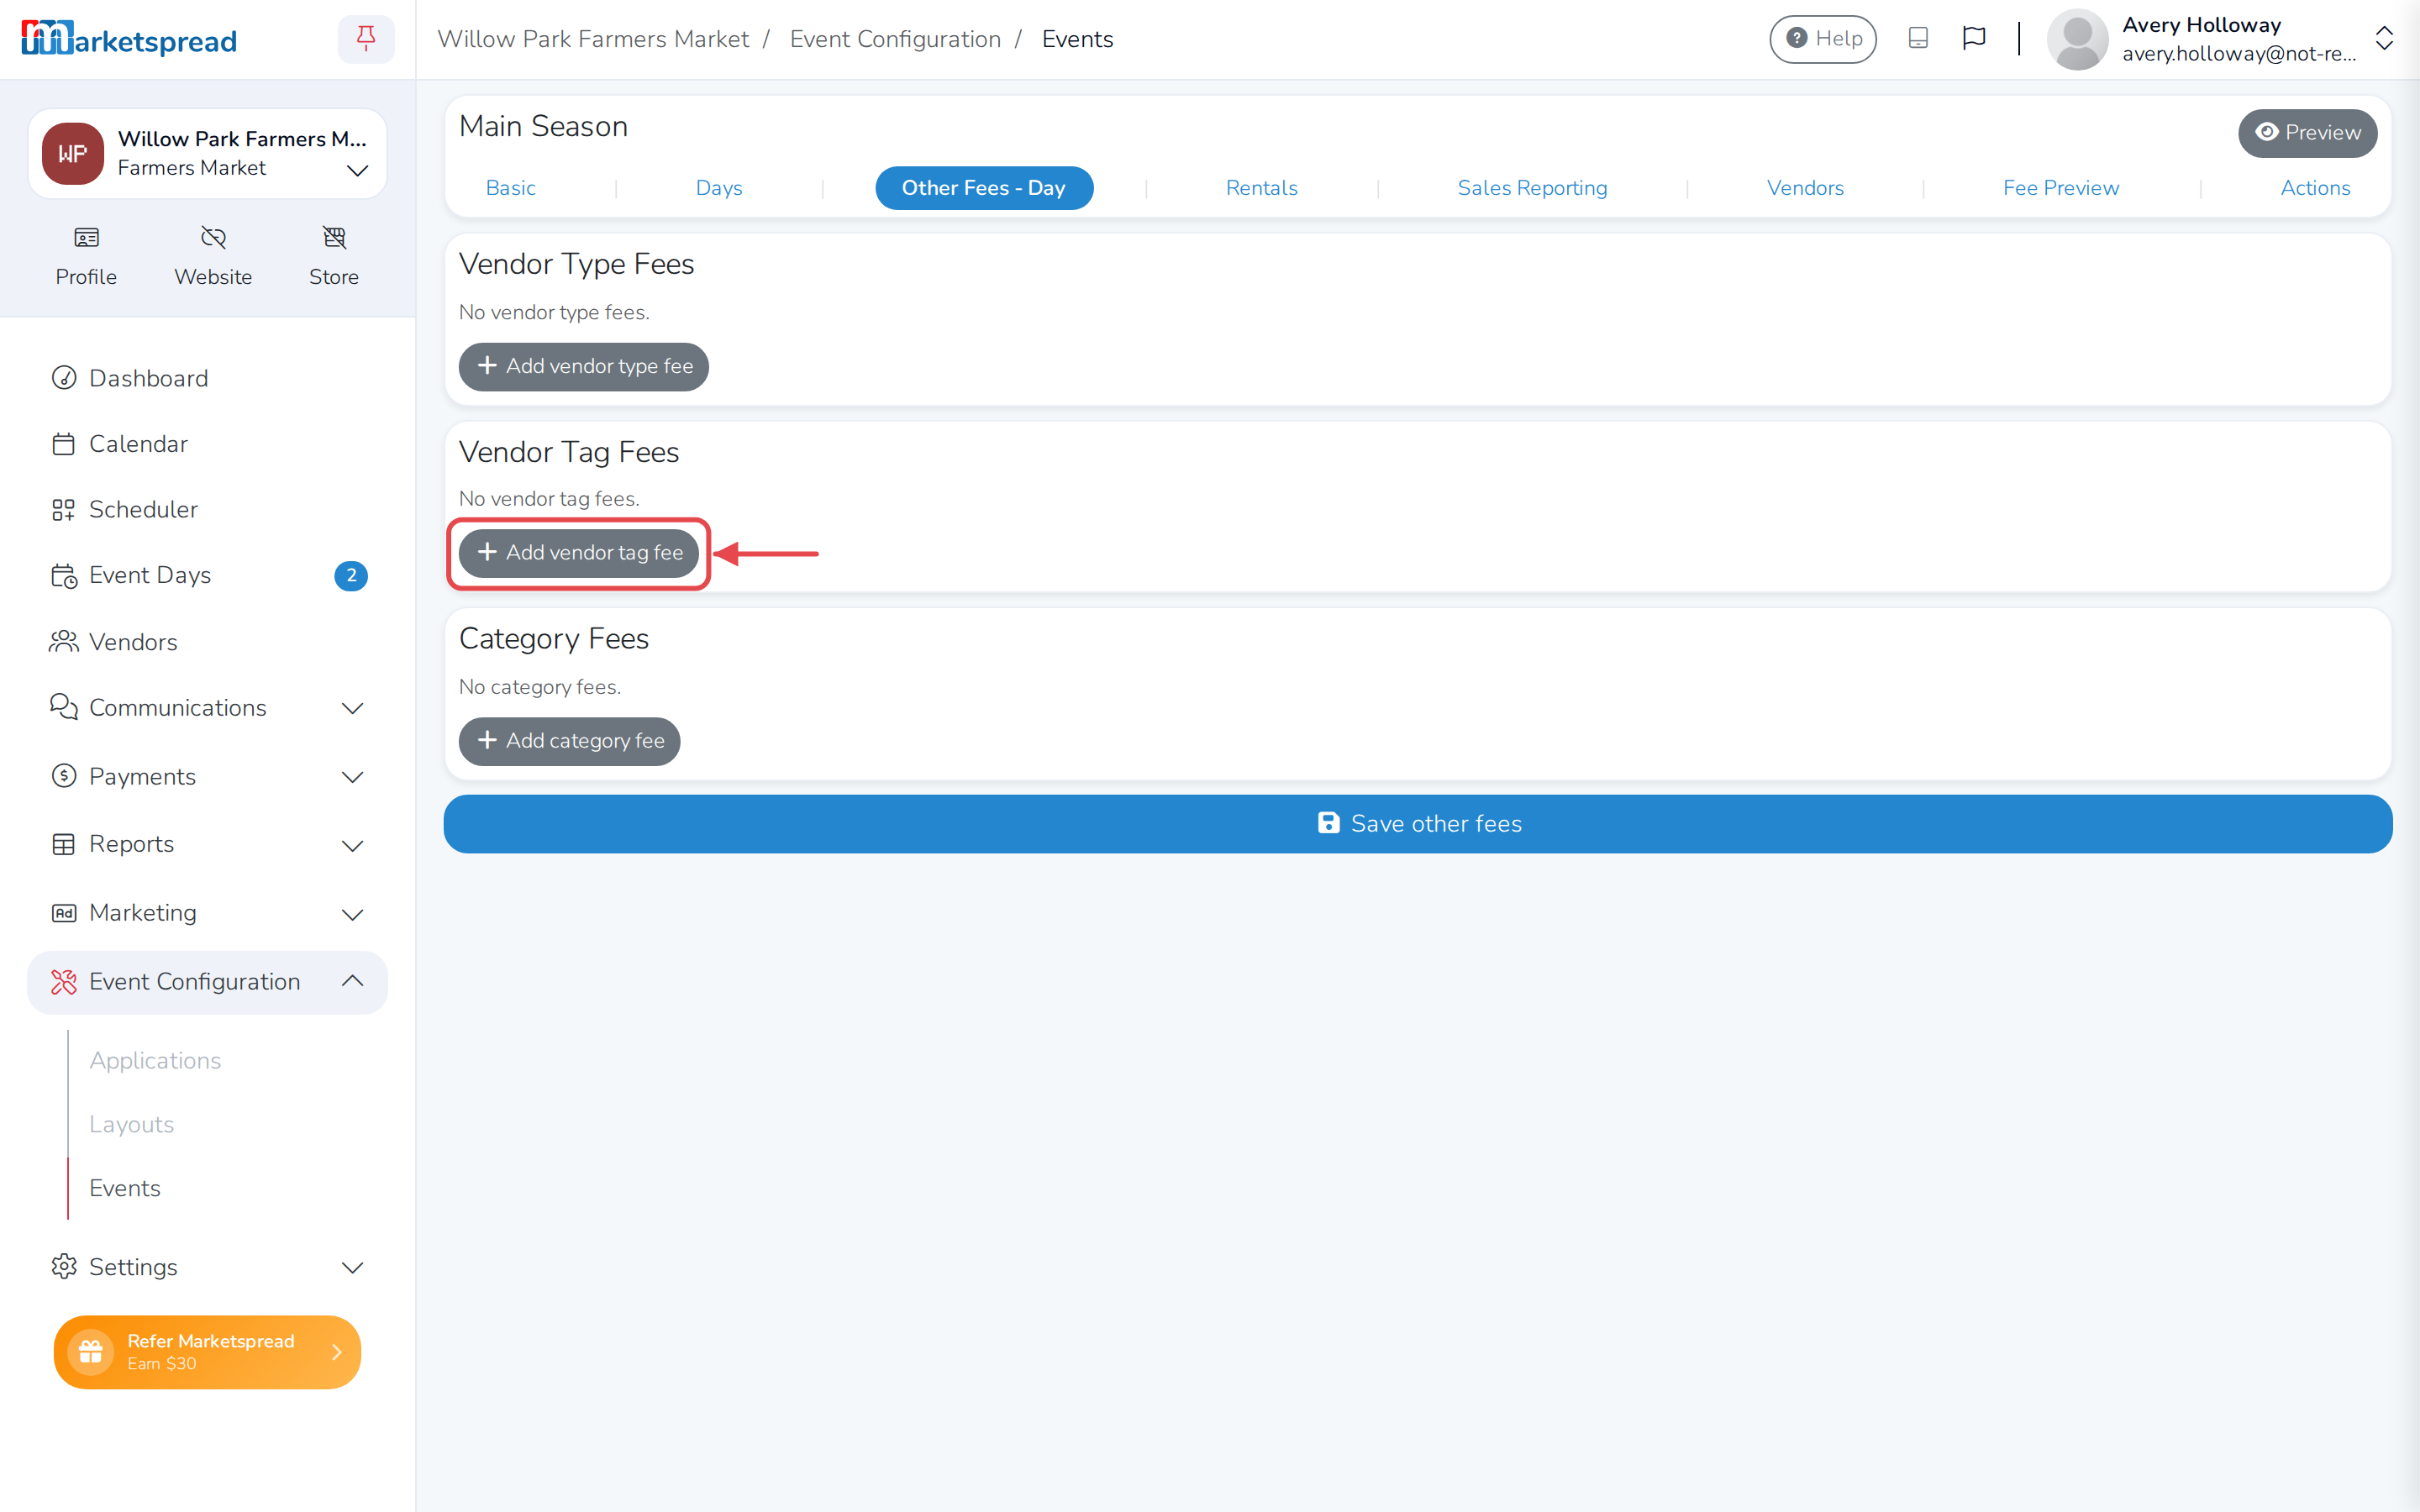
Scroll down to Vendor Tag Fees and click Add vendor tag fee.
-
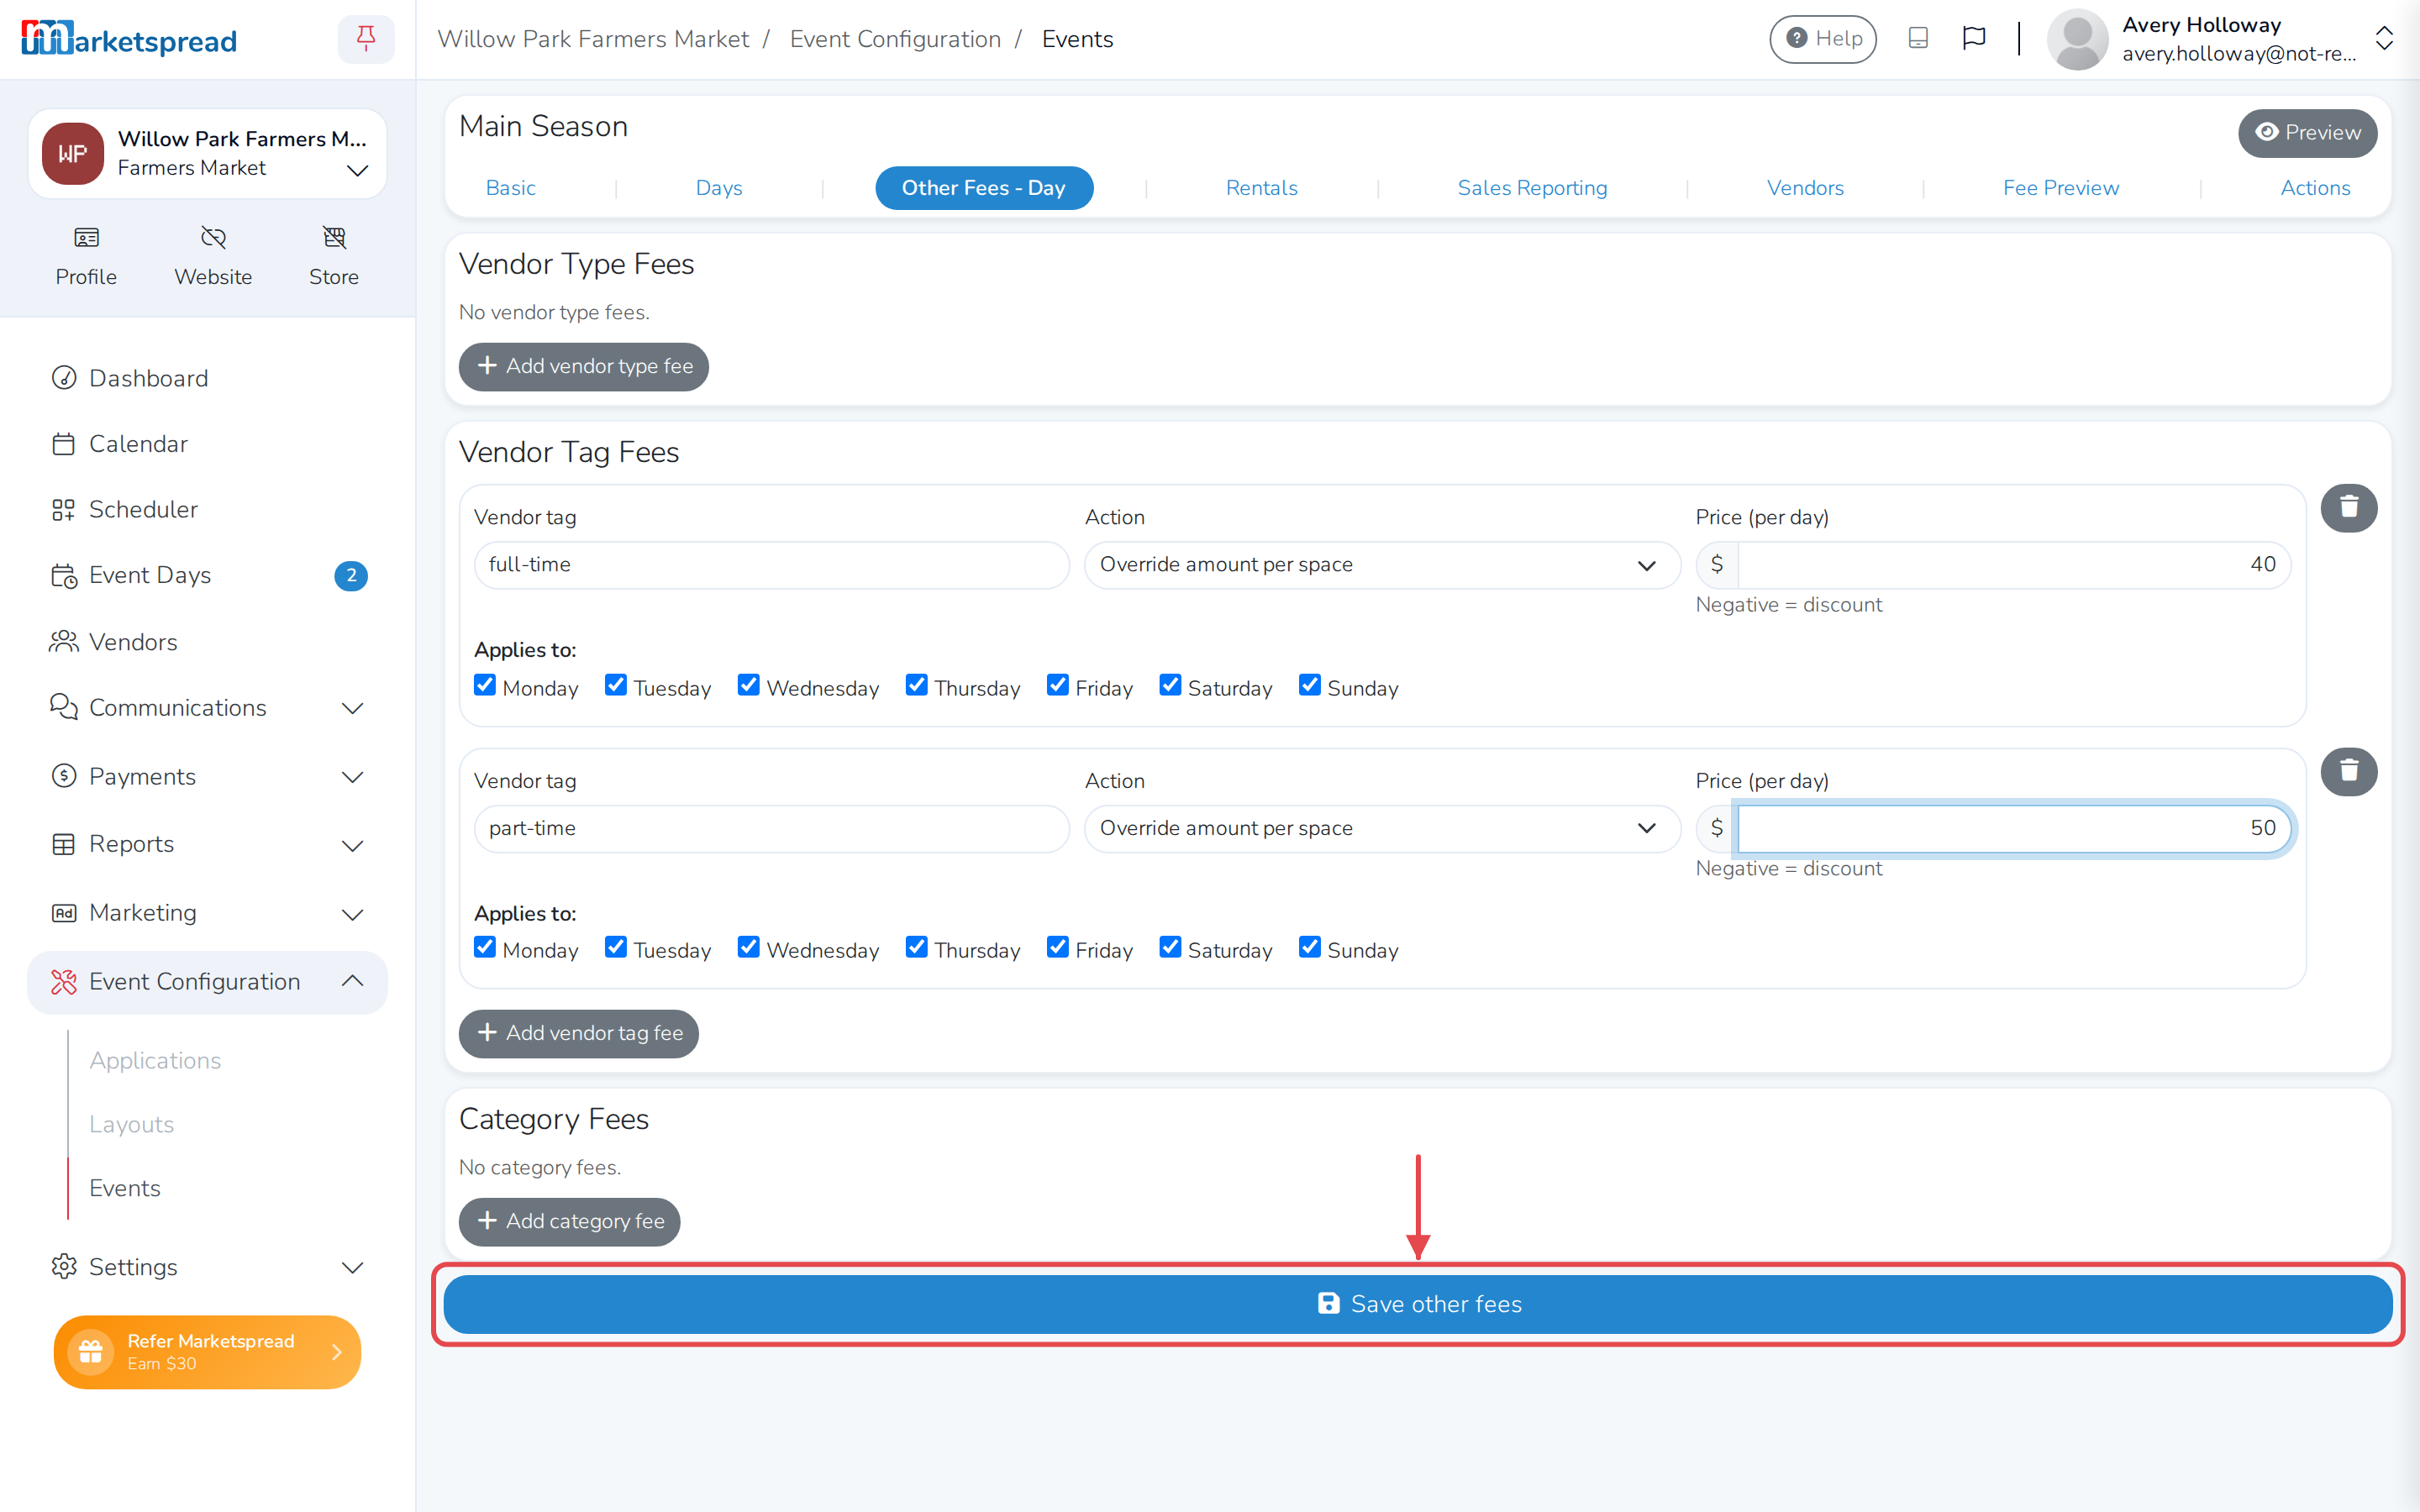
Name the tag under Vendor Tag, choose an Action, and set the Price.
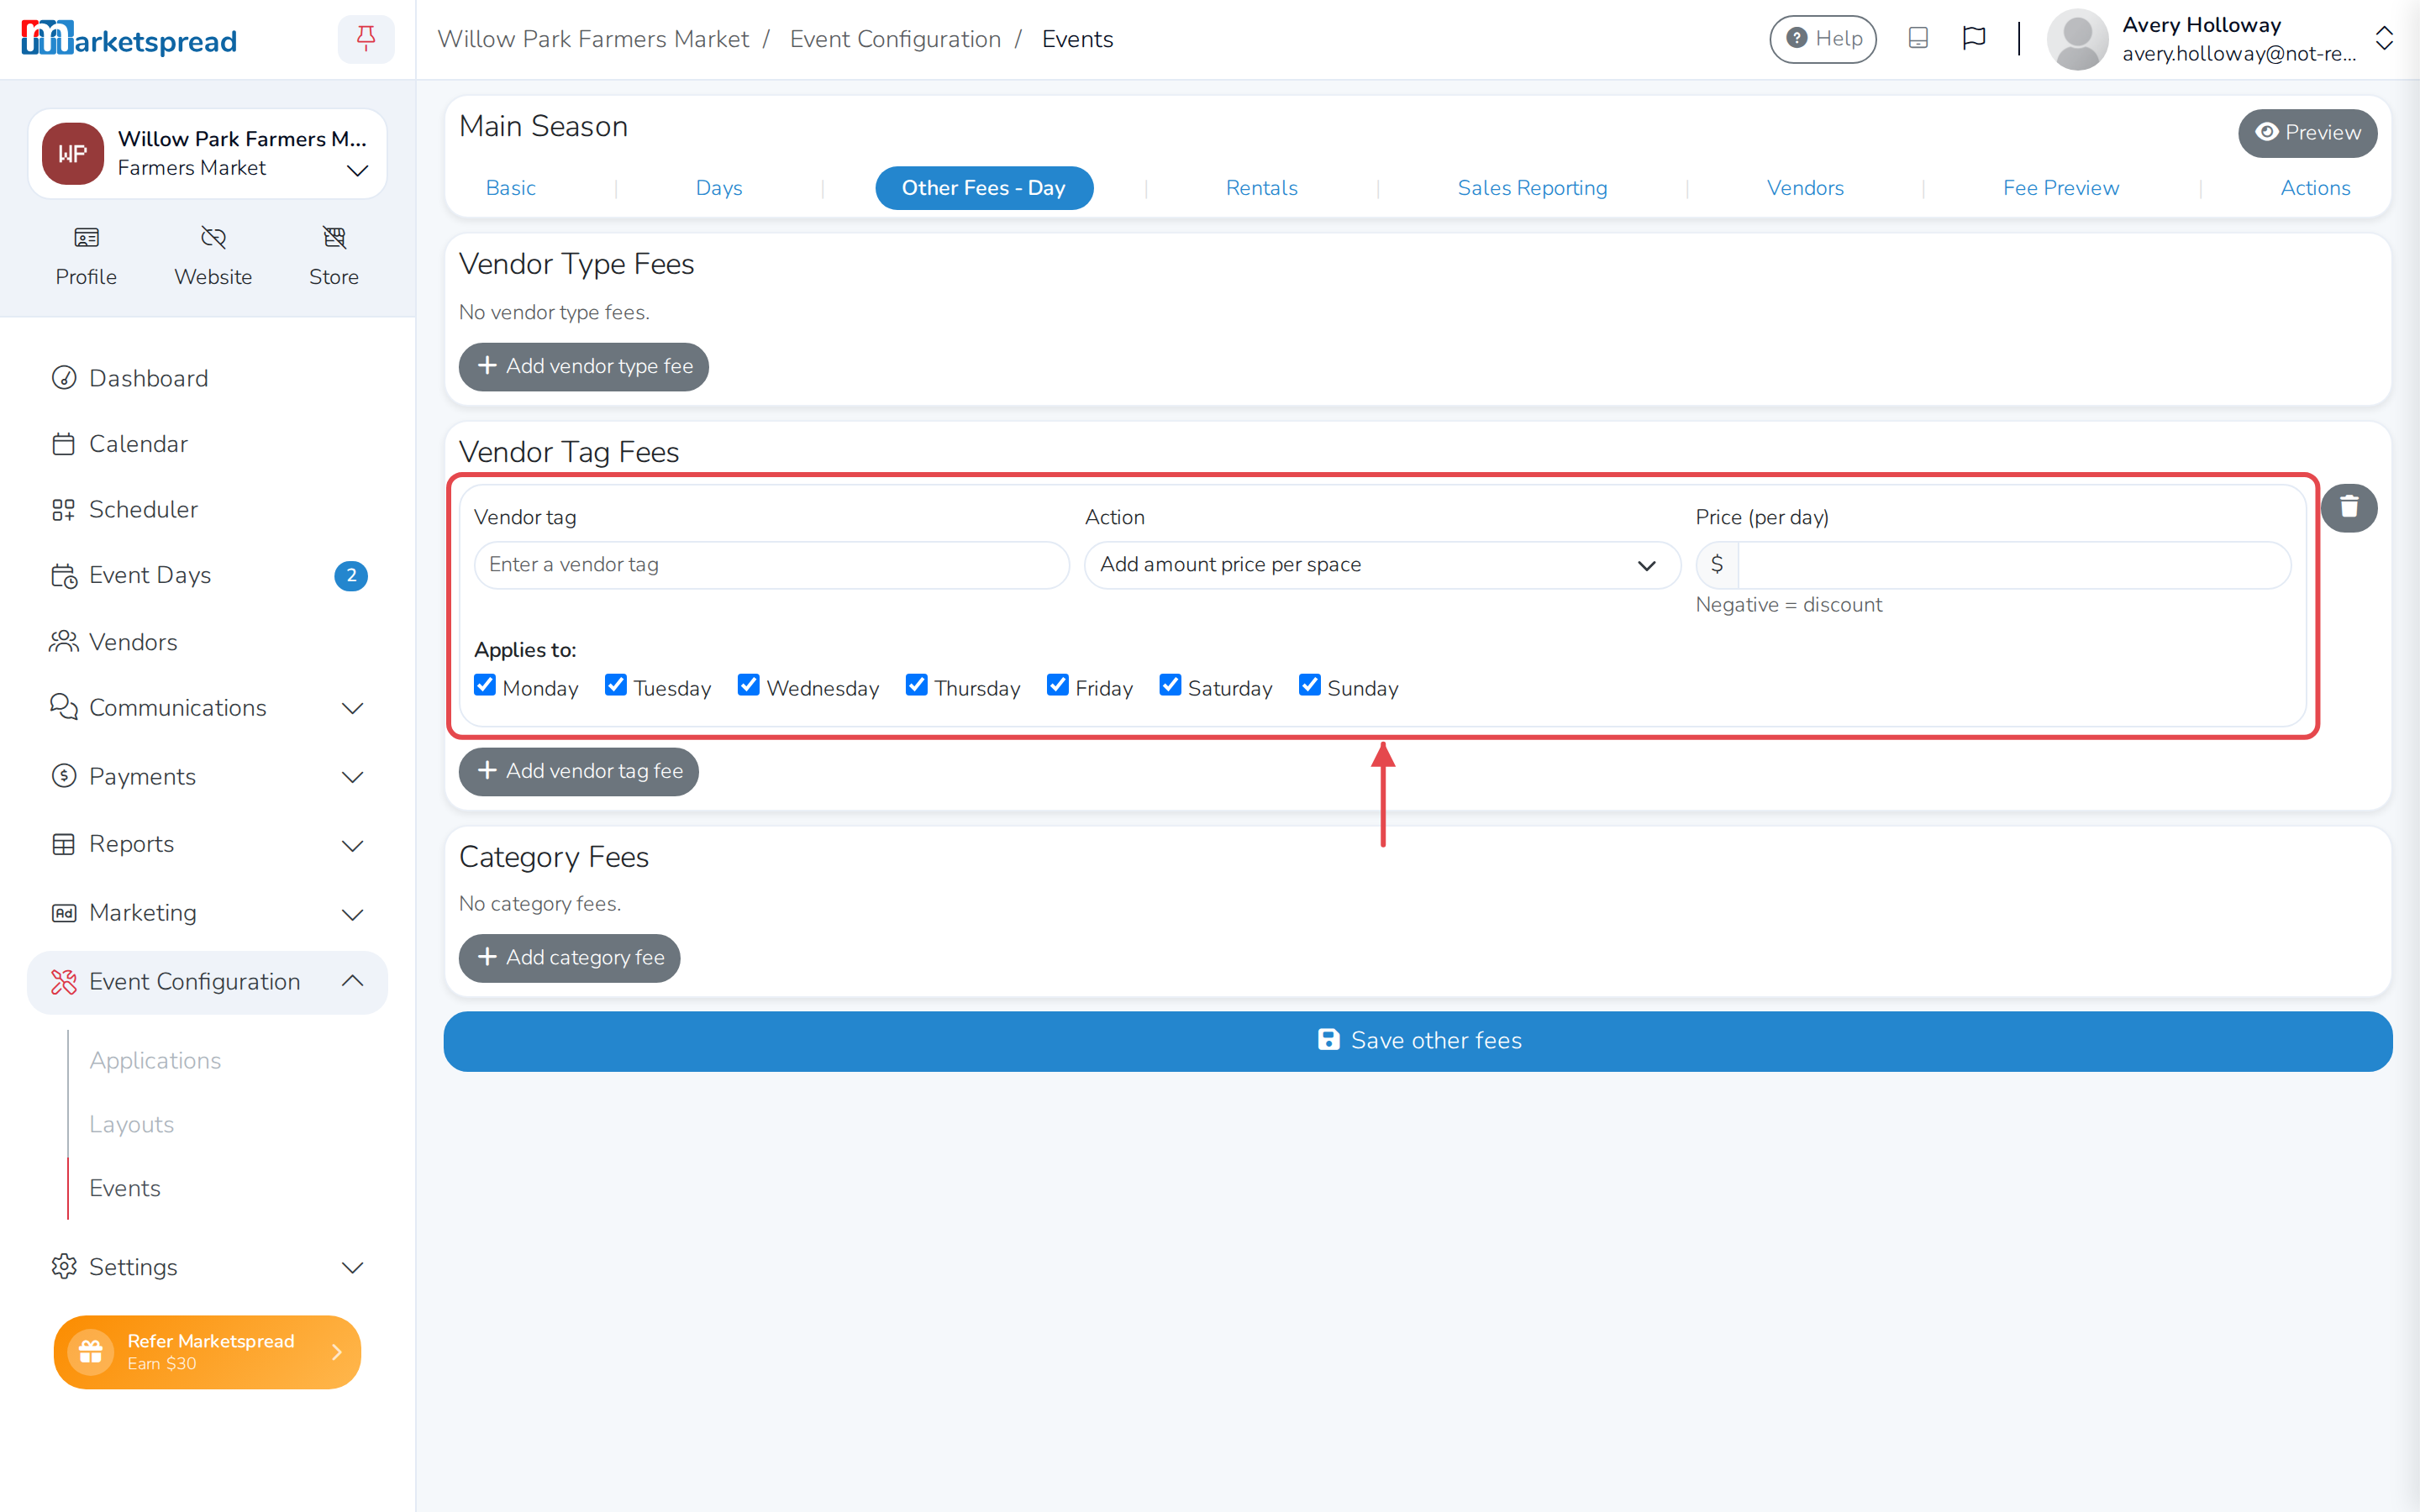
The Action decides how the price is charged:
- Add amount price per space adds it on top of any other booth fees, for each booth.
- Override amount per space replaces other booth fees with just this price, for each booth.
- Override overall total replaces the vendor's whole total for the day with this price, however many booths they have.
Every day of the week is checked under Applies to by default. Uncheck a day if the fee should only apply on some days.
-
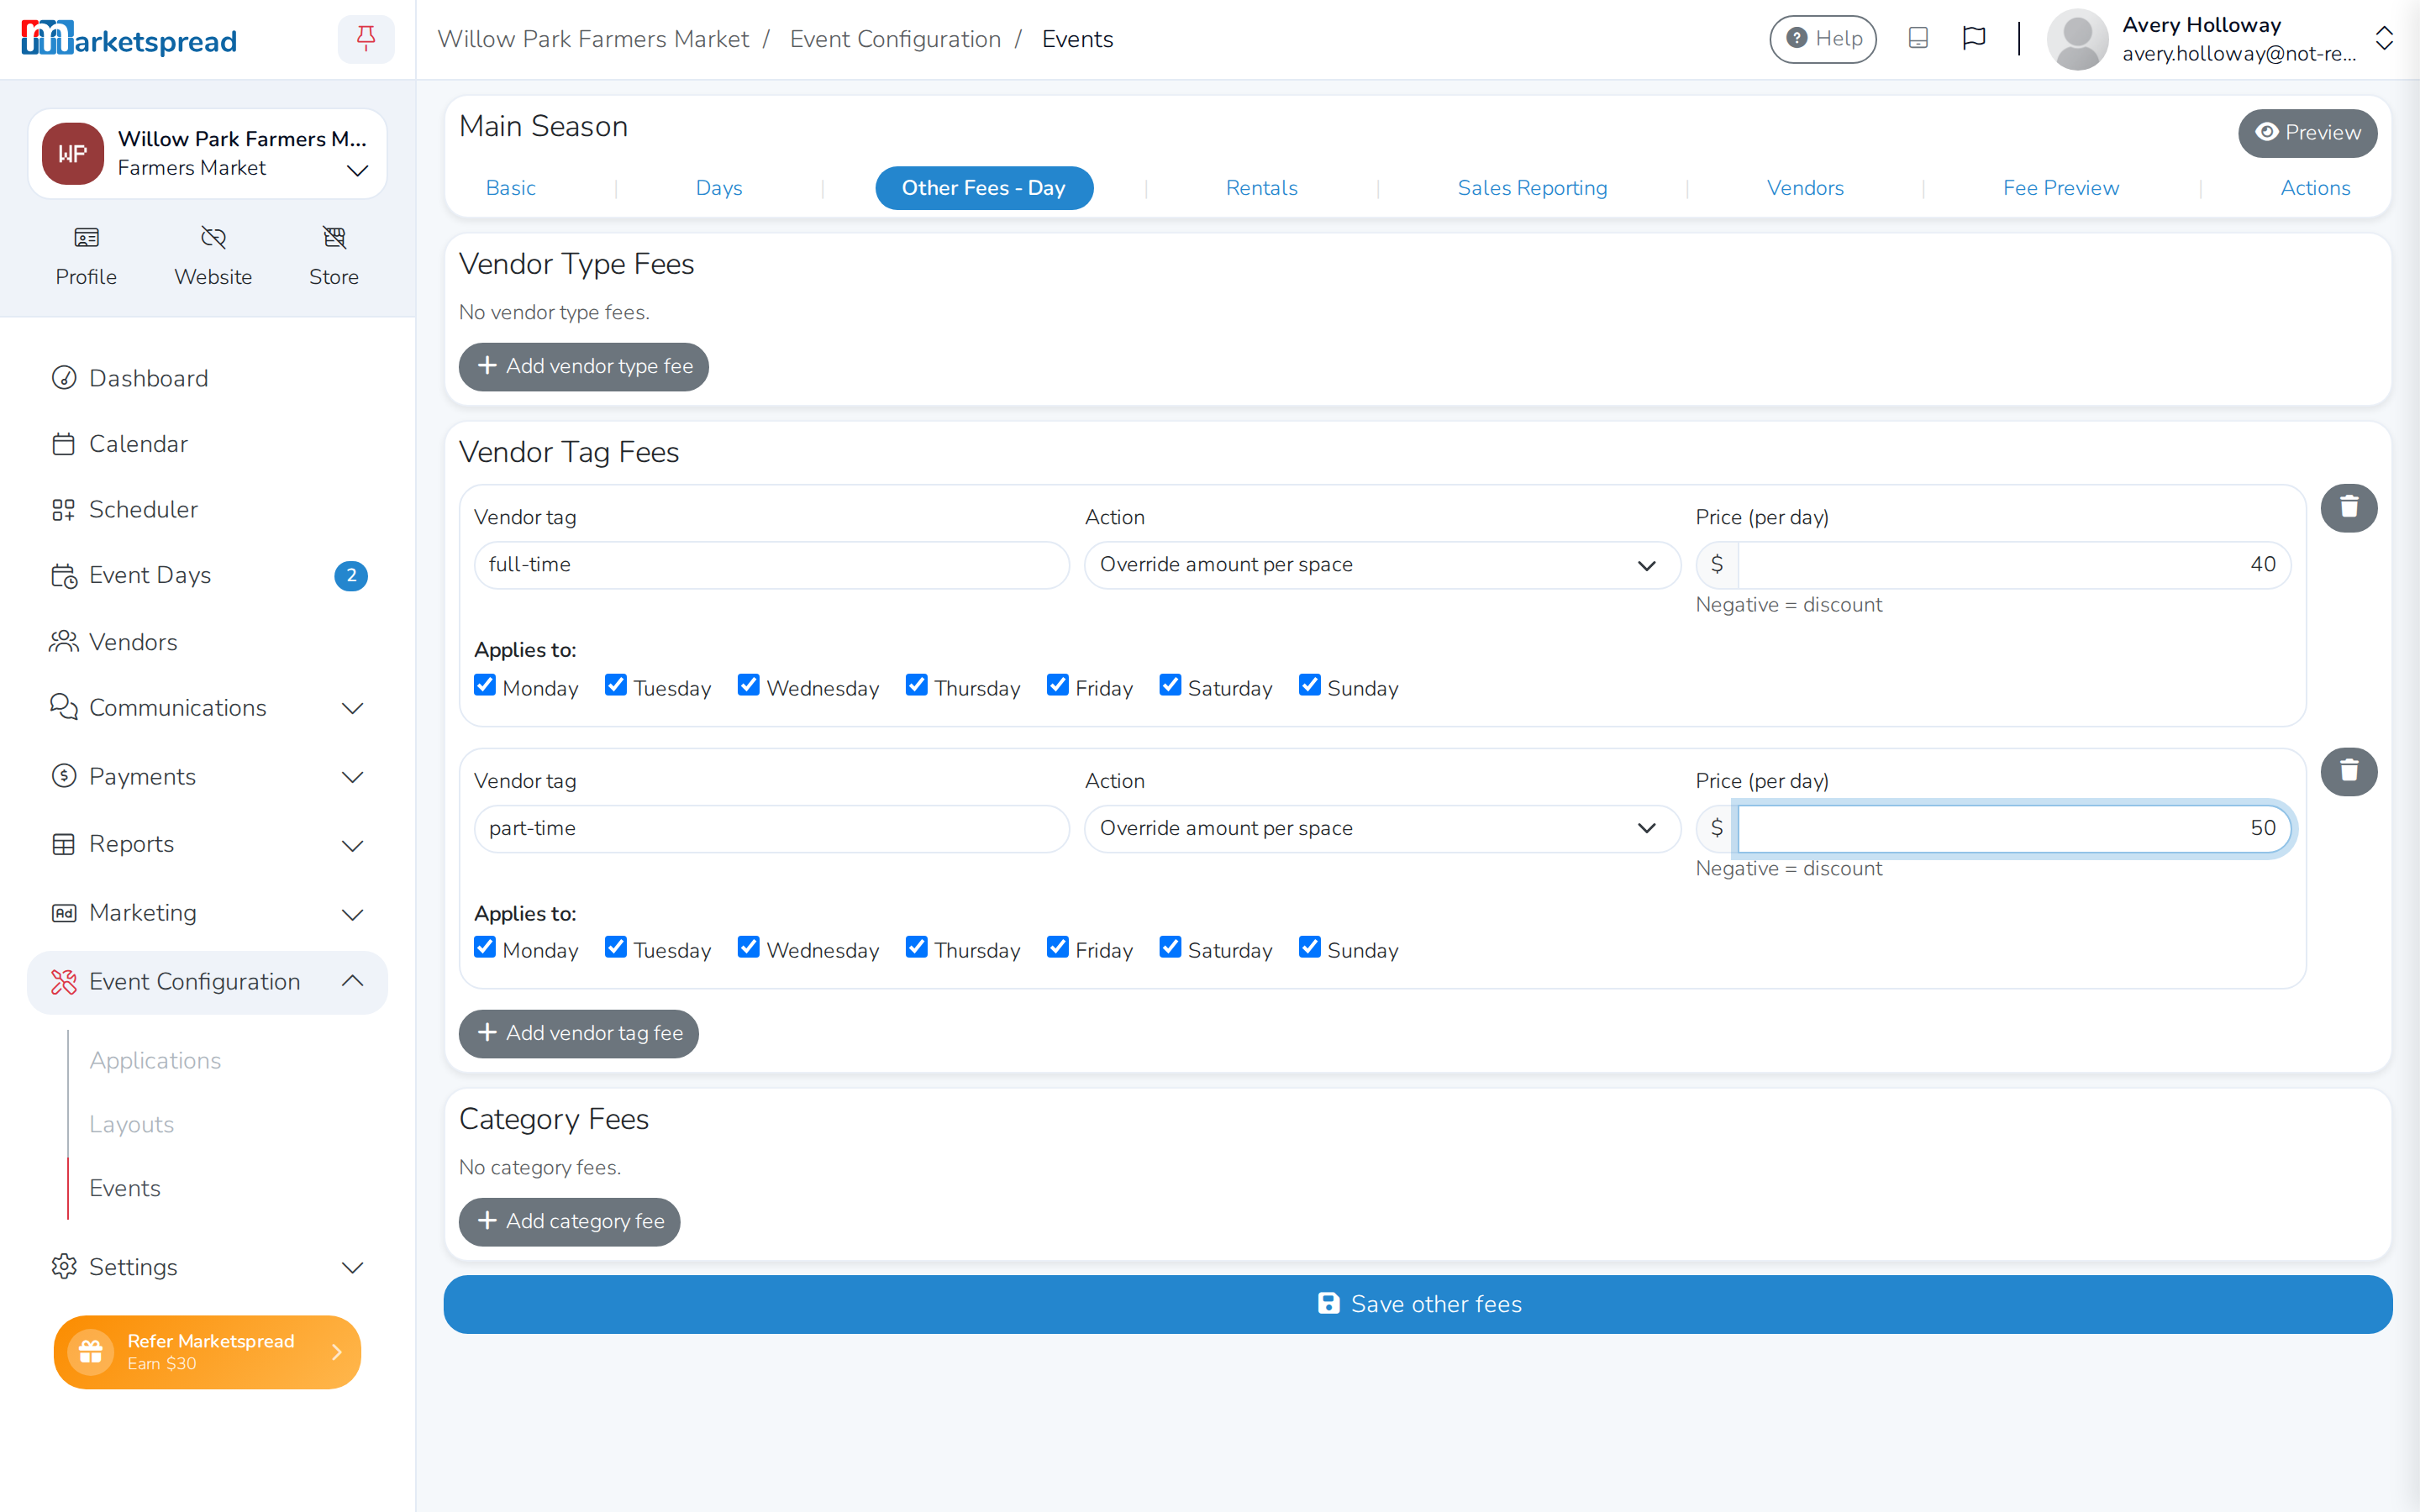
Repeat for each tag you need. This example uses full-time at $40 and part-time at $50, both set to Override amount per space.
-
Click Save other fees.
Override amount per space charges per booth
A full-time vendor with 2 booths is charged $80 under Override amount per space — $40 for each. To charge $40 no matter how many booths they have, use Override overall total instead.
Tag a vendor to apply the fee
A vendor only gets the fee once they have the matching tag.
-
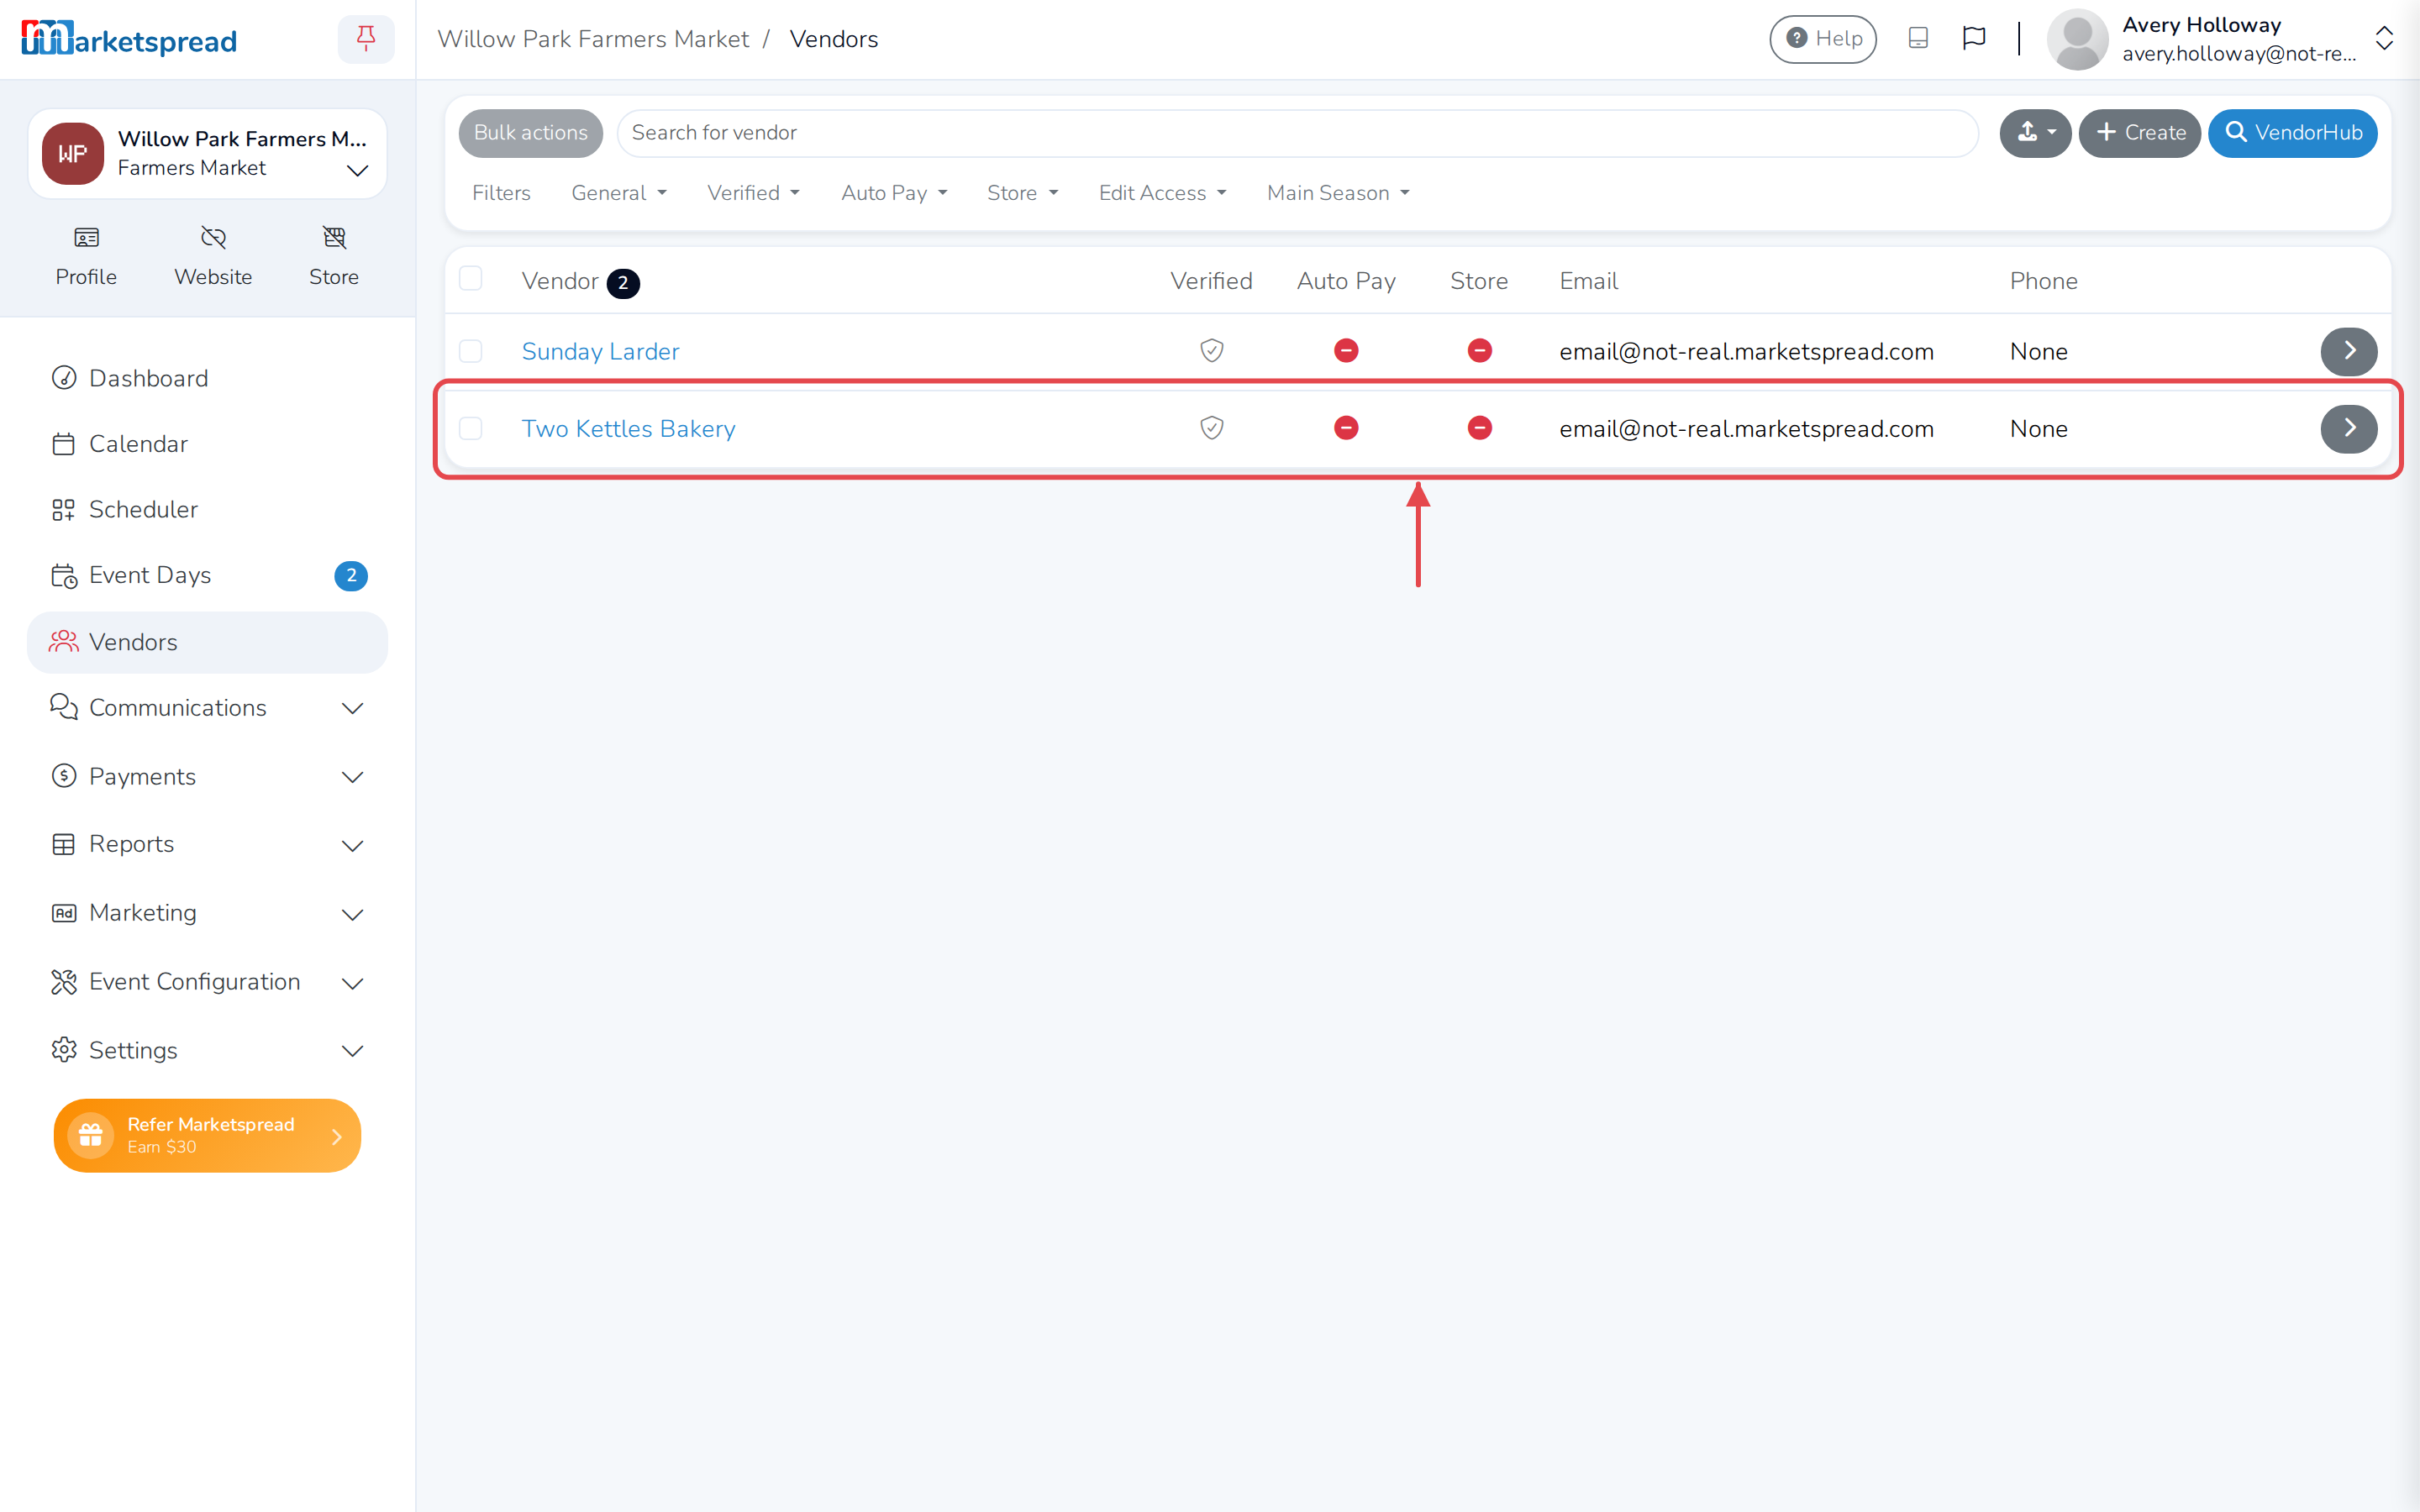
Open Vendors and select the vendor.
-
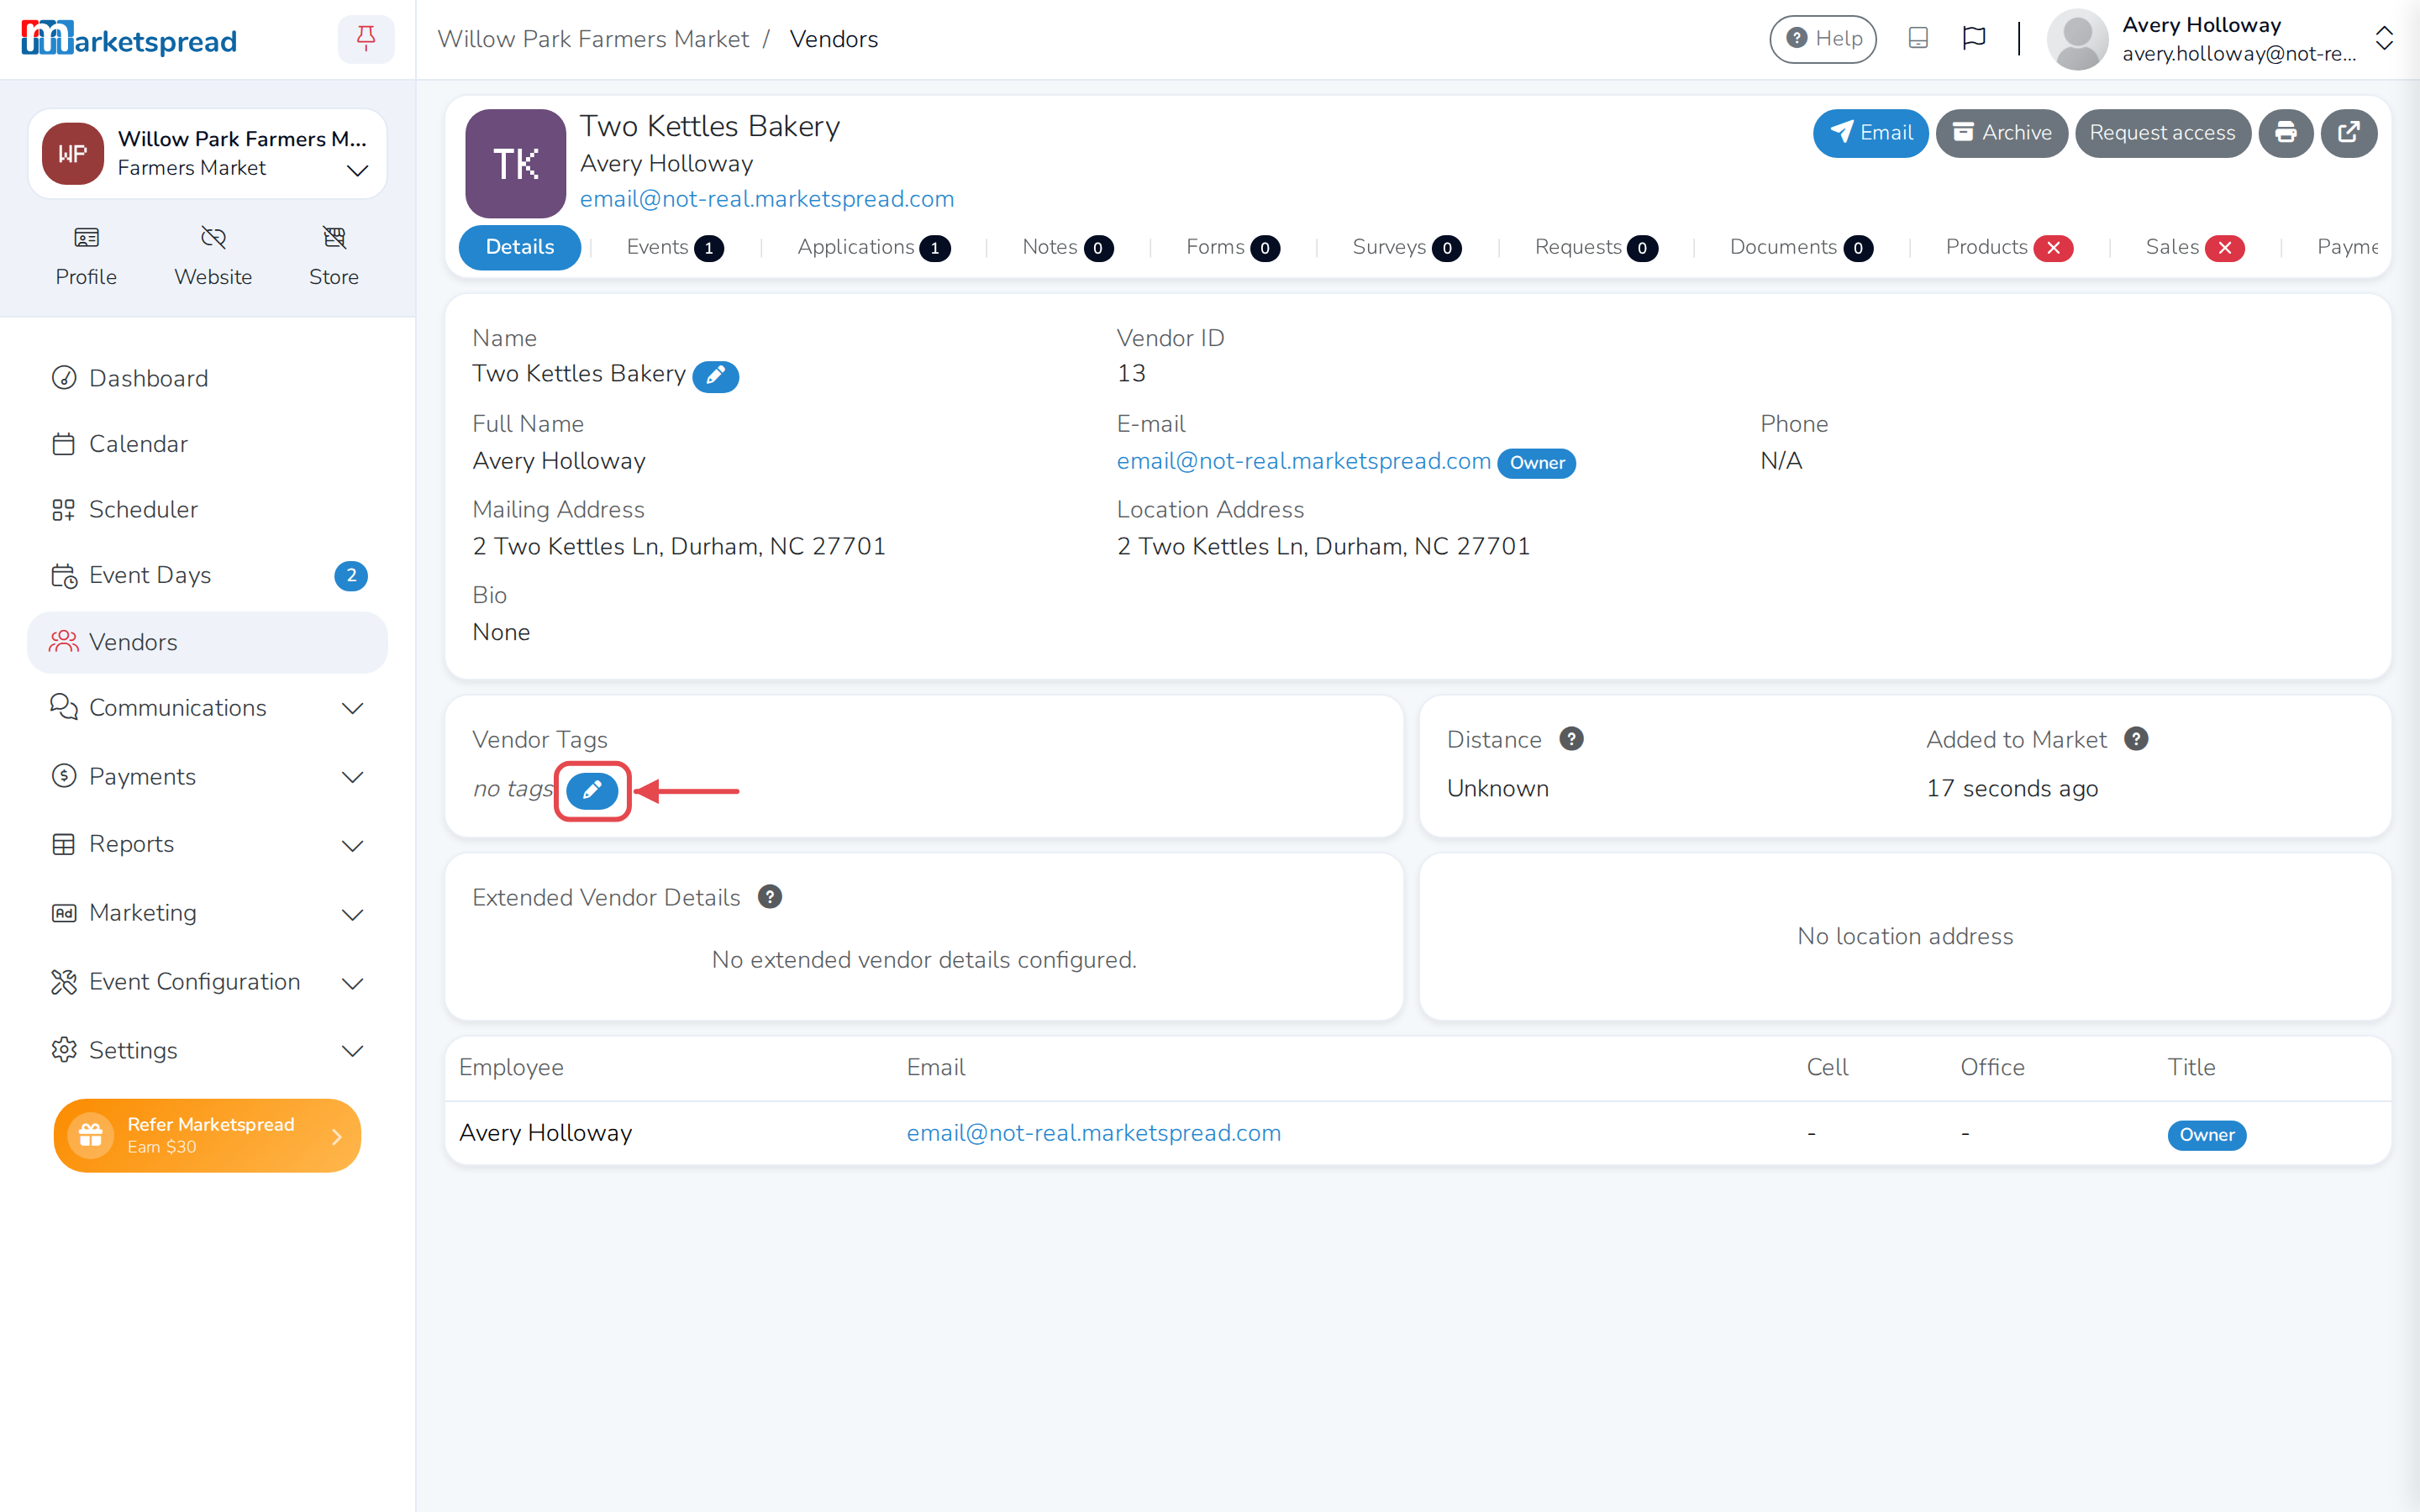
On the vendor's record, click the pencil next to Vendor Tags.
-
Type the tag's name and click Save.
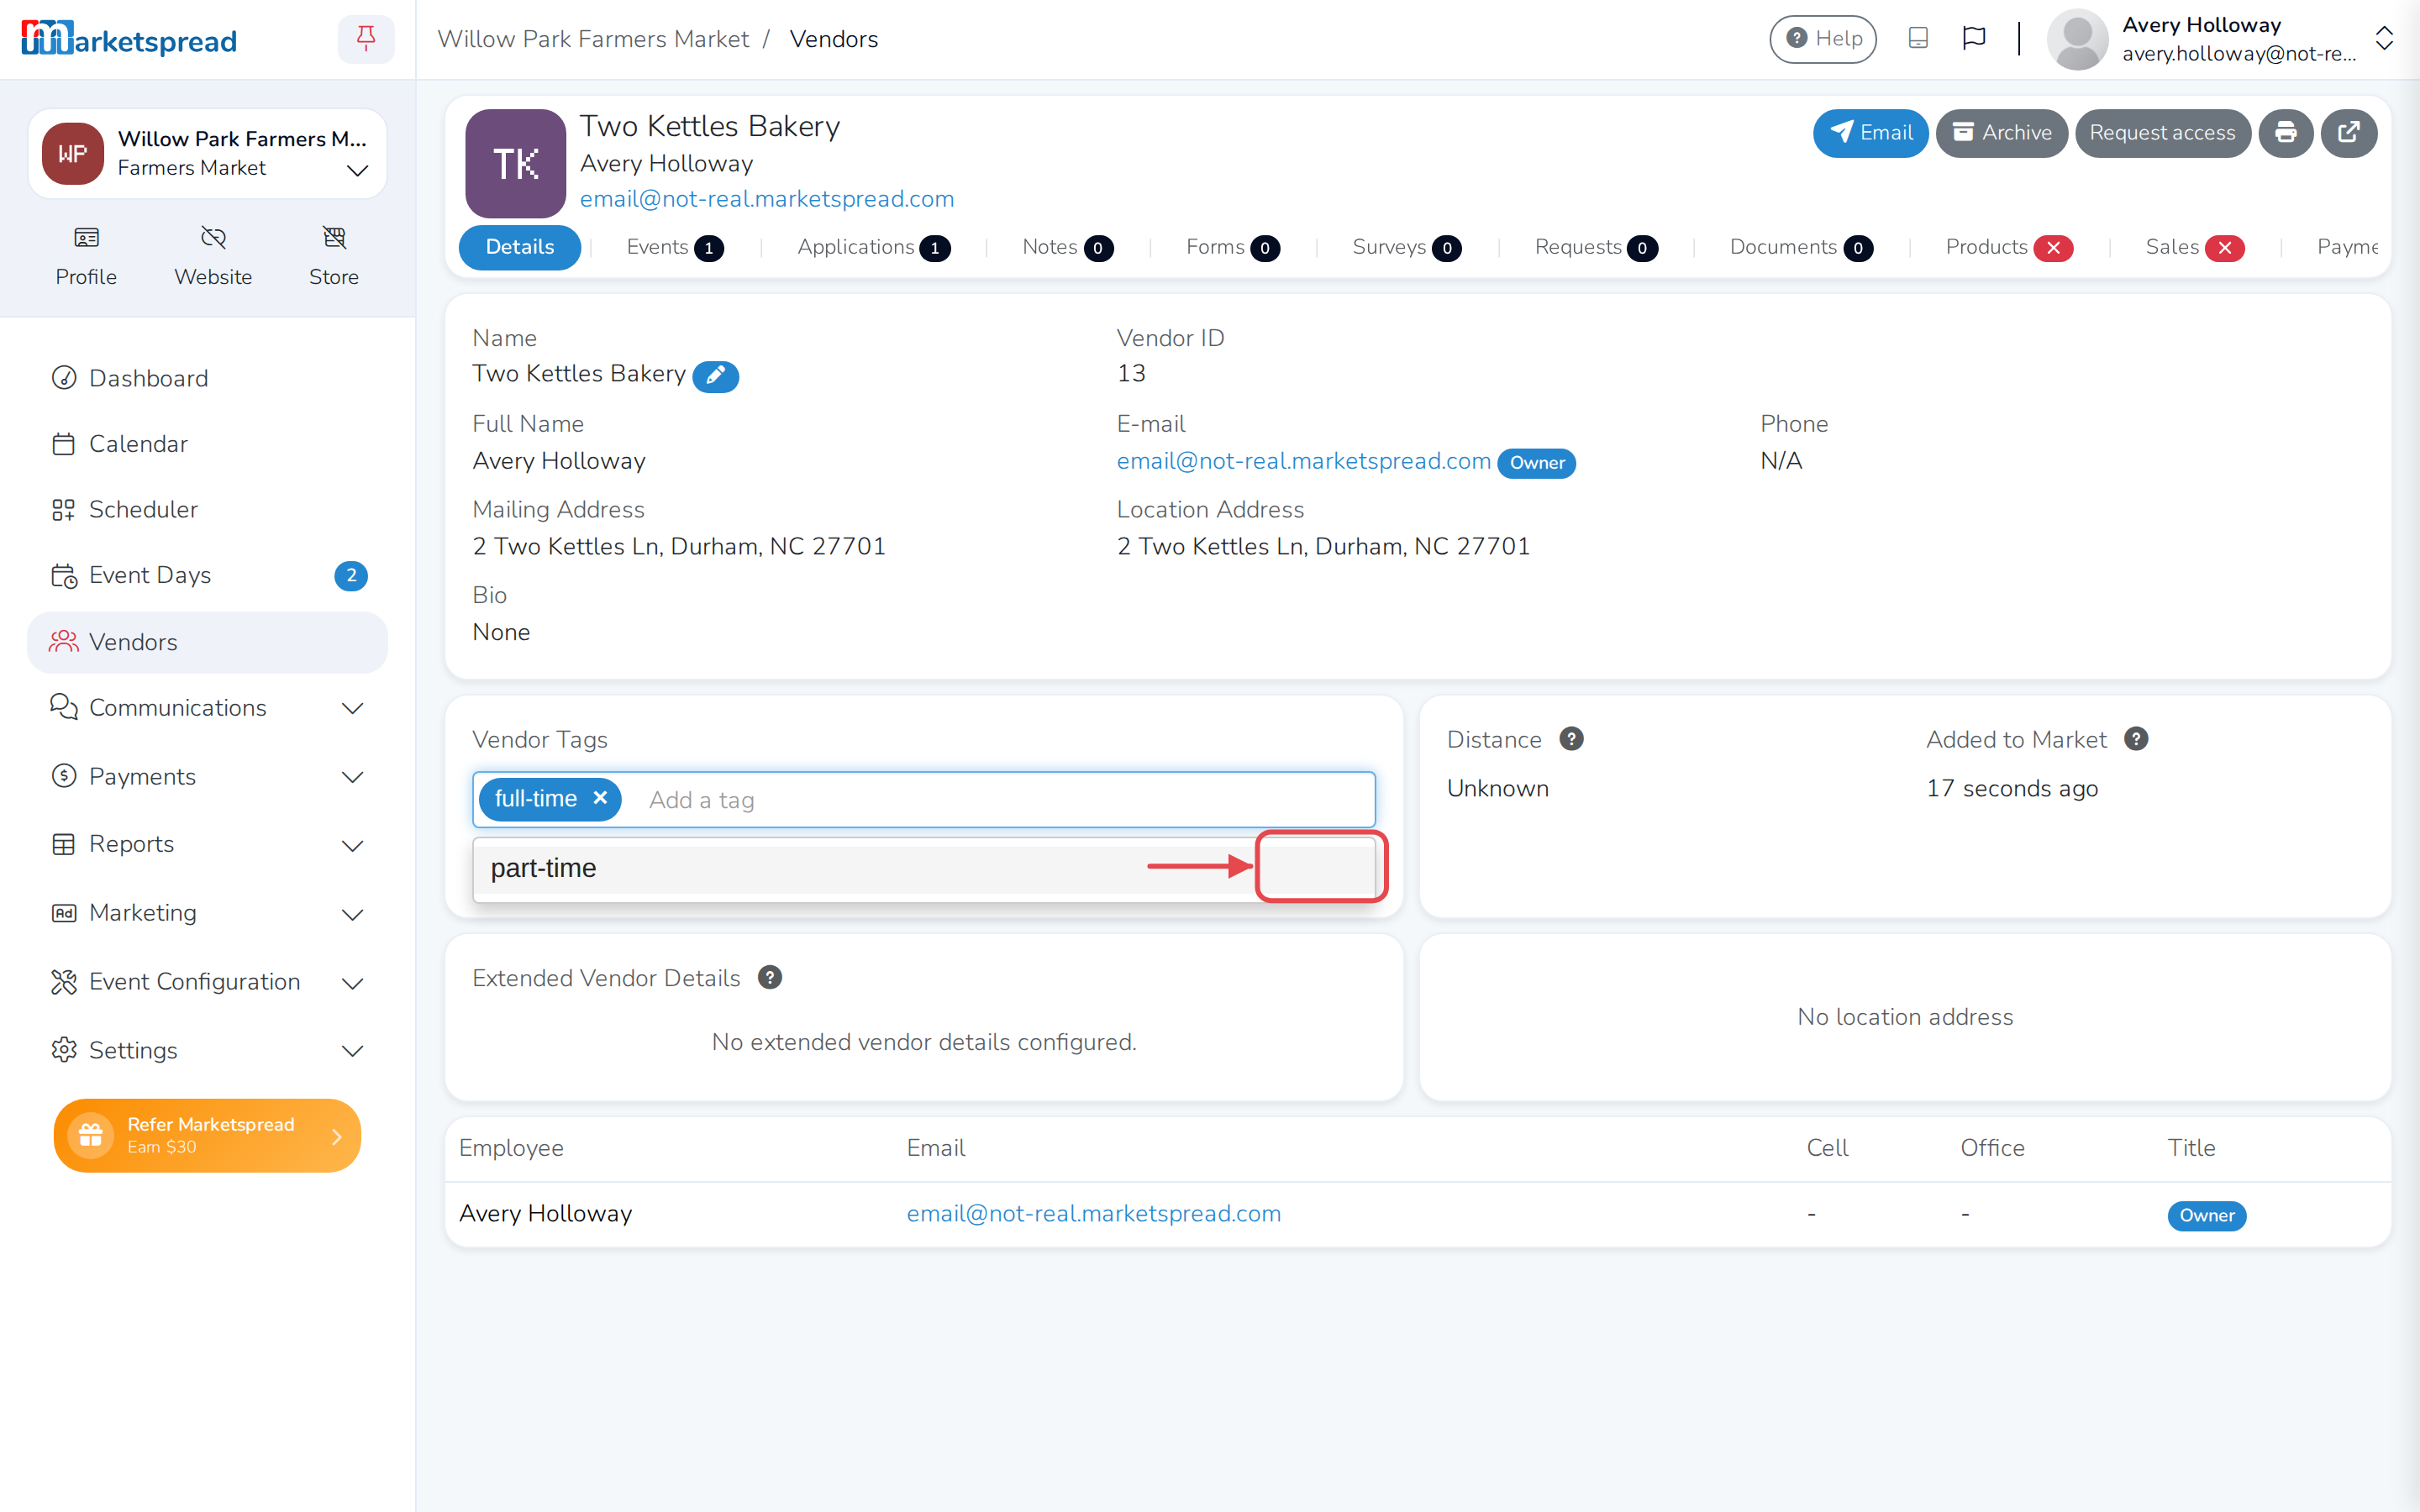
The tag now shows on the vendor's record.

-
Repeat for every vendor that needs the tag.
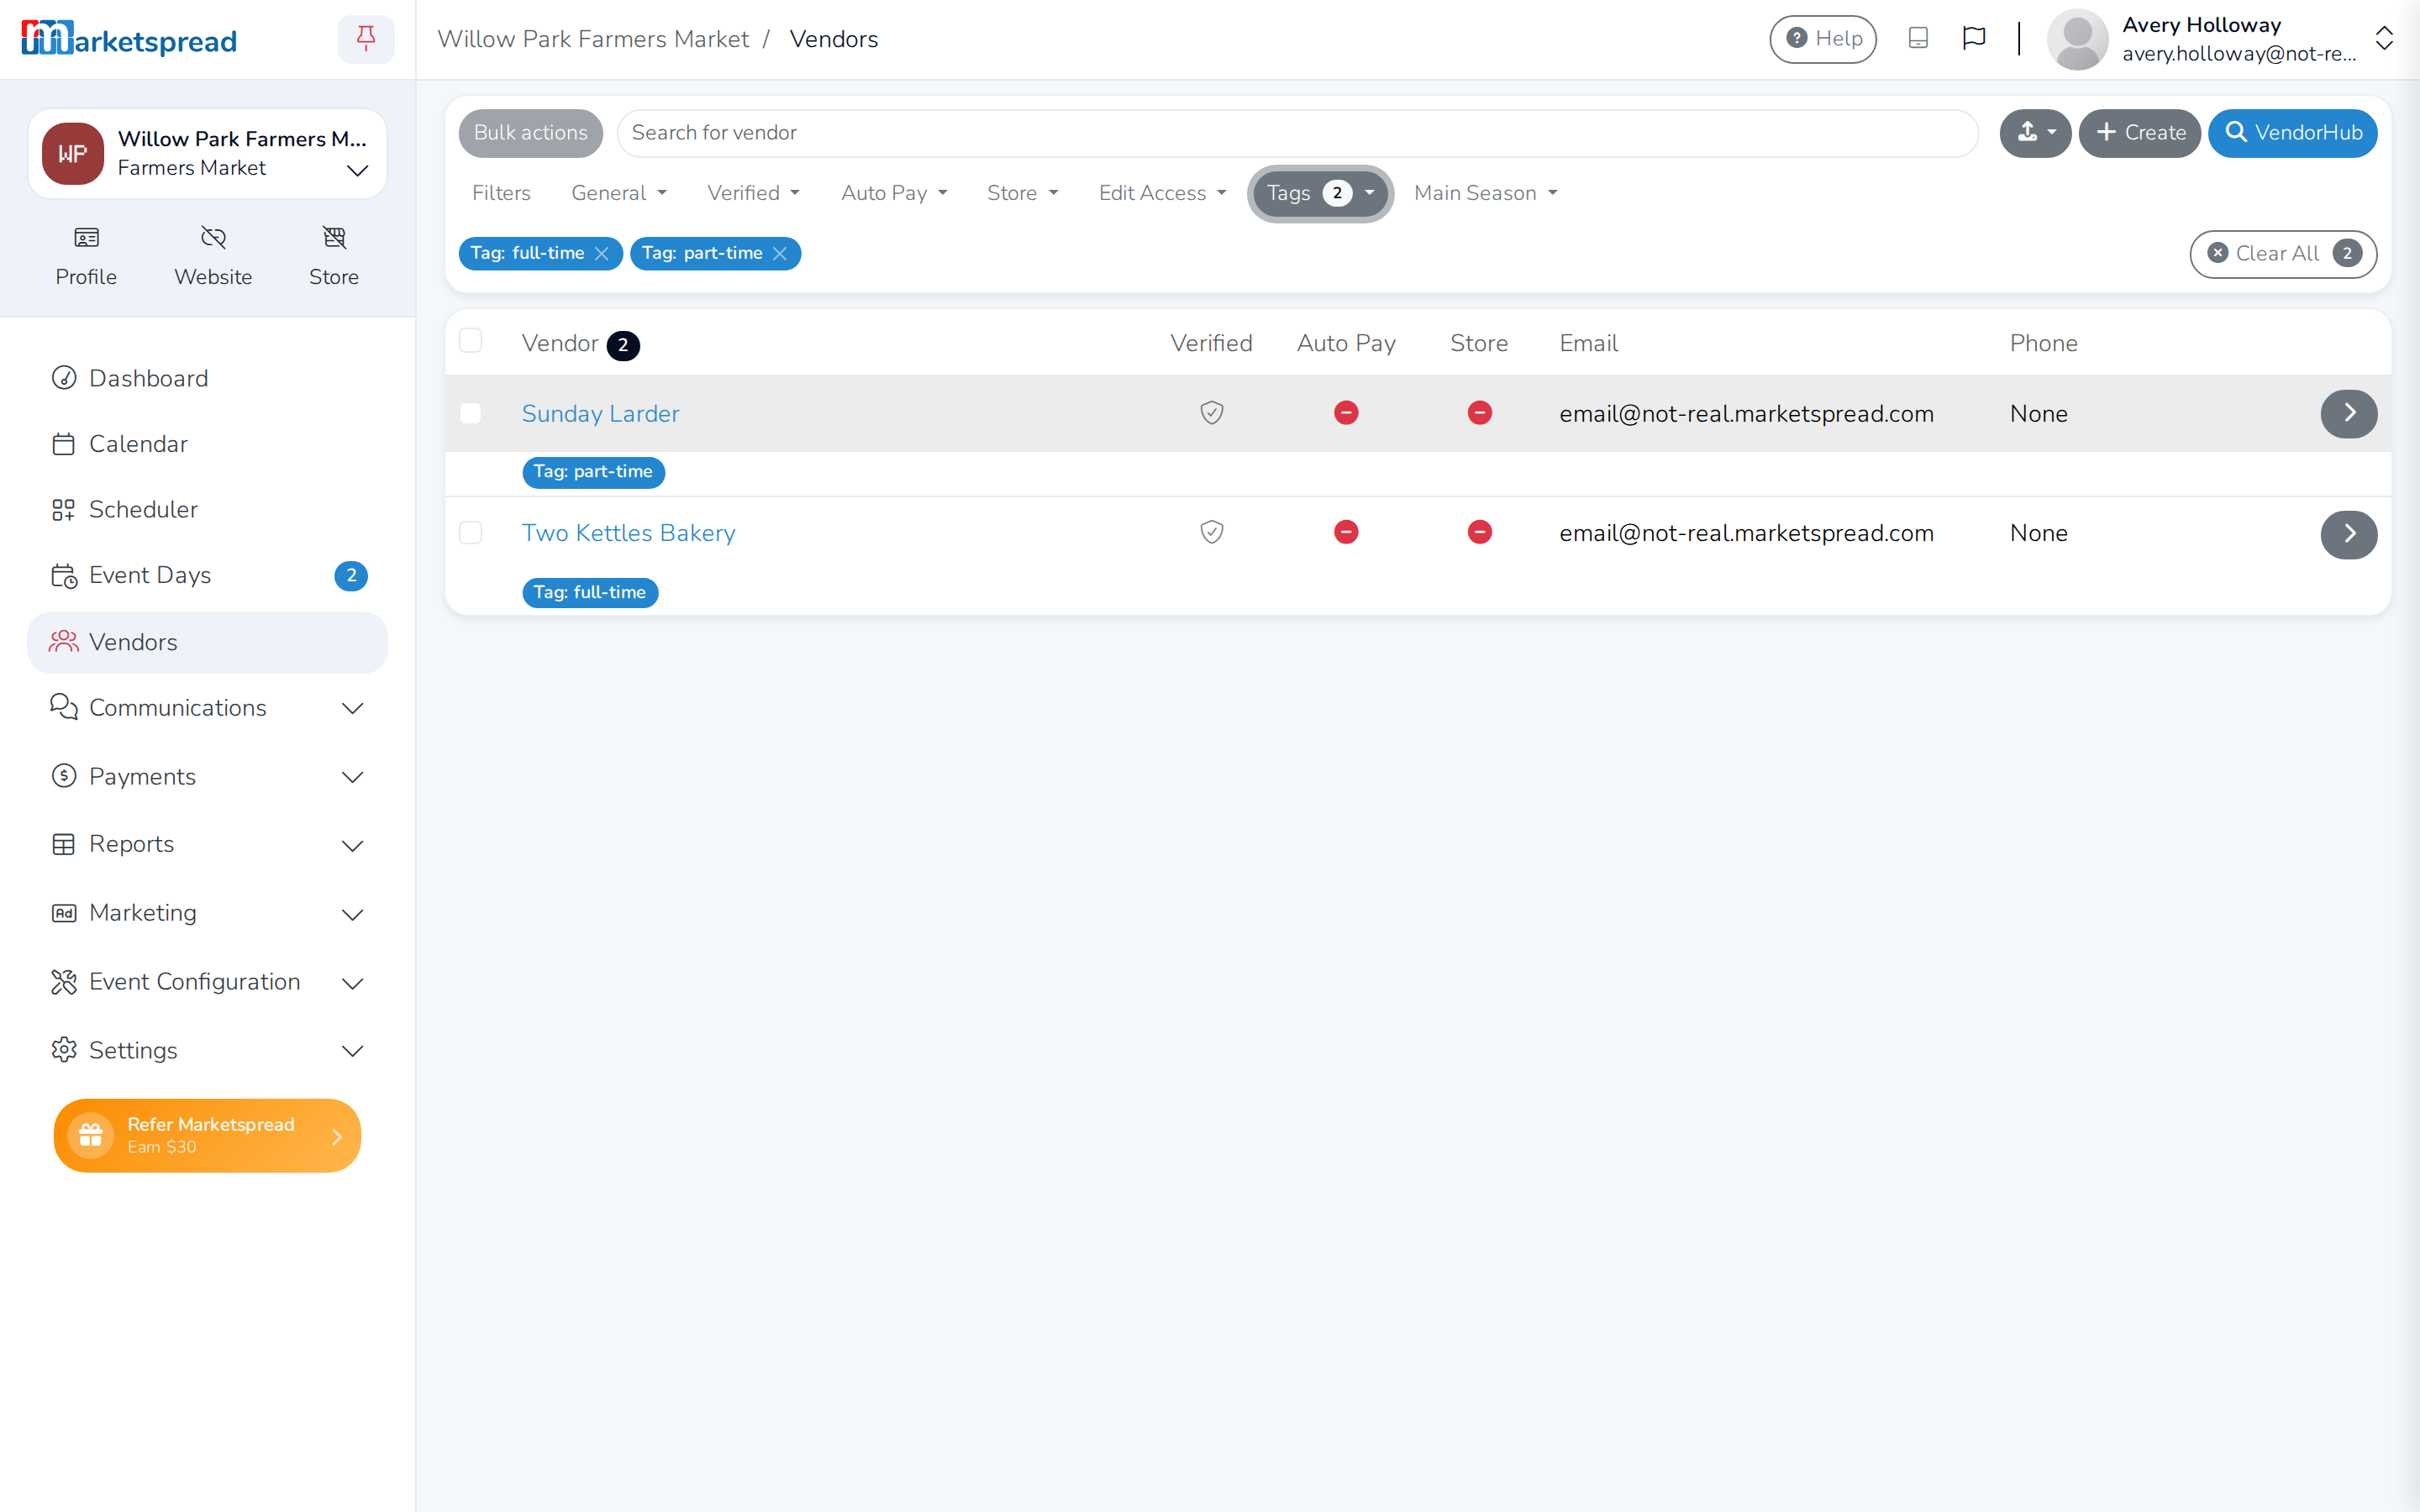
Check Tags in the filters above your vendor list to see who has which tag.
Once a tagged vendor is assigned a booth in Scheduler, the fee is added automatically. Pick the vendor, choose the Day term, click Edit, then click the day to assign it — the tag fee shows up in the commit summary as the booth's price.