


When a vendor applies to your market, Marketspread flags it for you in two places: your dashboard notifications and your vendor list. From there you open the application and move it through review. Once you approve the vendor, check the event and product choices they made.
Find a new application
Click the flag icon at the top right of your dashboard to see your notifications, including any new vendor application.
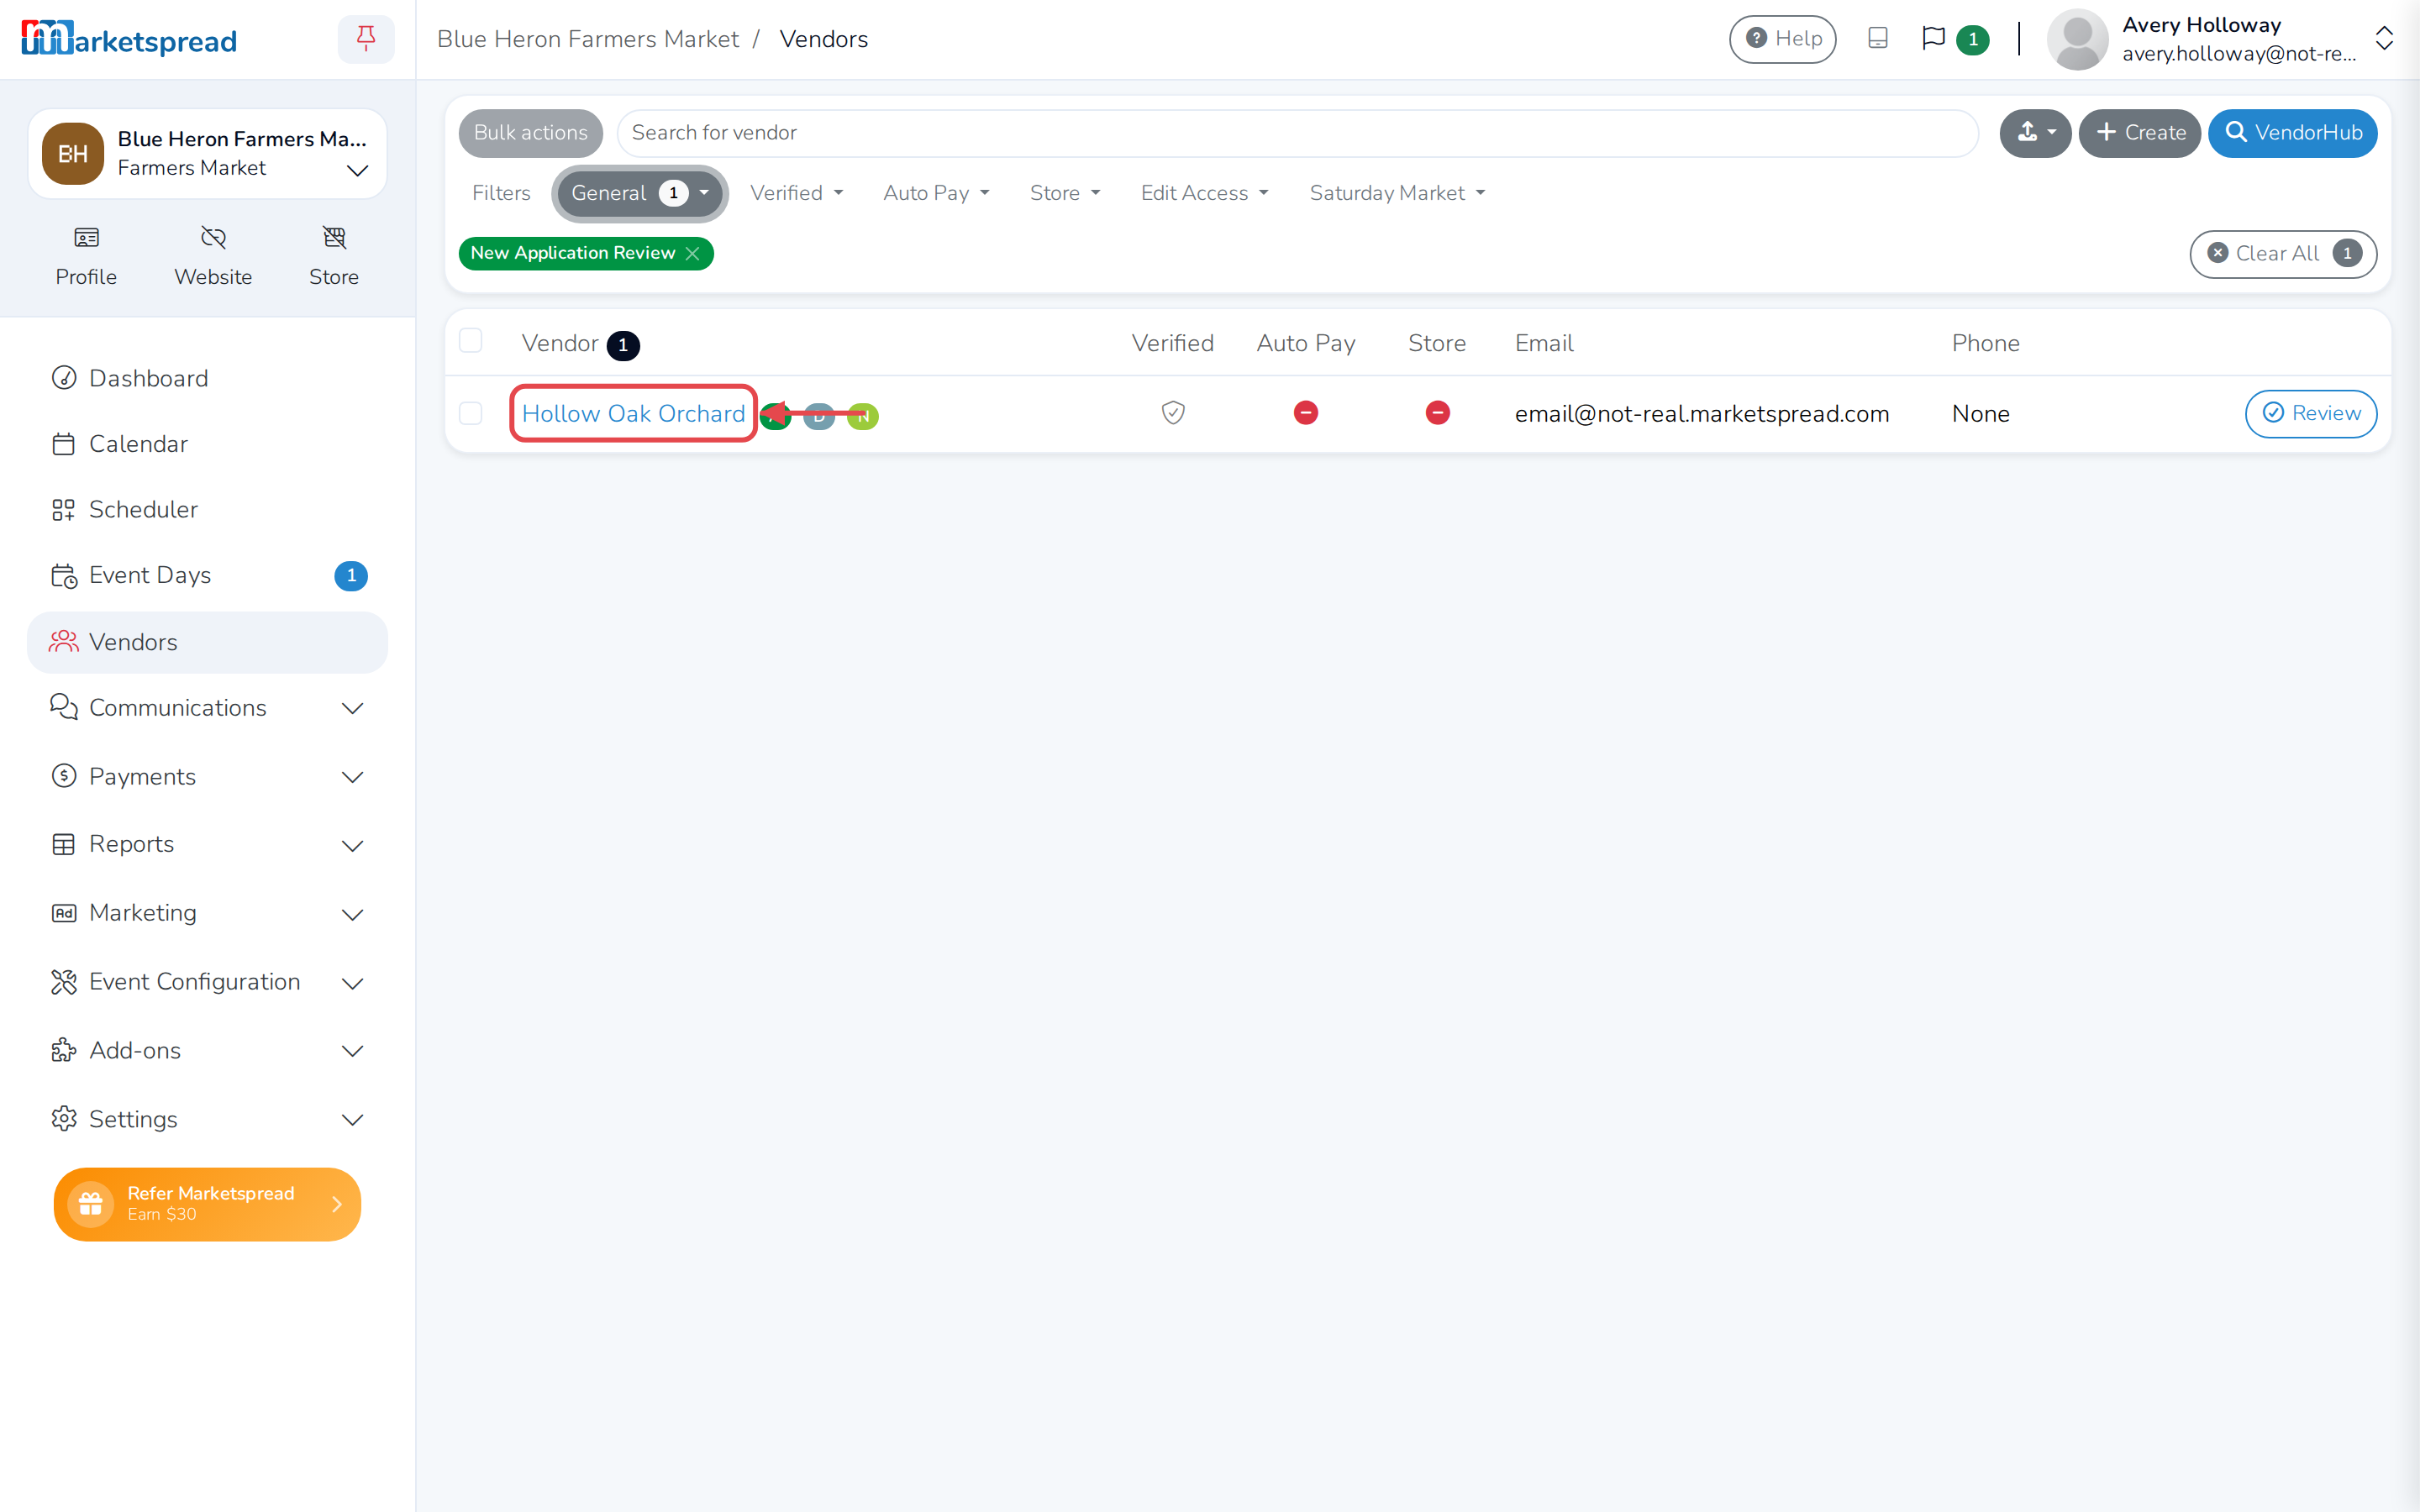
You can also find every new application at once from your vendor list. Open Vendors in your side toolbar, click General in the filter bar, then turn on New Application Review. Every vendor with an application waiting on you shows up here.
Review the application
Click Review on the vendor's row to open their Vendor Record. It has a tab for each part of their file — Details, Events, Applications, Notes, Forms, Surveys, Requests, Documents, Products, Sales and Payments.
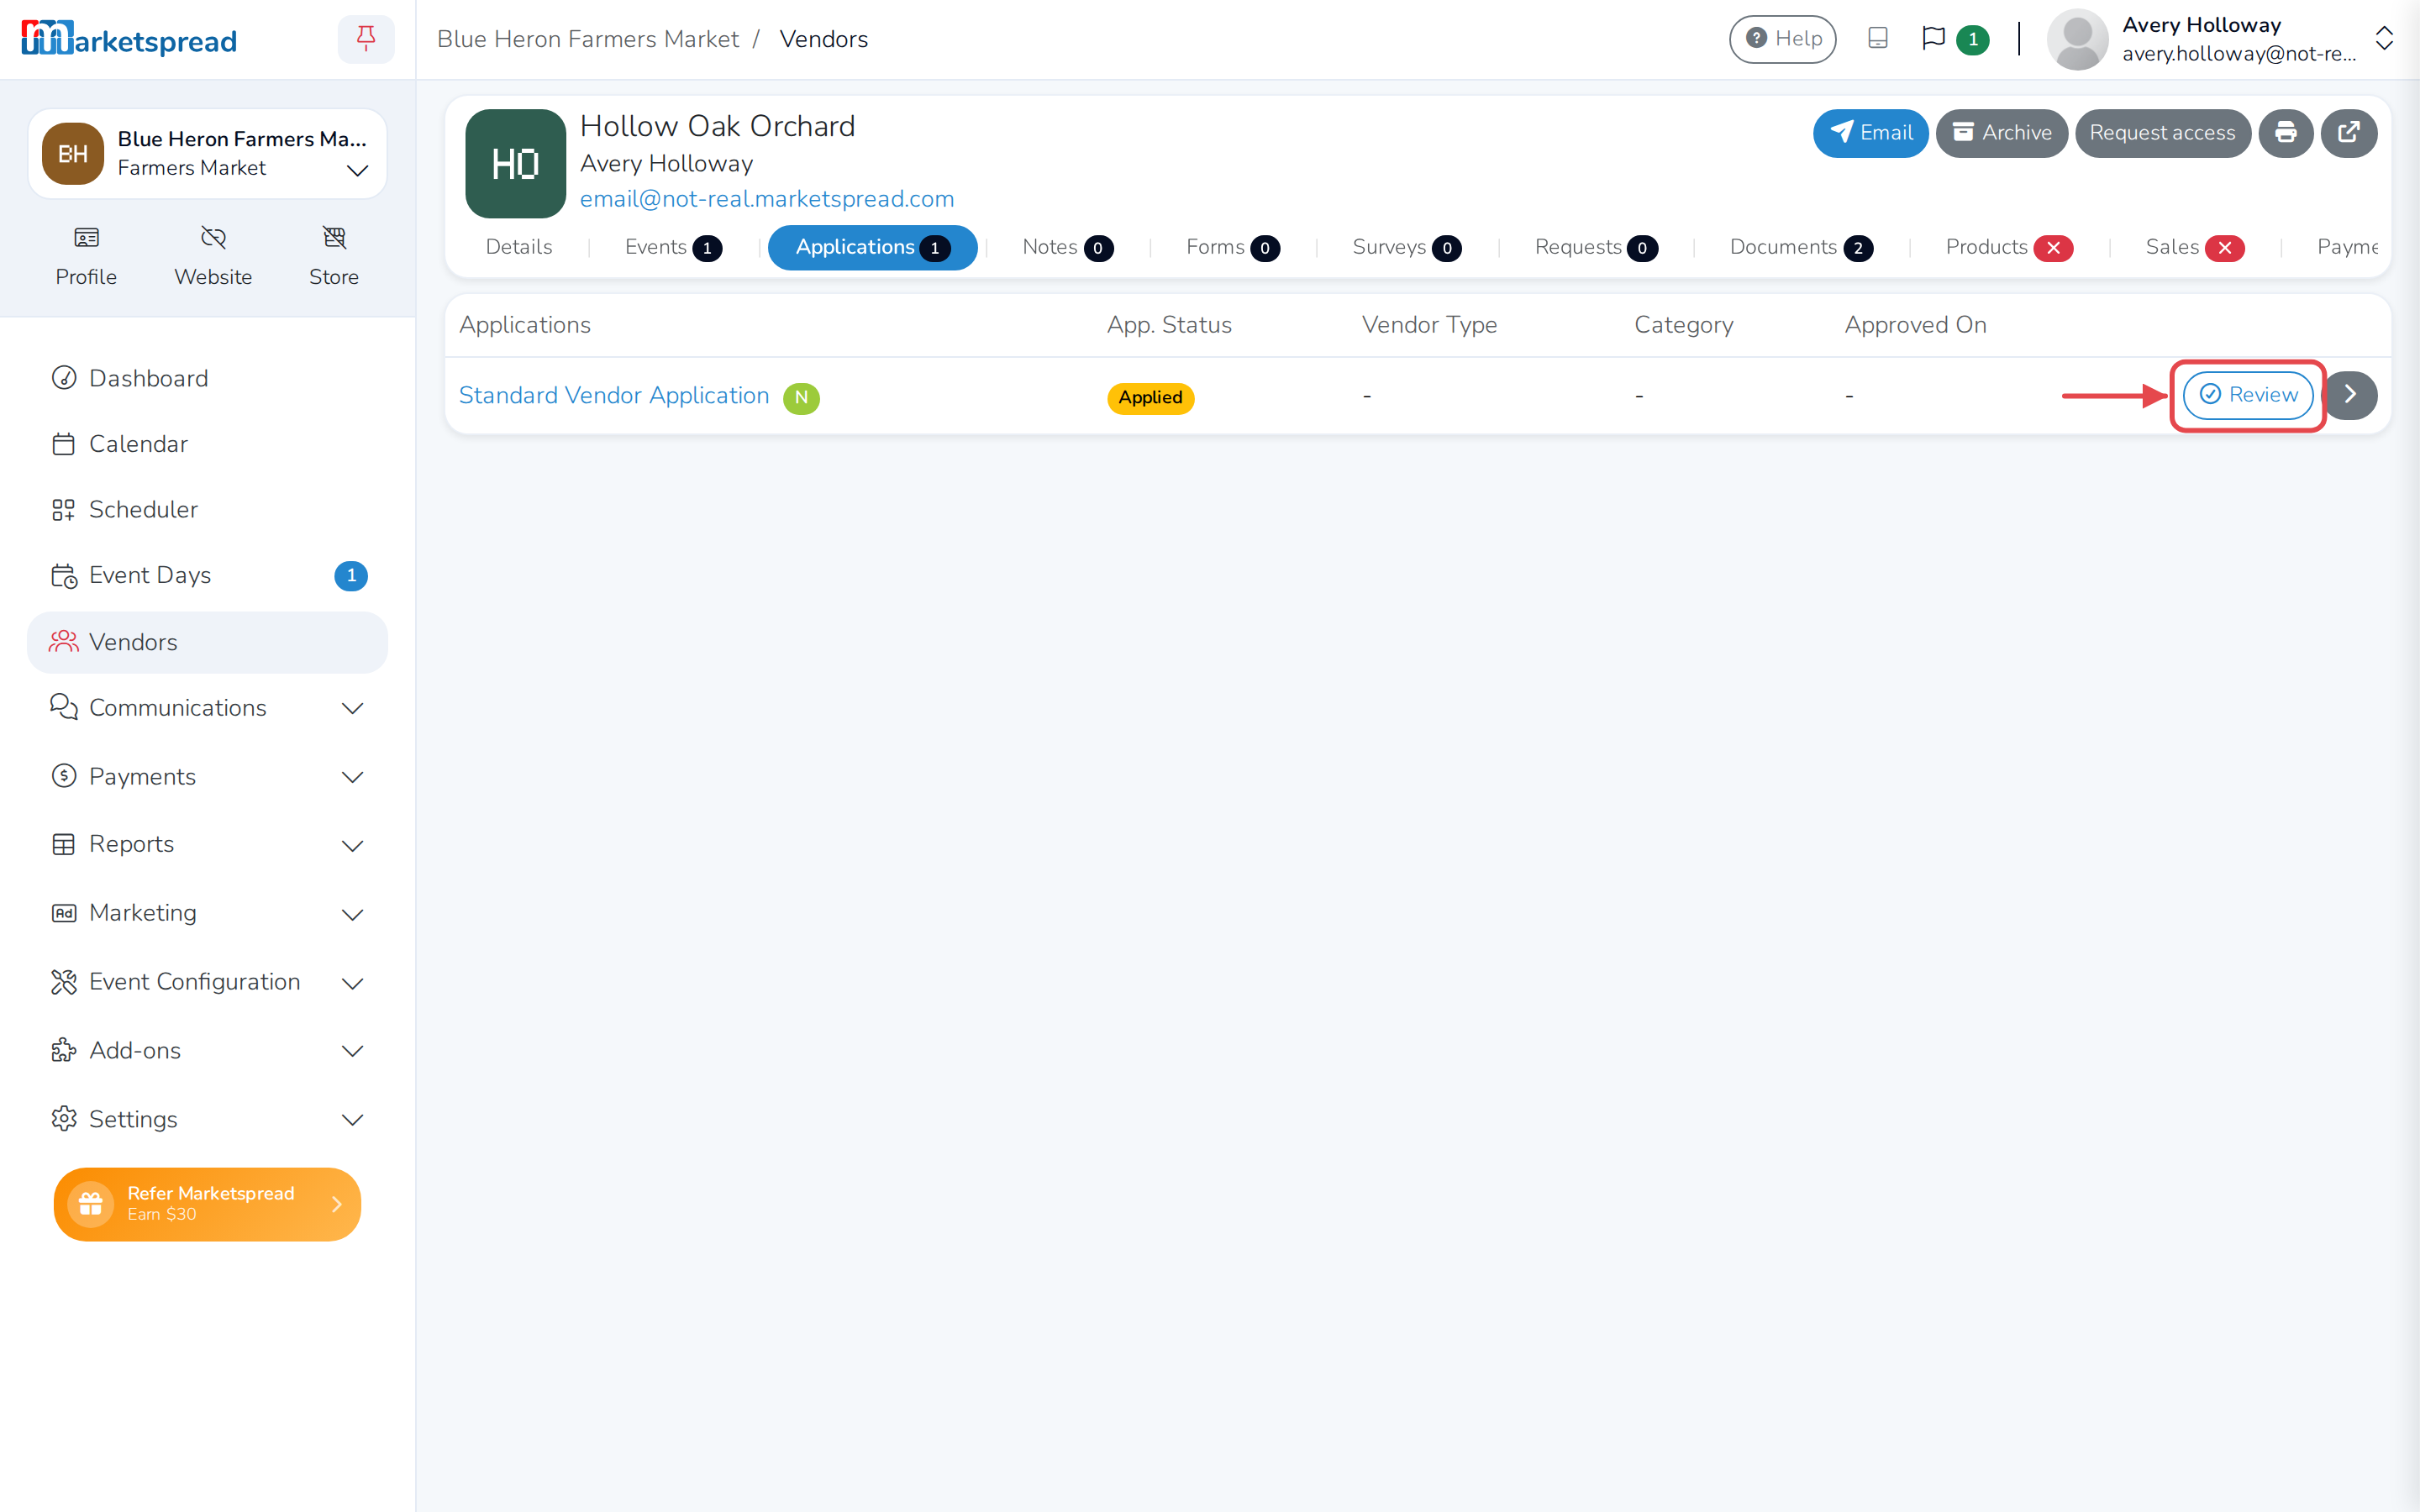
Click the Applications tab. An application with something new for you to see carries a green N badge next to its name. Click its Review button to open it.
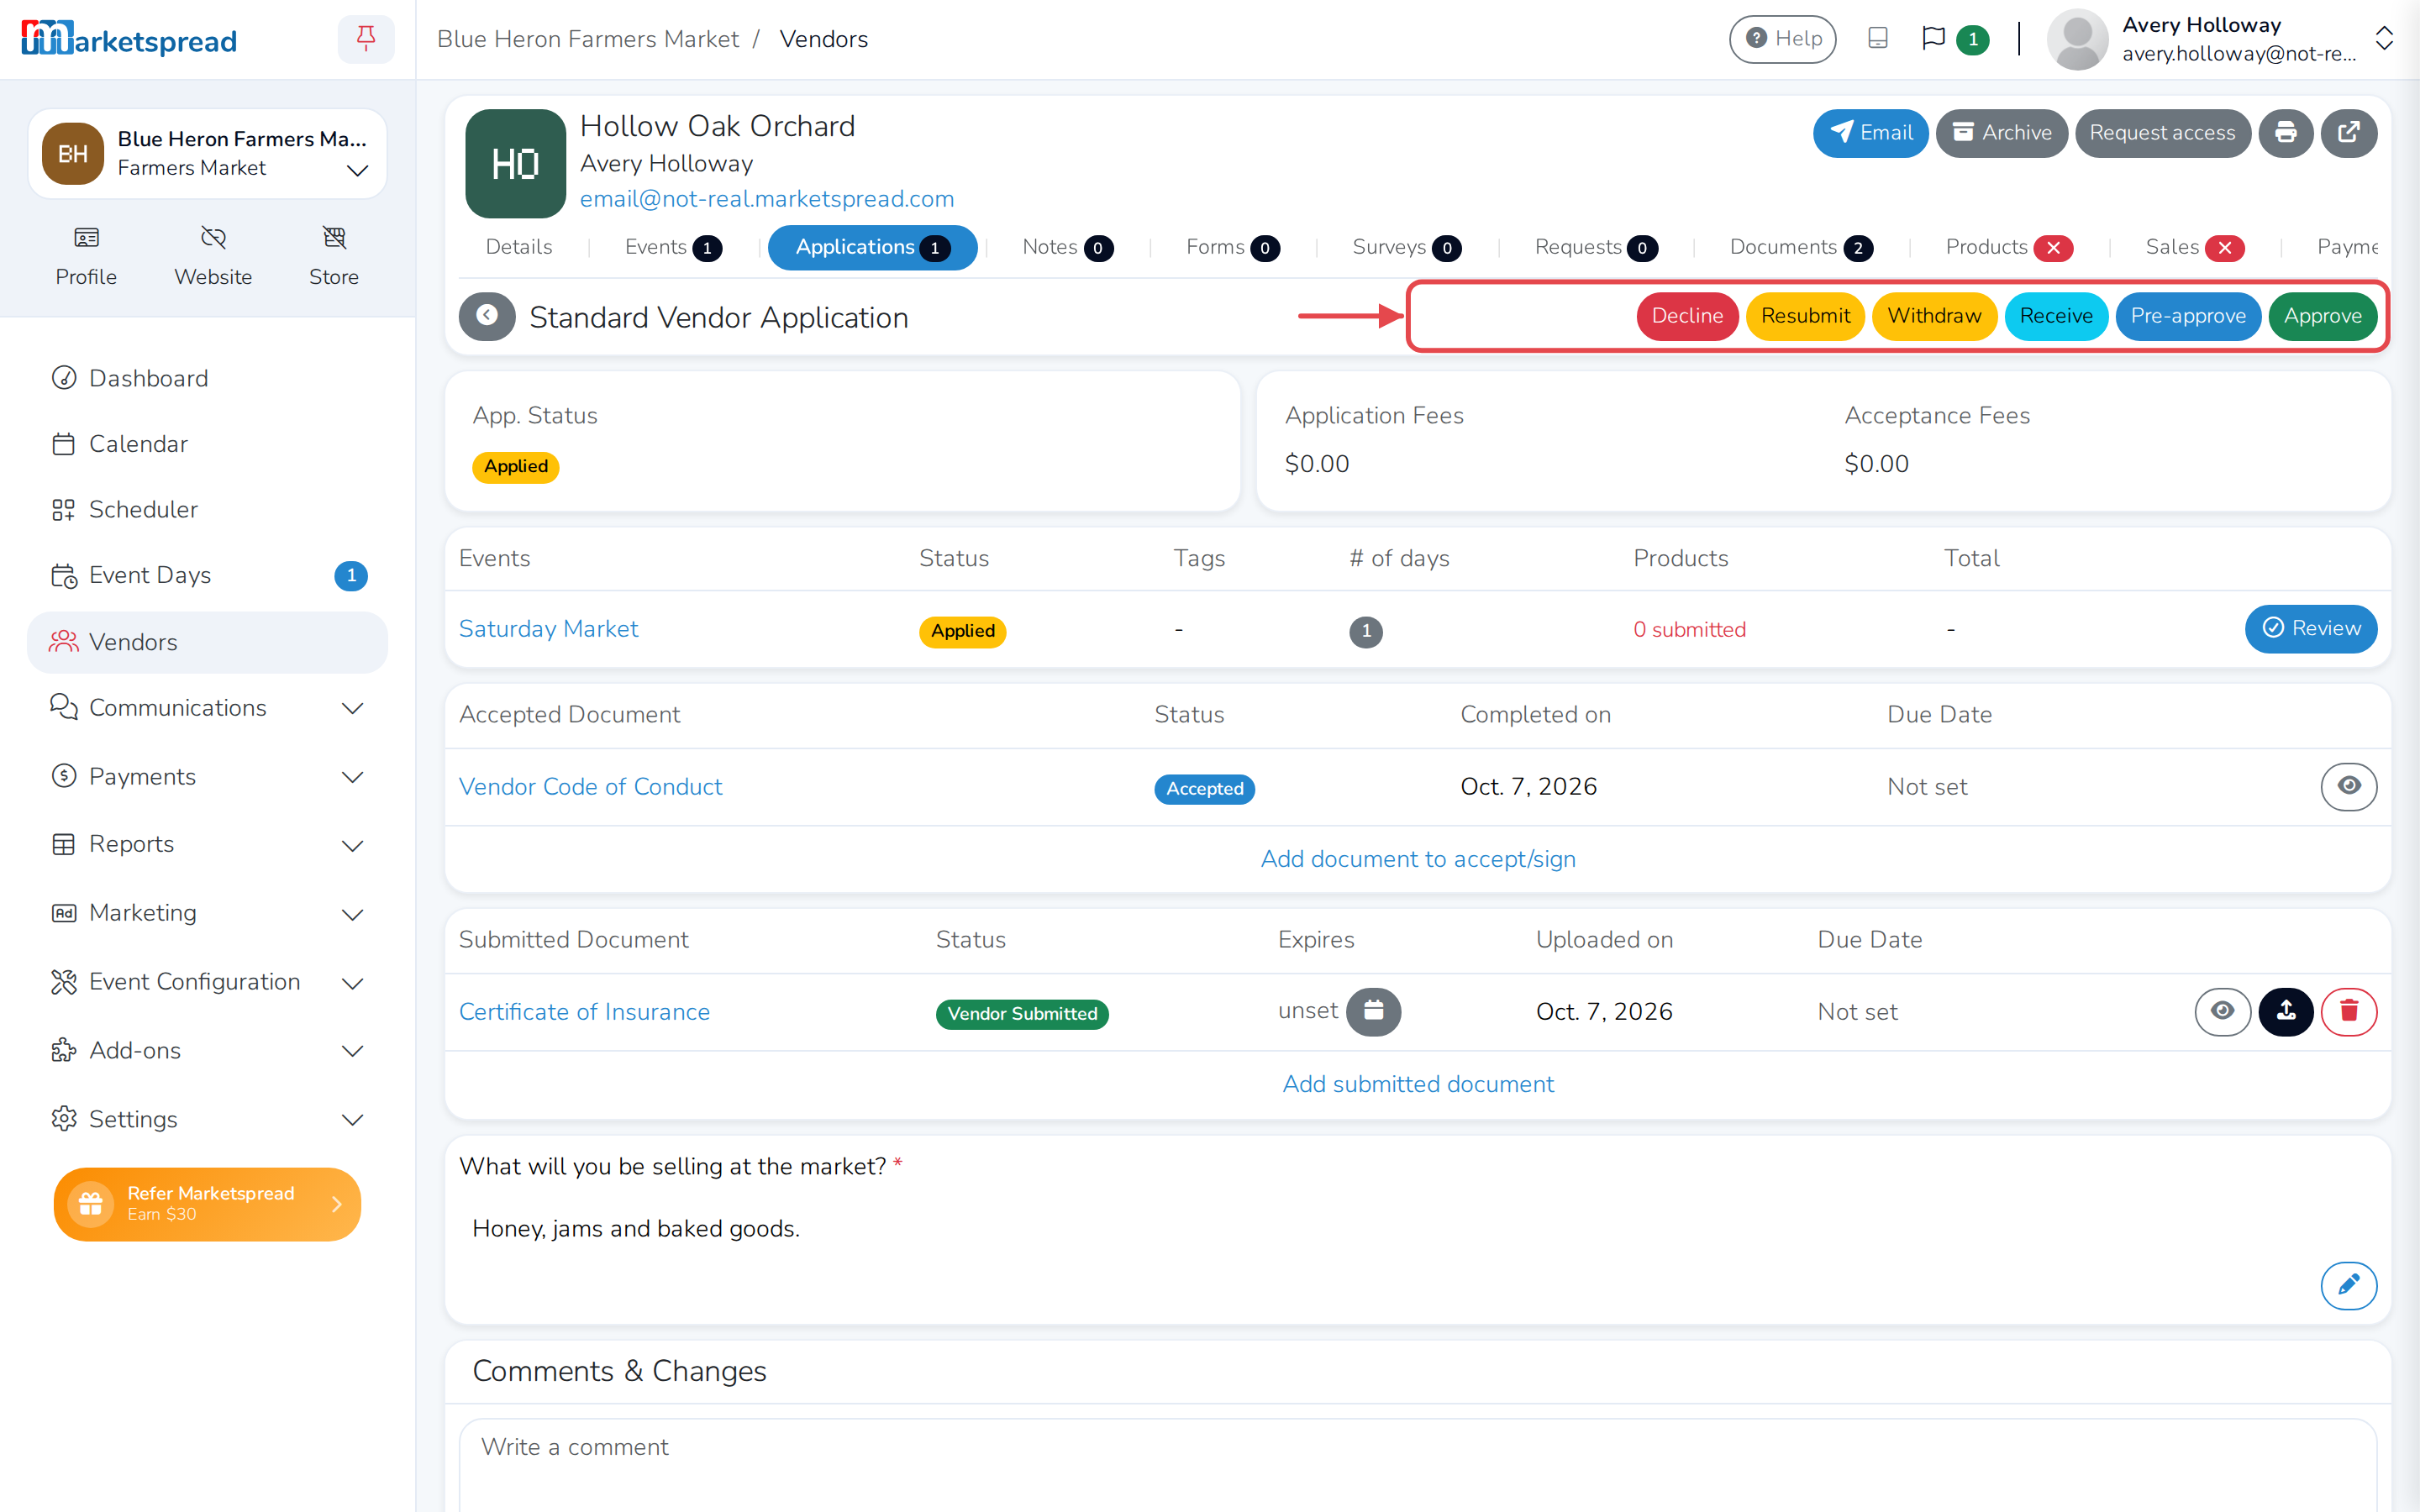
This opens the application itself, with the statuses you move it through across the top: Decline, Resubmit, Withdraw, Receive, Pre-approve and Approve. See Vendor Application Status Guide for what each one means and when to use it. A common pattern is Receive first to let the vendor know you have it, then Approve or Decline once you have looked it over.
Vendors get an email
Changing a vendor's status emails them and posts a notification to their dashboard. To change the wording, see Customize status messages.
Check their event day status
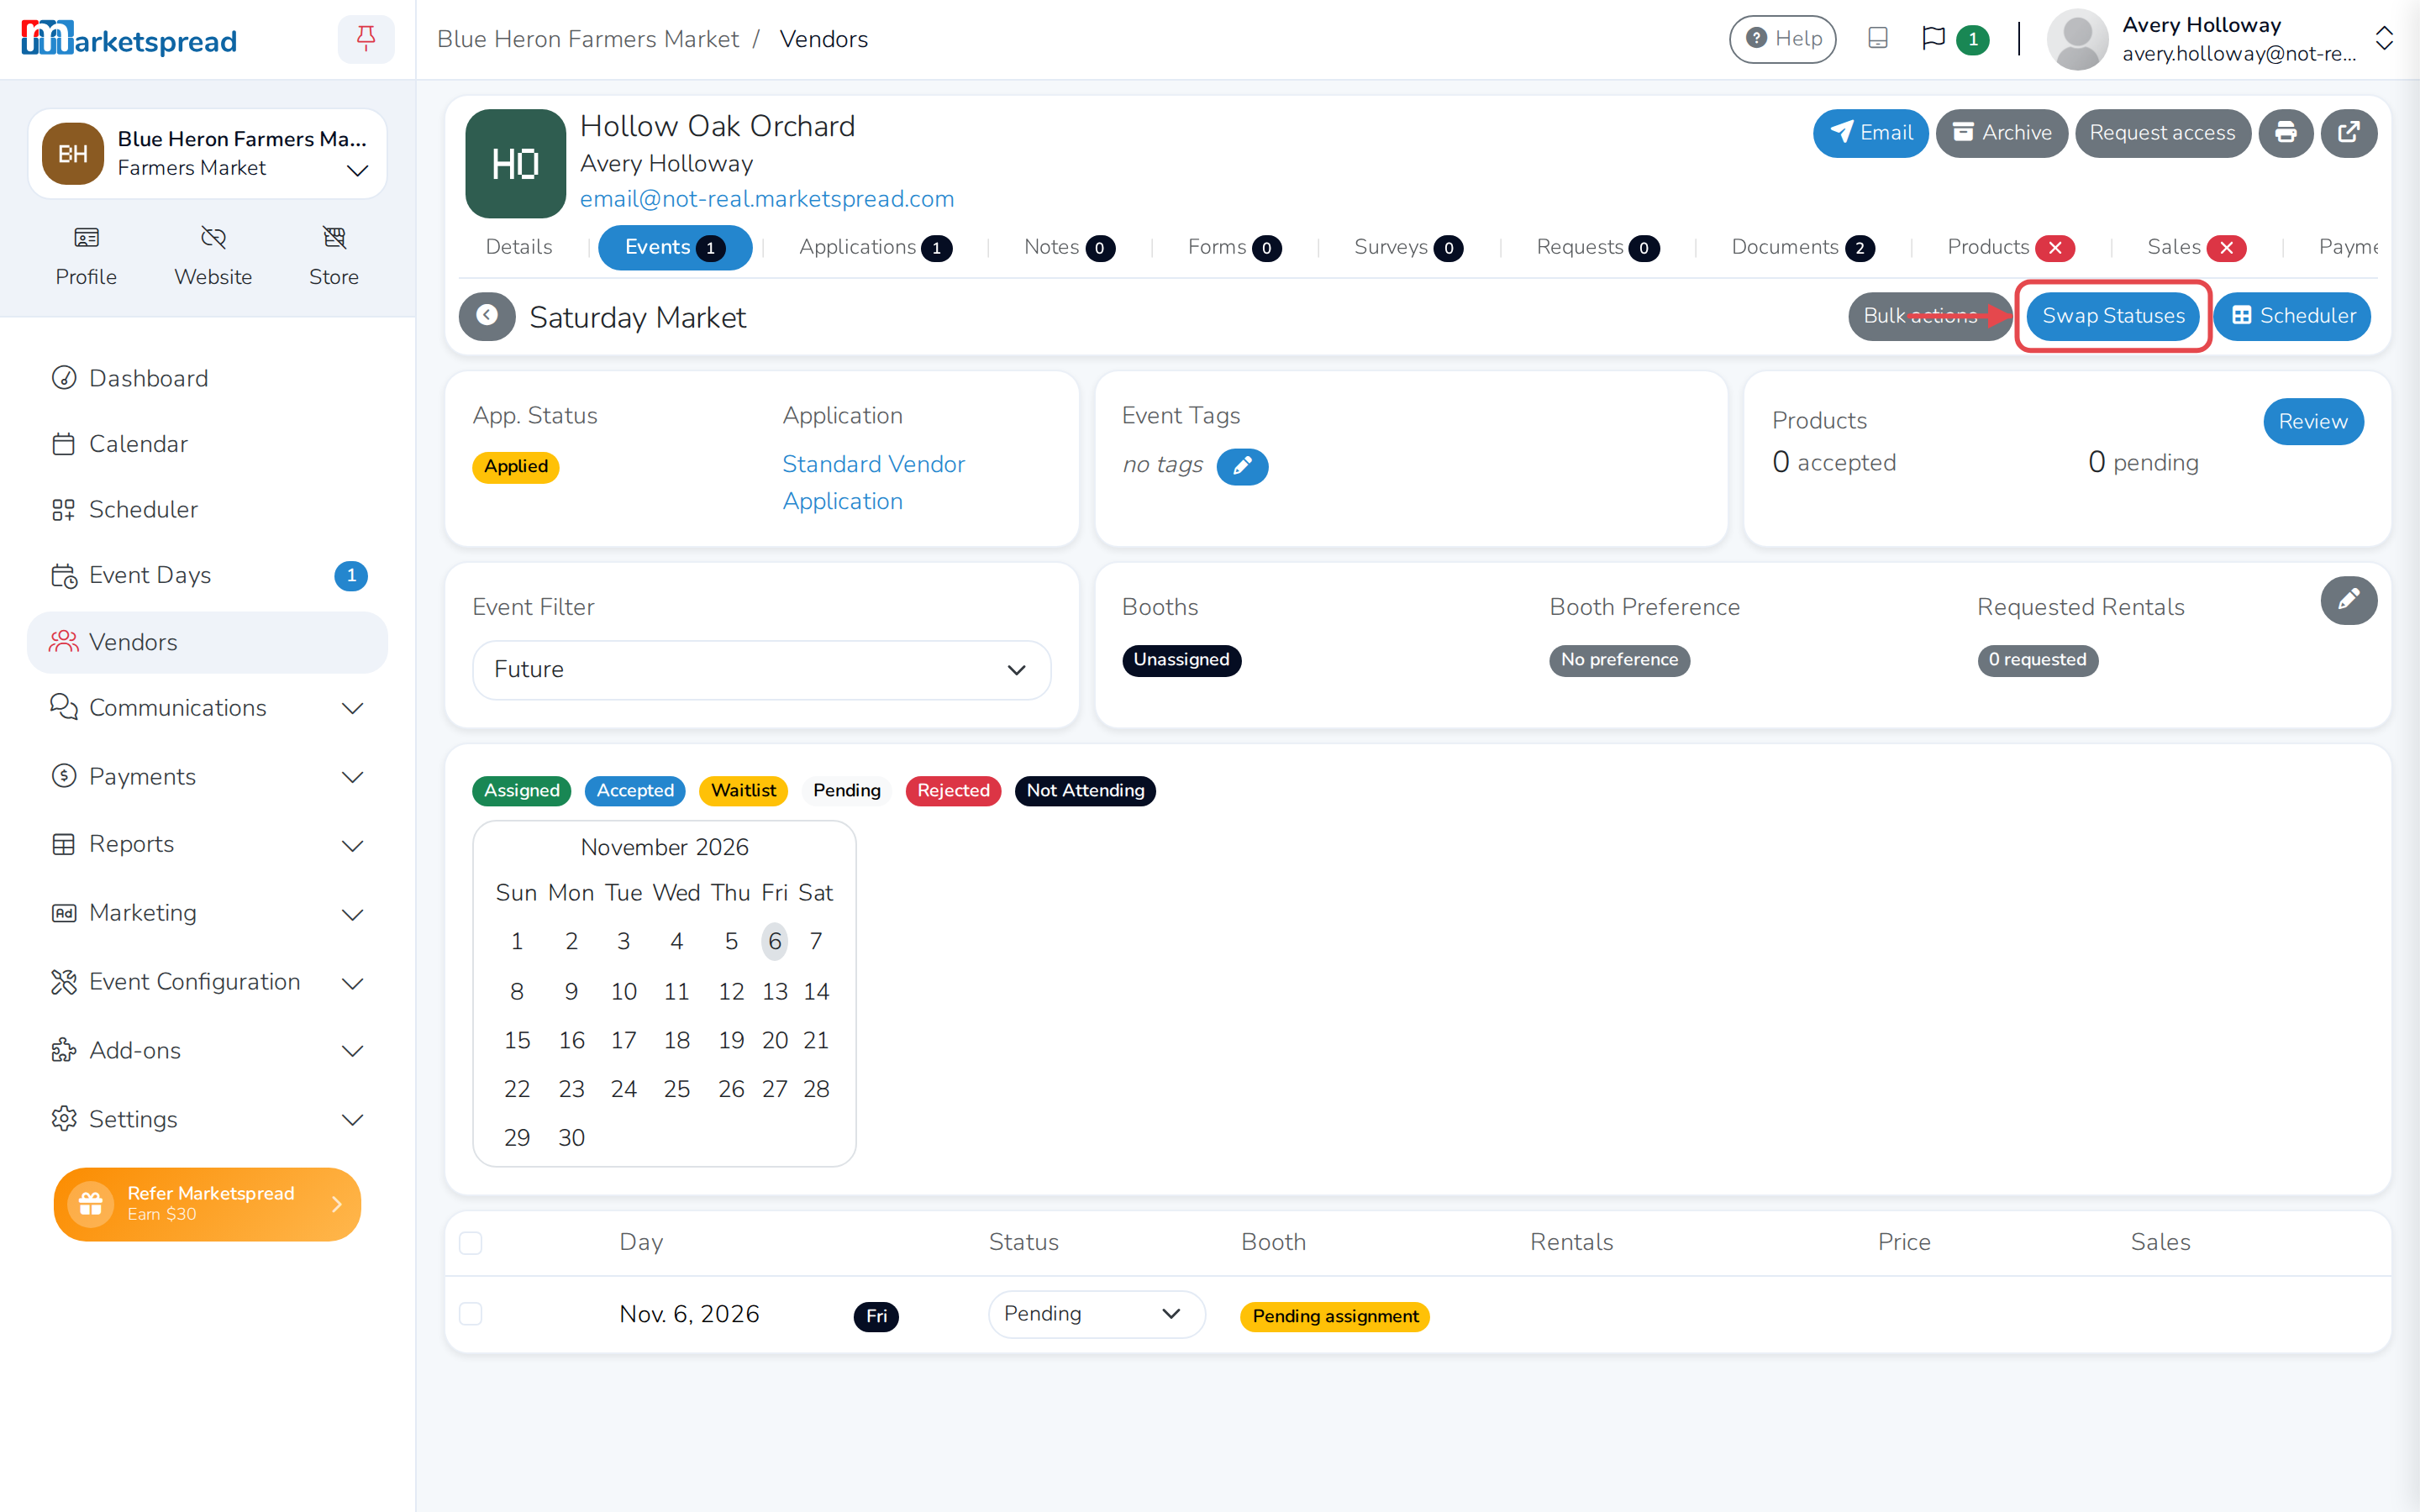
The application also lists the event they applied to, under Events. Click its own Review button (or the Events tab on the Vendor Record) to see their day selections.
From there you can set their status for each day of the event, separately from their overall application status — Pending, Waitlist, Accepted, Rejected or Not Attending — one day at a time or in bulk with Swap Statuses. The vendor sees each day's status on their own dashboard.
Once their days are set, assign them a space with Scheduler — see Assigning vendor booths with Scheduler.
Review their product selections
If you turn on Review vendor products for the event, the same screen also shows a Products card with how many of the vendor's products are accepted and how many are still pending. Click its Review button to accept or reject each one, then click Save.