


Booking a vendor into a booth in Scheduler creates a draft invoice — private
until you release it. Automatic invoicing releases it for you, on a schedule,
instead of you sending it by hand.
You can:
- Turn on automatic release for an event's draft invoices
- Choose when invoices are due
- Choose when auto-pay charges a vendor who has it turned on
- Check when a draft invoice will release
How draft invoices work
Booking a vendor into a priced booth creates a draft invoice. It is
private to your market or event team — the vendor never sees it — and you can
edit or delete it freely, any time, until it is released.
A draft becomes a real invoice one of two ways: you release it by hand (see
Invoice guide: manual and via Scheduler),
or it releases on its own once you turn on the Draft auto-release window,
below.
Here is what booking a vendor looks like:
-
In Scheduler, select the vendor, click Edit, select a booth, then click
Commit.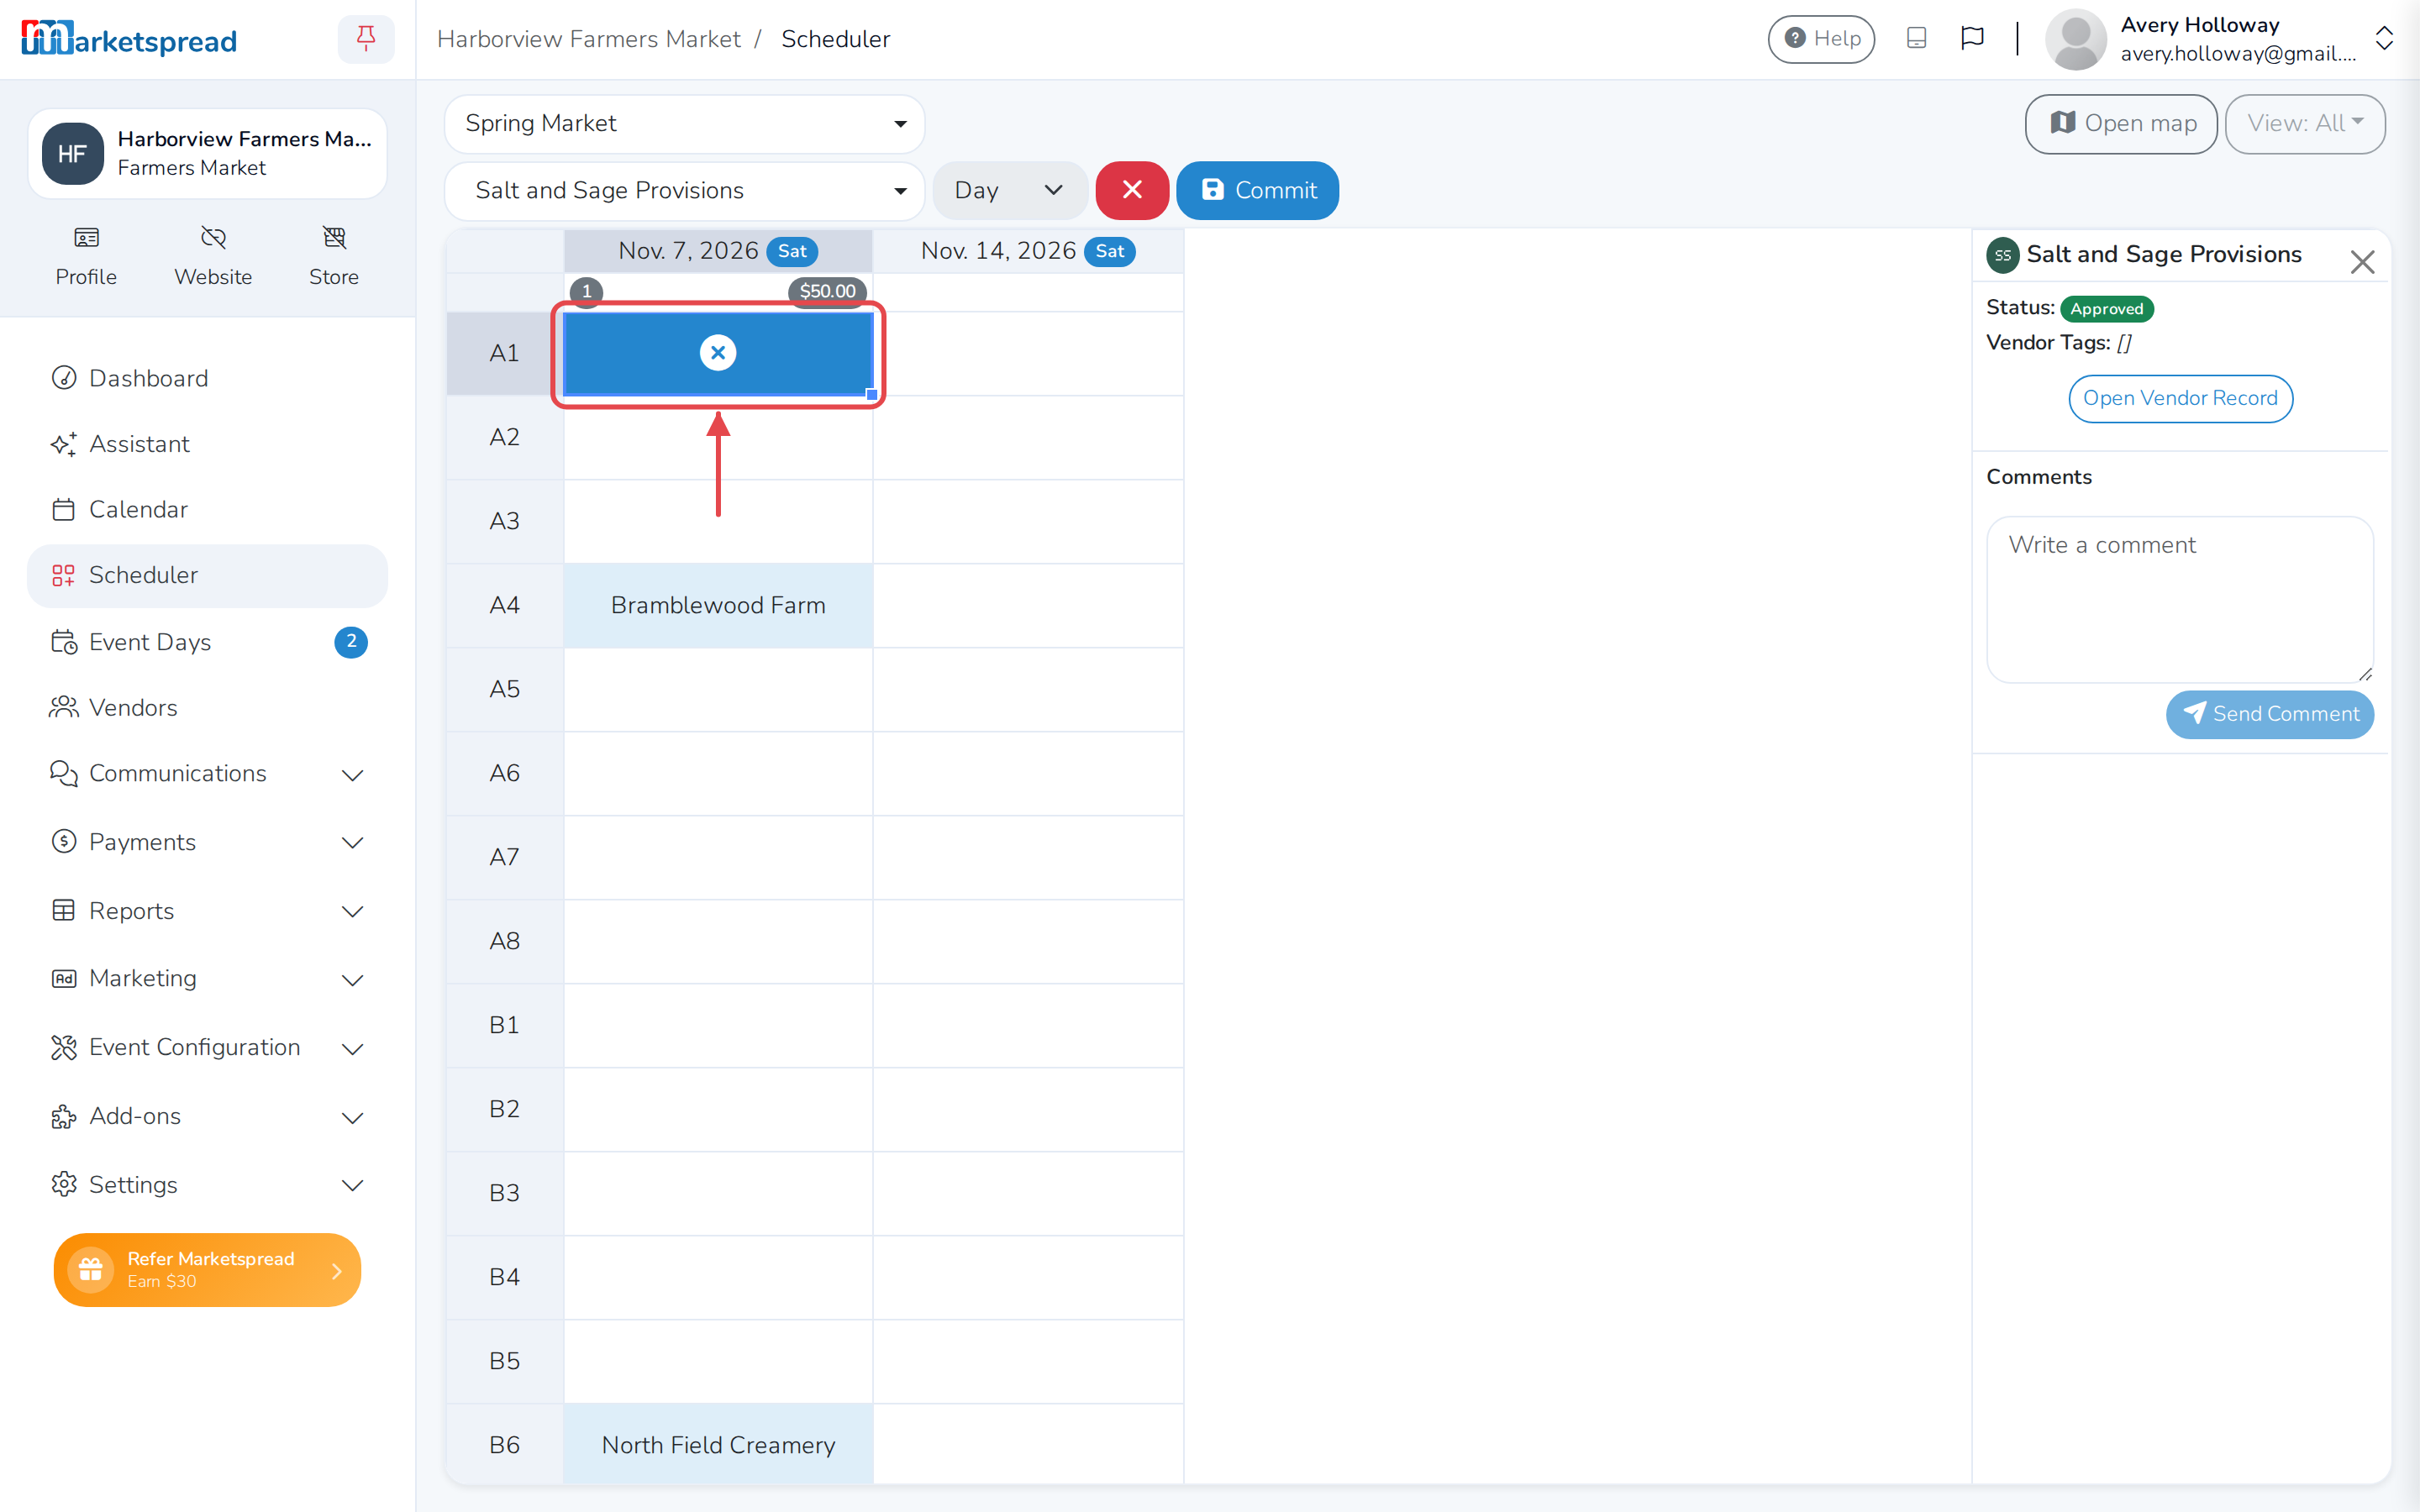
-
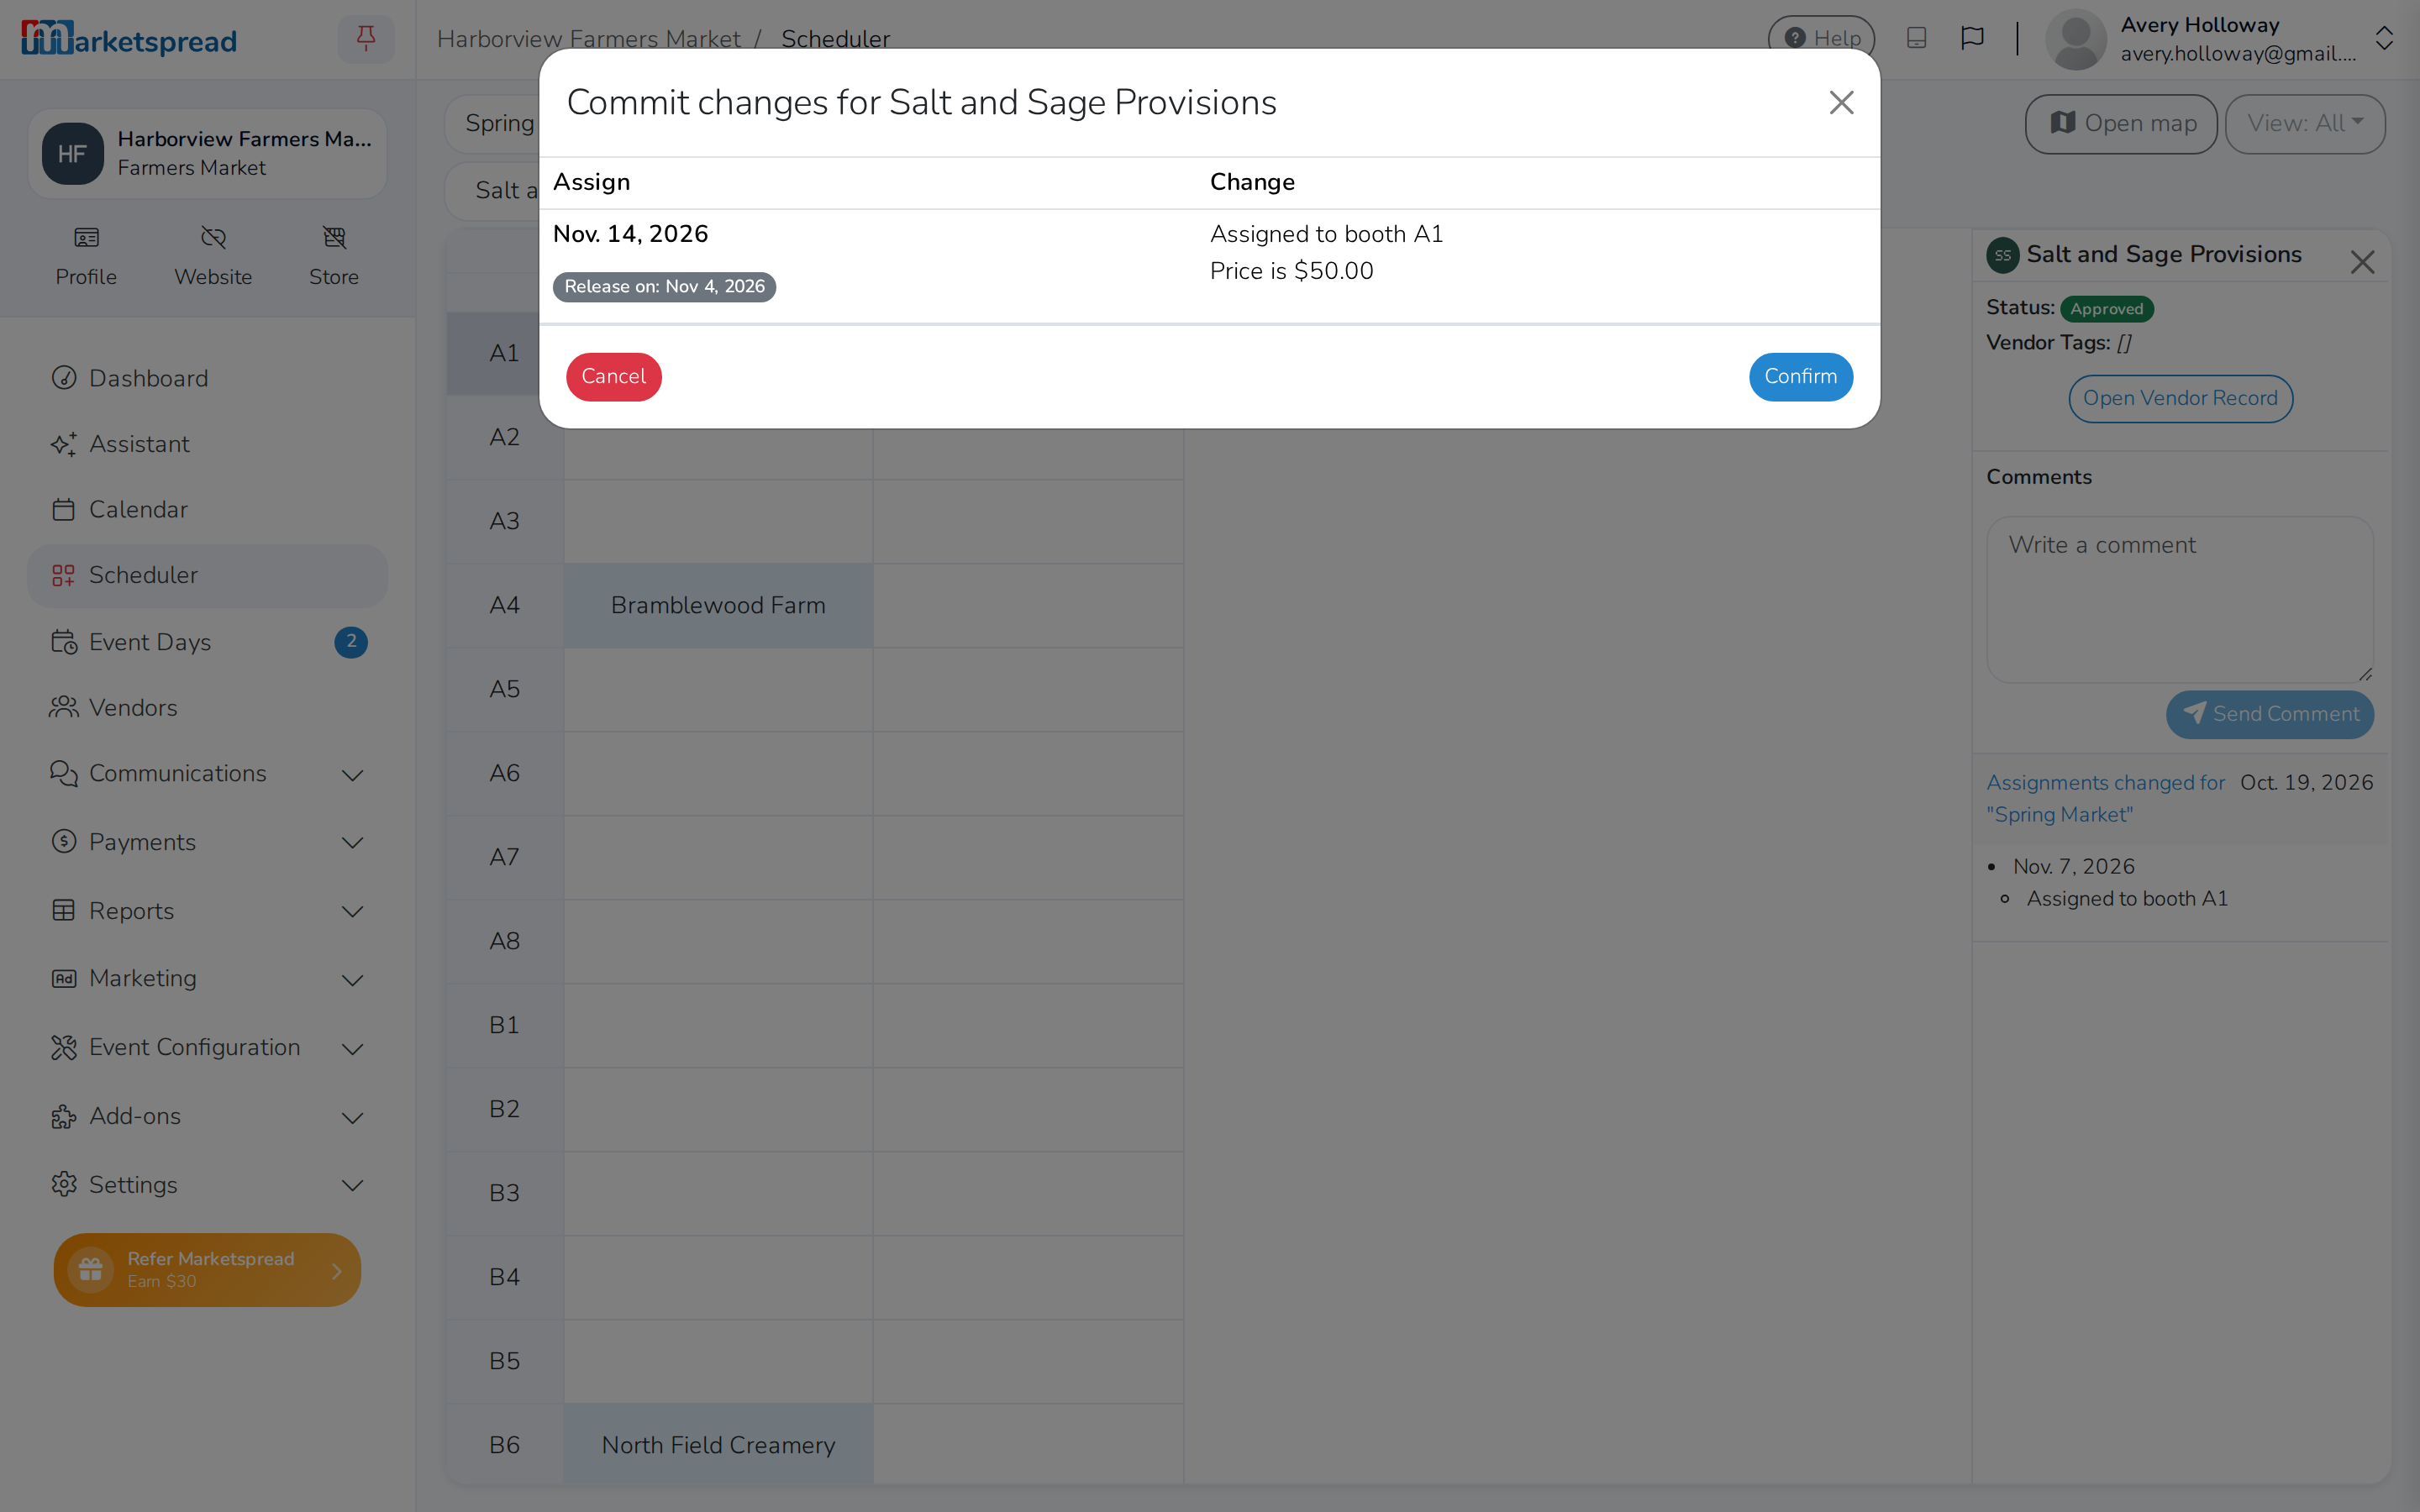
A window opens, titled Commit changes for the vendor, listing the
booth and its price.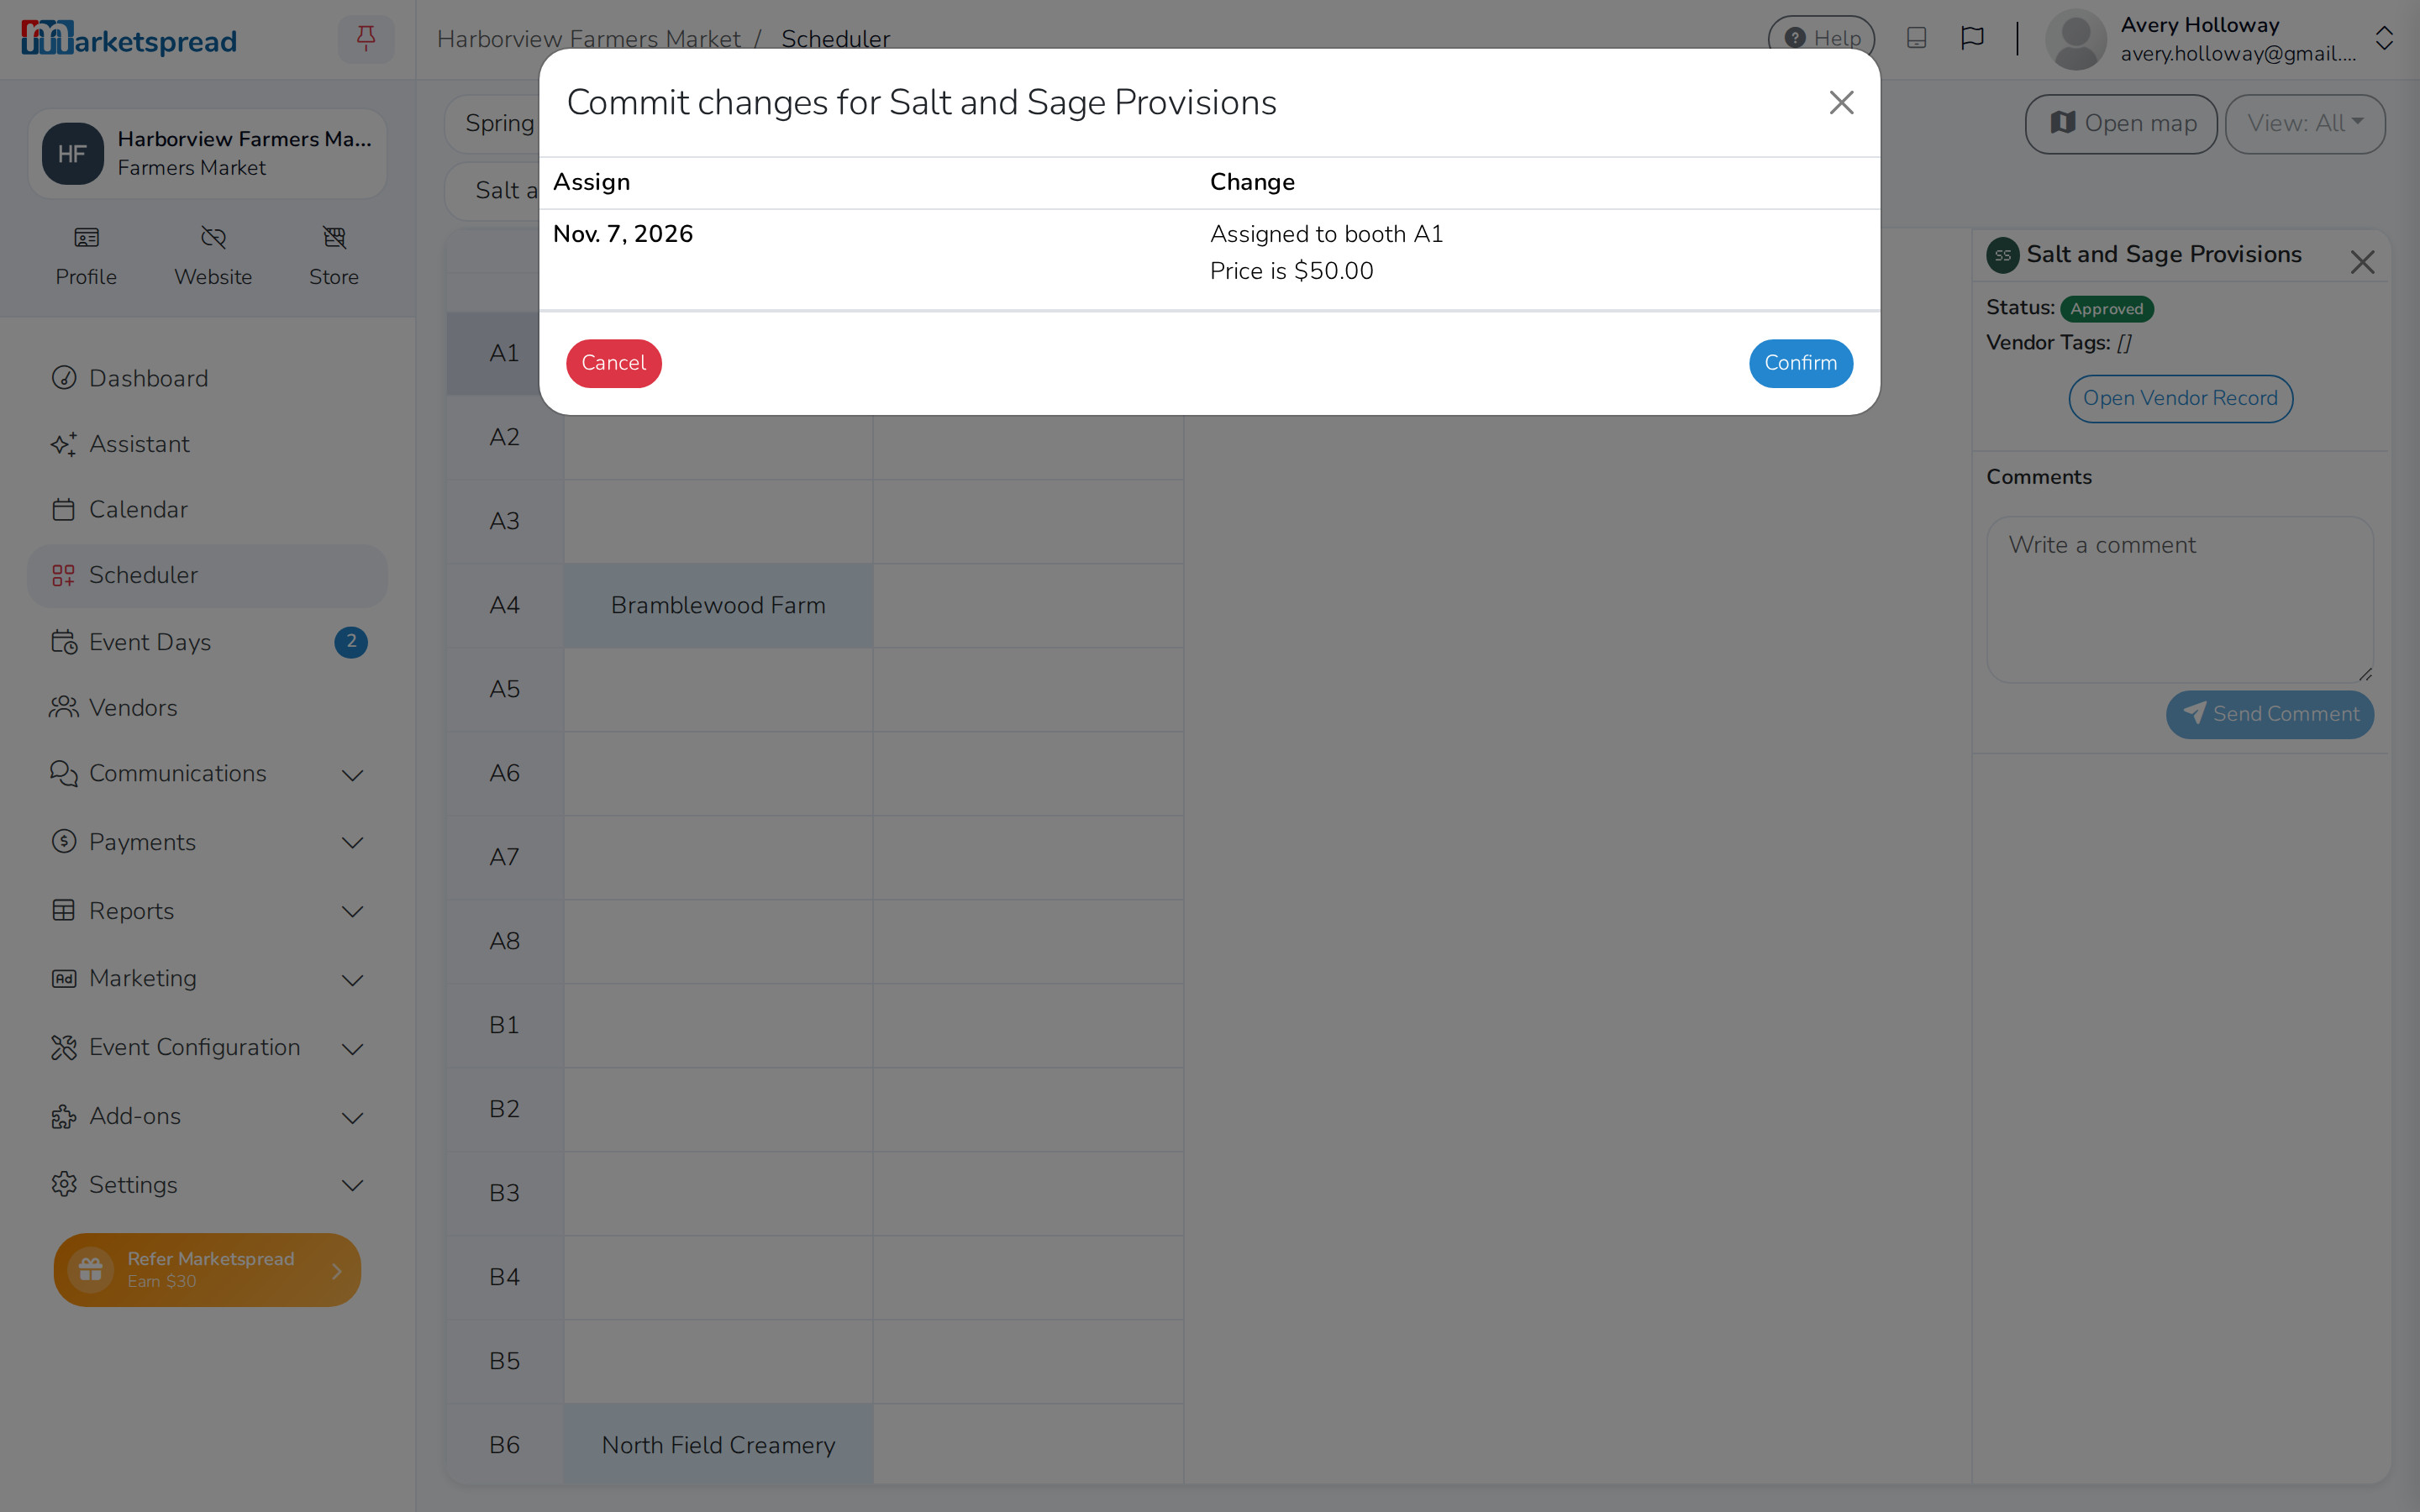
-
Click Confirm.
-
Right-click the booked cell and choose View invoice. A Draft tag
means it has not gone out yet.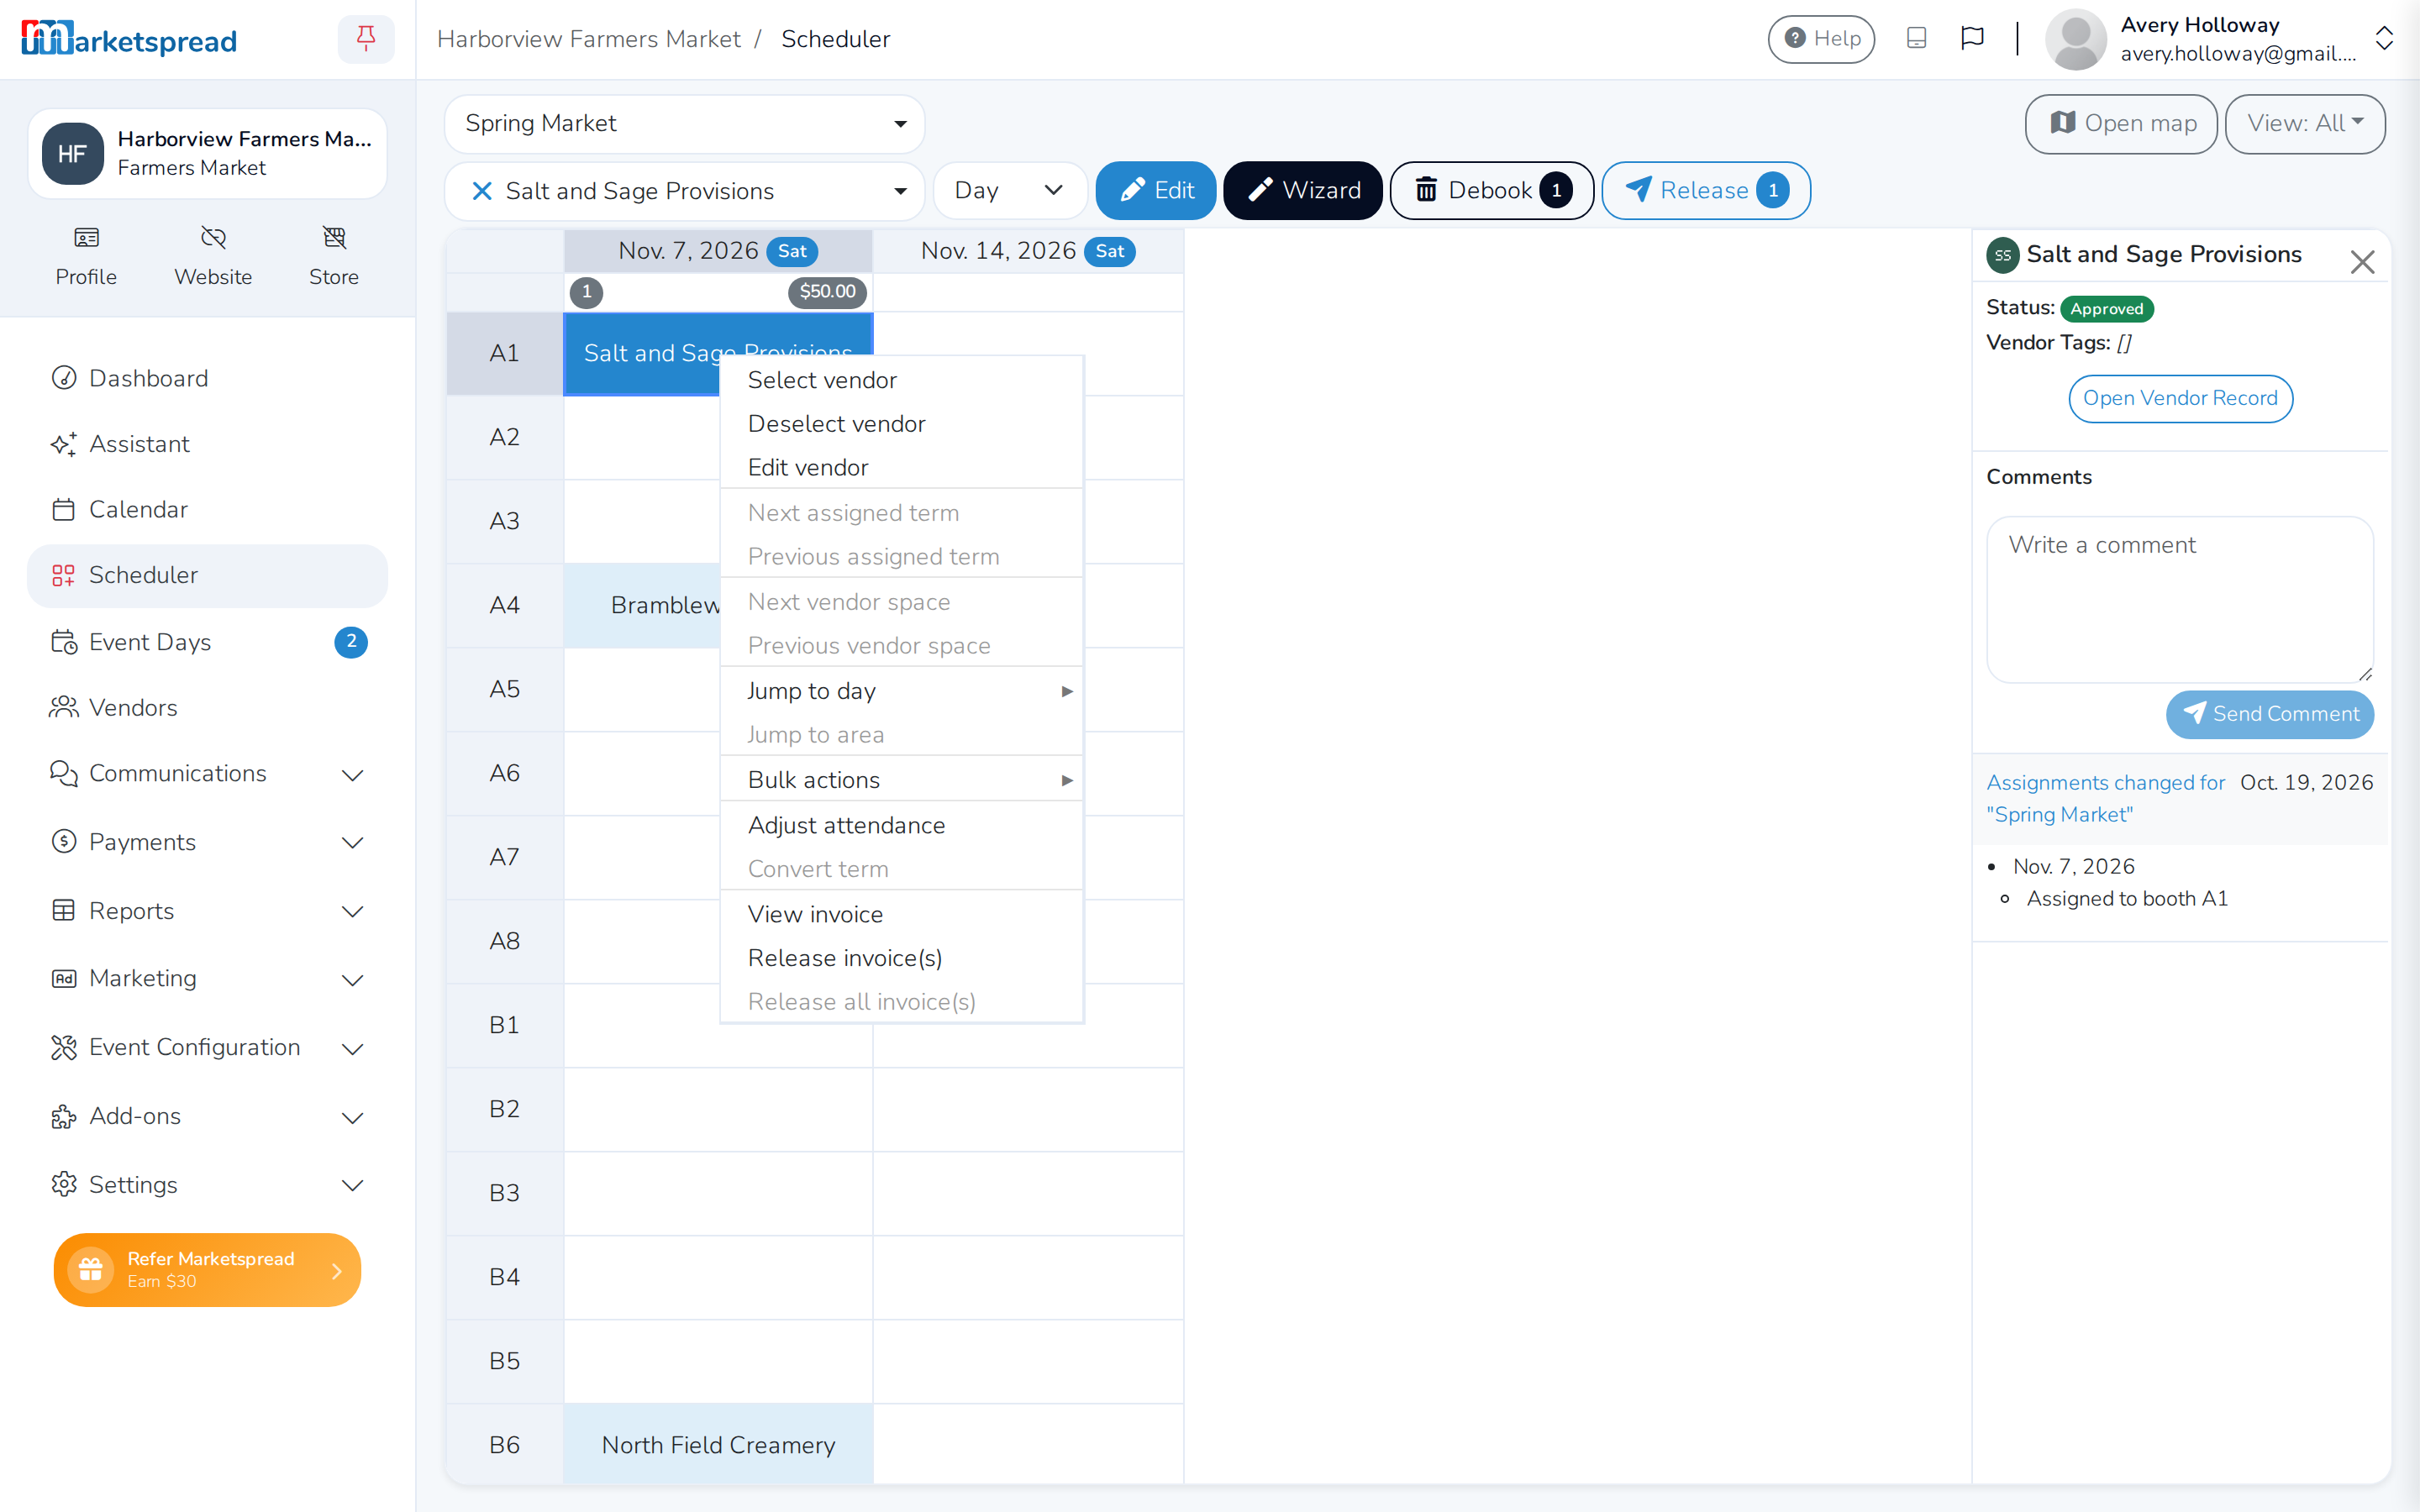
Turn on automatic release for an event
-
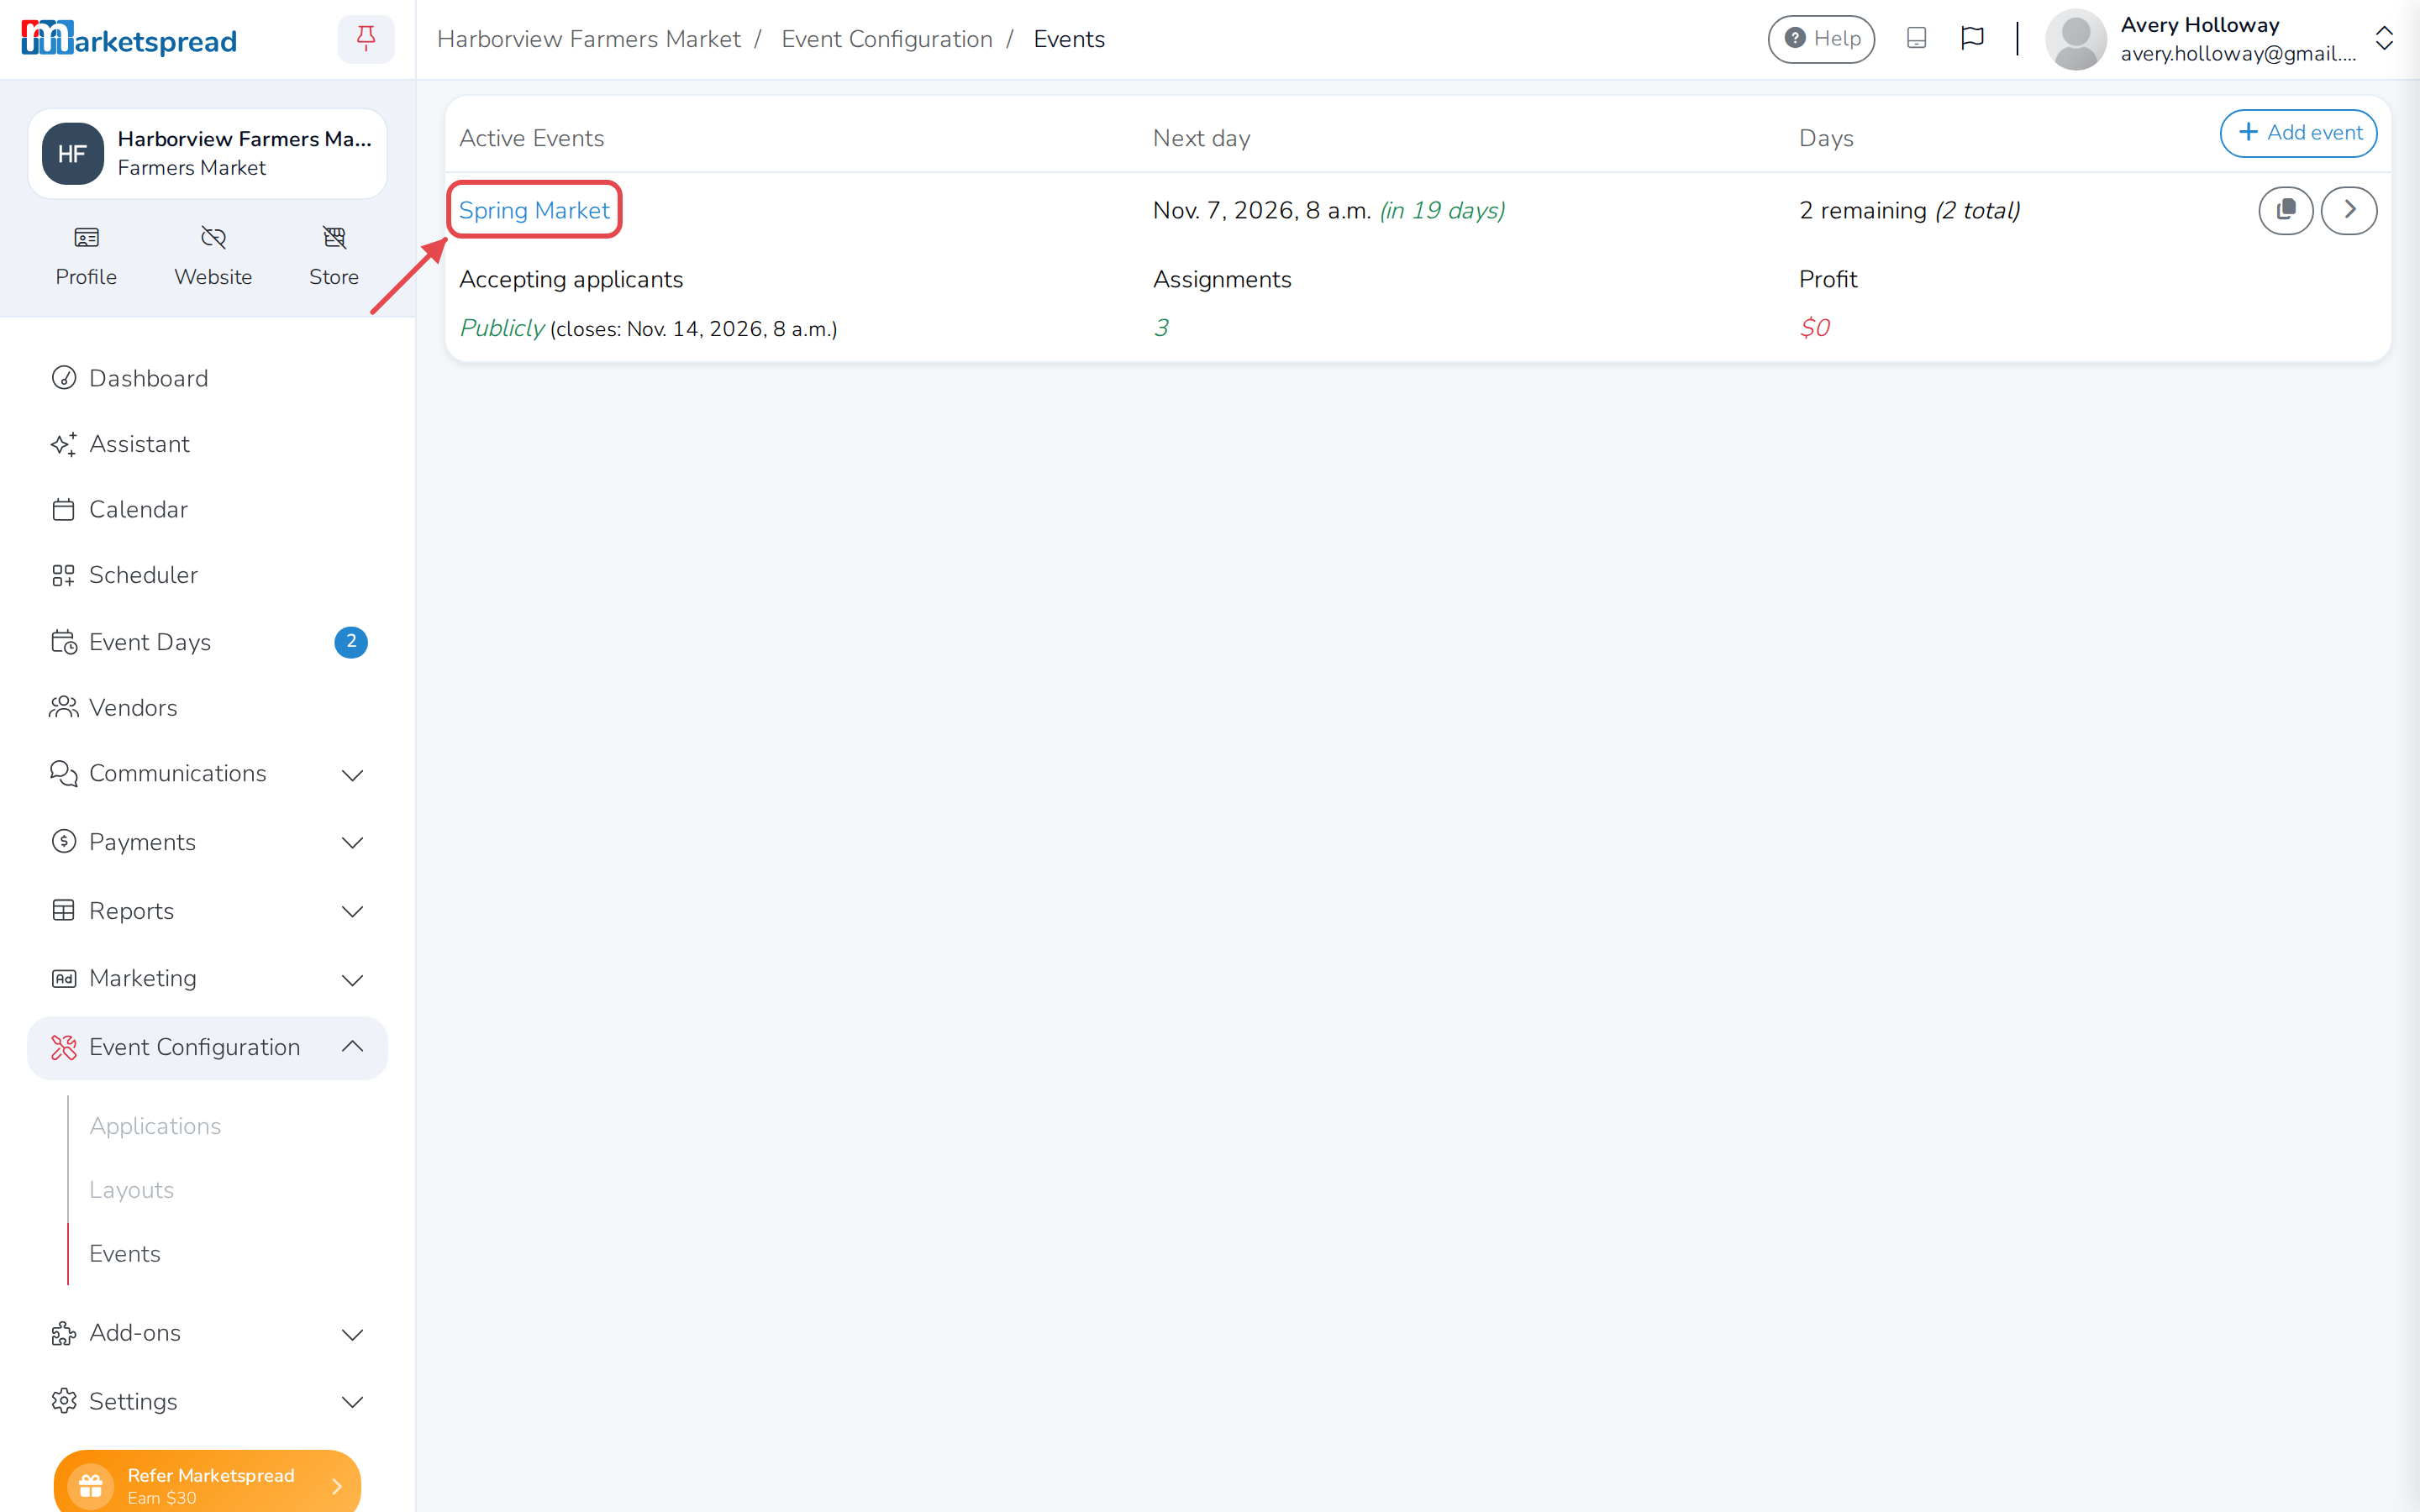
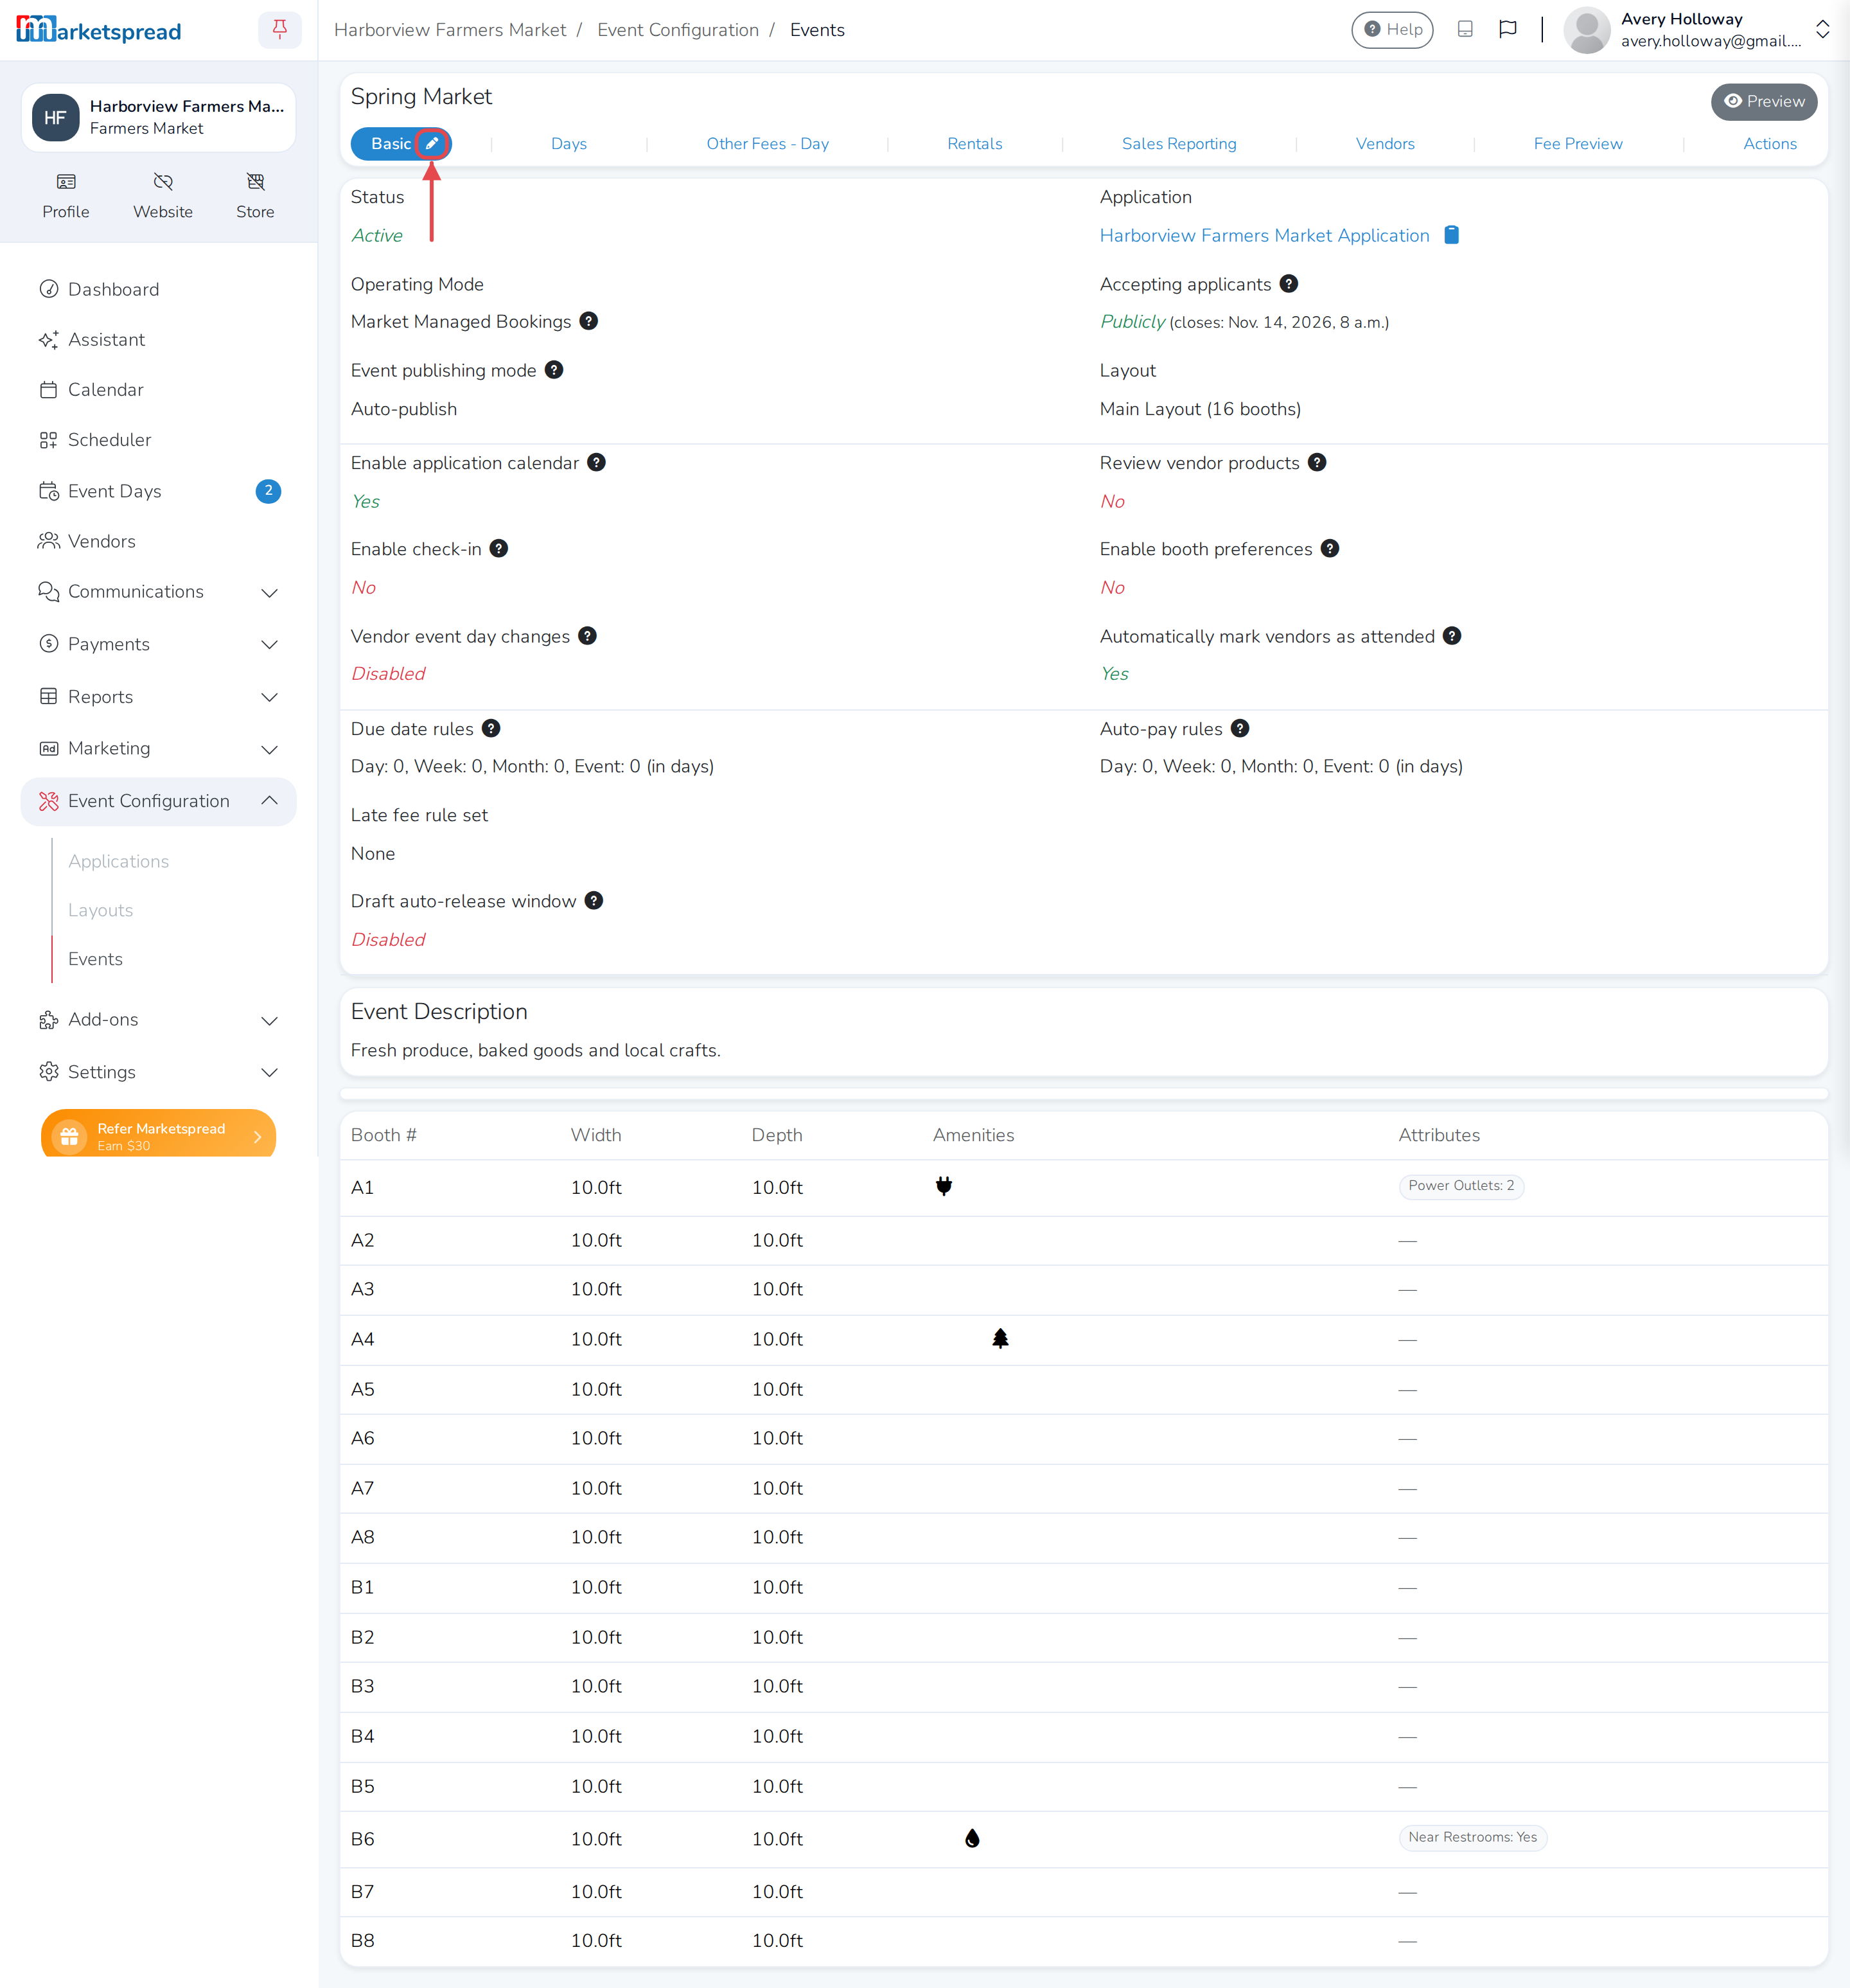
Open Event Configuration, then Events.
-
Click the event you want to change.
-
On the Basic tab, click the pencil icon.
-
Scroll to Invoicing Options. Draft auto-release window is off by
default.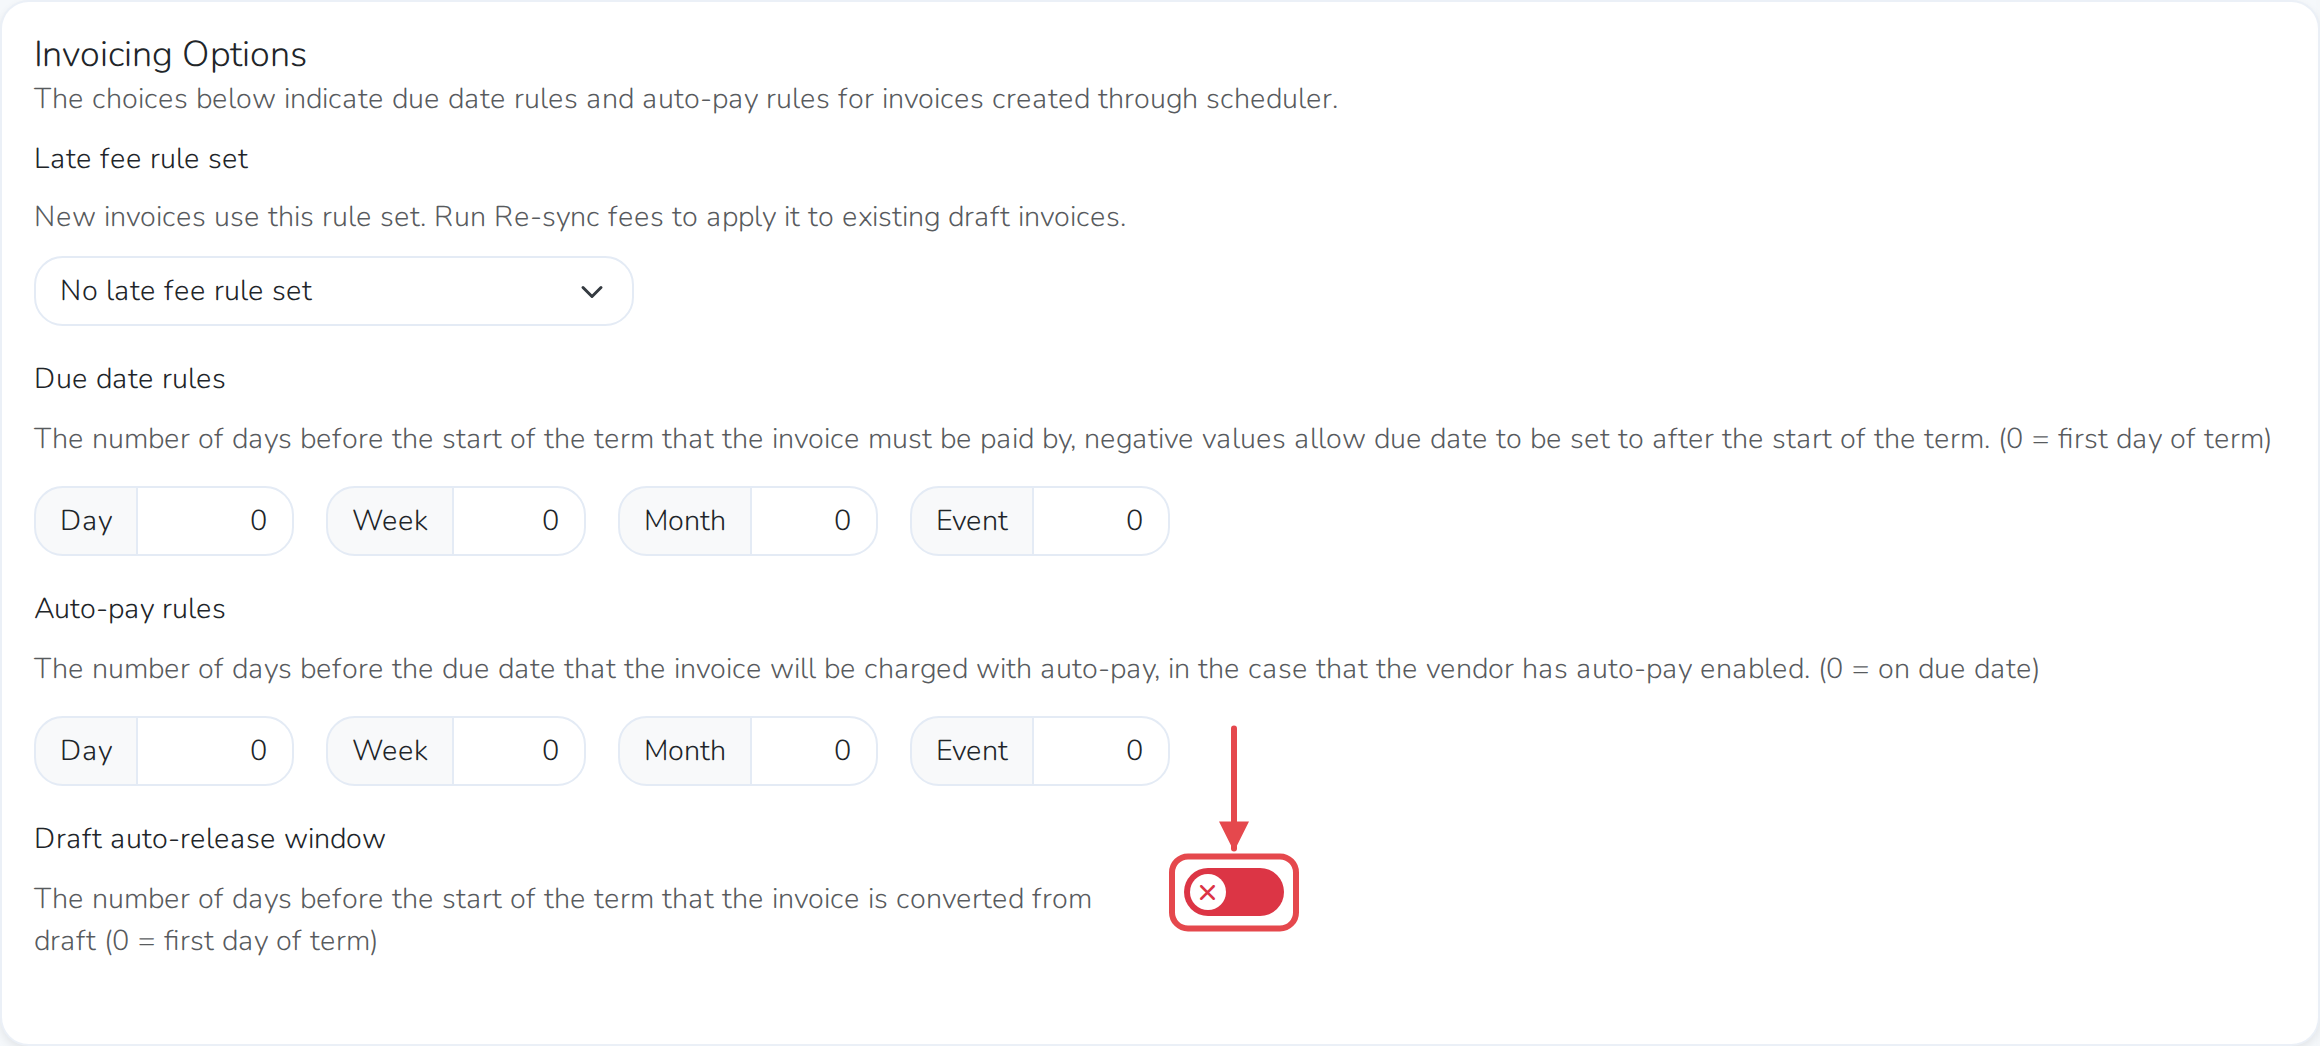
-
Turn on Draft auto-release window.
-
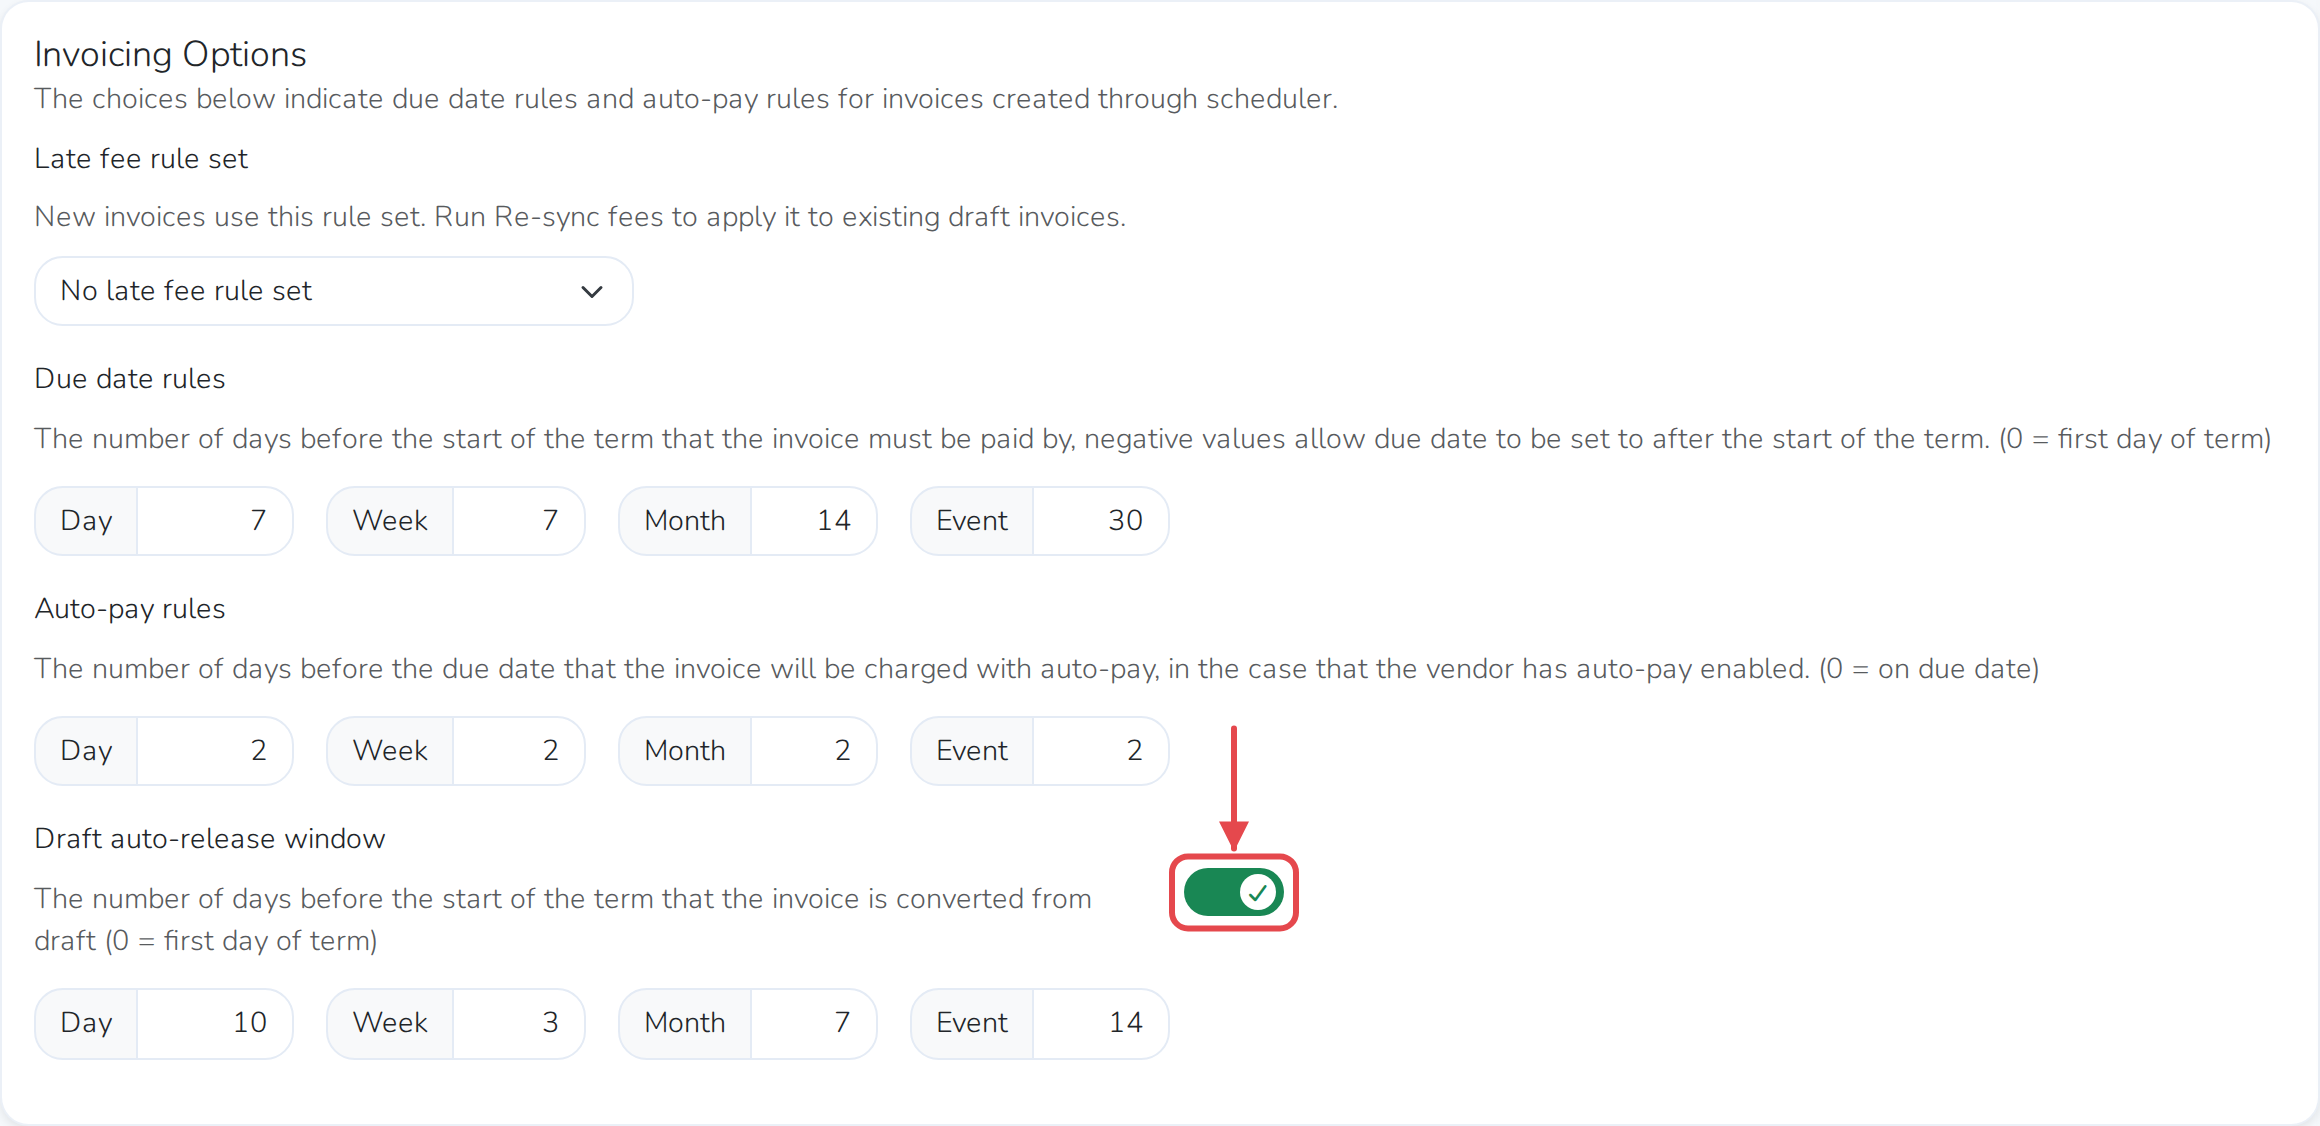
Fill in the number of days before the term starts that its invoice should
release, next to Day, Week, Month and Event. Use whichever
of those booking terms
you book with — bookings use the Day term by default, and terms are set
up in your layout. Leave
a box at "0" and that invoice releases:- Day — on the day of the event
- Week — on the first day of the week
- Month — on the first day of the month
- Event — on the first day of the first event in the series
-
Click Save basic.
The Basic tab shows all three rules' current values any time you open it, not
just while editing — Due date rules, Auto-pay rules and Draft
auto-release window, each broken down by Day, Week, Month and Event.

Once automatic release is on, the next vendor you book sees its release date
right in the commit window. On the release date, the invoice goes to the
vendor — and if they have auto-pay turned on, it charges their card on file.
Choose when invoices are due
- Open the event's Basic tab and click the pencil icon.
- Under Due date rules, fill in the number of days before the term
starts that its invoice is due, next to Day, Week, Month and
Event. Leave a box at "0" and that invoice is due on the first day of
the term. - Click Save basic.
A negative number sets the due date after the term has already started,
instead of before it.
All of these numbers are in days. For example, if a vendor's invoice for a Day
booking should be due a month ahead, enter "30" next to Day. If a Week
booking should be due a week ahead, enter "7" next to Week.
Choose when auto-pay charges a vendor
- Open the event's Basic tab and click the pencil icon.
- Under Auto-pay rules, fill in the number of days before the due date
that auto-pay should charge, next to Day, Week, Month and
Event. Leave a box at "0" and auto-pay charges on the due date. - Click Save basic.
This only charges a vendor who has turned on auto-pay themselves — see
Charge vendors who have Auto Pay. It applies
whether or not automatic release is turned on.
Check when a draft invoice will release
- Open Scheduler.
- Right-click the booking you want to check.
- Choose View invoice.
A Draft tag means it has not gone out yet. If automatic release is on for
that event, its Auto-Release Date shows next to the due date.
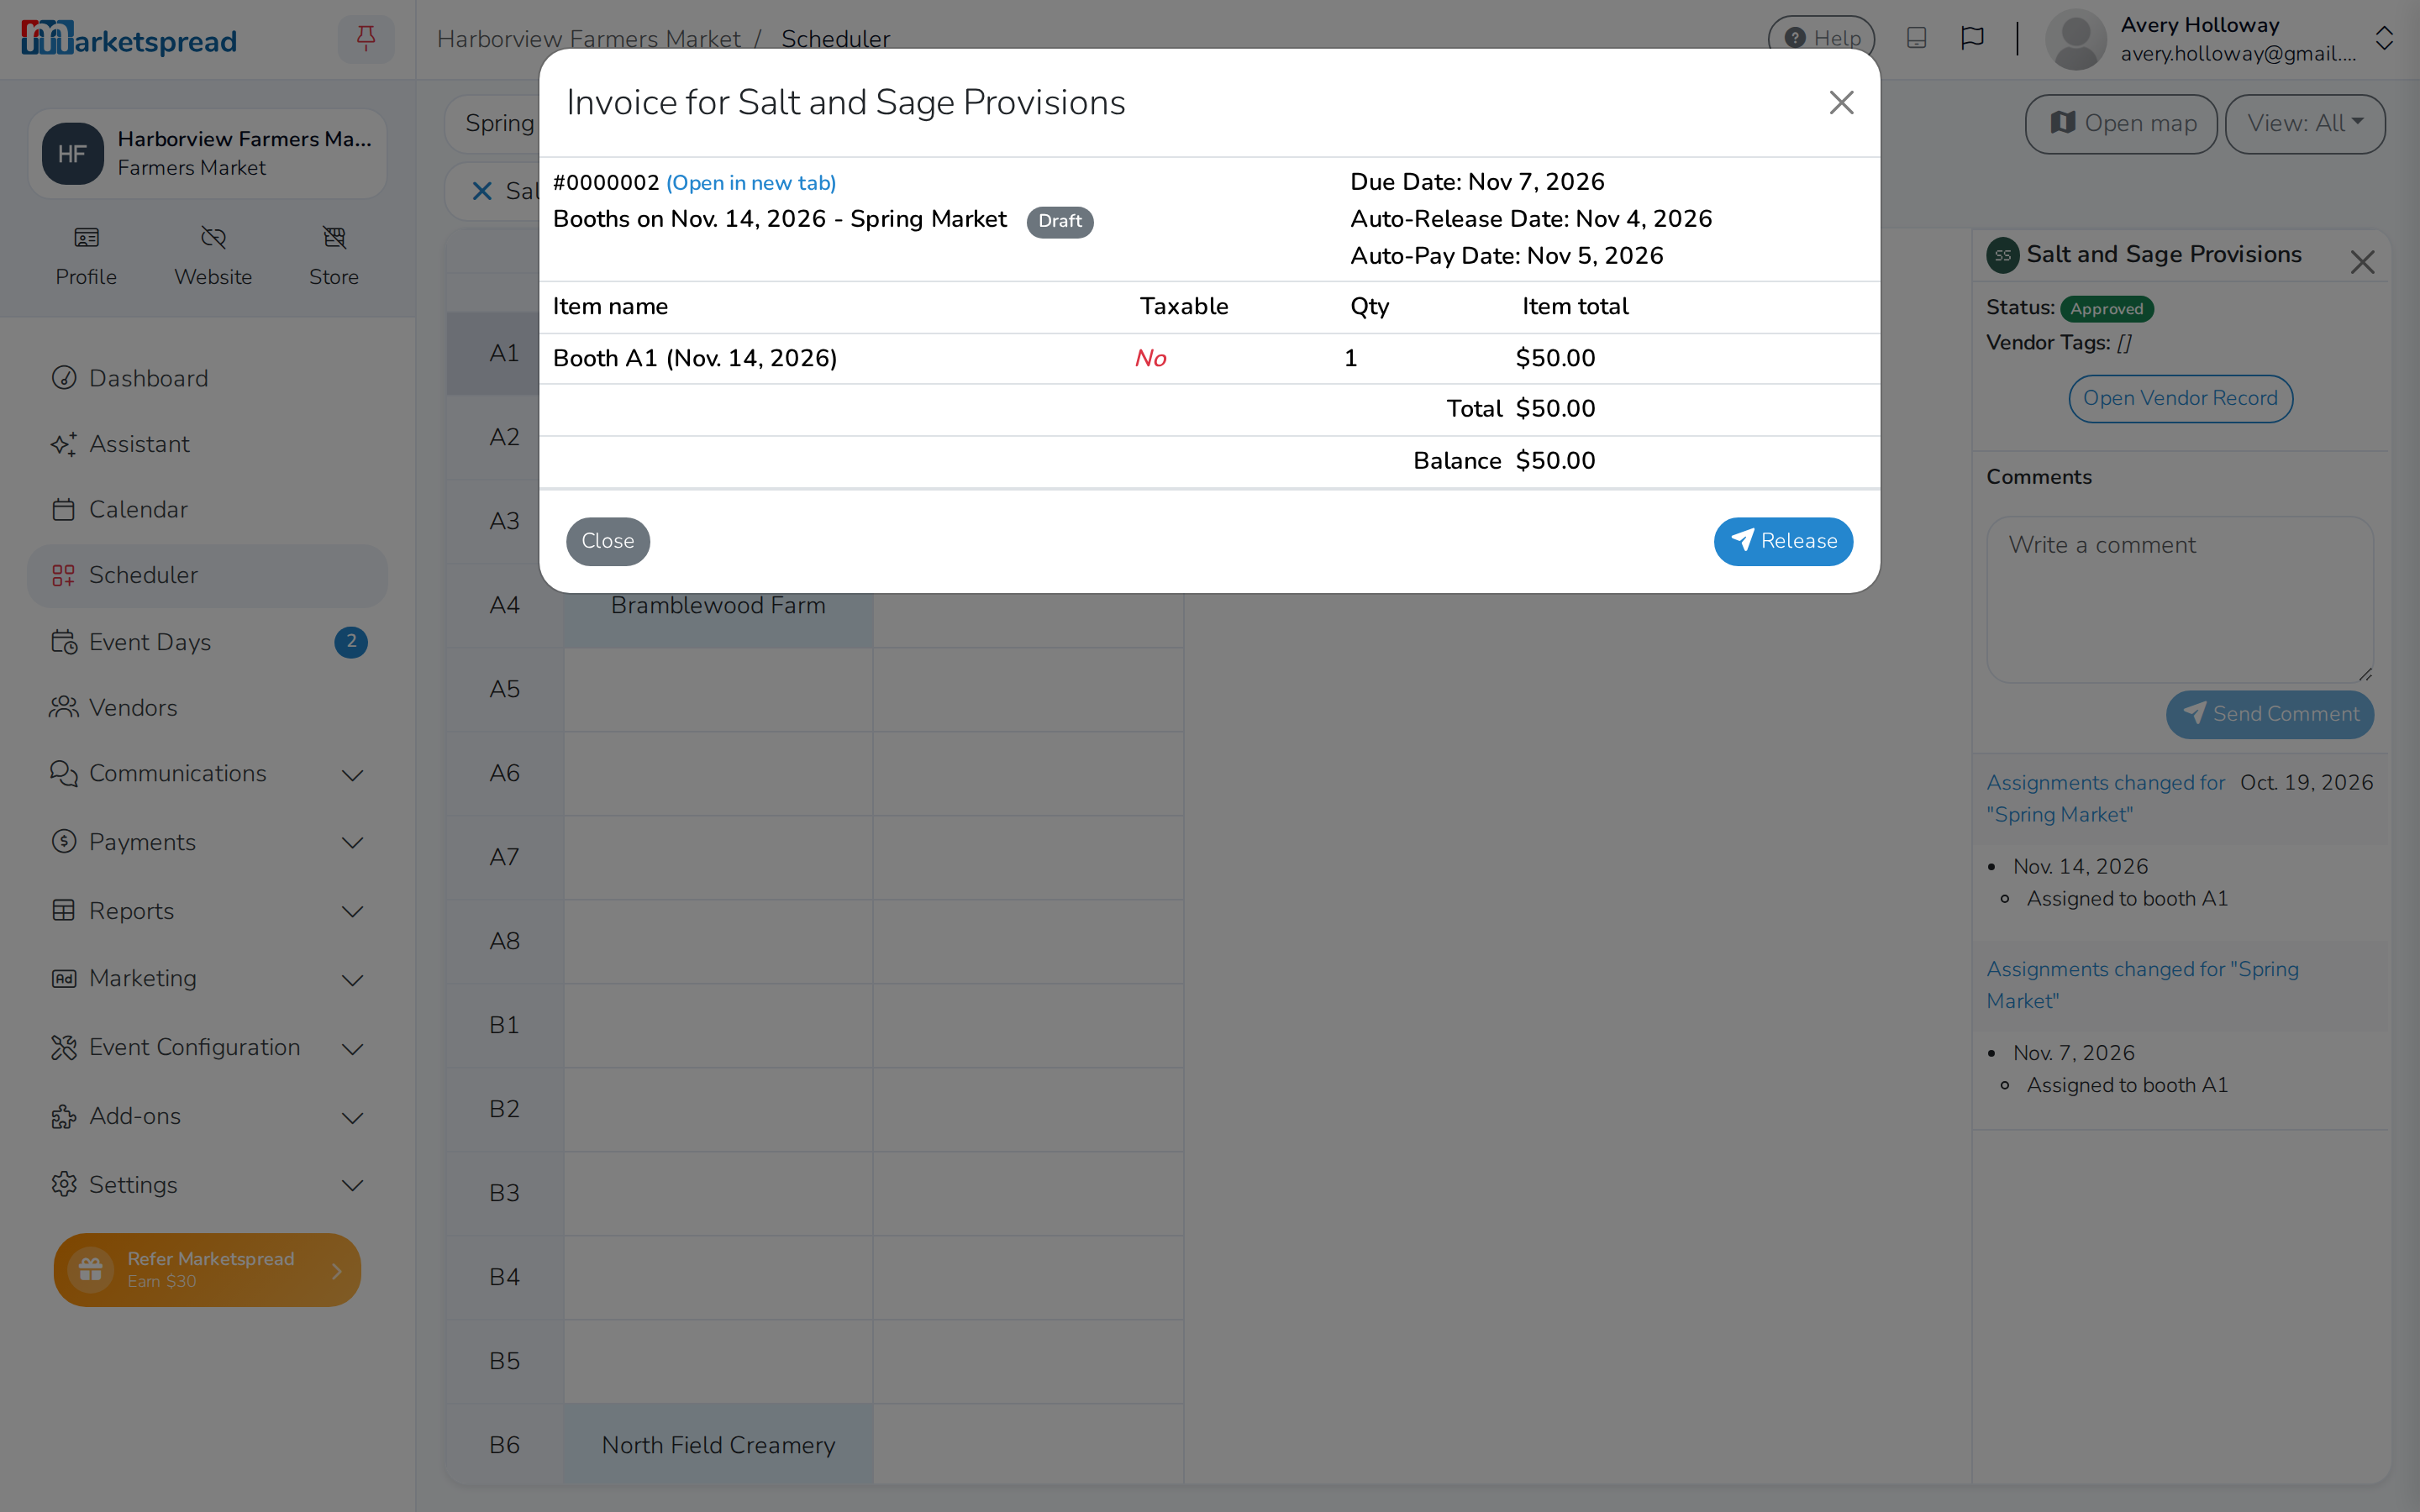
Tip
Click Release in this window to send the invoice right away, instead
of waiting for its release date.