


You can attach a document — a waiver, a hold harmless agreement — to your
application and require every vendor to sign it before they submit. A signed
document carries the same legal weight as one signed by hand.
It takes two passes: add the document to the application, then mark up where
the vendor has to sign.
Add the document
-
Open Event Configuration, then your application, and click the pencil to
edit it. -
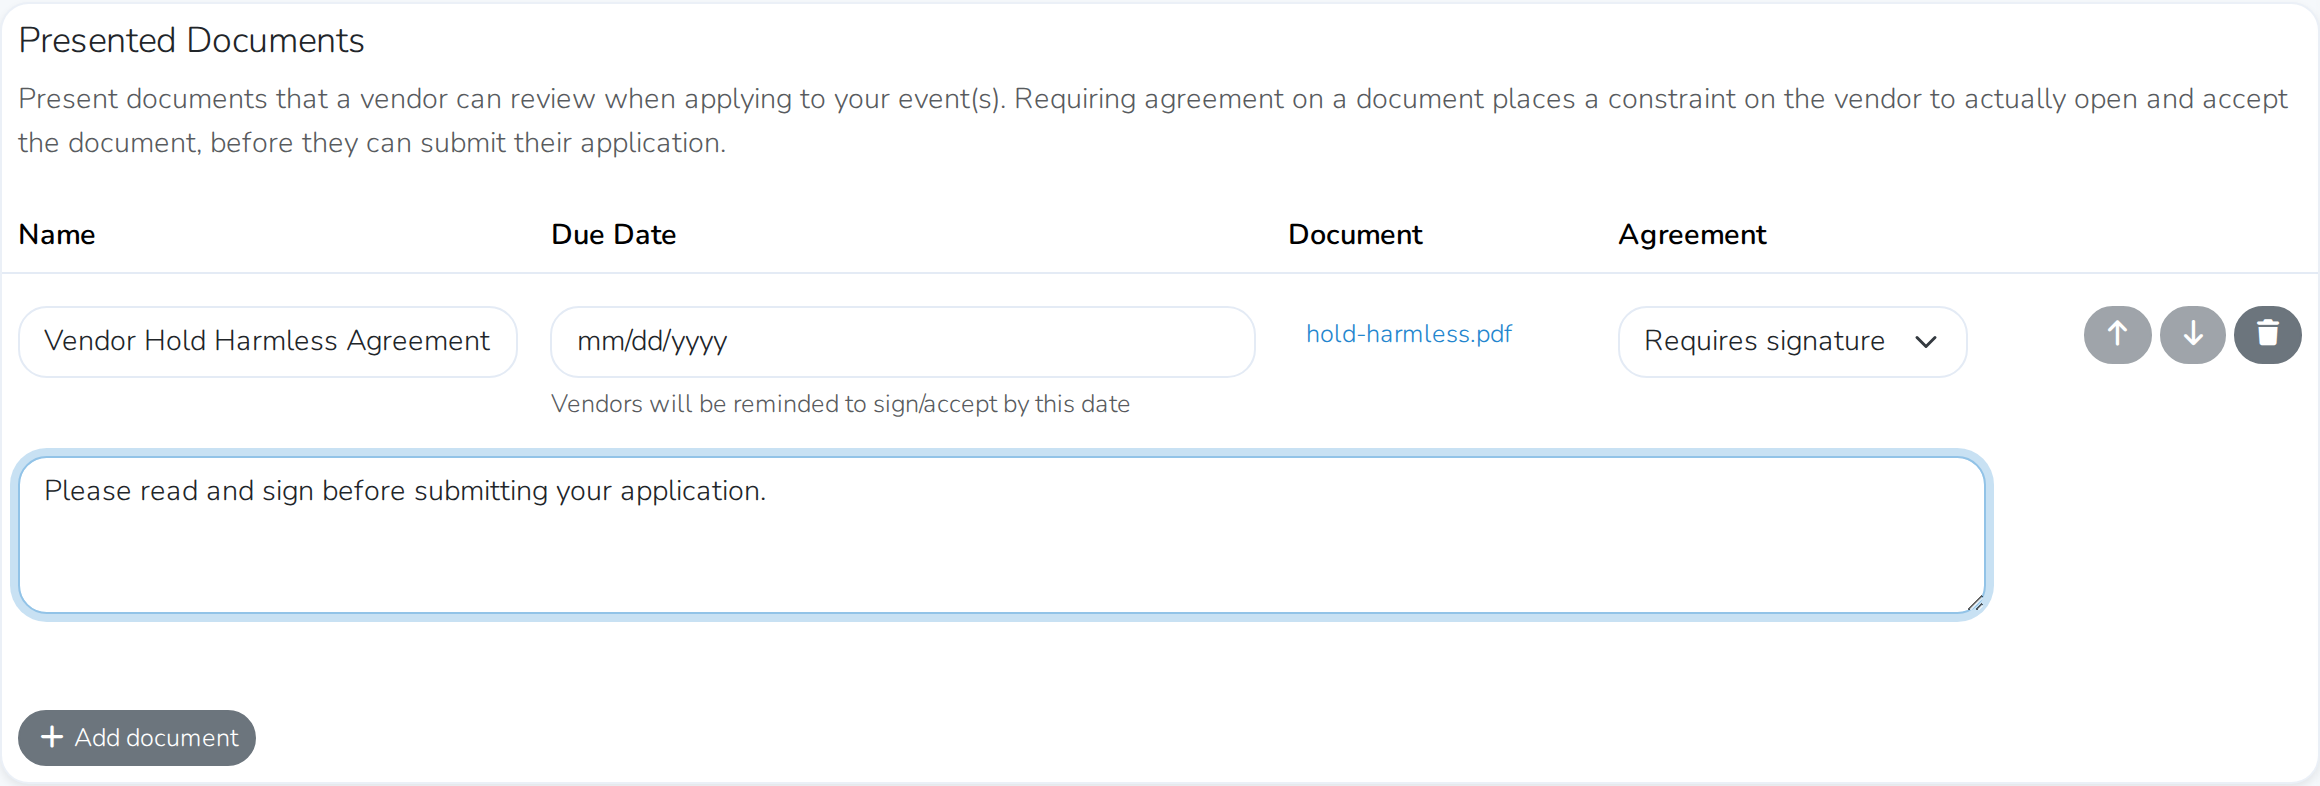
Scroll to Presented Documents and click Add document.
-
Name it, so vendors know what they are signing.
-
Click Select document and upload the file.
-
Set Agreement to Requires signature.
-
Write a description. Vendors see this beside the signature request.
-
Click Save application.
Requires agreement is not a signature
Requires agreement is a tick-box — the vendor confirms they accept it.
Requires signature is the one that collects a real signature.
Mark up where they sign
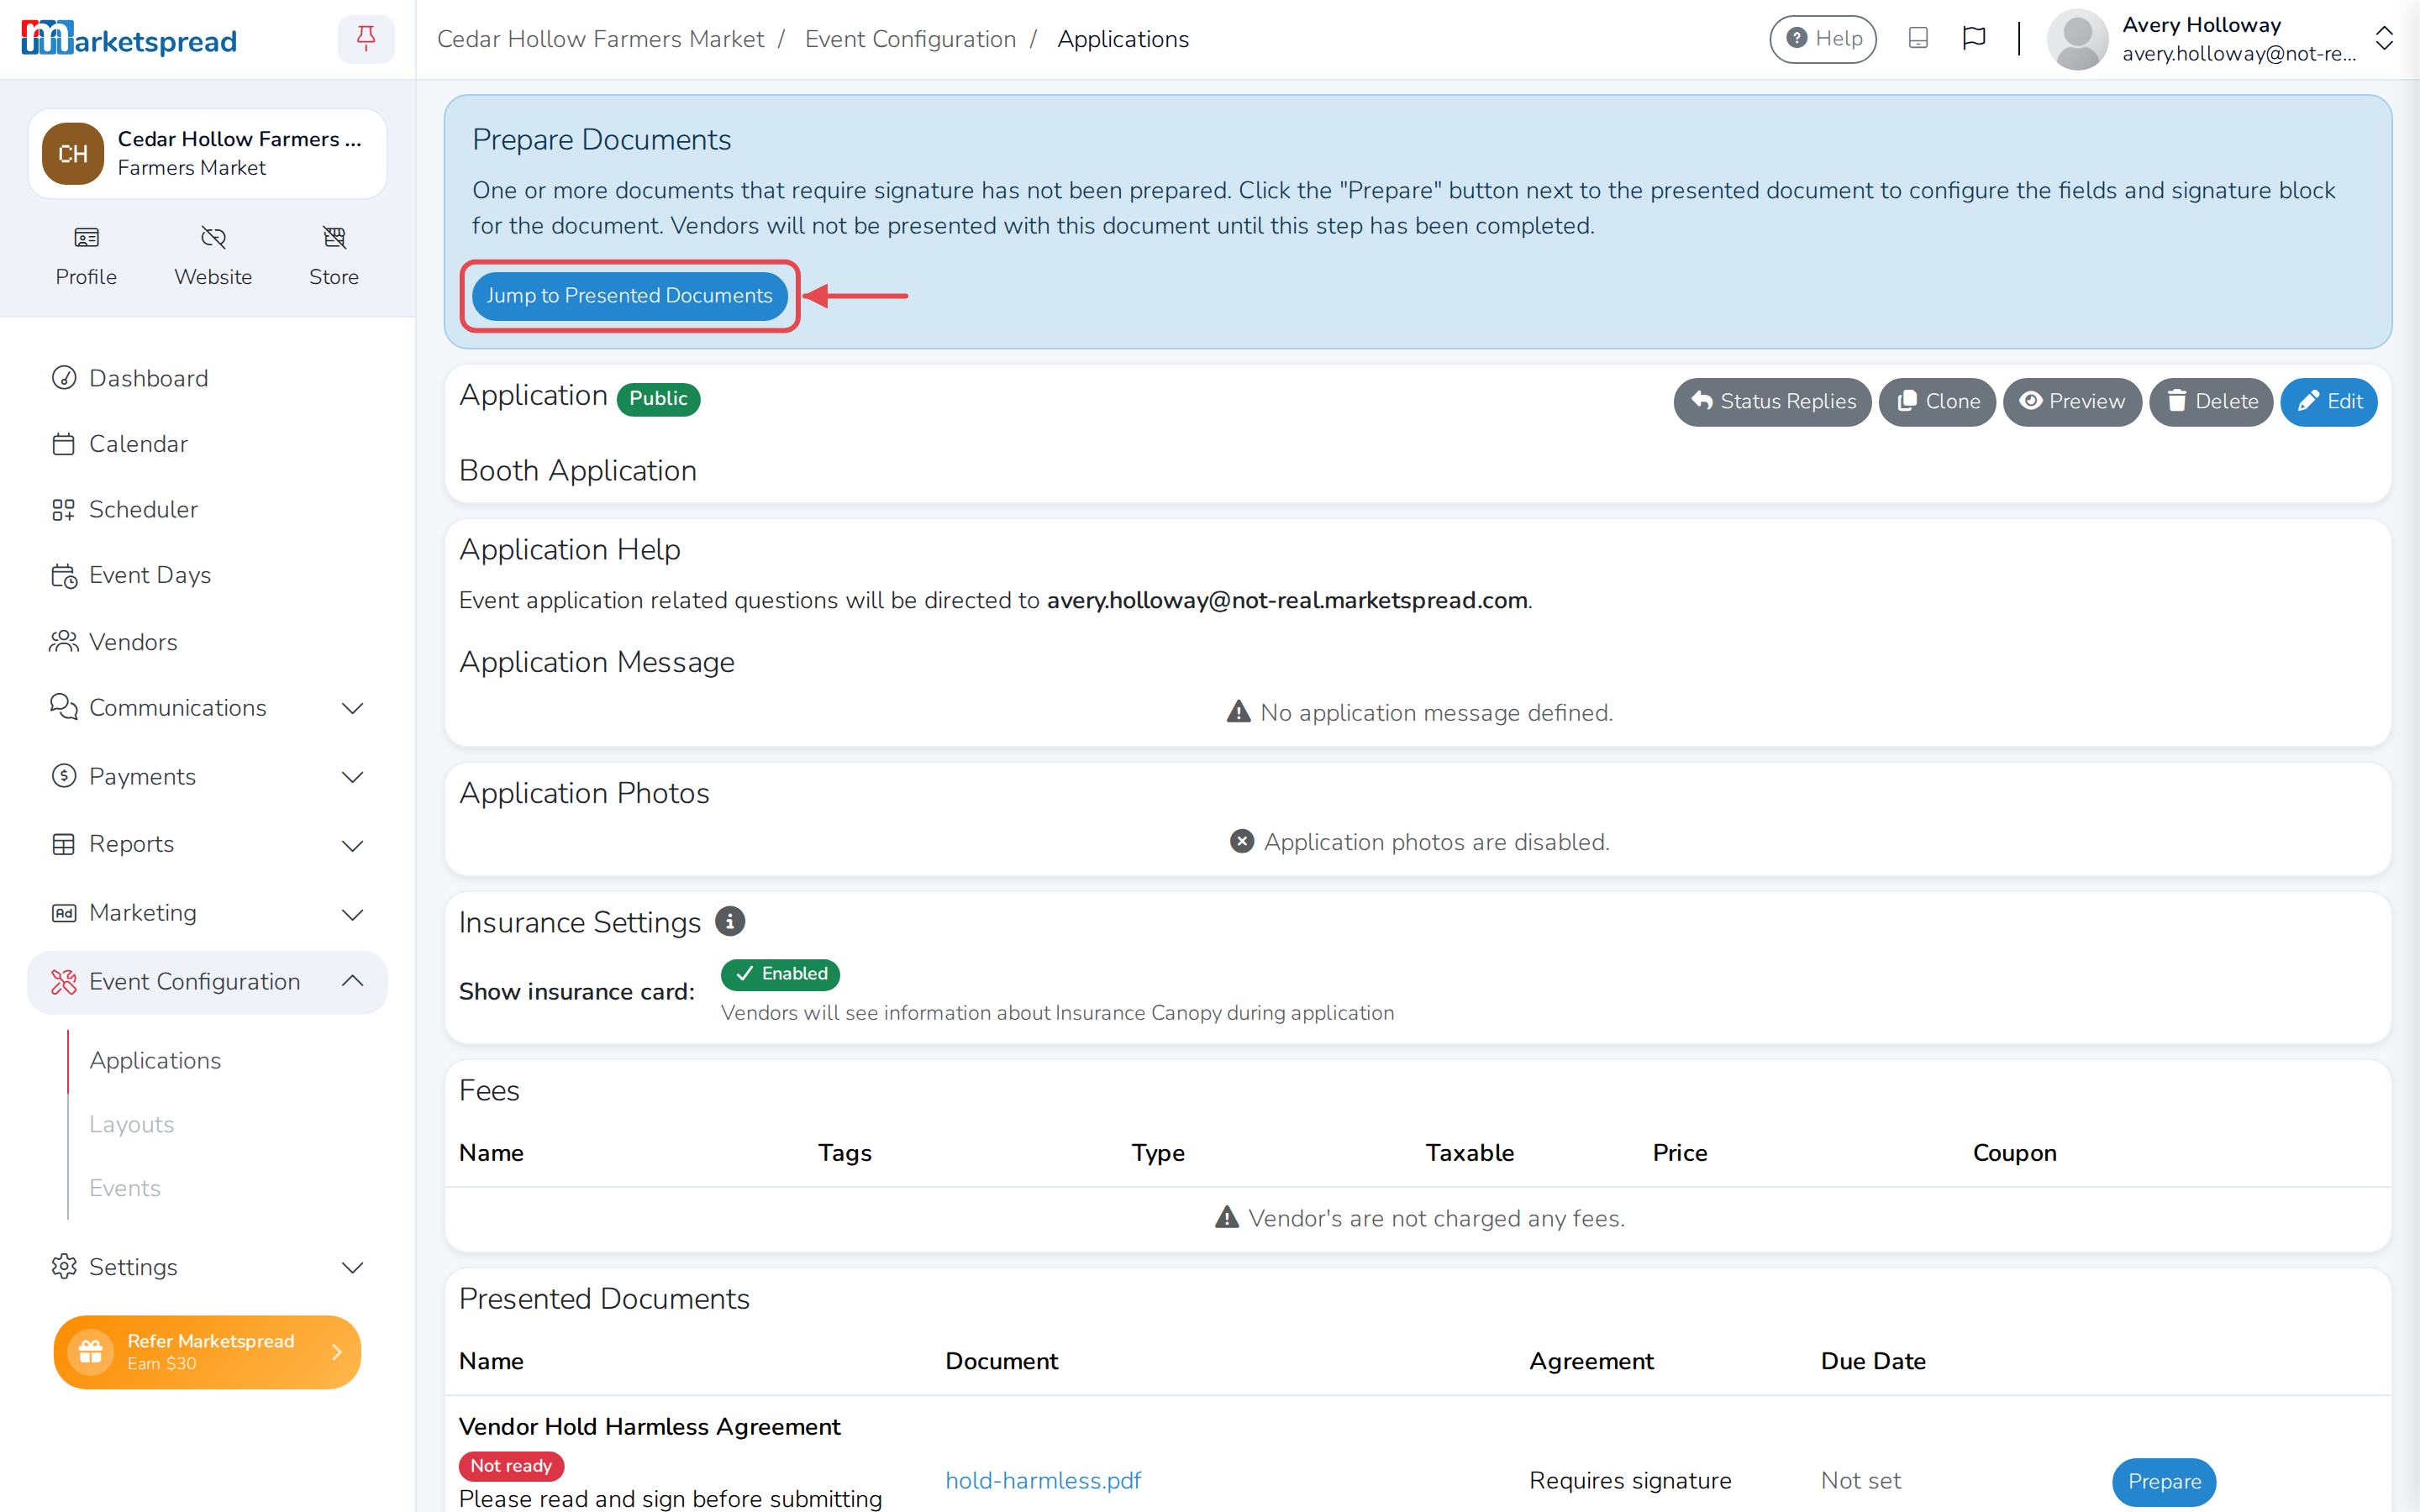
After saving, you are prompted to prepare the document, and it is tagged
Not ready until you do.
-
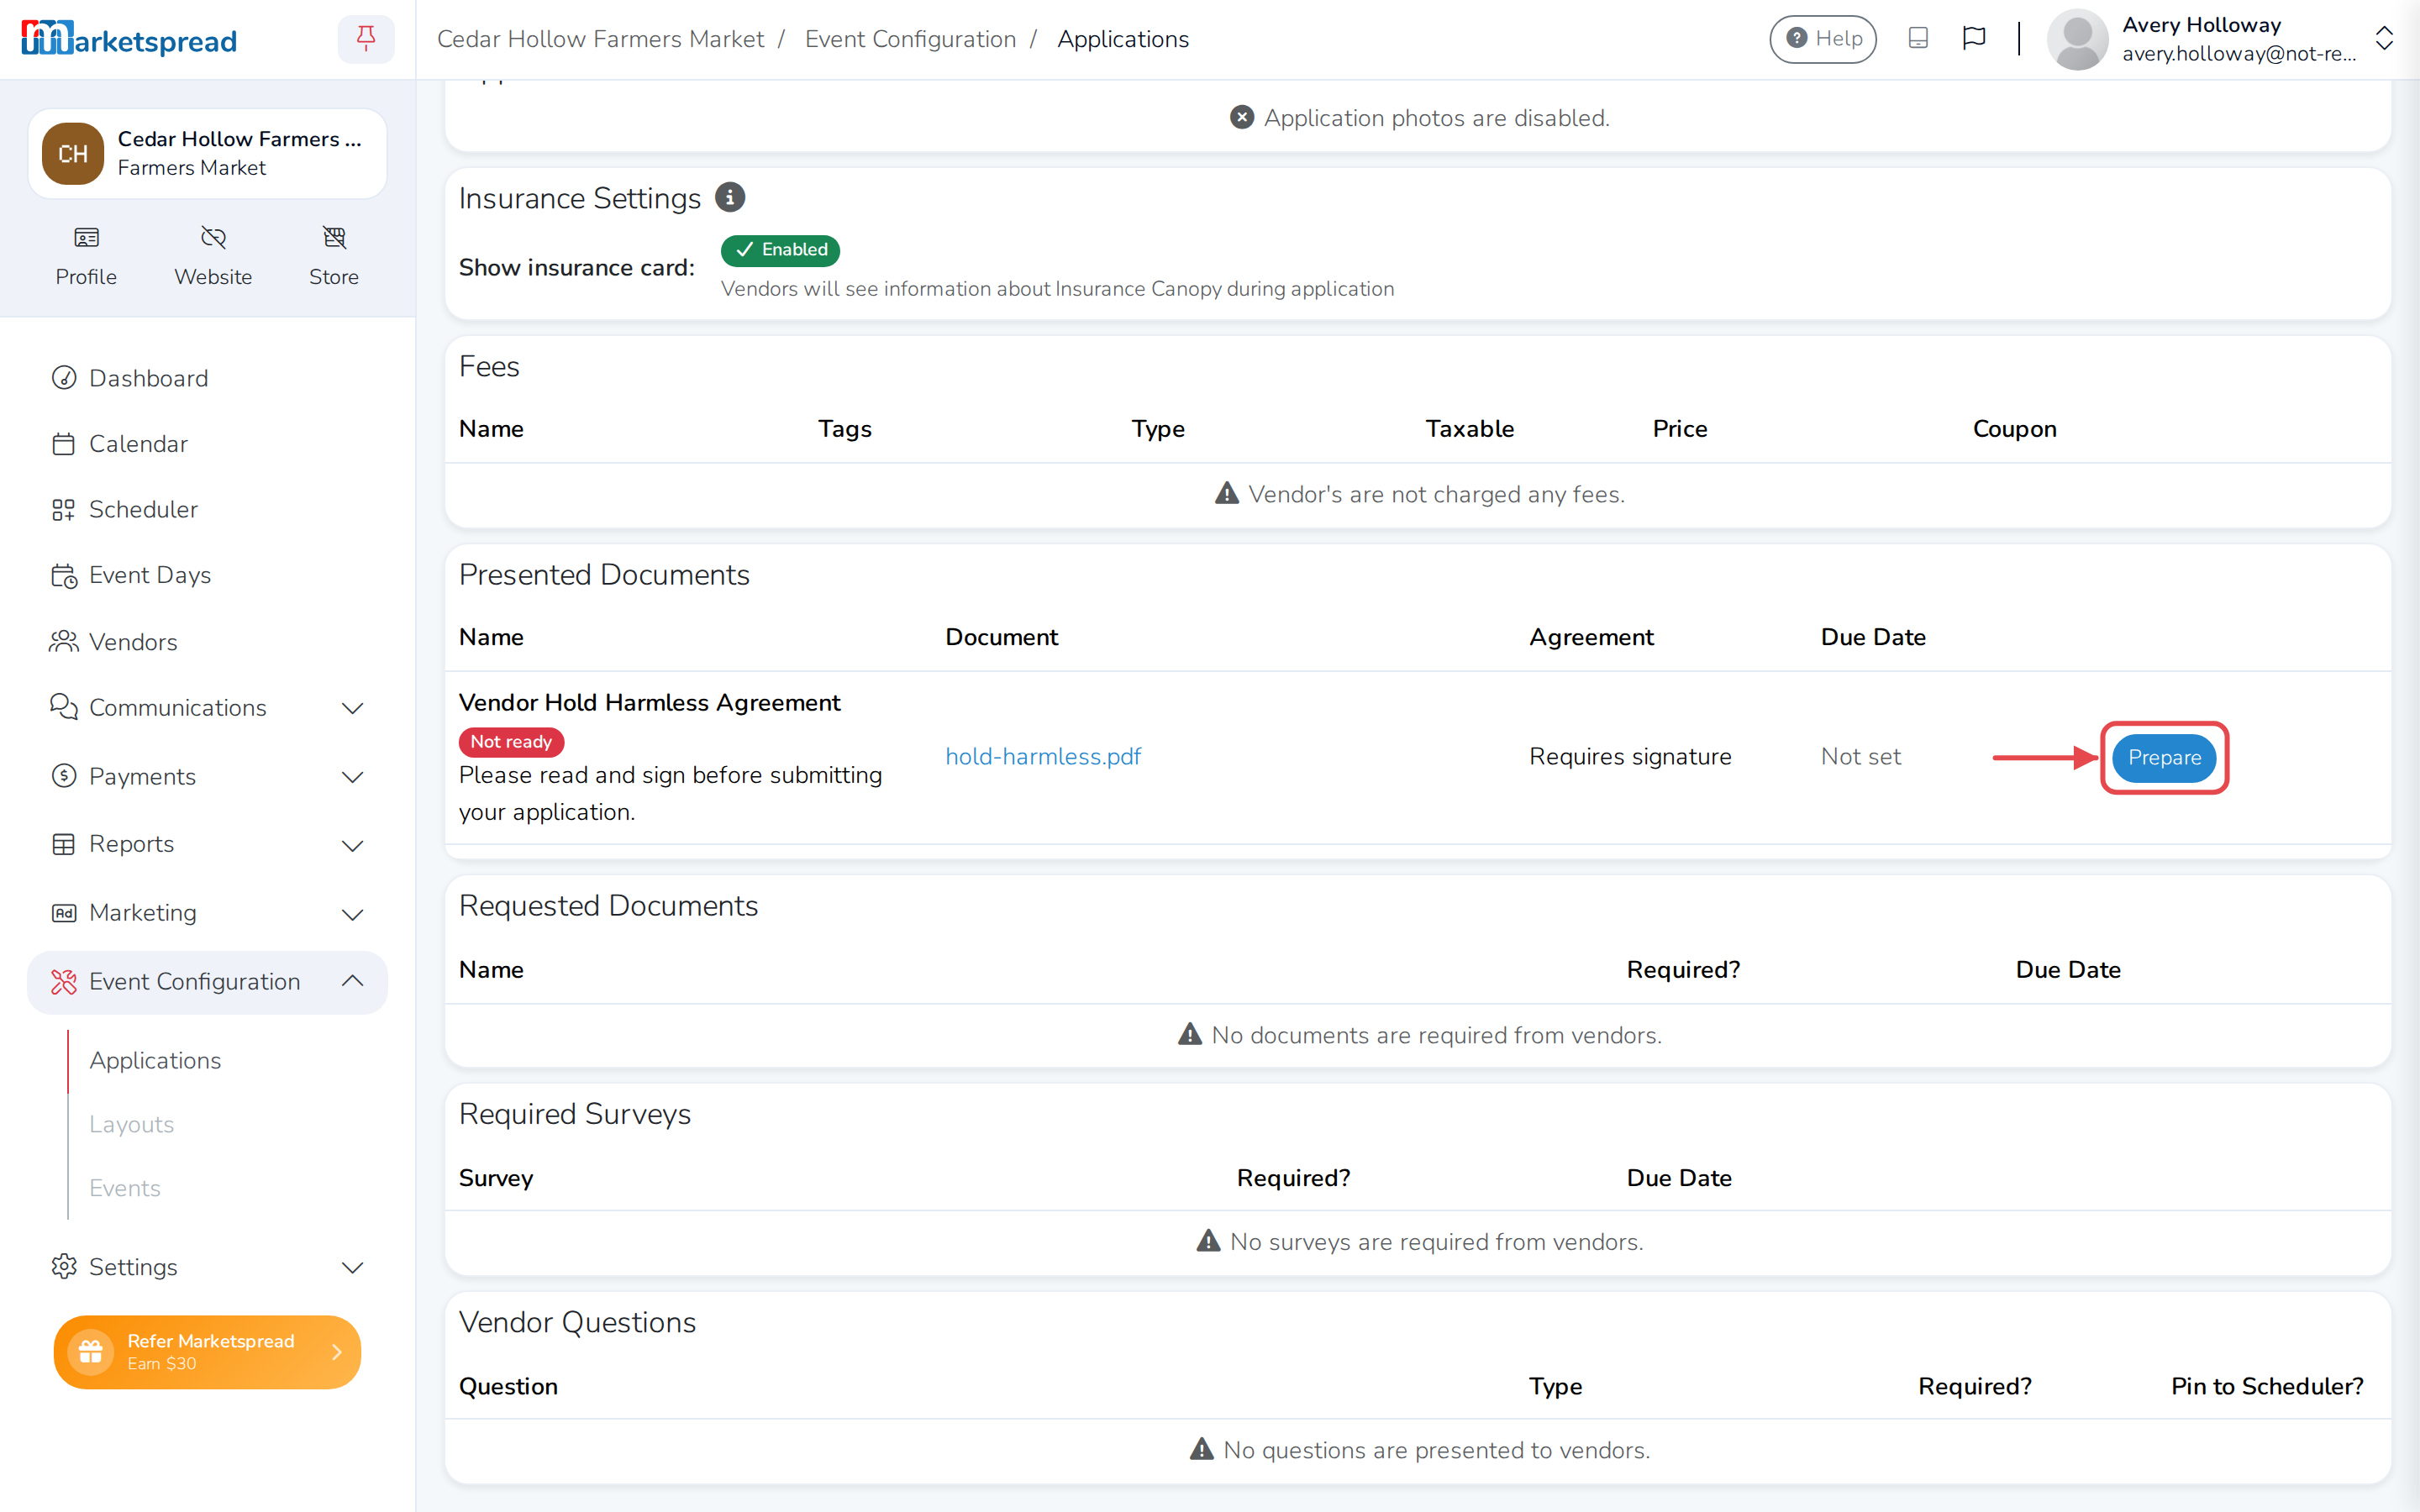
Click Jump to Presented Documents, then Prepare.
-
Drag the blocks you need onto the document. There are five: Signature,
Initials, Text Field, Checkbox and Date Field. -
Drag a block's edge to resize it.
-
Use Advanced on a block to set a date format, add a label, or require a
particular kind of answer. A label tells the vendor what to type. -
Click Save Document.
Prepare every document that shows Not ready, or the application is not
finished.
What the vendor sees
The vendor clicks Review & sign, fills in every required block, and
signs. A green mark confirms it, and they carry on with the rest of the
application.
Find a signed document
Open the vendor's application and you will see the document with the date and
time it was signed. Click it to read it, including the audit trail at the end.
Every document a vendor has submitted is also listed on their vendor record.