


If you've run an event before, you don't need to build a new application or layout for the next one — create the event from what you already have, then activate it. This article covers adding the event and its days, then activating it so vendors can start applying.
Tip
If you want vendors who were already accepted into a previous event to carry straight over, pick that event's application when you set this one up. See Run several events off one application.
Create your next event
-
In the left-hand menu, click Event Configuration, then Events.
-
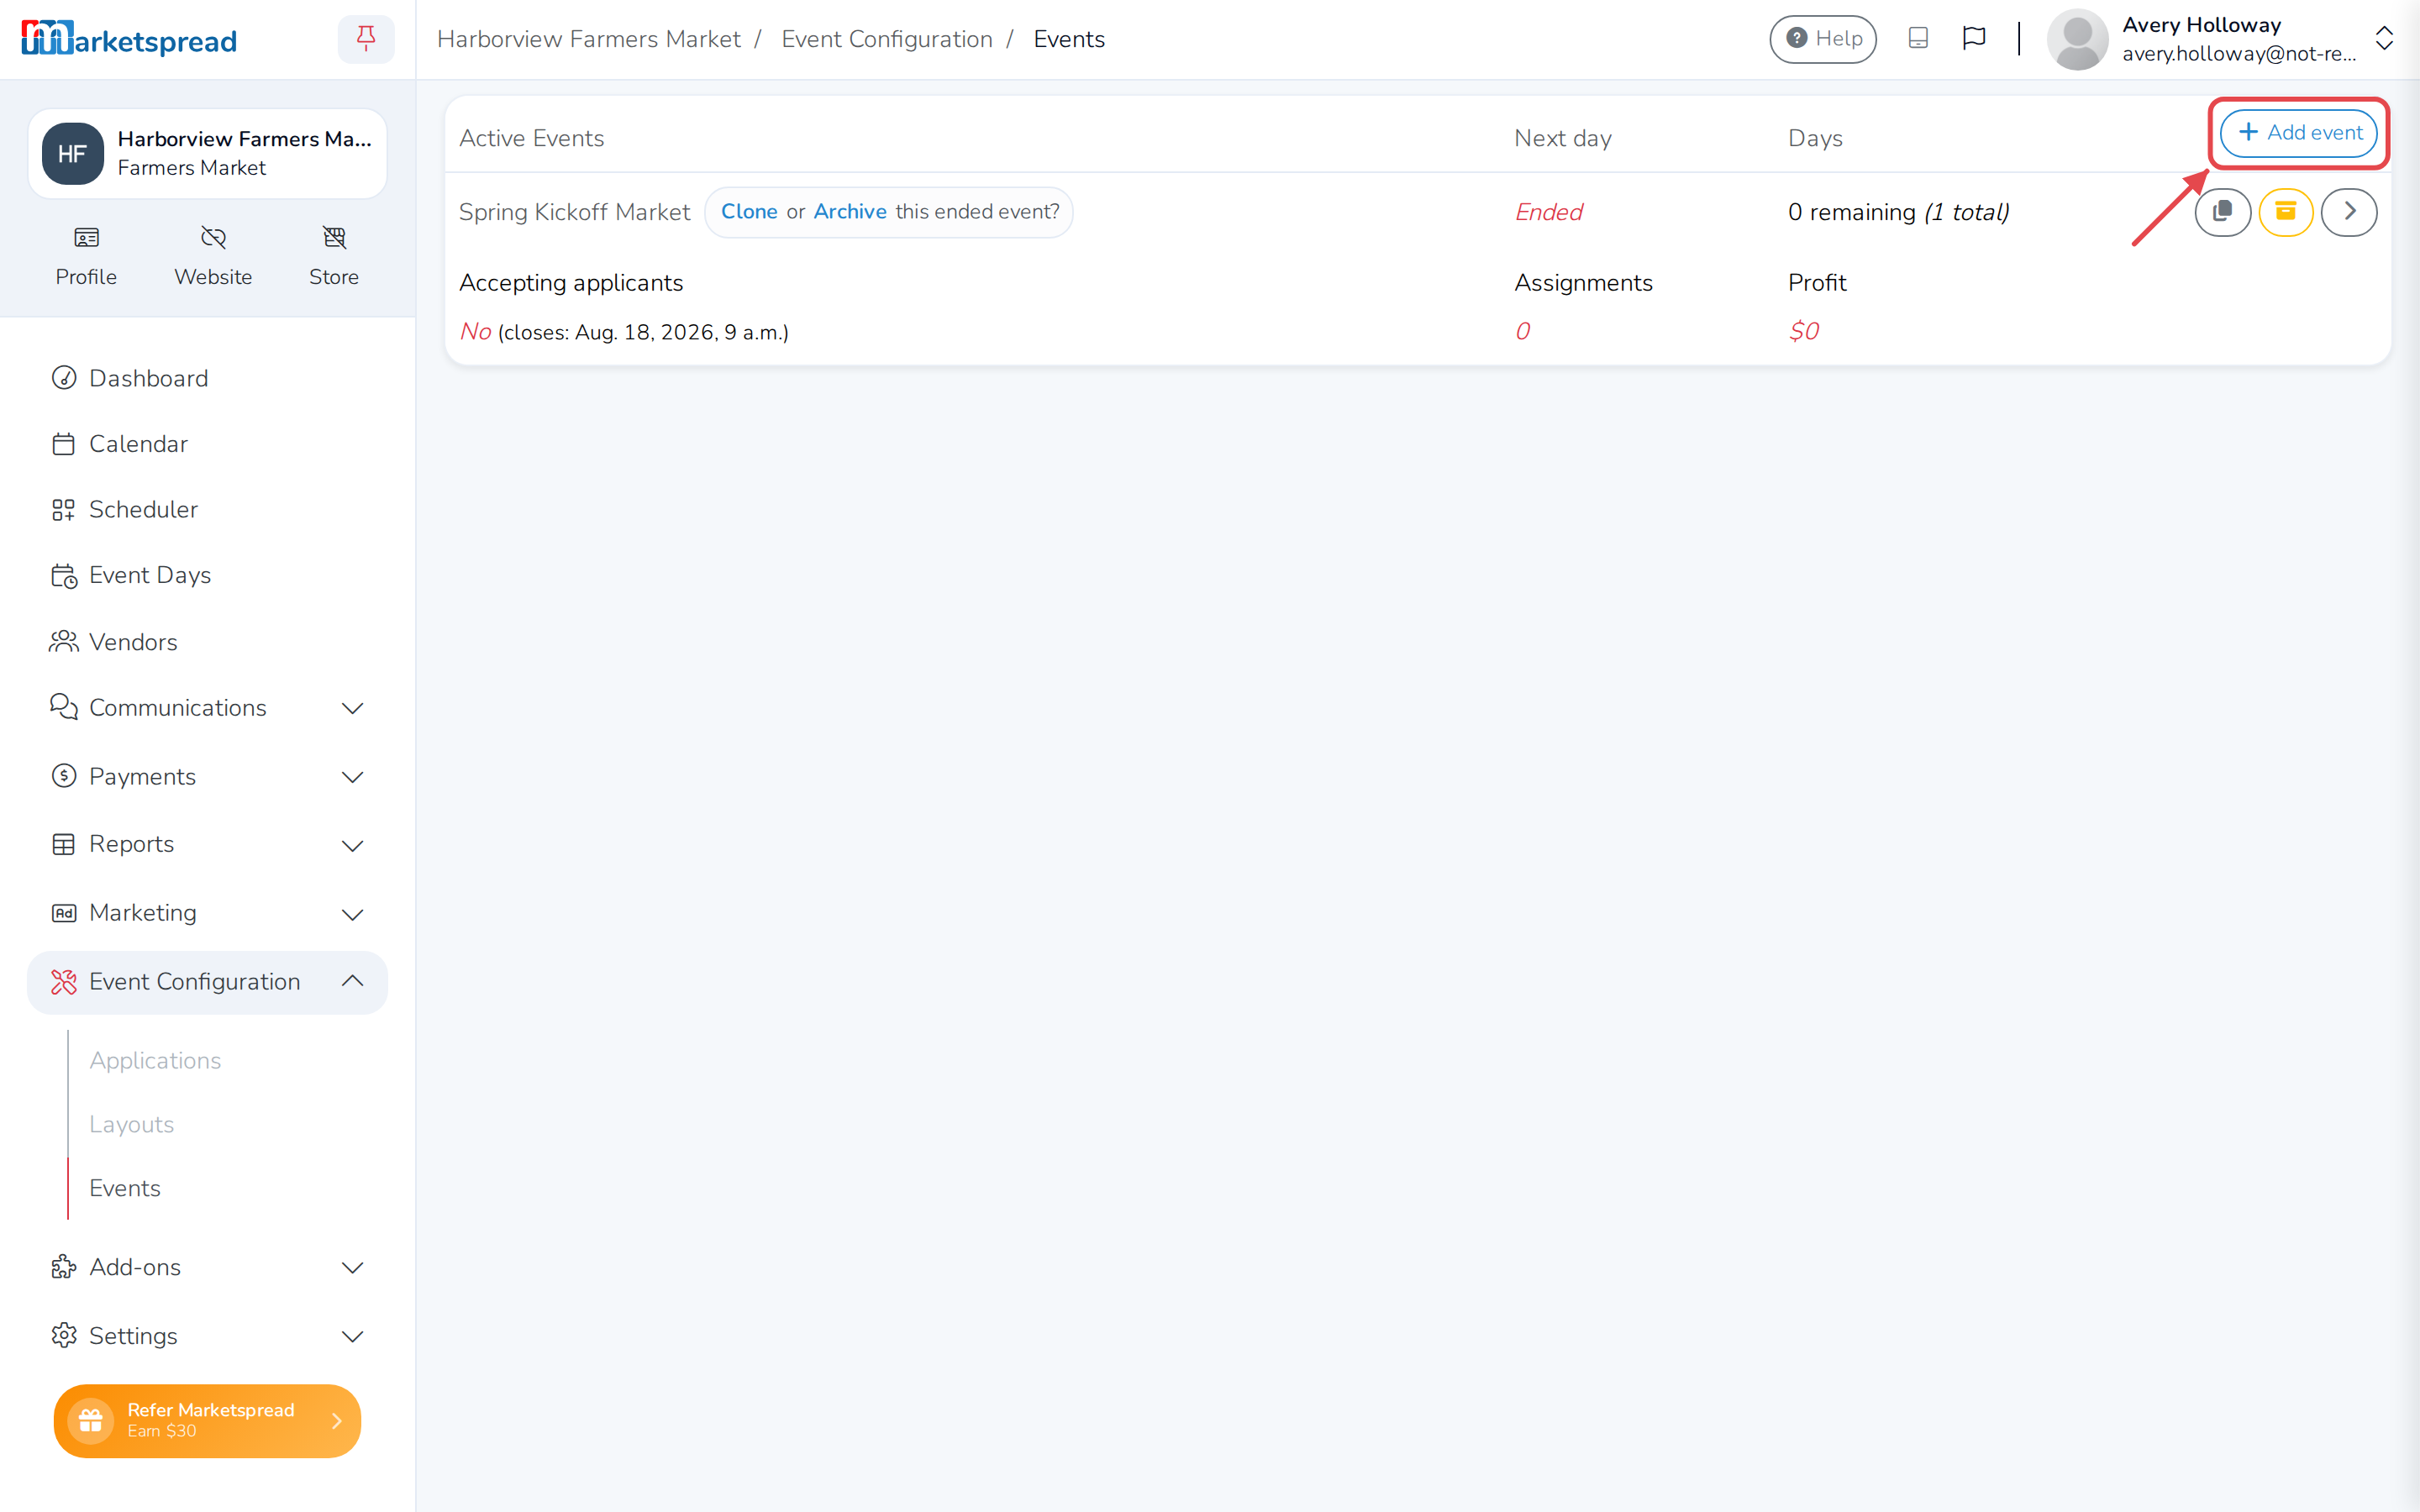
Click Add event.
-
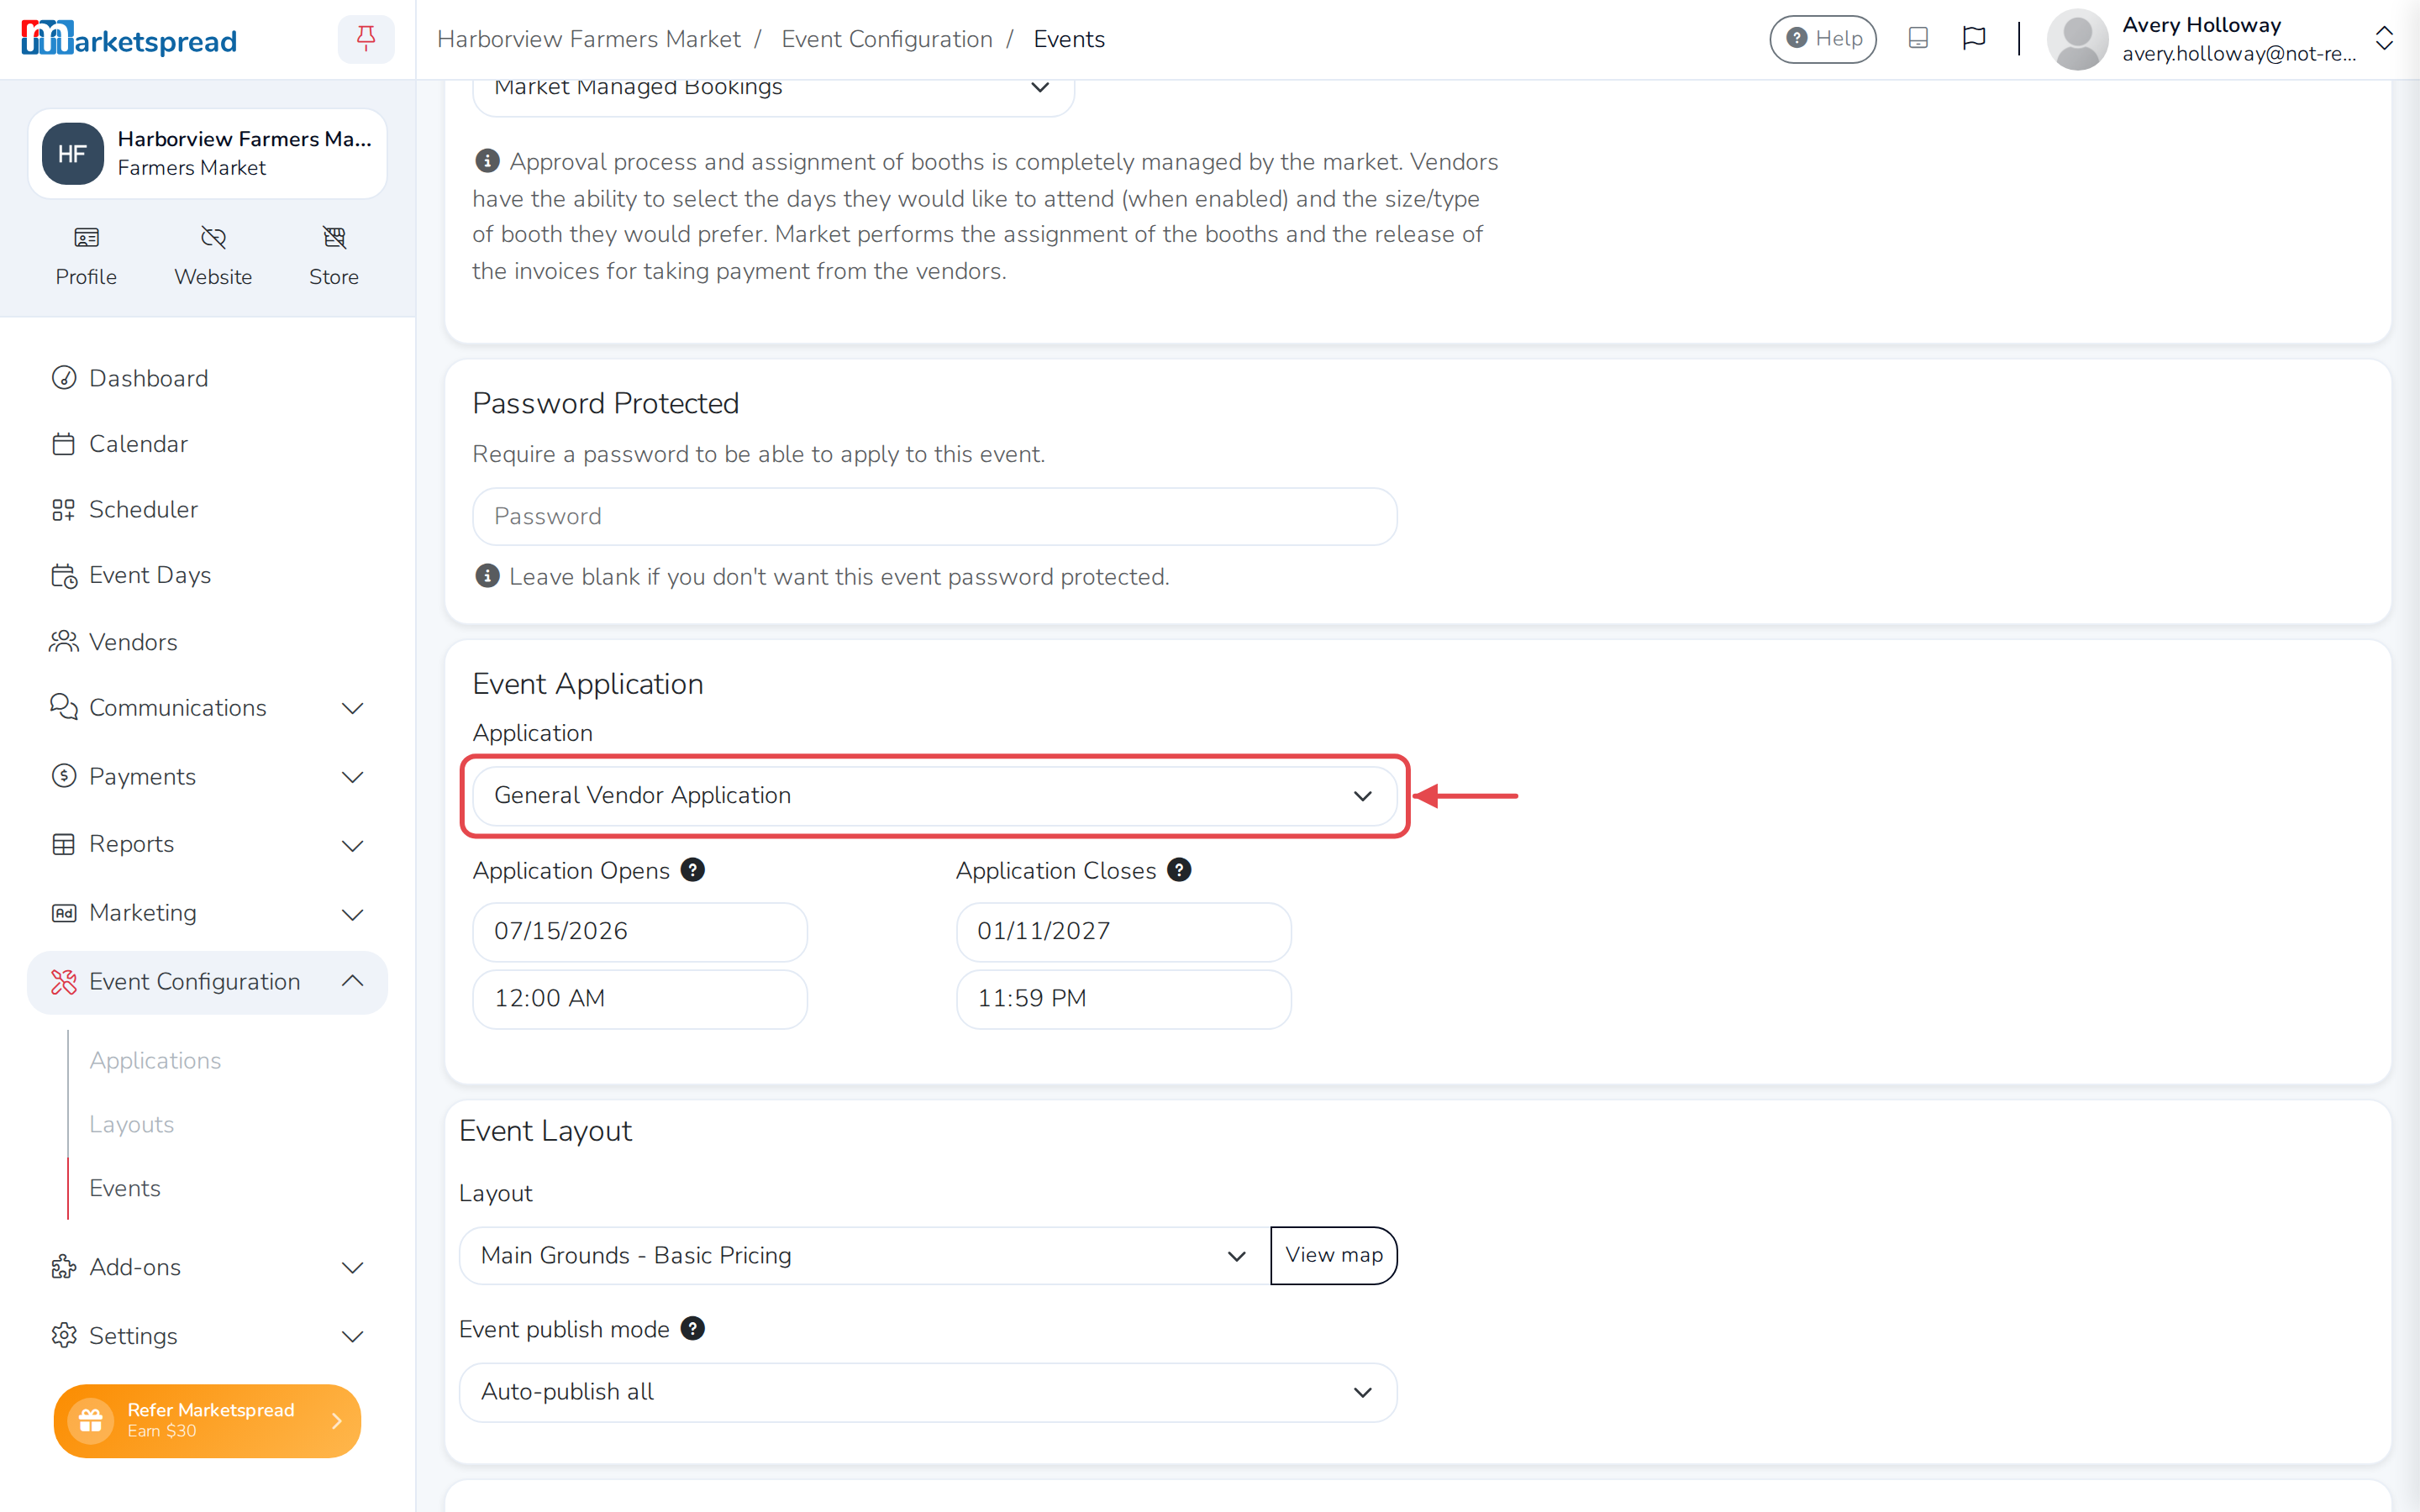
Fill in the event's details, choosing the application and layout you already have. For what each setting does, see Creating and Activating an Event or Event Season.
-
Click Save & add days.
Add your event days
- Enter the date, then the start and end time, in the day that's already there.
- Click Add day for each additional day, and fill in its date and times too.
- Click Save days.
Activate your event
Your event gets an Activate tab as soon as you create it, with a warning icon until you turn it on.
-
Click the Activate tab.
-
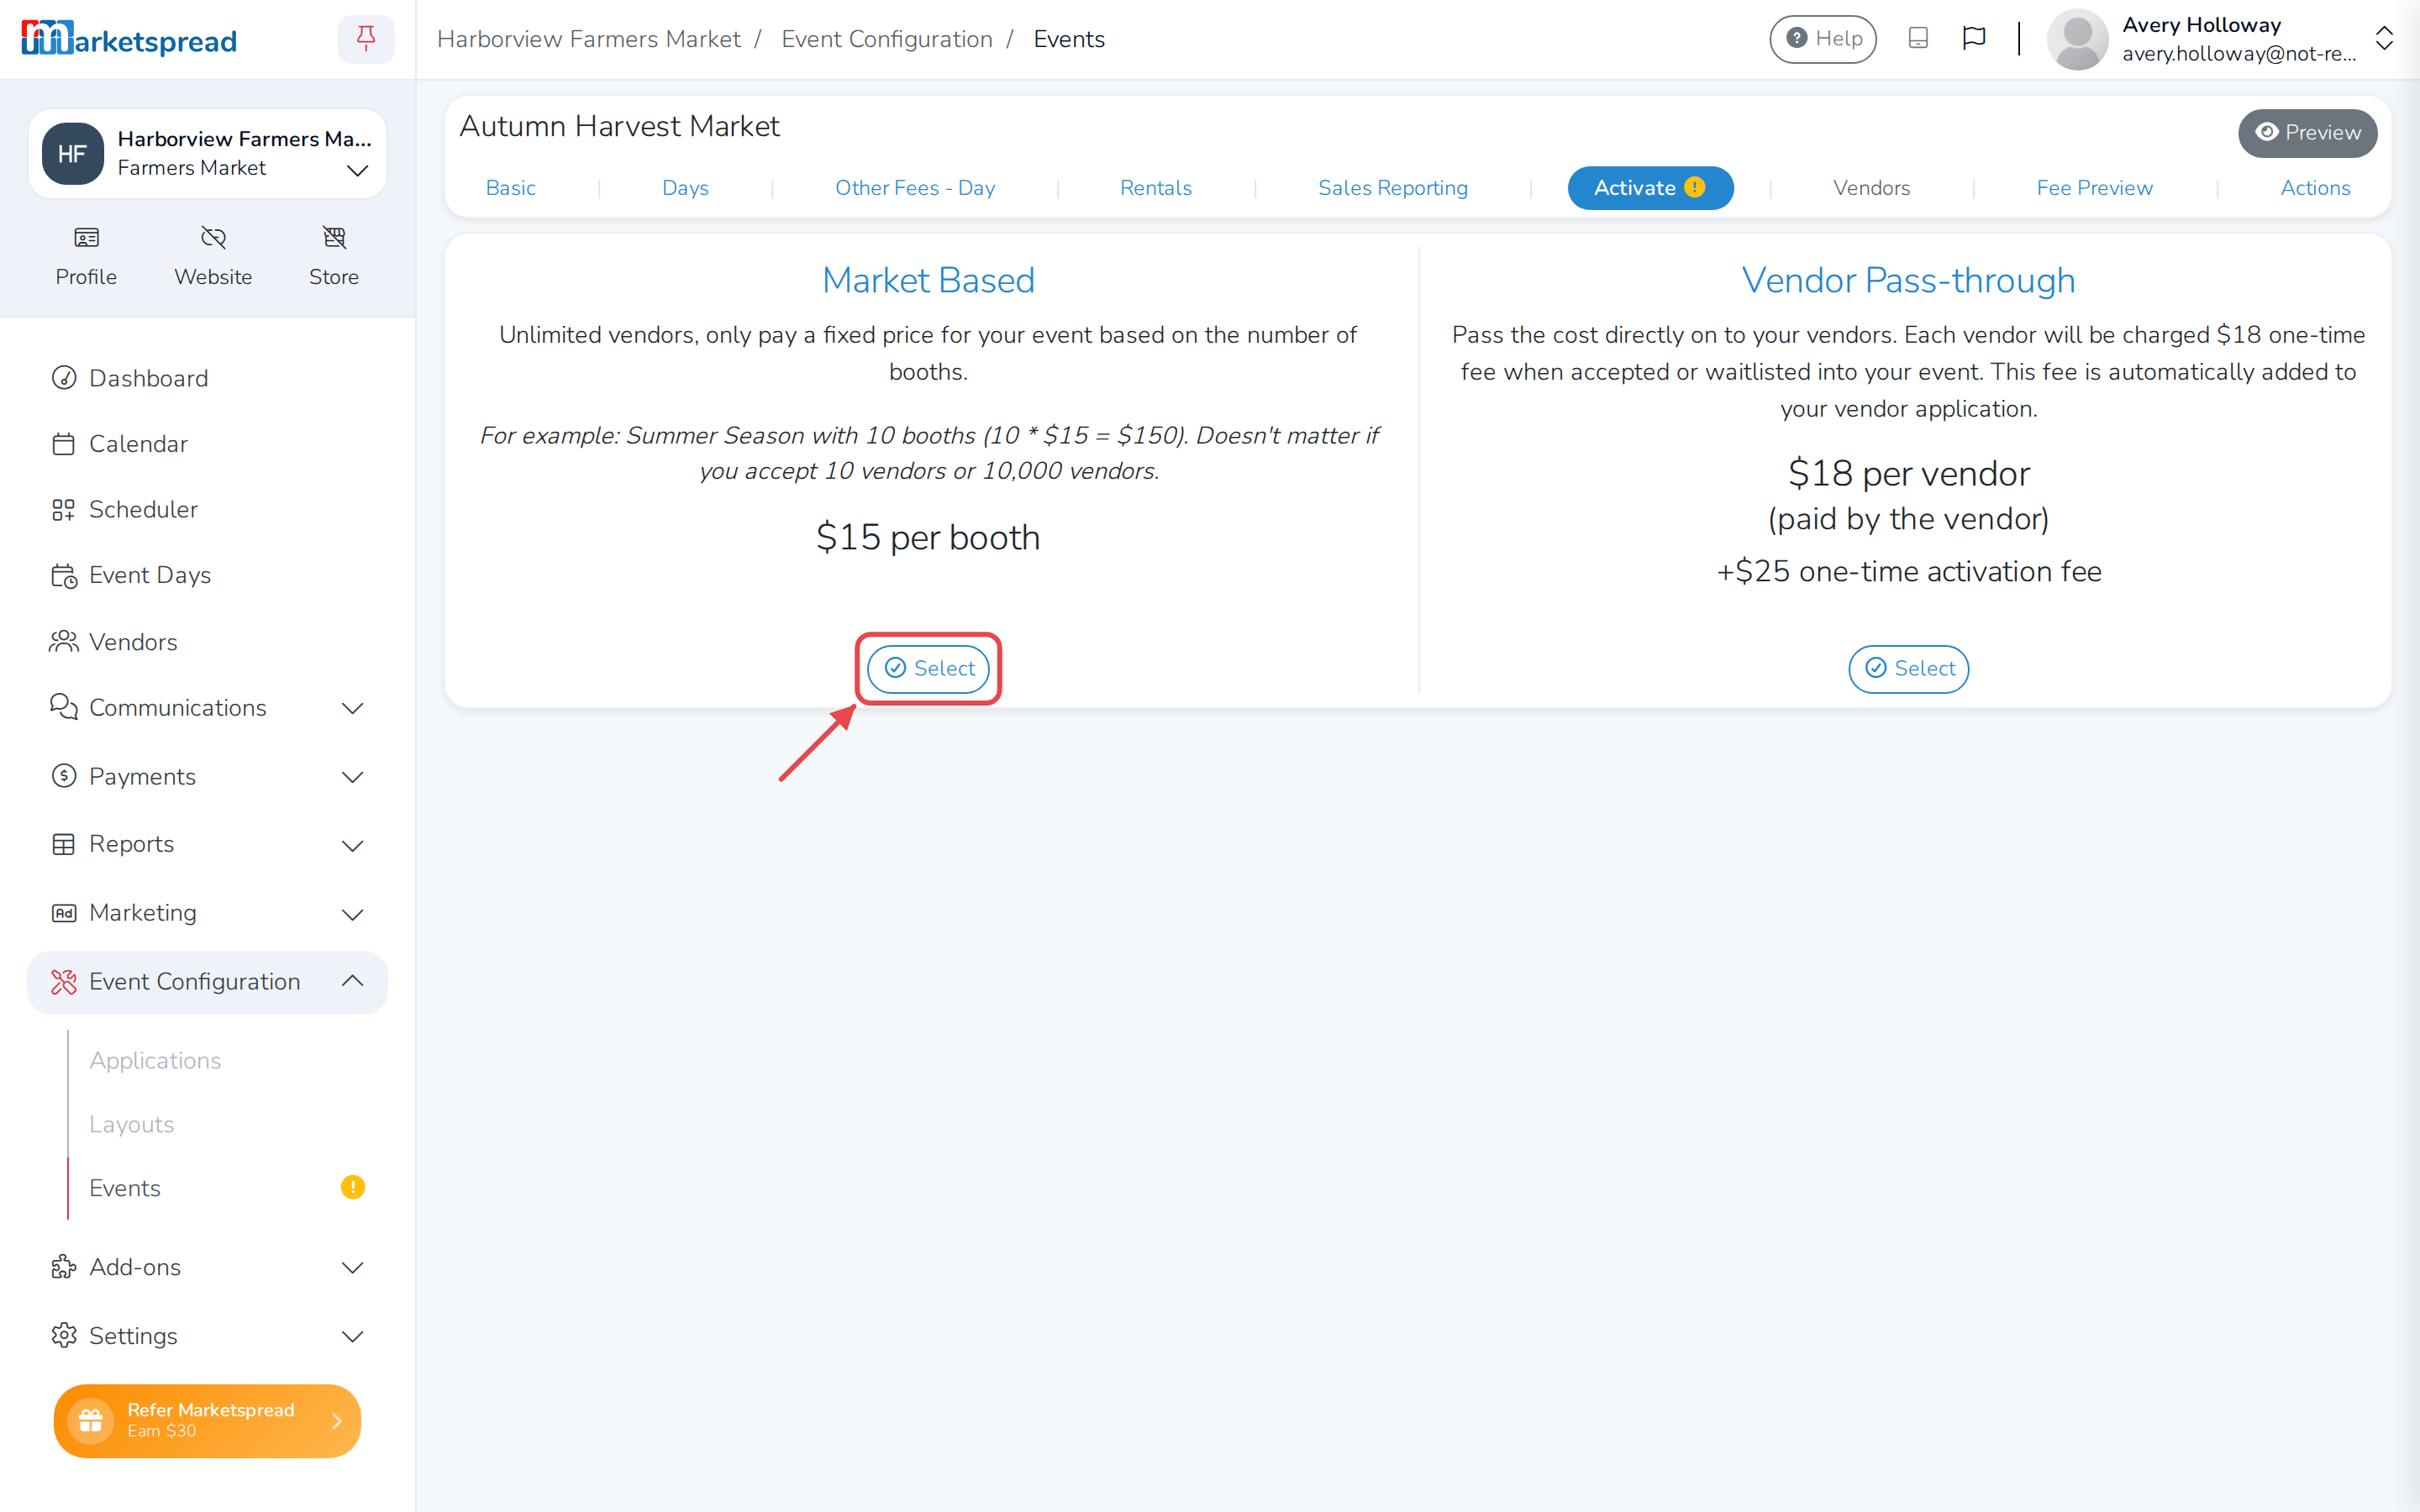
Choose Market Based or Vendor Pass-through, then click Select under the one you want.
Note
If anything is missing — a payment method, an application that isn't ready, a layout with no booths — this page tells you what to fix, with a button that takes you straight there.
Activate with Market Based pricing
The market pays for the event, so vendors don't pay anything extra to apply.
-
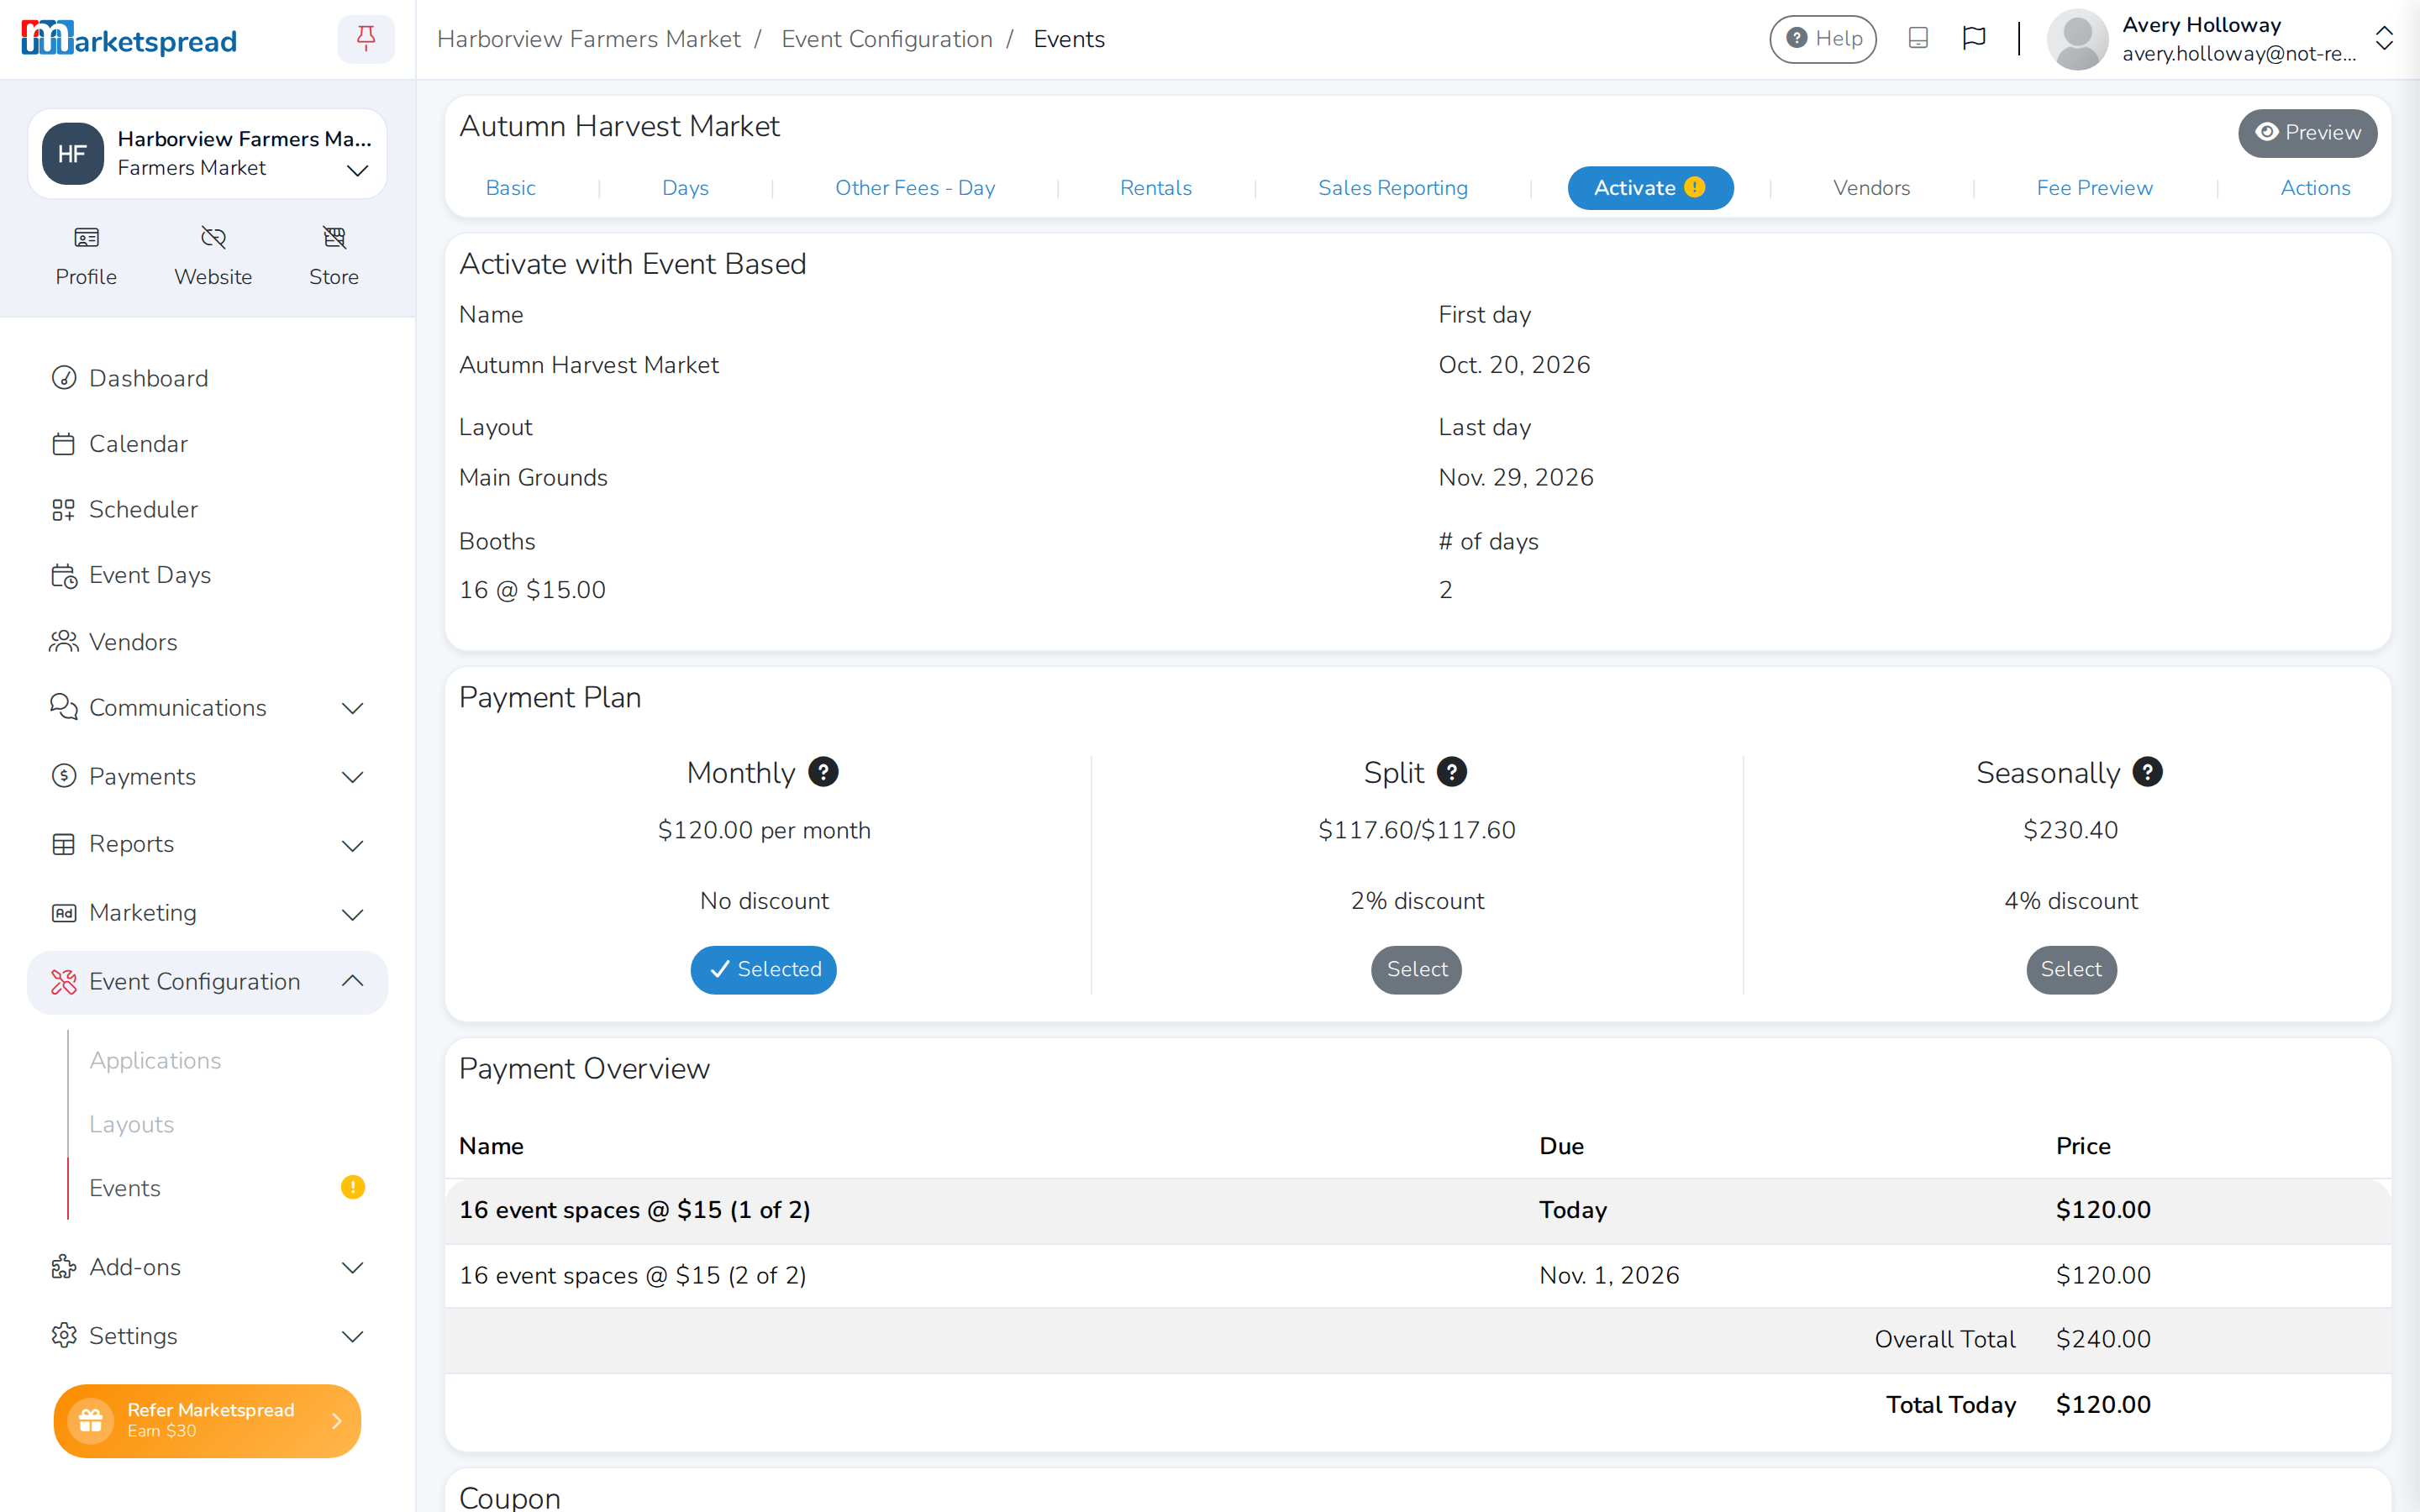
If you're offered more than one payment plan — Monthly, Split or Seasonally (pay in full for a discount) — choose one and click Select under it.
-
Click Pay at the bottom of the page.
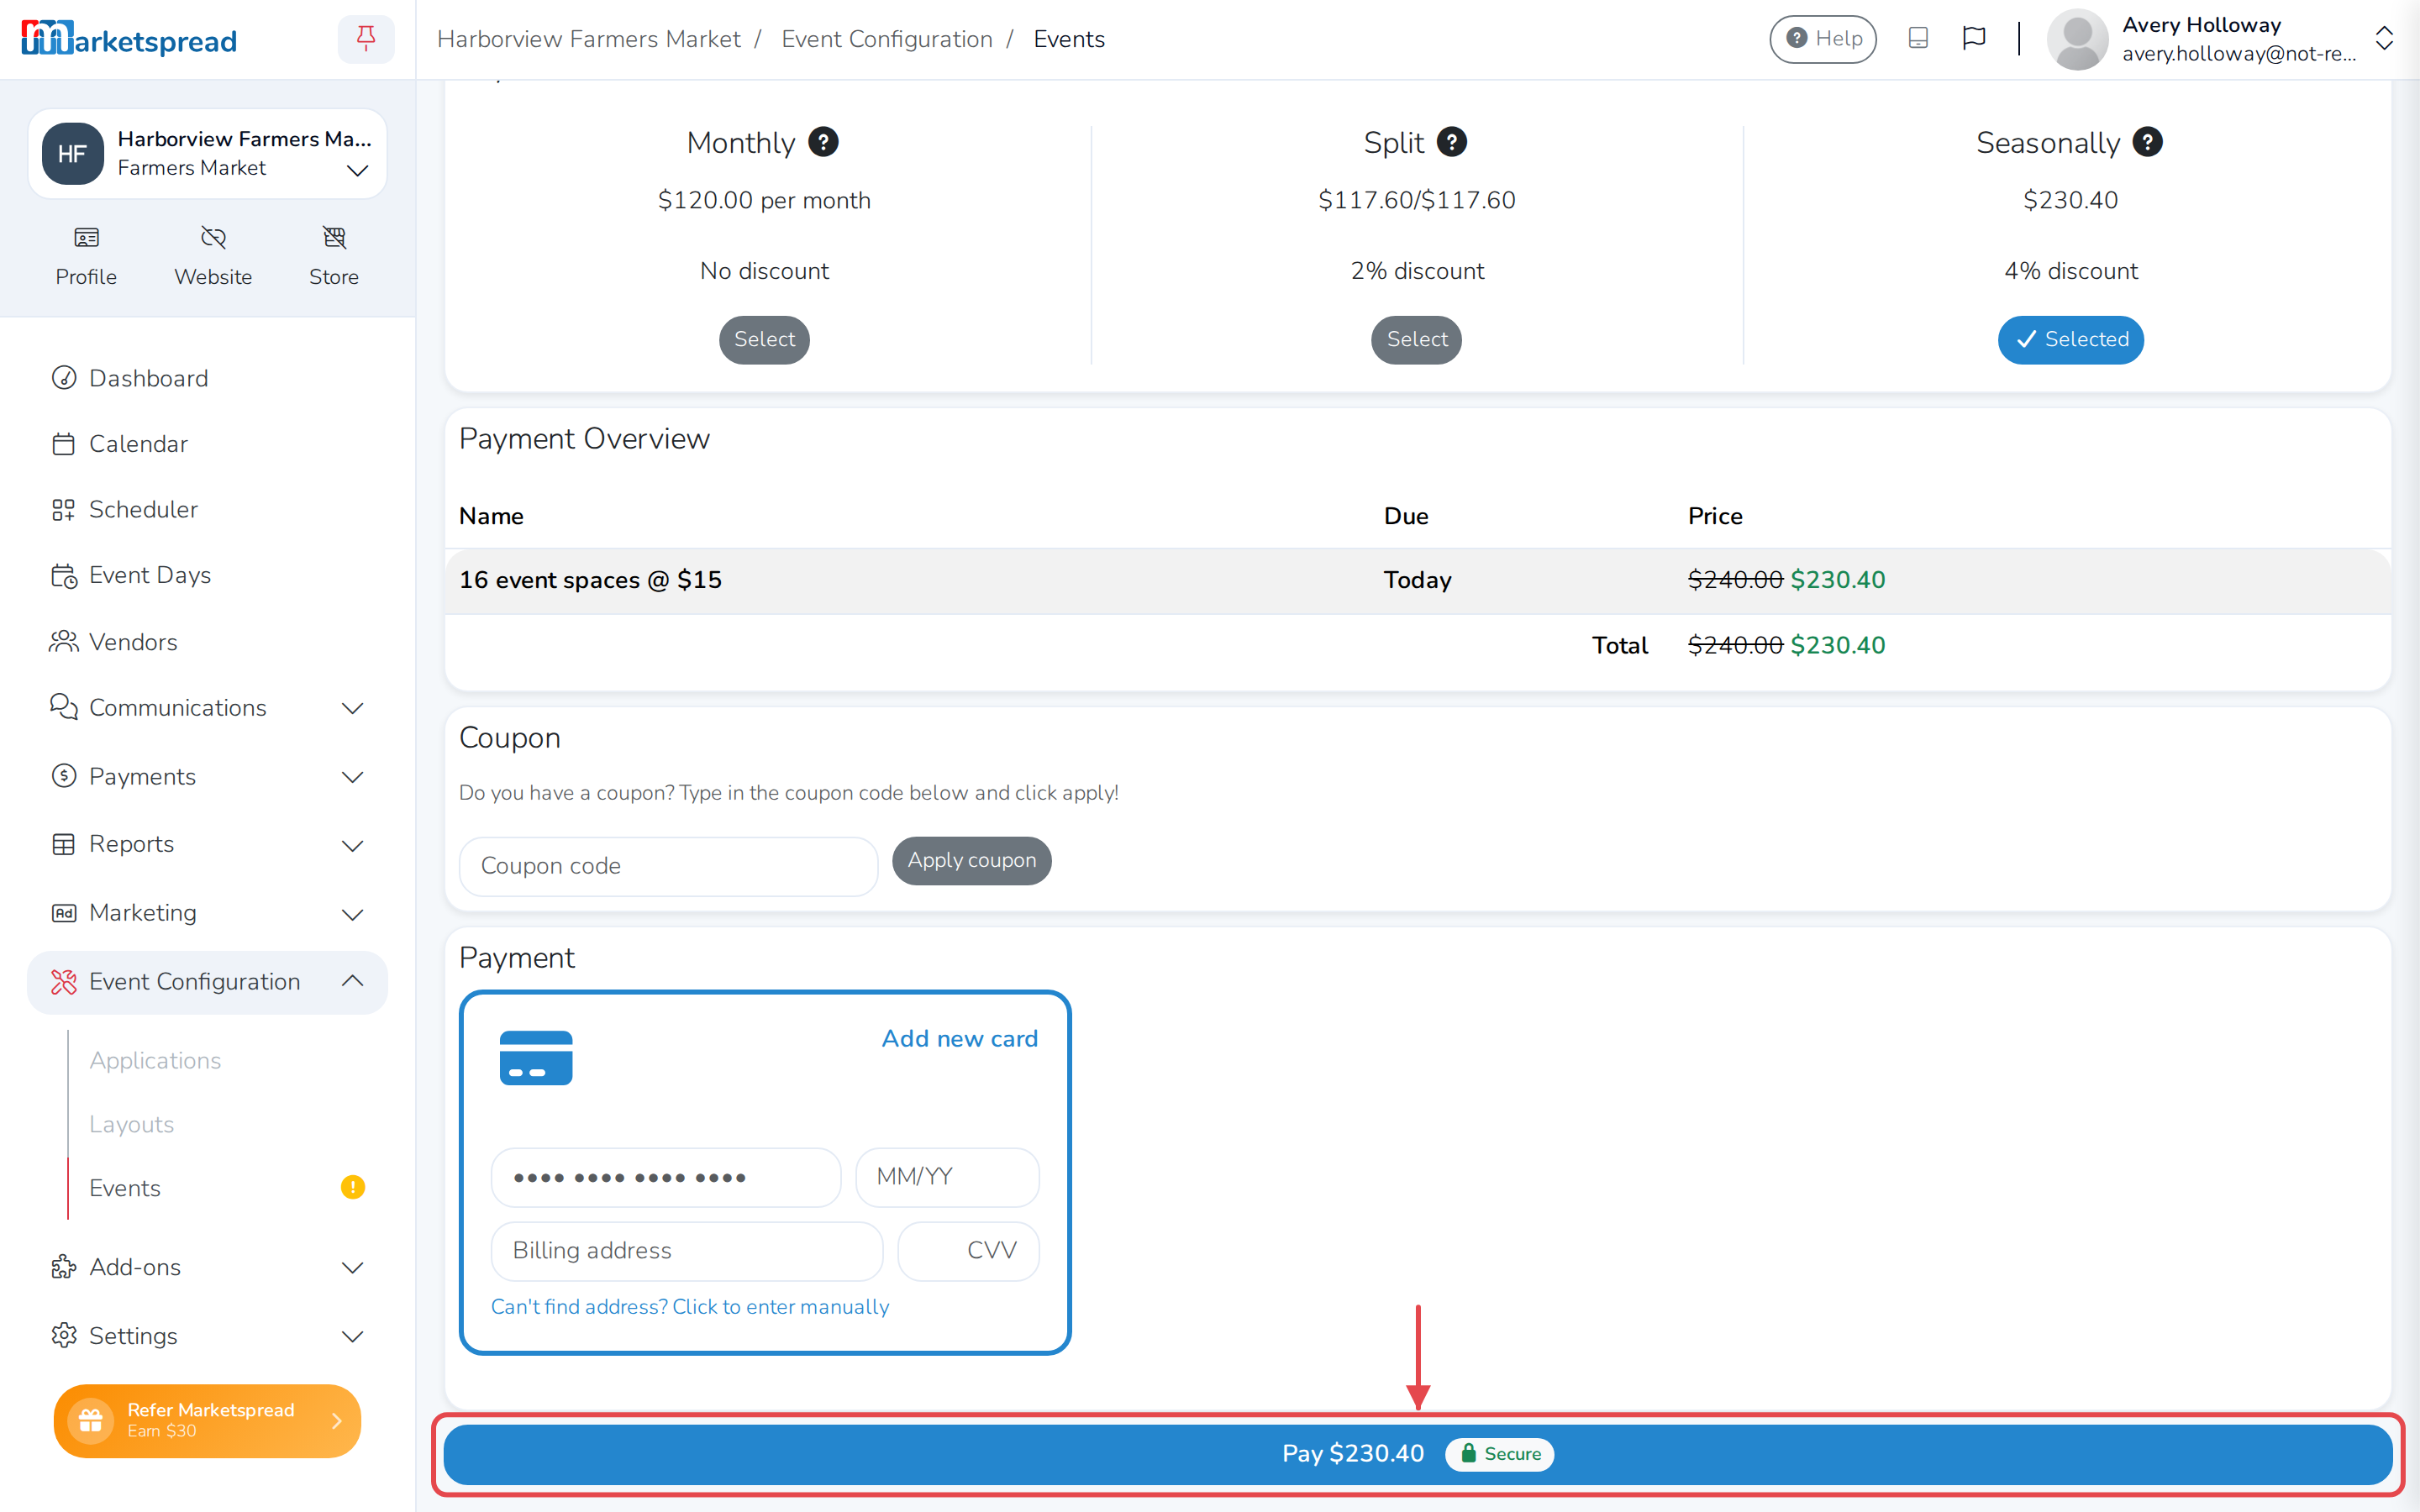
Tip
Have a coupon code? Enter it before you pay. See Using a Coupon Code when Activating an Event.
Activate with Vendor Pass-through pricing
Vendors cover the cost of applying, so you pay only a one-time activation fee to open the event.
-
Review the activation fee.
-
Click Pay at the bottom of the page.
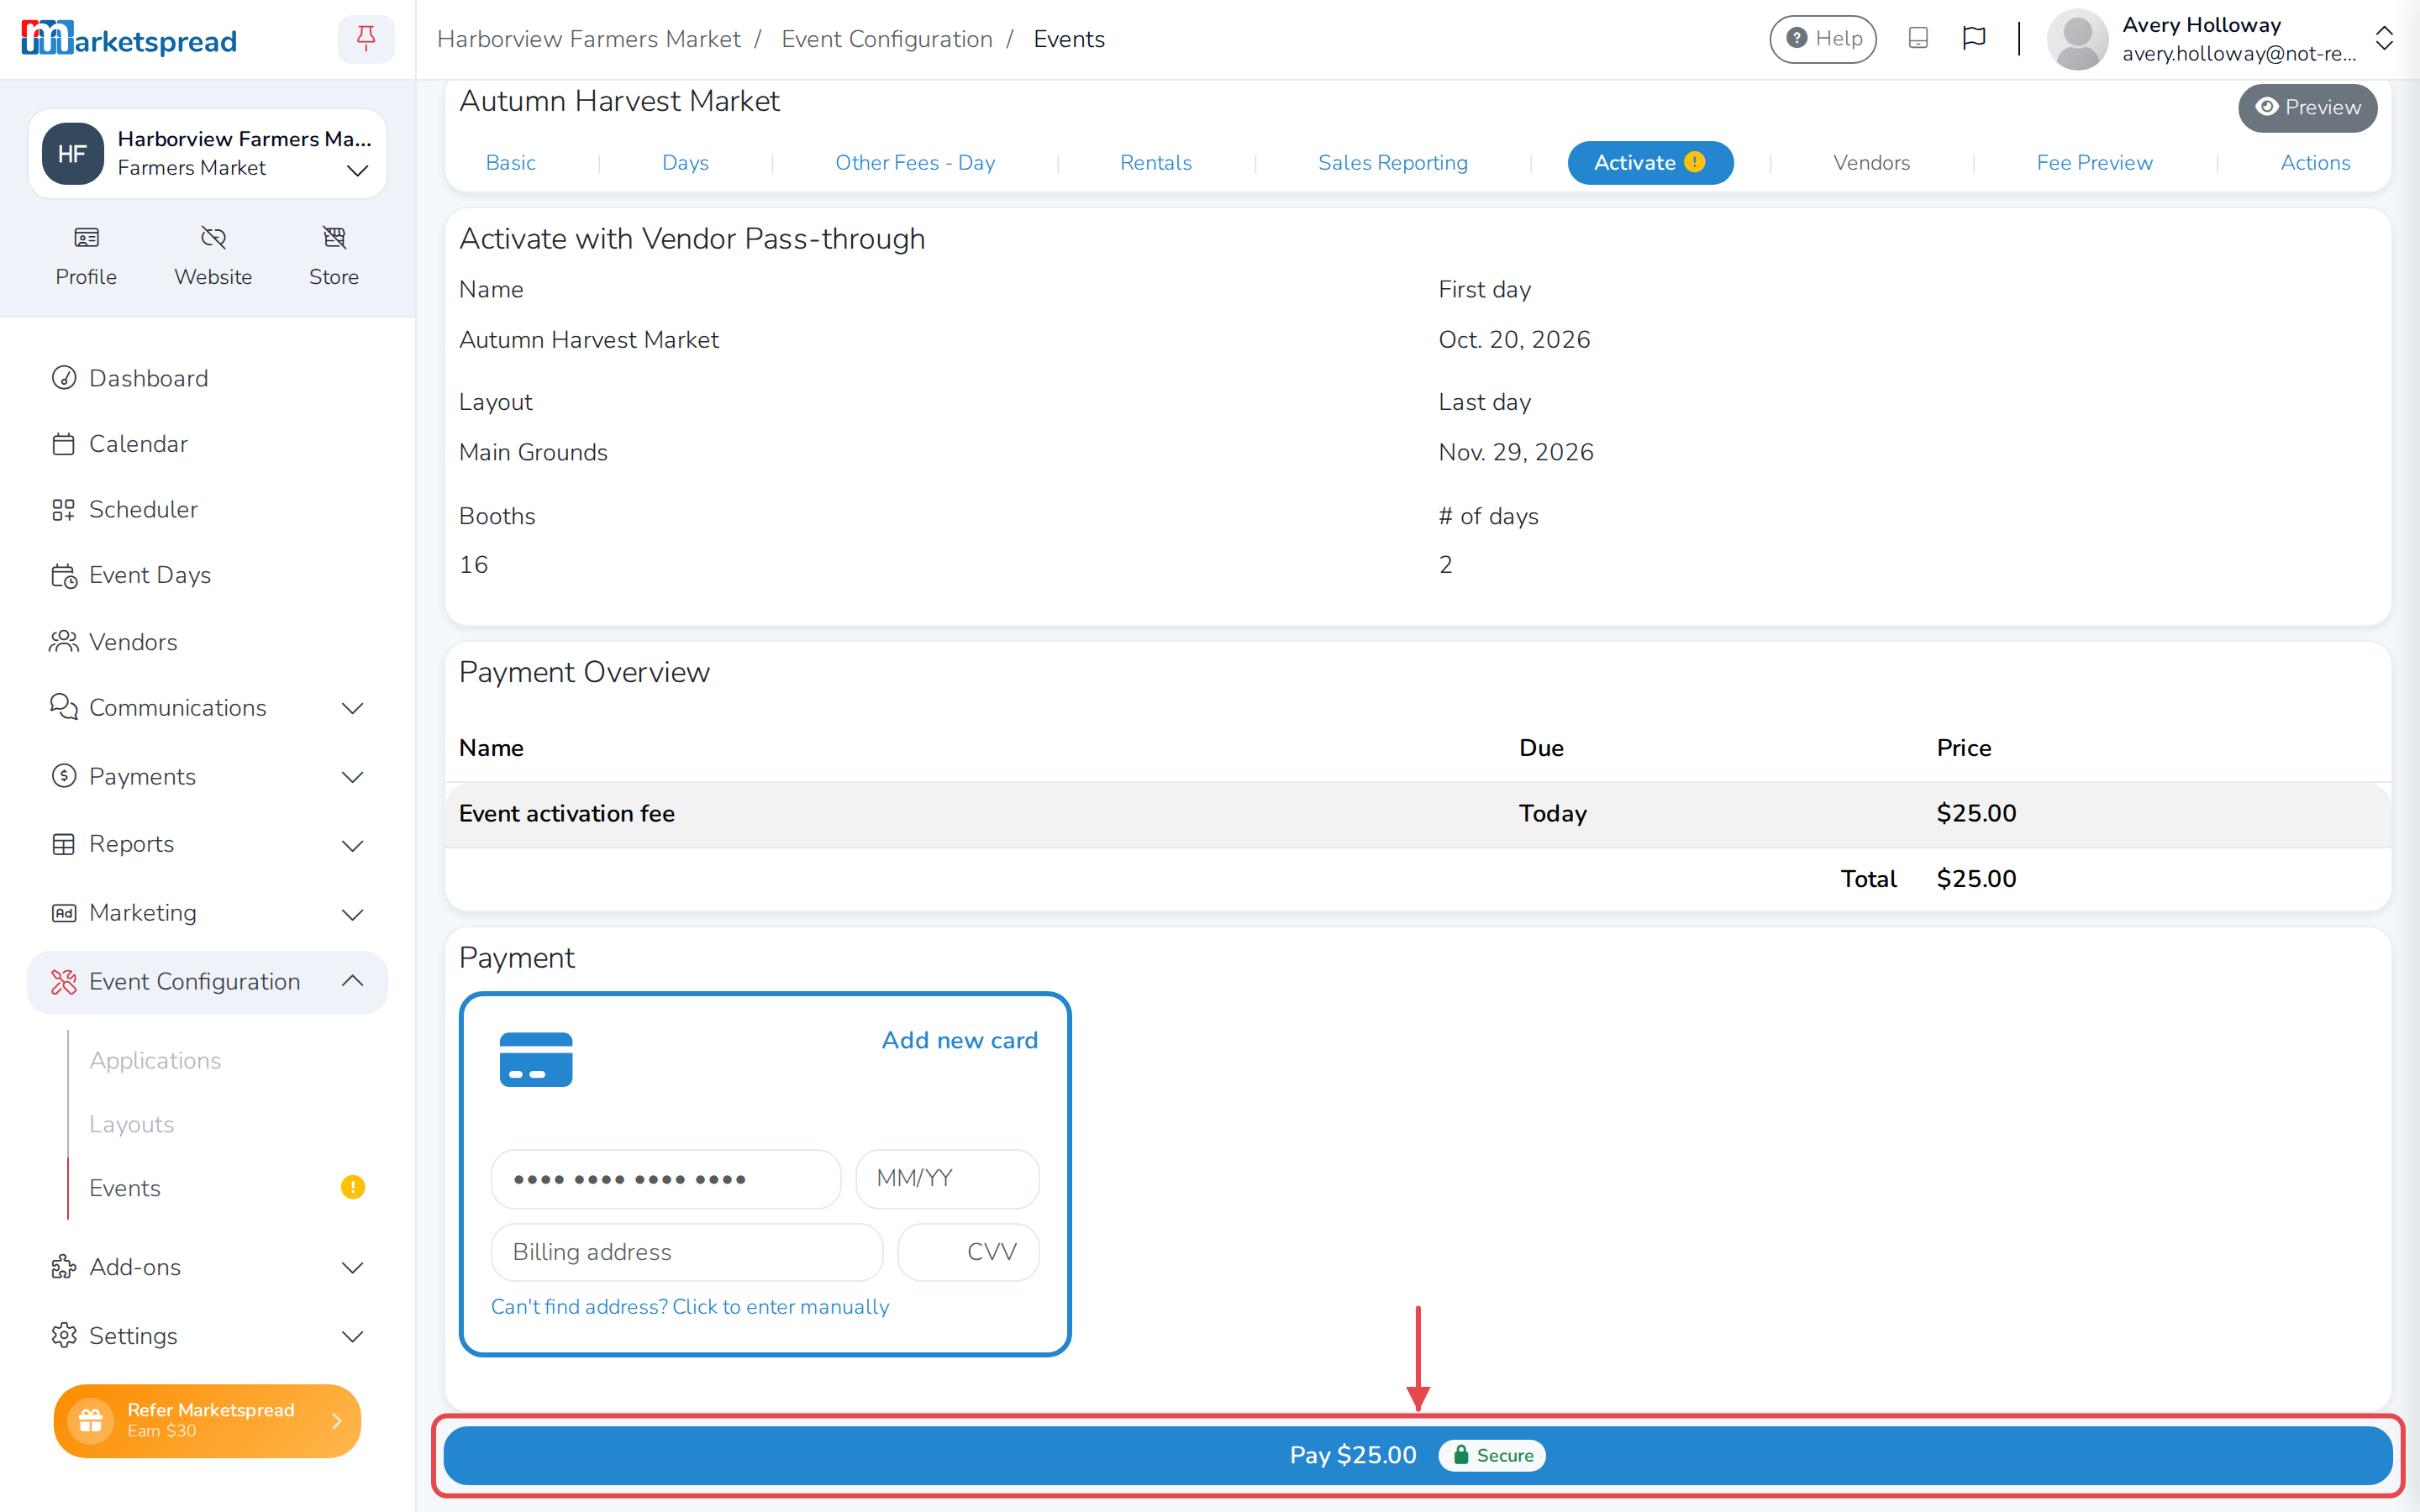
Once payment goes through, your event is active and vendors can apply. Next, find and invite vendors to it.