


Your market's calendar shows your event days automatically, and lets you and your team track meetings, volunteer shifts and other tasks alongside them. Open it by clicking Calendar in the left-hand menu of your market dashboard. From there you can:
- See your event days, and switch how you view them
- Jump to a date, or see another employee's calendar alongside your own
- Add your own events and tasks, and mark a task complete when it's done
View your calendar
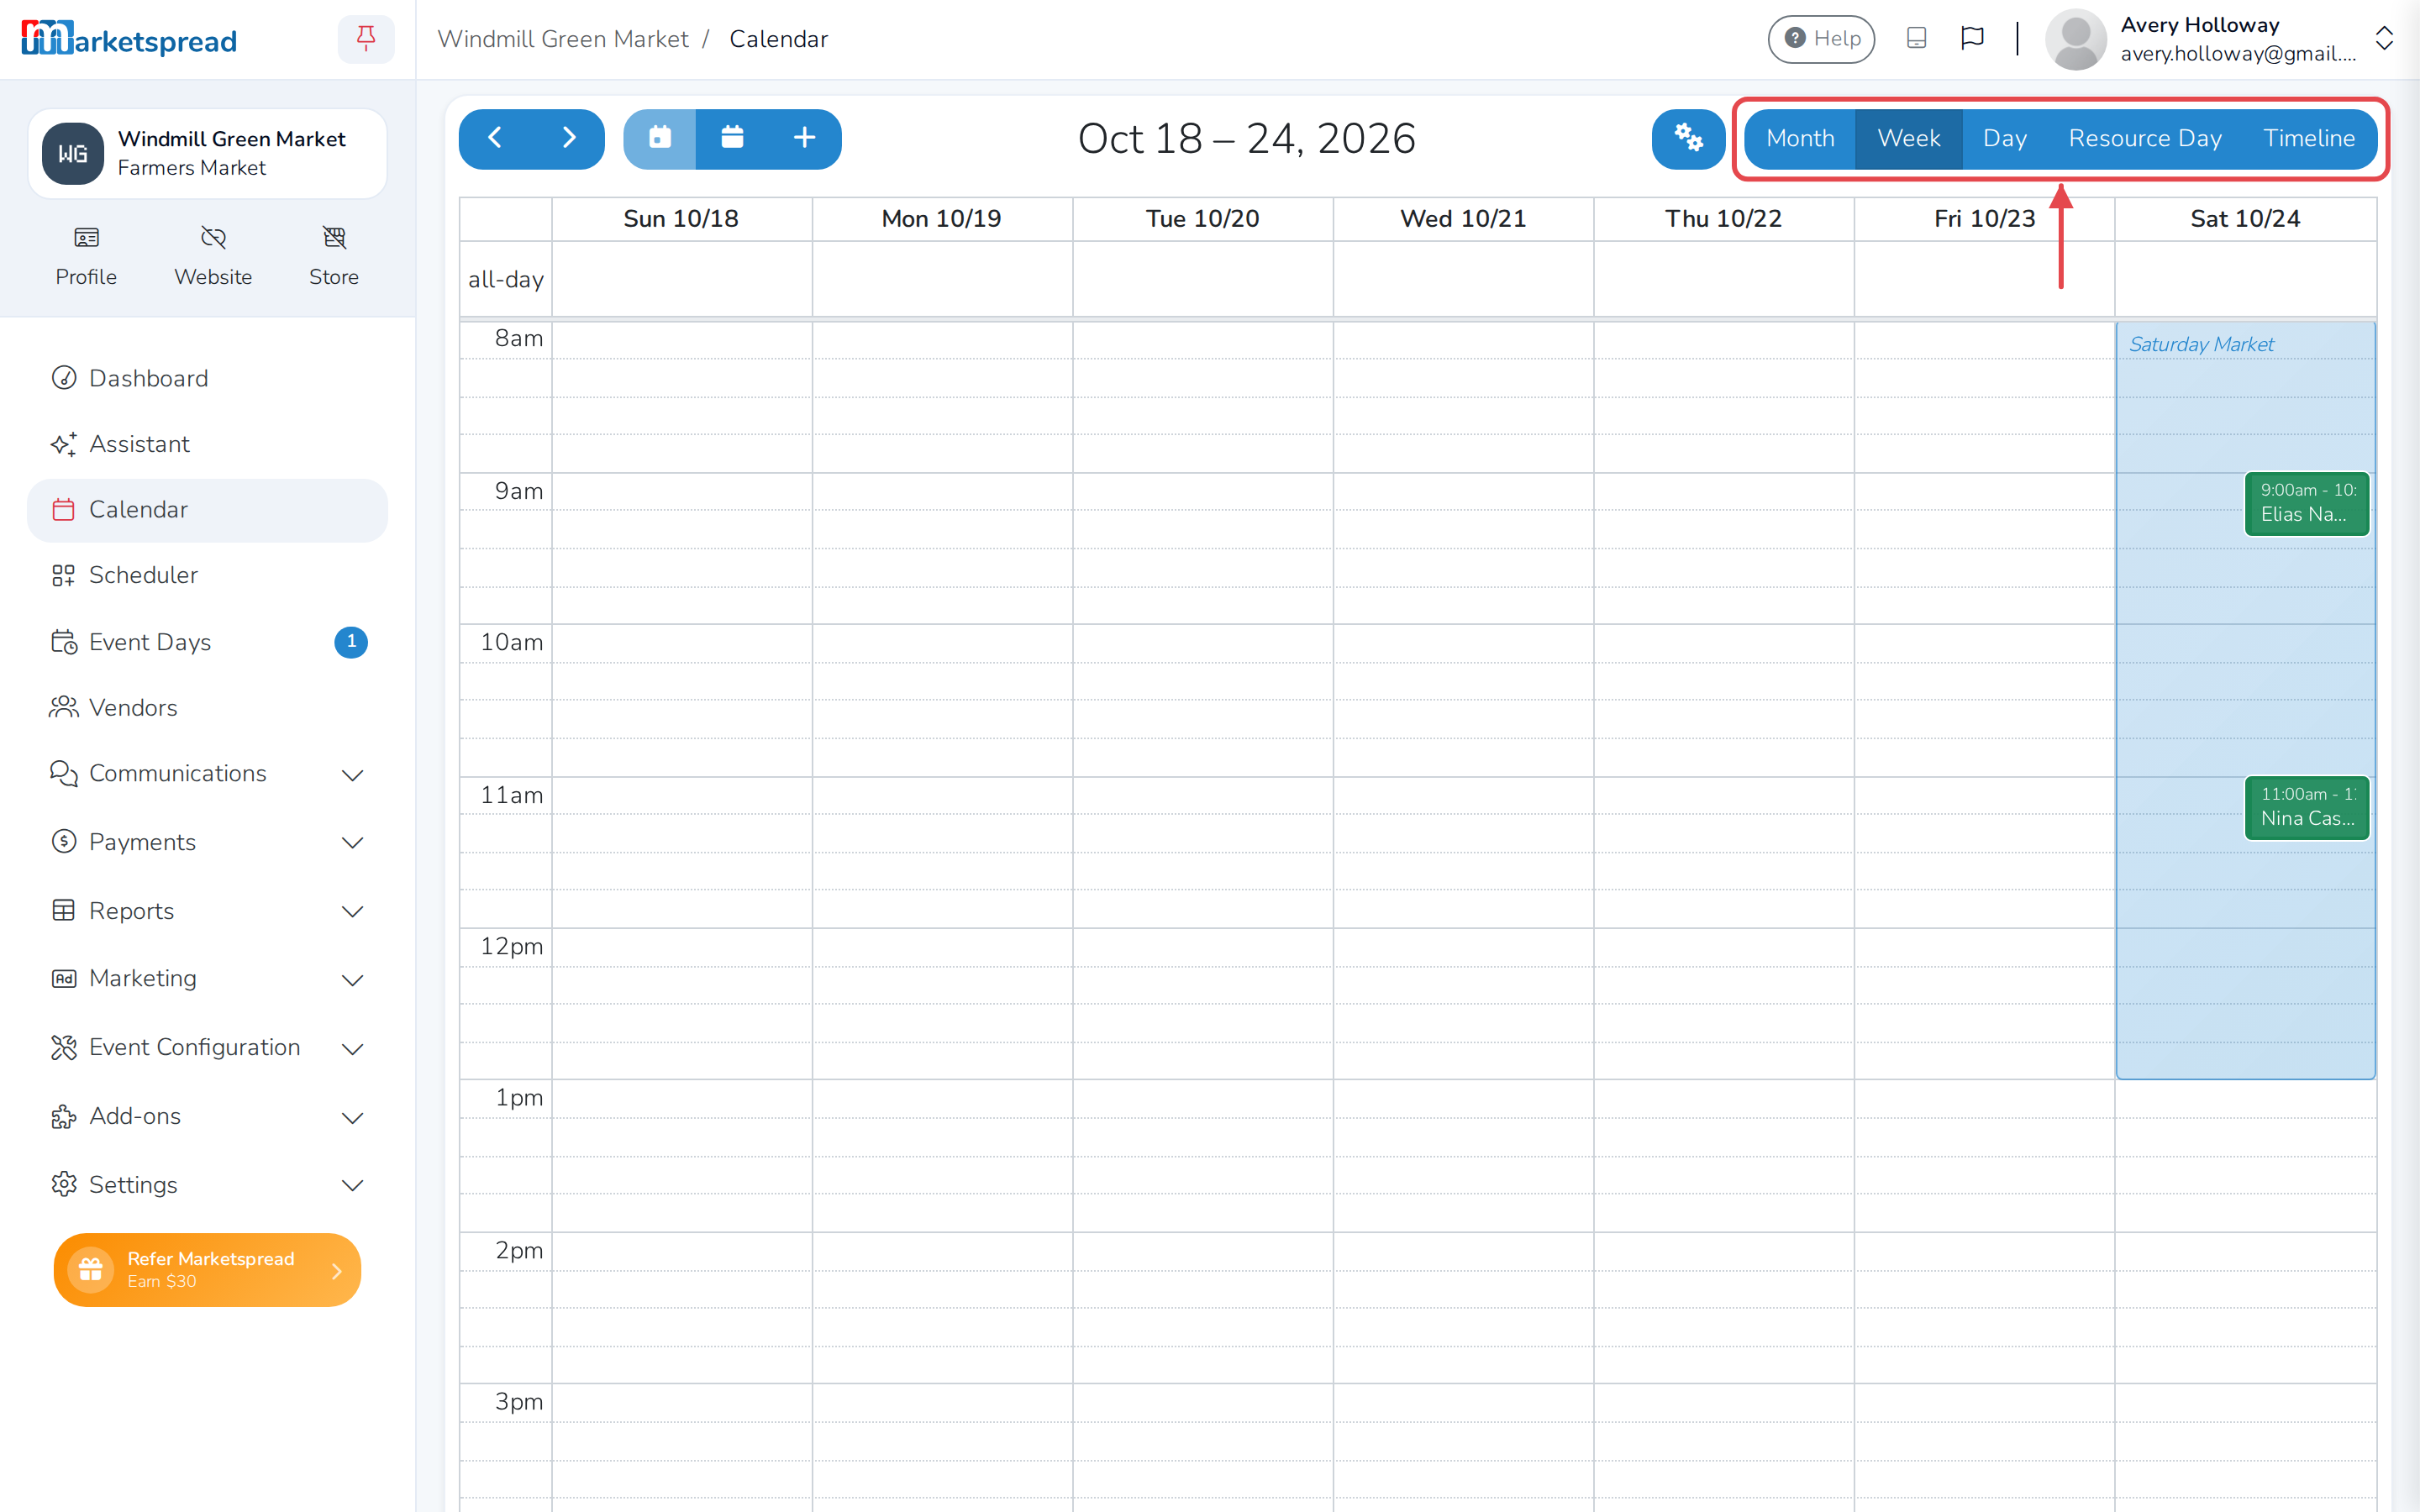
- Click Calendar in the left-hand menu. It opens in Week view.
- Click Month, Week, Day, Resource Day or Timeline at the top right to change how you see it.
- Click the arrows at the top left to move back or forward.
- Click the calendar icon beside the arrows to jump back to today.
Note
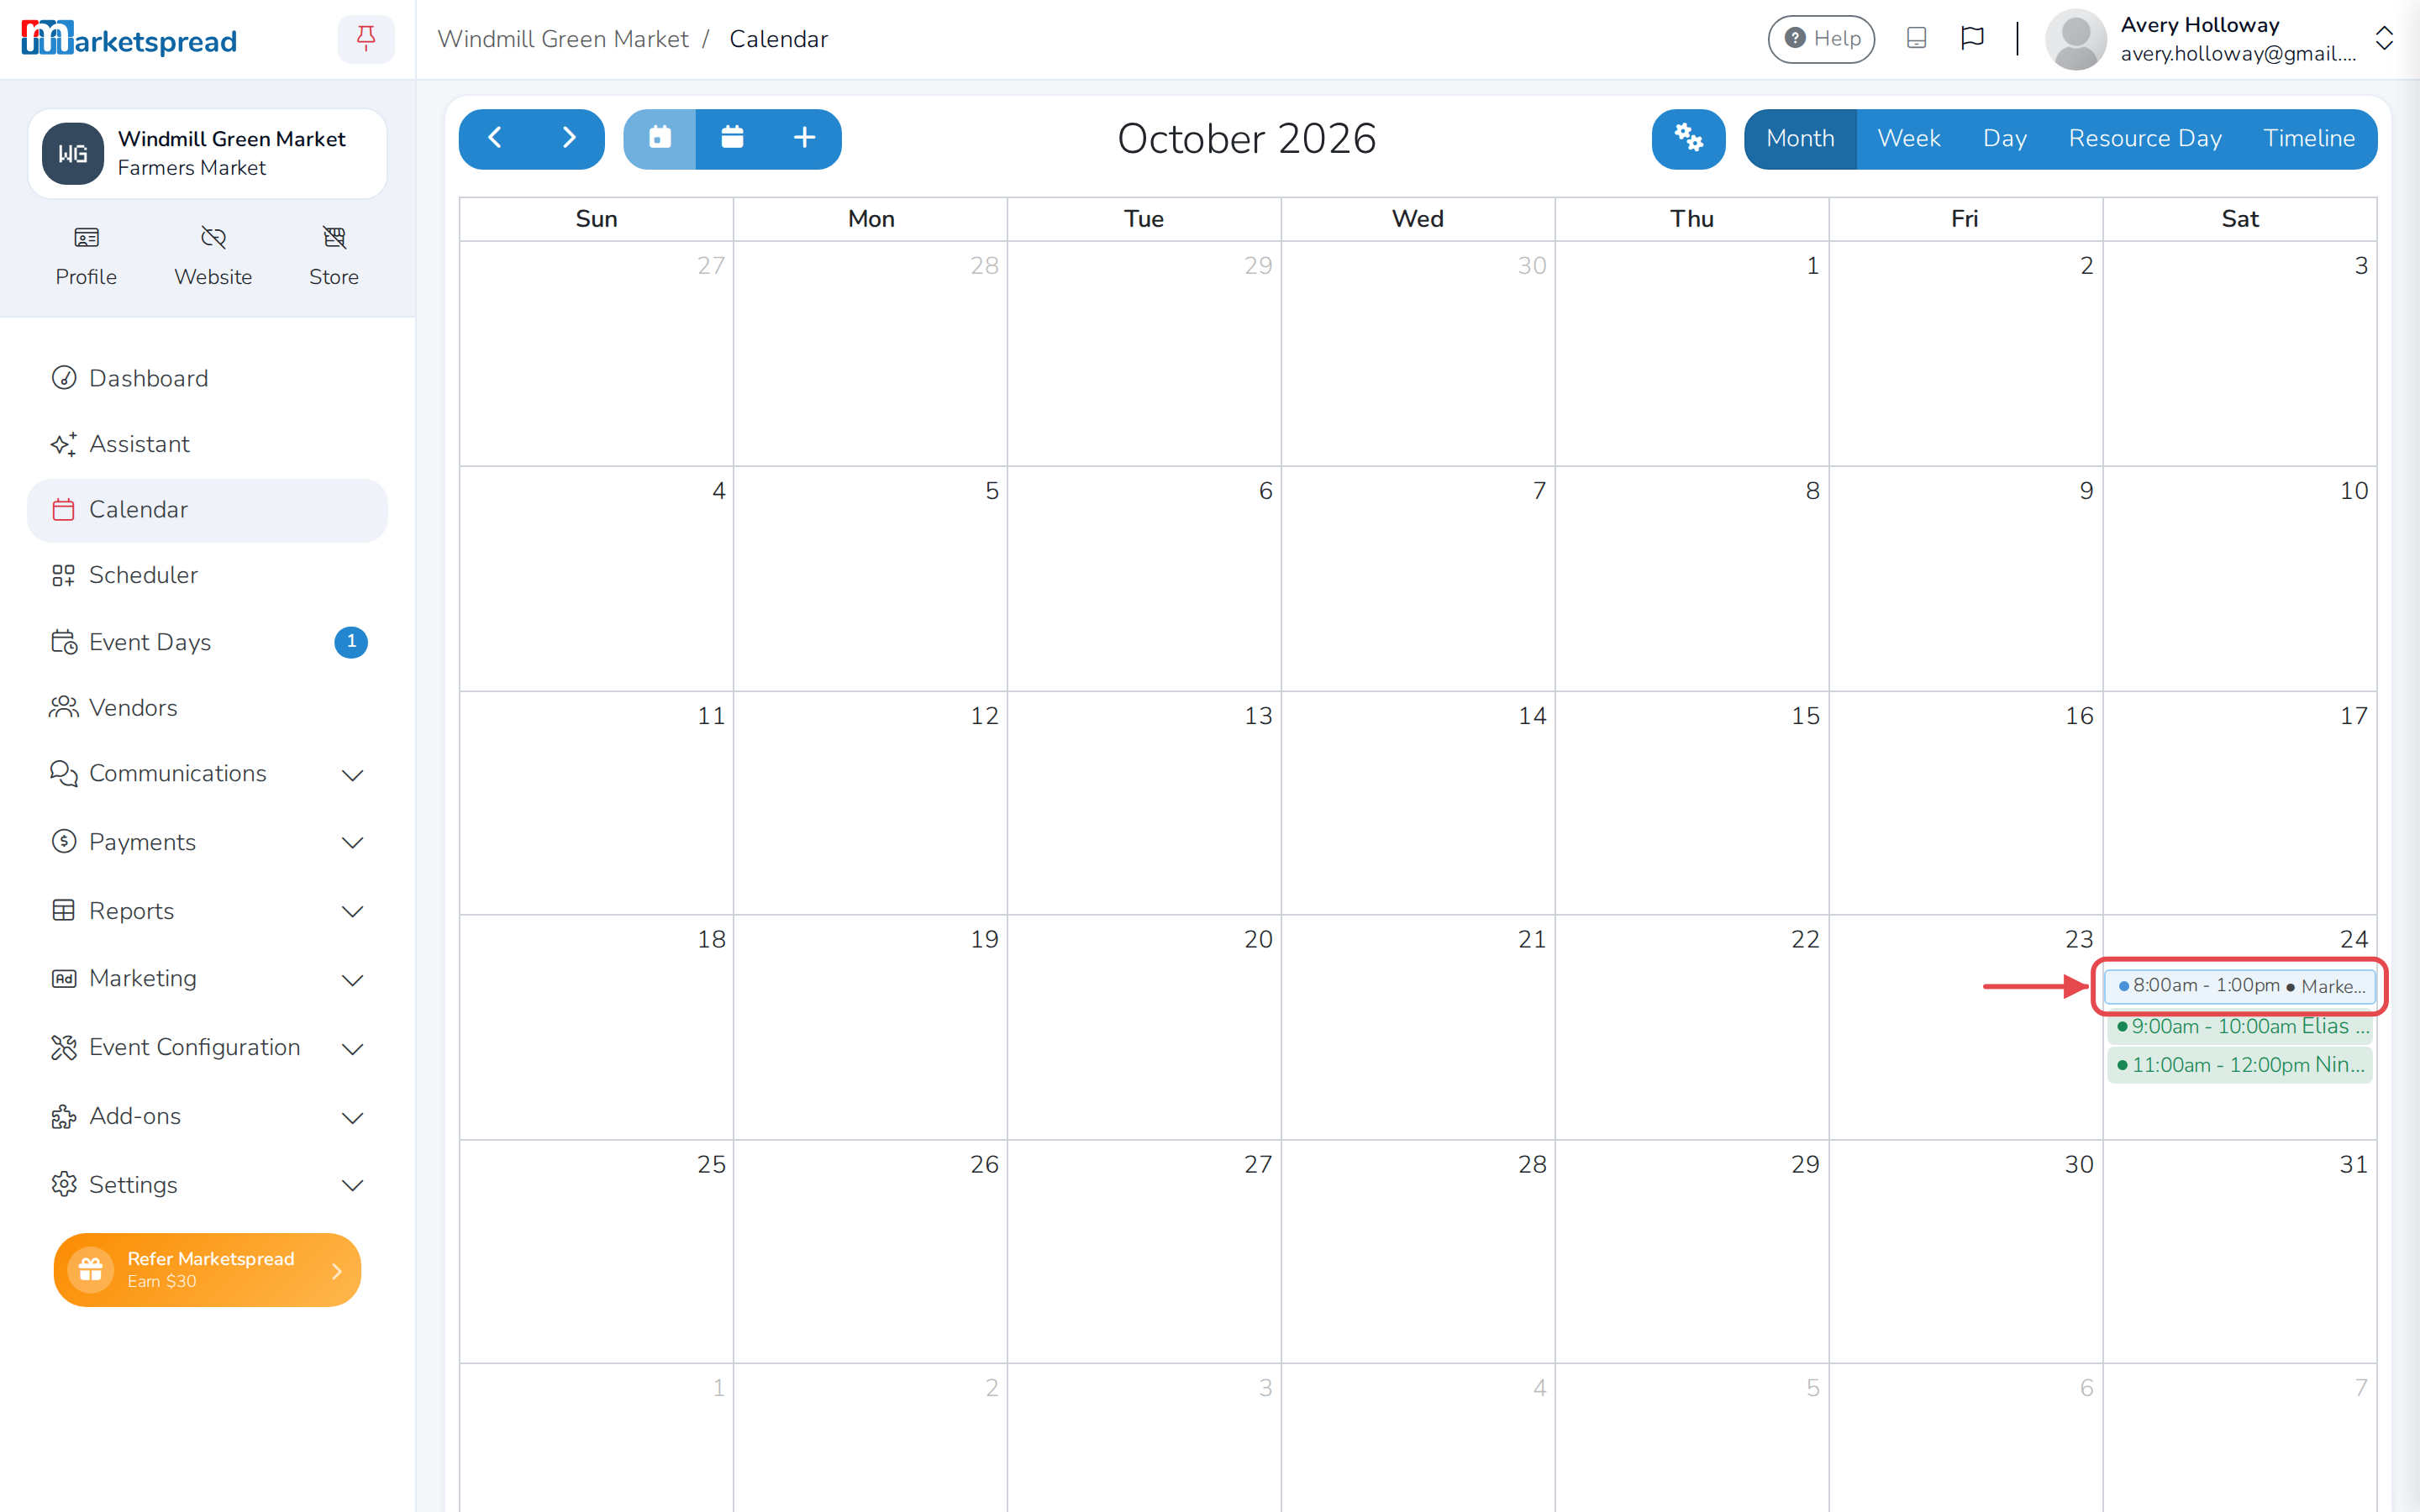
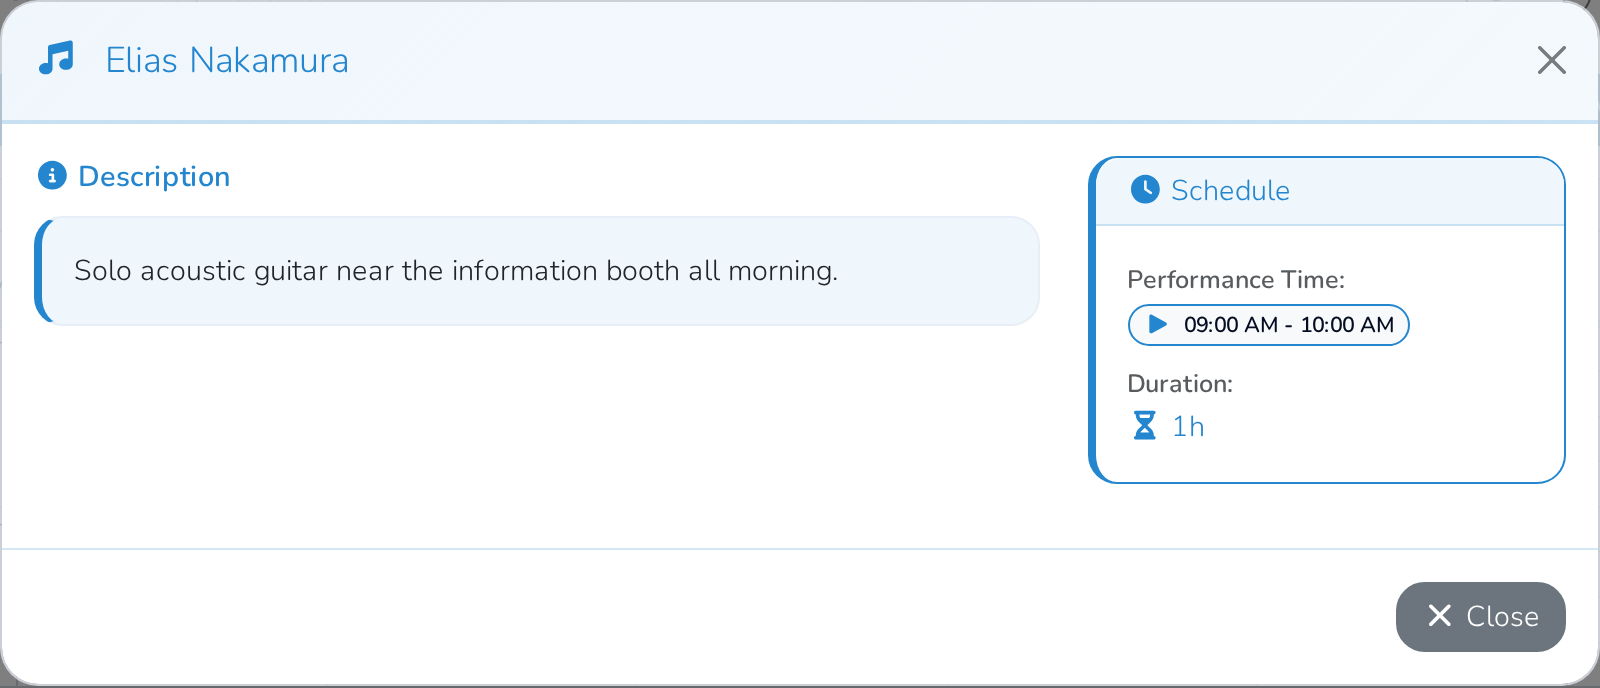
Your event days show up on the calendar on their own — you don't add them here. So does anything you've added under Activities for one, like a performer. Click a market day in Month view to jump to it in Day view, or click an activity any time to see its details.
If you don't have any event days yet, see creating an event.
Jump to a date, or see someone else's calendar
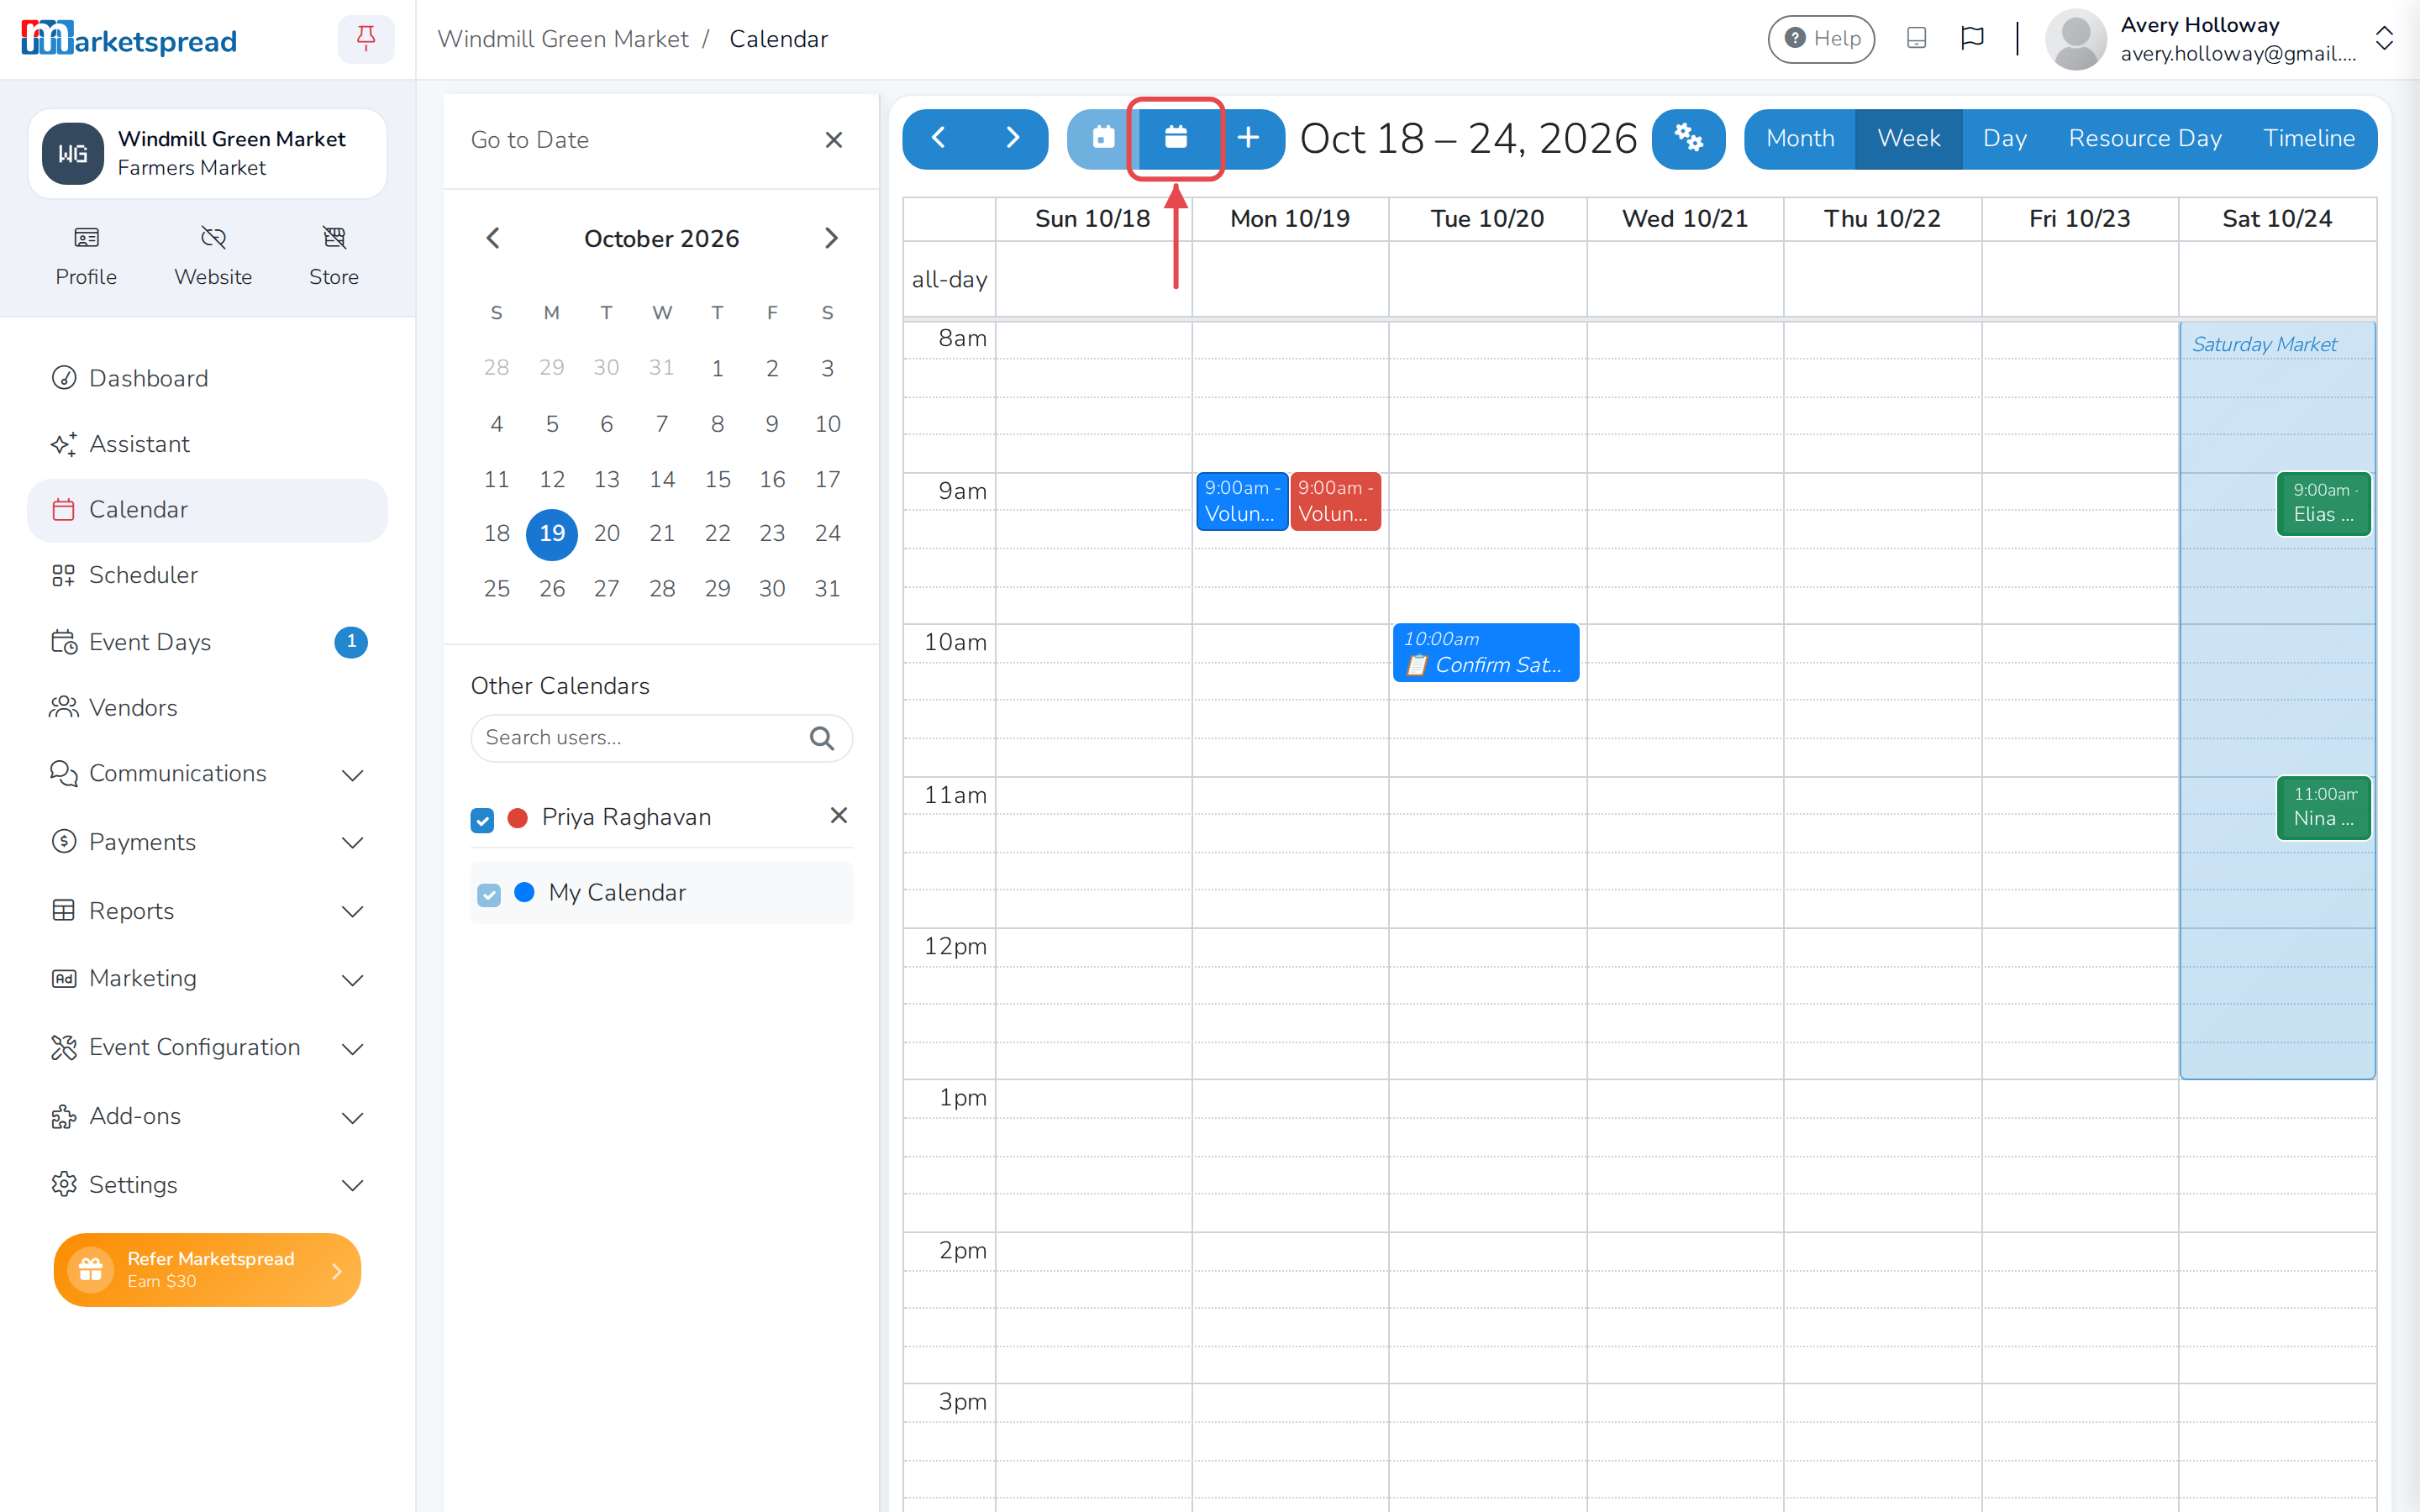
- Click the second calendar icon at the top left, next to the one that jumps to today. The Go to Date panel slides out, with a month calendar in it.
- Click any day on it to jump straight to that day, in Day view.
- Under Other Calendars, search for a name and click it. Their events show on your calendar in their own color.
- Uncheck a name to hide their events again without removing them from the list.
Add an event
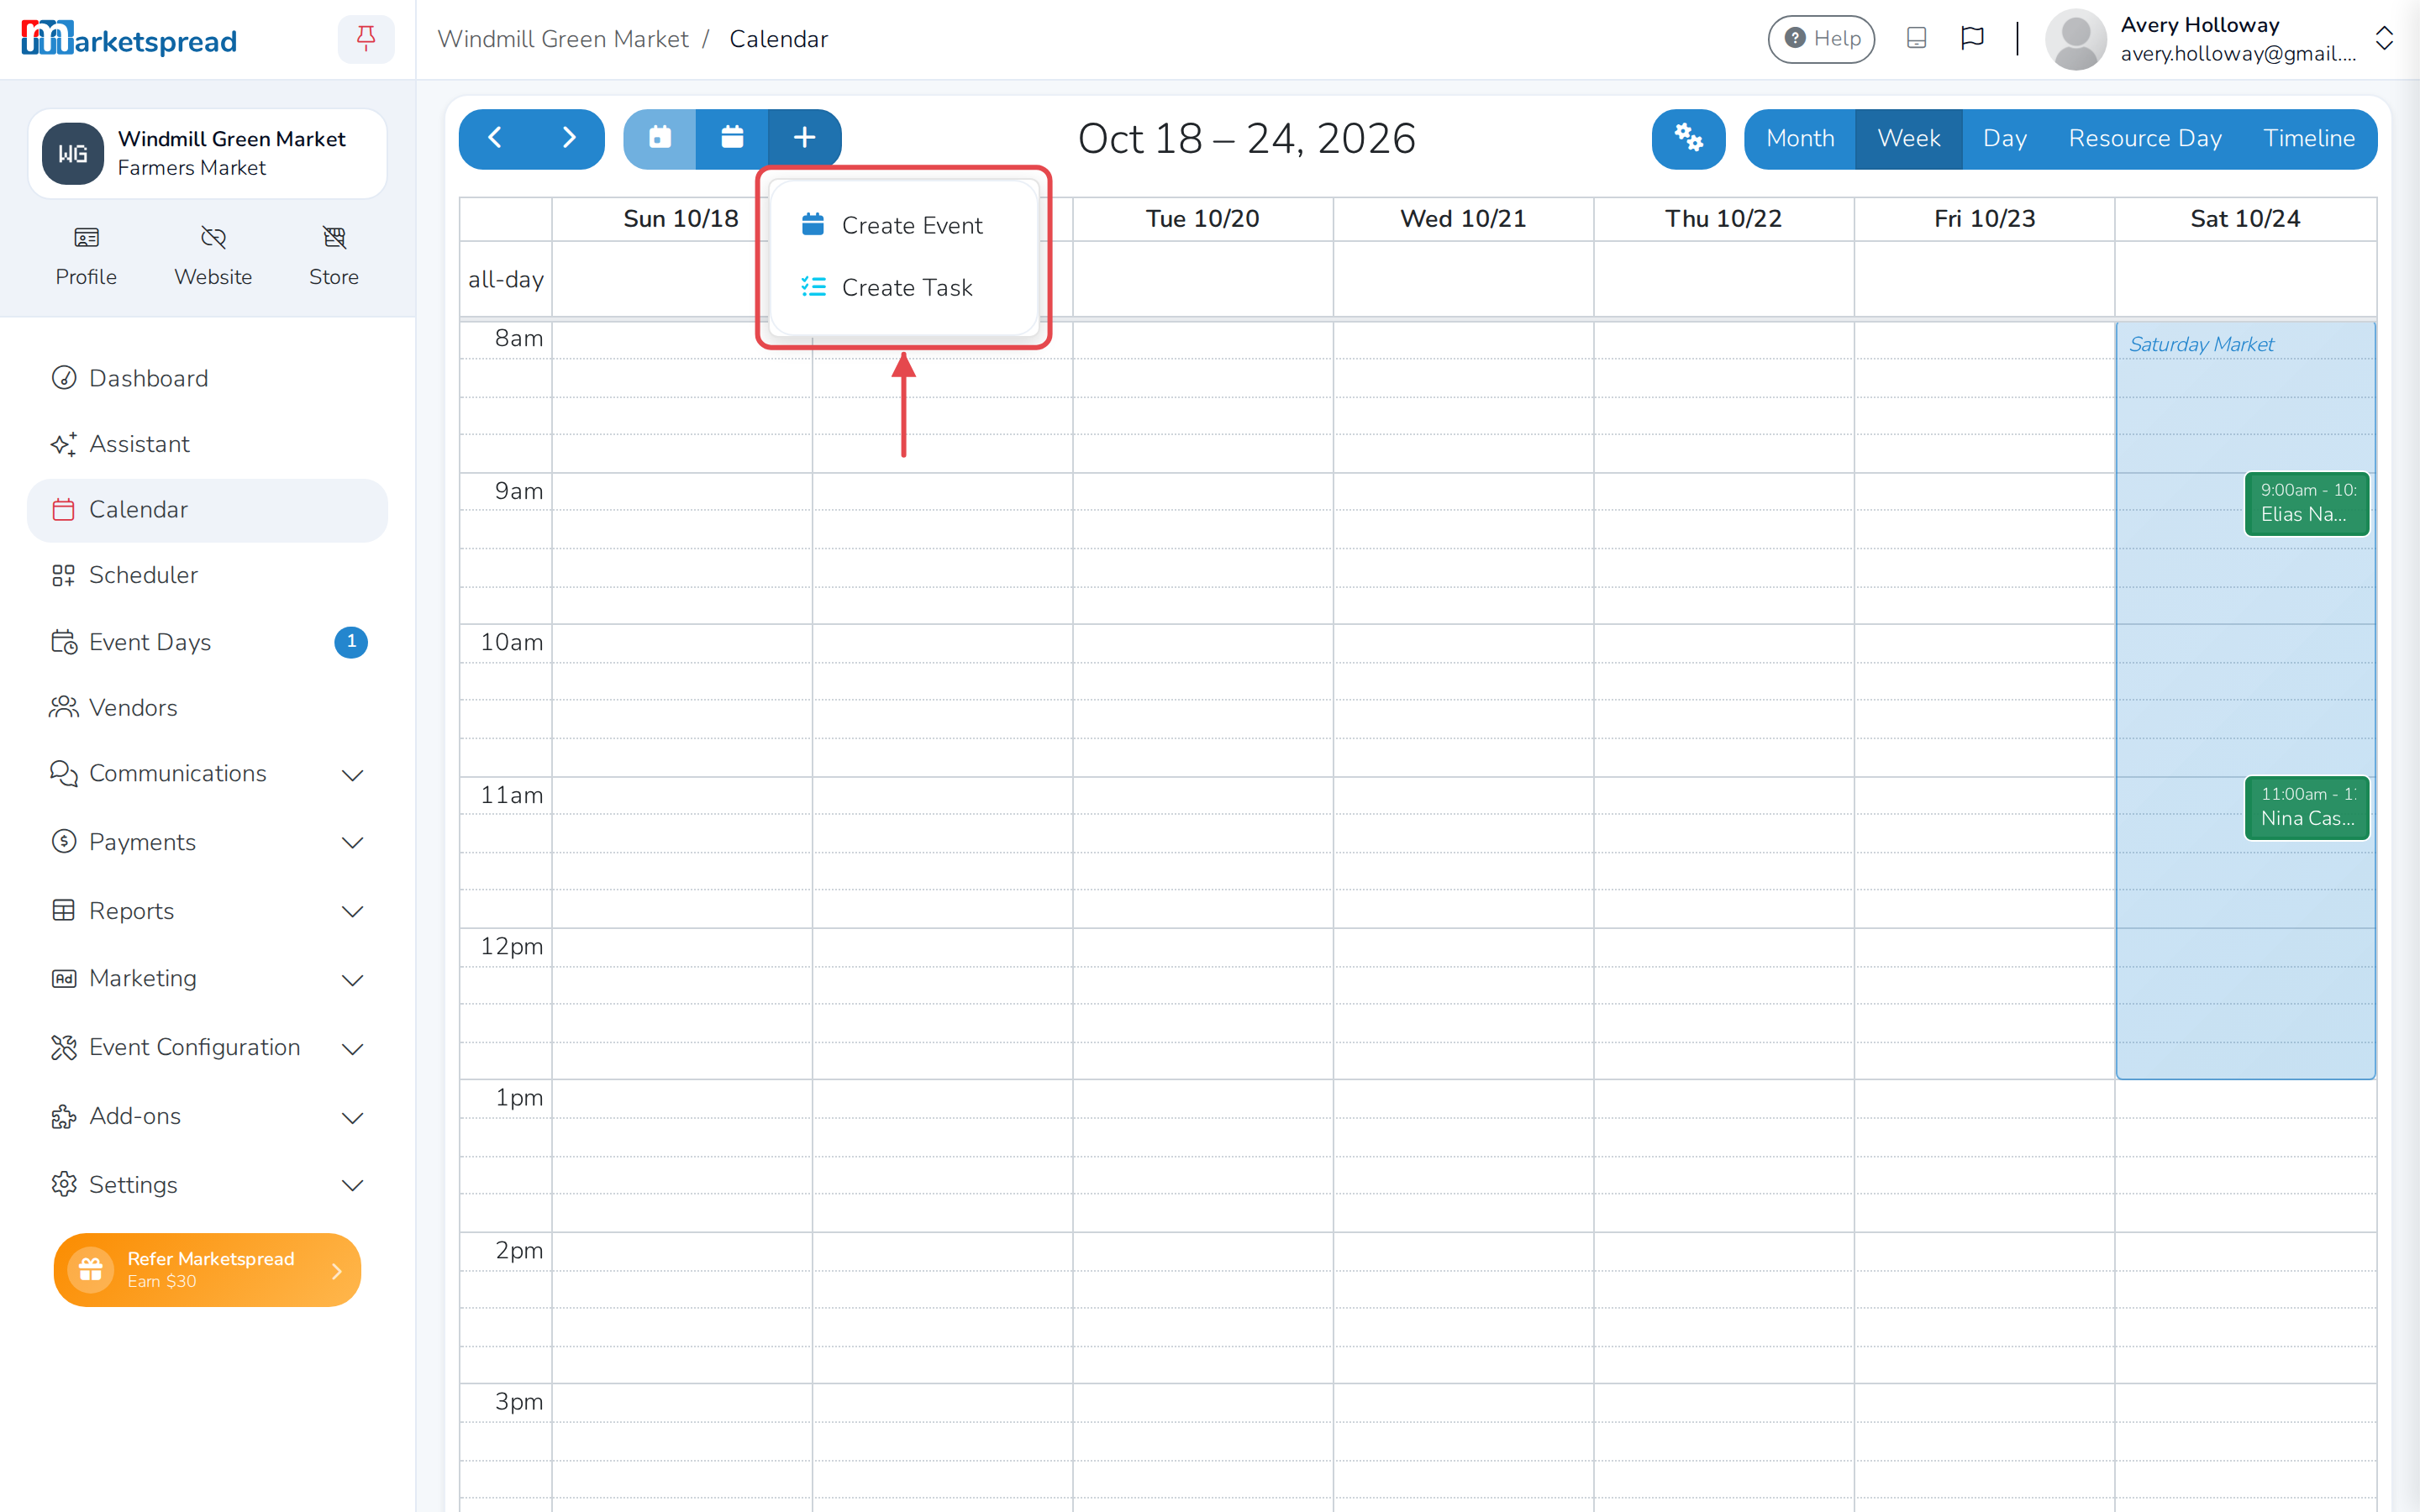
- Click the + icon at the top left, then click Create Event.
- Under Event Title, type what it's called.
- Optional: choose a Resource/Location.
- Fill in Description.
- Under Assign To Users, search for and click anyone who should be on it.
- Choose a Date, or check All Day.
- Choose a Start Time and End Time.
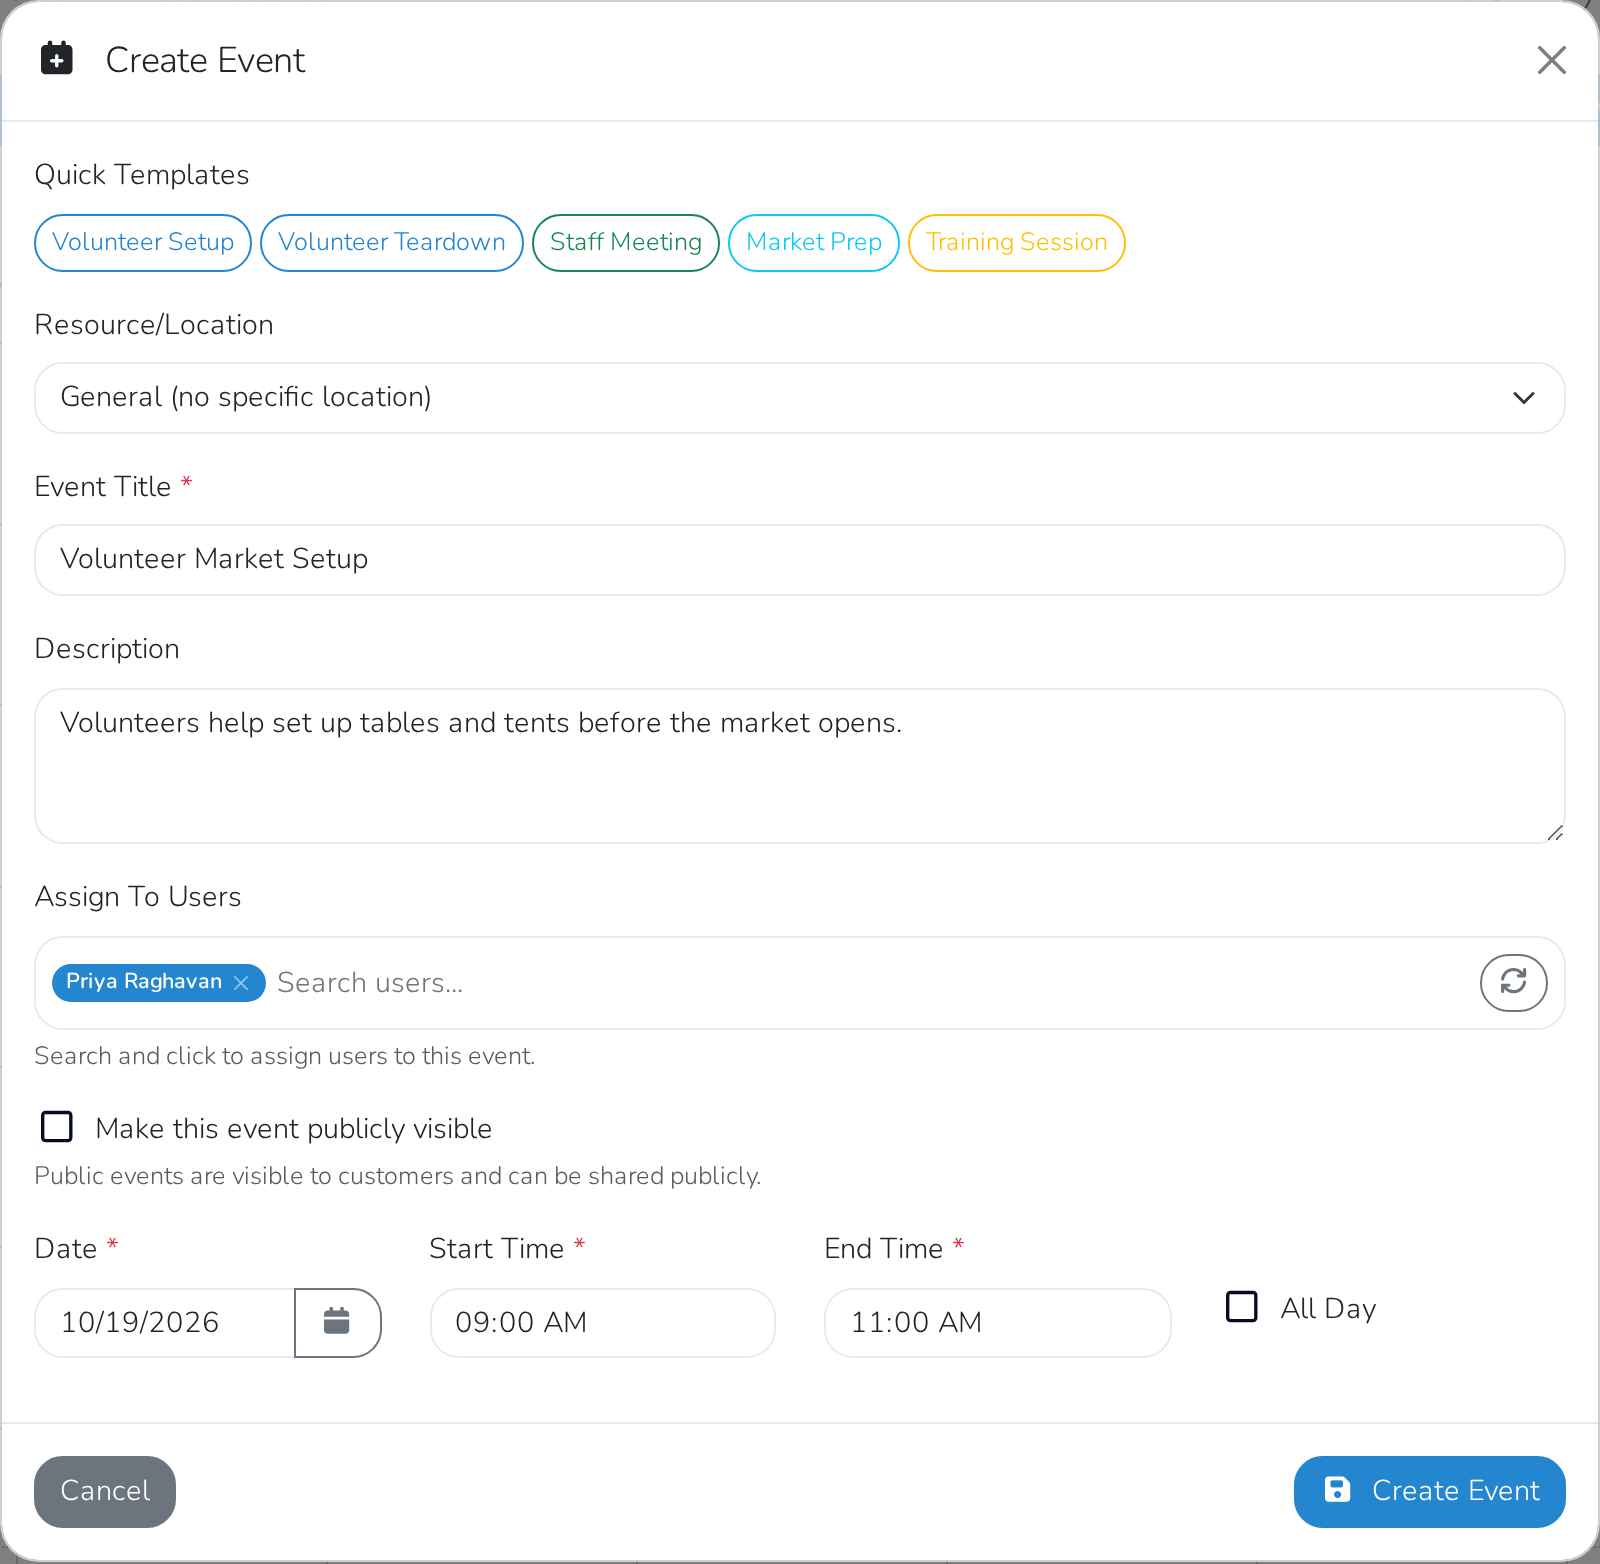
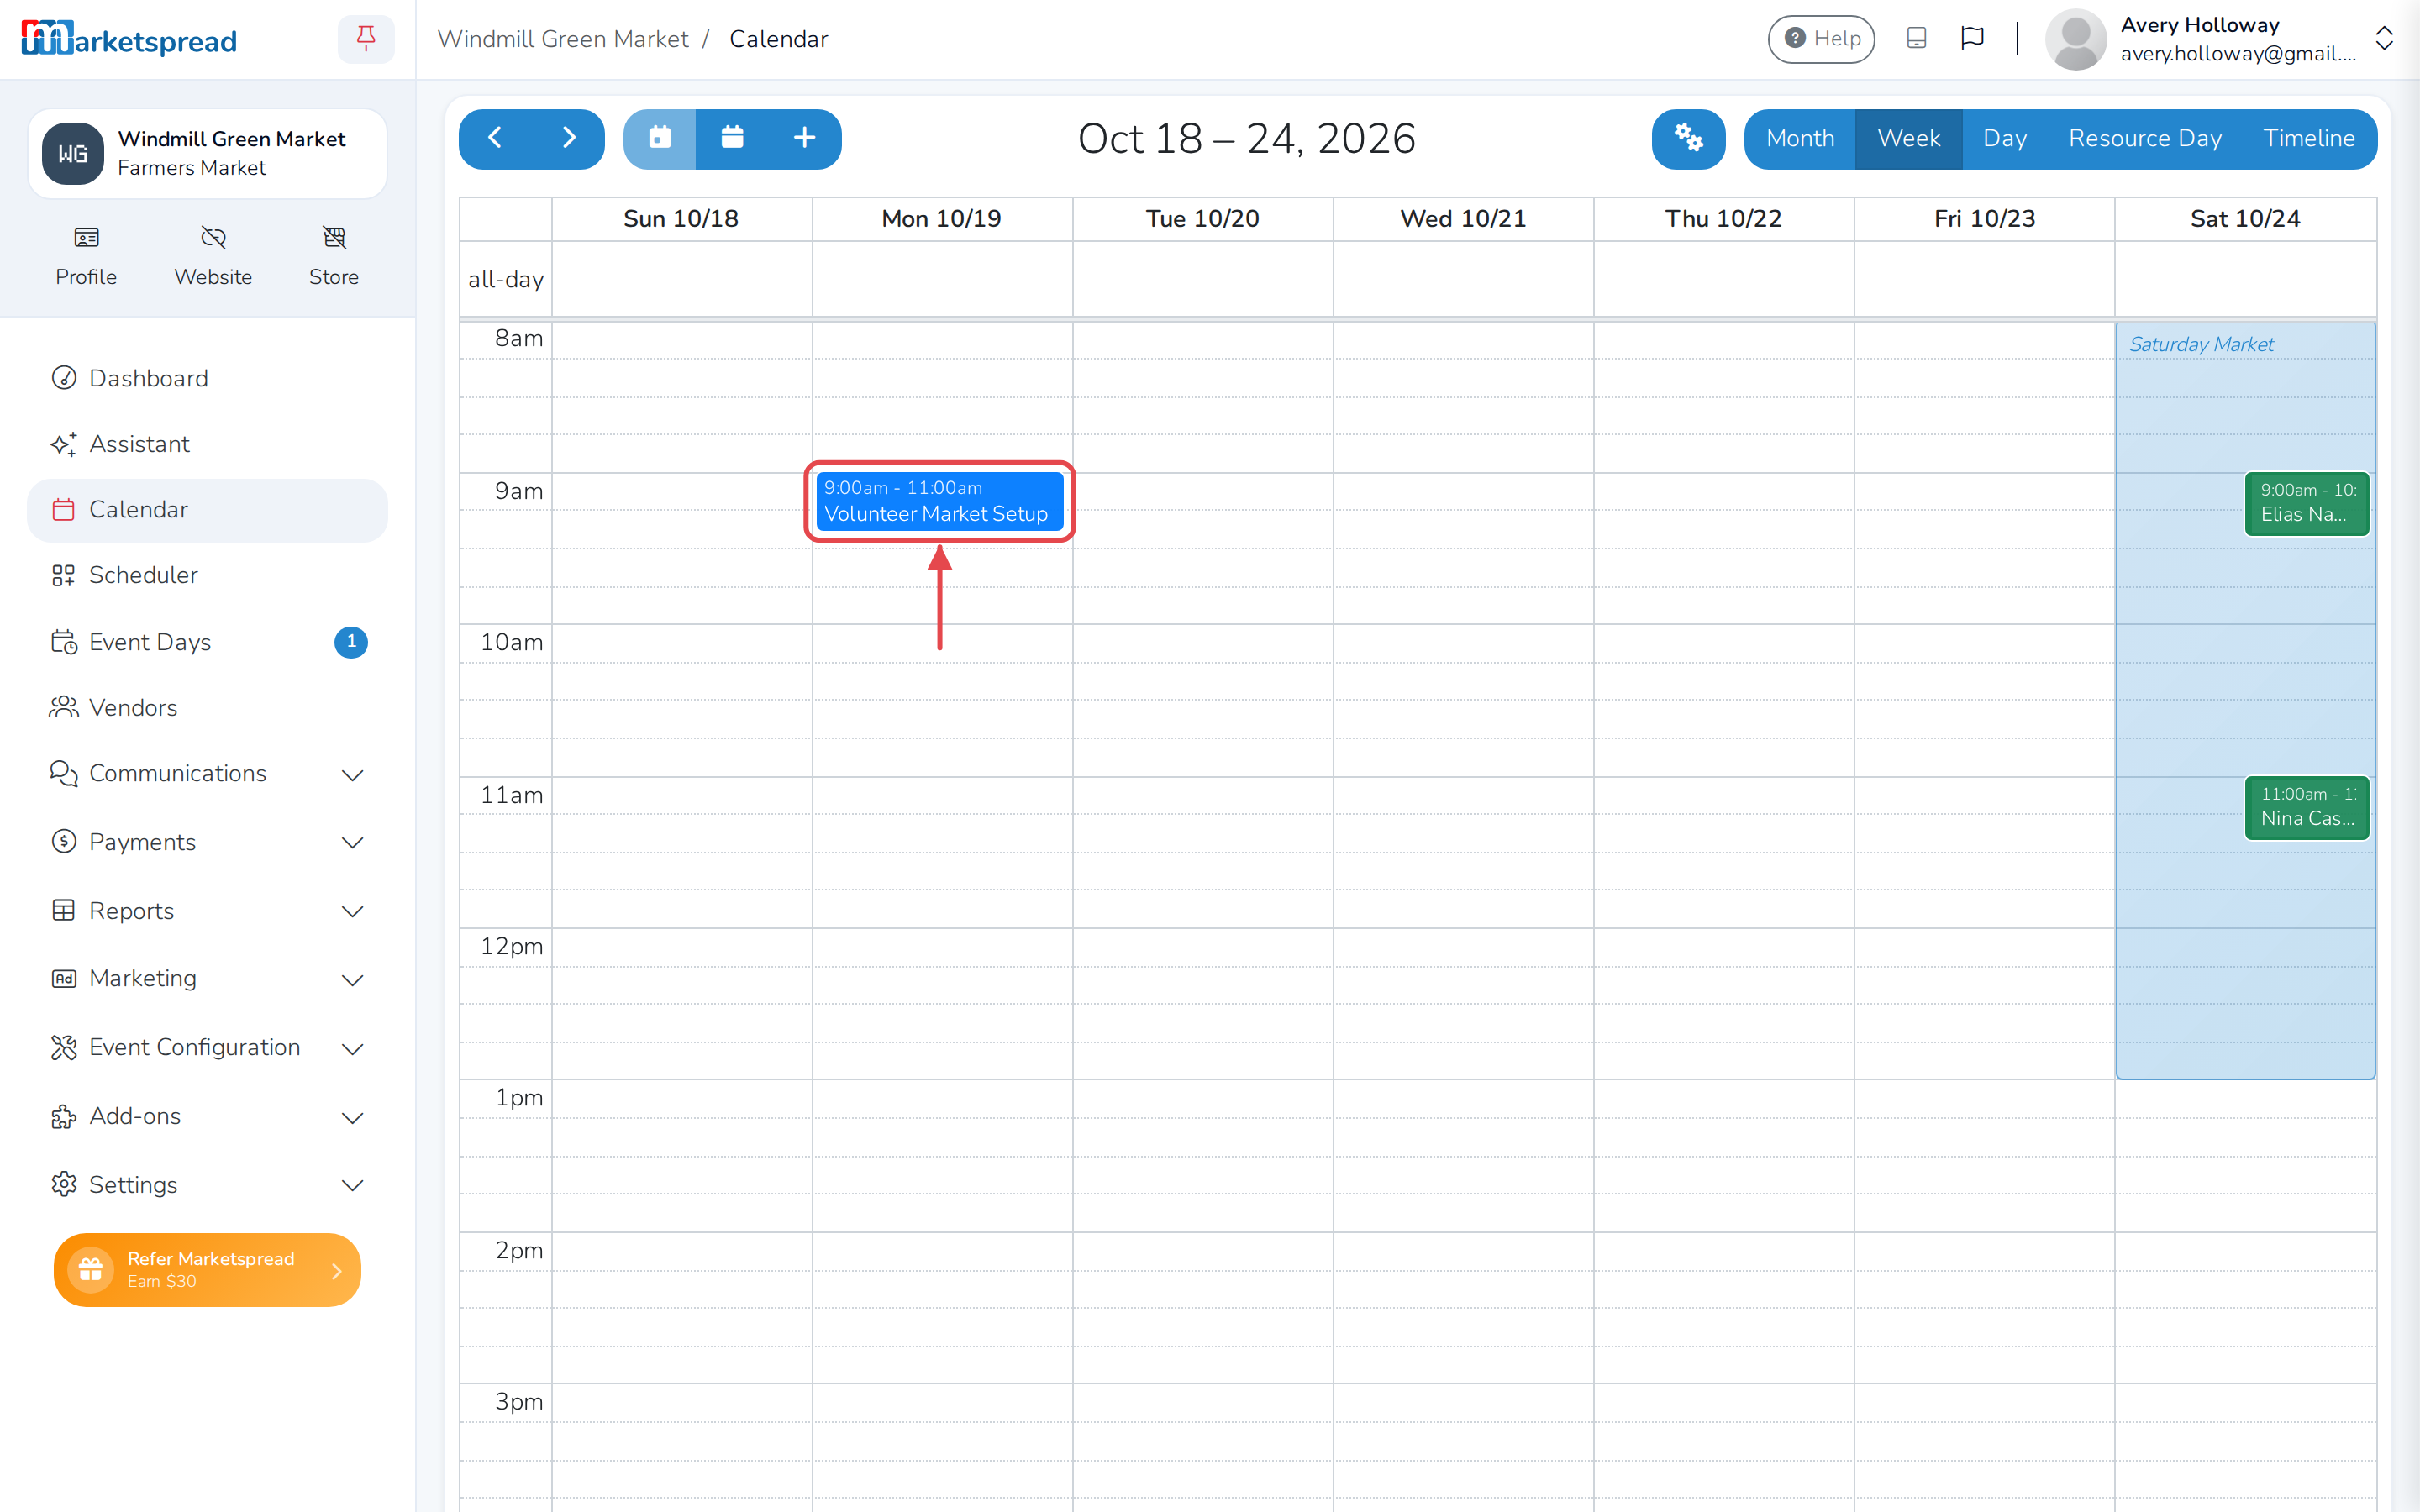
- Click Create Event. It shows up on your calendar right away.
Tip
Click one of the Quick Templates — Volunteer Setup, Volunteer Teardown, Staff Meeting, Market Prep or Training Session — to fill in a title and description for you. You can also just click or drag a time on the calendar itself instead of using the + icon; dragging across several days fills in a multi-day event.
Note
Checking Make this event publicly visible shows it to customers, not just your team. It needs a premium account — contact support to upgrade.
Add a task
- Click the + icon at the top left, then click Create Task.
- Under Task Title, type what needs to be done.
- Optional: choose a Resource/Location, and fill in Description.
- Click Assign to myself, or search for and click a name under Assign To Users.
- Choose a Due Date and Due Time.
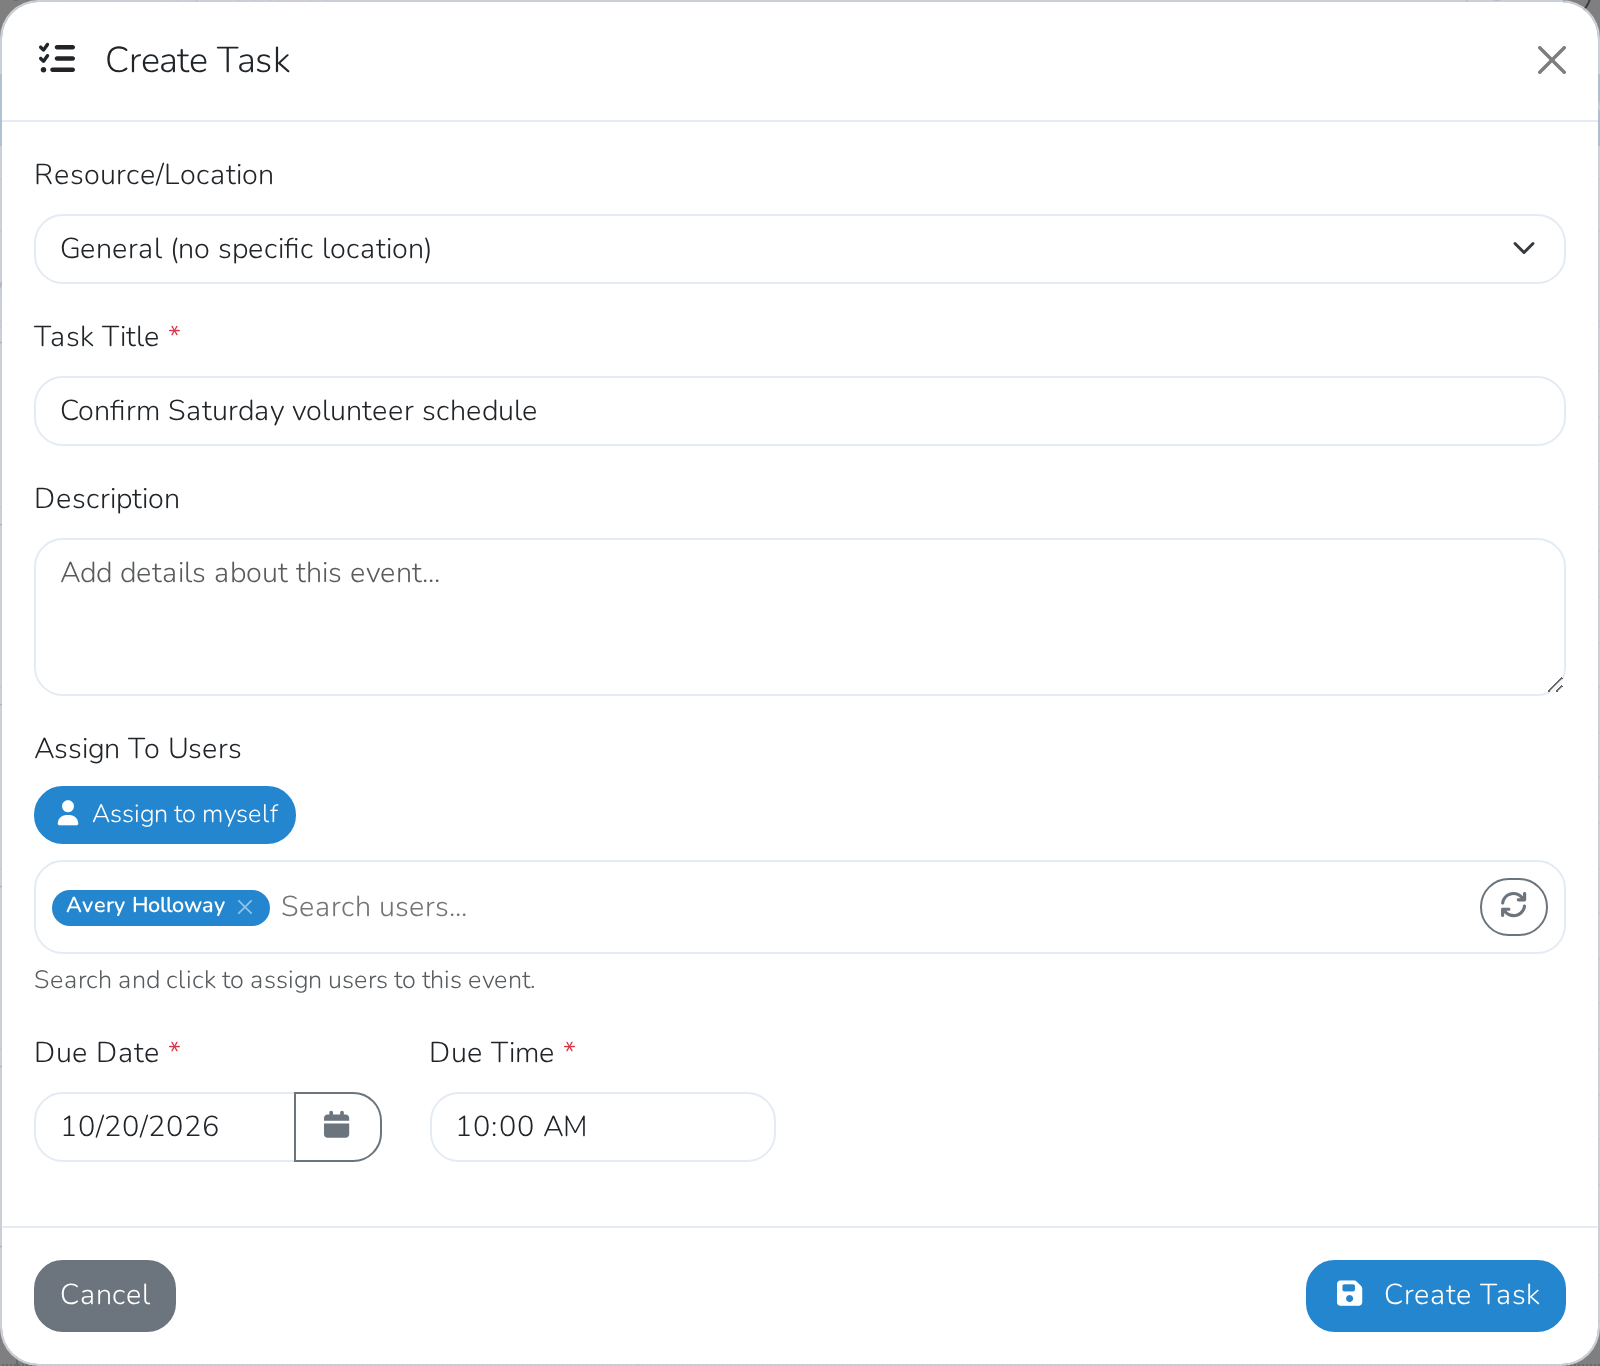
- Click Create Task.
Mark a task complete
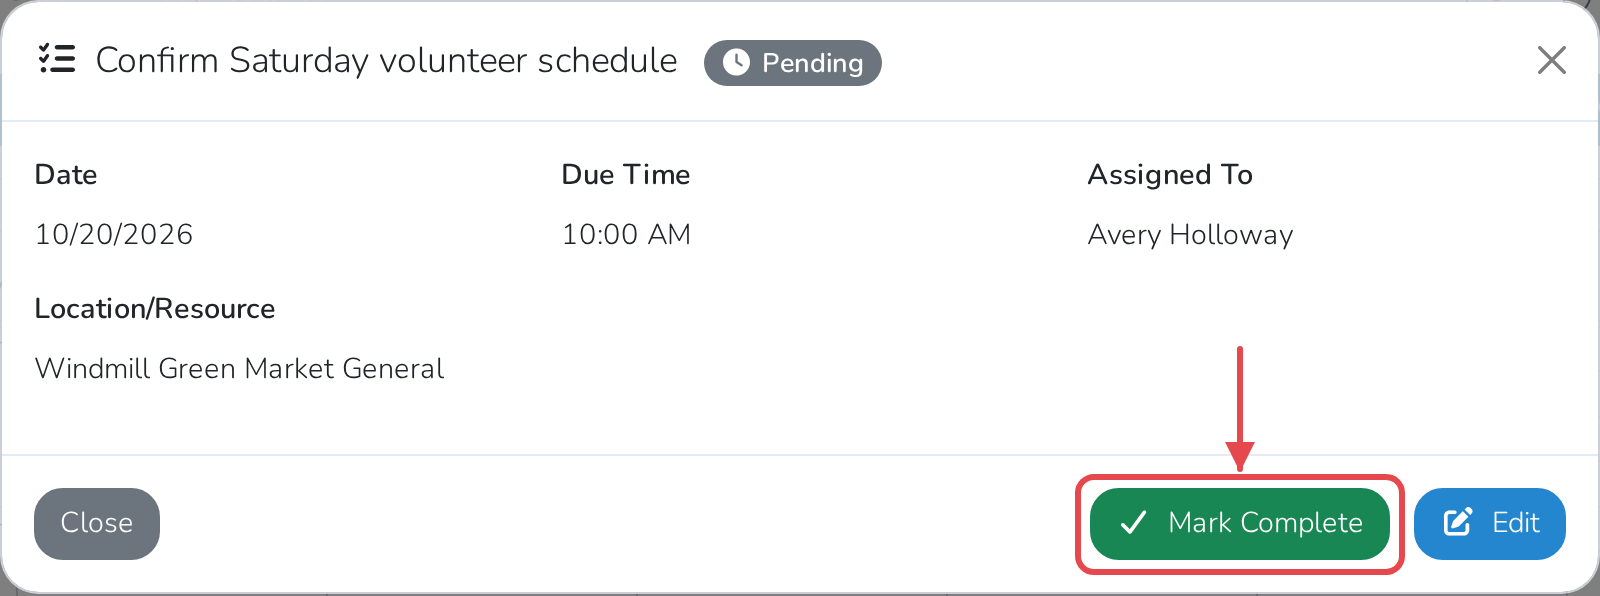
- Click the task on the calendar to open it.
- Click Mark Complete.
Tip
Click Mark Incomplete on a completed task to undo it.
Edit or delete an event or task
- Click it on the calendar to open it.
- Click Edit.
- Make your changes, then click Update Event or Update Task.
To remove one instead, click Delete in the edit window.
Note
You need calendar access to change anything, or to see the + icon for adding something new. Ask a market admin if you don't have it.
Get notified about new tasks and events
When someone assigns you an event or task, a message pops up the next time you're in your dashboard, with a View Calendar button that takes you straight there.
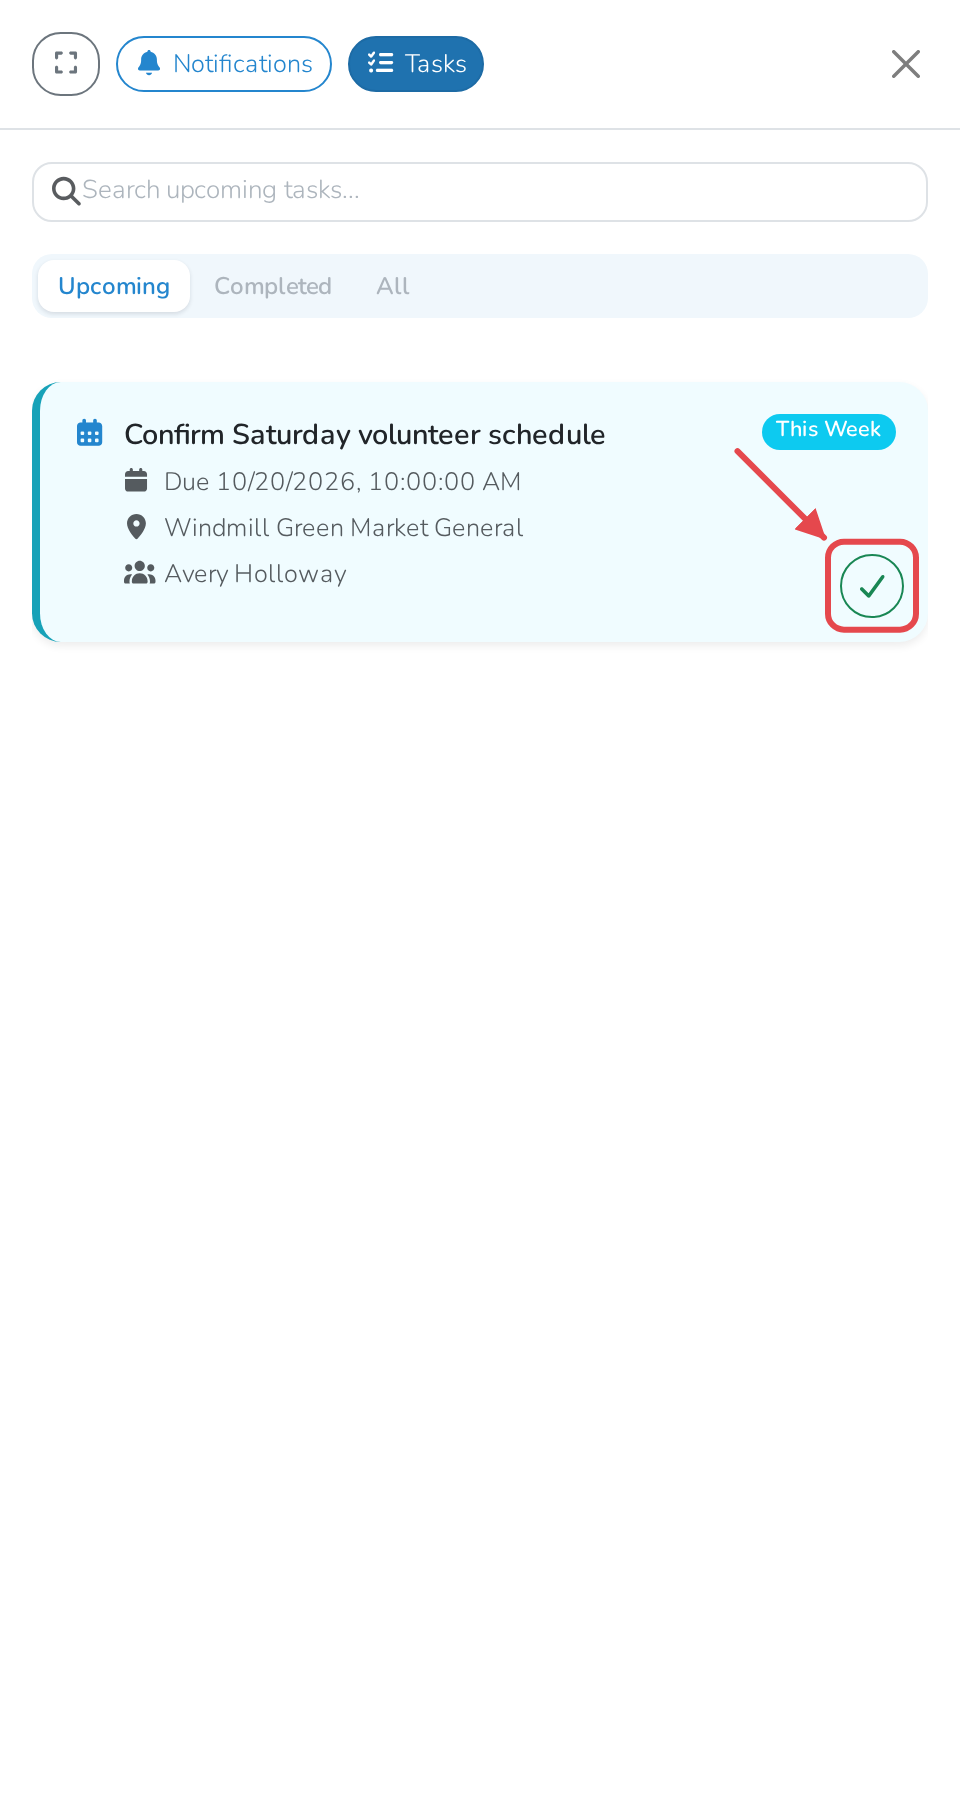
You can also see your tasks any time from the flag icon at the top of your dashboard. Click it, then click Tasks — each one has its own checkmark button, so you can mark it complete without opening the calendar.
Set up locations for your calendar
Only market admins can do this.
- Click the gear icon at the top right.
- Under Add New Resource, fill in a Resource Name and pick a Color.
- Click Add.
Note
Adding a new location needs a premium account. Without one, you can still assign events to General.