


Your dashboard is a grid you can arrange yourself. Move cards where you want them, resize the ones you check most often, and pull in new ones from a widget gallery. Market, venue, vendor, and organization dashboards all work this way, and each one offers the widgets that fit it. With Premium, you can also create extra dashboards for different views, and choose who sees each one.
From here you can:
- Rearrange, resize, and get a closer look at your cards
- Add or remove widgets
- Create, rename, and delete dashboards (Premium)
Rearrange your cards
-
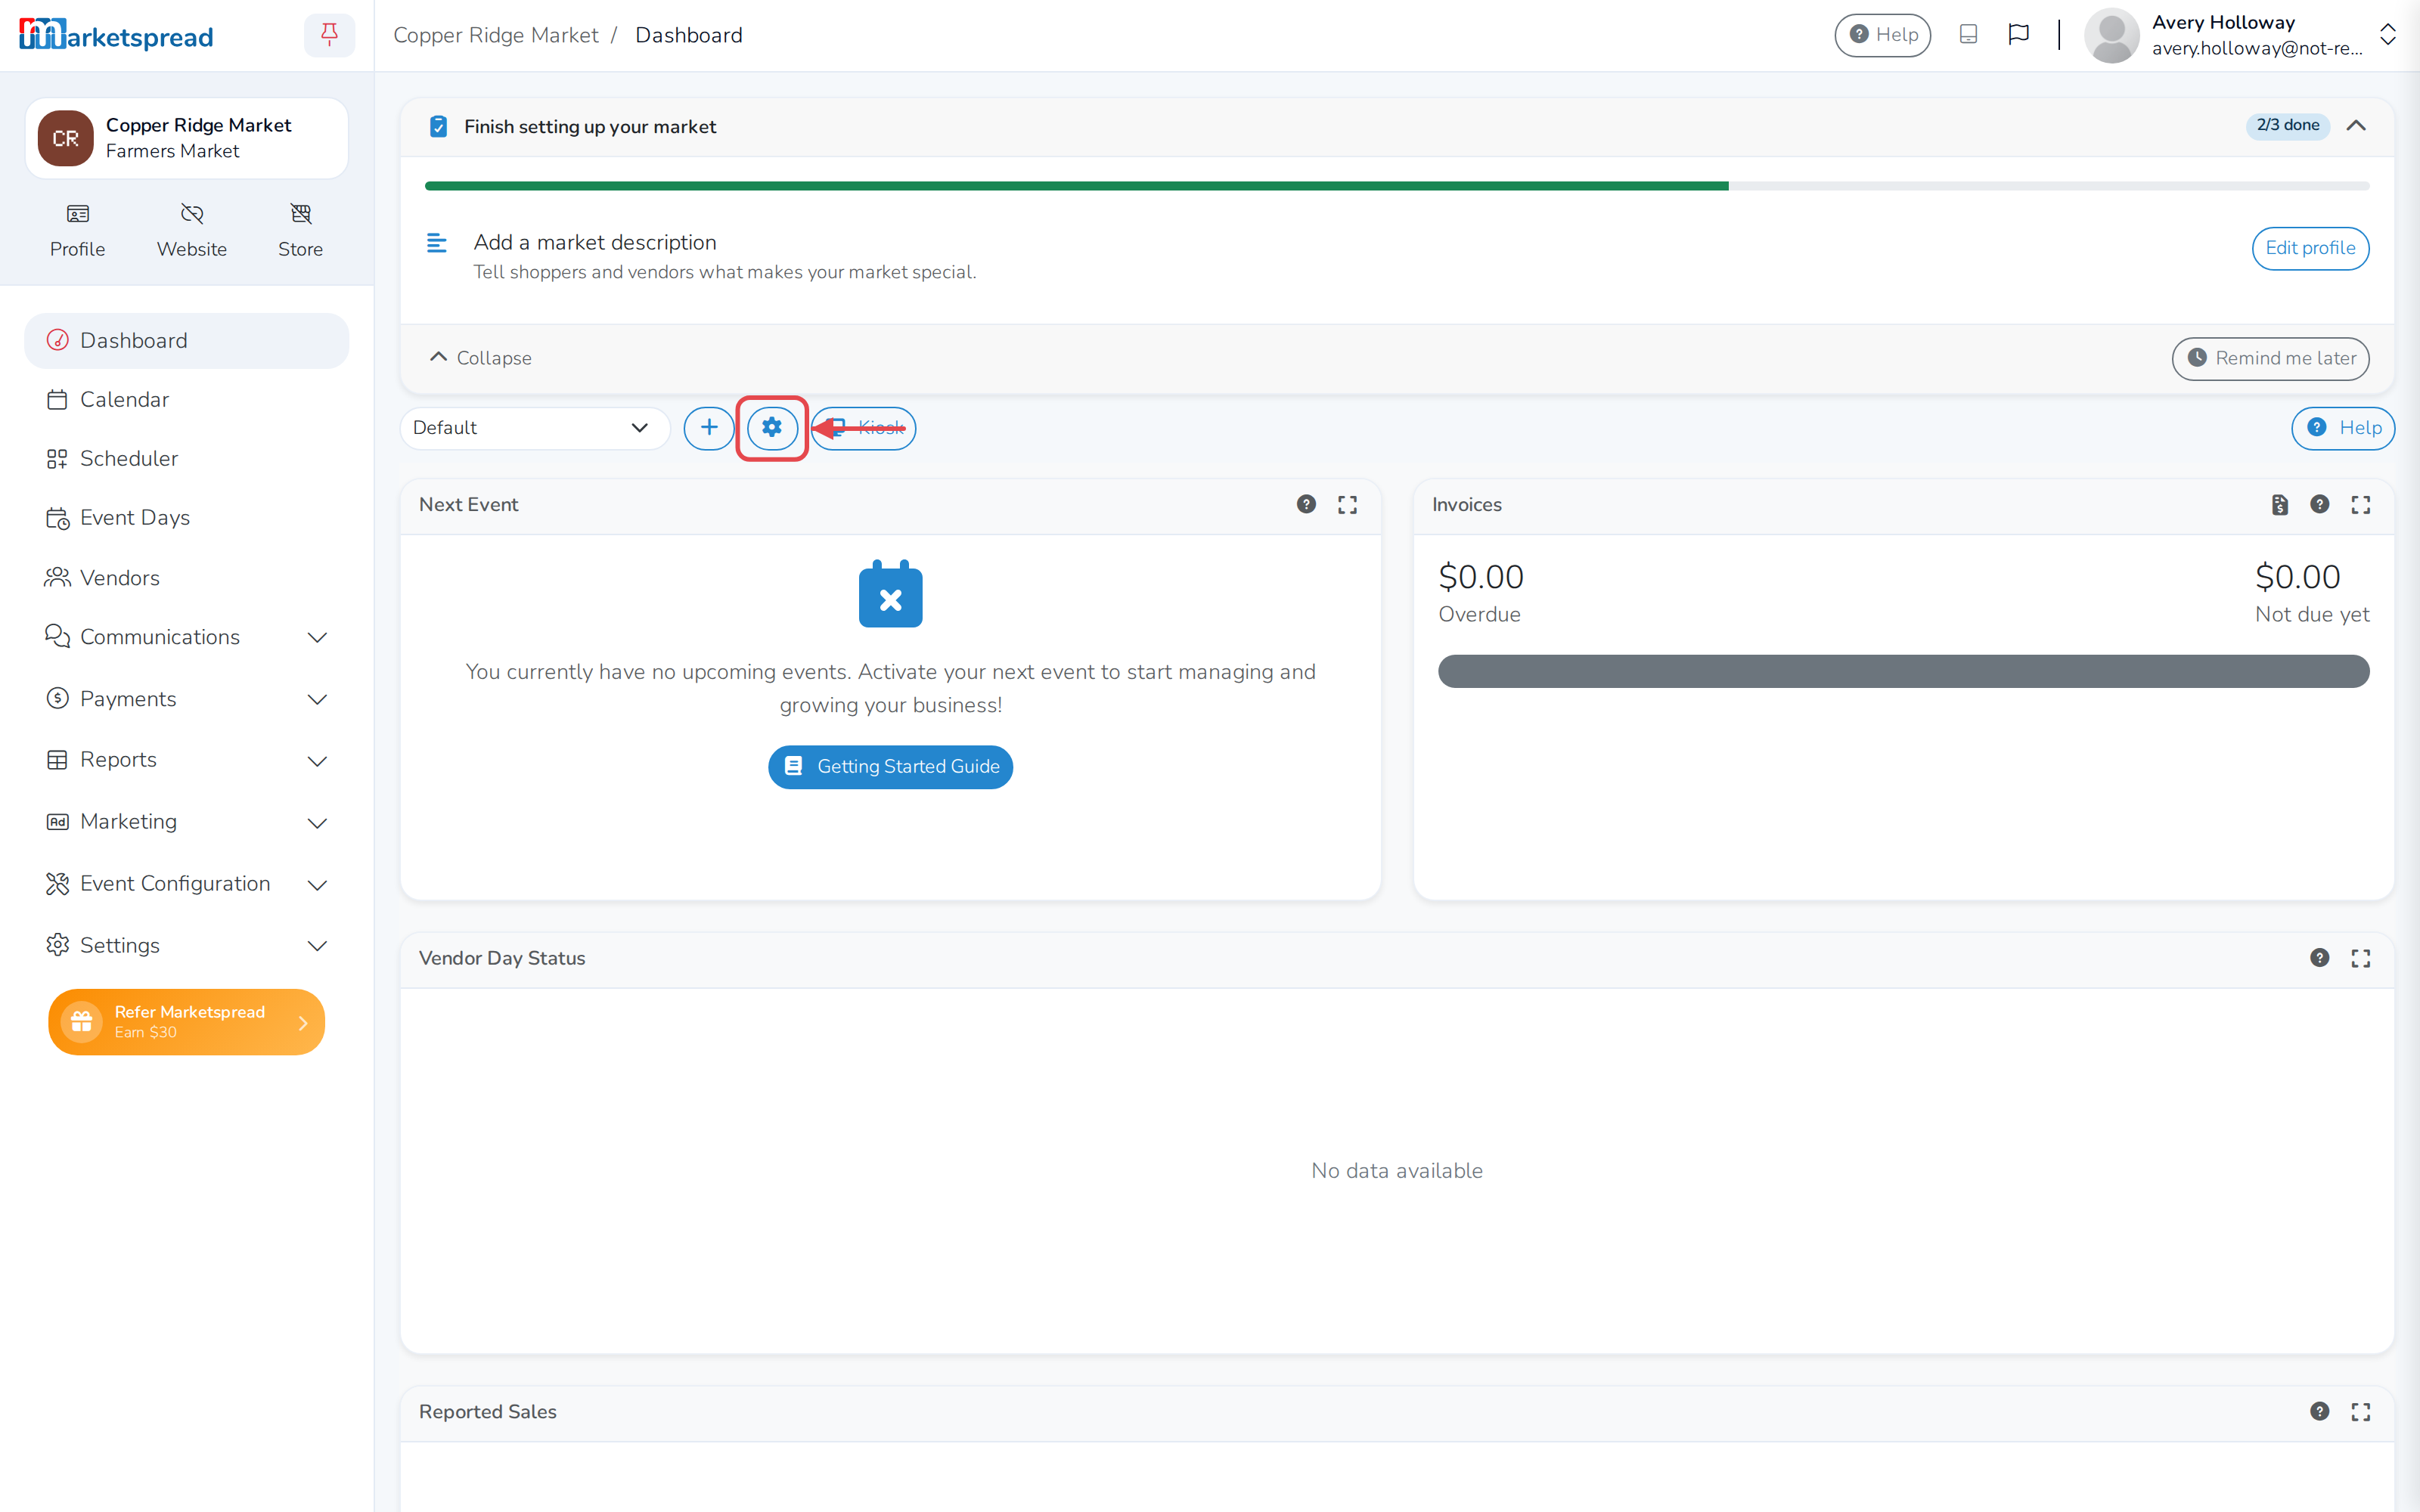
Click the gear icon at the top of your dashboard.
-
Drag any card to a new spot. Grab it anywhere on the card — no title bar needed. The other cards move aside as you go.
-
To resize a card, drag the grip at its bottom-right corner.
-
Click Save.
Note
Buttons, links, and form fields inside a card keep working while you arrange. Clicking one of them won't start a drag, so you can use a card without accidentally moving it.
Get a closer look at a card
Click the maximize icon in a card's header bar to fill the screen with it. Click the icon again, or press Esc, to go back.
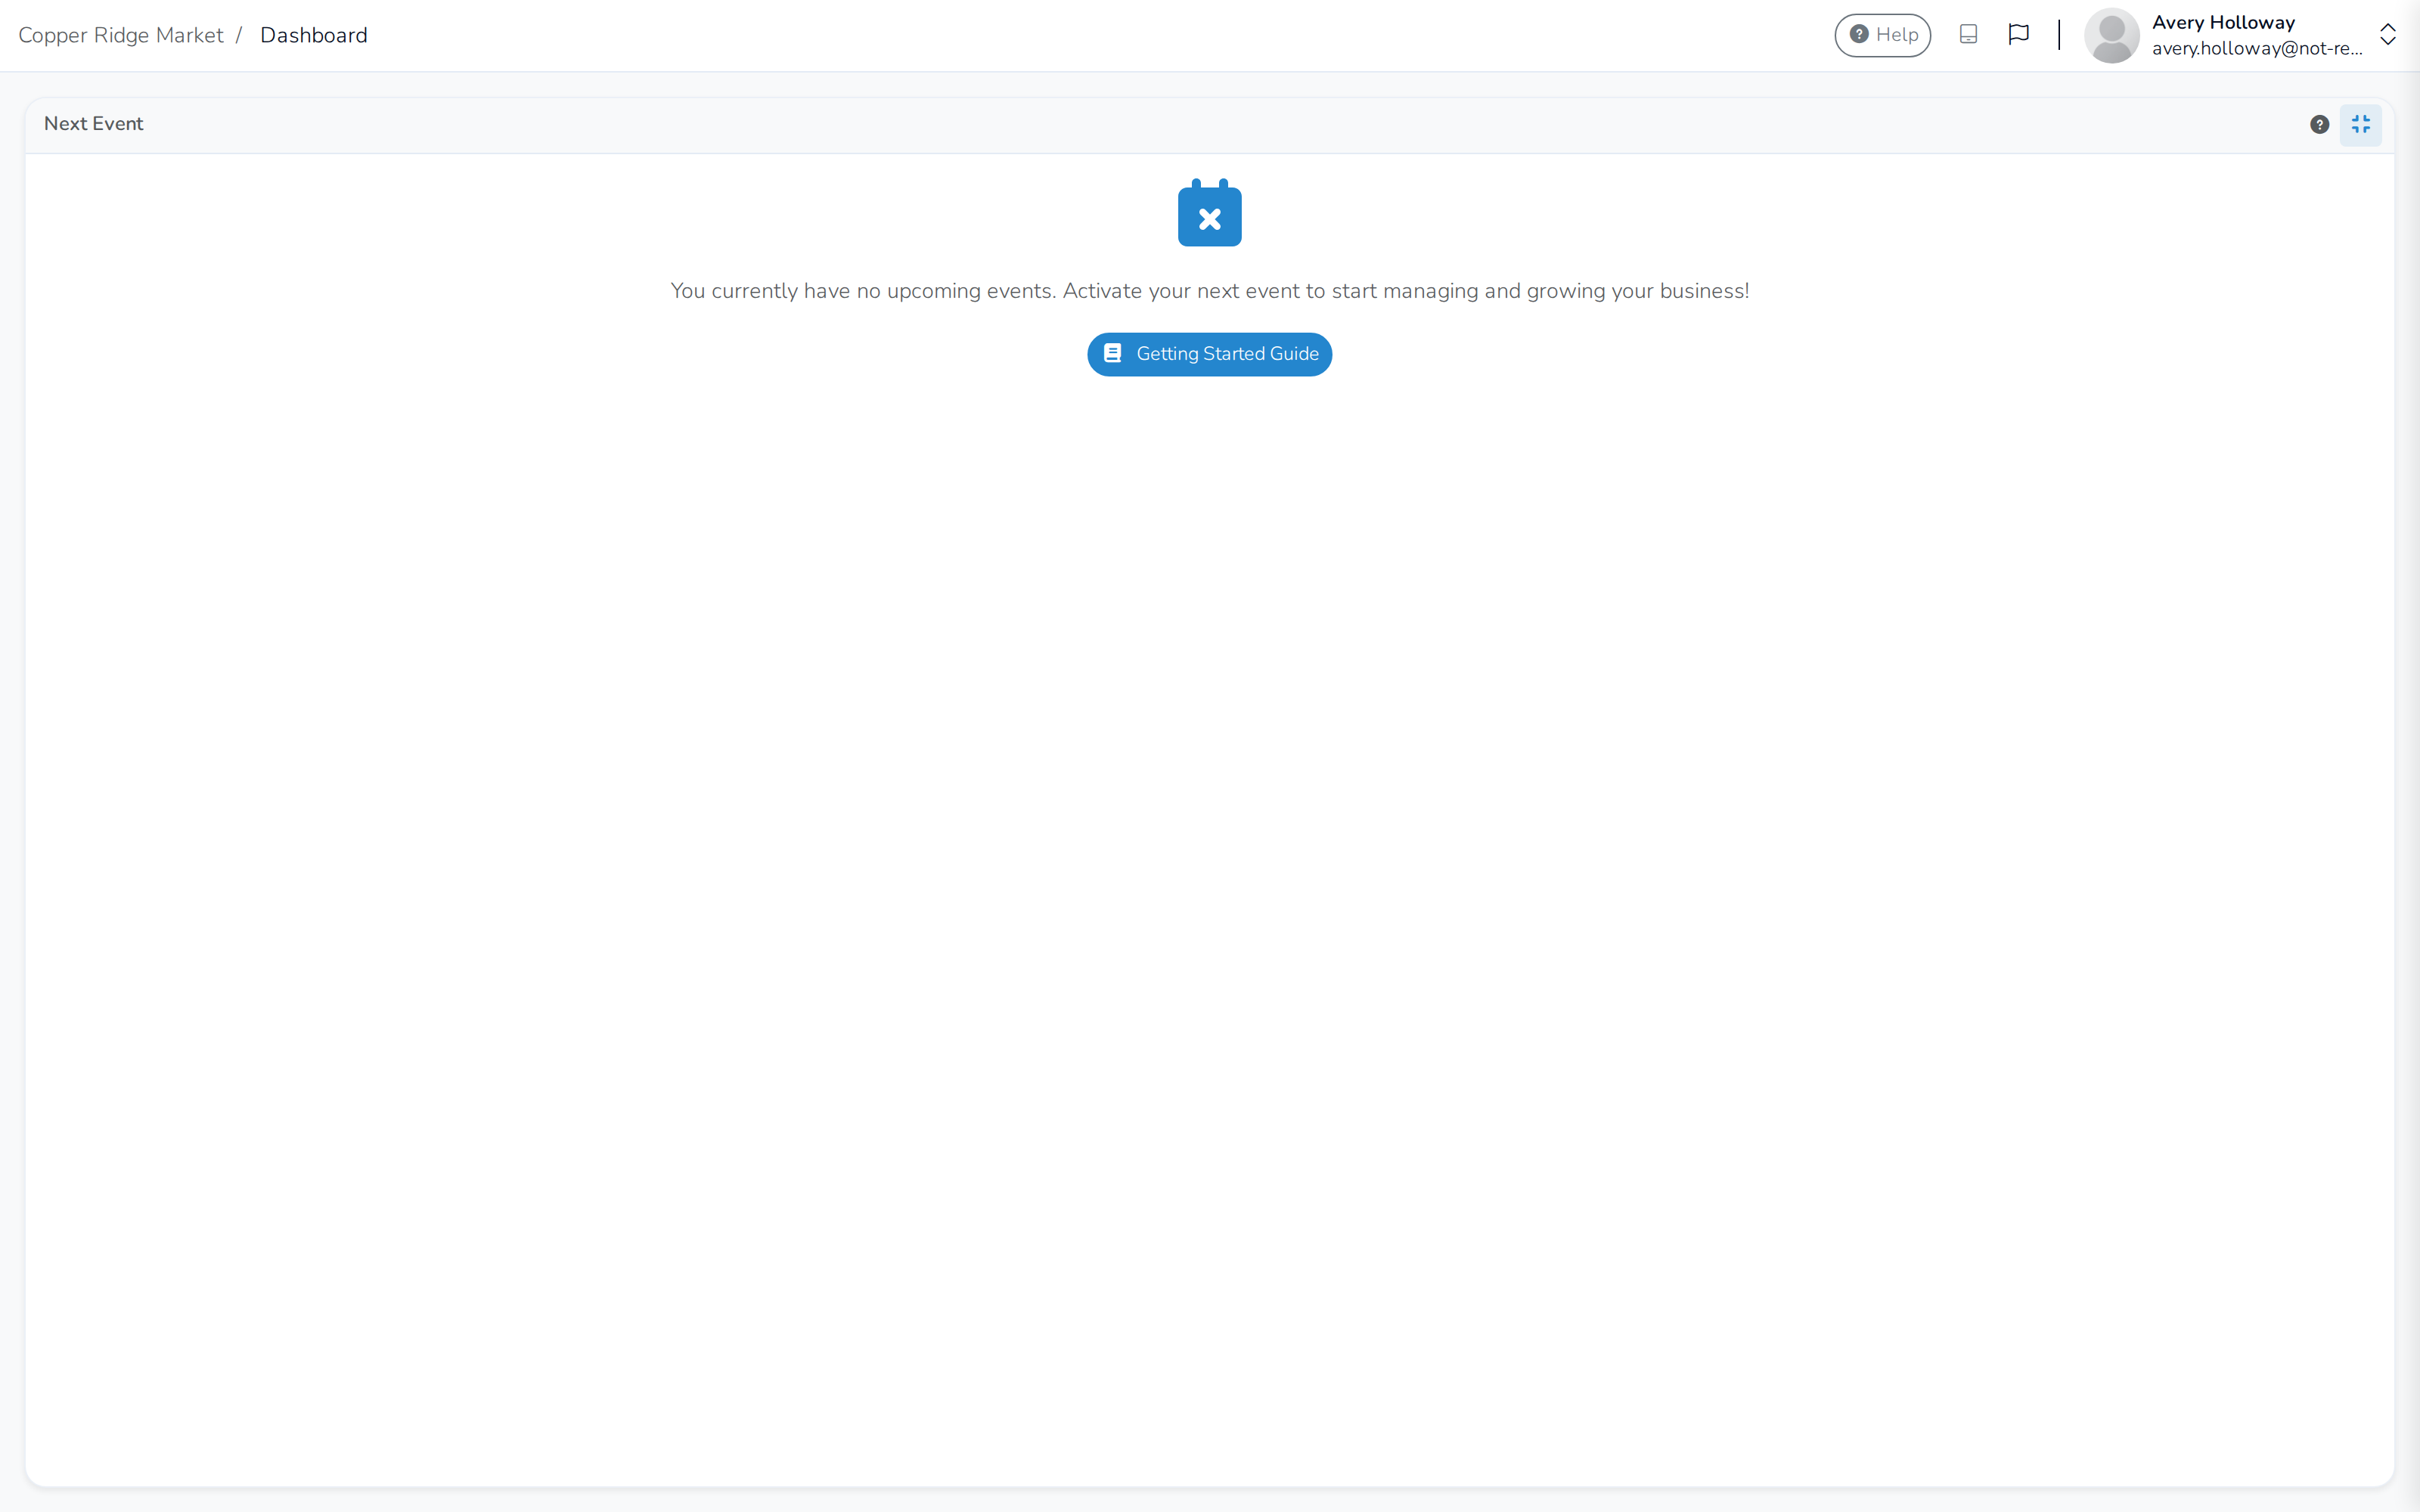
Maximizing is only a bigger view. It doesn't move anything or change your layout, so you can open a card and close it as often as you like.
Add widgets from the gallery
-
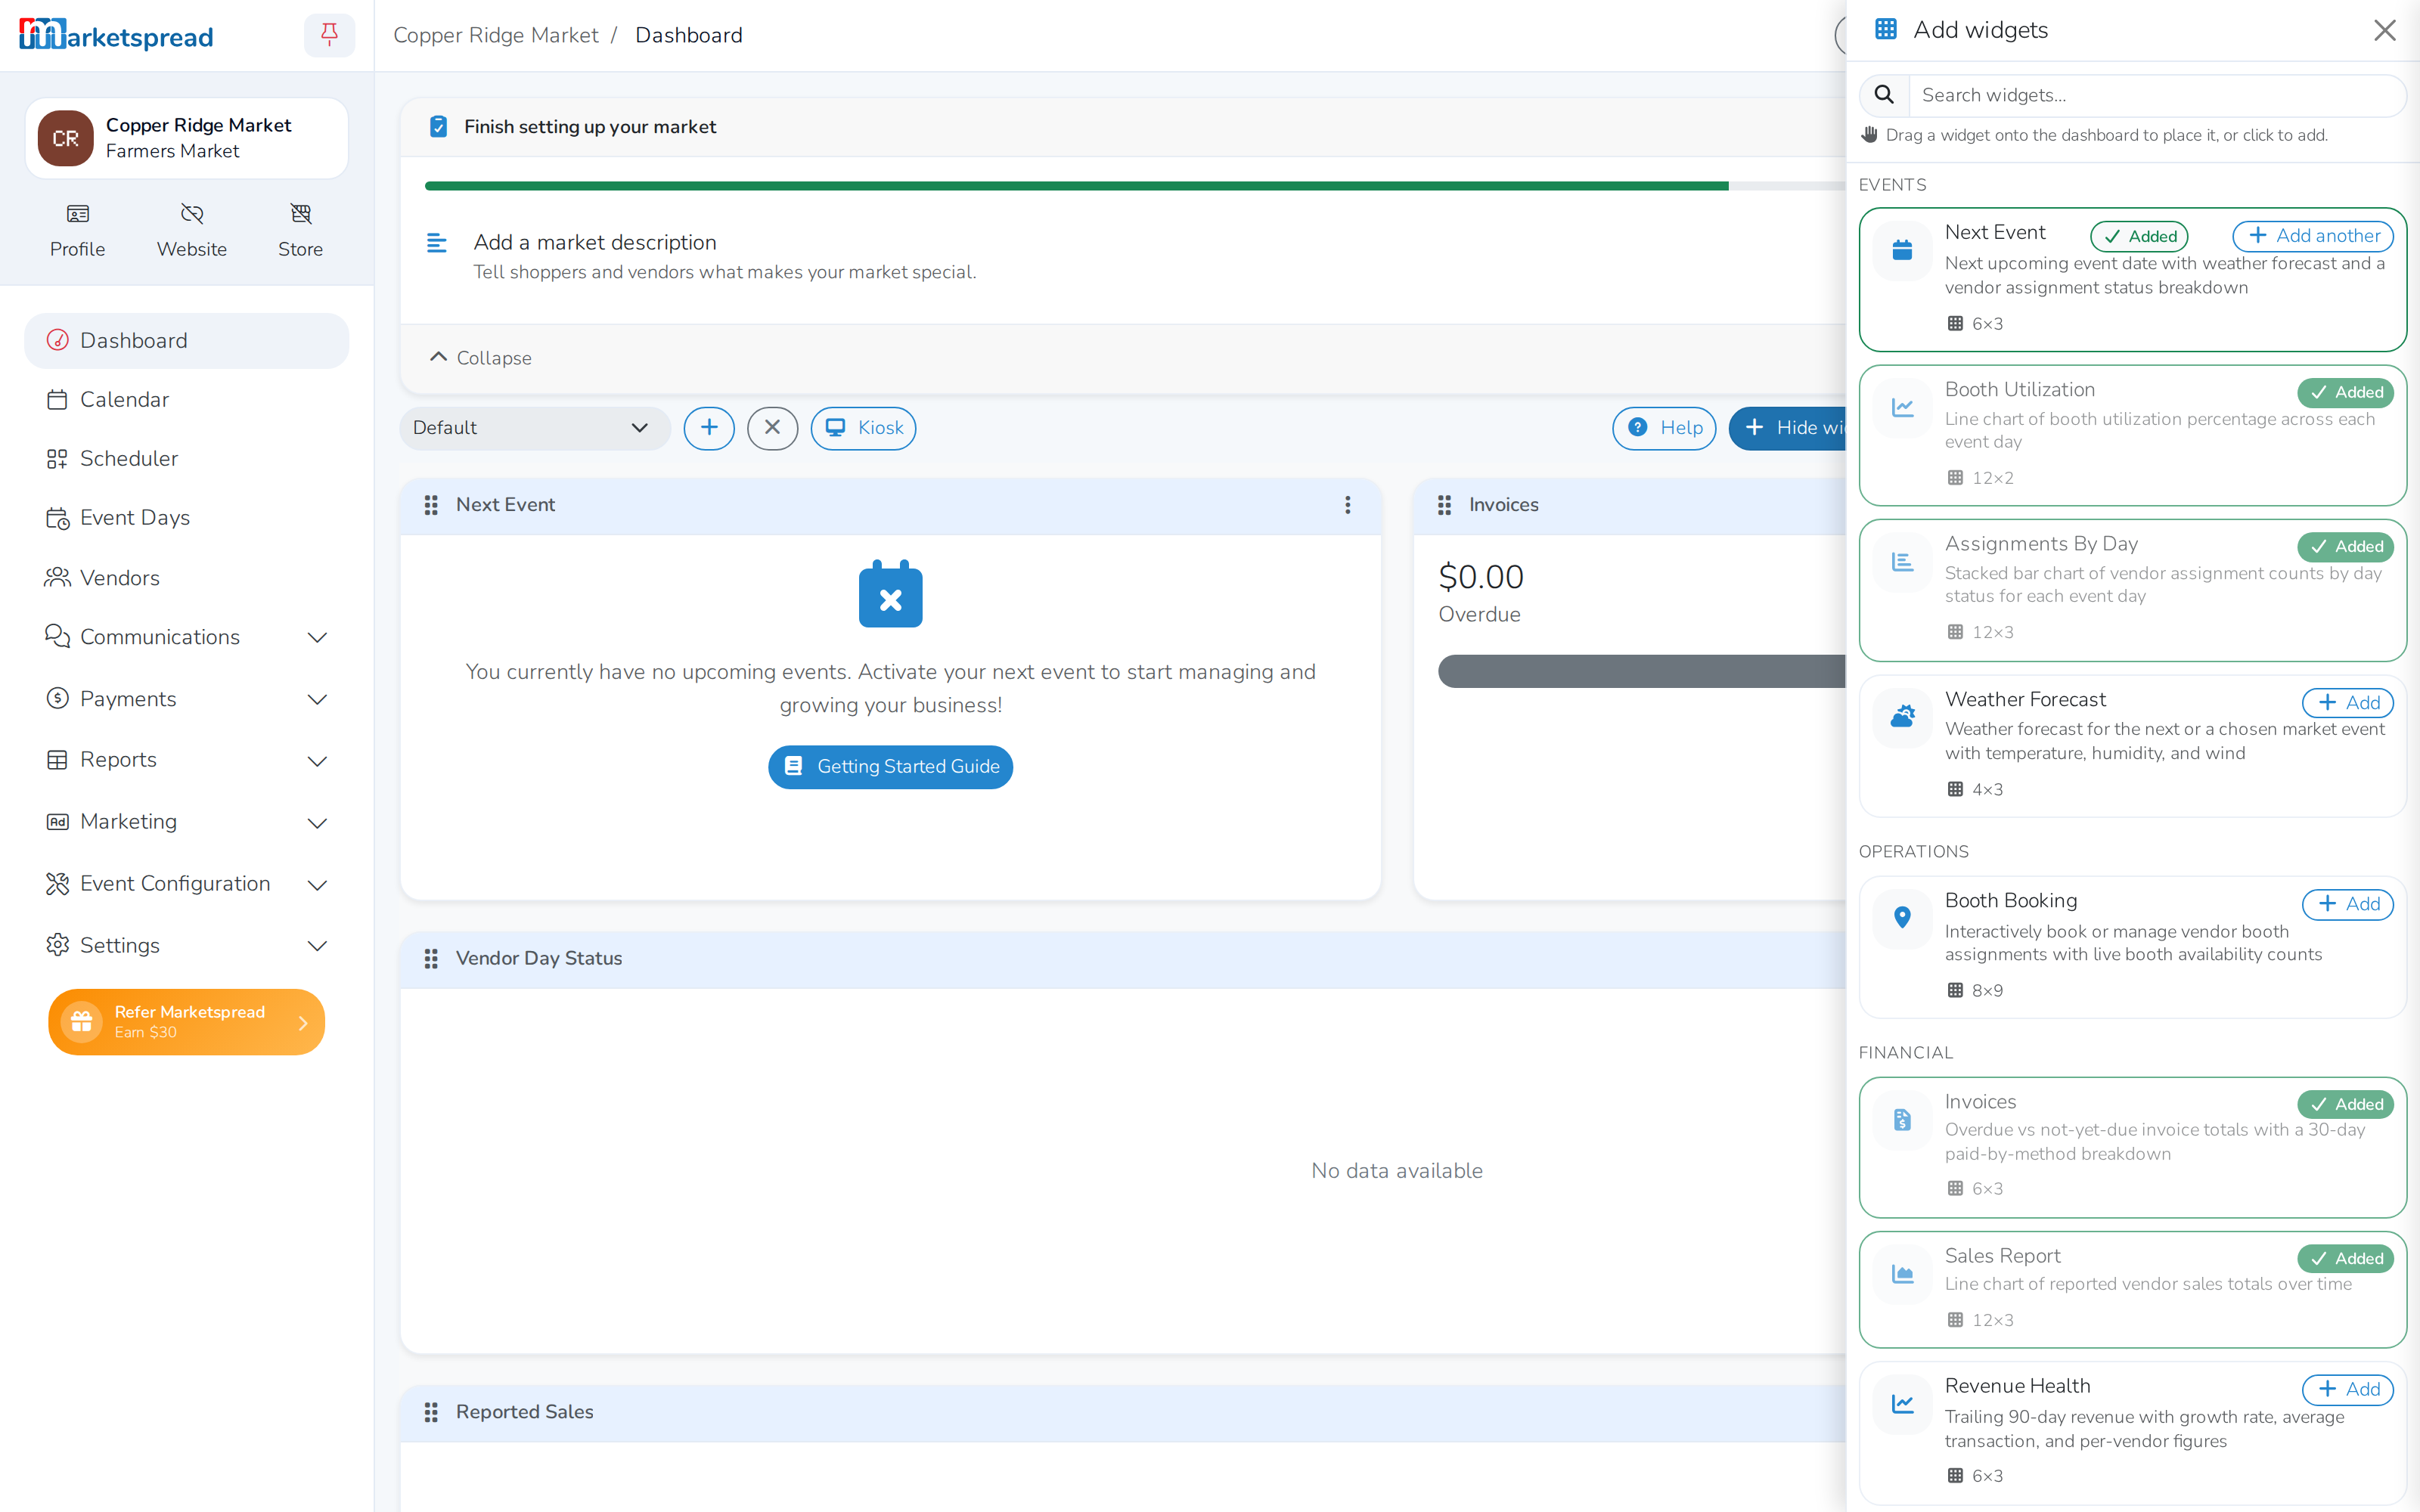
In Customize mode, click Add widgets. A panel slides in from the right.
-
Widgets are grouped by category. Scroll through them, or type in the search box to find one by name.
-
Click a widget to add it, or drag it onto the grid where you want it to land.
-
Click Save.
Remove a widget
-
Click the gear icon to start customizing.
-
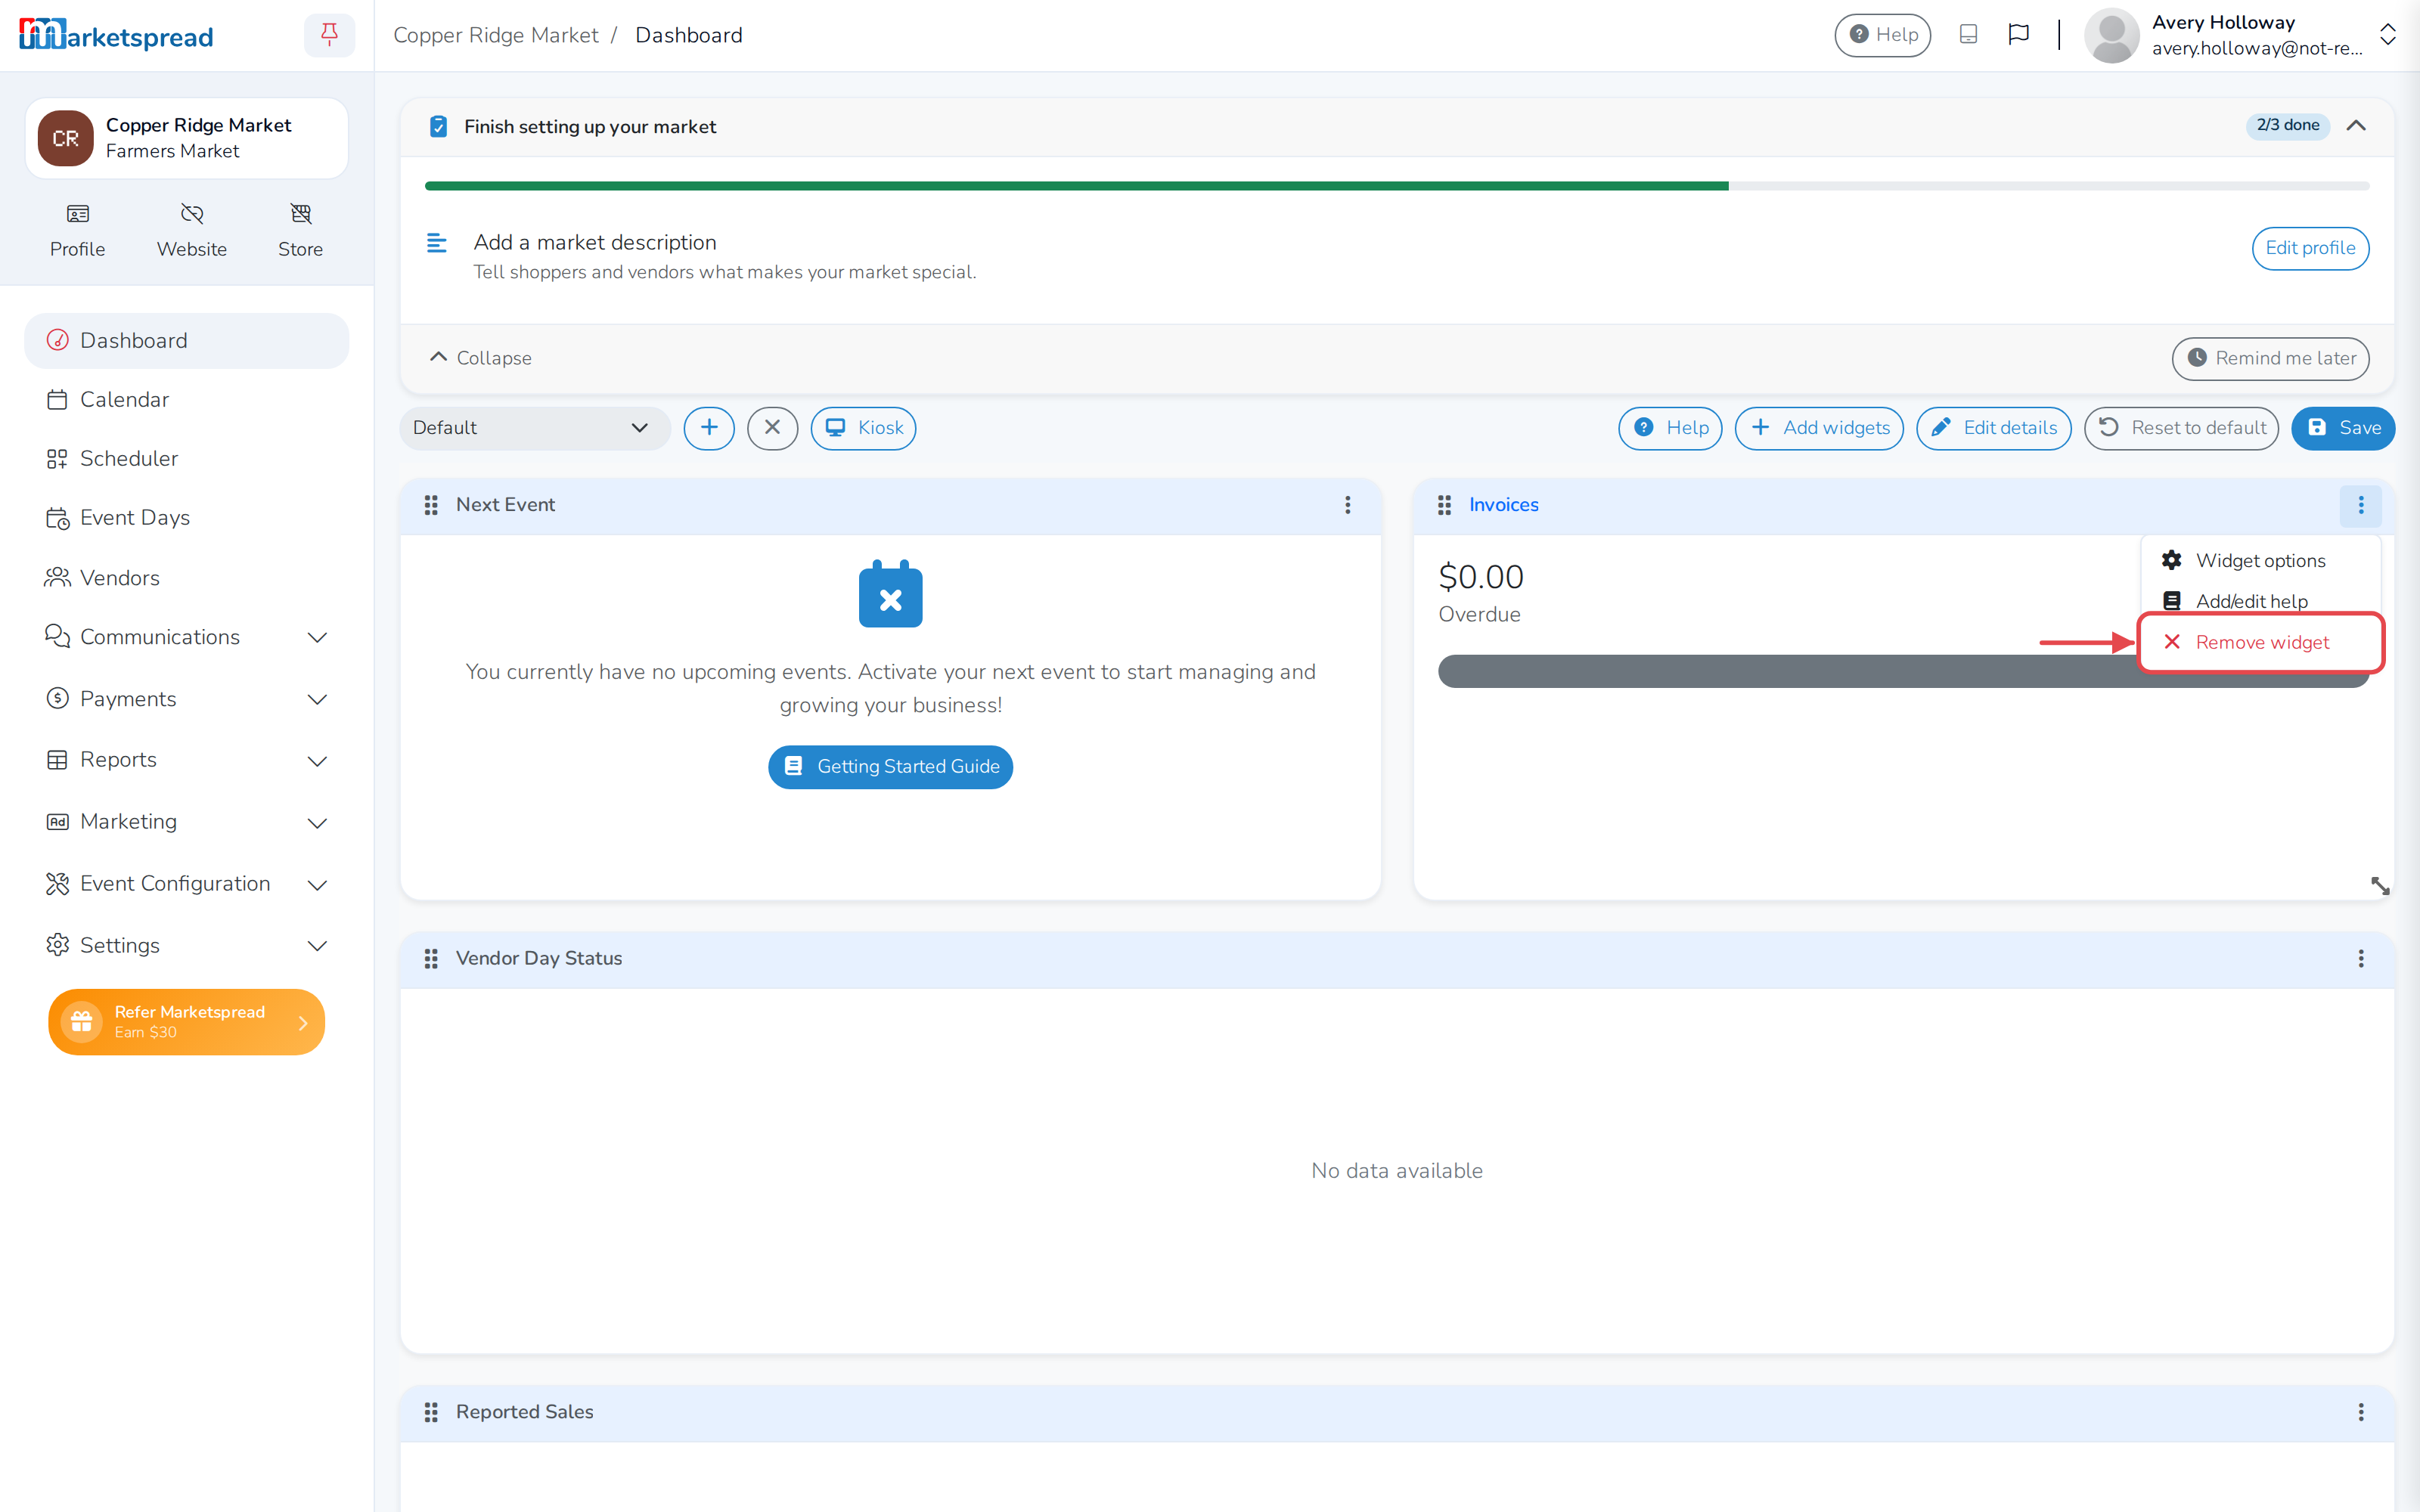
Click the three-dot menu in that card's header.
-
Click Remove widget.
-
Click Save.
Create a dashboard
Create another dashboard when you want a different view of your market — for example, one focused on sales, or one you only share with a few people.
-
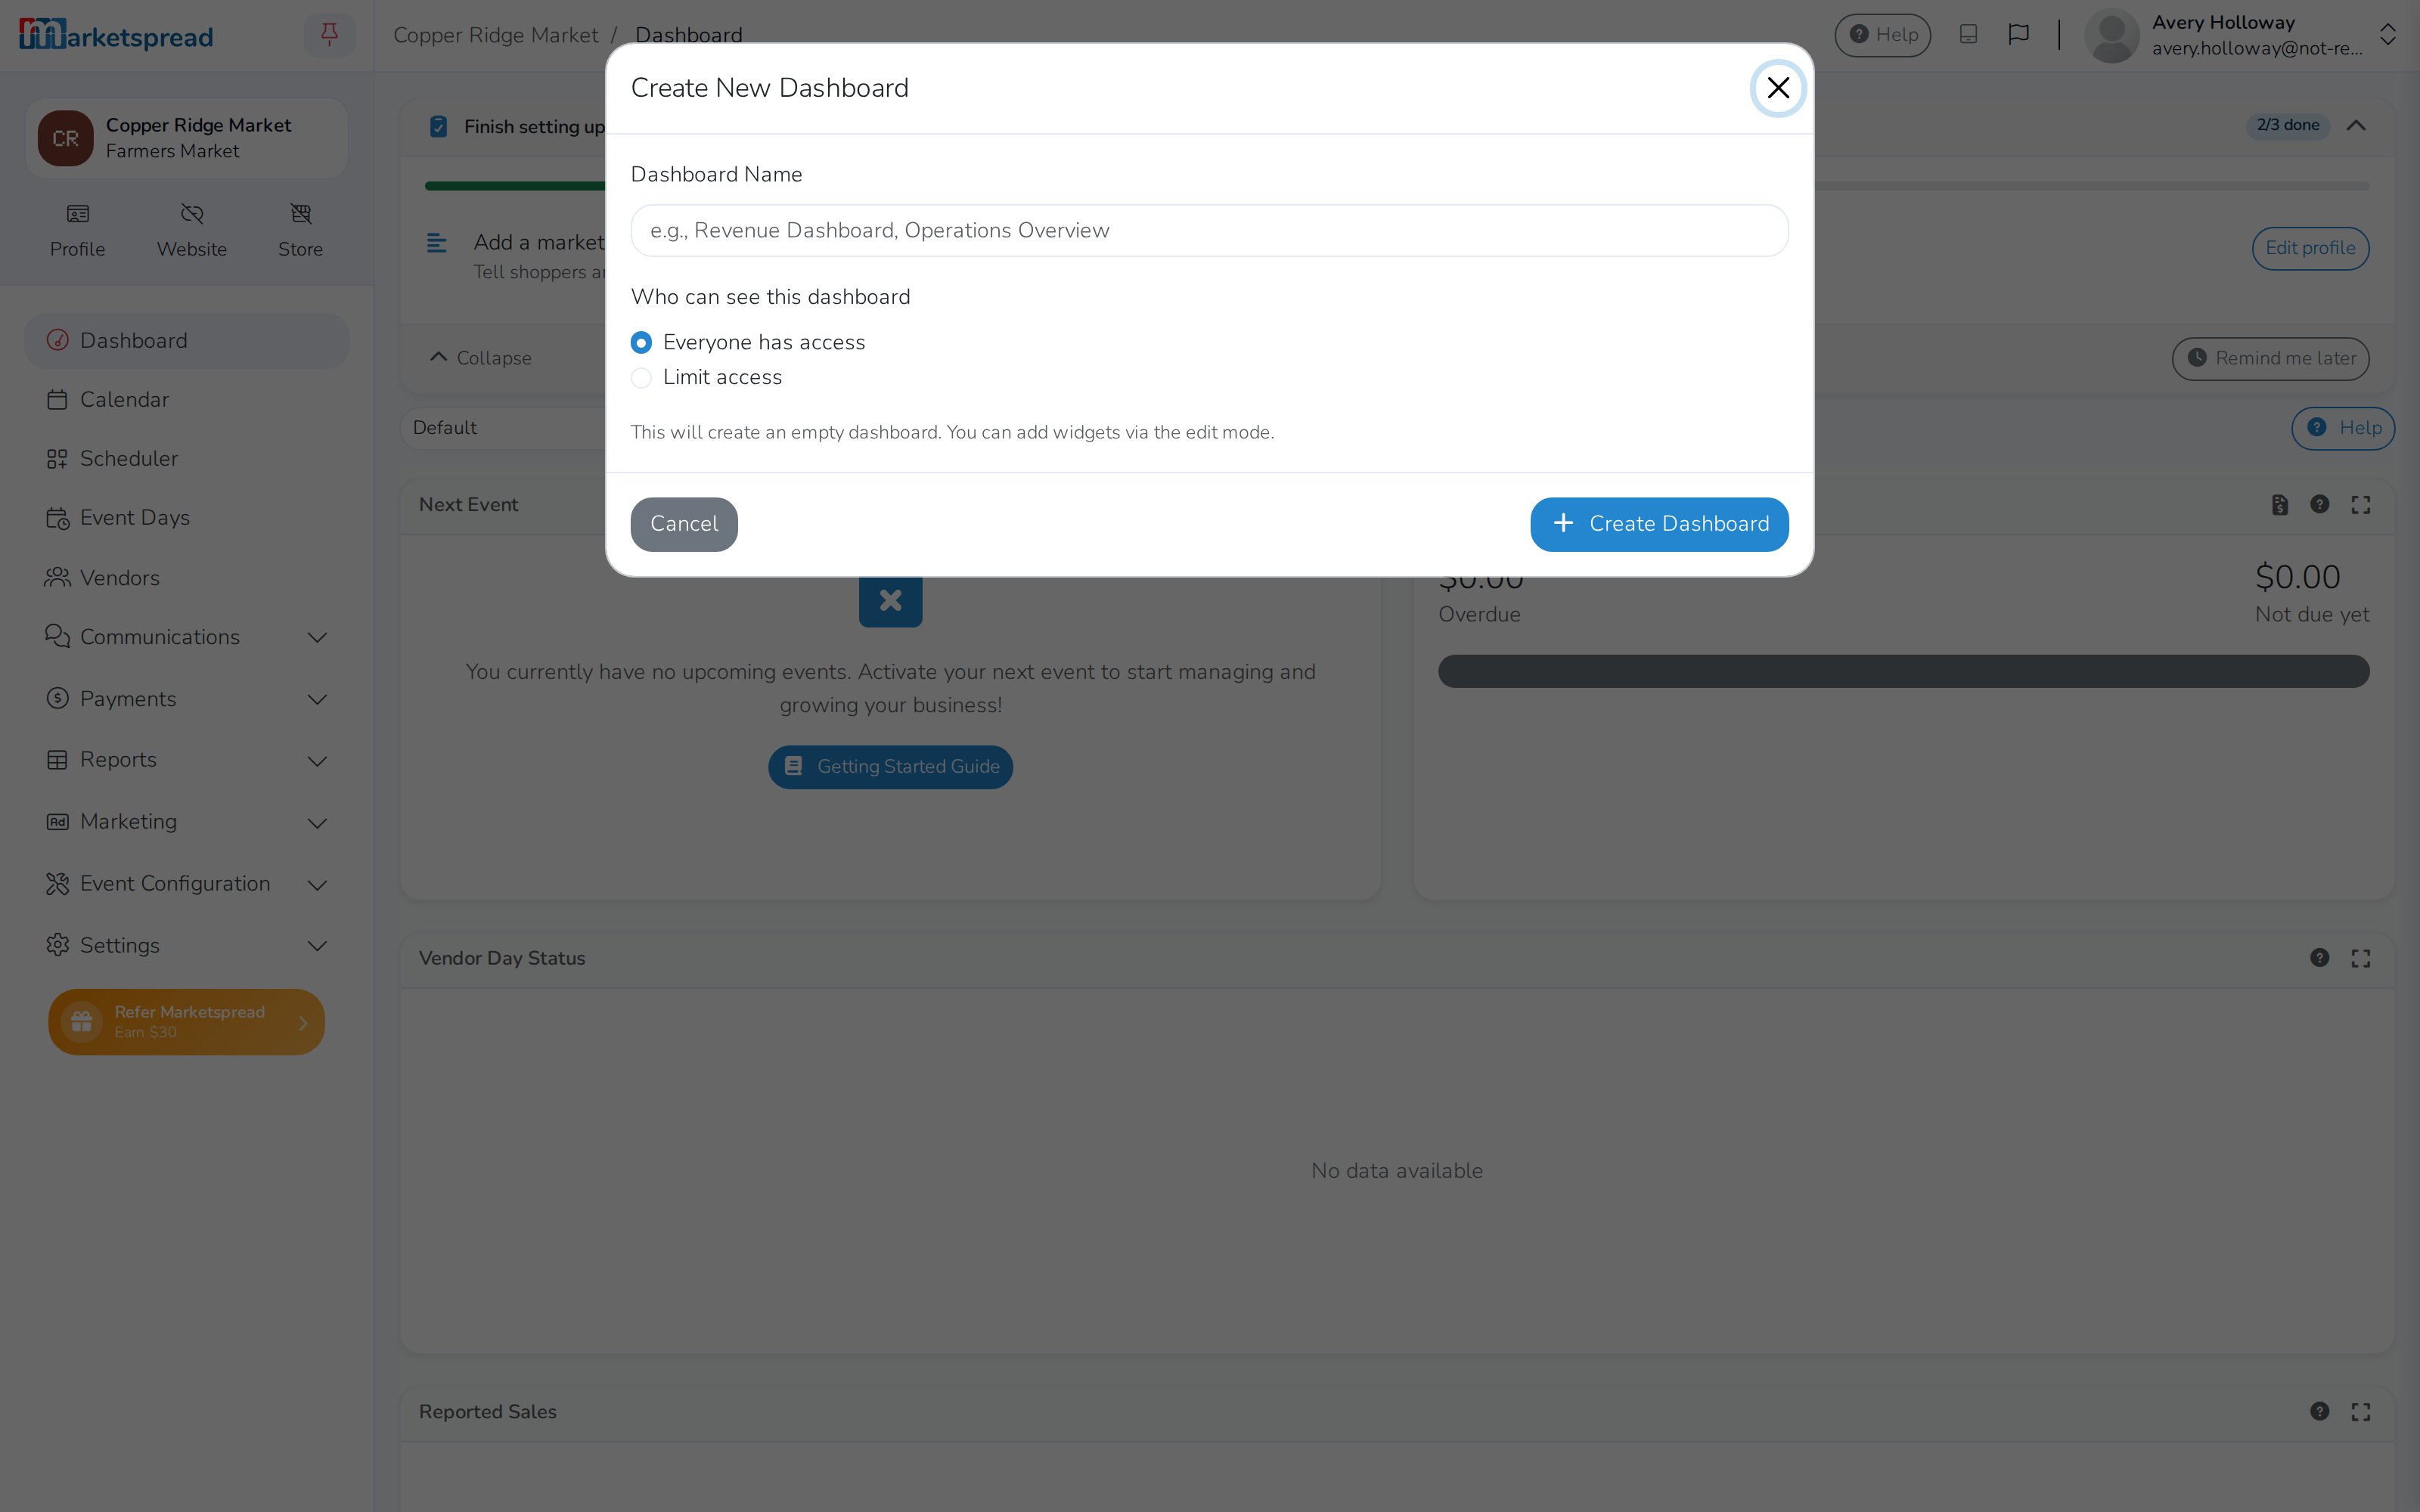
Click the plus icon next to your dashboard's name at the top of the screen.
-
Type a name in Dashboard Name.
-
If you can manage who sees dashboards, click Everyone has access, or click Limit access and pick people.
-
Click Create Dashboard.
A new dashboard starts empty and opens straight into Customize mode, so you can add widgets to it right away.
Note
Creating more than one dashboard requires Premium. If your market doesn't have it, clicking the plus icon shows a message to contact support and upgrade instead.
Switch between dashboards
-
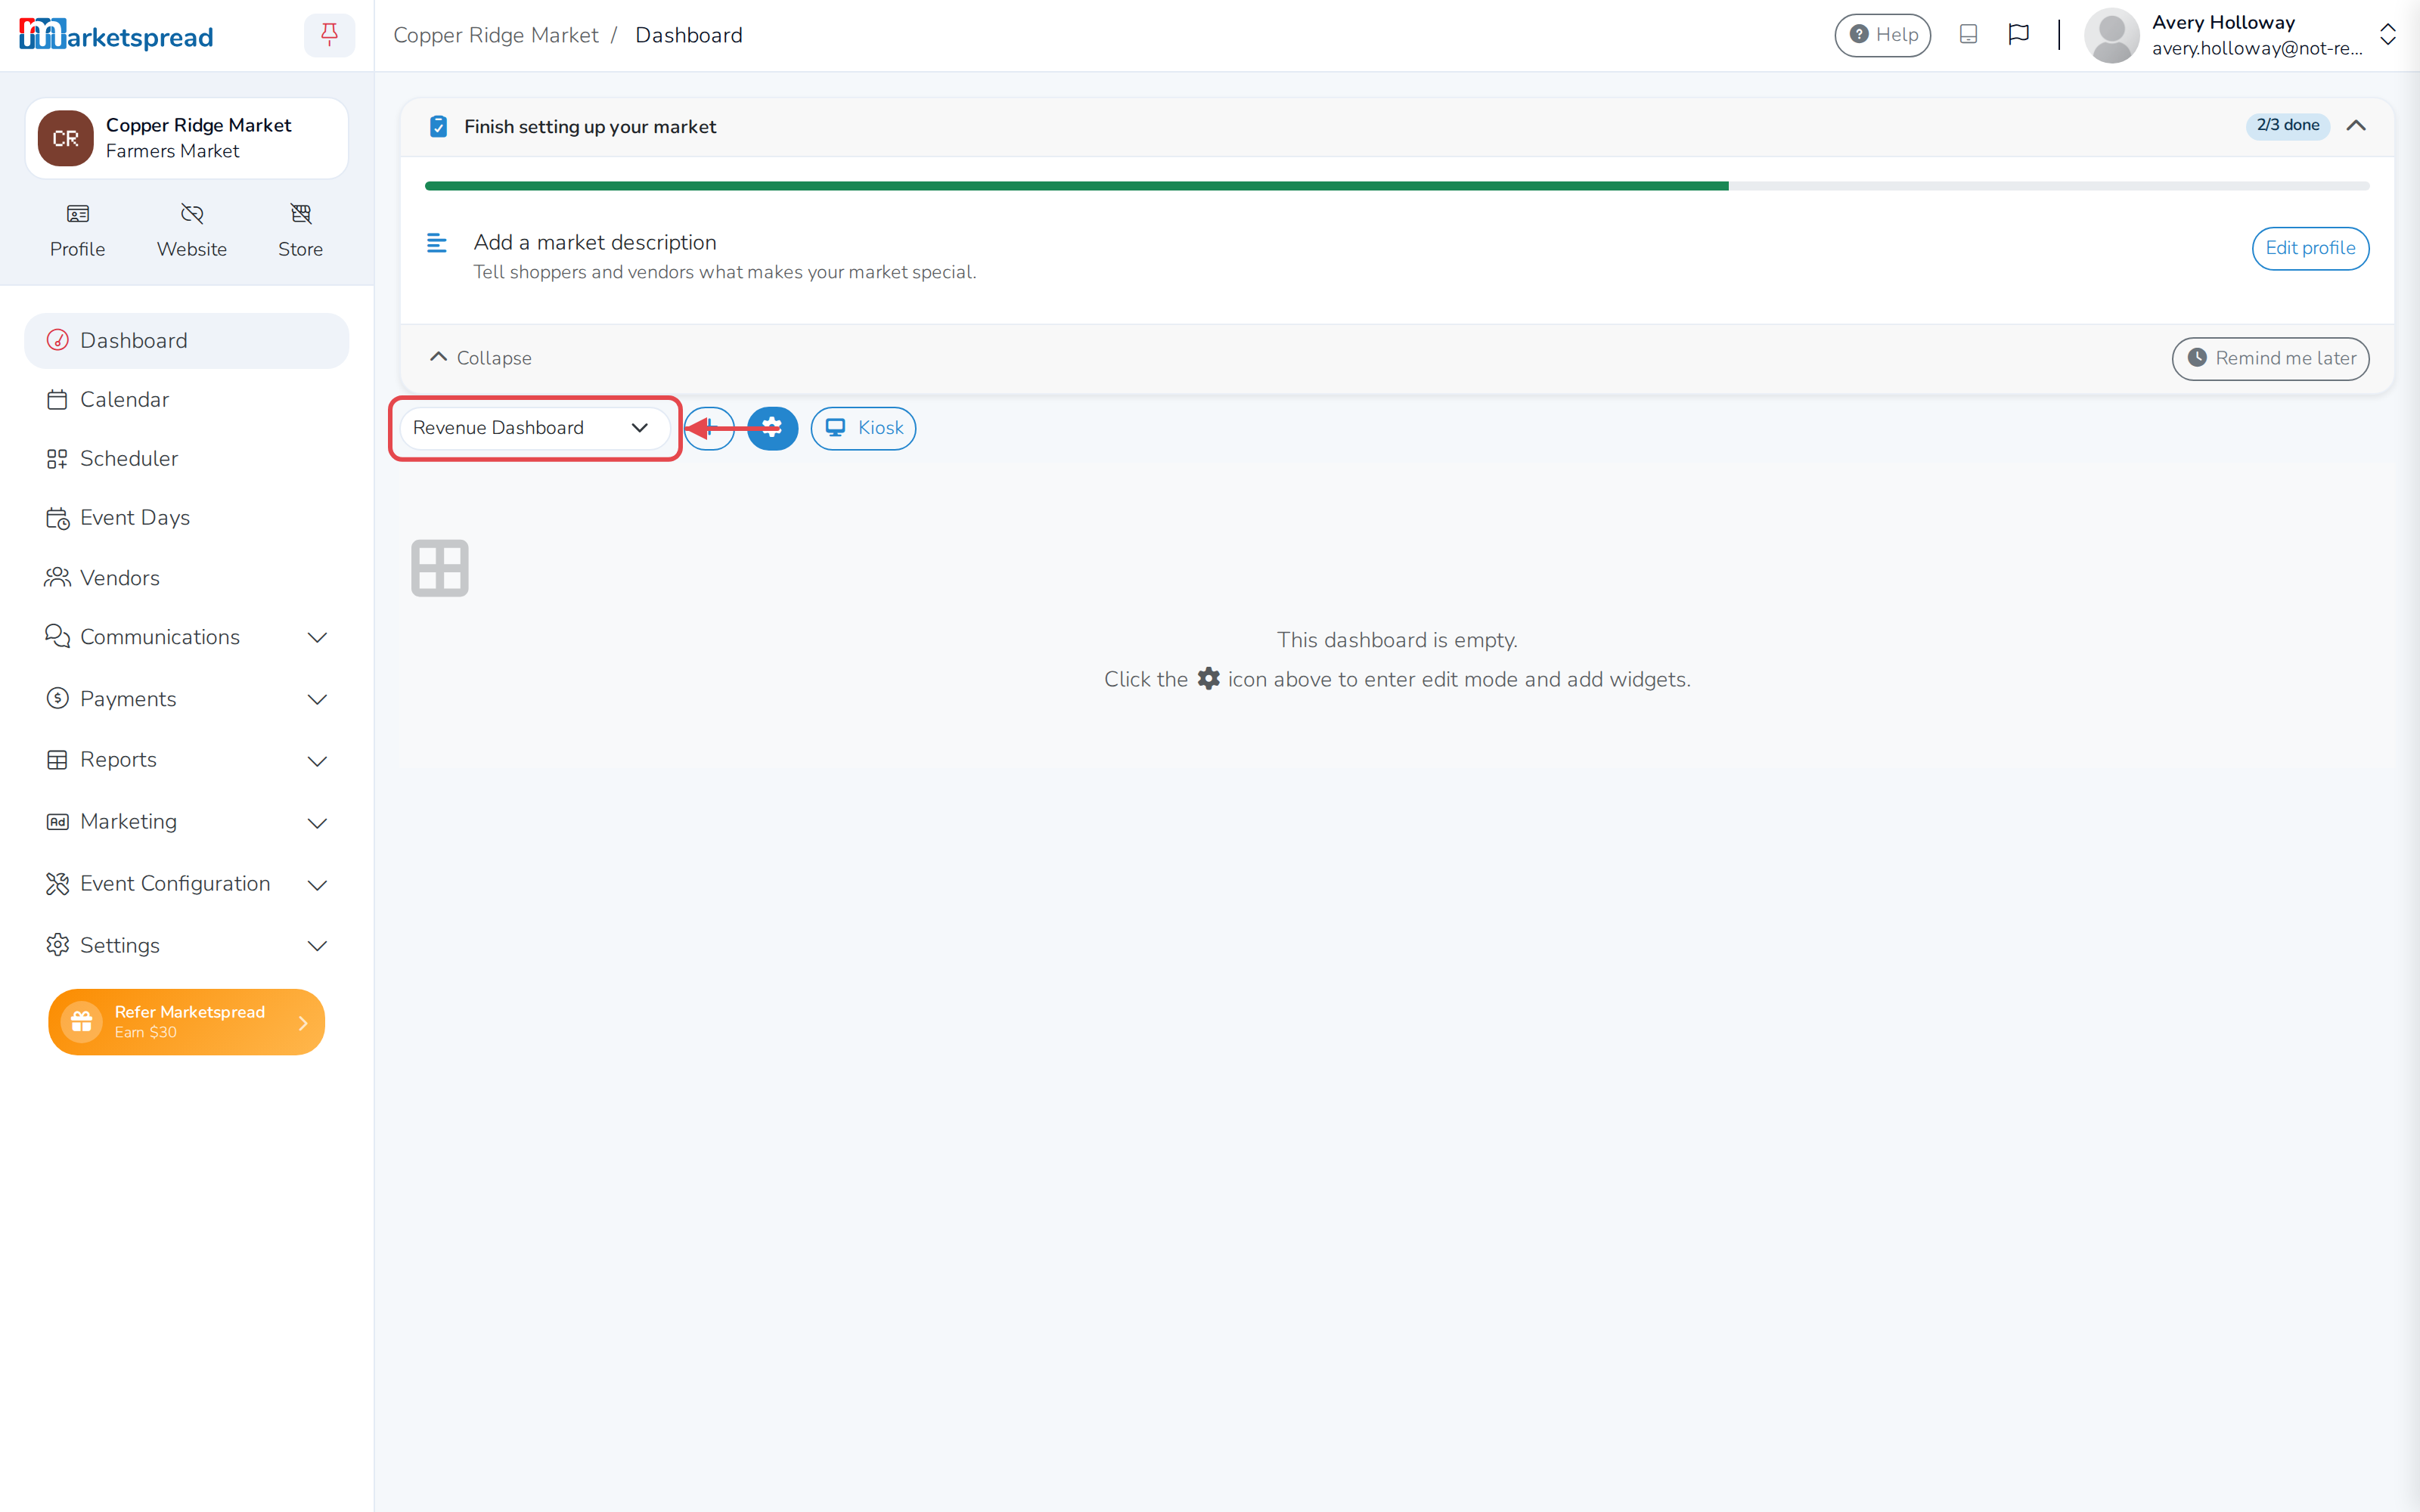
Click your dashboard's name at the top of the screen. A list of your dashboards drops down.
-
Choose the one you want.
Note
You can't switch dashboards while you're customizing one. Save your changes, or cancel, first.
Rename a dashboard or change who can see it
-
Switch to the dashboard you want to change.
-
Click the gear icon to start customizing.
-
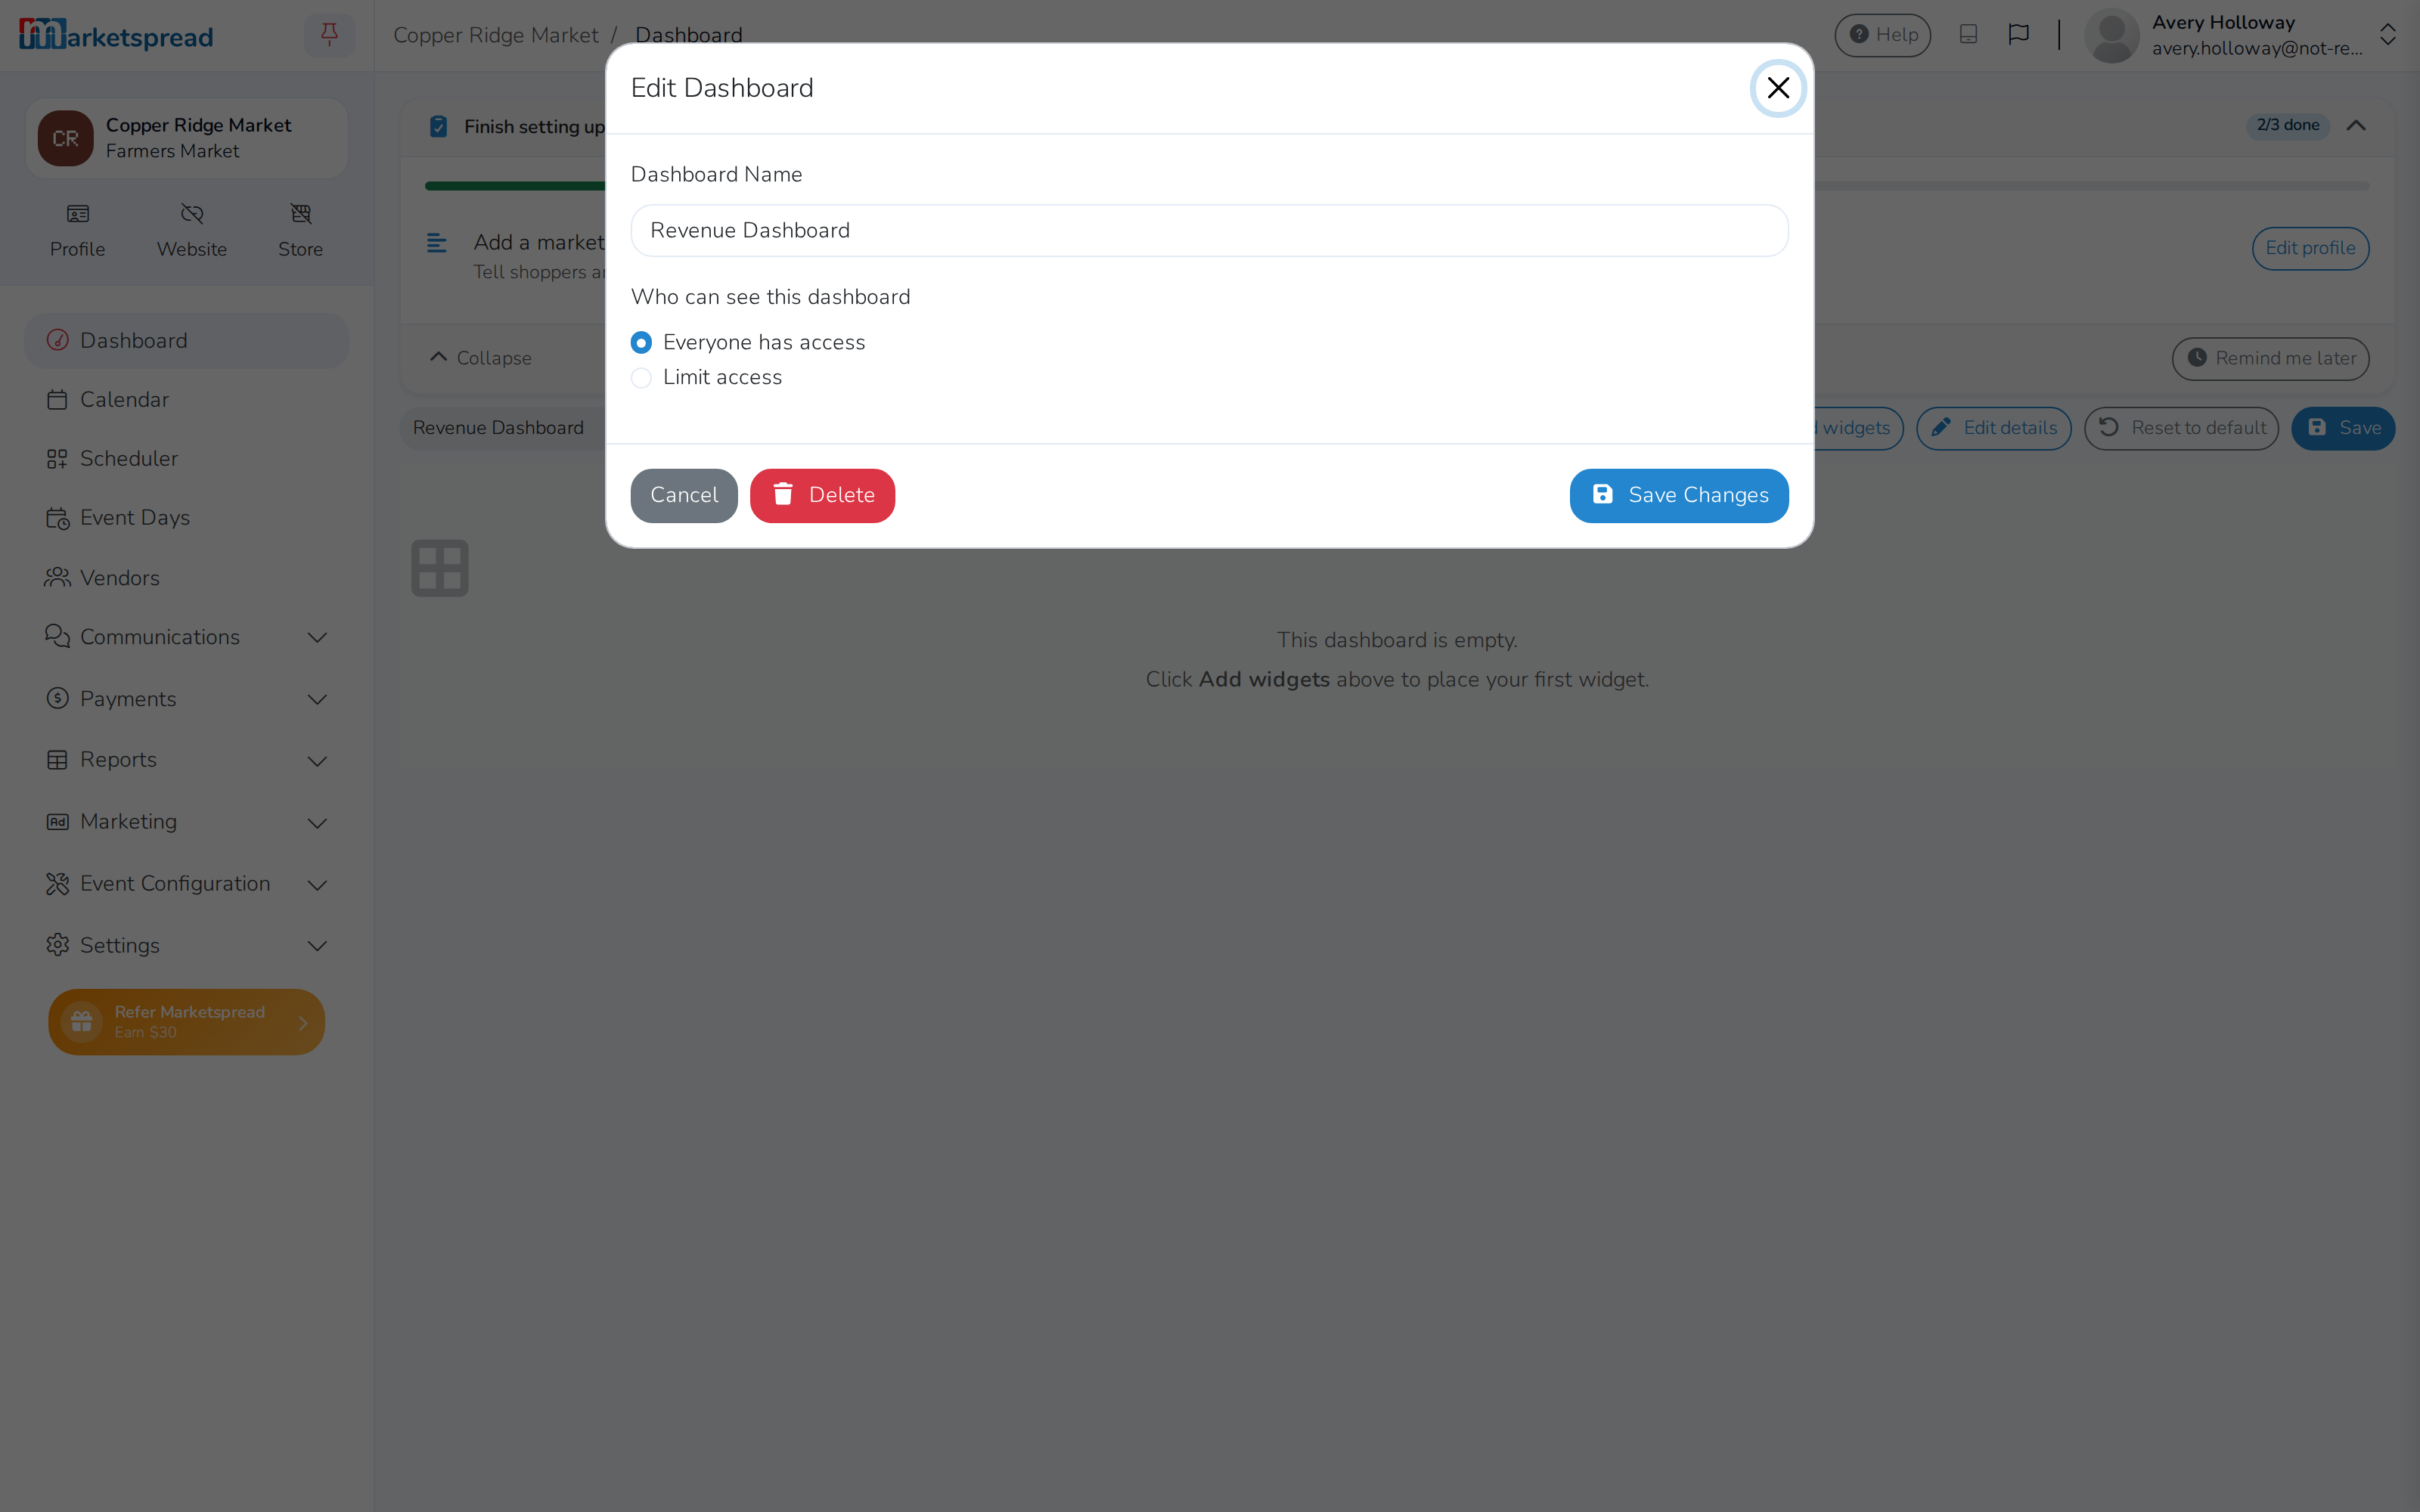
Click Edit details.
-
Change the name. If you can manage who sees dashboards, you can also click Everyone has access or Limit access to change who sees it.
-
Click Save Changes.
Delete a dashboard
-
Switch to the dashboard you want to delete.
-
Click the gear icon to start customizing.
-
Click Edit details.
-
Click Delete.
-
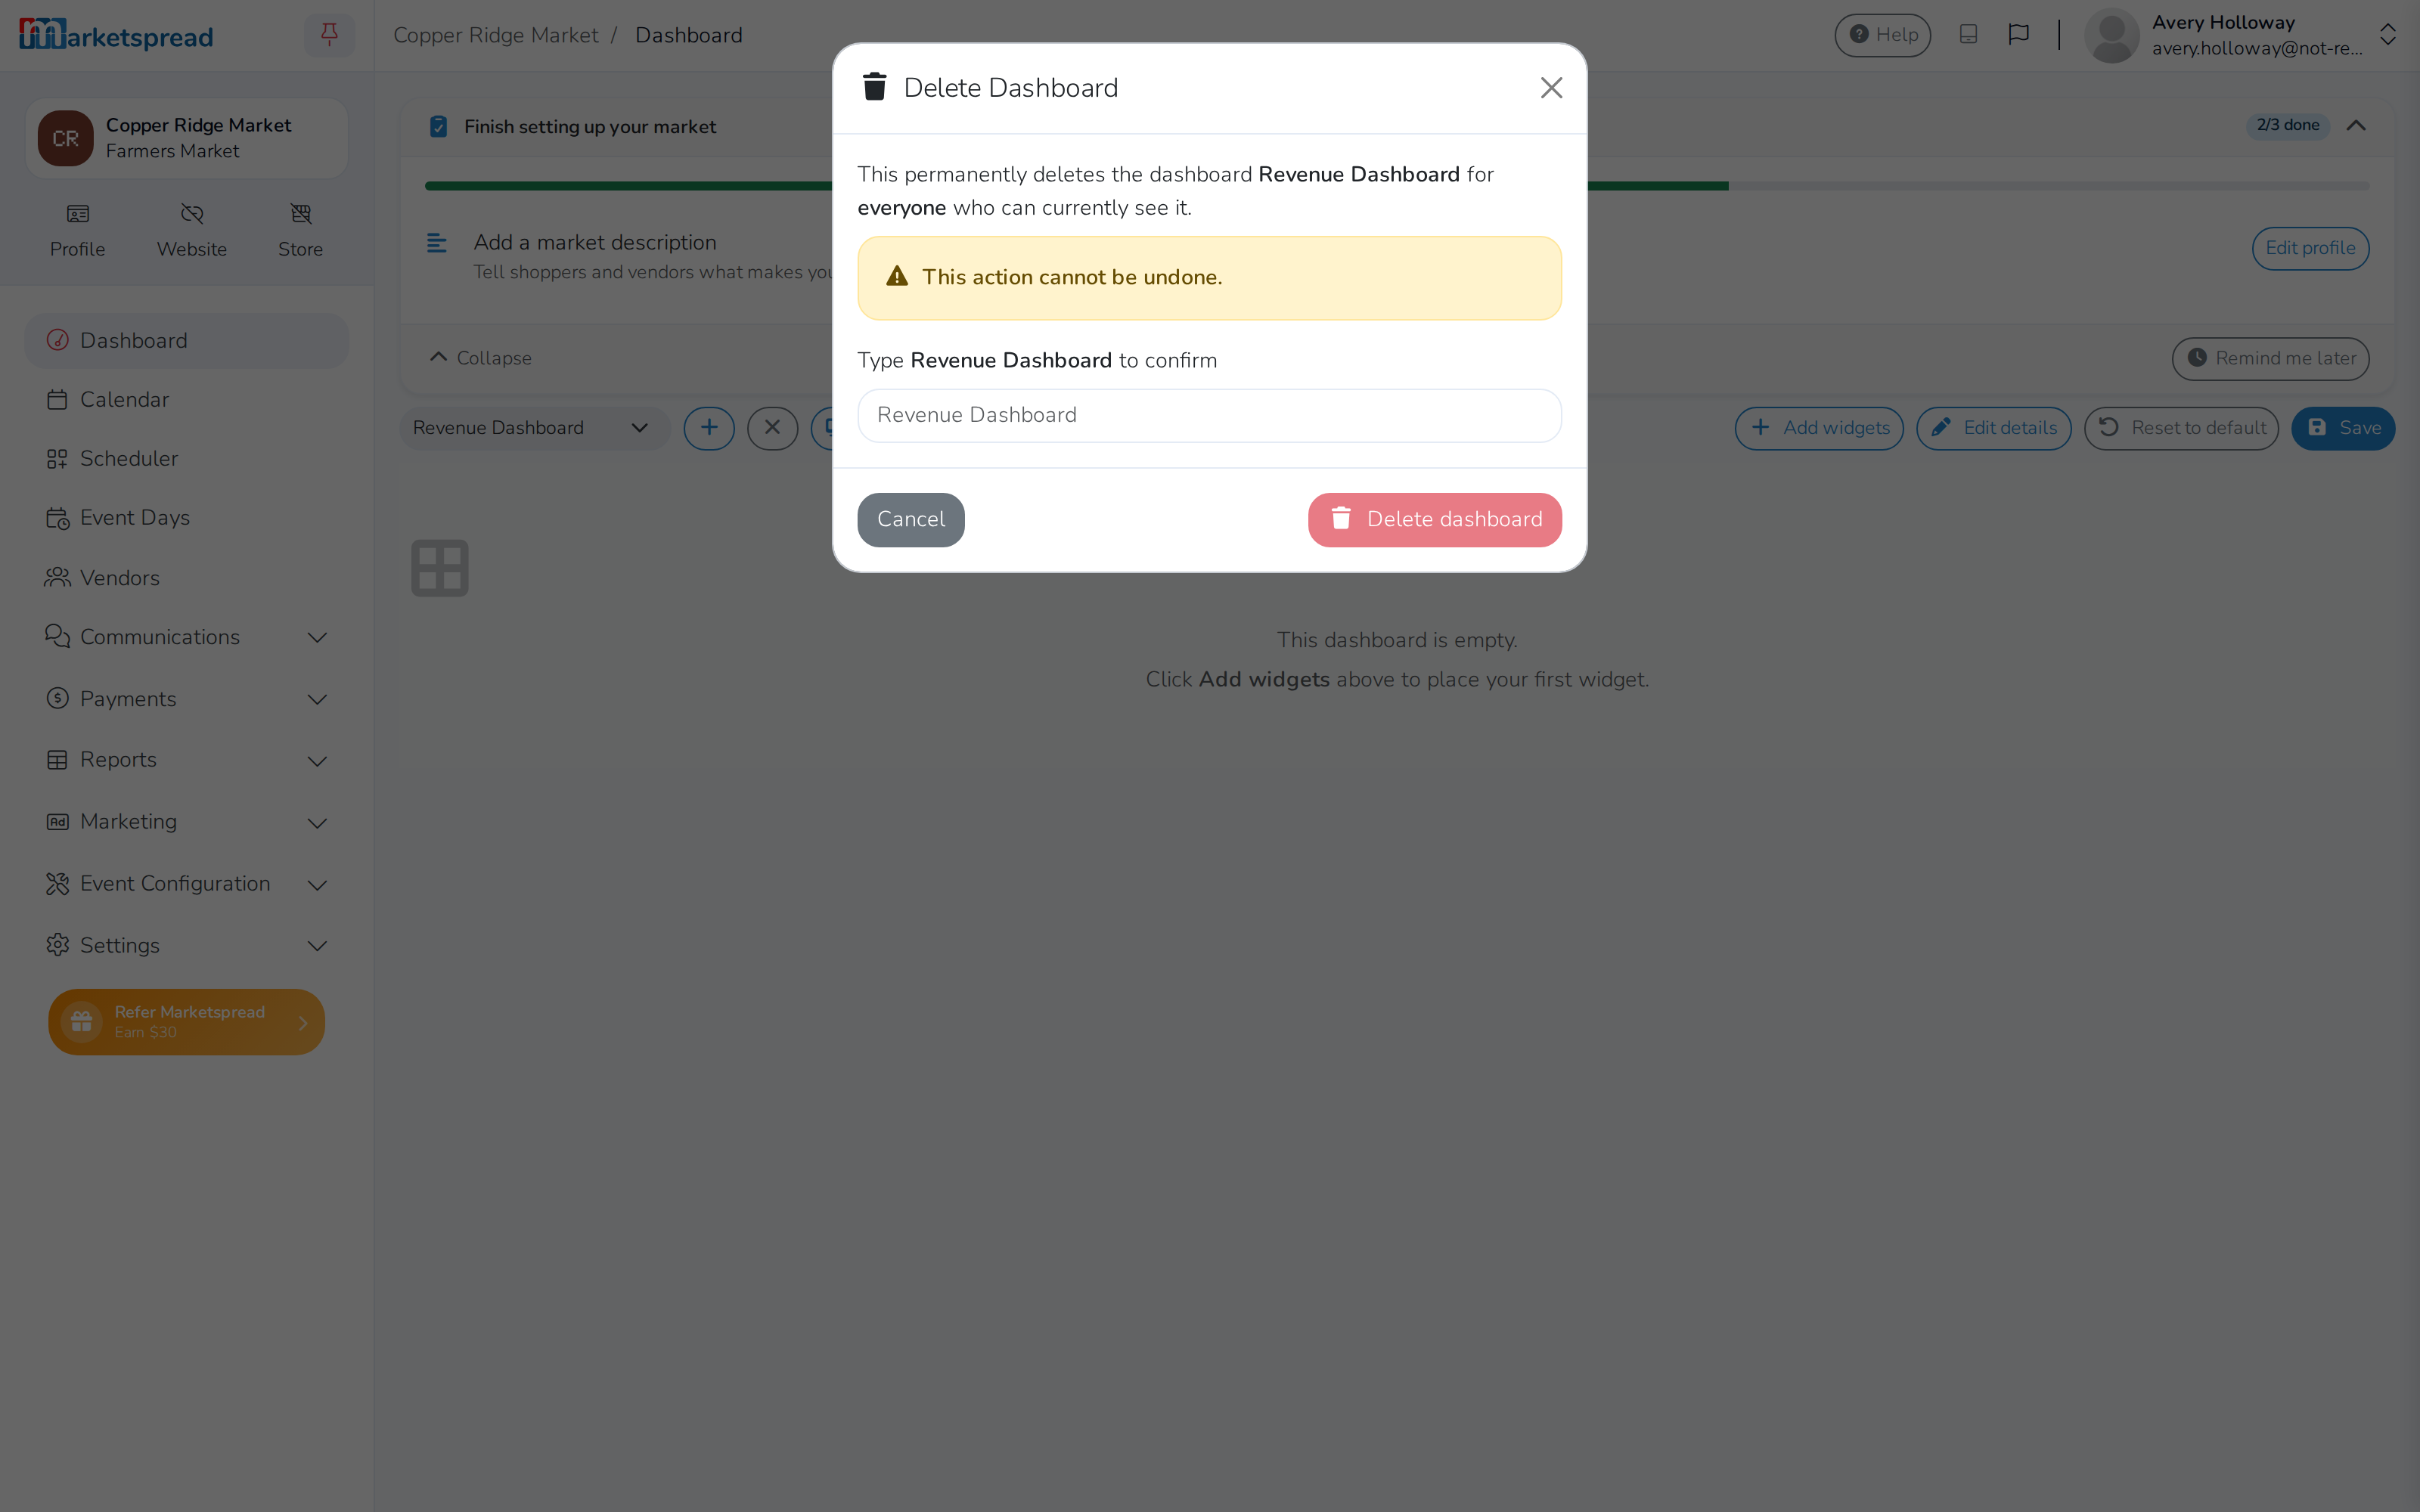
Type the dashboard's name to confirm, then click Delete dashboard.
Caution
Deleting a dashboard removes it for everyone who can see it. This can't be undone.
Each dashboard shows its own widgets
The gallery only lists widgets that make sense for the dashboard you're on. A market dashboard offers market widgets, a venue dashboard offers venue widgets, and so on.