


A request is a form you send to one of your vendors to get information back from them, in a format you control. Use it for a change order, a maintenance report, anything you'd otherwise chase over email. Every request you send shows up on Communications > Requests, where you can see whether the vendor has answered and move it through a status as you deal with it.
From here you can:
- Build a form and mark it as a request, then publish it
- Send it to one of your vendors
- Track its status, and change that status yourself
- See what the vendor sent back, or fill it in for them
- Delete a request you no longer need
If you just want a form your own team fills in — not one you send to a vendor — see the Forms Guide for Event Managers instead.
Create a request form
-
Click Settings in the left-hand menu, then Forms.
-
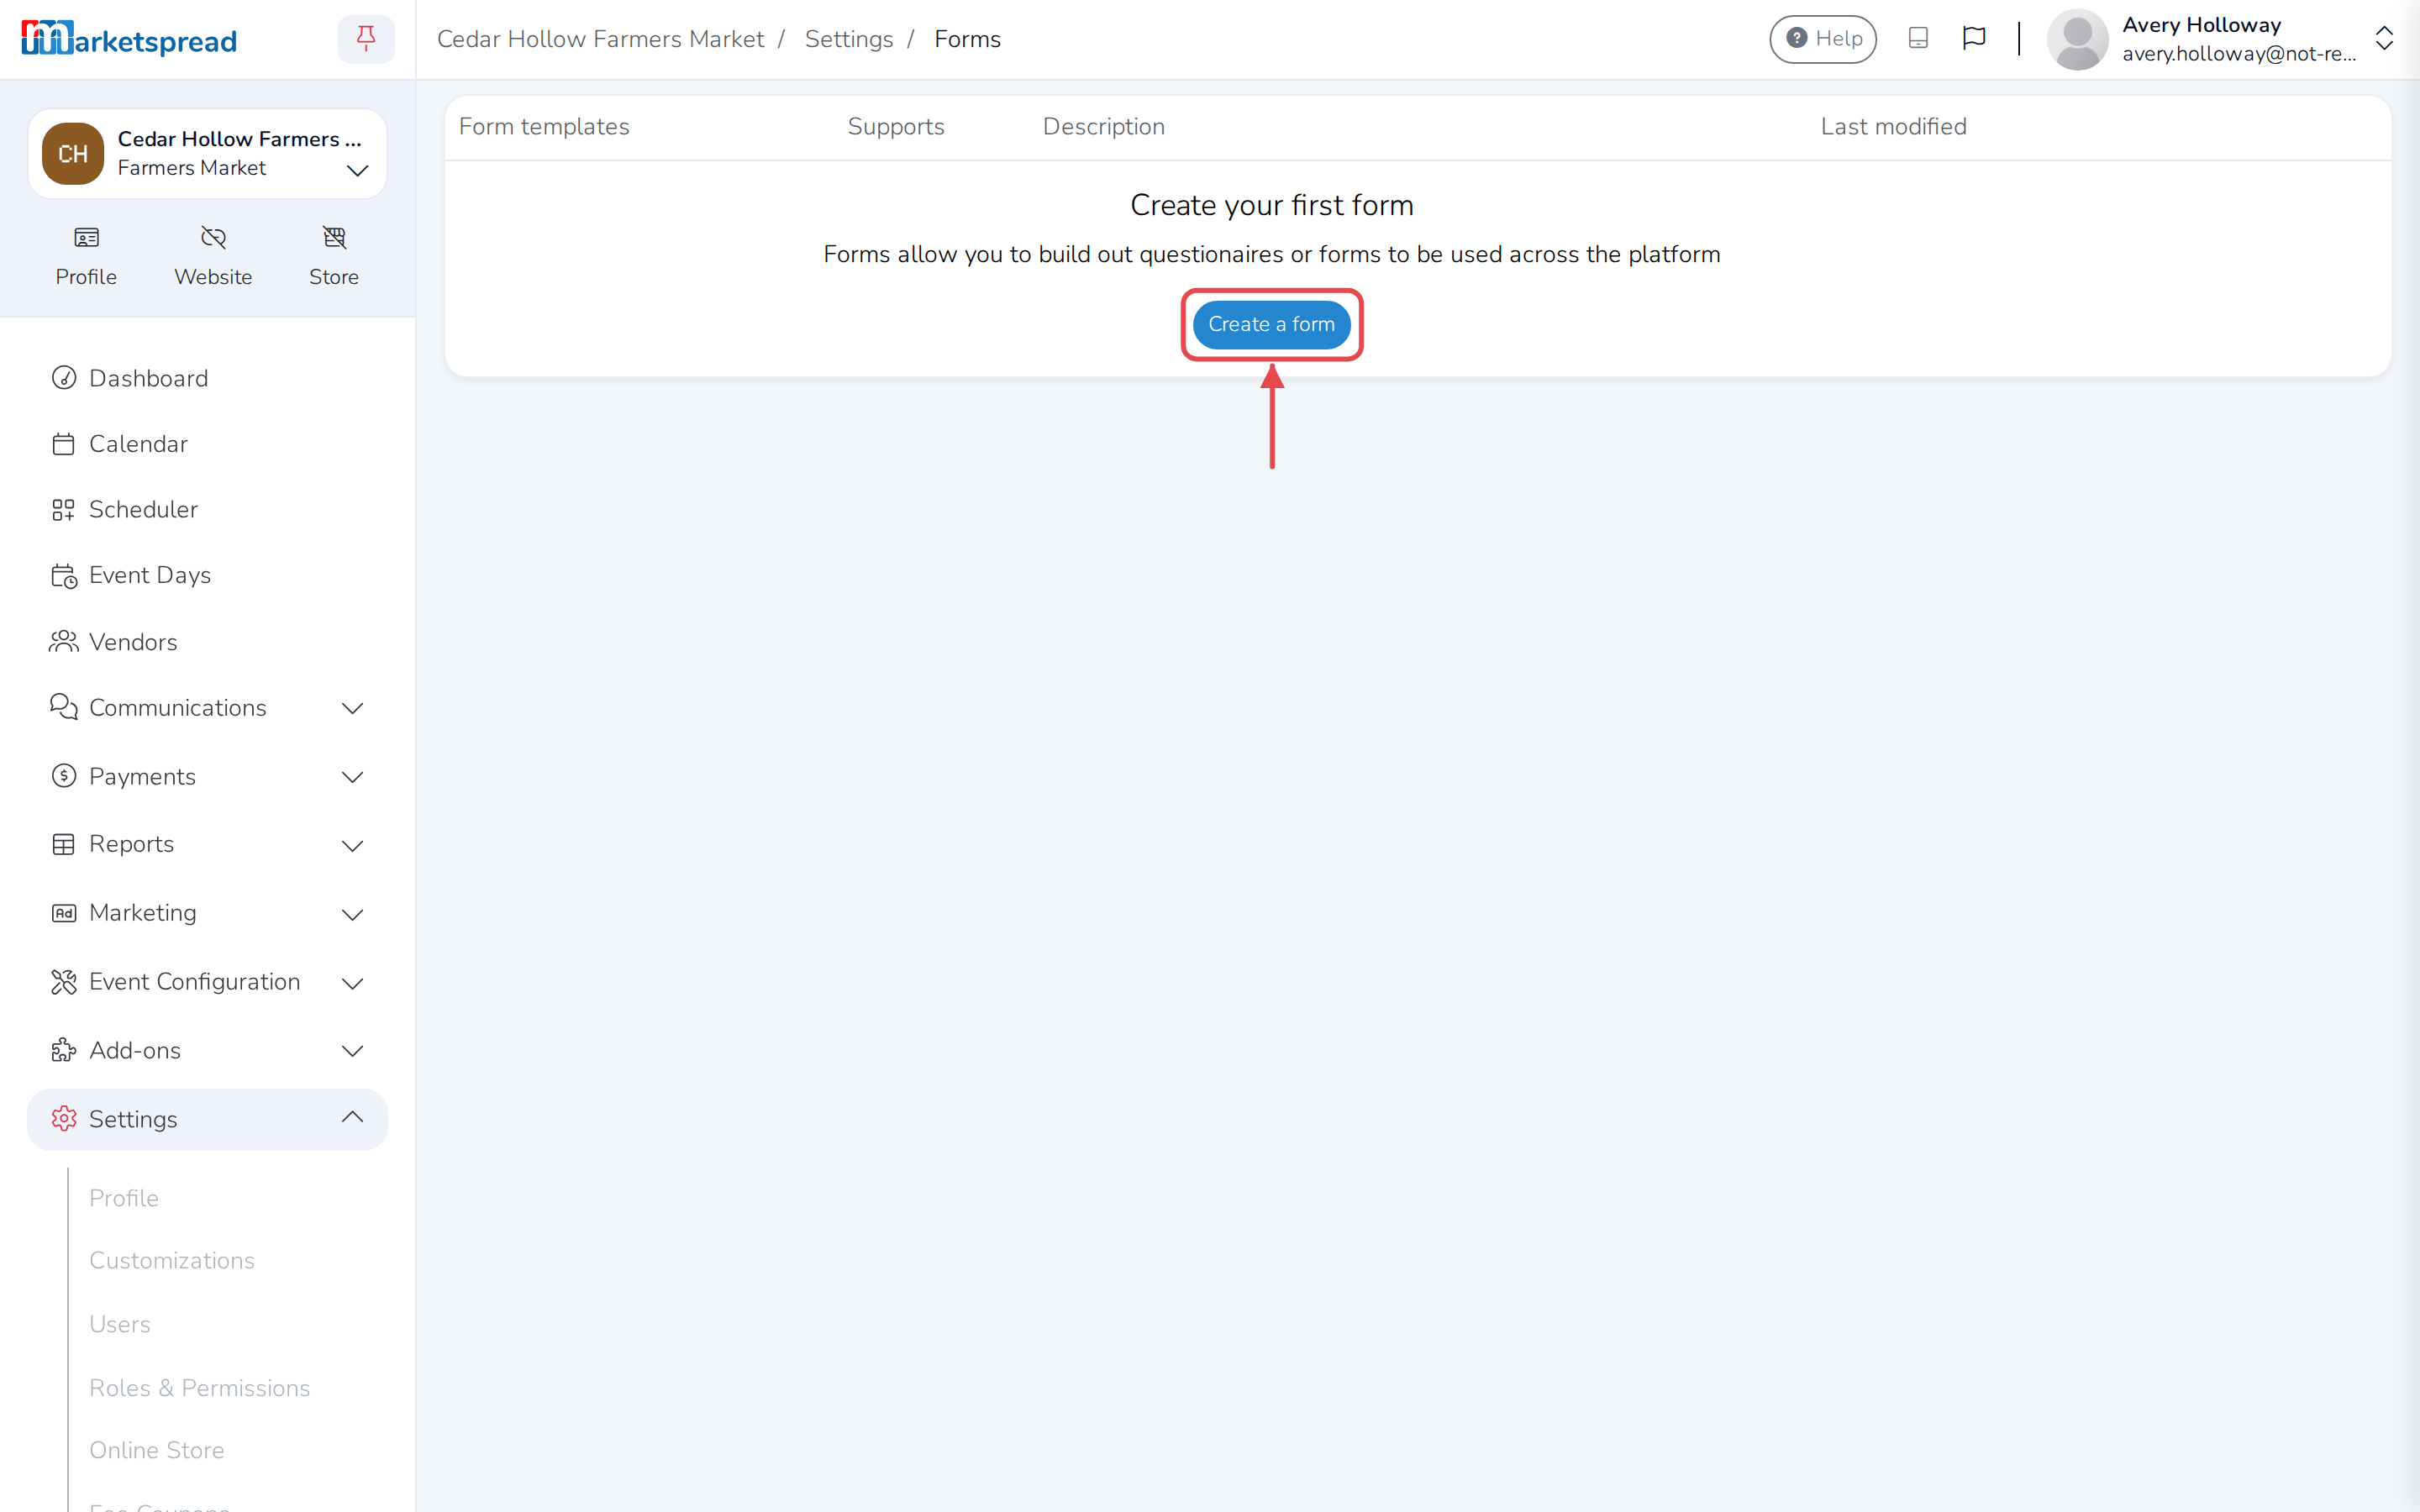
Click Create a form.
-
Add the questions you want the vendor to answer.
-
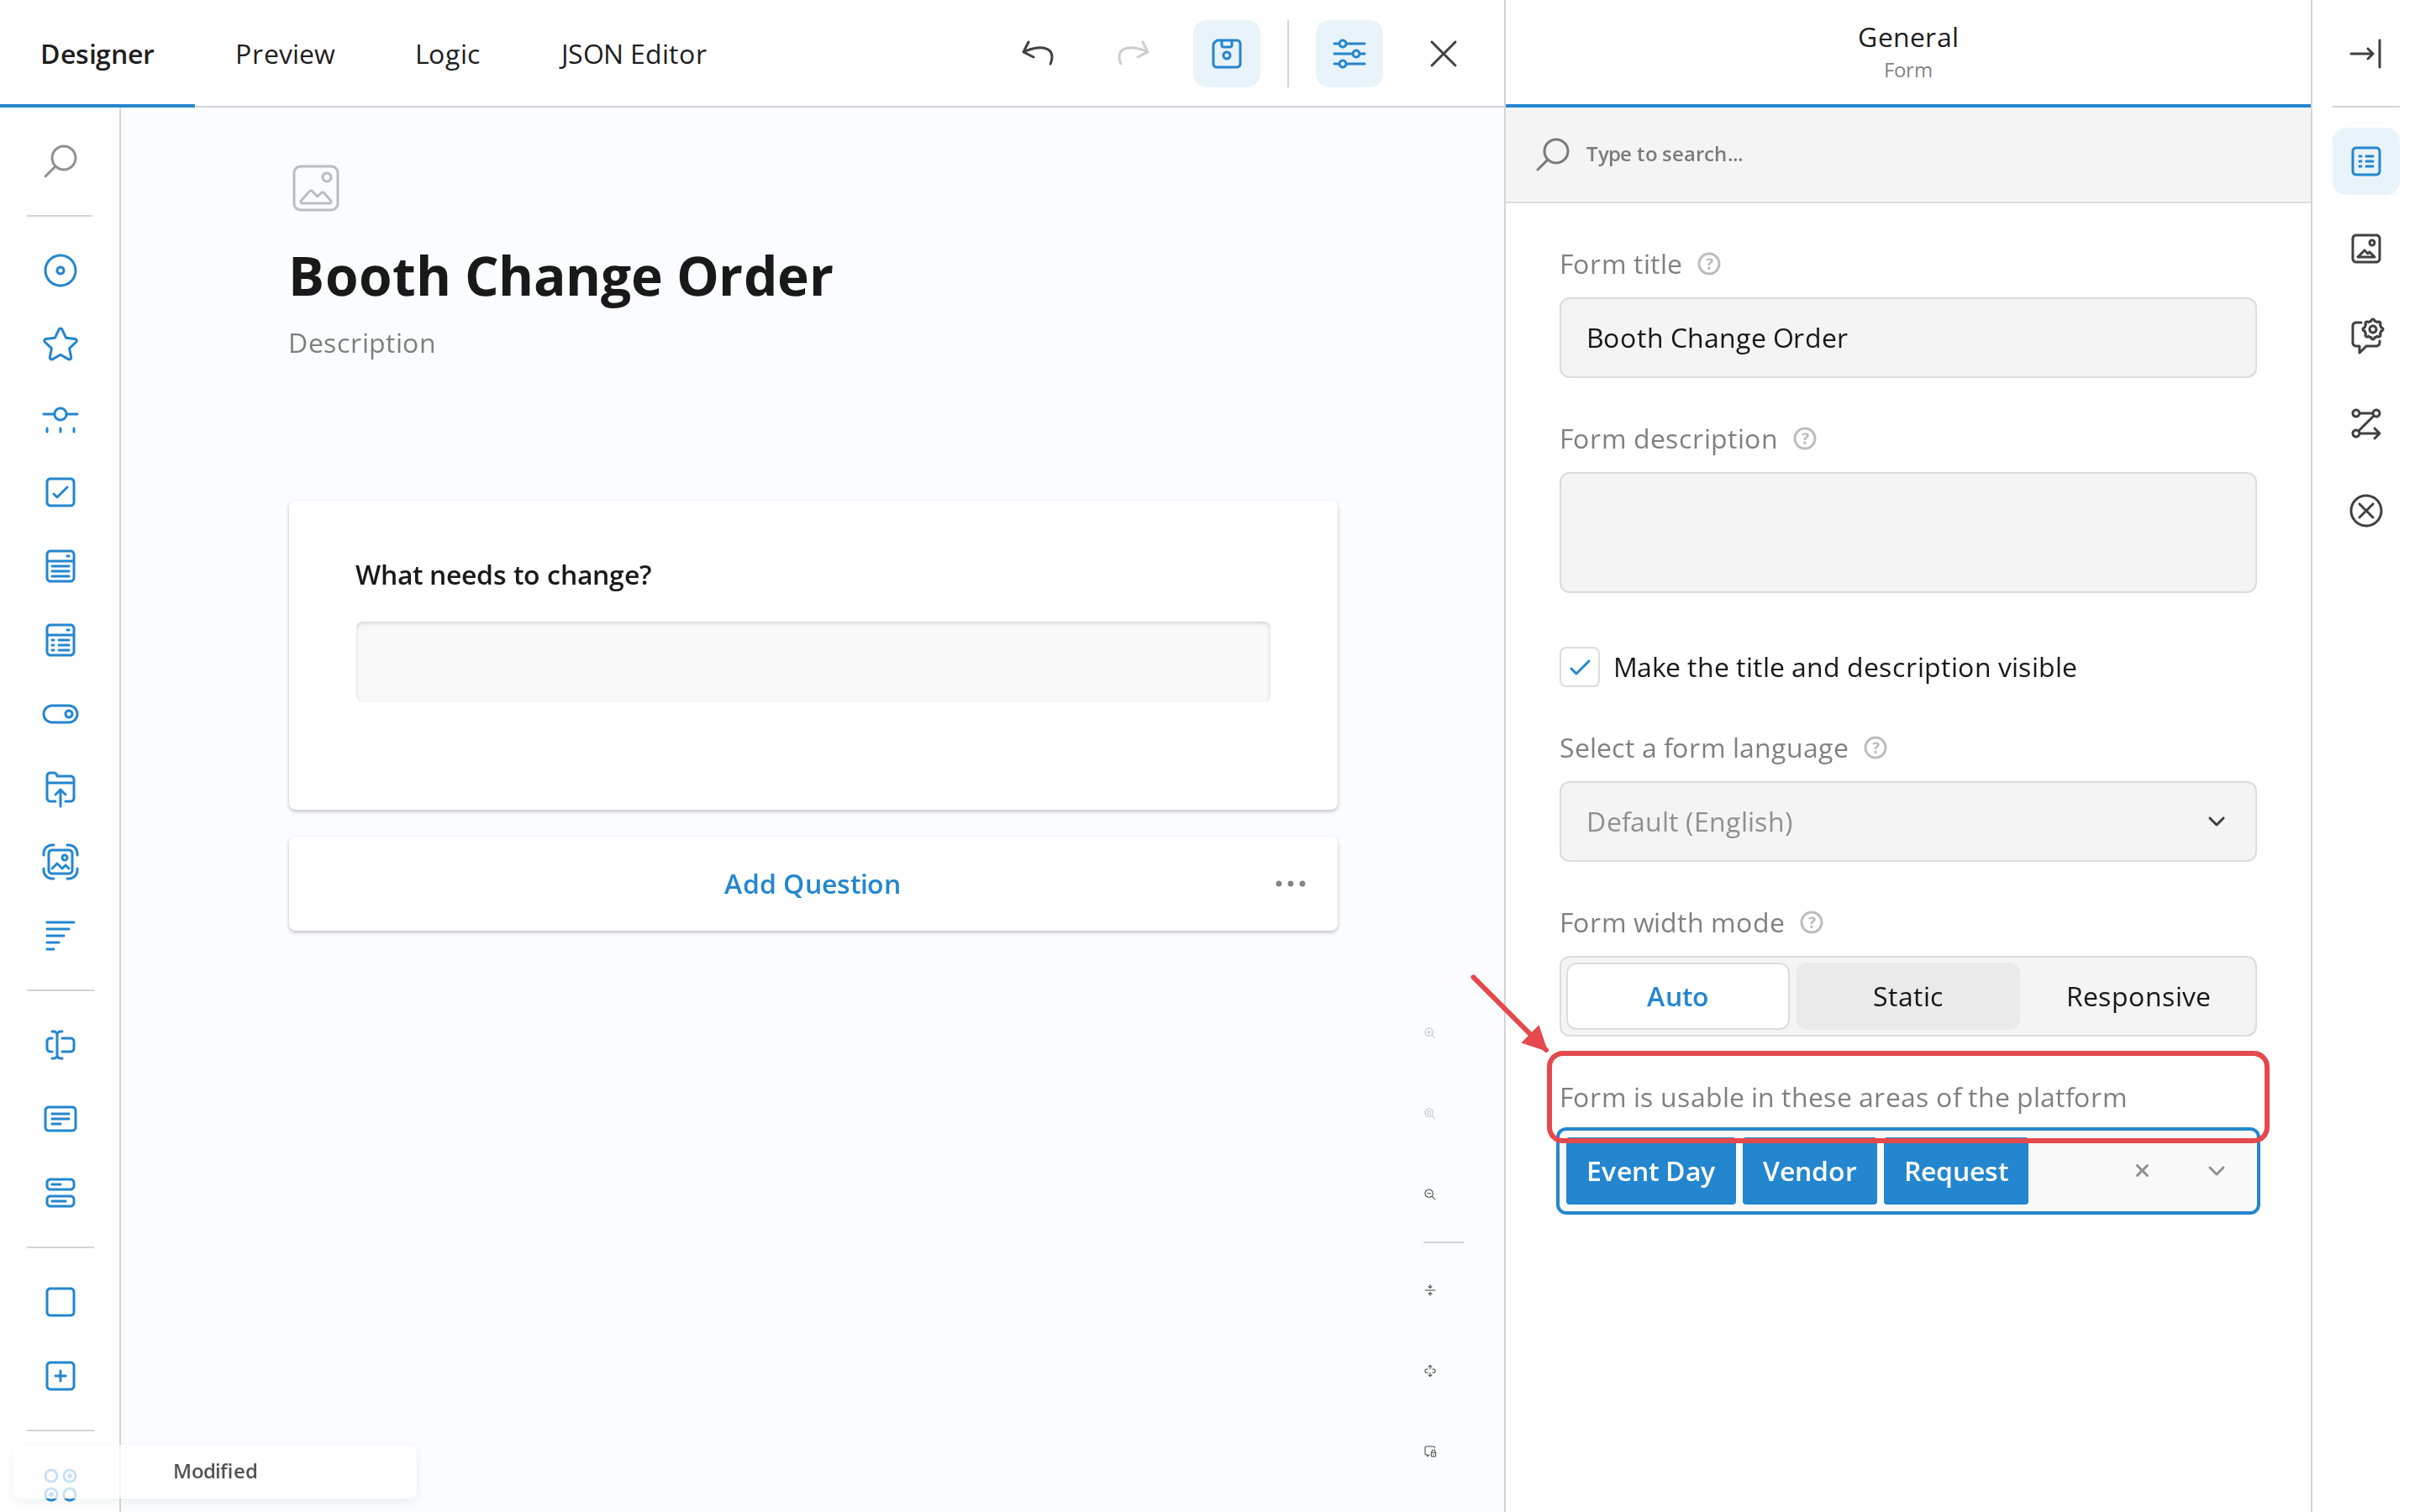
Click Form settings.
-
Under Form is usable in these areas of the platform, open the dropdown and add Request.
-
Click Save.
-
Click Exit.
Tip
Mark one text question Set as request title and its answer — a business name, a site address — shows up in place of the form's own name wherever the request is listed.
Publish a request form
A form is a draft until you publish it, and only published forms can be sent.
-
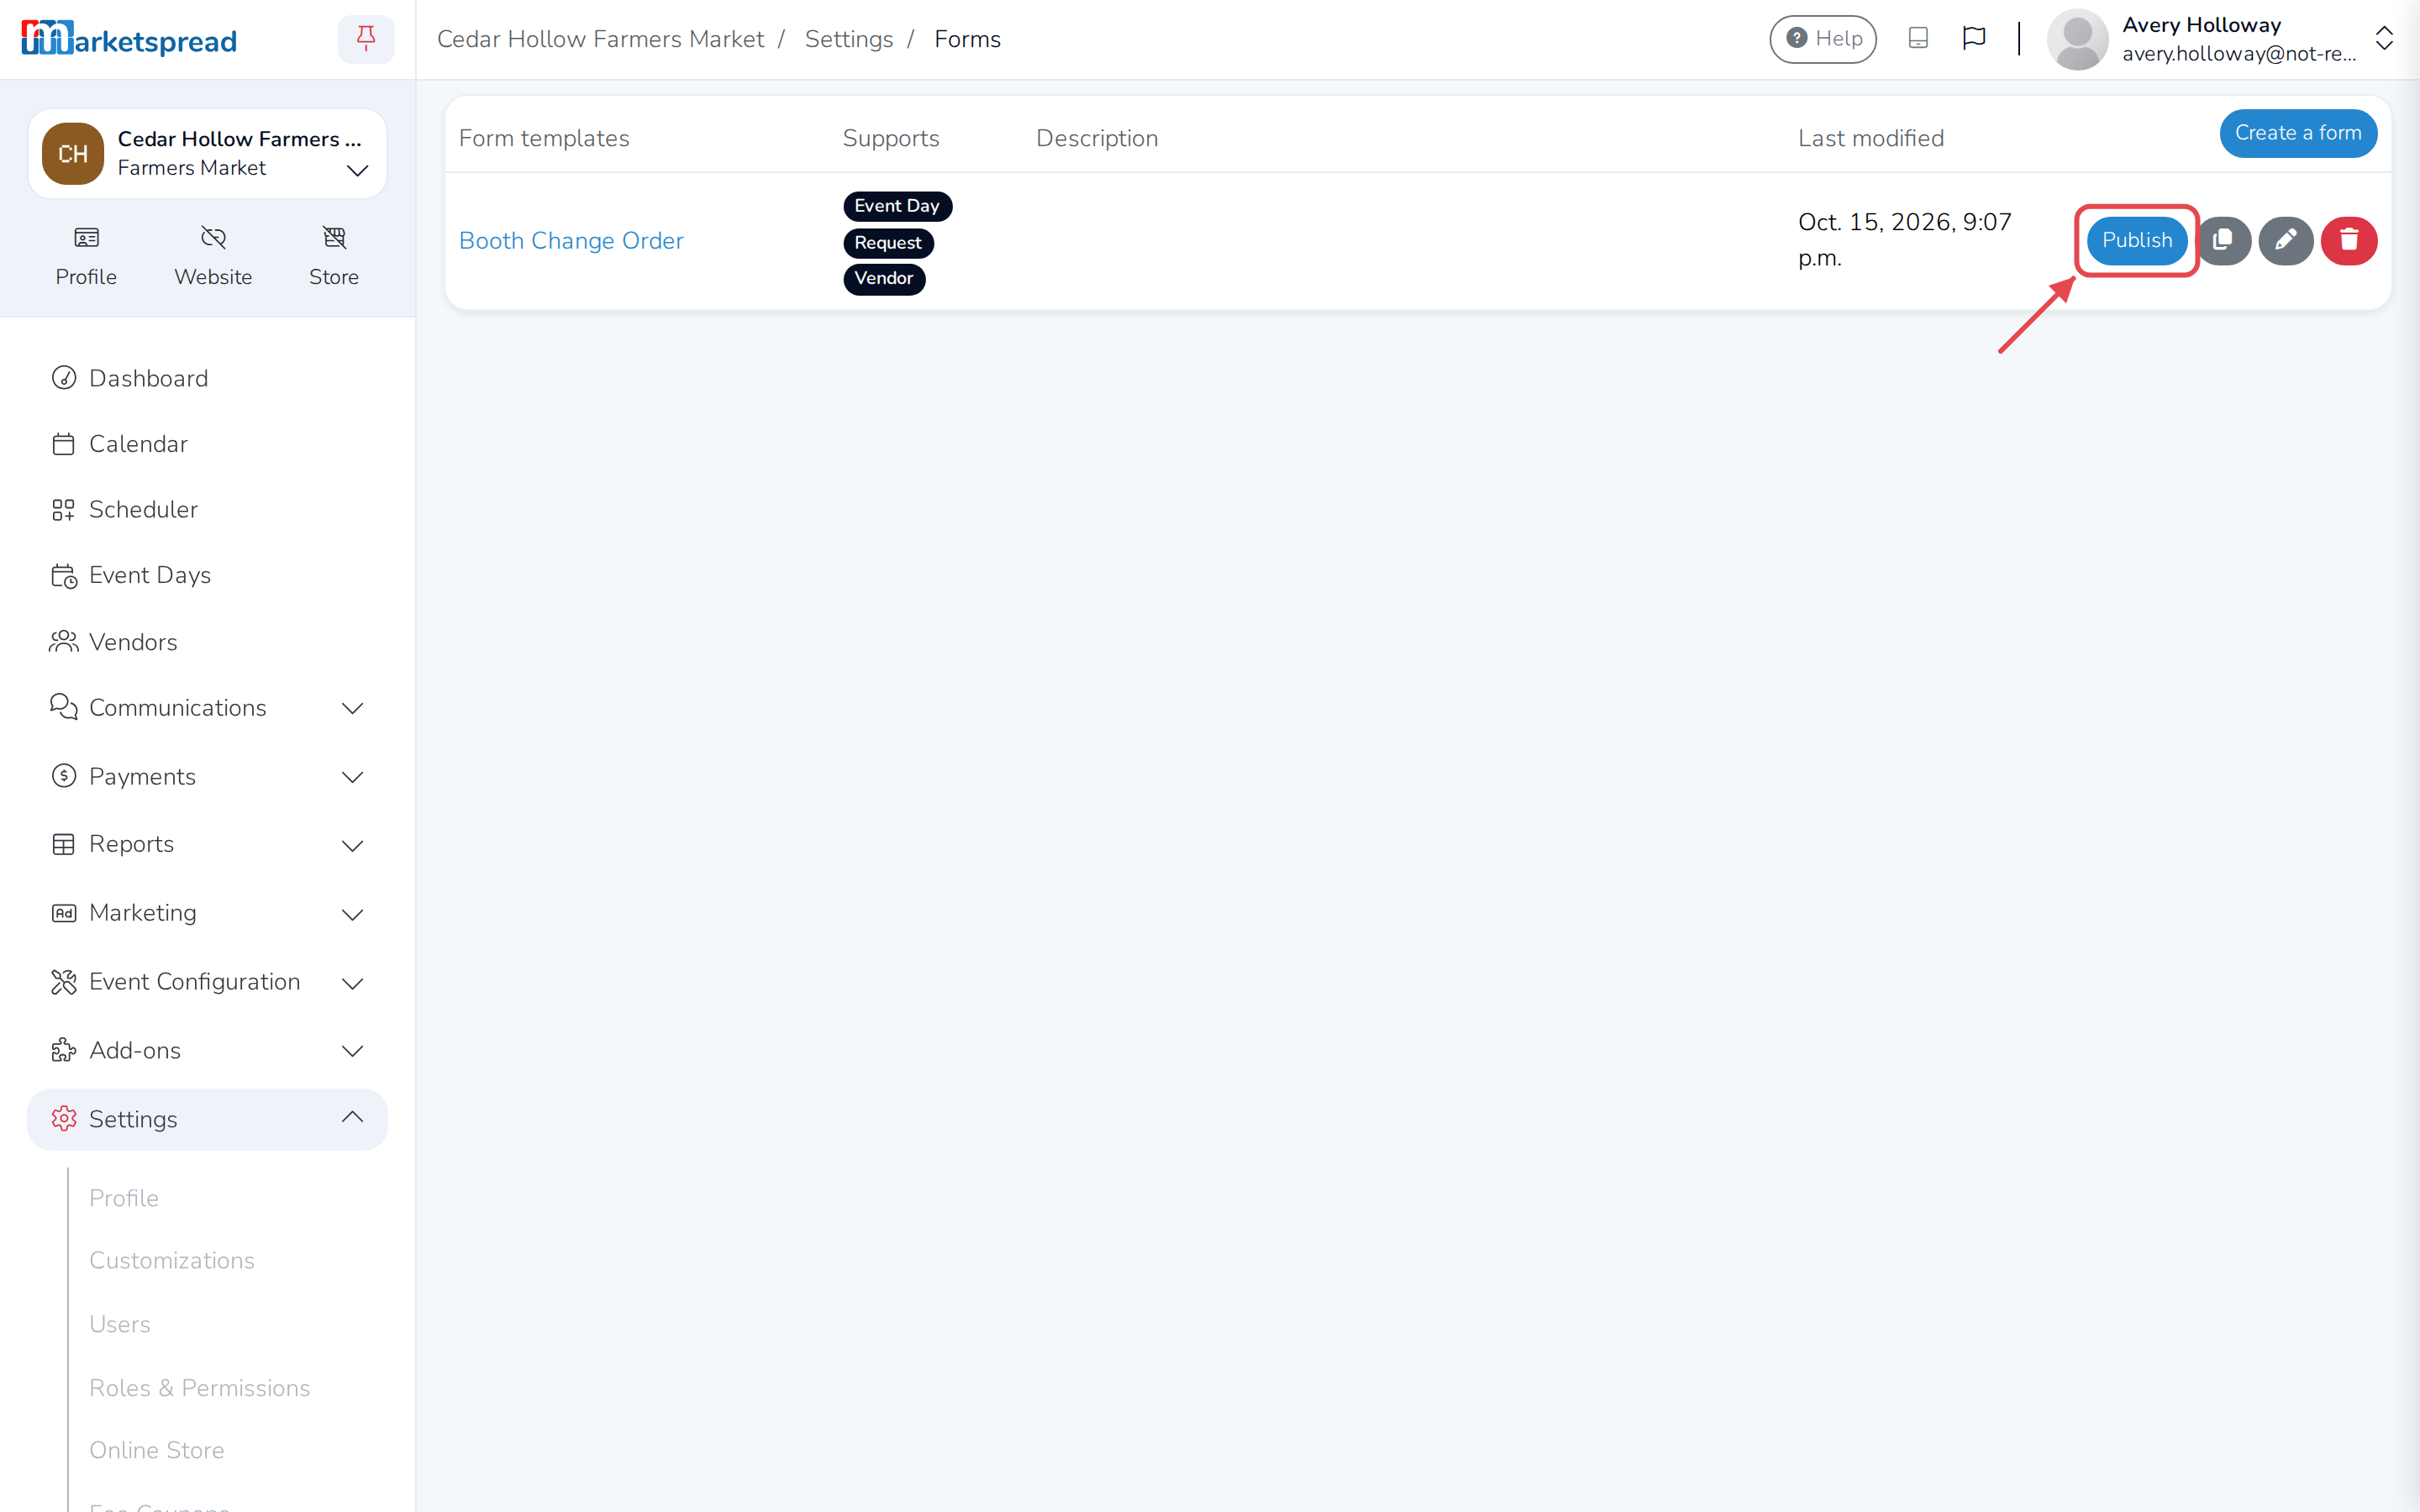
On the Forms page, find your form and click Publish.
-
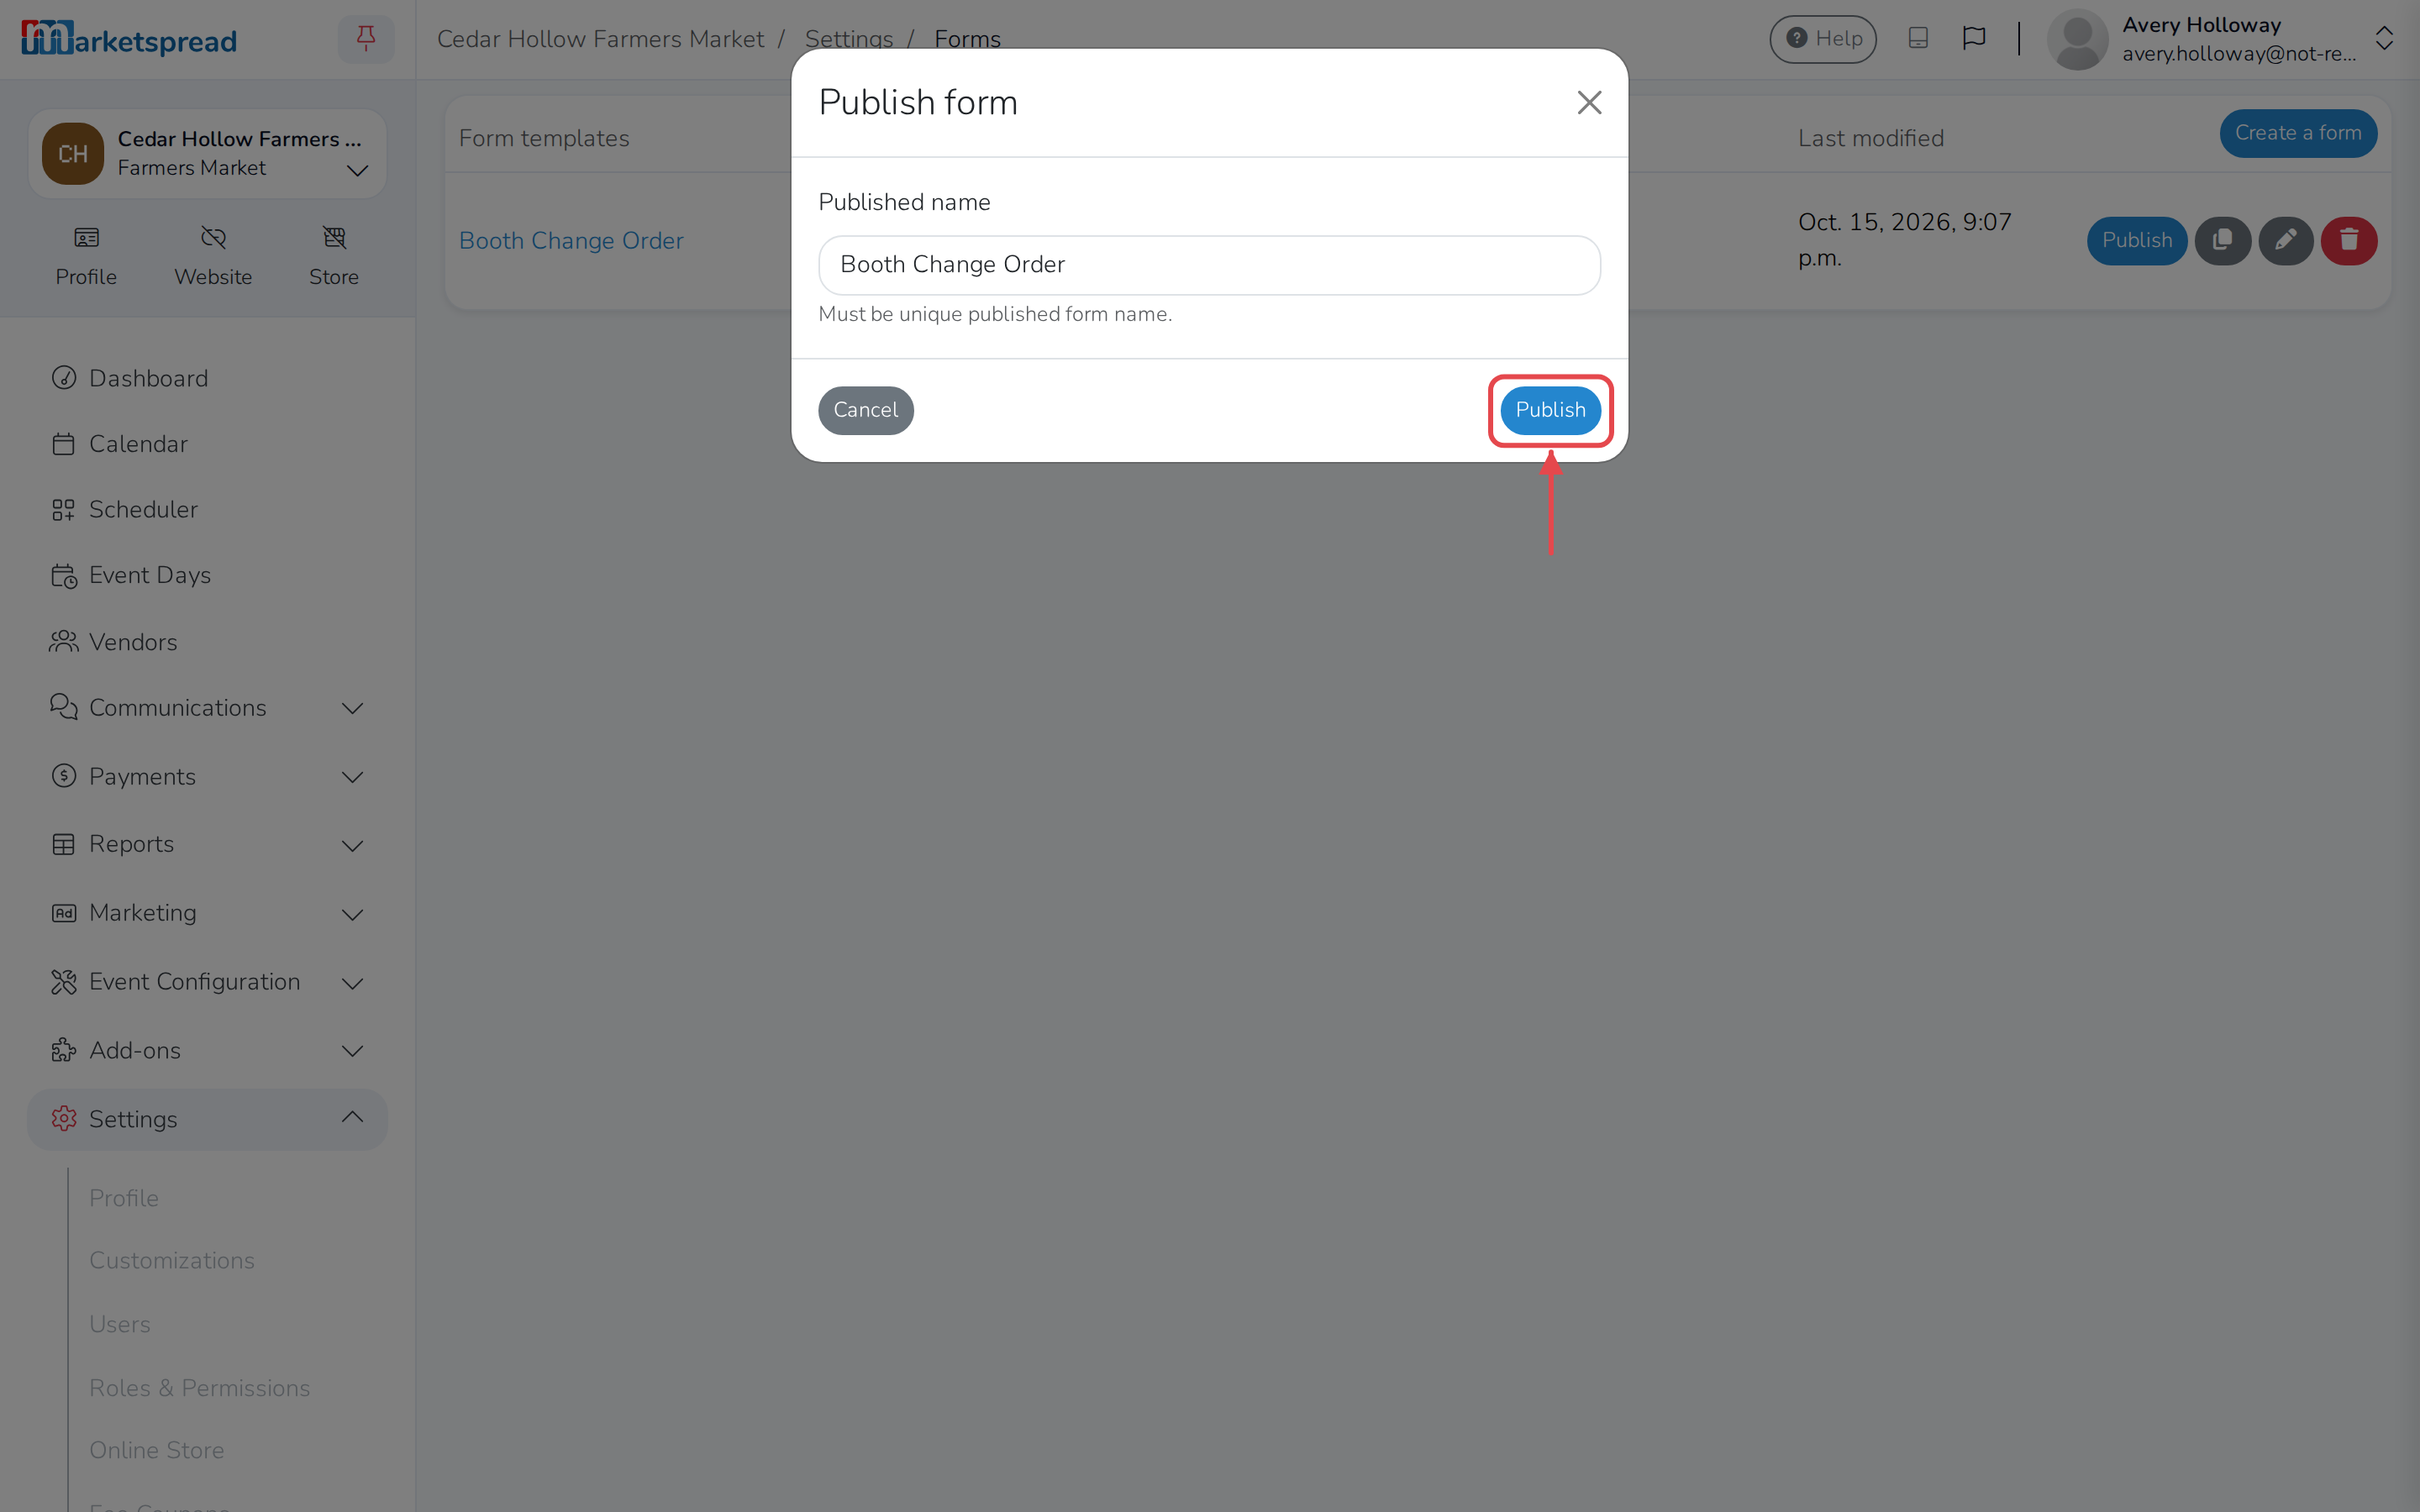
Fill in Published name.
-
Click Publish.
Send a request to a vendor
-
Open the vendor.
-
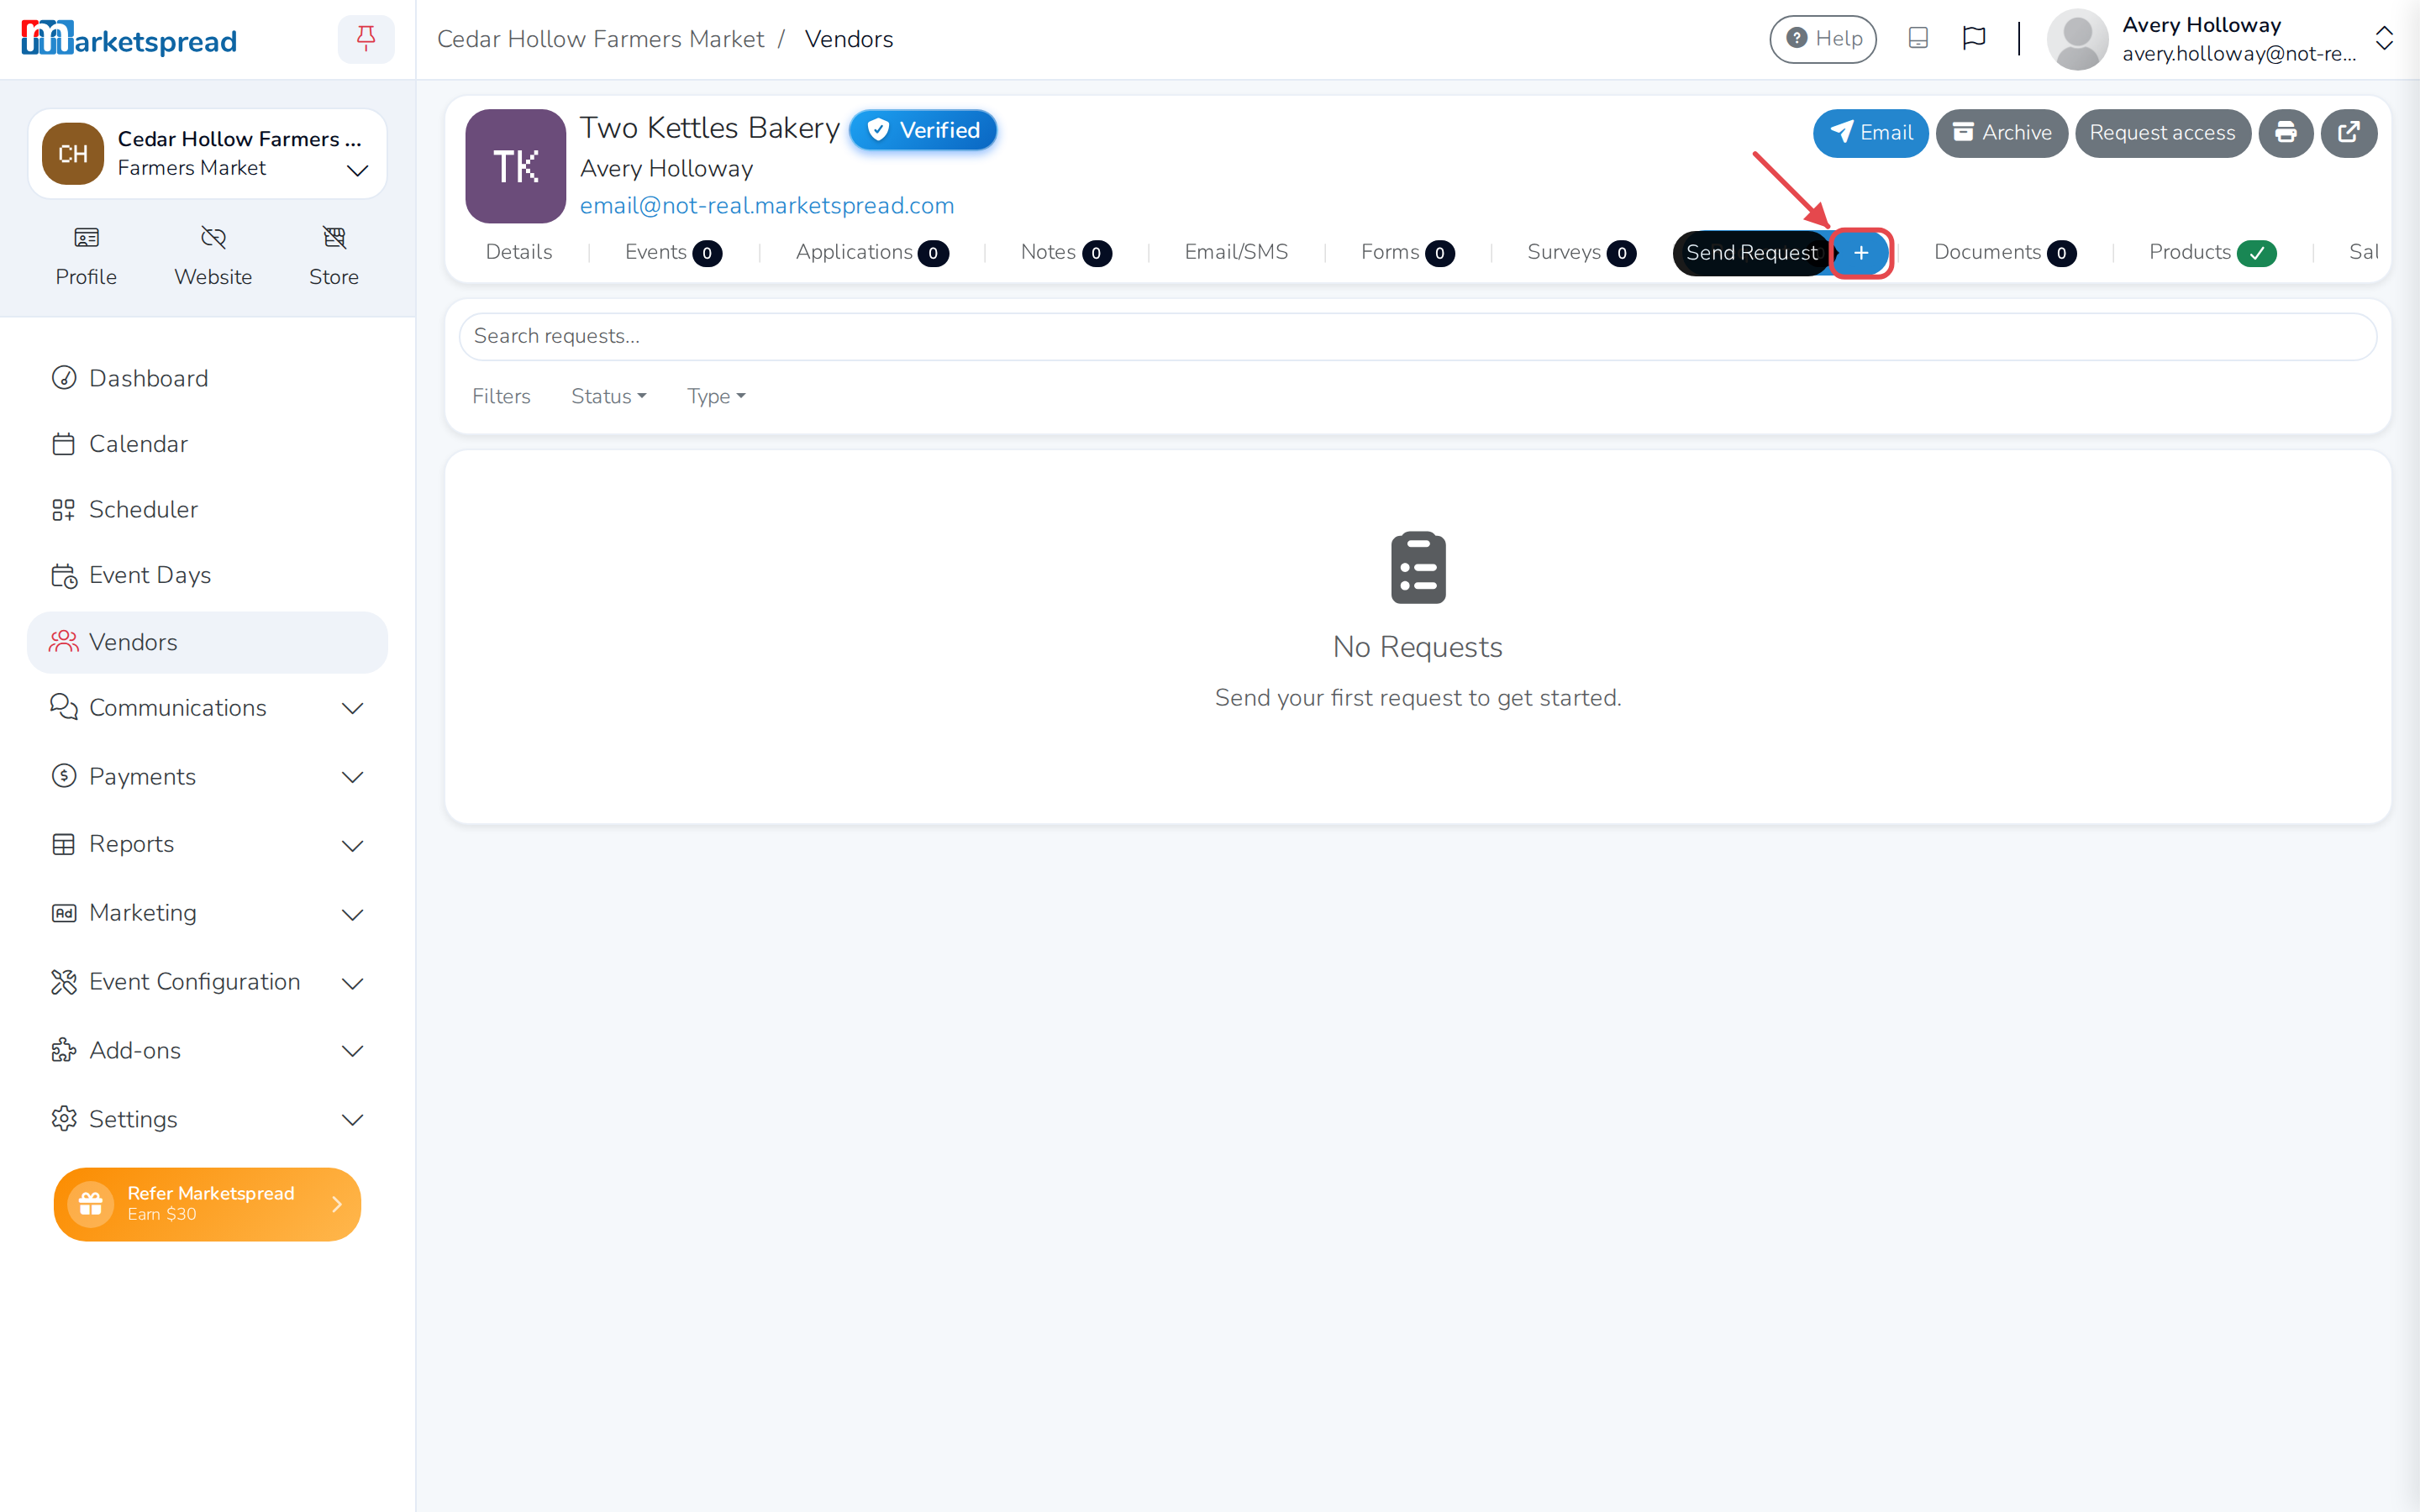
Click the Requests tab.
-
Click the + next to Requests — its tooltip says Send Request.
-
Choose the form to send.
-
Optionally, fill in a Custom name for this request.
-
Click Next.
-
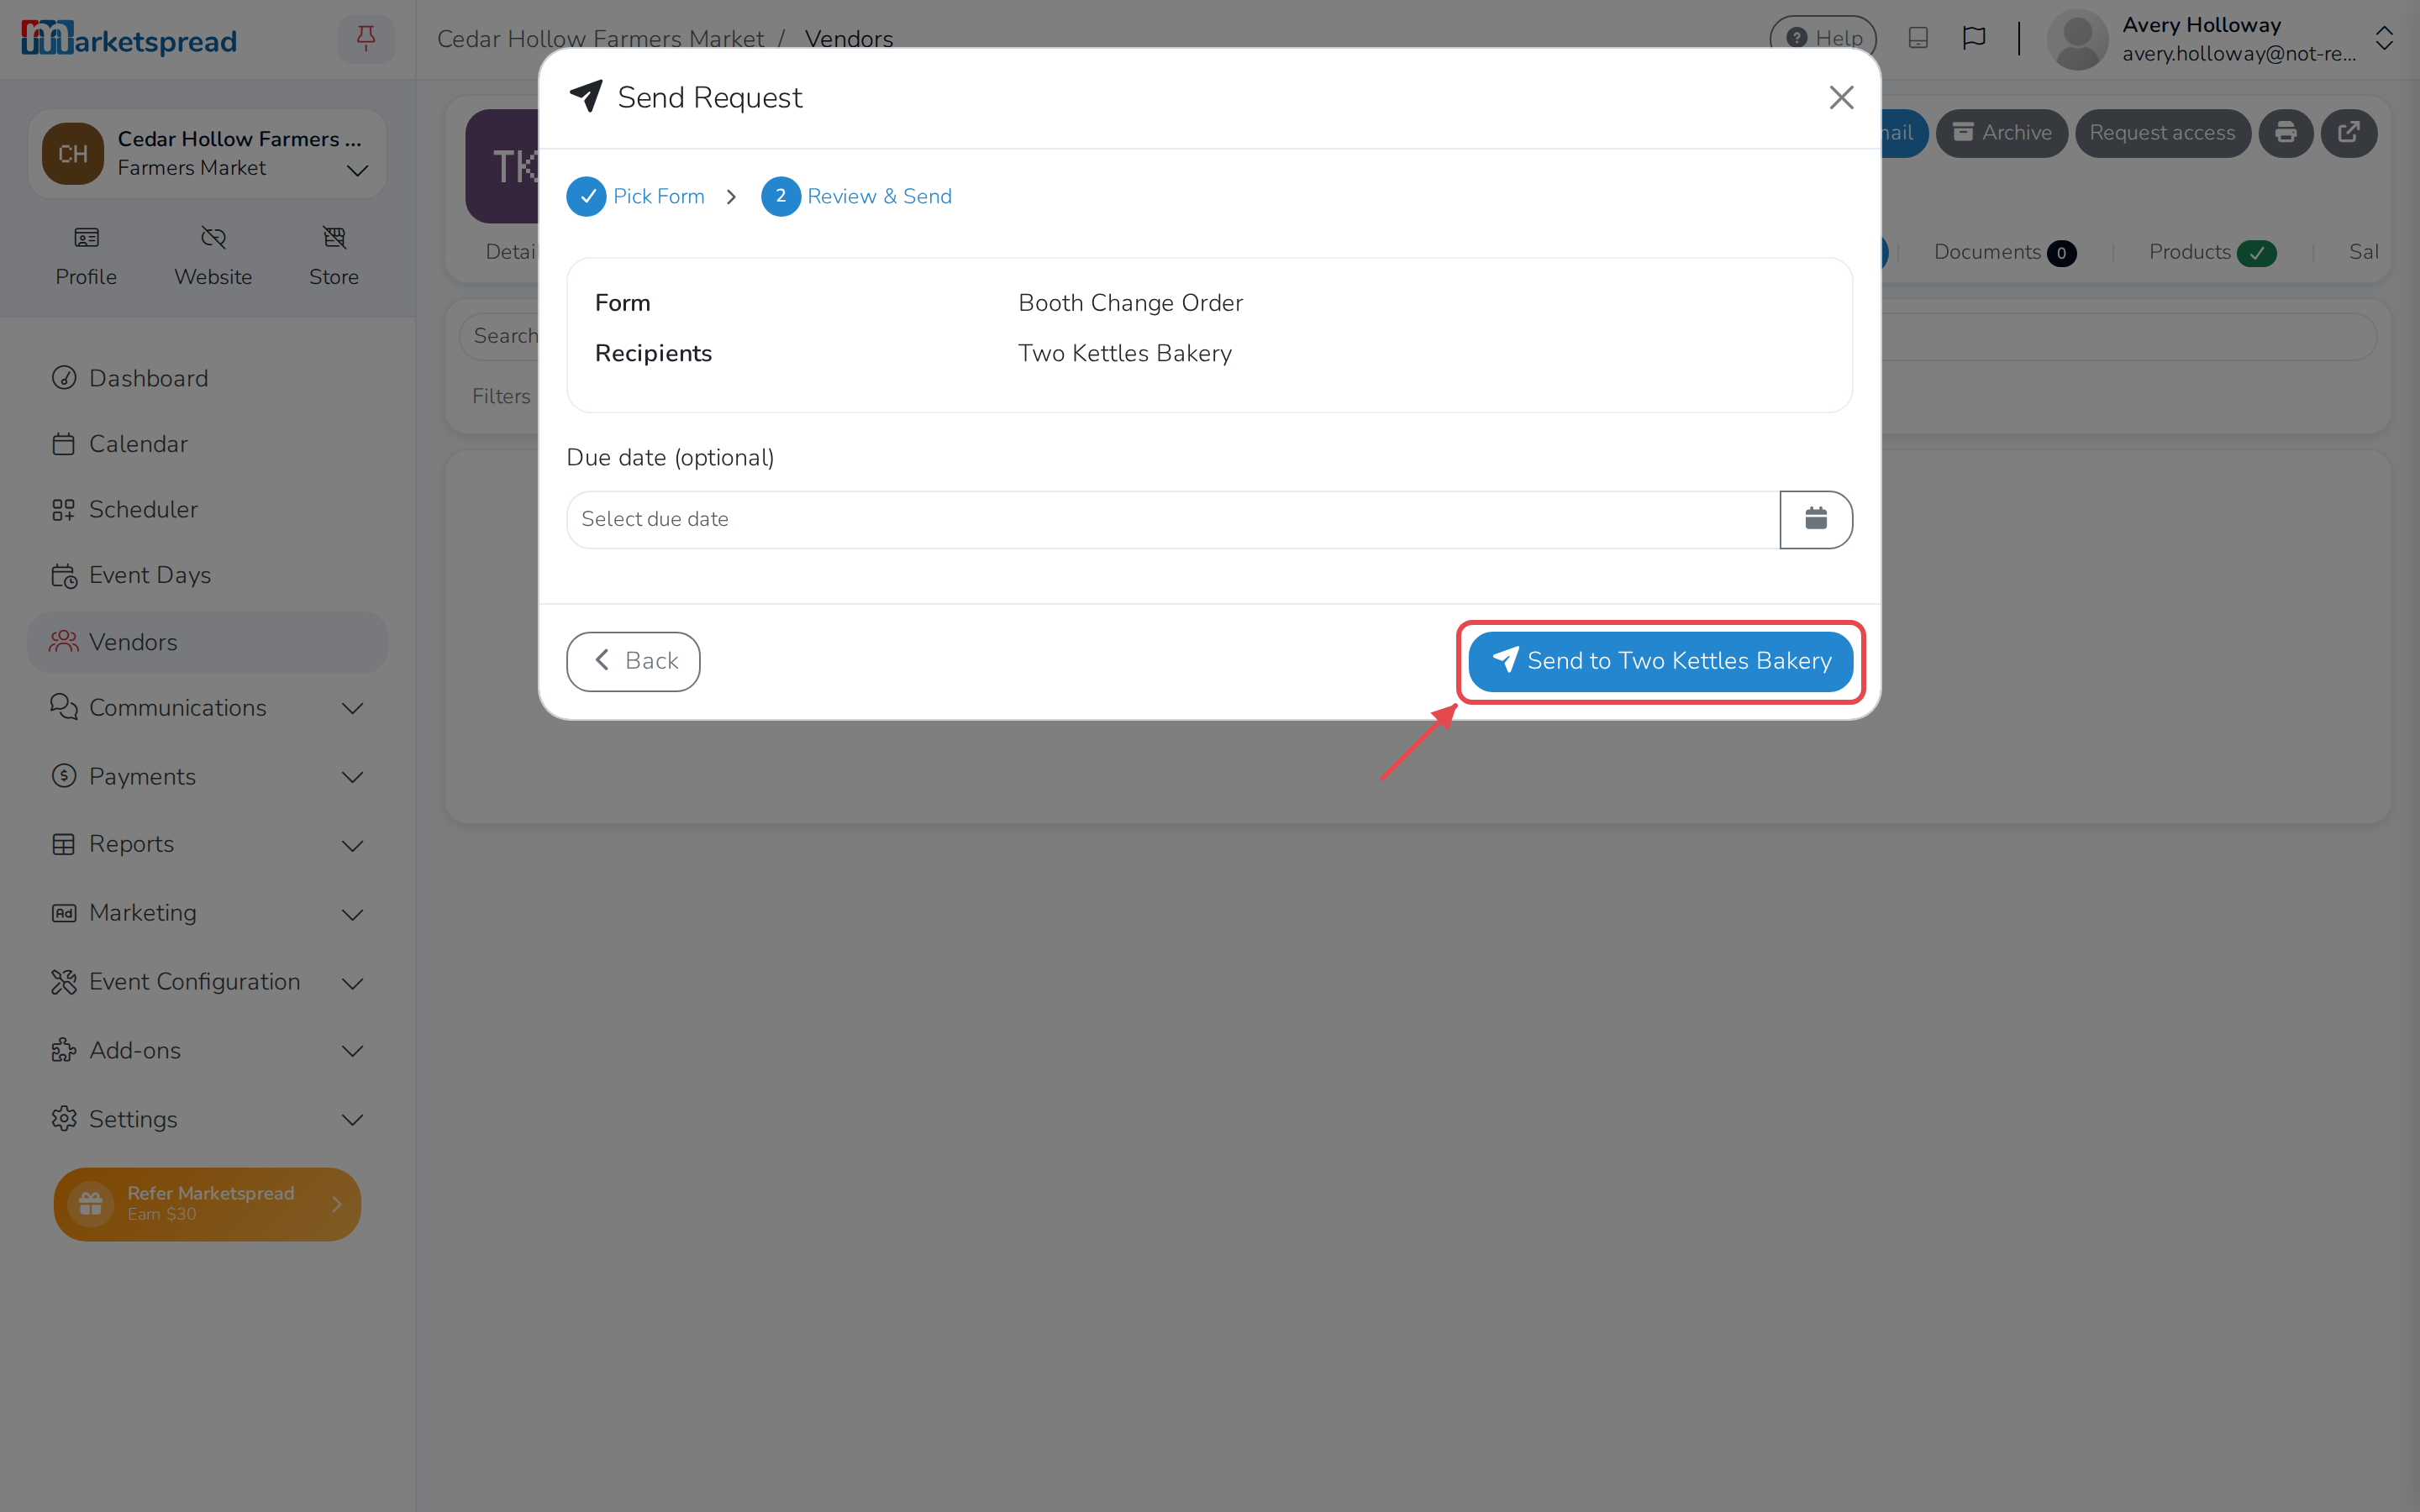
Optionally, choose a Due date.
-
Click Send to and the vendor's name.
Note
The vendor gets an emailed notification, and finds the request on their own Requests page.
Set up a recurring request
Some requests should go out on a repeating basis — a weekly sales report, for example — rather than to one vendor at a time.
- When you create the form, add Recurring Request instead of Request to that same dropdown.
- Publish it the same way as any other form.
Once it's published, it appears on every vendor's Requests page on its own — you don't send it. Each time a vendor fills it in, that submission gets its own row and its own status on your Requests page.
Track requests you've sent
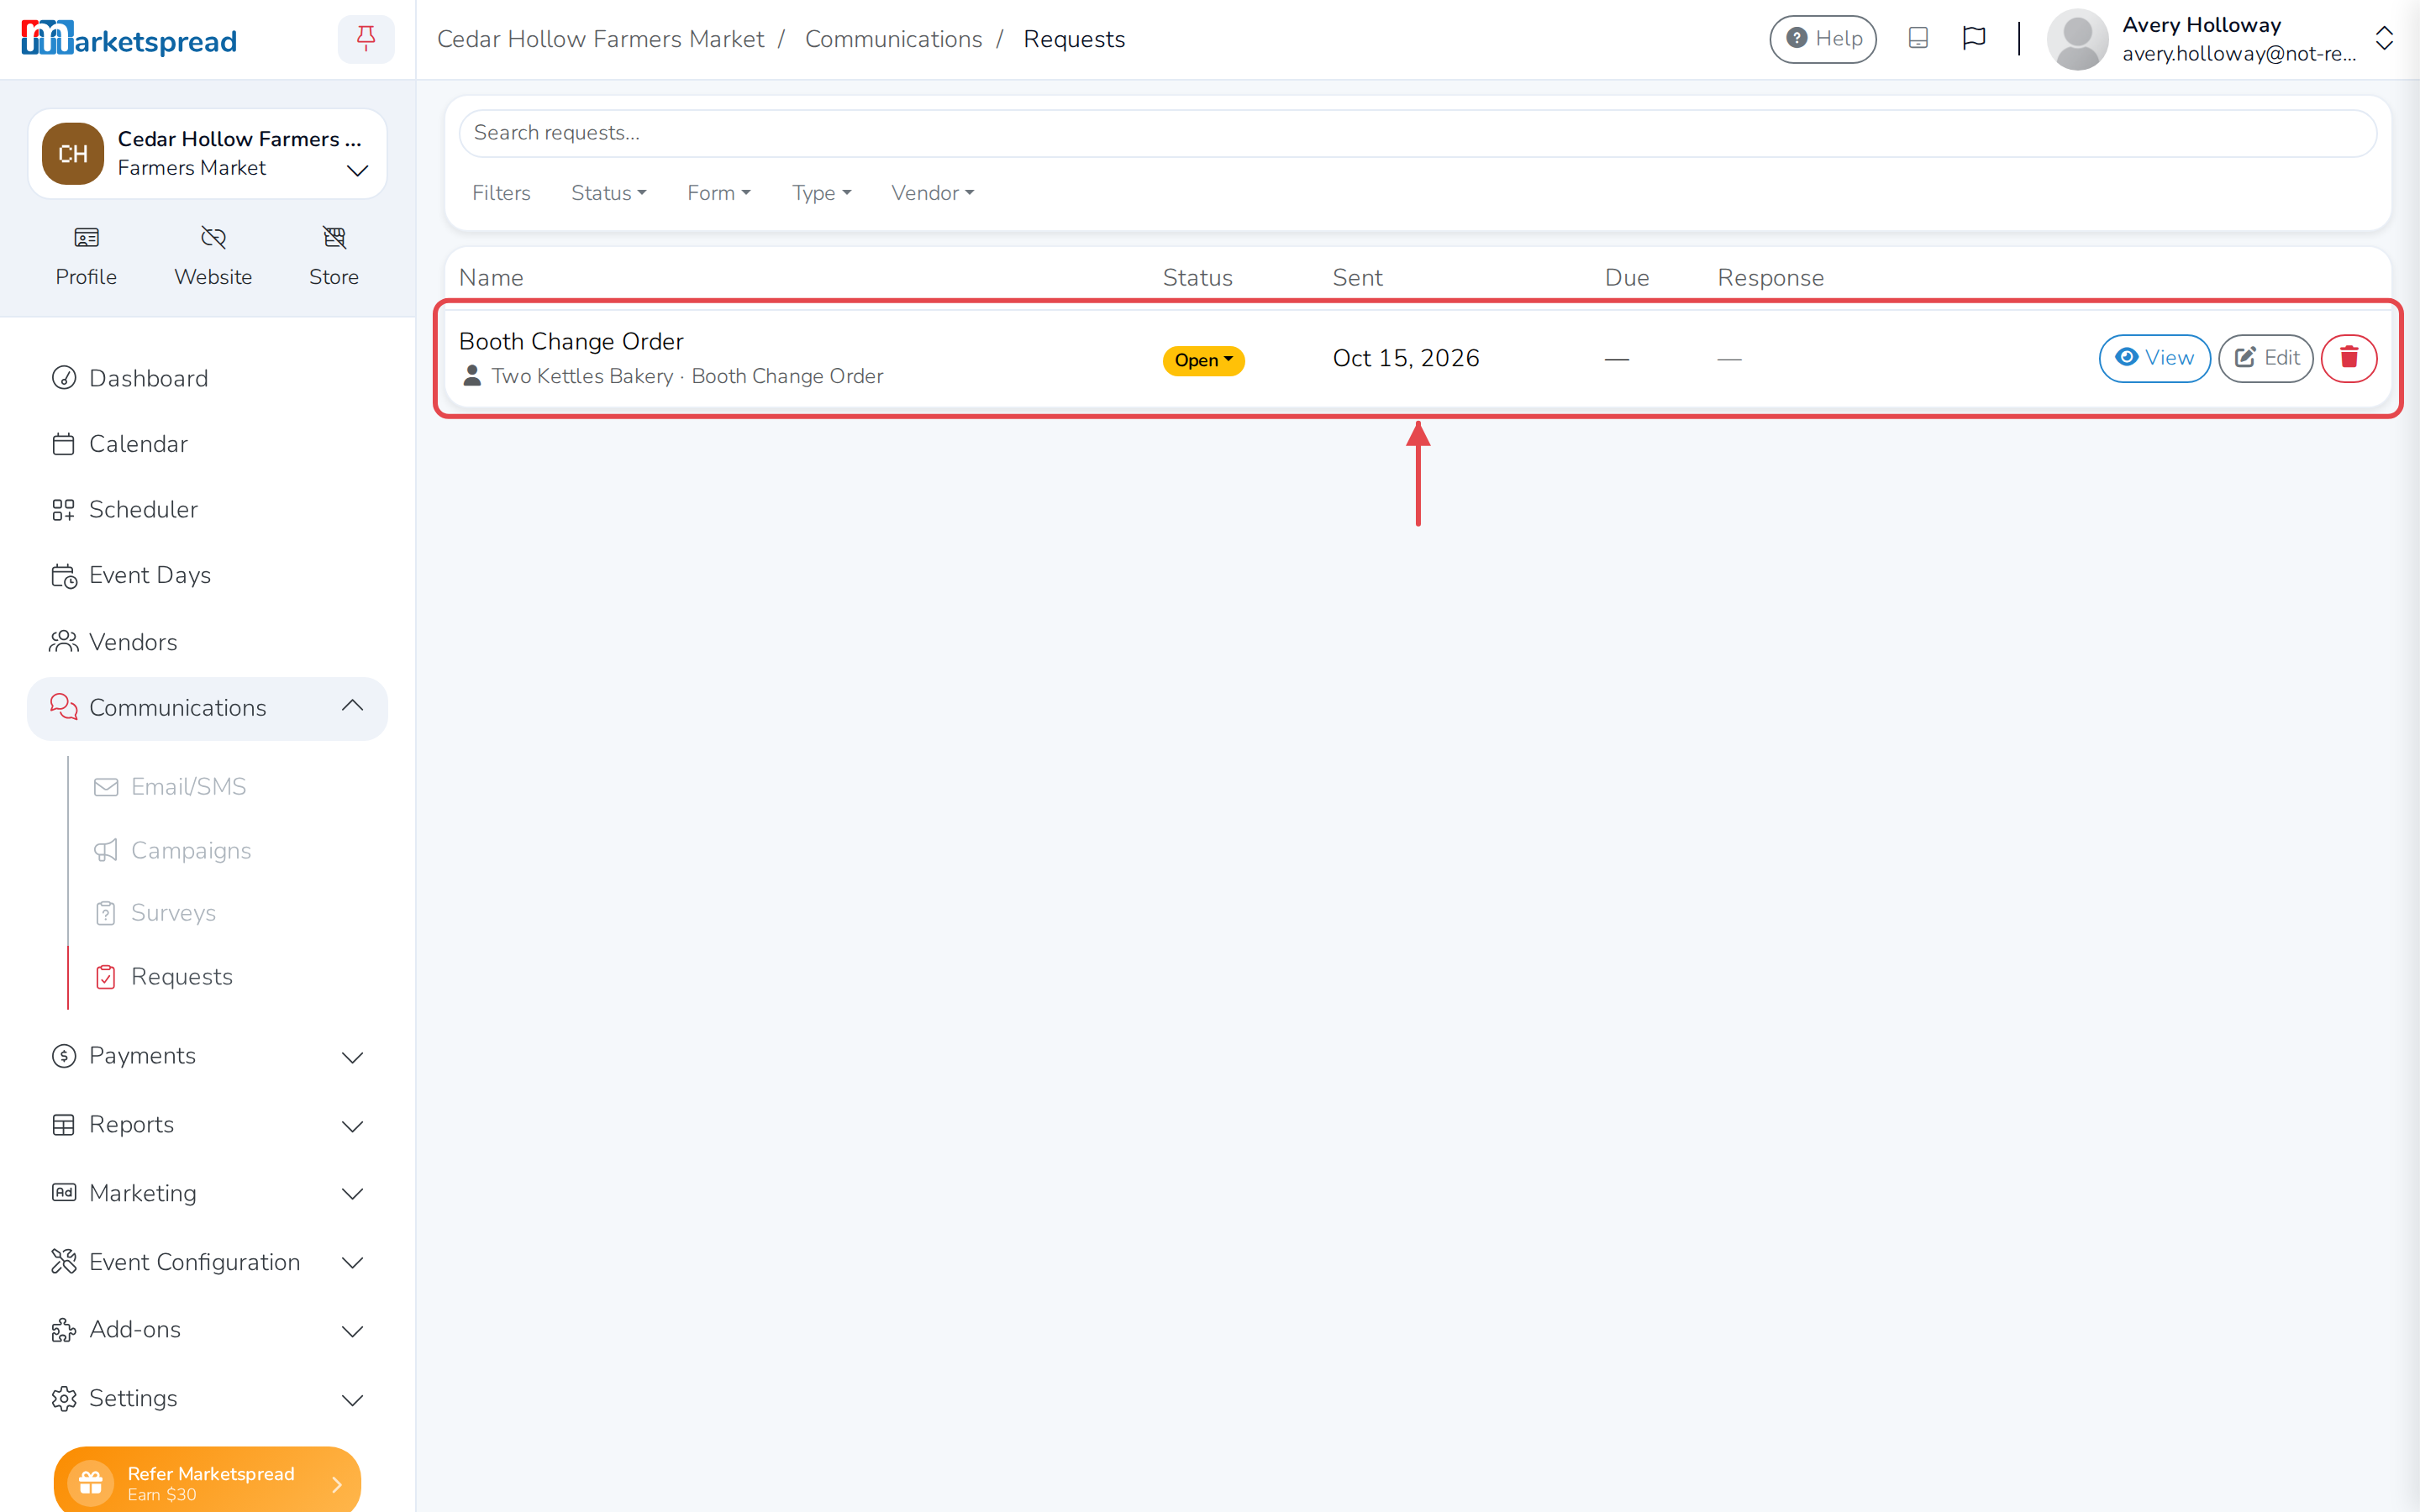
- Click Communications in the left-hand menu, then Requests.
- Use the Status, Form, Type and vendor filters, or the search box, to find one.
Each request shows its status, when it was sent, when it's due, and when the vendor answered, with View, Edit and delete actions on the same row.
See every request in a report
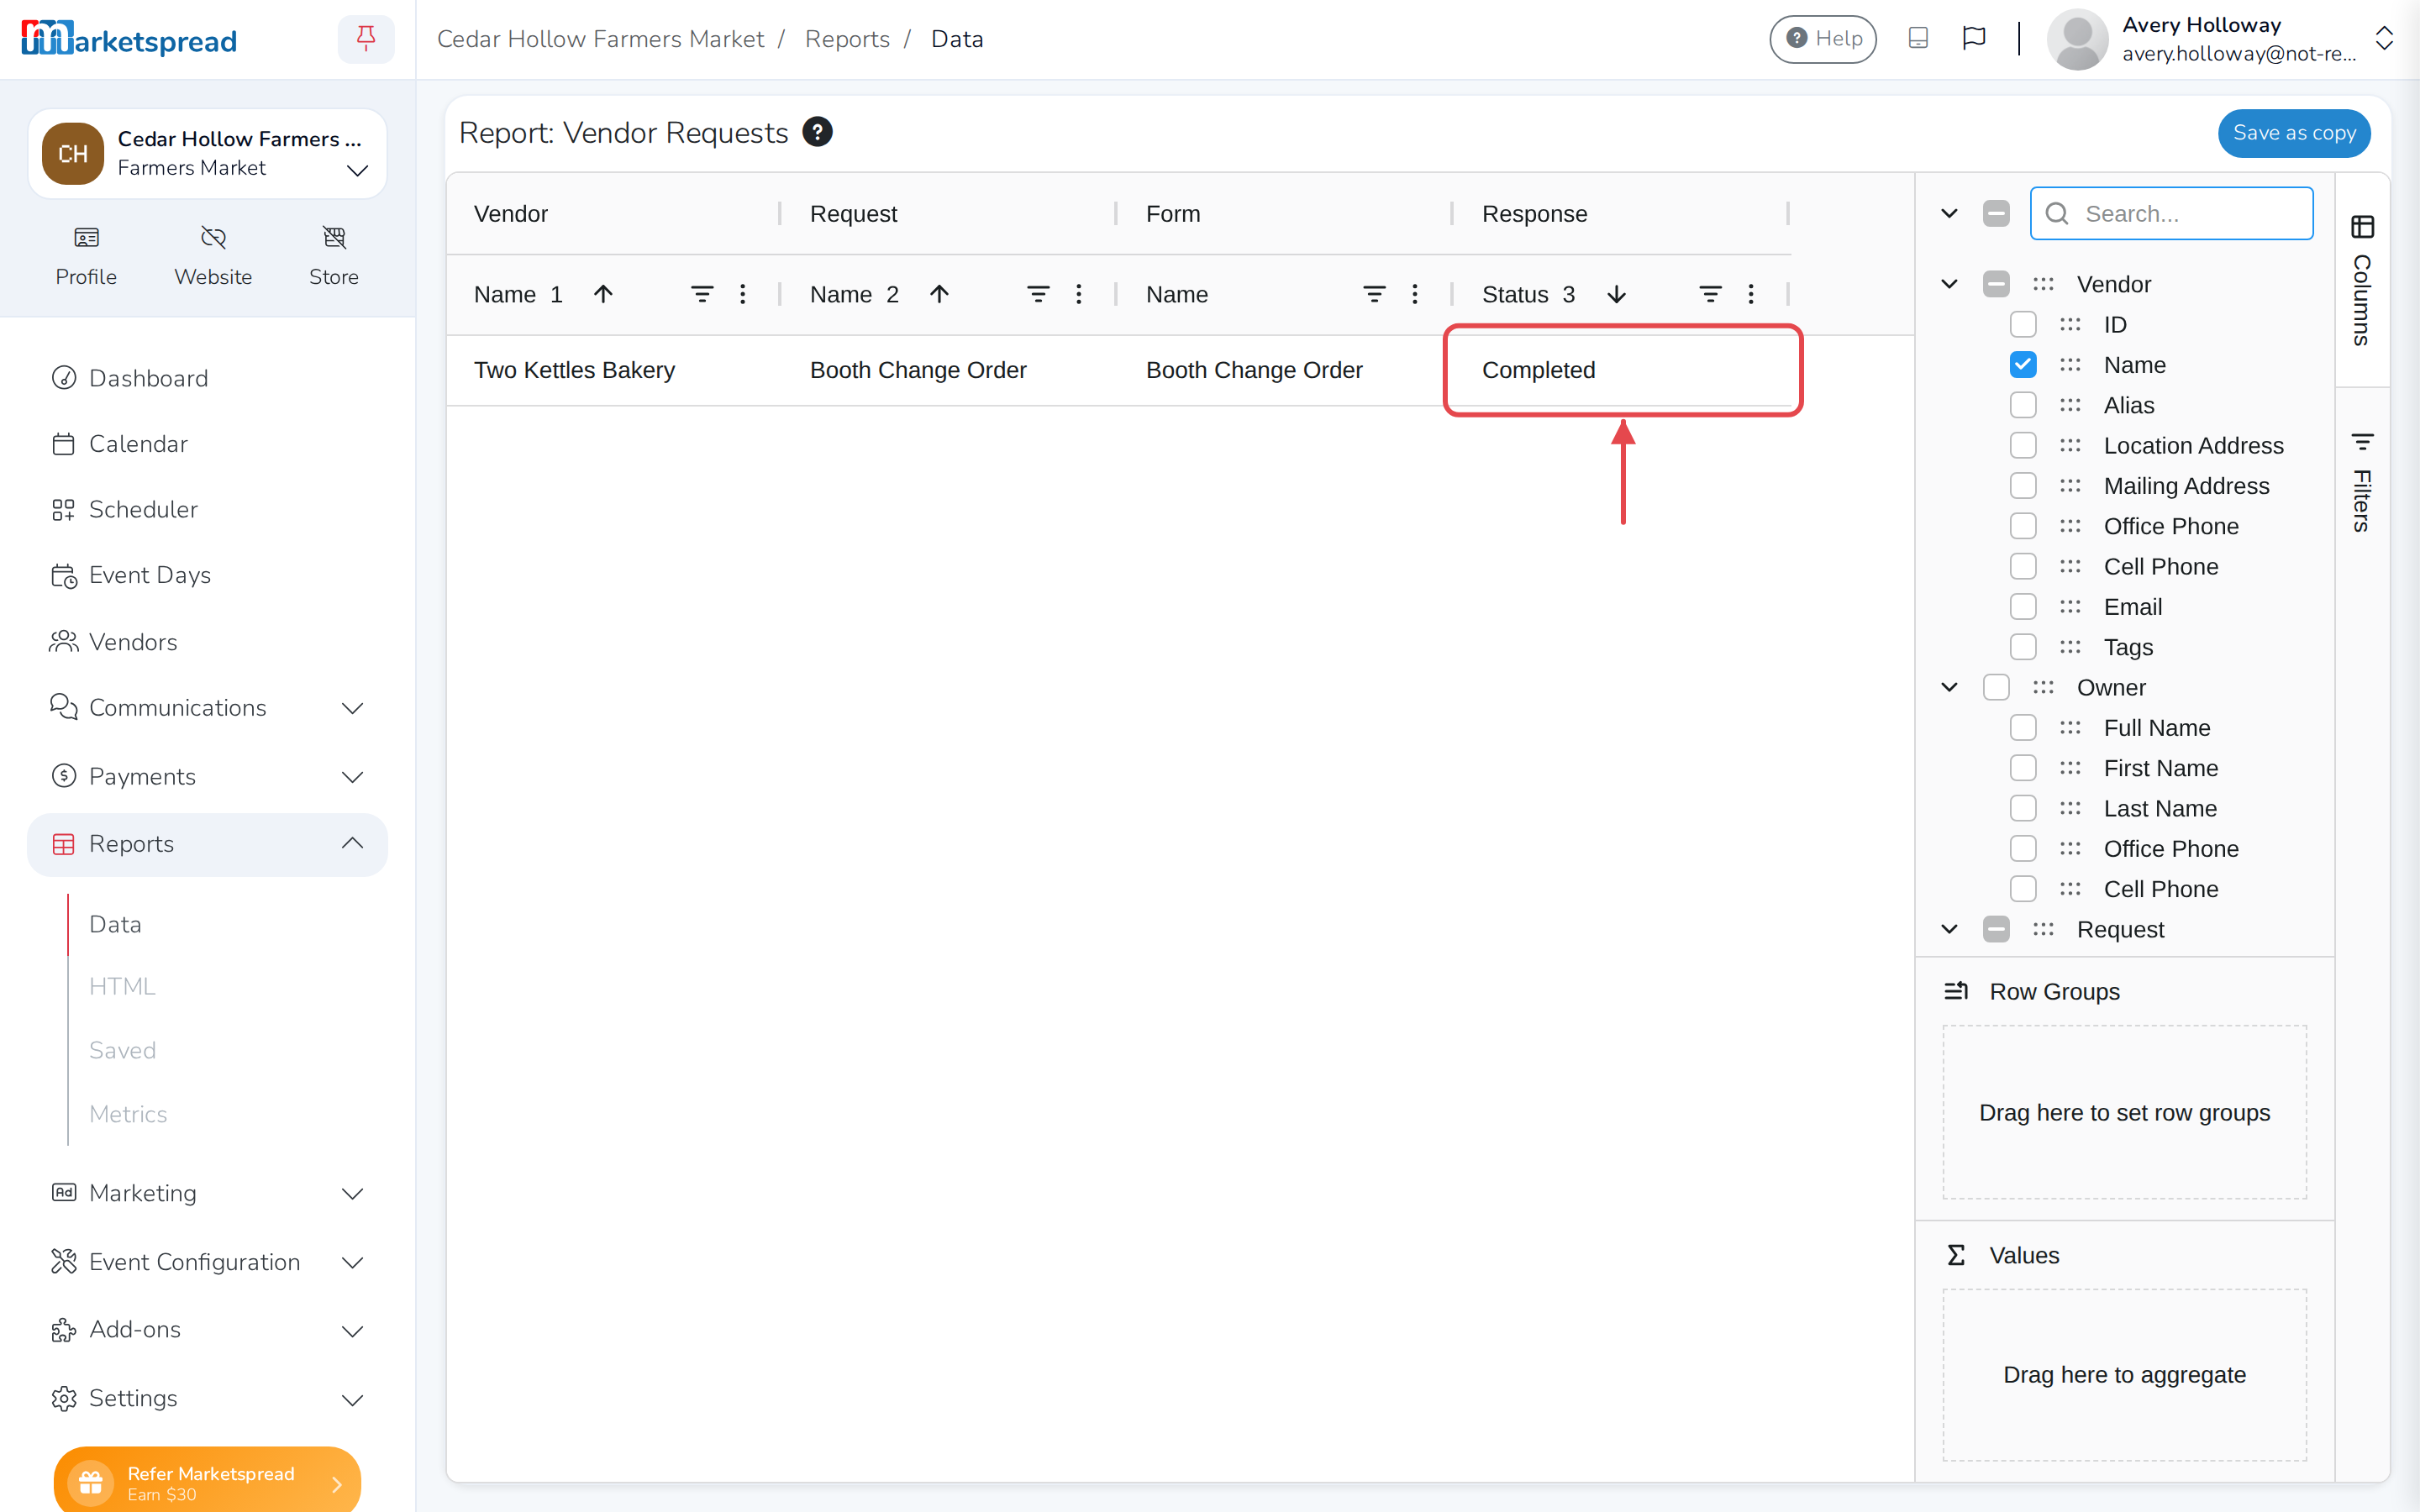
The Requests page shows one request at a time. The Vendor Requests report gives you every response, across every vendor, in one list you can filter, sort and export.
-
Click Reports in the left-hand menu, then Data.
-
Click Vendor Requests.
Change a request's status
A request starts Open, and moves itself to In Progress as soon as the vendor answers. Change it yourself at any point:
- On the Requests page, click the status next to the request.
- Choose Open, In Progress, Completed or Closed.
See what a vendor sent back
- On the Requests page, click View next to the request.
Fill in a request yourself
You can complete a request on a vendor's behalf — over the phone, for example.
- Click Edit next to the request.
- Fill in the answers.
- Click Save.
Important
If the request already raised an invoice, saving your changes here won't update it. Open the invoice and adjust it yourself if the charges need to change.
Delete a request
Deleting a request also removes it from the vendor's own dashboard.
- Click the trash icon next to the request.
- Click Delete.