


Booth fees live on the map, on each booth. That means one booth can cost
something different from the one beside it, and can be priced by the day, the
week, the month or the whole event series.
A booth can only be booked for a term you have given it a price for.
Start a layout
- Click Add Layout Template.
- Give the layout a name.
- Give it a pricing name, such as "Summer Pricing".
The two names are separate so you can have the same physical layout twice with
different prices on it.
Price a booth
- Add a booth from the elements at the top left.
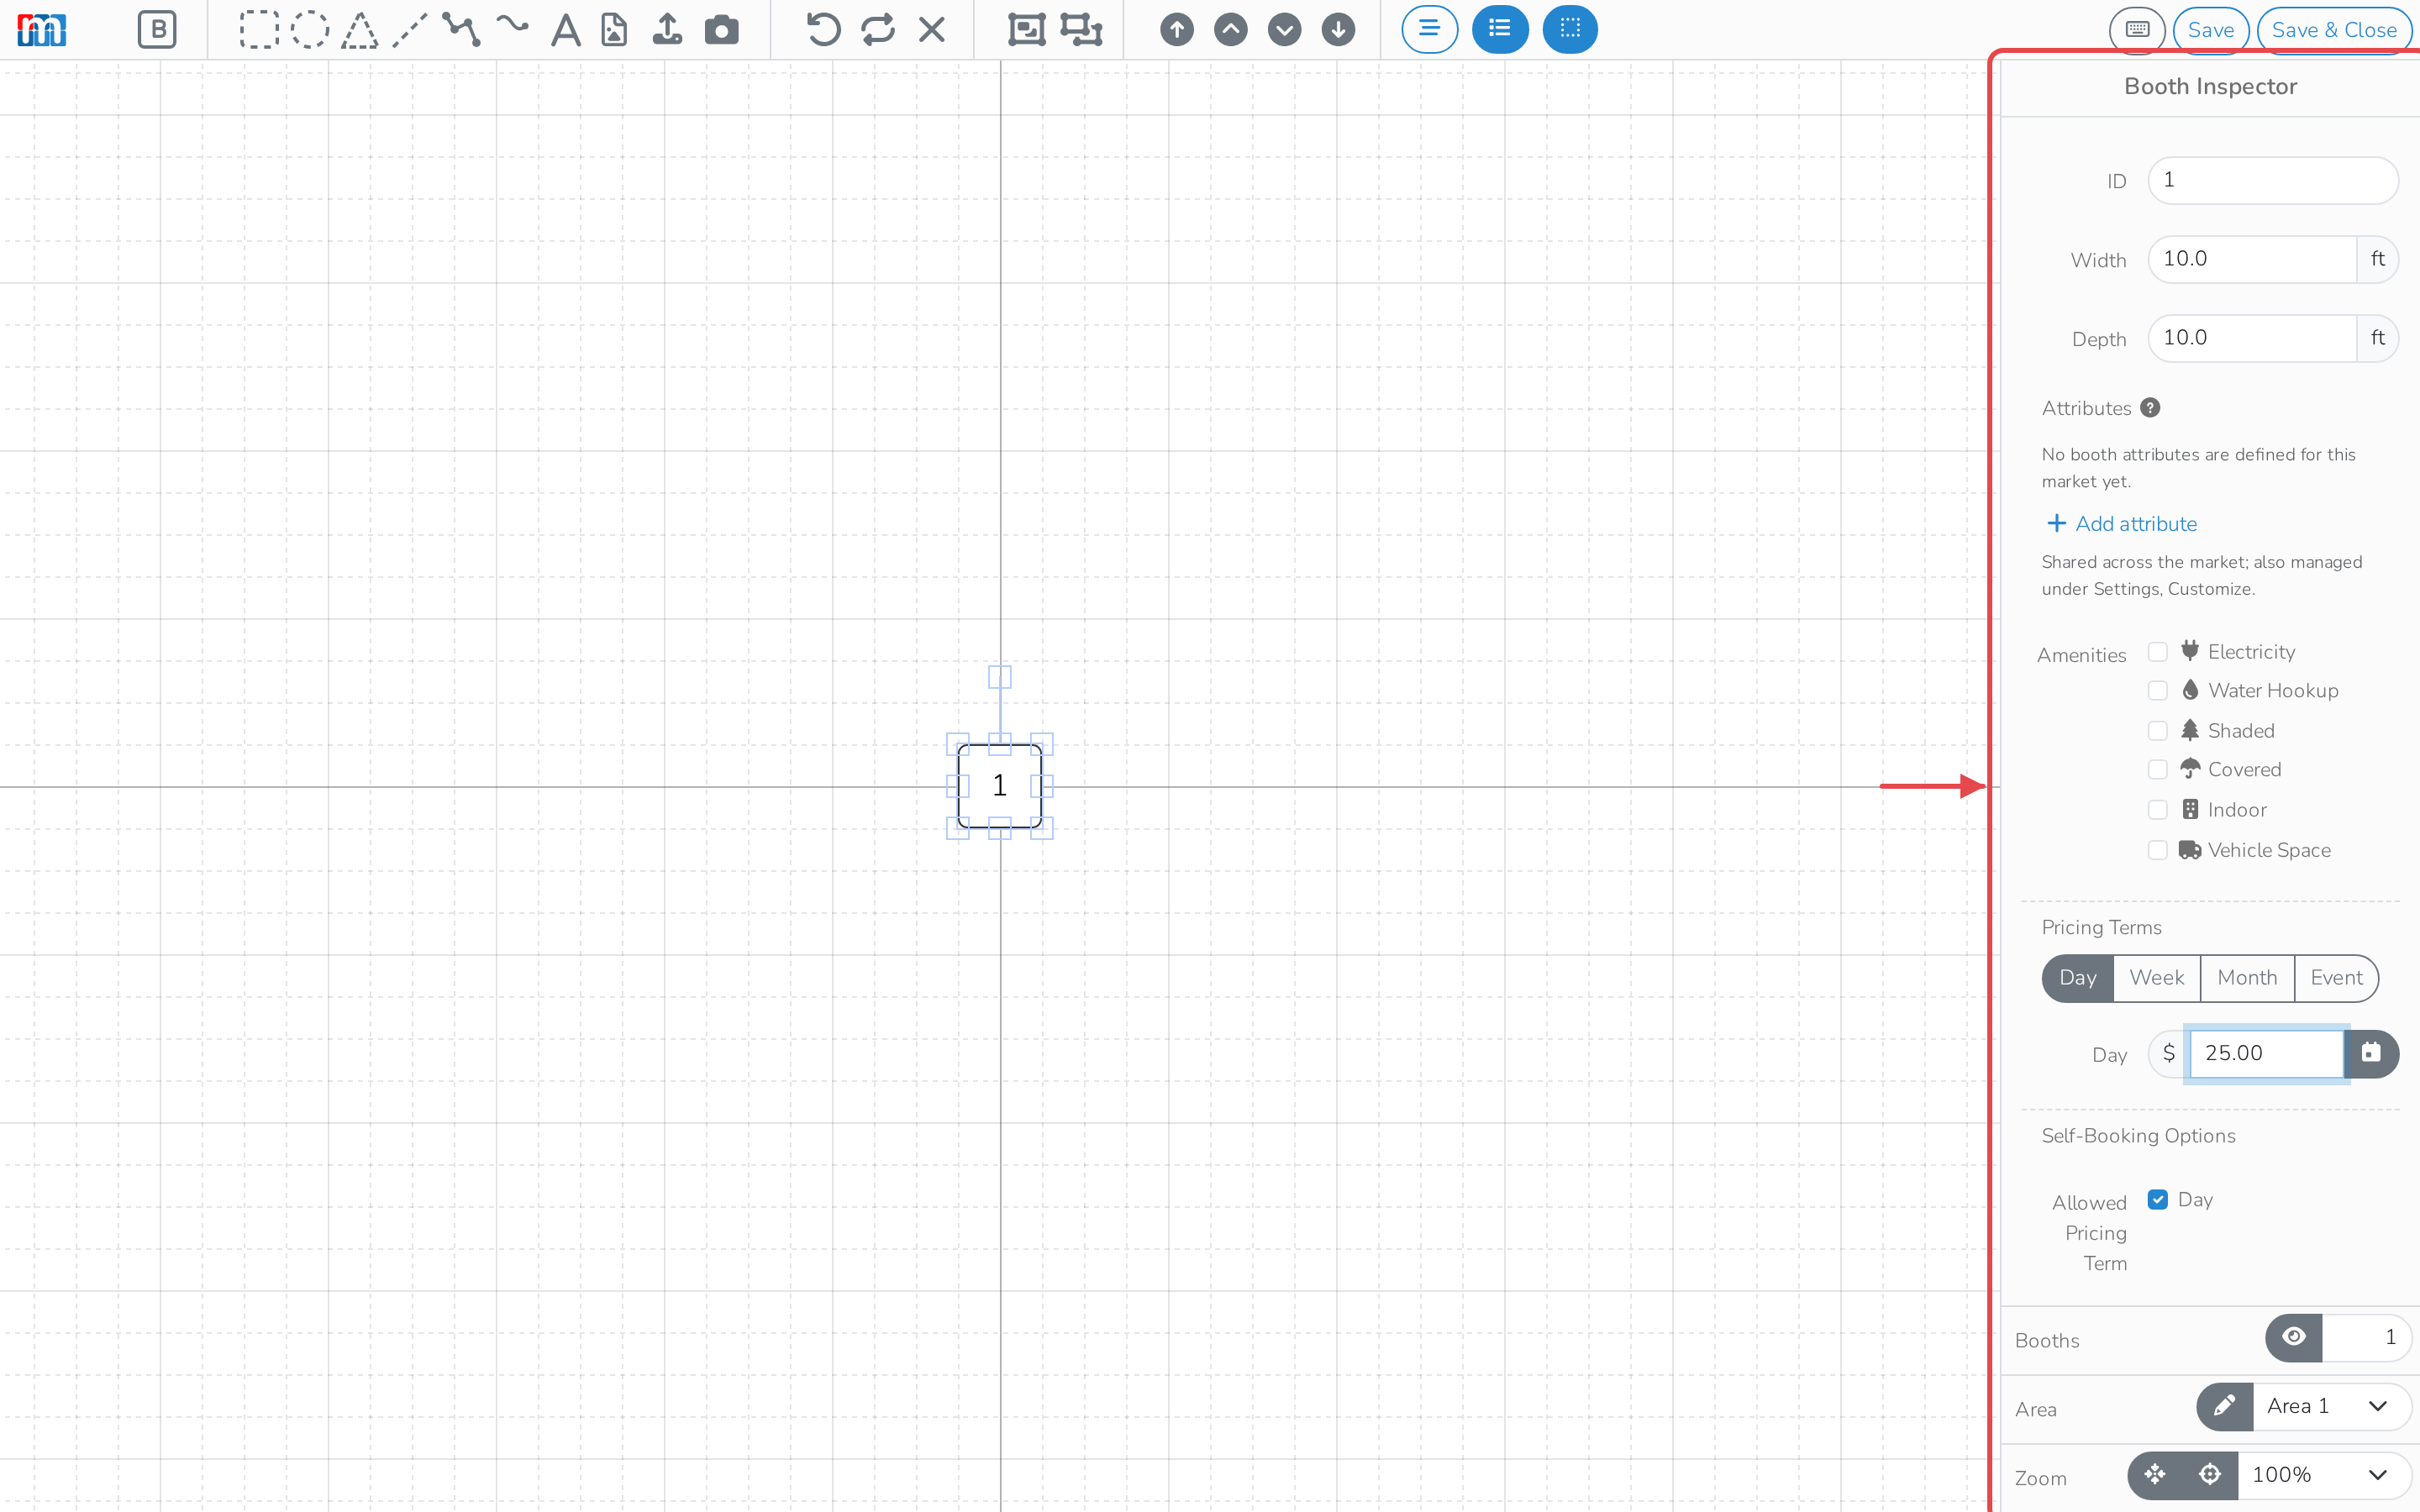
- Select it and find Pricing Terms in the inspector.
- Click a term — Day, Week, Month or Event — and a price box
appears. Fill in the ones you want to offer.
Untick a term to stop the booth being bookable that way.
Charge different amounts on different days
Turn on the day-of-week toggle and you can price each day separately — $40 on
weekdays and $50 at weekends, for instance.
Weekly and monthly terms work the same way: every week of the year, or every
month, can have its own price.
The inspector then shows the price as varies, because there is more than
one.
The Event term is a single fee
It covers the whole run, however long, and produces one invoice. Use it
when you want vendors booked for everything at once.
Add tags for your reports
Click the calendar icon beside a term price, then the tag icon, and add as many
tags as you like. They land on the invoice when it is created, so you can group
by them in reports later.
Copy the settings to other booths
You do not have to price every booth by hand.
- Select the booths you want to change.
- Click Sync attributes in the inspector.
- Choose the booth you already set up as the one to sync from.
- Tick what to copy — Size, Amenities, Attributes,
Pricing & Types, Font Options or Design Options. - Click Perform sync.
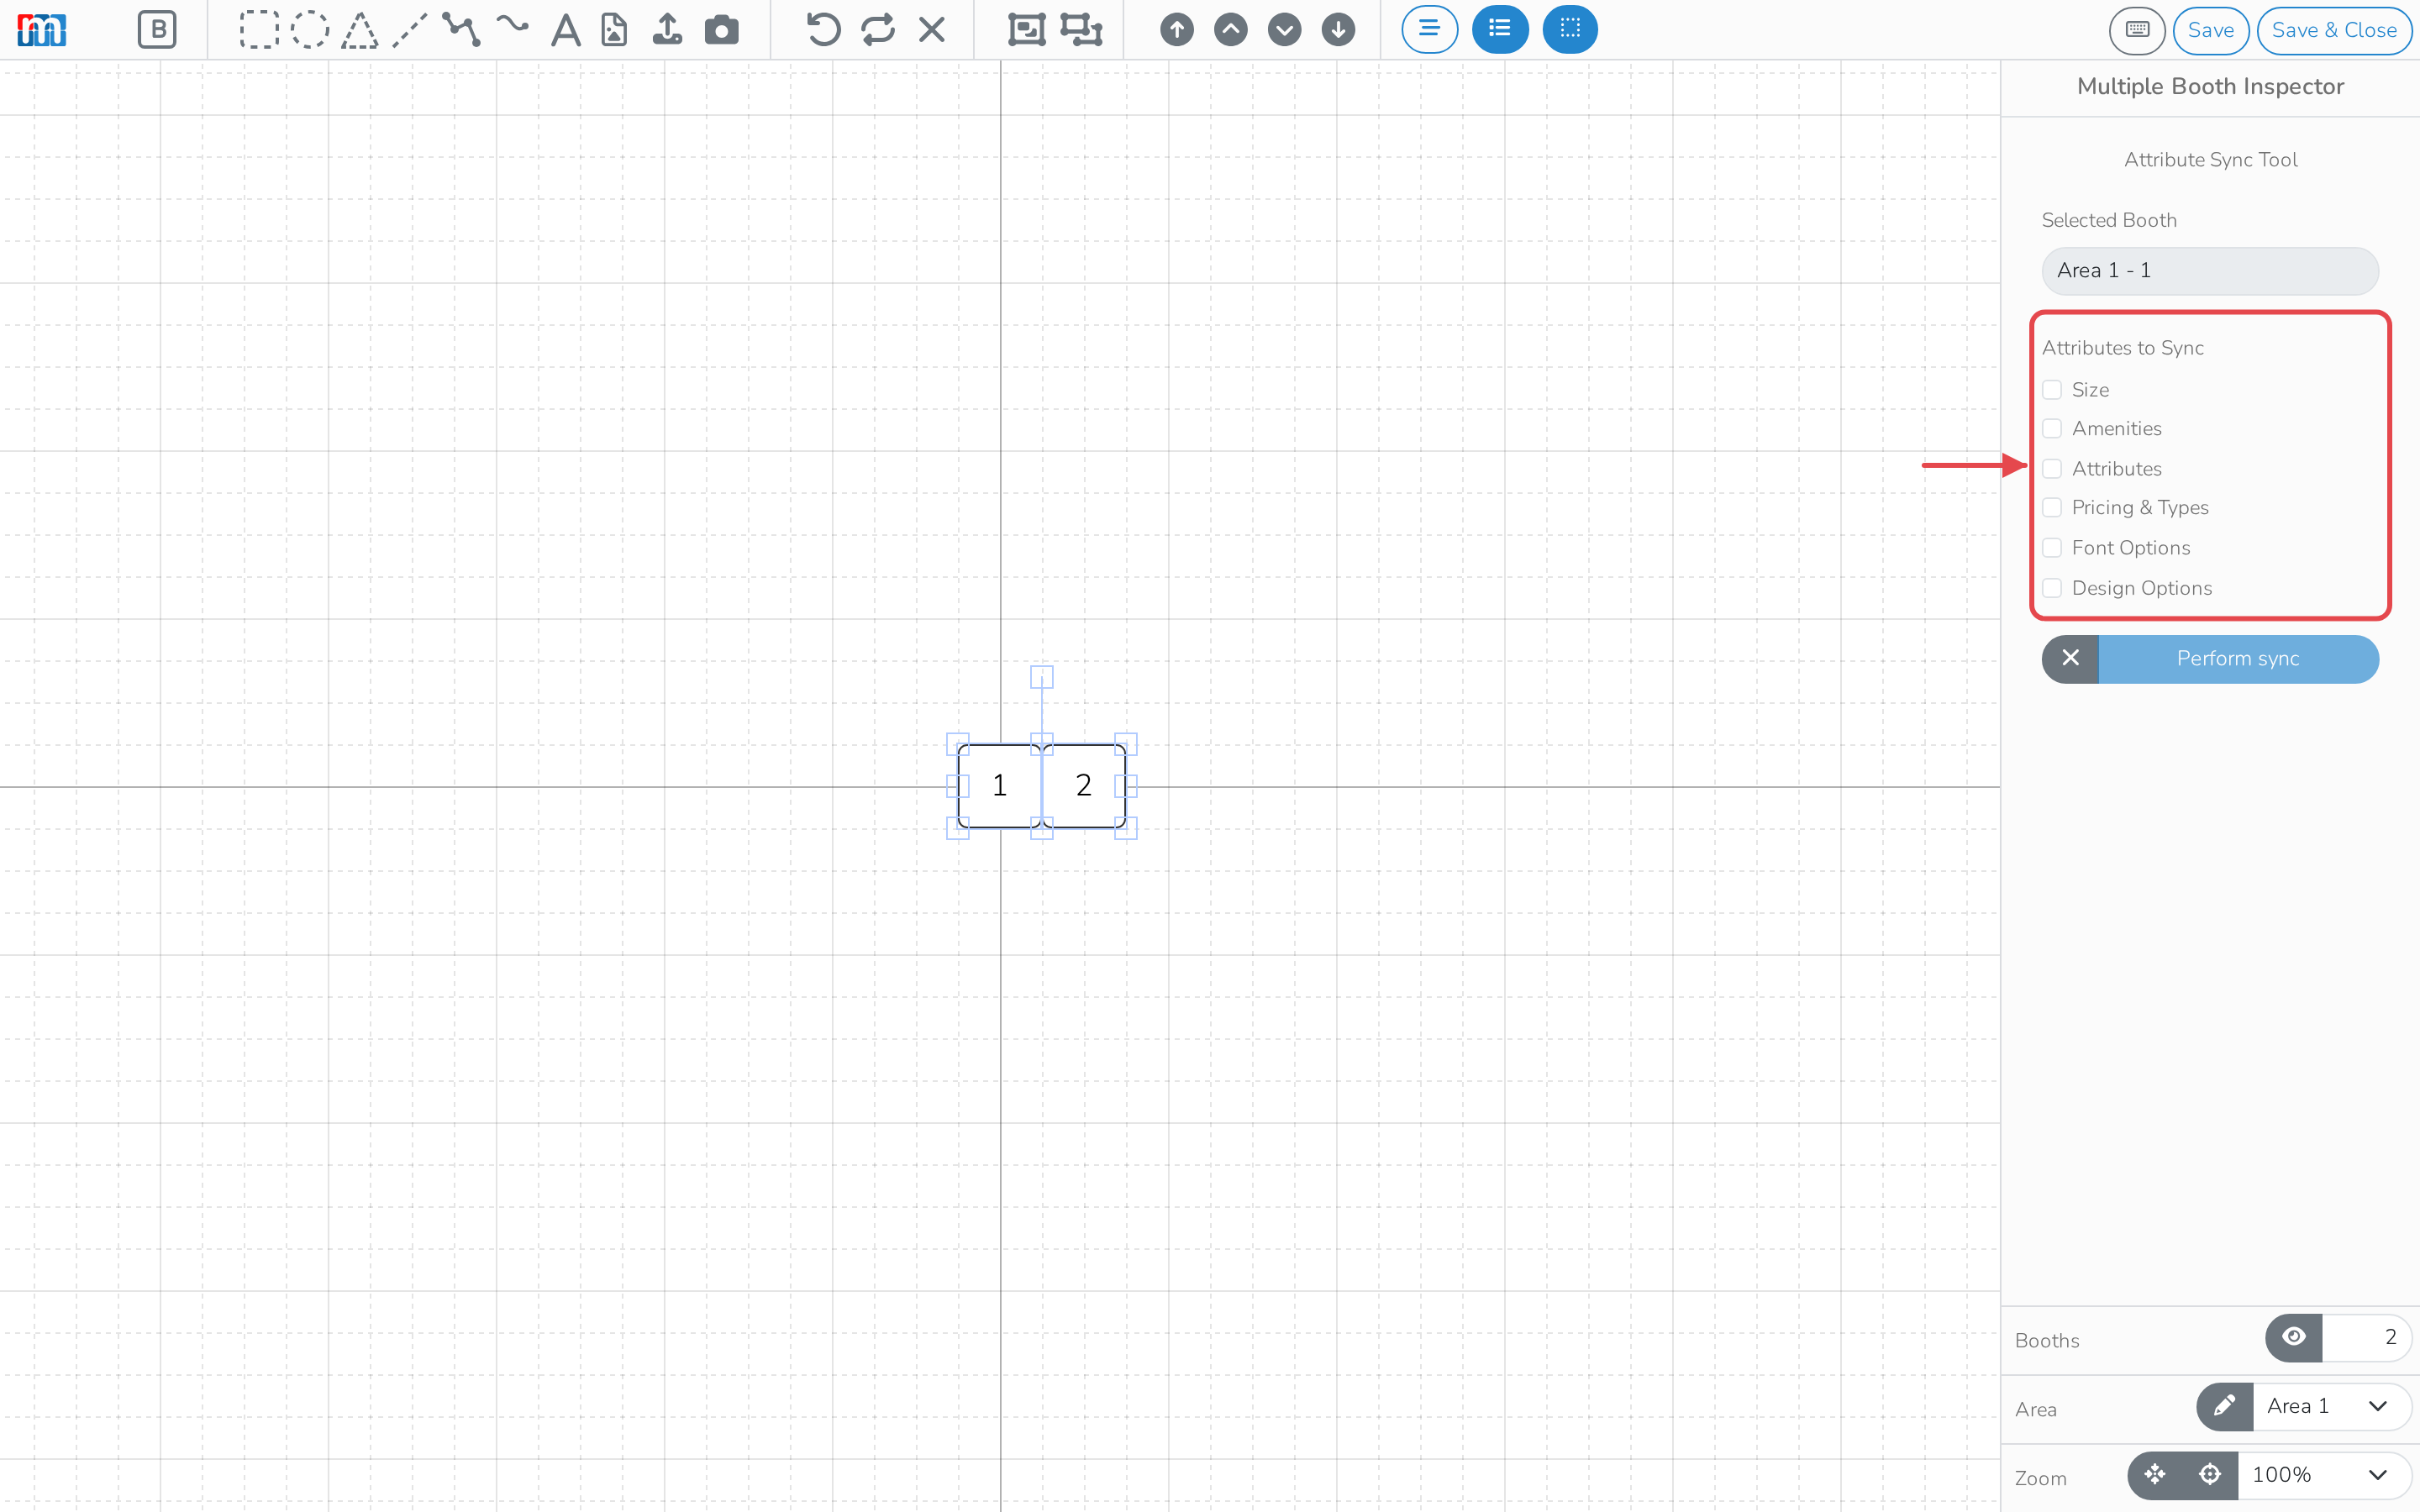
To give a few booths their own price, set one of them up, then sync the others
from it with only Pricing & Types ticked. Everything else about them stays
as it was.
Check and save
Click the eye icon at the bottom right to review the map, then Save or
Save & Close at the top right.