


The sponsor listing is one of your market's embeddable widgets — a card for
each sponsor, with their logo, bio and the days they're at your market. You
can preview it, customize it, and paste it into your own website. A sponsor
is a vendor whose application has the vendor type Sponsor and who has
also been accepted into one of your activated events — the vendor type on
its own does not add them to the listing.
Note
A note next to Embeddable Widgets says they're only available for
activated events. If none of your events are activated yet, activate one
from Event Configuration, then Events.
Make a vendor a sponsor
-
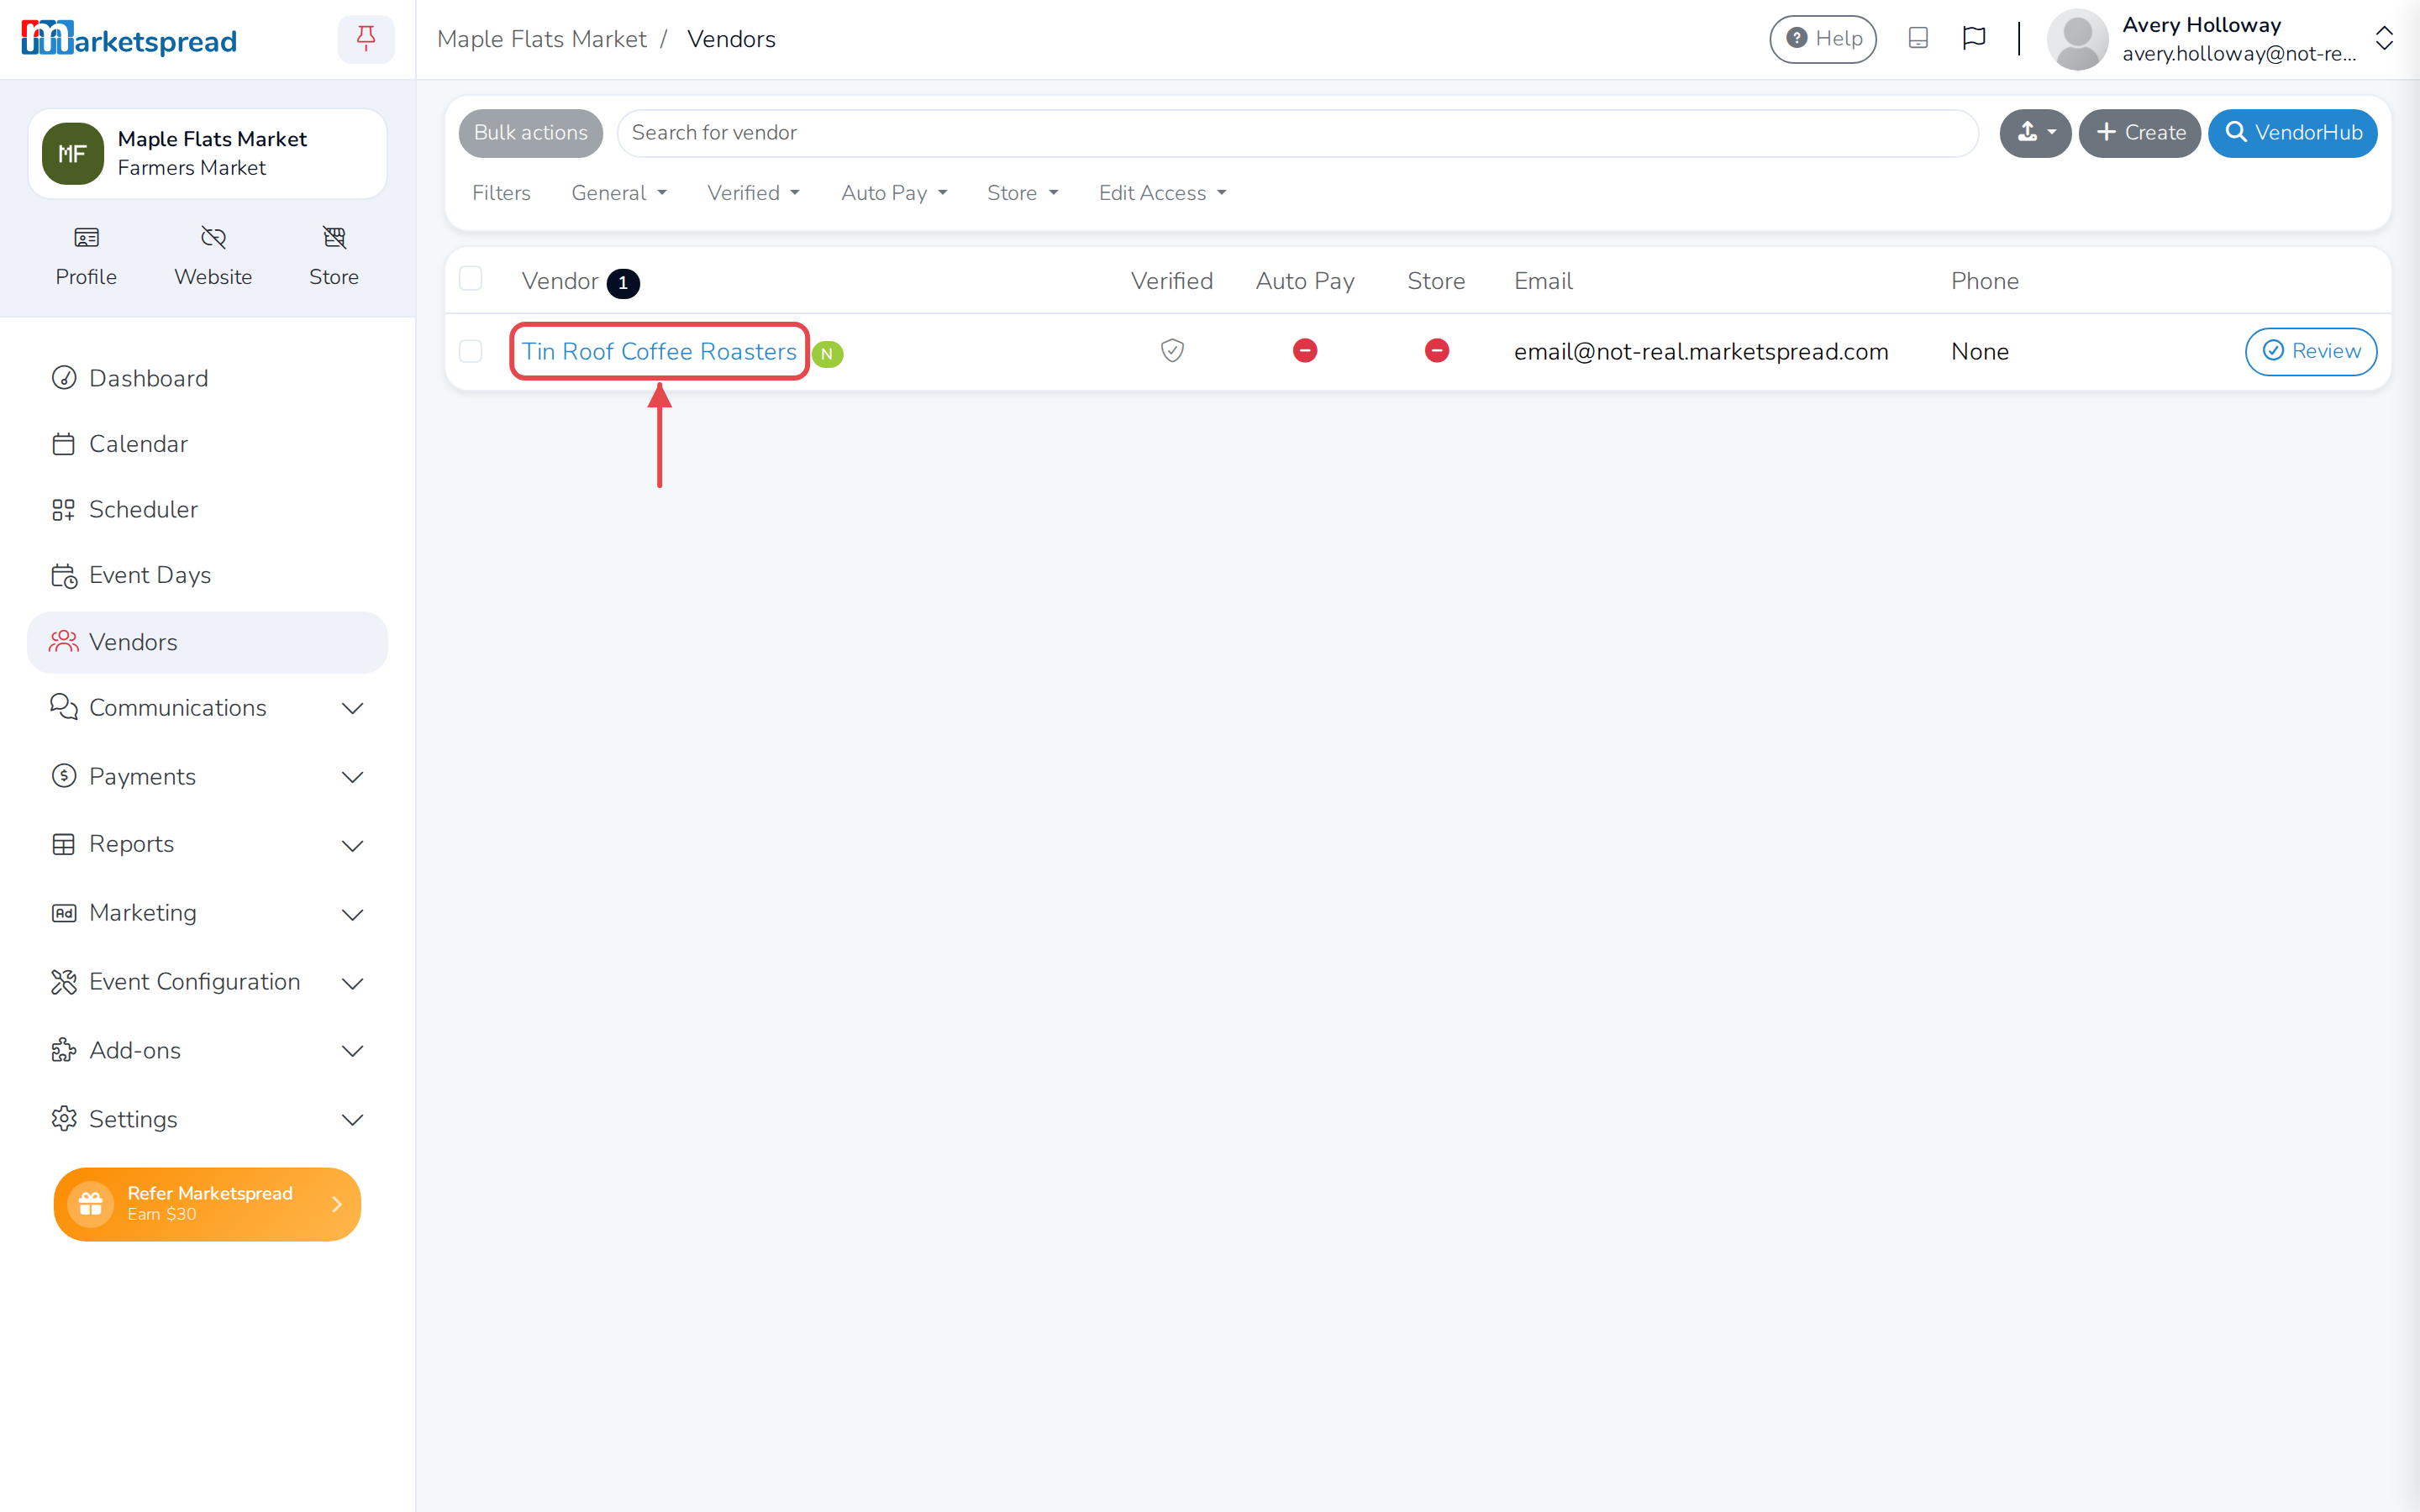
Open Vendors in the left-hand menu.
-
Click the vendor's name to open their Vendor Record.
-
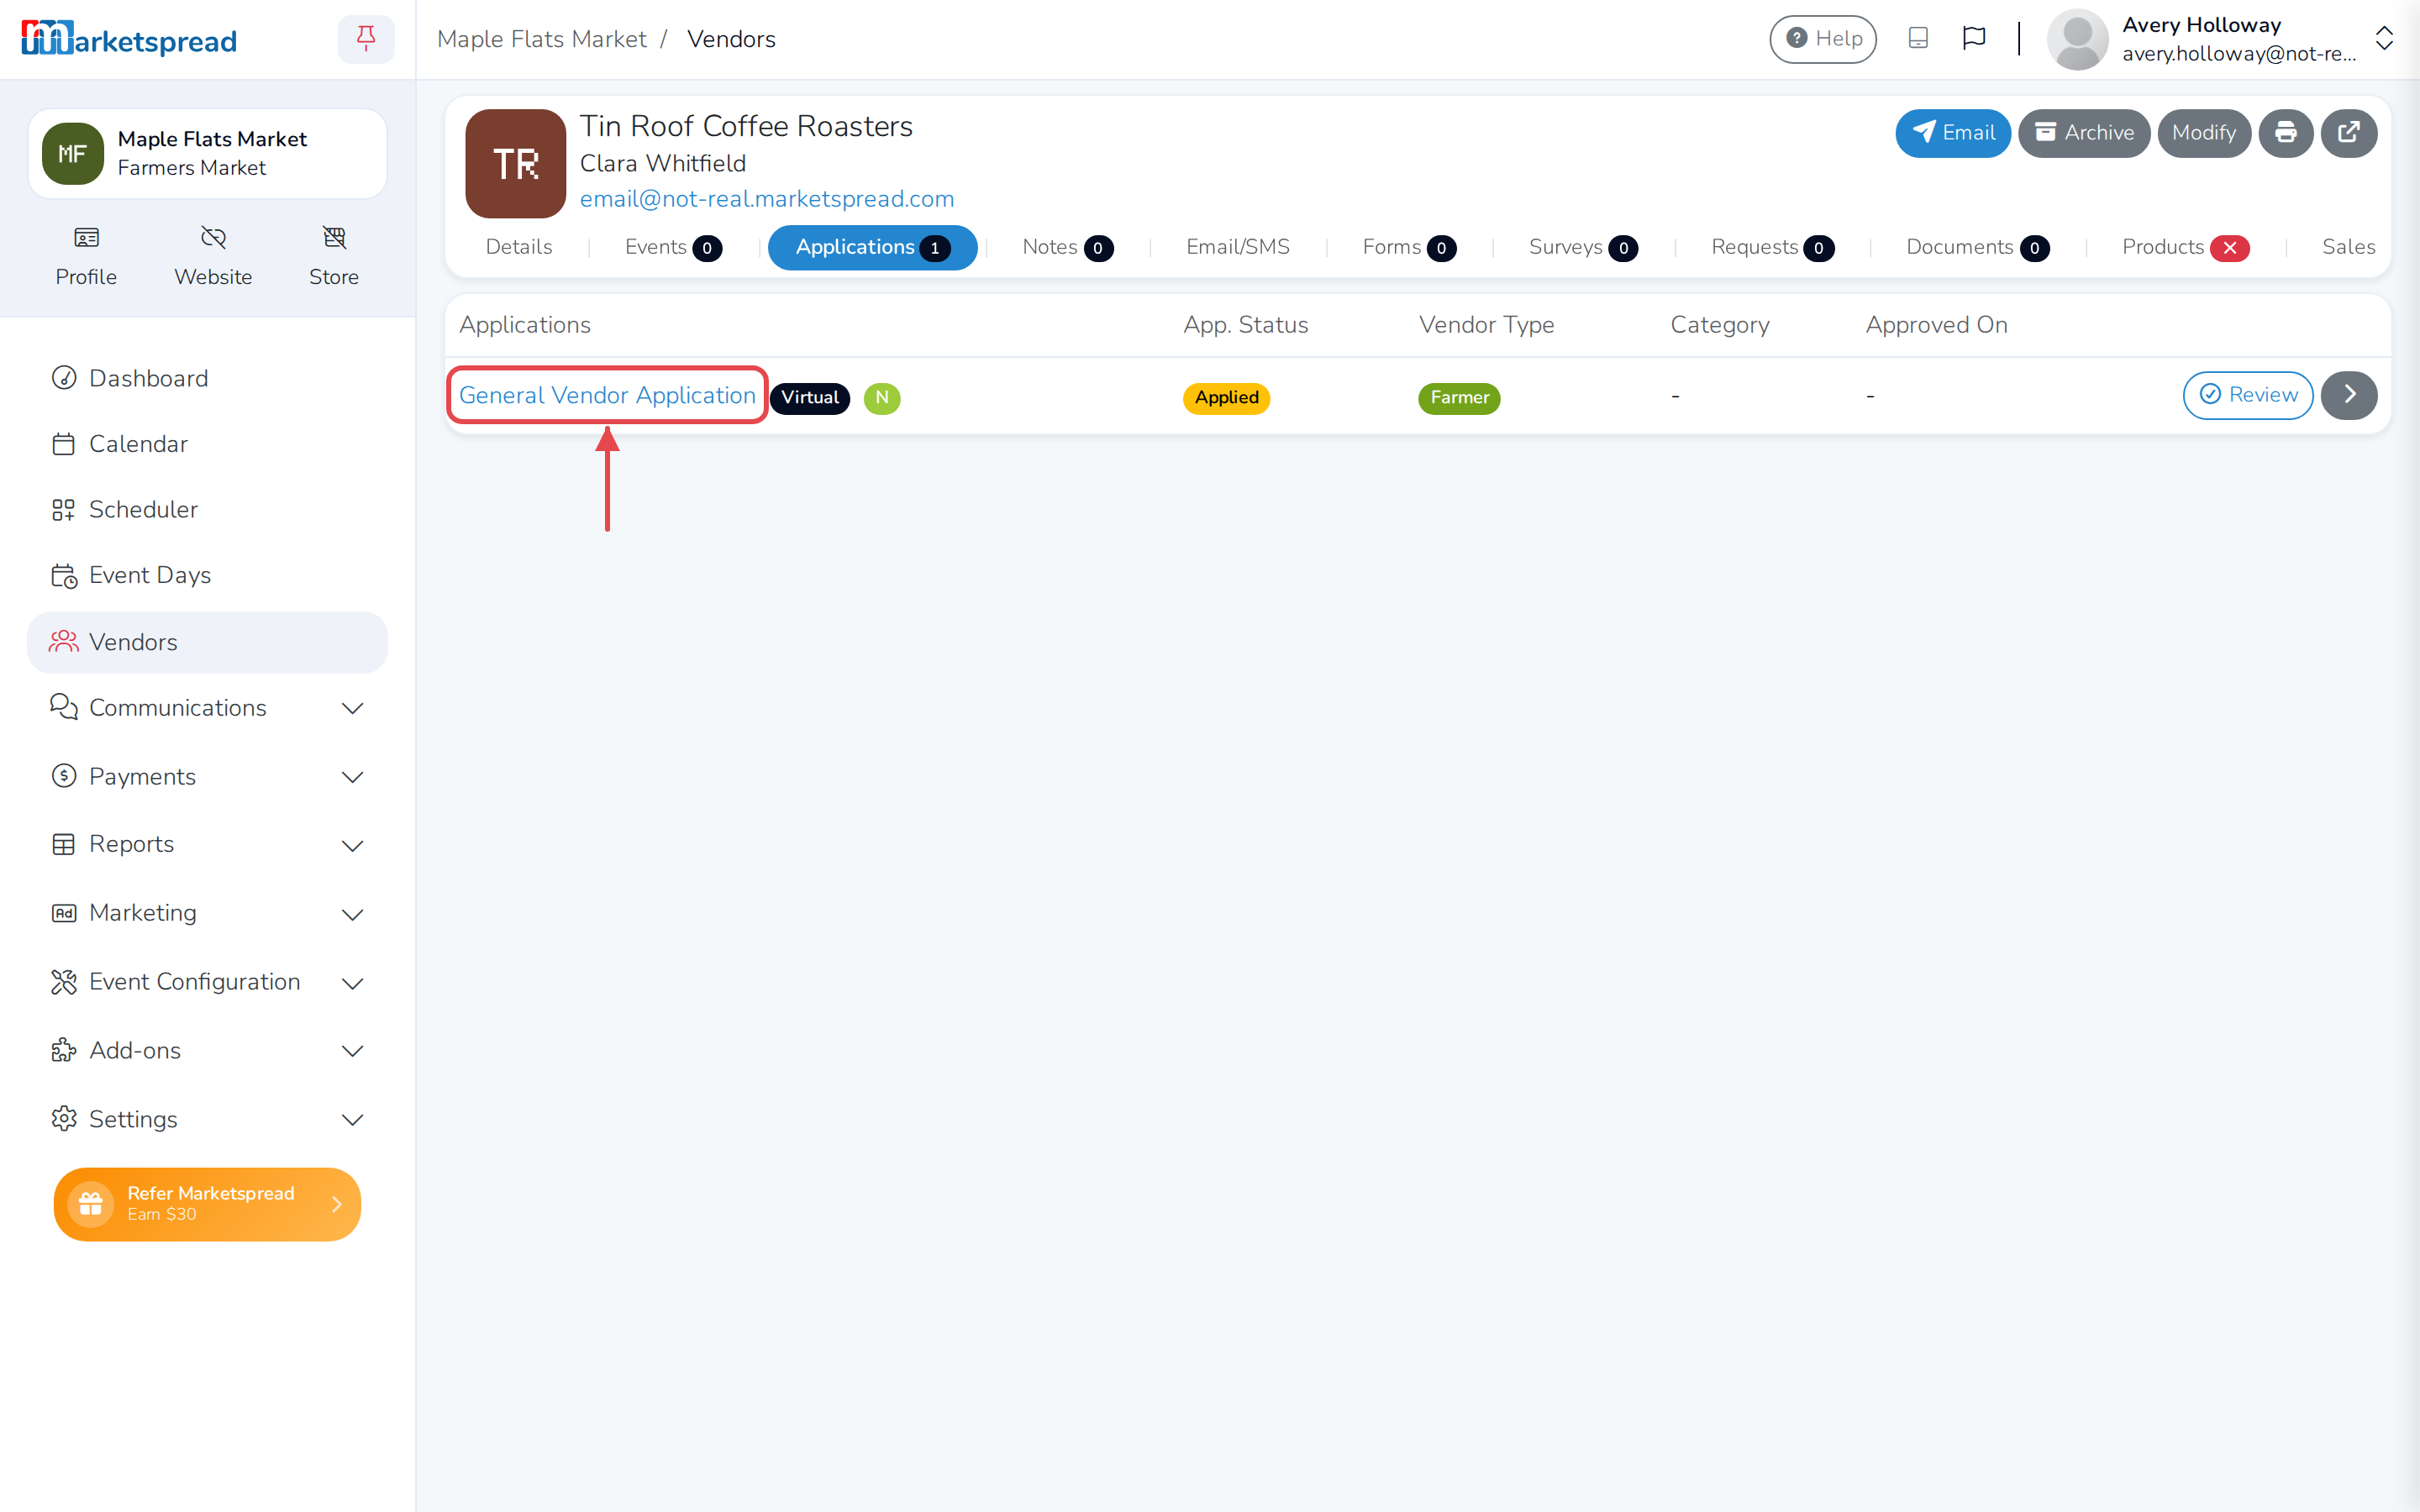
Click the Applications tab.
-
Click the application you want to change.
-
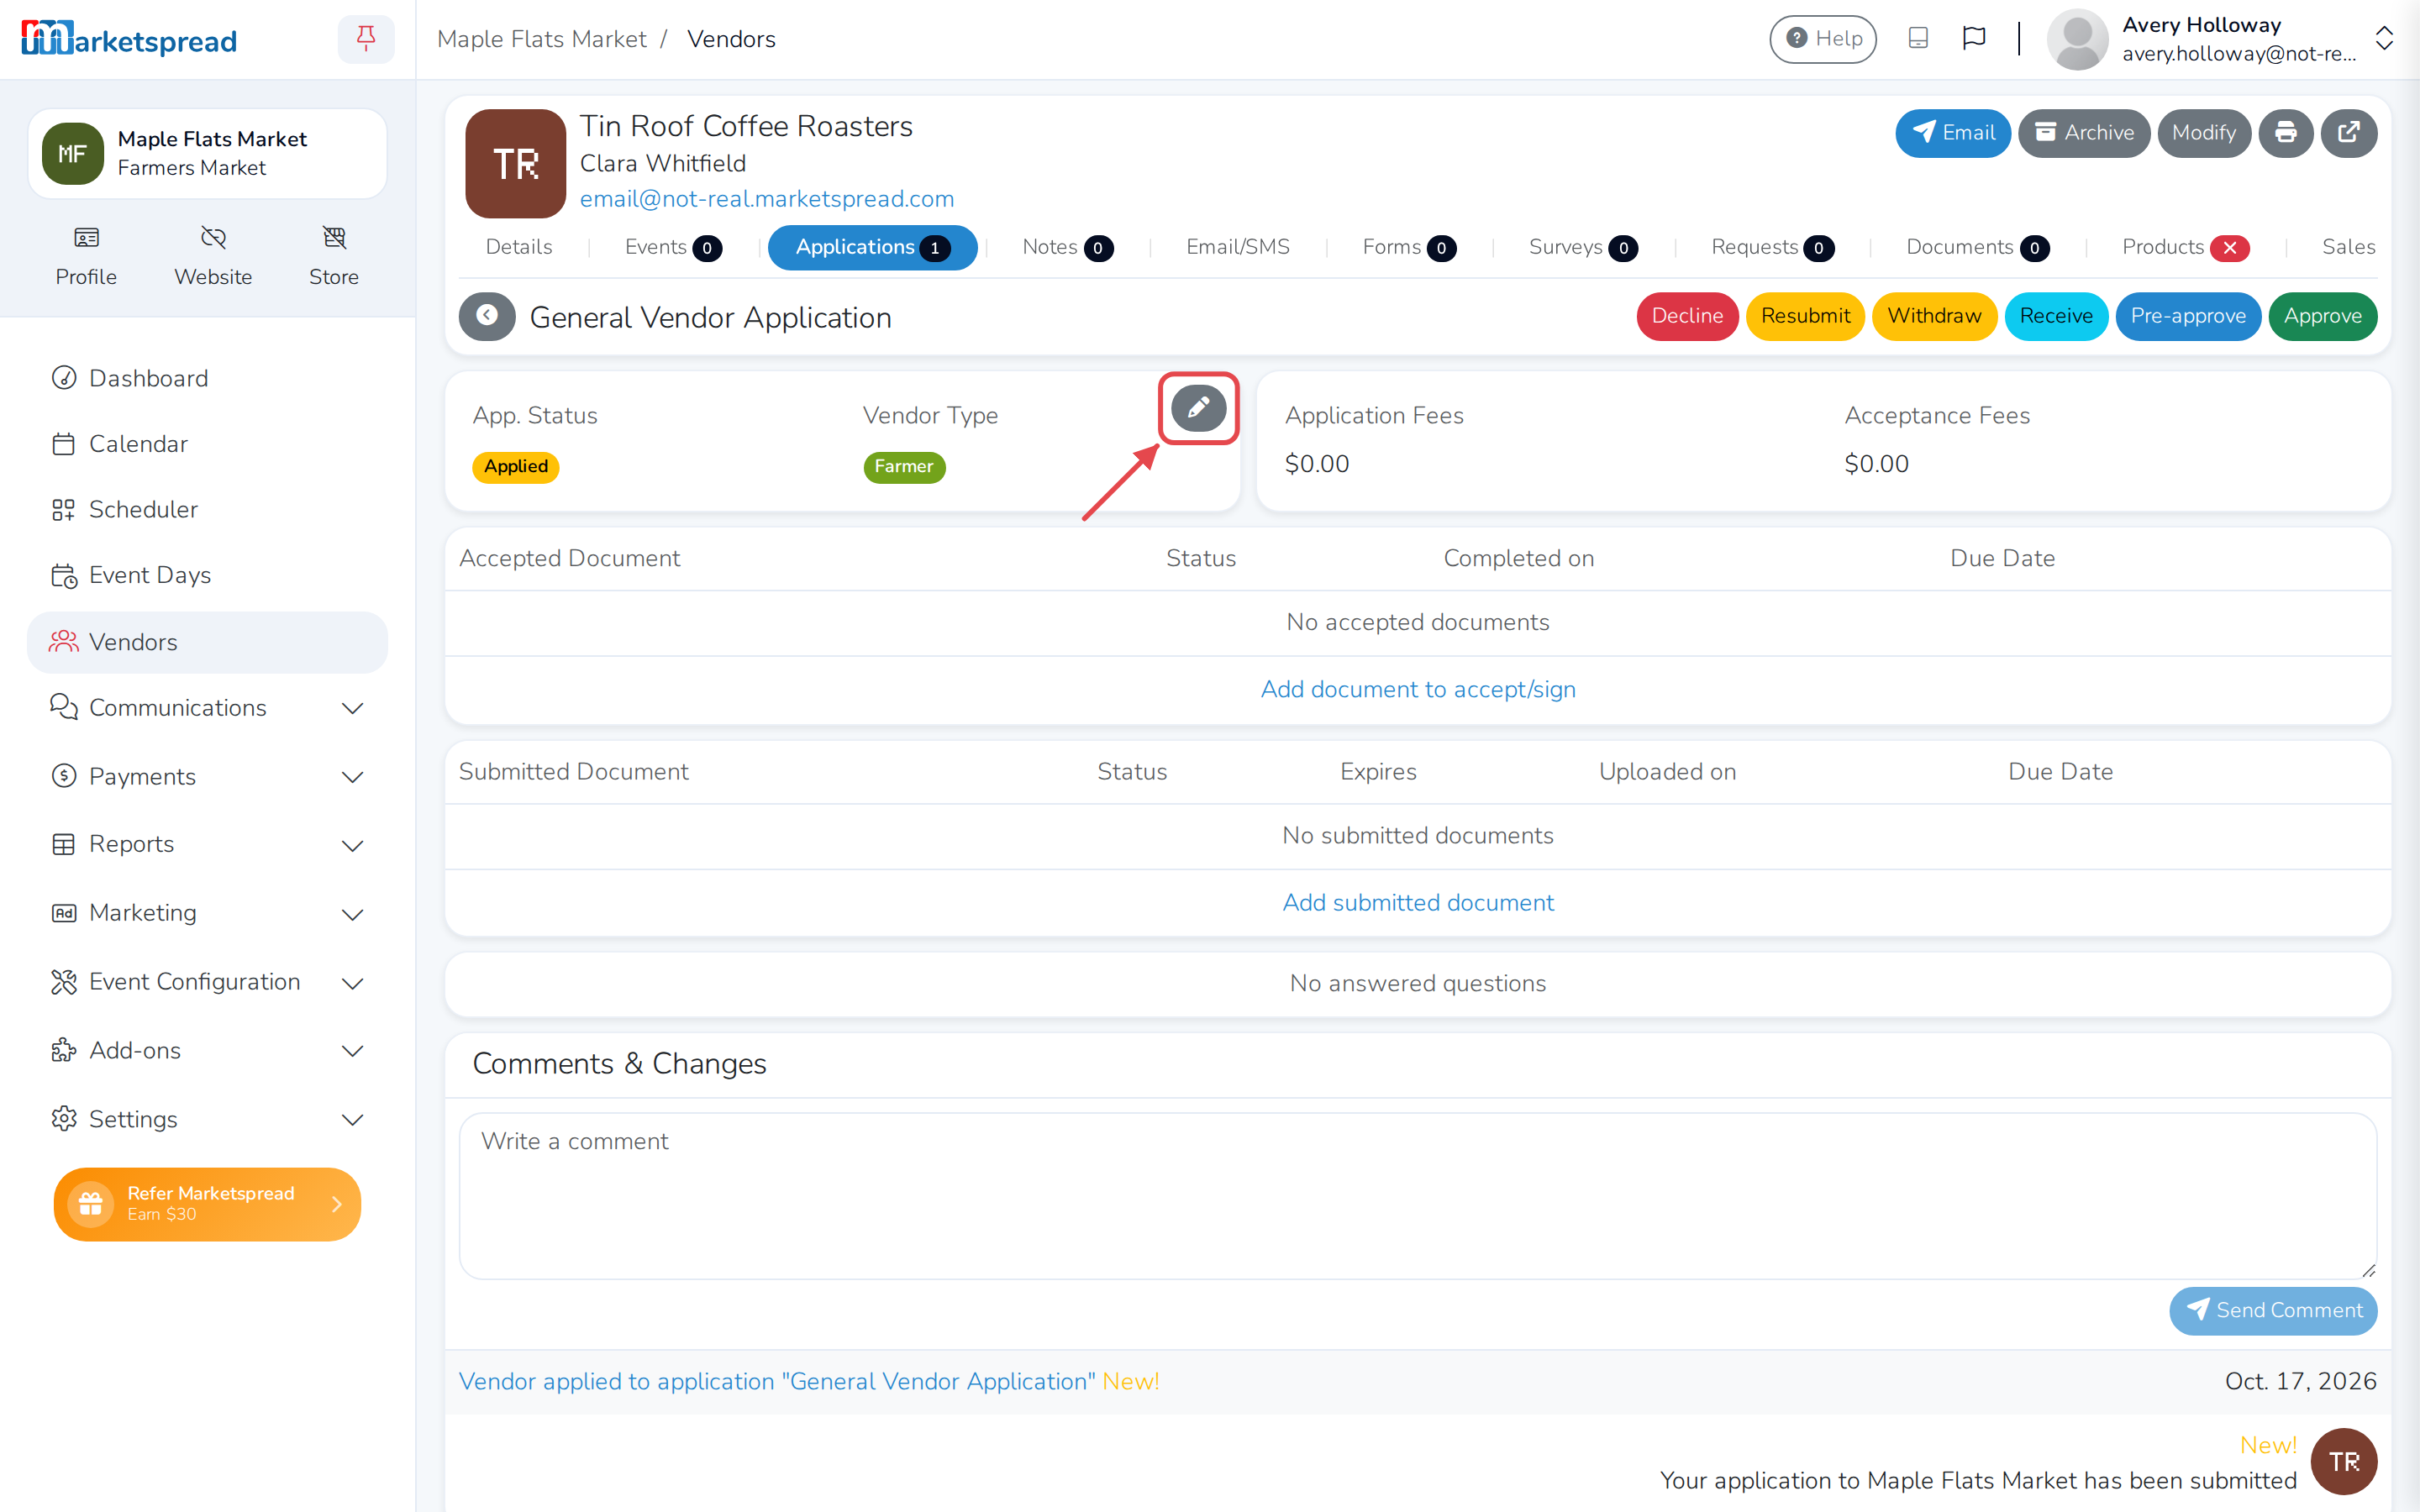
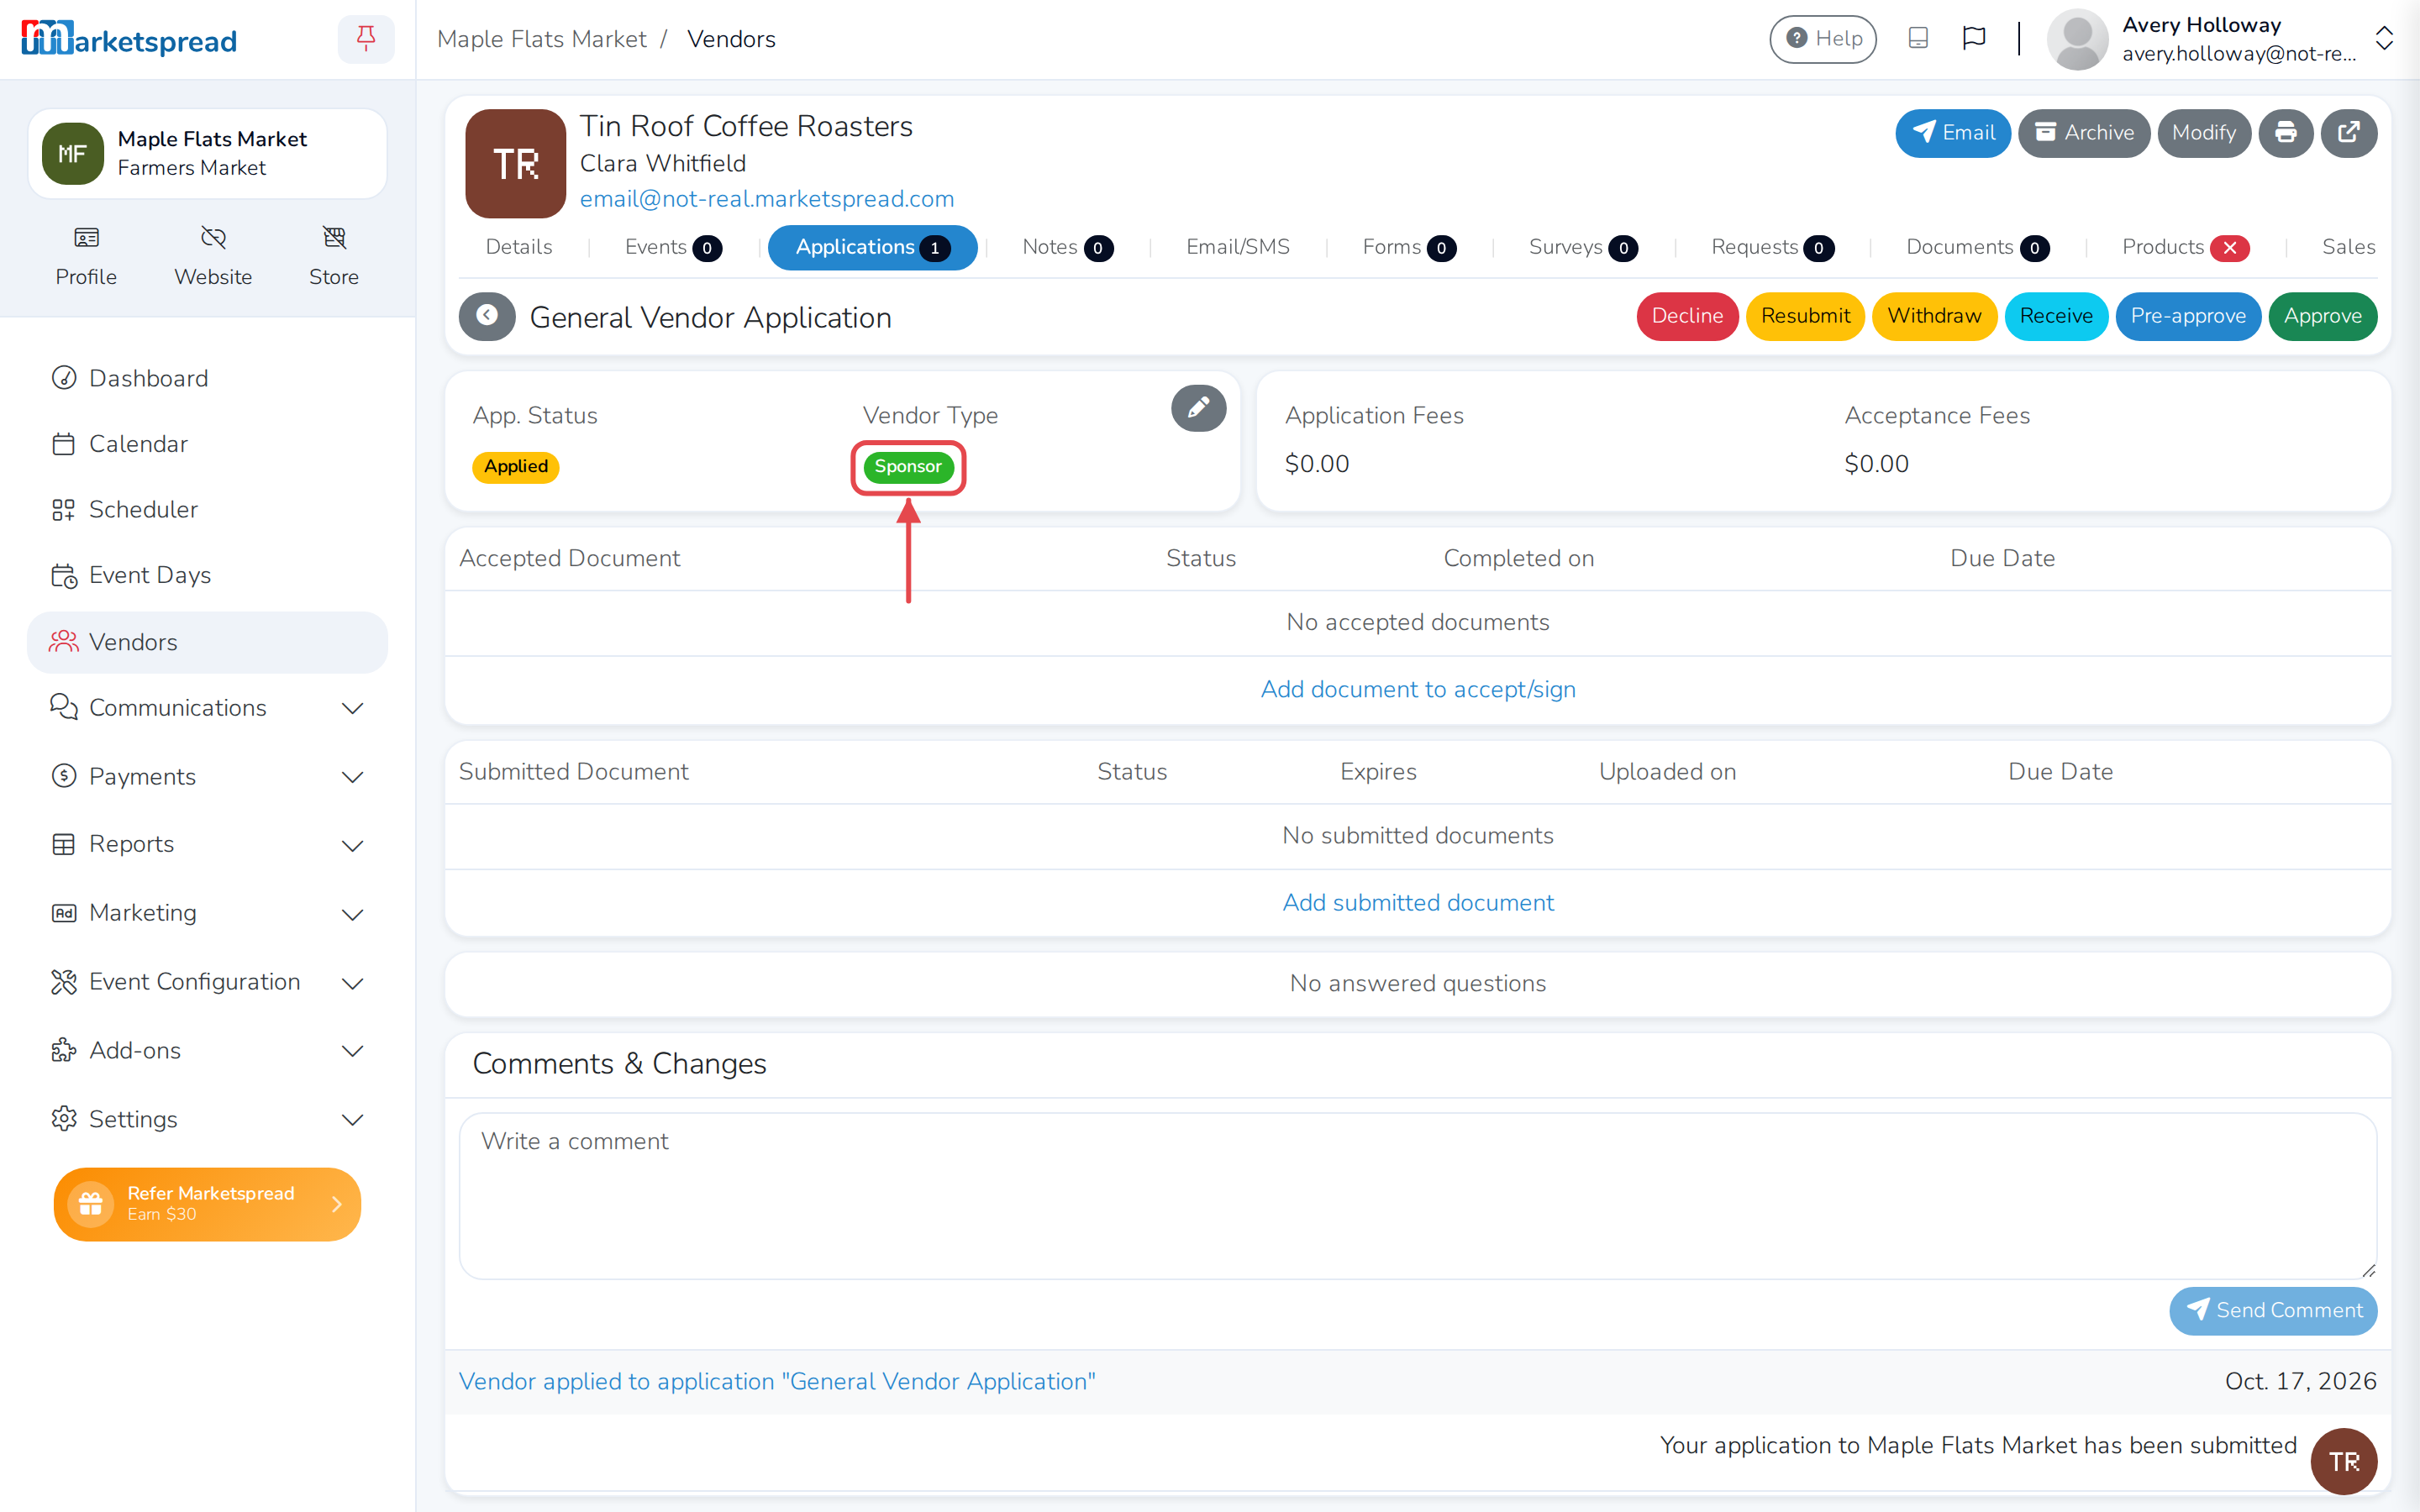
Click the pencil icon on the application's status card.
-
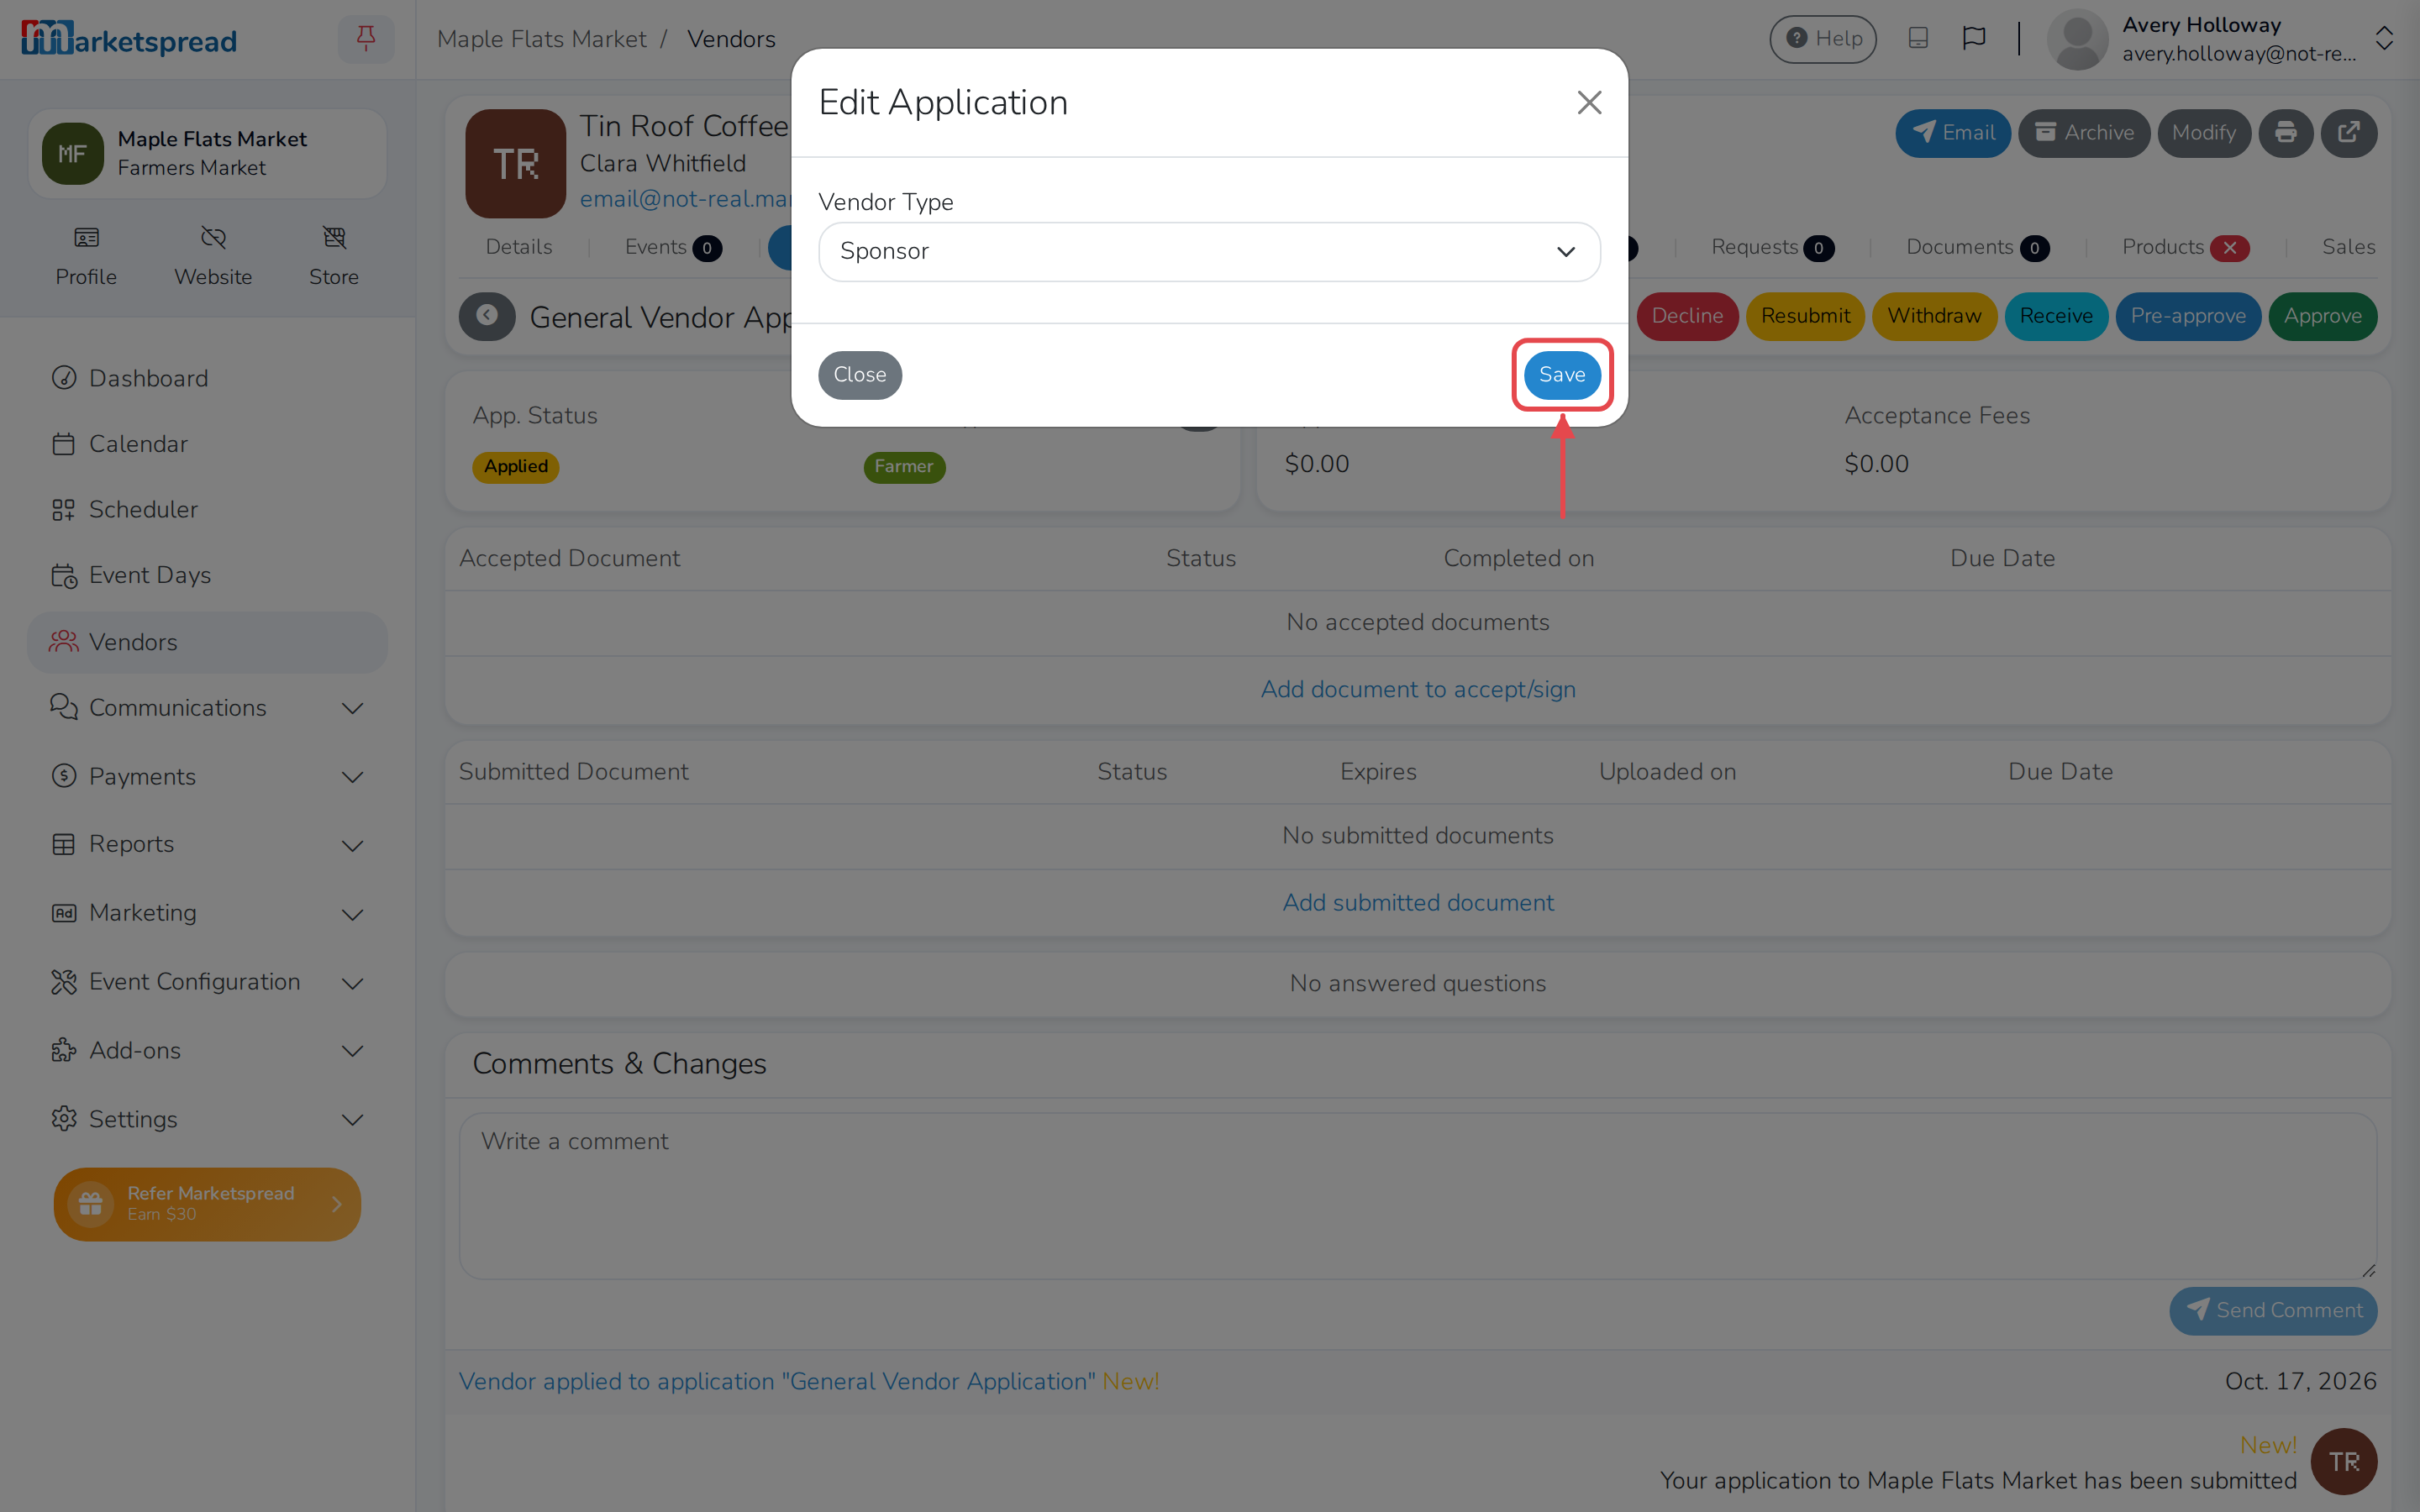
Choose Sponsor from Vendor Type.
-
Click Save.
Note
Every market starts with Sponsor as one of its vendor types, under
Settings → Customizations → Vendor Types. If it's missing
from the list, see How to create custom vendor
types to add it back.
Preview the sponsor listing
-
Click Settings in the left-hand menu.
-
Click Widgets.
-
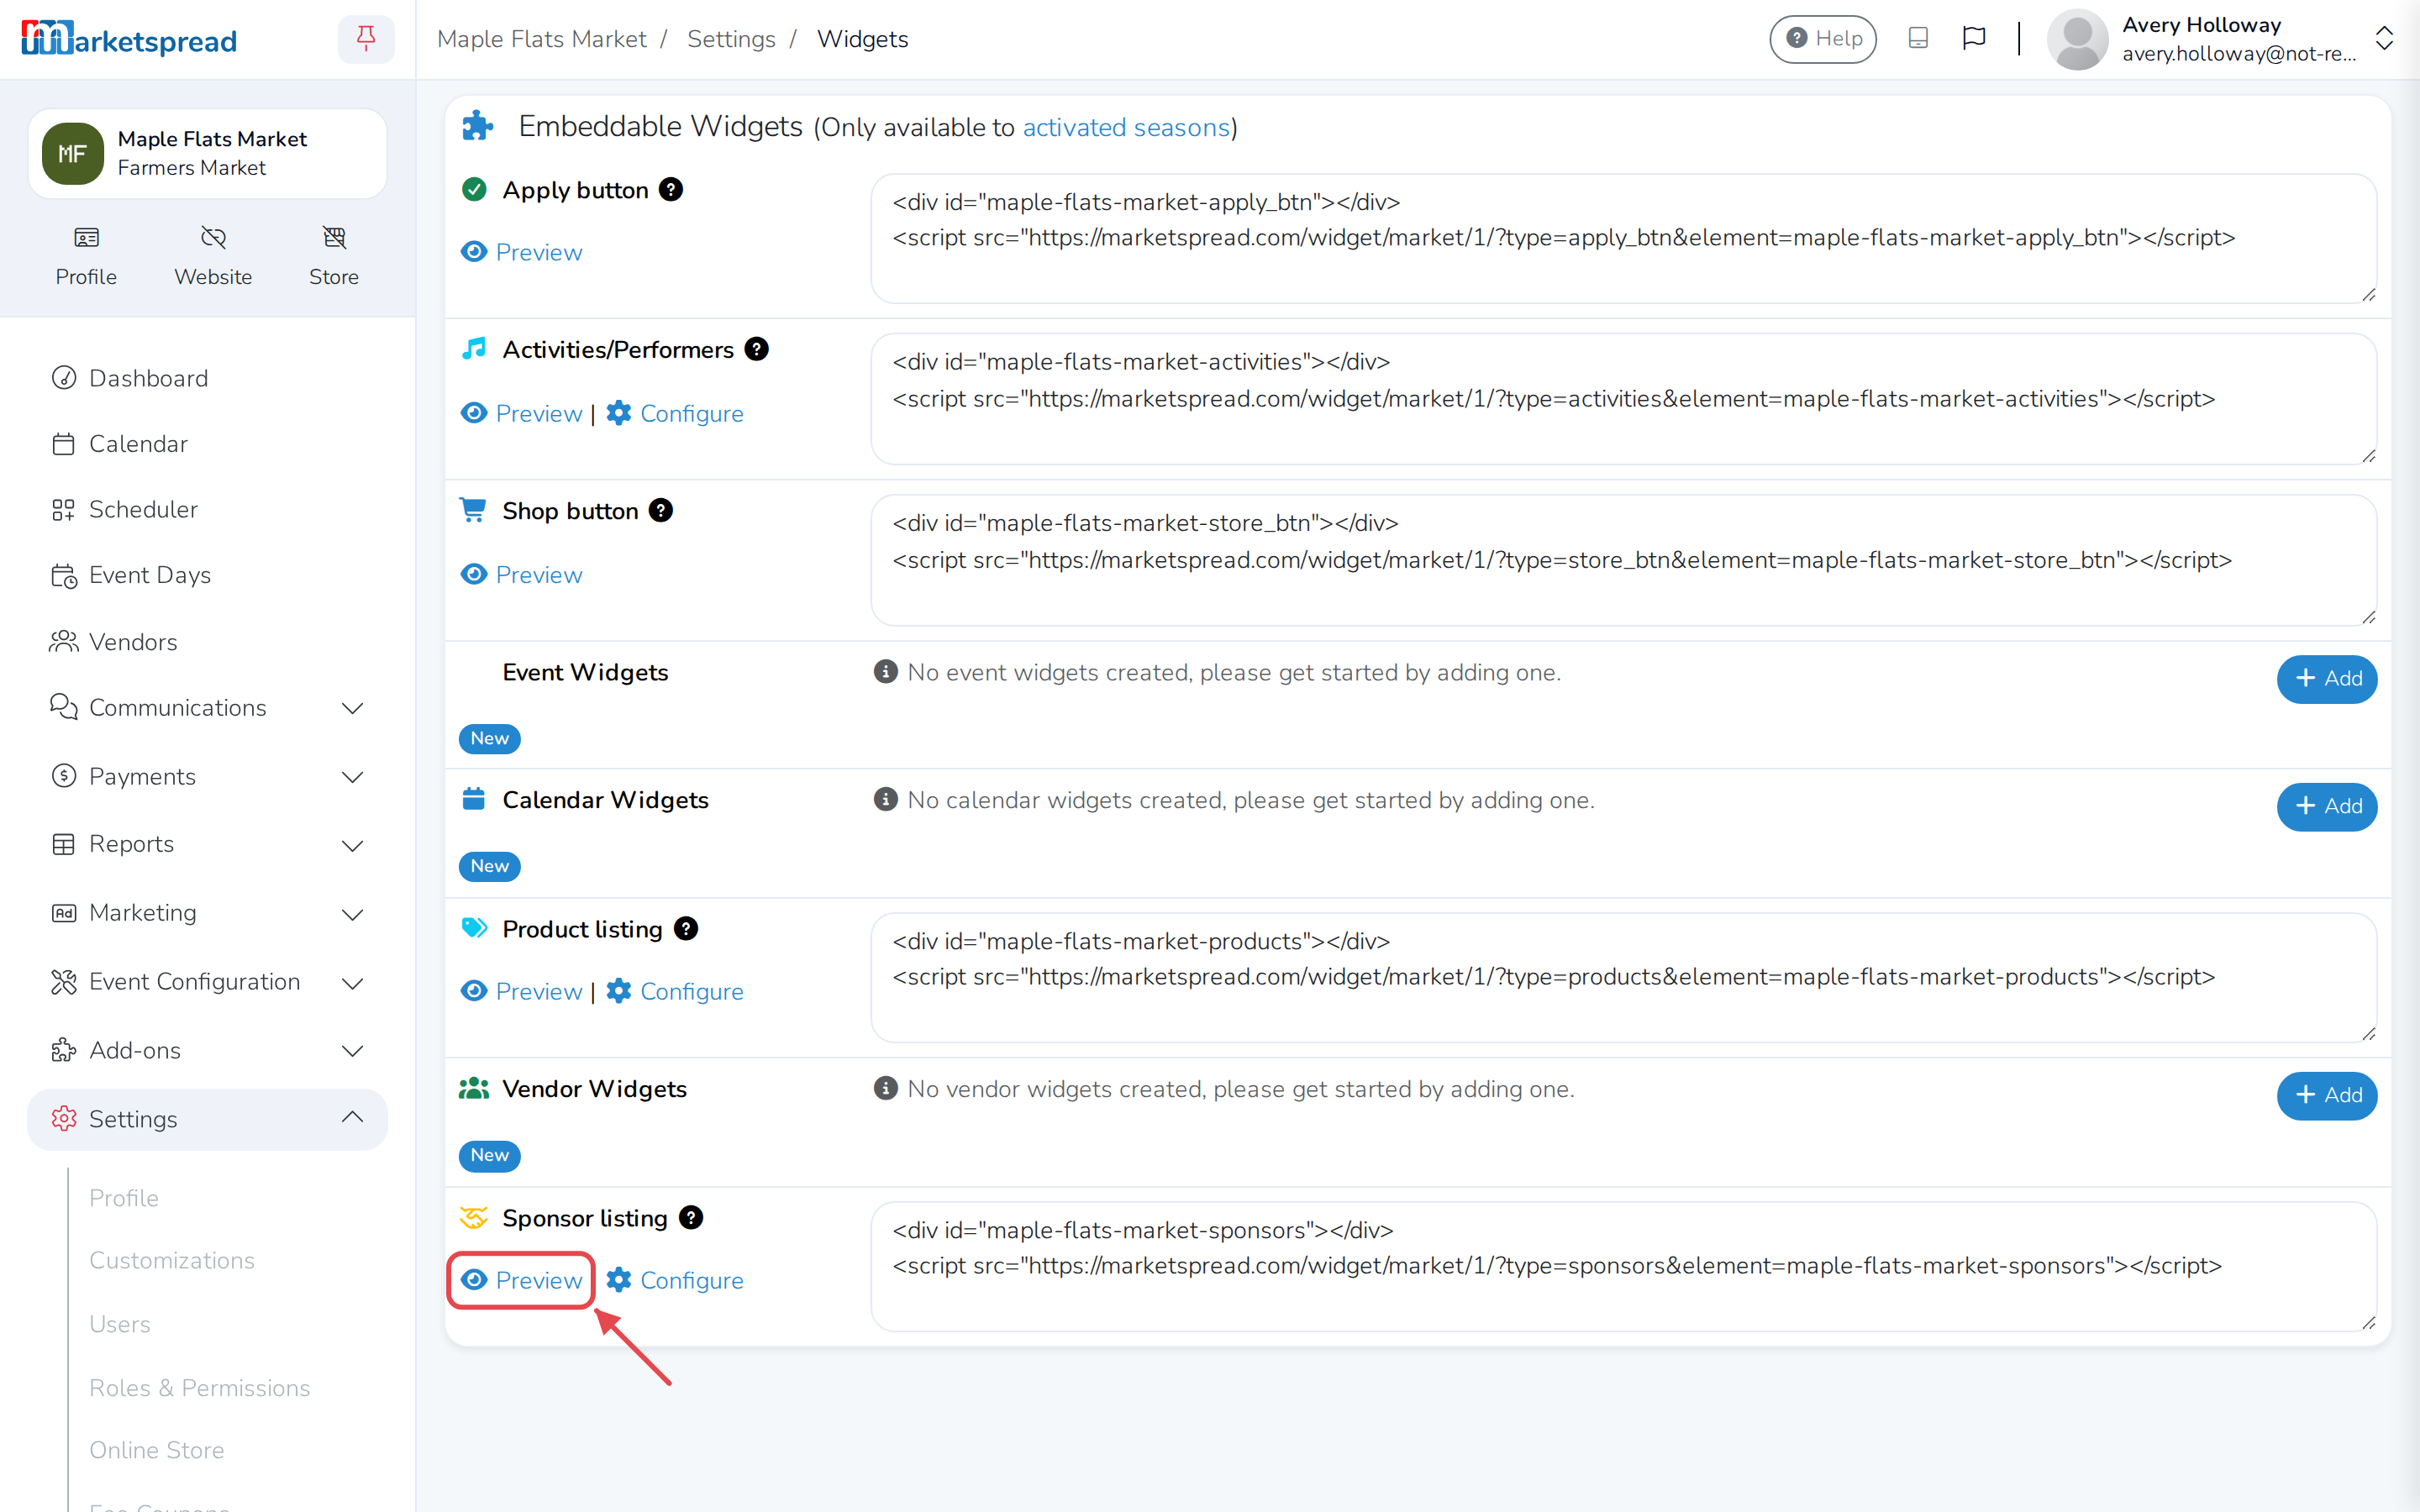
Click Preview next to Sponsor listing.
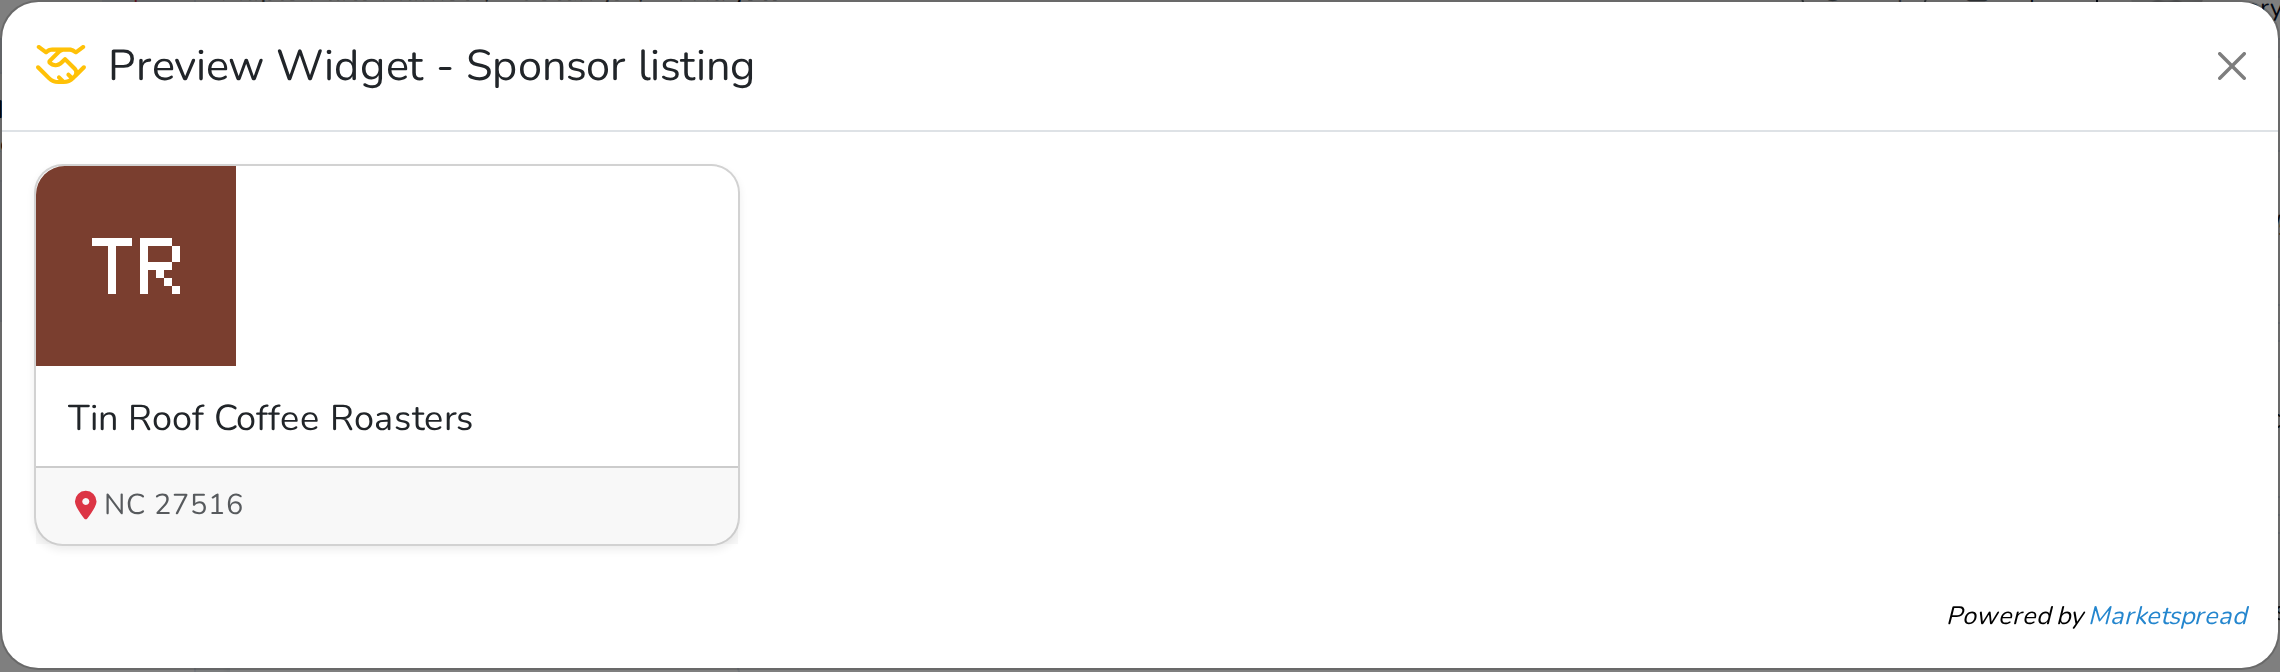
A preview is a representative example — it may not look exactly like it will
once it's on your website. Until a sponsor has been accepted into one of
your activated events, it shows "Currently no accepted sponsors." See
Review a new vendor application
for how to accept a vendor into an event.
Choose what the listing shows
-
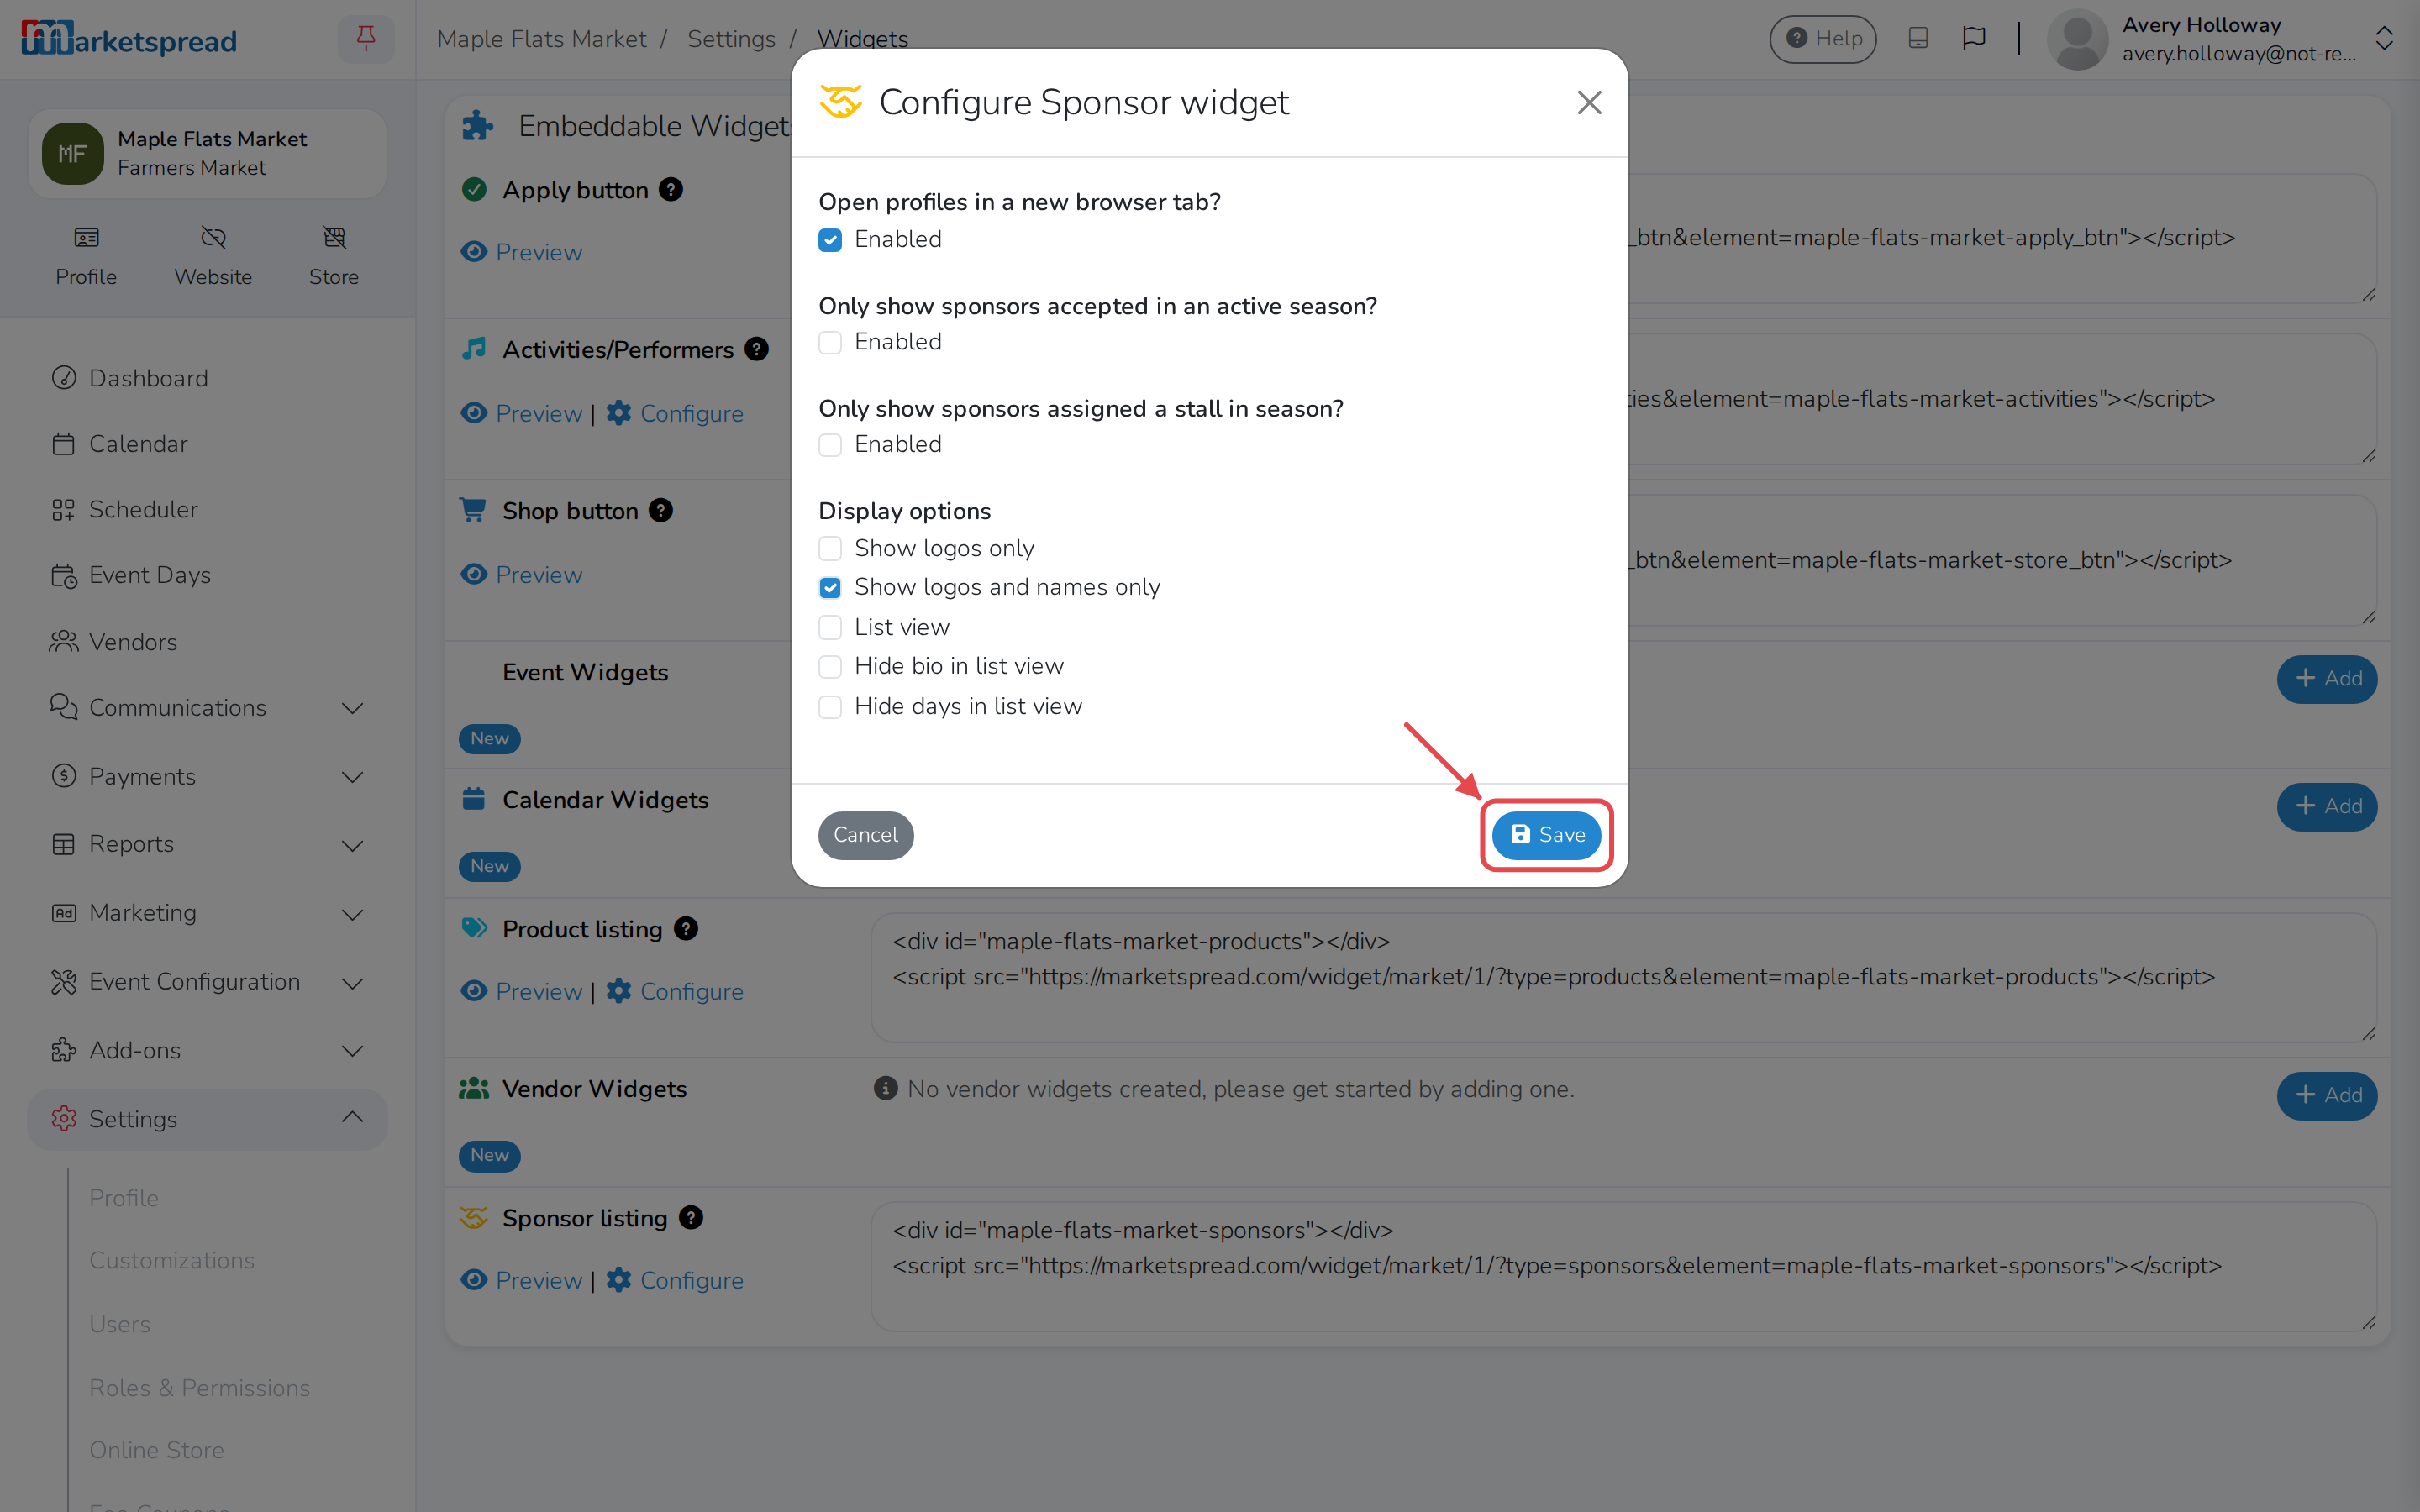
On the Widgets page, click Configure next to Sponsor listing.
-
Turn on any of these:
- Open profiles in a new browser tab
- Only show sponsors accepted in an active season
- Only show sponsors assigned a stall in season
- Show logos only, Show logos and names only, List view,
Hide bio in list view or Hide days in list view
-
Click Save.
Add the sponsor listing to your website
-
On the Widgets page, find Sponsor listing.
-
Copy the code shown.

-
Paste it into your website, wherever you want the listing to appear.