


An event is a market day, or a run of them — an event series — that vendors apply and book into. Open Event Configuration → Events in your market dashboard to build one and turn it on.
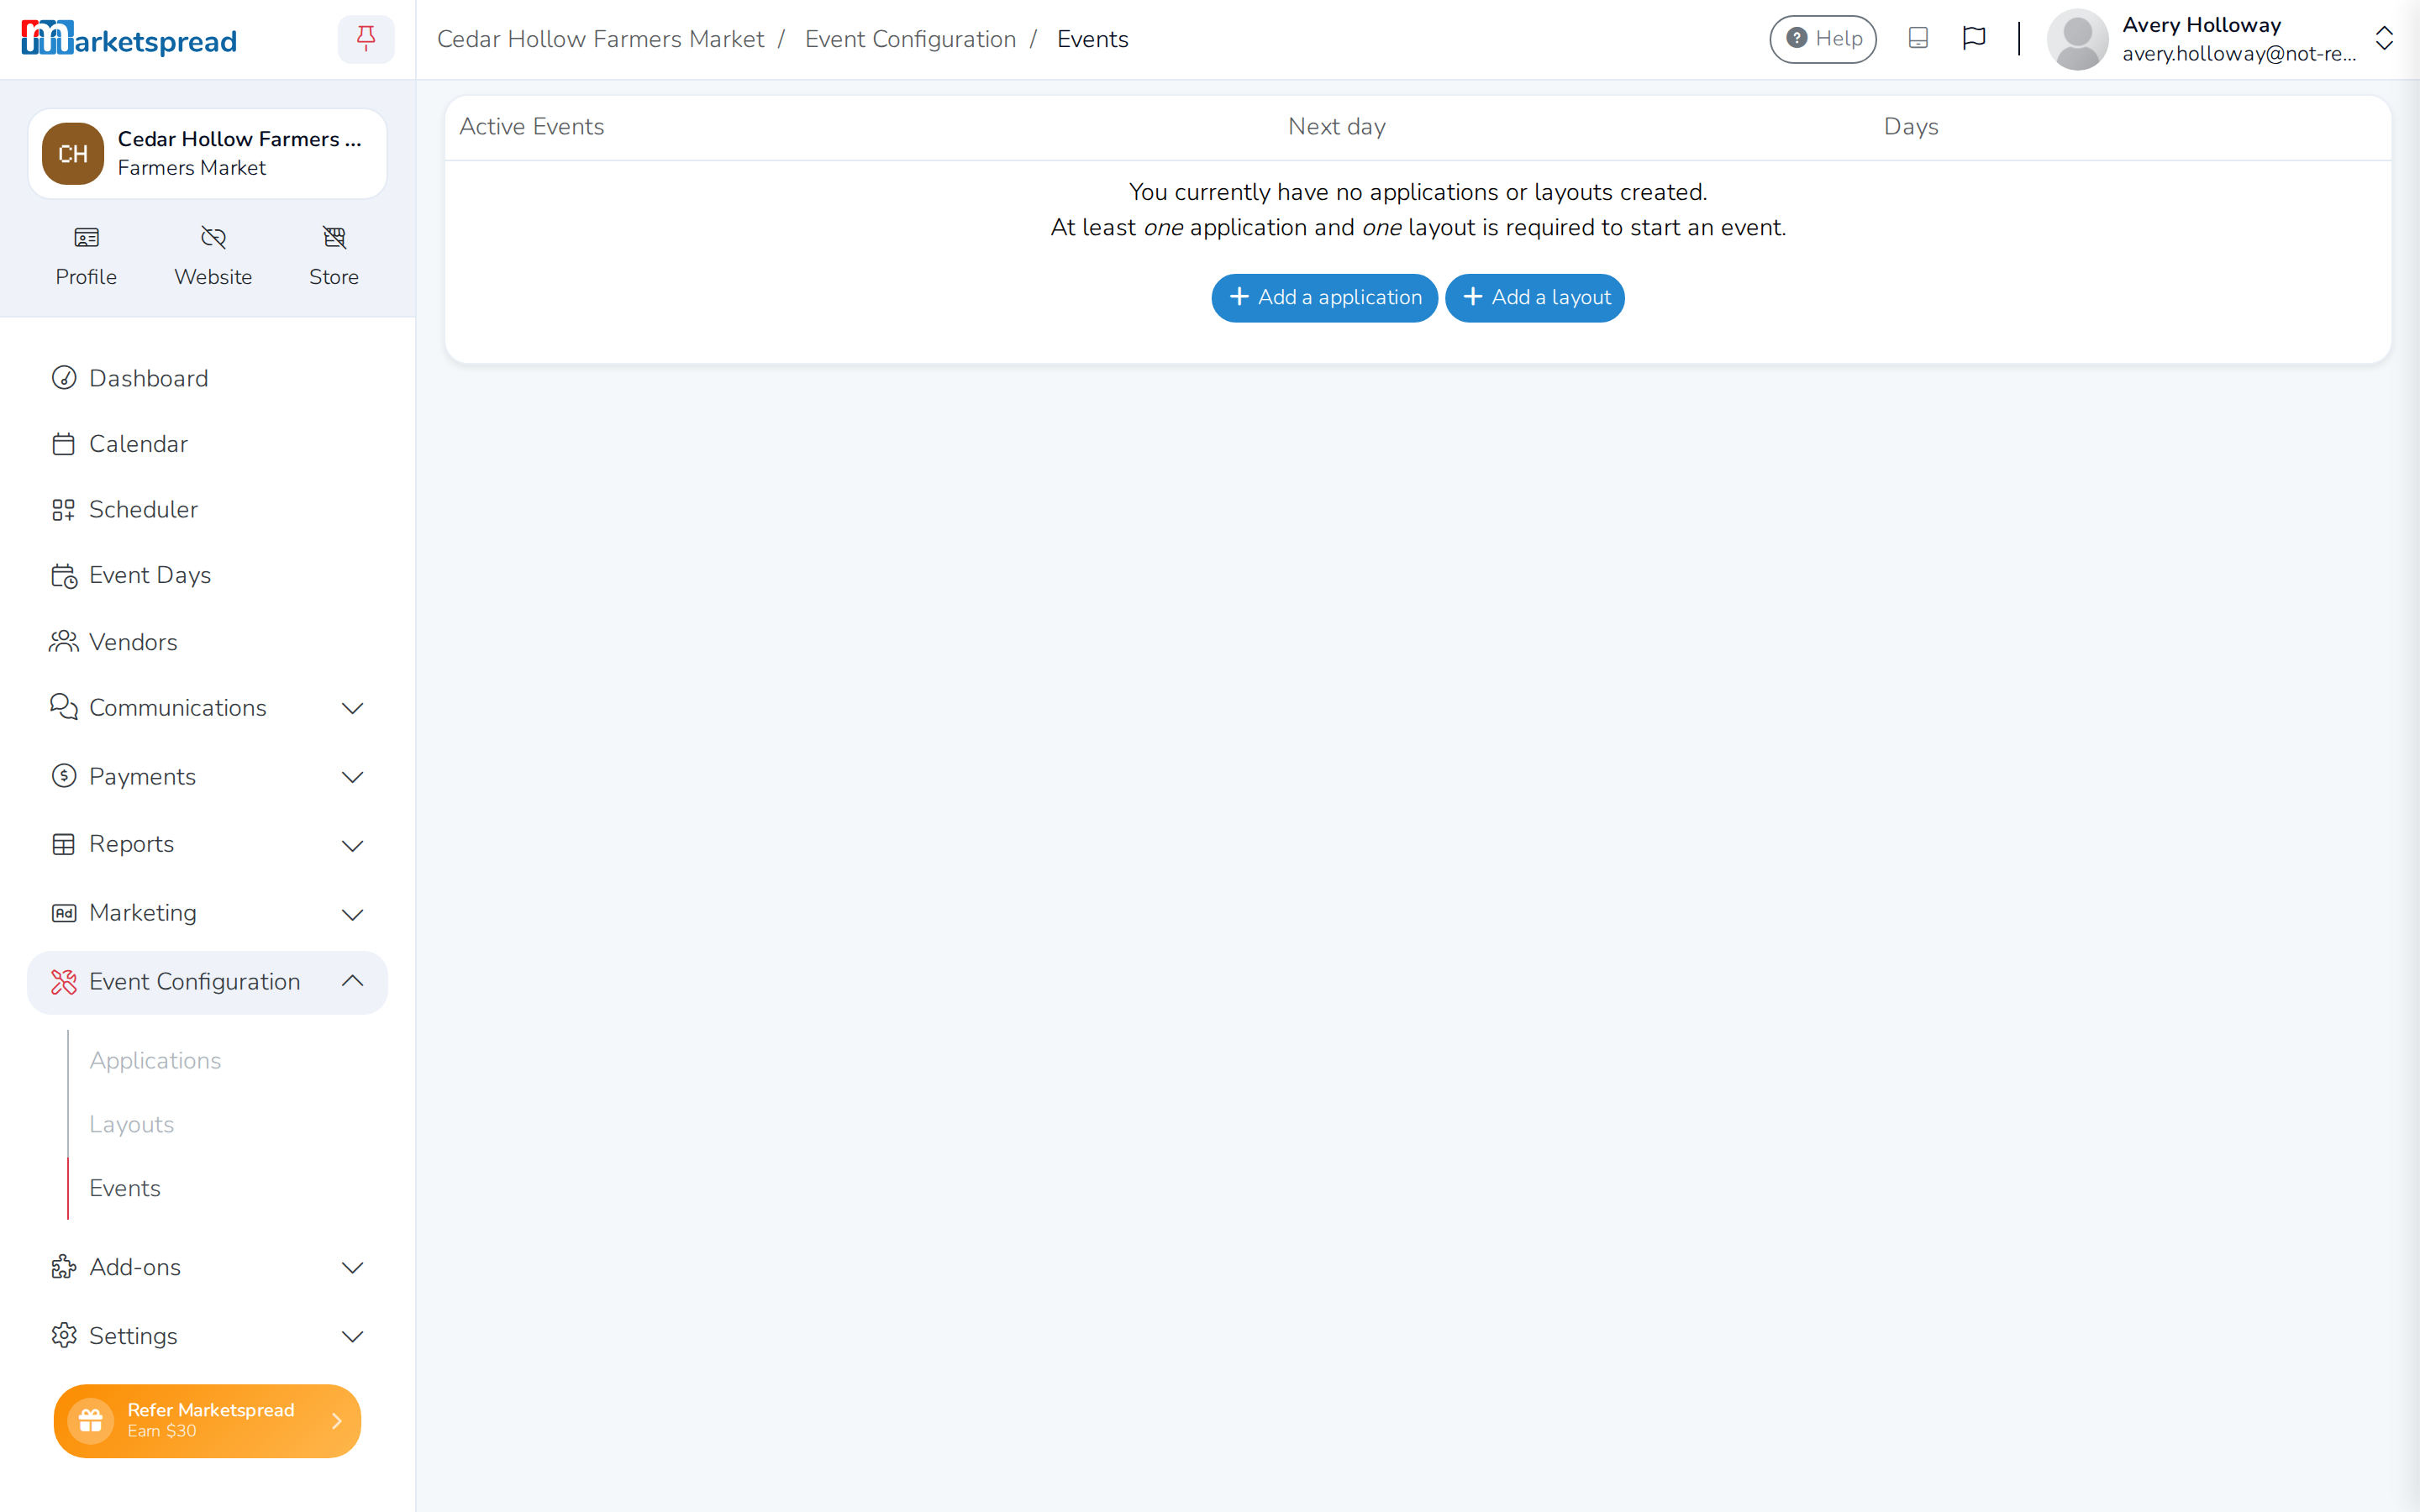
If the market doesn't have an application or a layout yet, the Events page says so instead of letting you add one, with Add a application and Add a layout buttons right there.
From this page you can:
- create an event and choose how vendors are approved and booked
- add the days it runs
- charge extra fees and offer rentals
- turn on vendor sales reporting
- activate it so vendors can find and apply to it
- manage it once it's running
Once you open an event, it has its own tabs: Basic for its core setup, Days for its dates, Other Fees and Rentals for extra charges, Sales Reporting for vendor sales, Activate to turn it on, Vendors for who's on it once it's active, and Actions for tools like cloning it.
Create an event
Note
You need at least one application and one layout before you can add an event. See Creating applications and Use the Layout Designer.
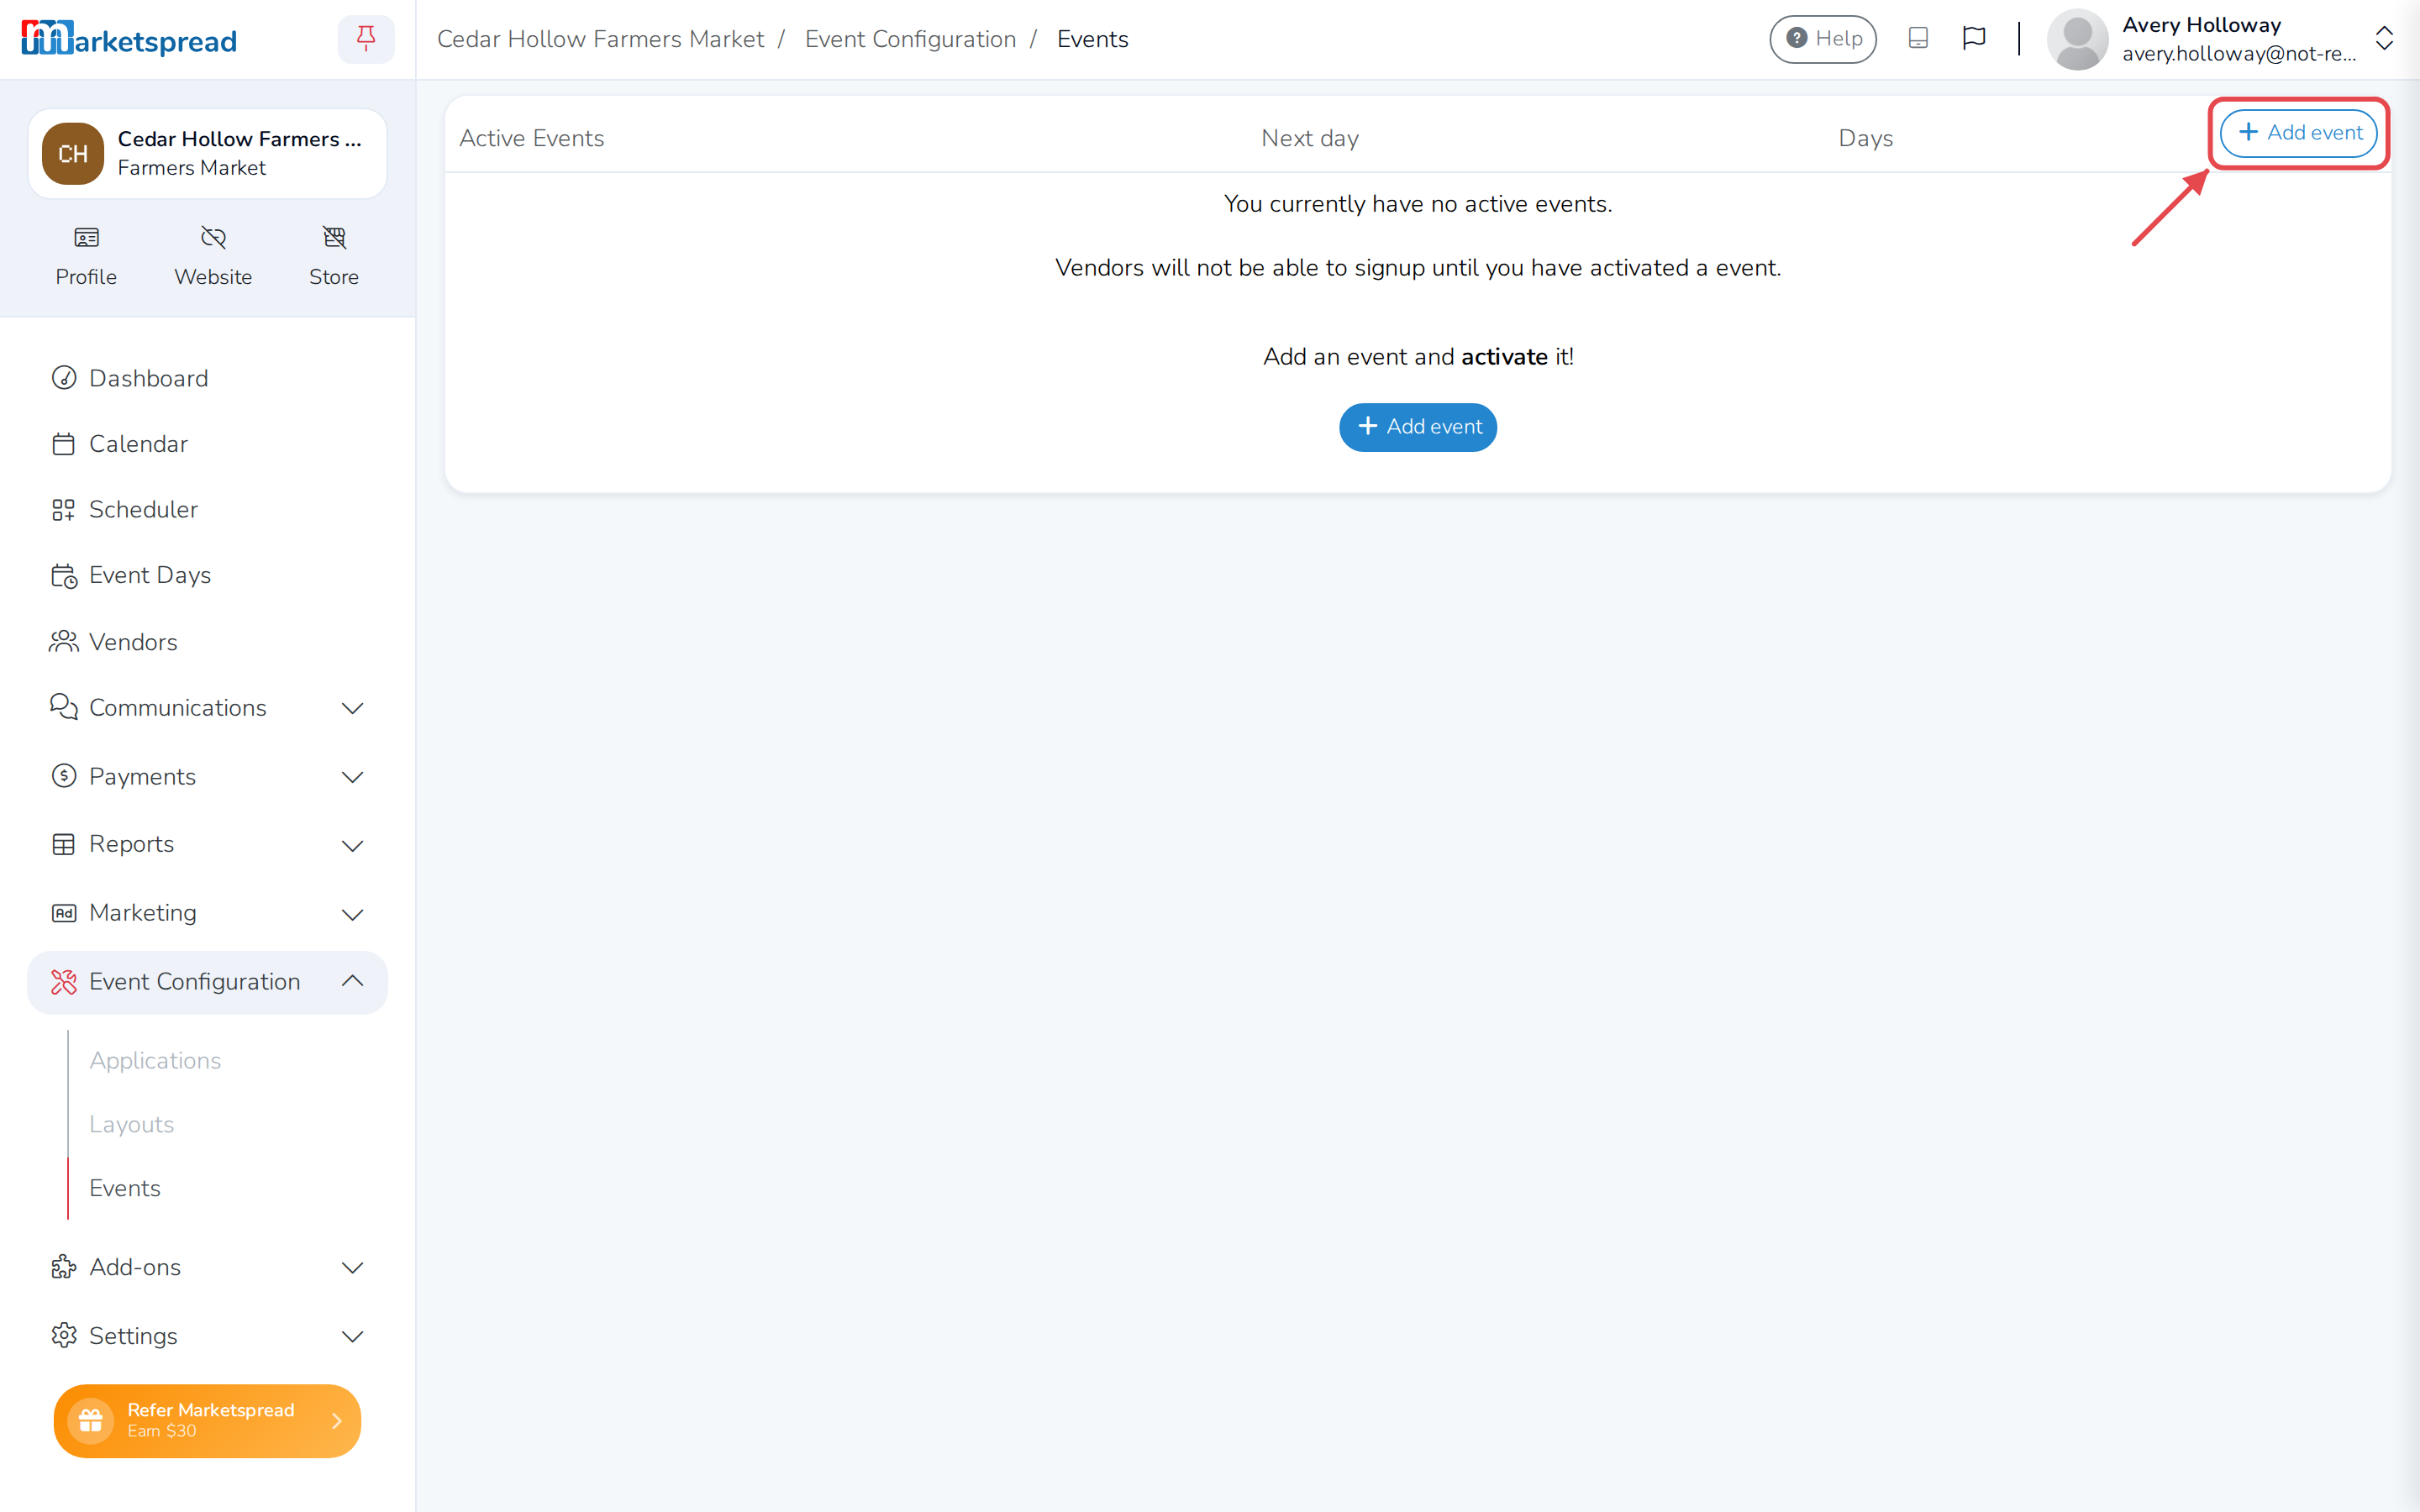
Once both exist, the Events page is ready for you to add one.
-
Click Add event.
-
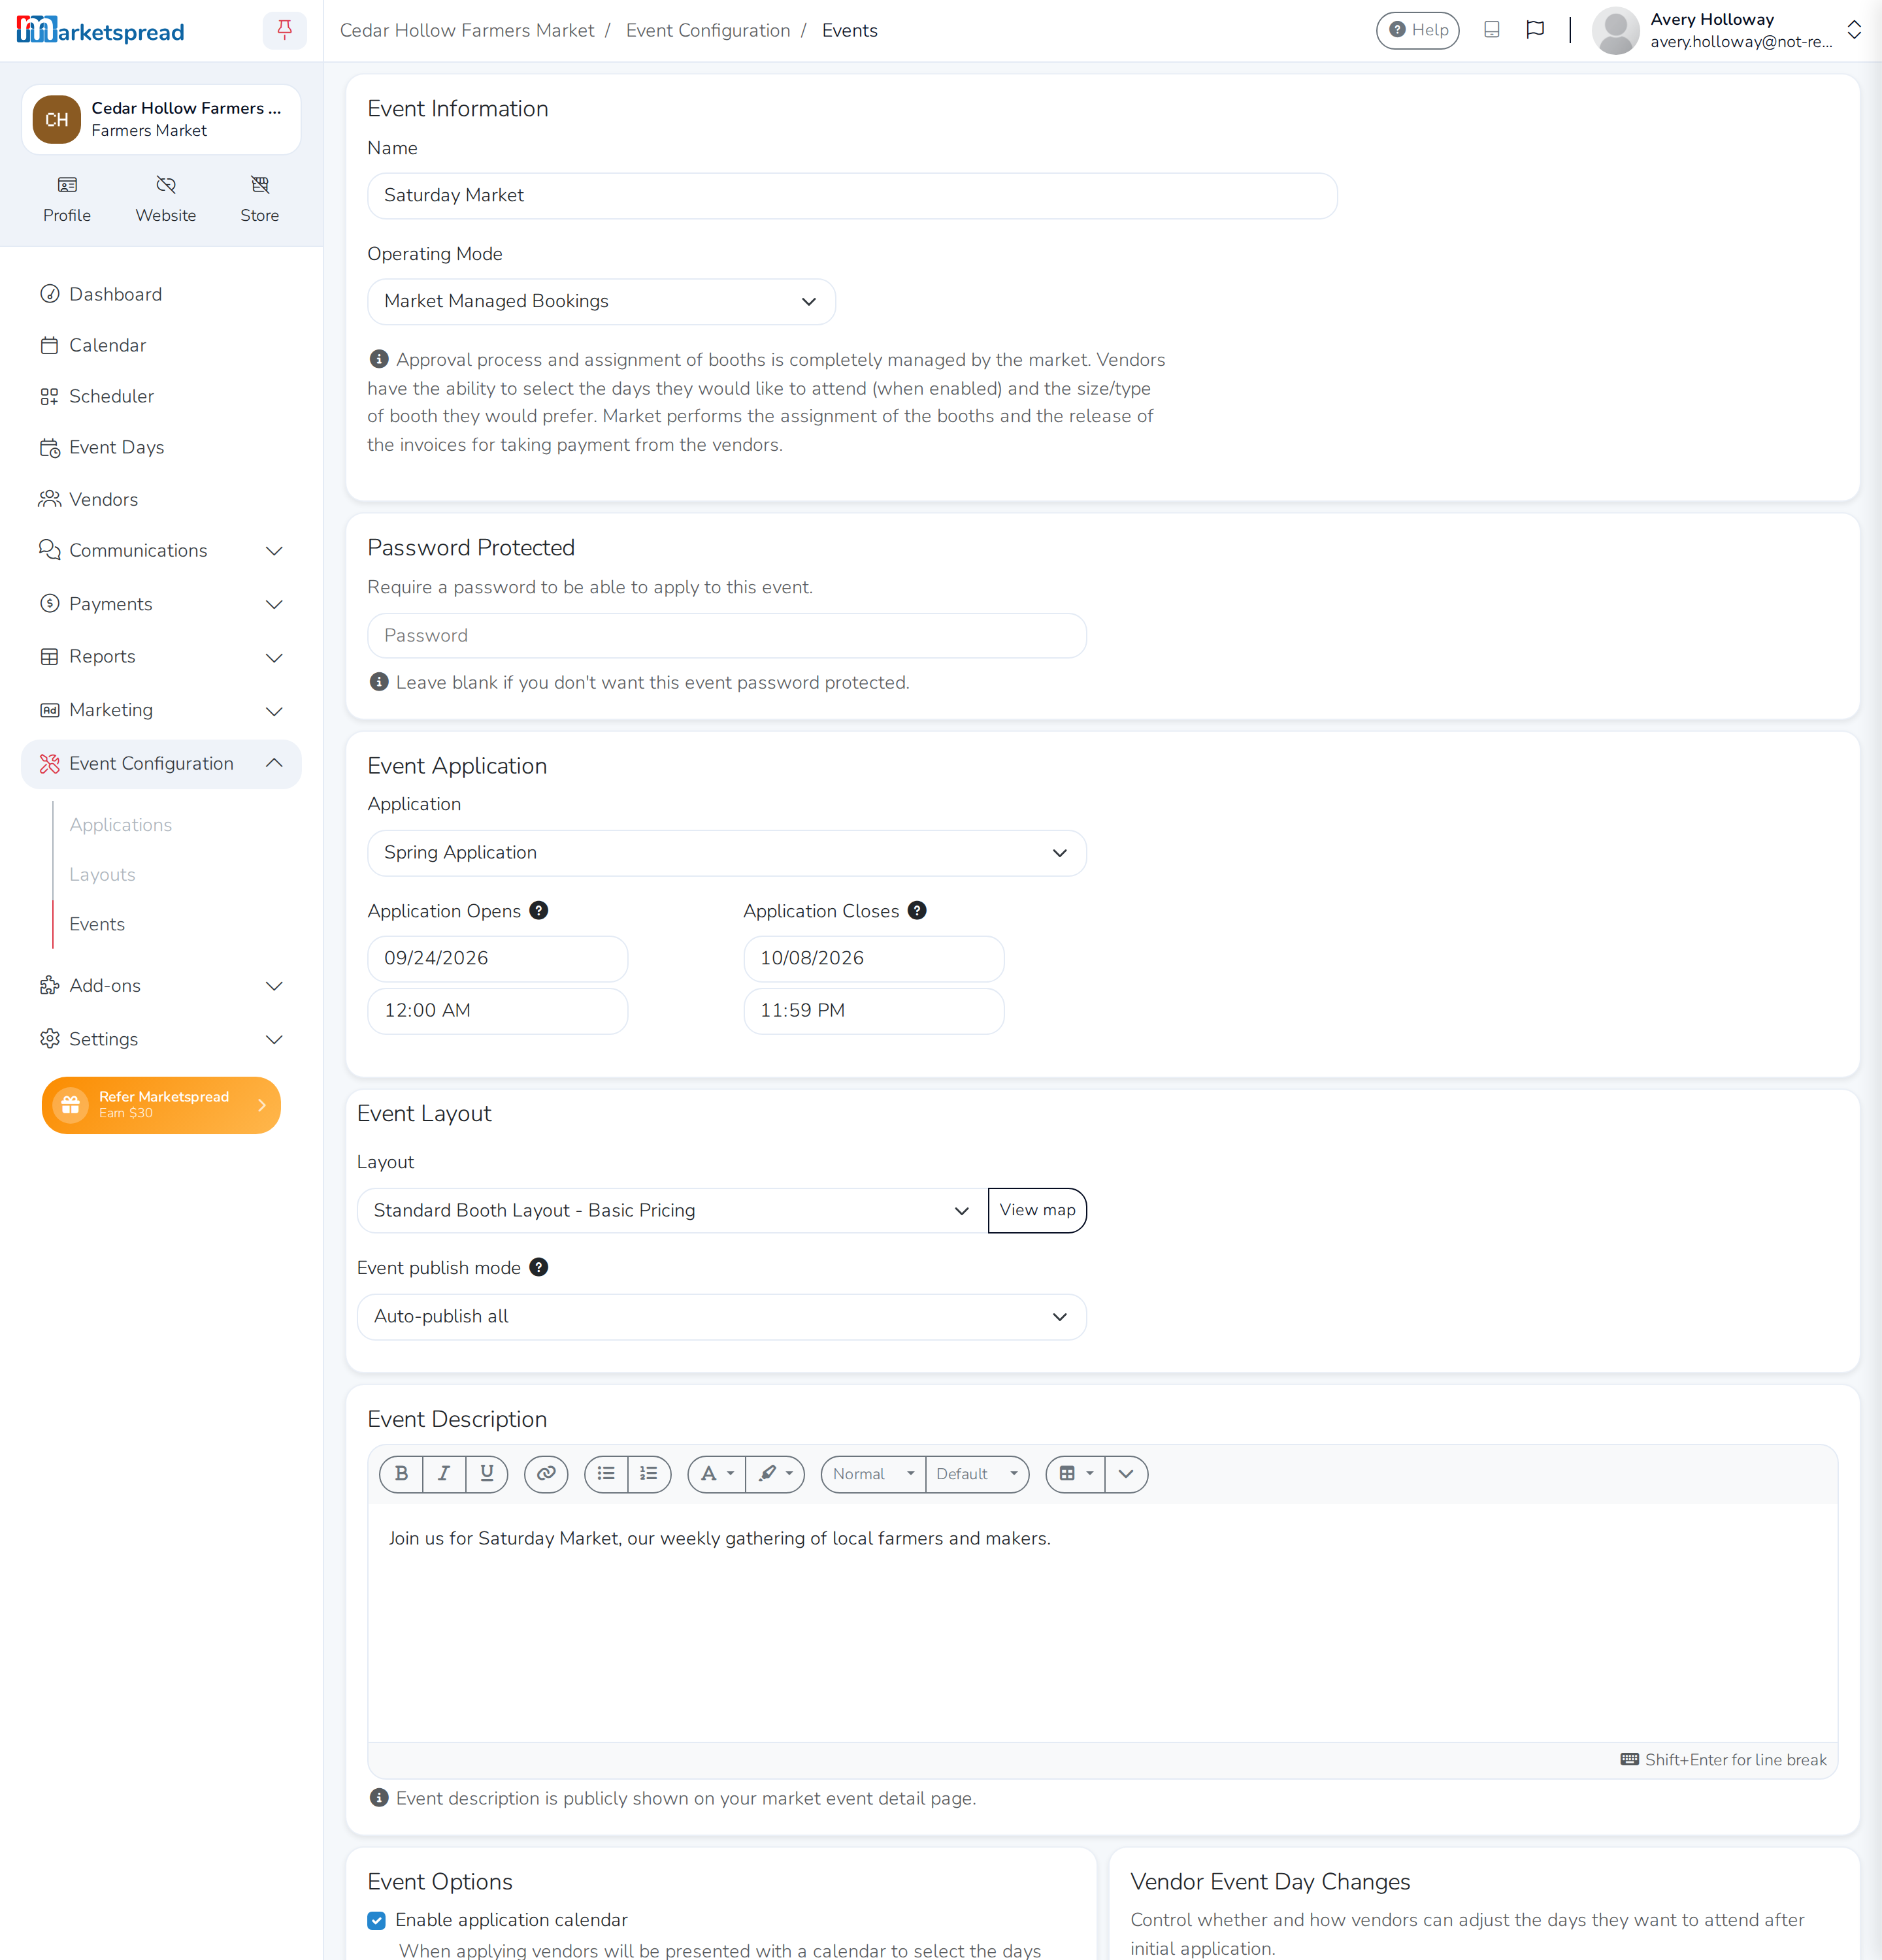
Under Name, type a name for the event.
-
Under Operating Mode, choose how vendors get in:
- Market Managed Bookings — you assign booths and release invoices. Vendors can pick which days they want, if you've turned on the calendar, and say which booth size or type they'd prefer.
- Managed Vendor Bookings — once you approve a vendor, they pick their own days and booths and check out themselves. You can still move vendors and change booth assignments.
- Open Vendor Bookings — vendors are approved and pick their days and booths at the same time, during checkout. You can still move vendors and change booth assignments.
-
Under Password, enter one if vendors should need it to apply. Leave it blank for none.

-
Under Event Application, choose the Application vendors will fill out, and set when it opens and closes under Application Opens and Application Closes.
-
Under Event Layout, choose a Layout, and an Event publish mode for the map — Auto-publish all, Auto-publish next, or Manual. Published maps are visible to vendors and customers.
-
Under Event Description, add a description — it's shown on your public market page.
-
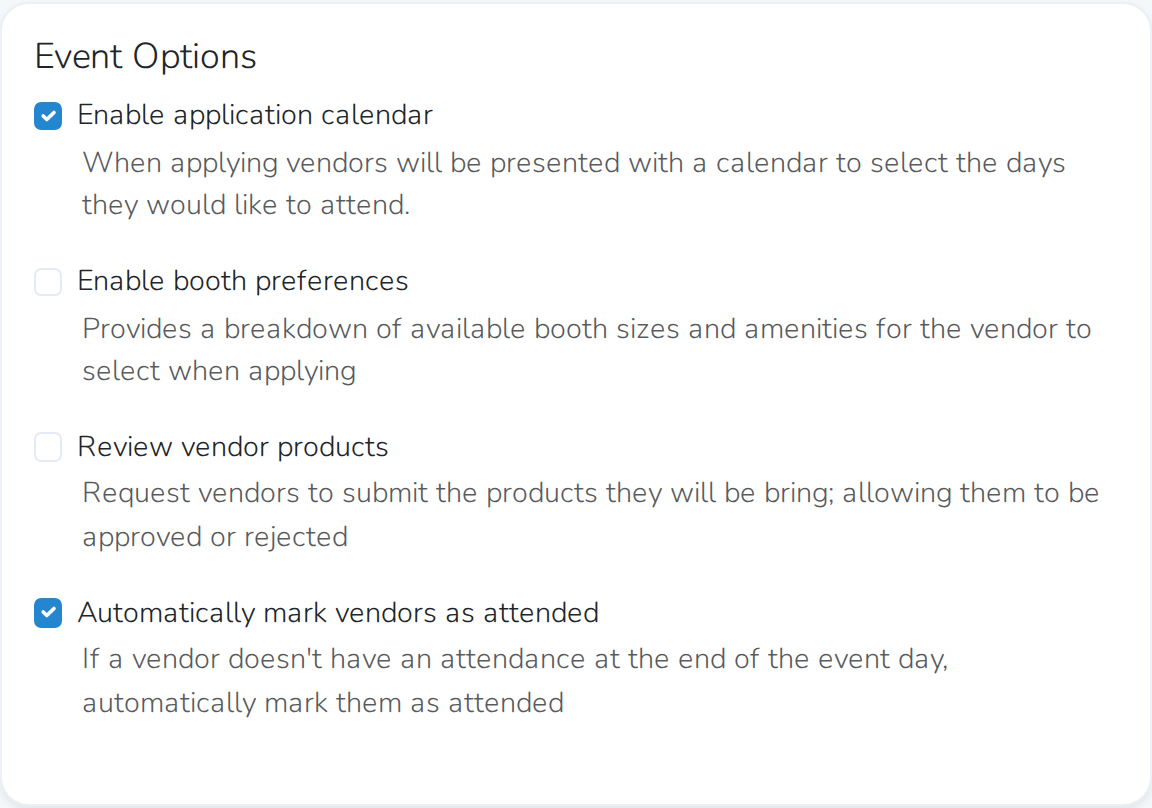
Under Event Options, turn on any of:
- Enable application calendar — vendors pick the days they want when they apply.
- Enable booth preferences — vendors choose a booth size and amenities when they apply.
- Review vendor products — vendors submit the products they'll bring, for you to approve or reject.
- Automatically mark vendors as attended — turns on for a vendor if nobody sets their attendance by the end of the event day.
-
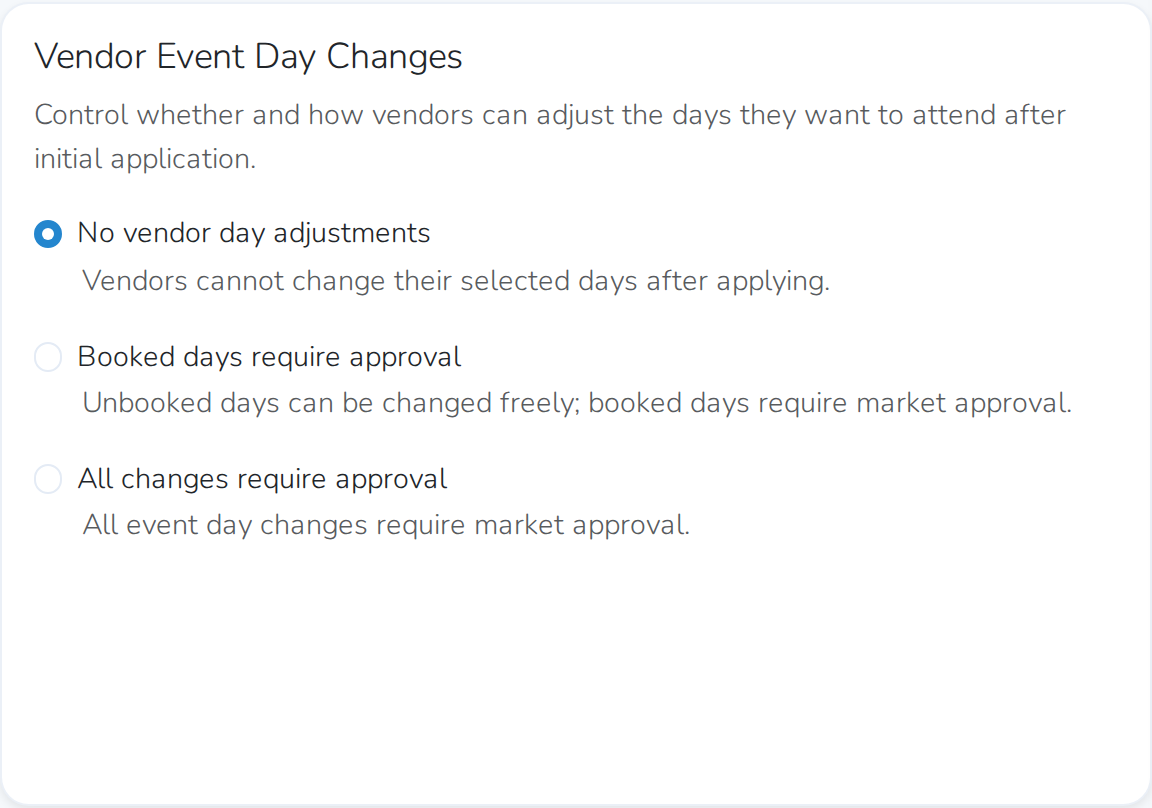
Under Vendor Event Day Changes, choose how vendors can change the days they're coming after they've applied: No vendor day adjustments, Booked days require approval (unbooked days can still change freely), or All changes require approval.
-
Turn on Event Check-in if you want every accepted vendor emailed a check-in button before the event, then set Days before to how many days ahead of the event they get it.


-
Under Invoicing Options, set:
- Due date rules — days before the term starts that the invoice is due; a negative number lets it stay payable after the term starts.
- Auto-pay rules — days before the due date that a vendor with auto-pay on is charged.
- Draft auto-release window — turn on to pick how many days before the term a draft invoice is released automatically.
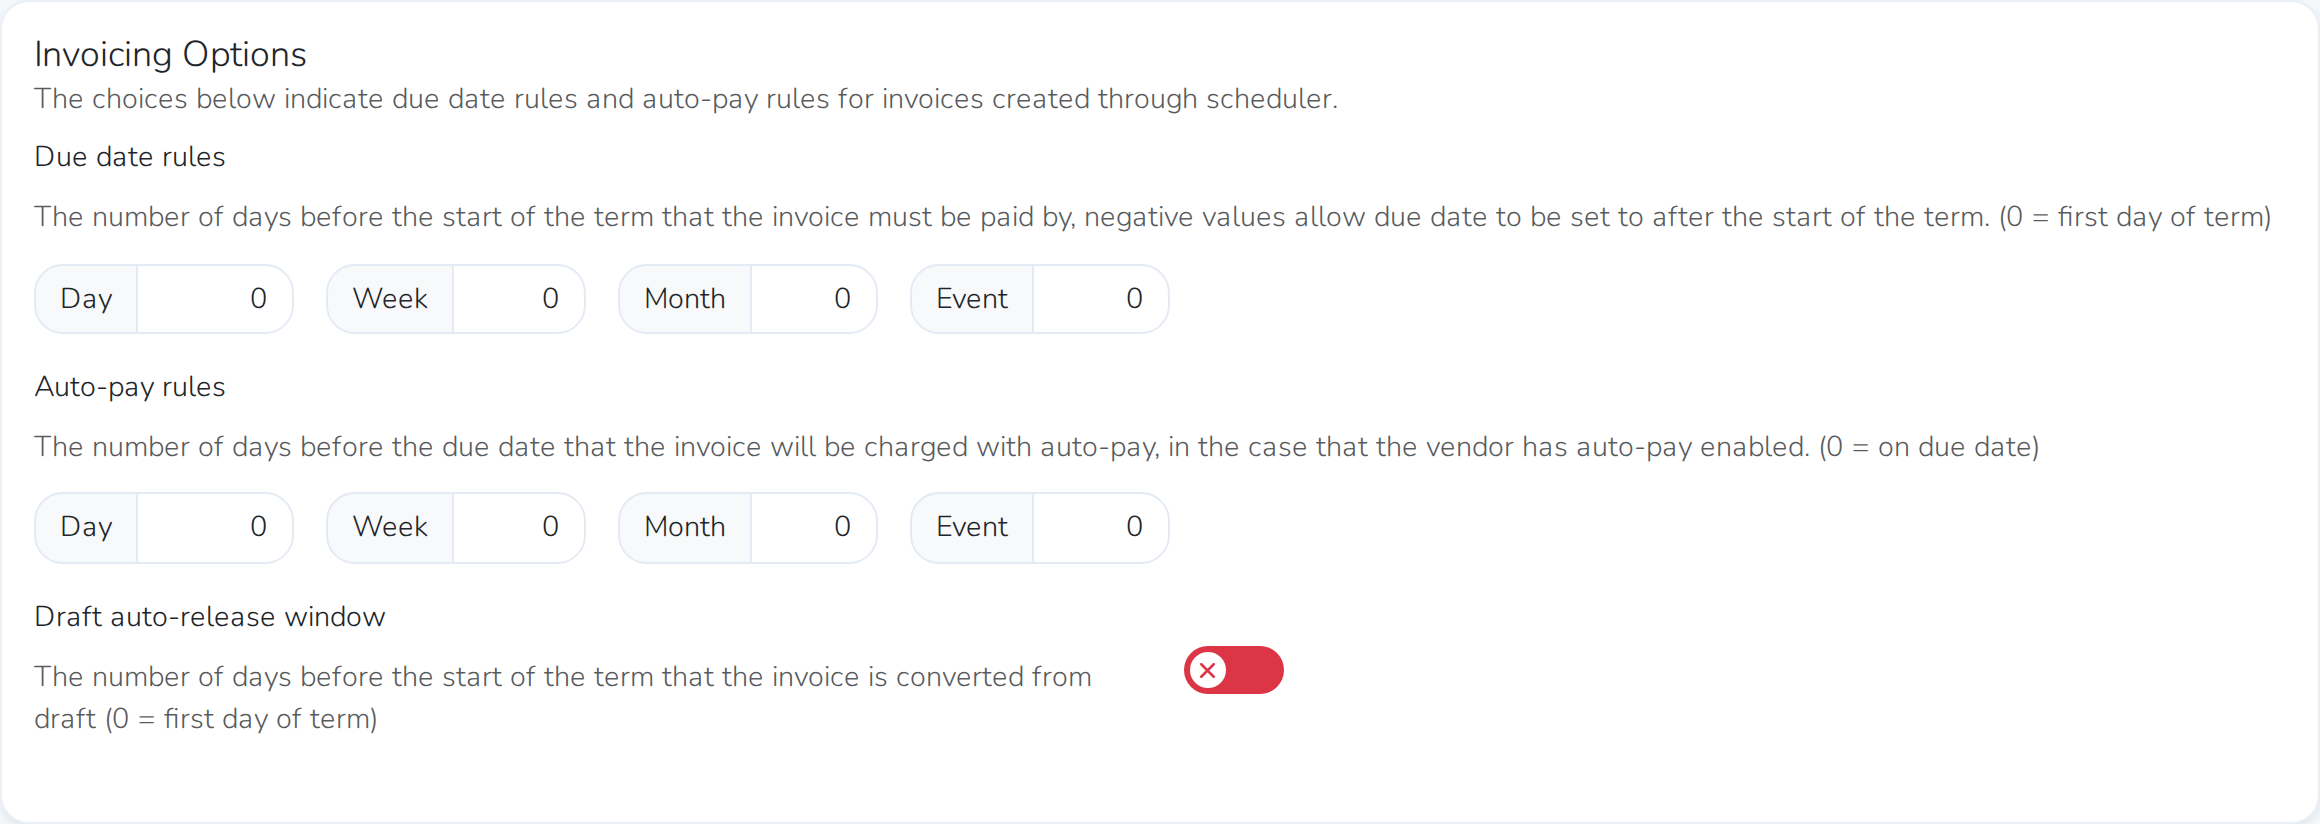
See Automatic Invoicing for more on how these schedules work.
-
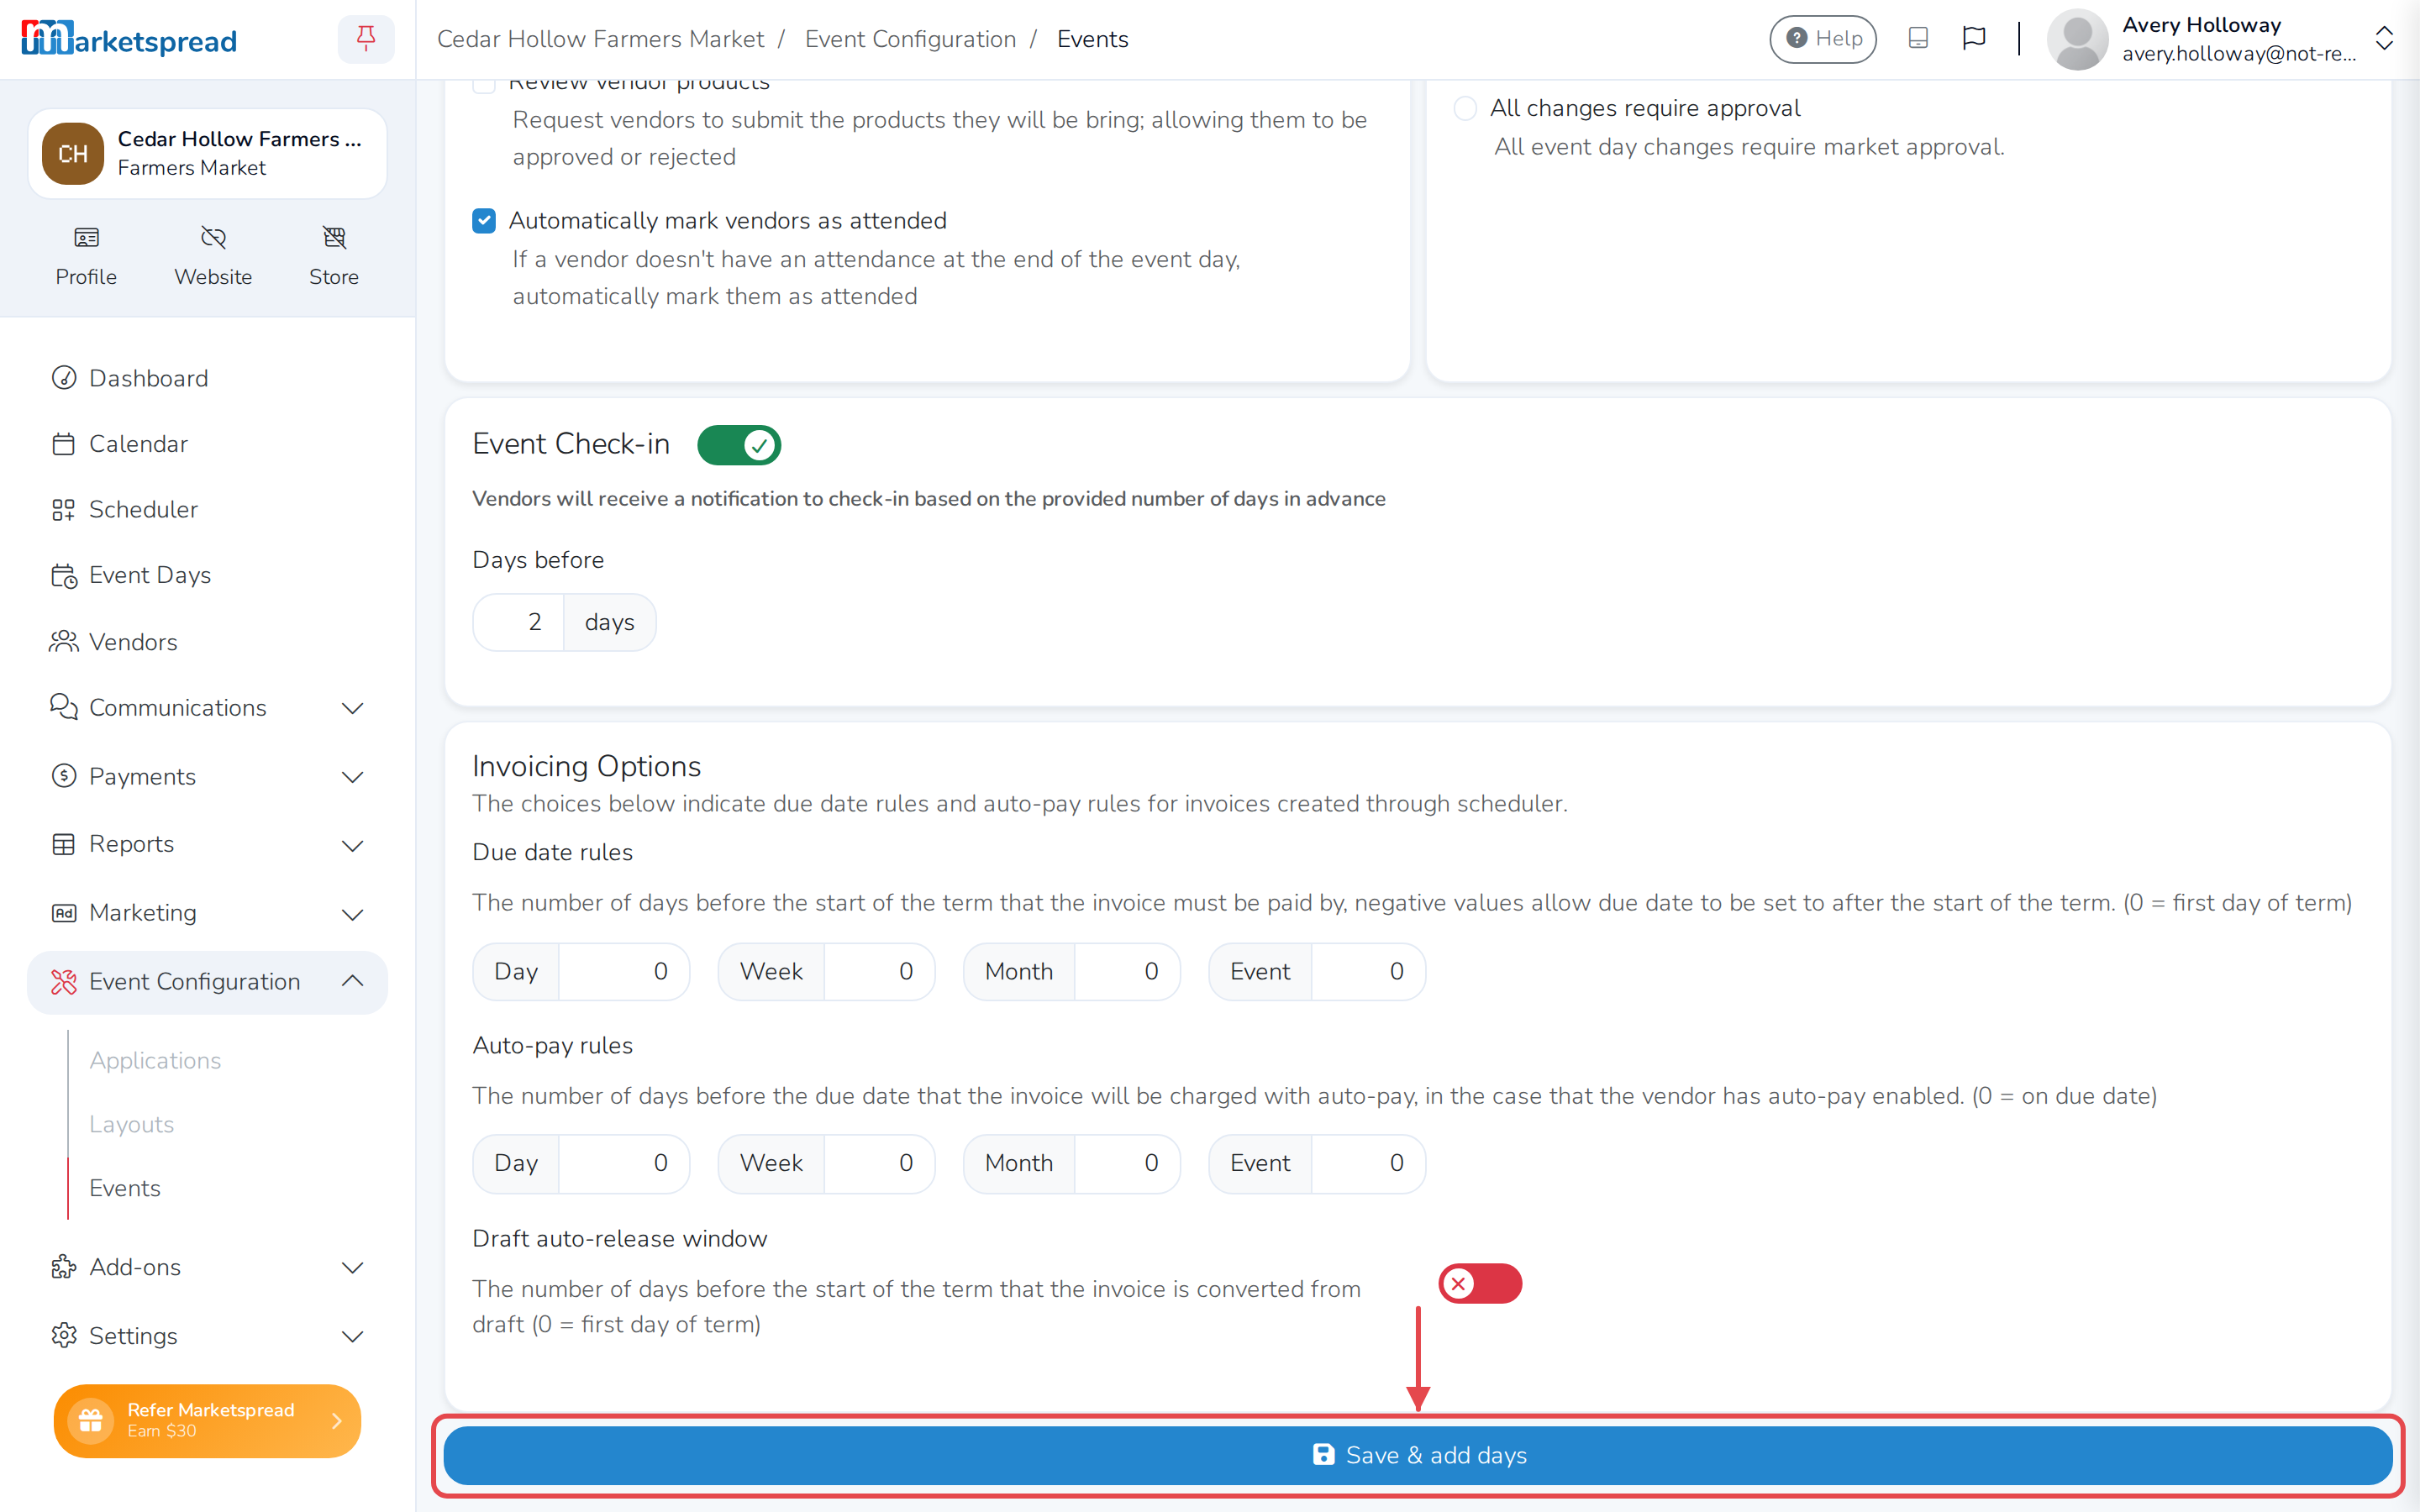
Click Save & add days.
Add your event's days
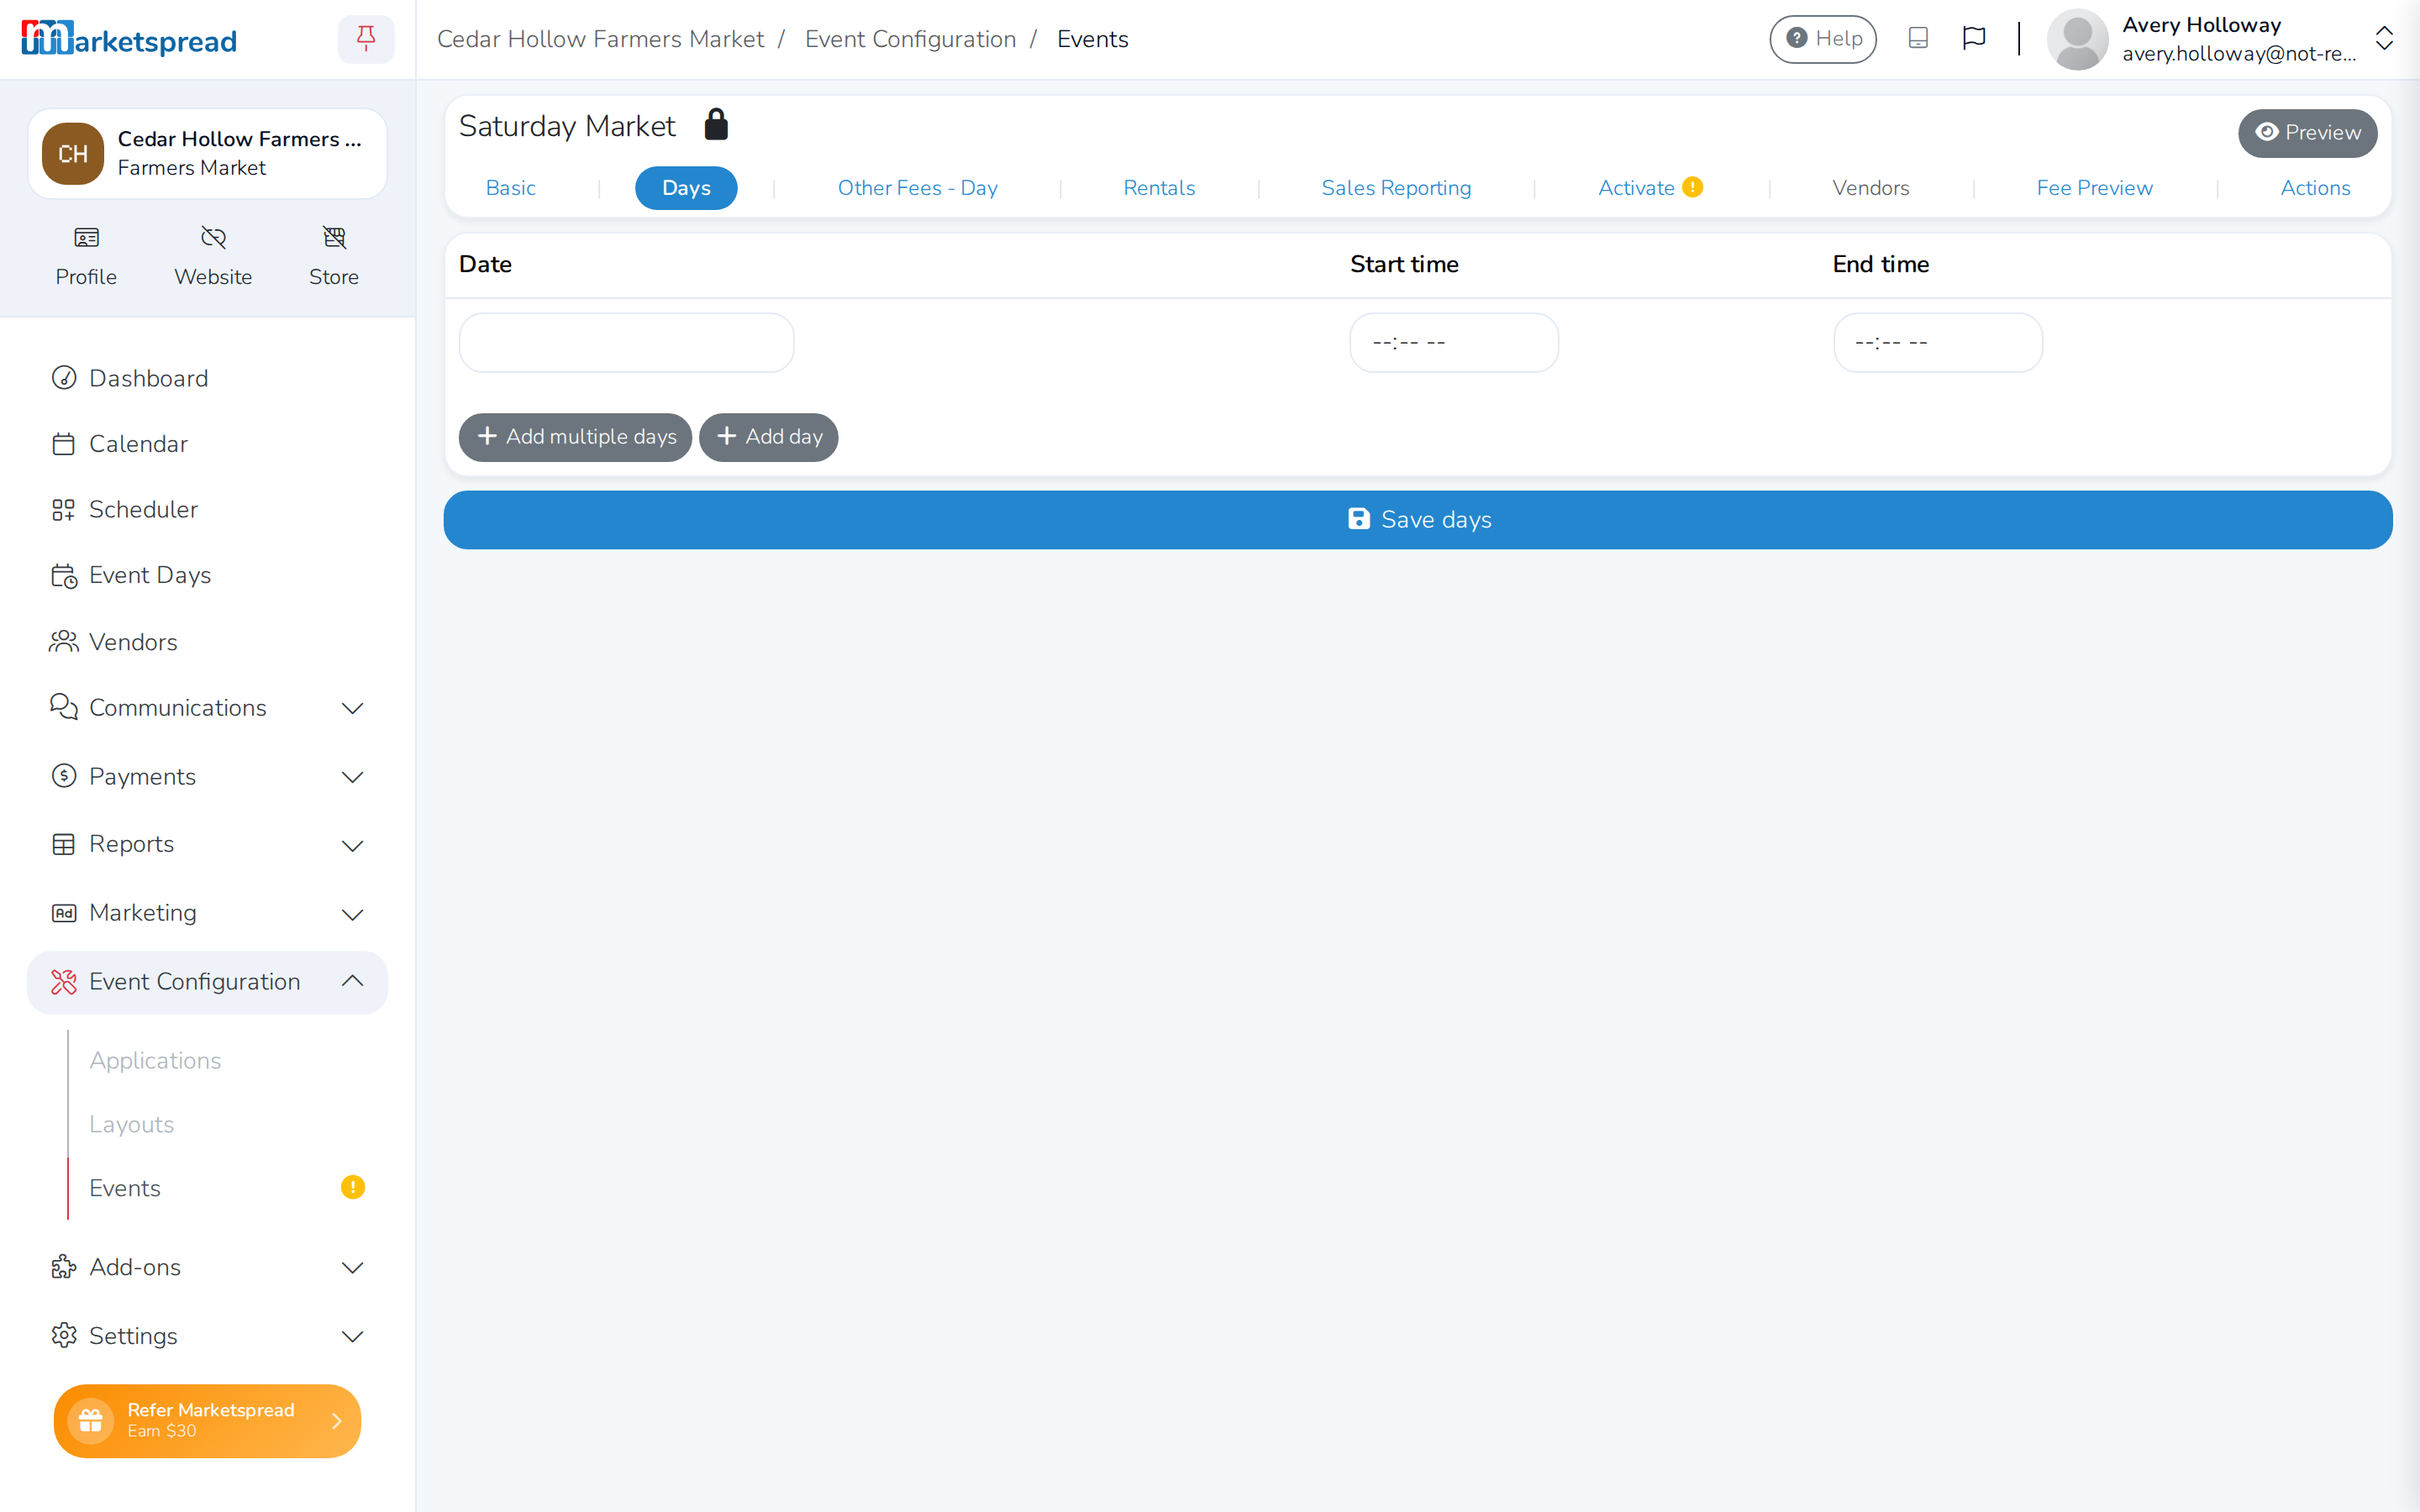
Saving the event lands you on its Days tab, with one empty day row already waiting.
-
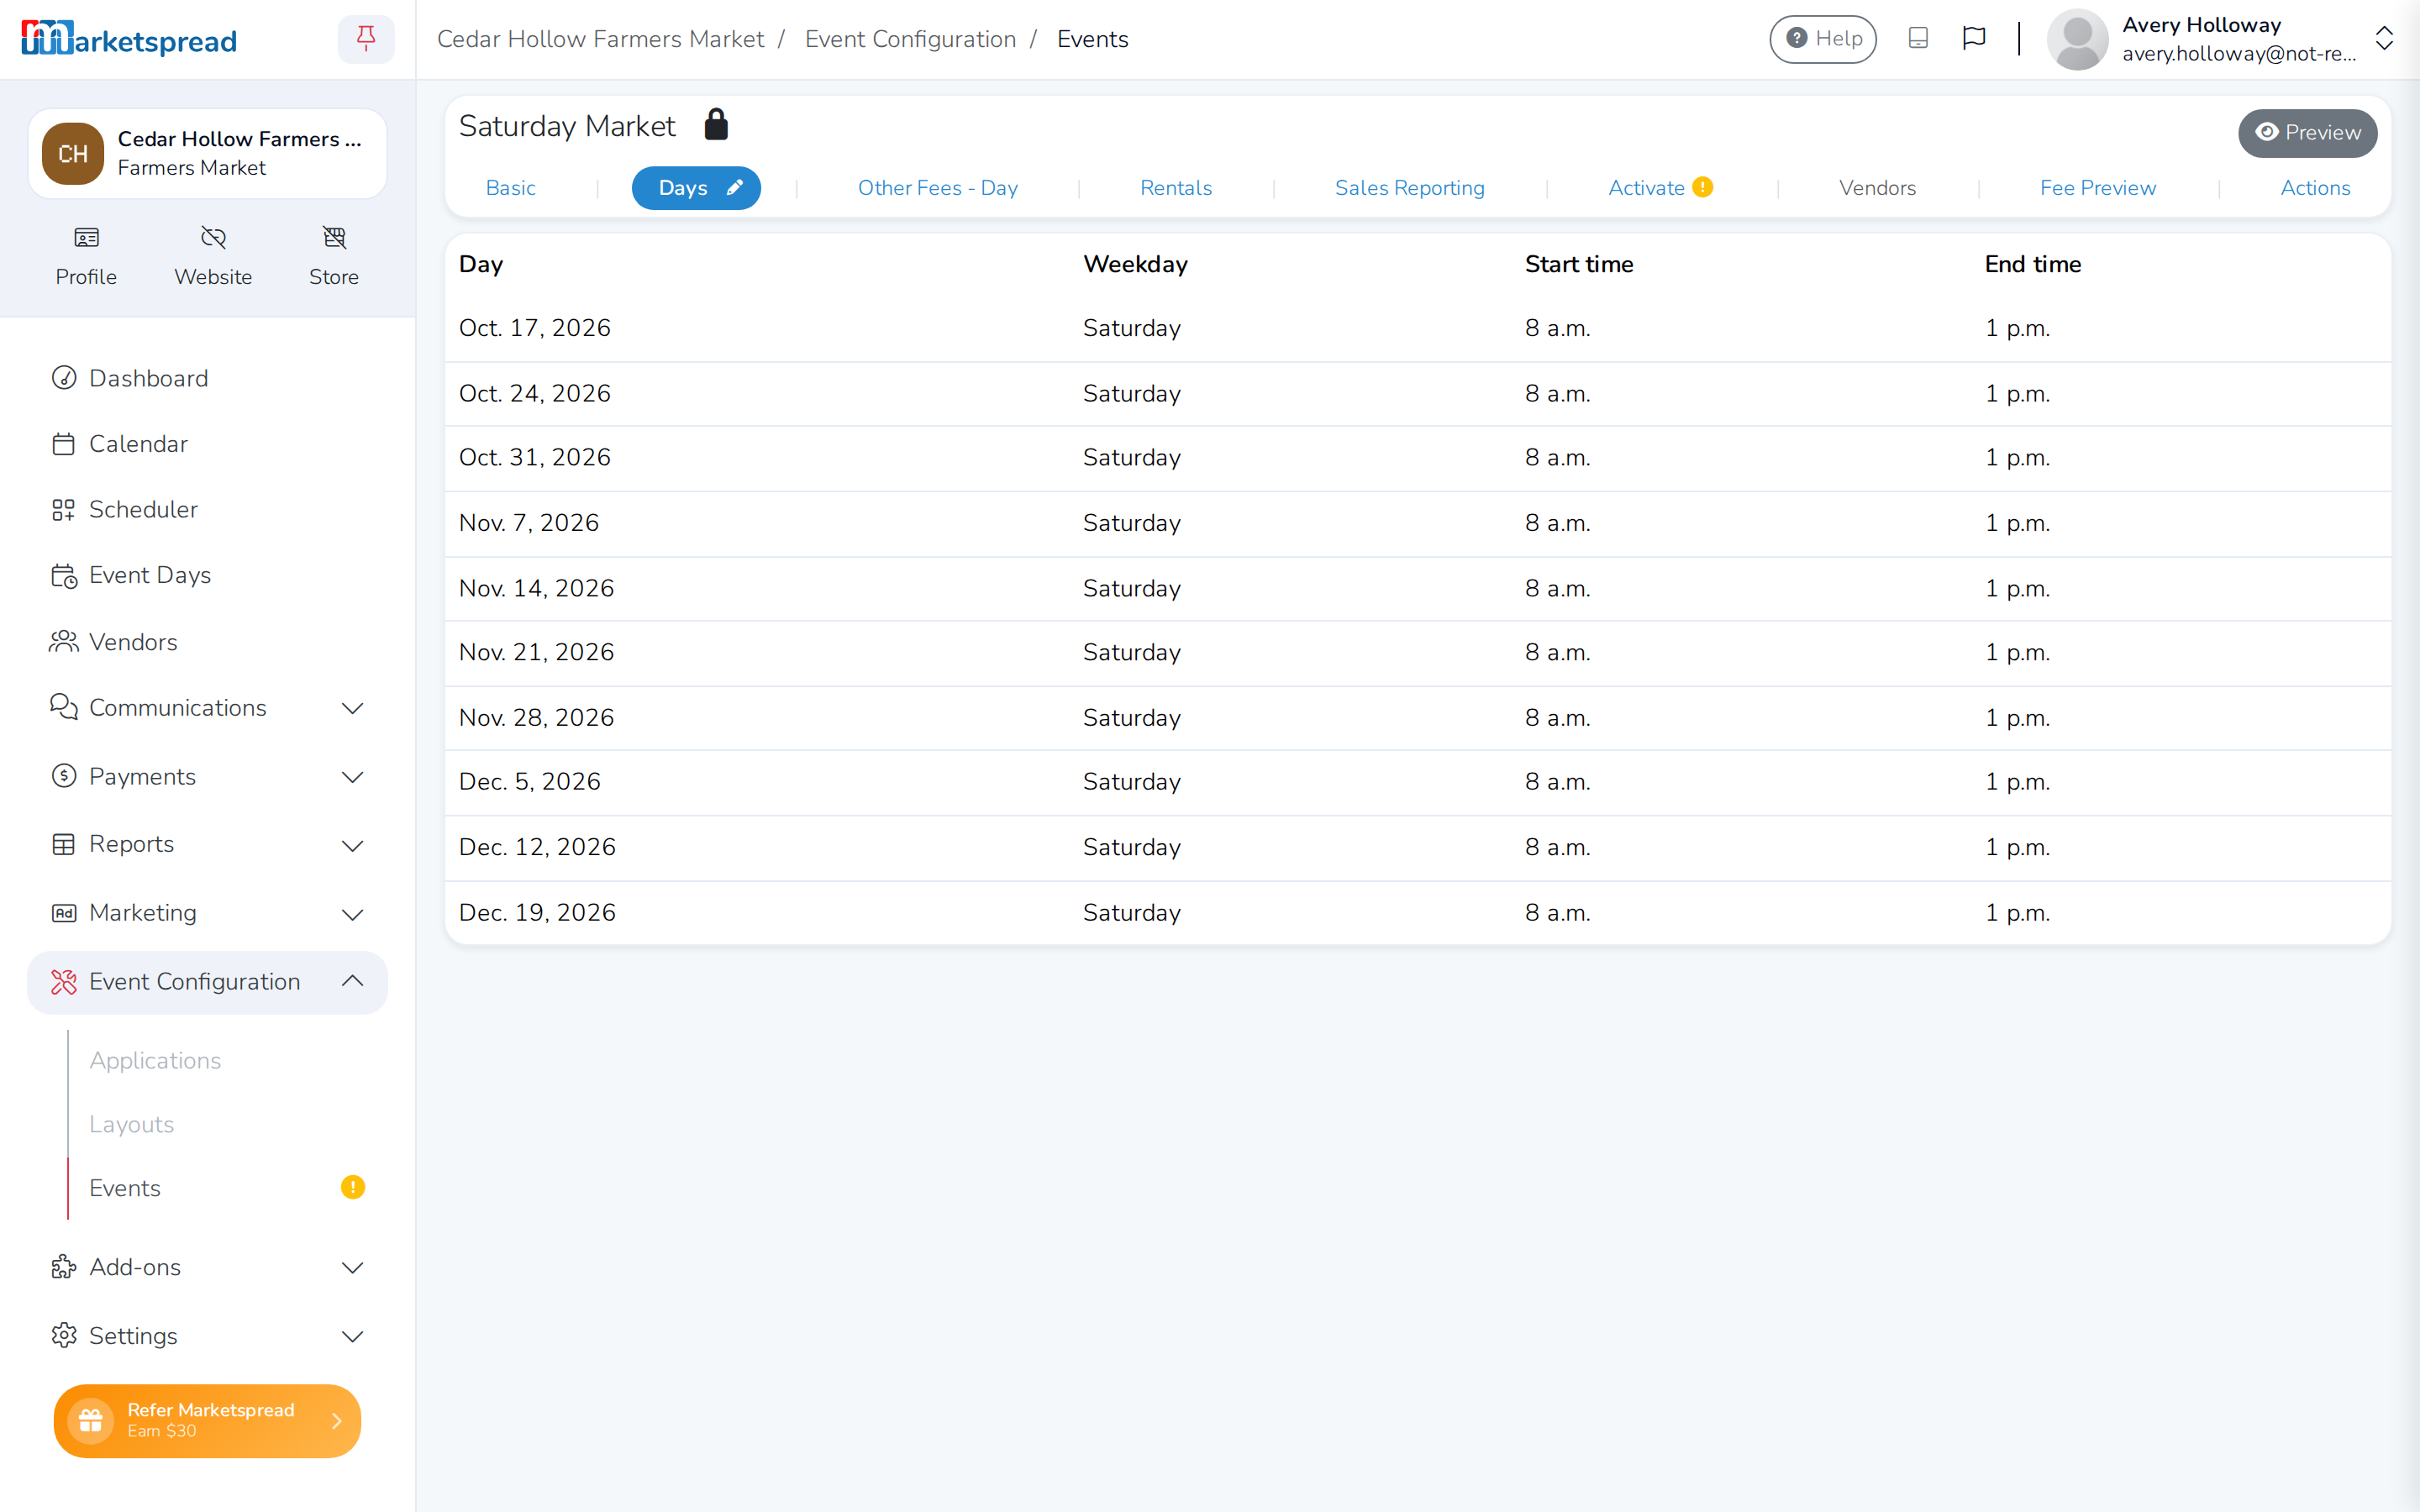
On the Days tab, click Add day, then enter its Start time and End time. Repeat for each single day.
-
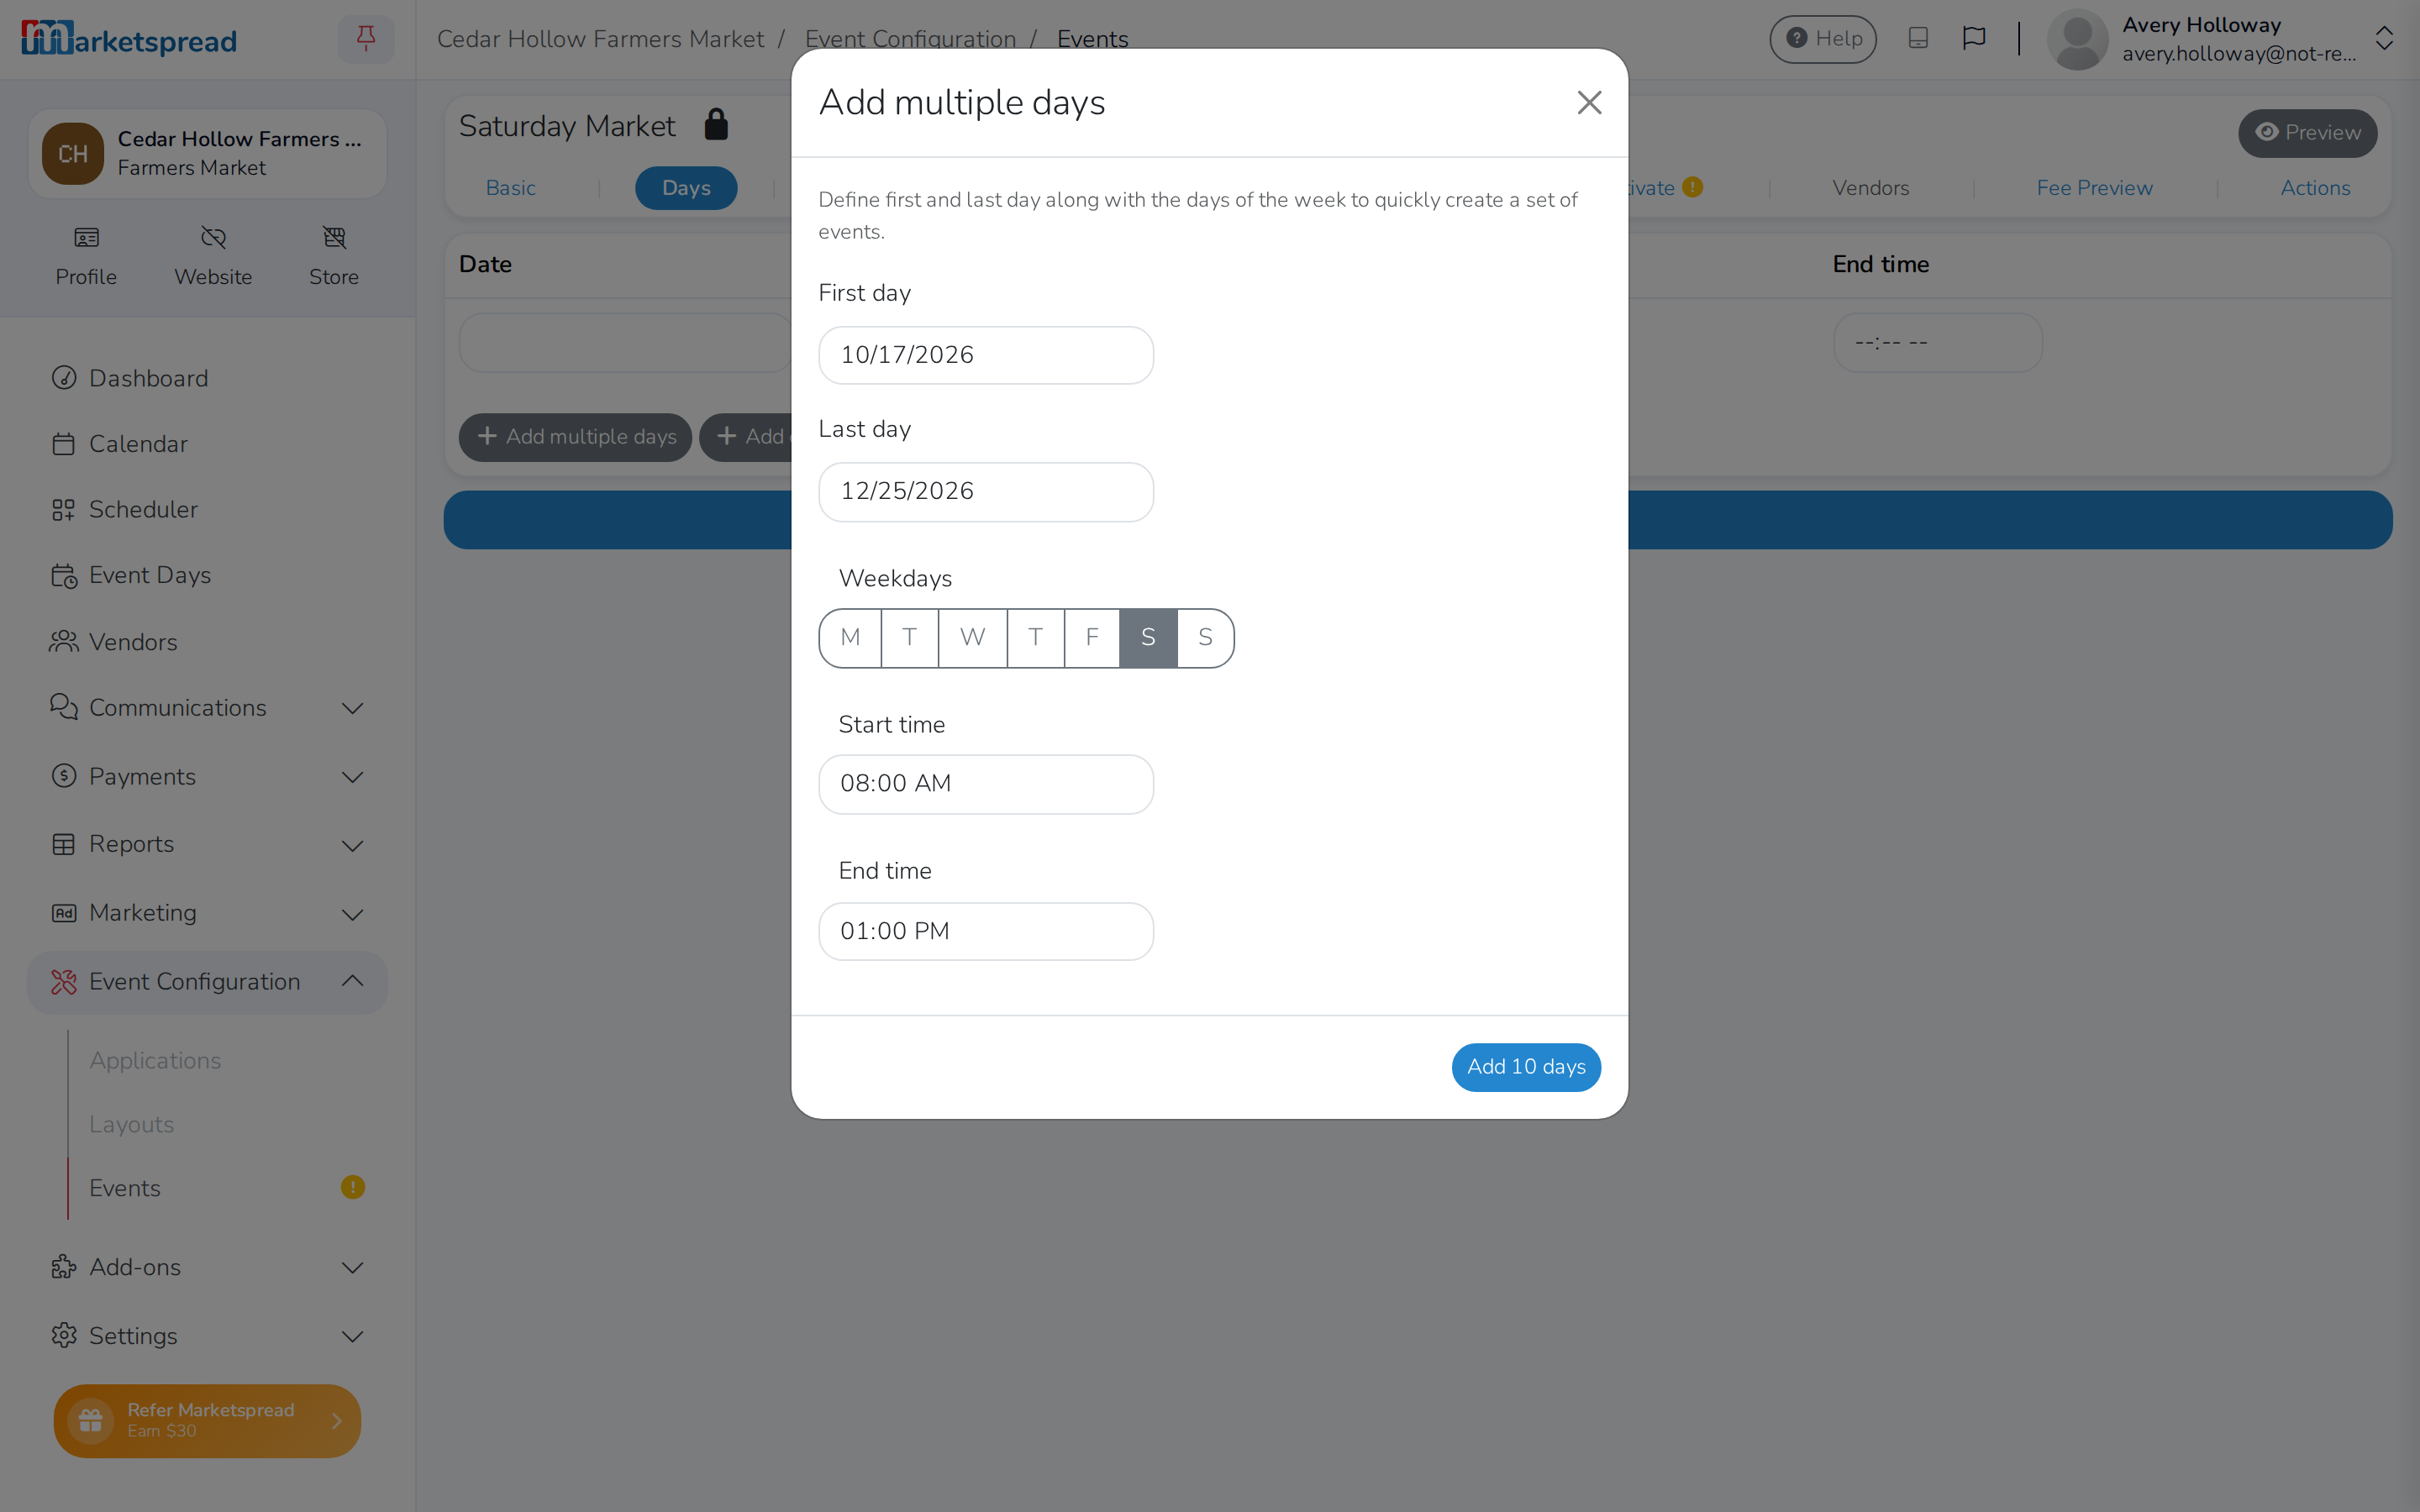
To add several days at once, click Add multiple days.
-
Enter the First day, the Last day, select the Weekdays the event runs on, and set a Start time and End time.
-
Click the Add days button — it shows how many days it's about to create.
-
Click Save days.
Note
You can still edit, add or remove individual days afterward — you don't need to redo the whole series for one change.
Add extra fees and rentals
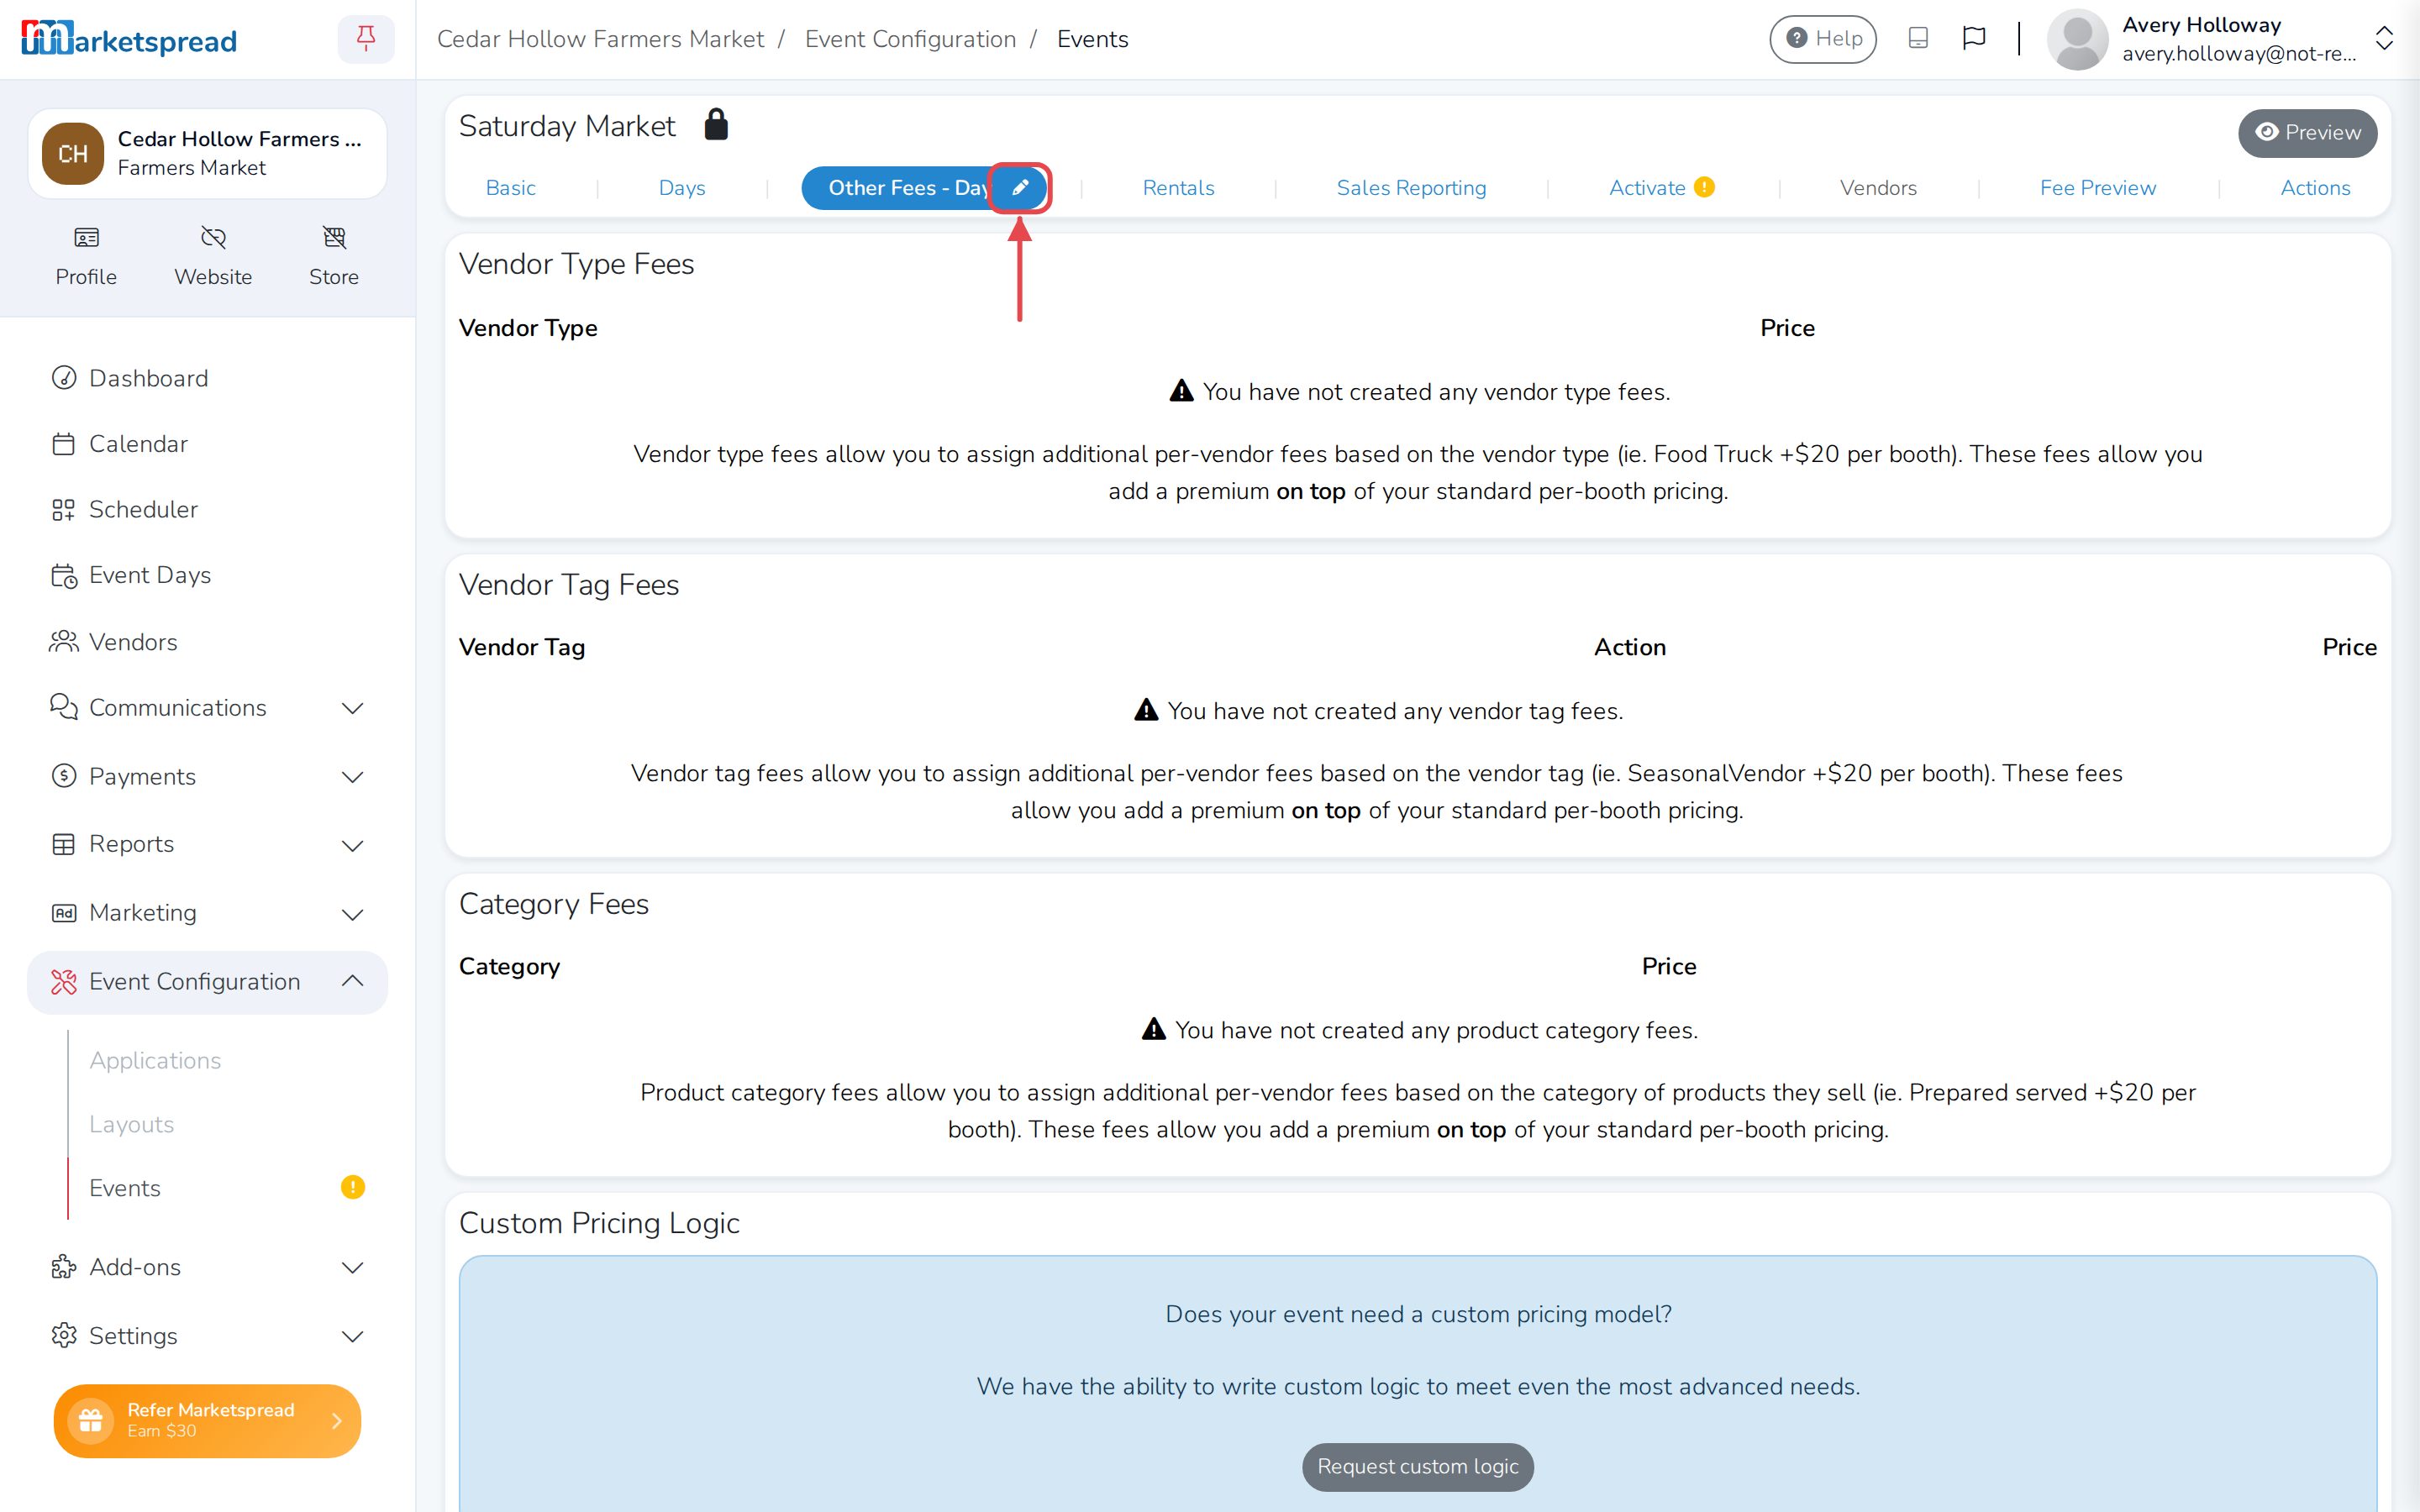
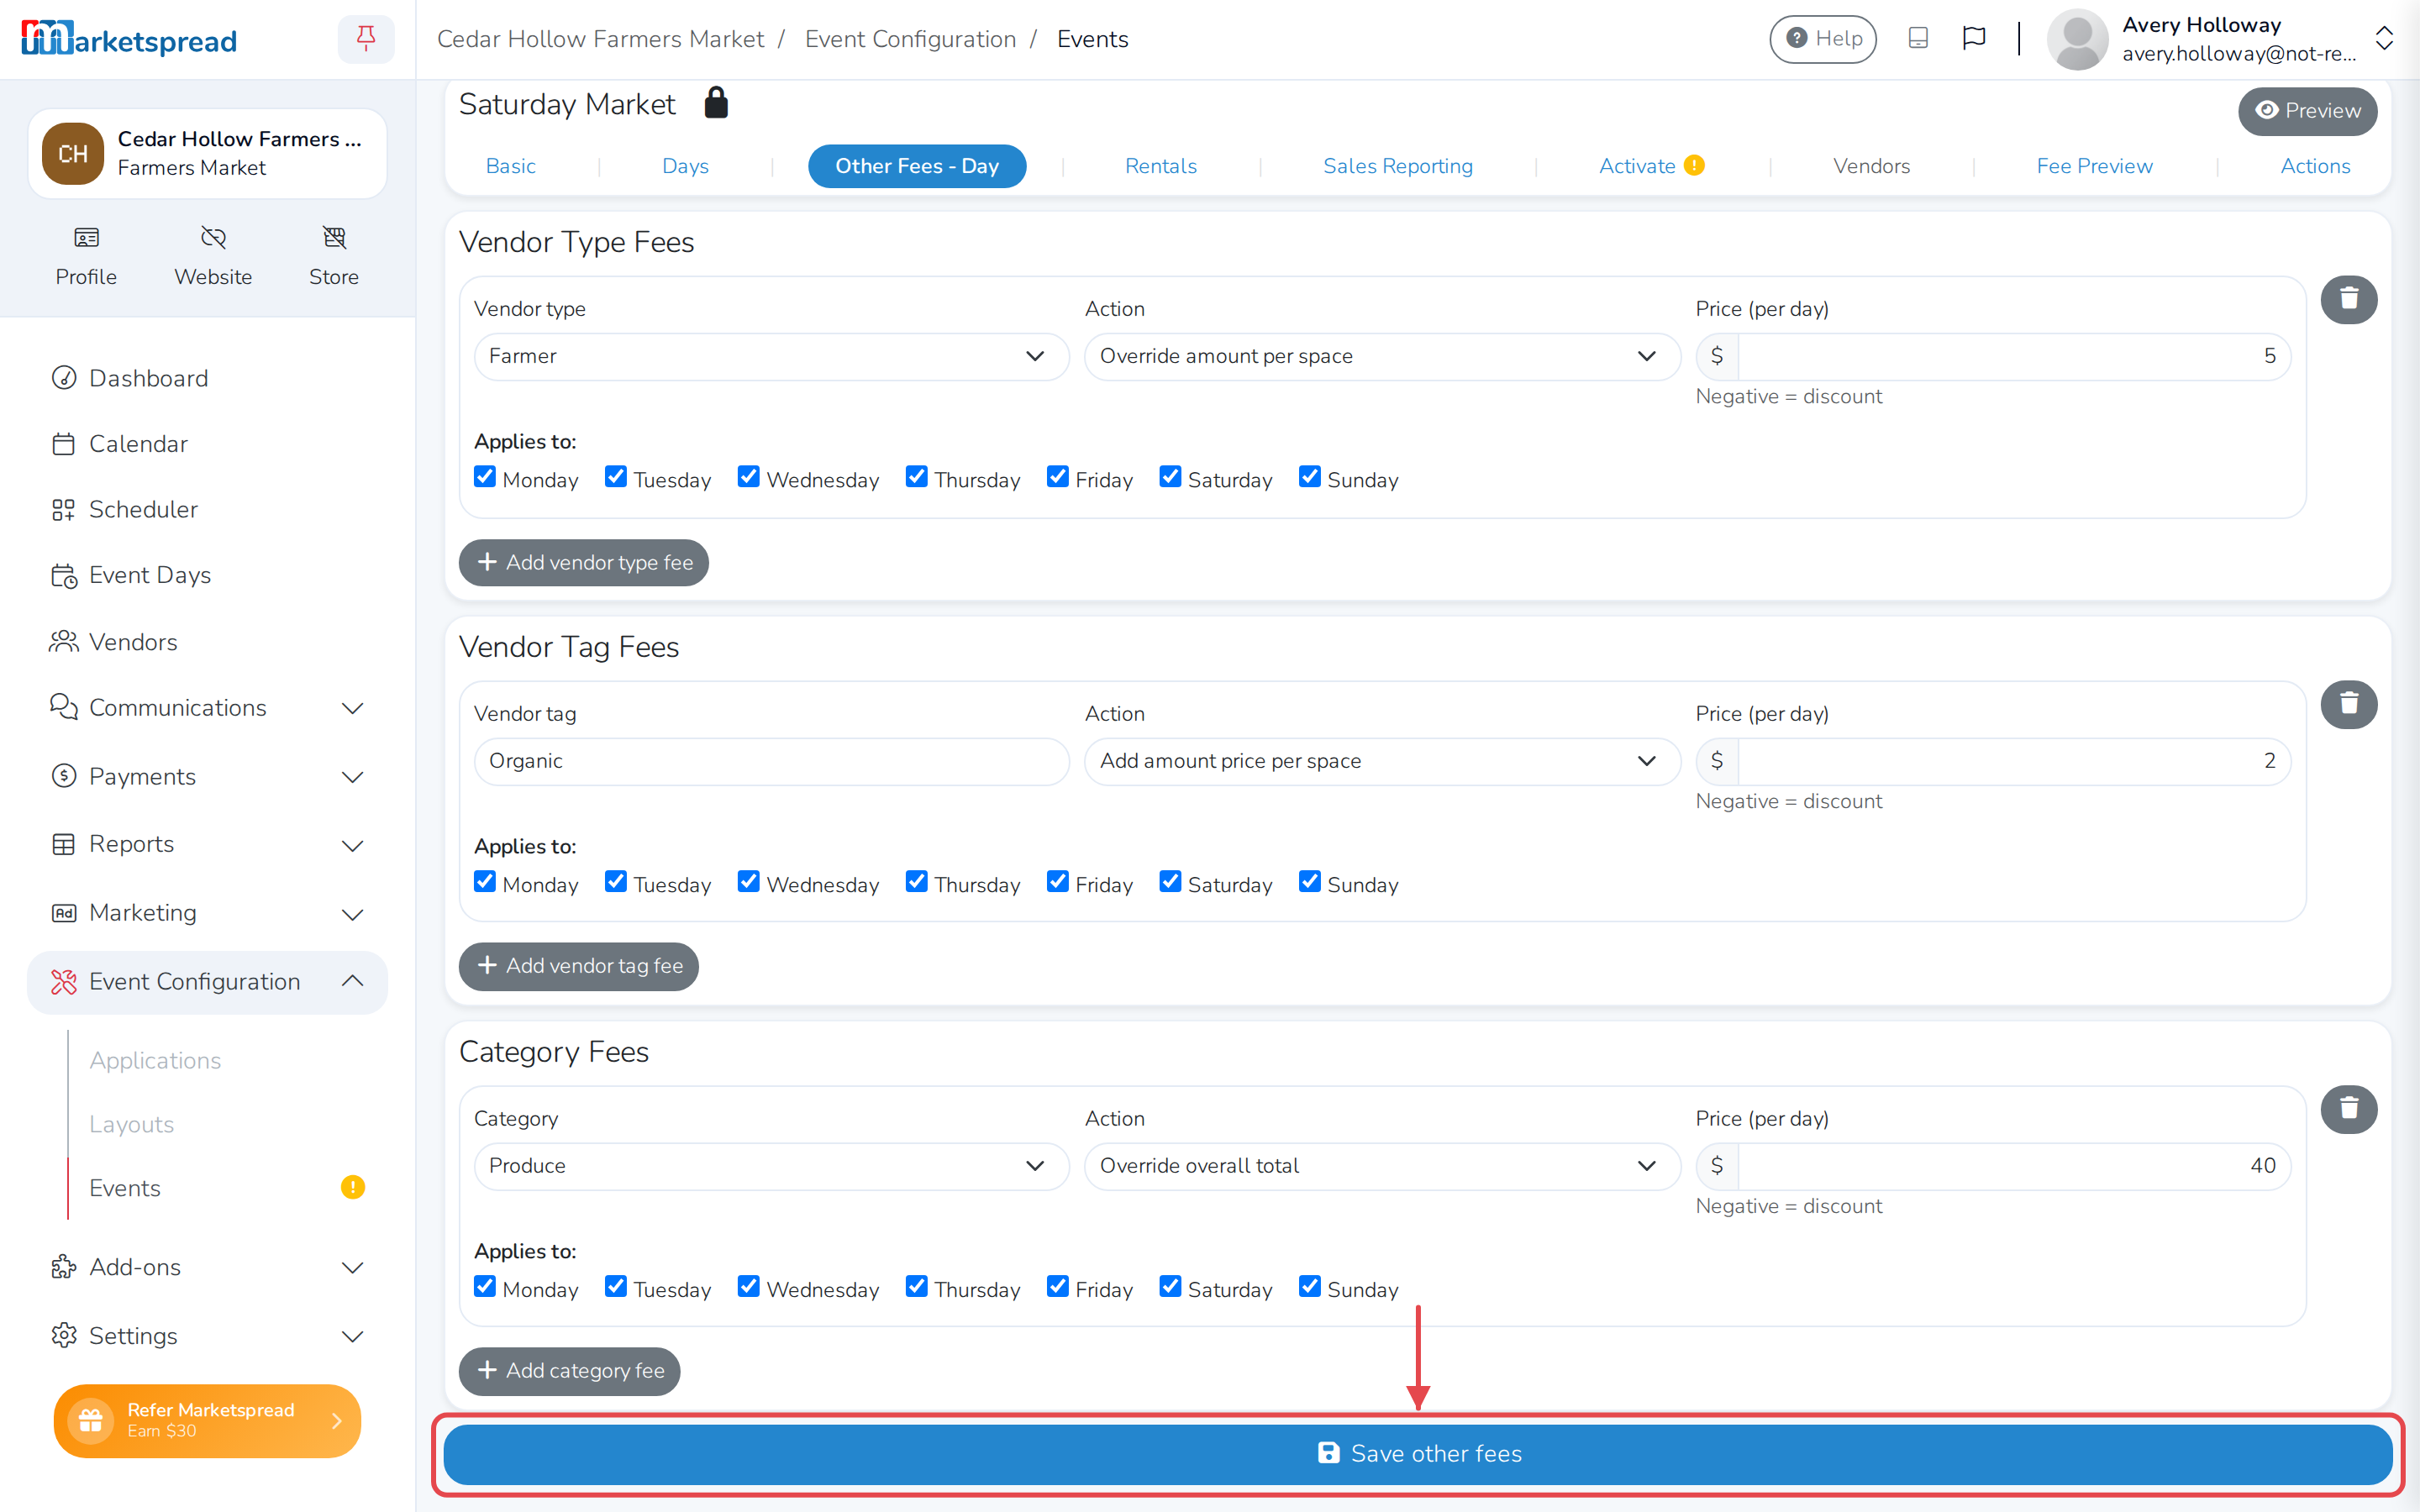
On the Other Fees tab, click the pencil to unlock it.
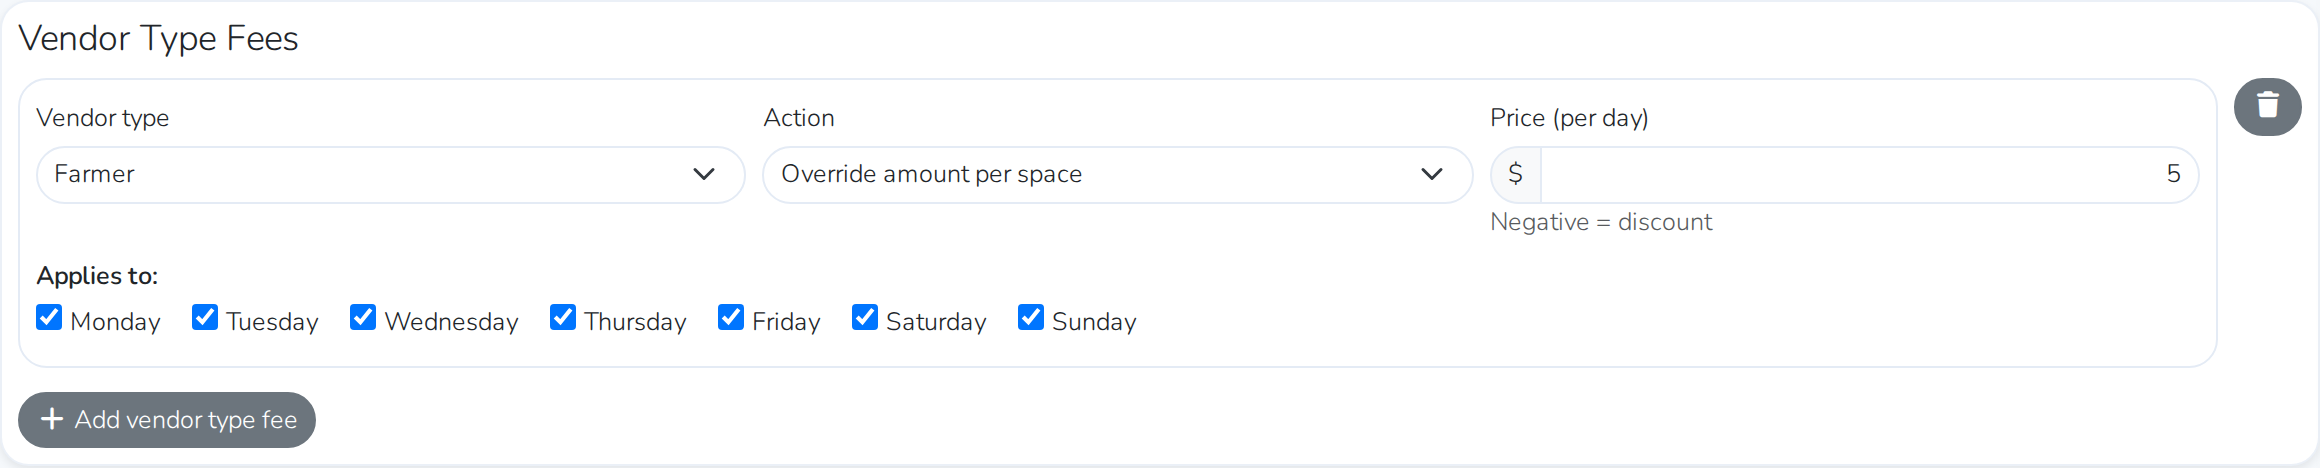
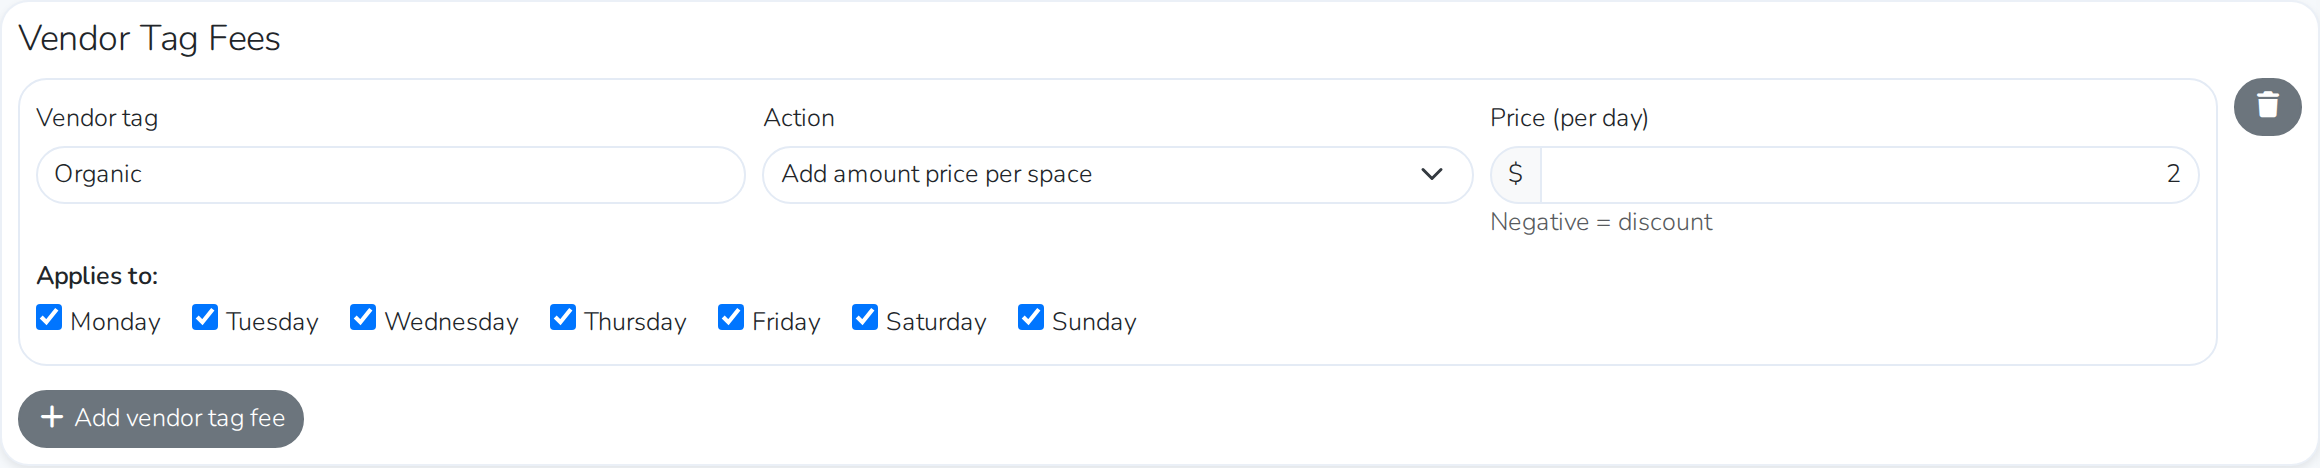
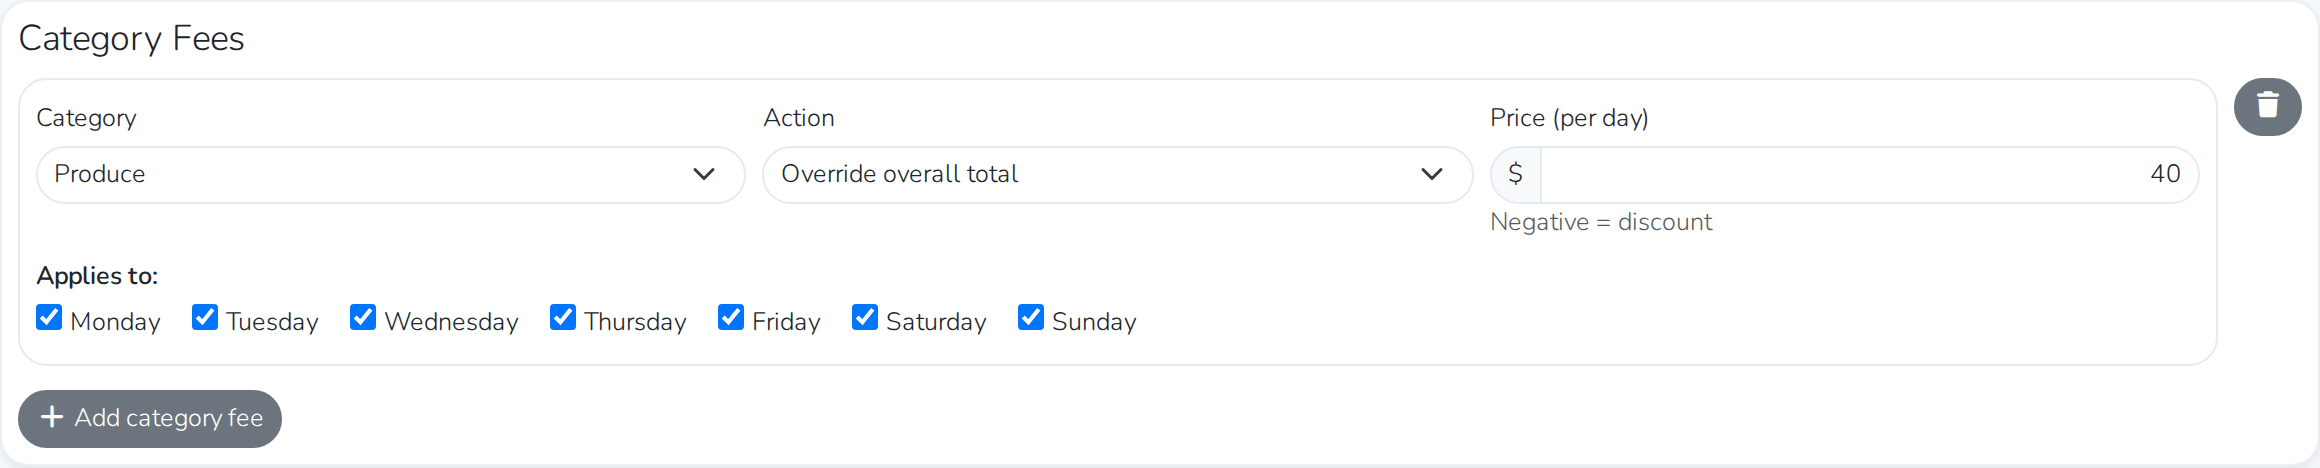
Then add a fee under Vendor Type, Vendor Tag or Category fees — on top of your booth fees. Each fee has an Action — Add amount price per space, Override amount per space, or Override overall total — a price, and the weekdays it applies to.
Click Save other fees when you're done.
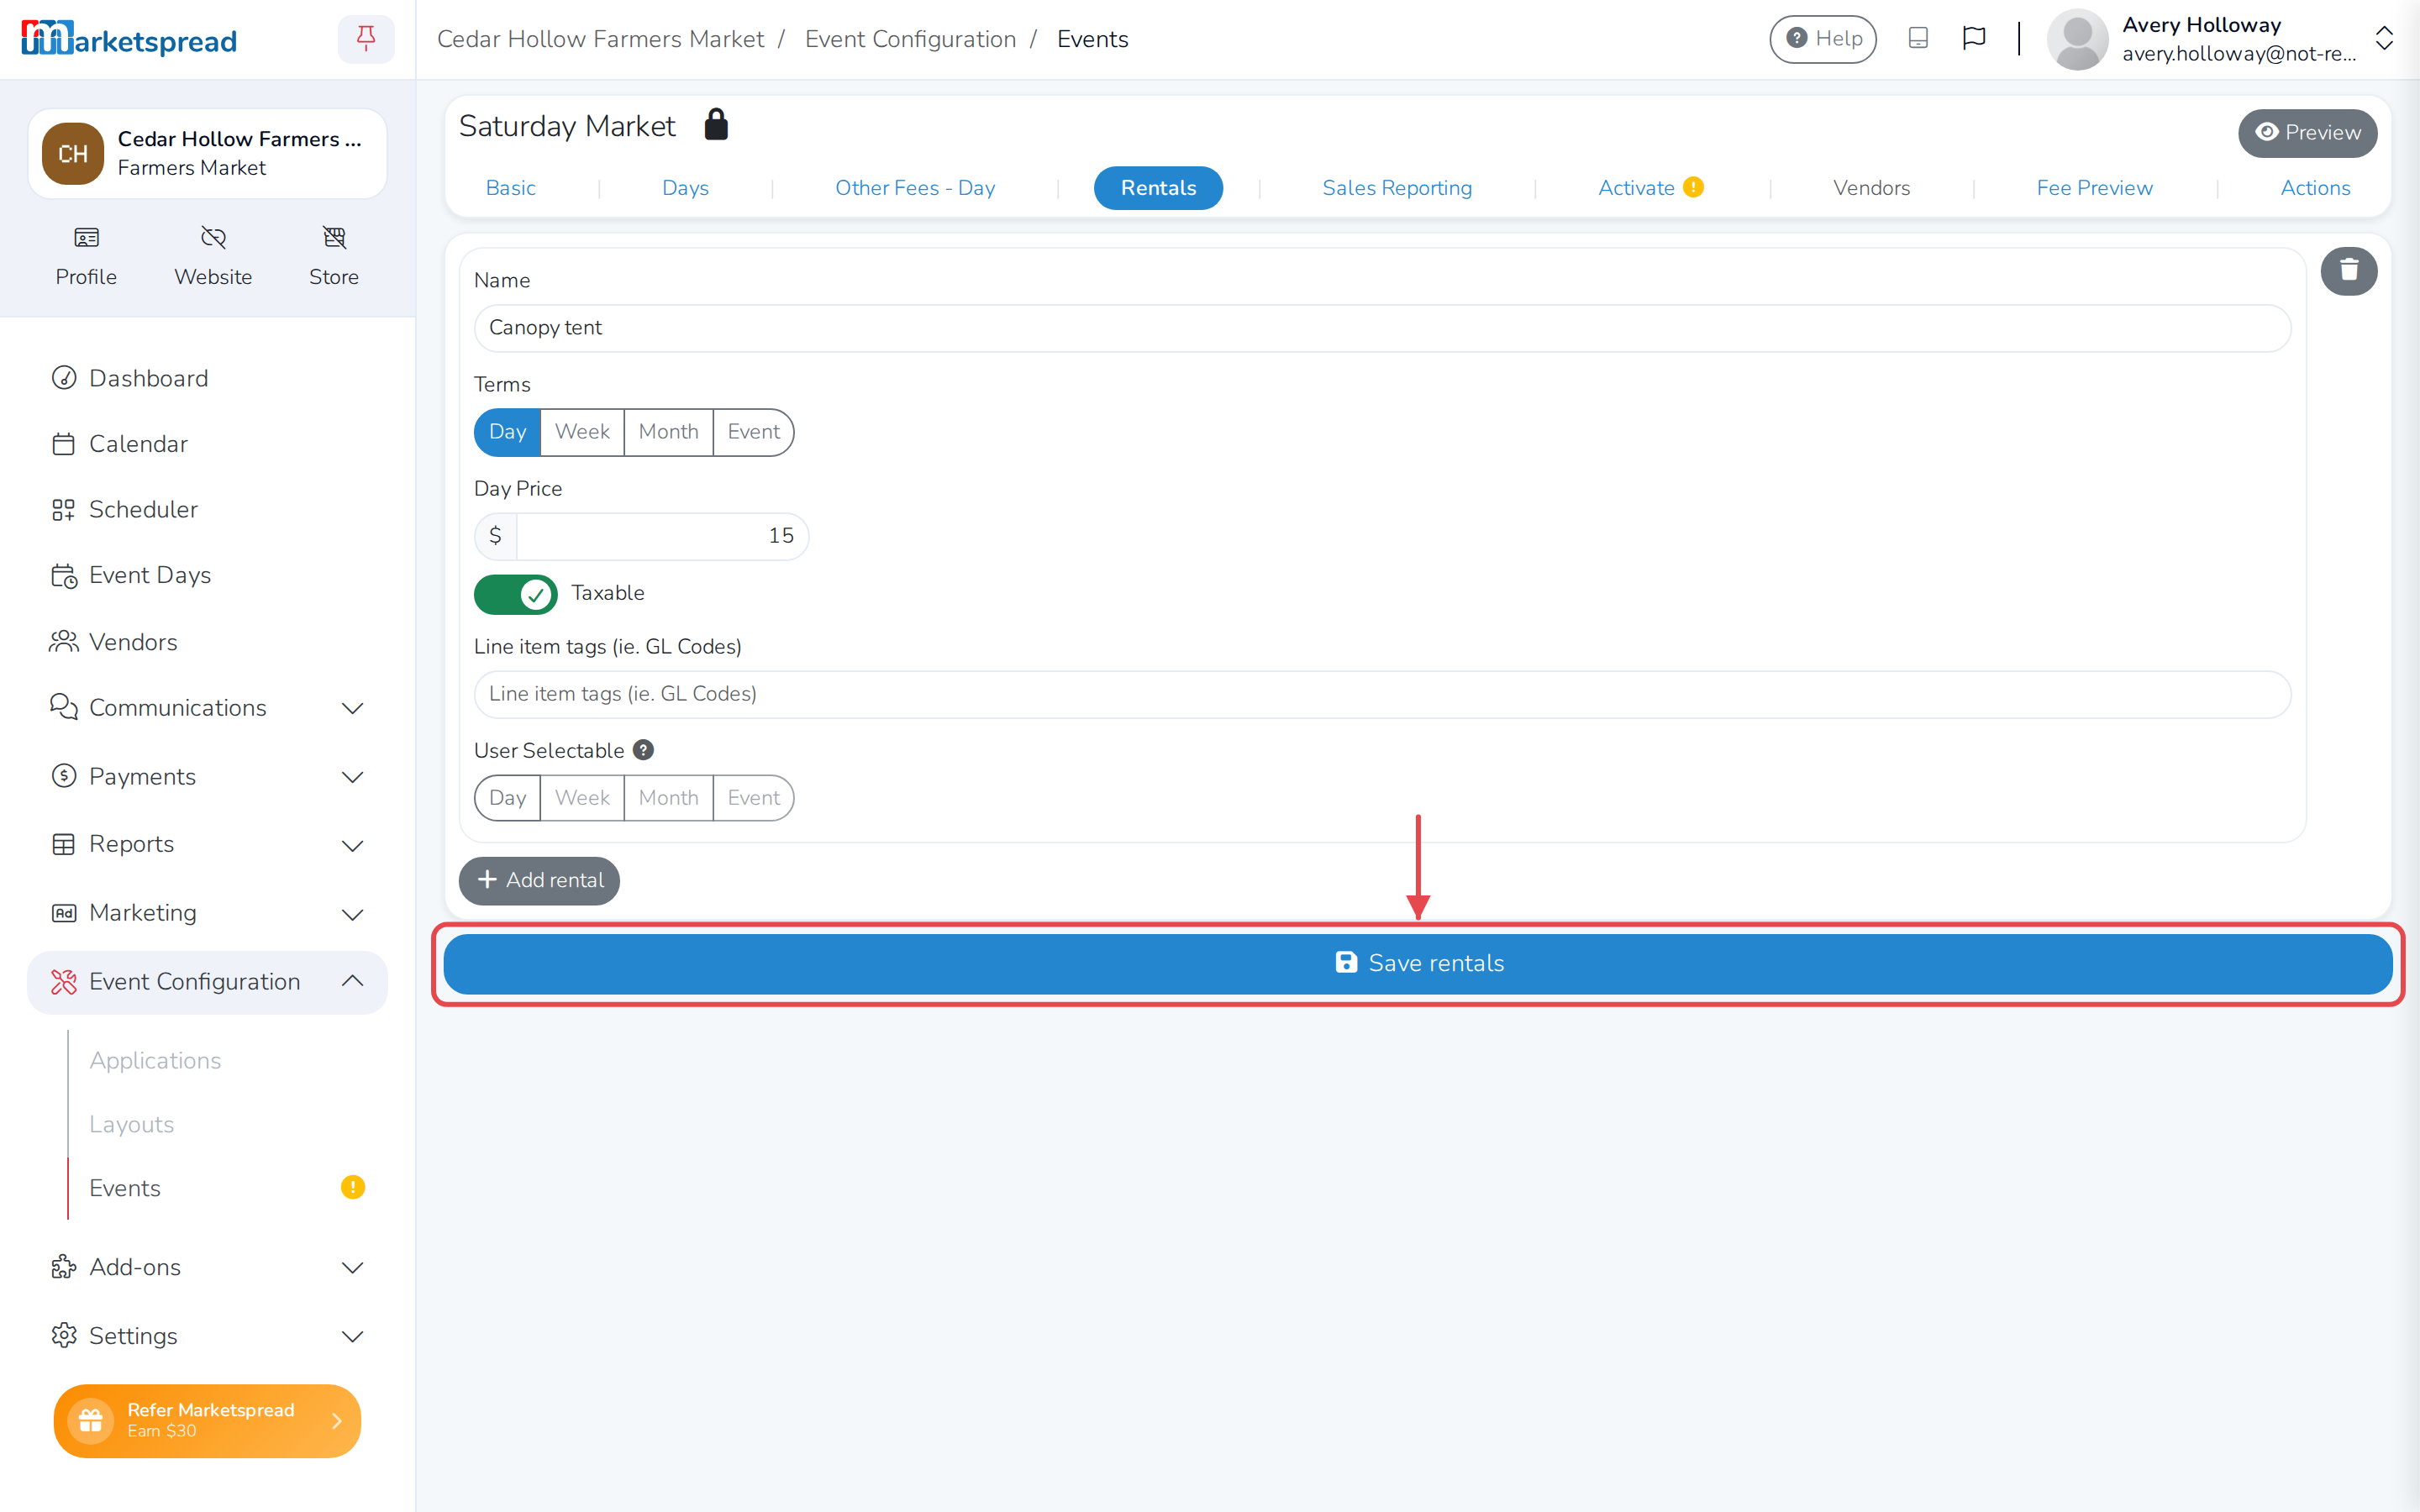
Under Rentals, click the pencil to unlock it, then Add rental for each item vendors can rent — tables, tents, power hookups.

Give it a Name, a price for each term it's offered on, and turn on Taxable if it's taxed.
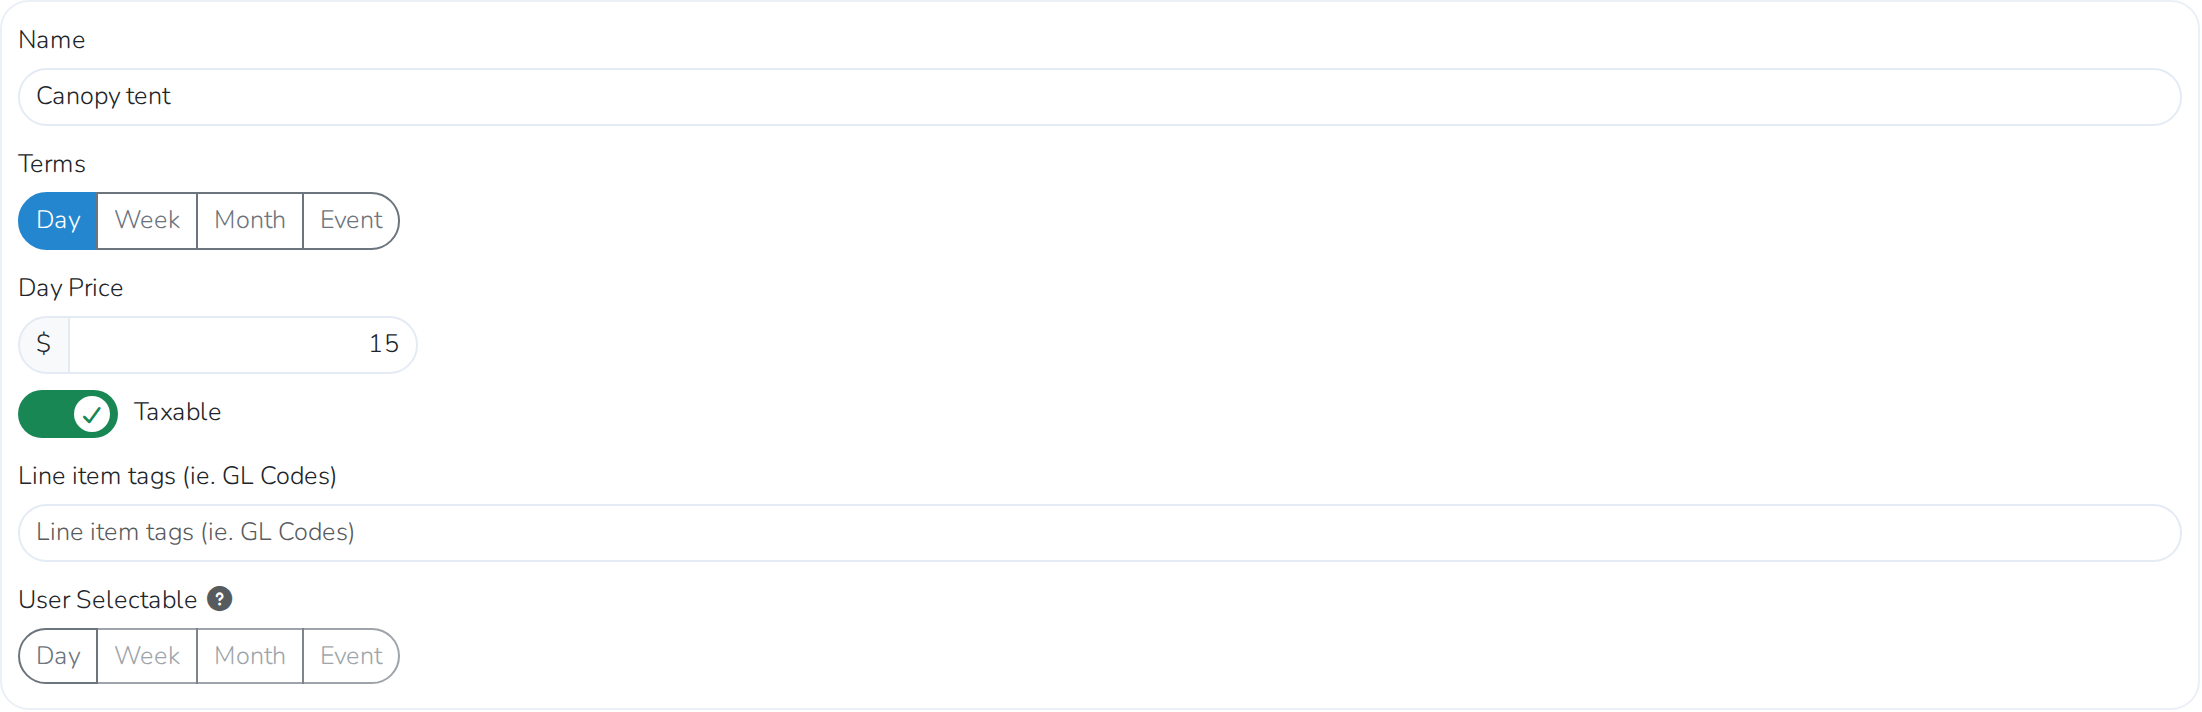
Click Save rentals when you're done.
Turn on sales reporting
On the Sales Reporting tab, turn on Enable sales reporting to have vendors report what they sold at the end of each event day. Click Save sales reporting when you're done.
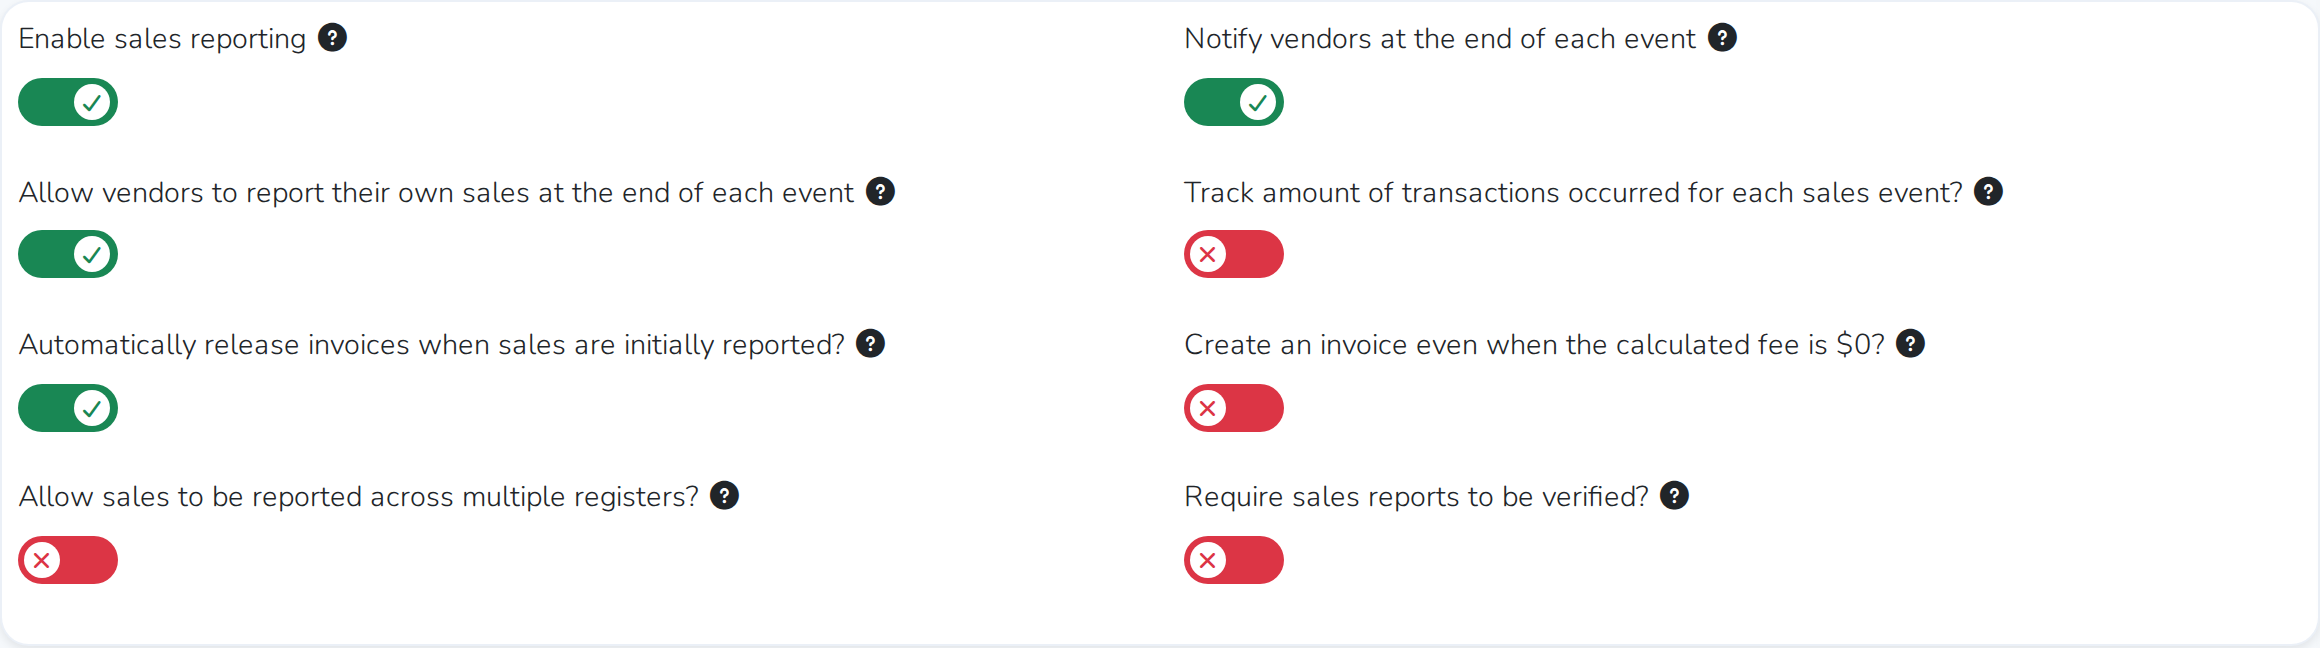
Every vendor accepted to a day gets an email and a dashboard notification asking them to report their sales, about 45 minutes before the event ends. You can report sales on a vendor's behalf at any time — handy if your market runs a formal vendor checkout.
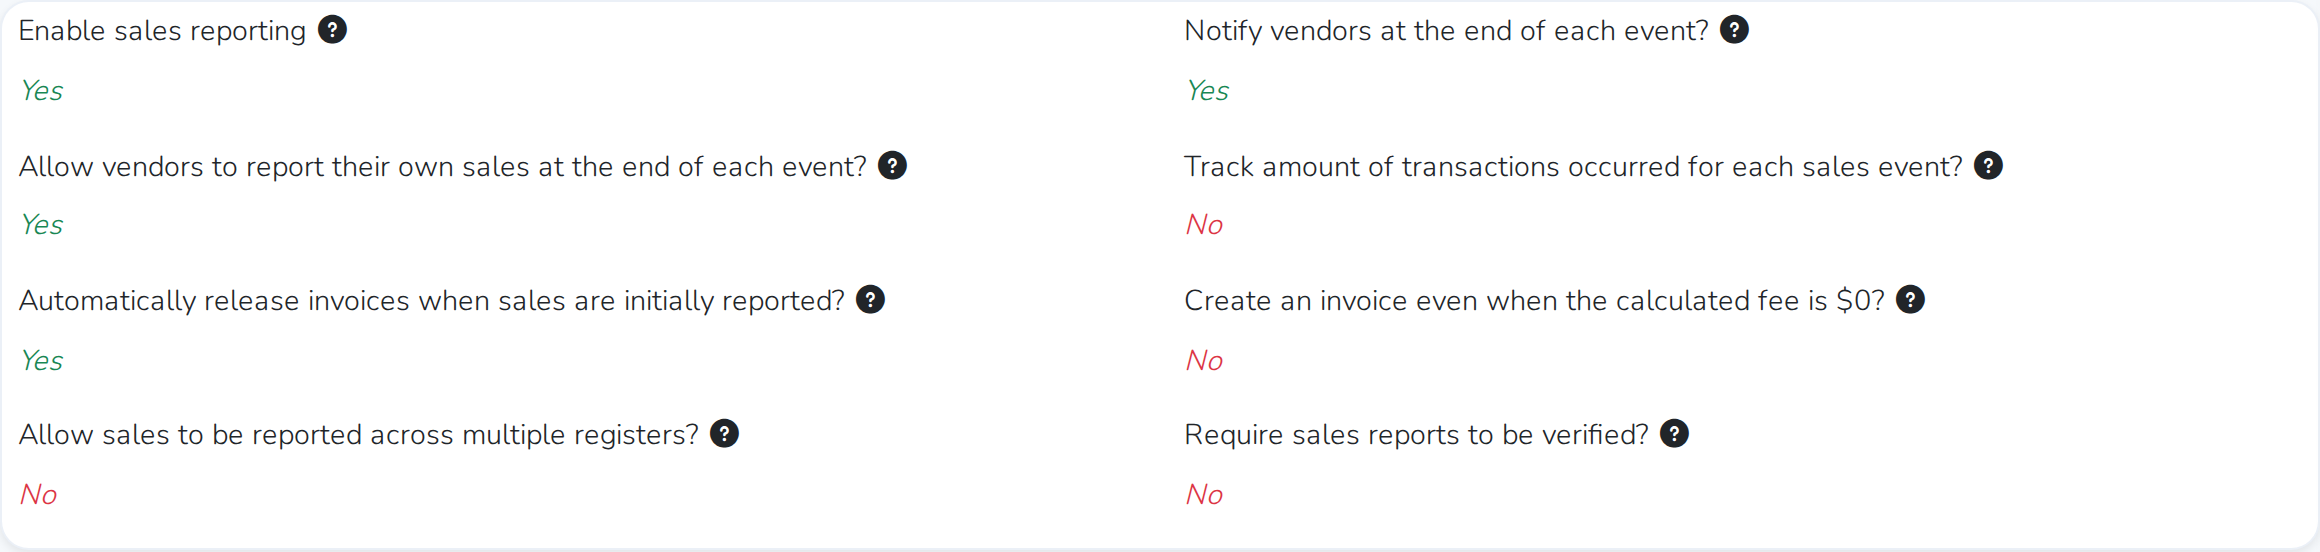
See Manage vendor sales reporting with currencies for every option this turns on.
Activate the event
Important
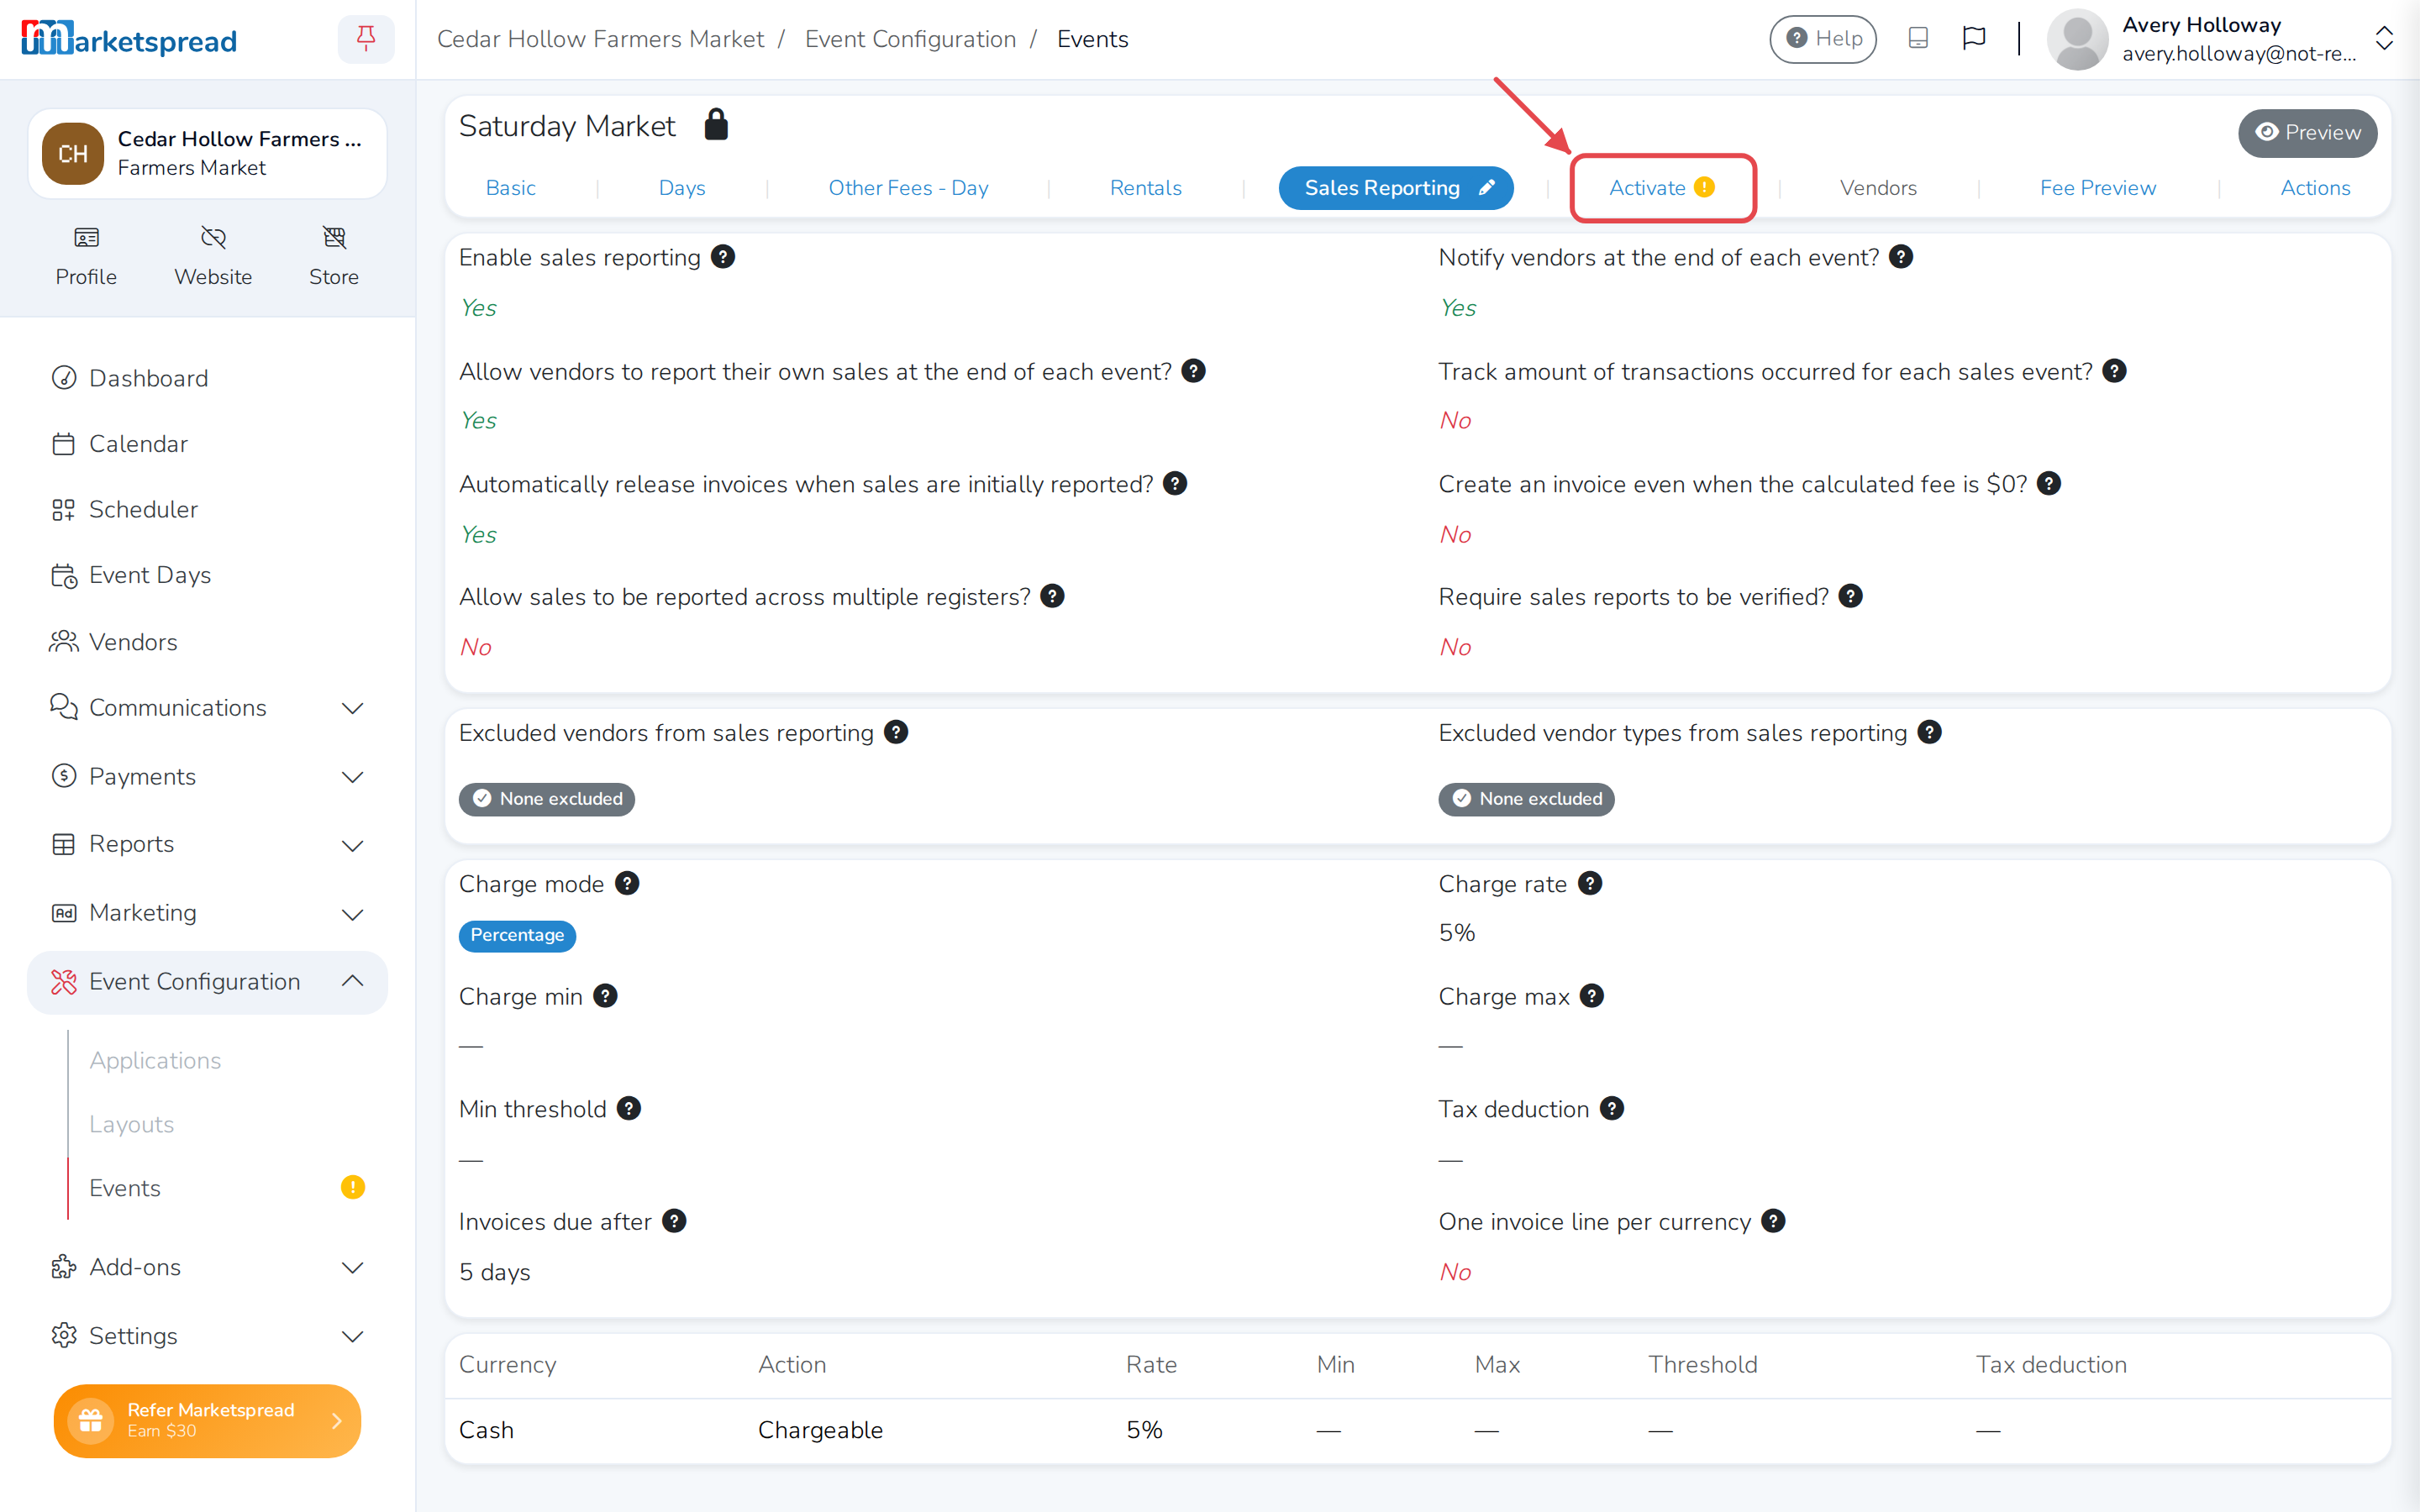
An event needs at least one day, and its application has to be ready, before you can activate it.
-
Click Activate at the top of the event.
-
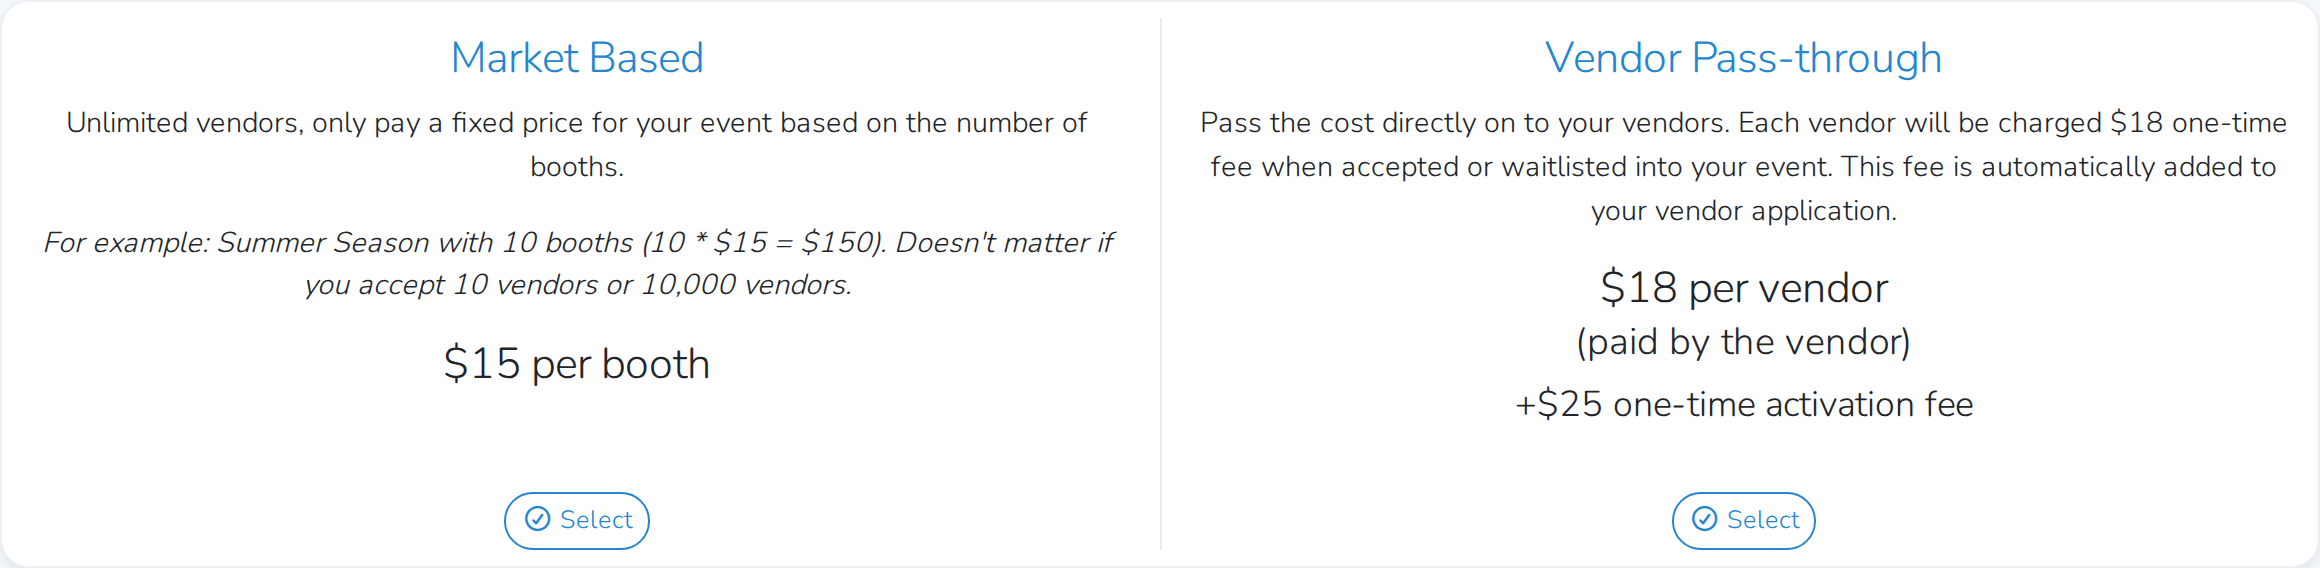
Both ways to pay Marketspread show side by side, each with a Select button:
- Market Based — you pay a fixed fee per booth and accept unlimited vendors.
- Vendor Pass-through — you pay a one-time $25 activation fee, and each vendor is then charged a one-time fee of their own — for most markets, $18 — when they're accepted or waitlisted, added straight to their application.
-
Click Select on the one you want.
Pay with Market Based
-
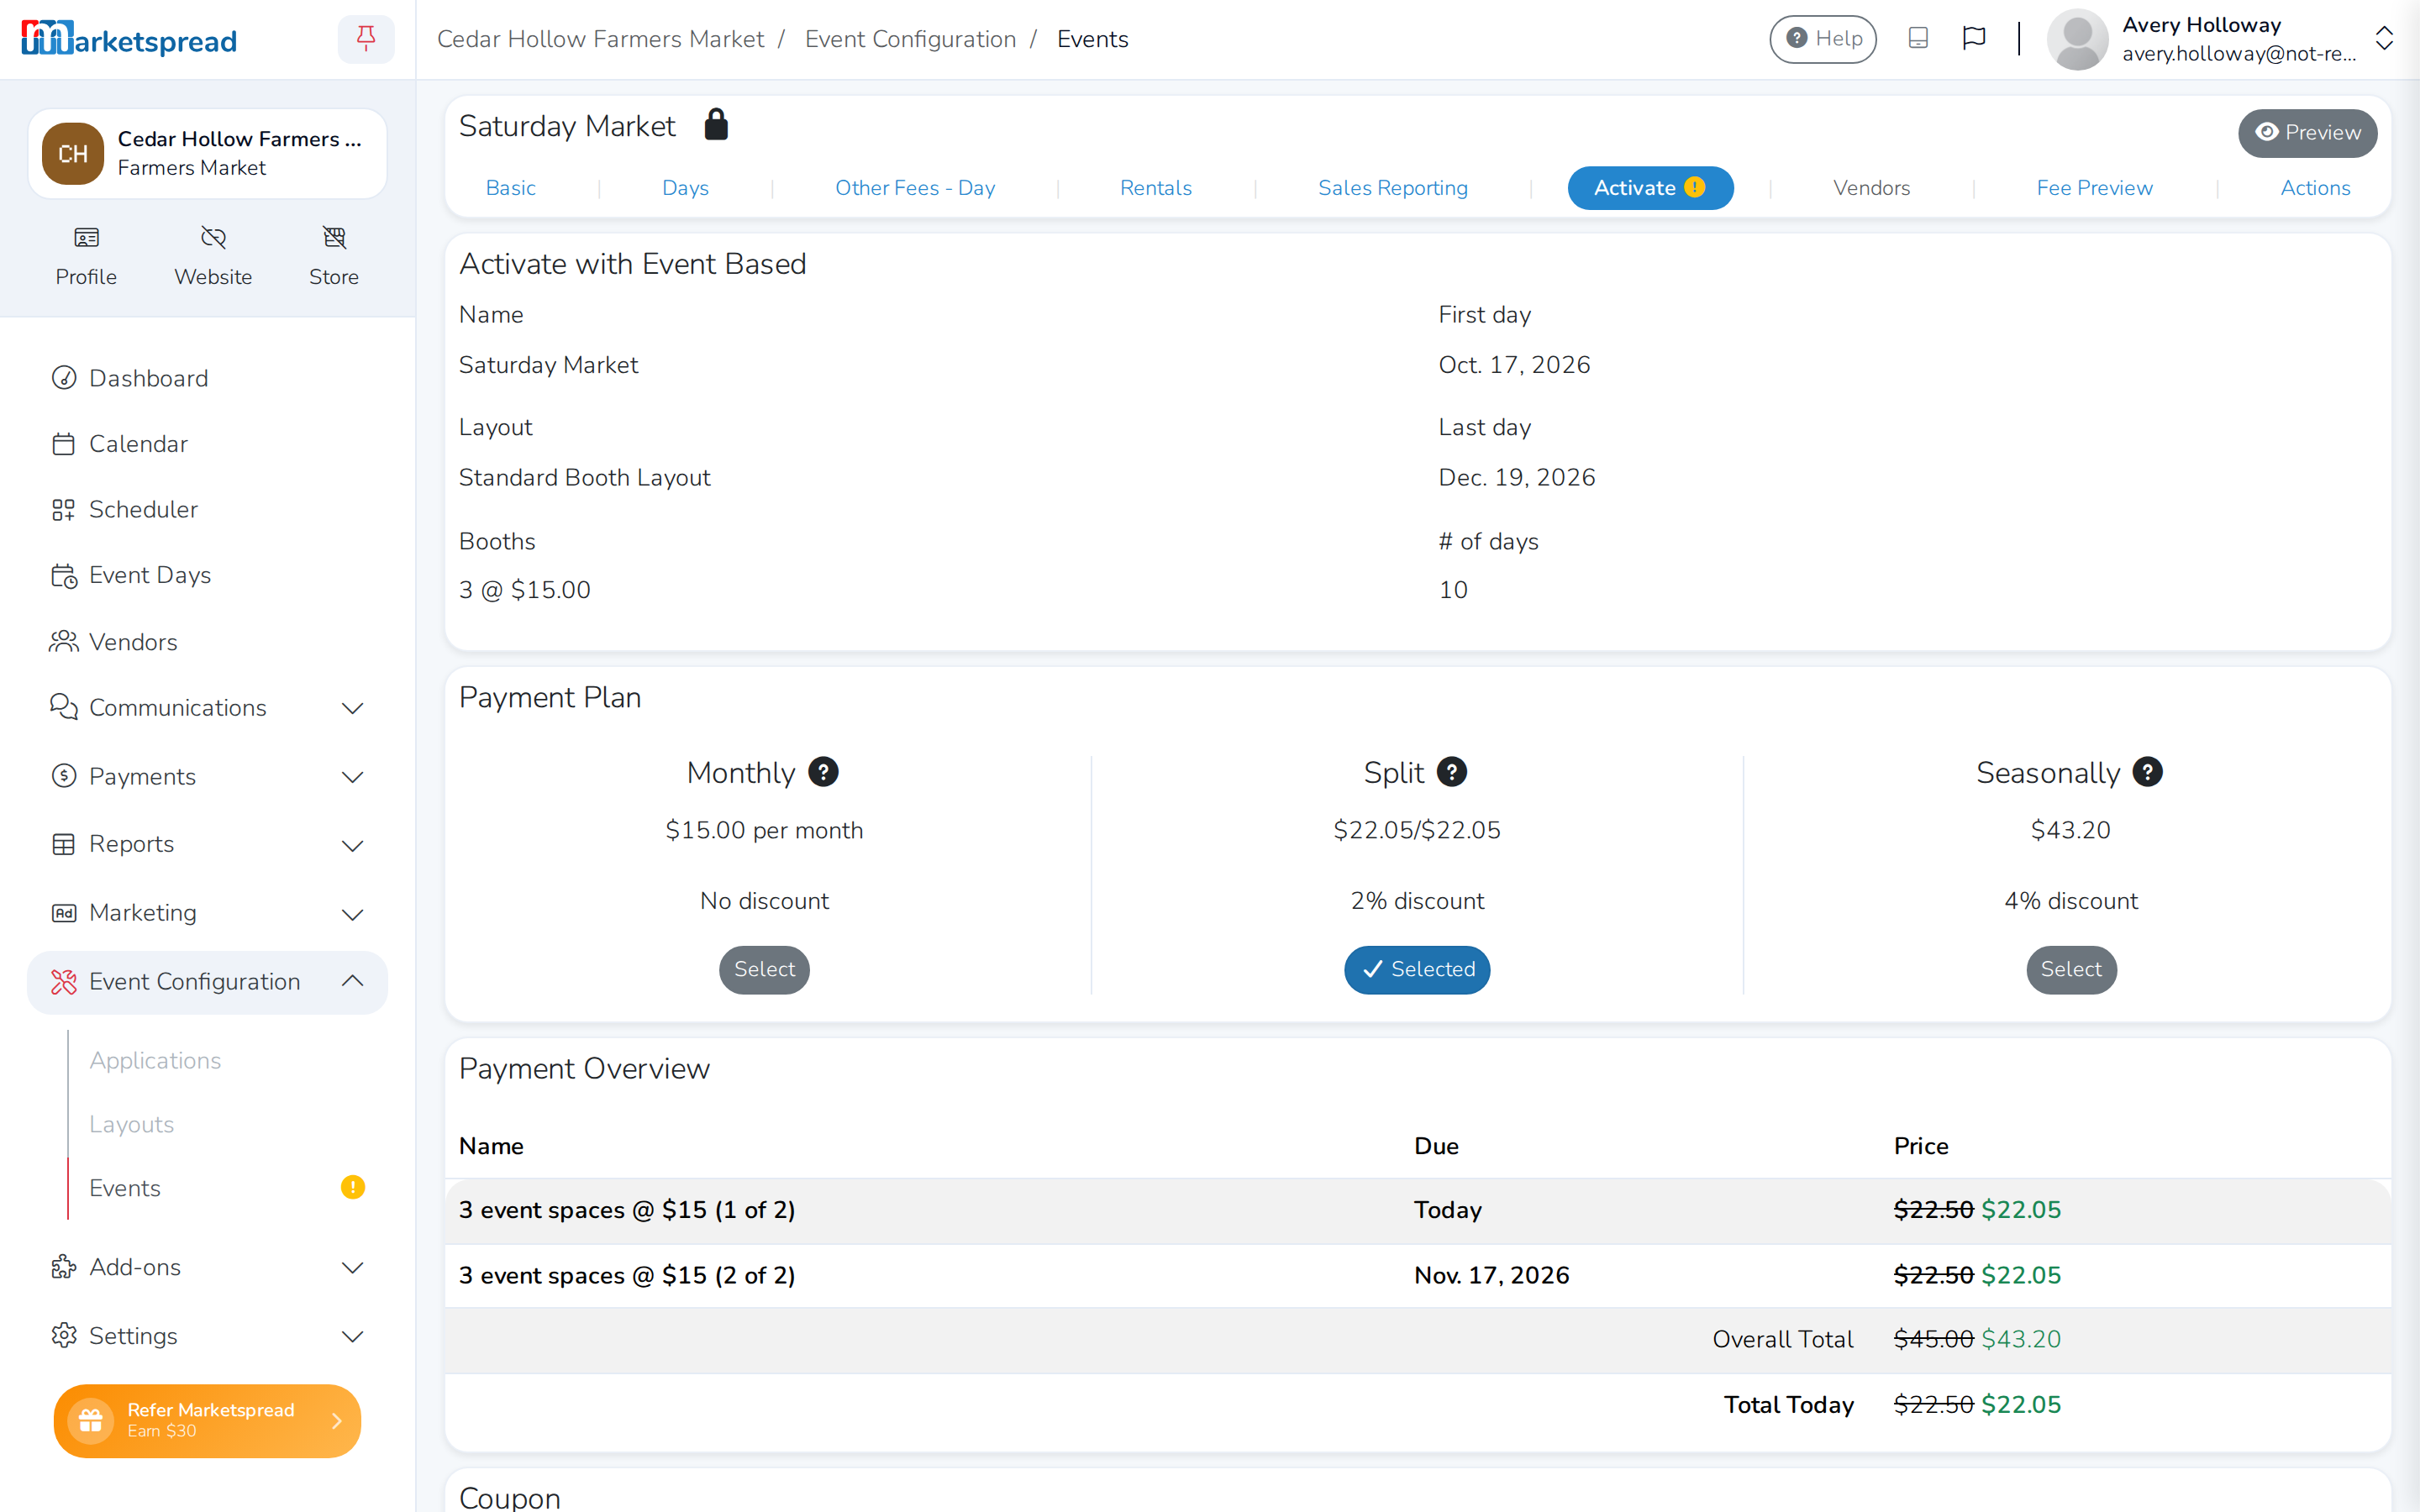
Review the event — its name, layout, booths and their price, first and last day, and number of days.
-
Choose a payment plan: Monthly, Split (half now, half mid-event), or Seasonally (pay it all now) — Split and Seasonally knock a little off the price.
-
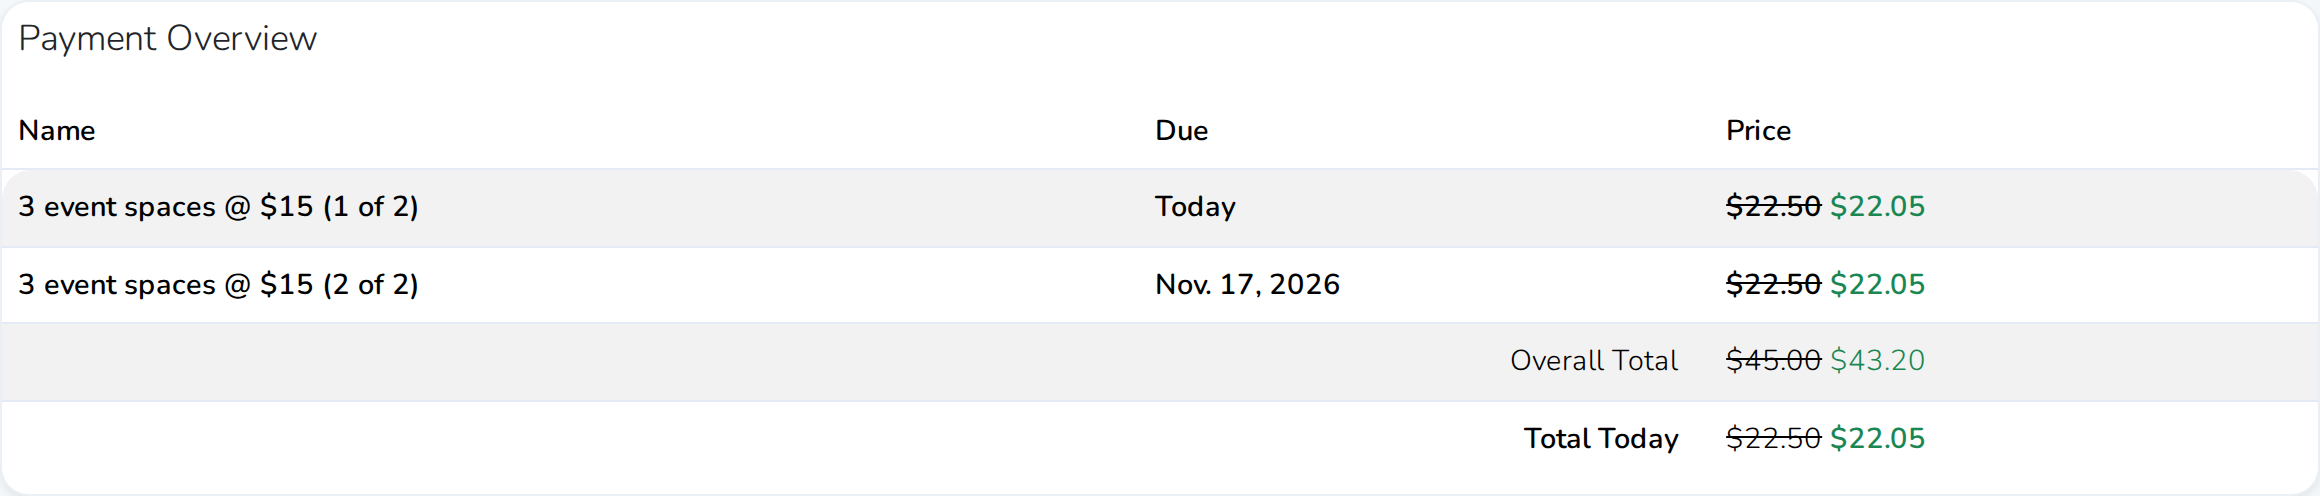
Check the Payment Overview for which event spaces are included and when each payment is due. Your card is charged automatically on the later due dates.
-
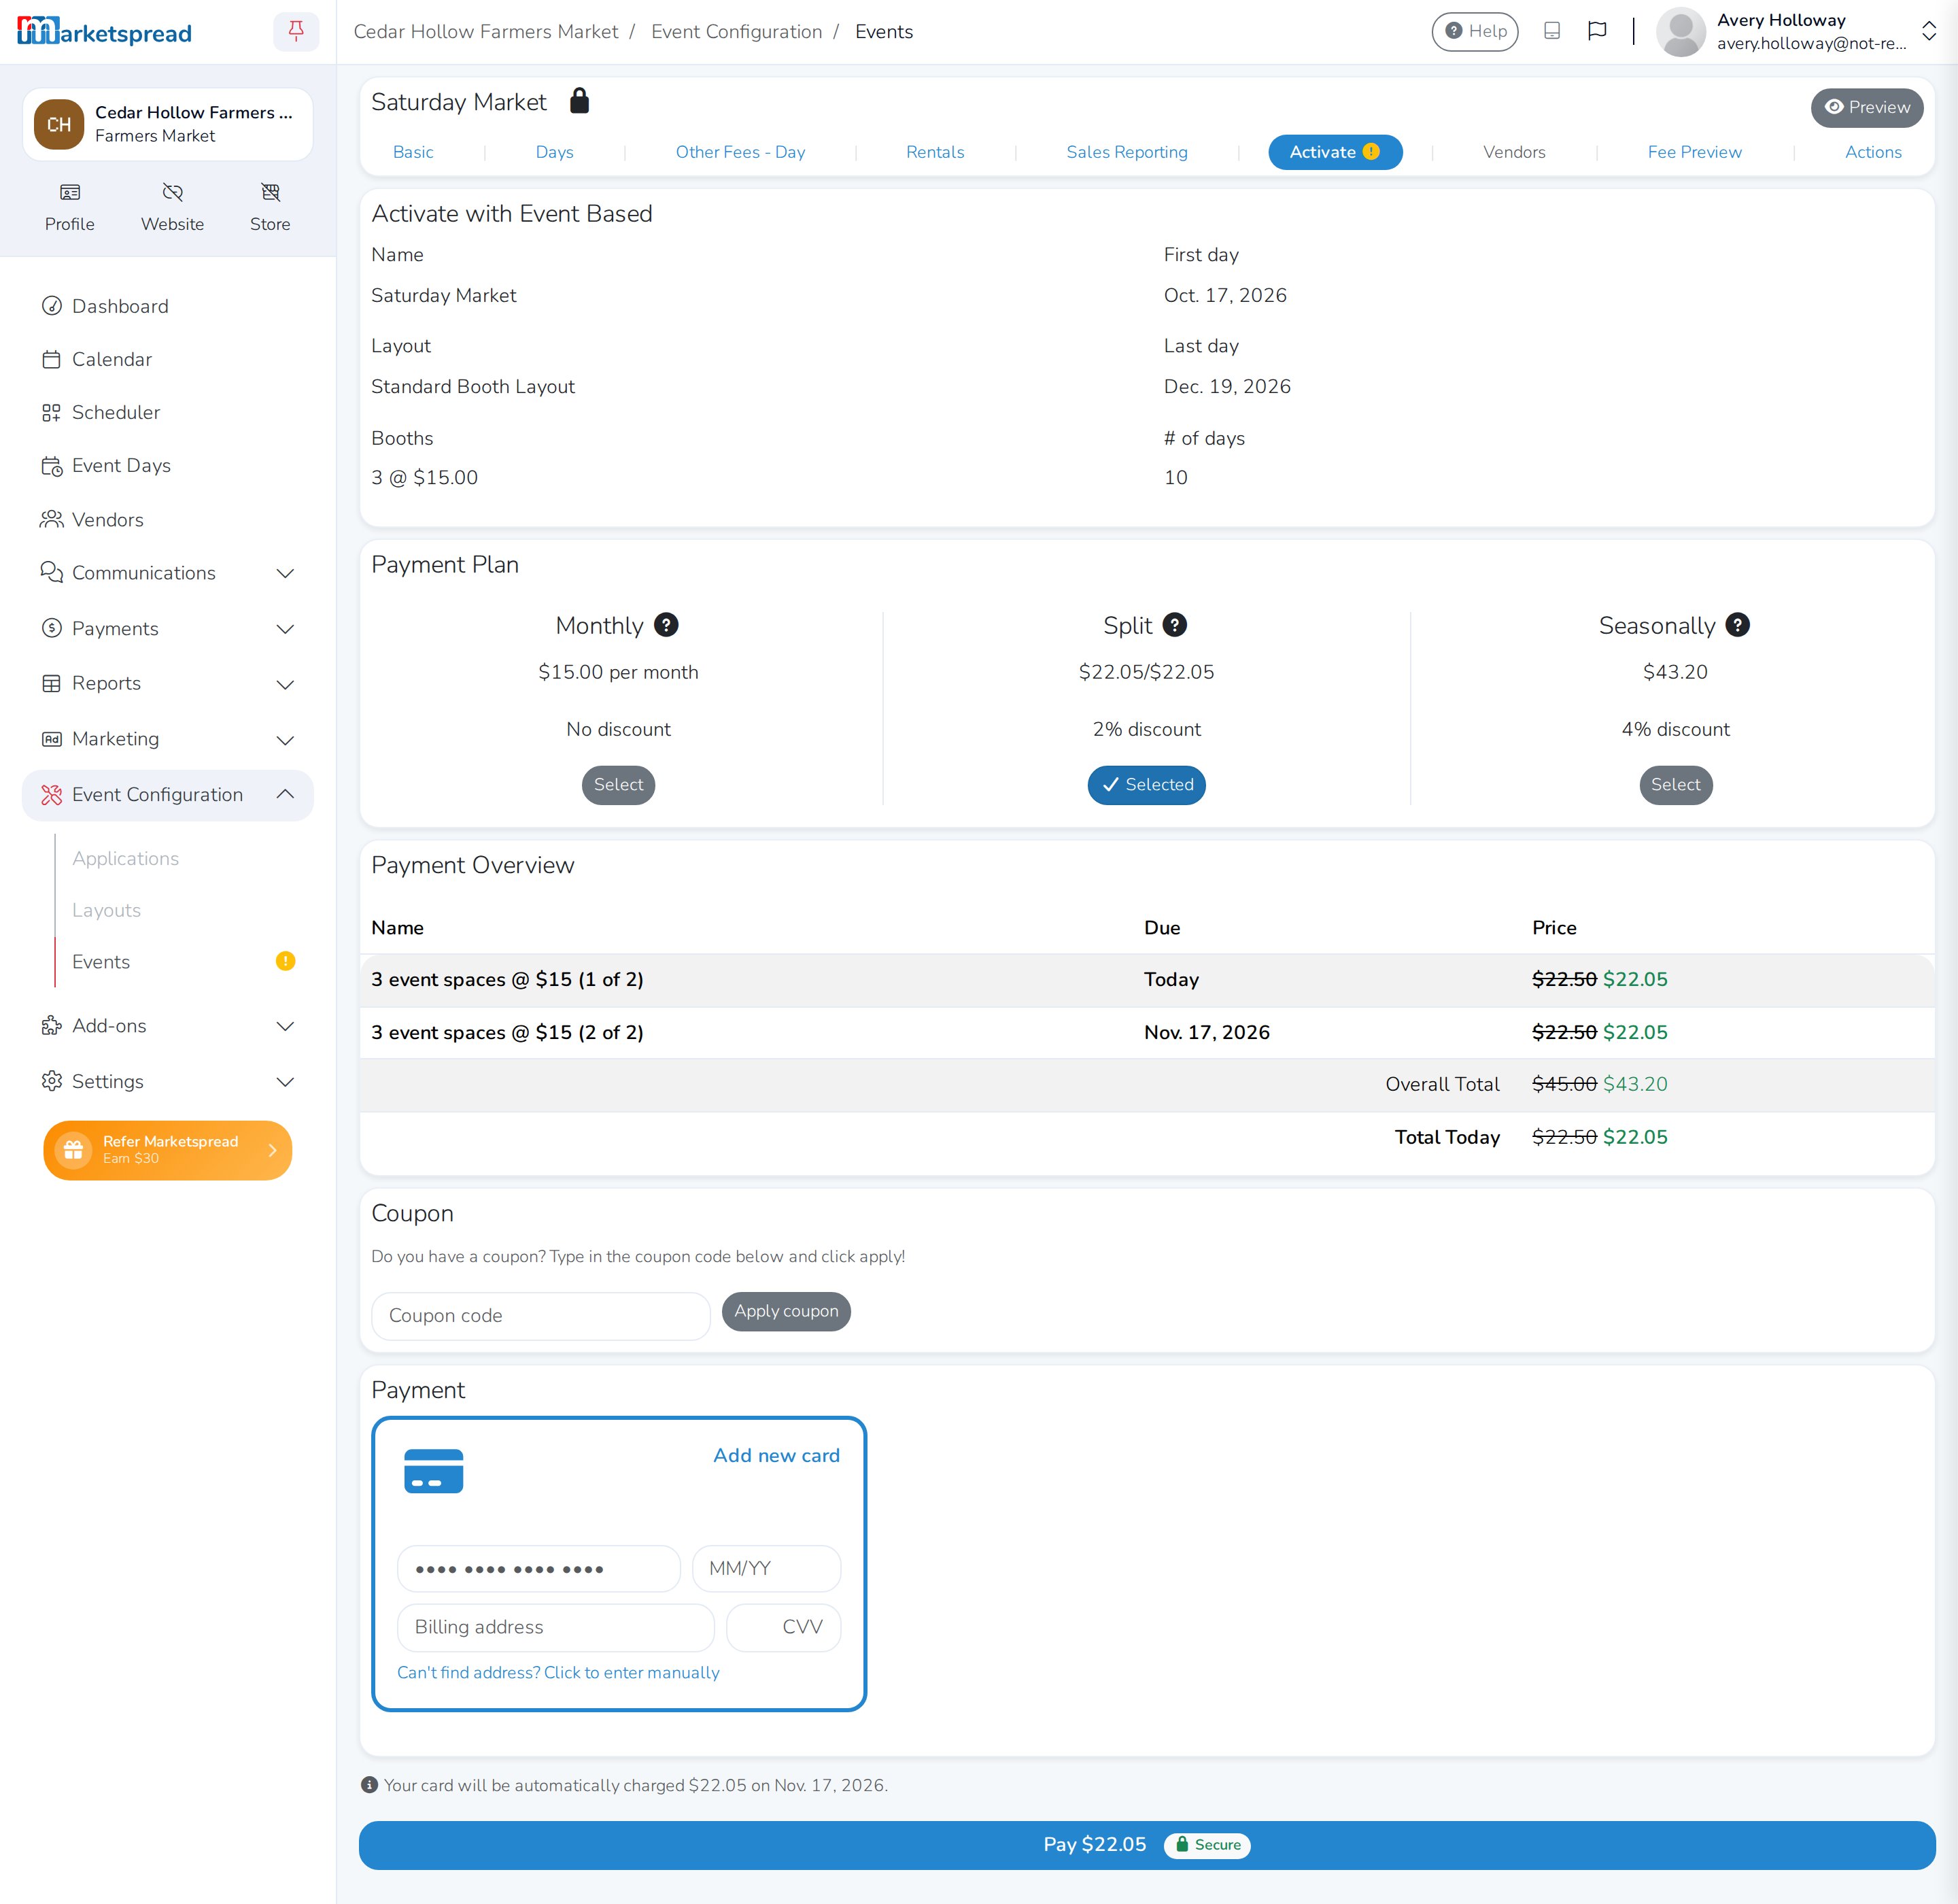
Enter a coupon and click Apply coupon, if you have one.
-
Add or choose a card, and click Pay.
Pay with Vendor Pass-through
-
Review the event the same way, then check the Payment Overview for the one-time activation fee.
-
Add or choose a card, and click Pay.
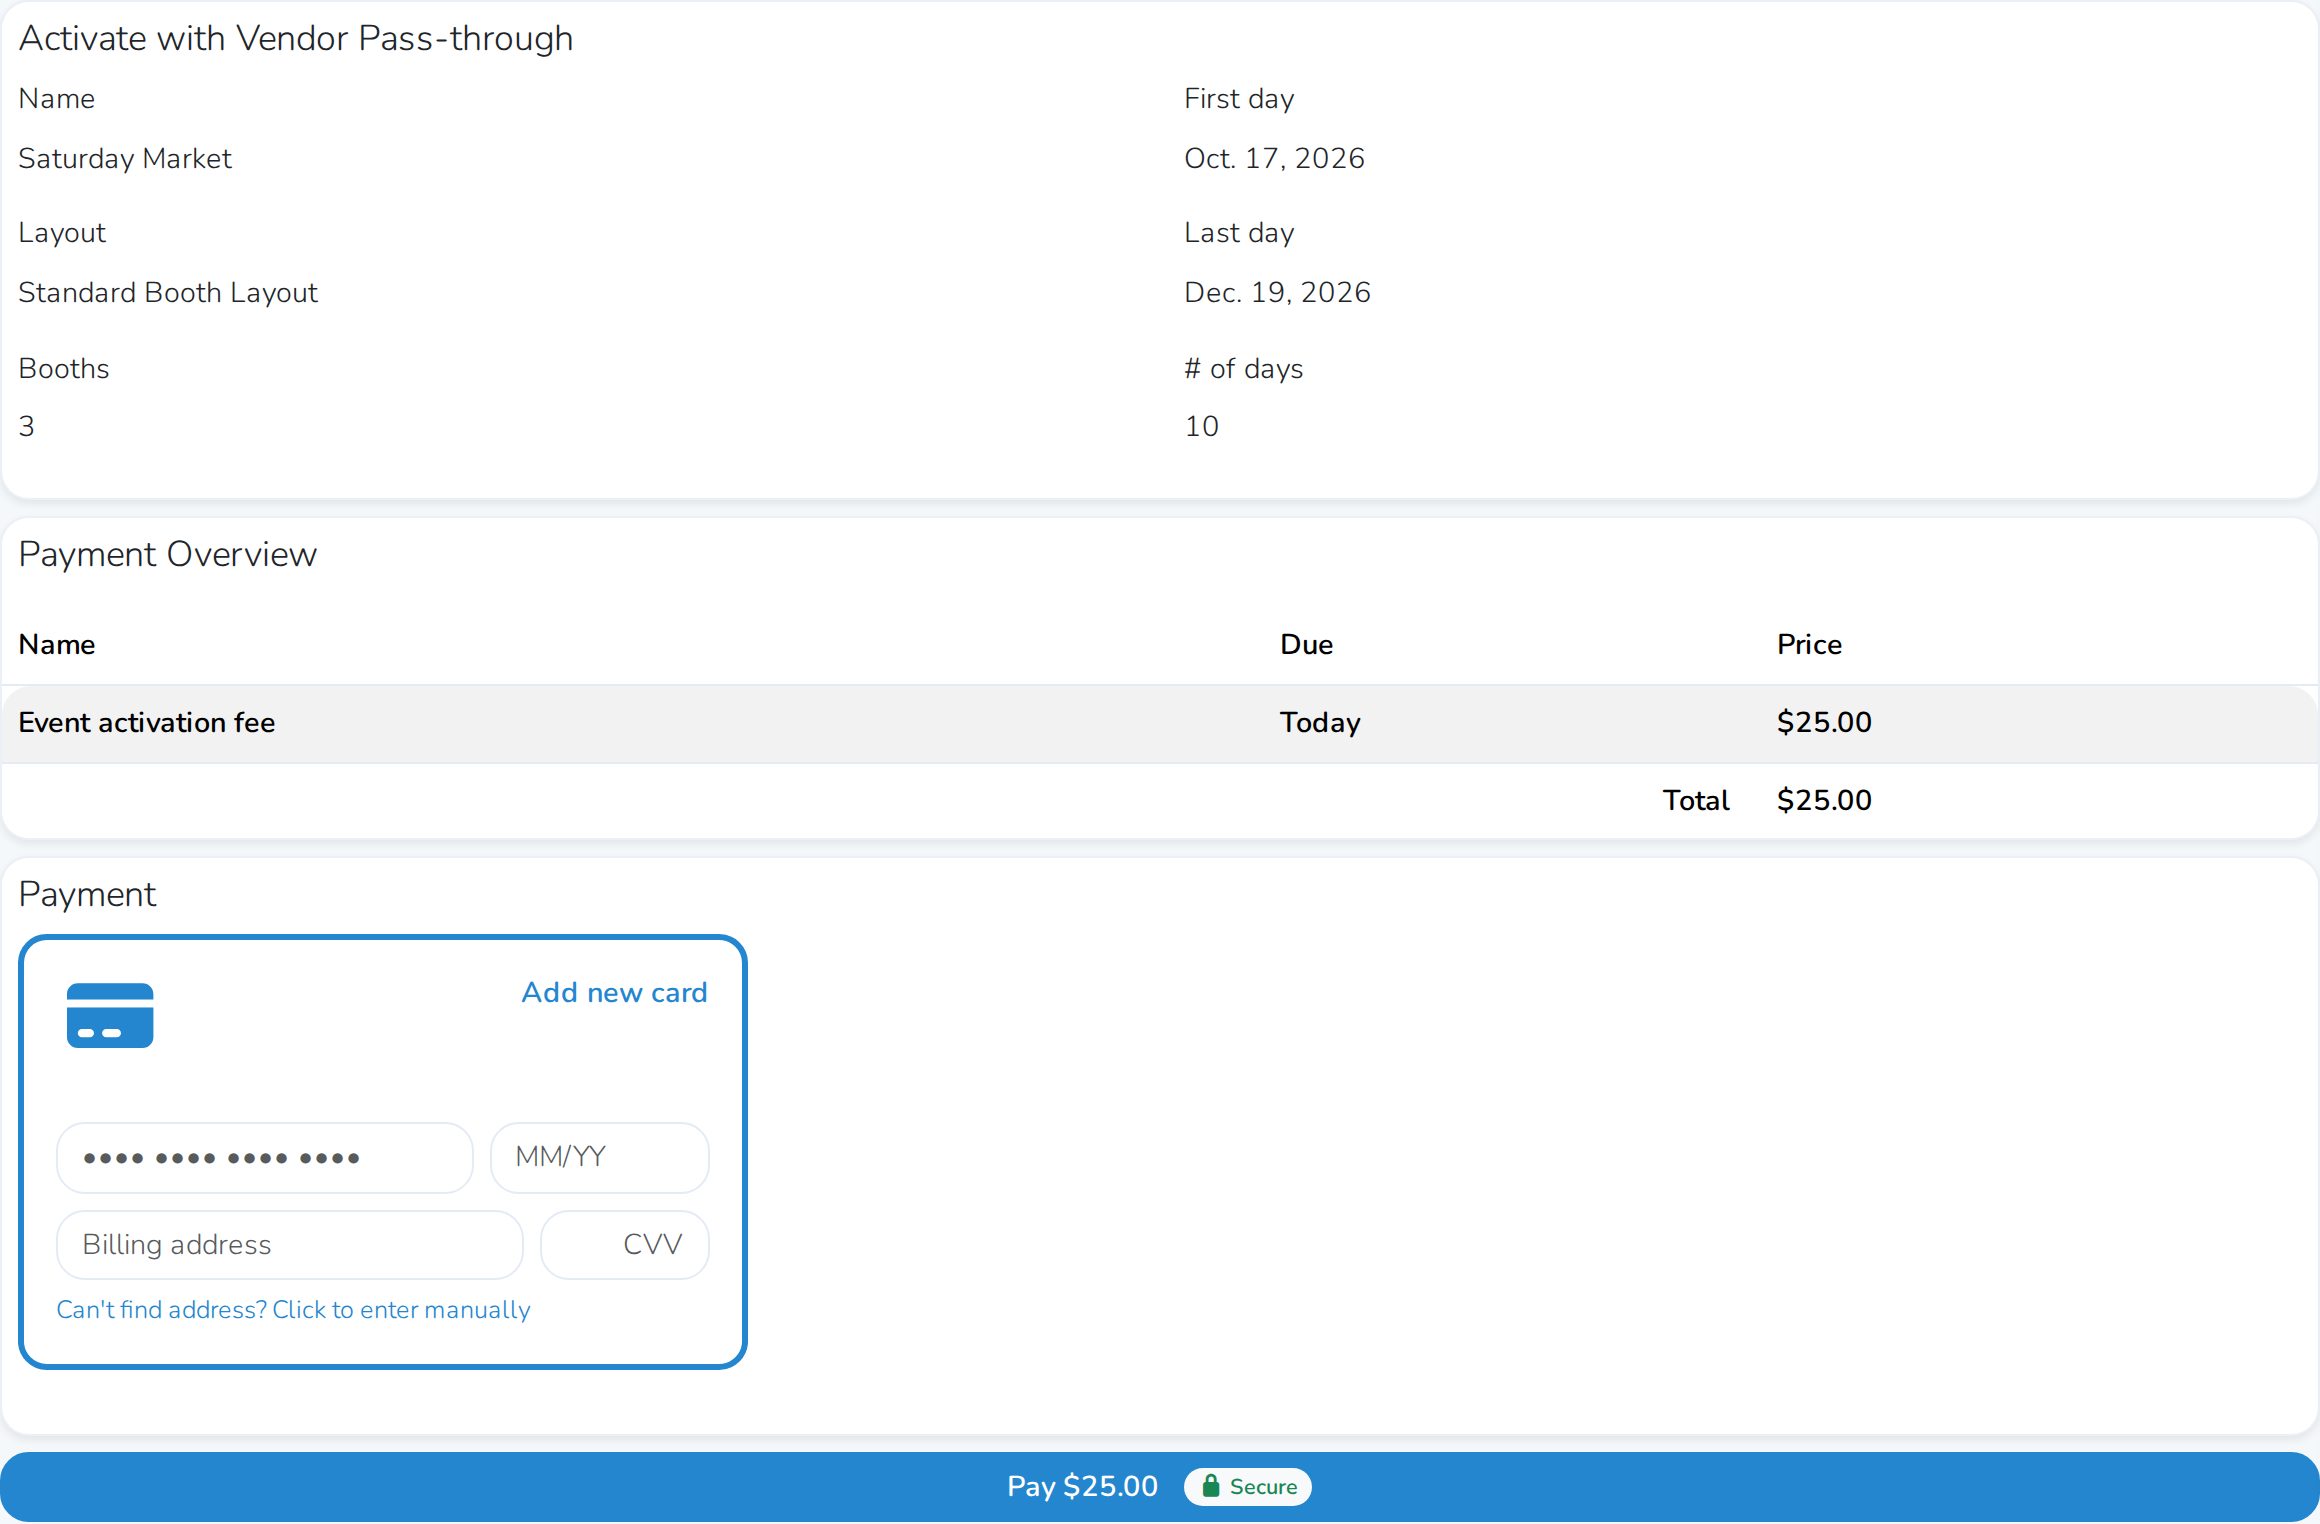
Once payment goes through, your event is activated and live — vendors can find it and apply. You'll land on a confirmation with a link to the paid invoice.
Next, see How to Find Vendors and Exhibitors.
Manage the event from Actions
Open Actions for a few more tools:
- Clone copies the event into a new one. See Cloning an Event or Event Series.
- Re-sync fees recalculates fees for vendors already assigned, without touching invoices already sent.
- Archive moves a finished event to Previous Events. Unarchive brings it back.
- Delete removes an event for good, but only before it's activated. Once vendors can apply, archiving is how you retire it.