


Once a vendor is booked into a booth for an event day, you can override what they're charged for it instead of the price Scheduler calculates automatically. You do this from Scheduler — the same screen you use to book vendors into booths. Setting an override replaces that booth's price outright; it doesn't add to it.
Set a price override
-
In the left-hand panel of your dashboard, click Scheduler.
-
Click Select a vendor near the top of the screen, and choose the vendor.
-
Click Edit.
-
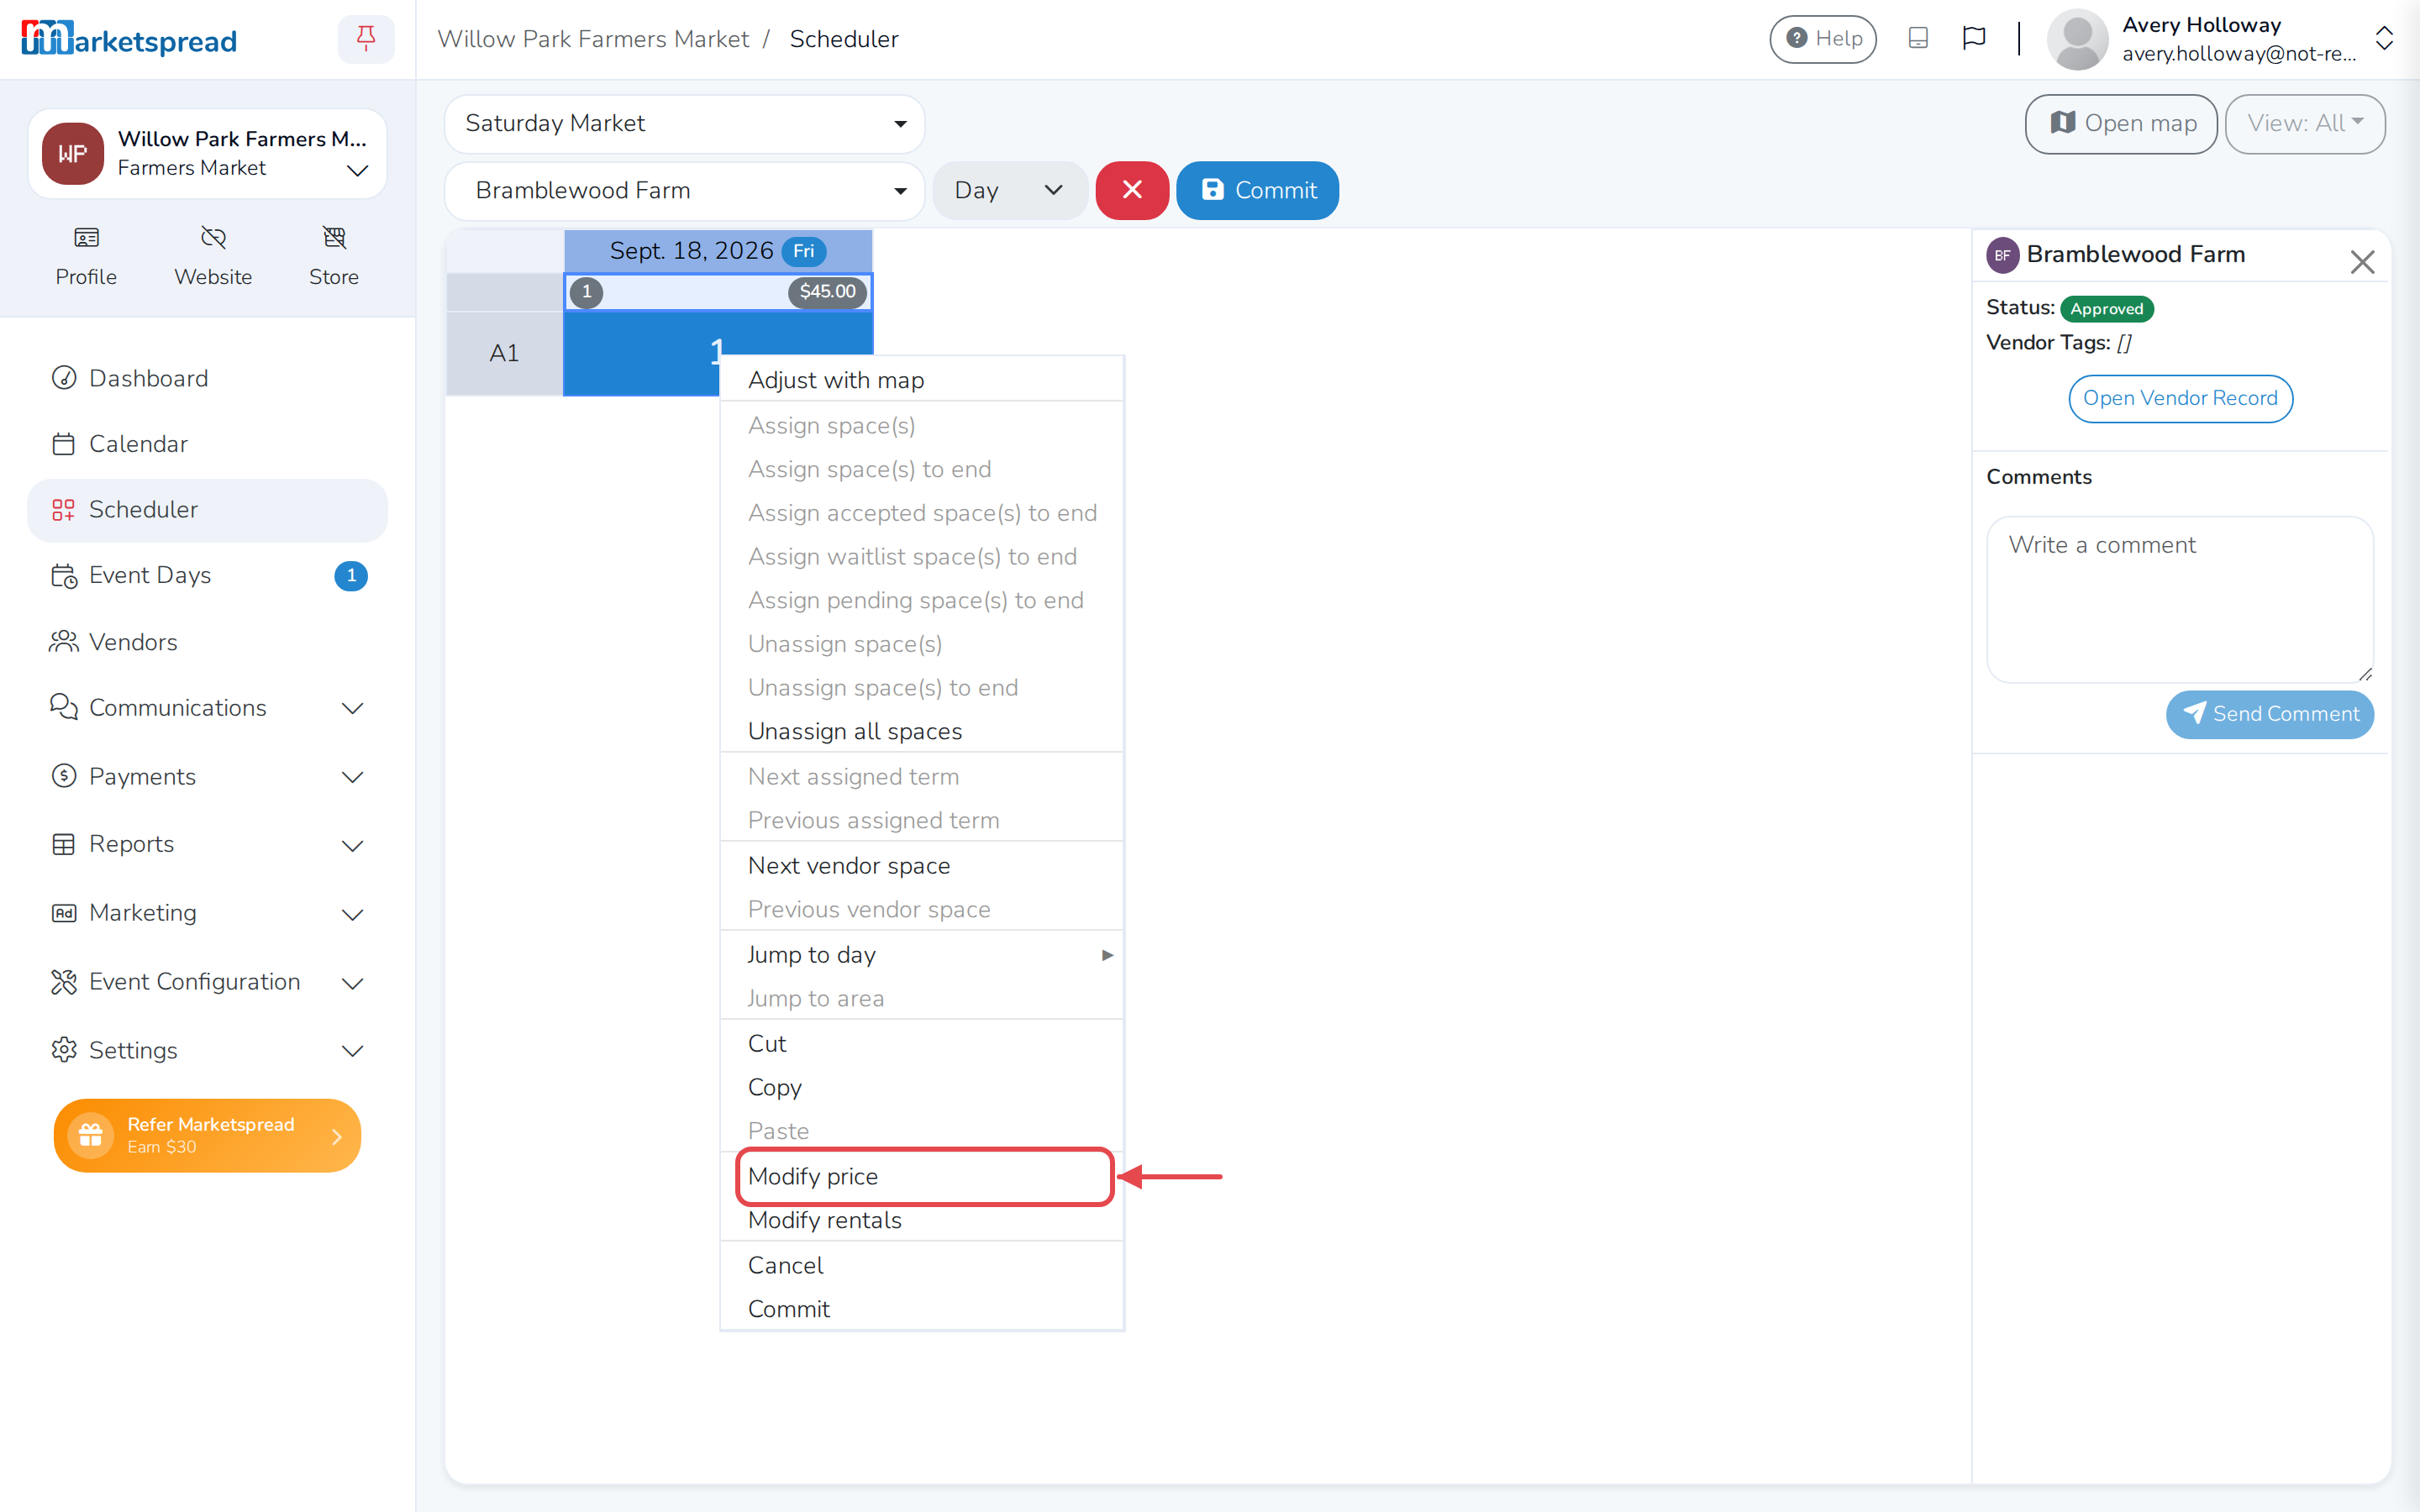
Right-click the cell that shows the vendor's price for that day (two-finger click on a Mac trackpad), then click Modify price.
-
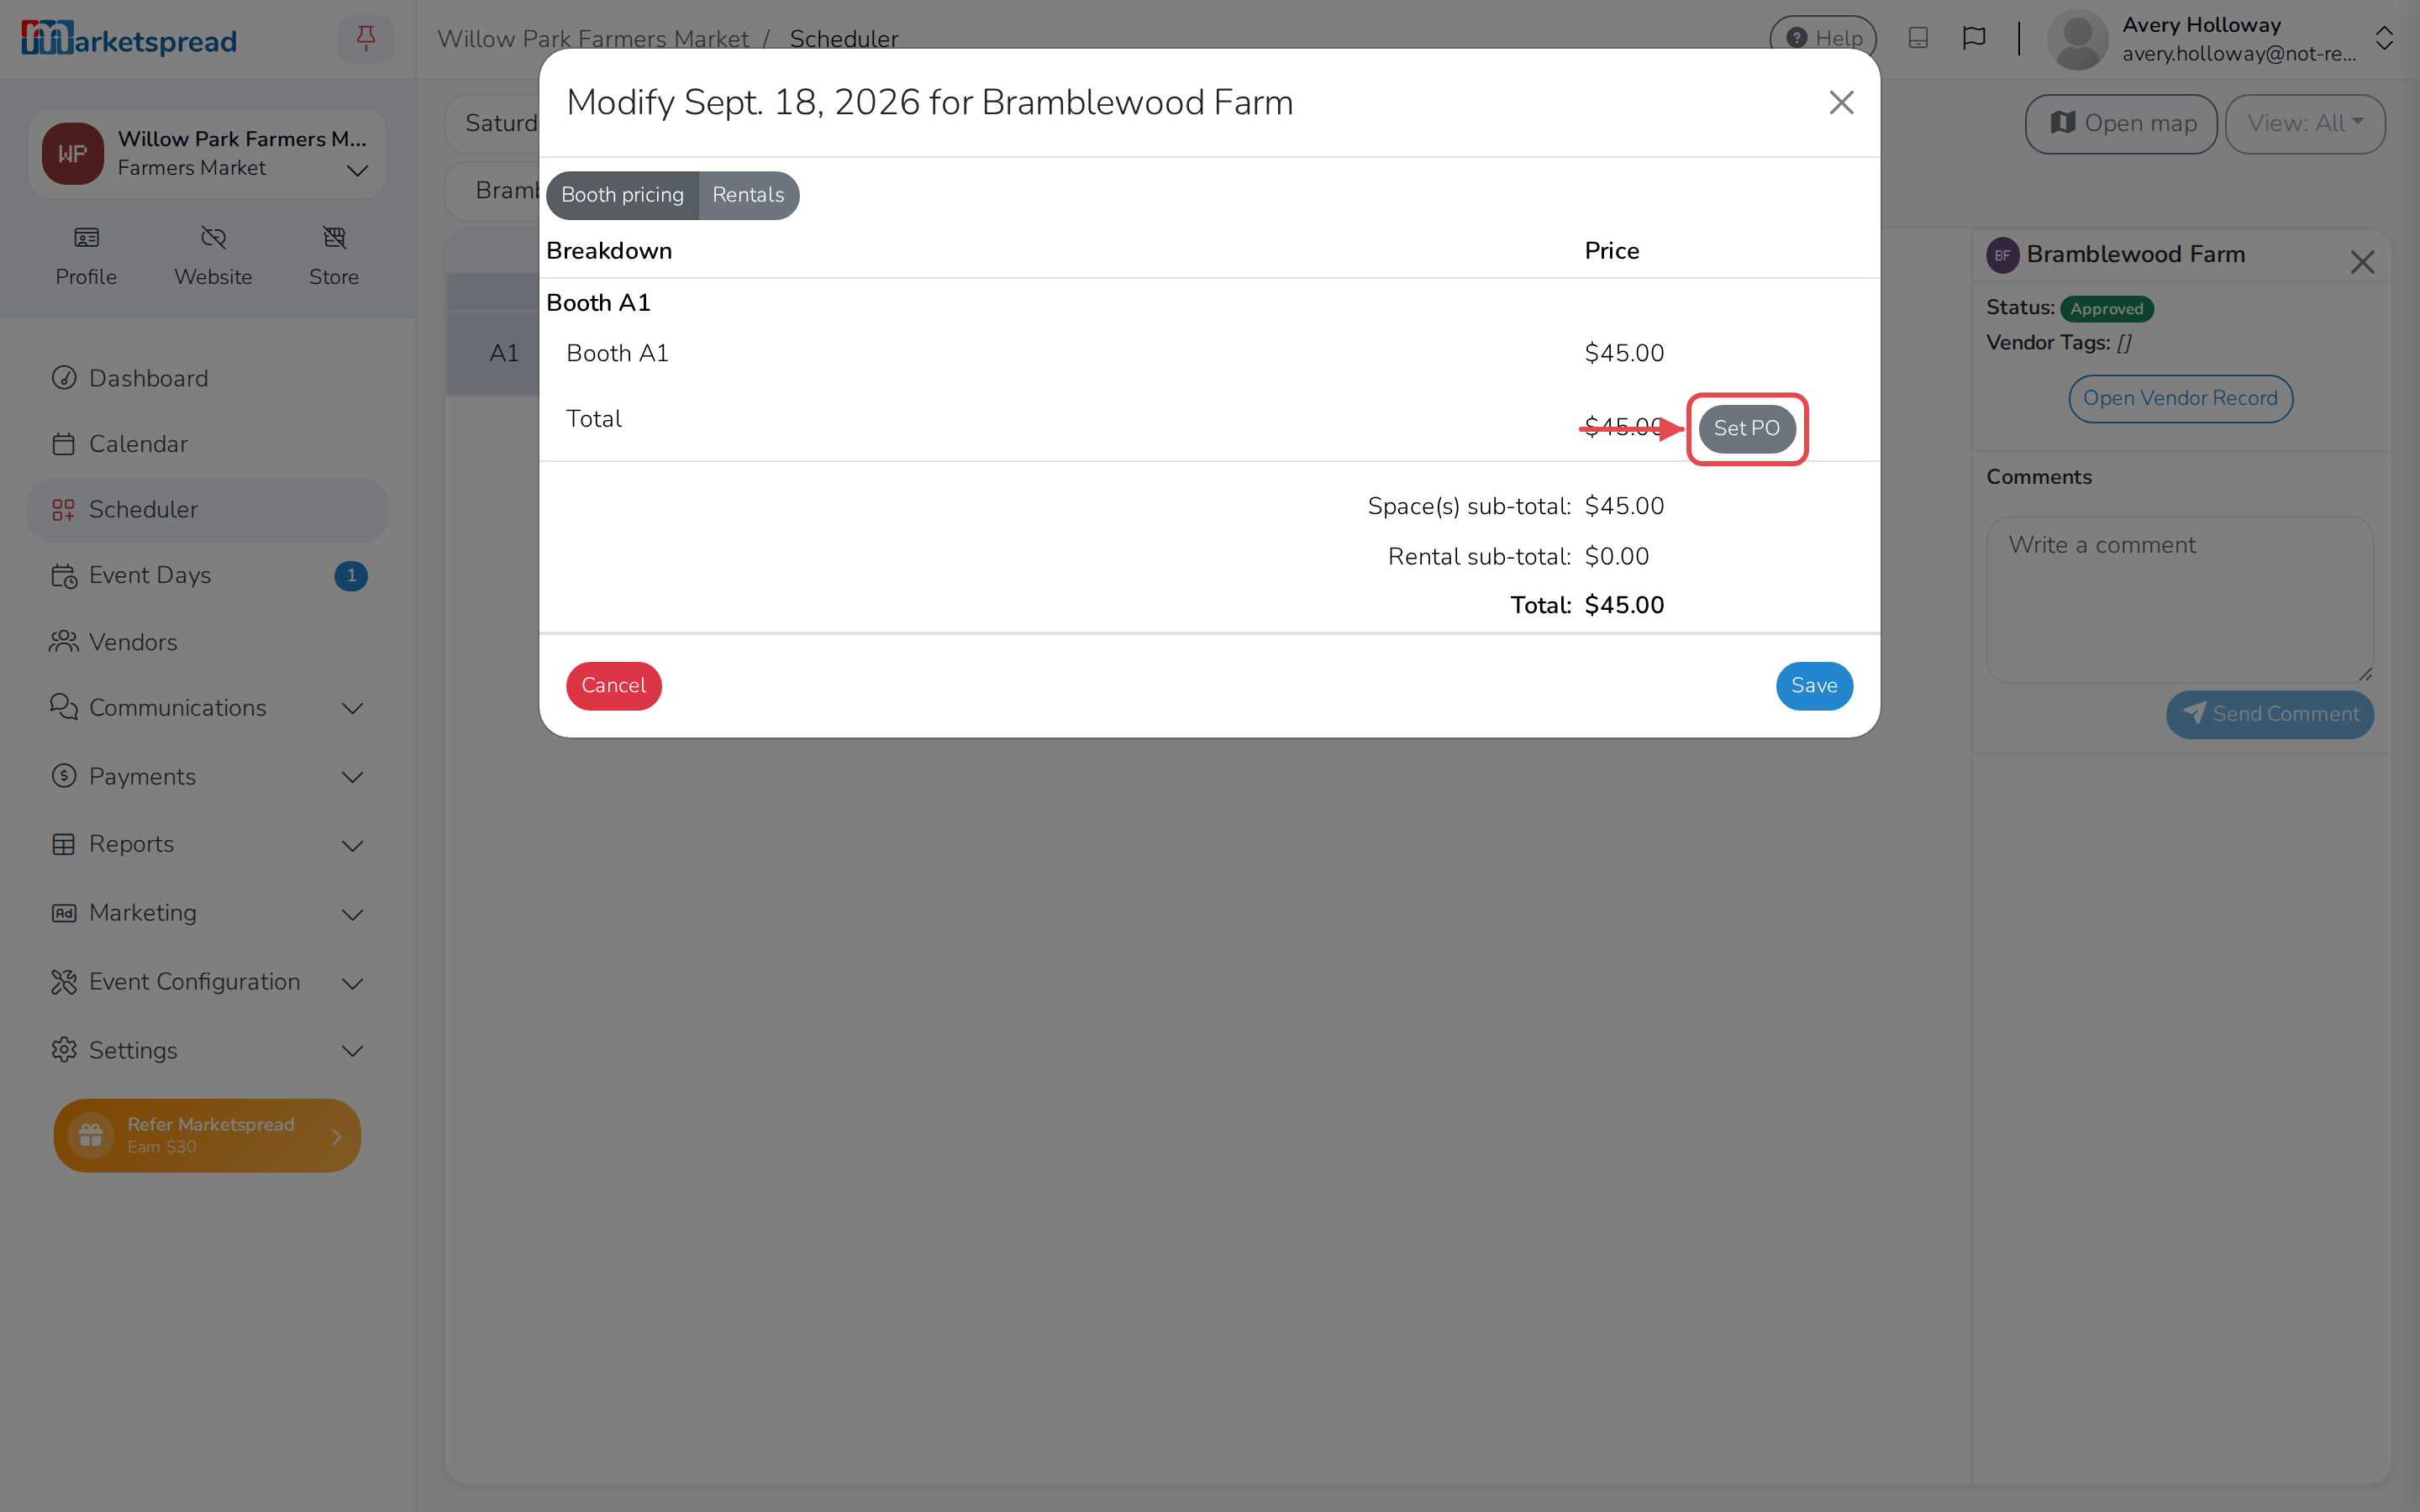
Next to the booth, click Set PO. If the vendor has more than one booth that day, each one has its own Set PO button.
-
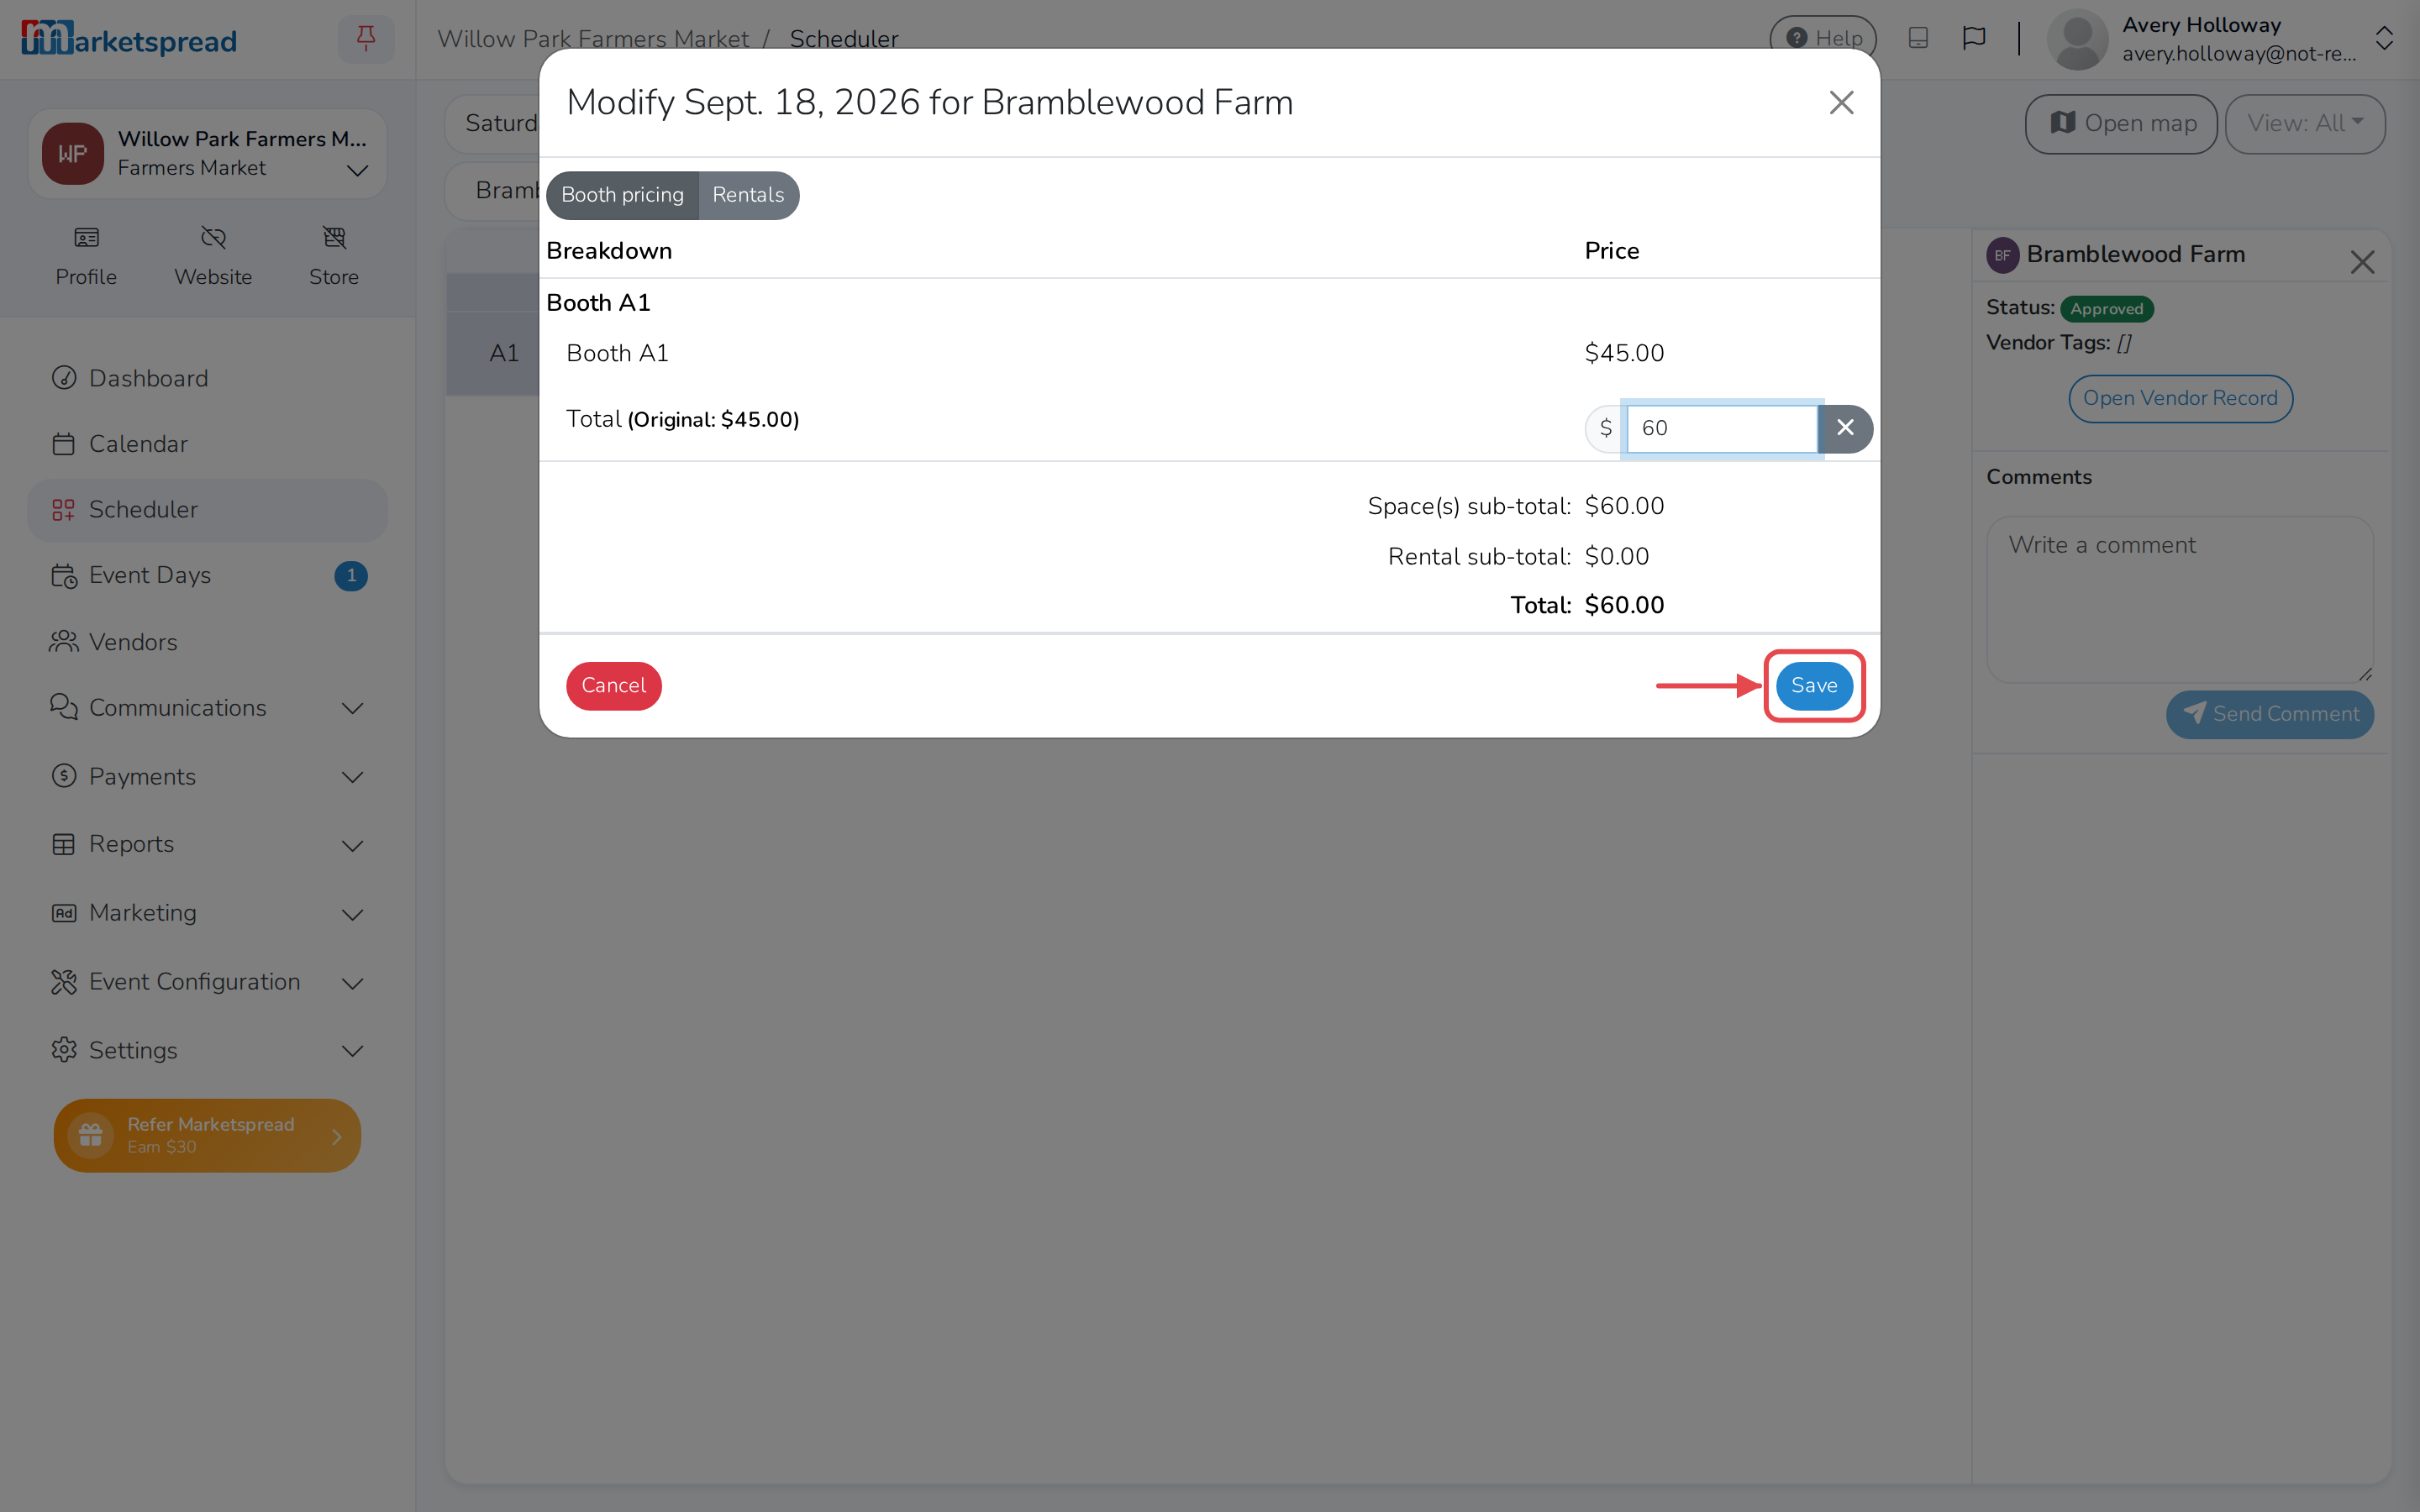
Type the price you want to charge instead.
-
Click Save.
-
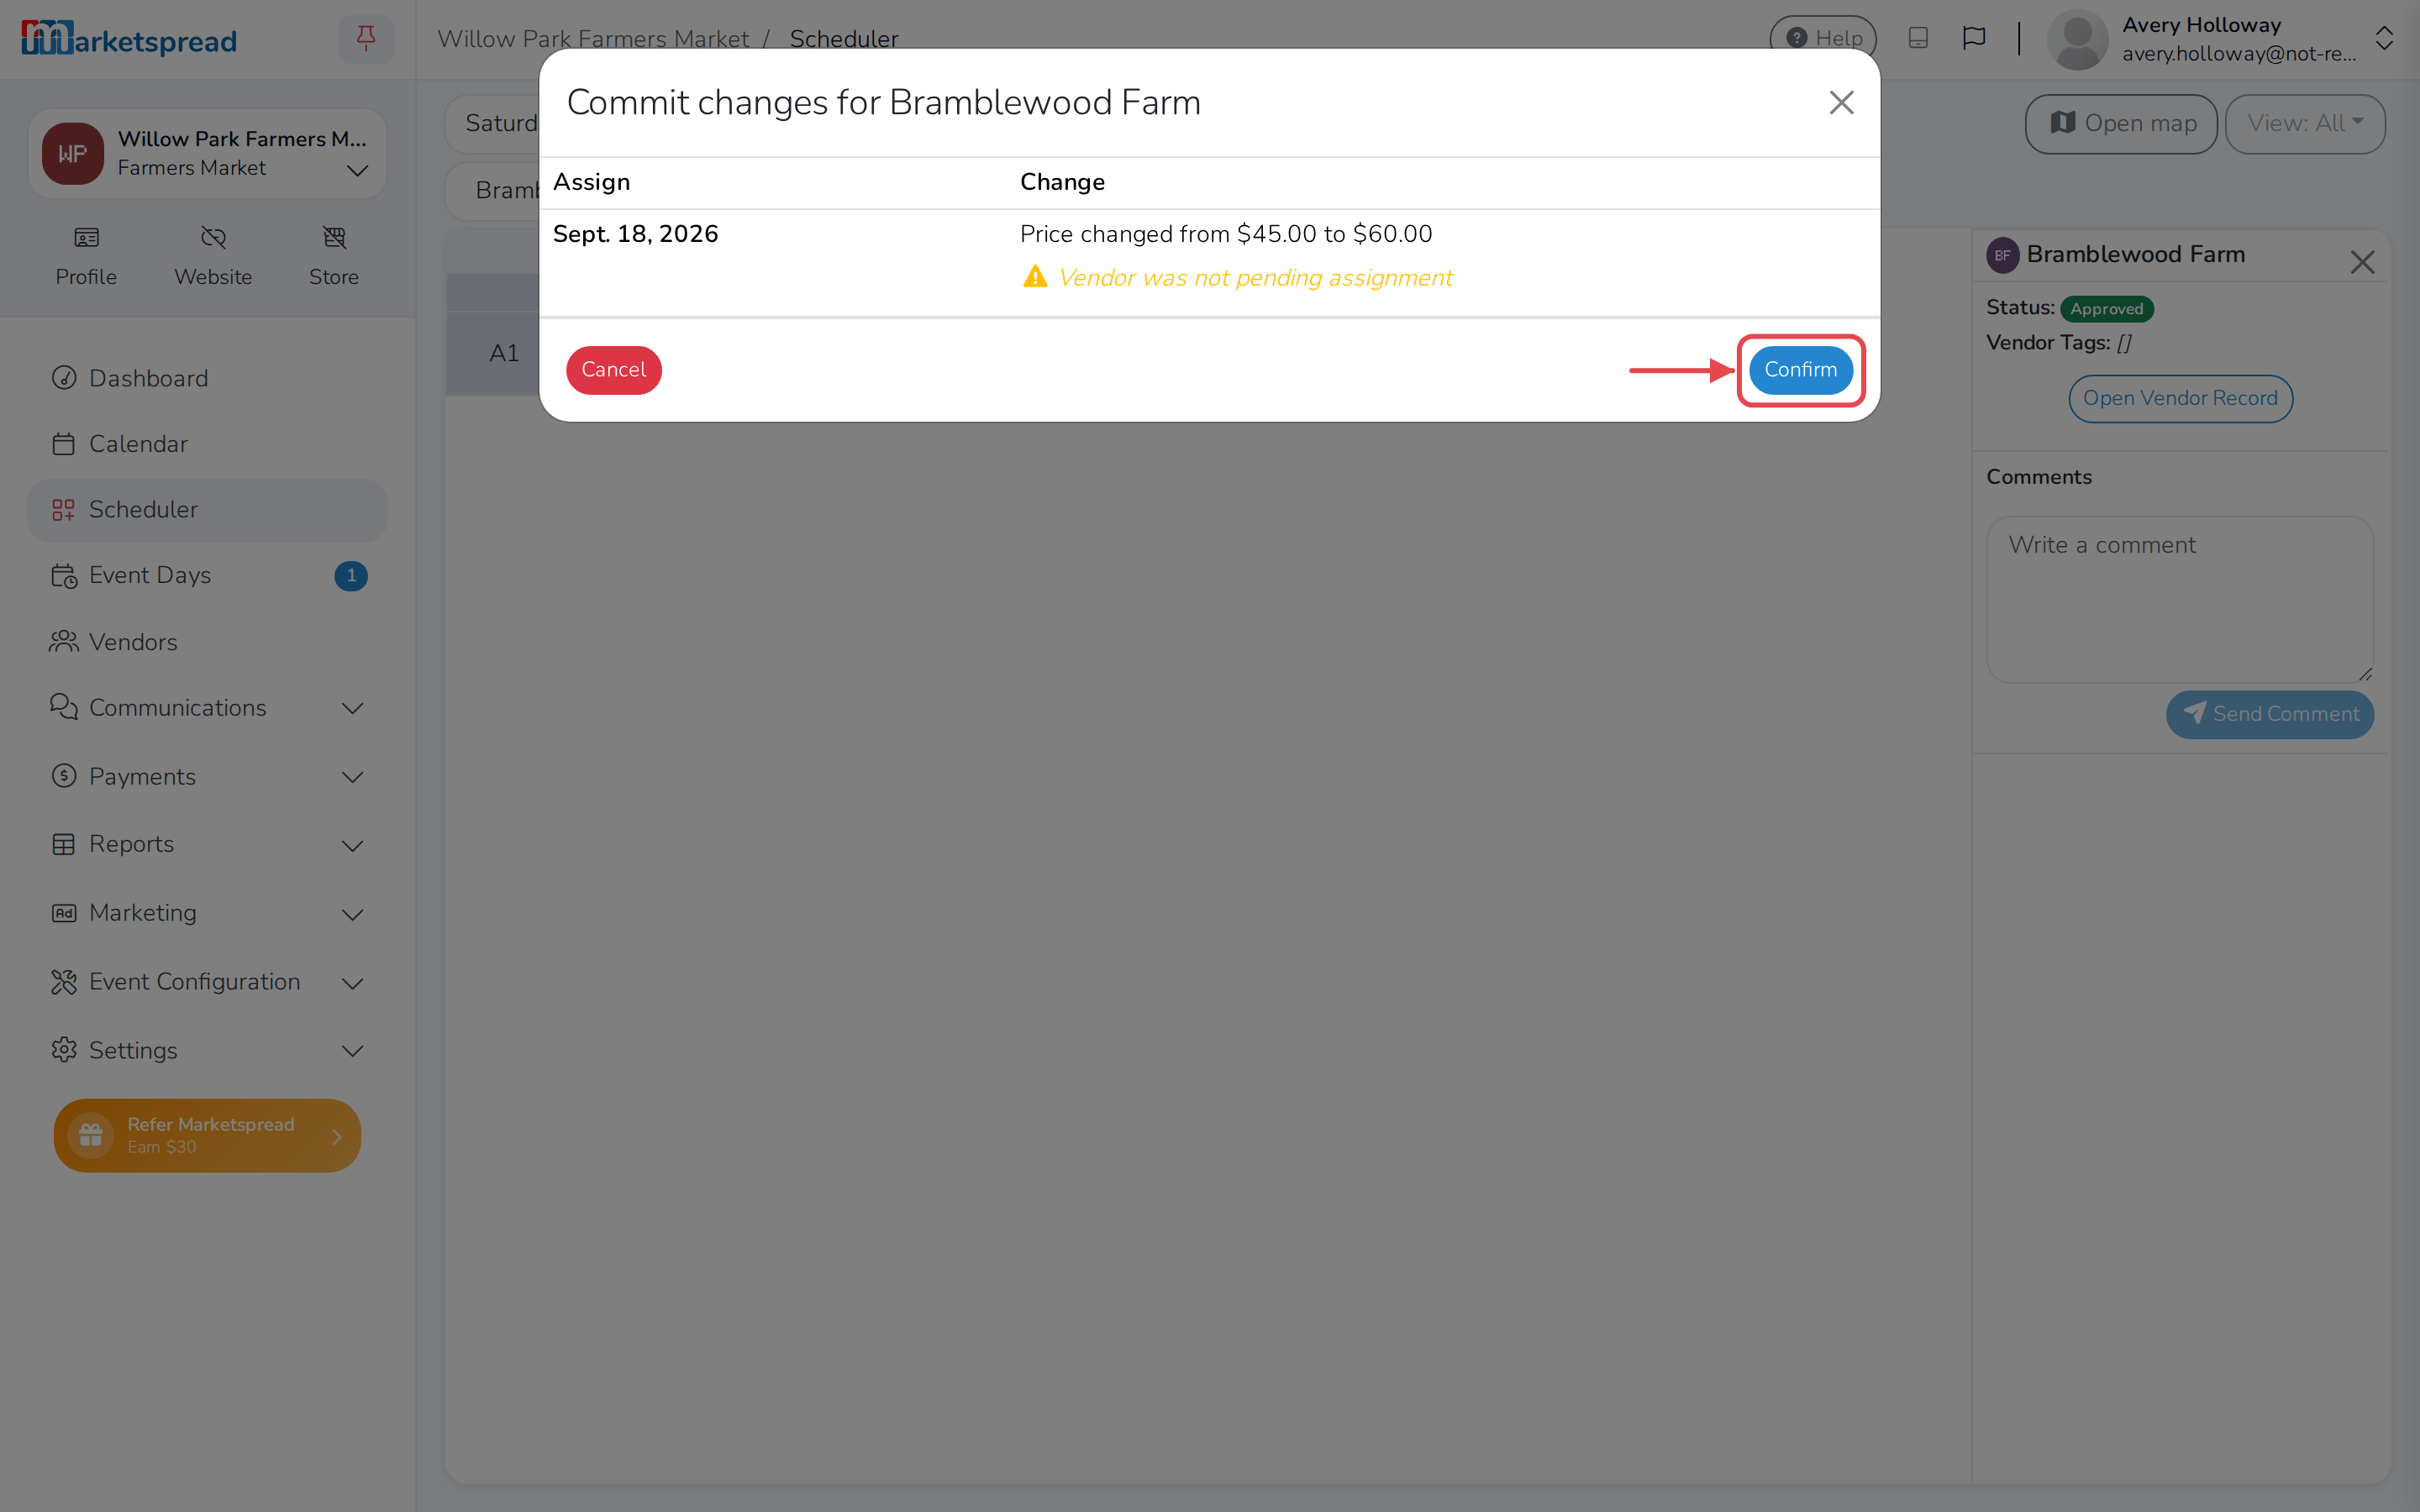
Click Commit.
-
Review the change, then click Confirm.
Note
Only some accounts can do this. If you don't see Set PO, ask an account admin to give you permission to override prices.
Caution
If the vendor already paid and the override lowers what they owe, you'll be asked to refund them. Type REFUND or CREDIT to confirm the refund or credit — this can't be undone.
Remove a price override
Clearing an override puts the booth back to the price Scheduler would otherwise calculate.
- Right-click the vendor's cell for that day, then click Modify price.
- Click Clear price override, next to the price.
- Click Save.
- Click Commit.
- Review the change, then click Confirm.
Note
If removing the override lowers what the vendor owes and they already paid, you'll be asked to refund them the same way as above.
Check the change on the invoice
- Right-click the vendor's cell for that day, then click View invoice.
Note
View invoice is greyed out until that day has an invoice. If it doesn't yet, the price change is still saved — you'll be able to see it once one is created.