


Every vendor carries a status for each day of an event — Pending, Waitlist, Accepted, Rejected or Not Attending — separate from whether they actually have a booth. Set that status from the vendor's own page, then find everyone still waiting for a booth without leaving Scheduler.
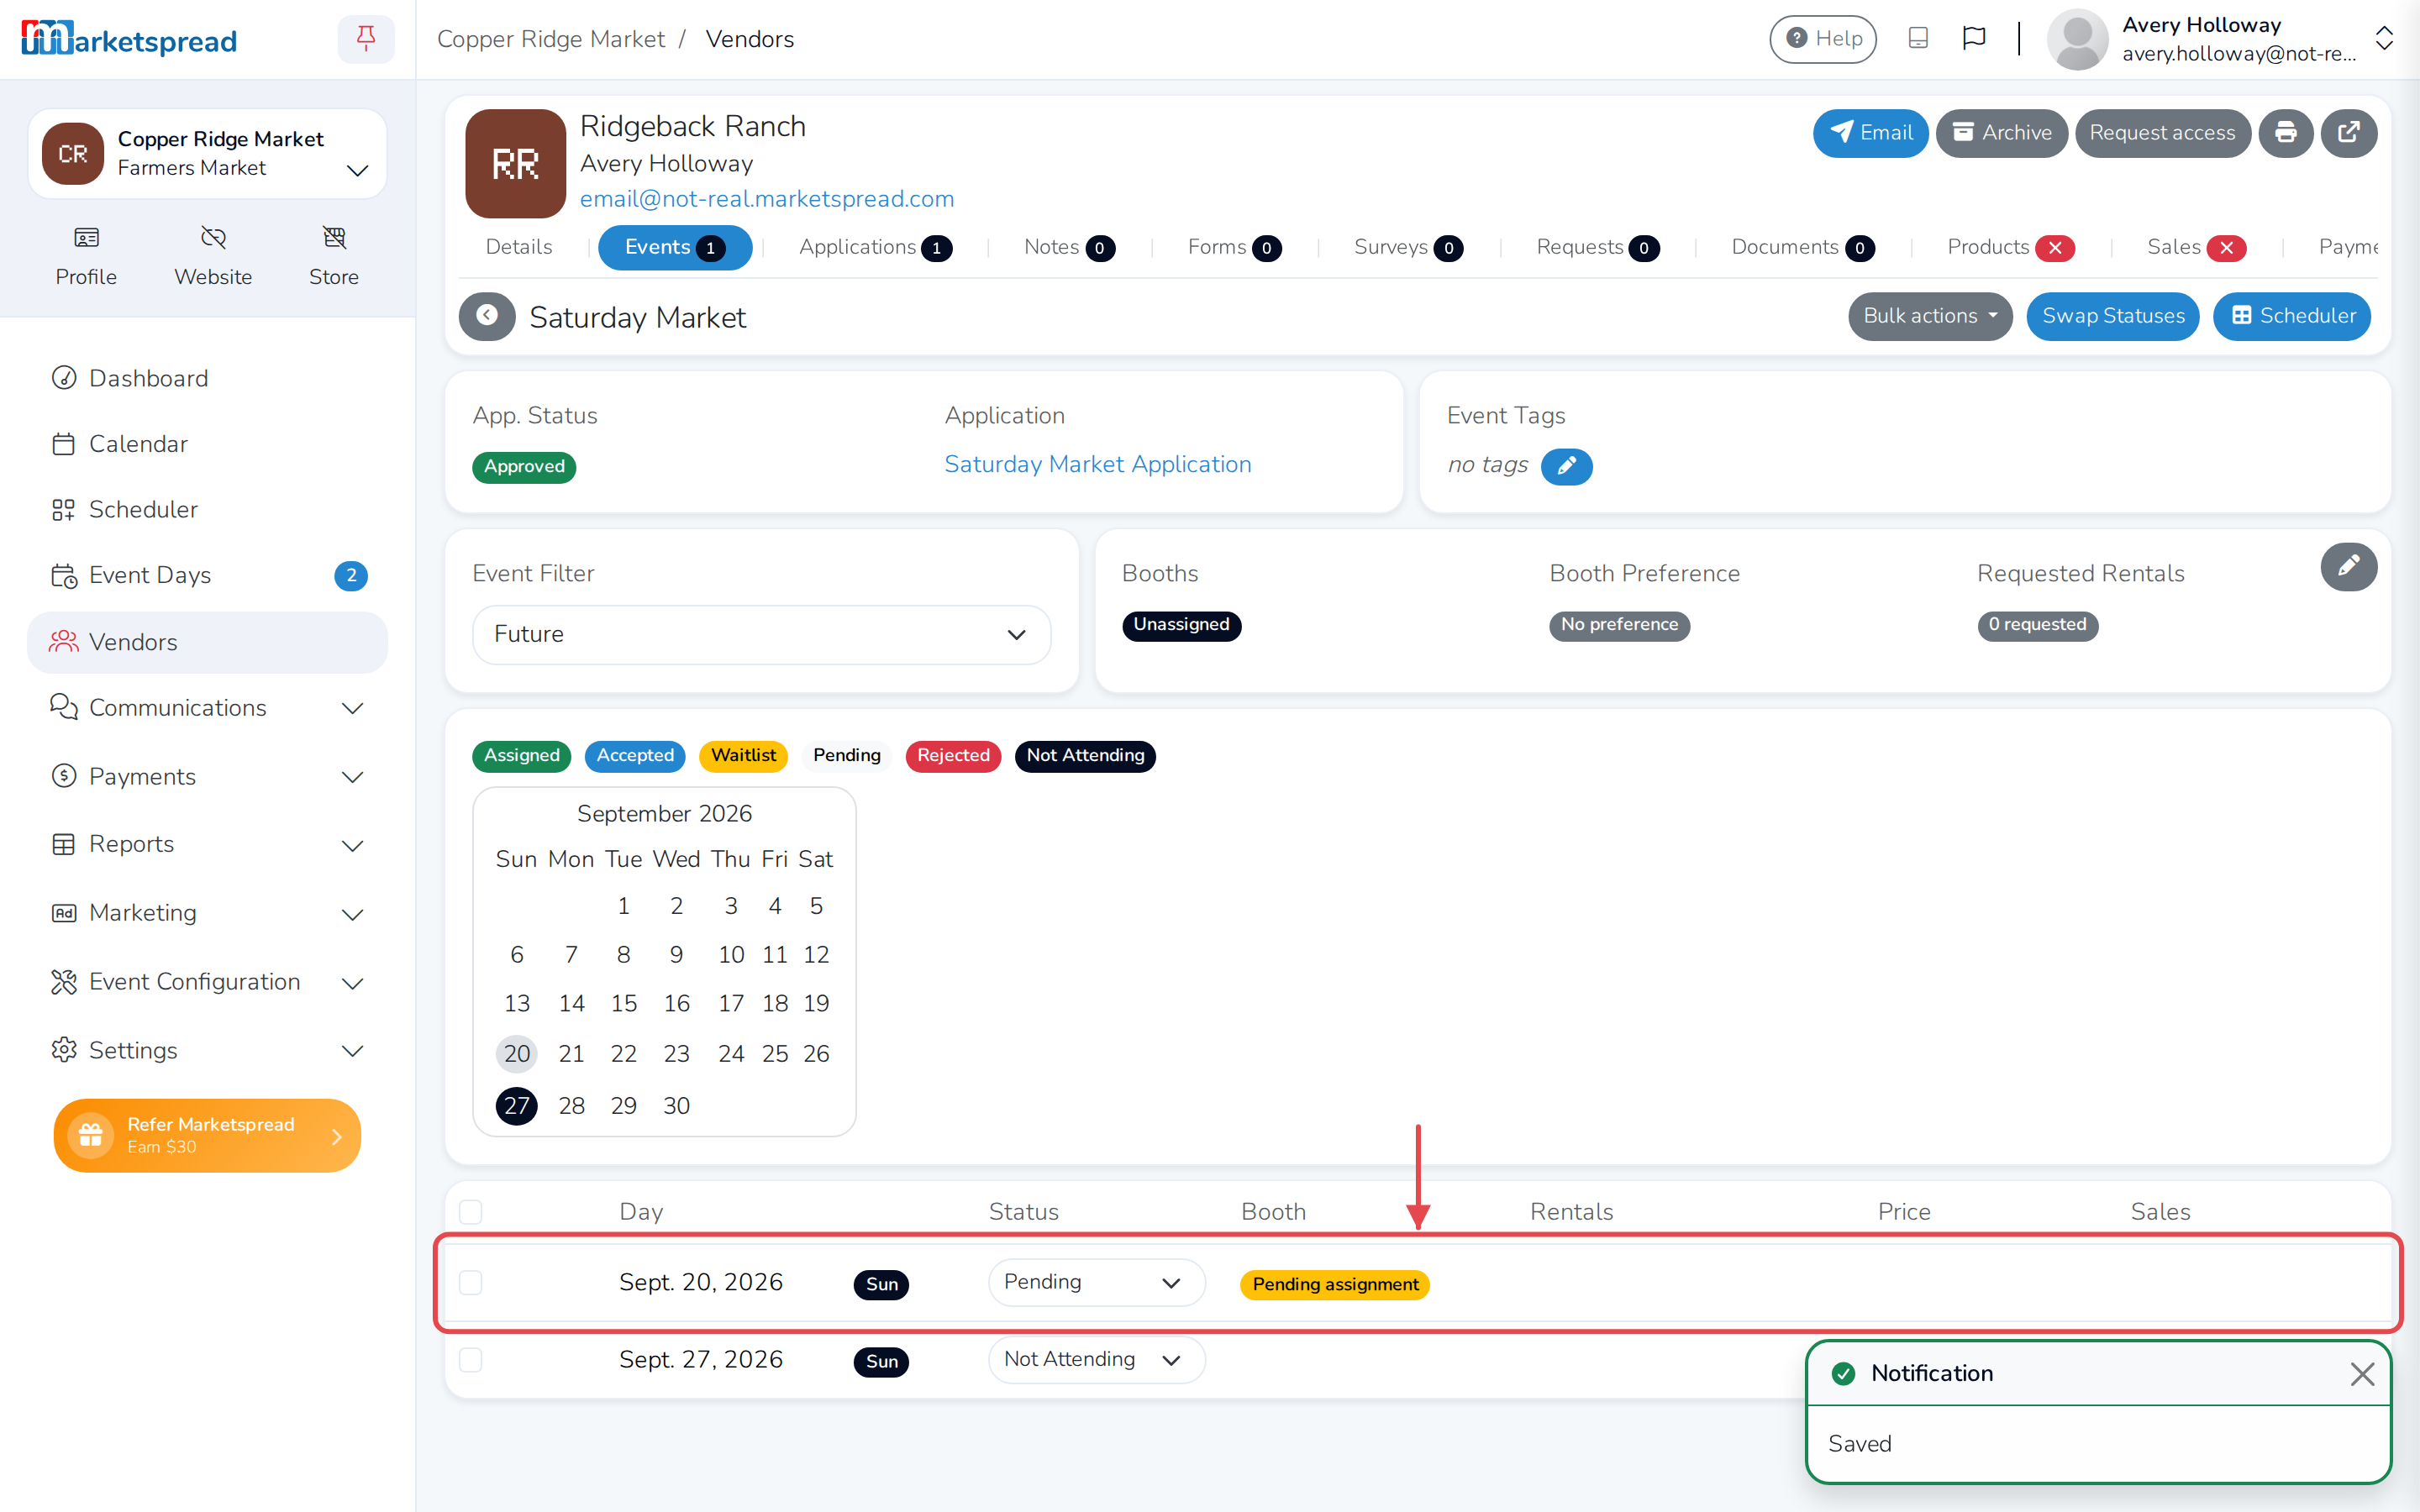
Set a day's status
- Open Vendors in the left-hand menu.
- Click the vendor's name.
- Click Events.
- Click the event you want.
- Next to the day, choose a status from the dropdown: Pending, Waitlist, Accepted, Rejected, or Not Attending.
Note
A day starts as Not Attending until you mark it, or the vendor asks to attend it.
Find vendors waiting for a booth
-
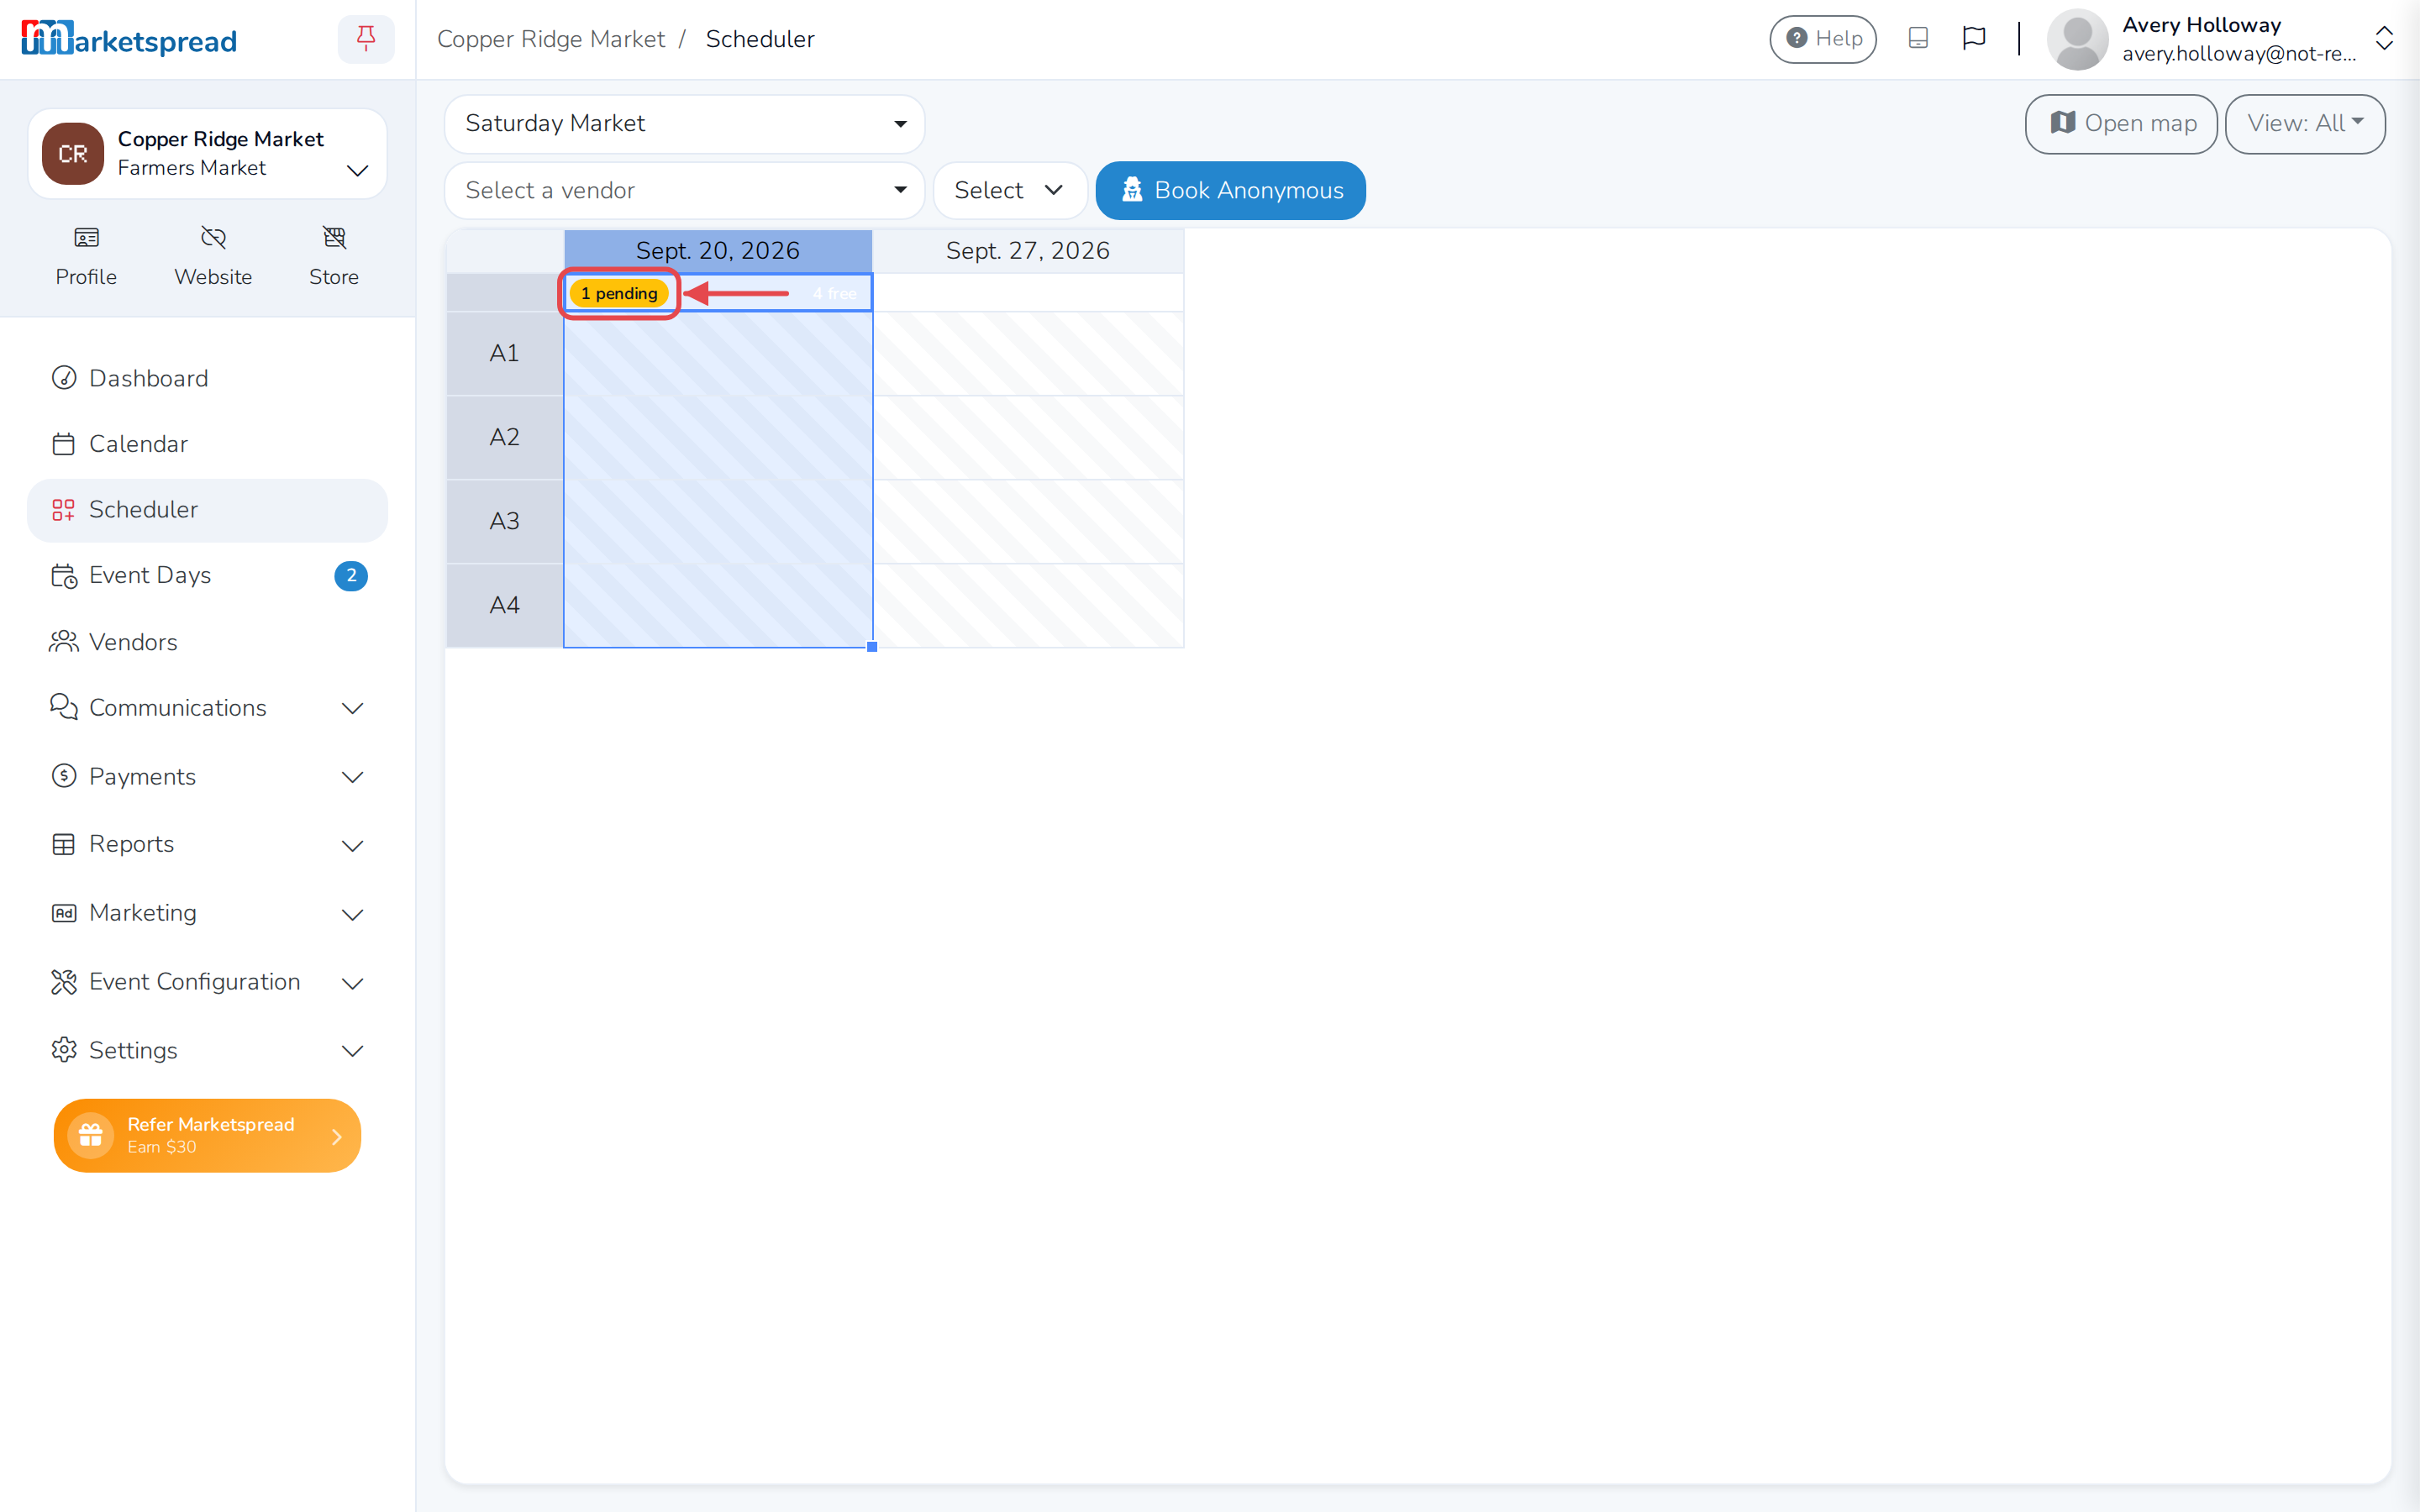
Open Scheduler in the left-hand menu.
-
Leave the vendor dropdown empty. Each event day shows a badge for how many vendors are waiting, like 1 pending, and one for how many booths are free, like 4 free.
-
Click the pending badge for the day you want to fill.
-
Next to the vendor you want, click Select.
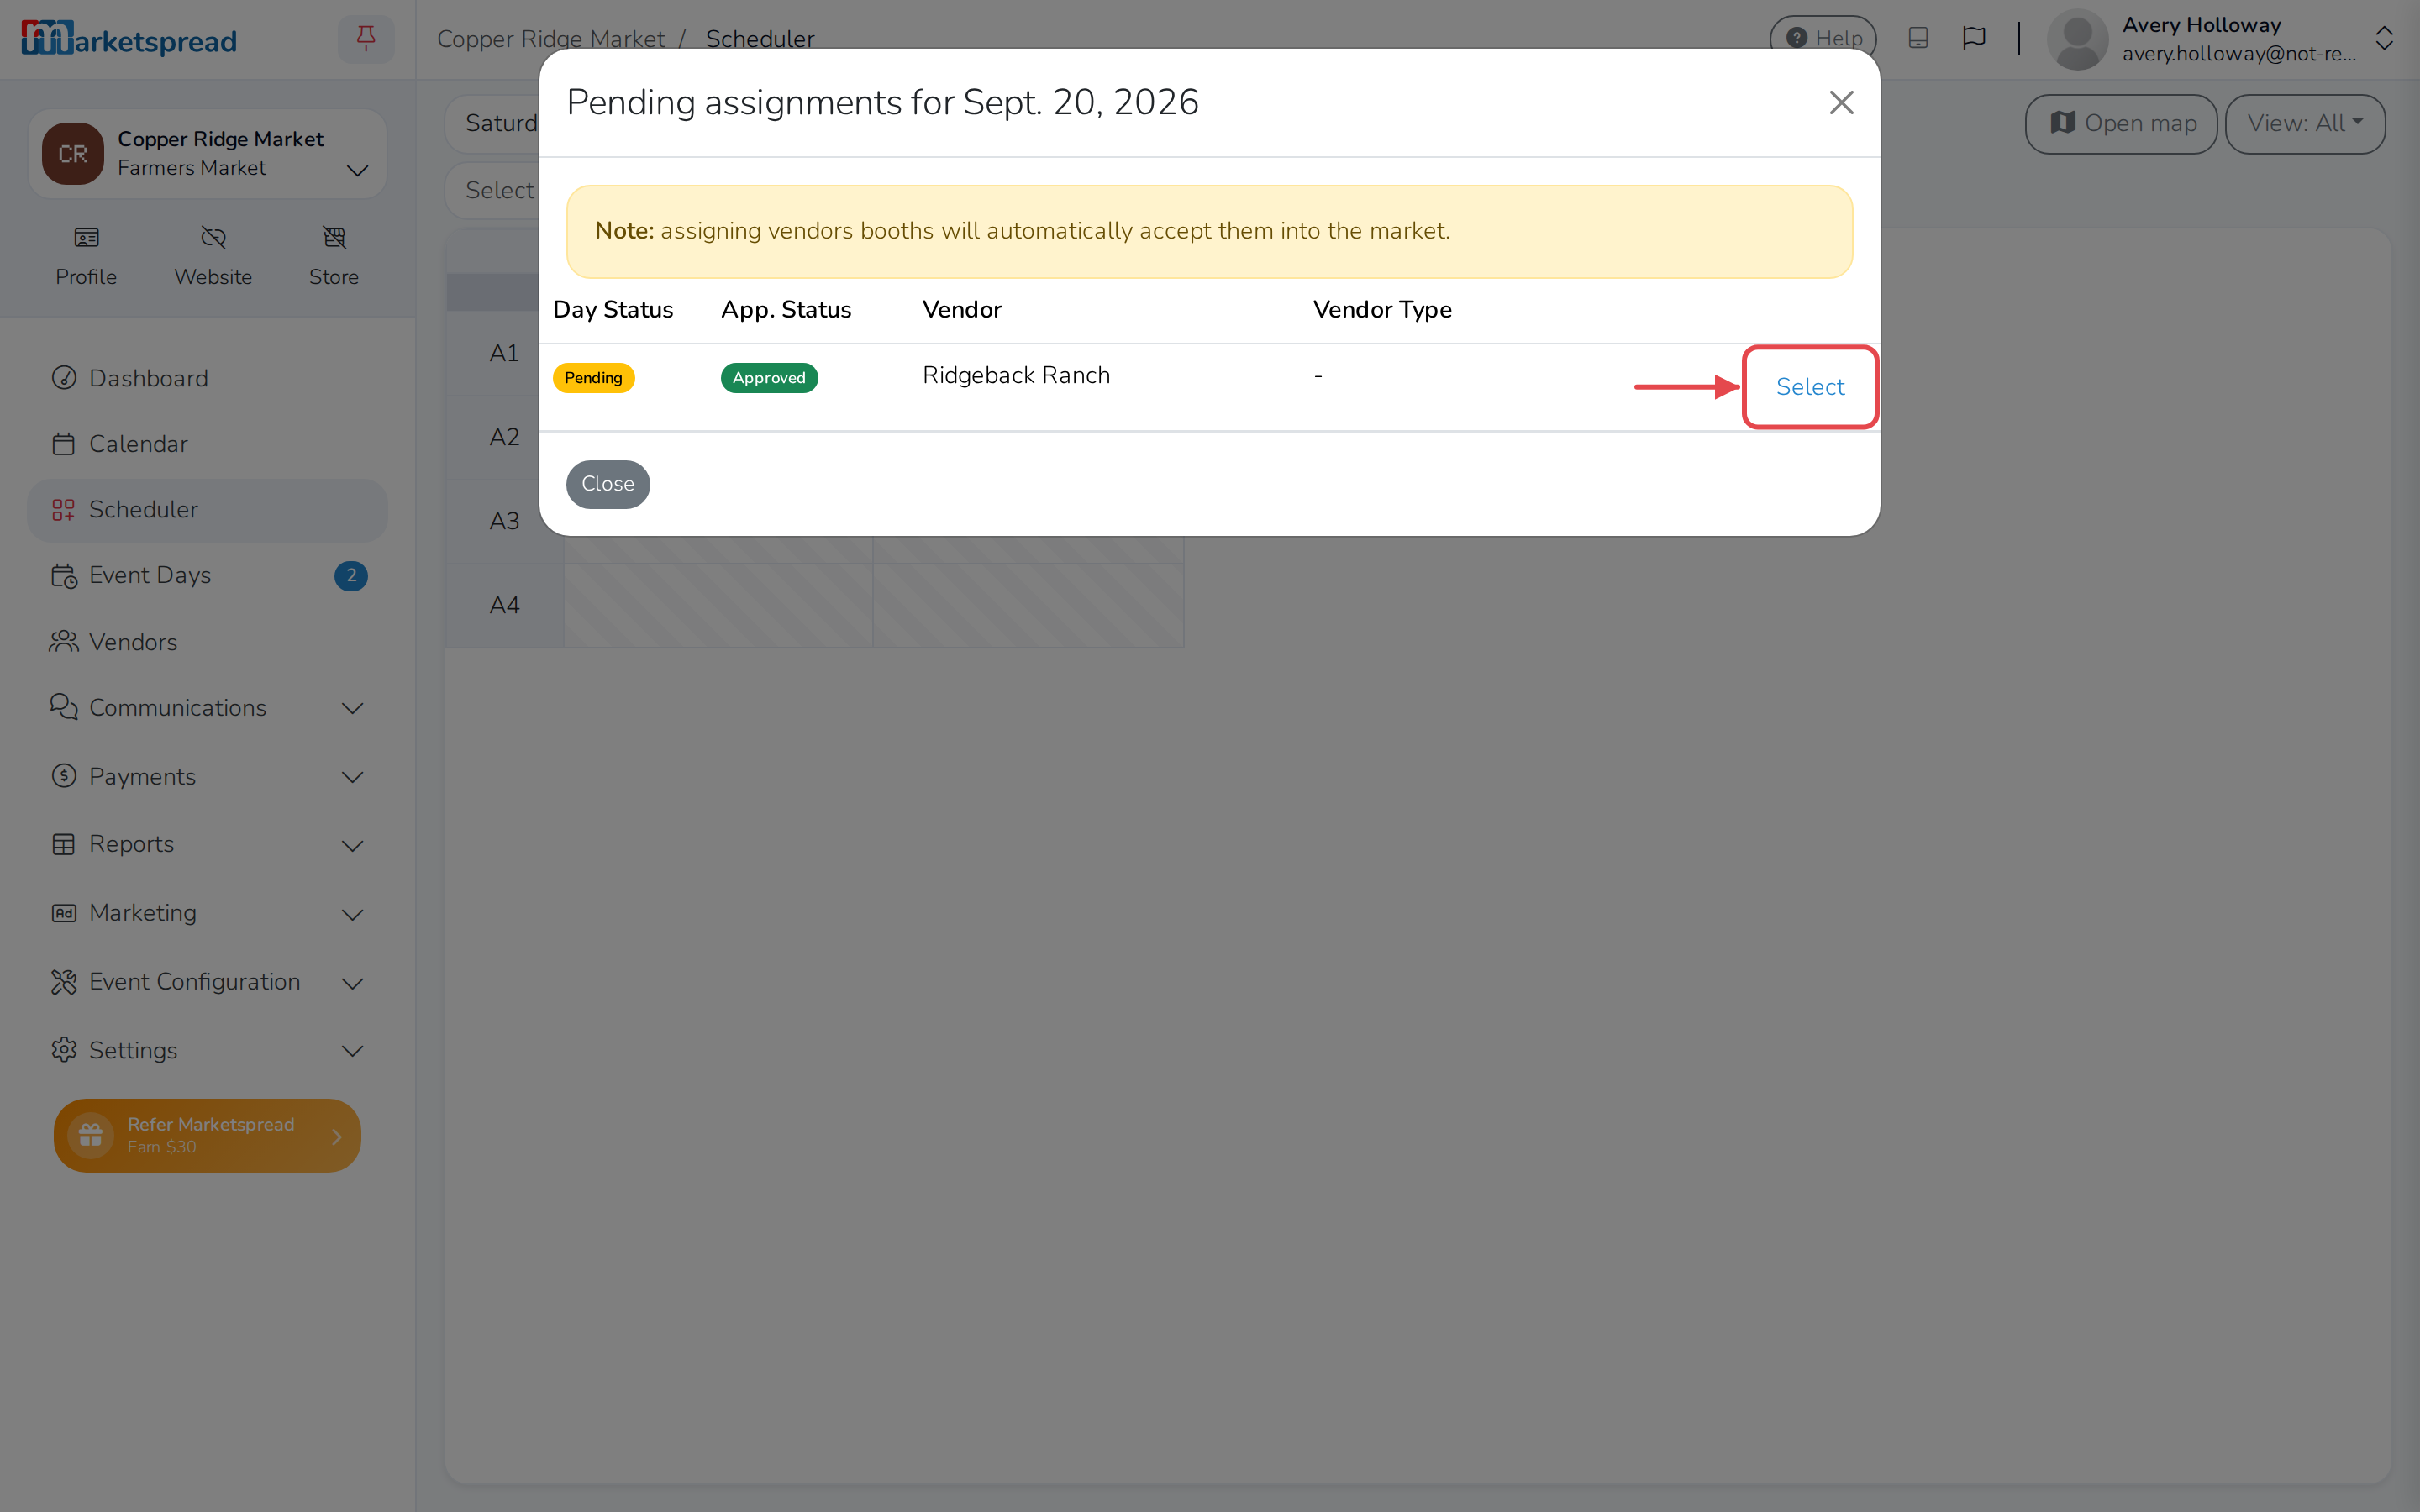
This selects the vendor in Scheduler, so you can give them a booth.