


A layout is a drawing of your market with bookable booths on it. You draw the
place — streets, buildings, grass, your logo — then add booths that vendors can
actually be booked into.
Open Event Configuration, then Layouts, and click Add Layout
Template. You can keep as many layouts as you like.
Name it
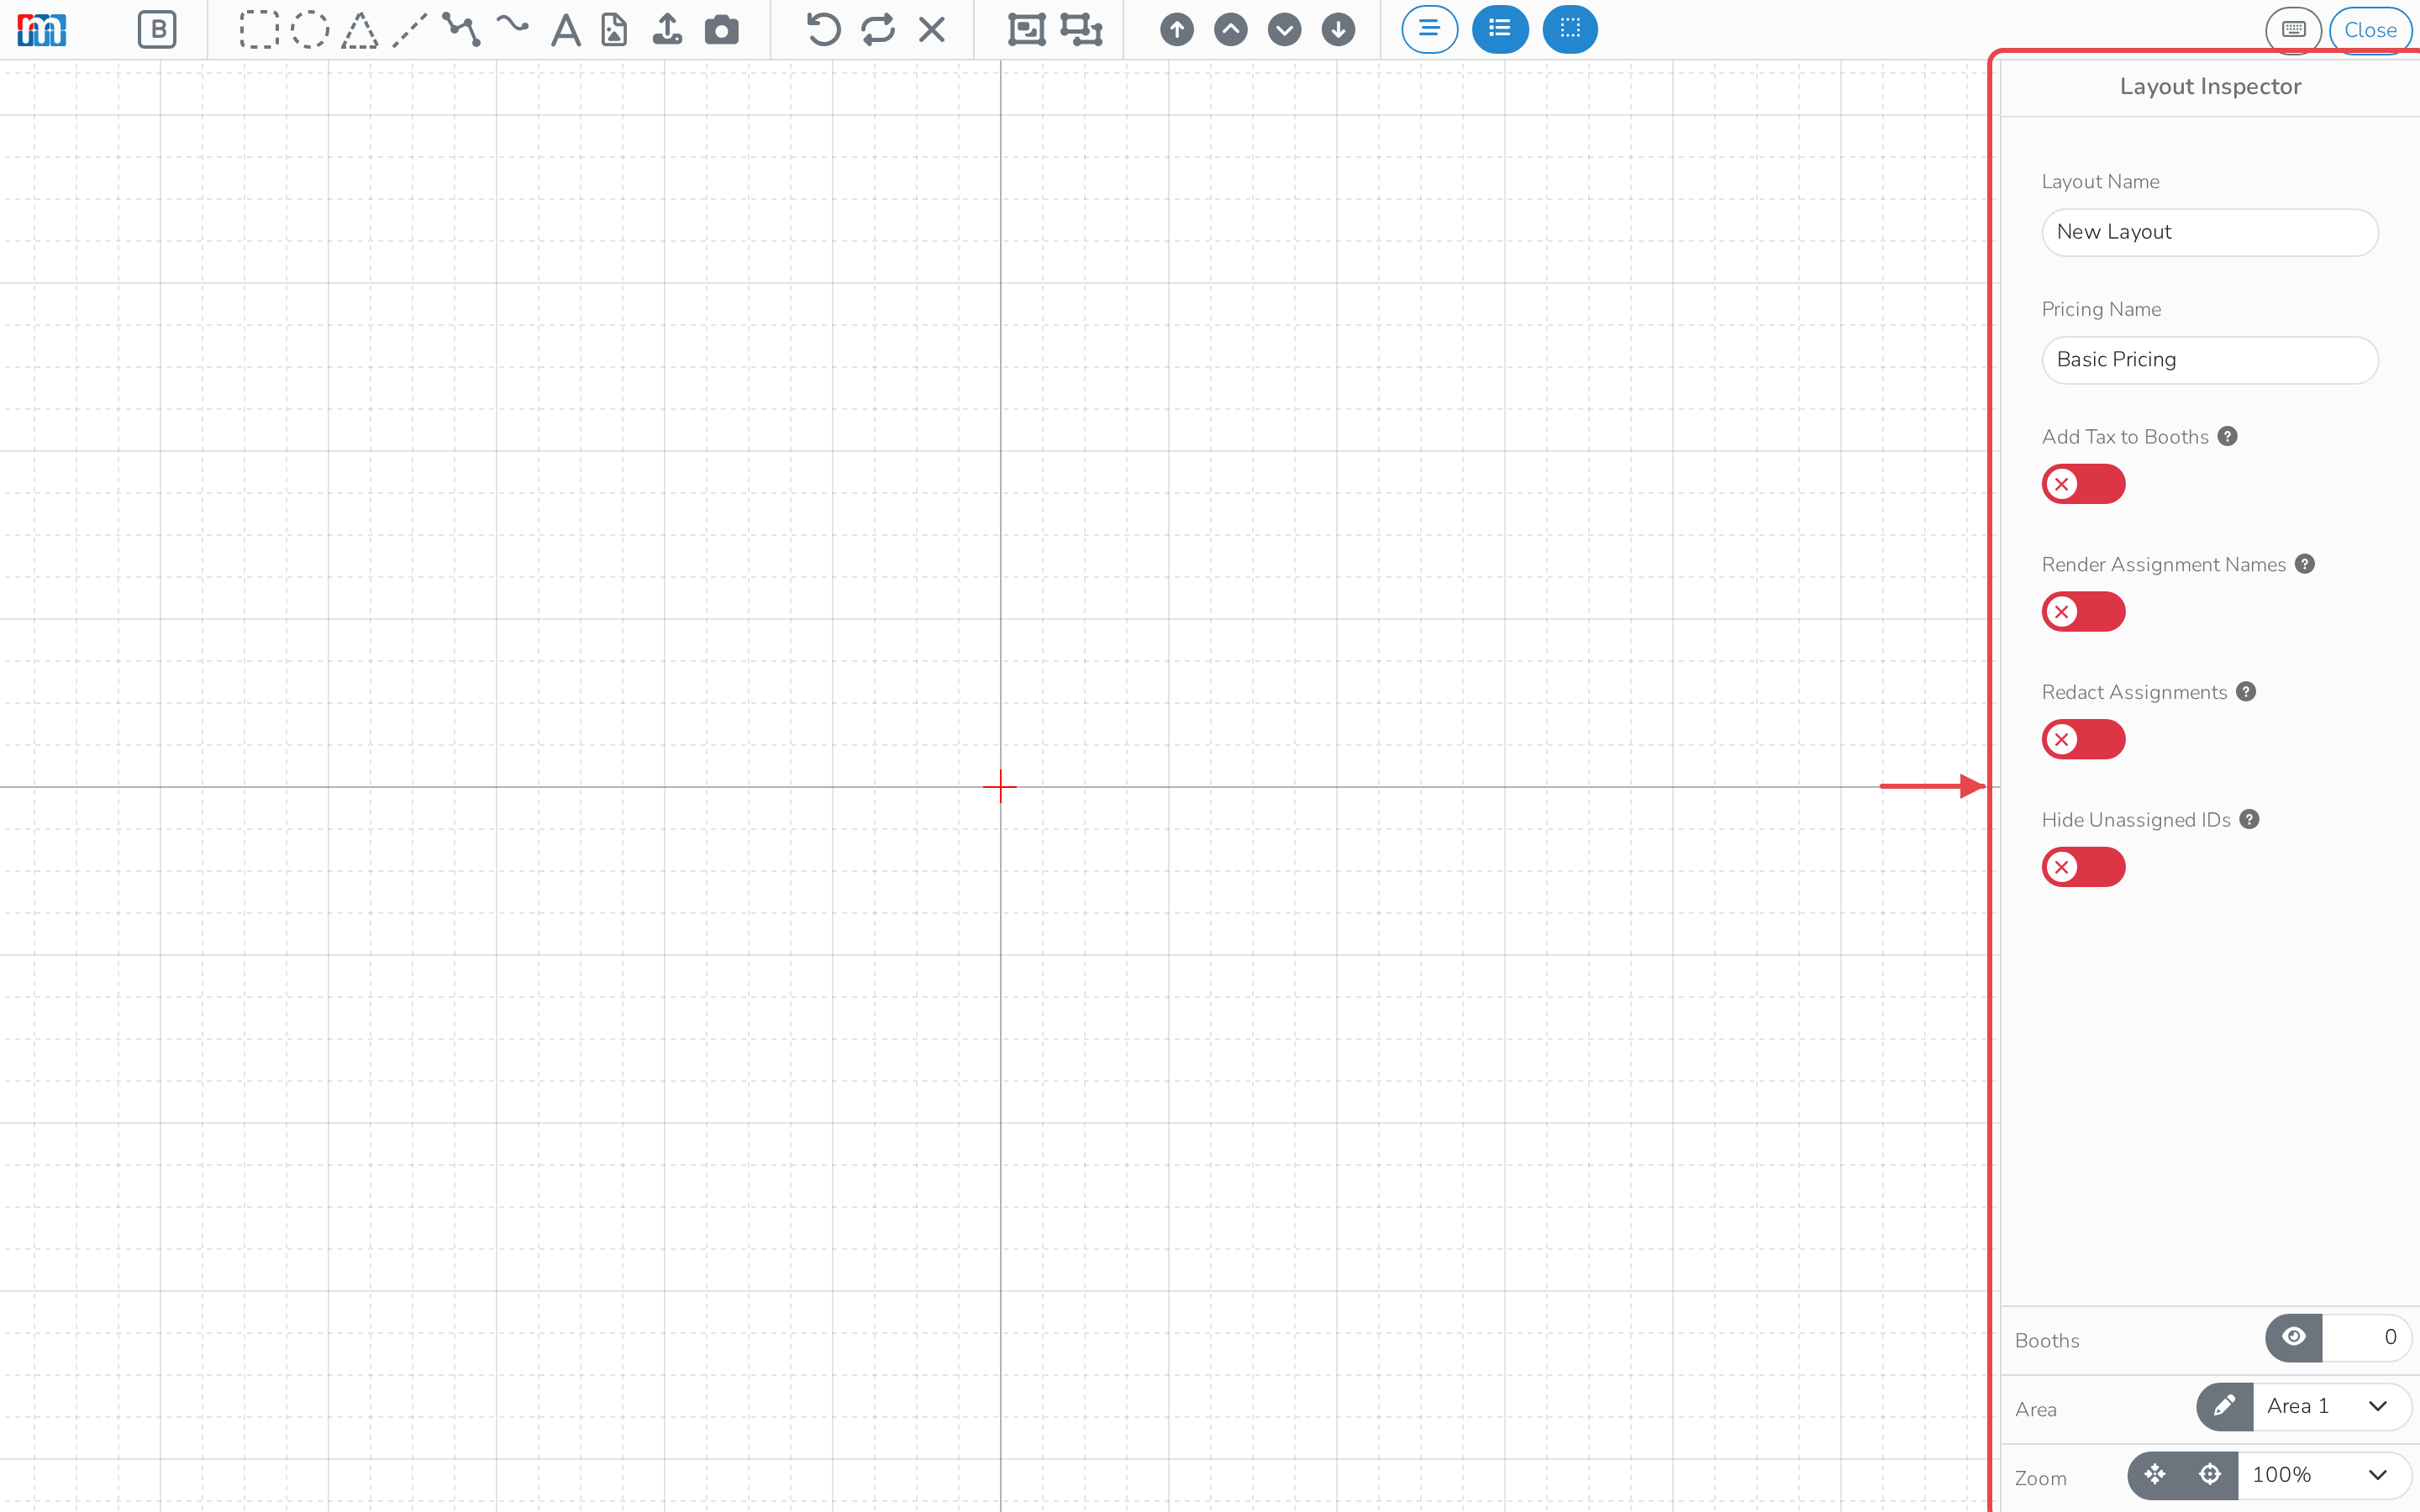
In the layout inspector on the right, give it a name and a pricing name.
The two are separate so the same drawing can exist twice with different prices
on it — one "Summer Pricing", one "Winter Pricing". They show as separate
layouts to pick from.
The other settings there:
- Render Assignment Names — show the vendor's name in a booked booth
instead of the booth number. Most markets want this on. - Redact Assignments — keep who is booked where private.
- Hide Unassigned IDs — show an empty booth as a plain outline, with no
number. - Add Tax to Booths, if you charge tax on booth fees.
Split a big site into areas
One layout can hold several areas, each its own canvas — an indoor hall and an
outdoor street, say. You see one at a time instead of cramming both onto one
drawing.
Find Areas under Booths in the layout inspector, click Edit, rename
the one you have, and add more. Switch between them from the same menu.
Draw the place
Add a line, square, circle or triangle from the top, then click it to open its
inspector and set its color, its outline, or no outline at all. Add text
labels streets and buildings. Upload puts your own logo on the map, and
Element has ready-made pieces such as trees.
A few things that save time:
- Hold Option (Alt on Windows) and drag to move the canvas rather than
select things. - Ctrl+C and Ctrl+V copy anything, including all its settings.
- Arrow keys nudge one point at a time; hold Shift for five.
- Hold Shift while turning something to snap to 45 degrees.
- The arrows at the top move a shape in front of or behind others.
- Select two things and group them so they move together.
Lock what you have finished
The object explorer — the icon with three lines at the top — lists everything
on the canvas, like layers.
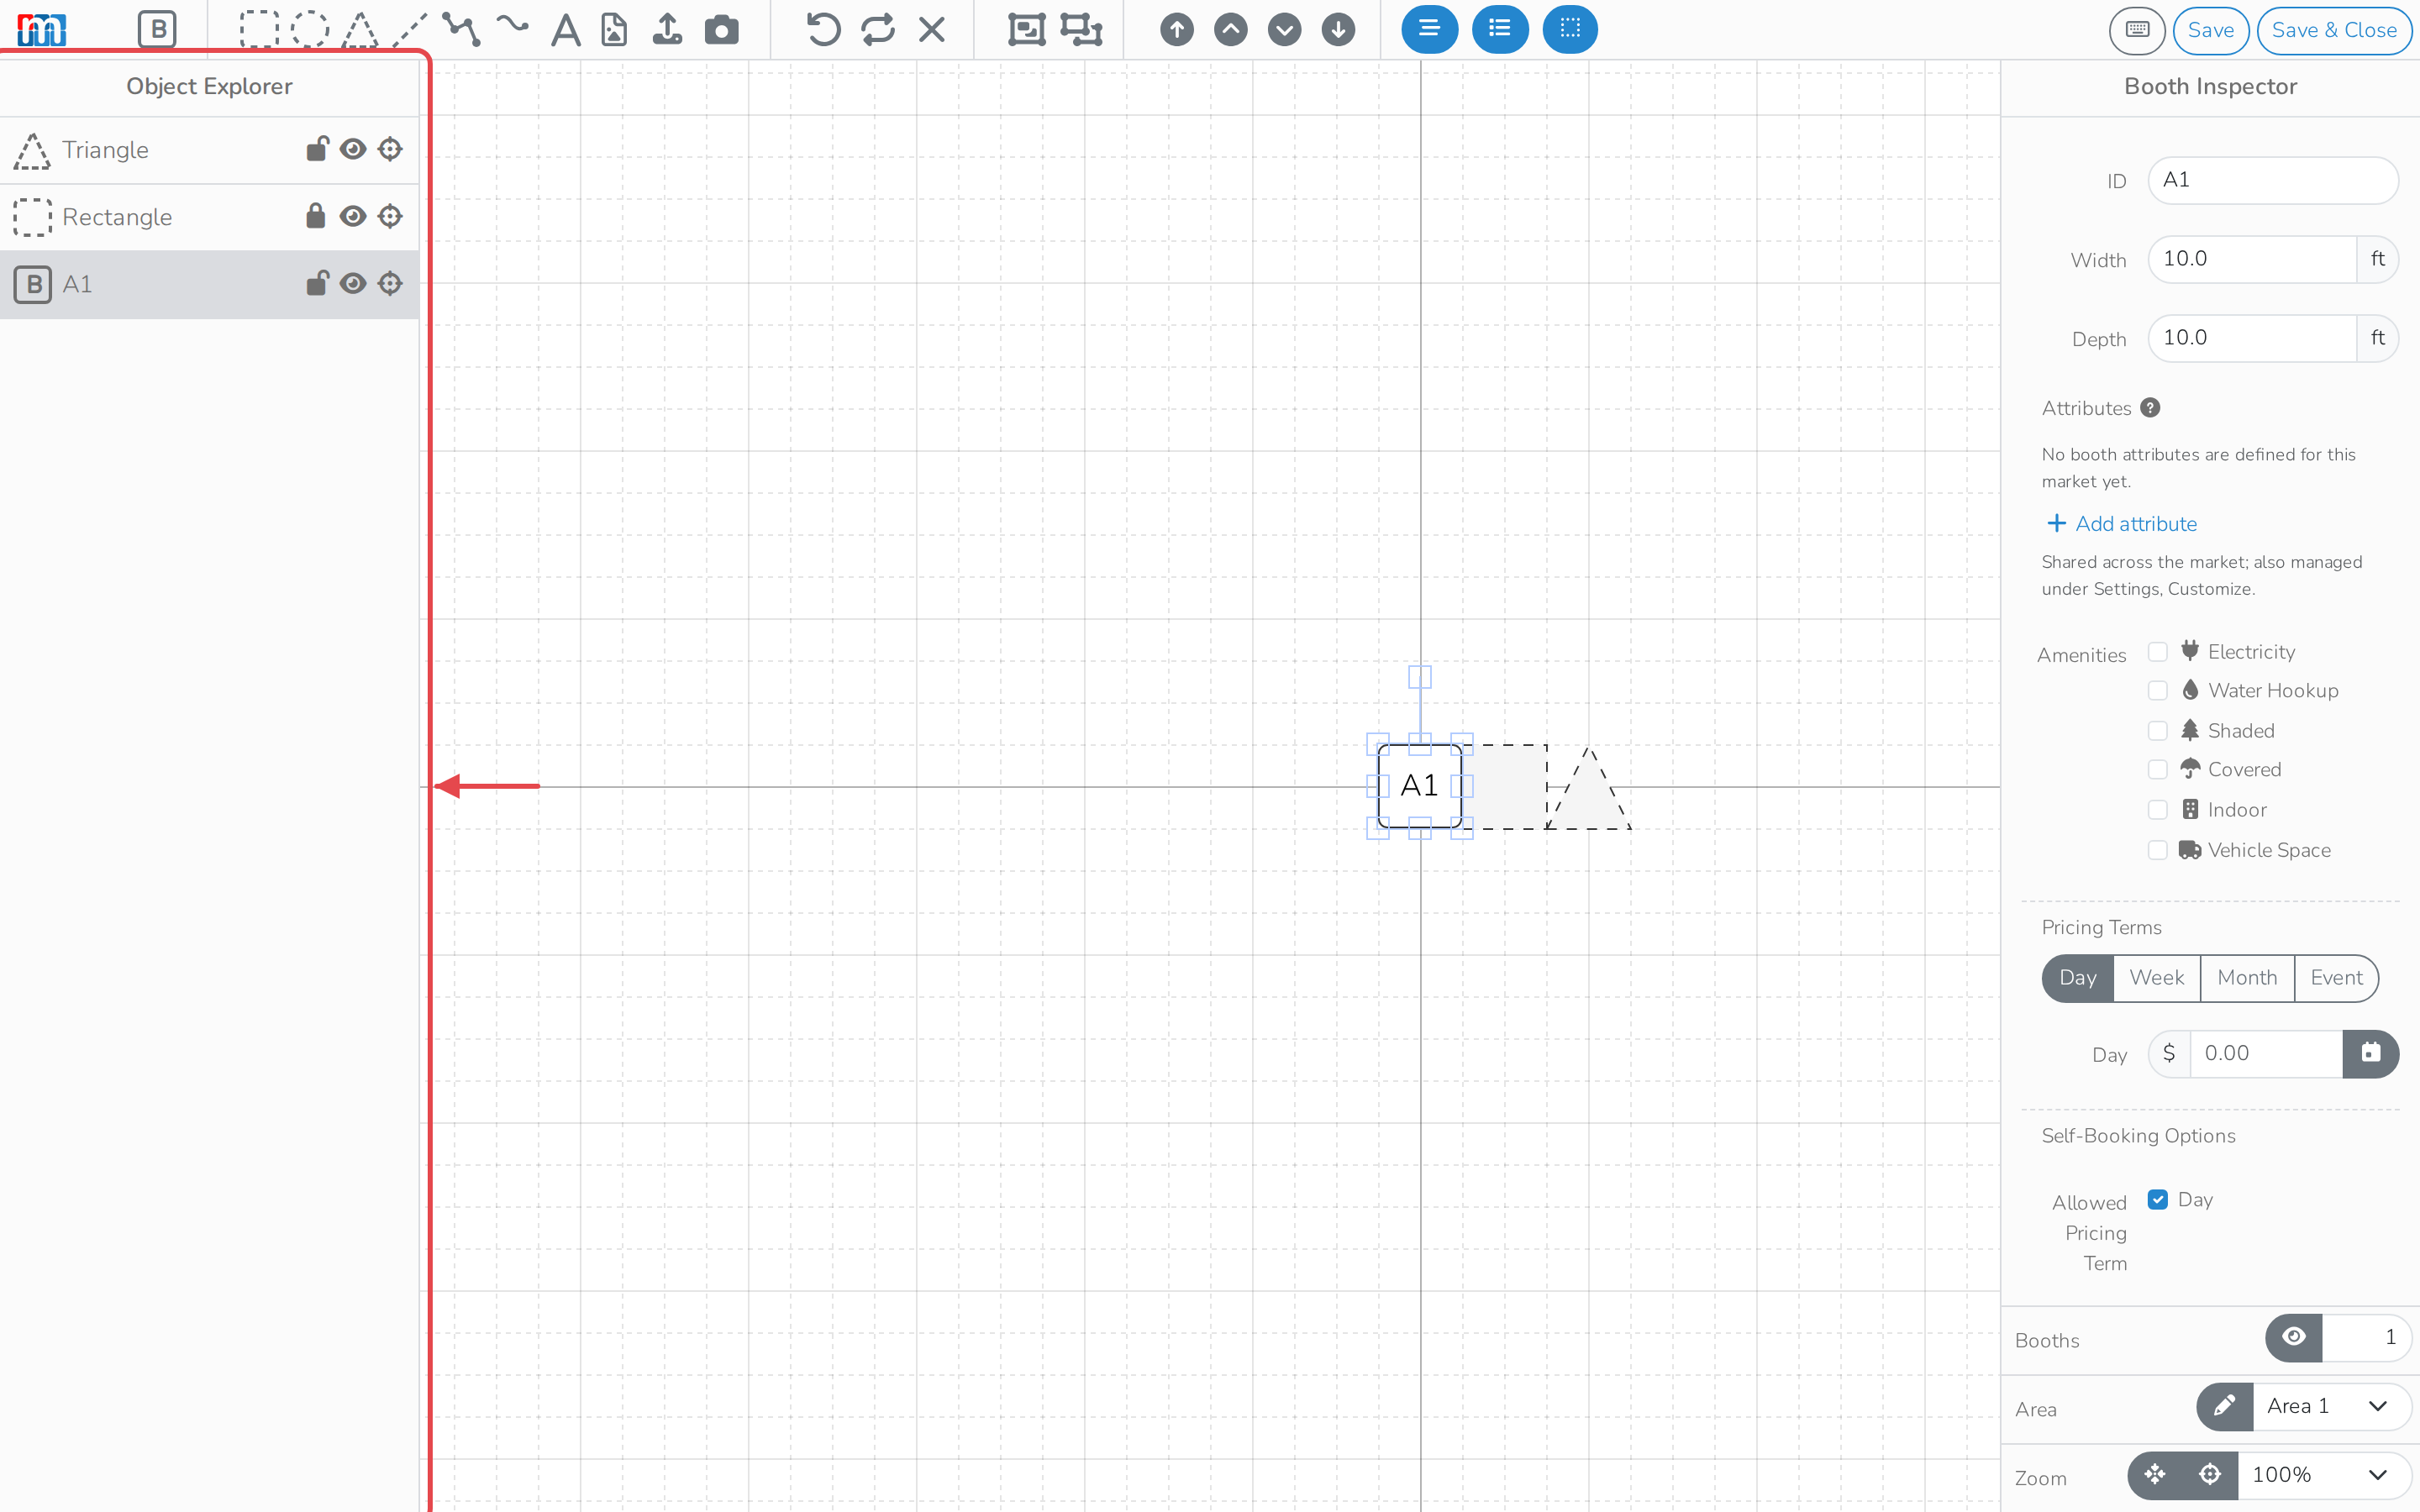
Against each one you can lock it so you cannot drag it by accident, hide
it, or click the target to bring it into view when you have lost it on a big
map.
Lock as you go
Lock each piece of the background once it is where you want it. Otherwise
you will drag a street halfway across the map while reaching for a booth.
Add booths
A booth is not just a shape — it is the thing a vendor gets booked into.
Add one from the top and click it to open the booth inspector:
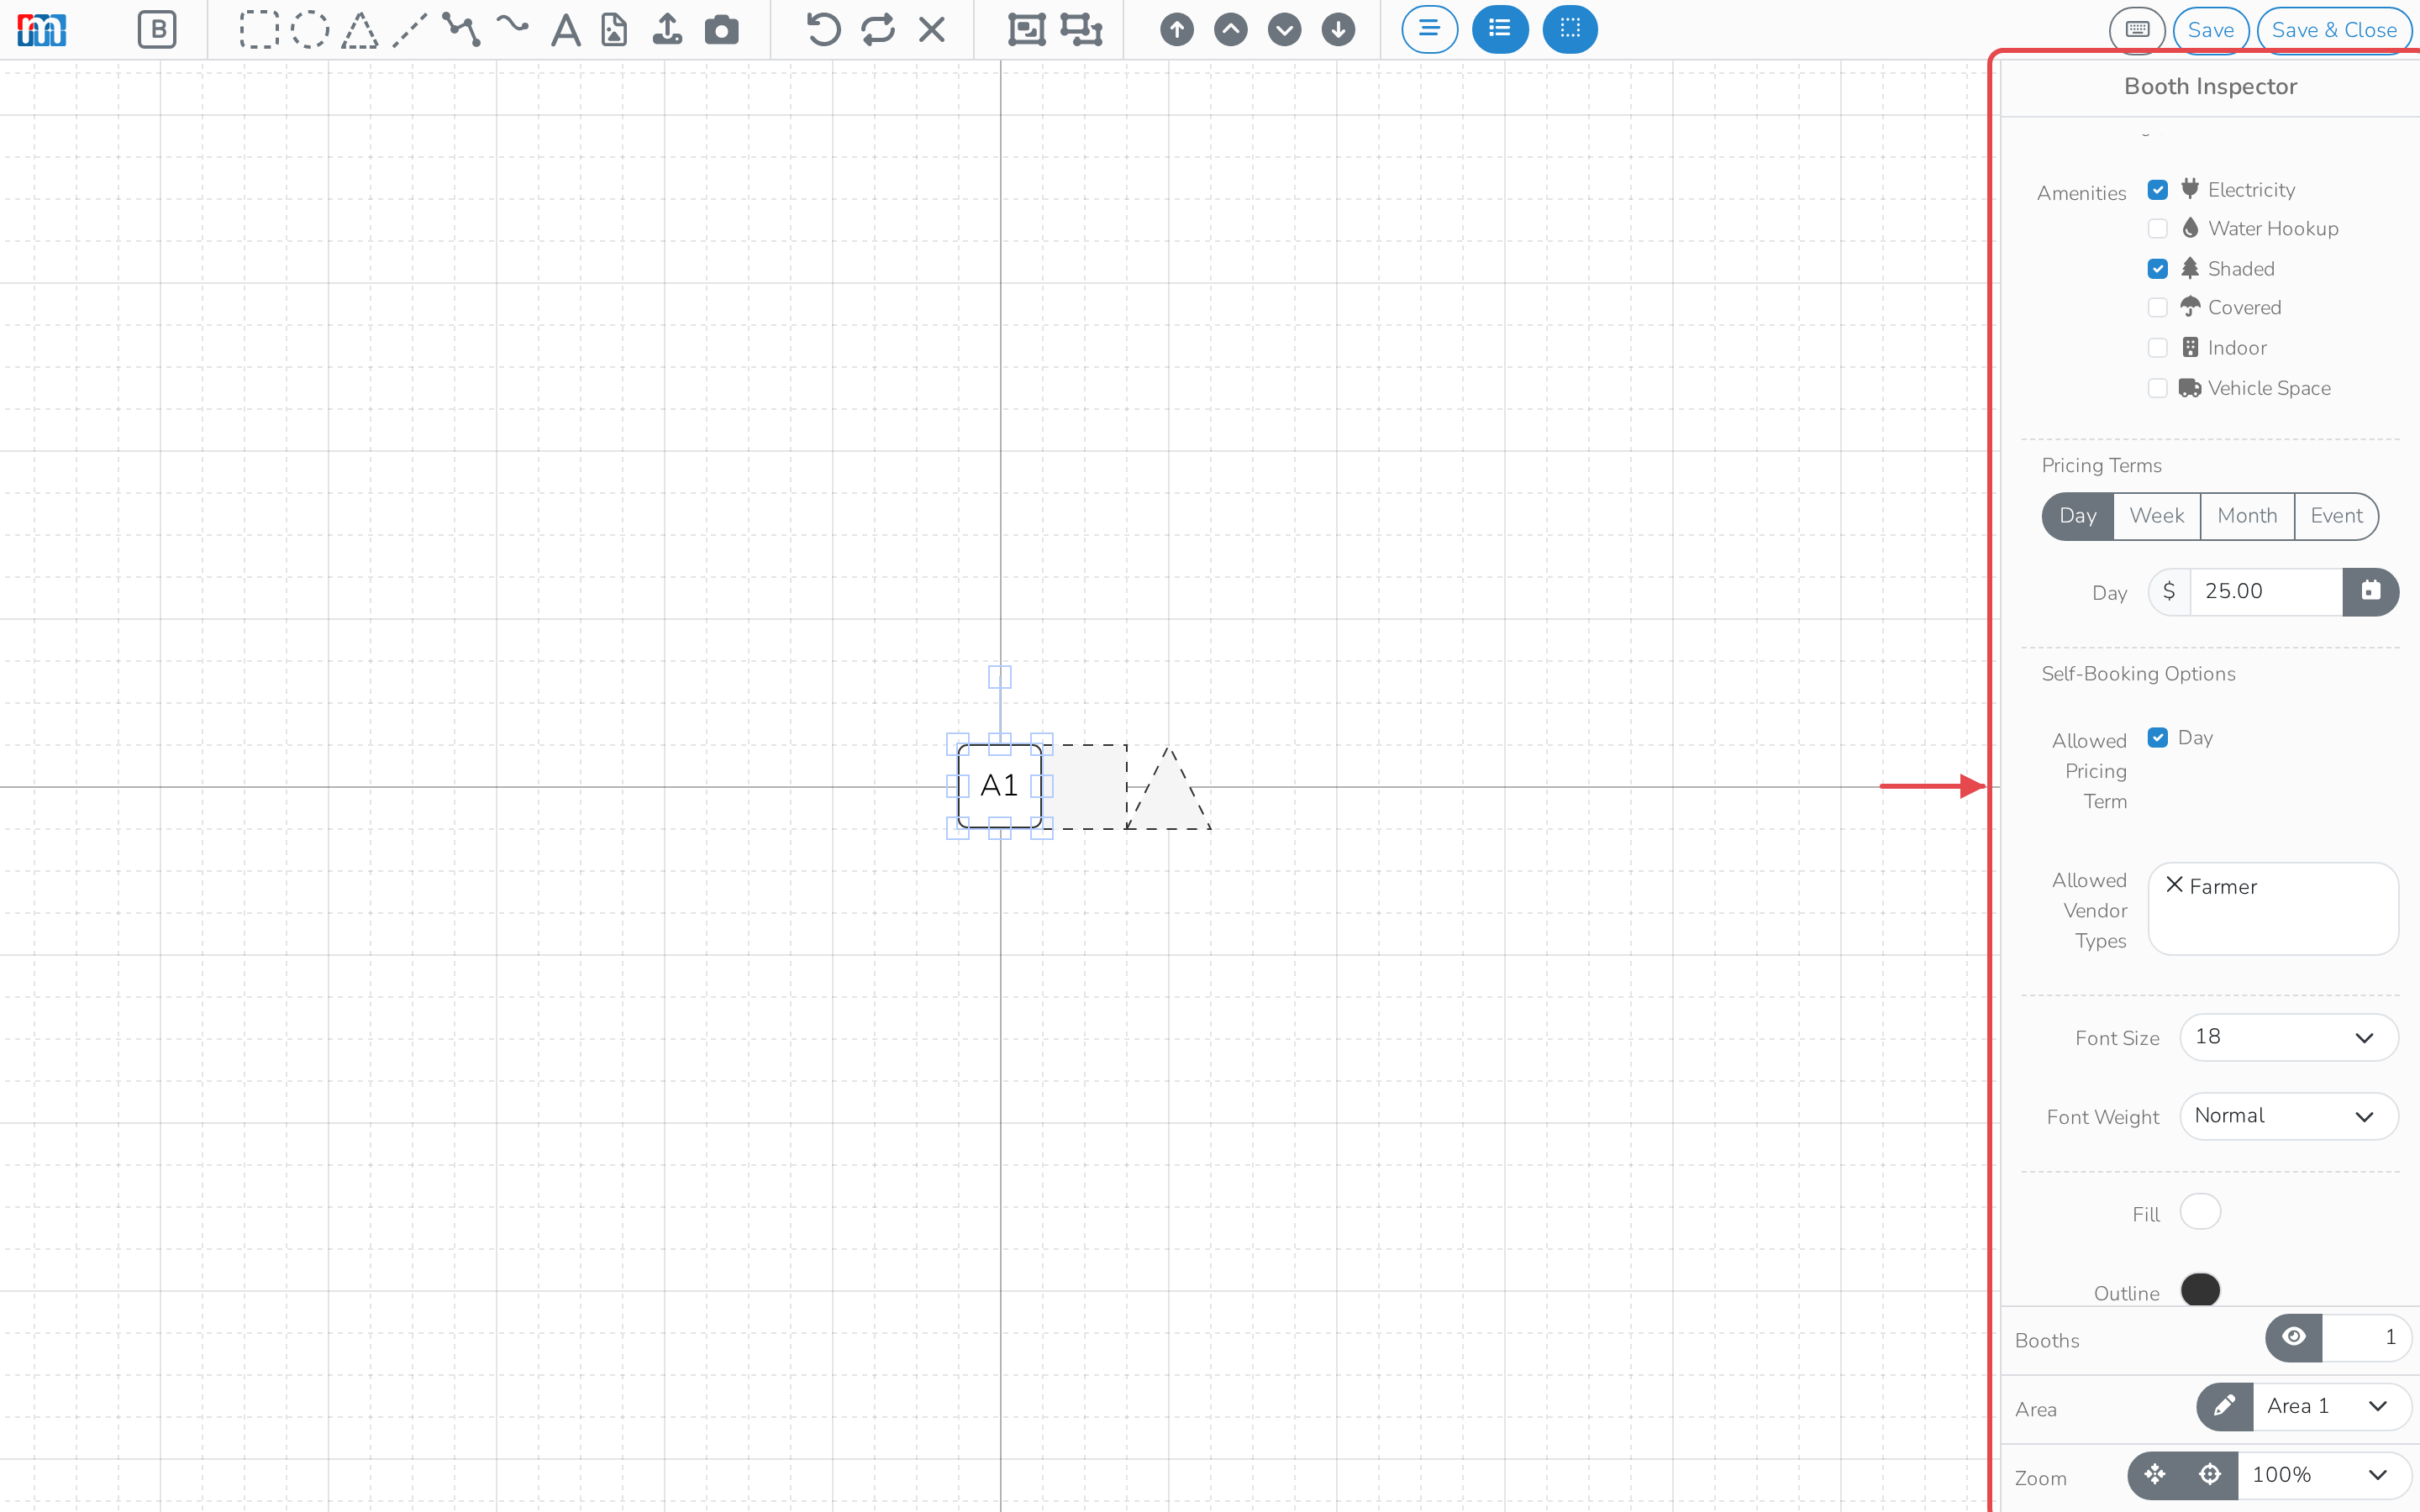
- Name it. It can be a number or anything else.
- Set its width and depth, by dragging or by typing exact numbers.
- Tick its amenities, such as electricity or a vehicle space. These show up
elsewhere in Marketspread. - Set pricing terms — what it costs by day, week, month or event series.
- Choose which vendor types may book it.
Stop the wrong vendor booking the wrong booth
Limiting vendor types means a food truck cannot be booked into a 10x10
space. Set it once on the map instead of remembering it every time you
schedule.
Pricing has a lot more to it — different rates per day of the week, tags that
follow through to your invoices and reports. That is covered in its own
article.
Fill the map quickly
Set one booth up exactly as you want it, then copy and paste it. Each copy
keeps the size, colors and prices, so you can go from one booth to sixteen in a
few keystrokes and just position them.
For booths that differ, set one up, select the others, click Sync
attributes, choose the one you set up, and tick what to copy — Size,
Amenities, Attributes, Pricing & Types, Font Options or
Design Options. Then click Perform sync. It changes twenty booths as
easily as two.
Save
Save as you go
Click Save every so often while you work. A dropped connection loses
whatever you have not saved.
Save & Close when you are done. The layout appears in your list with its
pricing name and booth count. The view icon shows it, area by area, with its
pricing underneath.
Clone makes a copy — useful for a second version, or a scratch copy to
experiment on without touching the one you rely on.