


Not everyone applies online. For a walk-in, or a vendor you signed up over the
phone, you can create the vendor yourself and approve them into your events in
the same step.
Check they are not already there
Open Vendors and search for the business name first. A vendor who has
worked with you before already exists, and adding them again gives you two
records for one business.
Create the vendor
-
In Vendors, click Create in the top right.
-
Type the vendor's email address and click Next. If you do not have one,
click Continue without Email. -
Fill in the form.
-
Under Which Event(s) is this Vendor Attending, tick the events you want
them approved into.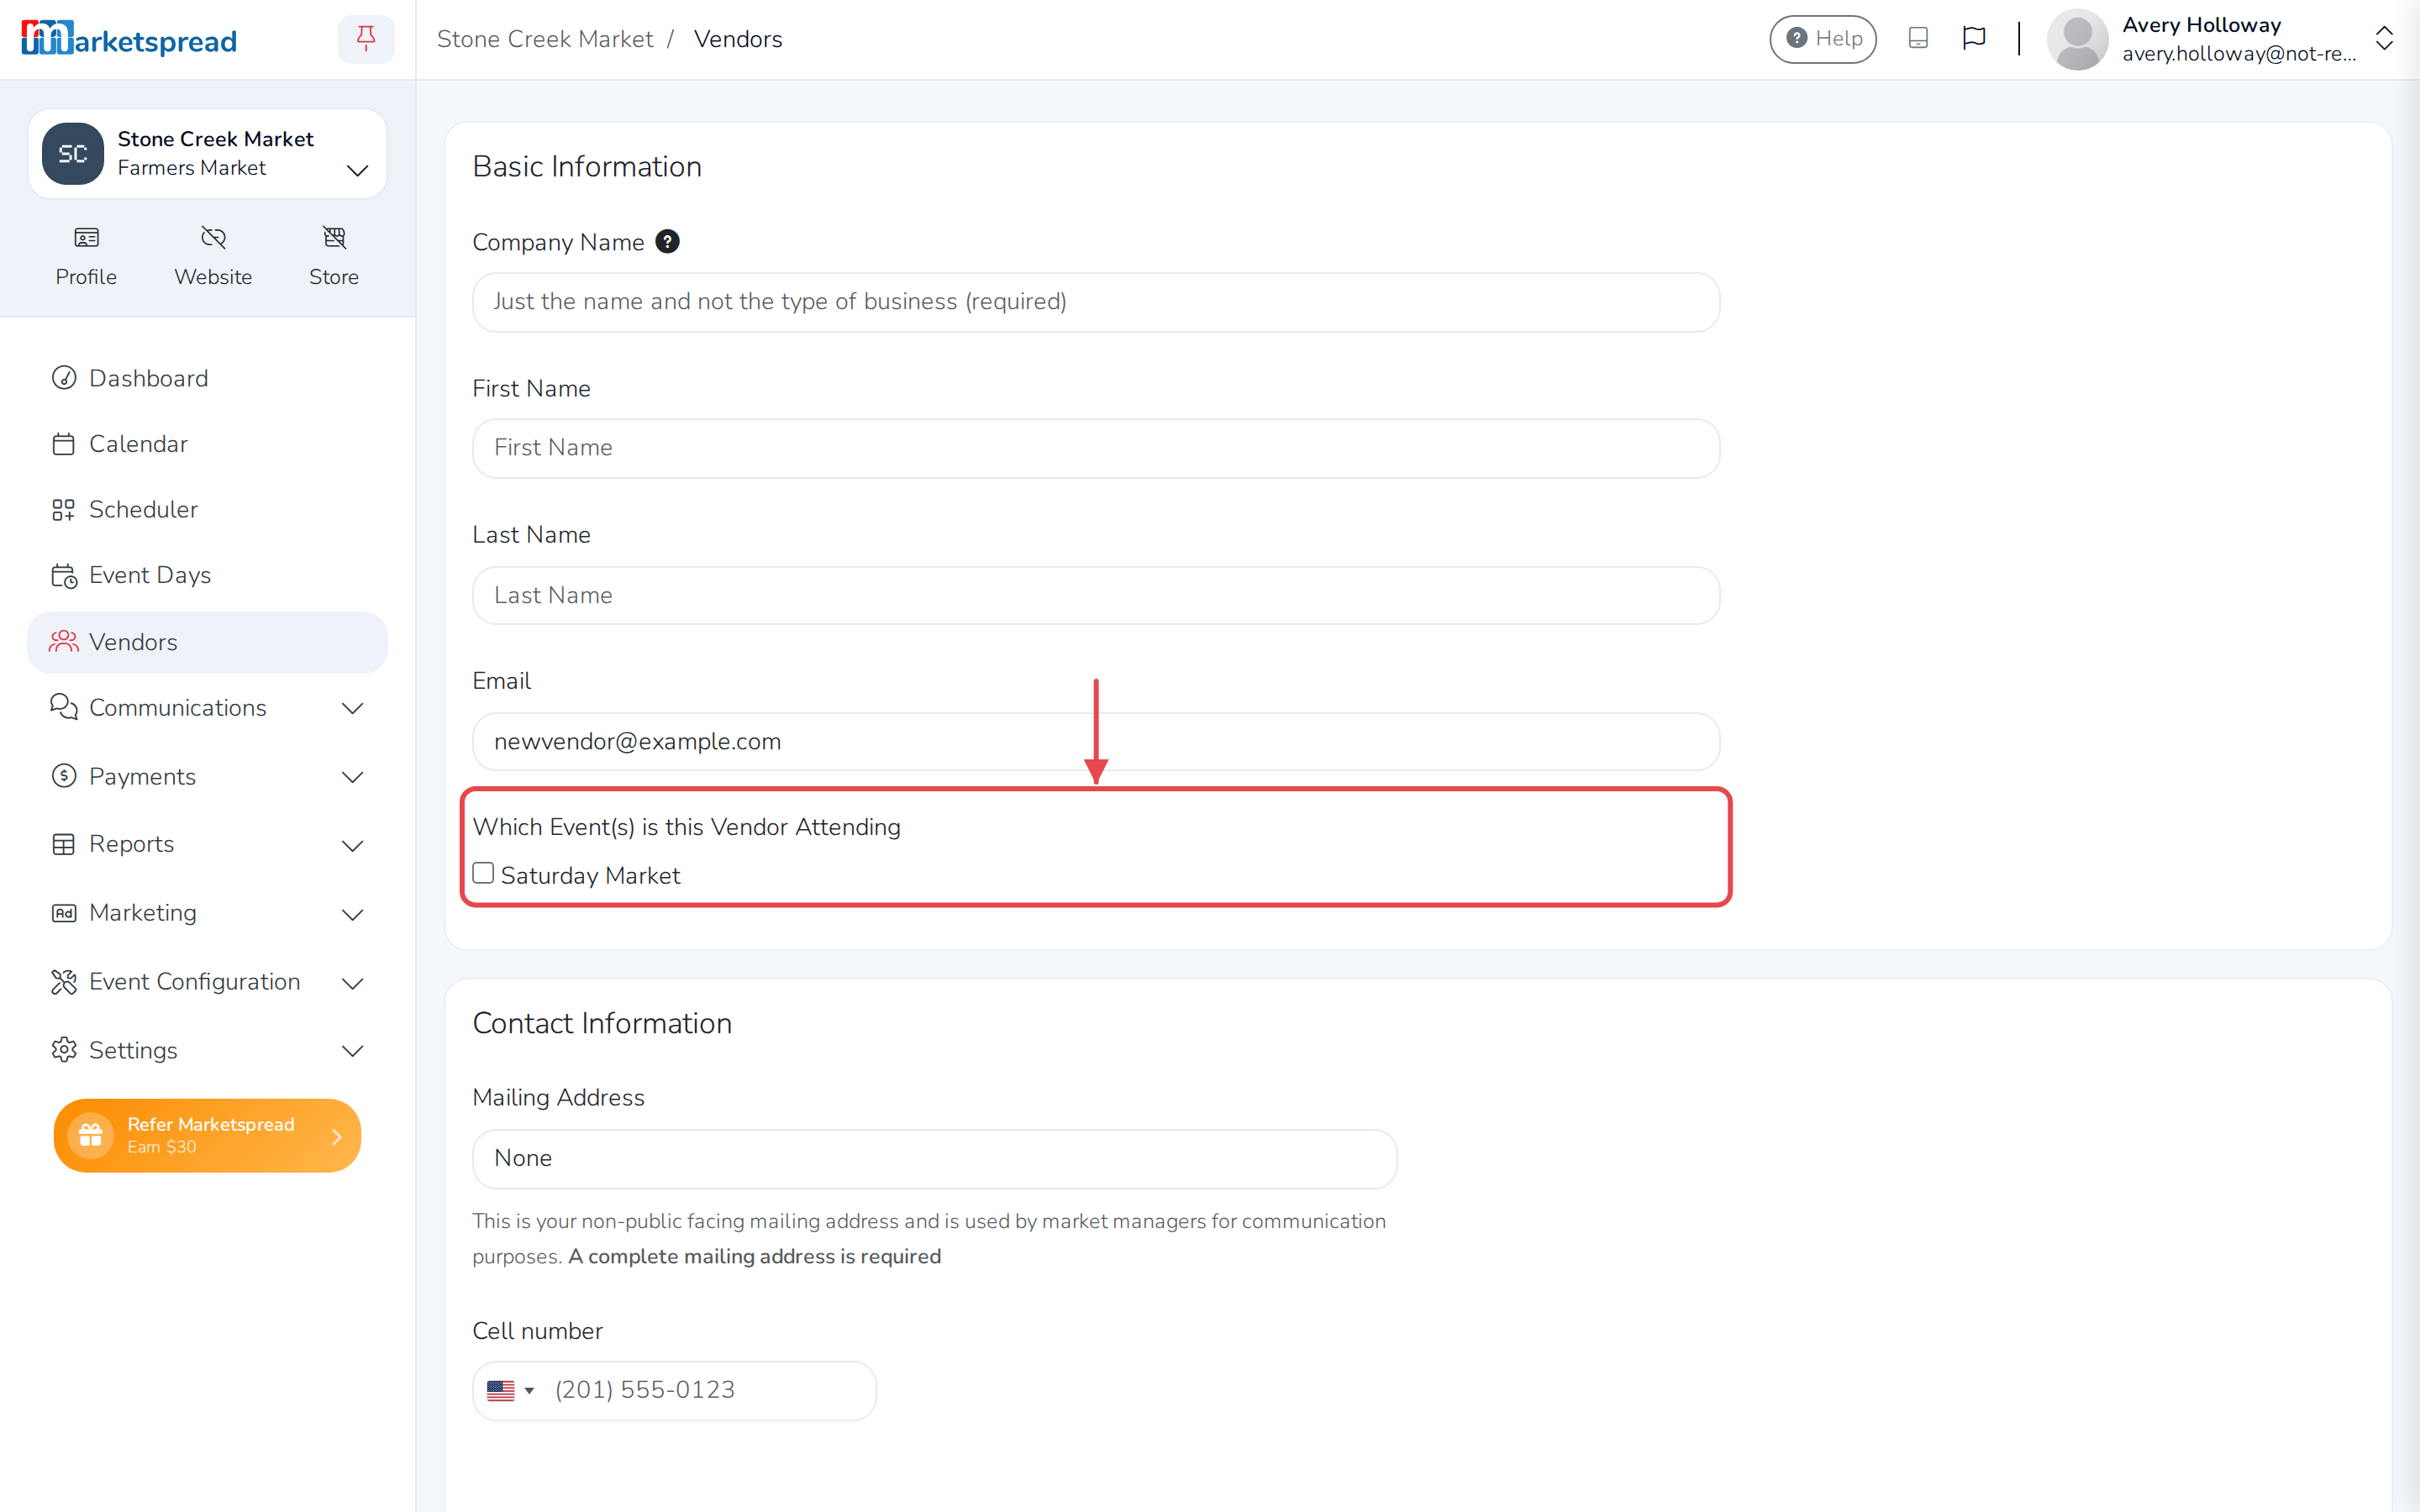
-
Click Save & Create, or Save & Schedule to go straight to
Scheduler and give them a booth.
They now appear in your vendor list, approved for the events you picked.
Let the vendor take over their own account
You created the account, but the vendor can run it themselves. Ask them to go
to the sign-in page, use Forgot Password or Username?, and enter the email
address you put on their record. Setting a password from there gives them the
same control as if they had signed up.
There is no application behind them
A vendor added this way has no application for the event, because they
never filled one in. Everything else — scheduling, invoicing, messaging —
works exactly as it does for a vendor who applied.