


A late fee rule set adds a fee to an invoice automatically once it's overdue — you don't have to add one by hand. Set a rule up once, then apply it to a single invoice or to a whole event. Every fee on that invoice — booth, vendor type, vendor tag or category — follows the same rule.
From here you can:
- Create, edit or delete a rule set
- Apply a rule set to an event, so every booking invoice for it uses that rule
- Apply a rule set to a single invoice
- Review and approve a fee, waive one, or undo a waive
Looking for a one-off fee instead?
This is for a fee that's added automatically. To add a single late fee by hand to one invoice, see Add a late fee to an invoice.
Create a late fee rule set
Only market admins can create, edit or delete a rule set. Any manager can still apply one, and can review or waive the fees it adds.
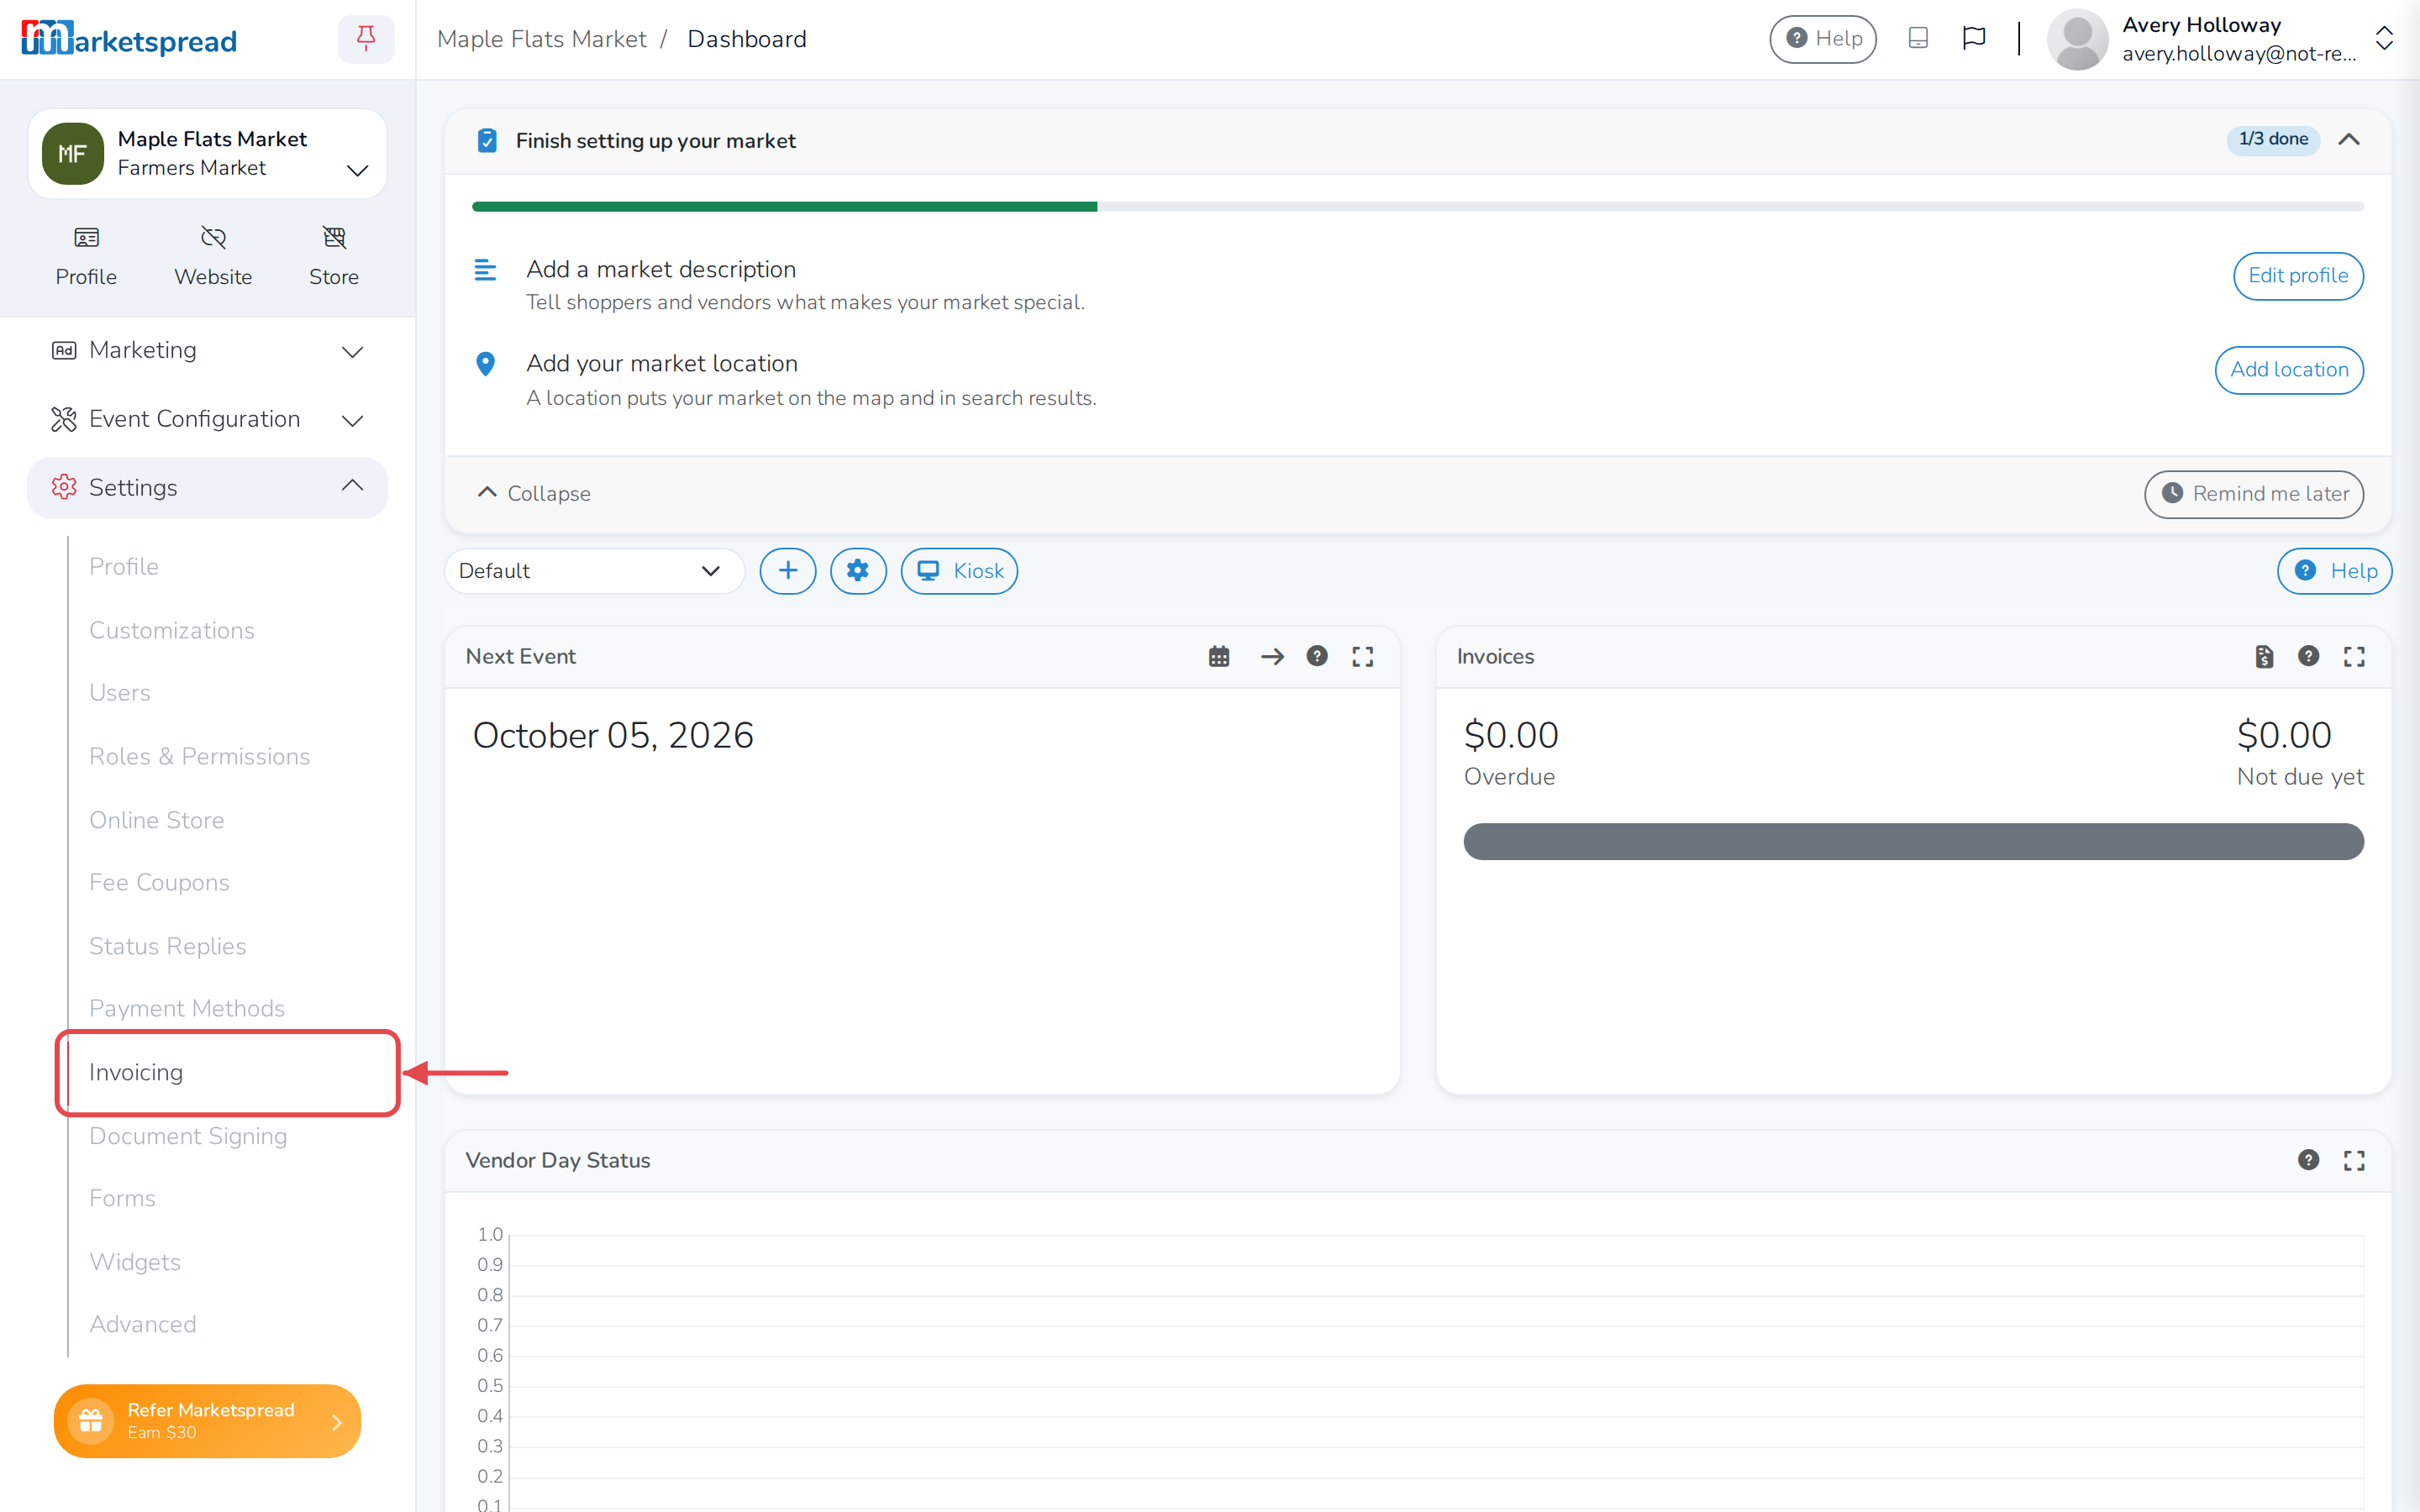
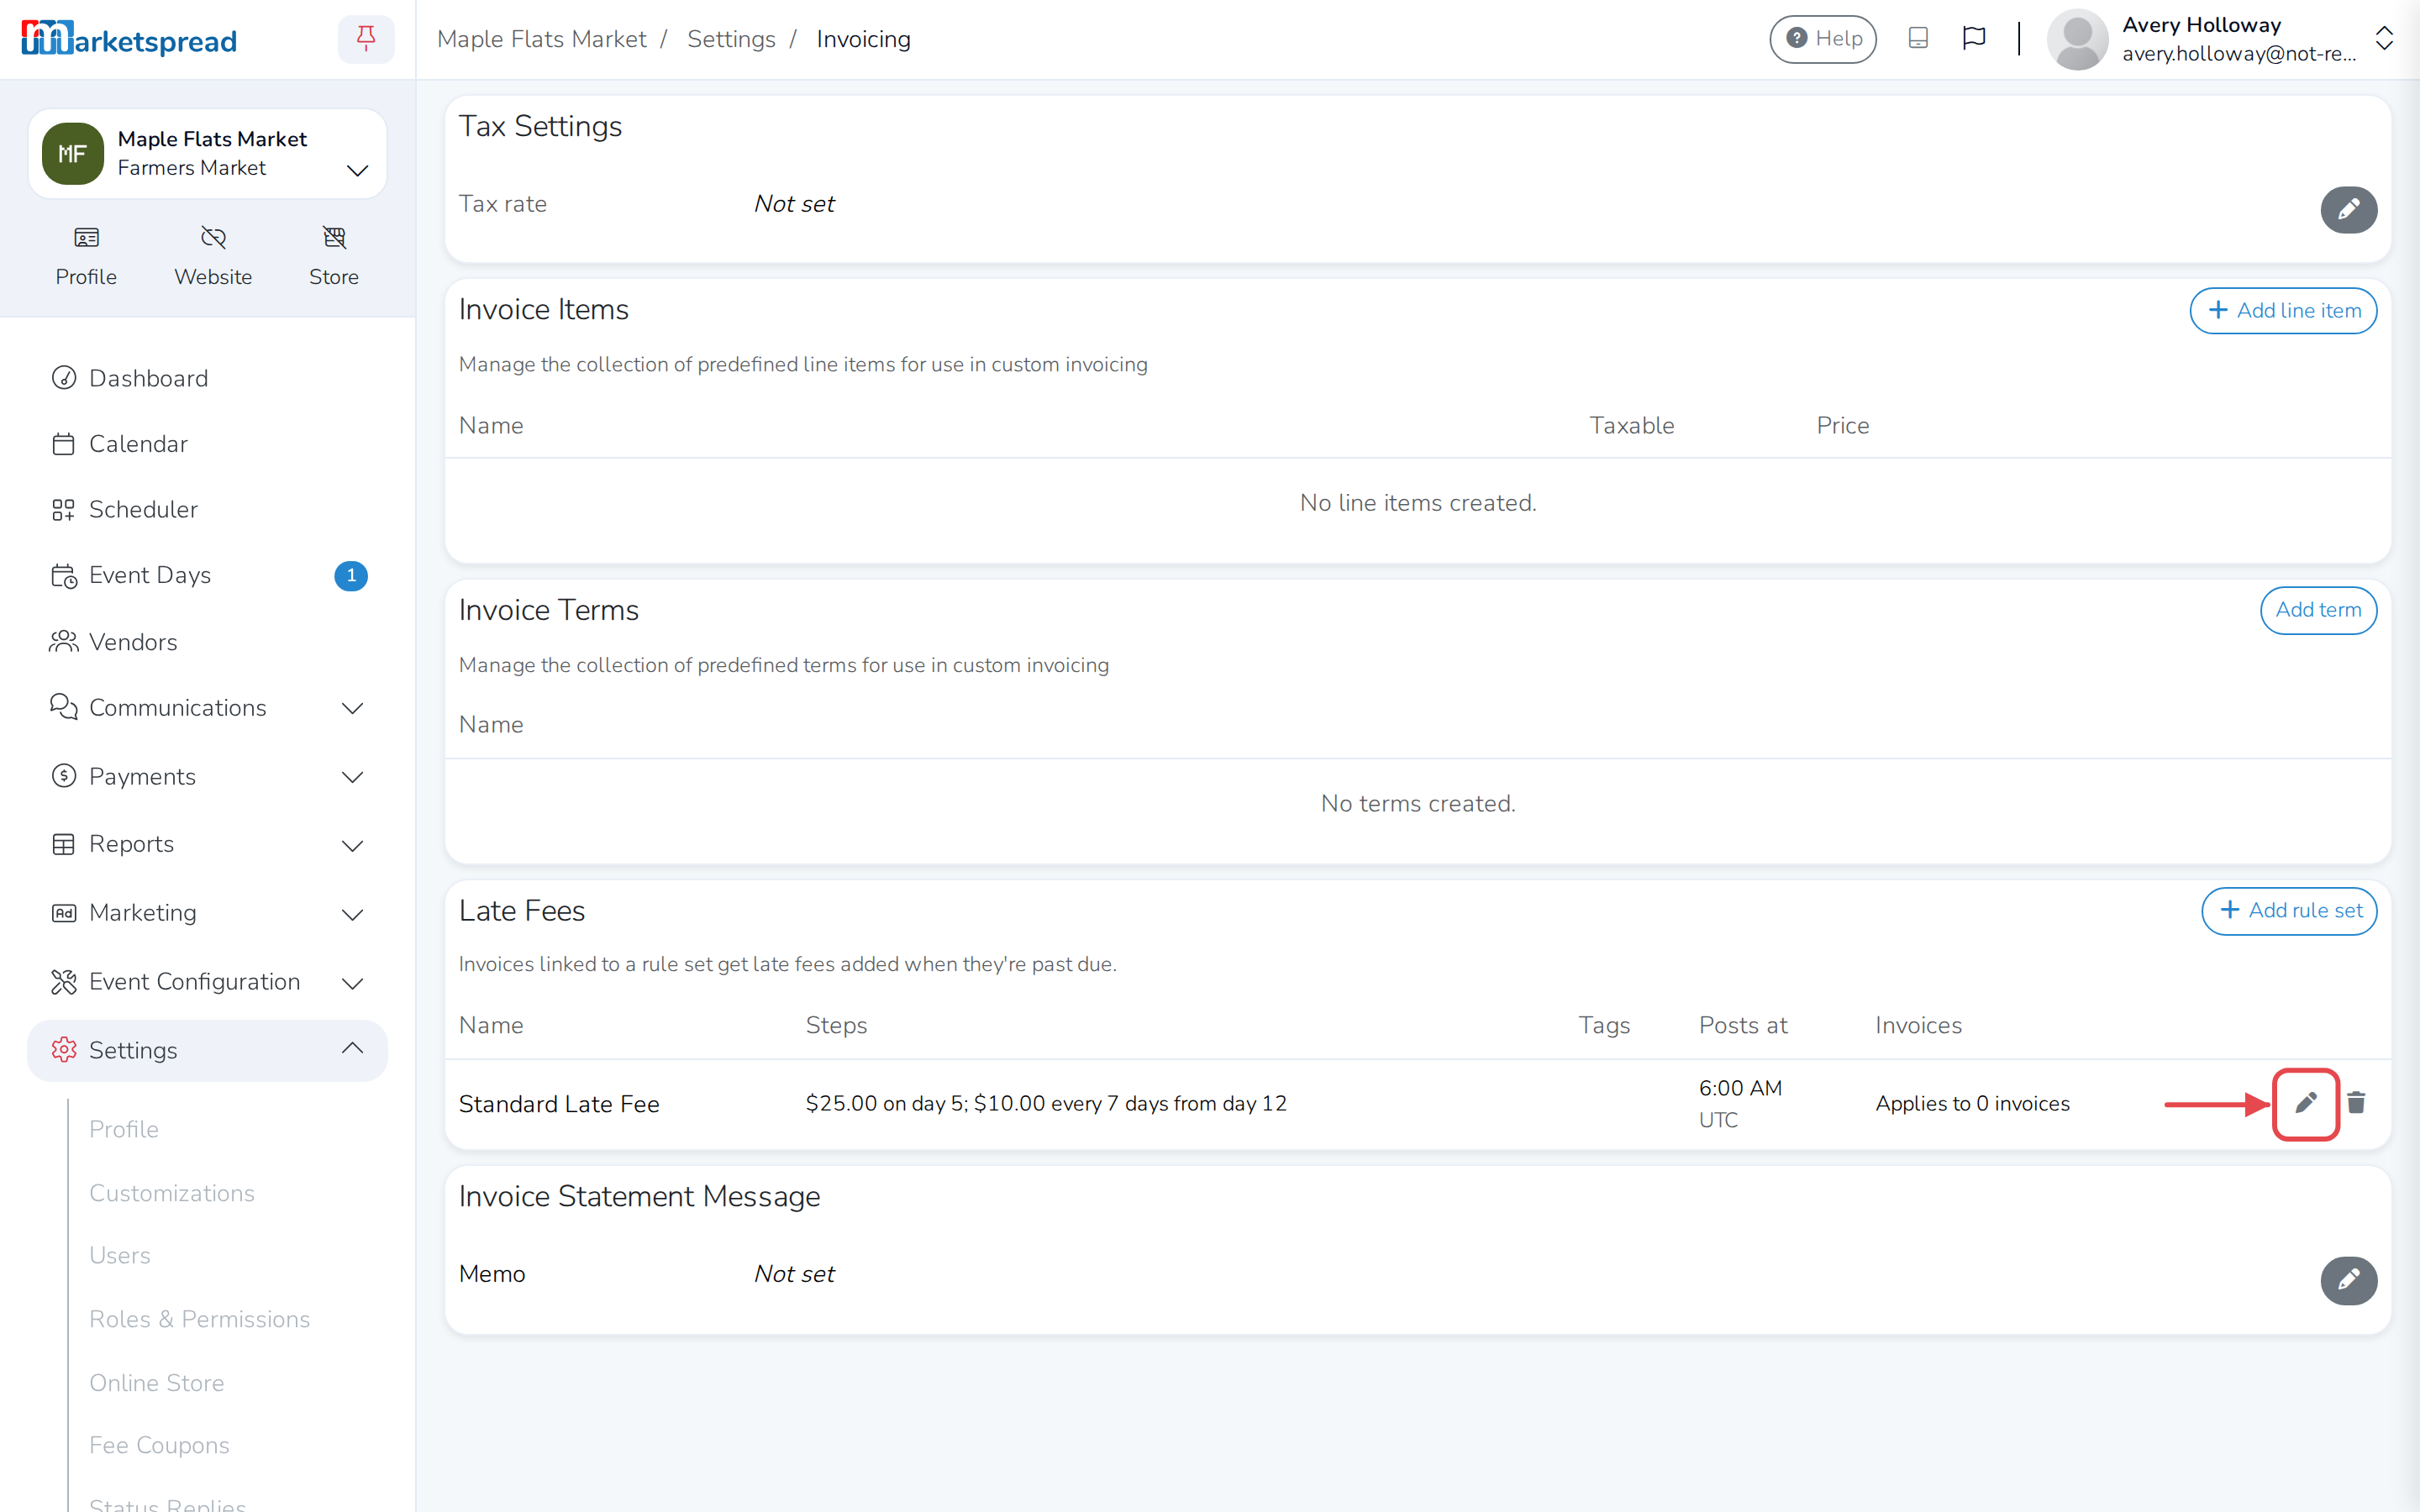
- Open Settings, then Invoicing.
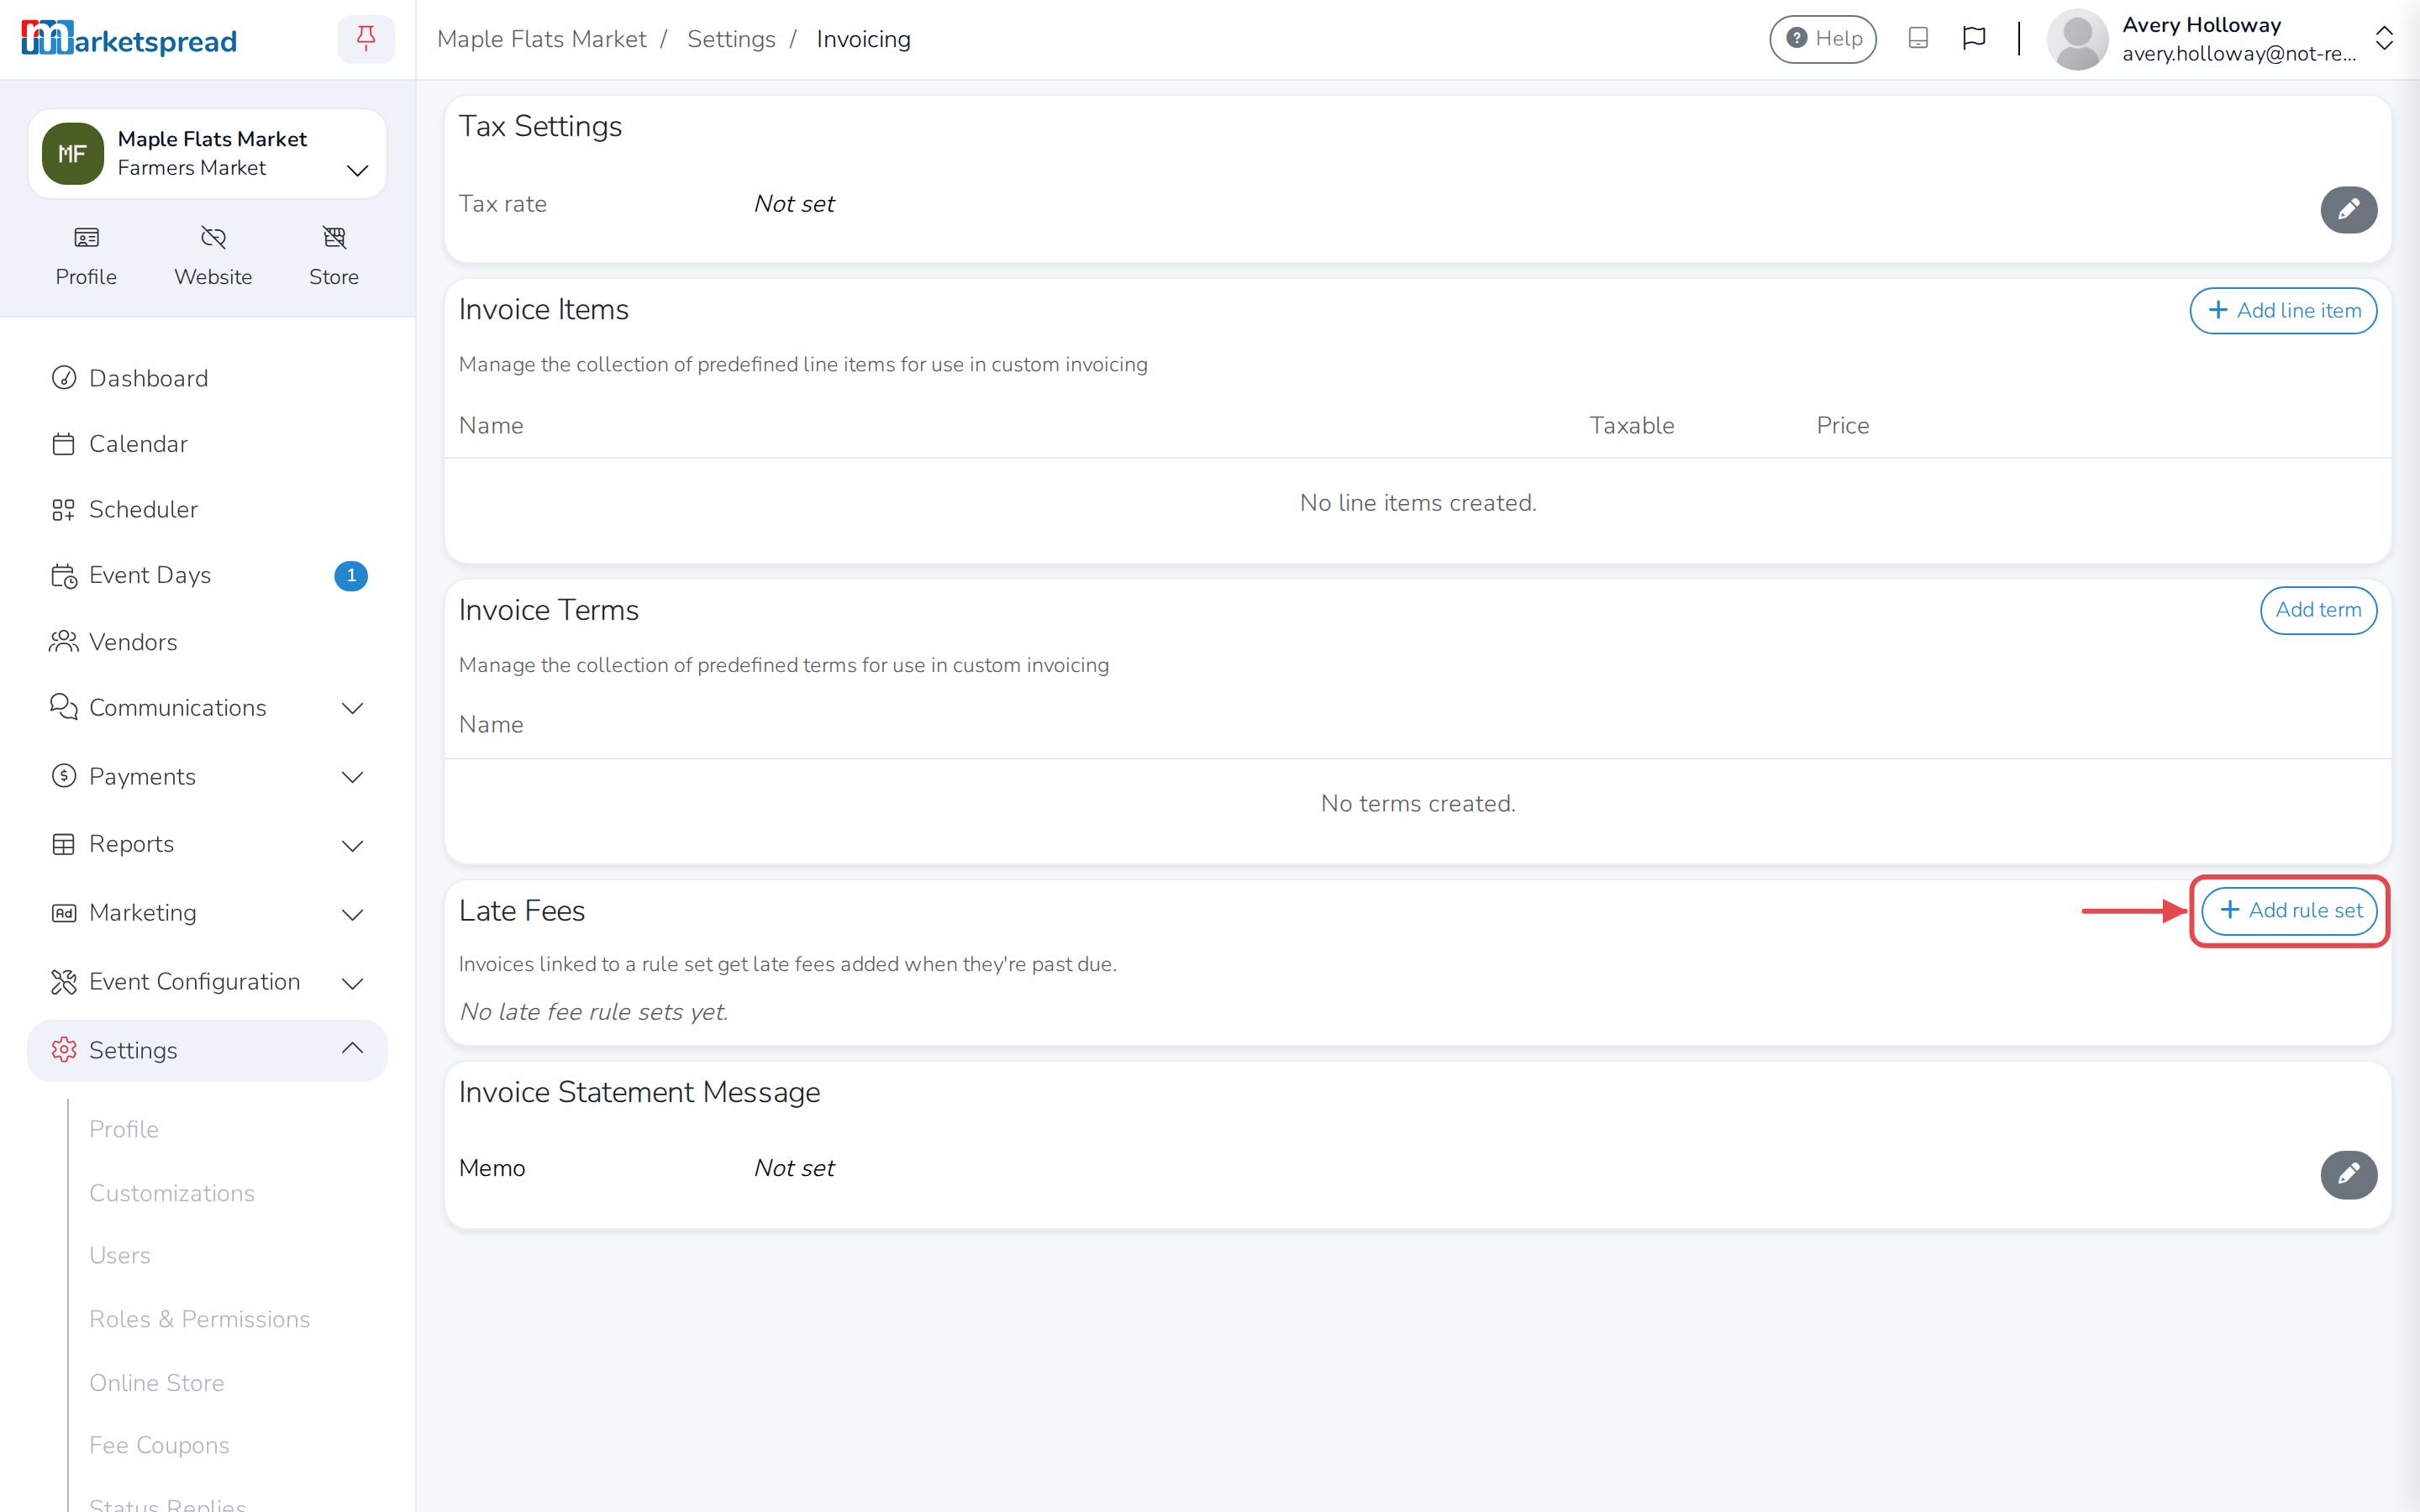
- Under Late Fees, click + Add rule set.
- Give it a Name.
- Fill in the Line item name — this is what shows on the vendor's invoice.
- Under Steps, set a Start day for the first fee.
- Under Charge, choose Flat amount or Percentage.
- Fill in the Amount or Percent.
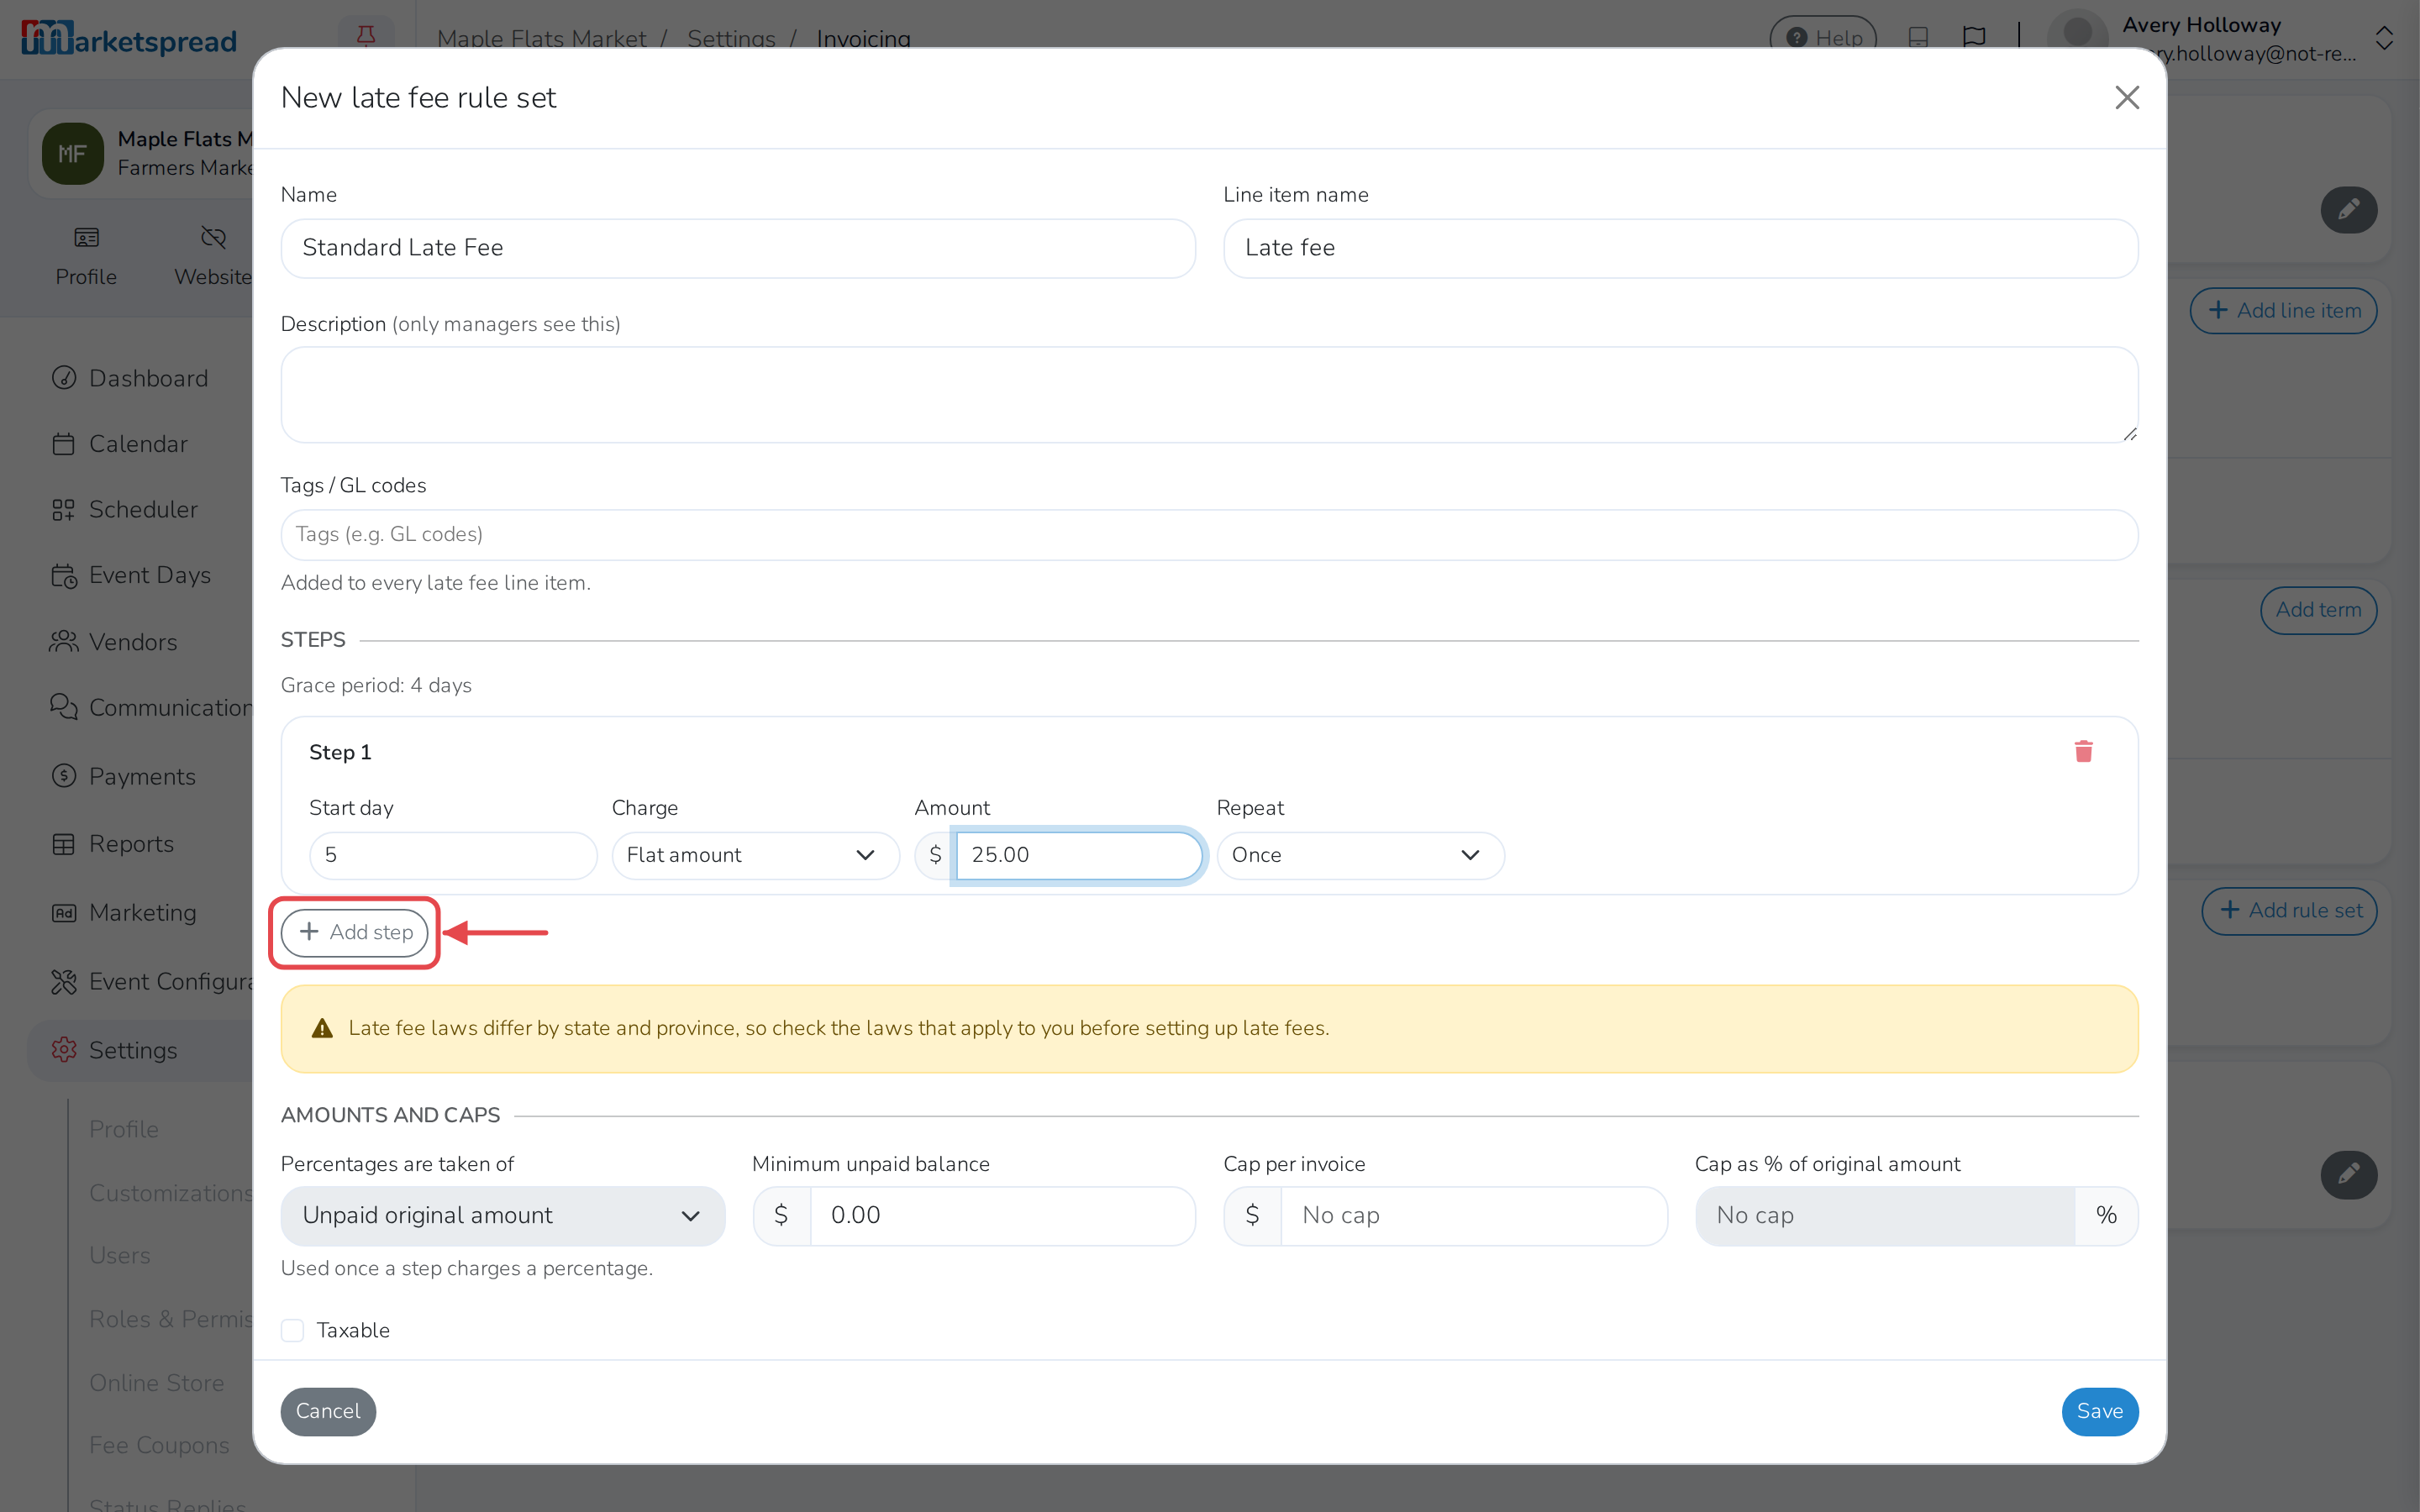
- Click + Add step to add another fee — for example, one that repeats every 7 days under Repeat.
- Under Posts at, choose what time of day new fees are added.
- Under Review, choose Automatic to add fees right away, or Review first to approve each one yourself.
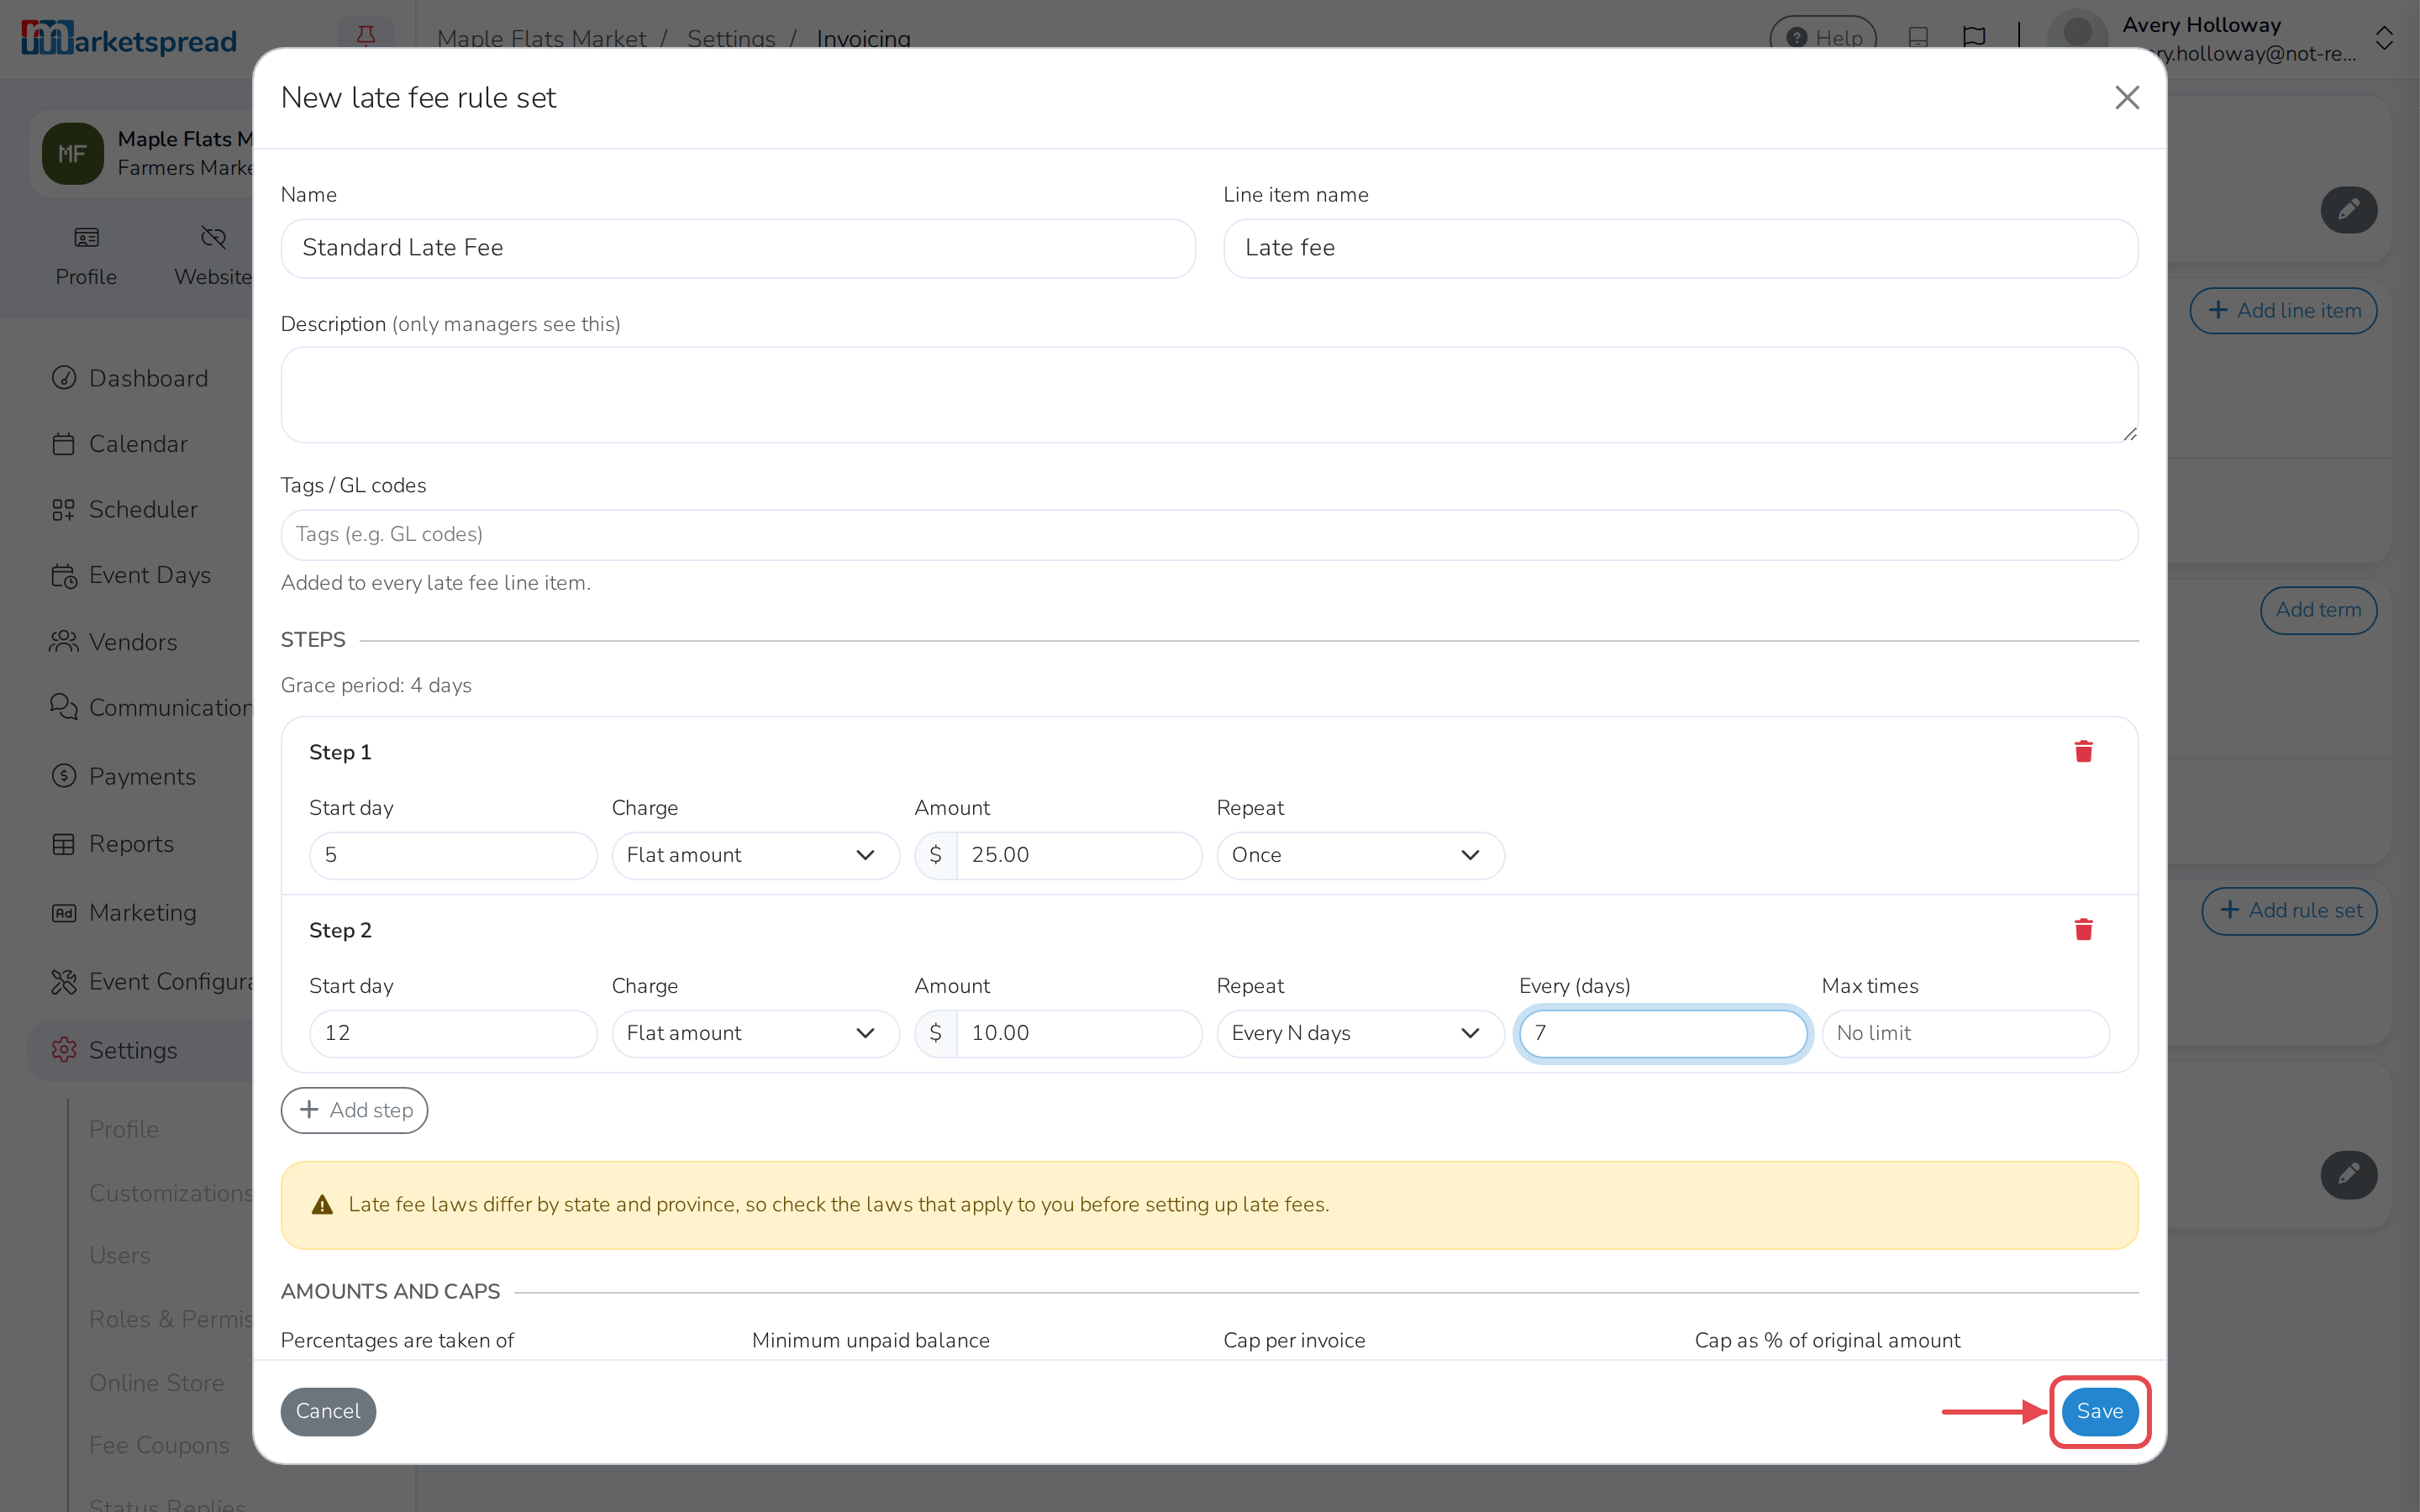
- Click Save.
Check your local laws
Late fee laws differ by state and province. Check the laws that apply to you before setting up late fees.
Tip
Cap what a rule set can charge under Amounts and caps. Warn the payer ahead of time with Remind the payer this many days before a fee under Notices and terms.
Edit or delete a rule set
- Open Settings, then Invoicing.
- Under Late Fees, find the rule set and click Edit or Delete.
- If editing, make your changes and click Save.
Note
Editing a rule set changes the fees still to come on every unpaid invoice linked to it. Fees already added to an invoice keep the amount they were charged.
Warning
Deleting a rule set removes its fees from every unpaid invoice linked to it, and removes it from any event series using it. Paid invoices aren't affected.
Apply a rule set to an event
This covers every booking invoice for the event. Booth fees, vendor type fees, vendor tag fees and category fees all land on the same invoice, so one rule set covers them all.
- Open Event Configuration, then Events.
- Click the event or event series.
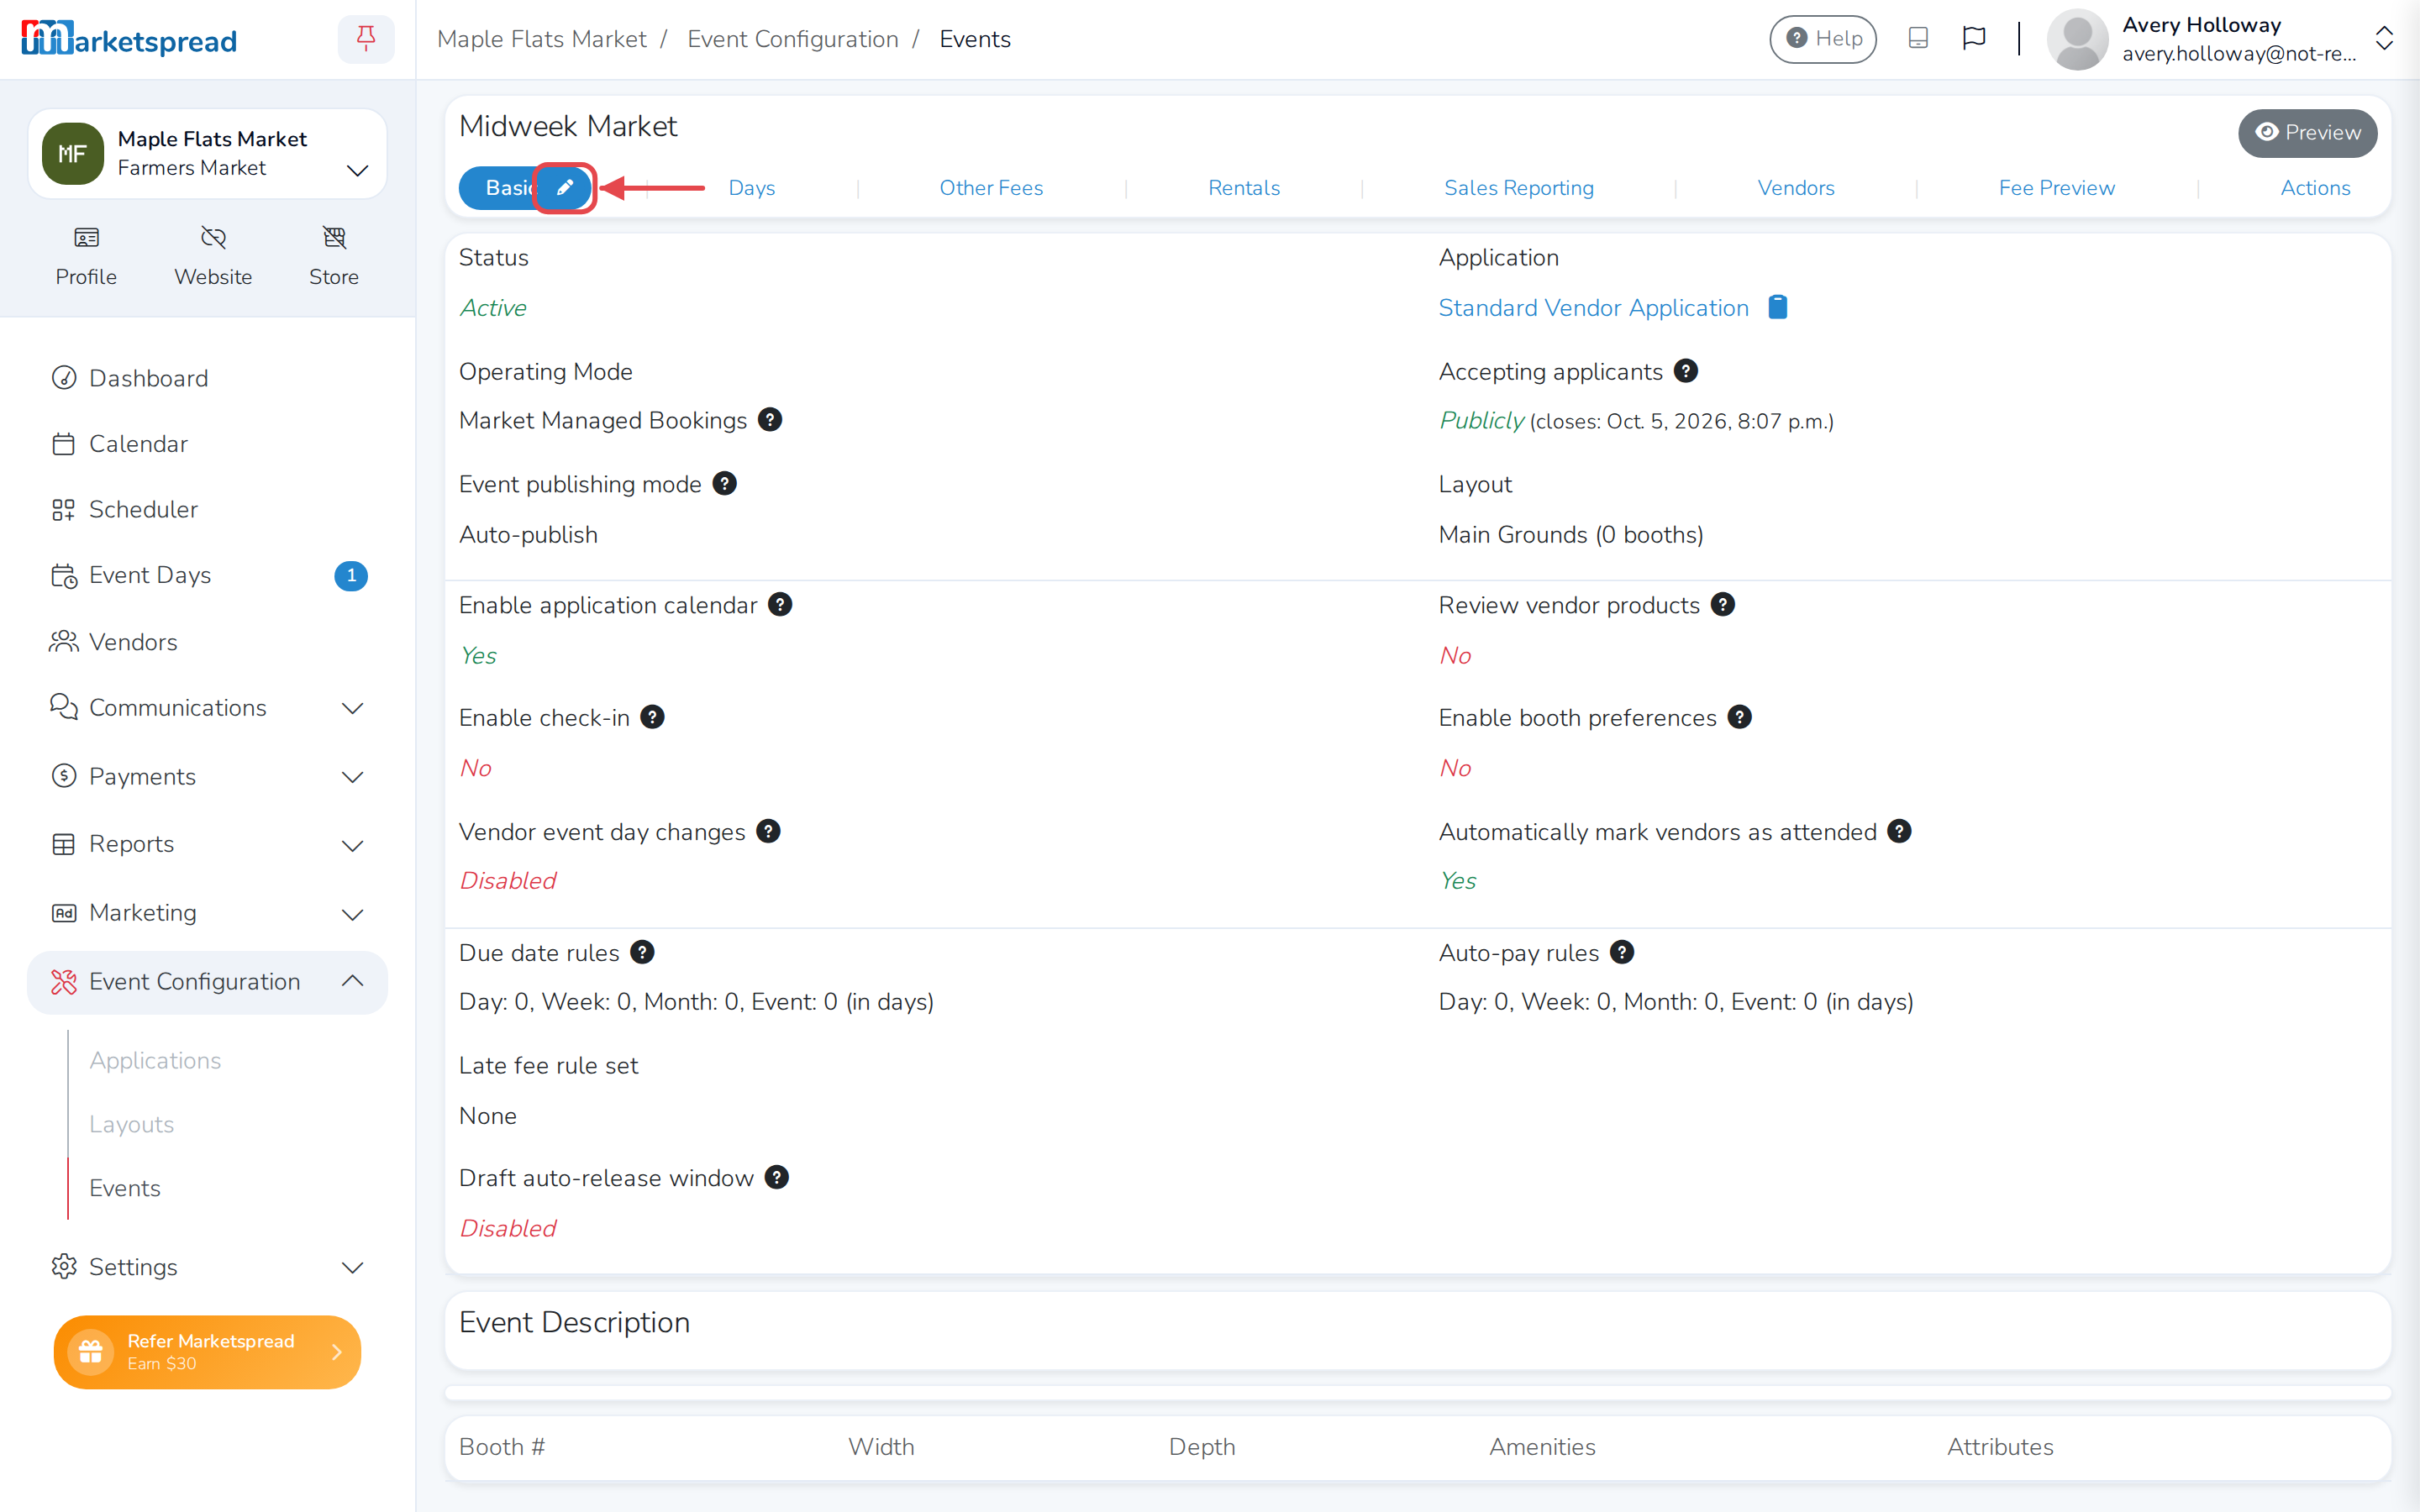
- On the Basic tab, click the pencil edit icon.
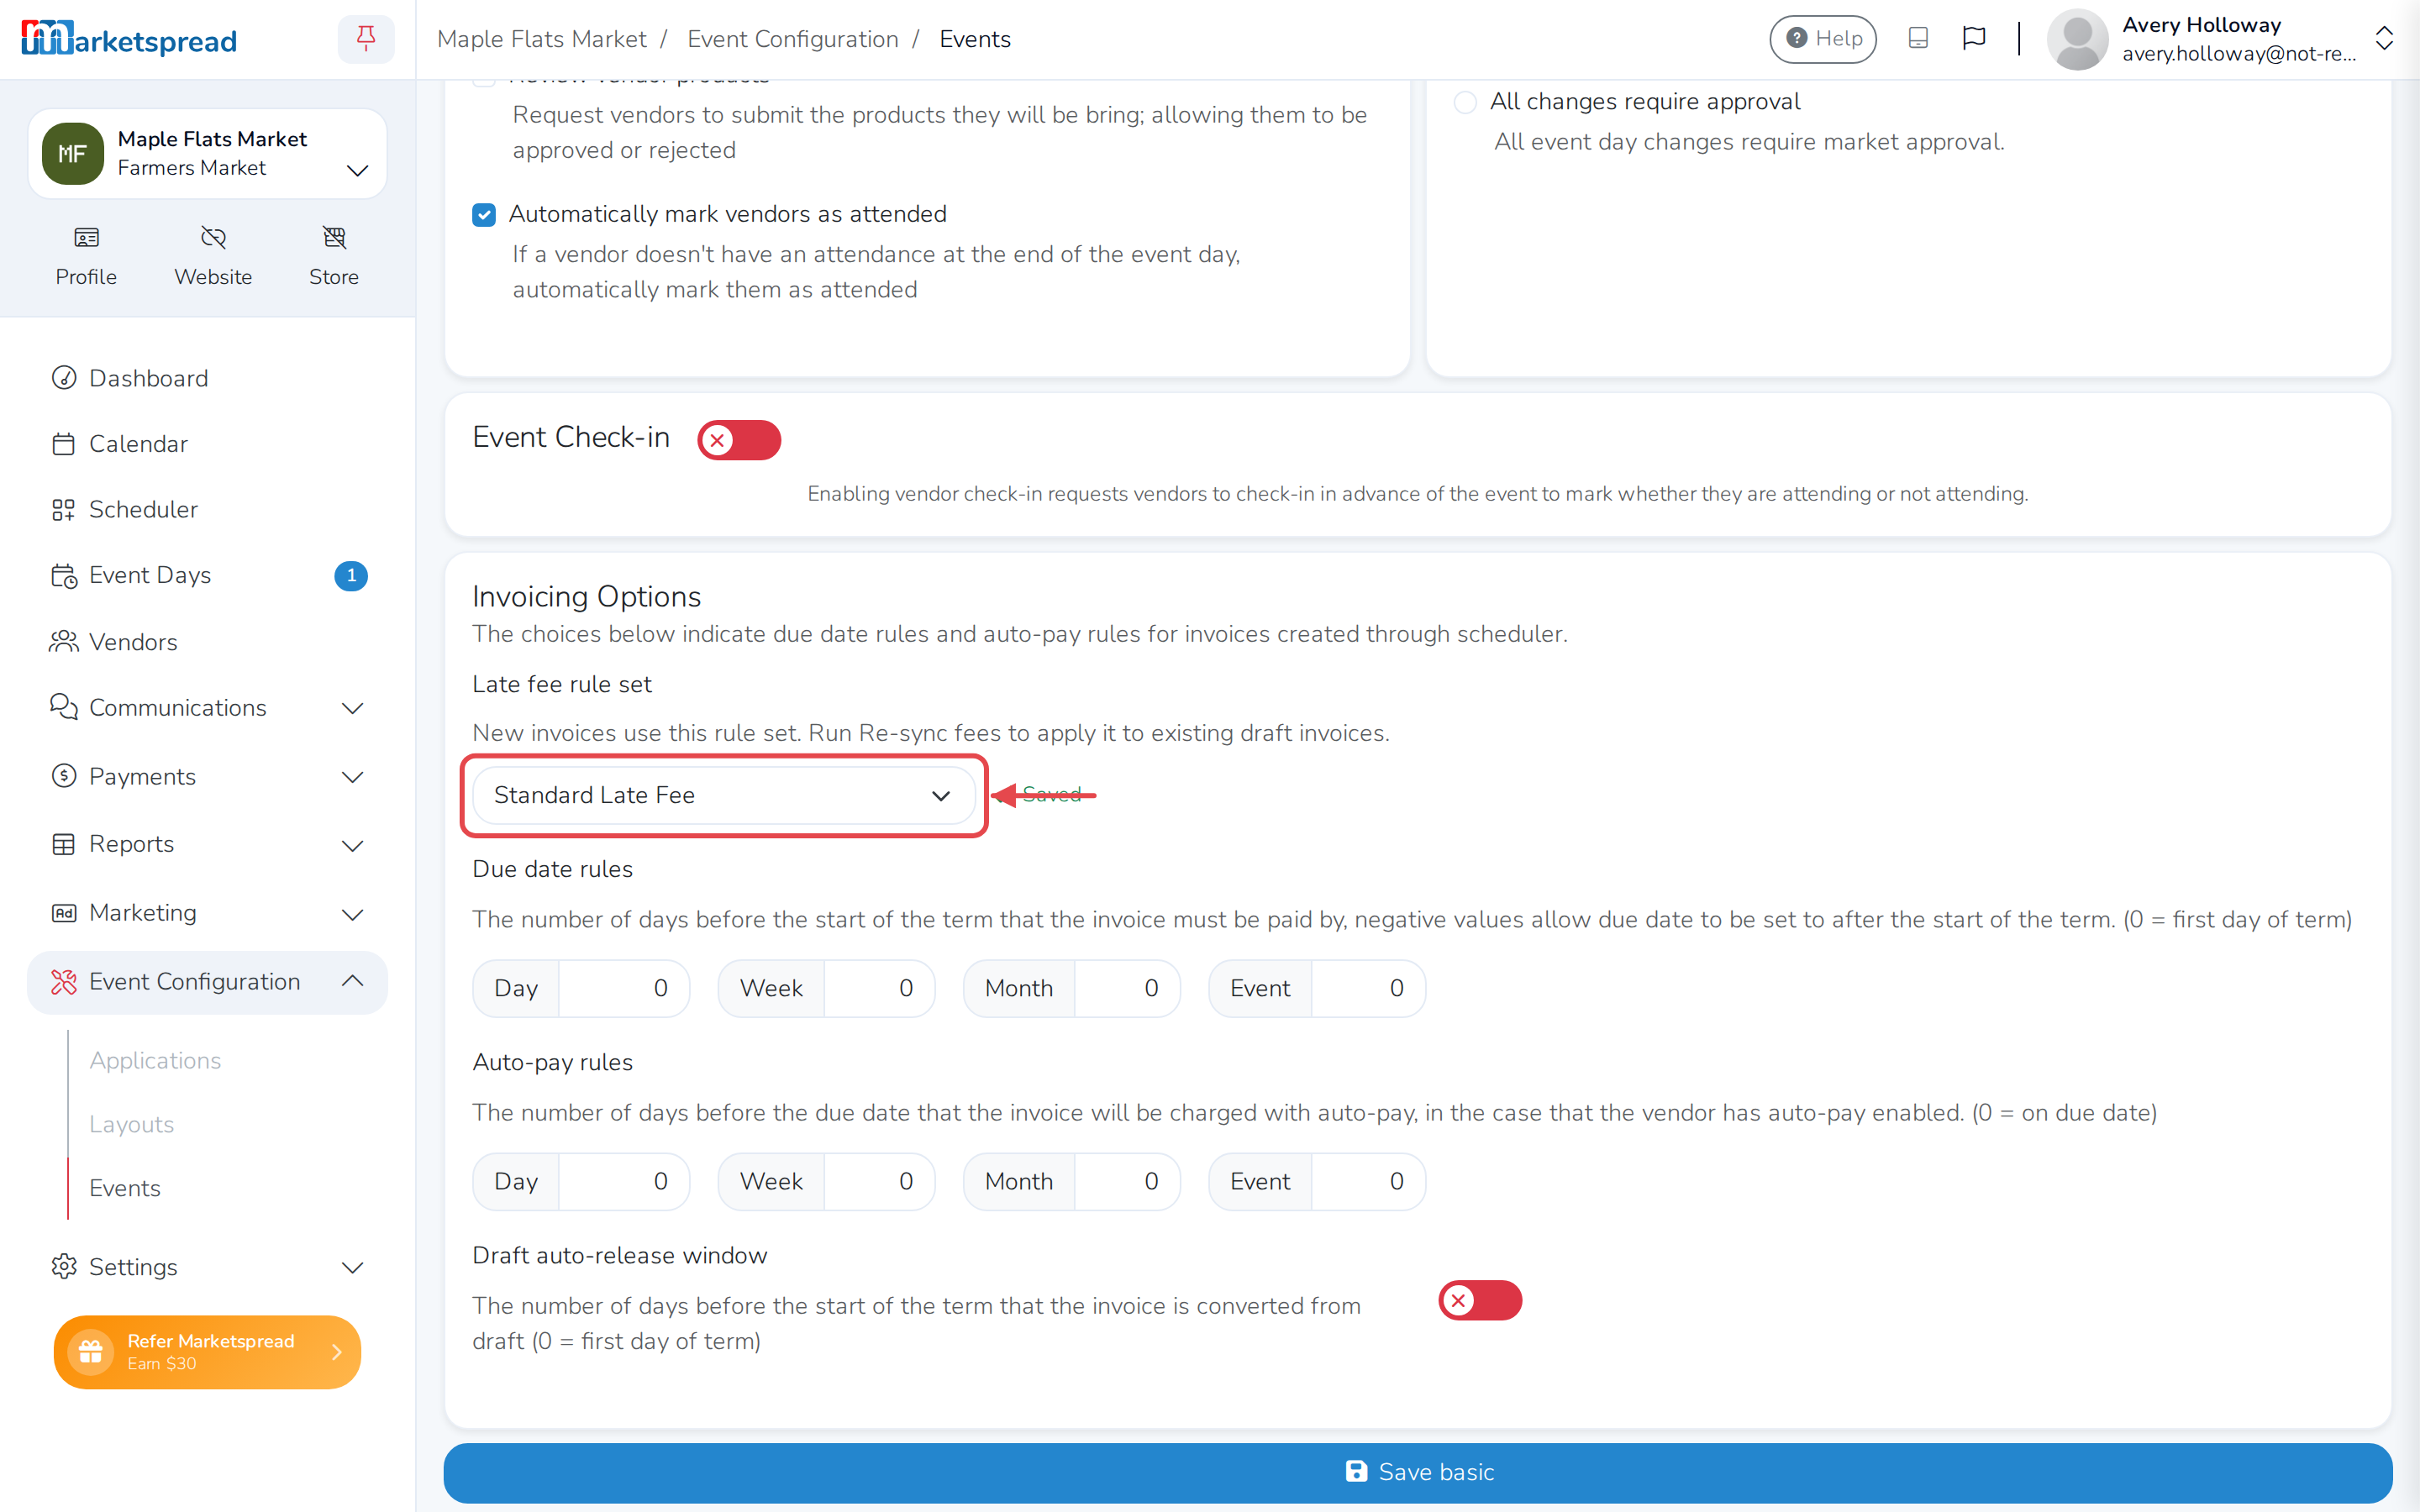
- Under Invoicing Options, use the Late fee rule set dropdown to choose one.
Note
New invoices use the rule set right away. For vendors already booked, open the event's Actions tab and run Re-sync fees to bring their draft invoices onto it. This won't change fees already invoiced.
Apply a rule set to a single invoice
- Open the invoice, or click + Add Invoice to create one.
- Click Edit in the top right, if you're not already editing it.
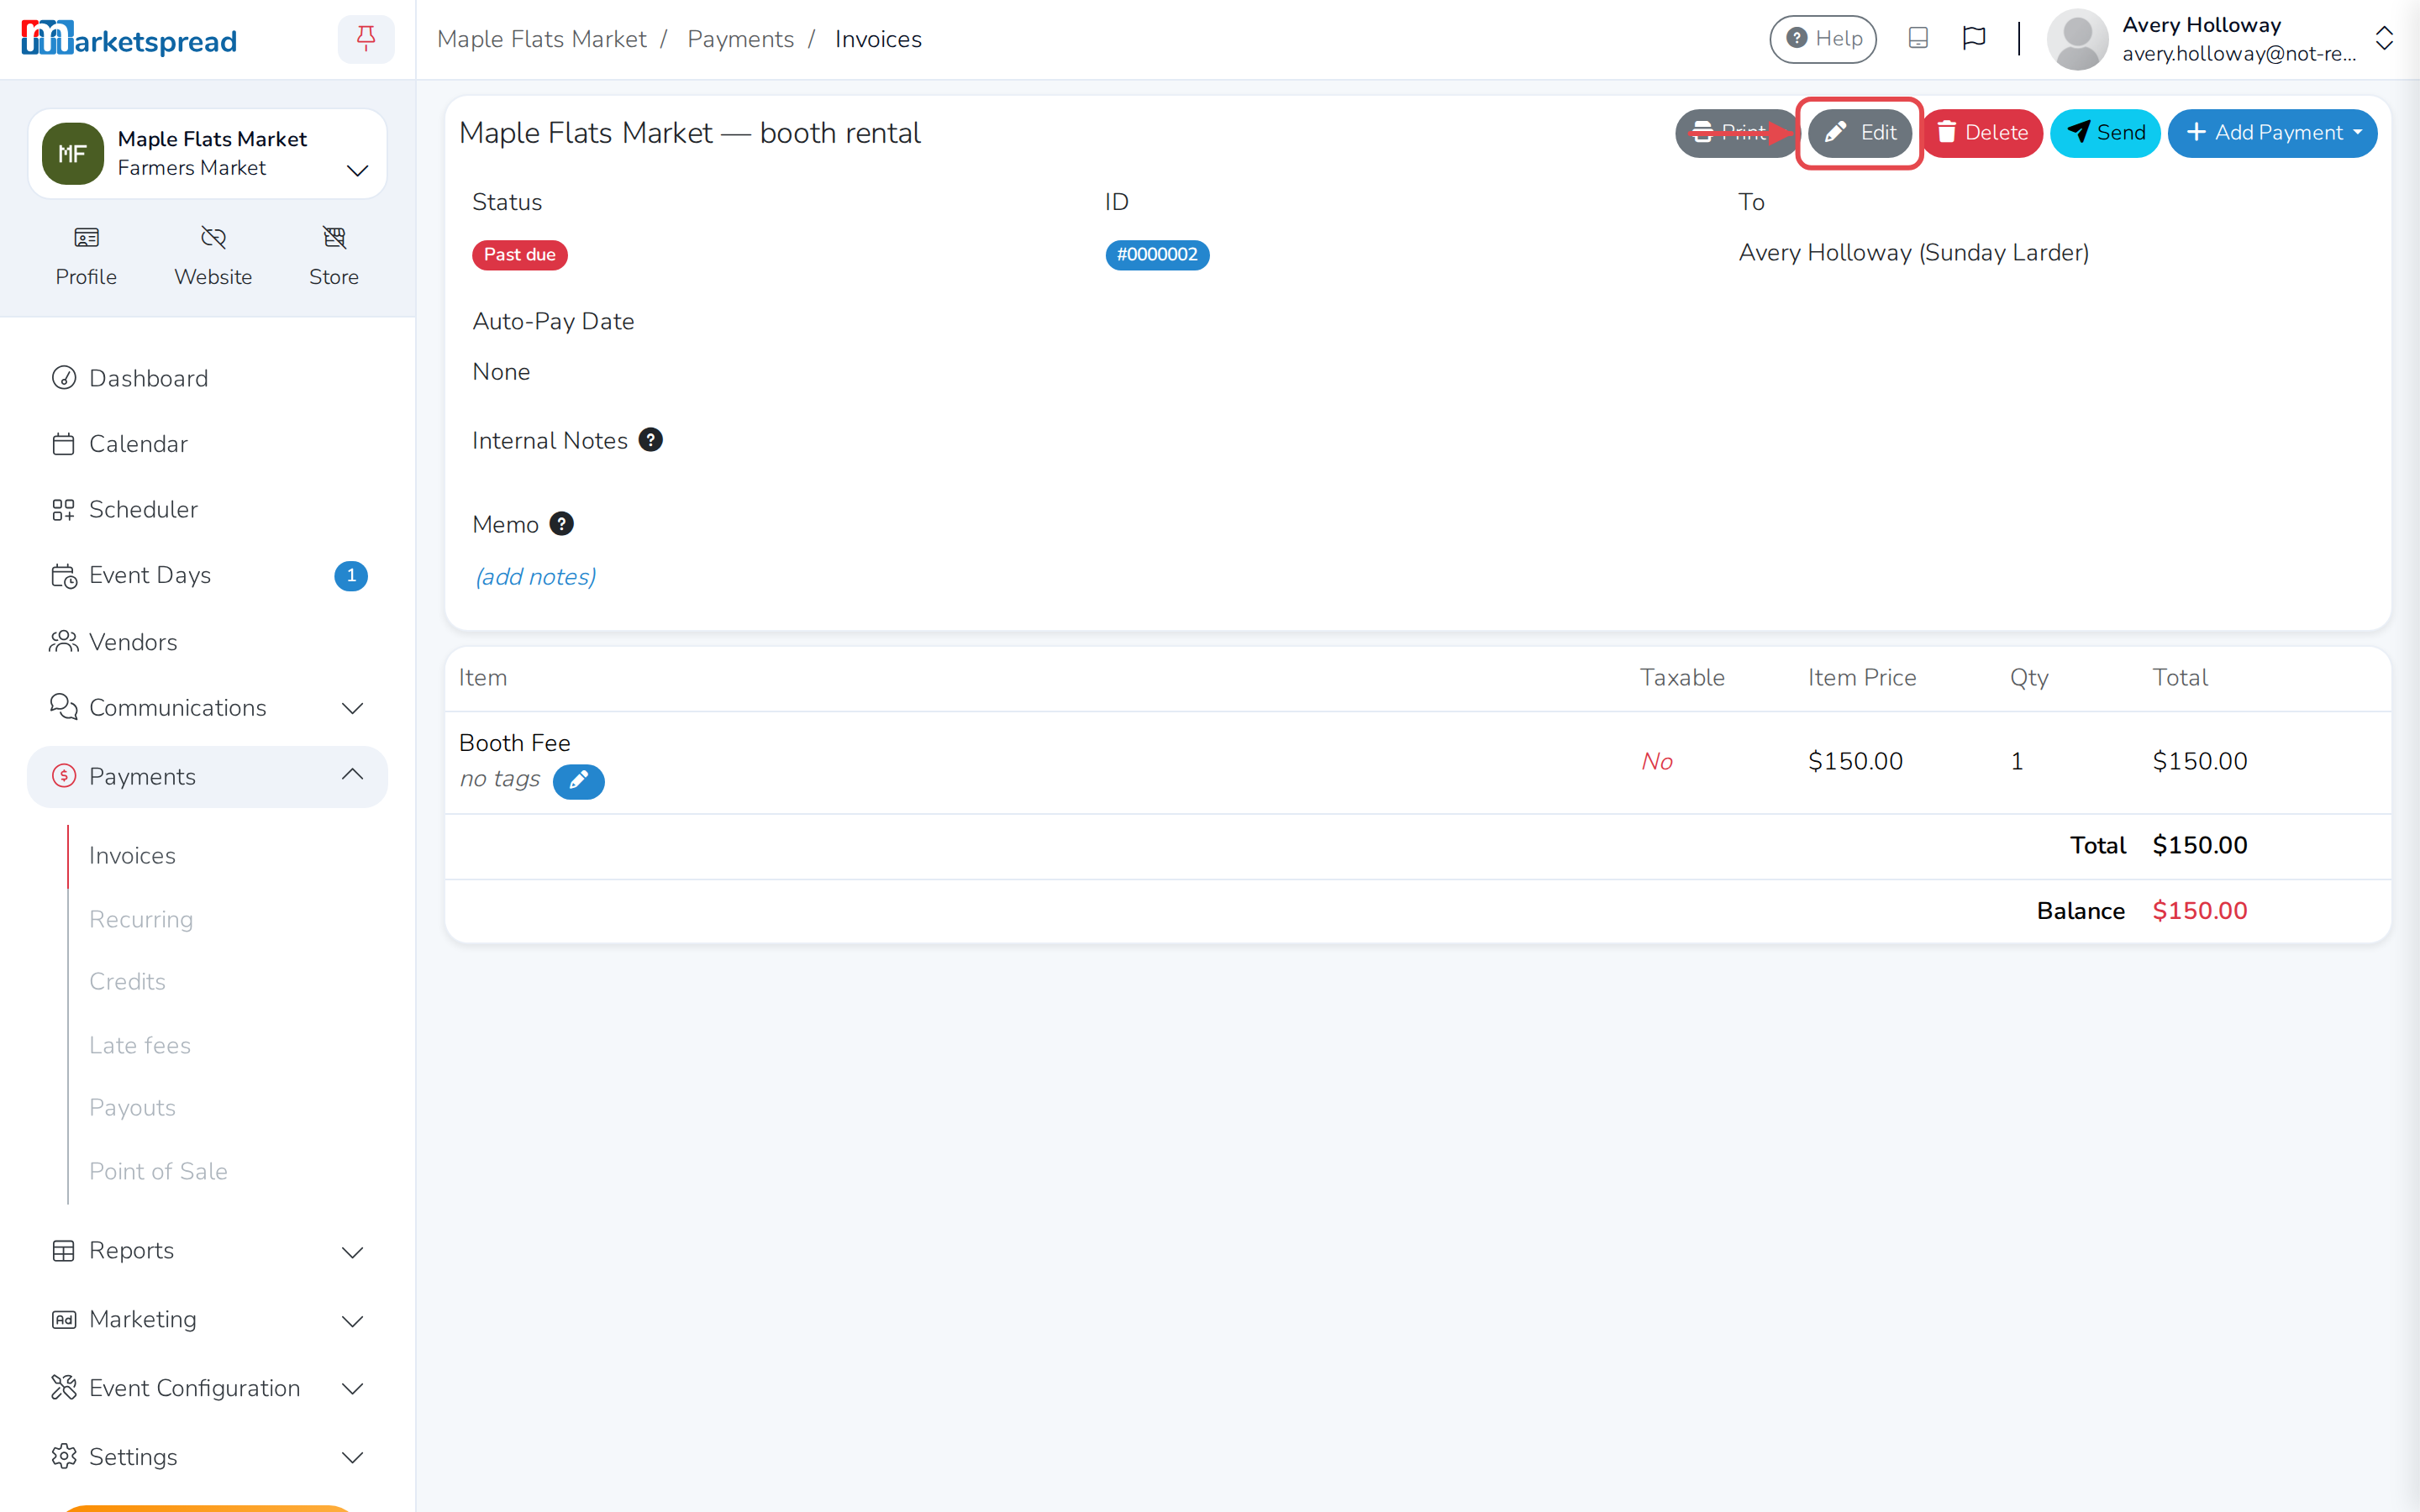
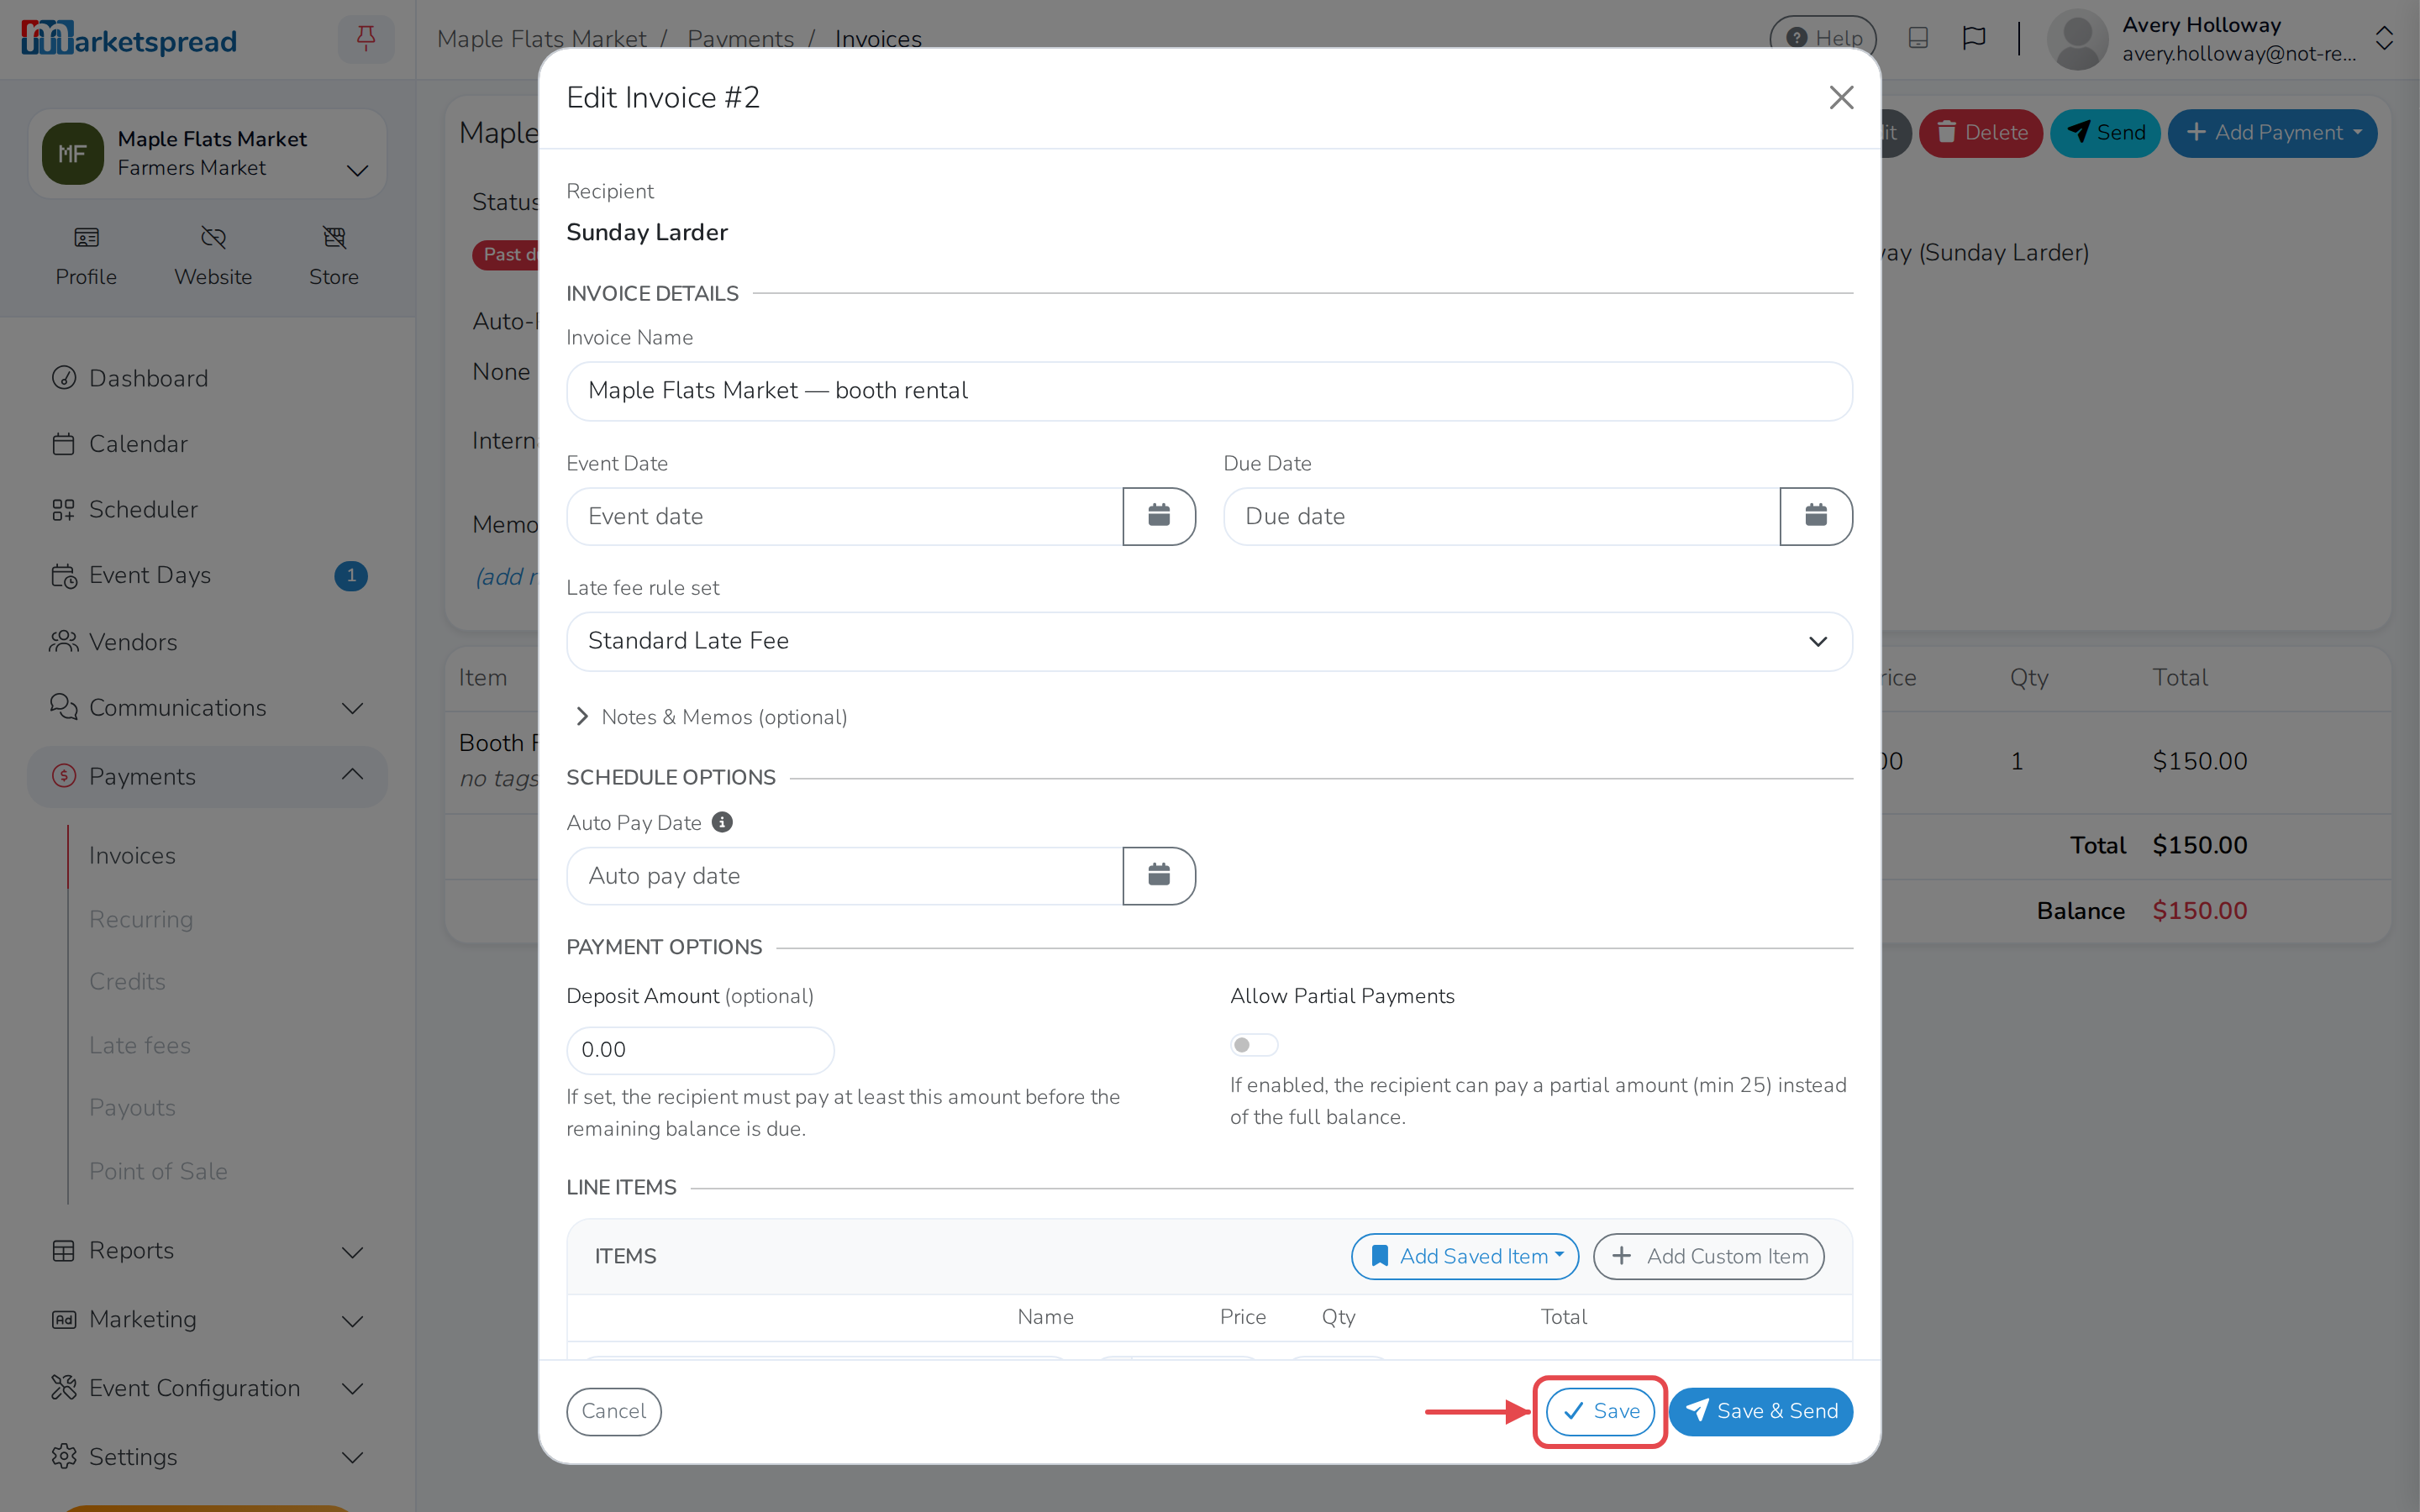
- Under Late fee rule set, choose the rule set you want.
- Click Save.
Note
You can't change an invoice's rule set once it's paid in full.
Review and approve a late fee
Only needed for a rule set that's set to Review first — an Automatic rule set skips this and adds its fees straight away.
- Open Payments, then Late fees.
- Click the Pending review tab.
- Click Approve next to the fee.
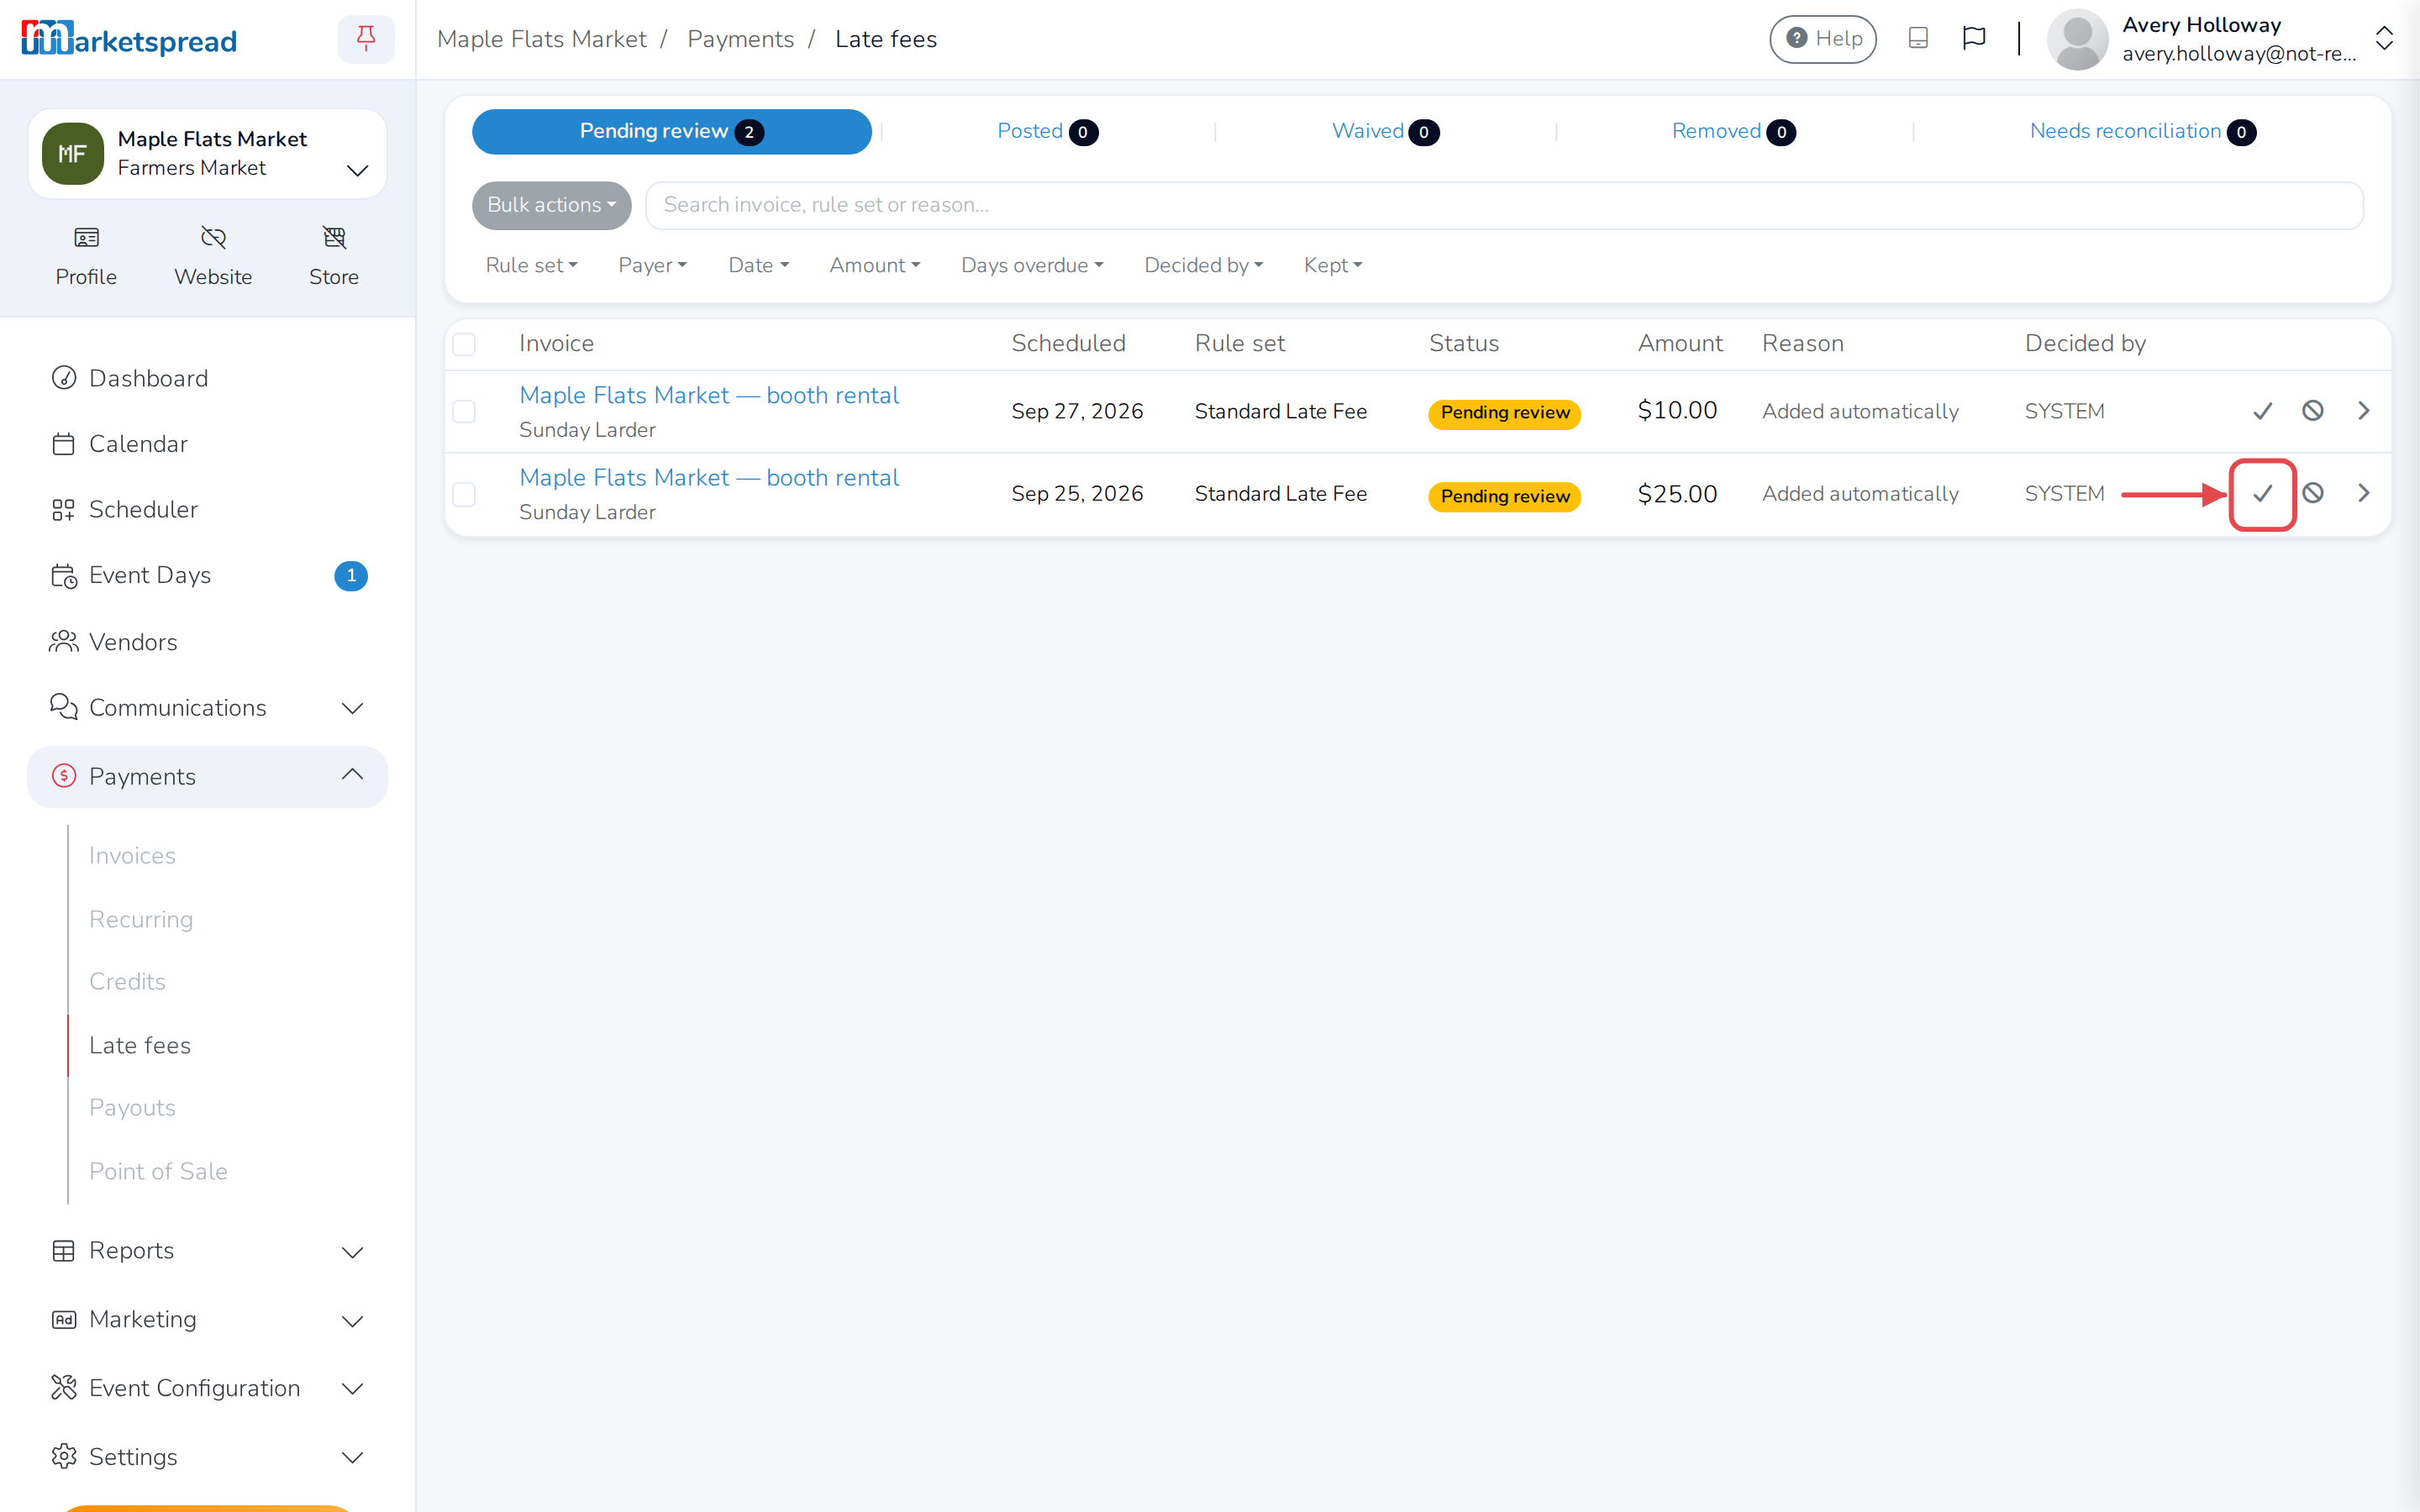
The fee is added to the invoice as soon as you approve it — nothing else to confirm.
Tip
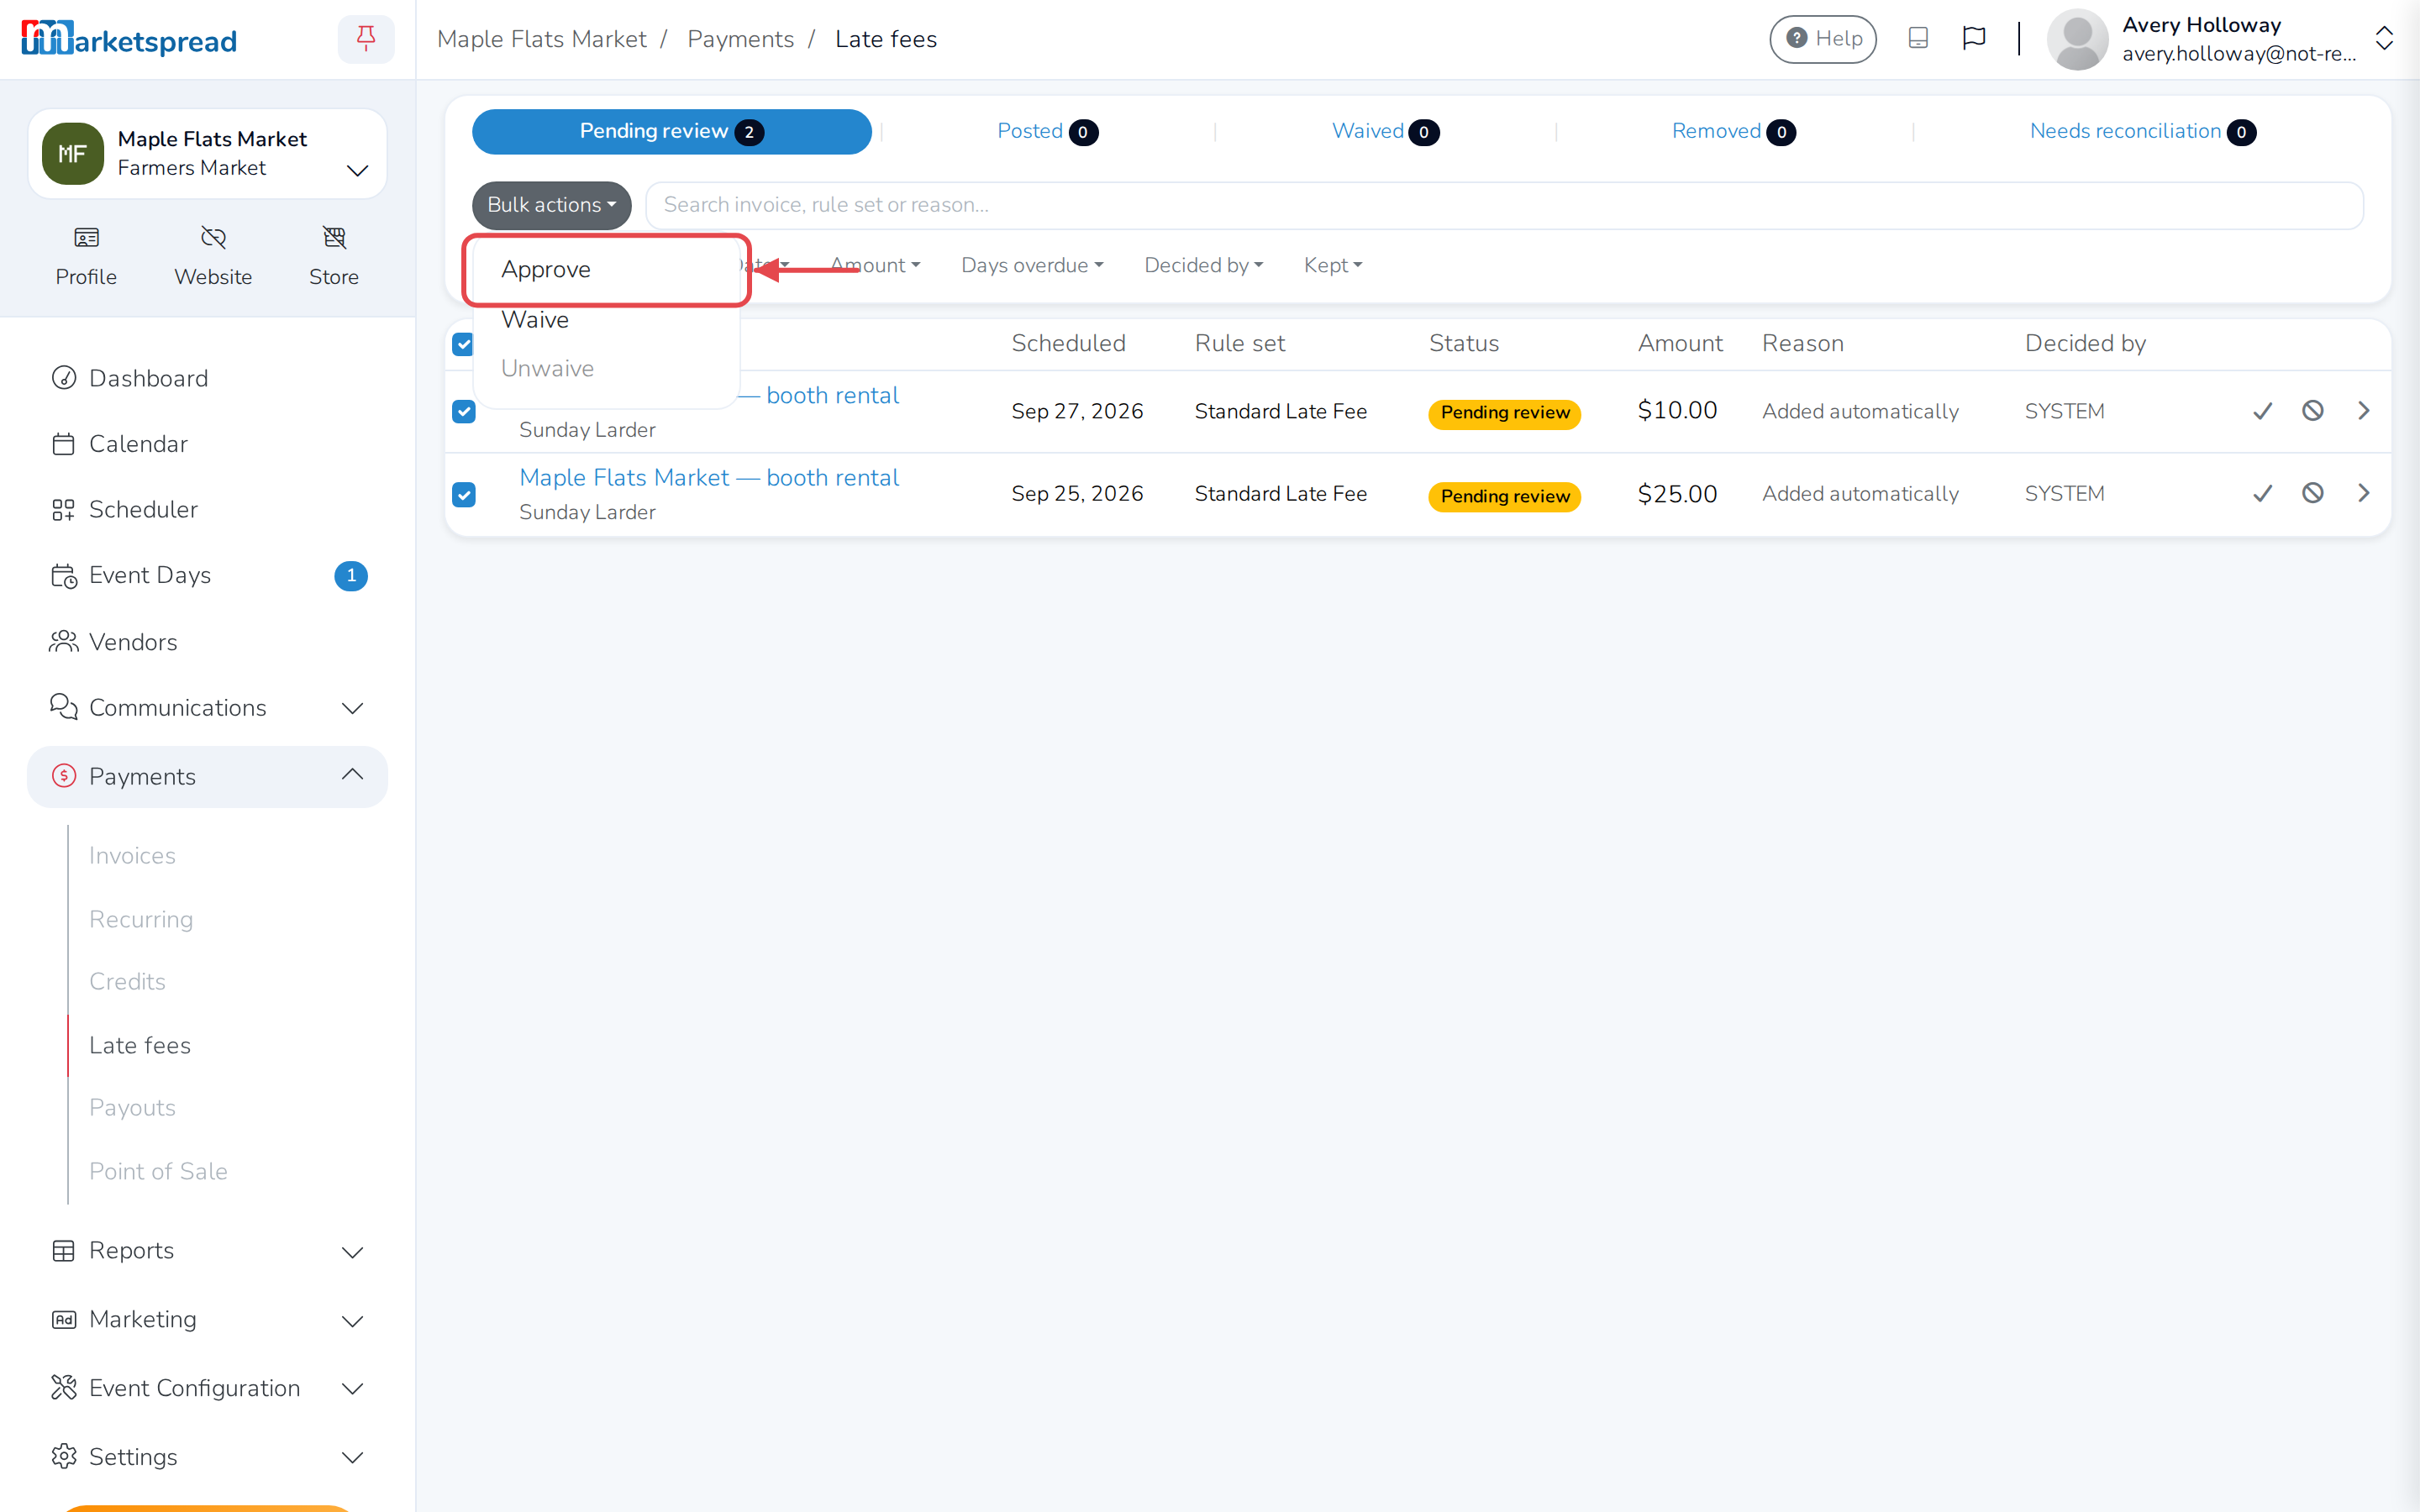
To approve several at once, check the boxes next to them, click Bulk actions, then Approve.
Waive a late fee
- Open Payments, then Late fees.
- Click the Posted tab.
- Click Waive next to the fee.
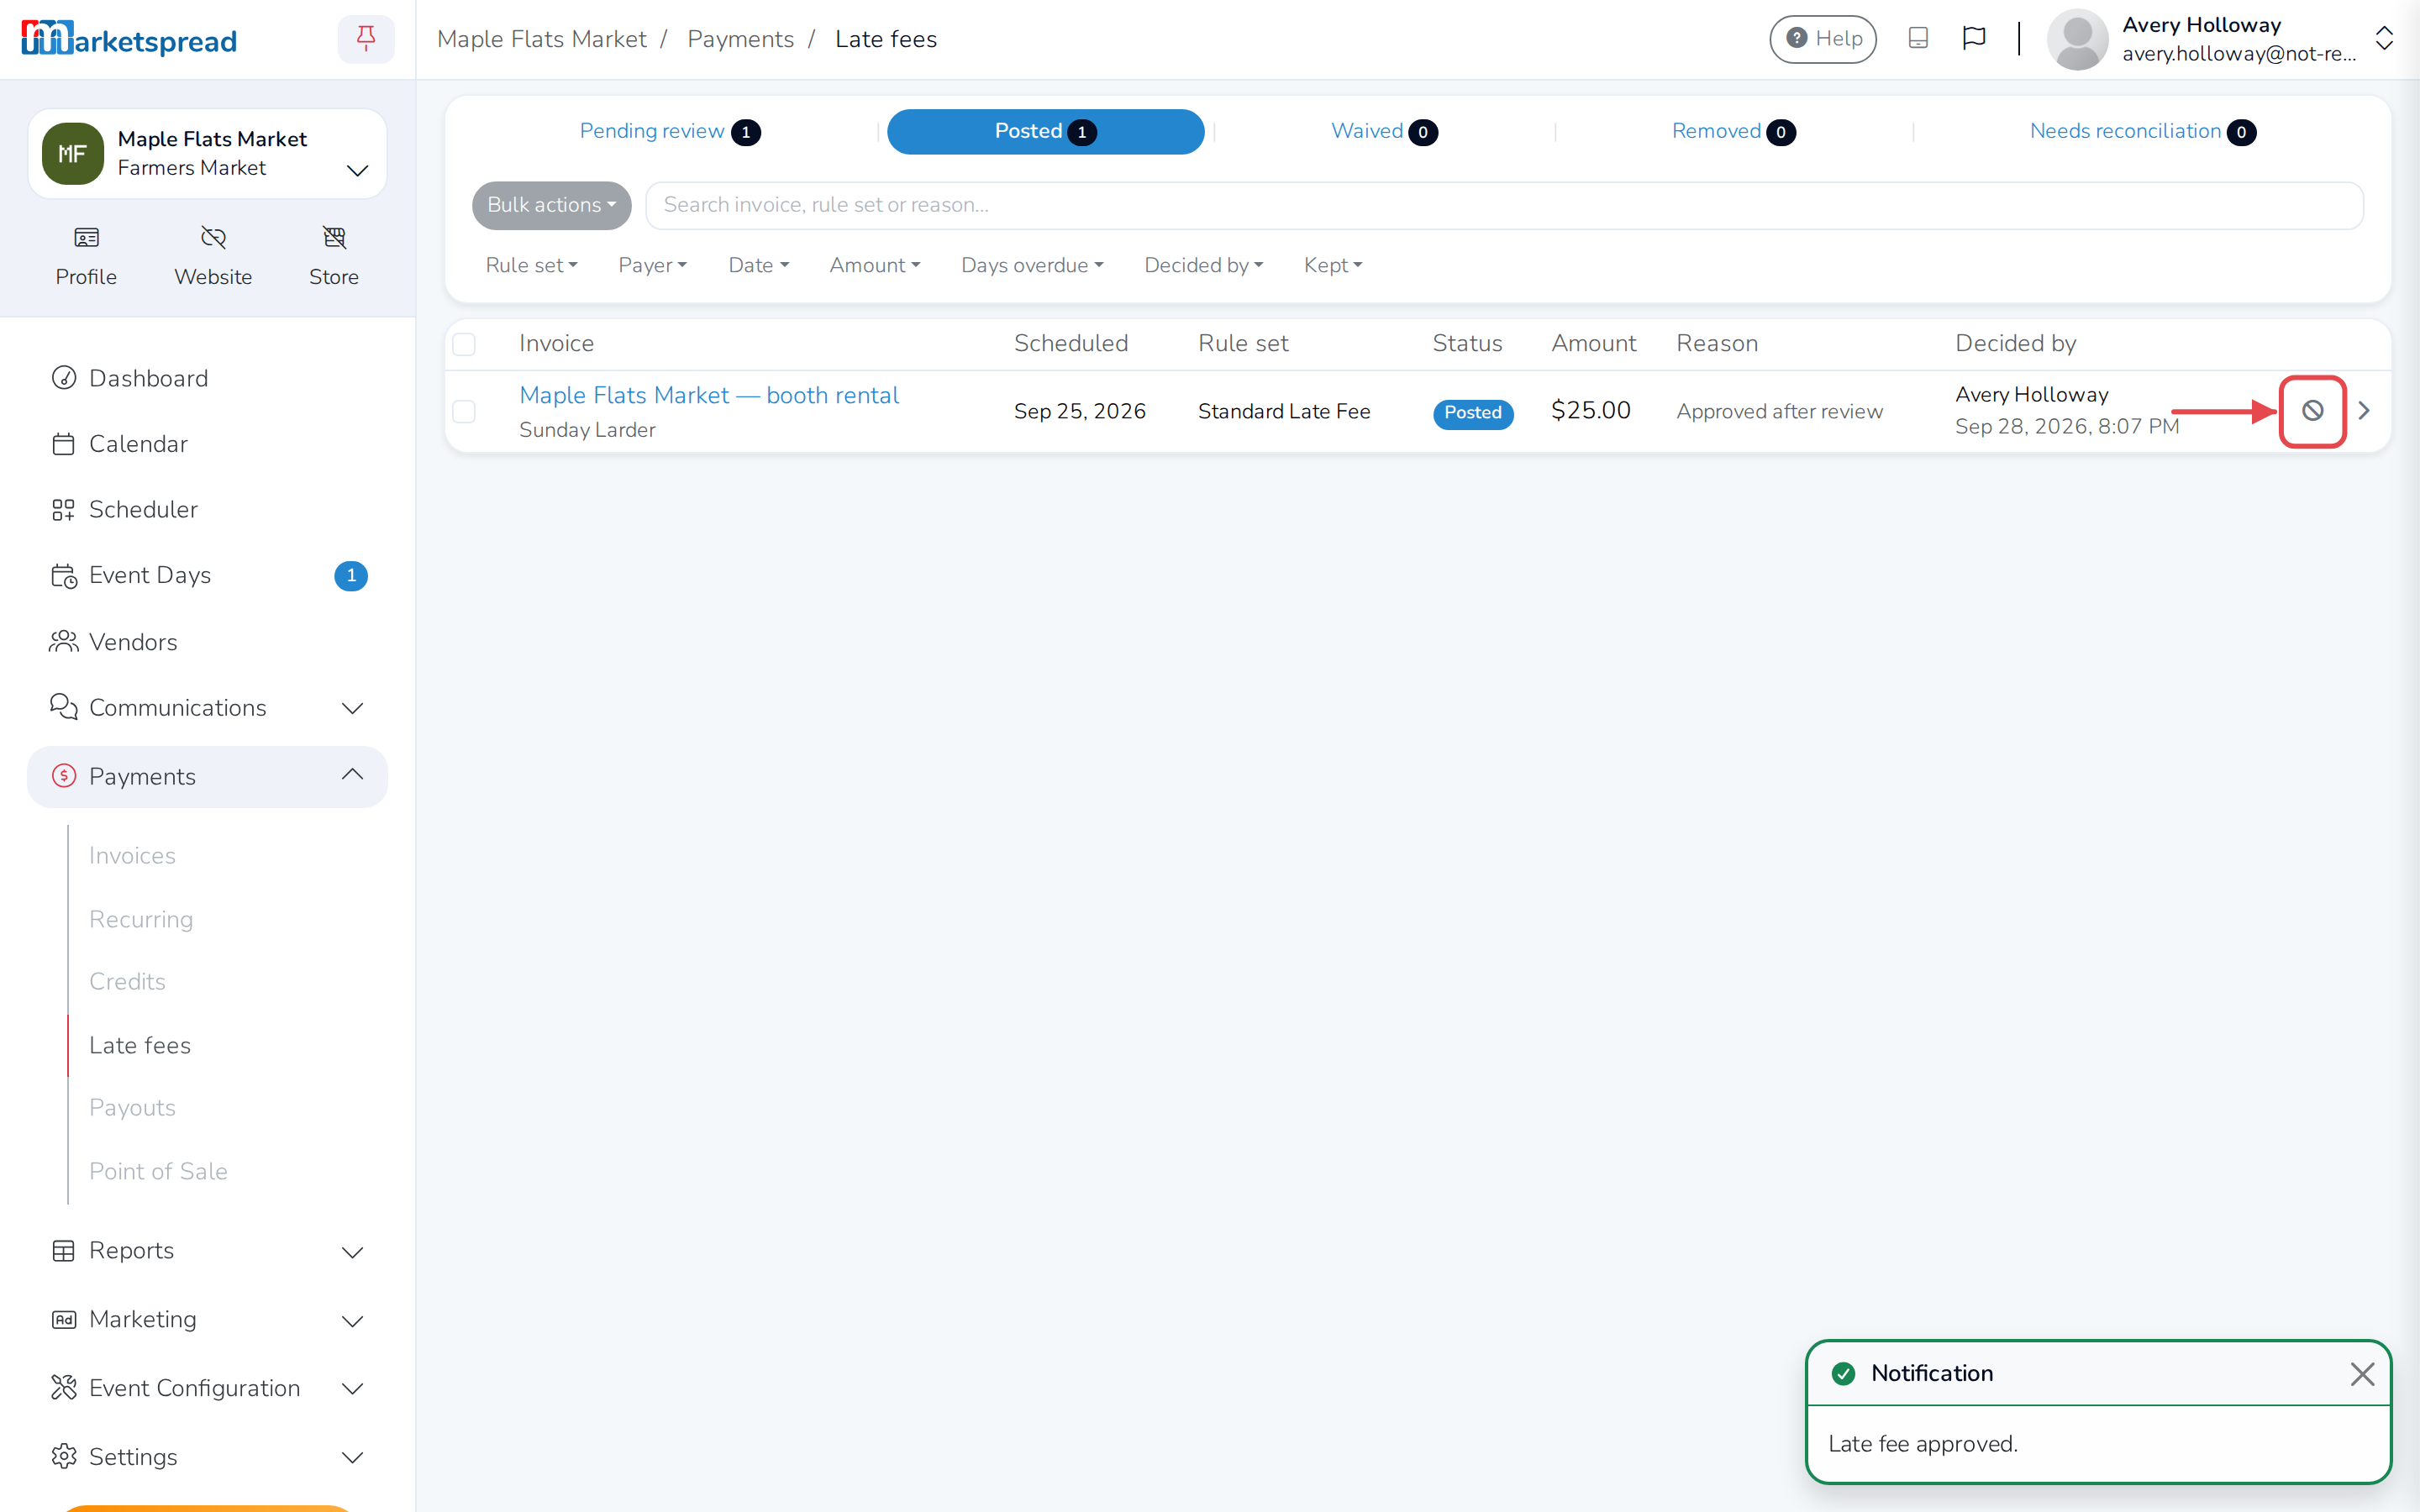
- Fill in a Reason.
- Click Waive.
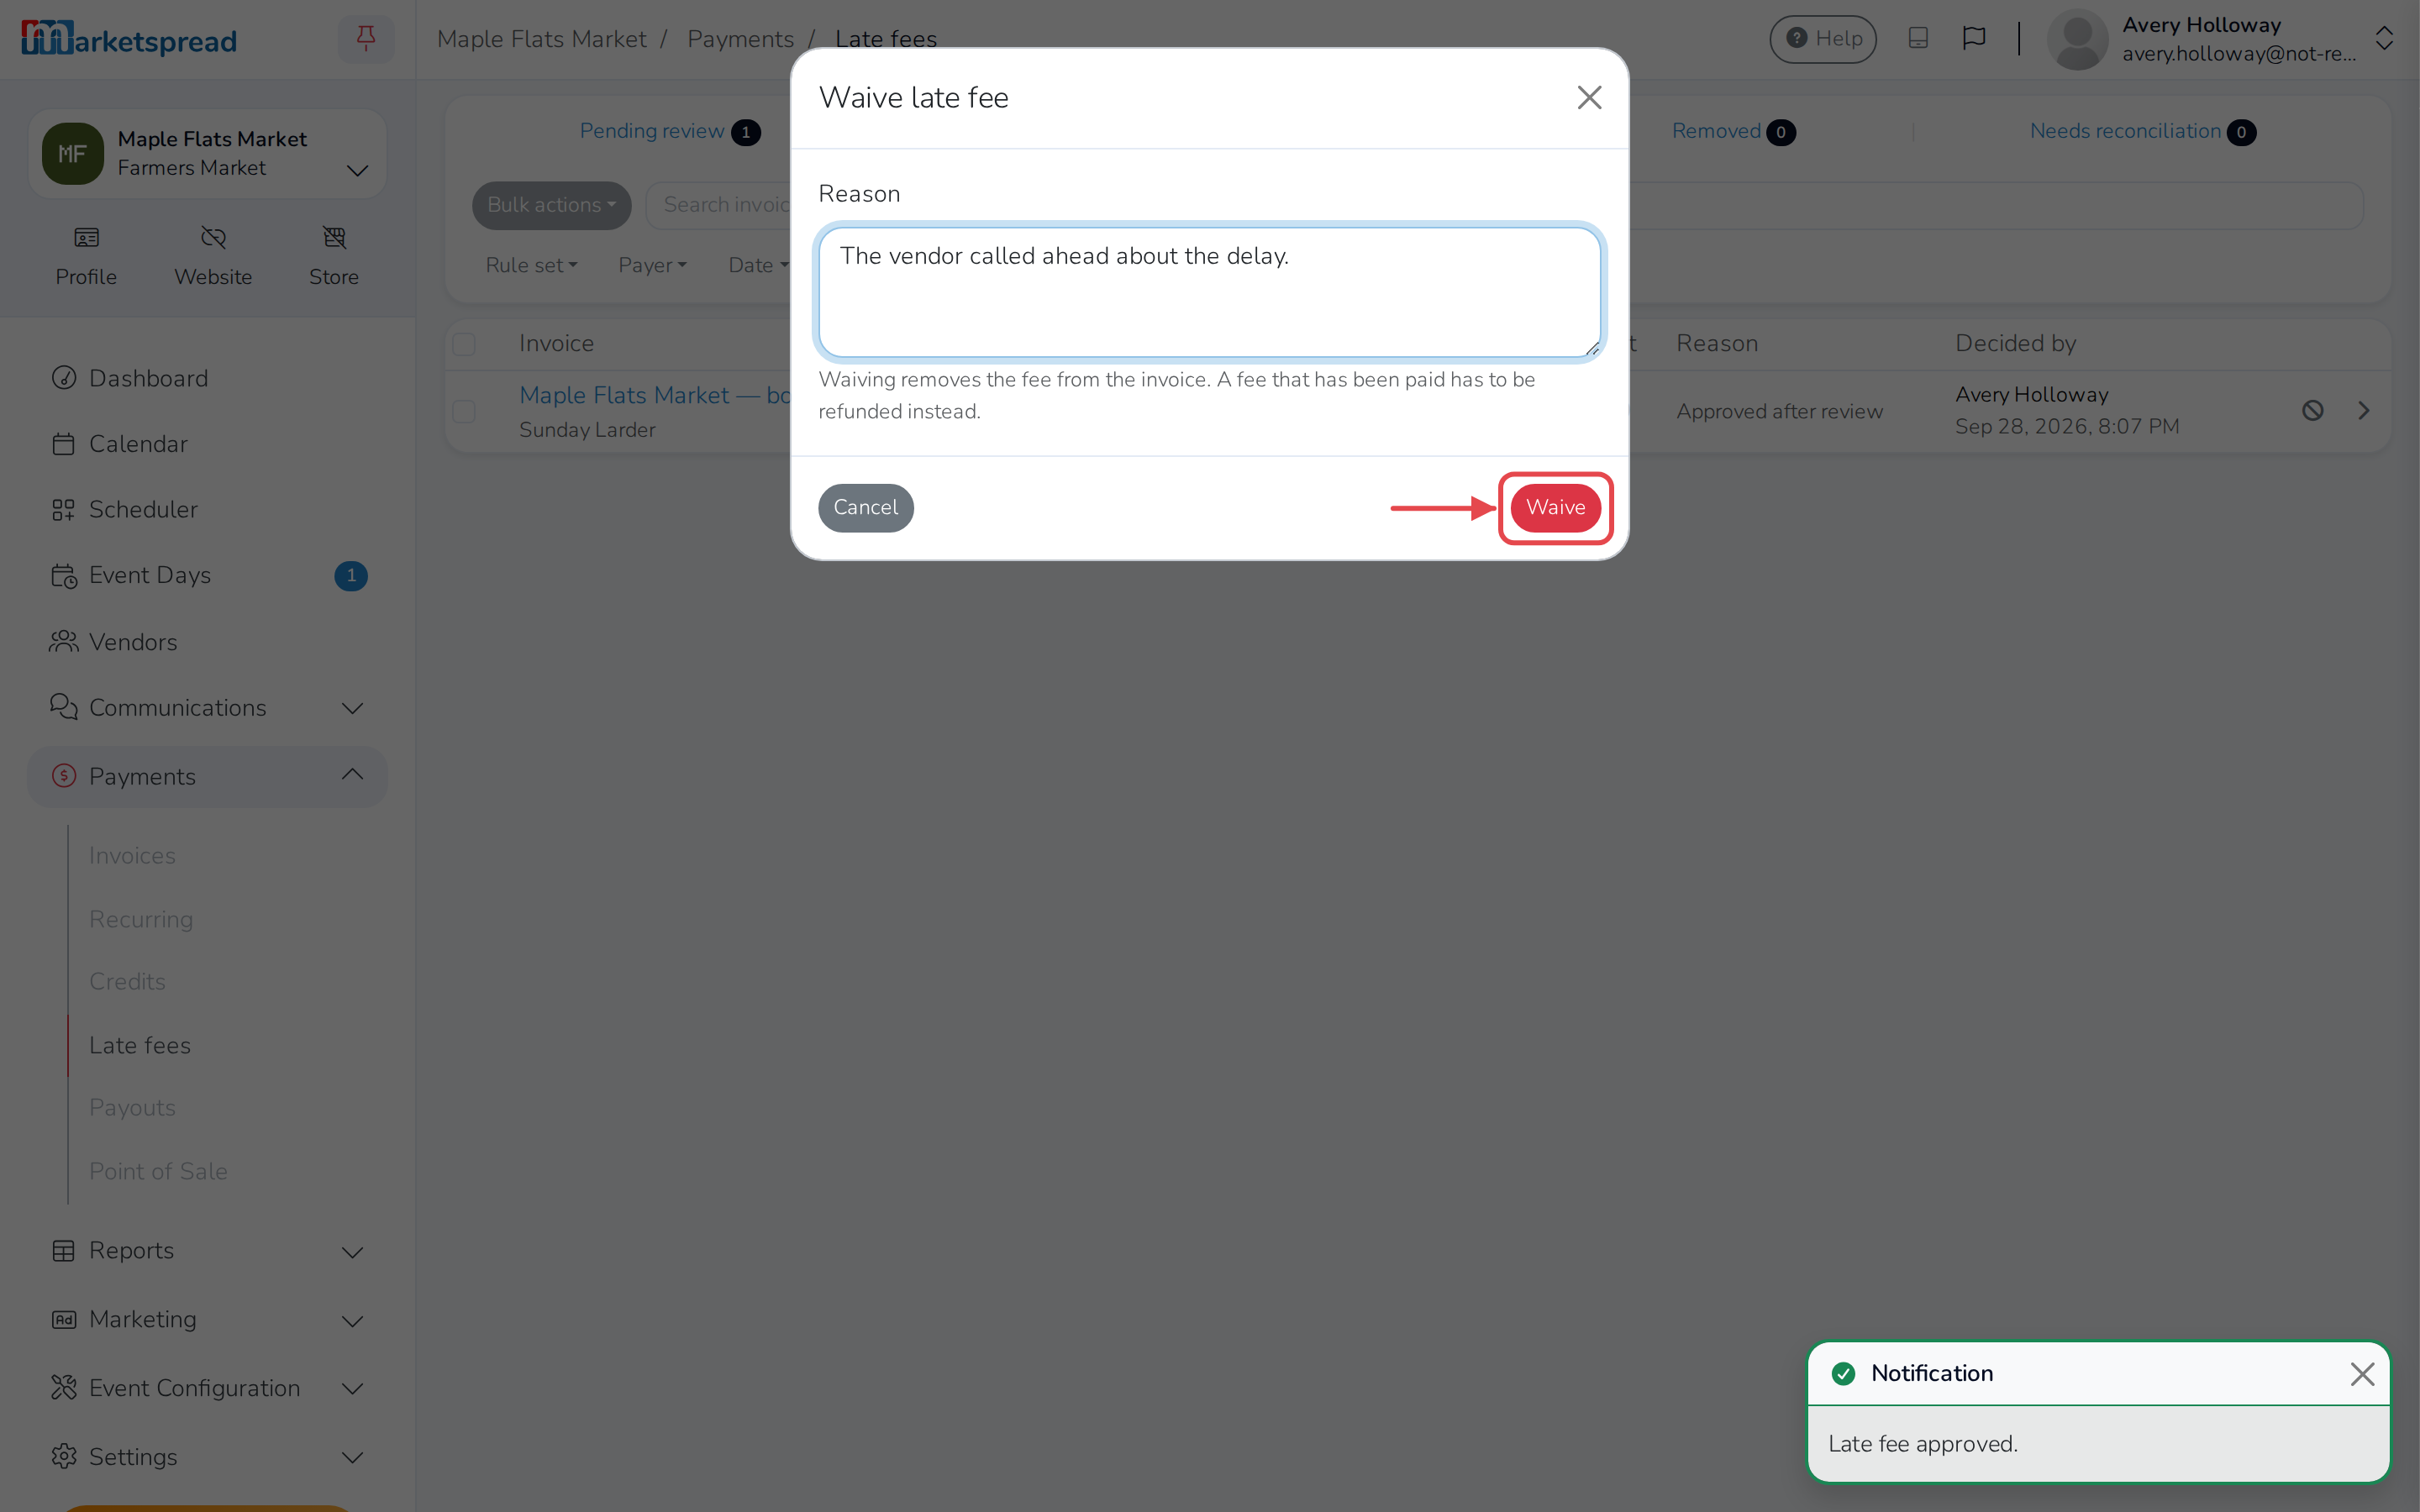
The fee comes off the invoice and the vendor no longer owes it.
Note
A fee that's already been paid has to be refunded instead of waived.
Undo a waive
- Open Payments, then Late fees.
- Click the Waived tab.
- Click Unwaive next to the fee.
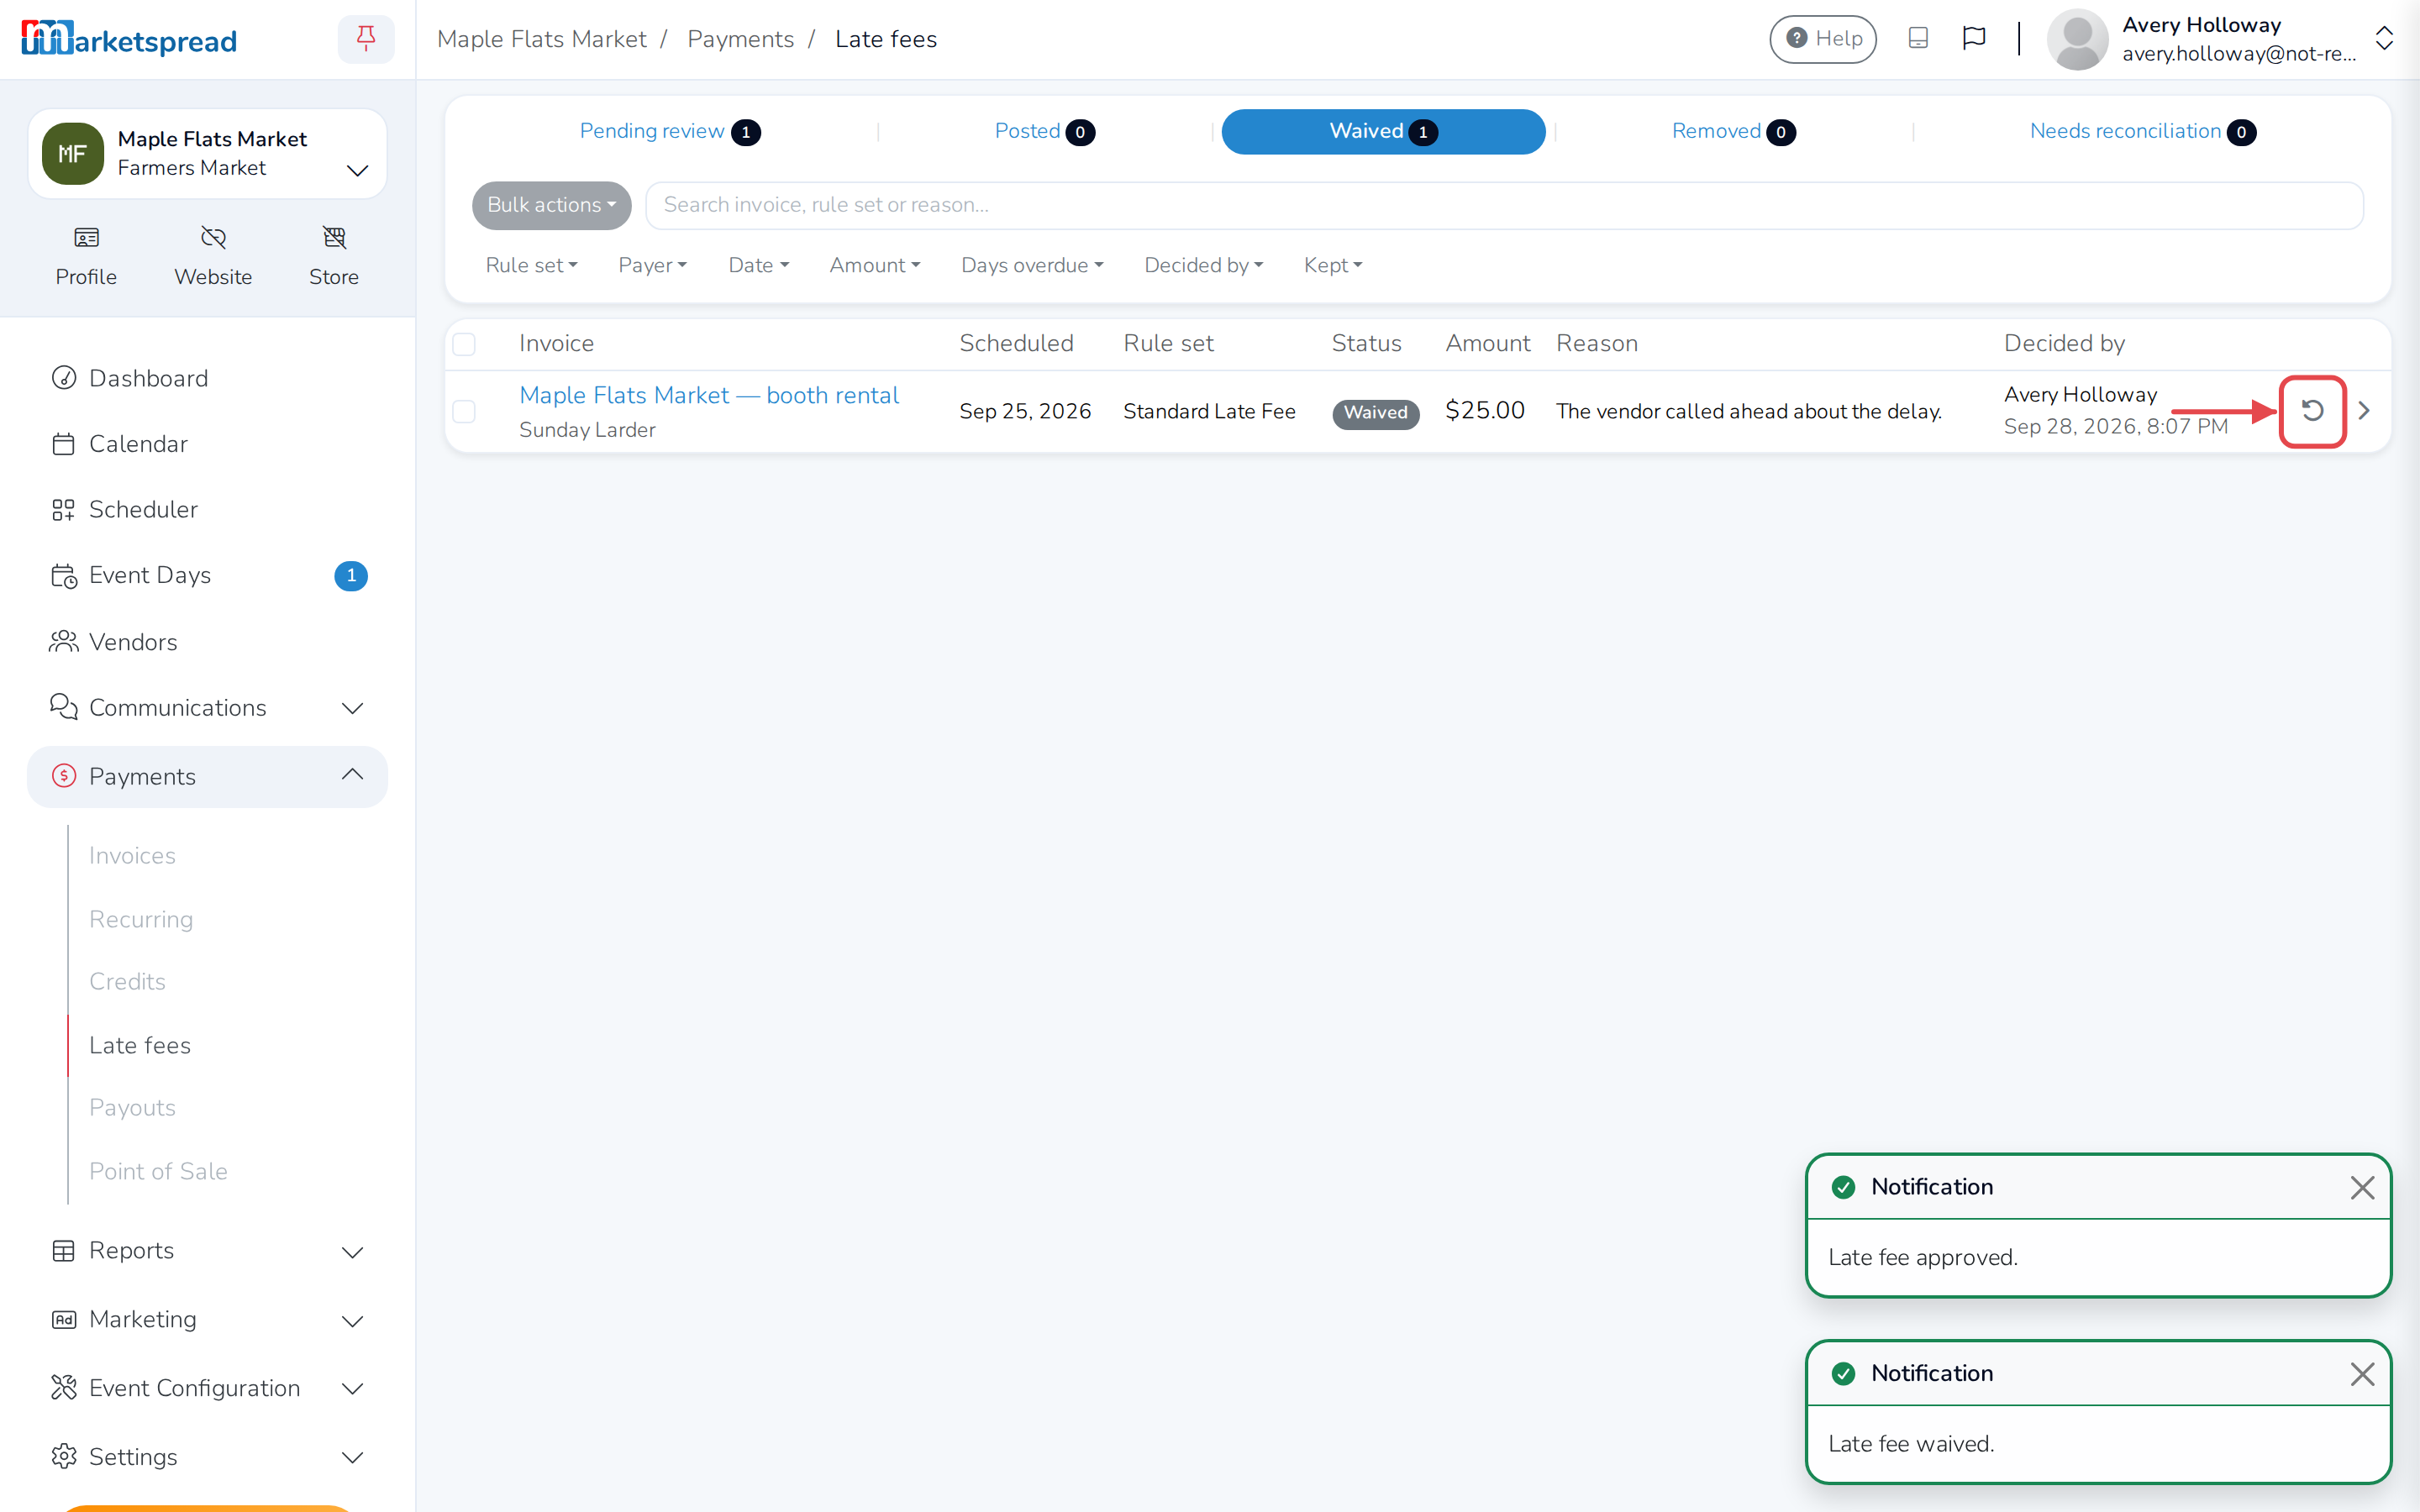
- Click Unwaive again to confirm.
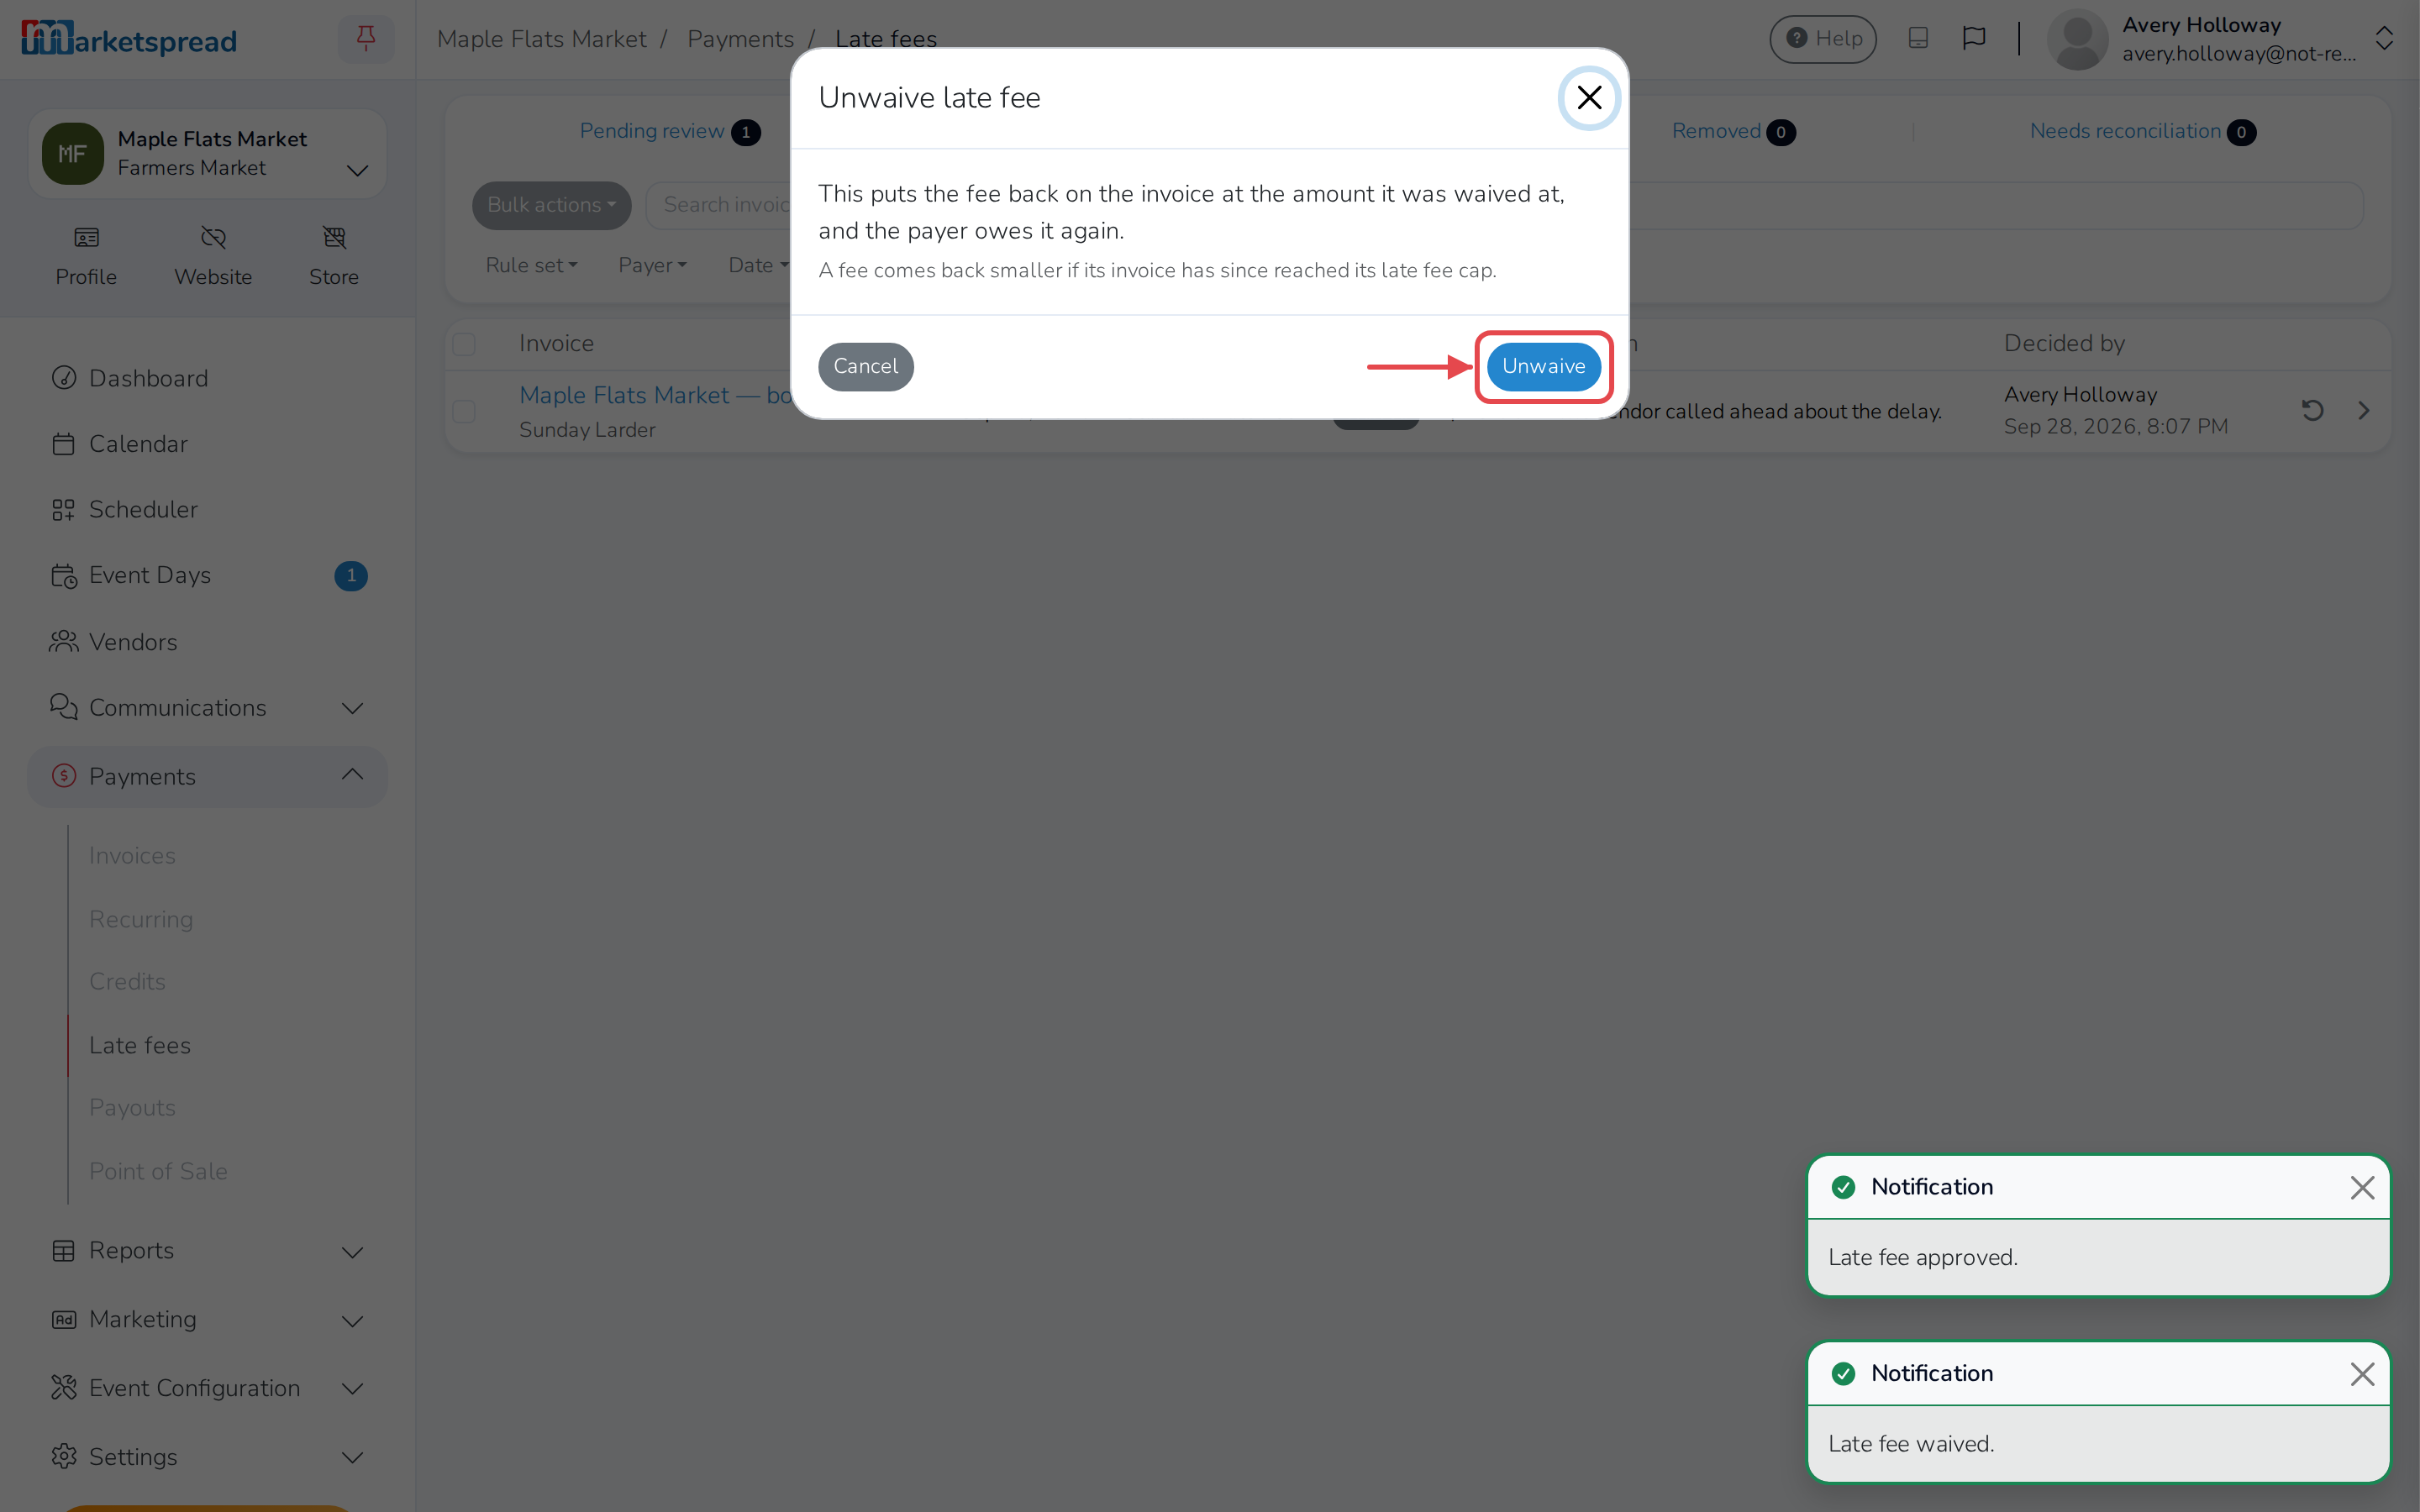
Note
The fee comes back at the amount it was waived at — unless the invoice has since hit its cap, in which case it comes back smaller.