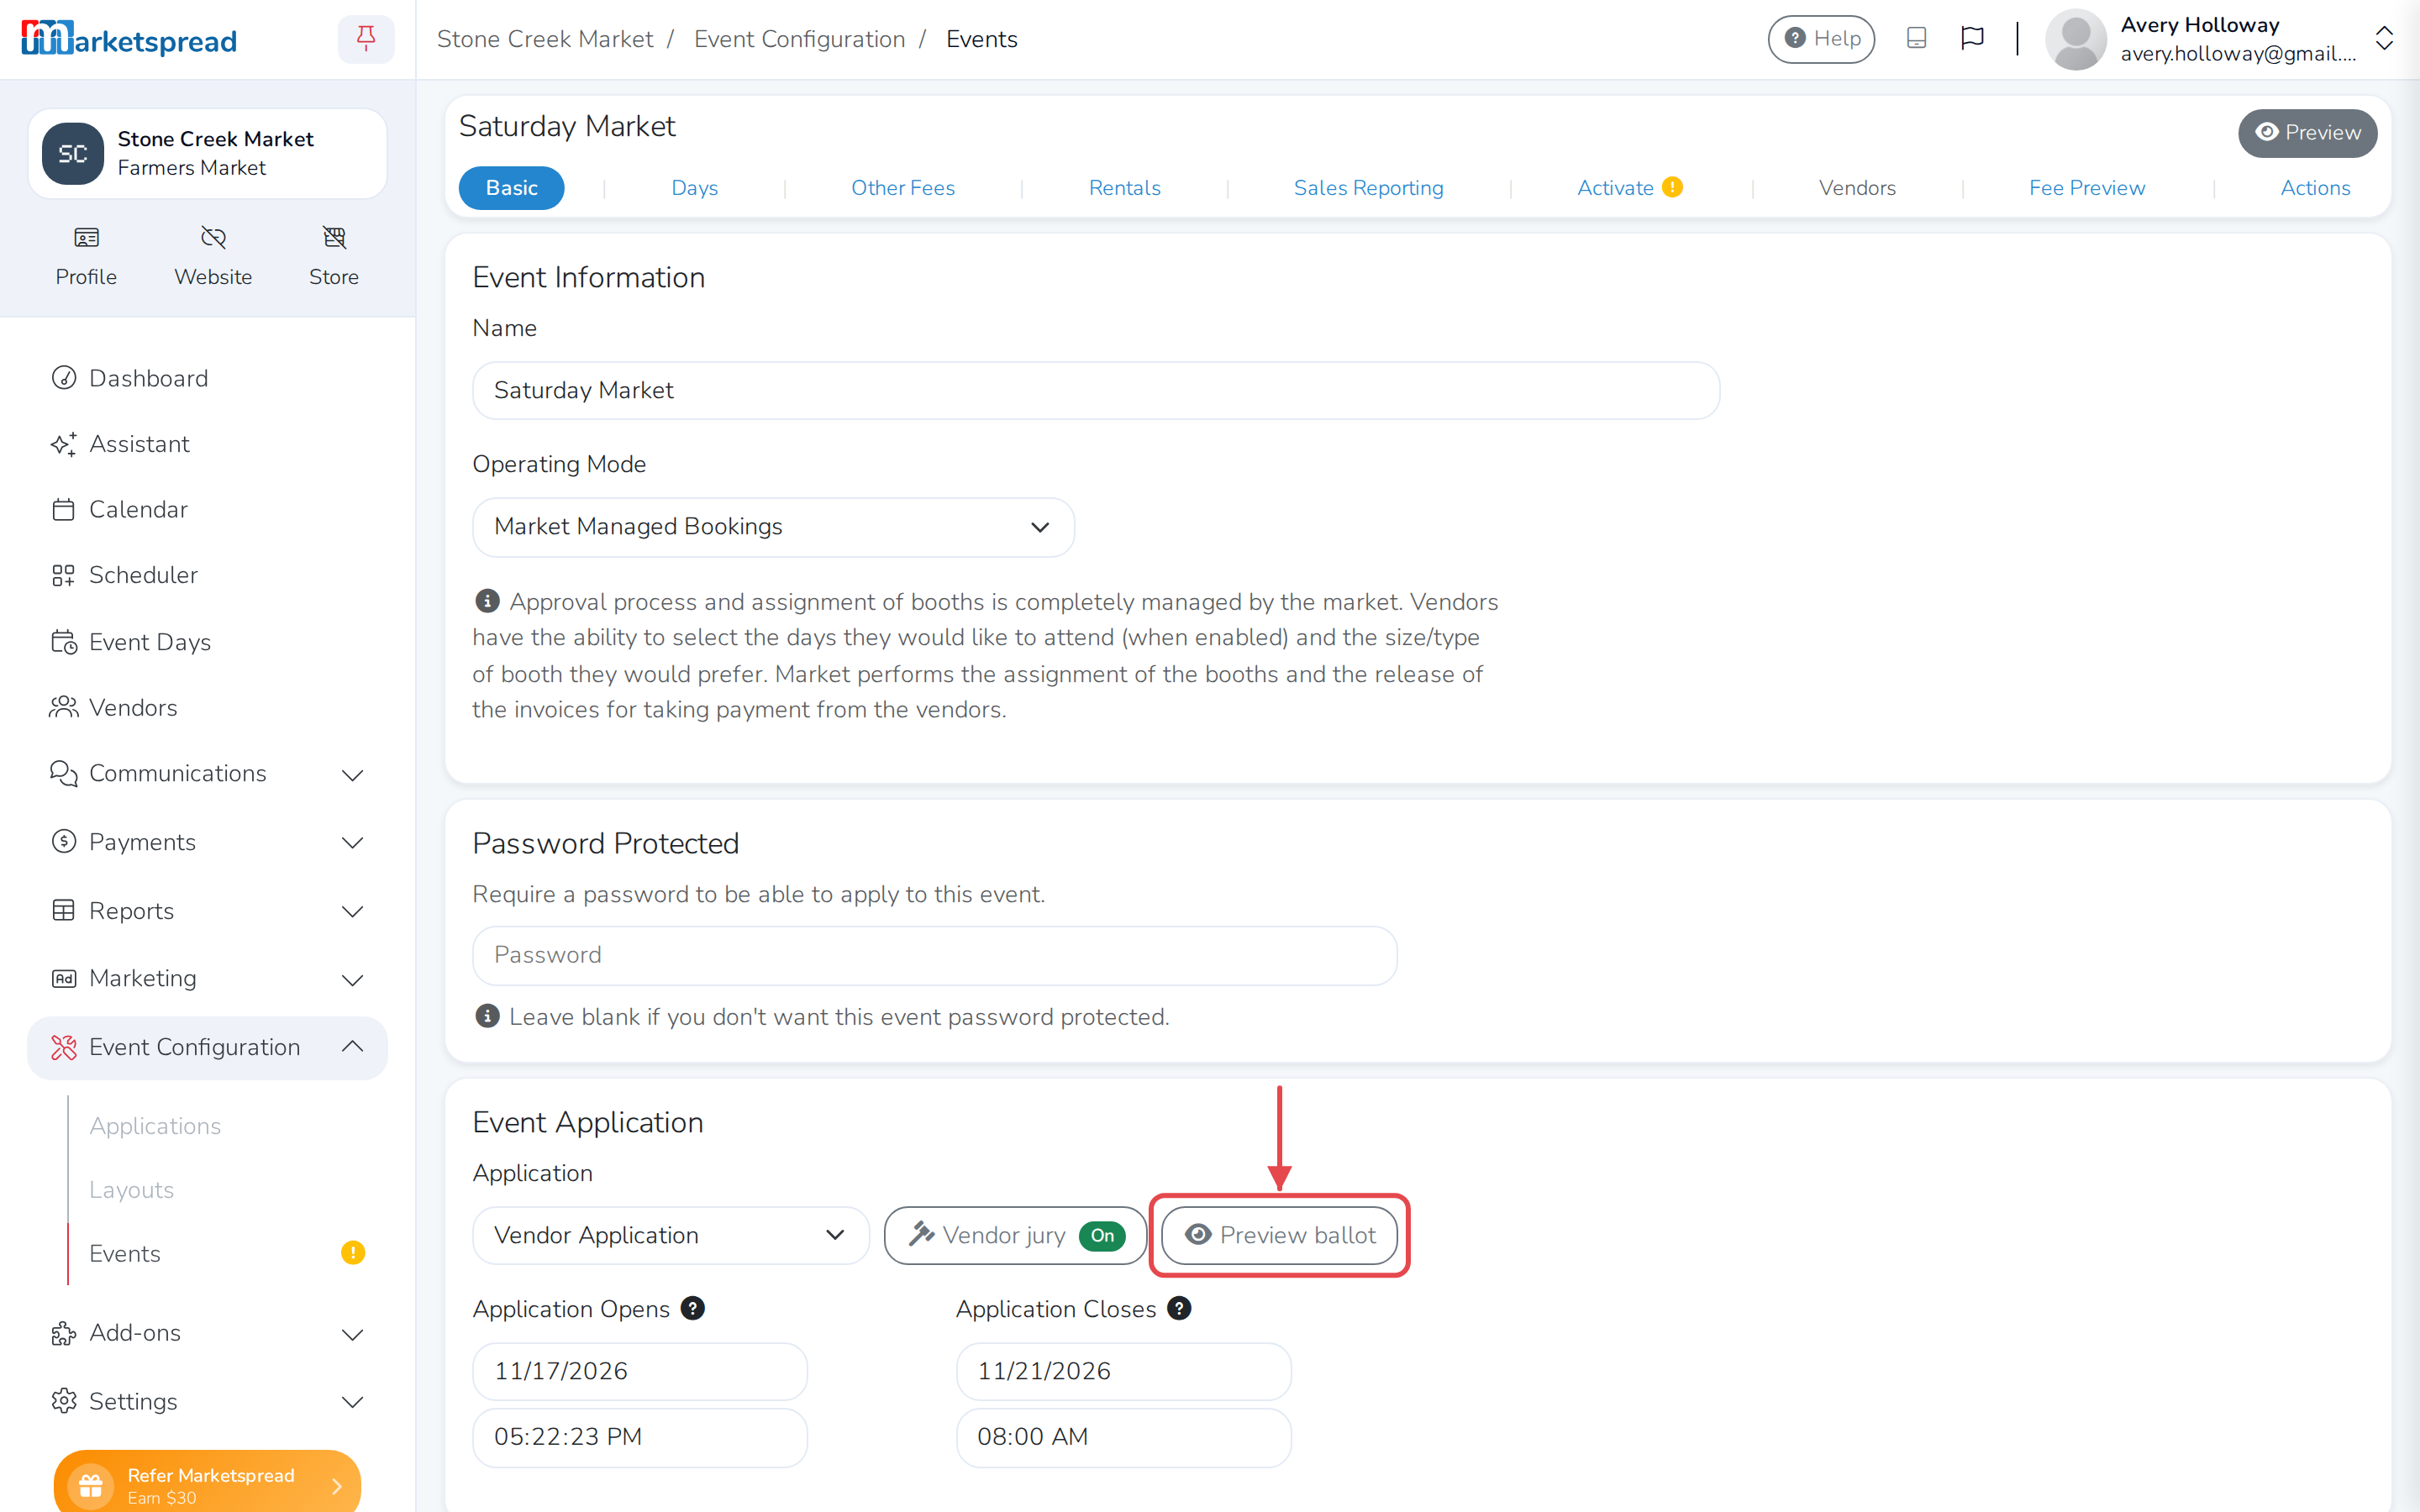
A vendor jury has a panel of people vote on each vendor application to an event, so you don't have to review every one yourself. It's part of Market Premium. Turn it on from the event's Basic tab, next to its application.
From the Vendor jury settings you can:
- Turn the jury on and pick who's in it
- Choose whether jurors vote approve or reject, or score each application
- Set the voting window, and what happens to applications still waiting when it closes
- Decide what happens once the jury approves or rejects an application
- Turn blind voting on or off
Turn on a vendor jury
-
Open Event Configuration → Events in your dashboard.
-
Click the event.
-
Click the pencil next to Basic.
-
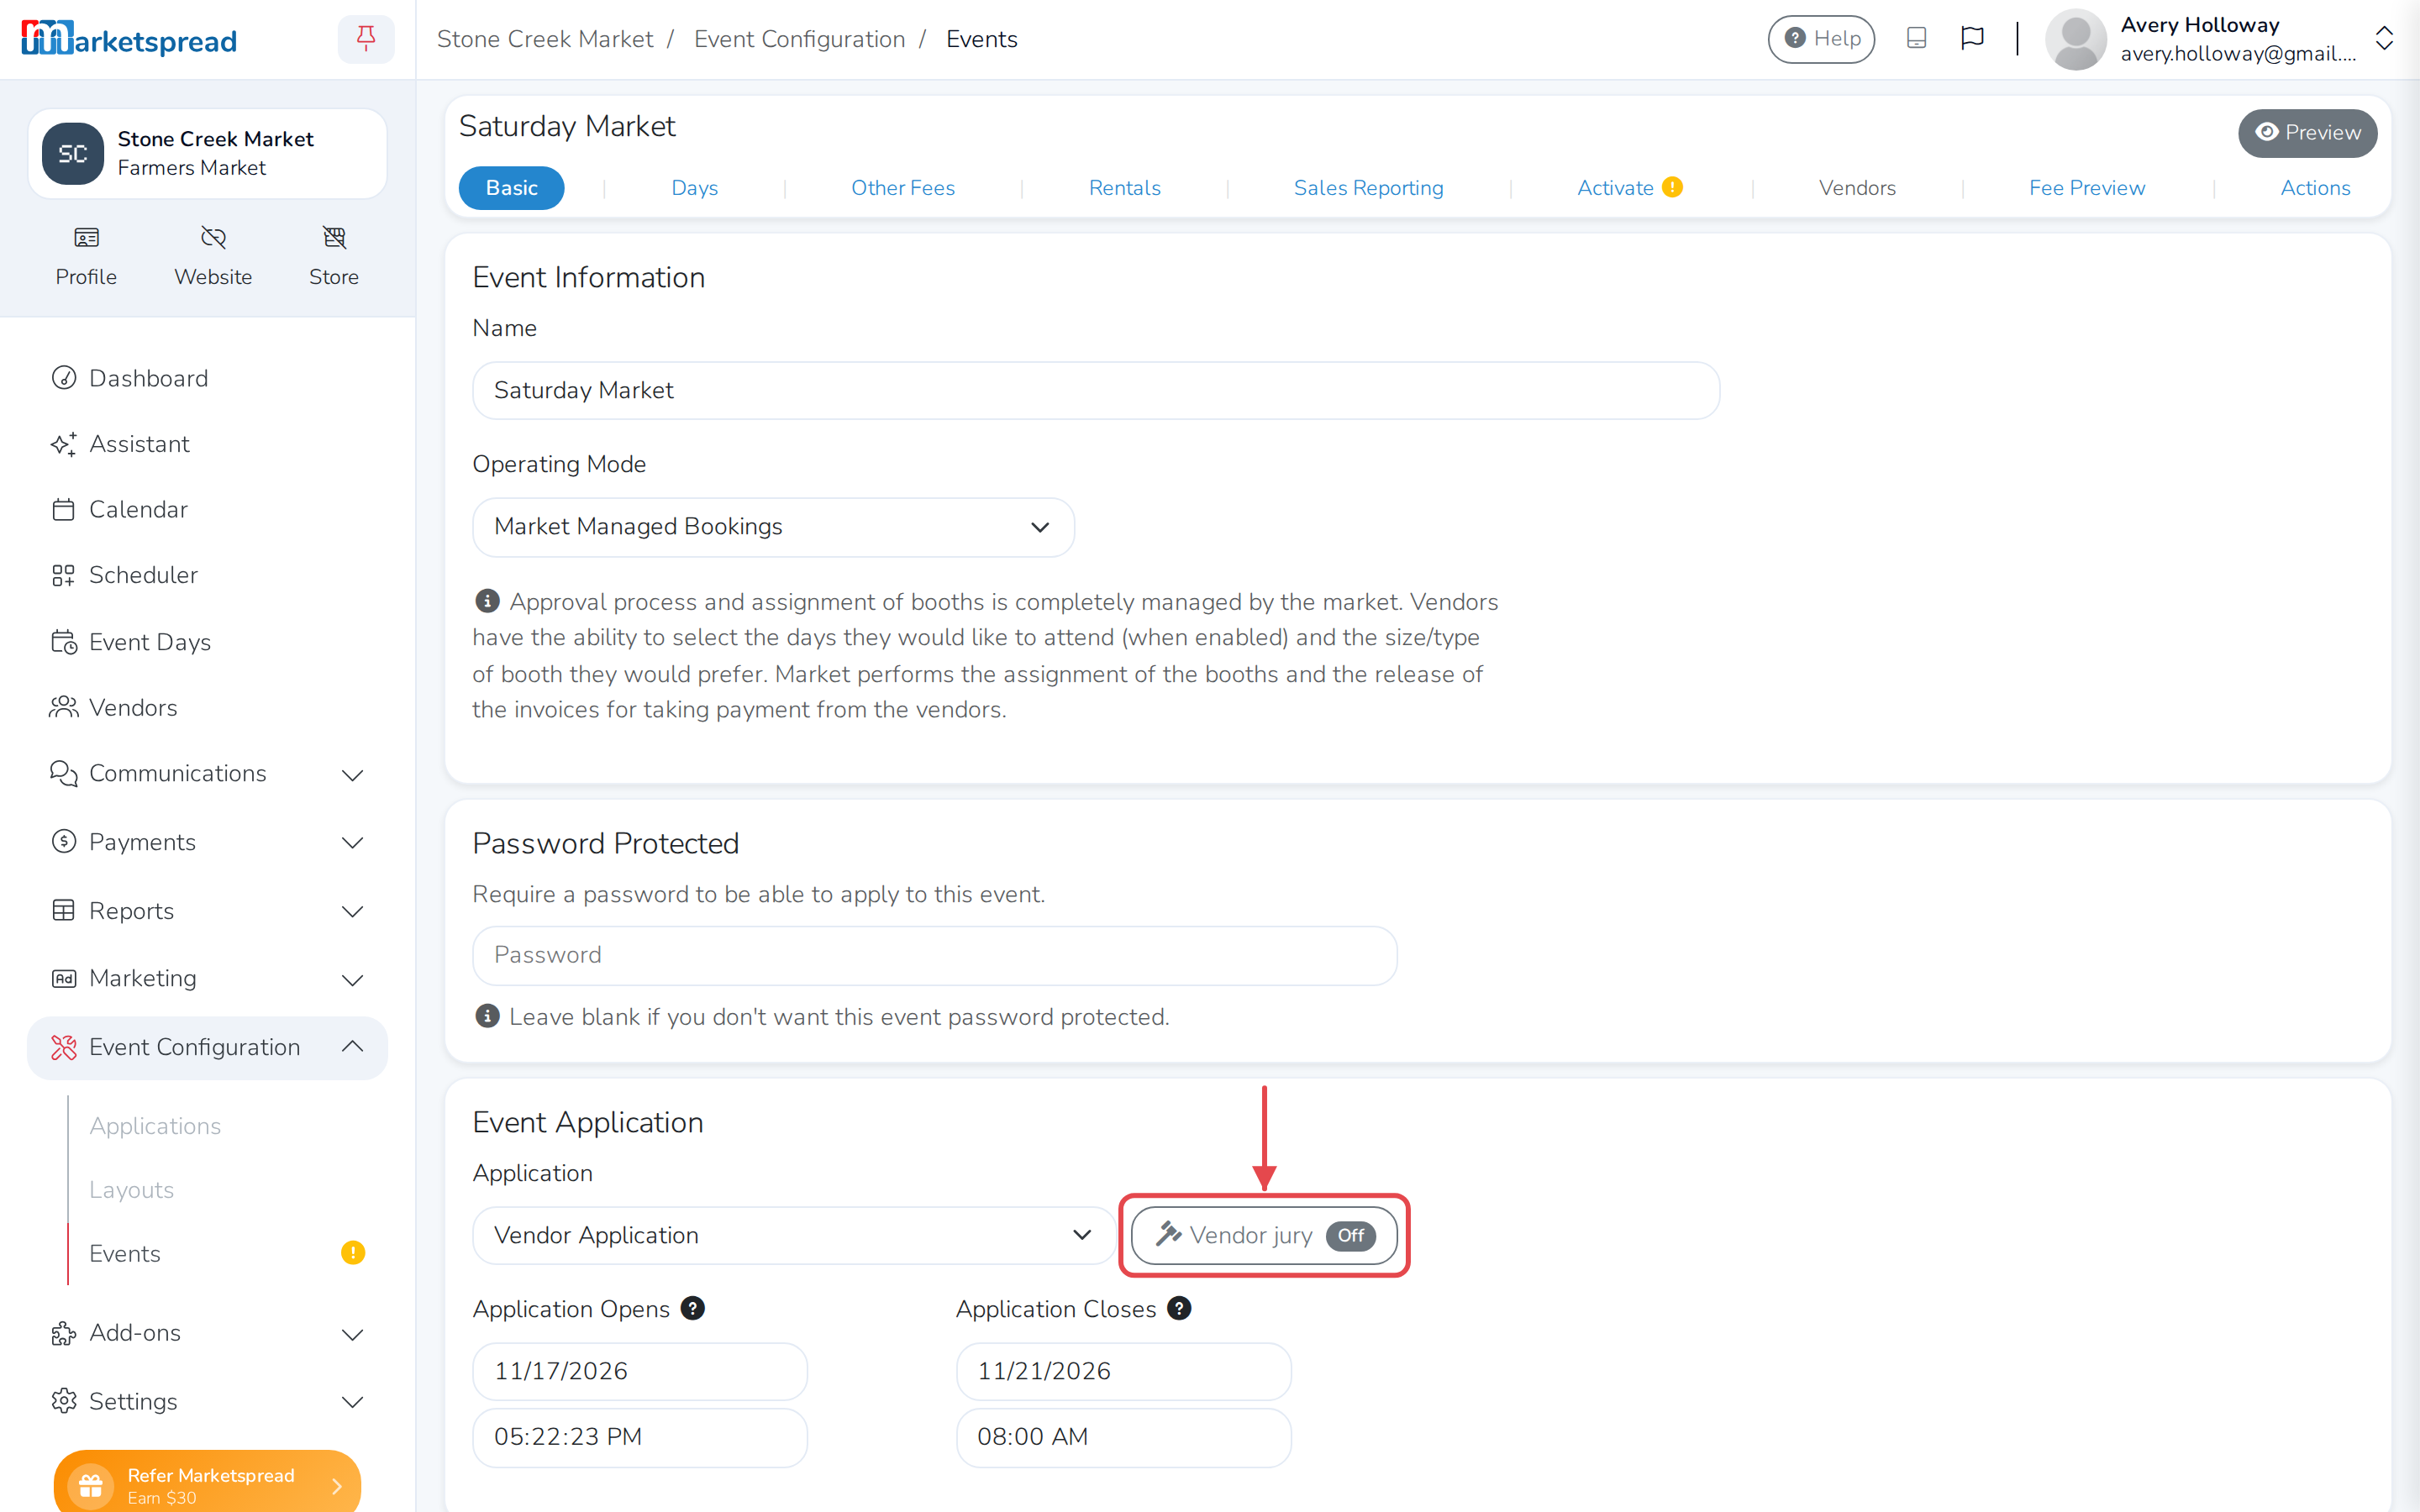
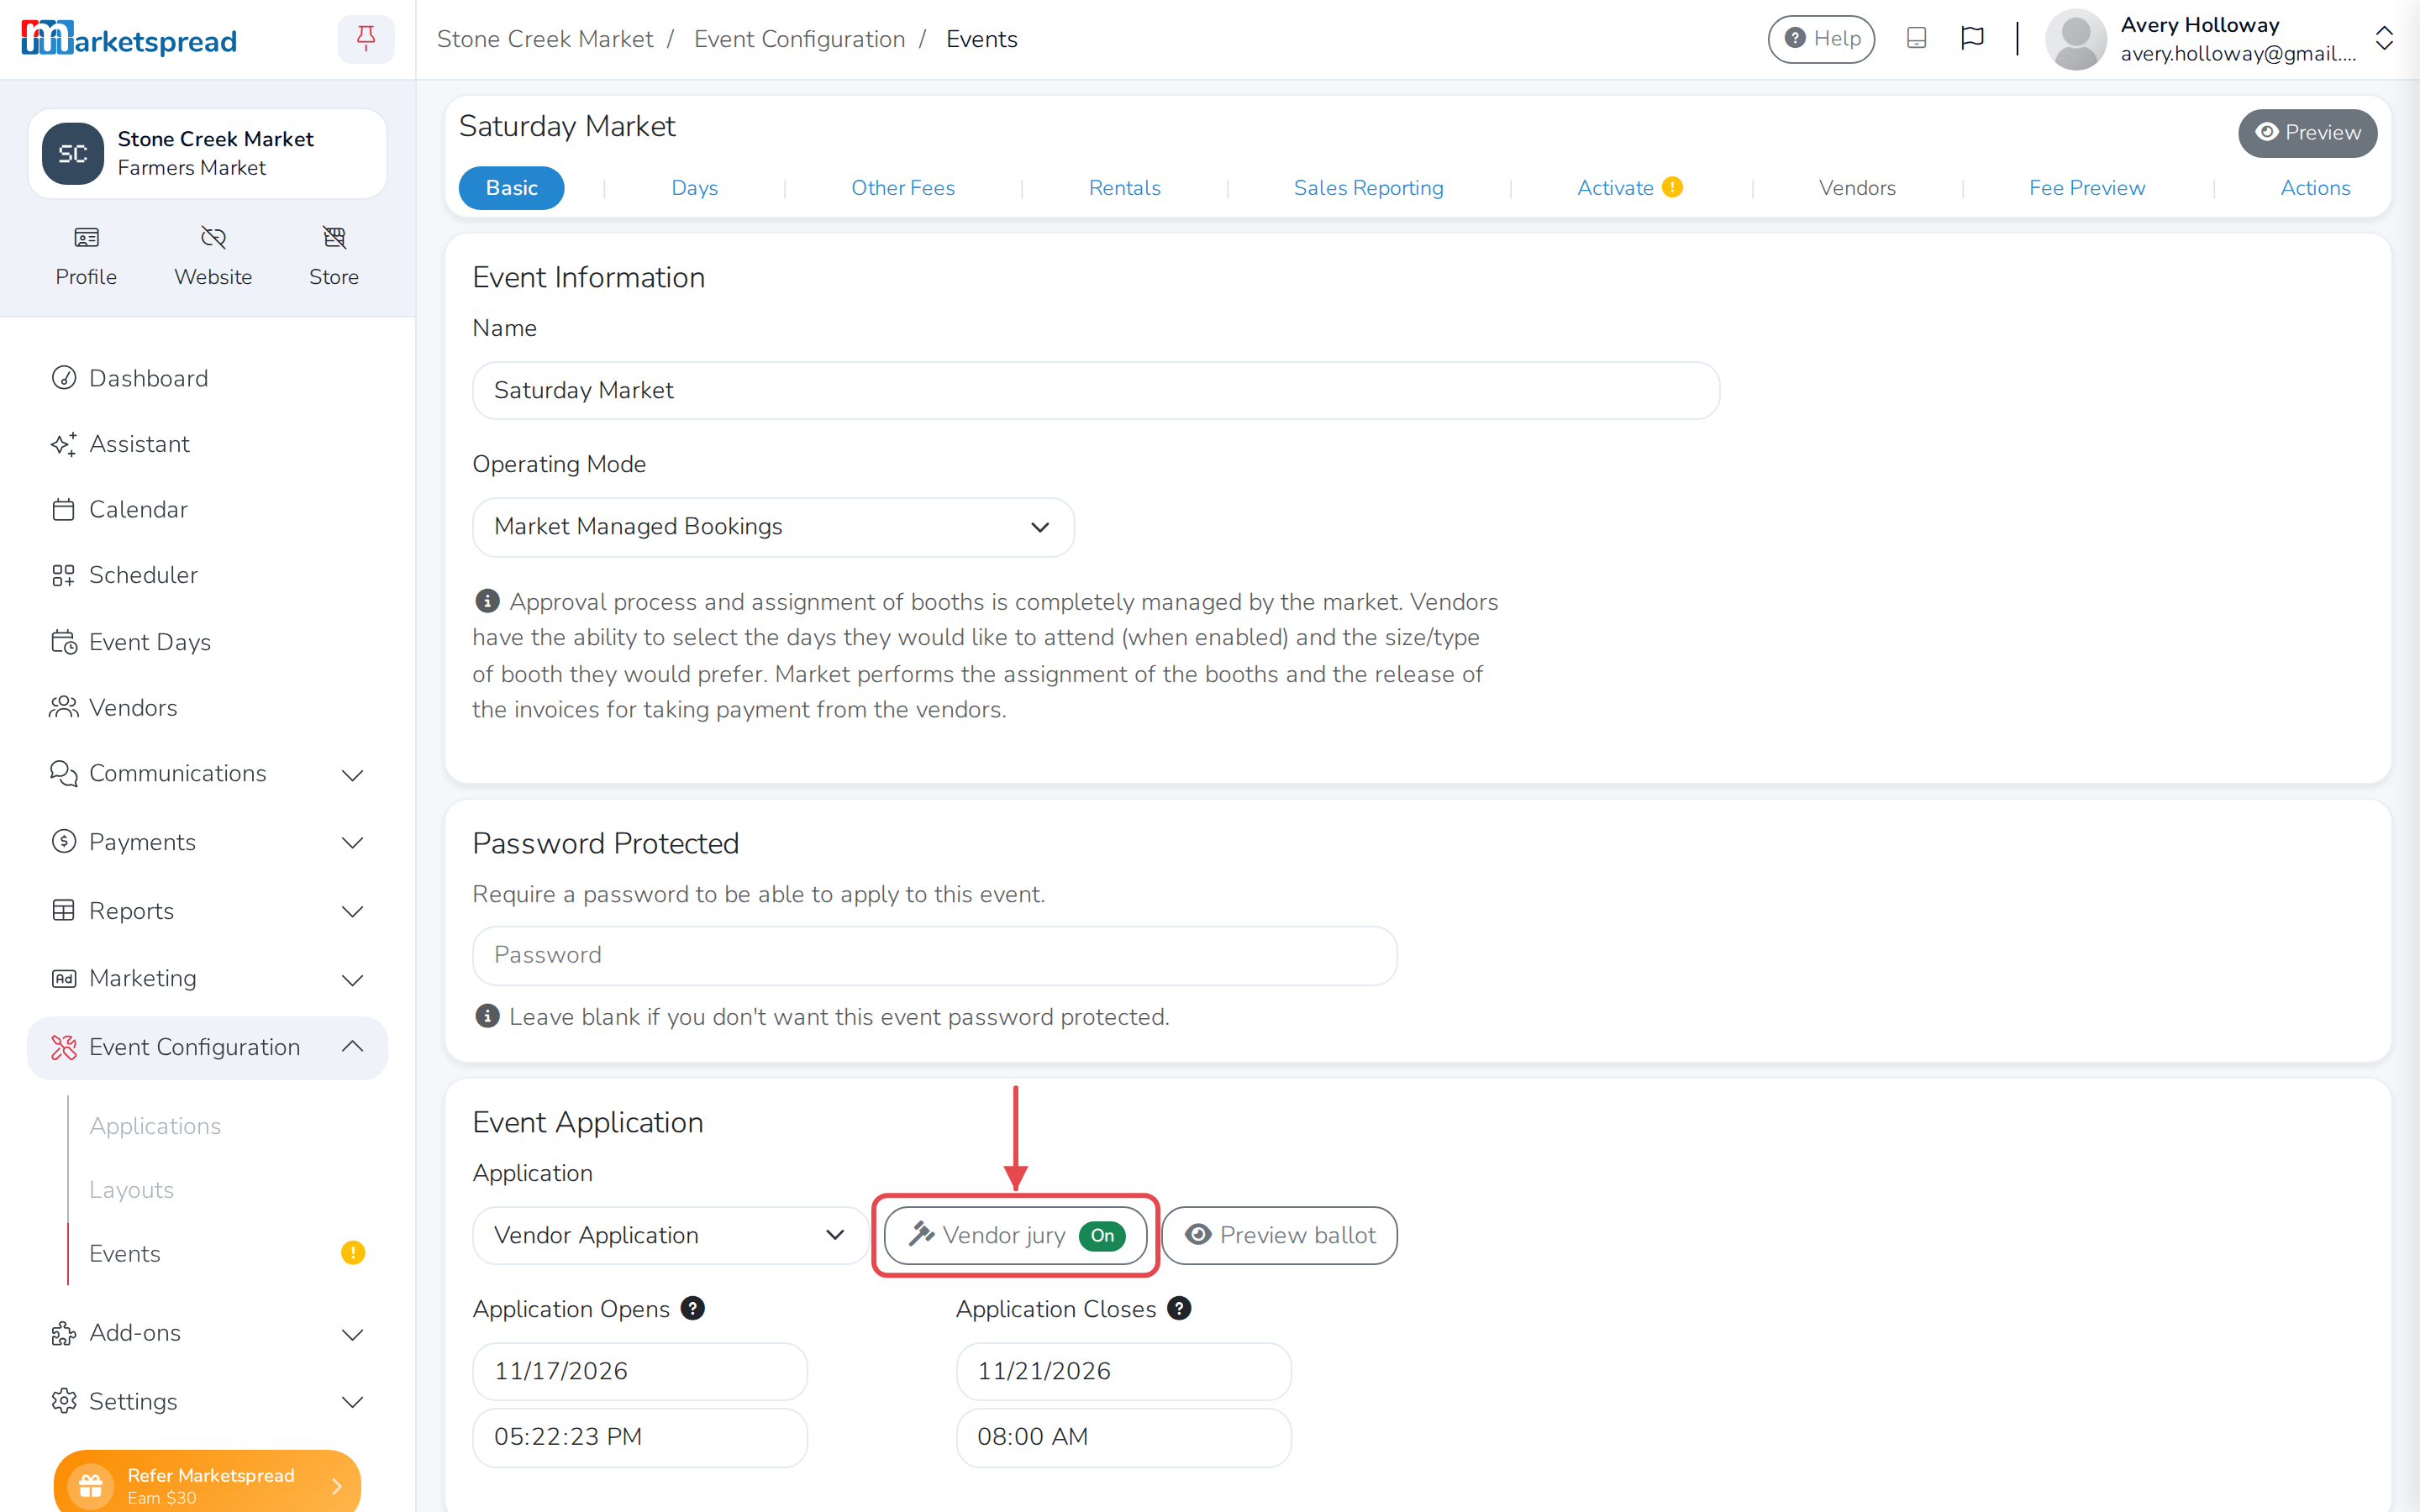
Under Event Application, click Vendor jury.
-
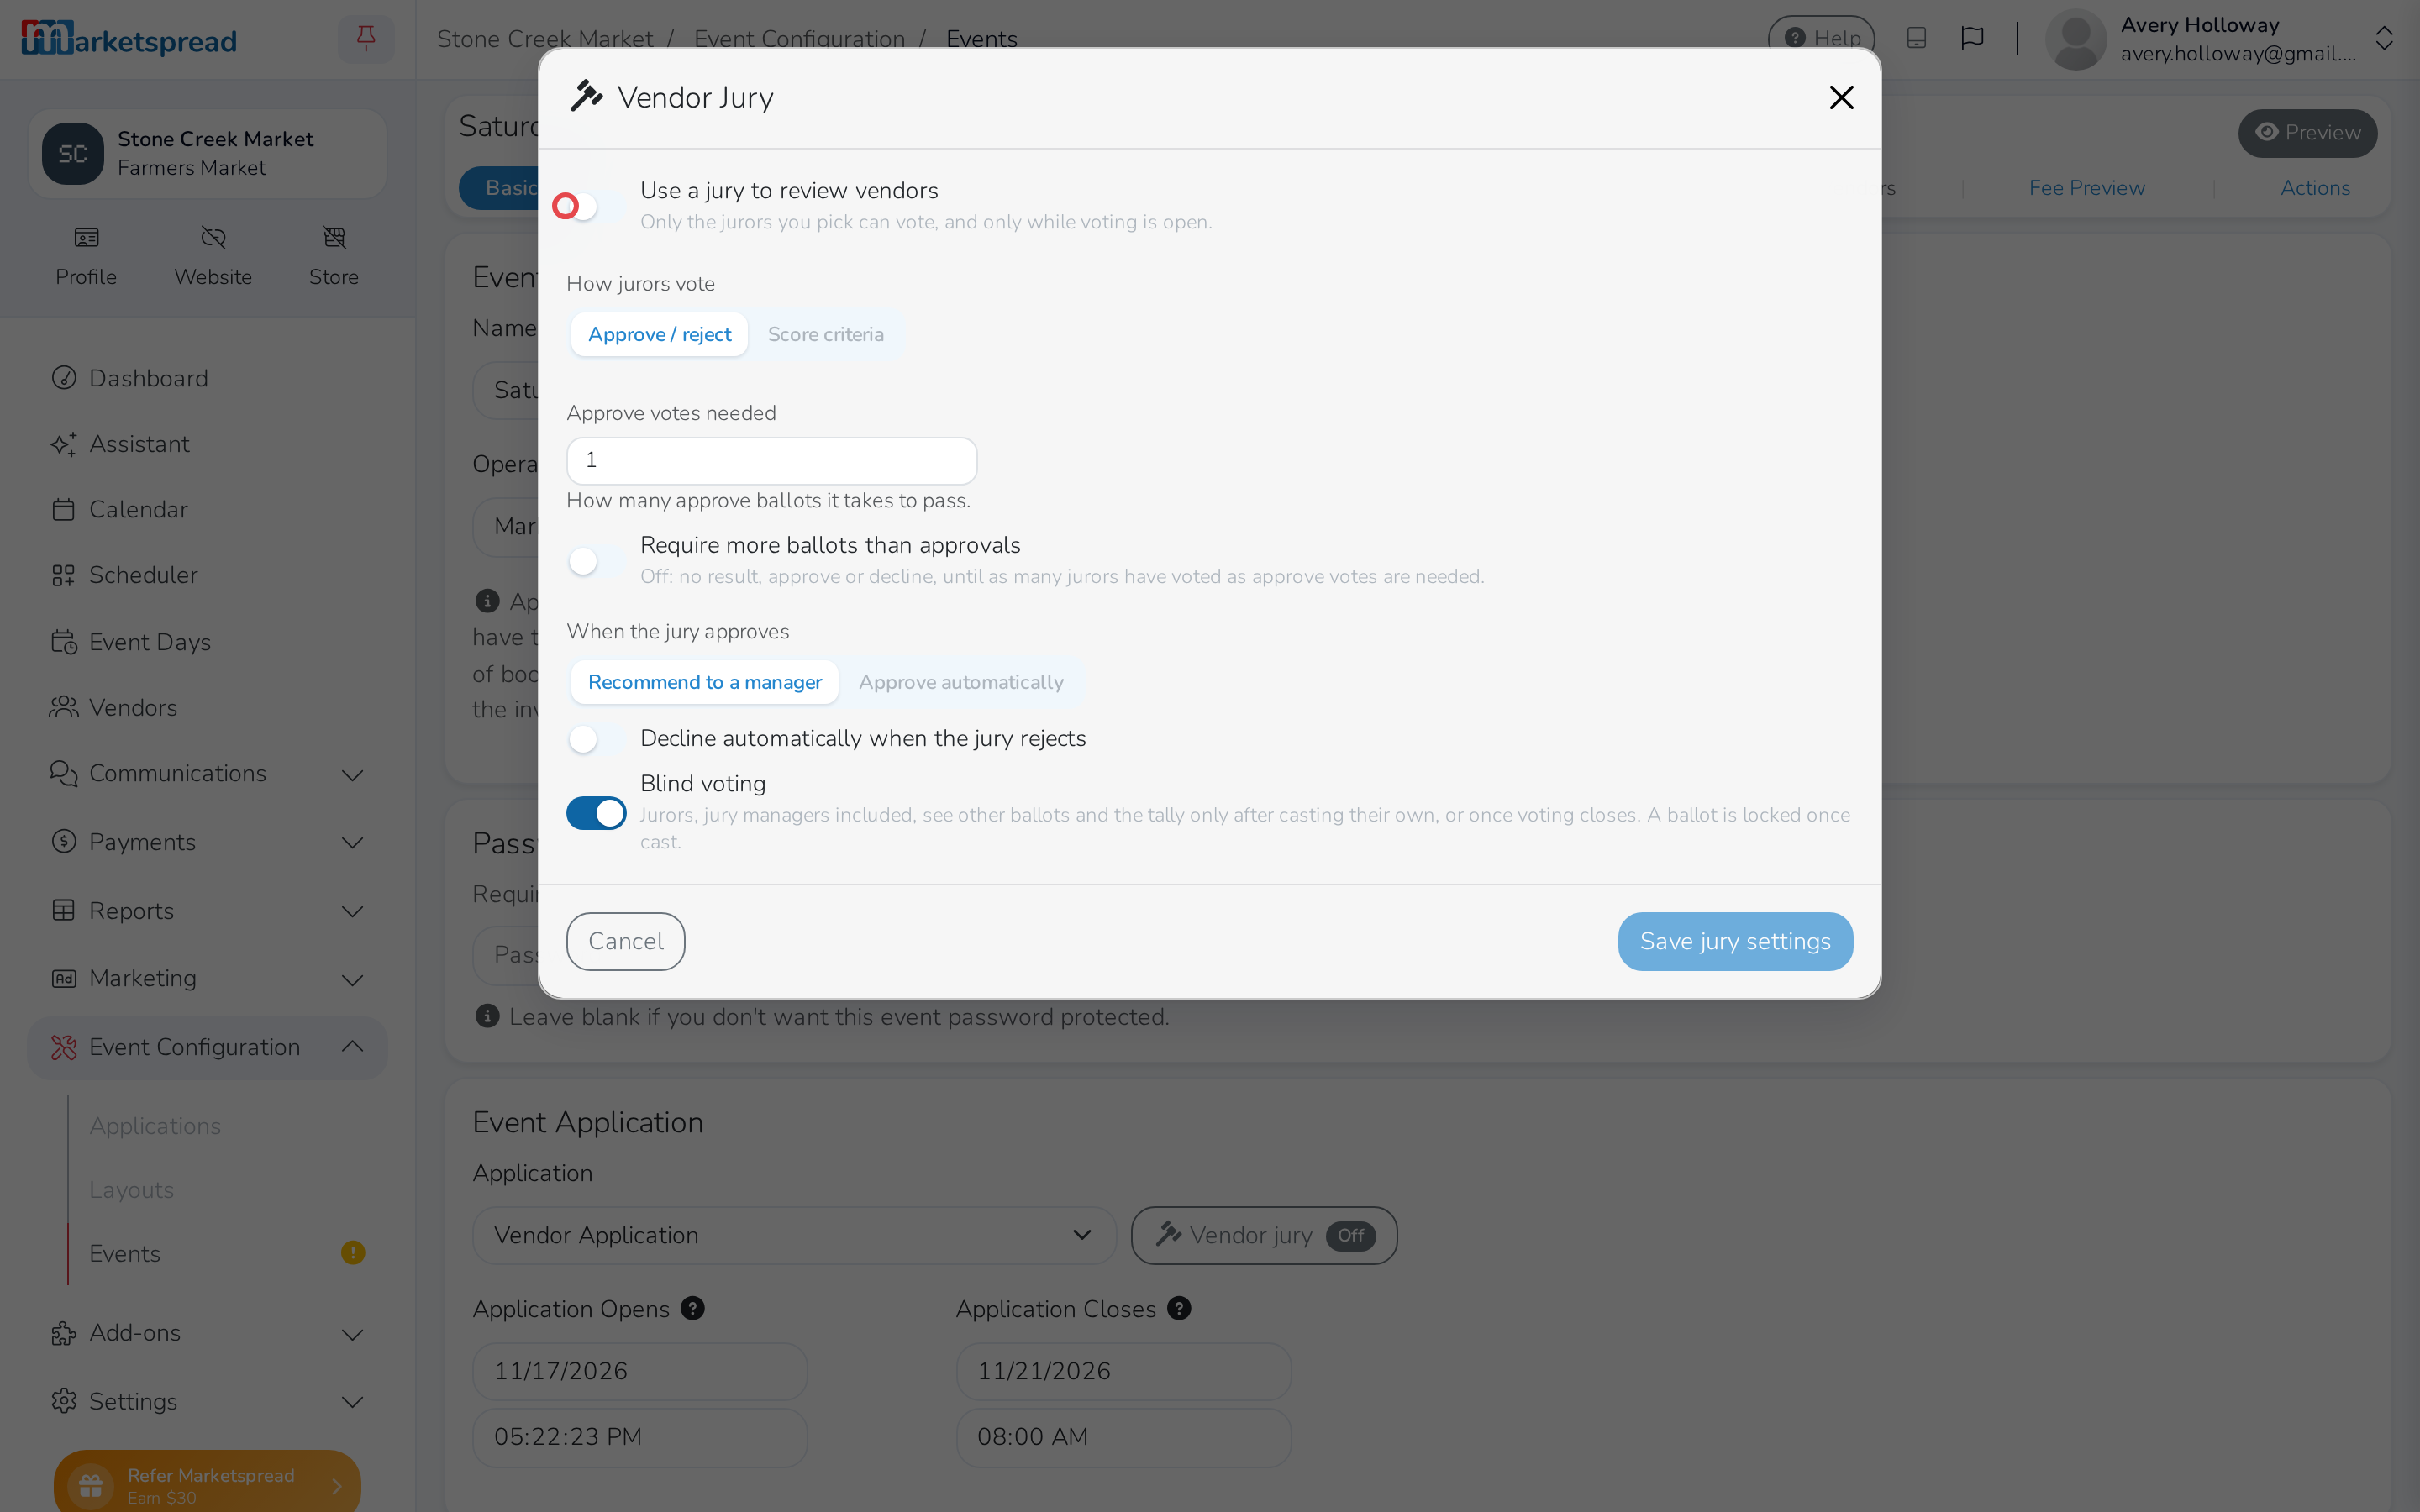
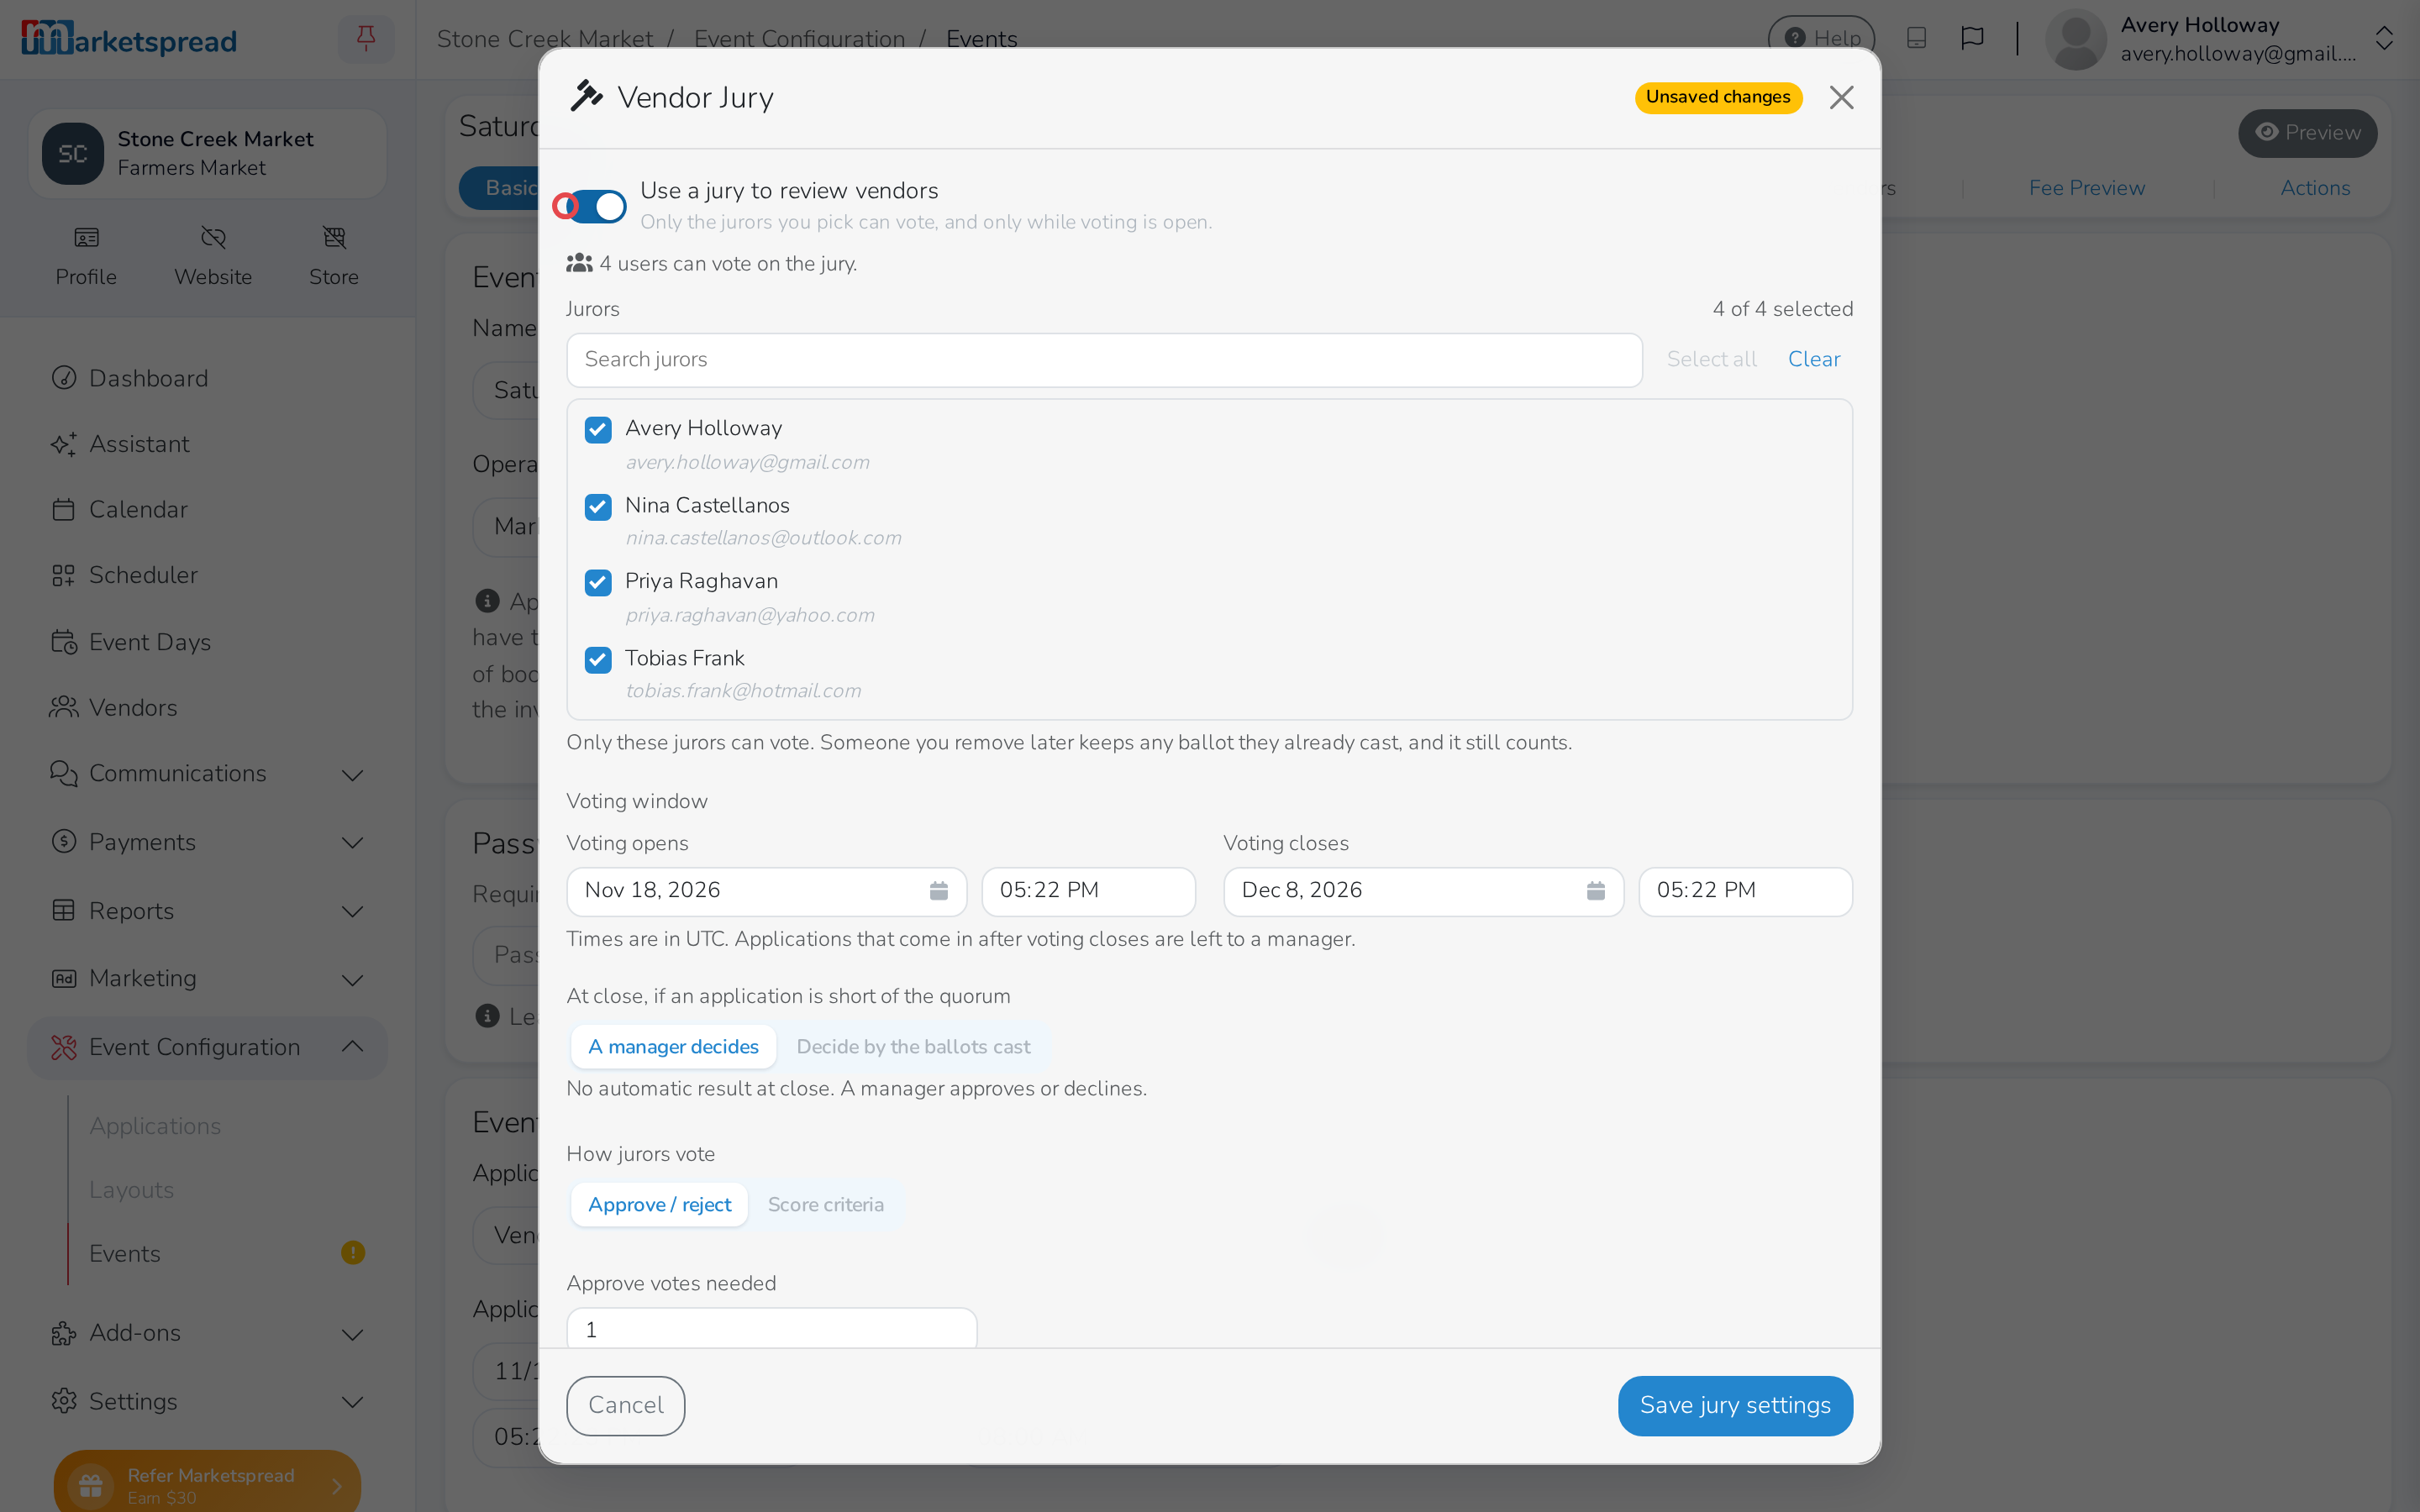
Turn on Use a jury to review vendors.
-
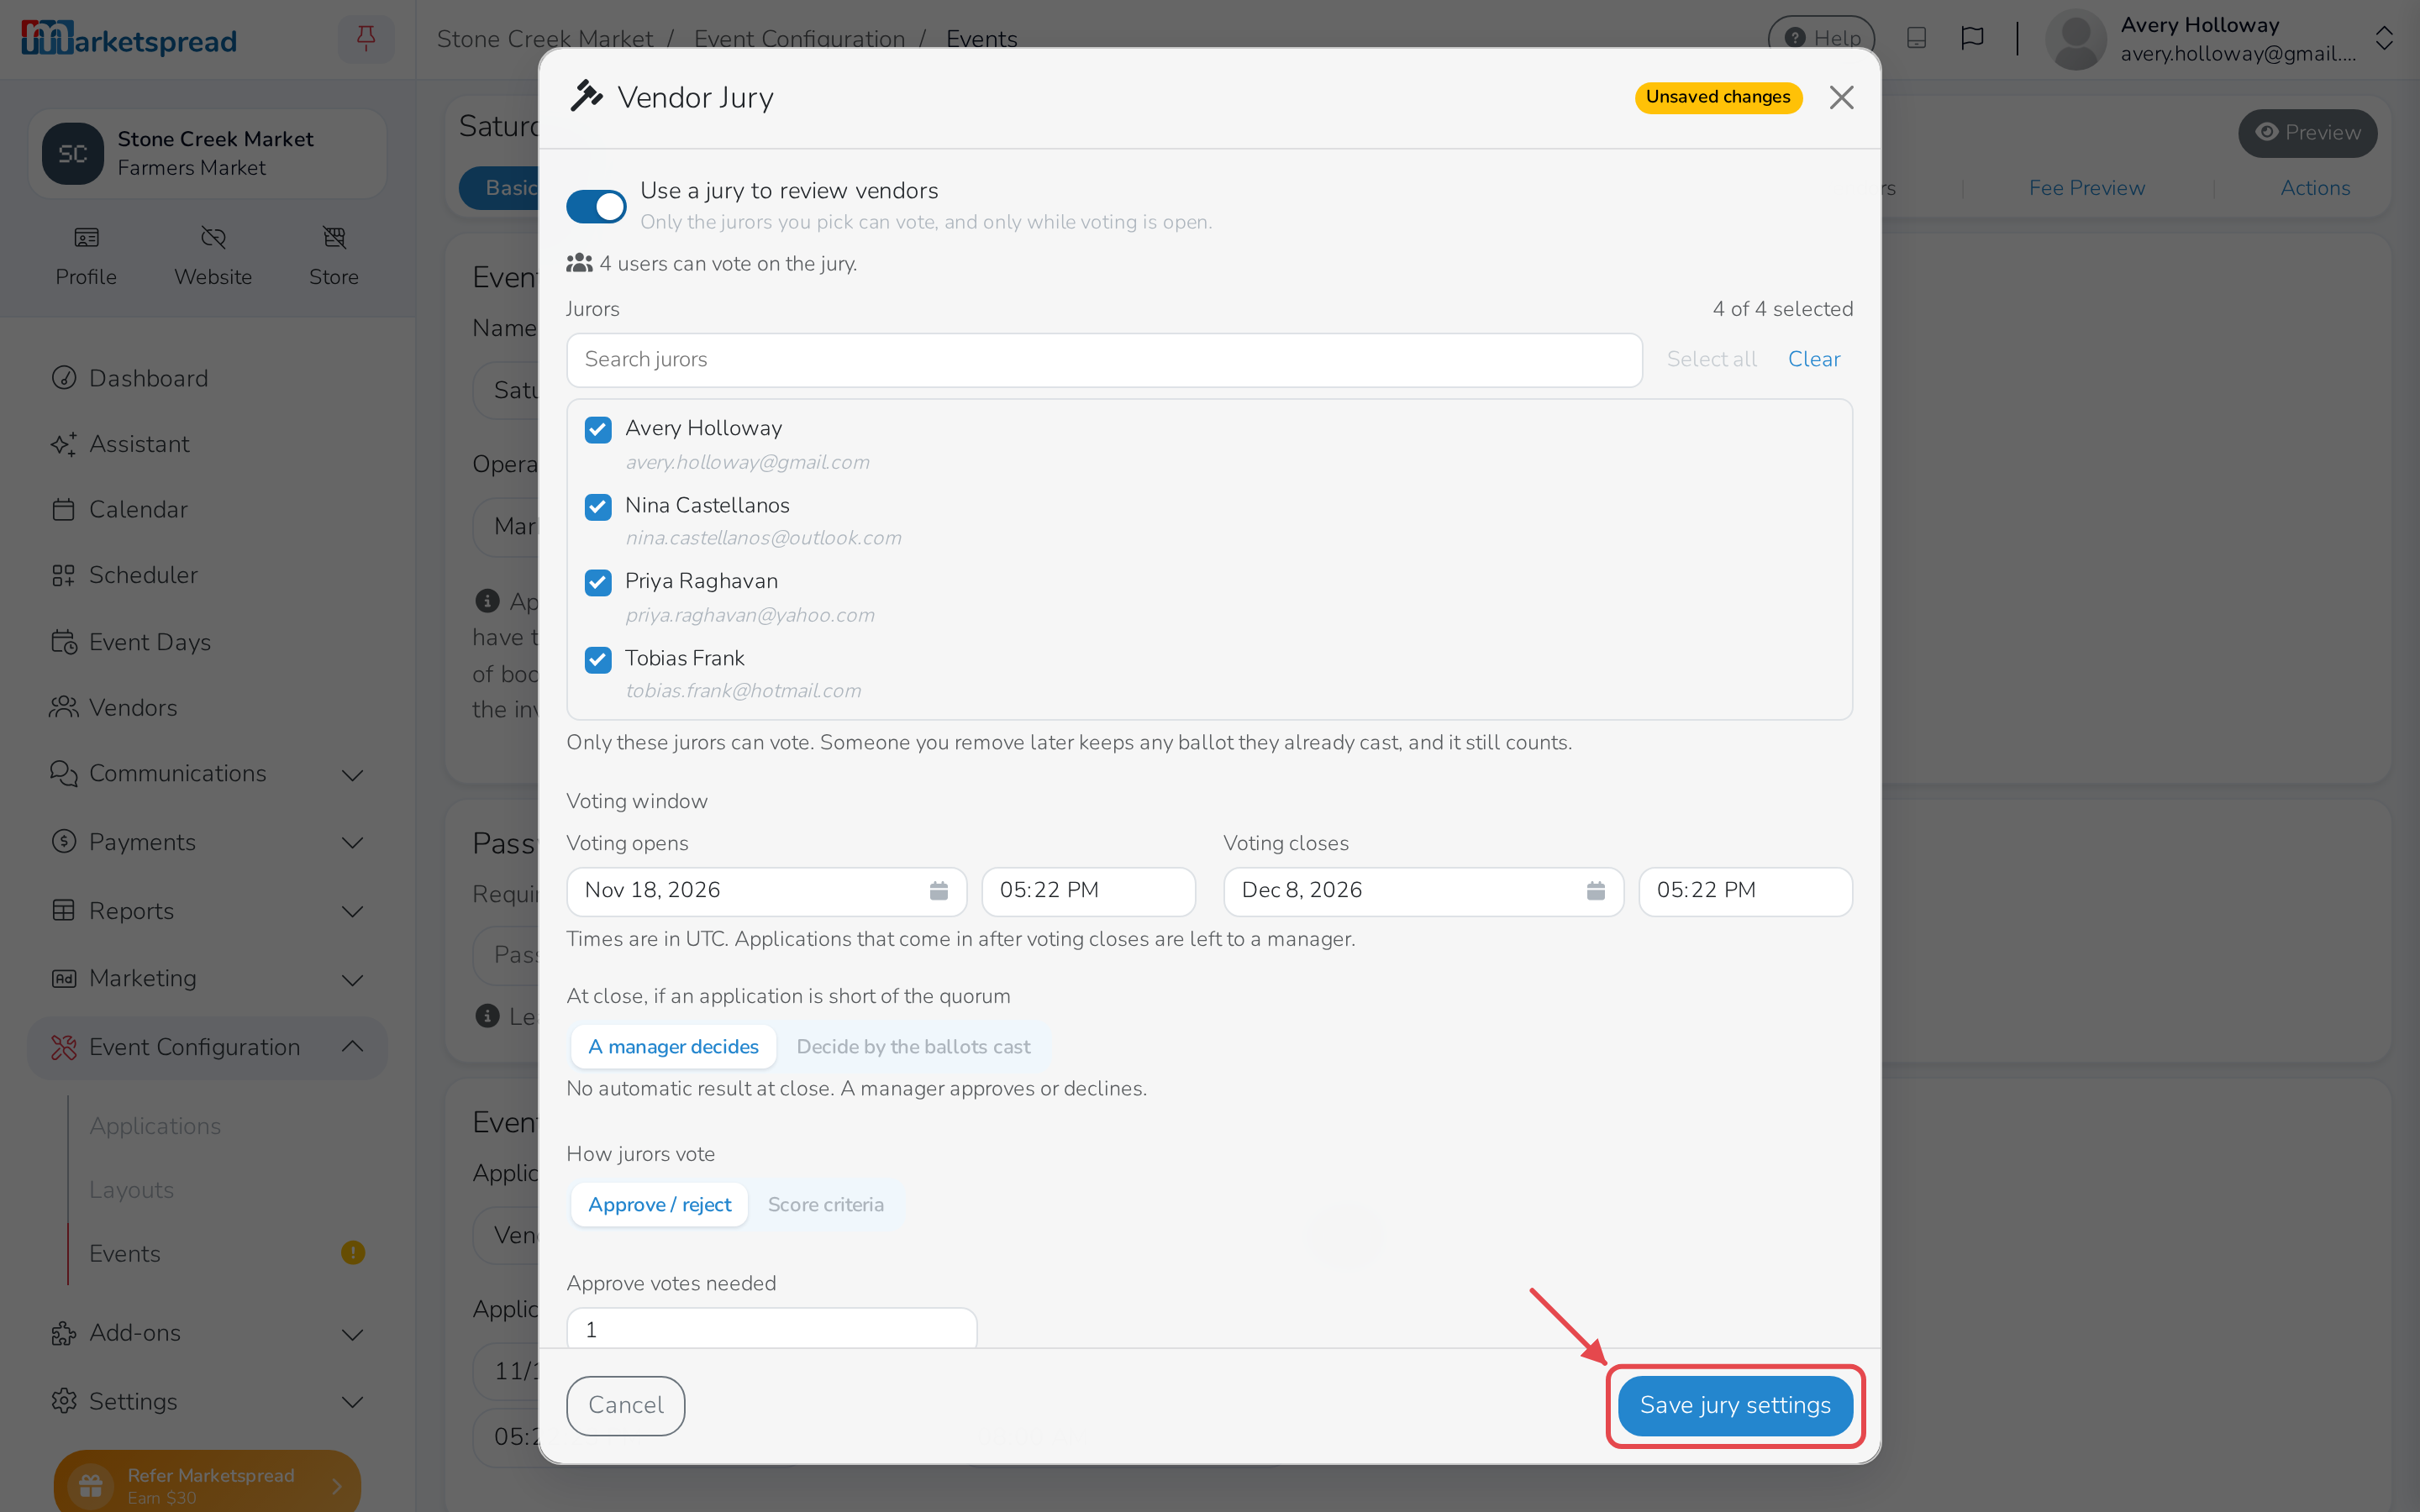
Click Save jury settings.
Note
Turning it on fills in every eligible juror, and opens voting now, closing it a week after the application closes — adjust either under Jurors and Voting window.
If your market doesn't have Market Premium, this button is labeled Vendor jury Premium instead, and opens an upgrade prompt. Contact support to add it.
Pick your jurors
-
Open Event Configuration → Events in your dashboard.
-
Click the event.
-
Click the pencil next to Basic.
-
Click Vendor jury.
-
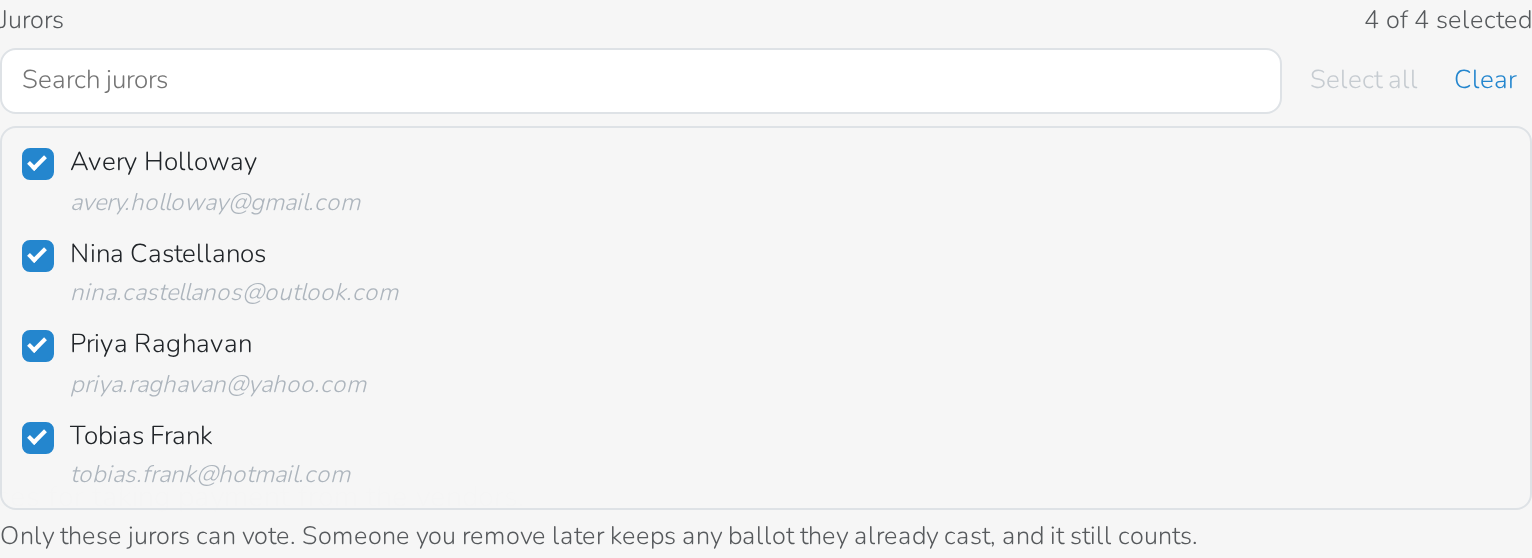
Under Jurors, check who should be able to vote, or click Select all or Clear.
-
Click Save jury settings.
Note
Only someone whose role has the Vendor Jury vote permission shows up here. If nobody does, give their role that permission under Settings → Roles.
Removing a juror later doesn't undo any ballot they already cast — it still counts.
Set the voting window
-
Open Event Configuration → Events in your dashboard.
-
Click the event.
-
Click the pencil next to Basic.
-
Click Vendor jury.
-
Under Voting window, set Voting opens and Voting closes, in your market's time zone.
-
Under "At close, if an application is short of the quorum", choose A manager decides or Decide by the ballots cast.
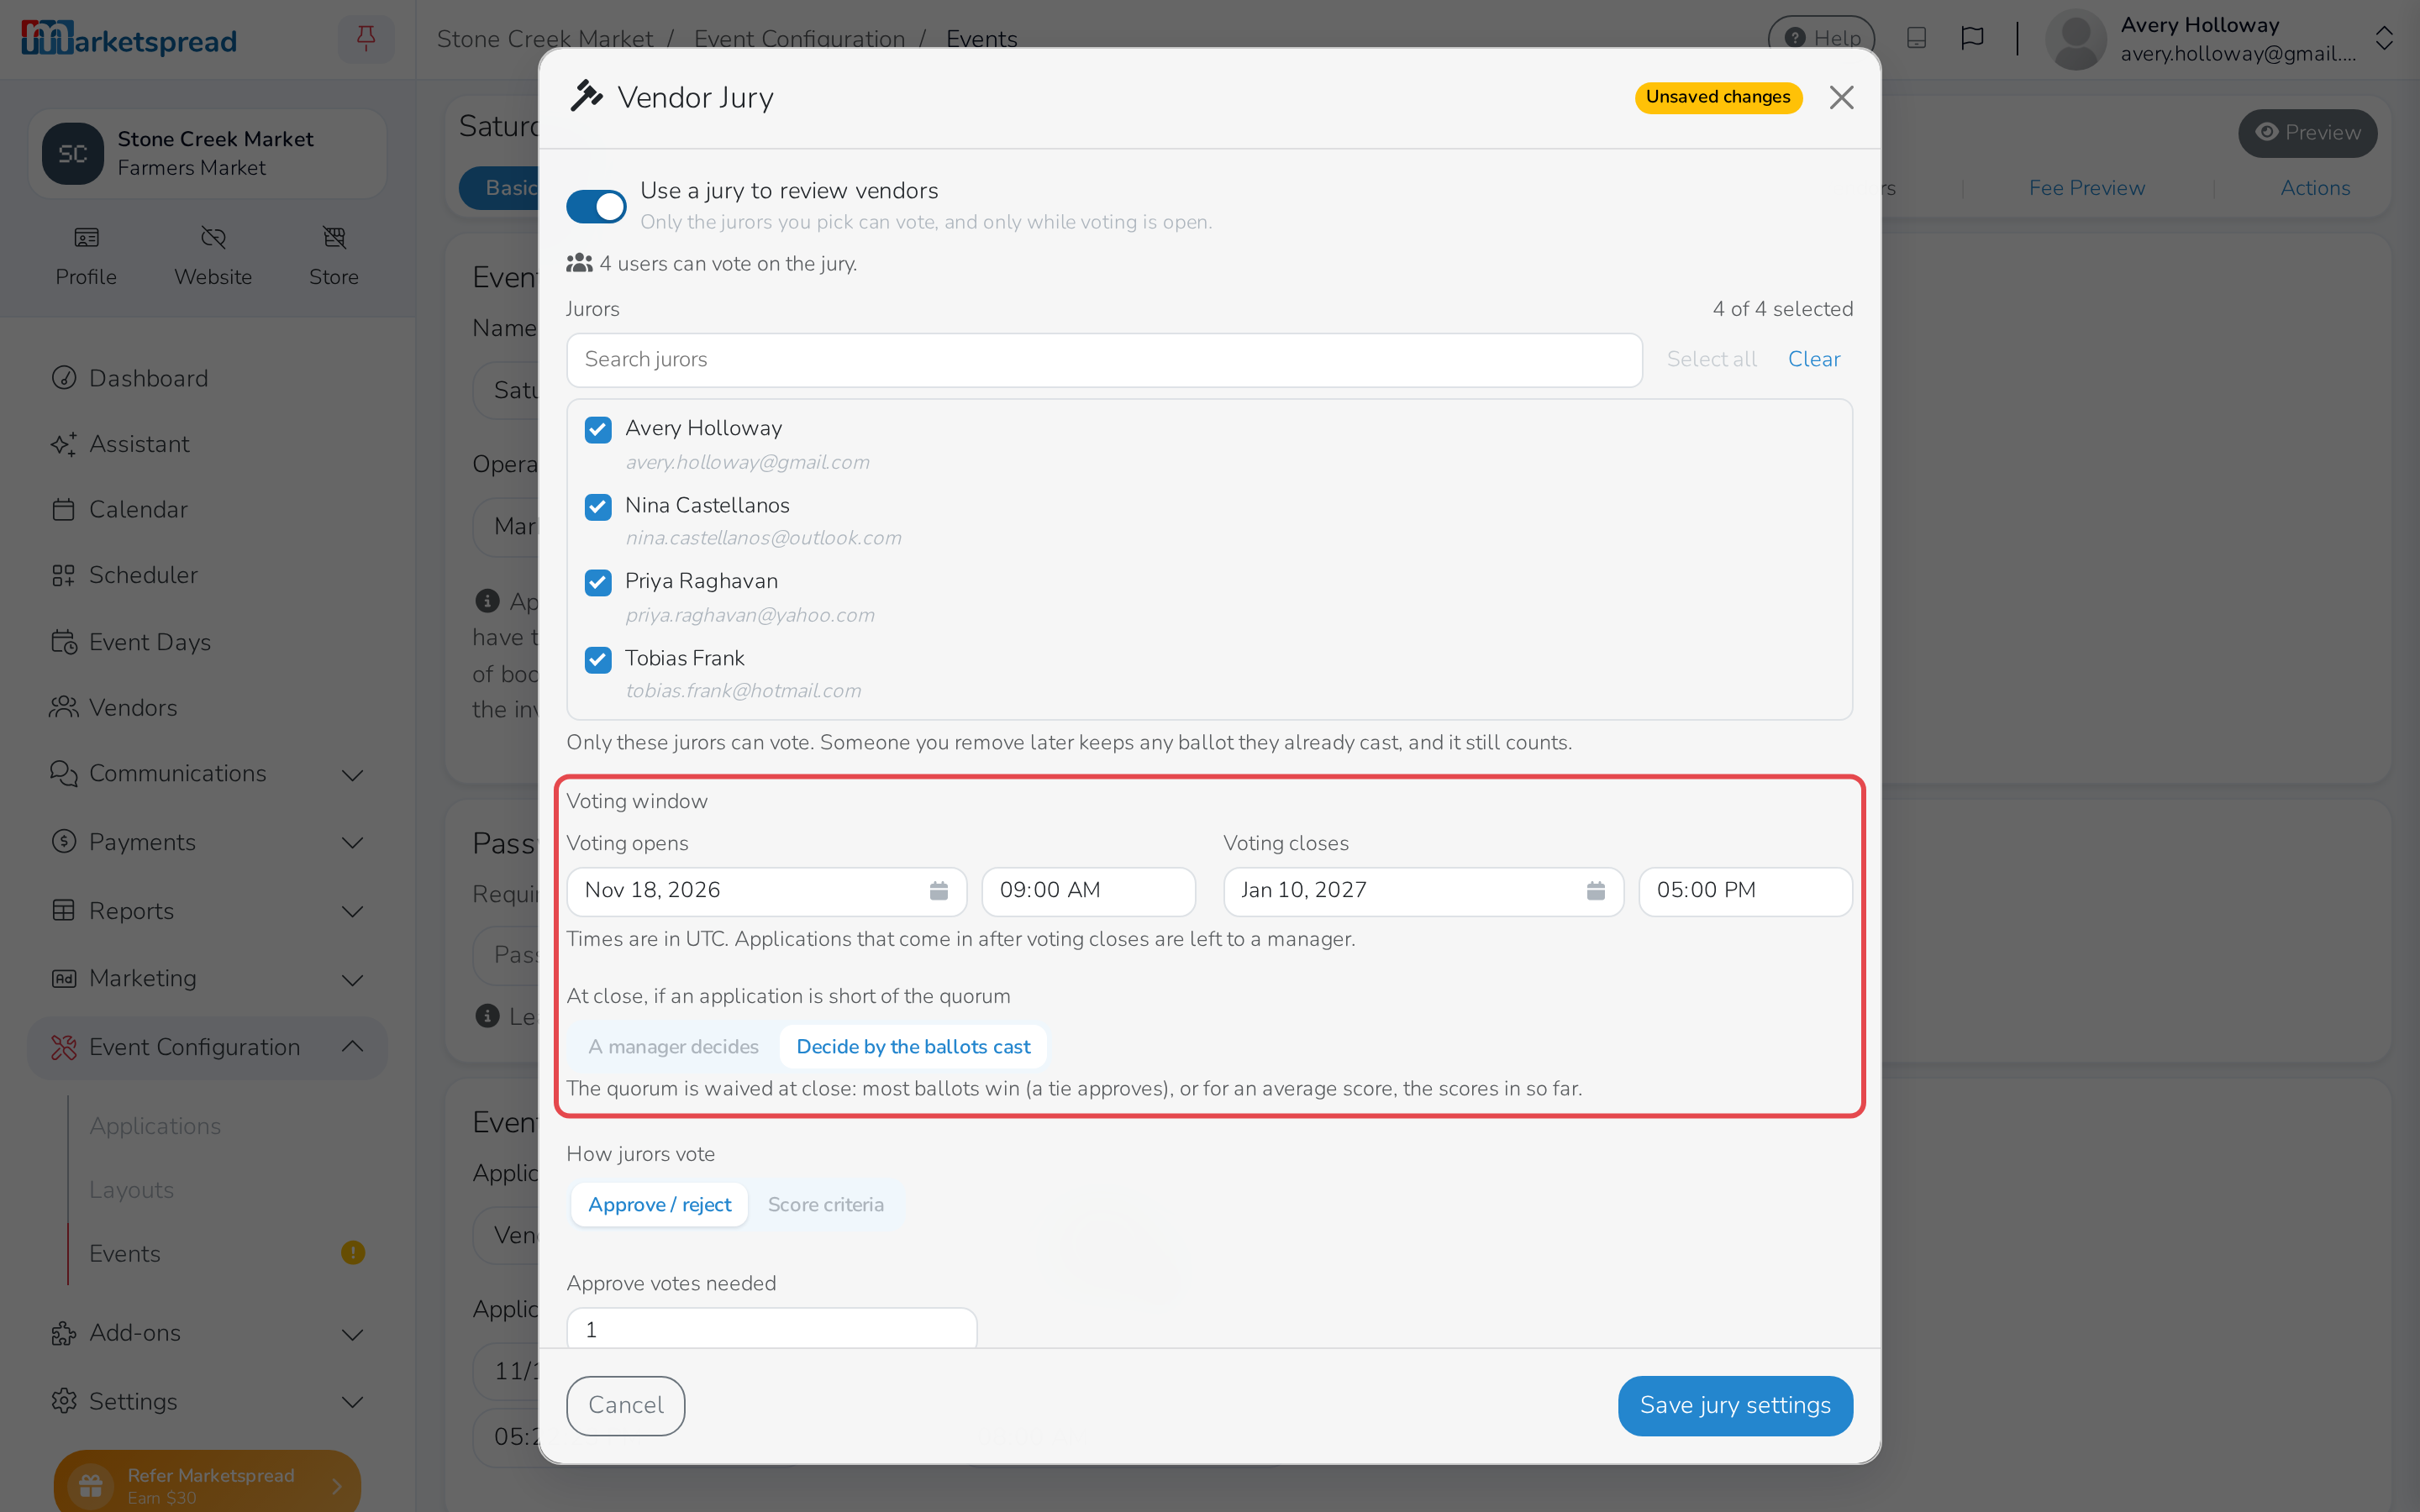
A manager decides leaves it with no automatic result. Decide by the ballots cast skips the quorum: whichever side has more ballots wins, a tie approves, and a scored application goes by whatever average is in so far.
-
Click Save jury settings.
Applications that come in after voting closes are left to a manager, whatever you choose here.
Choose how jurors vote
Jurors vote one of two ways: Approve / reject, or Score criteria.
With Approve / reject, each juror casts a straight approve or reject
ballot on the whole application, and it passes once enough approve ballots
are in. It's the simpler setup — pick it when a quick yes or no from your
panel is all you need.
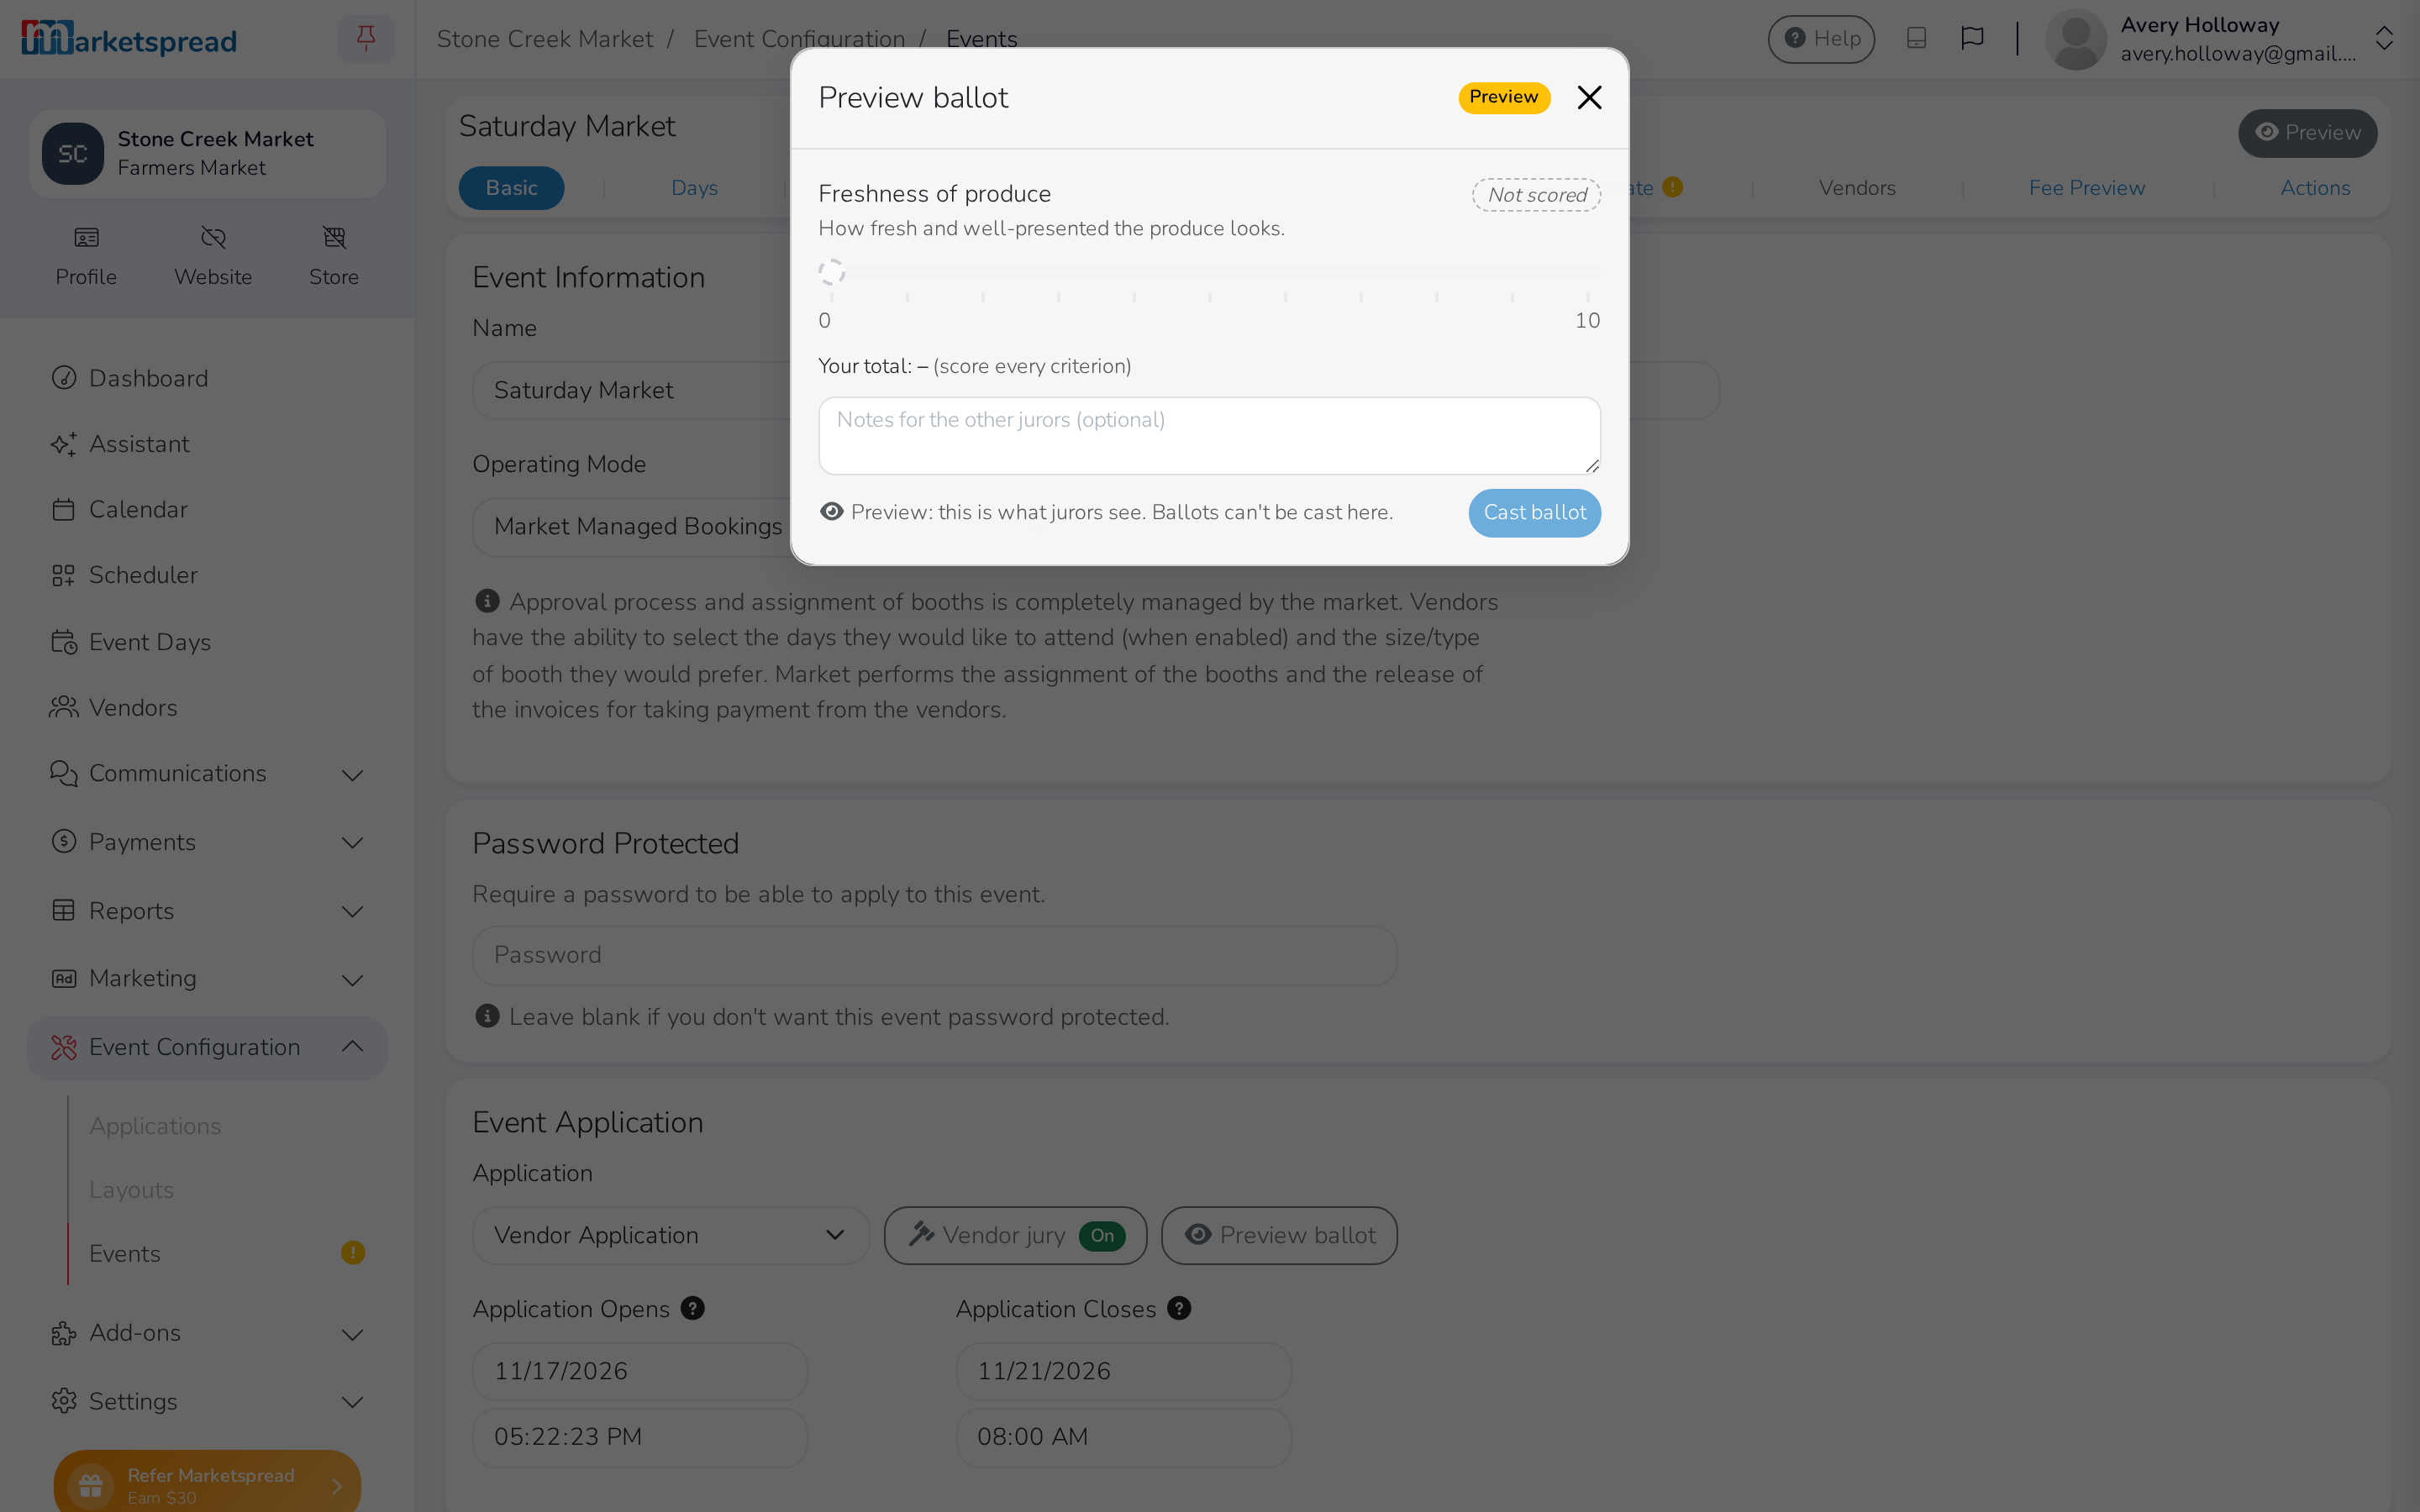
With Score criteria, jurors score the application against criteria you
set, like freshness of produce or booth presentation, and the scores decide
the result. Pick it when you want jurors weighing several things about an
application rather than giving one up-or-down vote.
Important
You can't switch between Approve / reject and Score criteria once an application is holding a ballot under this jury. Wait for those ballots to close, or open a new event.
Configure approve / reject voting
-
Open Event Configuration → Events in your dashboard.
-
Click the event.
-
Click the pencil next to Basic.
-
Click Vendor jury.
-
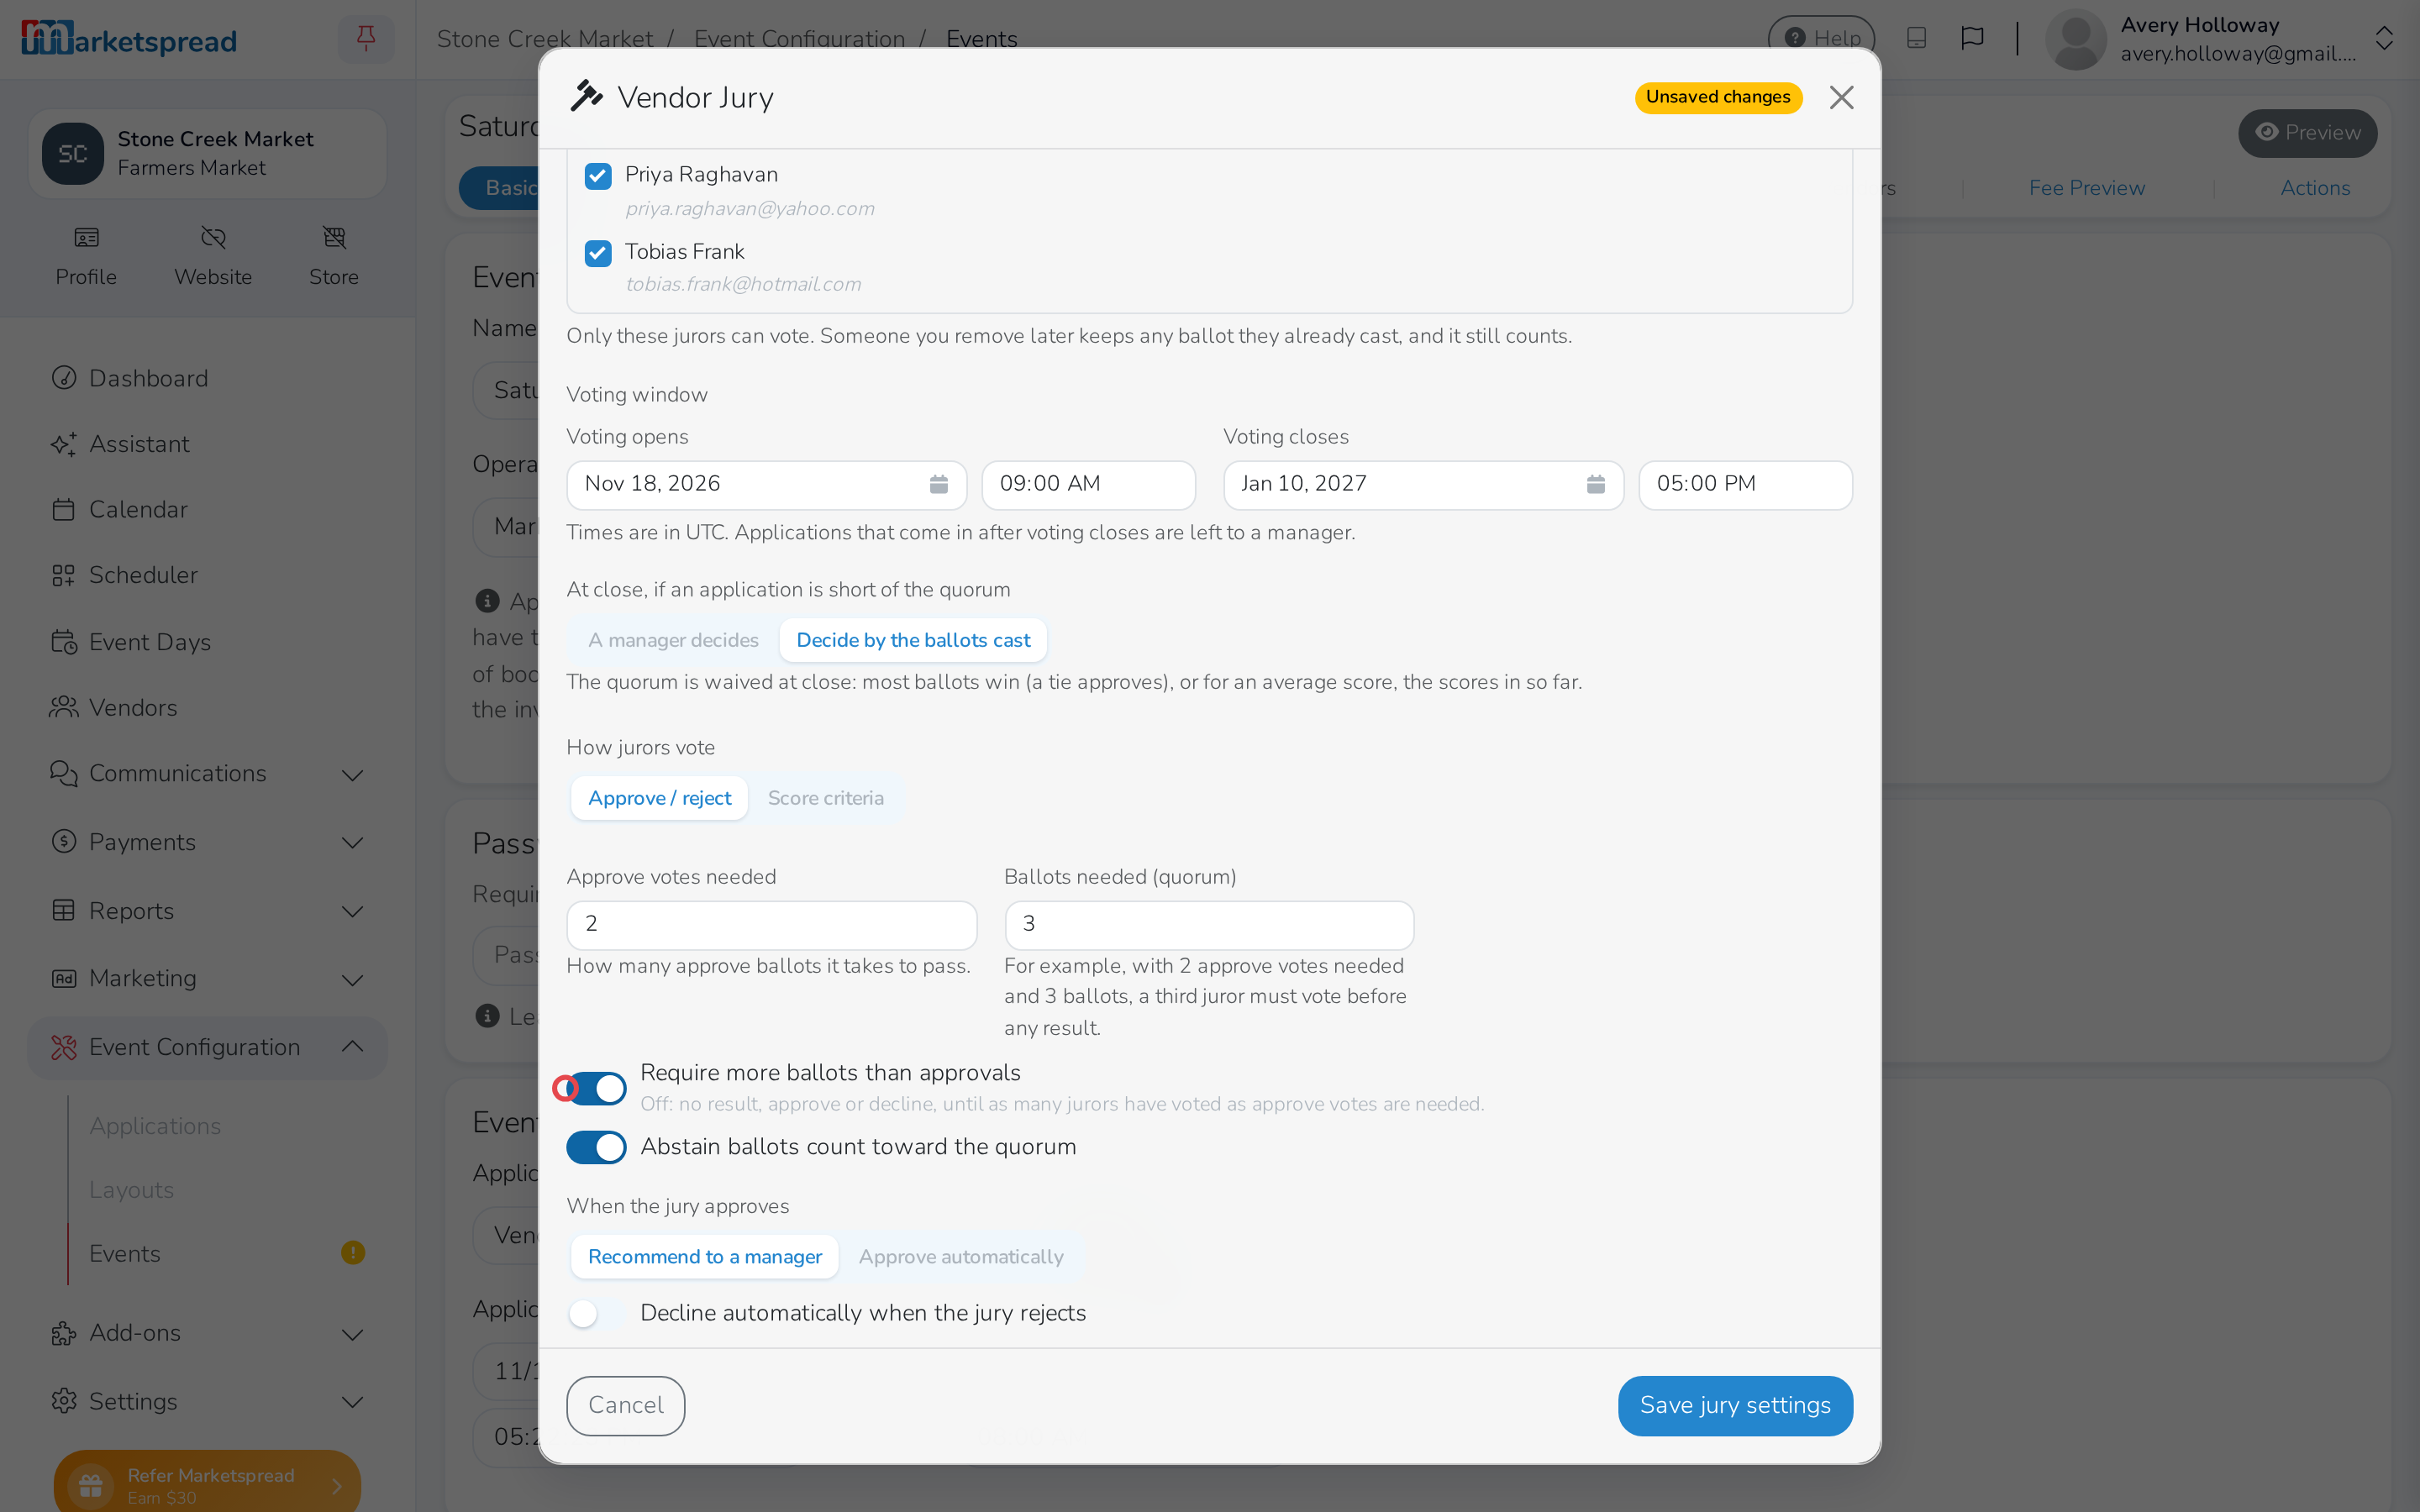
Under How jurors vote, choose Approve / reject.
-
Set Approve votes needed — how many approve ballots it takes to pass.
-
Turn on Require more ballots than approvals to need more jurors to vote than the approvals needed.
-
Set Ballots needed (quorum). You can also turn on Abstain ballots count toward the quorum.
-
Click Save jury settings.
Score applications against criteria
-
Open Event Configuration → Events in your dashboard.
-
Click the event.
-
Click the pencil next to Basic.
-
Click Vendor jury.
-
Under How jurors vote, choose Score criteria.
-
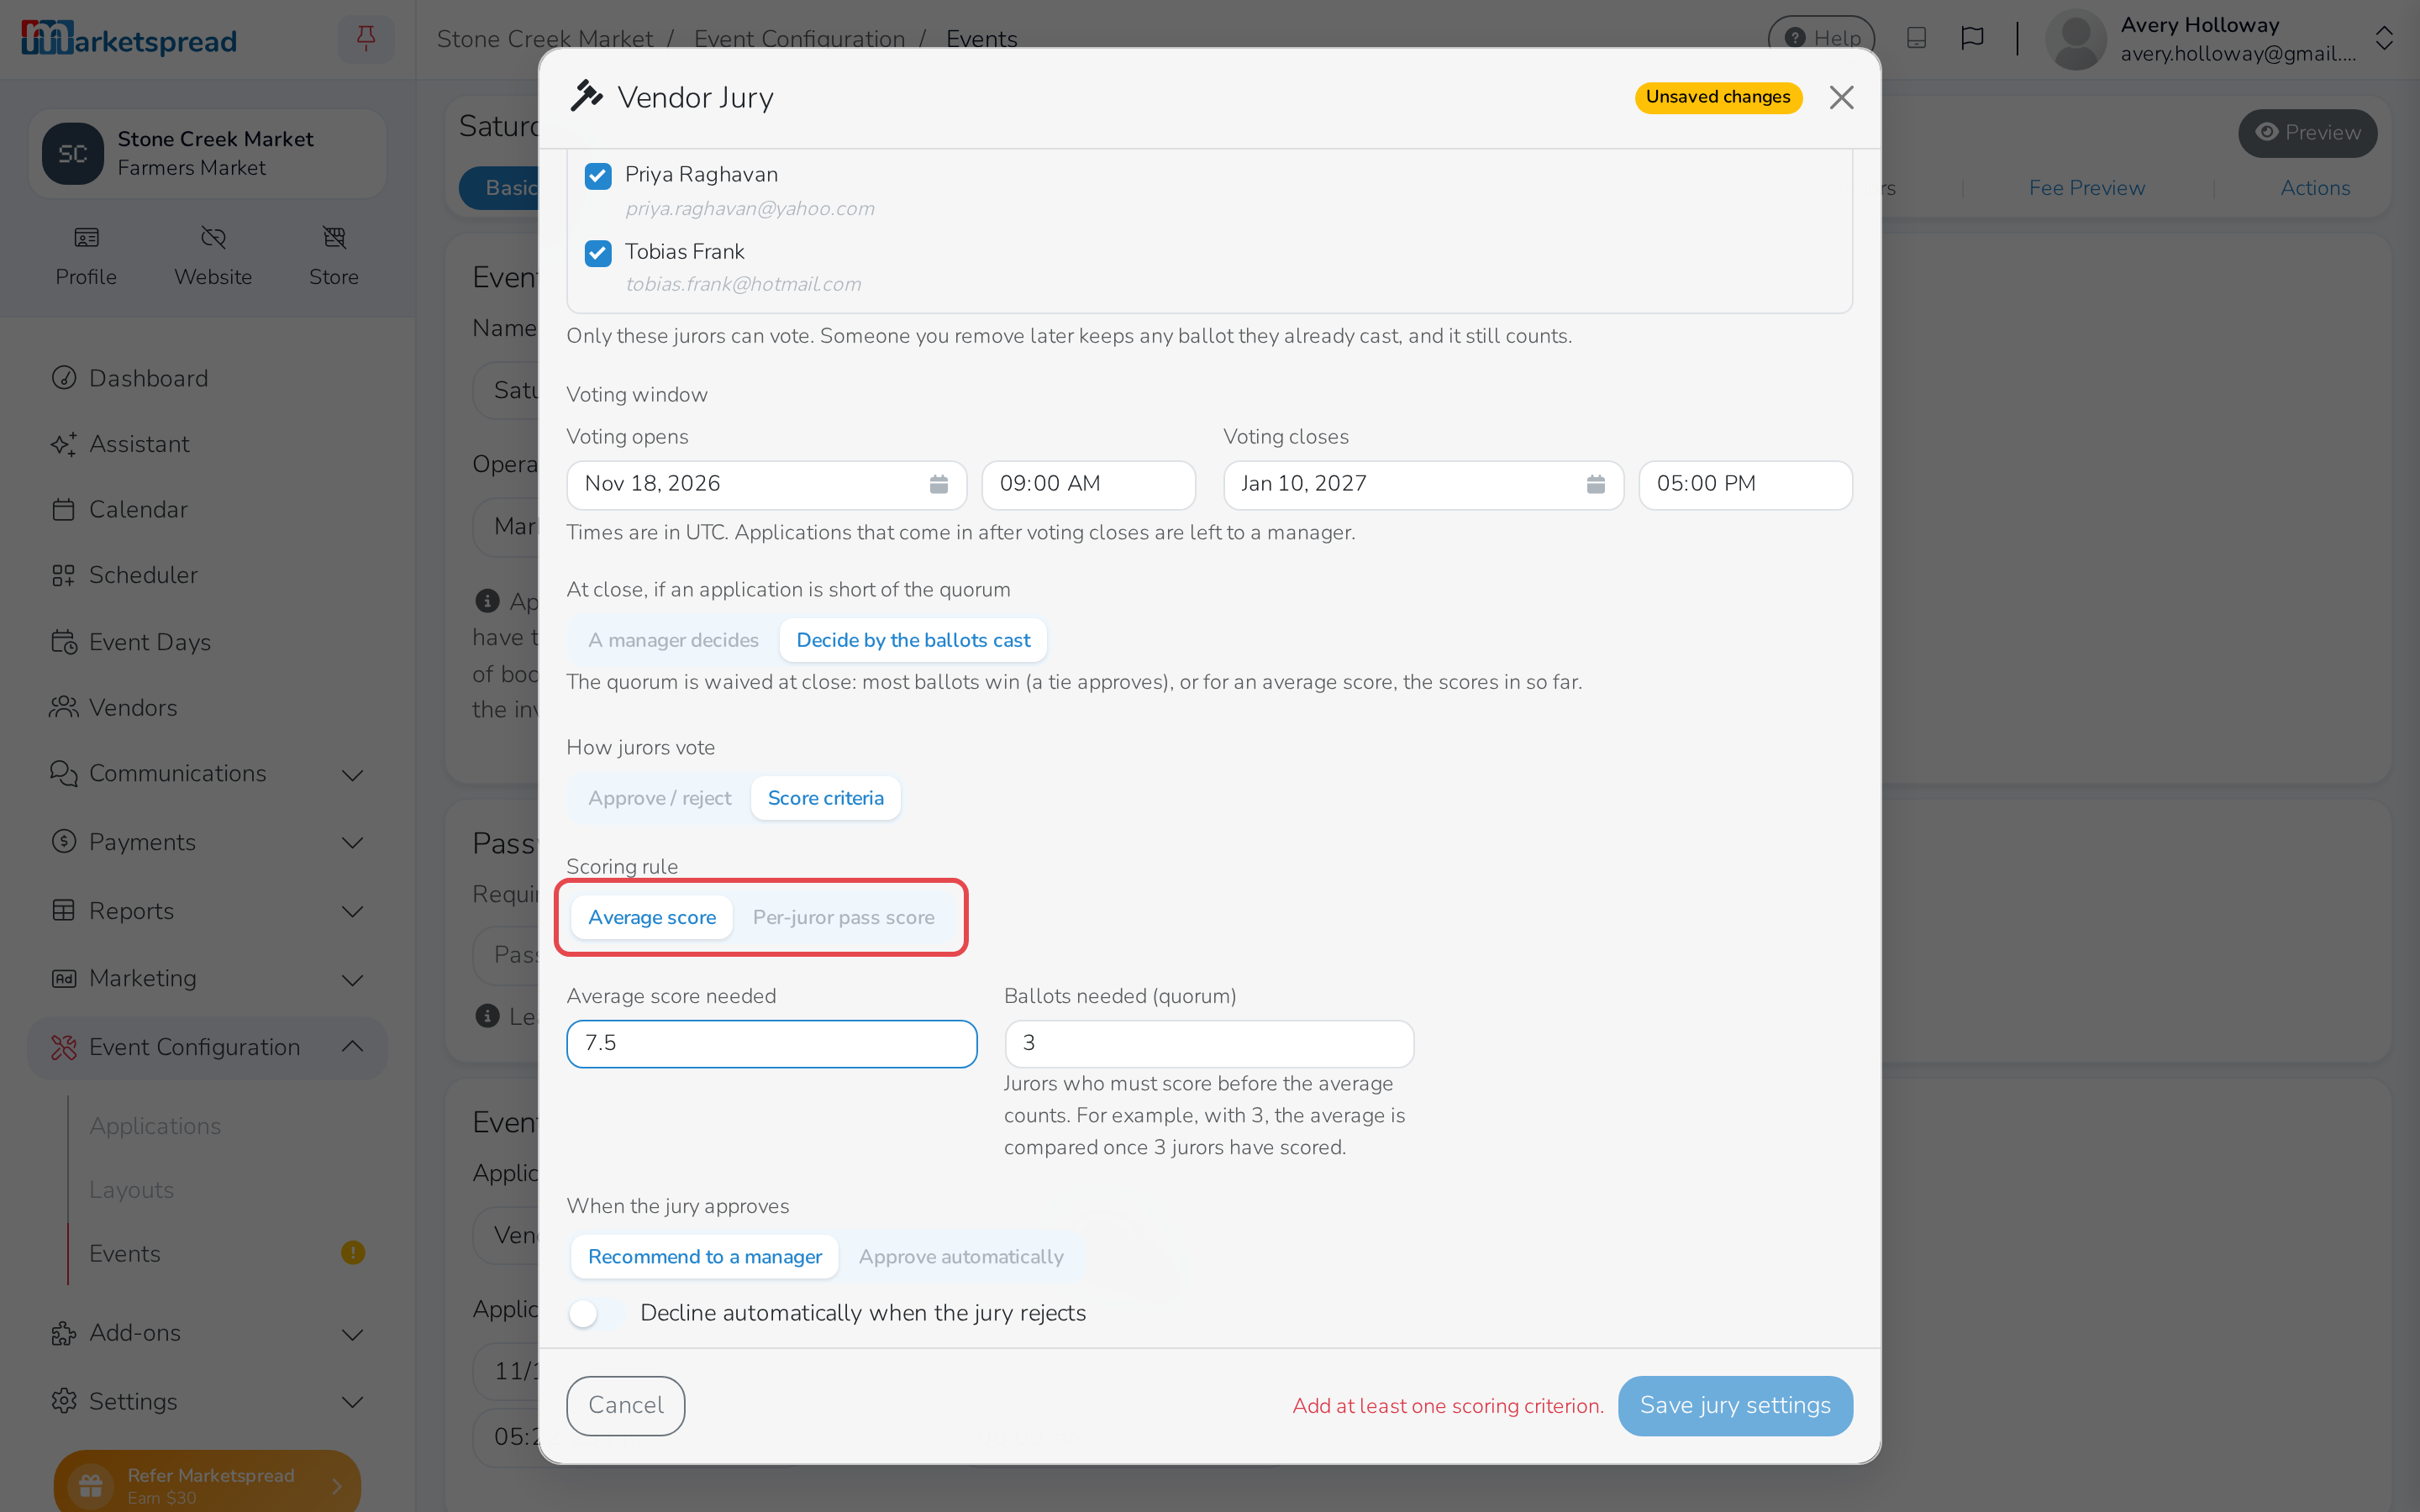
Under Scoring rule, choose Average score (jurors' scores are averaged) or Per-juror pass score (each juror's own total counts as an approve or reject vote).
-
For Average score, set Average score needed and Ballots needed (quorum) — how many jurors must score before the average counts.
-
For Per-juror pass score, set Juror pass score — a juror's total at or above this counts as an approve vote — and Approve votes needed.
-
Under Scoring criteria, click Add criterion for each thing jurors should score. Name it, add help text for jurors, and set its Min, Max, Step and Weight.
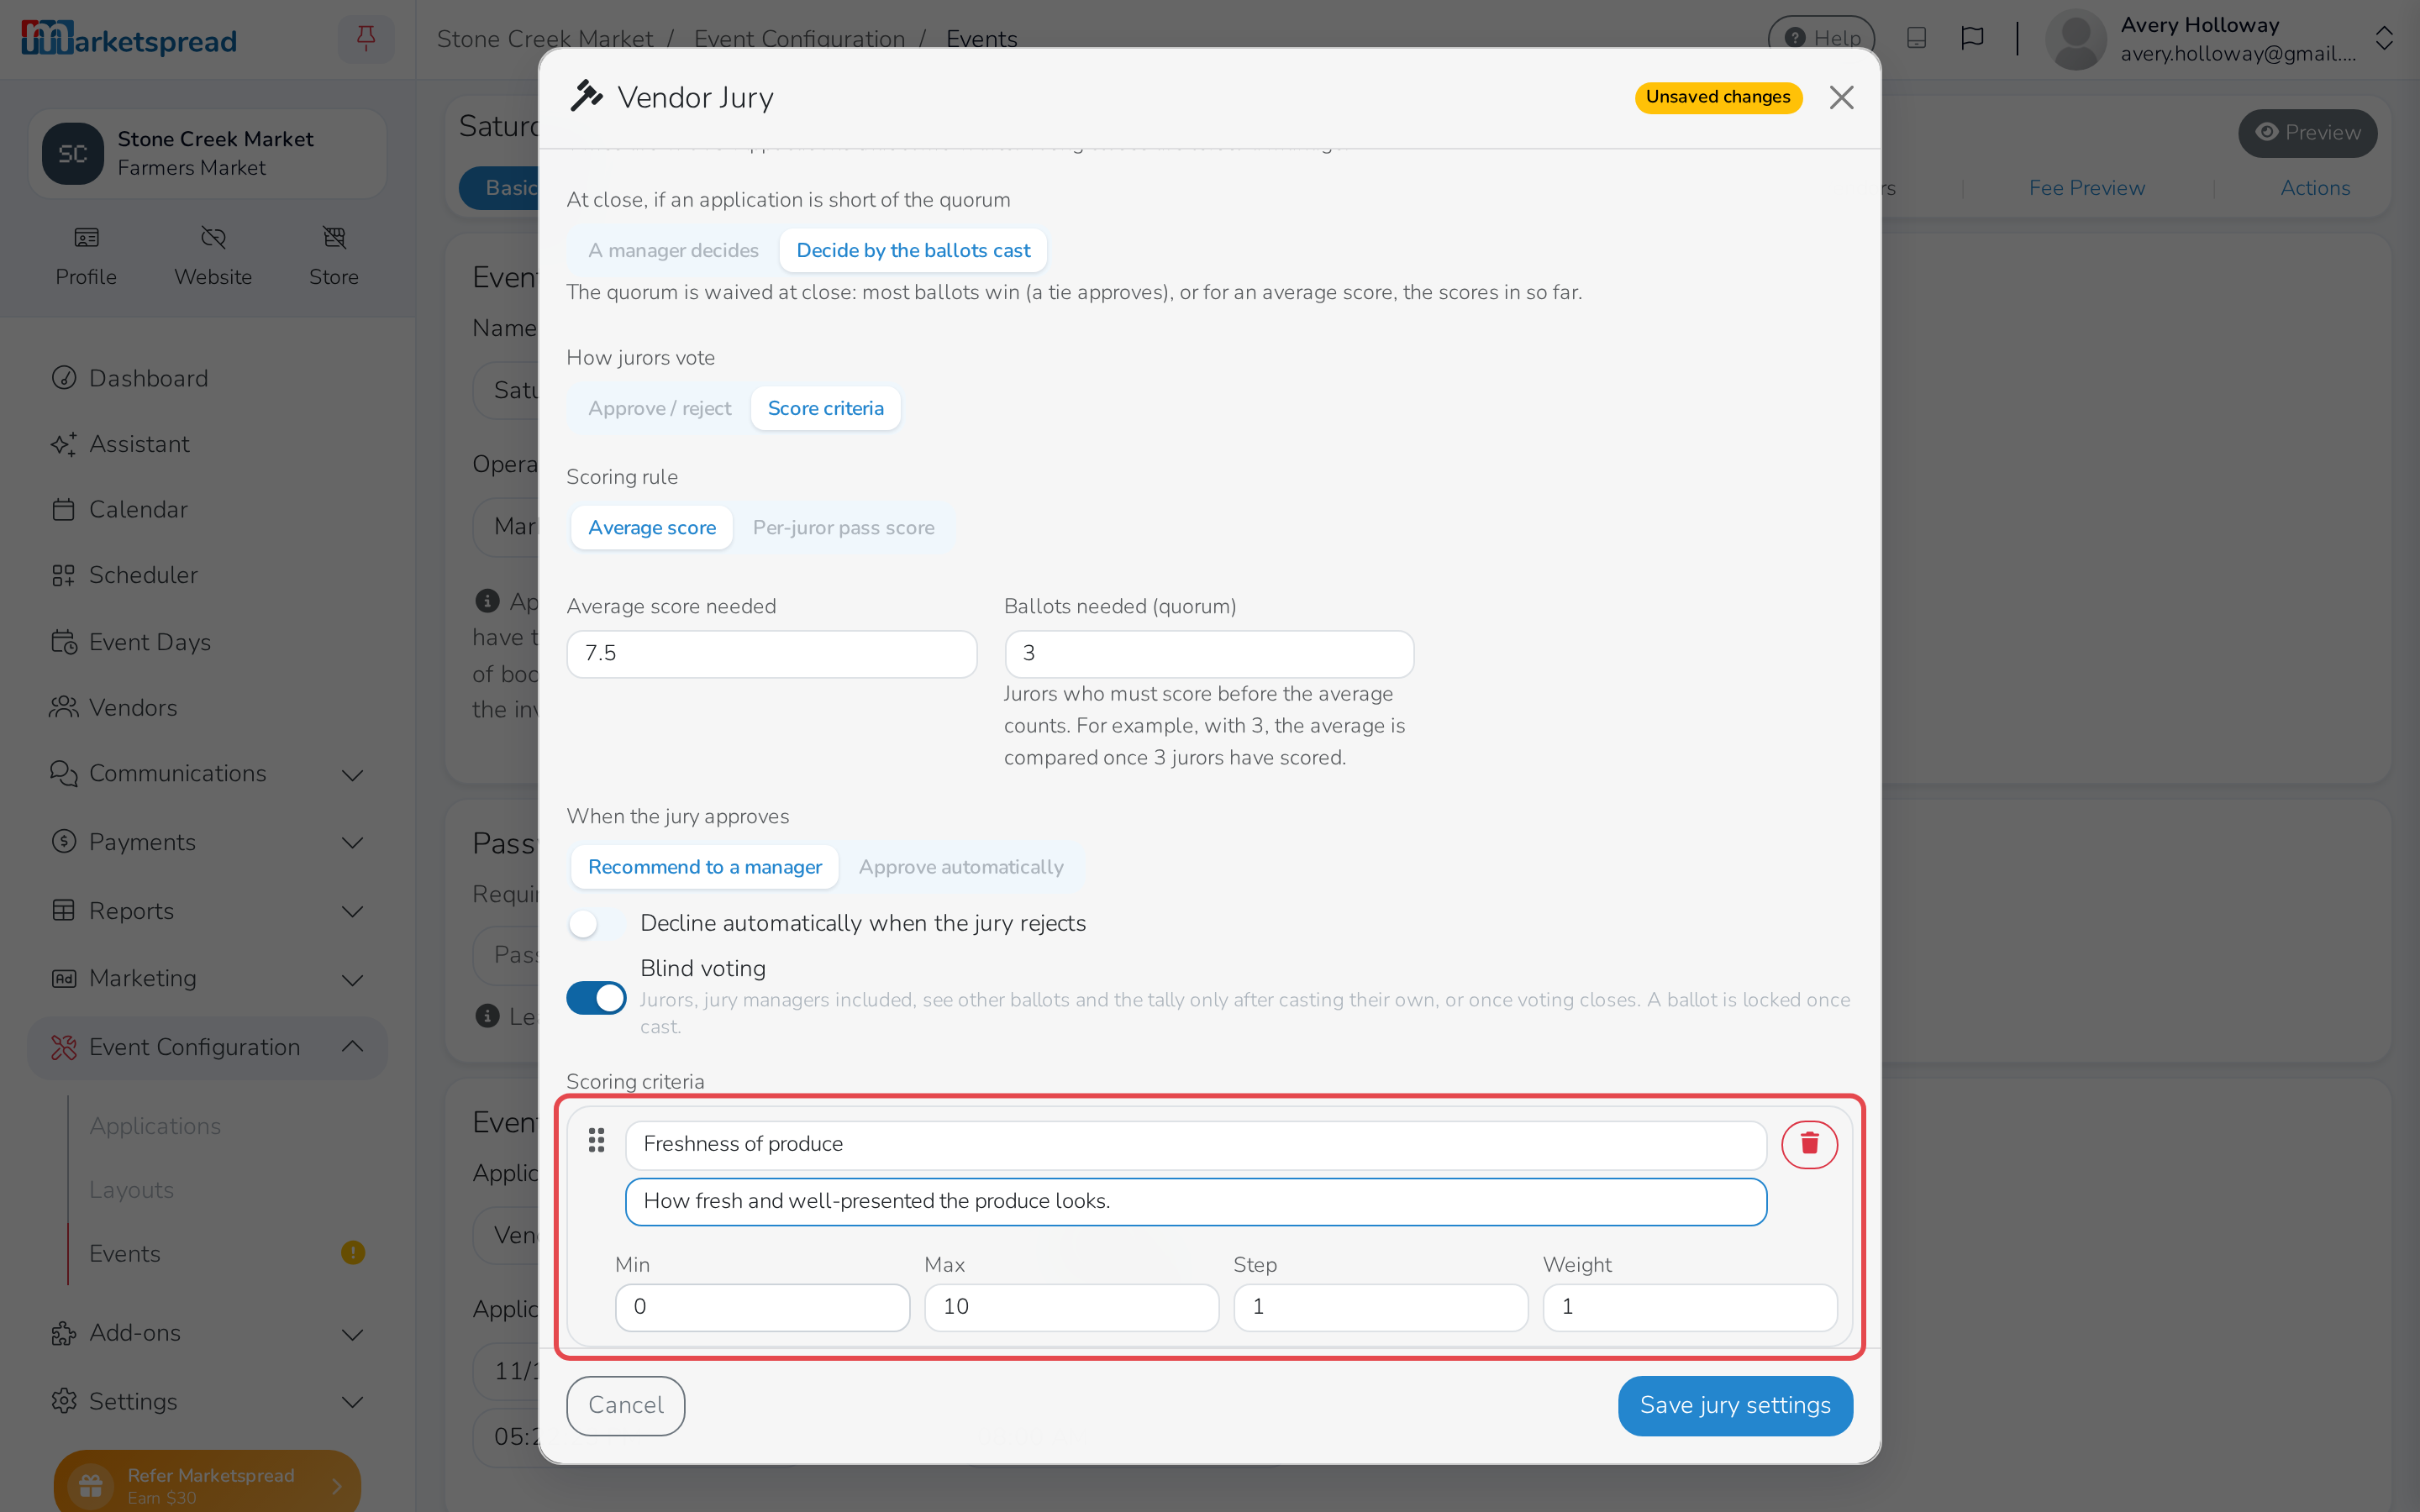
Min and Max are the lowest and highest score a juror can give. Step is how finely they can score in between — a Step of 1 only allows whole numbers, a Step of 0.5 also allows half-points like 7.5.
Weight is how much a criterion counts toward the application's total, compared to the others. A juror's total adds up every criterion's score times its weight, so a criterion weighted 2 counts for twice as much as one weighted 1, and one weighted 0 doesn't count at all. For example: Freshness of produce scored 0–10 with a Weight of 2, and Booth presentation scored 0–5 with a Weight of 1. A juror who gives Freshness 8 and Booth presentation 4 gives a total of (8 × 2) + (4 × 1) = 20 — that's the number Average score needed or Juror pass score compares against.
-
Click Save jury settings.
Note
Once an application is holding a score ballot, you can still rename a criterion, edit its help text or reorder it, but can't add, remove, or change its range, step or weight.
Decide what happens when the jury votes
-
Open Event Configuration → Events in your dashboard.
-
Click the event.
-
Click the pencil next to Basic.
-
Click Vendor jury.
-
Under When the jury approves, choose Recommend to a manager or Approve automatically.
-
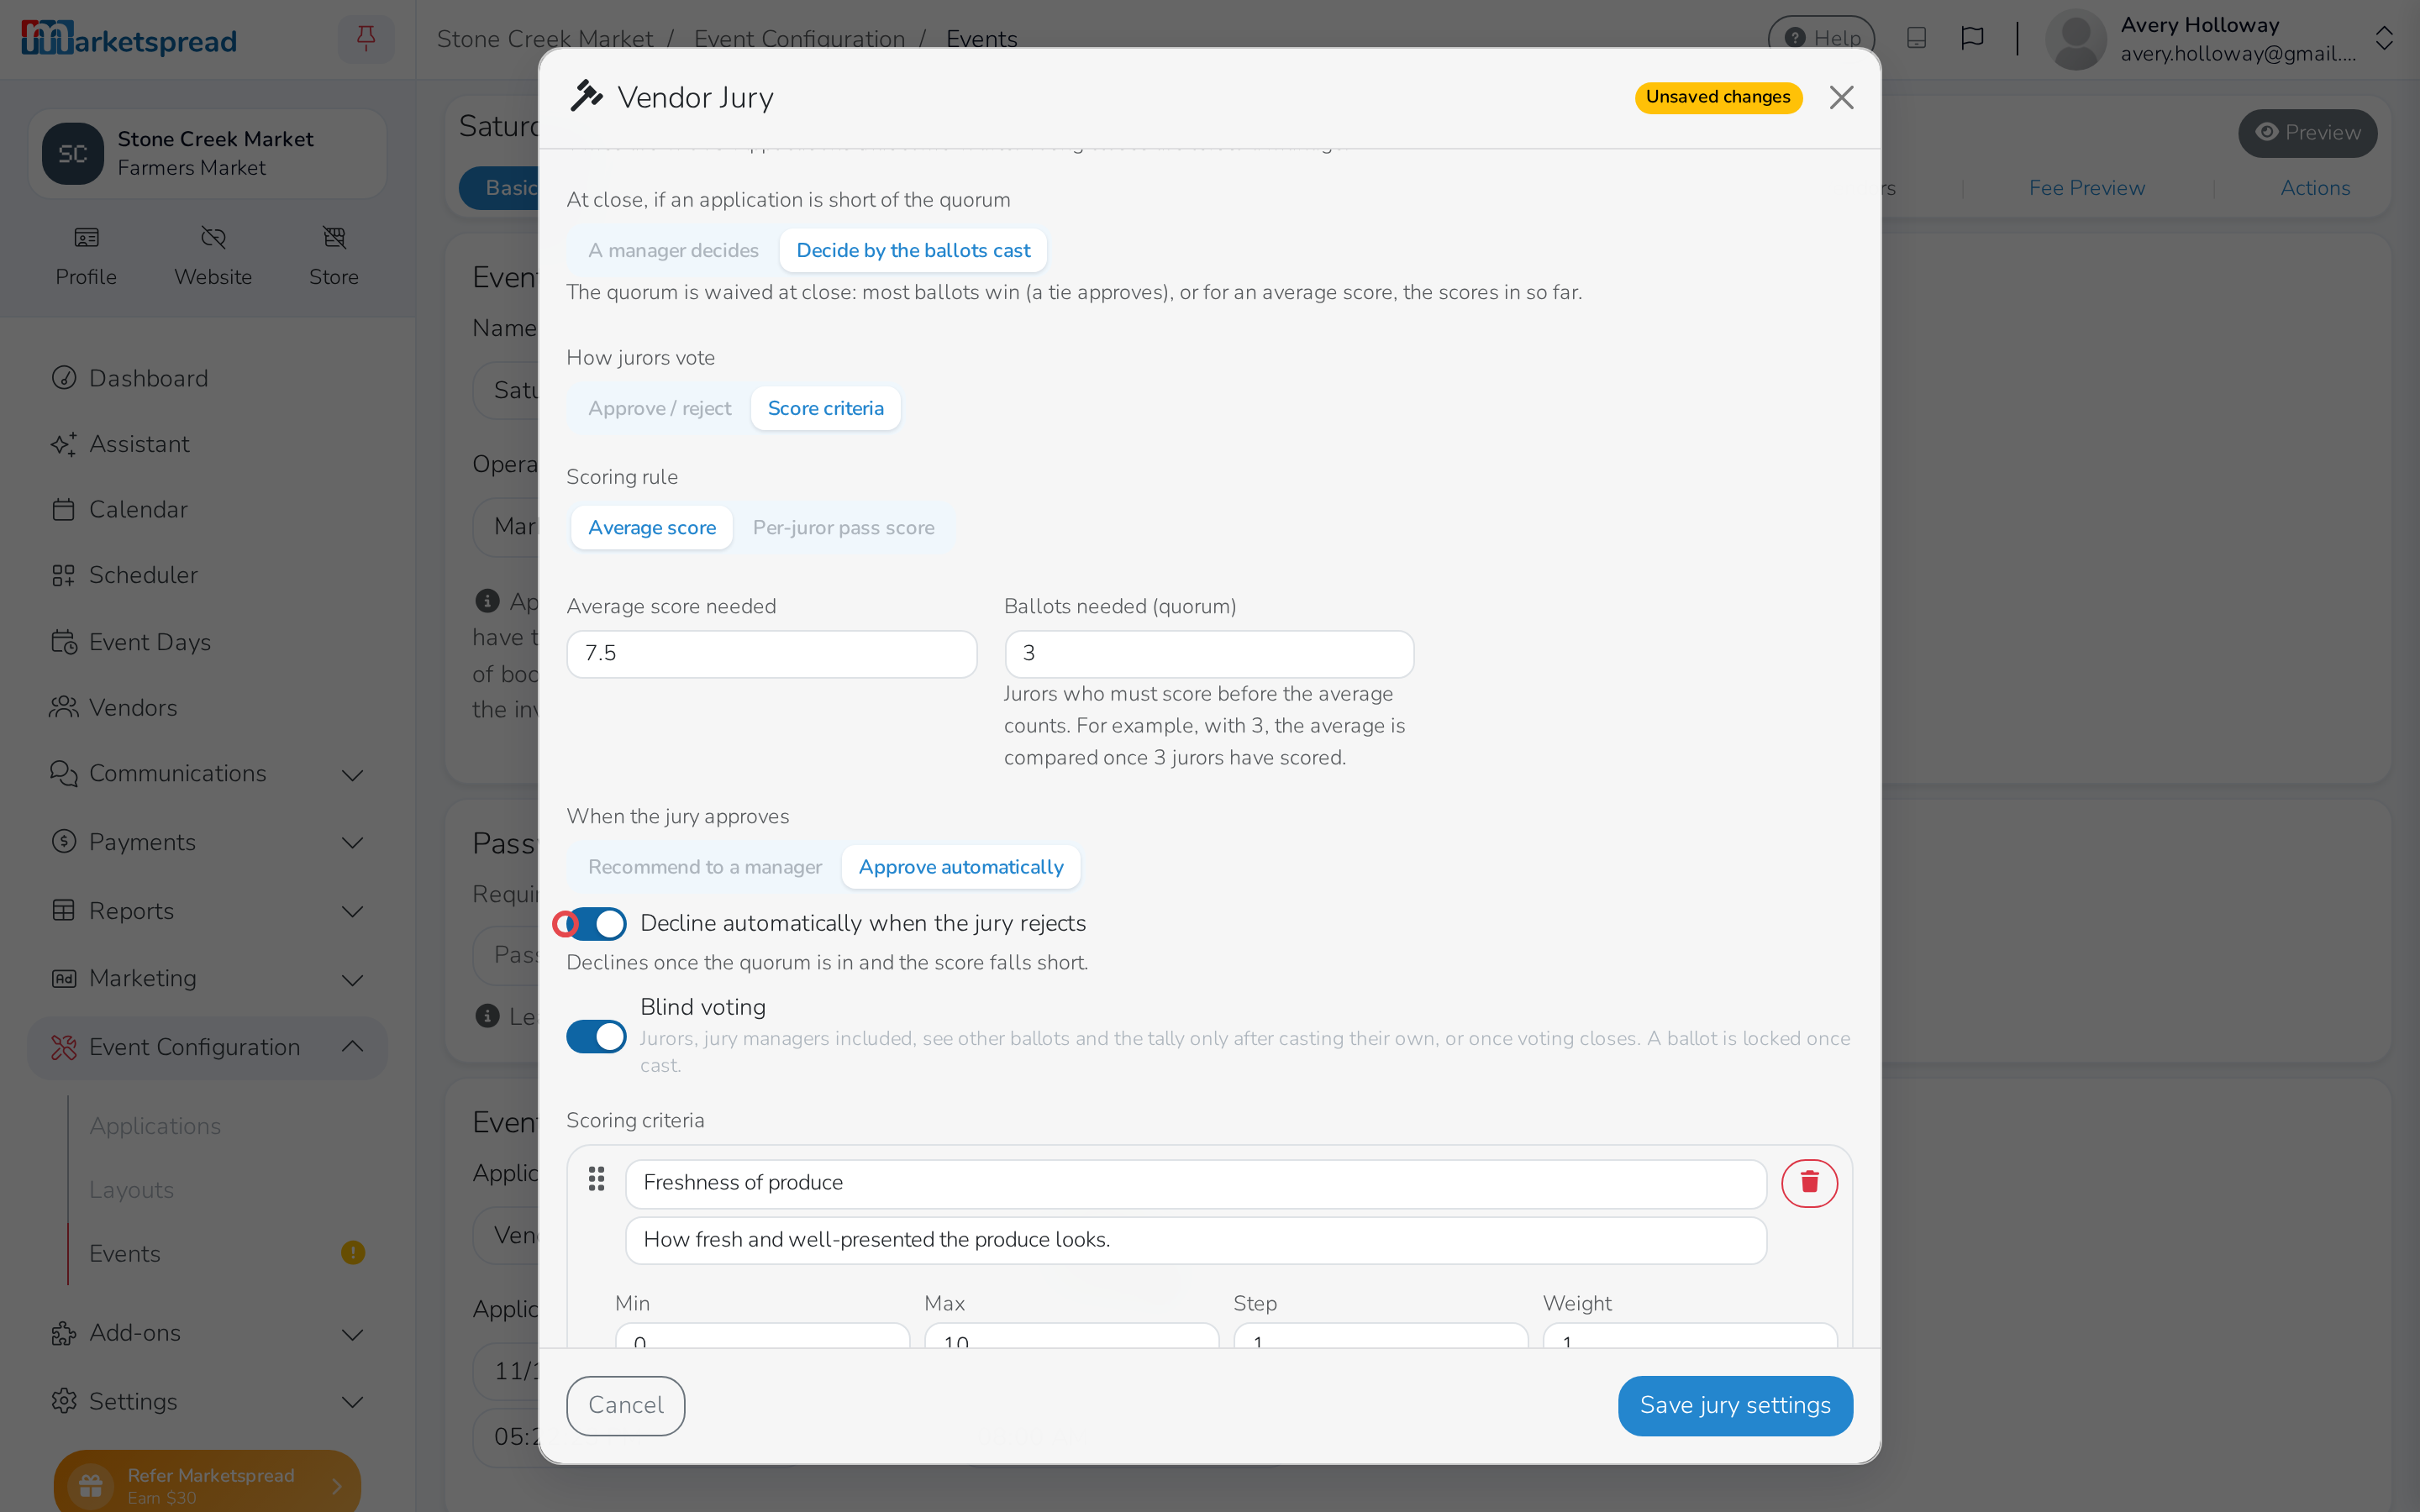
Turn on Decline automatically when the jury rejects to decline an application without stepping in.
-
Set Reject votes needed — how many reject ballots it takes to decline.
-
Click Save jury settings.
Scoring by average declines automatically, once the quorum is met, if the score falls short — there's no separate reject vote count to set.
Turn blind voting on or off
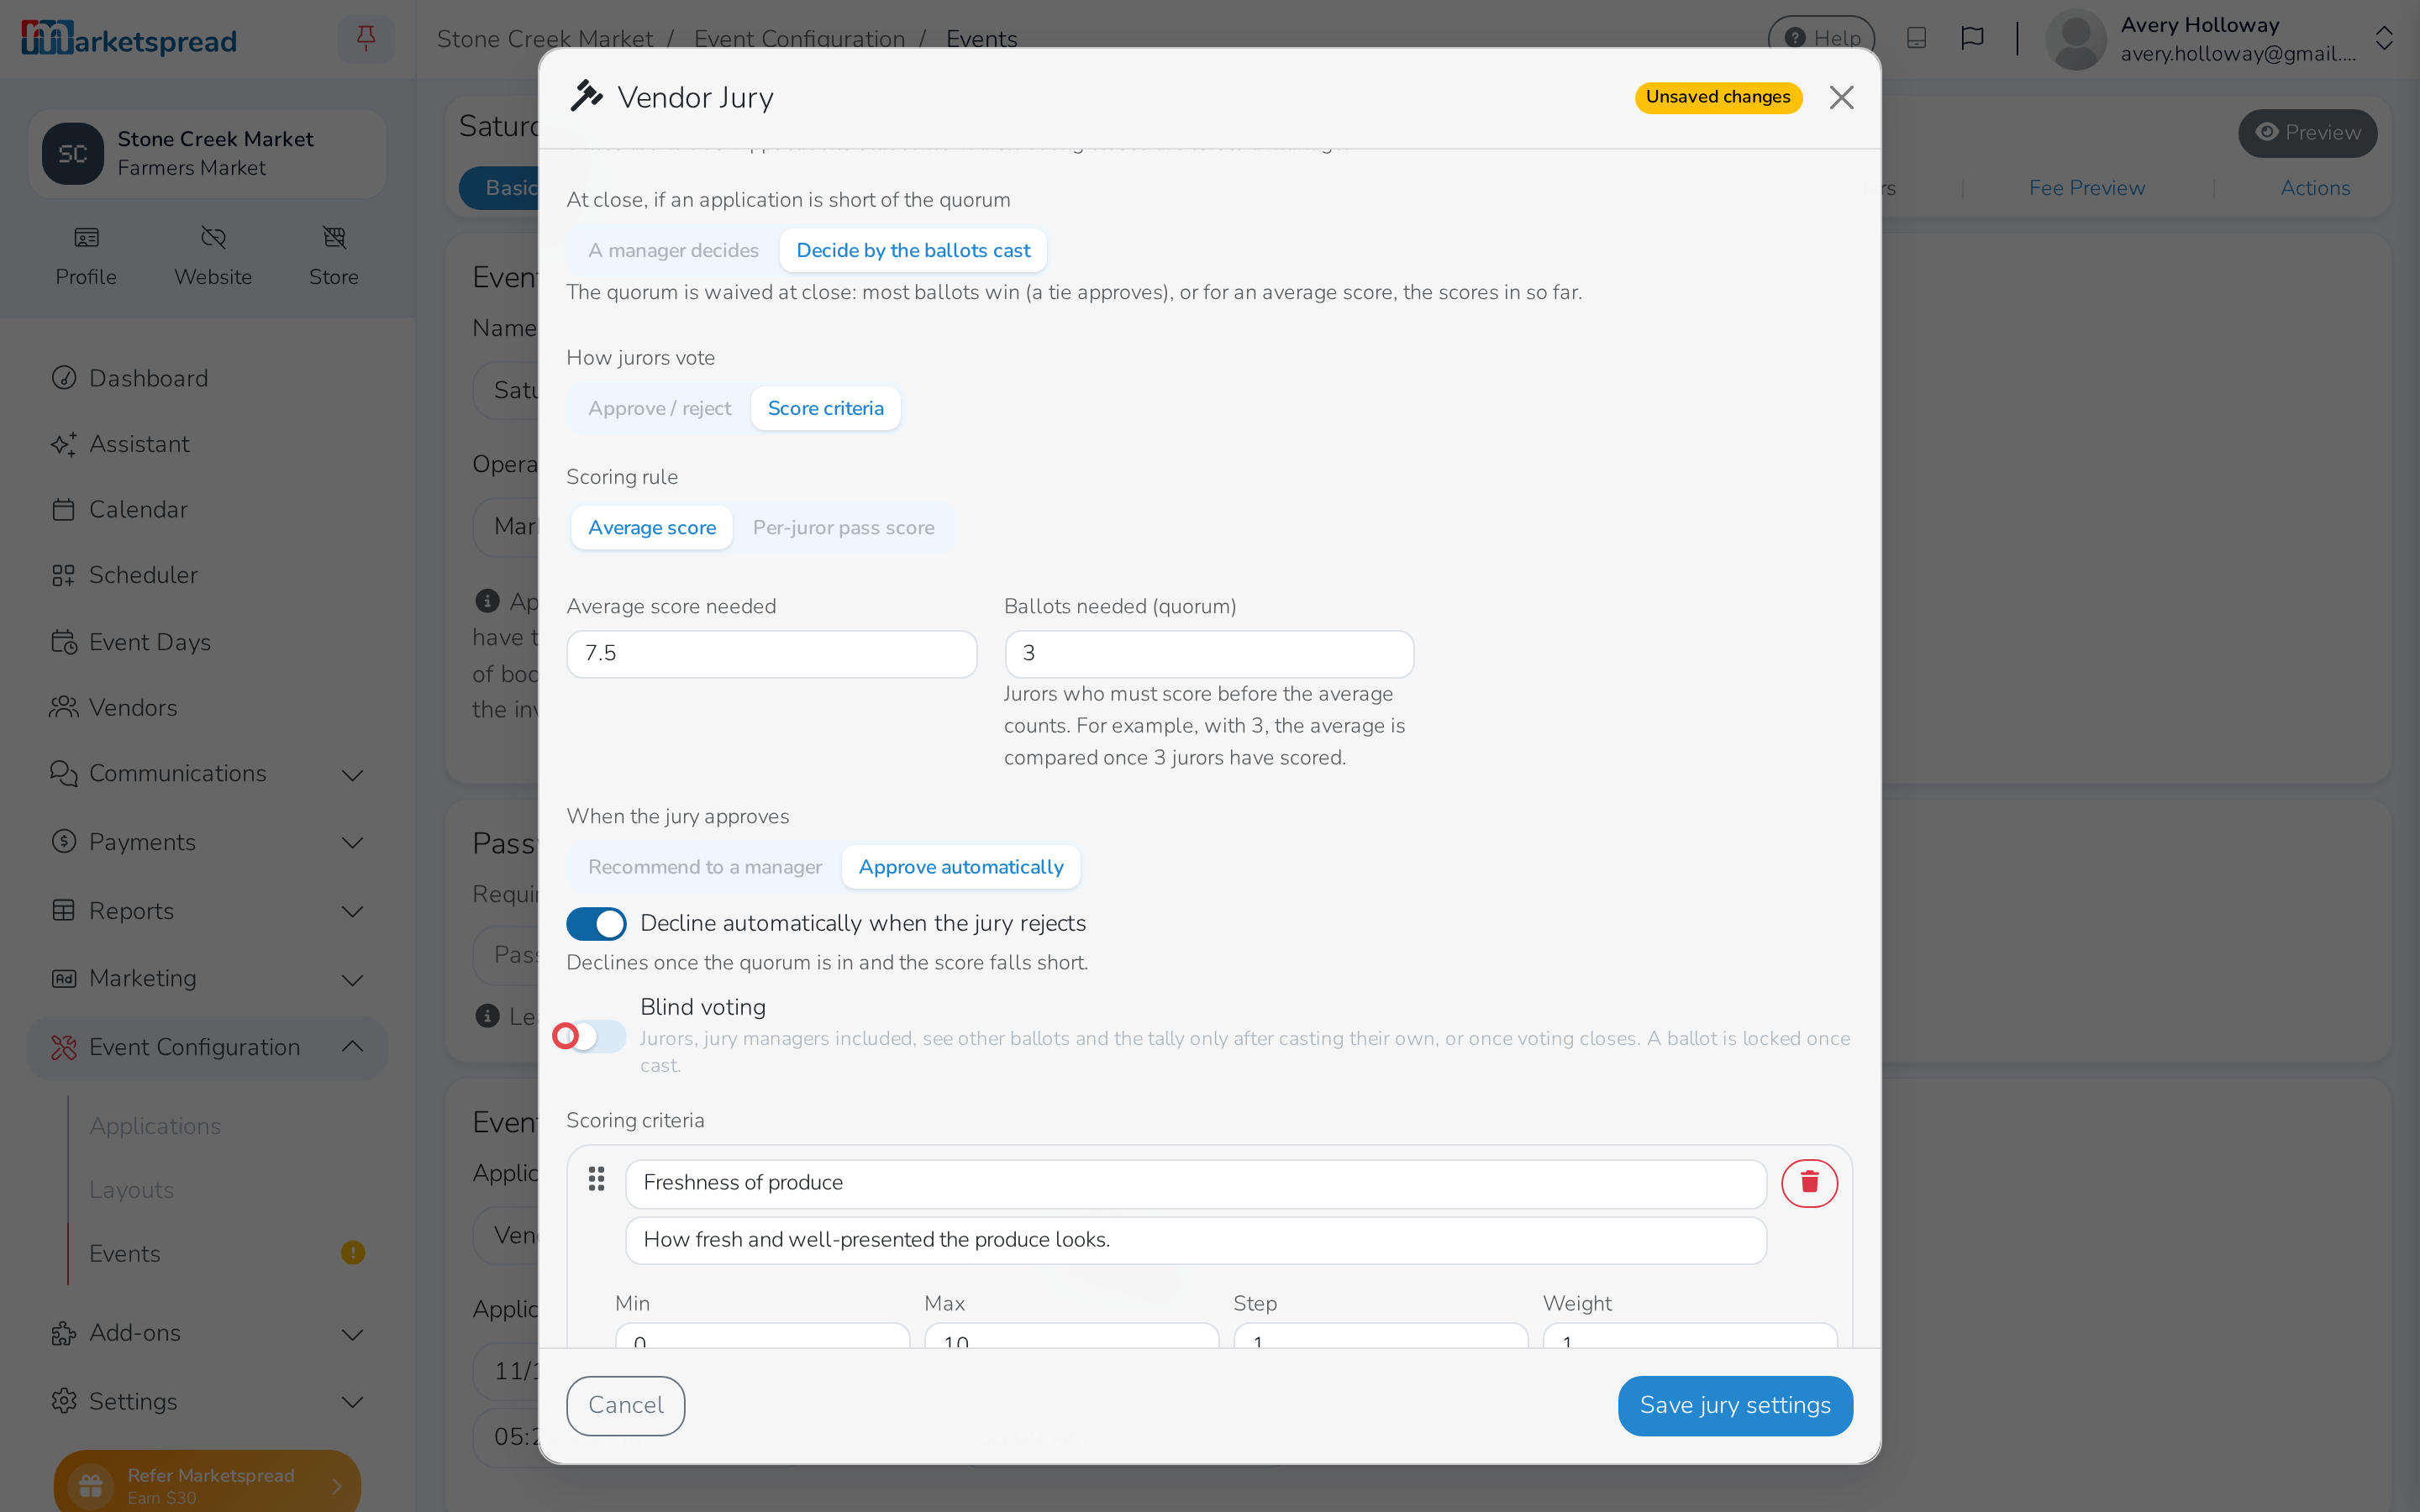
Blind voting is on by default: jurors, including jury managers, see other ballots and the tally only after casting their own, or once voting closes. A ballot is locked once cast.
-
Open Event Configuration → Events in your dashboard.
-
Click the event.
-
Click the pencil next to Basic.
-
Click Vendor jury.
-
Turn Blind voting on or off.
-
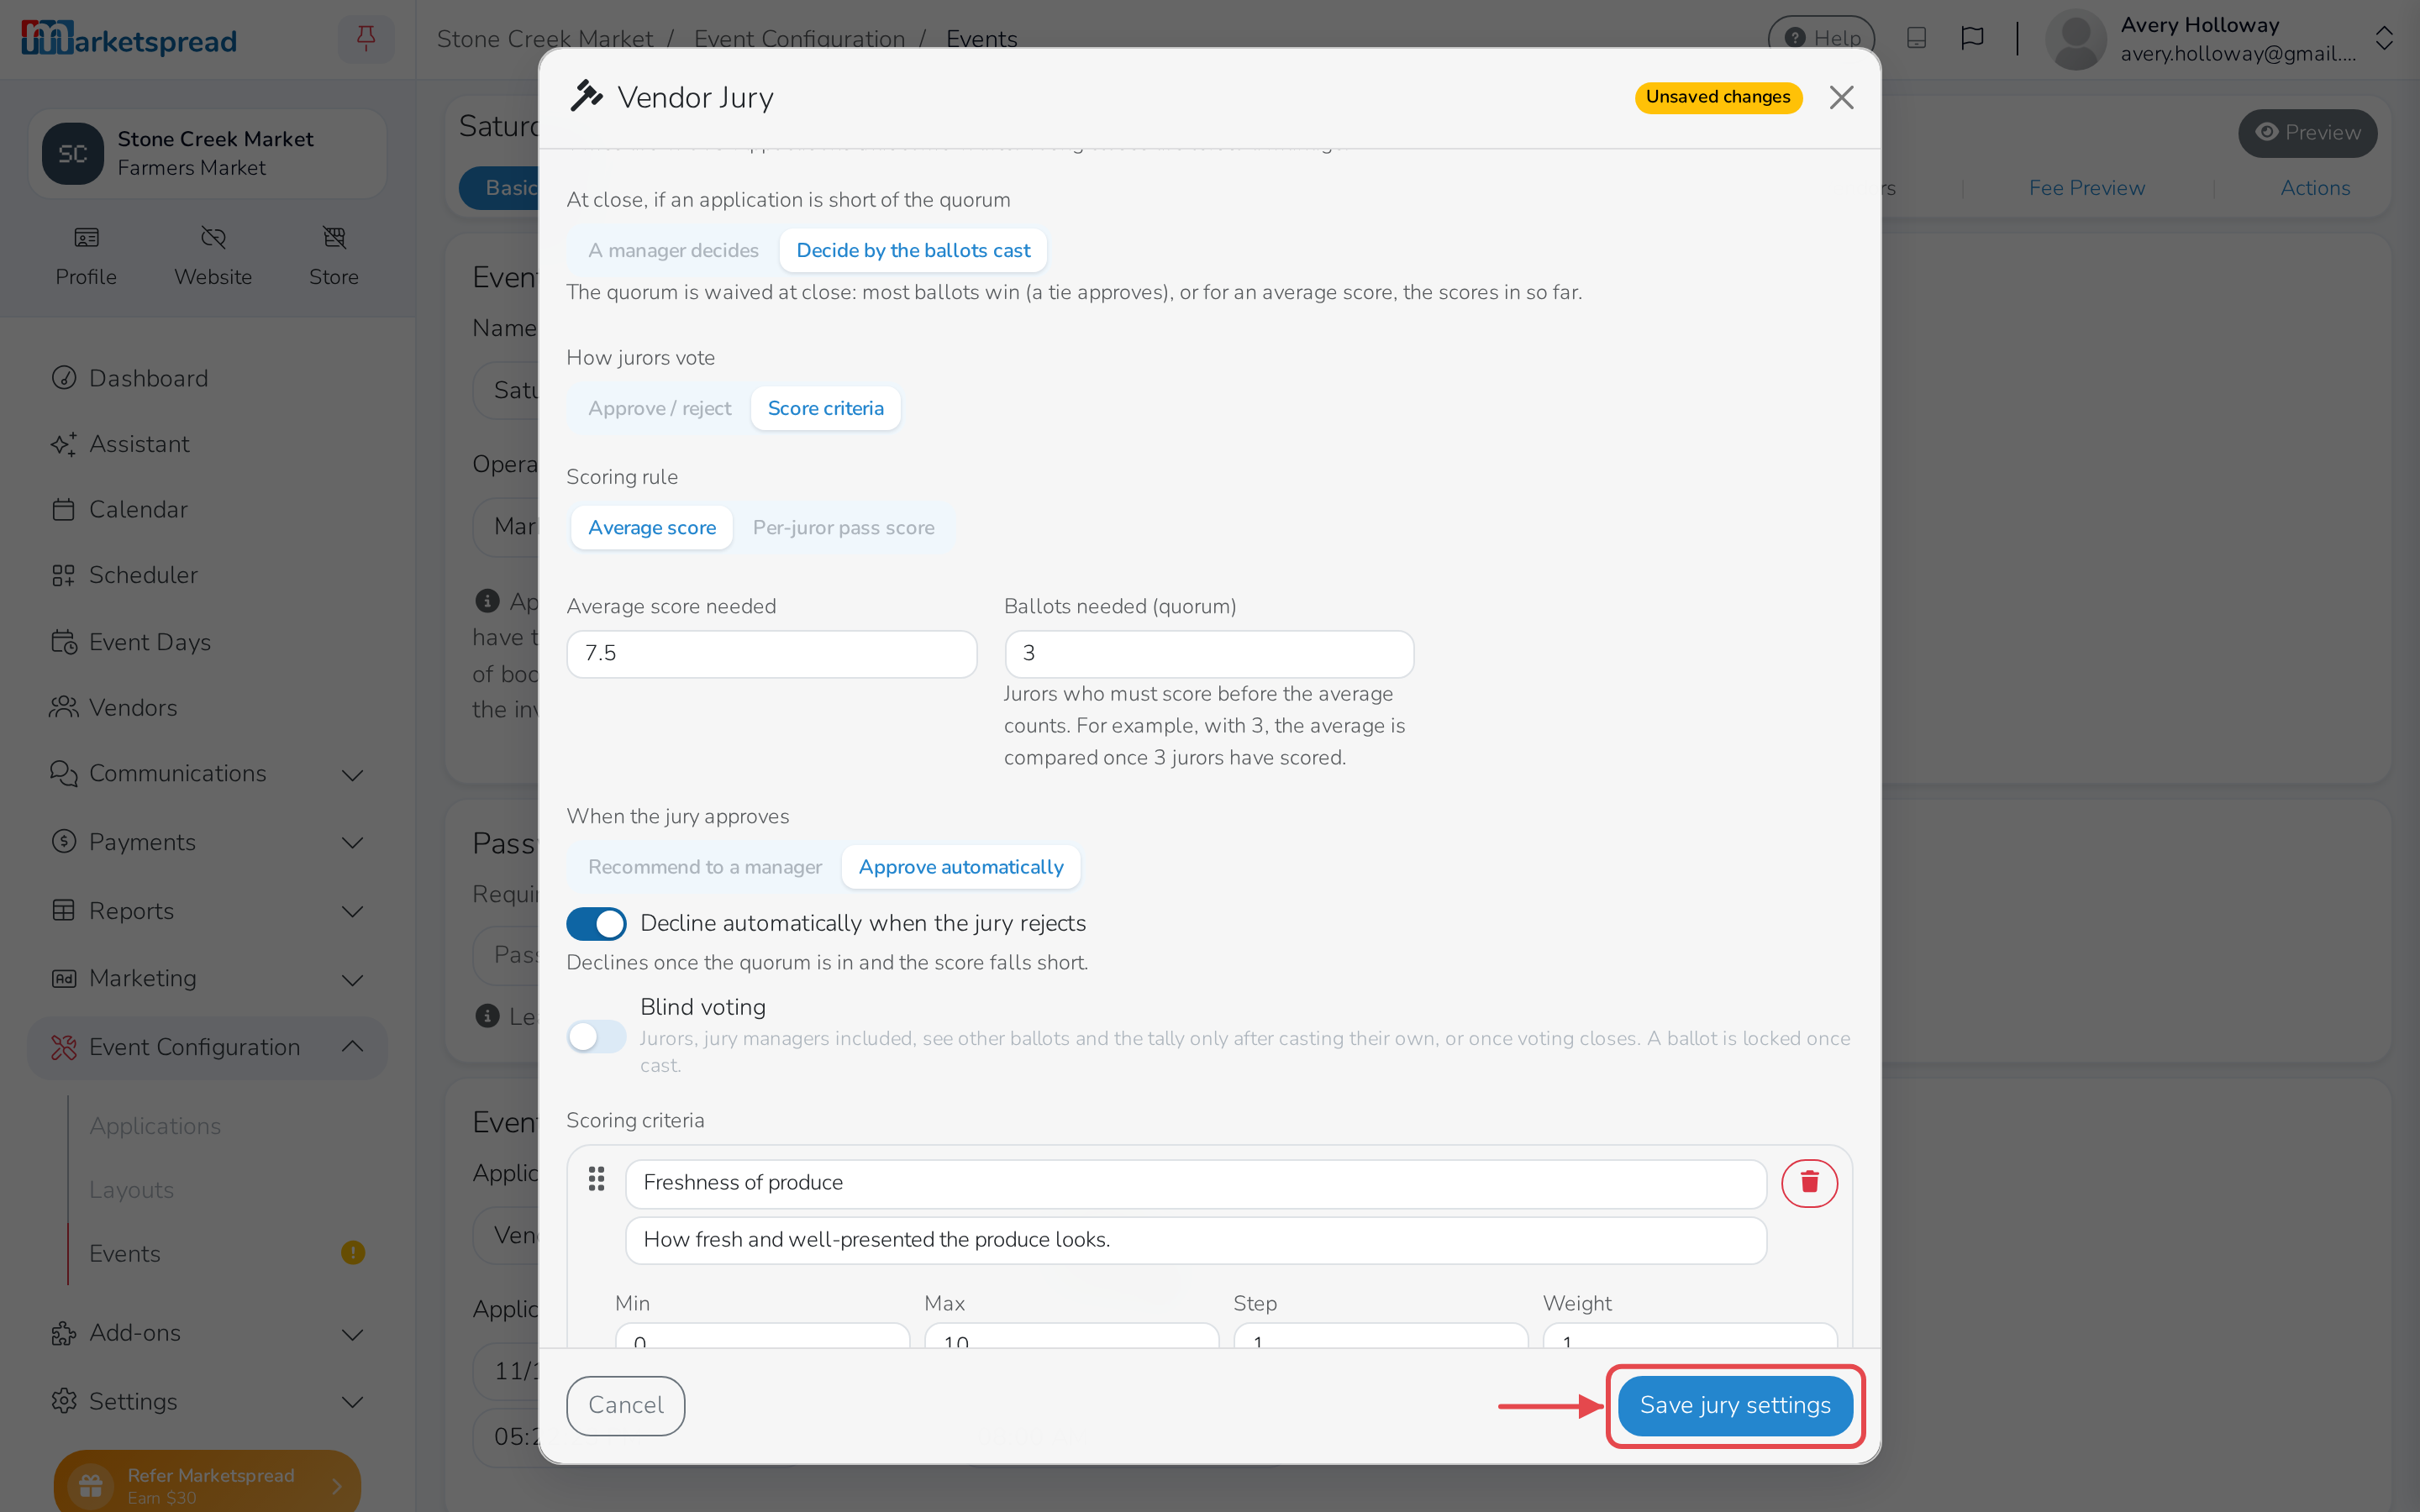
Click Save jury settings.
Good to know
Changing these settings needs the Vendor Jury manage permission for every event in your market, plus permission to edit every event that shares this application — a change here can reach applications beyond this one event. Someone with just the vote permission can see the settings but not change them.
Click Preview ballot, next to Vendor jury, to see exactly what jurors will vote on without casting a real ballot.