Marketpress is our website hosting service. Turn it on here to get your market its own website, built from a ready-made template.
Activating your Marketpress Website
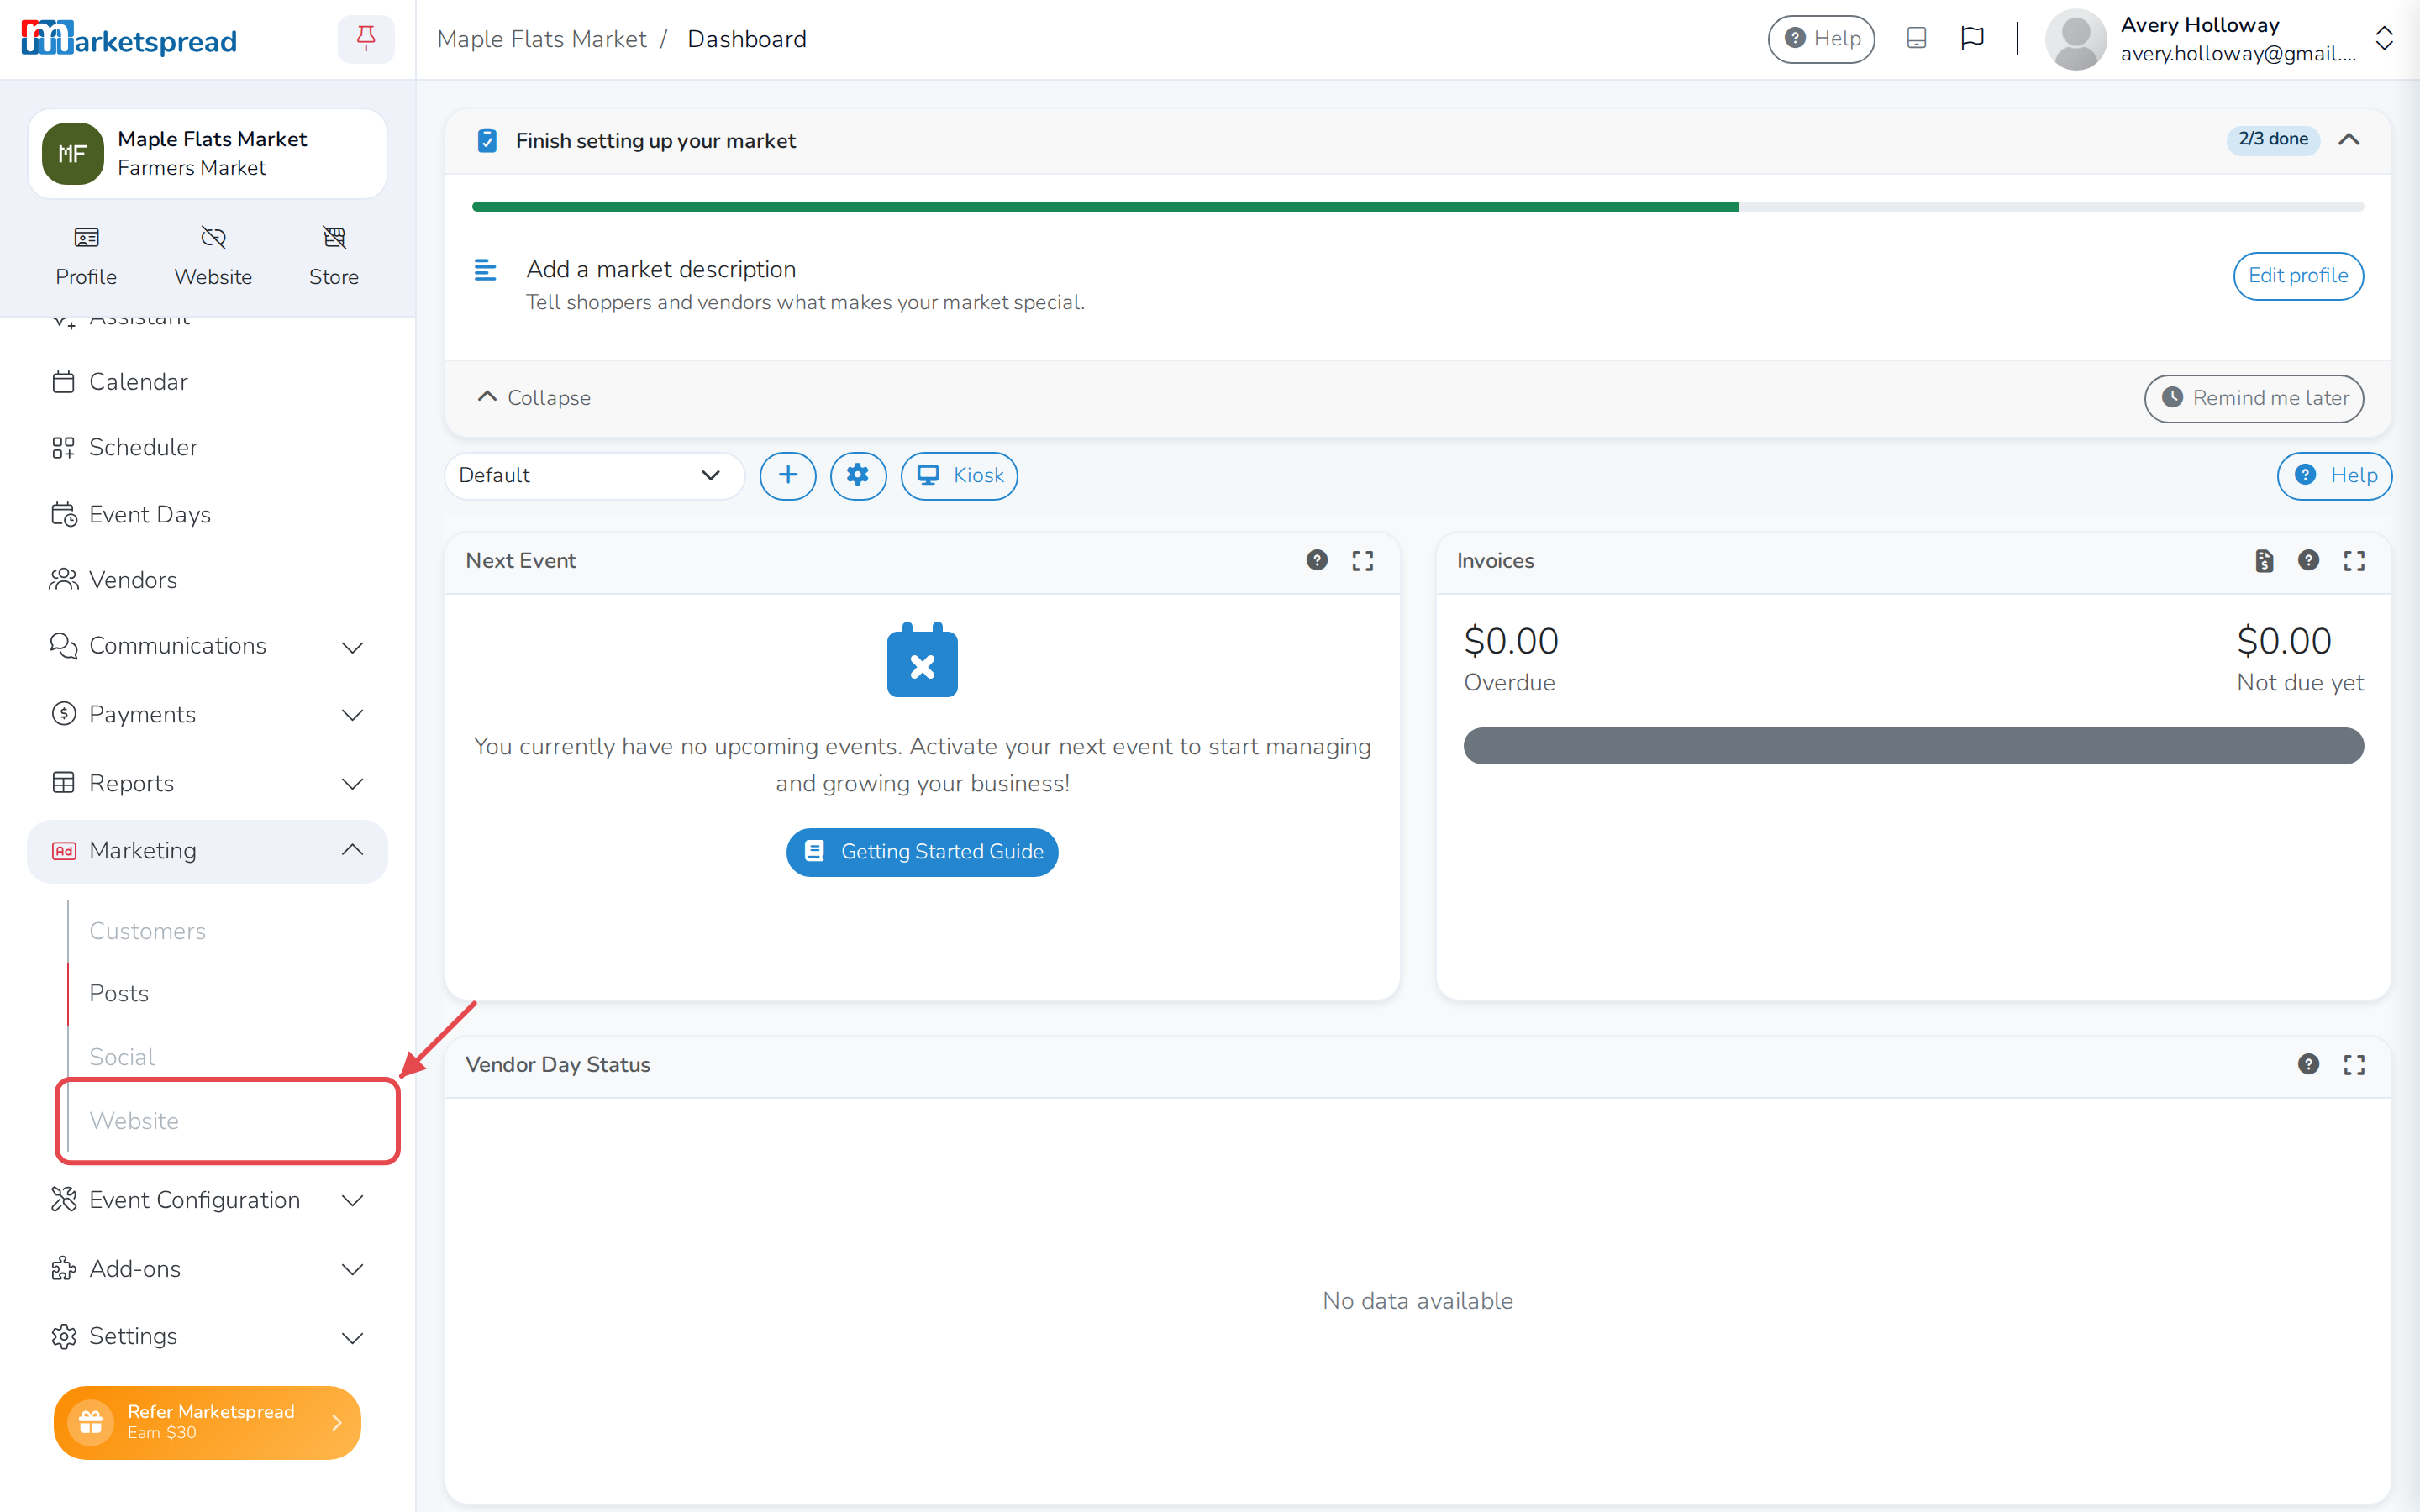
To get started, open Marketing in your dashboard's lefthand sidebar, then click Website (see below).
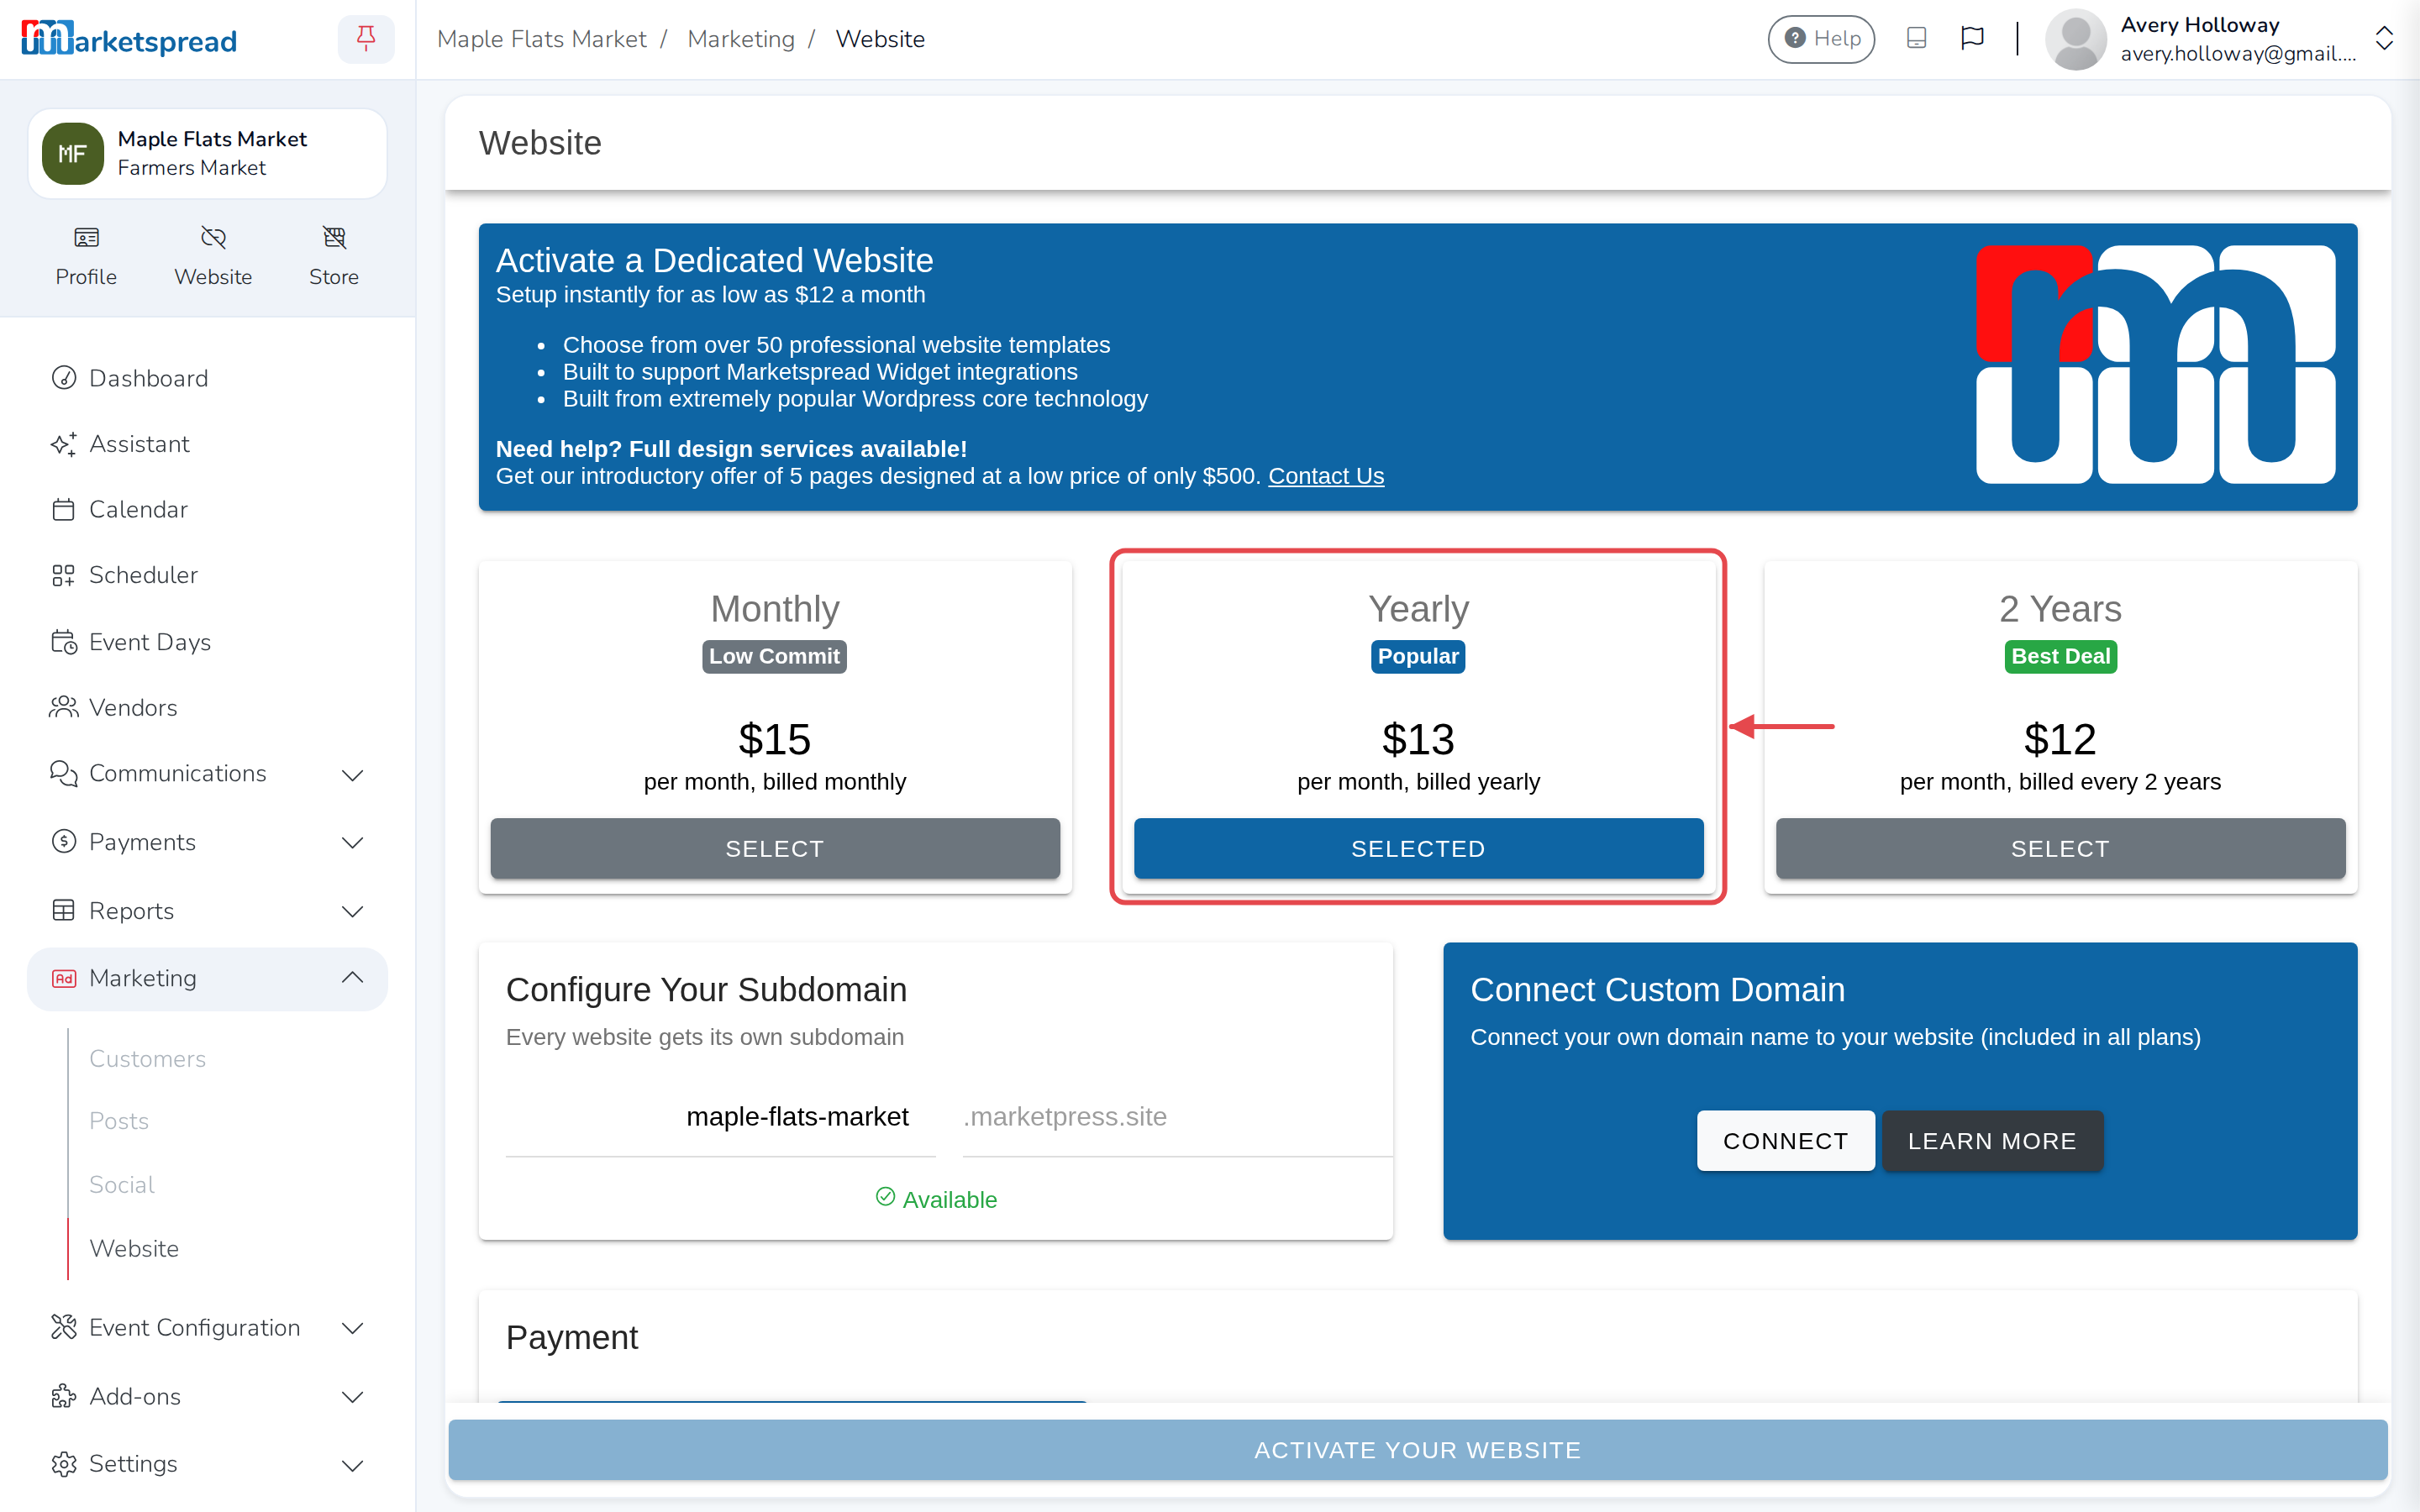
Select the plan that best fits your needs. For the purposes of this support walkthrough, we will keep the Yearly option selected. To change the selection, click one of the other grey Select buttons (see below).
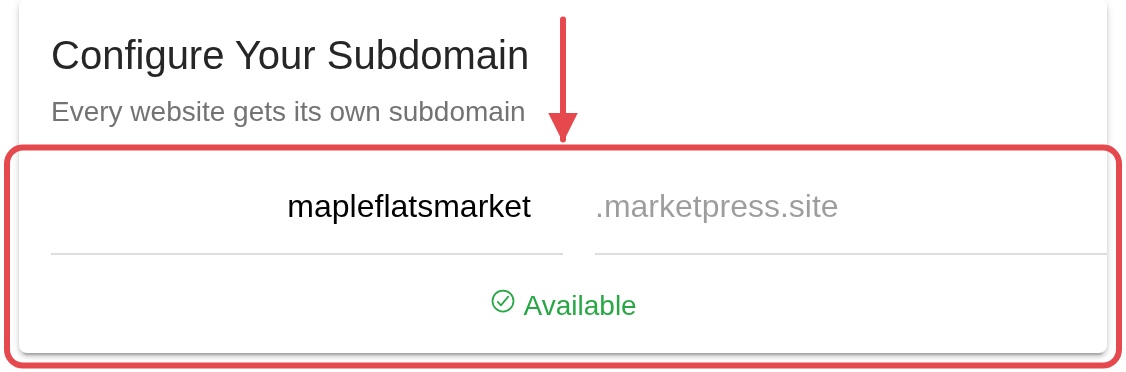
Every Marketpress account includes a configurable "marketpress.site" web address. This is the address your customers use to find your webpage. By default, it is your market's name with any spaces replaced with dashes. You can update this to anything you would like — for example, you can remove the dashes (see below).
If you have your own domain name, regardless of where you bought it (GoDaddy, Google, etc.), you can direct it to your Marketpress website too. A custom domain is not required — you can keep using your "marketpress.site" address on its own.
To point your own domain name, click Connect in the Connect Custom Domain panel (see below).
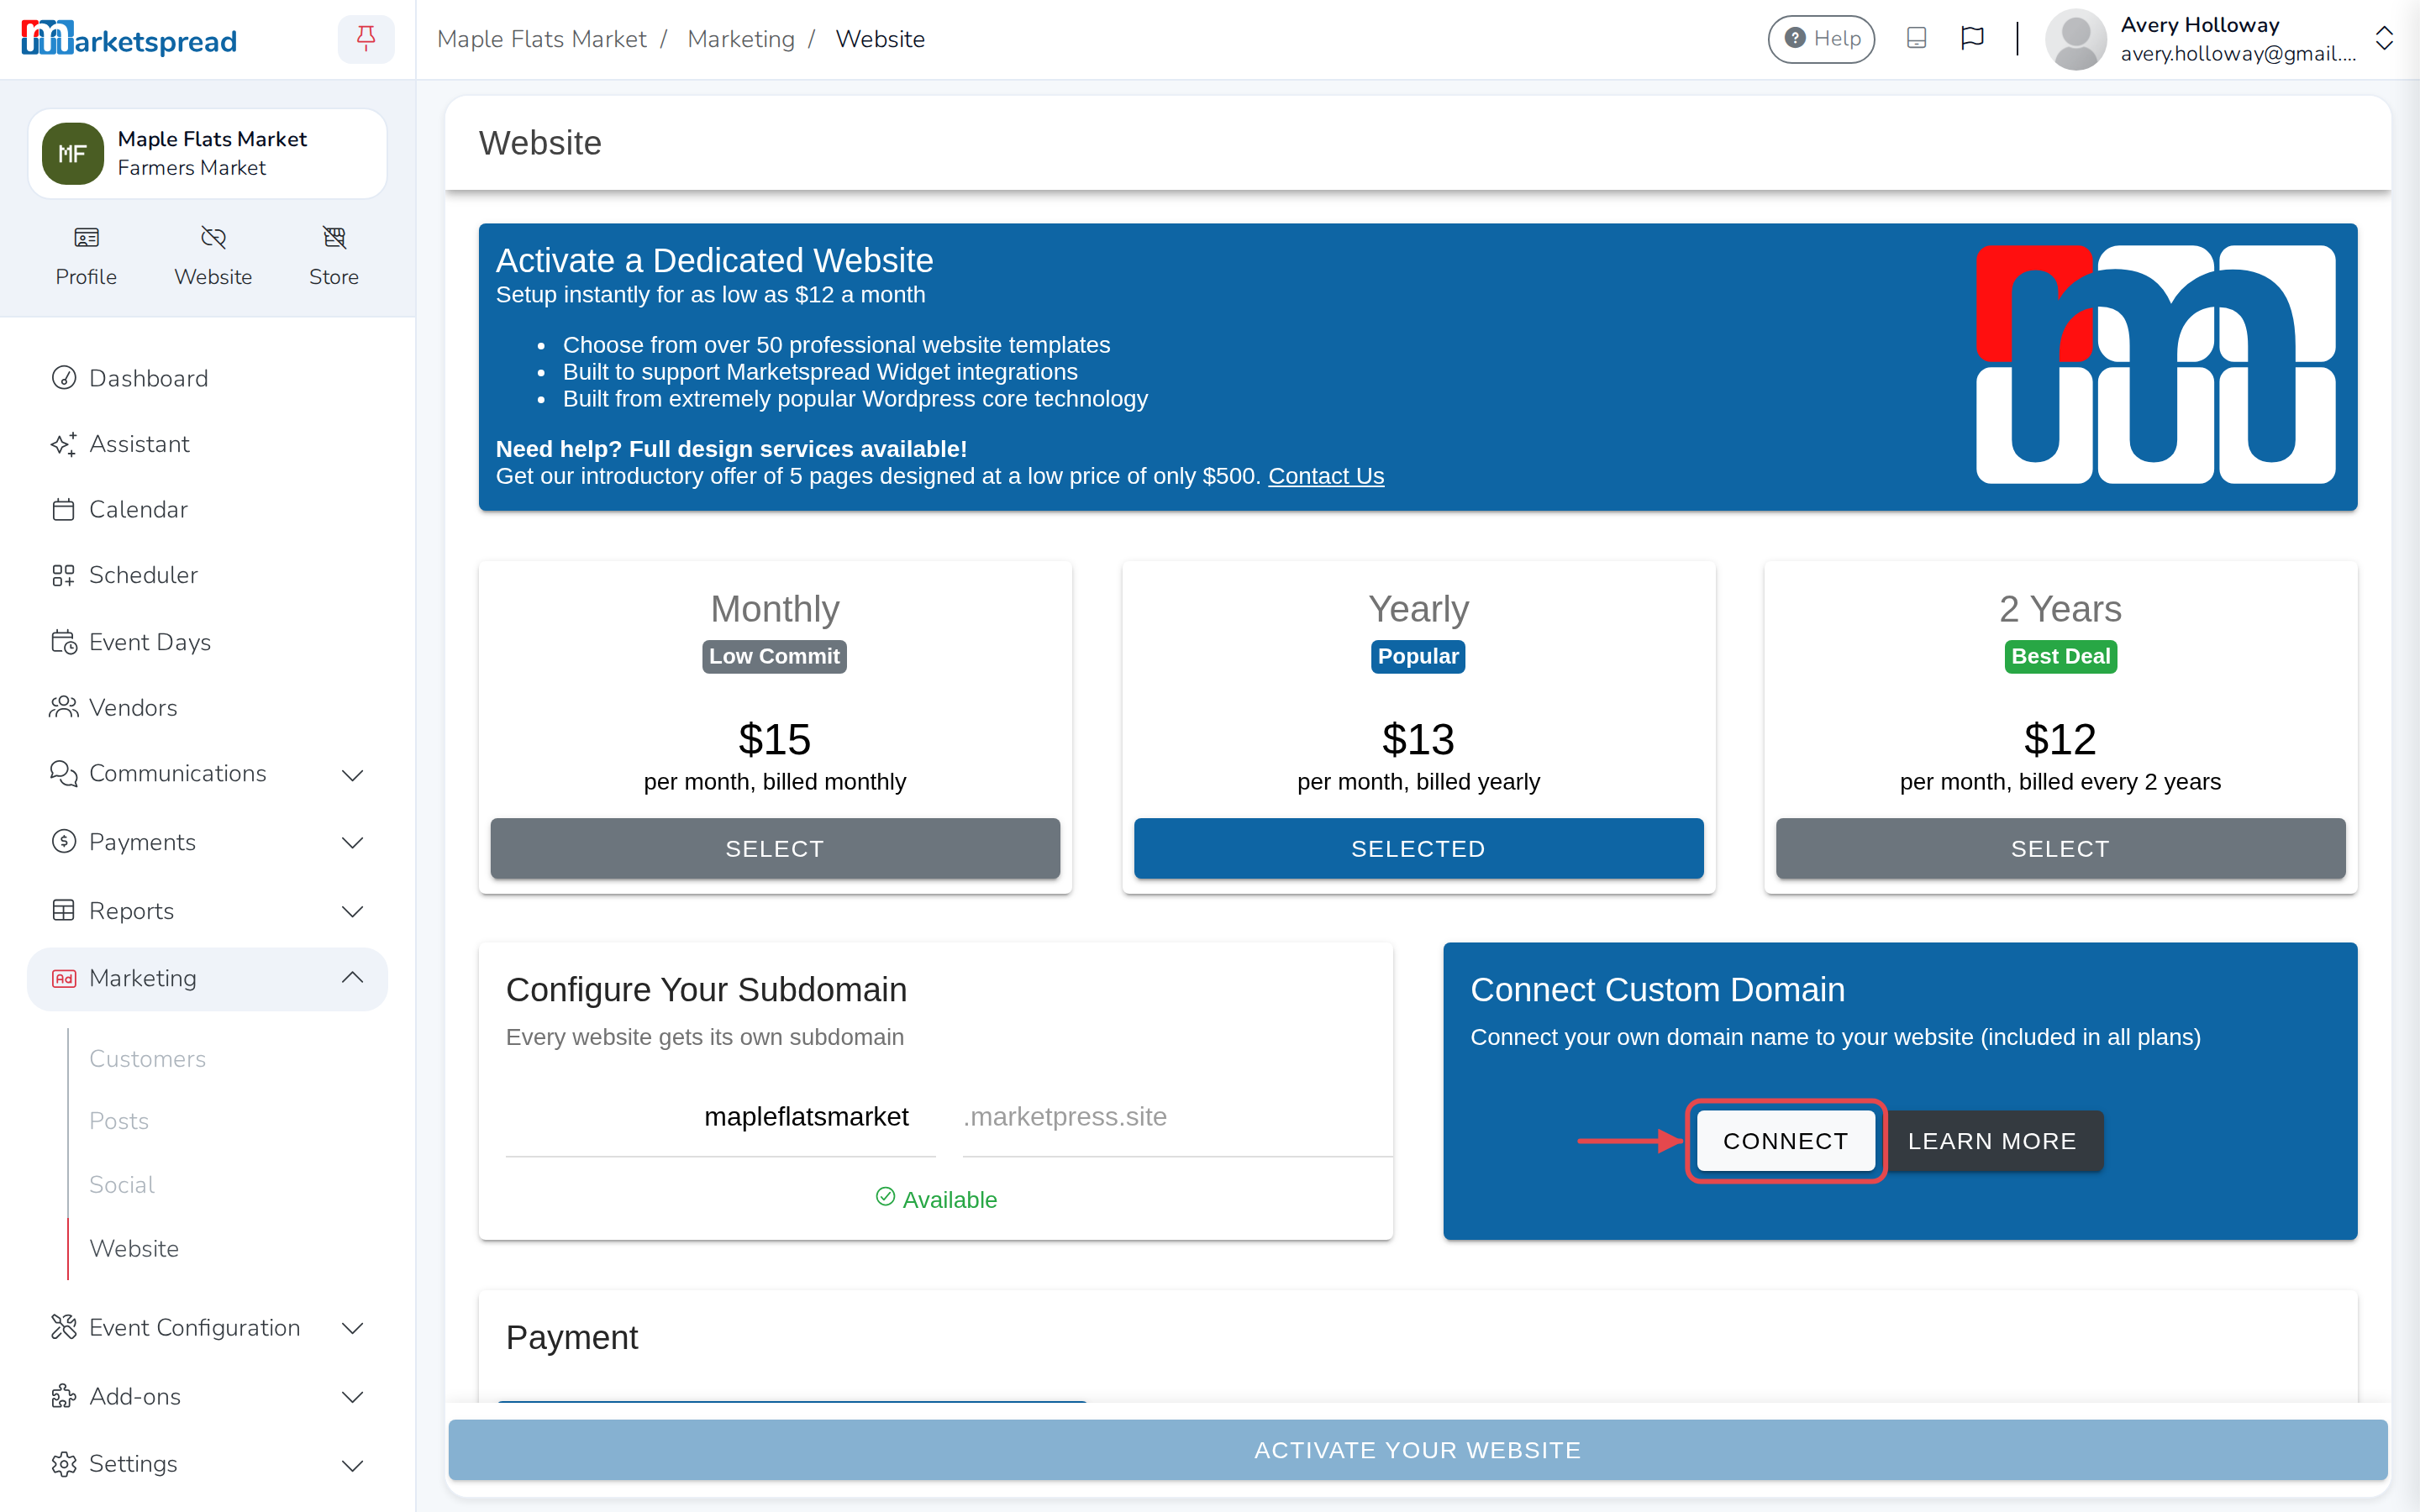
Clicking Connect opens a field for you to enter your custom domain. Marketspread checks whether it's available to connect (see below).

To activate your site, scroll to the bottom of the page and enter your payment details. The Activate Your Website button stays disabled until every required field, including your card details, is filled in (see below).
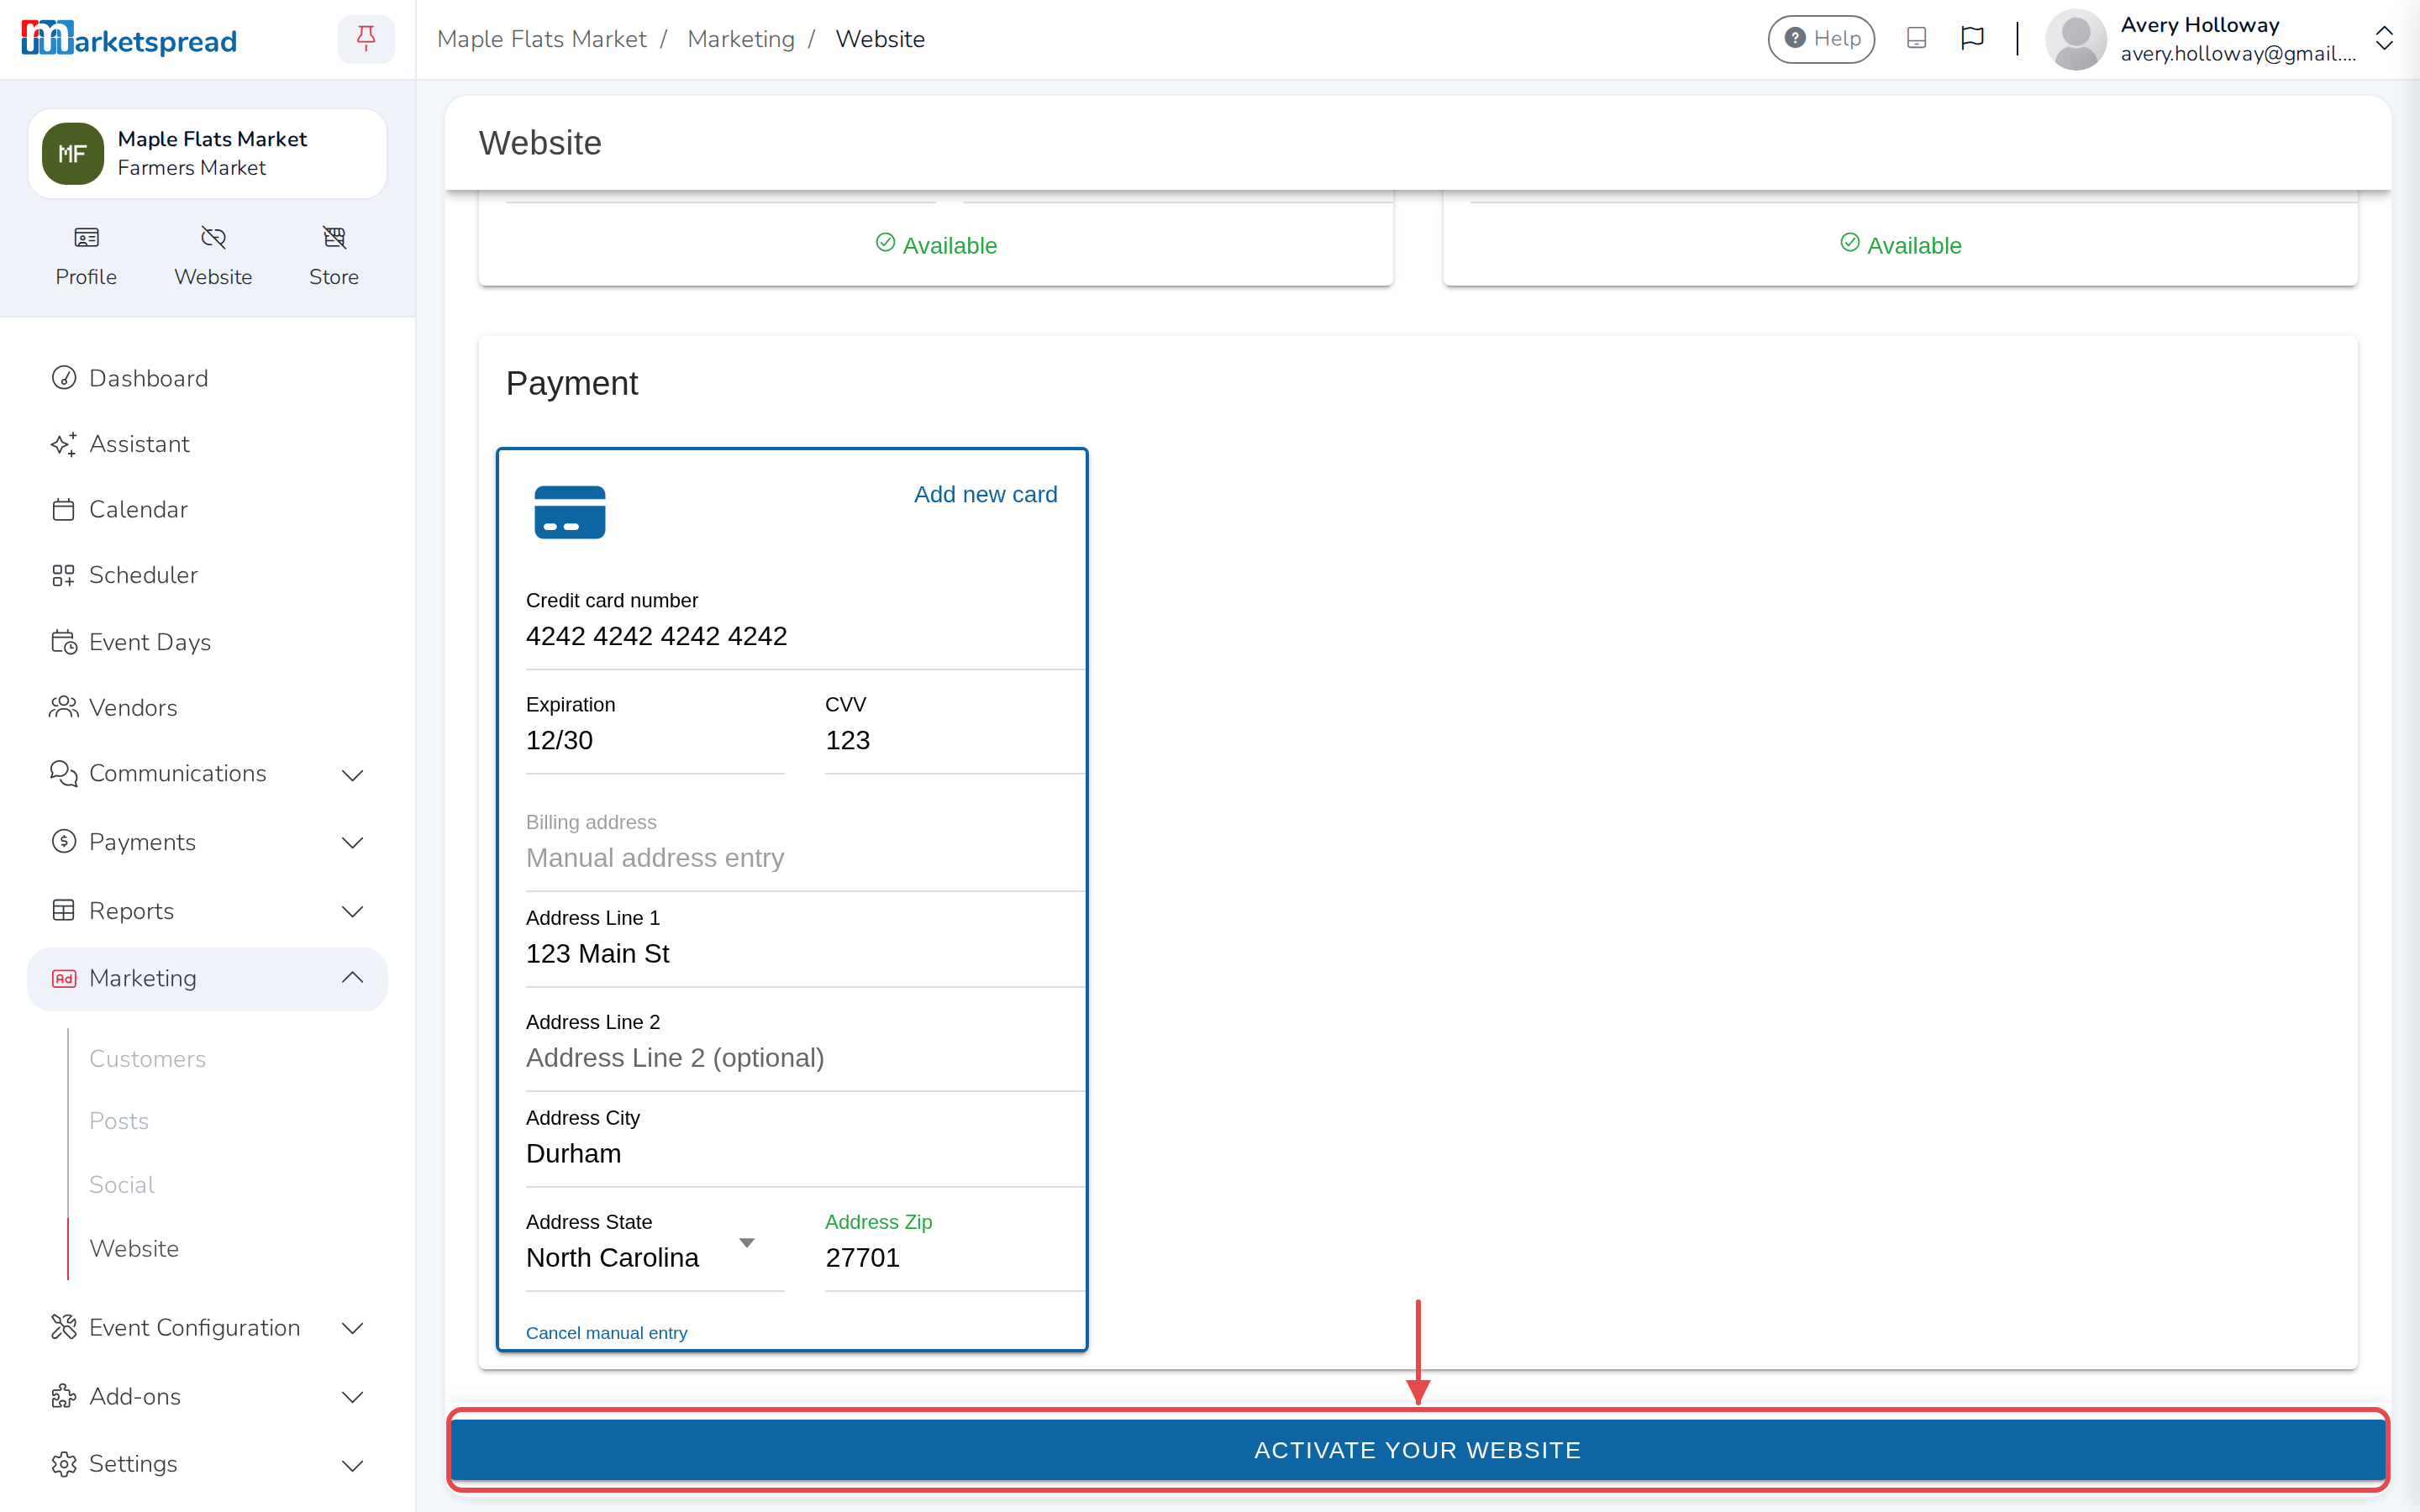
When everything is filled in, click Activate Your Website to complete the activation.
Selecting your Website Template
After activating your website, a Credentials window shows your website editor username and password. It closes for good once you dismiss it, so use a password you'll remember — you'll be asked to change it the first time you log in.
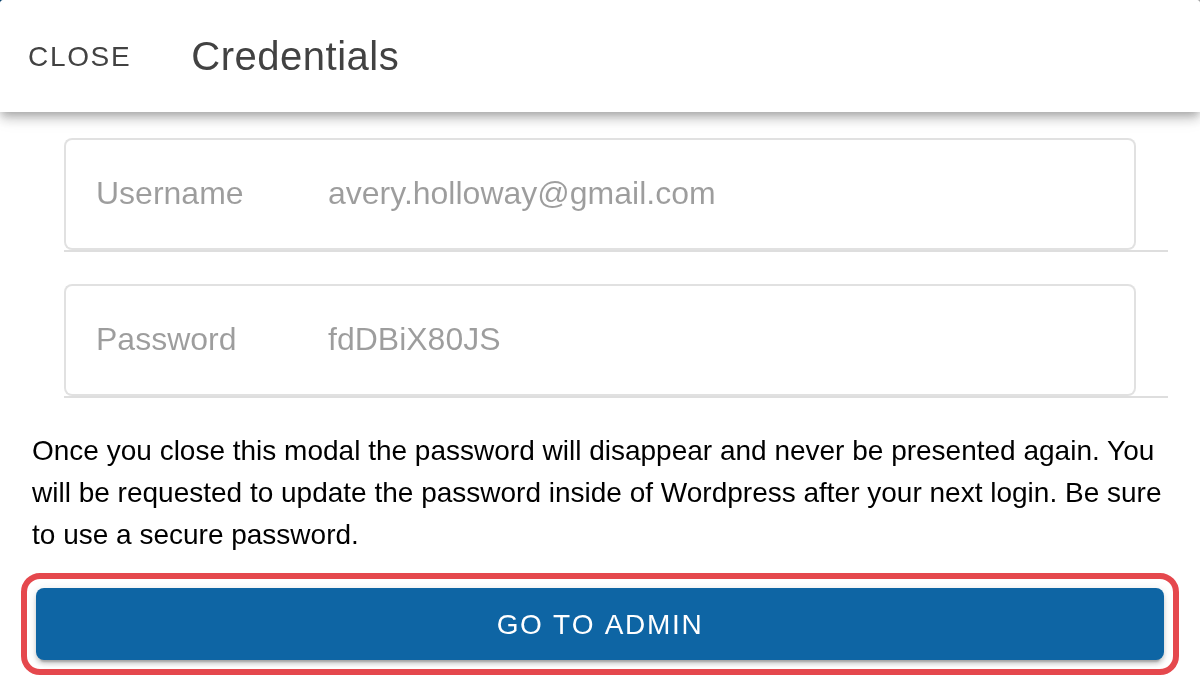
Click Go to Admin to open your website editor and choose a template.
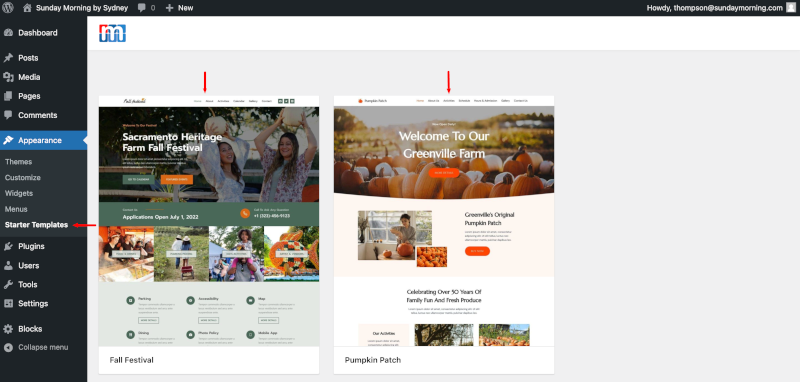
In the website editor, open Starter Templates from the lefthand sidebar.
Currently, we offer two templates:
Fall Festival - designed for markets and events
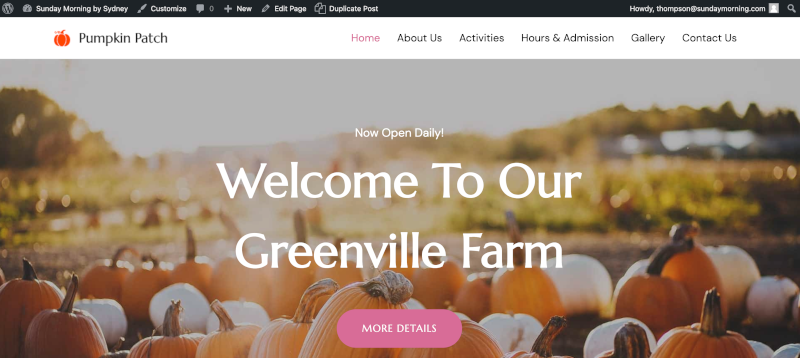
Pumpkin Patch - designed for farmers, food vendors, and any other small business type
More templates are available from the full list. Email us at [email protected] if you would like one of those instead.
Click a template to choose it.
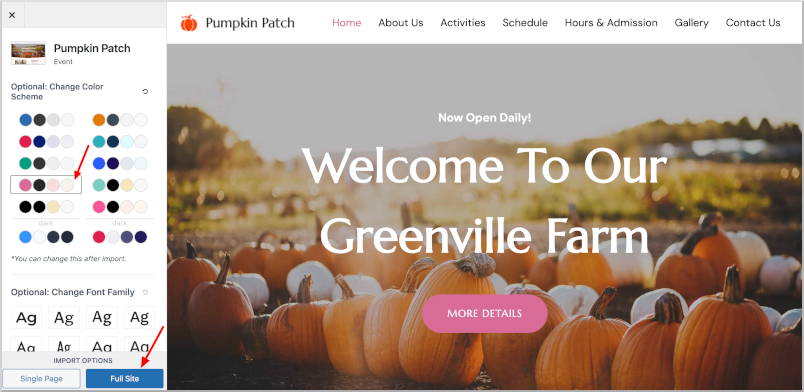
You'll see a preview of the template, with color and font options on the left. You can change these later too.
Click the blue Full Site button at the bottom left to start the import.
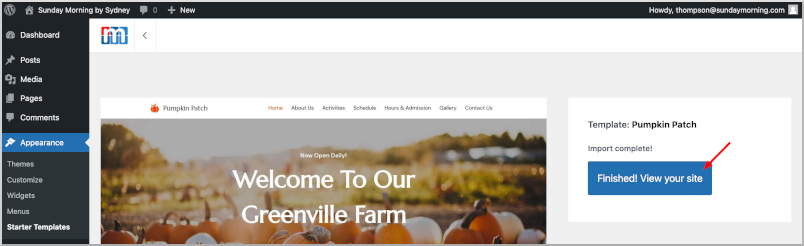
Importing can take a few minutes. When it finishes, click Finished! View your site.
Your website opens in the editor. From here, you can change the text and images for your market, event or business.
For help updating the template, email us at [email protected]. We have designers who can help.