


The Booth Booking area on your dashboard lets you book a vendor into a booth without opening a separate window. You choose the event, pick a vendor, pick which days, then pick a booth on the map — all in one place.
Book a vendor into a booth
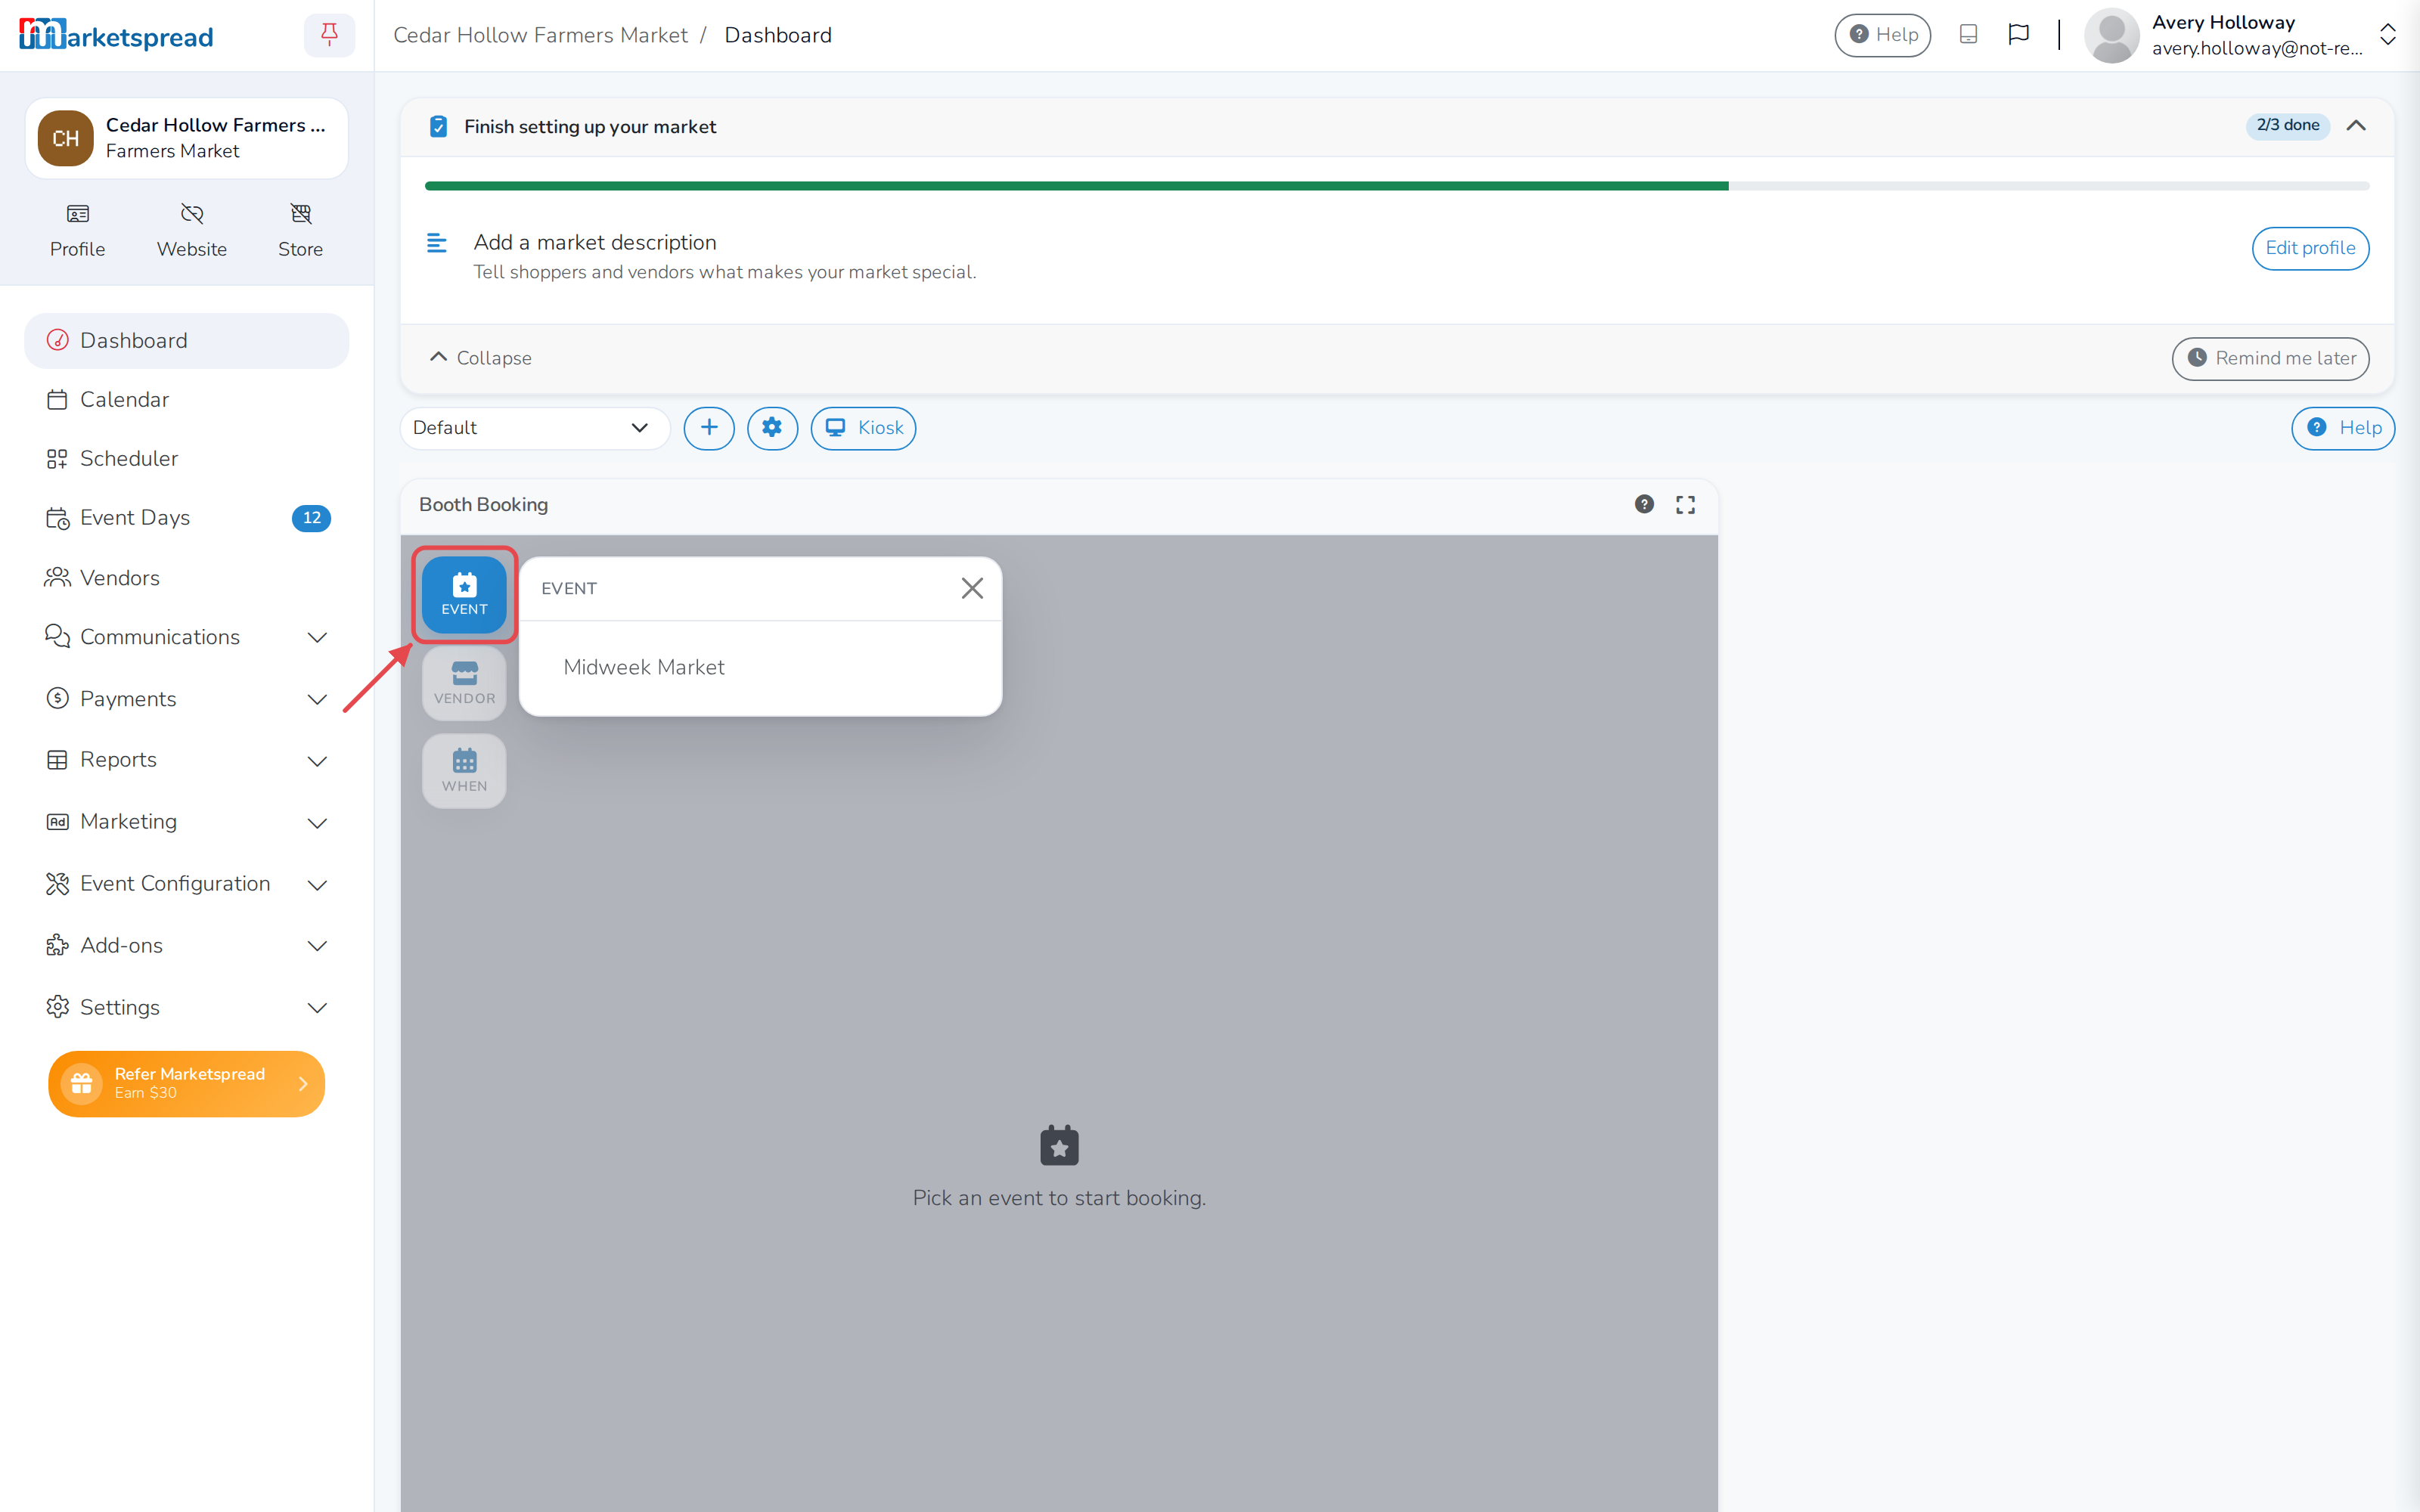
- Open your market dashboard and find the Booth Booking area. Click Event and choose the event you're booking for, if it isn't already showing.
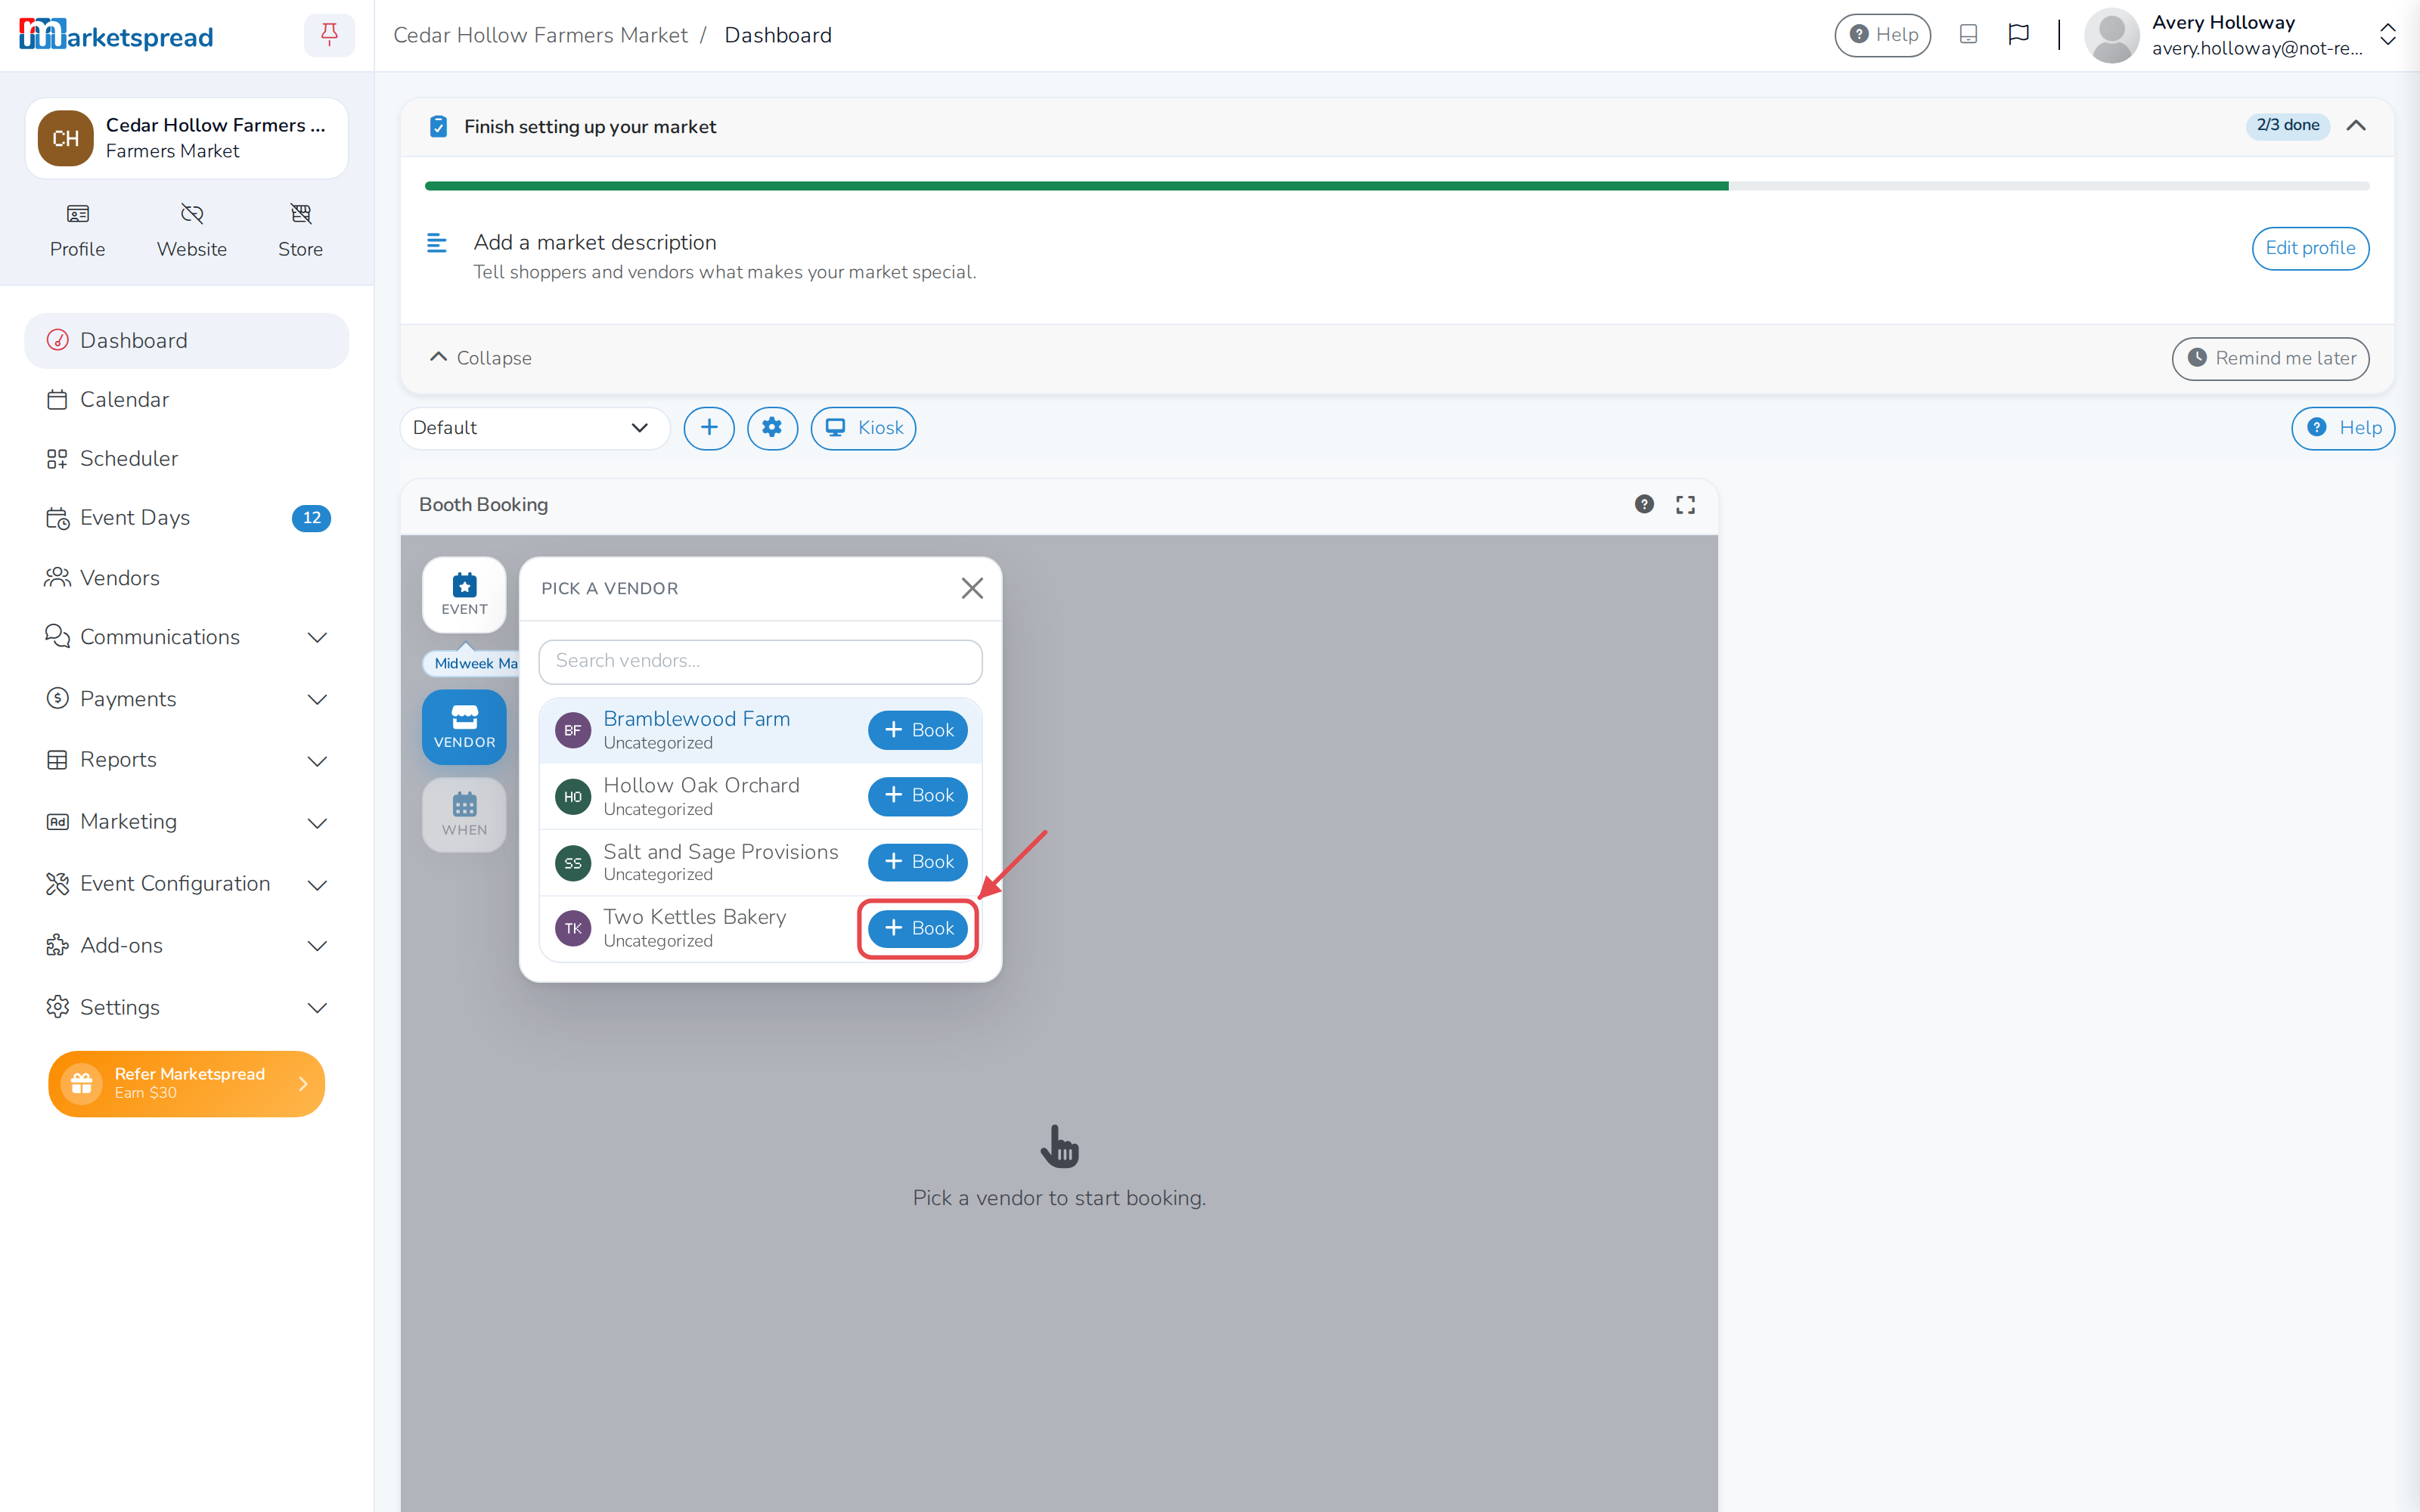
- Click Vendor, if it isn't already showing. Find the vendor you want — you can type a name in the search box to narrow the list down — and click Book next to their name.
- A calendar opens so you can pick the day. See Choose which days to book below for how it works. When you're done, click Select.
- The map opens with your vendor and the days they're booked for already set. Booths outlined green are available, gray booths are already taken, and the price shows right on the tile. Click an open booth to add it to the booking — it turns blue. Click it again to take it back off, or click another booth to add that one too.
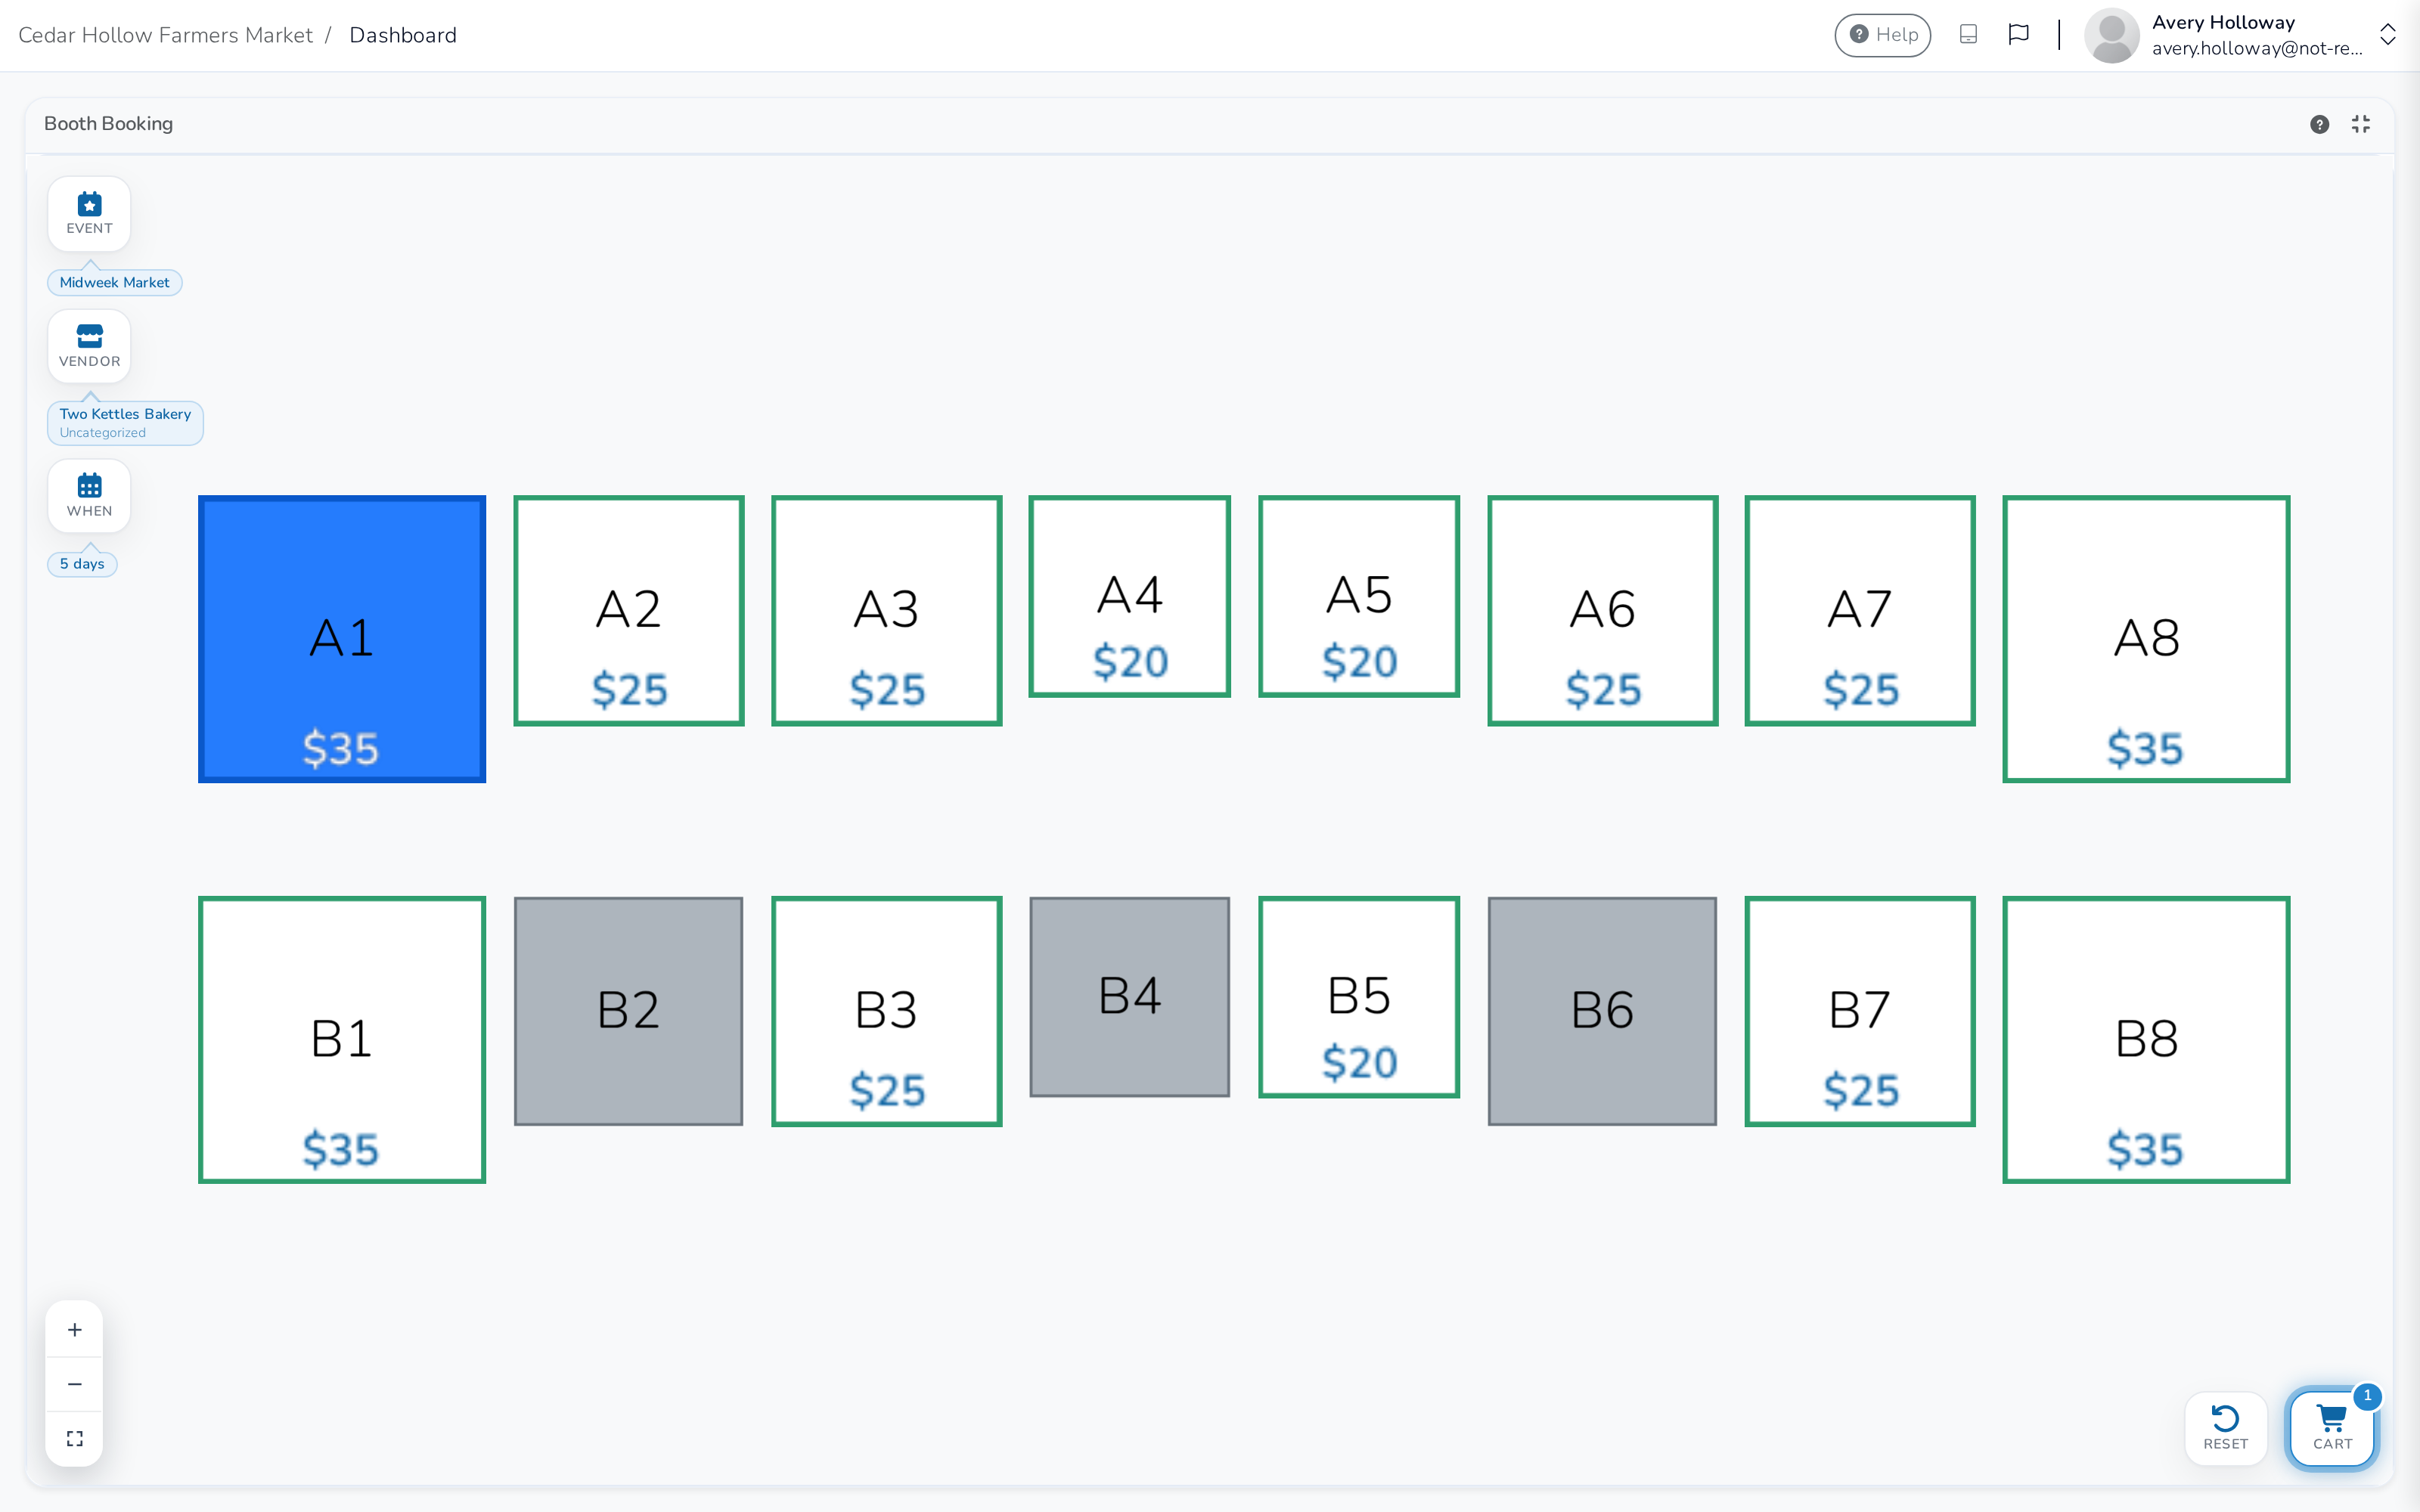
- Click Cart in the bottom corner to see what you've picked, its price, and the total.
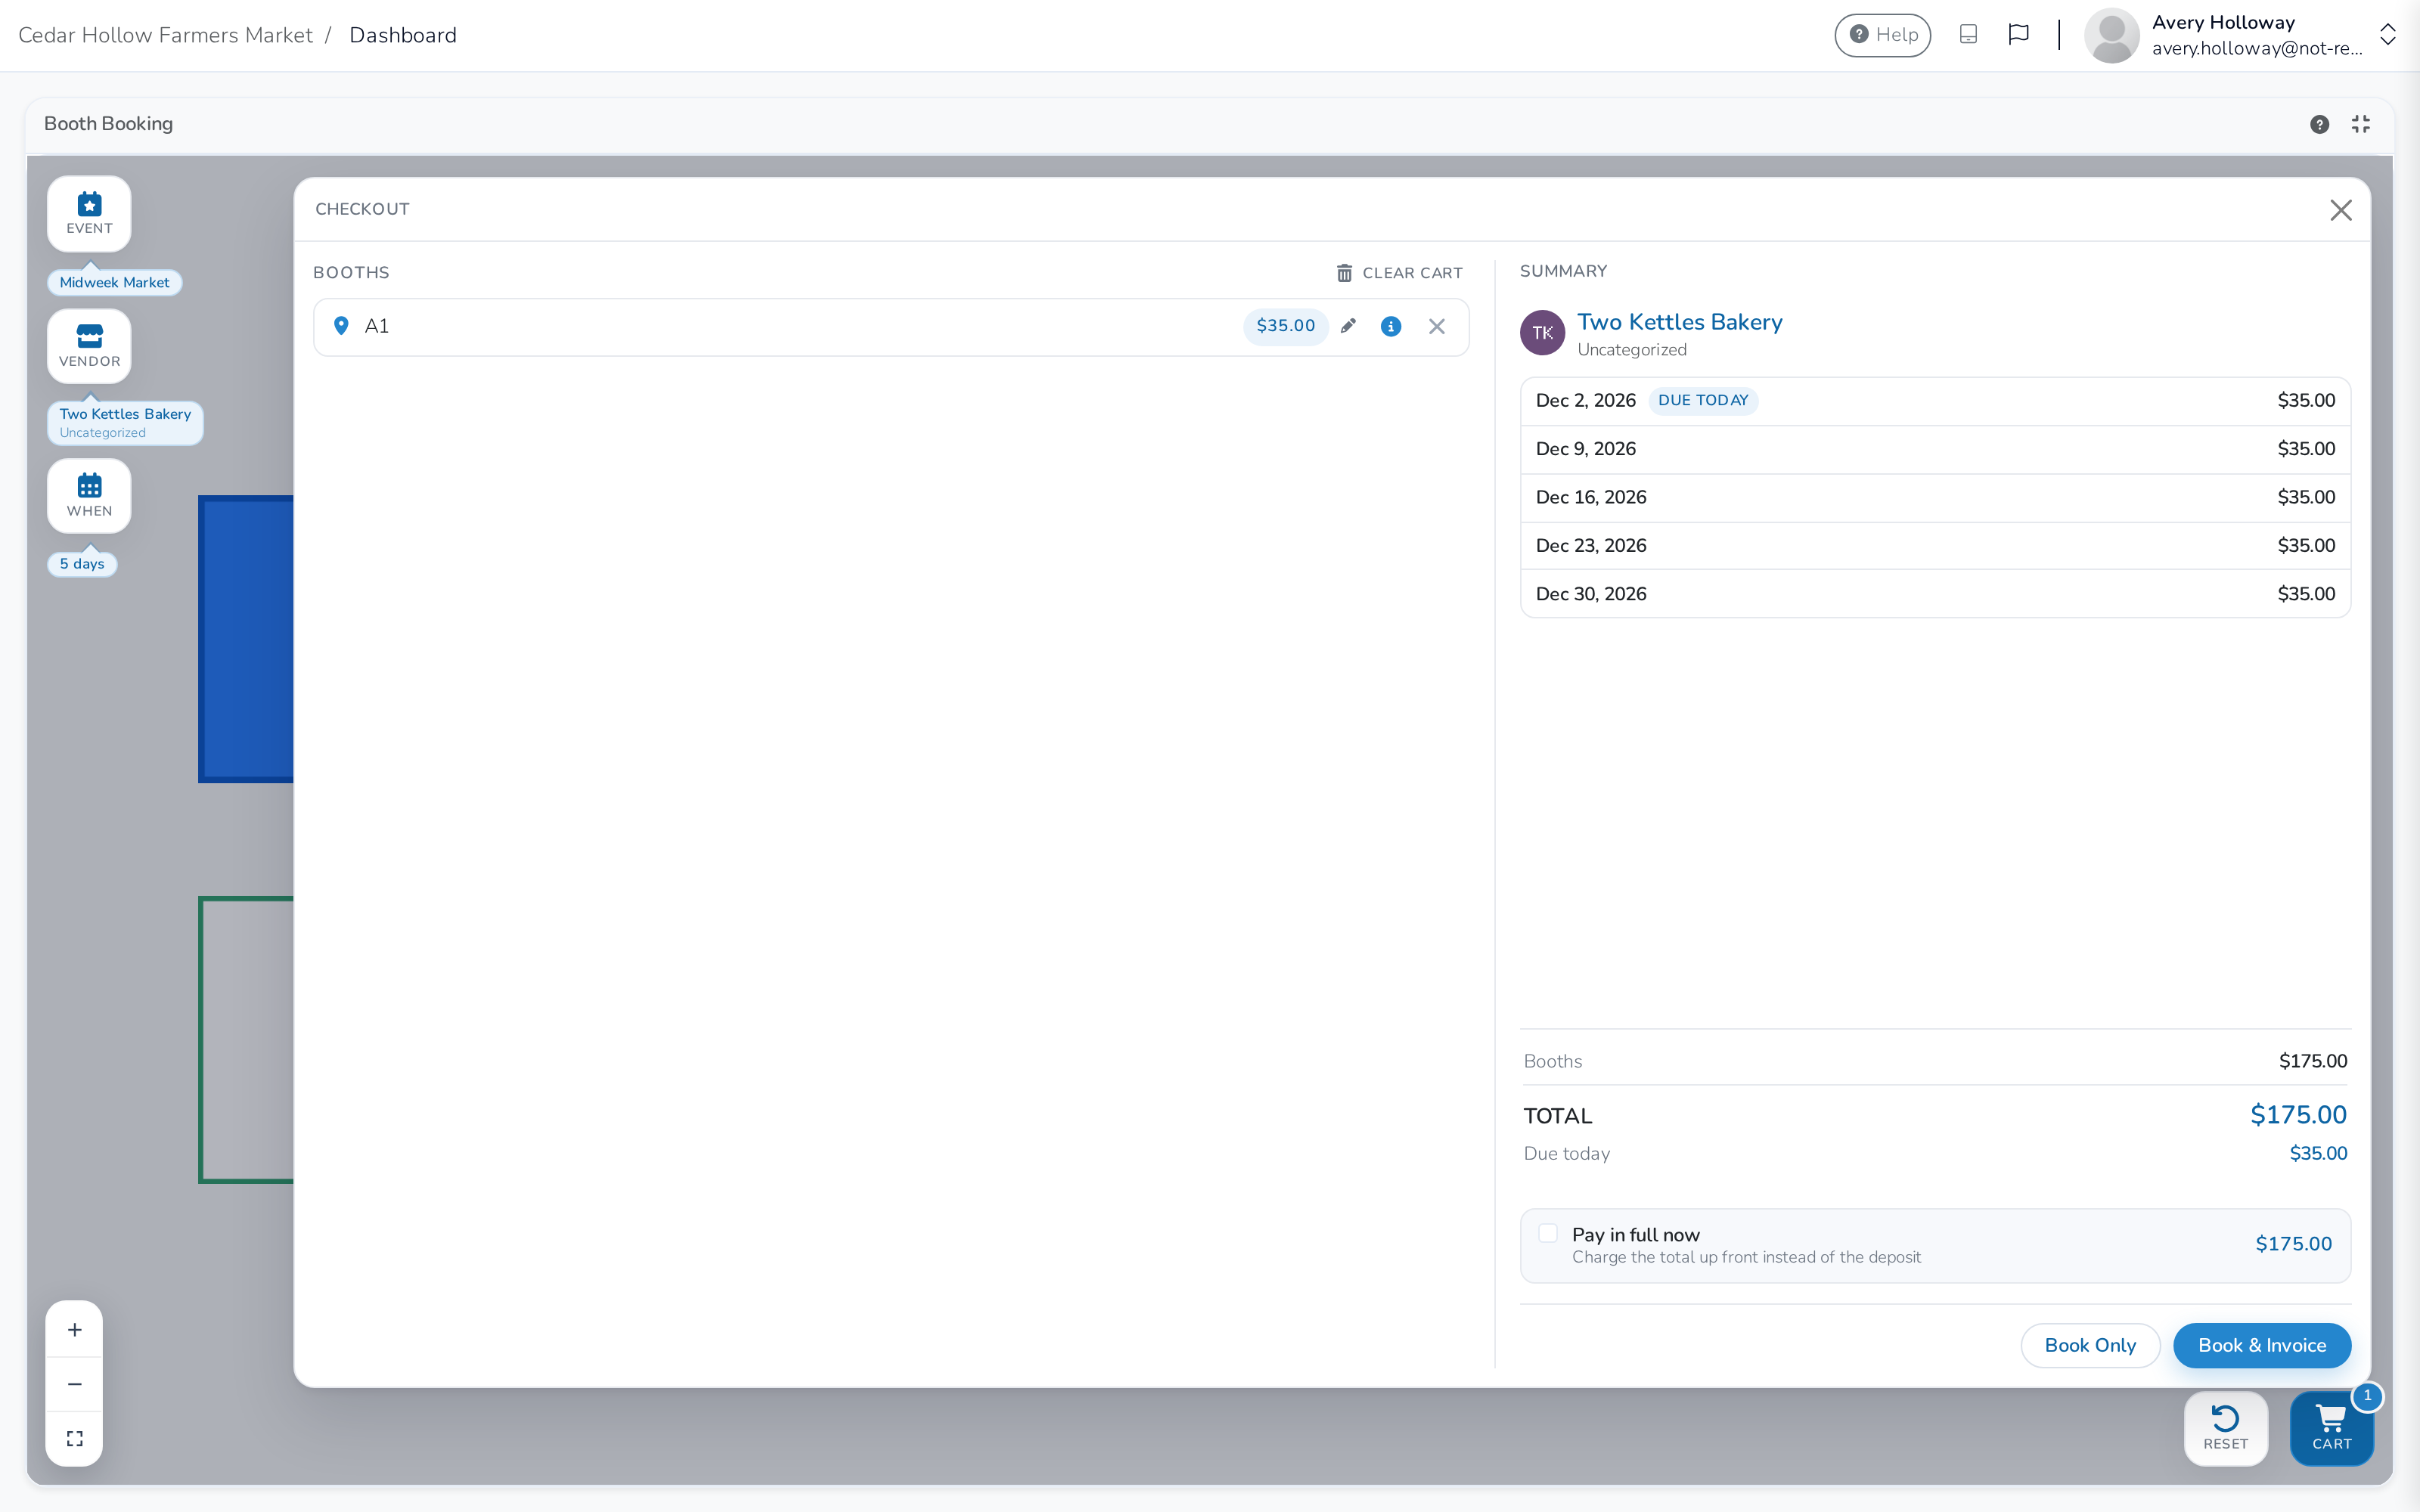
- Click Book Only to reserve the booth, or Book & Invoice to reserve it and send the vendor an invoice at the same time.
After you book, a short confirmation appears and the map stays open, so you can move straight to the next vendor.
Choose which days to book
Clicking Book opens a calendar. Instead of one month at a time, it lays out the whole event at once, with every month that has market days shown side by side. If there are a lot of months, the calendar wraps and scrolls, so you can see the whole run without paging back and forth.
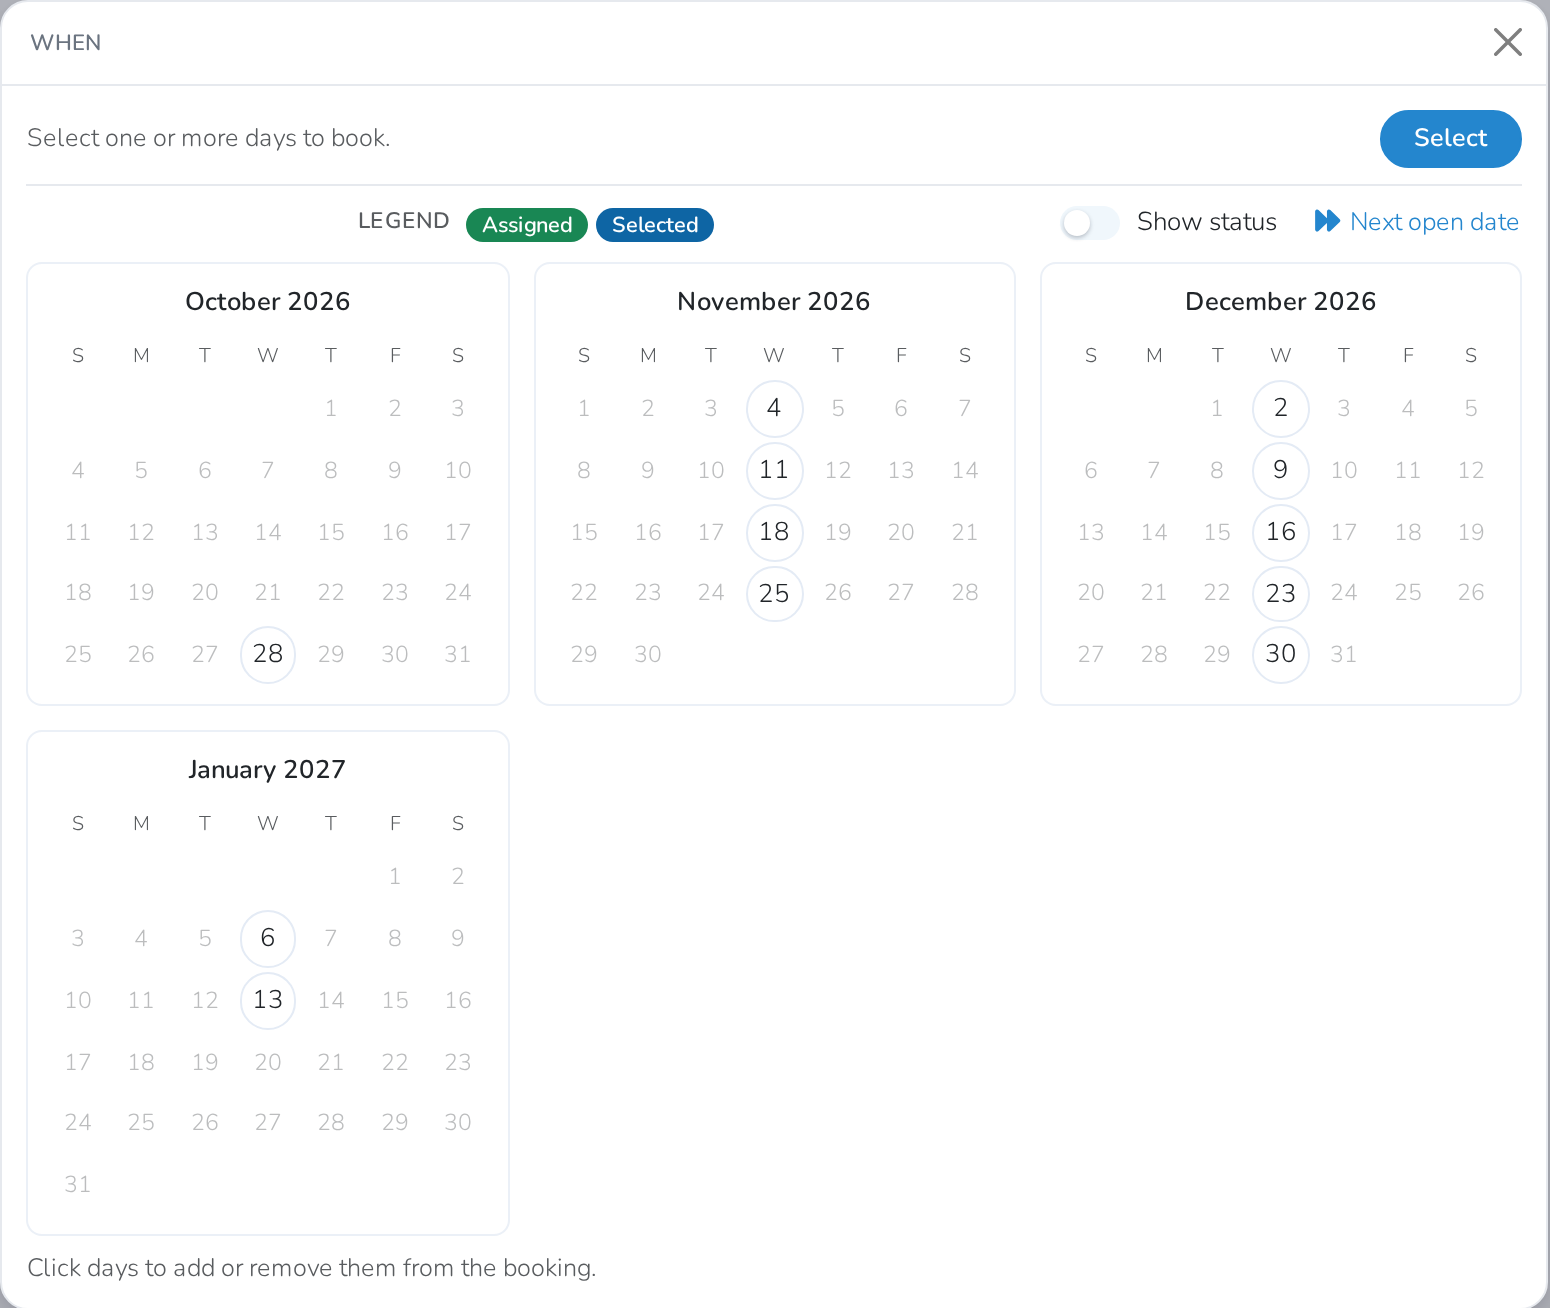
If your market runs on more than one schedule, buttons above the calendar let you pick a term — Day, Week, Month, or Event. Only the terms that fit your market's schedule appear, so a market that meets one day a week won't show a separate Week option. The term you pick decides what a single click grabs:
- Day — clicking a day adds just that day.
- Week — clicking any day adds that whole week.
- Month — clicking any day adds that whole month.
- Event — clicking adds the entire event.
Each market day is a circle with its date in it.
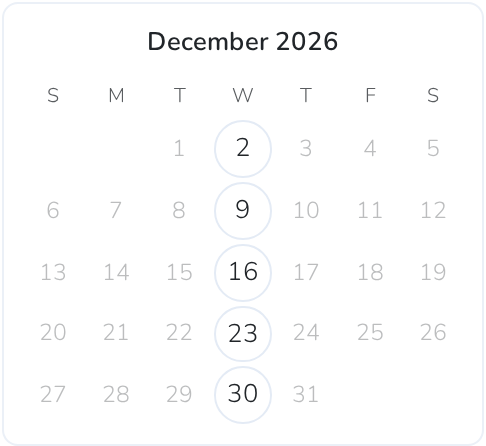
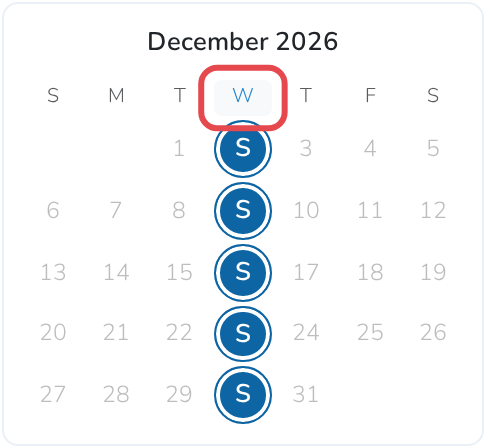
A day the vendor already holds a booth on shows green. The day or days you've picked show blue, with an "S" in place of the date. A Next open date link jumps you to the next day that still has space.
Turn on Show status to see how full each day is — a colored ring around it, with the exact count when you hover over it. It also shows which days this vendor is waitlisted, pending, accepted or rejected for. The legend explains each color.
There are also quick ways to add several days at once. Click a weekday letter at the top of a month, for example W for Wednesday, to add every one of that weekday in that month. Click a month's title to add the whole month the same way.
With the Day term you aren't limited to one day — click as many separate days as you like and they all book together in one action. Week and Month work the same way: pick more than one and they all go into the same booking. Event always books the whole run in a single click, since there's only one to pick. Whatever you've picked, the count next to Select keeps a running tally, like "4 selected of 24 days".
Good to know
- The Event, Vendor and When buttons each show what's currently chosen underneath them, so you can see the state of the booking at a glance.
- A folded corner on a booth means it has photos — click it to see them.
- Once a booth is in your cart, click the ⓘ next to it there to see its full details — photos, price and any amenities — without leaving the page.
- Click Reset, next to Cart, to clear the booking and start over.
- The gear icon on the widget lets you pin one event so the booking area opens straight to it instead of asking each time.
- Managing or cancelling a booking you've already made isn't available from the booking area yet.
- The older pop-up booking window still works if you prefer it.