


A reusable invoice term is a block of text — your payment policy, a deposit
requirement, a cancellation notice — that you save once and add to any
invoice instead of typing it out every time.
Add an invoice term
-
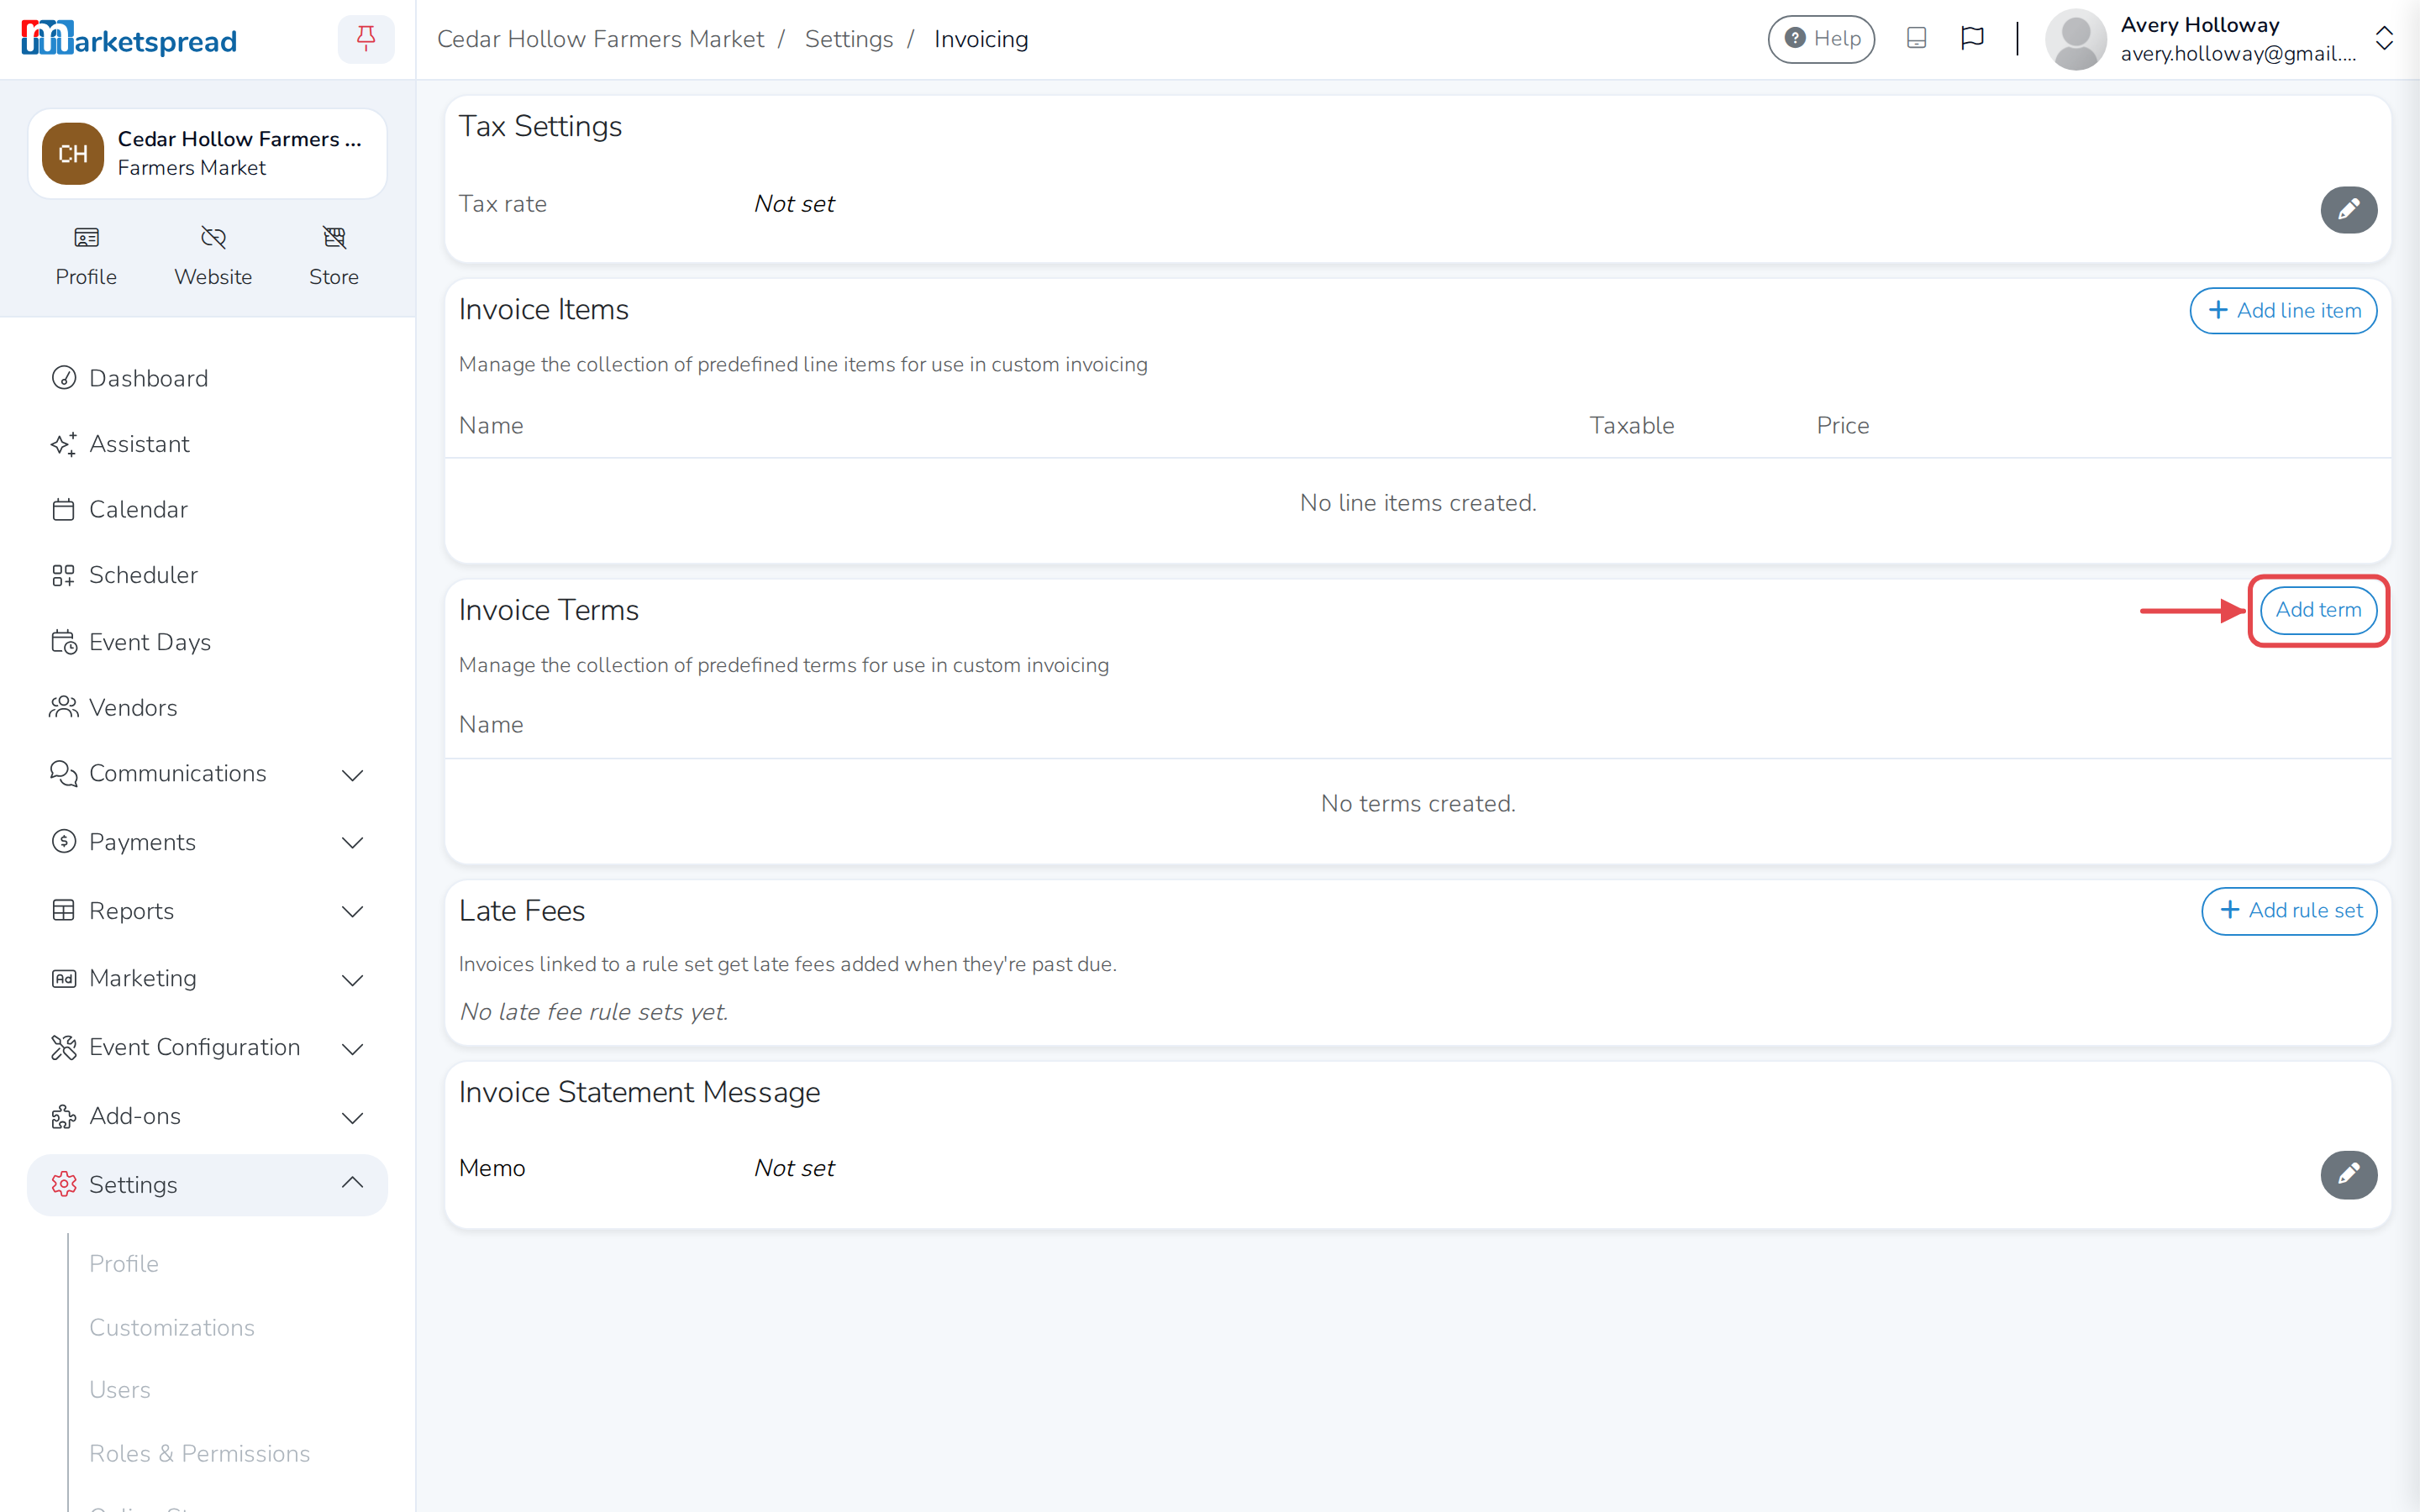
In the left-hand menu, click Settings, then click Invoicing.
-
Under Invoice Terms, click + Add term.
-
Enter a Name for the term and the Term text you want it to add to
invoices.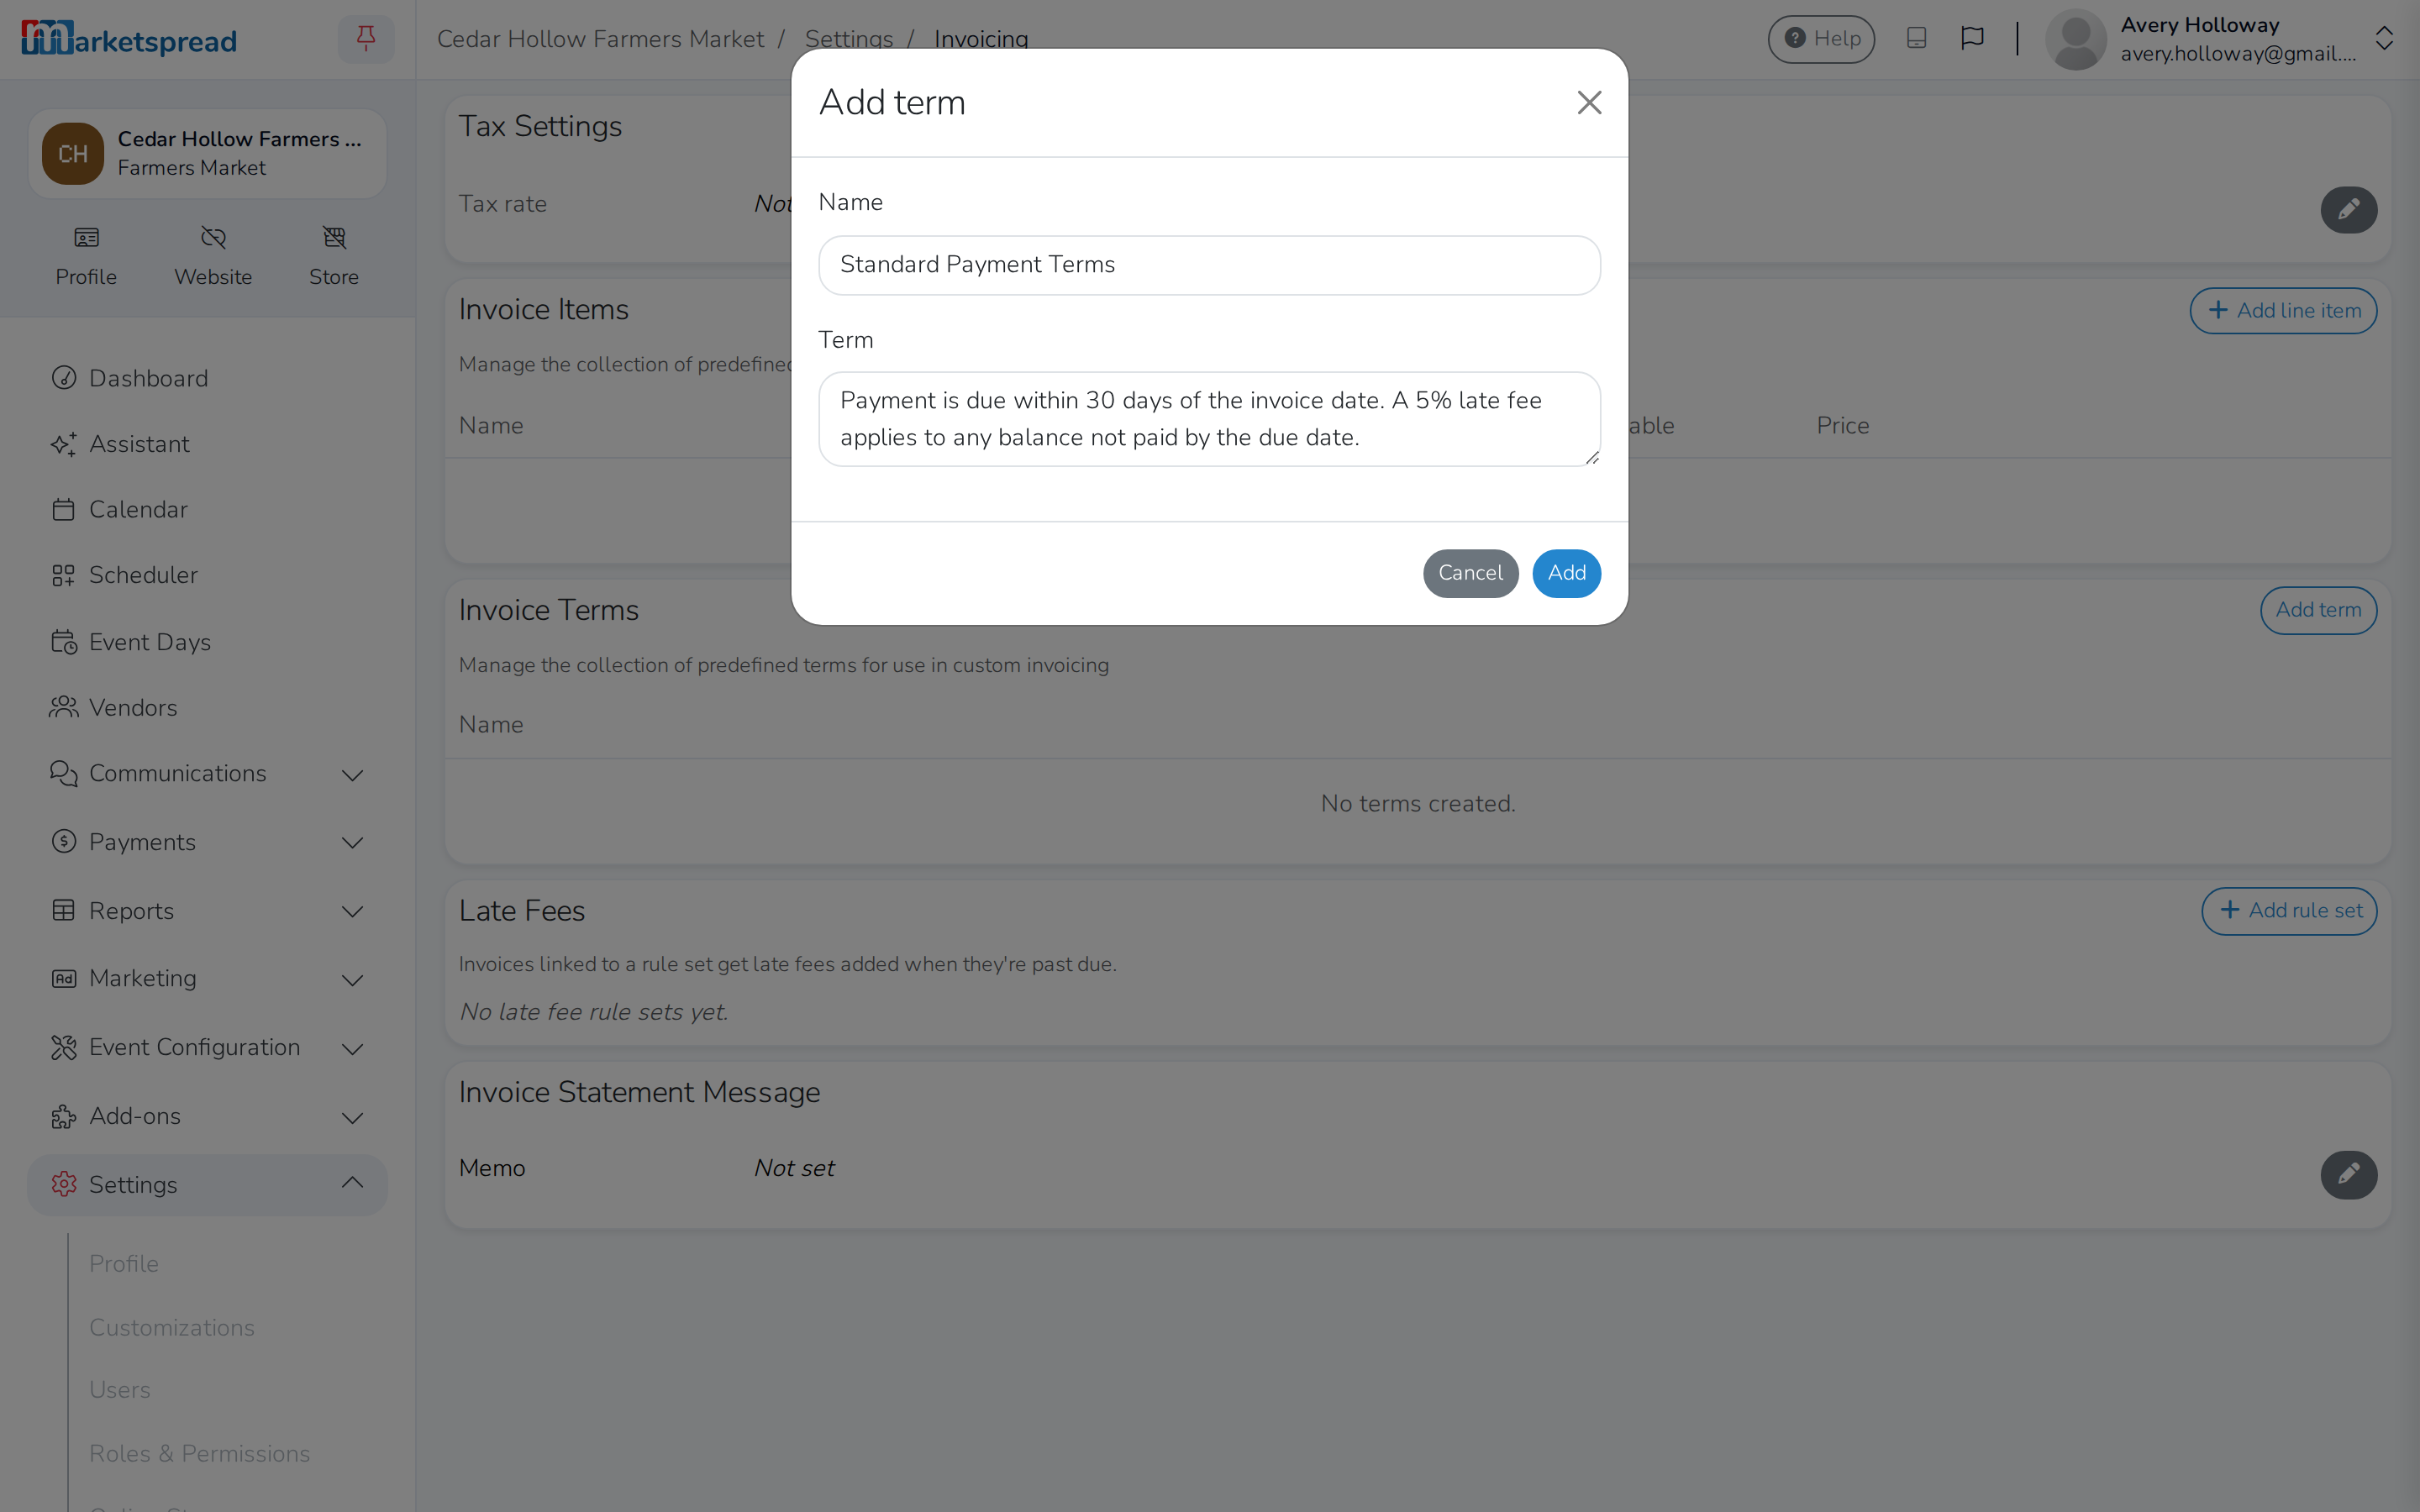
-
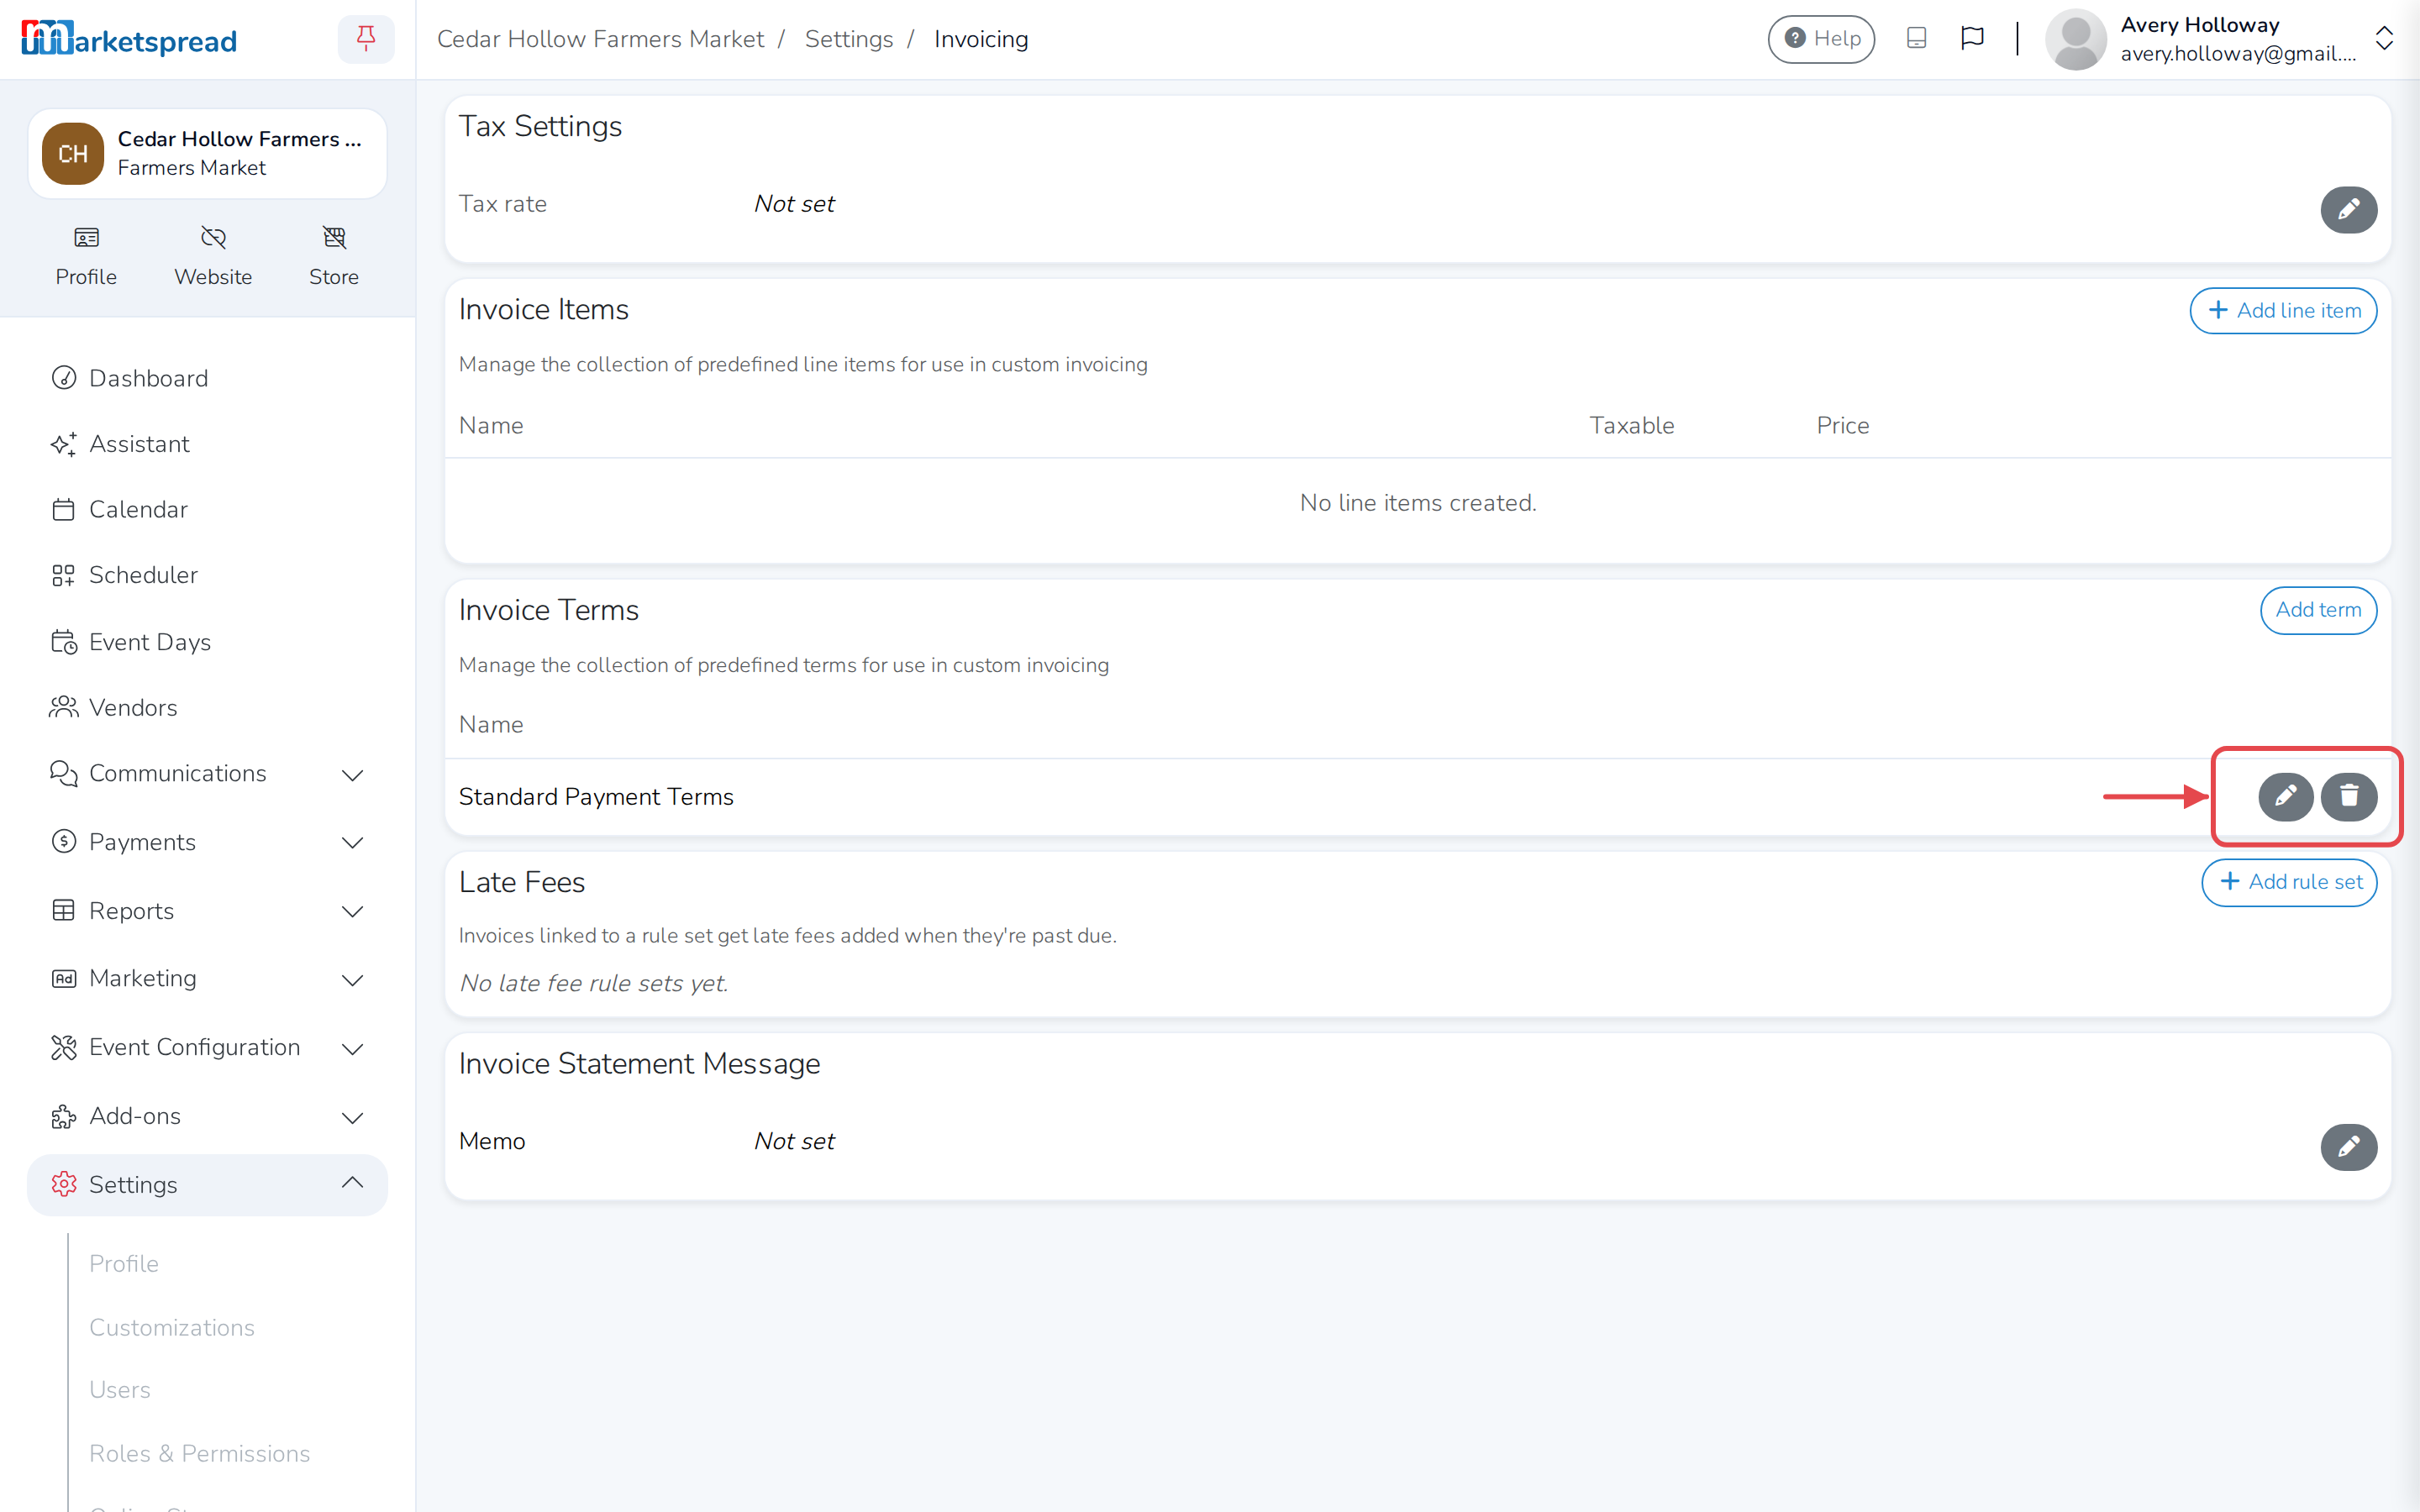
Click Add.
Add a term to an invoice
-
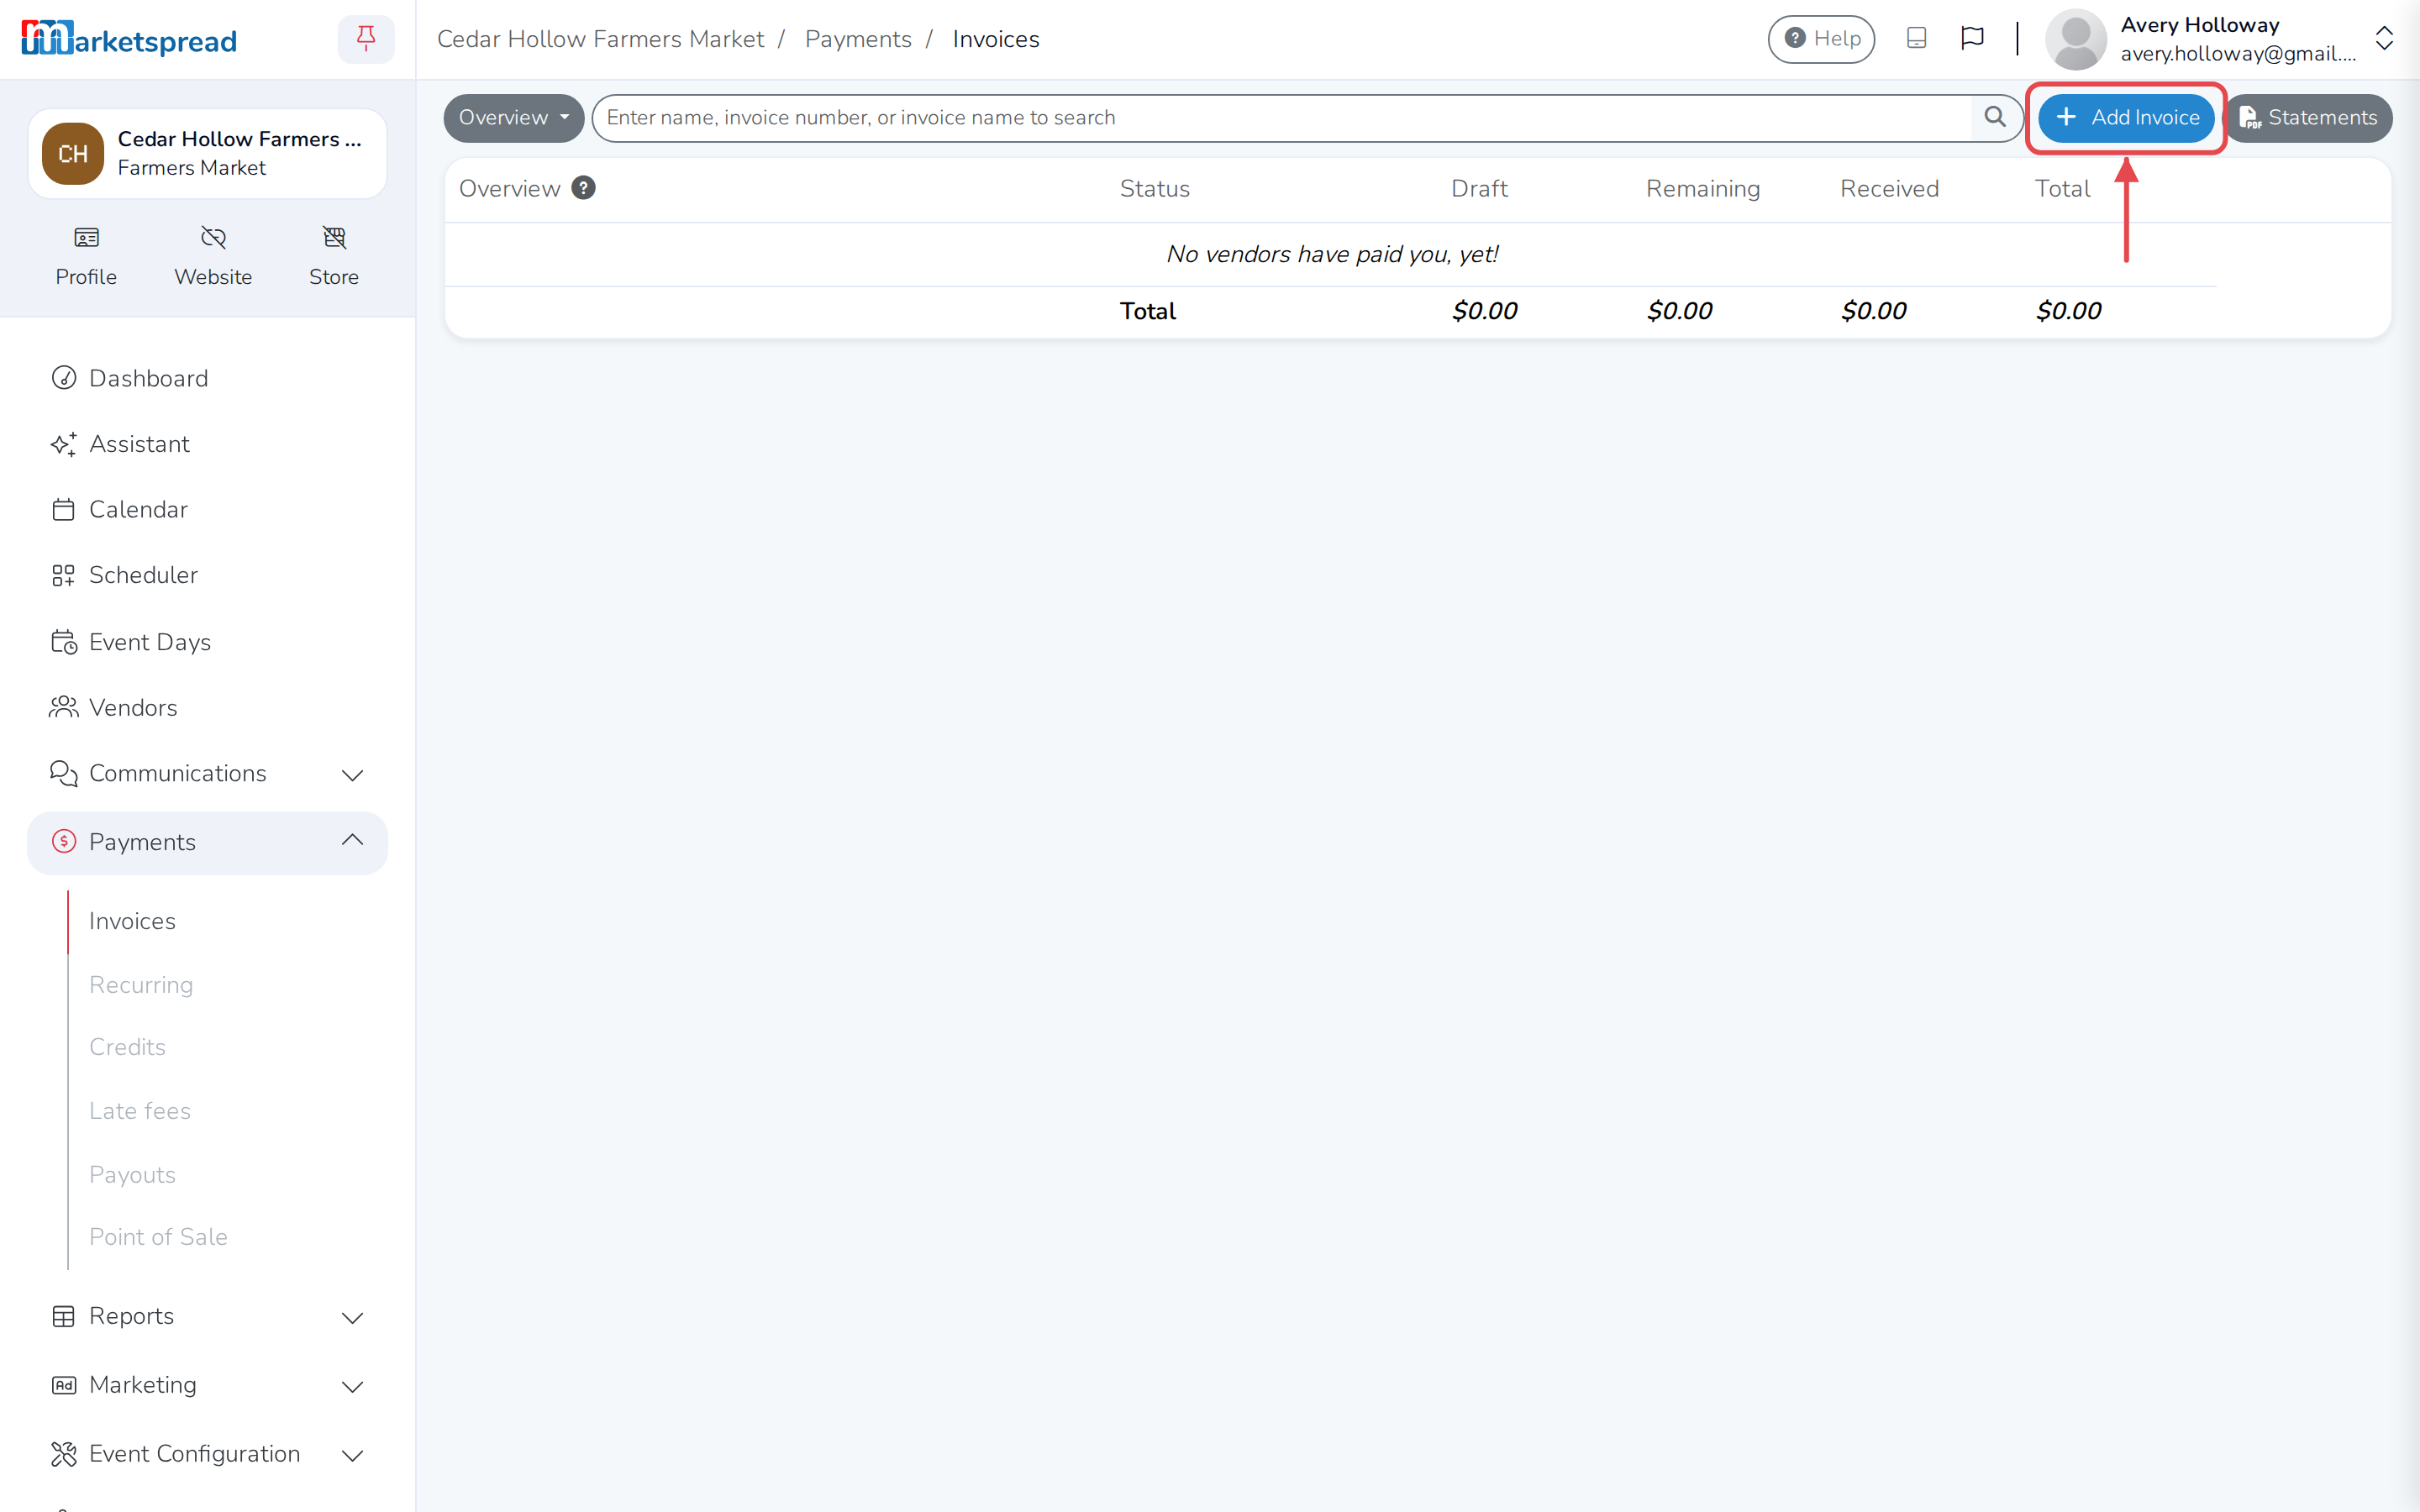
In the left-hand menu, click Payments, then click Invoices.
-
Click + Add Invoice.
-
Under Select Recipients, choose who the invoice is for.
-
Fill in the invoice's other details — Invoice Name, Due Date, and
so on. -
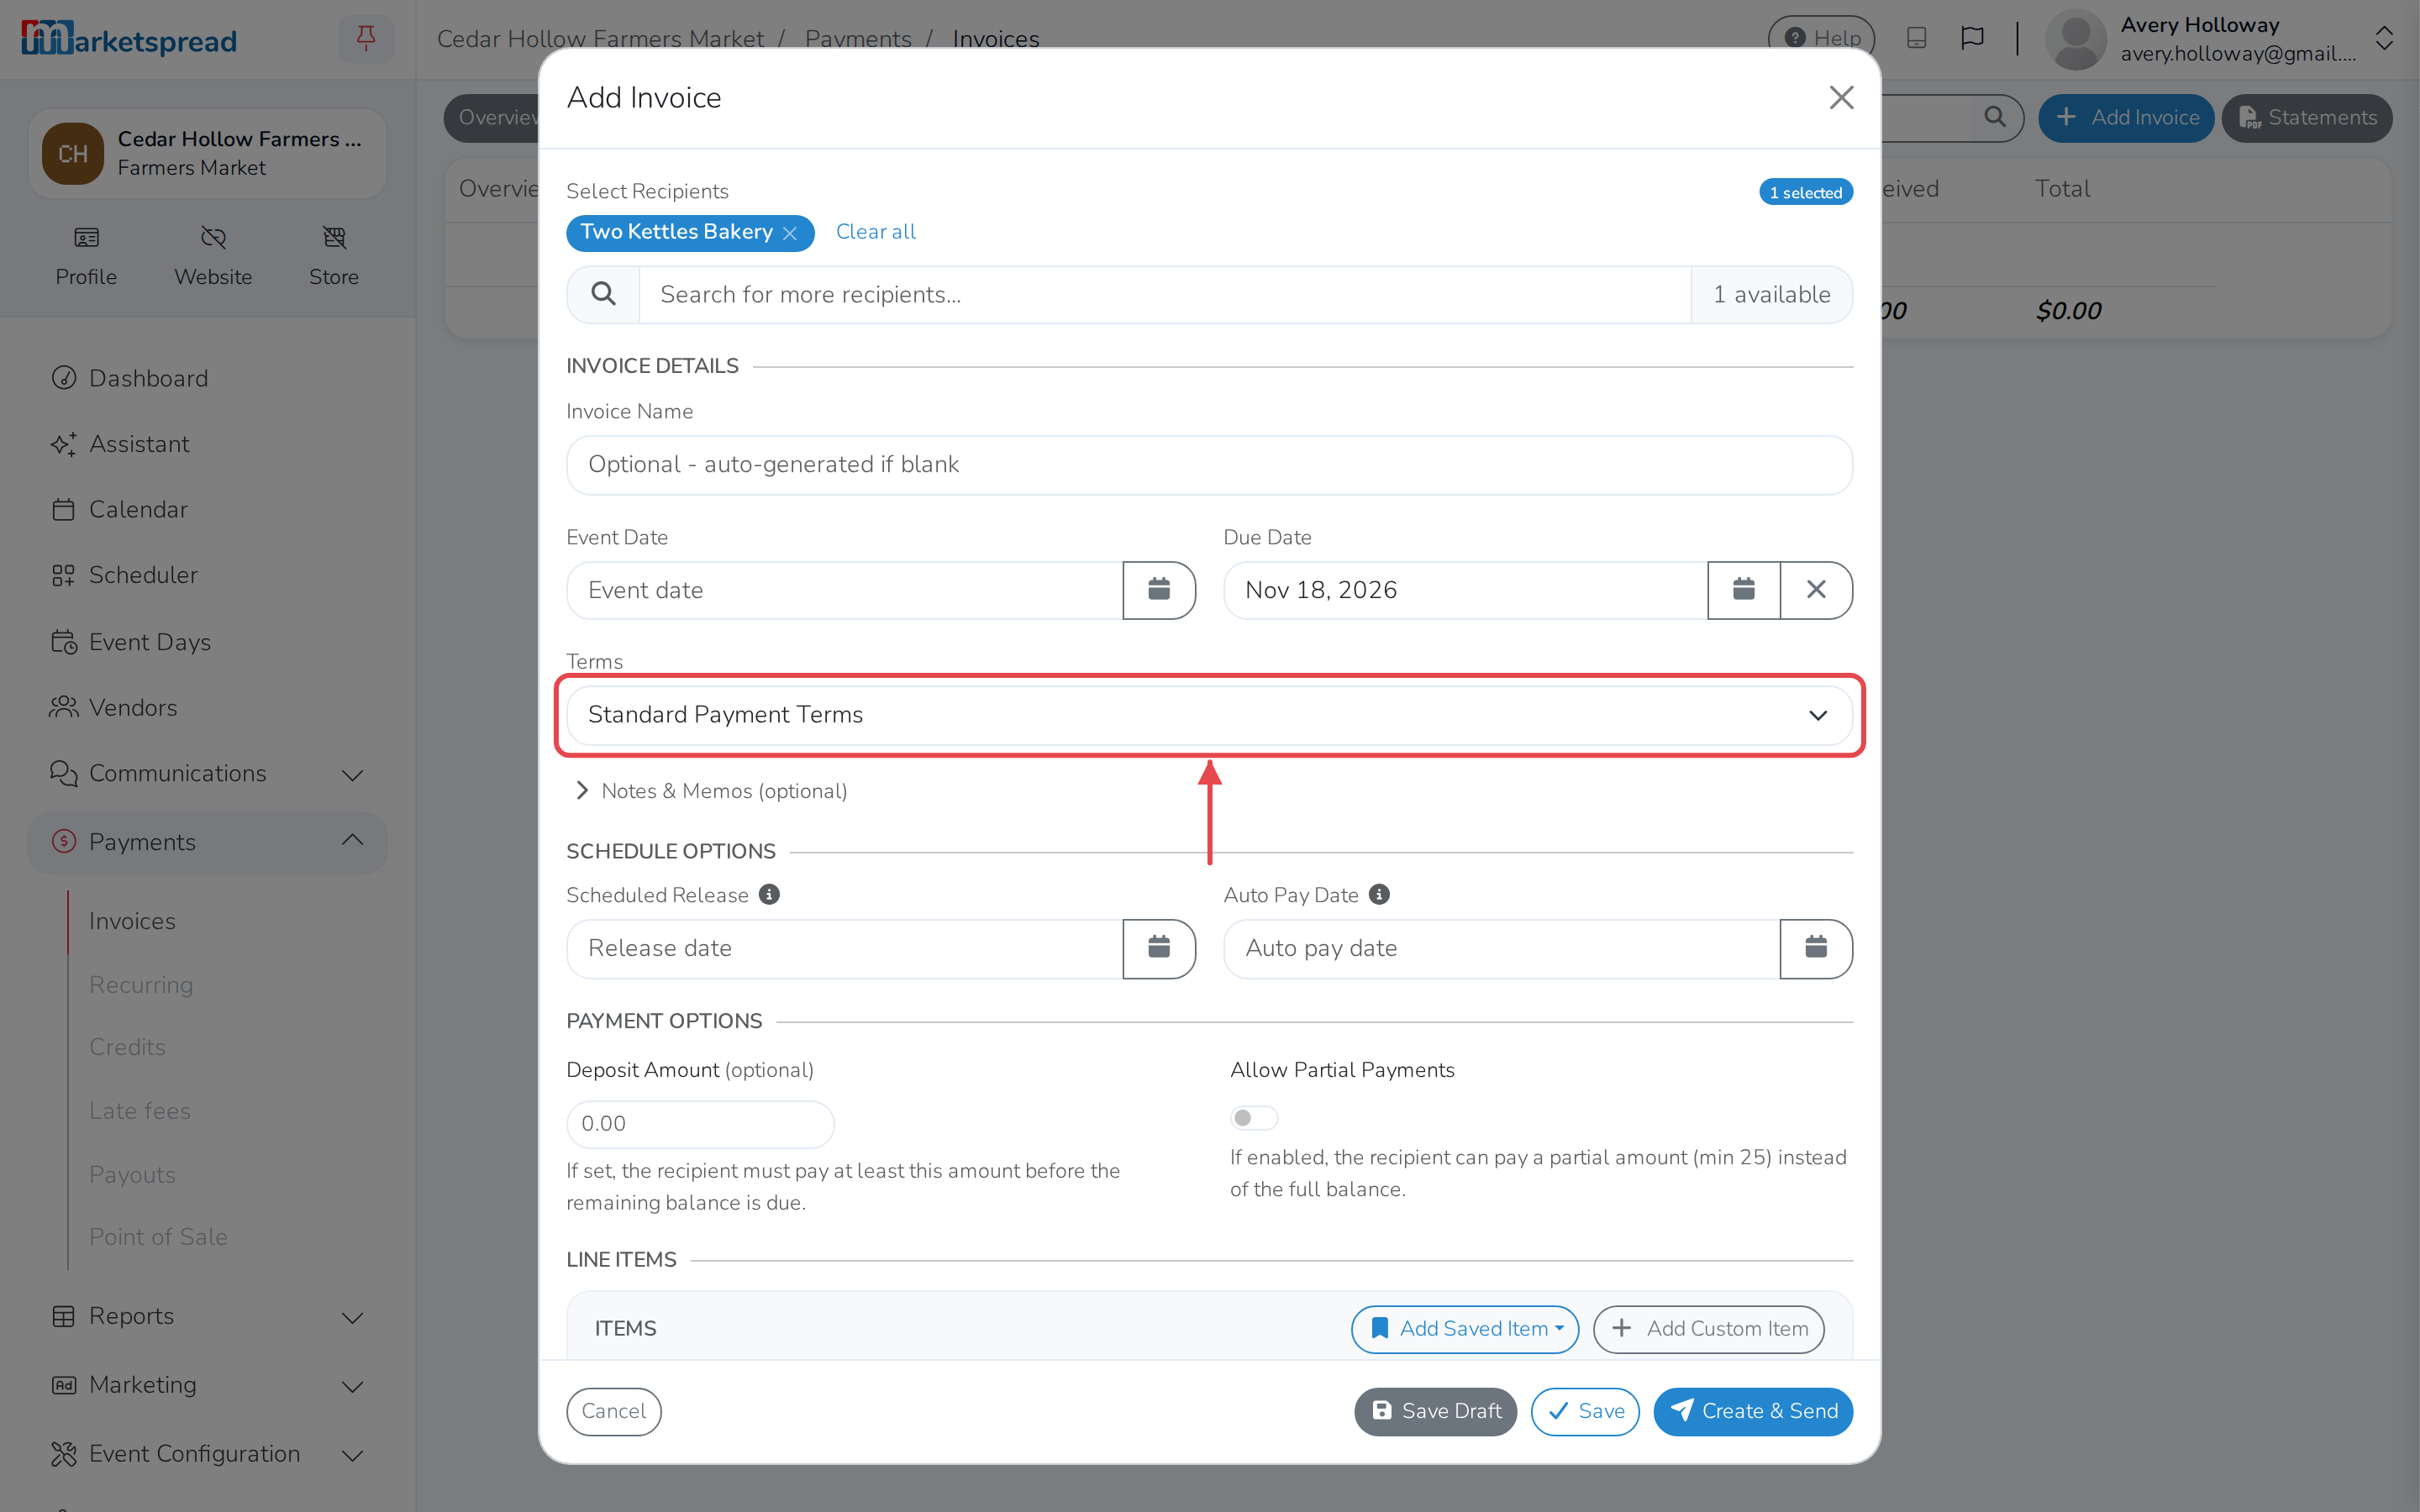
Under Terms, choose the term you created.
-
Under Items, fill in a Name and a Price for what you're
charging — the invoice needs at least one item before it can be sent.
Click Add Saved Item to use one you've already saved, instead of
typing it in.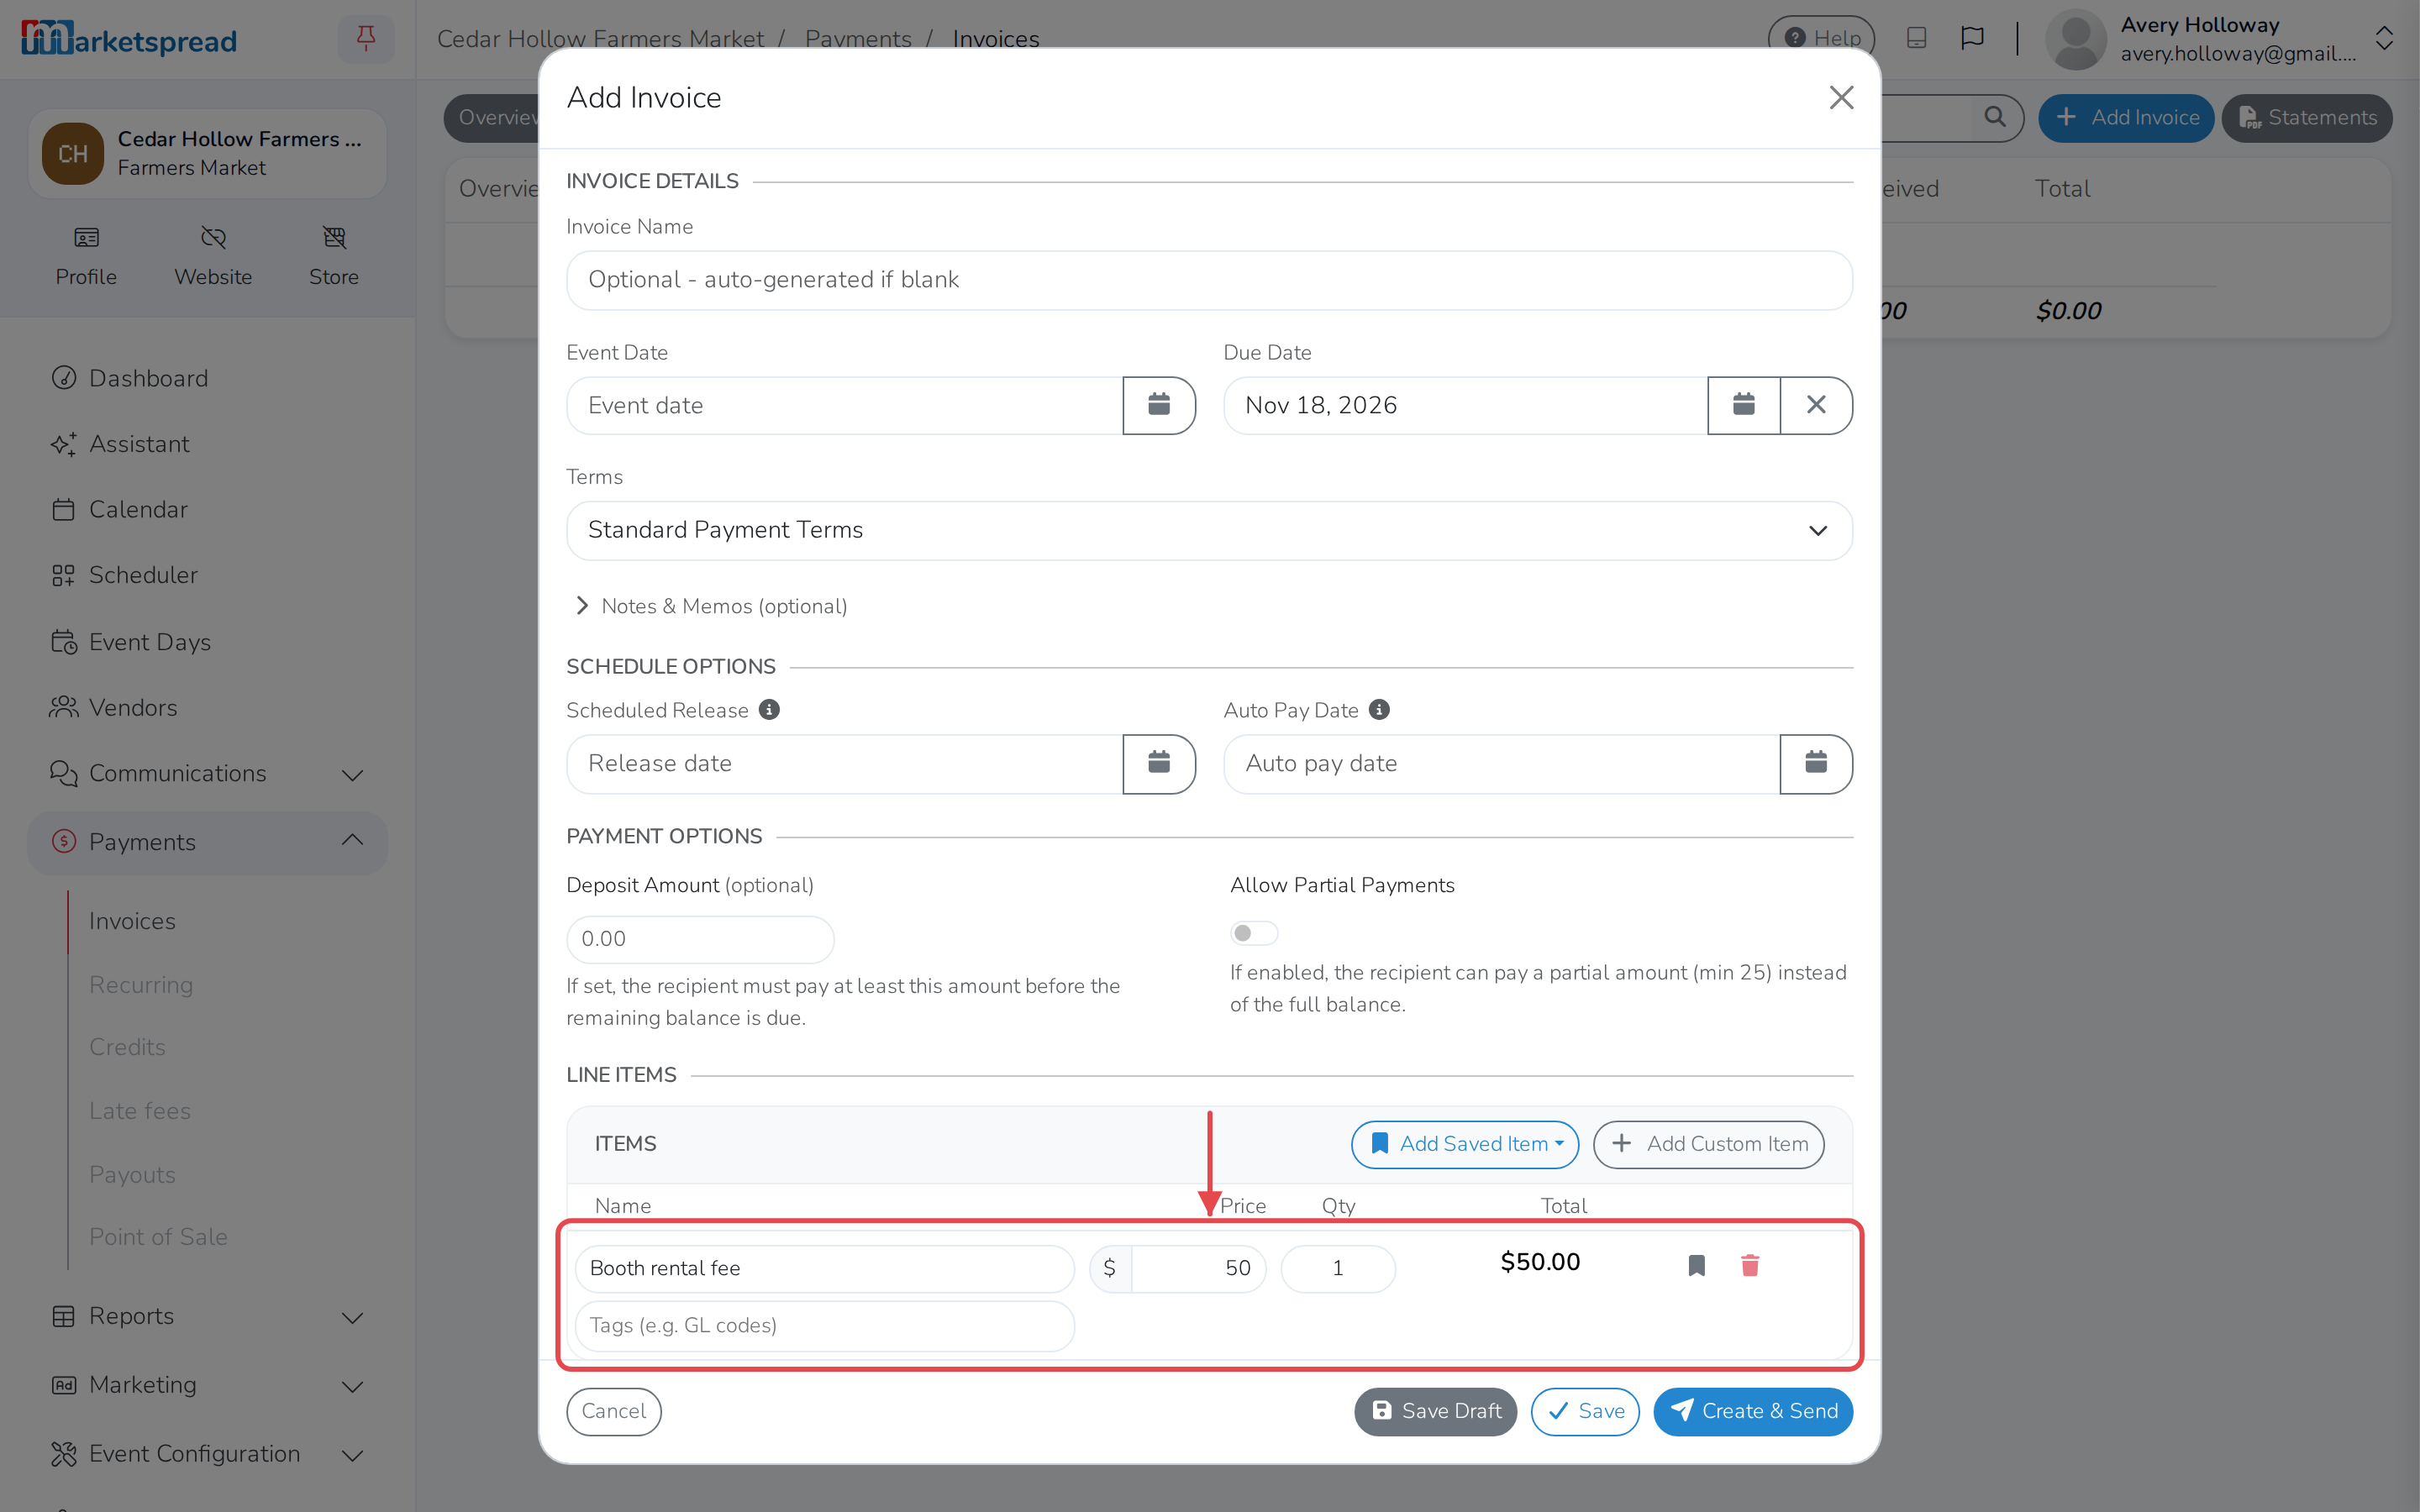
-
When the invoice is ready, click Save Draft (or Schedule, once
you've set a release date), Save, Create & Send, or
Send & Charge Auto Pay — see
Invoice guide: manual and via Scheduler
for what each one does.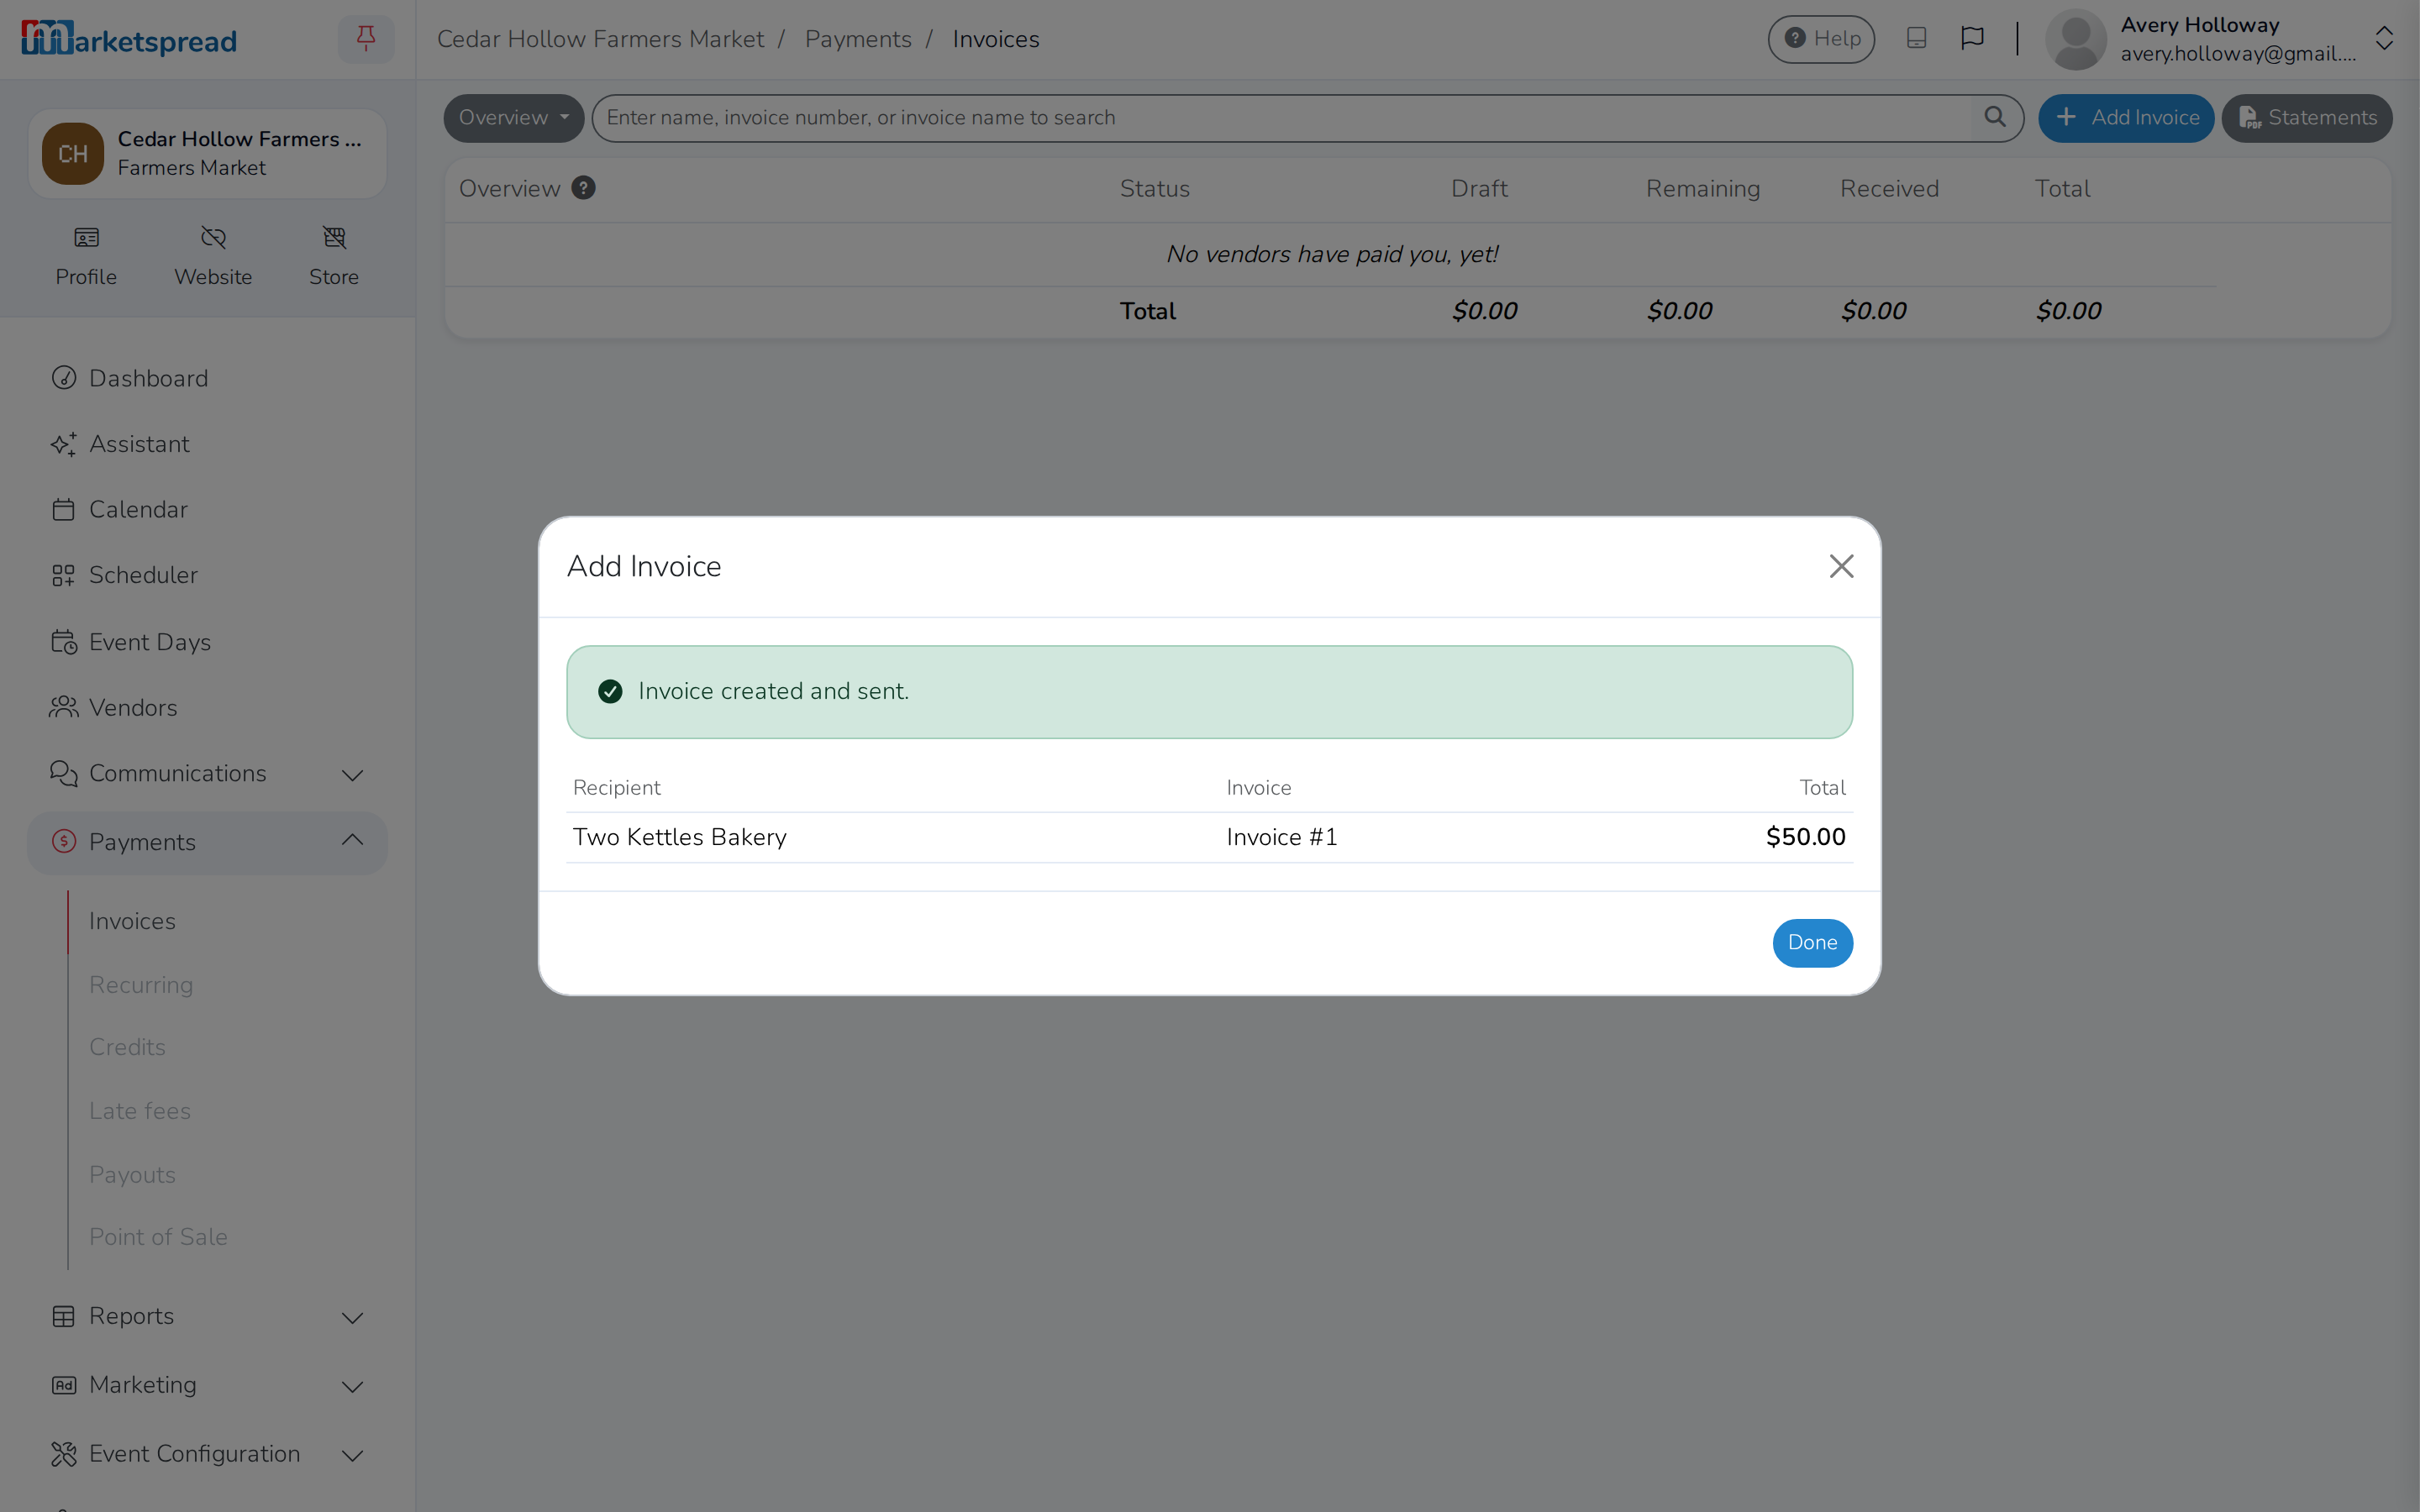
-
Click Done.
Note
The Terms dropdown only shows up once you've added at least one term.
See the term on an invoice
-
In the left-hand menu, click Payments, then click Invoices.
-
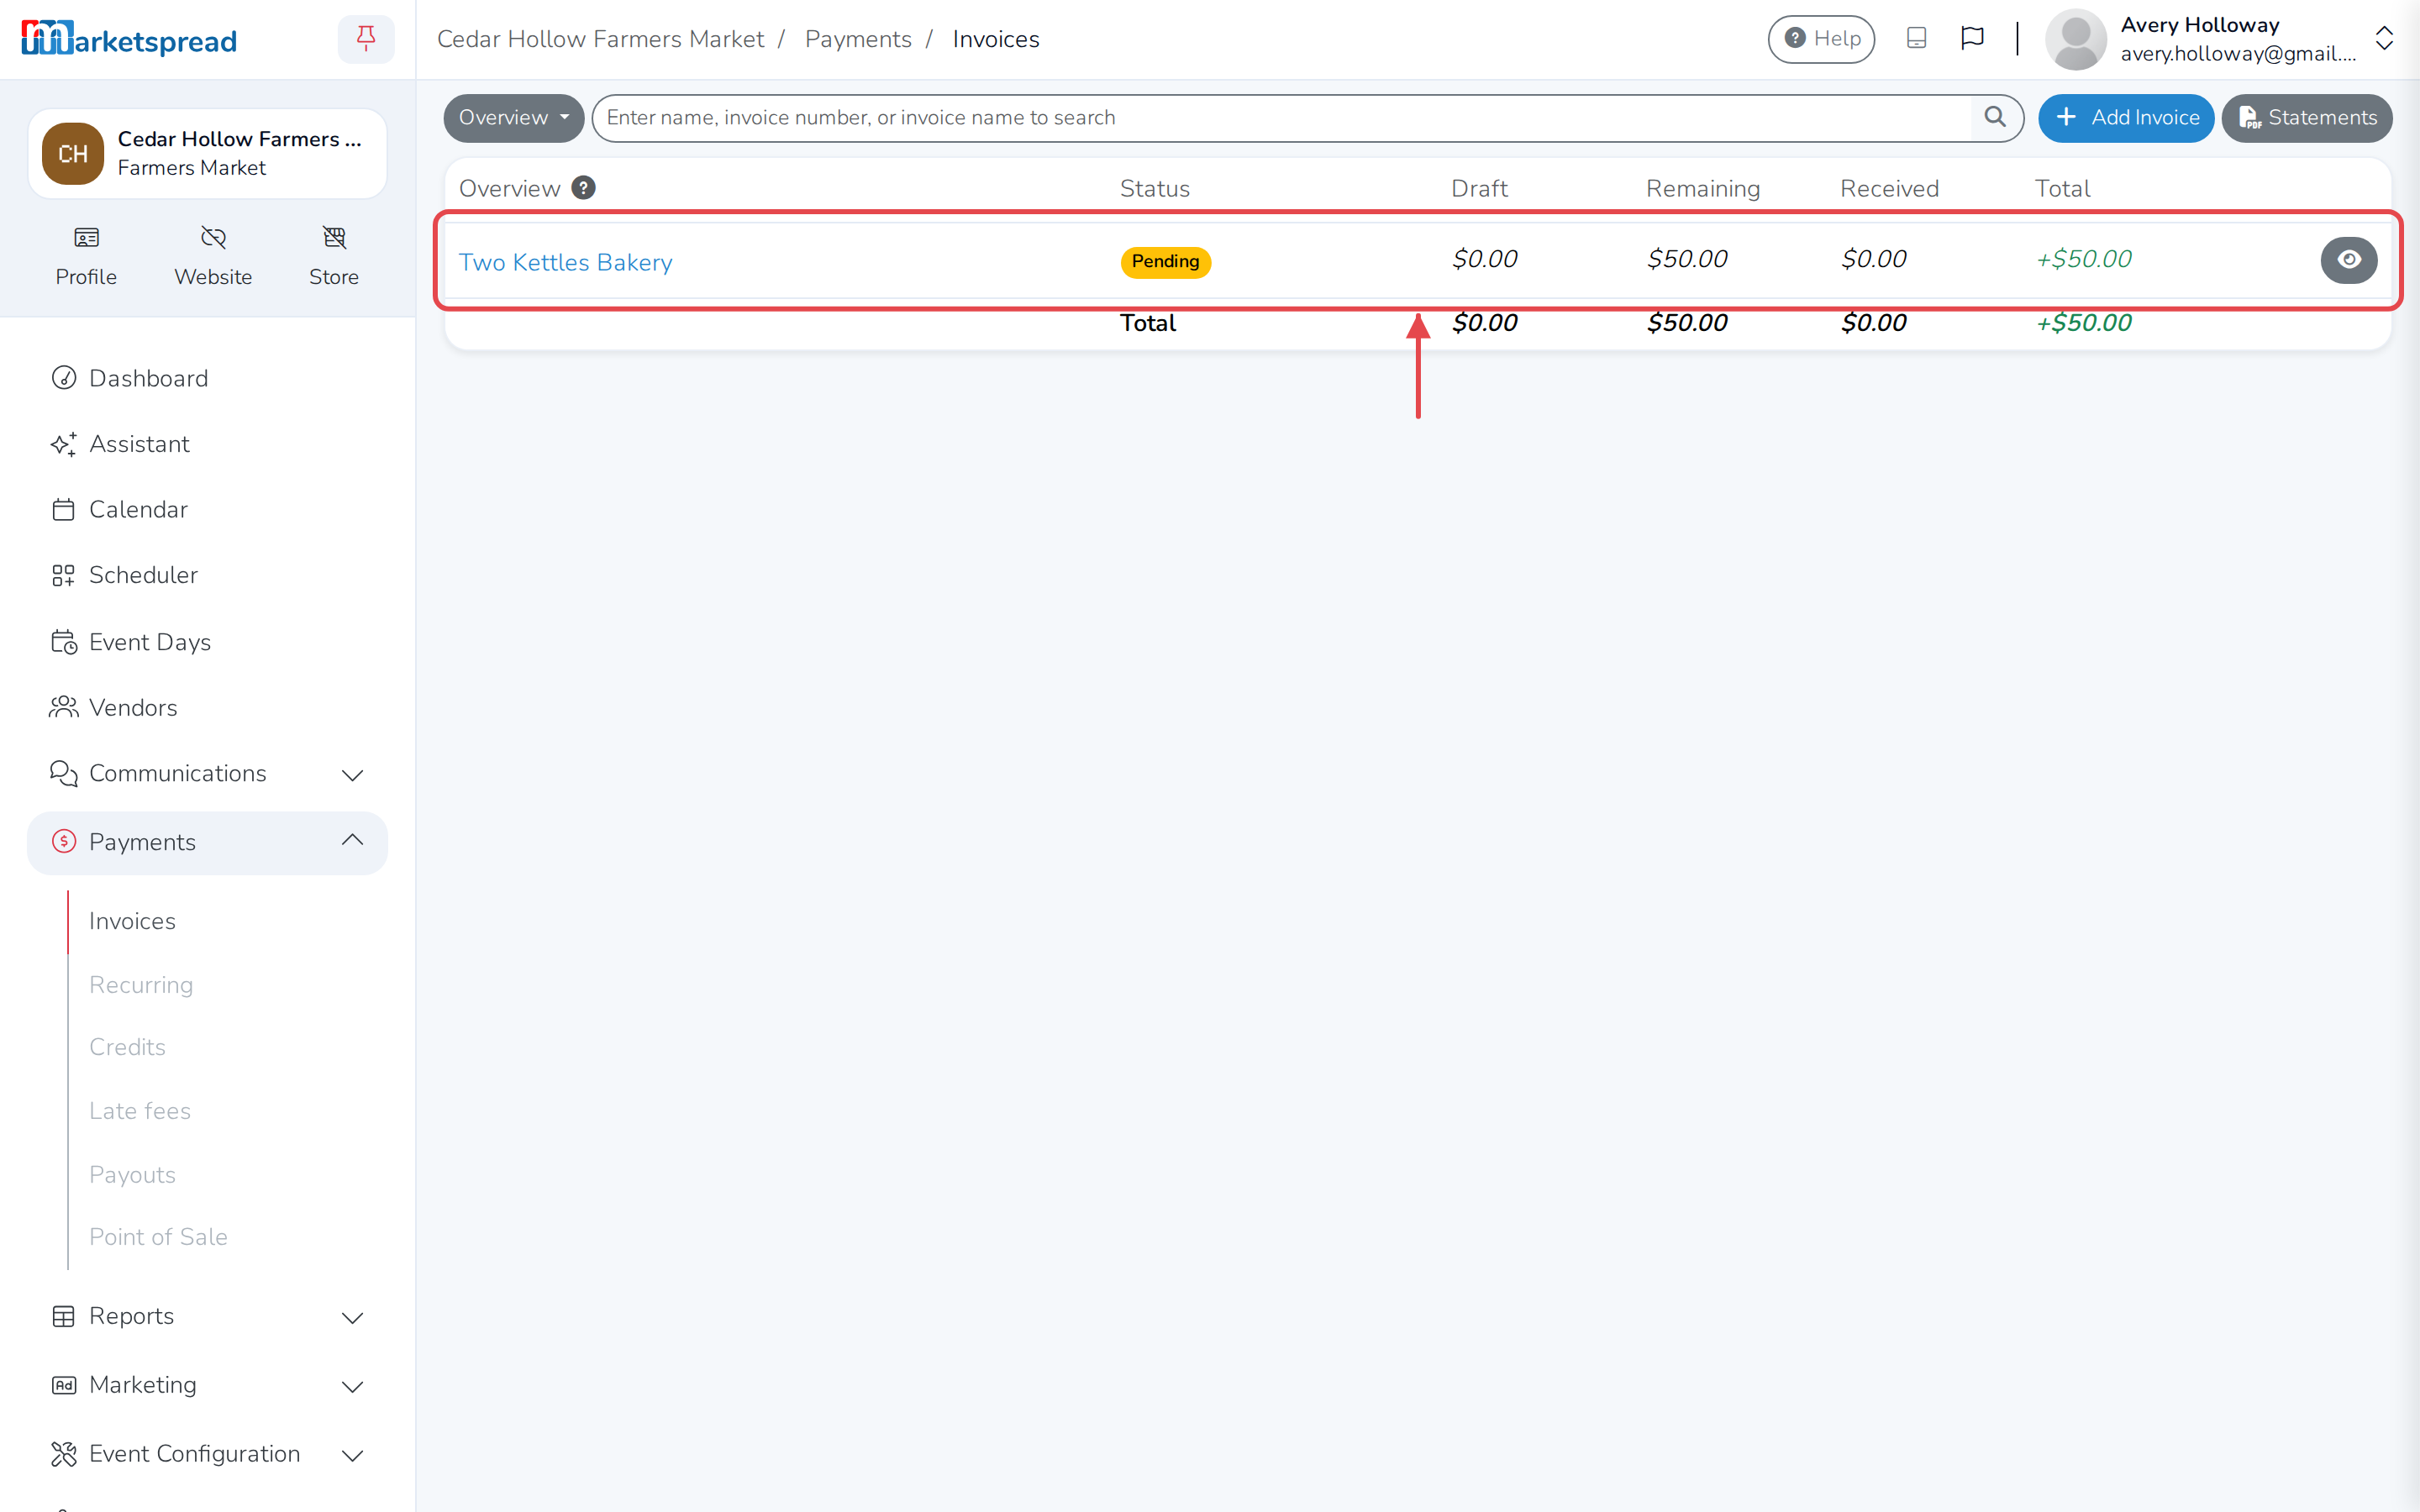
Under Overview, click the vendor you invoiced.
-
Click the invoice to open it. The term you chose is listed under
Terms.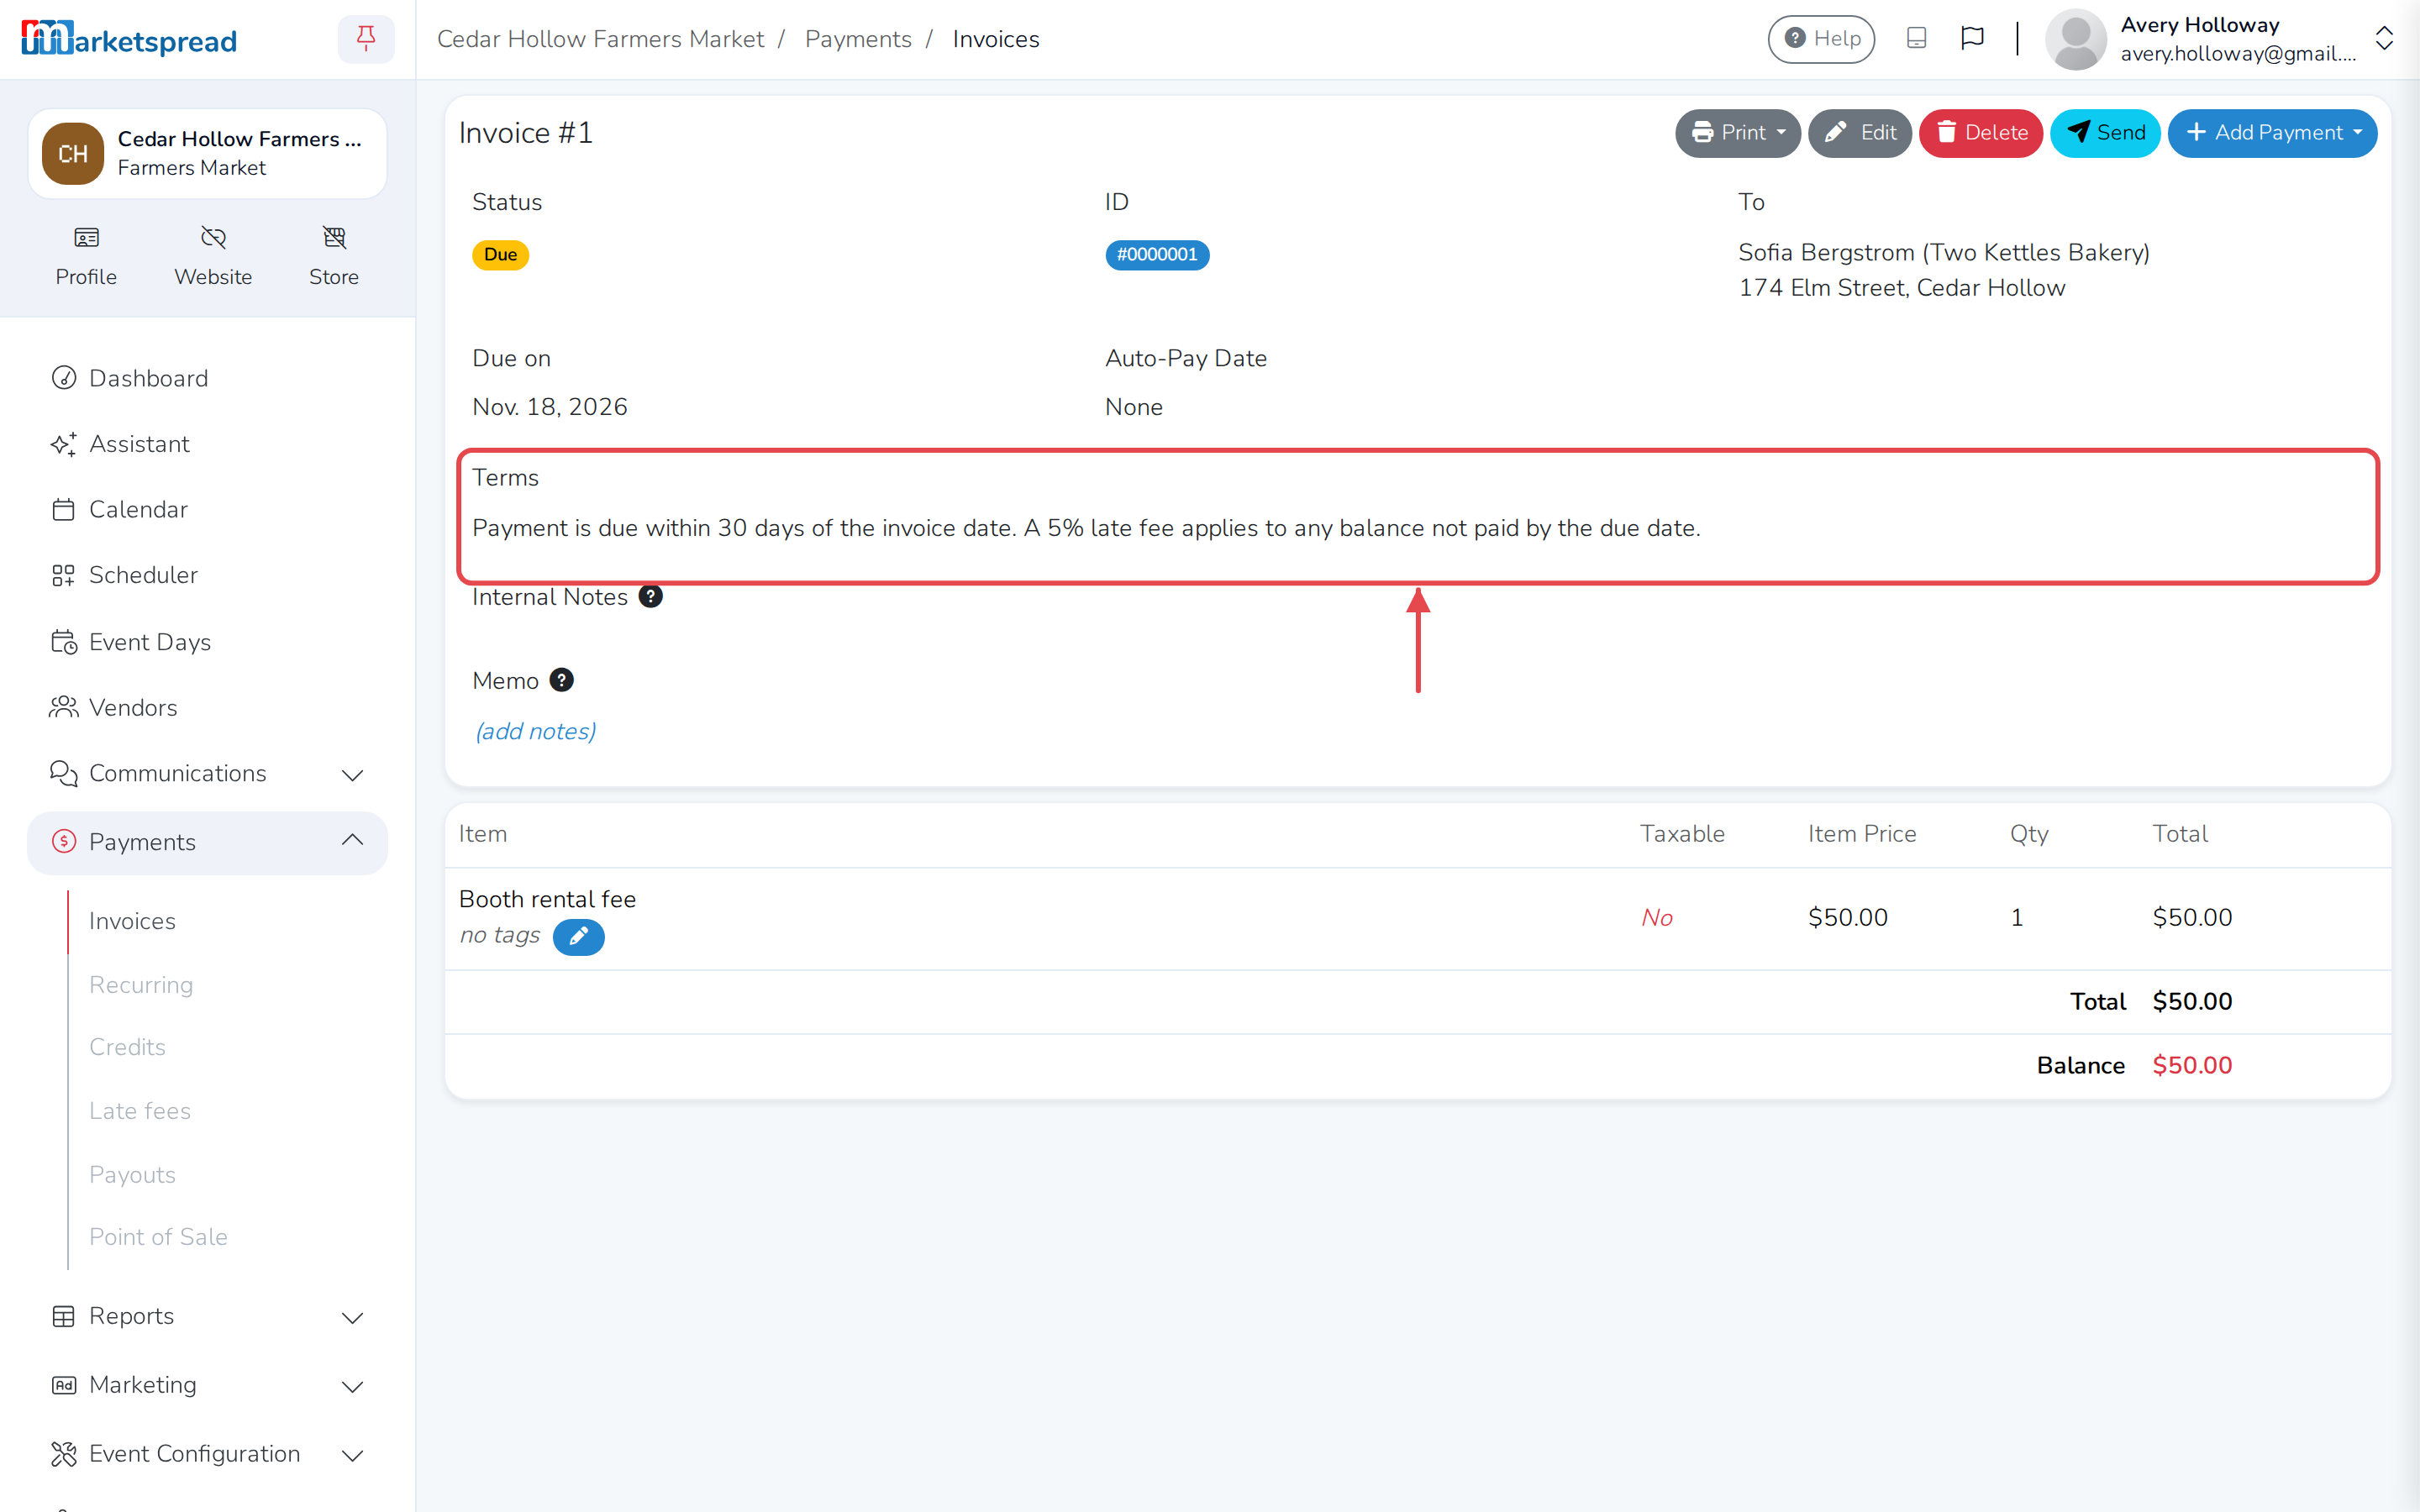
Edit an invoice term
- Under Invoice Terms, click the pencil icon next to the term.
- Update the Name or Term text.
- Click Update.
Note
Editing a term changes the wording on every invoice that already uses
it, not just new ones.
Delete an invoice term
- Under Invoice Terms, click the trash icon next to the term.
- Click Delete to confirm.
Note
A term that's already on an invoice can't be deleted.