


Extended Vendor Details let you track your own information against every vendor — an emergency contact, a certification number, anything Marketspread doesn't already have a field for. You set one up once, under Settings, and it's ready to fill in on every vendor's record. From here you can:
- Create a vendor detail
- Fill in a vendor's details
- Rename or delete a vendor detail
- Bring back a hidden detail
Create a vendor detail
-
Open Settings, then Customizations.
-
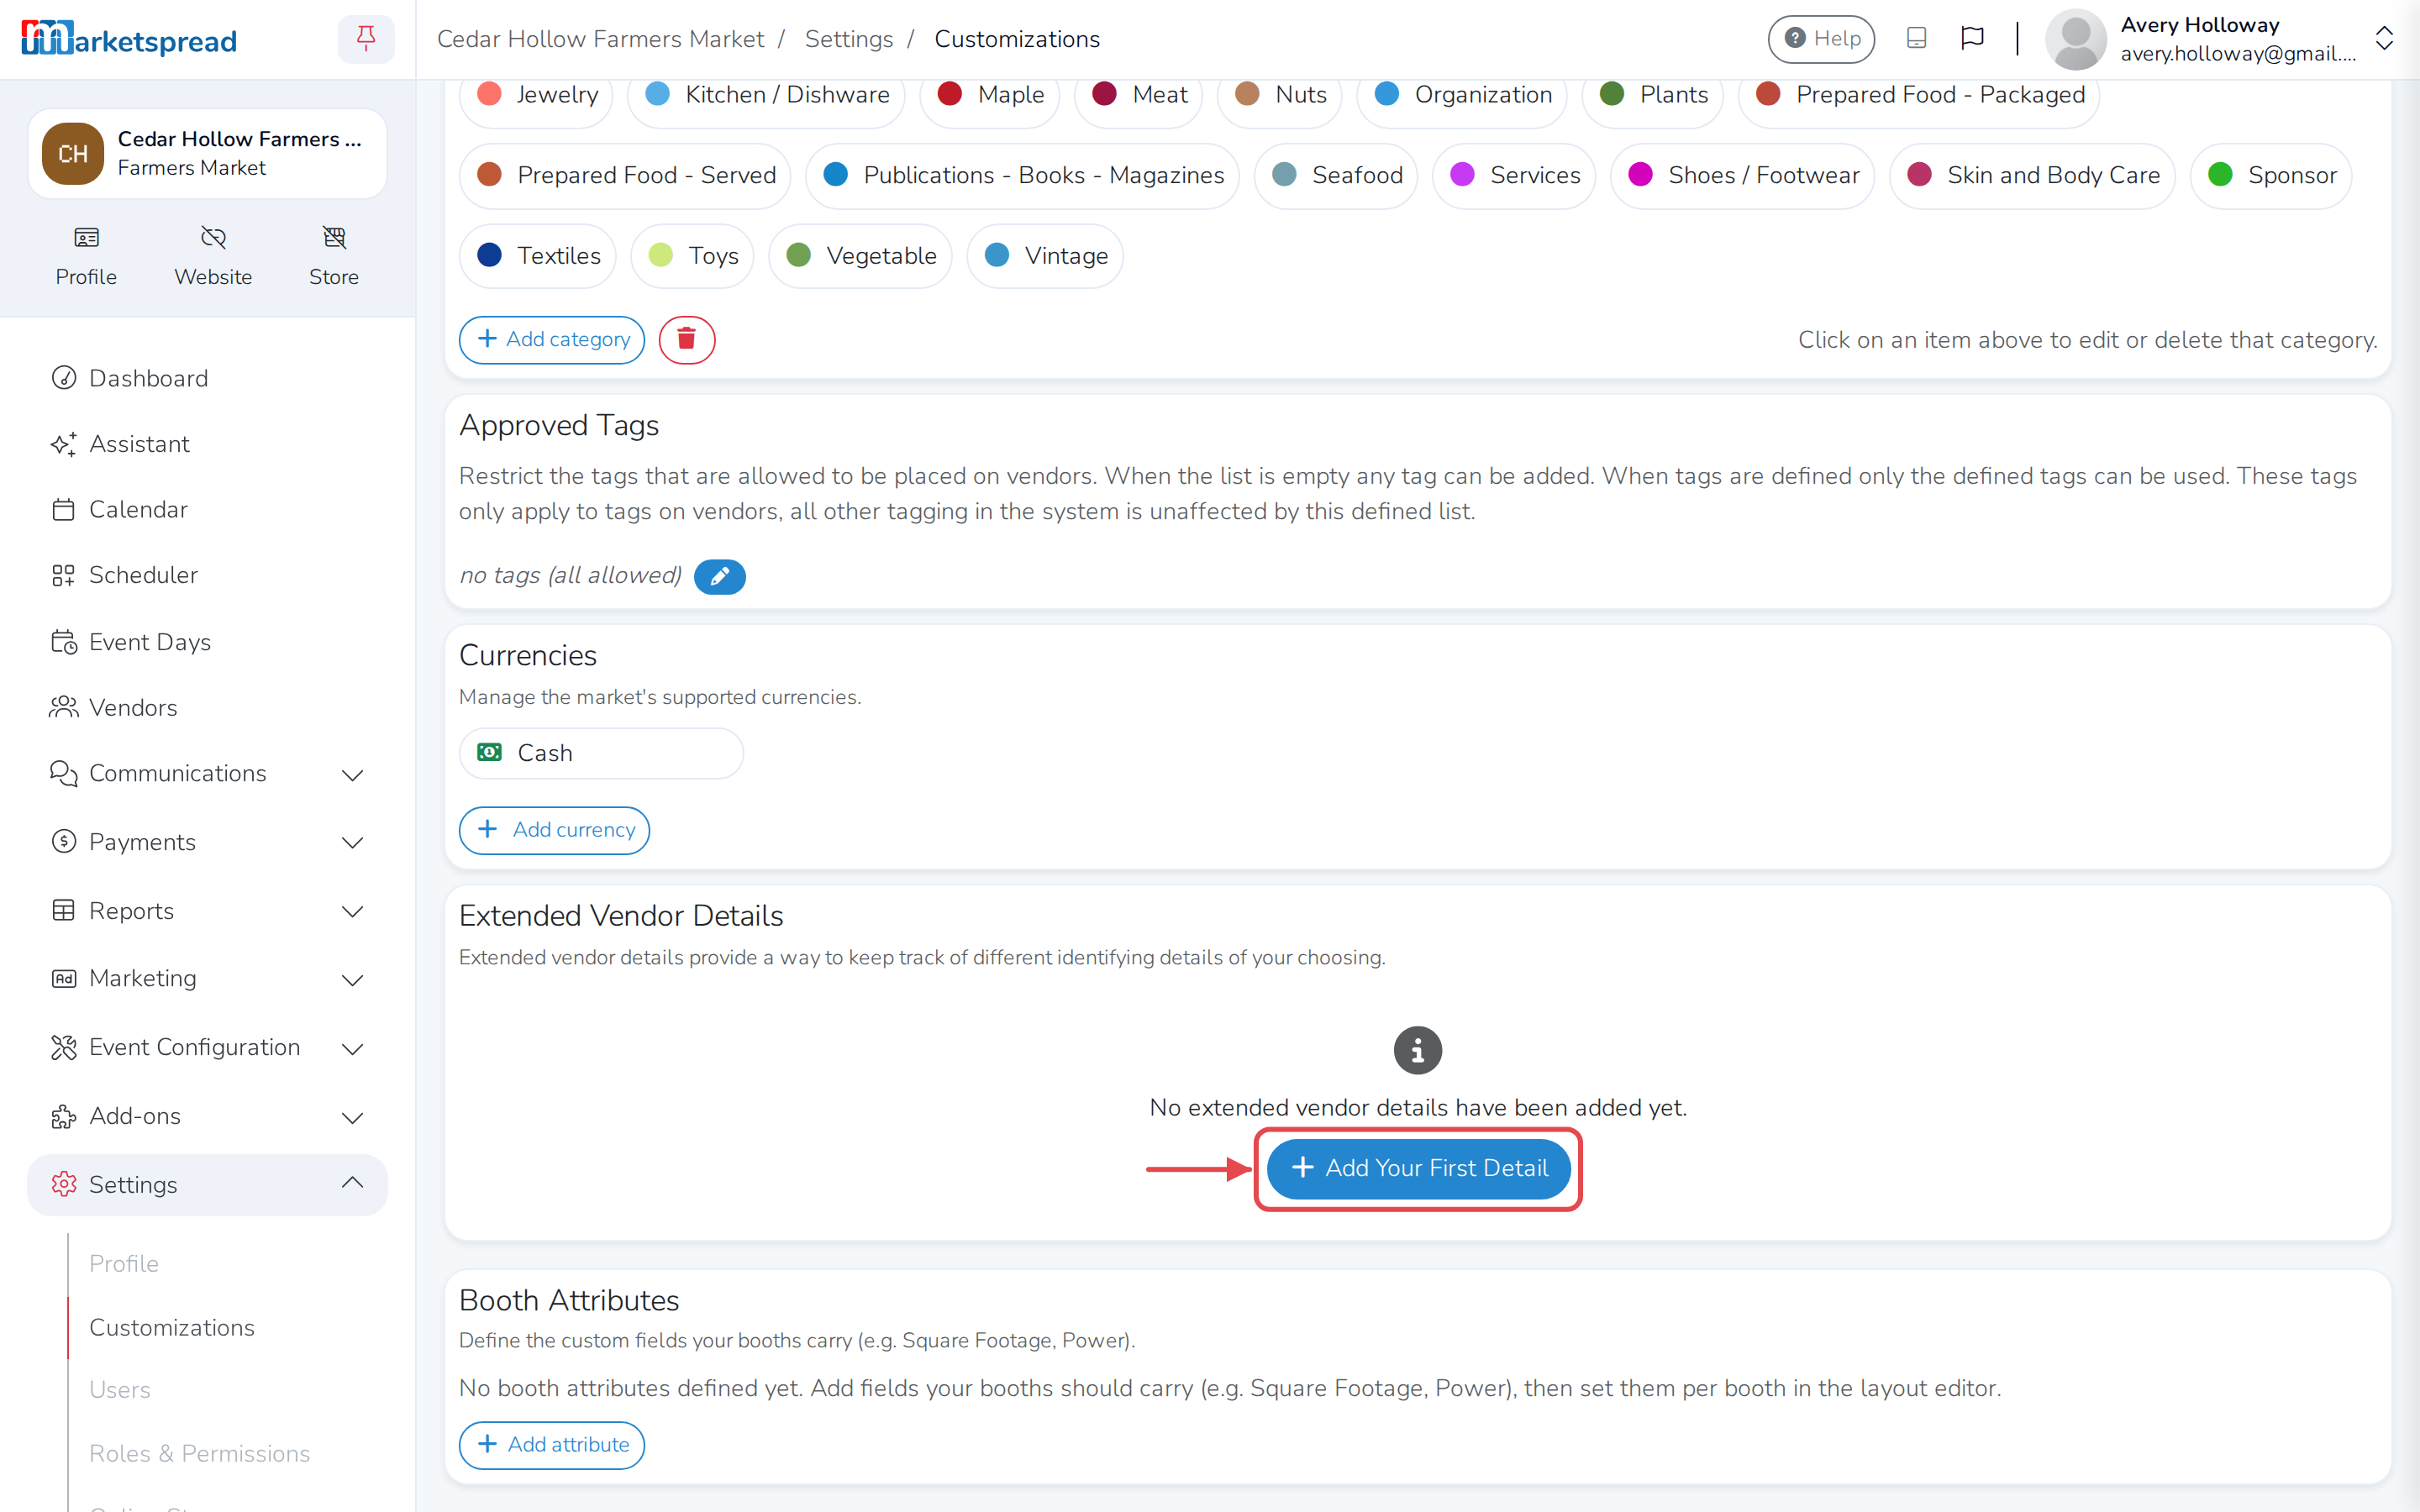
Scroll down to Extended Vendor Details.
-
Click + Add Your First Detail (or + Add detail, if you already have some).
-
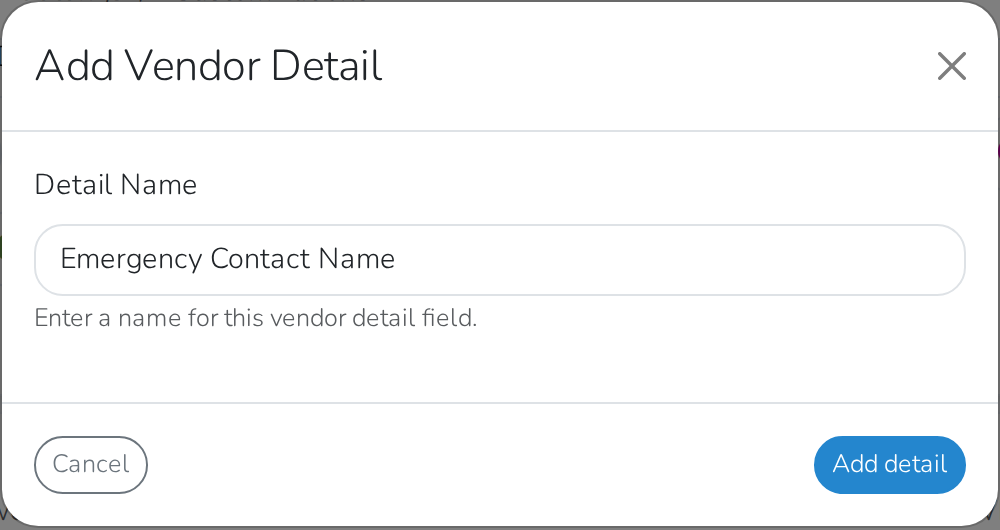
Type a name for the detail, for example Emergency Contact Name.
-
Click Add detail.
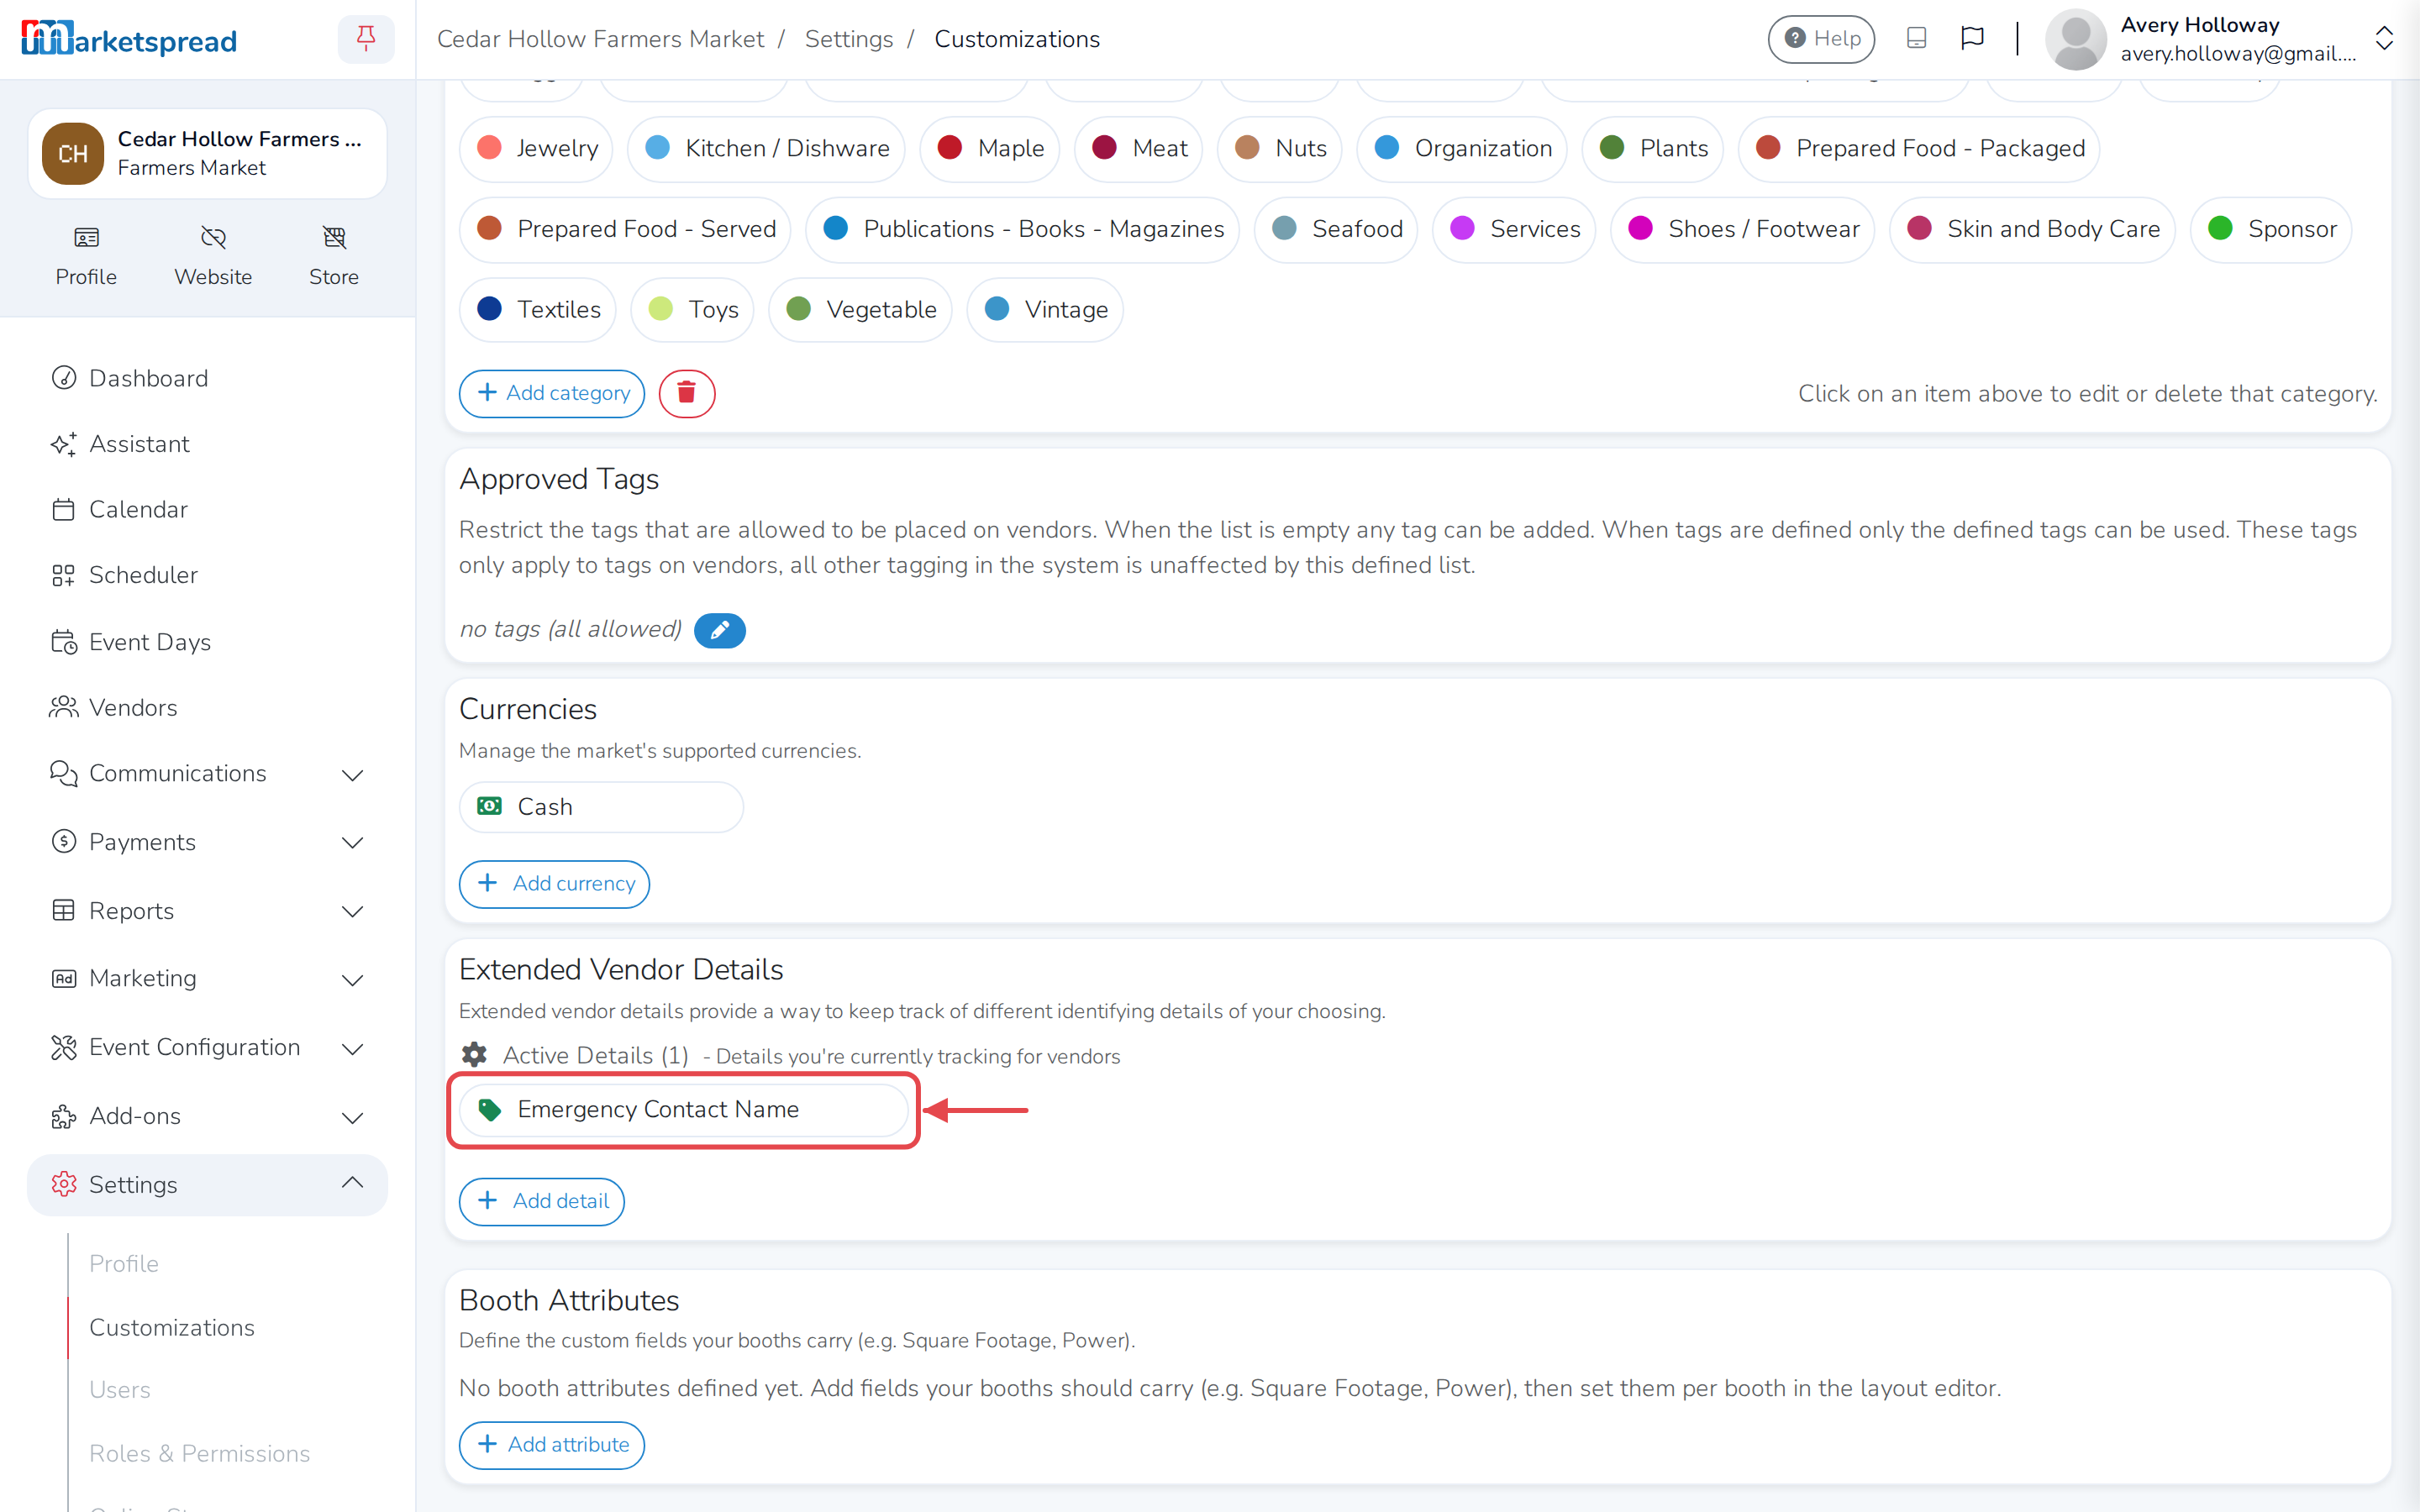
The detail appears under Active Details, and is ready to fill in on every vendor.
Note
Only account owners and administrators can add, rename or delete a detail. Anyone who can edit a vendor's record can fill in its values.
Fill in a vendor's details
-
Open Vendors and click the vendor's name.
-
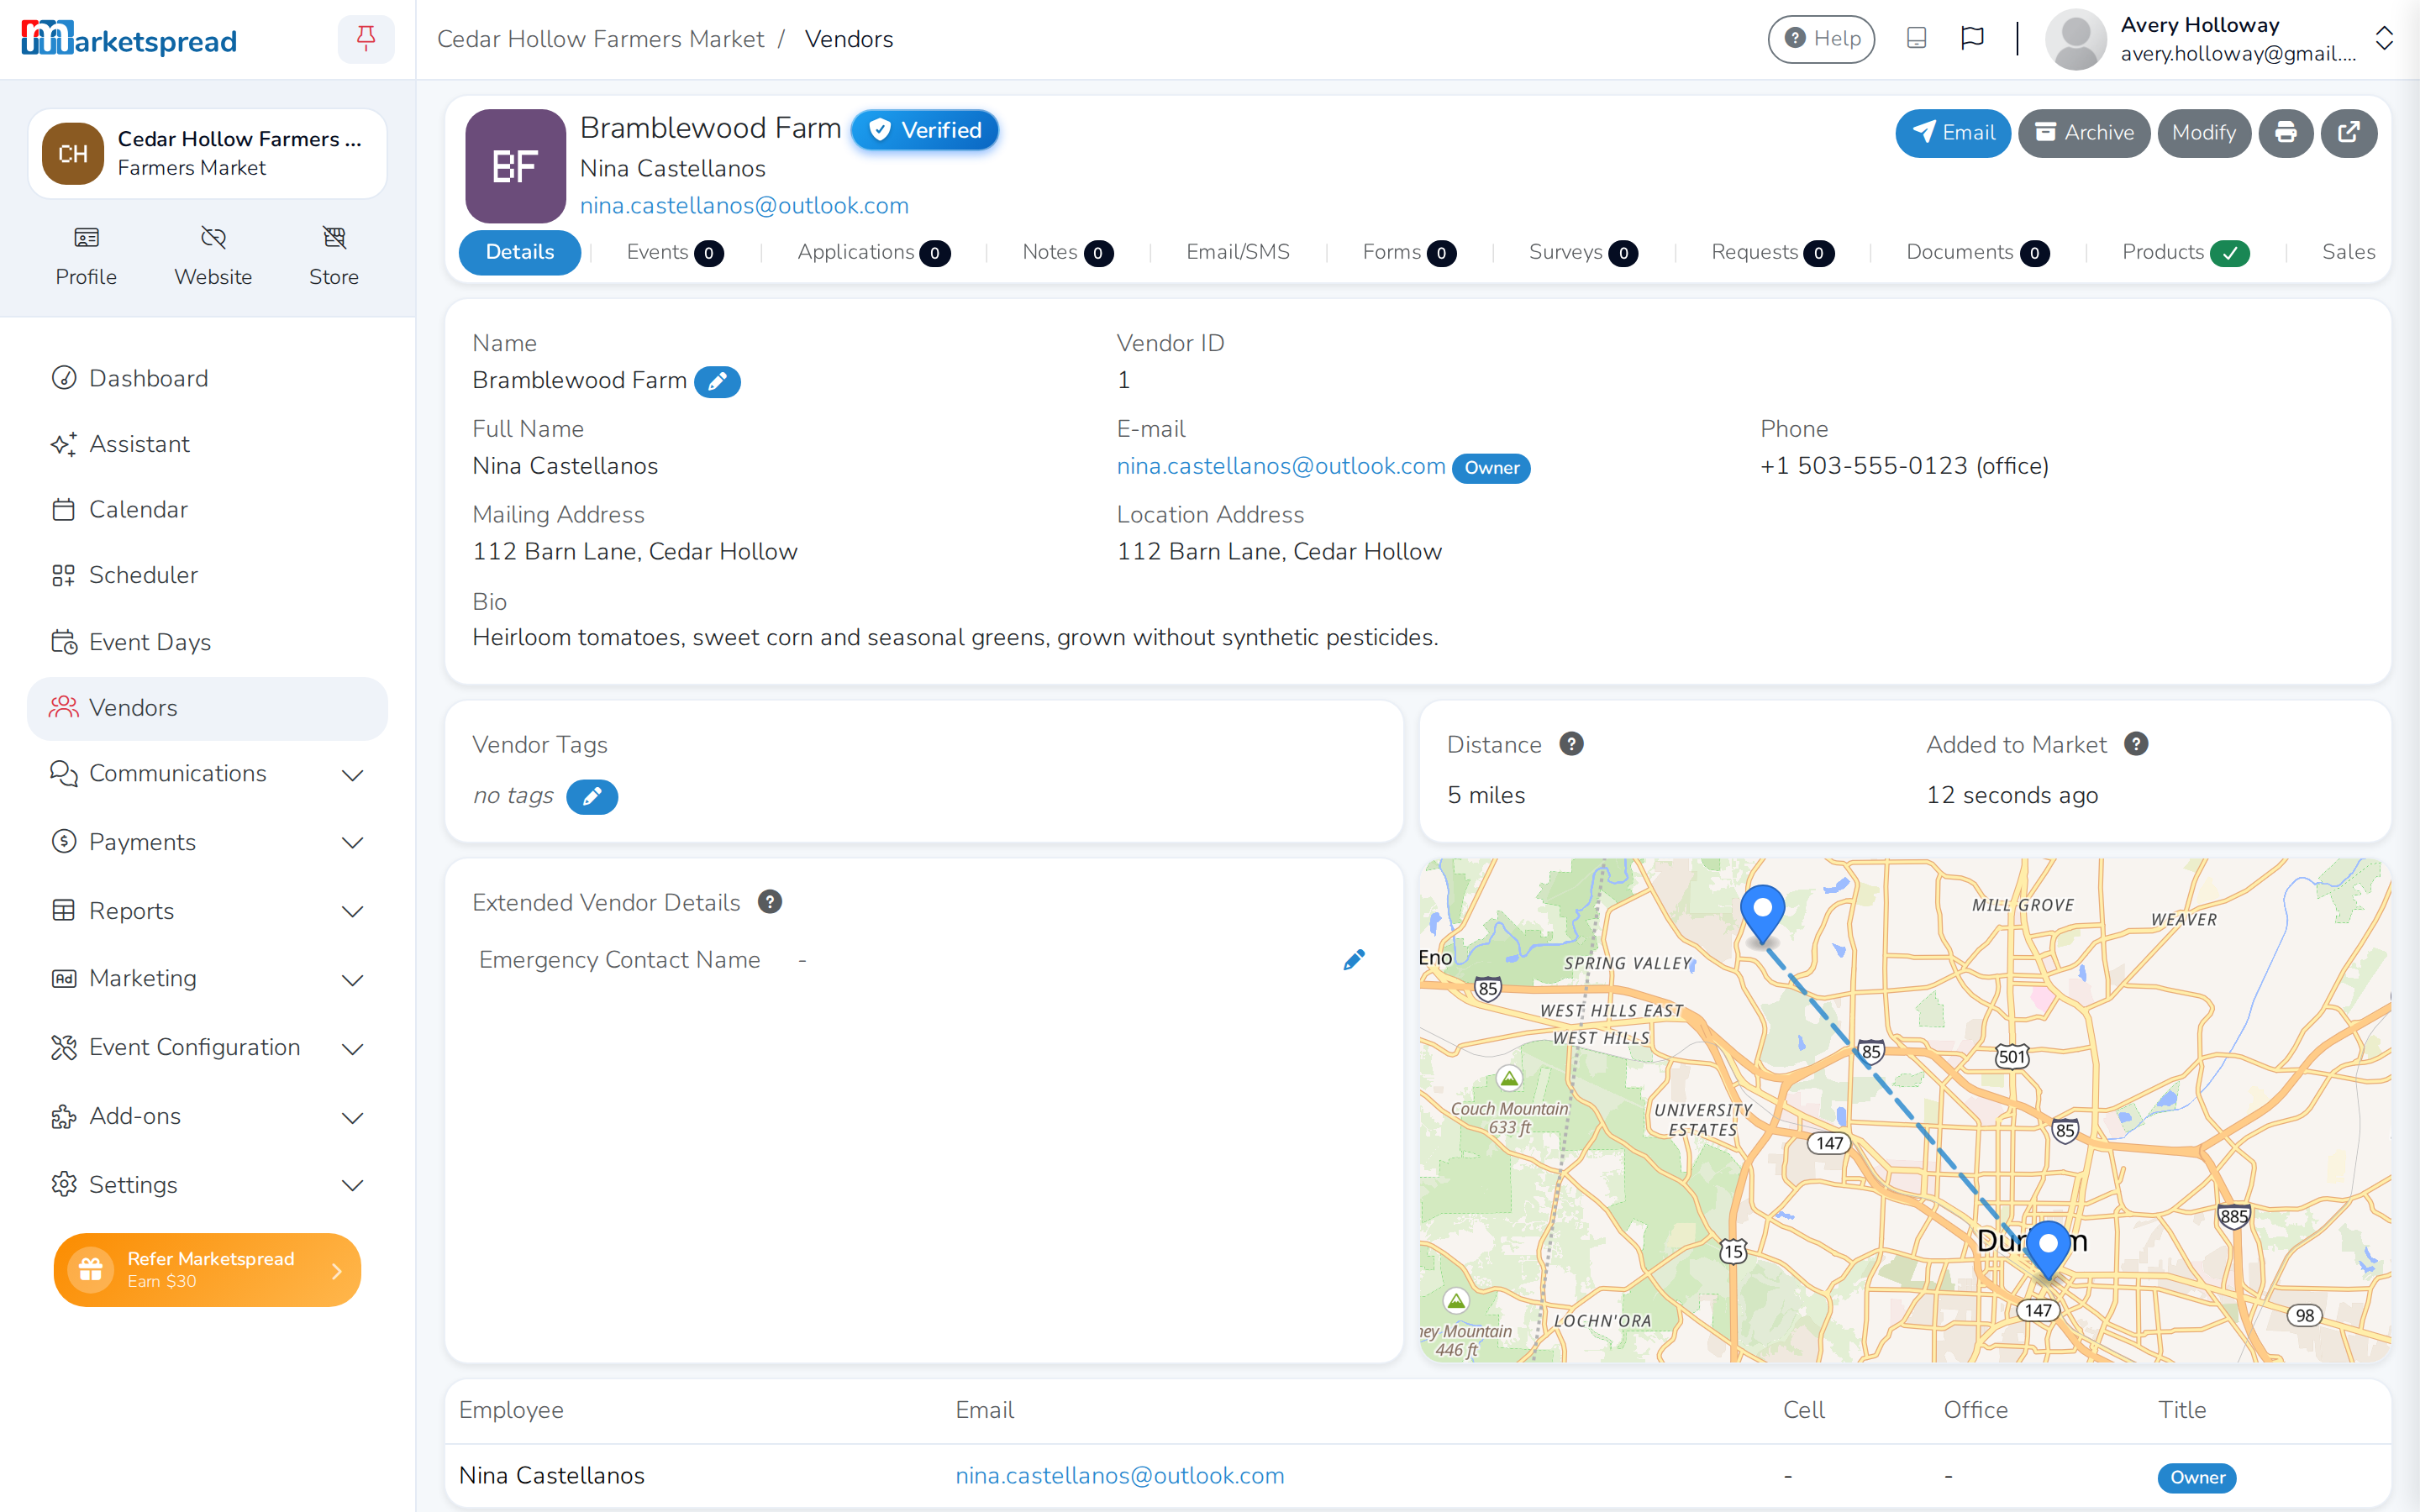
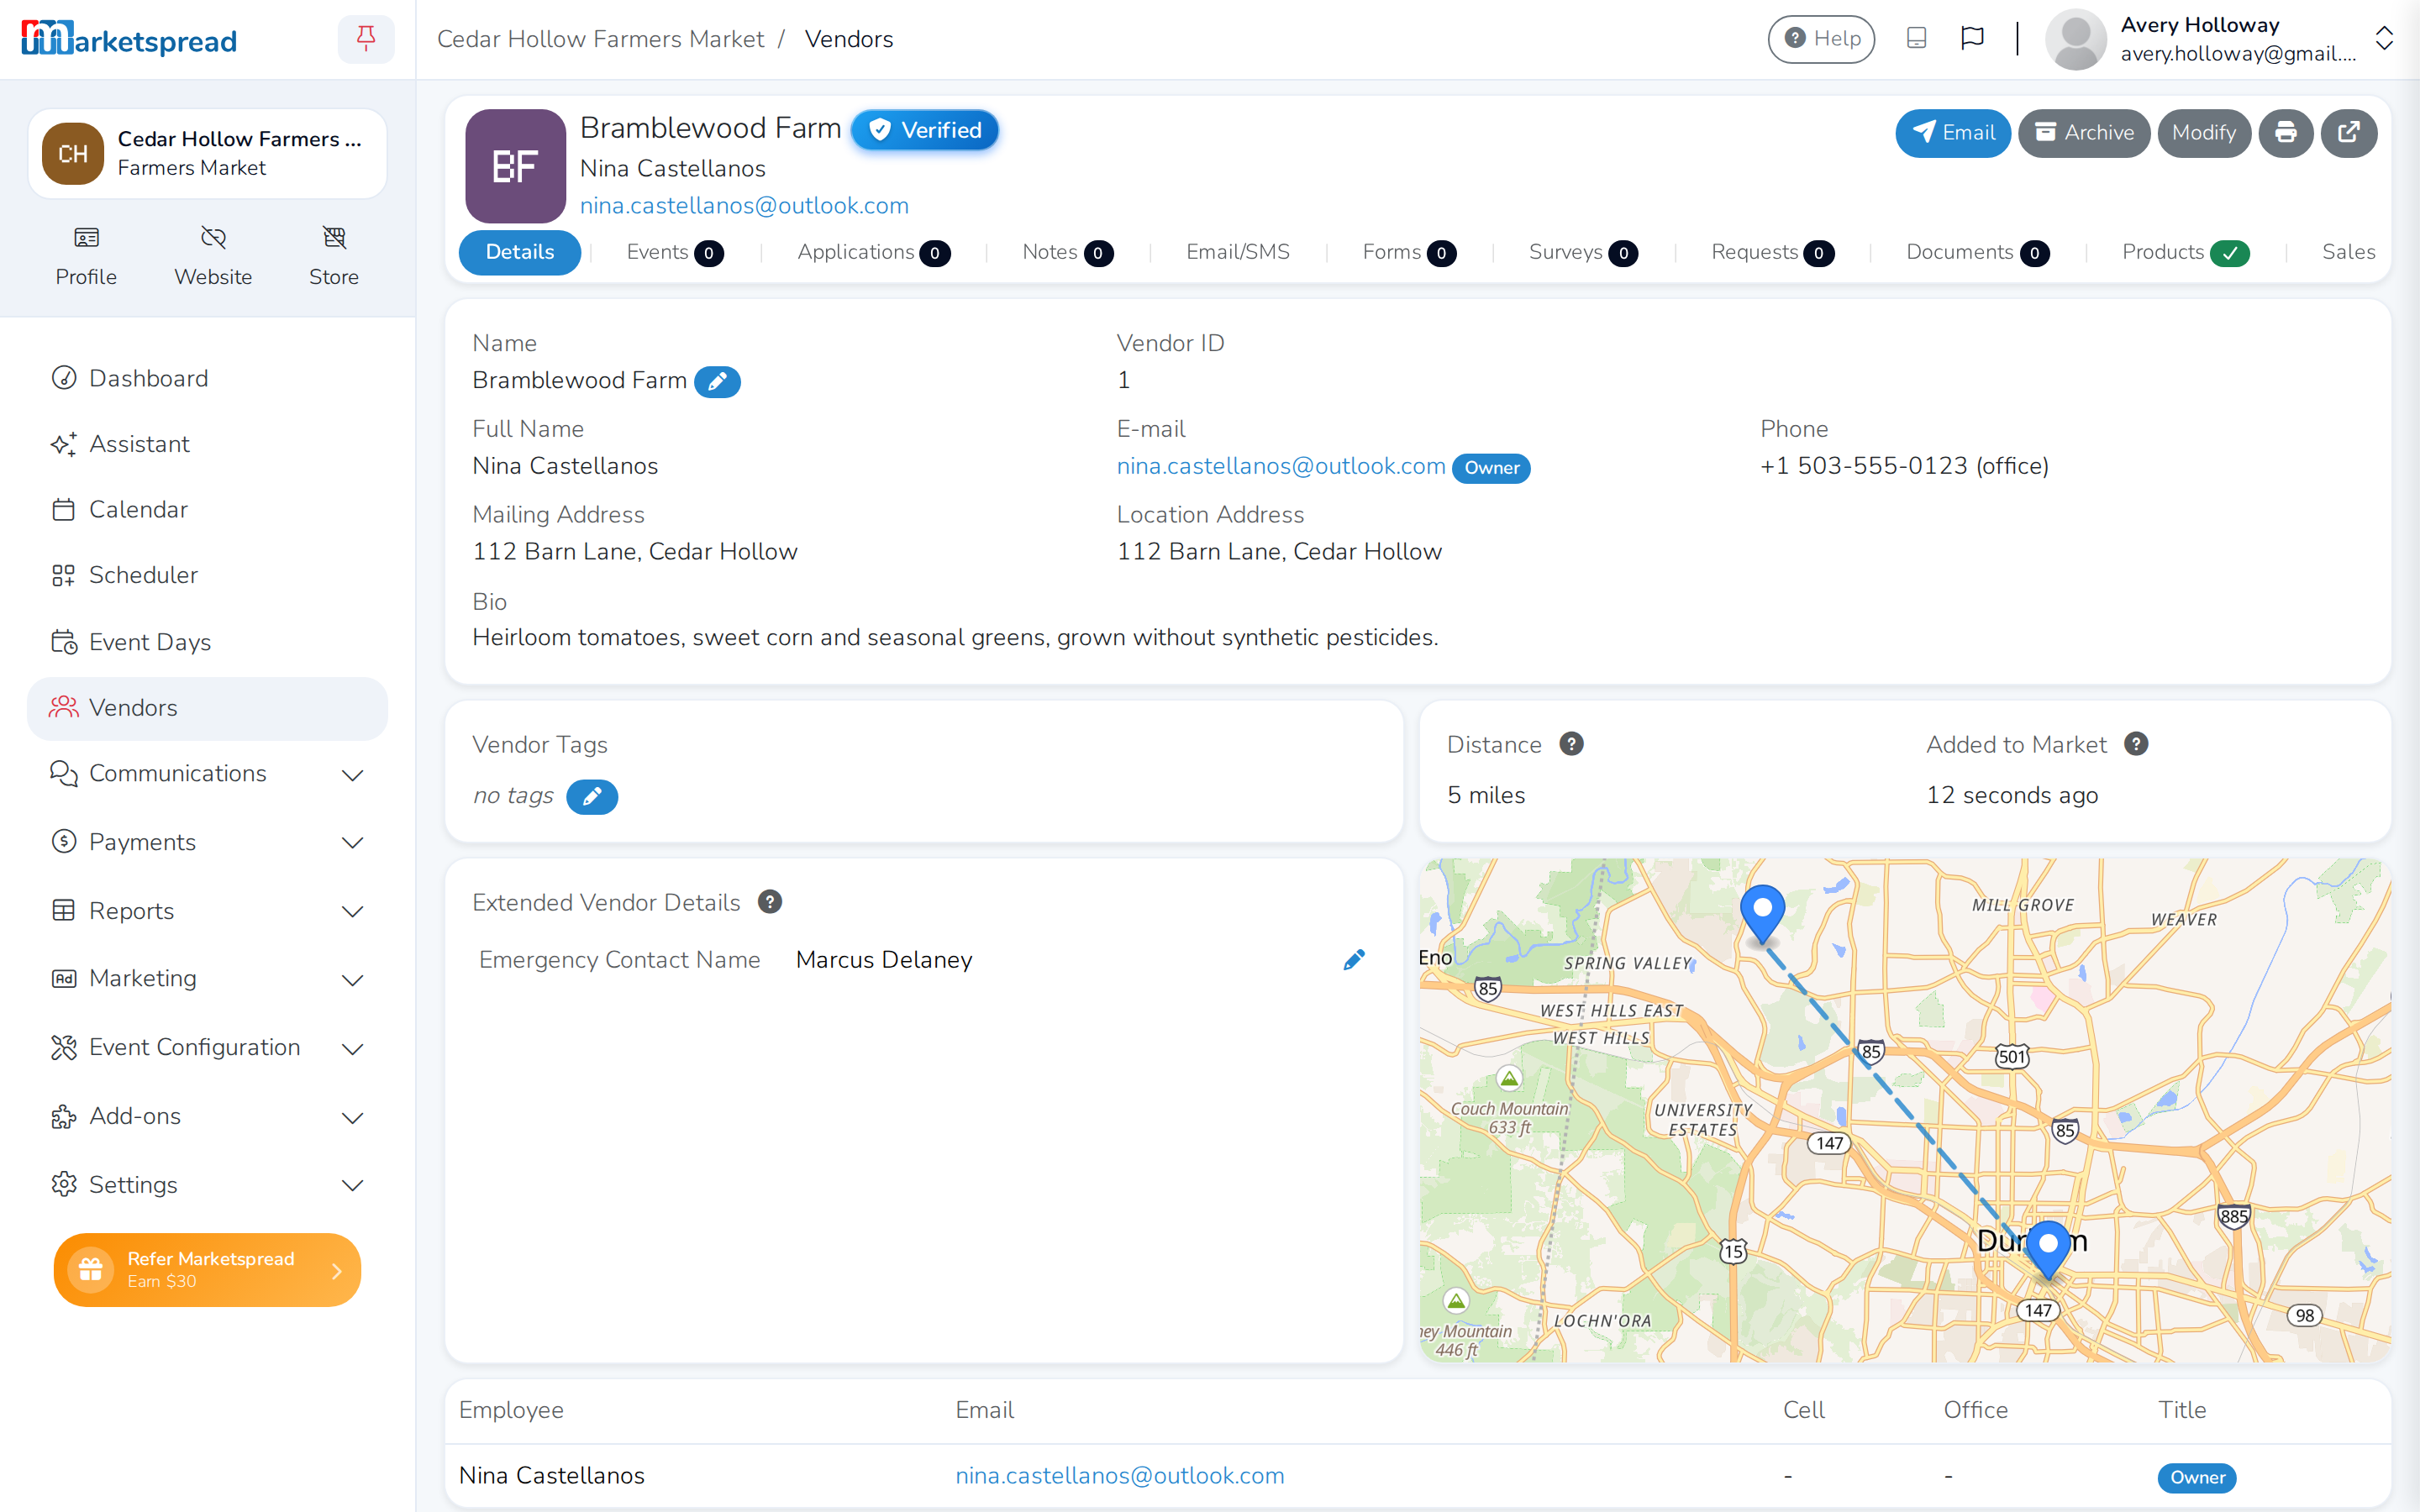
On their Details tab, find Extended Vendor Details.
-
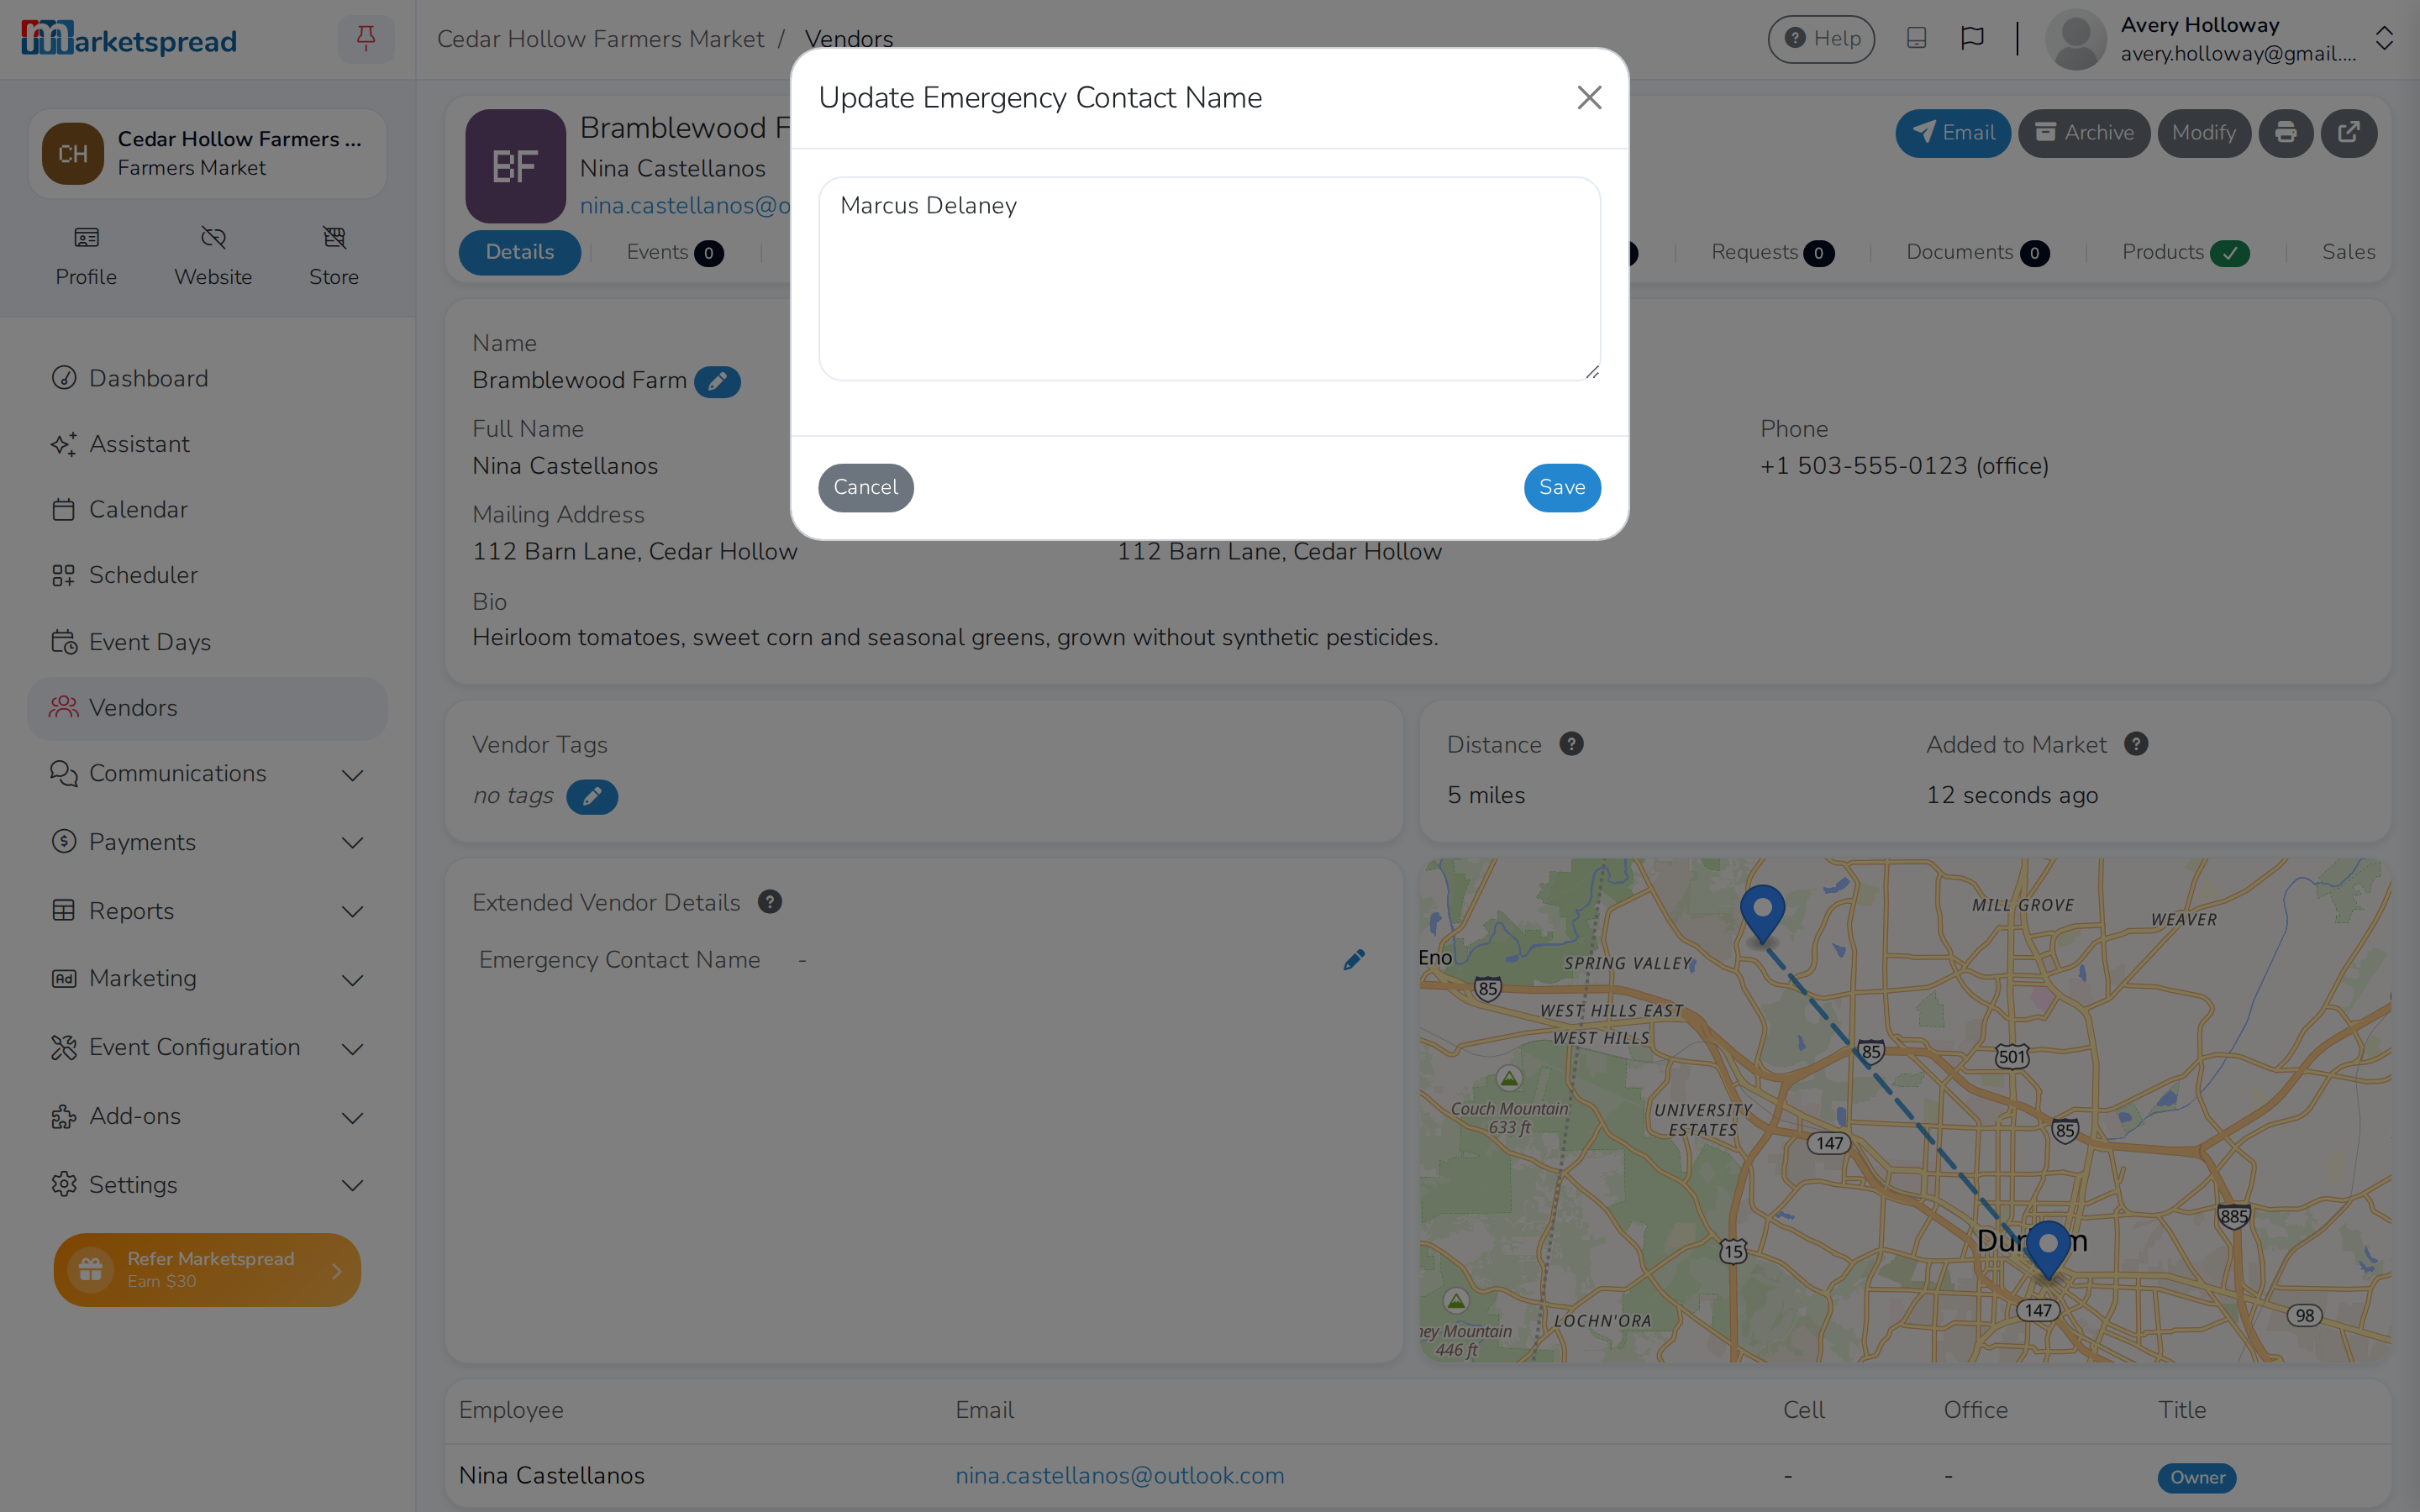
Click the pencil icon next to the detail.
-
Type the value.
-
Click Save.
The detail's value now shows on the vendor's Details tab.
Note
Extended Vendor Details are private to you and your team. Vendors, and the public, never see them.
Tip
If a value is too long to show in the list, click the expand icon next to it to read the whole thing.
Rename or delete a vendor detail
-
Open Settings, then Customizations.
-
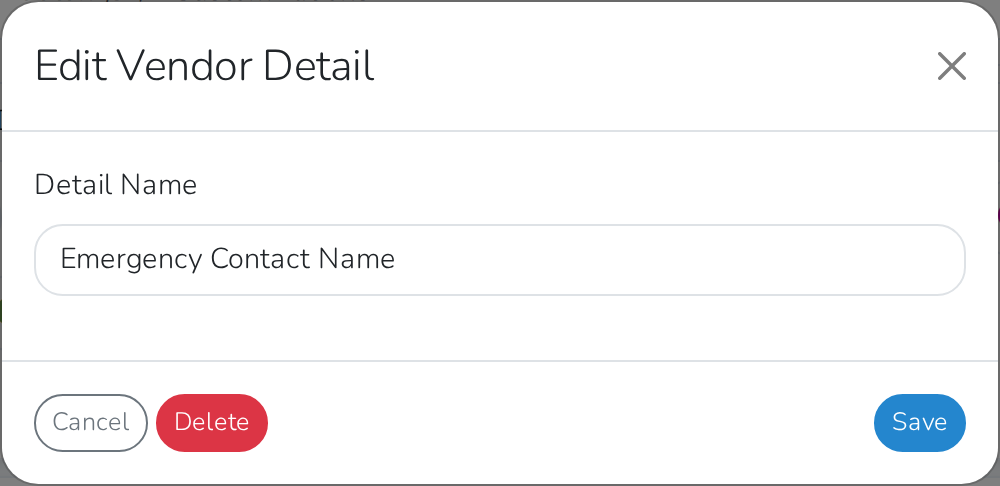
Under Extended Vendor Details, click the detail you want to change.
-
To rename it, change the name and click Save. To remove it, click Delete instead.
Warning
Renaming or deleting a detail happens right away — there's no confirmation step. It also doesn't carry over what was already filled in: after a rename, every vendor's record shows the new name with nothing filled in, and after a delete, the detail no longer shows on any vendor's record at all. Nothing is lost, though — see below.
Bring back a hidden detail
Renaming or deleting a detail doesn't erase what was already filled in for your vendors — it just stops showing it. It waits under Hidden Details.
- Open Settings, then Customizations.
- Under Hidden Details, find the detail.
- Click the plus icon next to it, or click Sync All to bring back every hidden detail at once.
The detail reappears under Active Details, with everything already filled in for it still there.