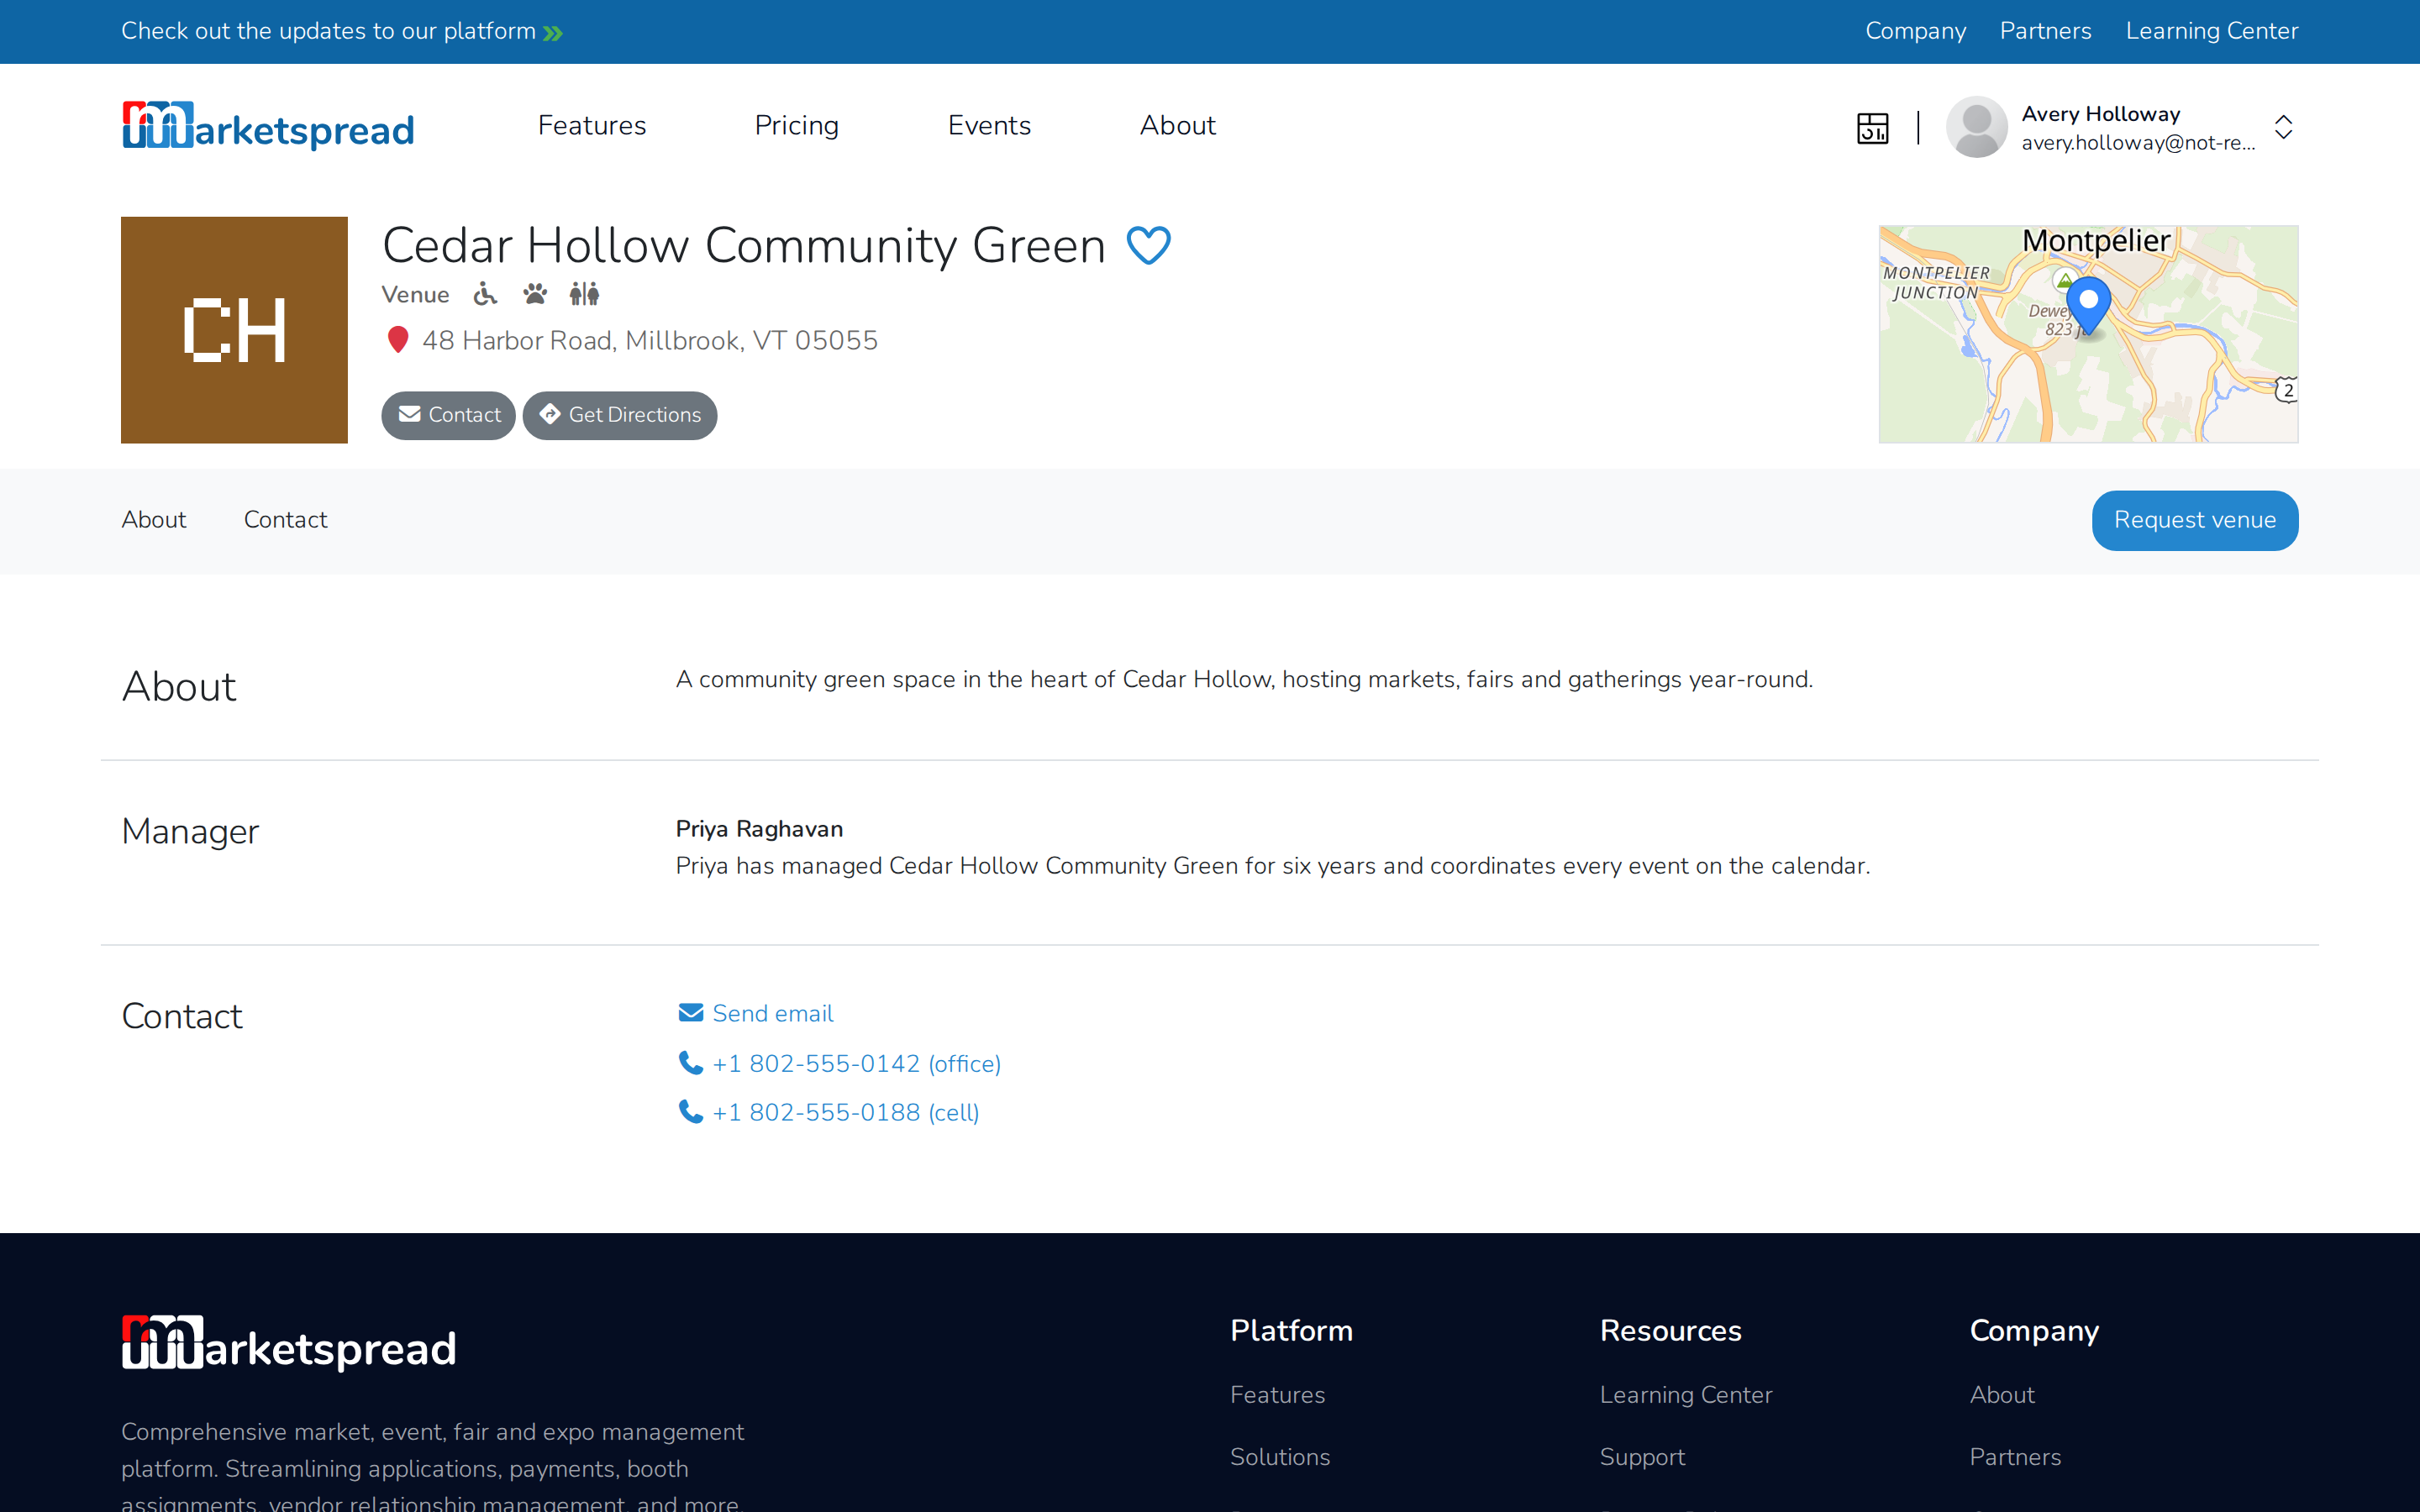
Every venue has its own public page — what people find when they search for your venue or follow a link to it. It shows your description, photos, upcoming events and ways to reach you. If you're accepting bookings, people can request your venue right from the page.
From Settings, you can:
- Update your description and photo
- Show your accessibility and amenities
- Add your website and social links
- Publish a phone number
- Introduce your venue manager
- Turn on requests from your page
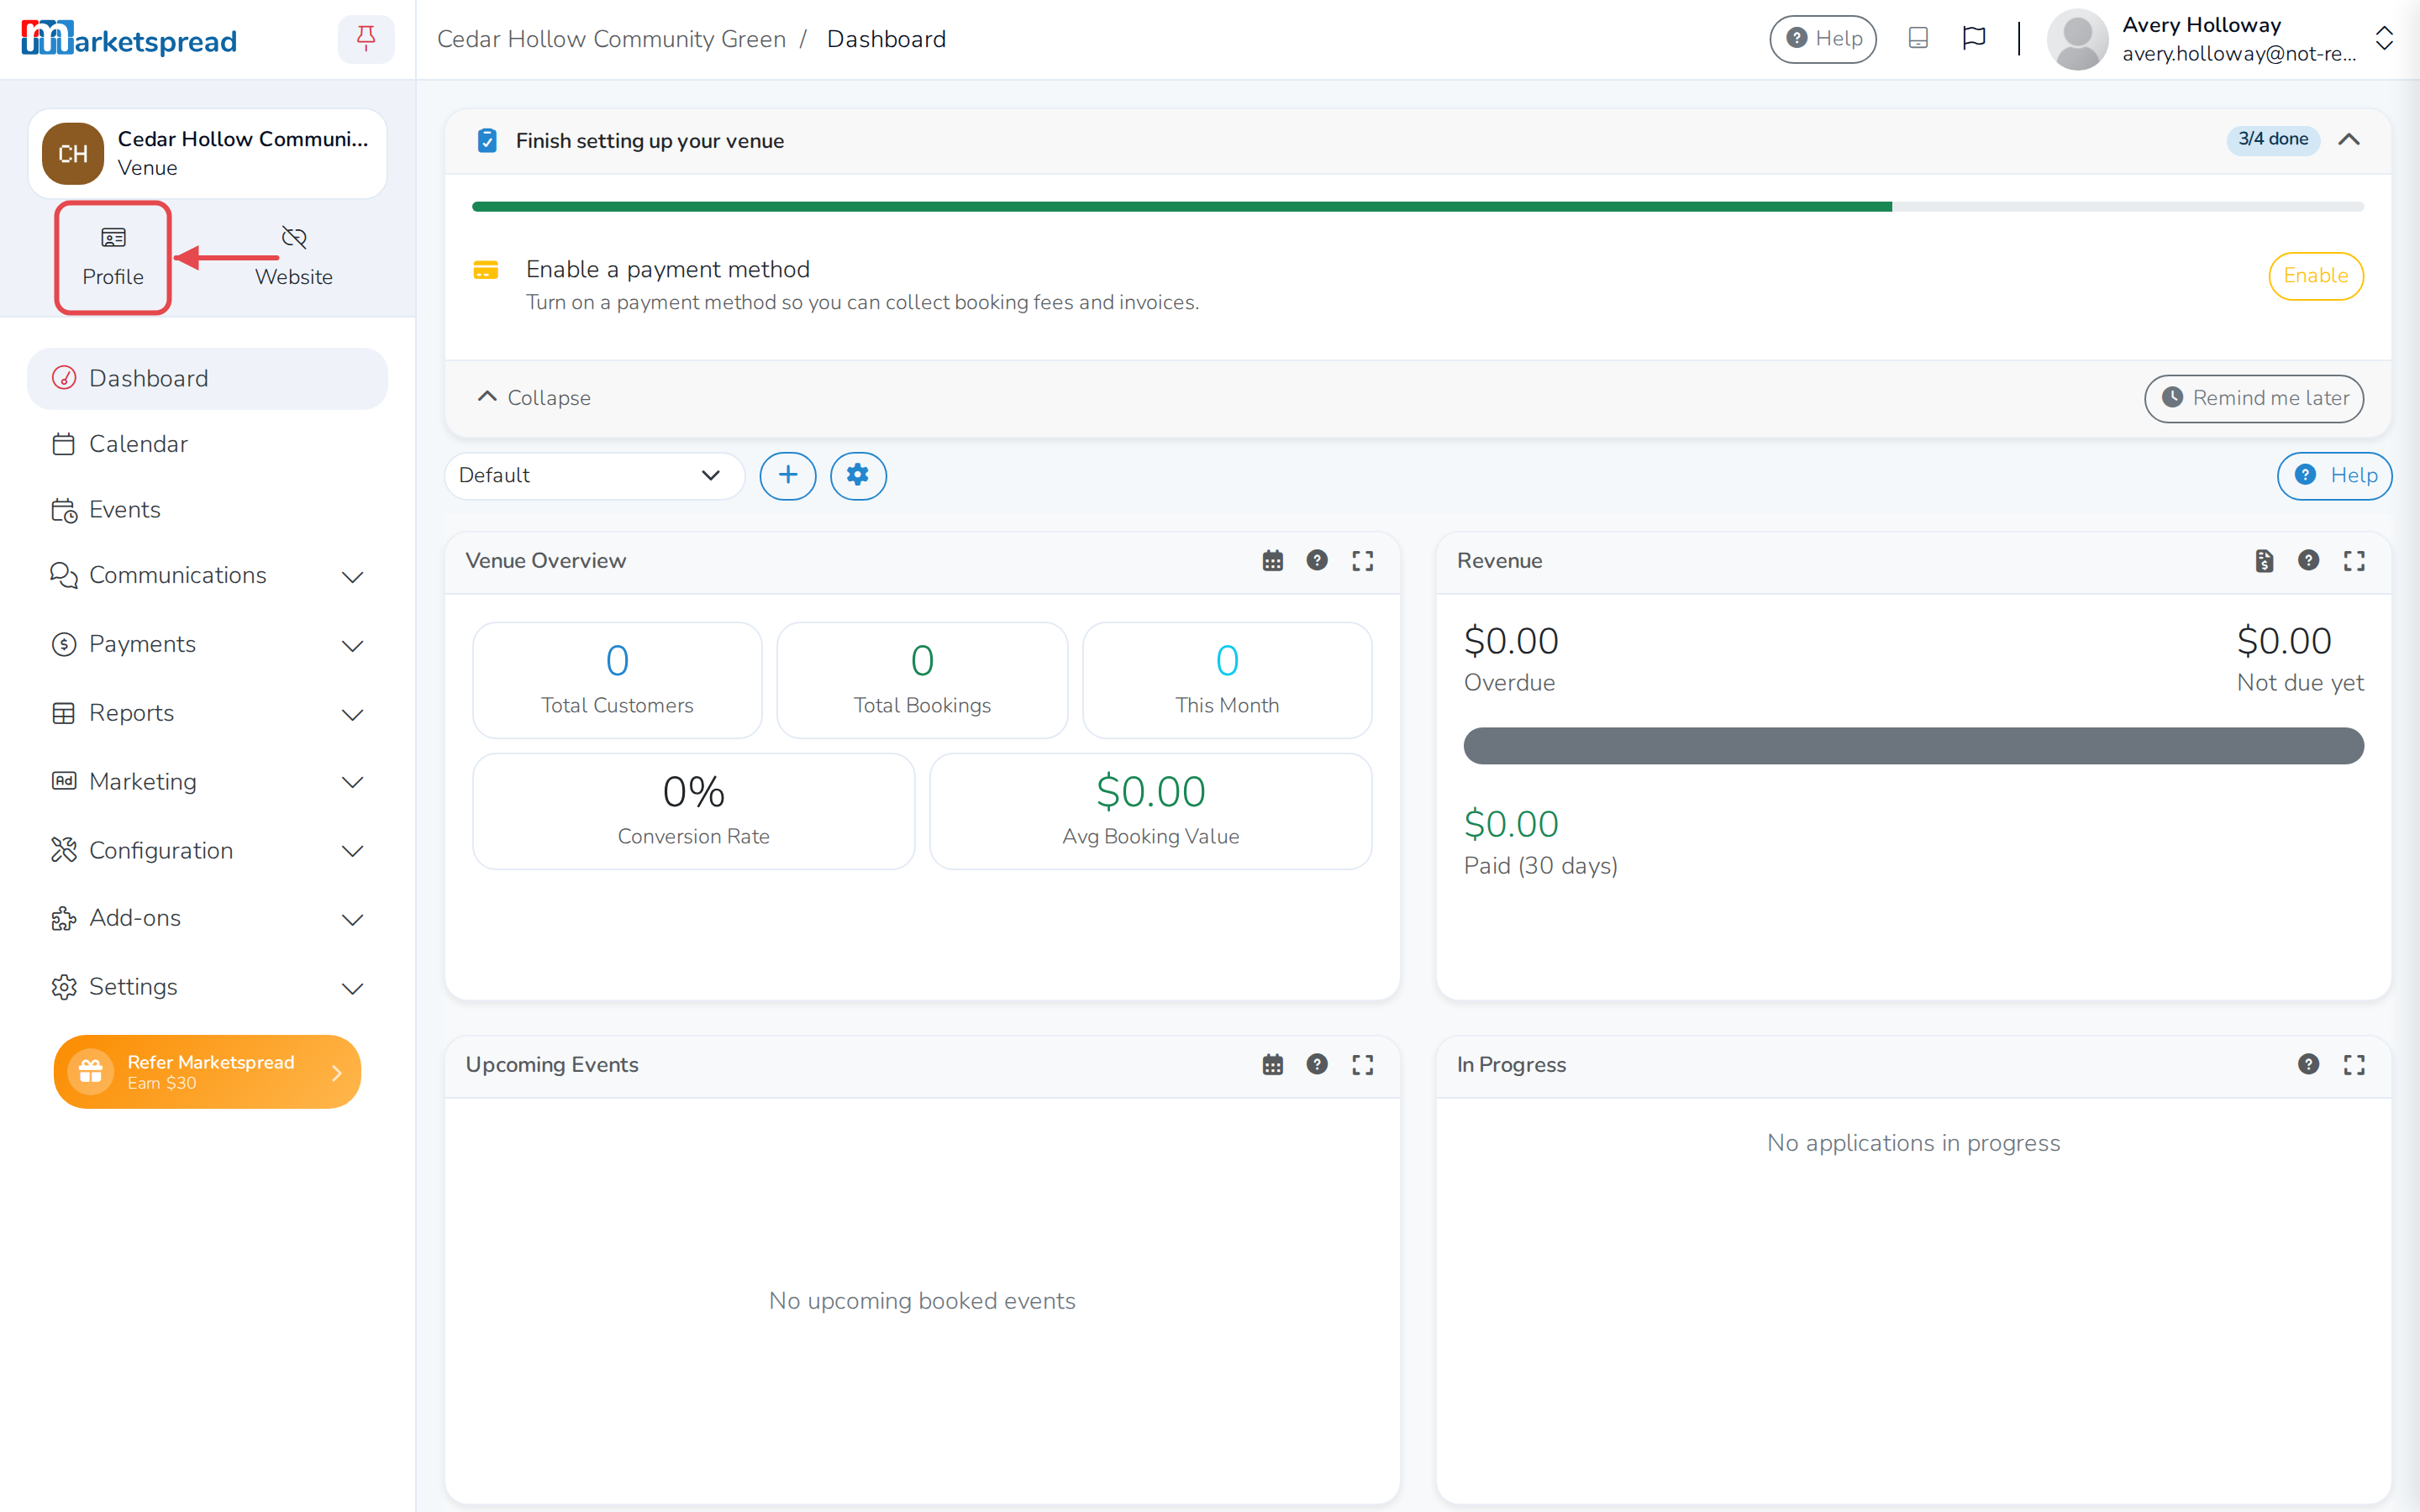
See what your public page looks like
- In your venue dashboard, click Profile near the top of the page.
Anyone can see your description, photos and upcoming events without signing in. Only customers who are signed in can see your phone number or send you an email.
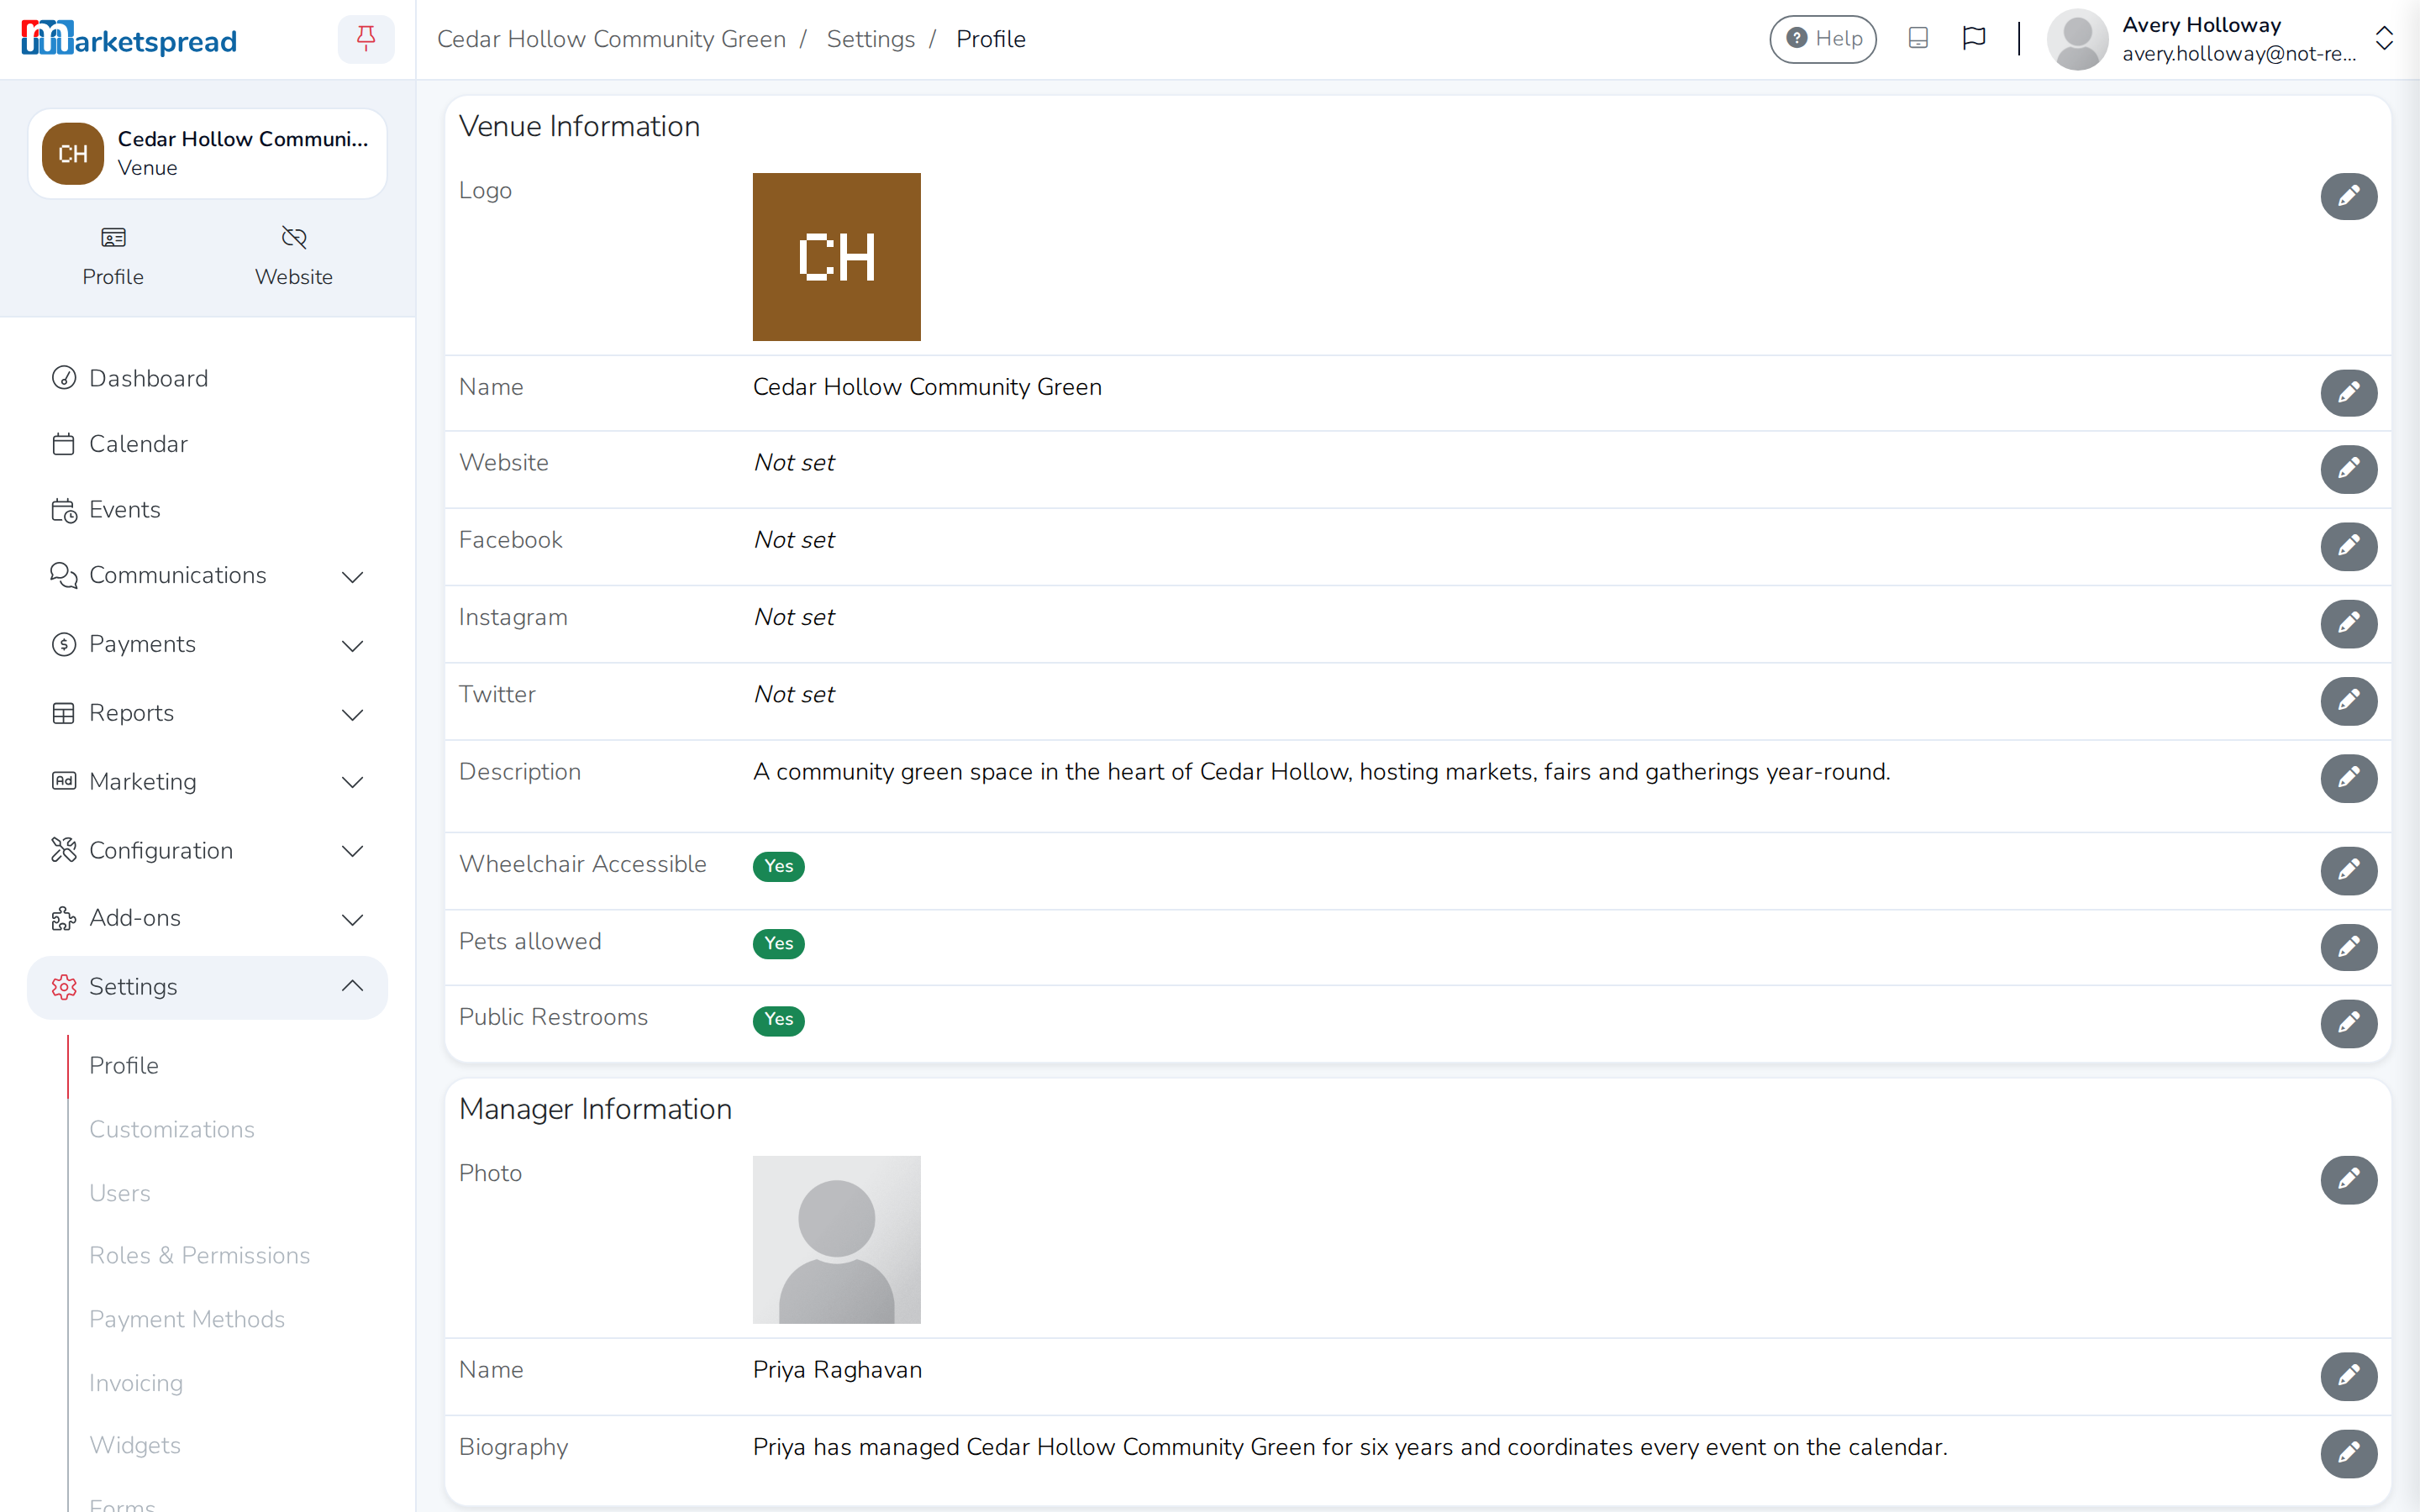
Update your description and photo
- Click Settings in the left-hand menu, then Profile.
- Next to Logo, click the pencil icon and choose a photo.
- Next to Description, click the pencil icon.
- Type what you want customers to read.
- Click Save.
Show your accessibility and amenities
Wheelchair Accessible, Pets allowed and Public Restrooms each show as an icon next to your venue's name.
- Click Settings in the left-hand menu, then Profile.
- Next to the one you want to change, click the pencil icon.
- Turn the switch on or off.
- Click Save.
Add your website and social links
- Click Settings in the left-hand menu, then Profile.
- Next to Website, Facebook, Instagram or Twitter, click the pencil icon.
- Enter the link or handle.
- Click Save.
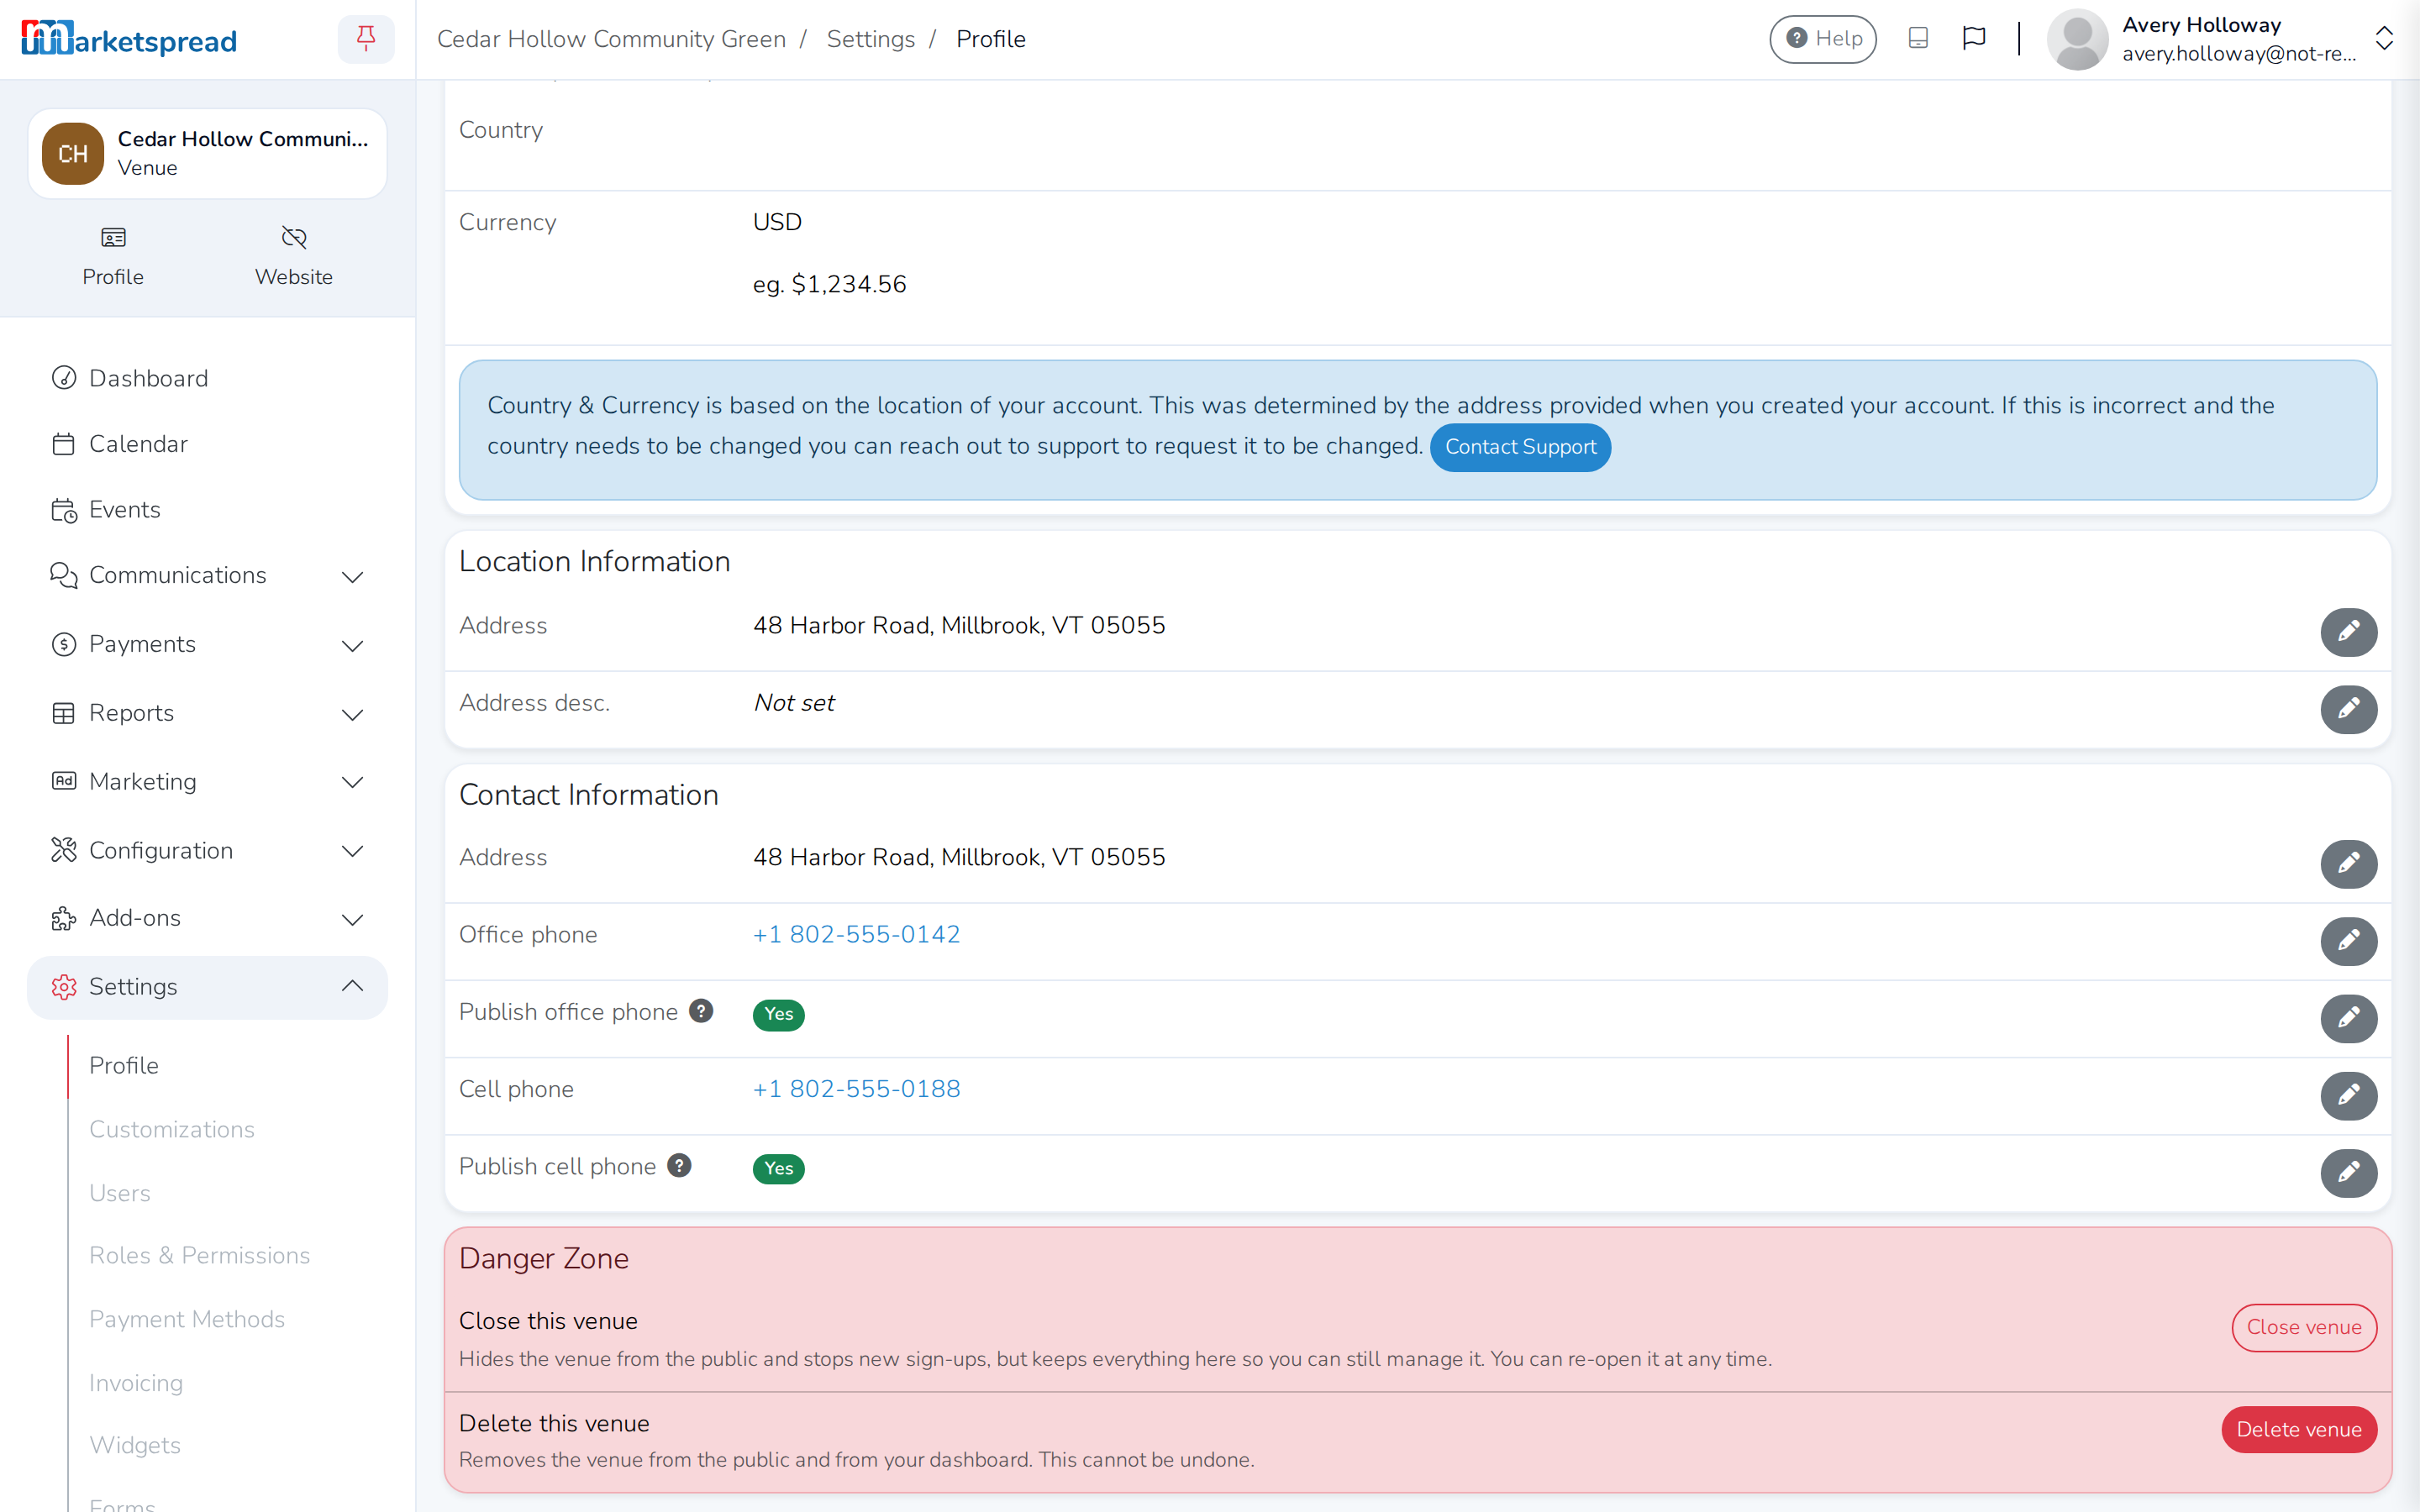
Publish a phone number
Your office and cell phone numbers are private until you publish them.
- Click Settings in the left-hand menu, then Profile.
- Next to Office phone or Cell phone, click the pencil icon, enter the number, then click Save.
- Next to Publish office phone or Publish cell phone, click the pencil icon.
- Turn the switch on, then click Save.
Introduce your venue manager
A manager's name and biography appear in a Manager section on your page — add a photo if you want one to show too. Both the name and biography have to be filled in for the section to appear.
- Click Settings in the left-hand menu, then Profile.
- Under Manager Information, click the pencil icon next to Photo to add one.
- Next to Name, click the pencil icon, enter your manager's name, and click Save.
- Next to Biography, click the pencil icon, enter their biography, and click Save.
Turn on requests from your page
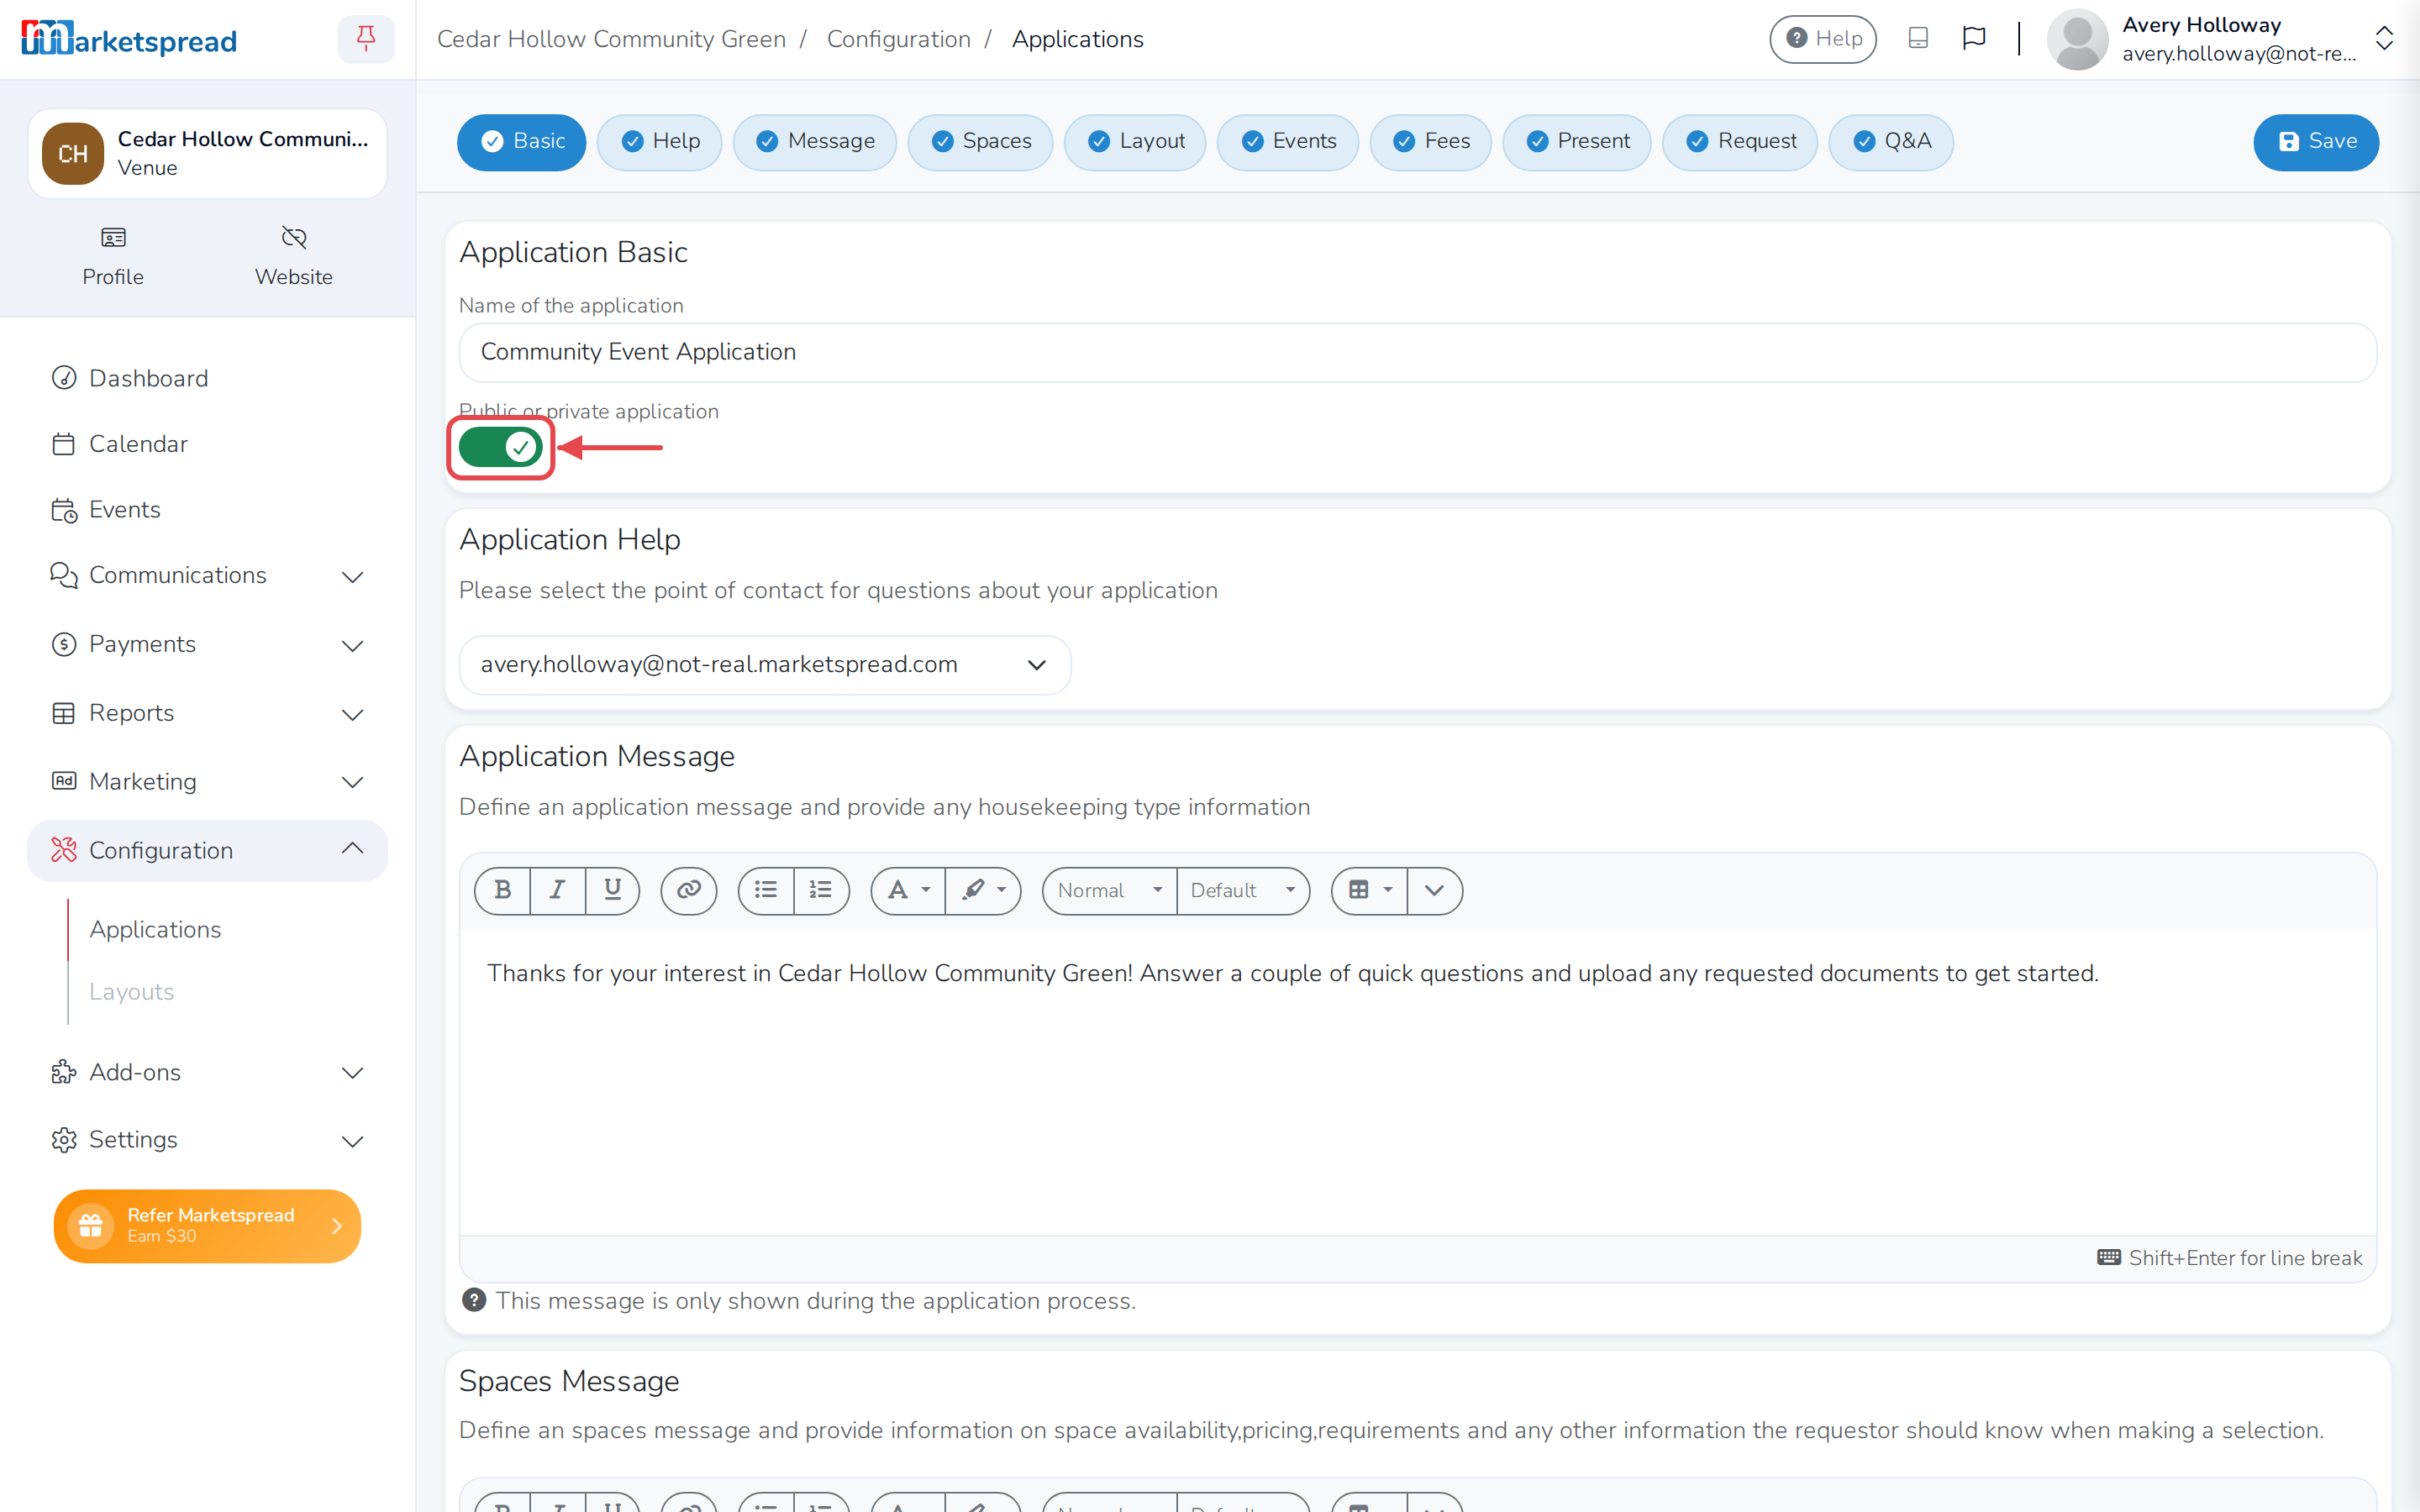
A Request venue button appears on your page once you have an activated application set to public.
- Click Configuration in the left-hand menu, then Applications.
- Click the pencil icon next to an activated application.
- Turn on the switch under Public or private application.
- Click Save.