


Your booking application is the form customers fill out to request an event at your venue — its fees, documents and questions. Find it under Applications, in the Configuration section of your venue dashboard. From there you can turn one on so customers can apply, change what's on it, or take it out of use.
Edit an application
-
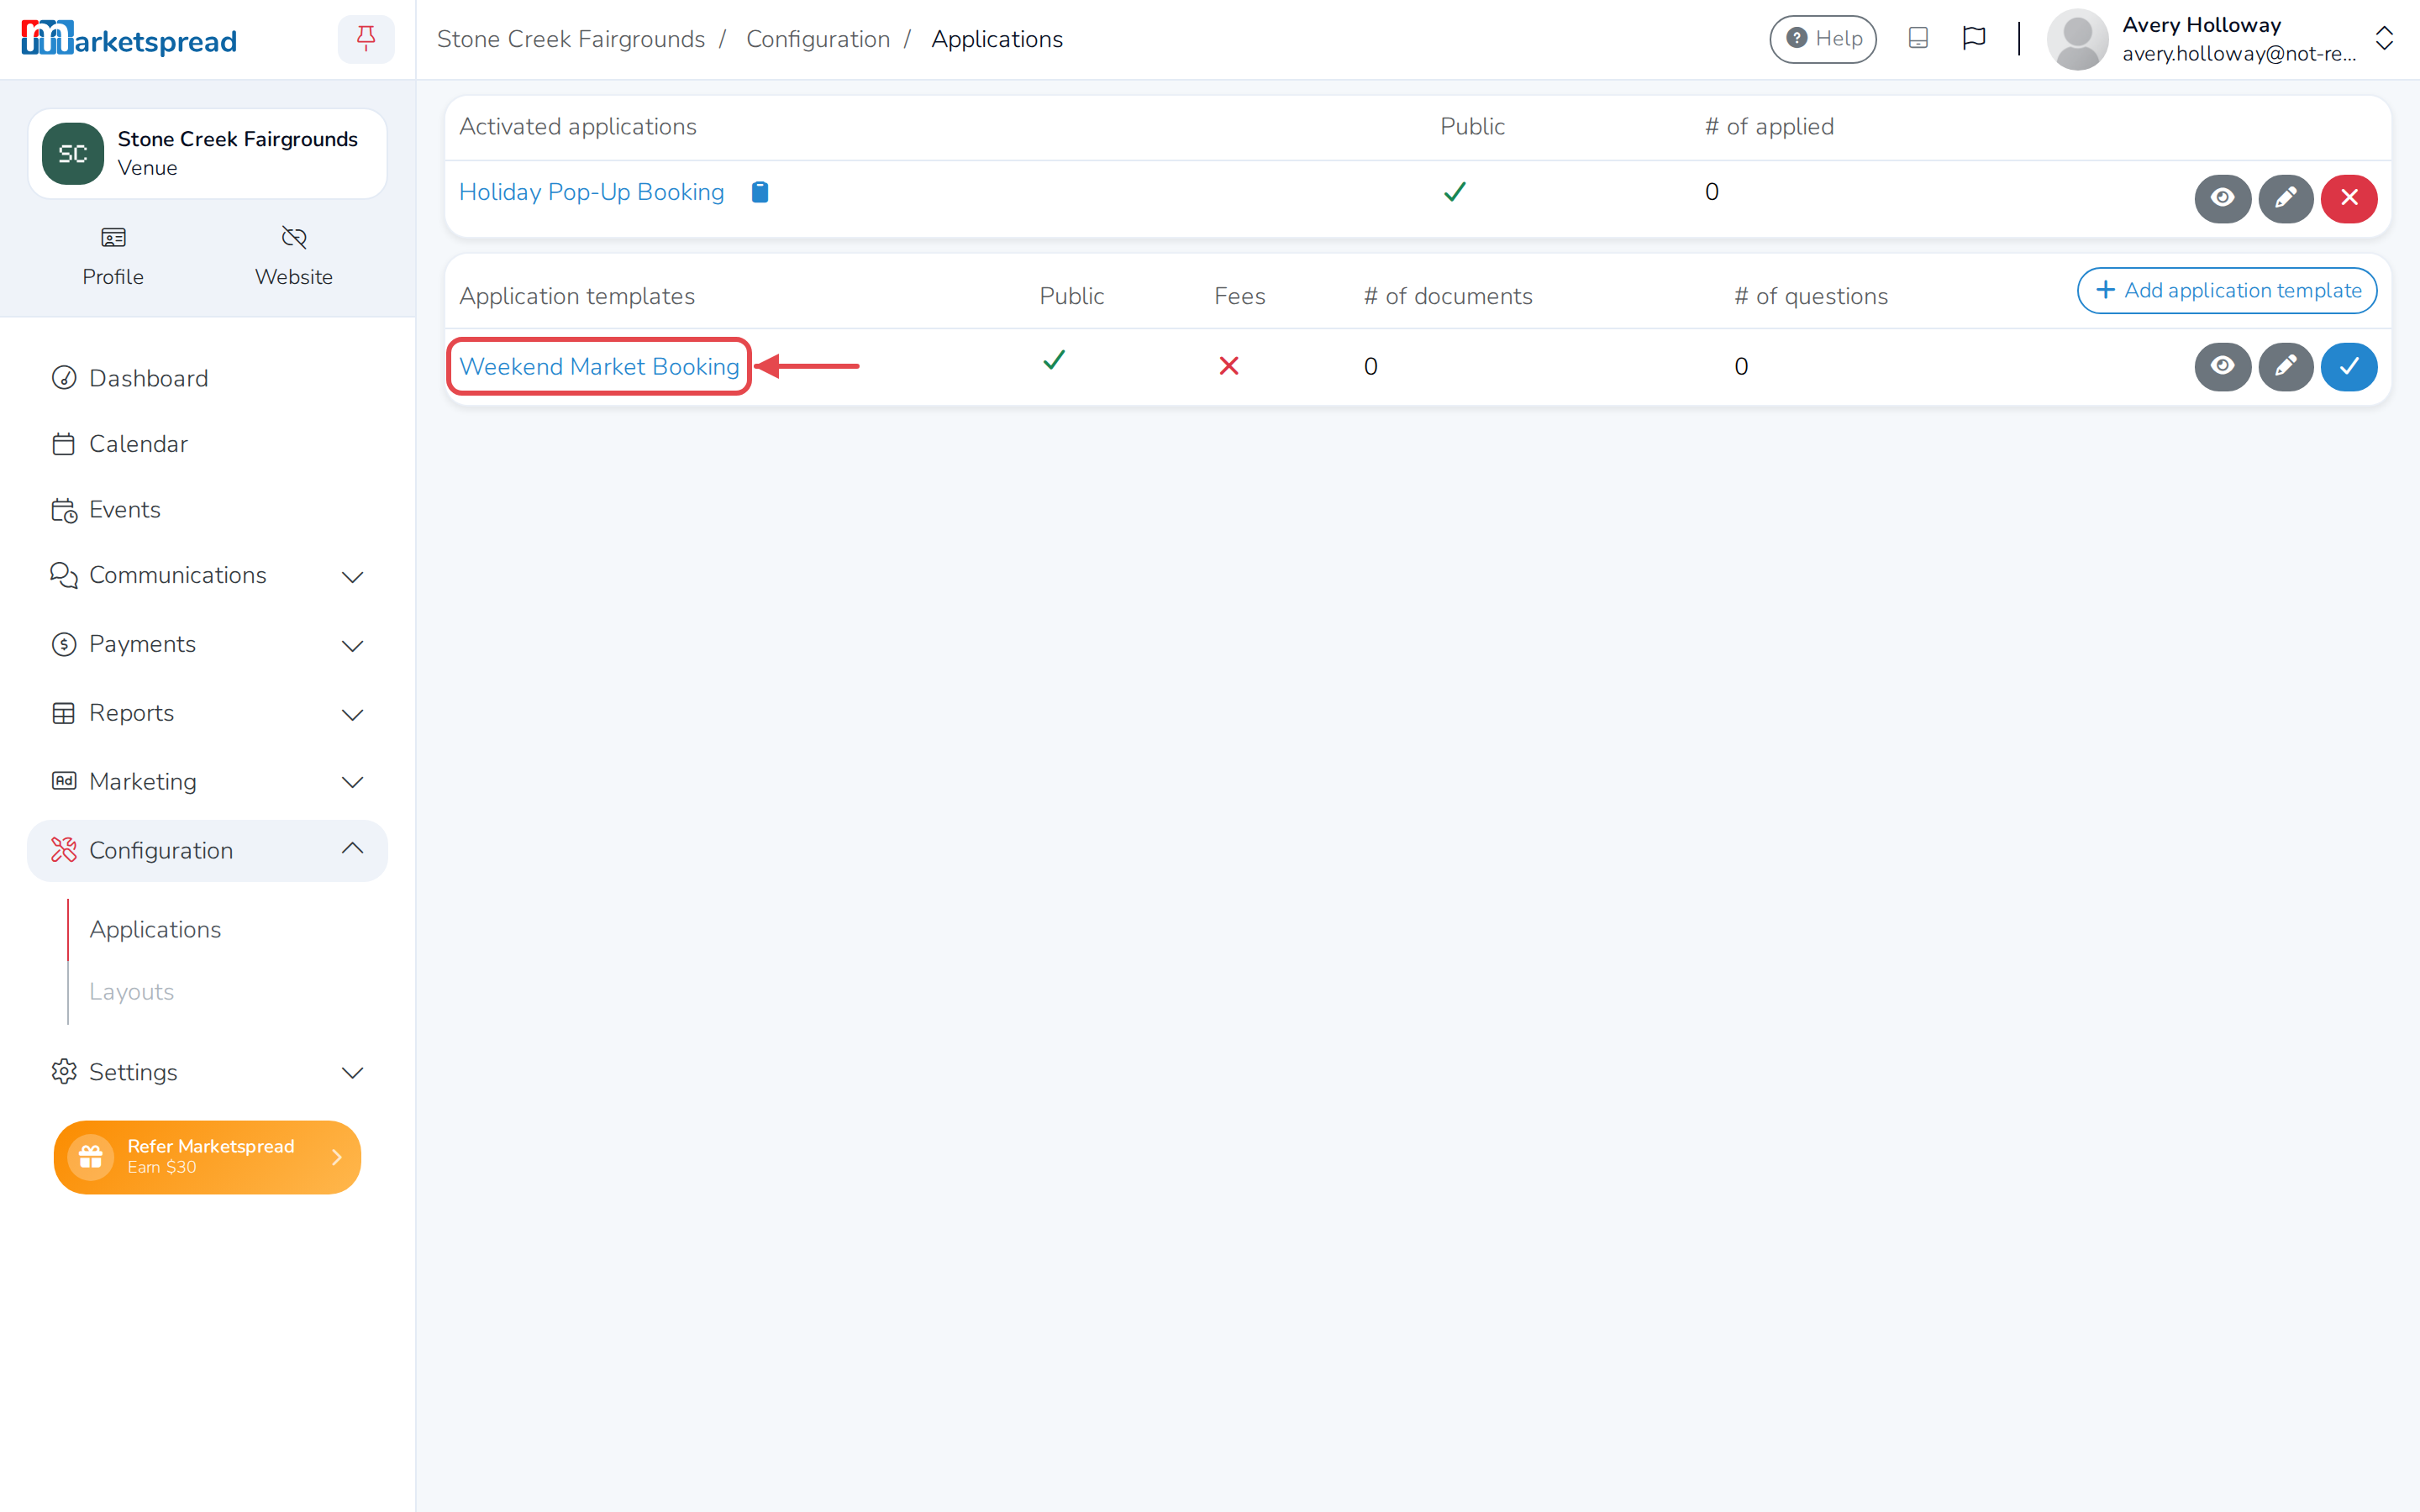
Click Configuration in the left-hand menu, then Applications.
-
Click the application's name to open it.
-
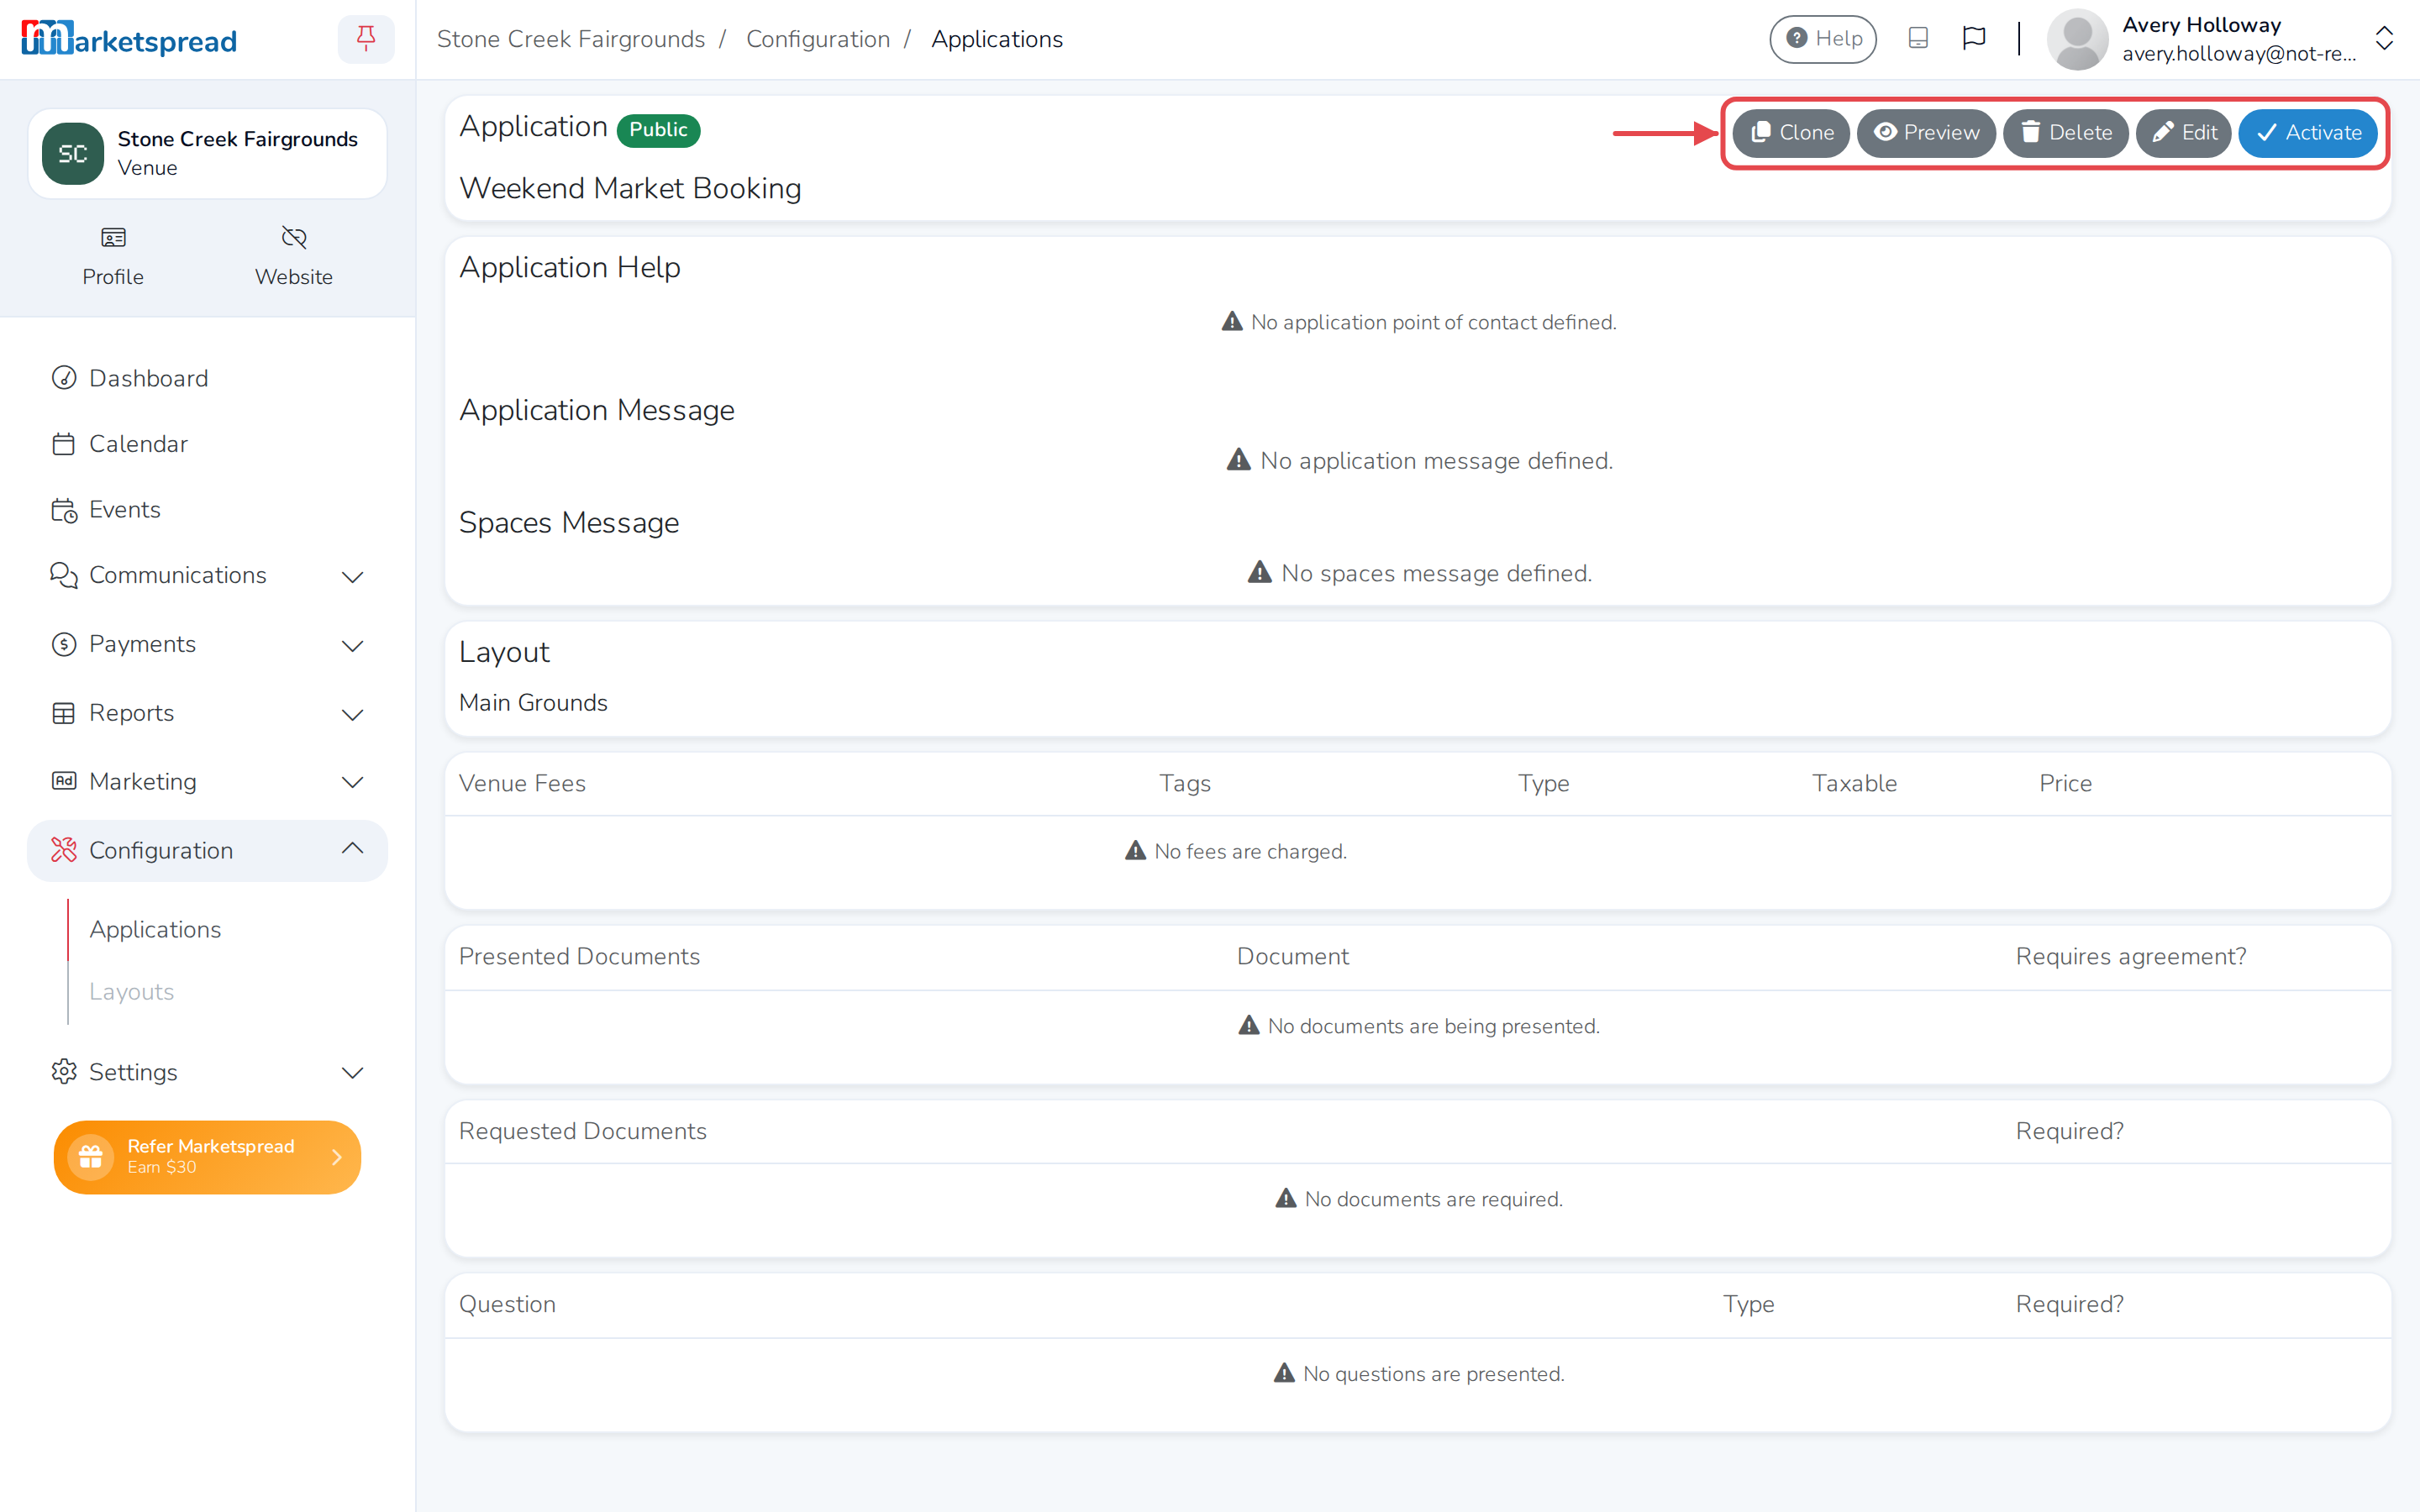
Click Edit.
-
Change what you need, then click Save application.
The application has:
- Application Basic — its name, and whether it's a Public or private application
- Application Help — who applicants' questions about the application go to
- Application Message and Spaces Message — optional messages shown while someone applies
- Application Layout — the layout that gives applicants the spaces to request, and the Event Types you accept
- Application and Approval Fees — fees charged when someone applies, or when you approve them
- Presented Documents and Requested Documents — documents you show applicants, or ask them to provide
- Questions — anything else you want to ask on the application
Activate an application
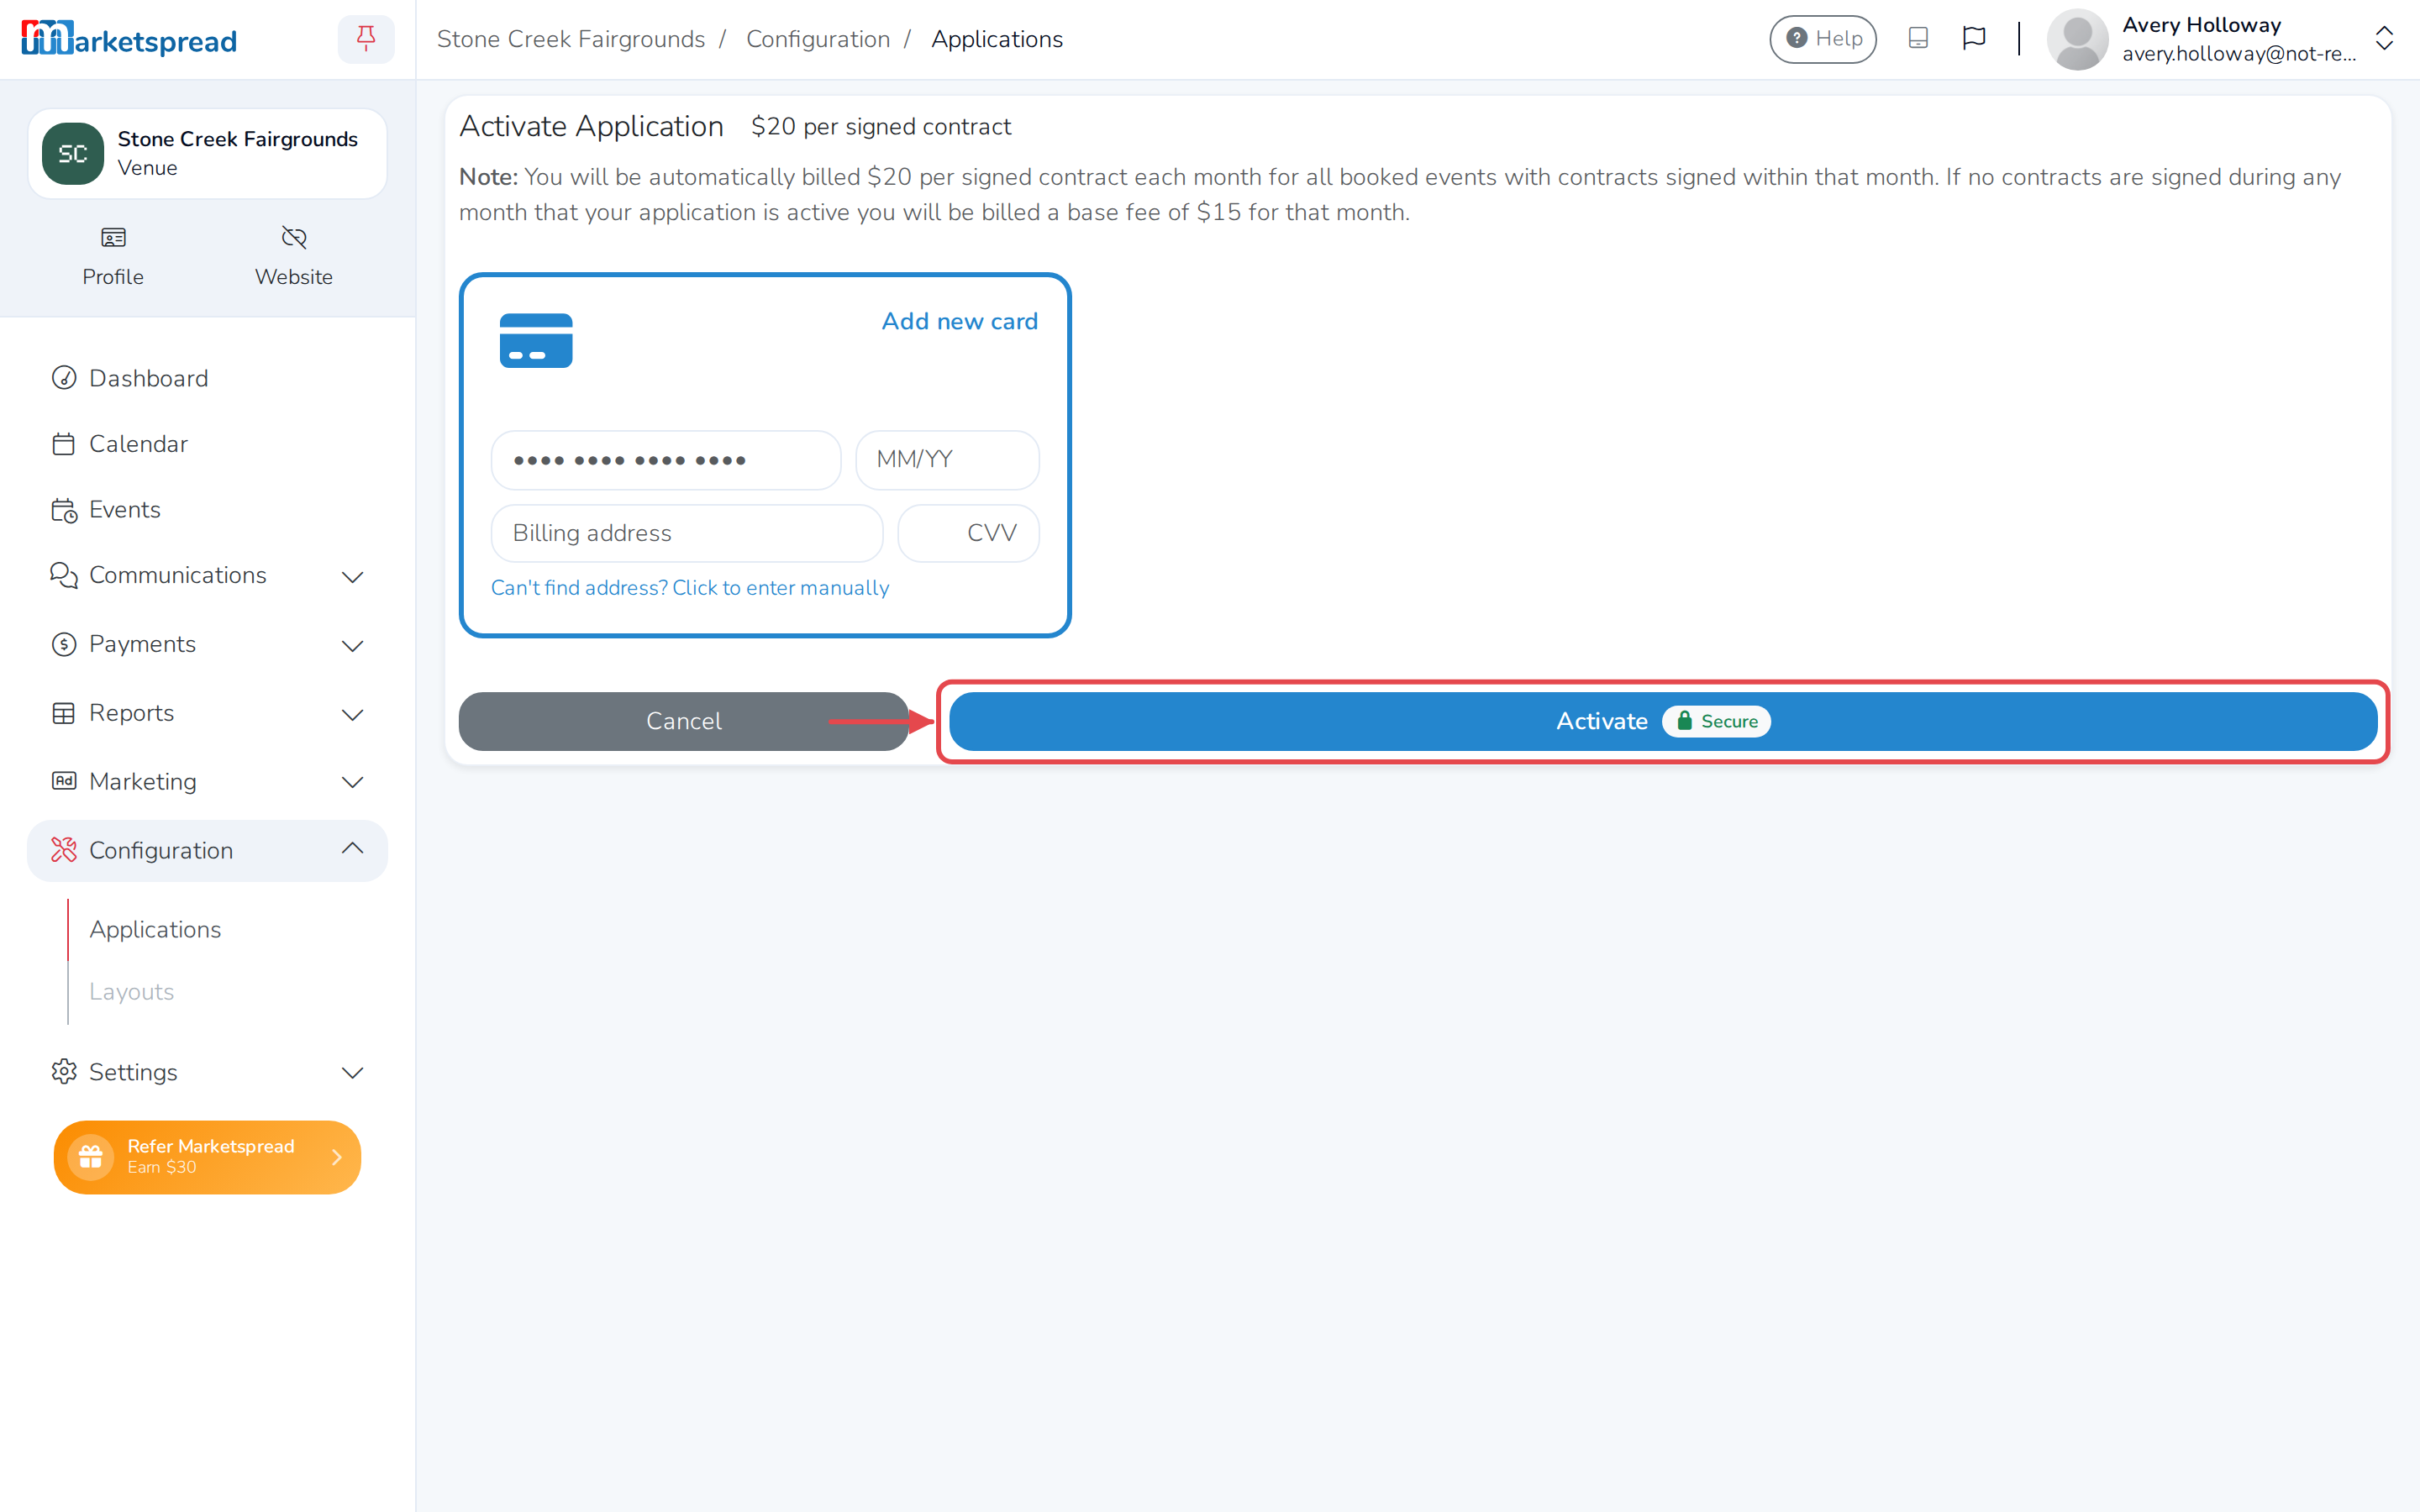
Activating an application makes it live at its own link, so customers can start applying. It costs $20 for every contract signed that month, or a $15 base fee for any month when none are signed.
-
Click Configuration in the left-hand menu, then Applications.
-
Click the application's name to open it.
-
Click Activate.
-
Fill in your card details.
-
Click Activate.
Once it's active, its Apply Link appears at the top of the page — copy it to send directly to a customer.
Update your payment method
If you've already activated an application, use the same screen to change the card you're billed on.
- Click Configuration in the left-hand menu, then Applications.
- Click the application's name to open it.
- Click the pencil icon next to Billing Information.
- Fill in your new card details.
- Click Update.
Retire an application
Retiring an application deactivates it, so it stops accepting new applications. You can't undo this — activate it again if you want to accept applications through it later.
-
Click Configuration in the left-hand menu, then Applications.
-
Click the application's name to open it.
-
Click Deactivate.
-
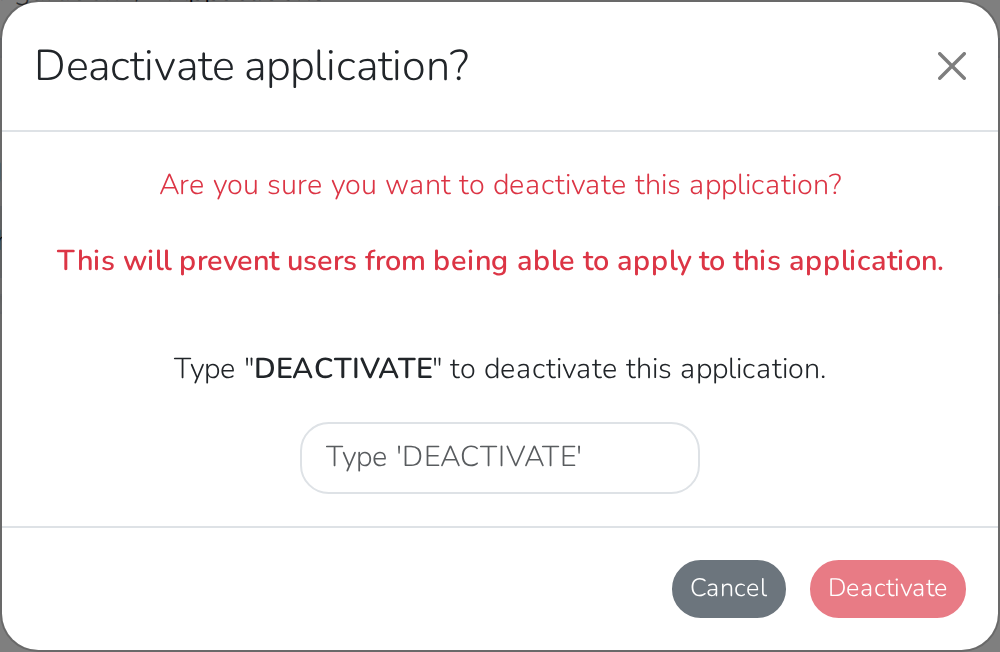
Type DEACTIVATE to confirm.
-
Click Deactivate.
Good to know
An application can't go live until its layout has at least one space. If nothing happens when you click Activate, that's why.
An application you've never activated can be deleted instead, removing it completely — click Delete on the application's page and confirm. Once it's been activated, Delete is no longer available; you can only deactivate it.