


Once you and a customer have agreed a price for their booking, invoice them for it. Open your venue's Invoices page, under Payments in the left-hand menu. From here you can create and send a new invoice, or check what's on one you've already sent. You can resend or edit it too, if something changes.
Create and send an invoice
-
Click Payments in the left-hand menu, then click Invoices.
-
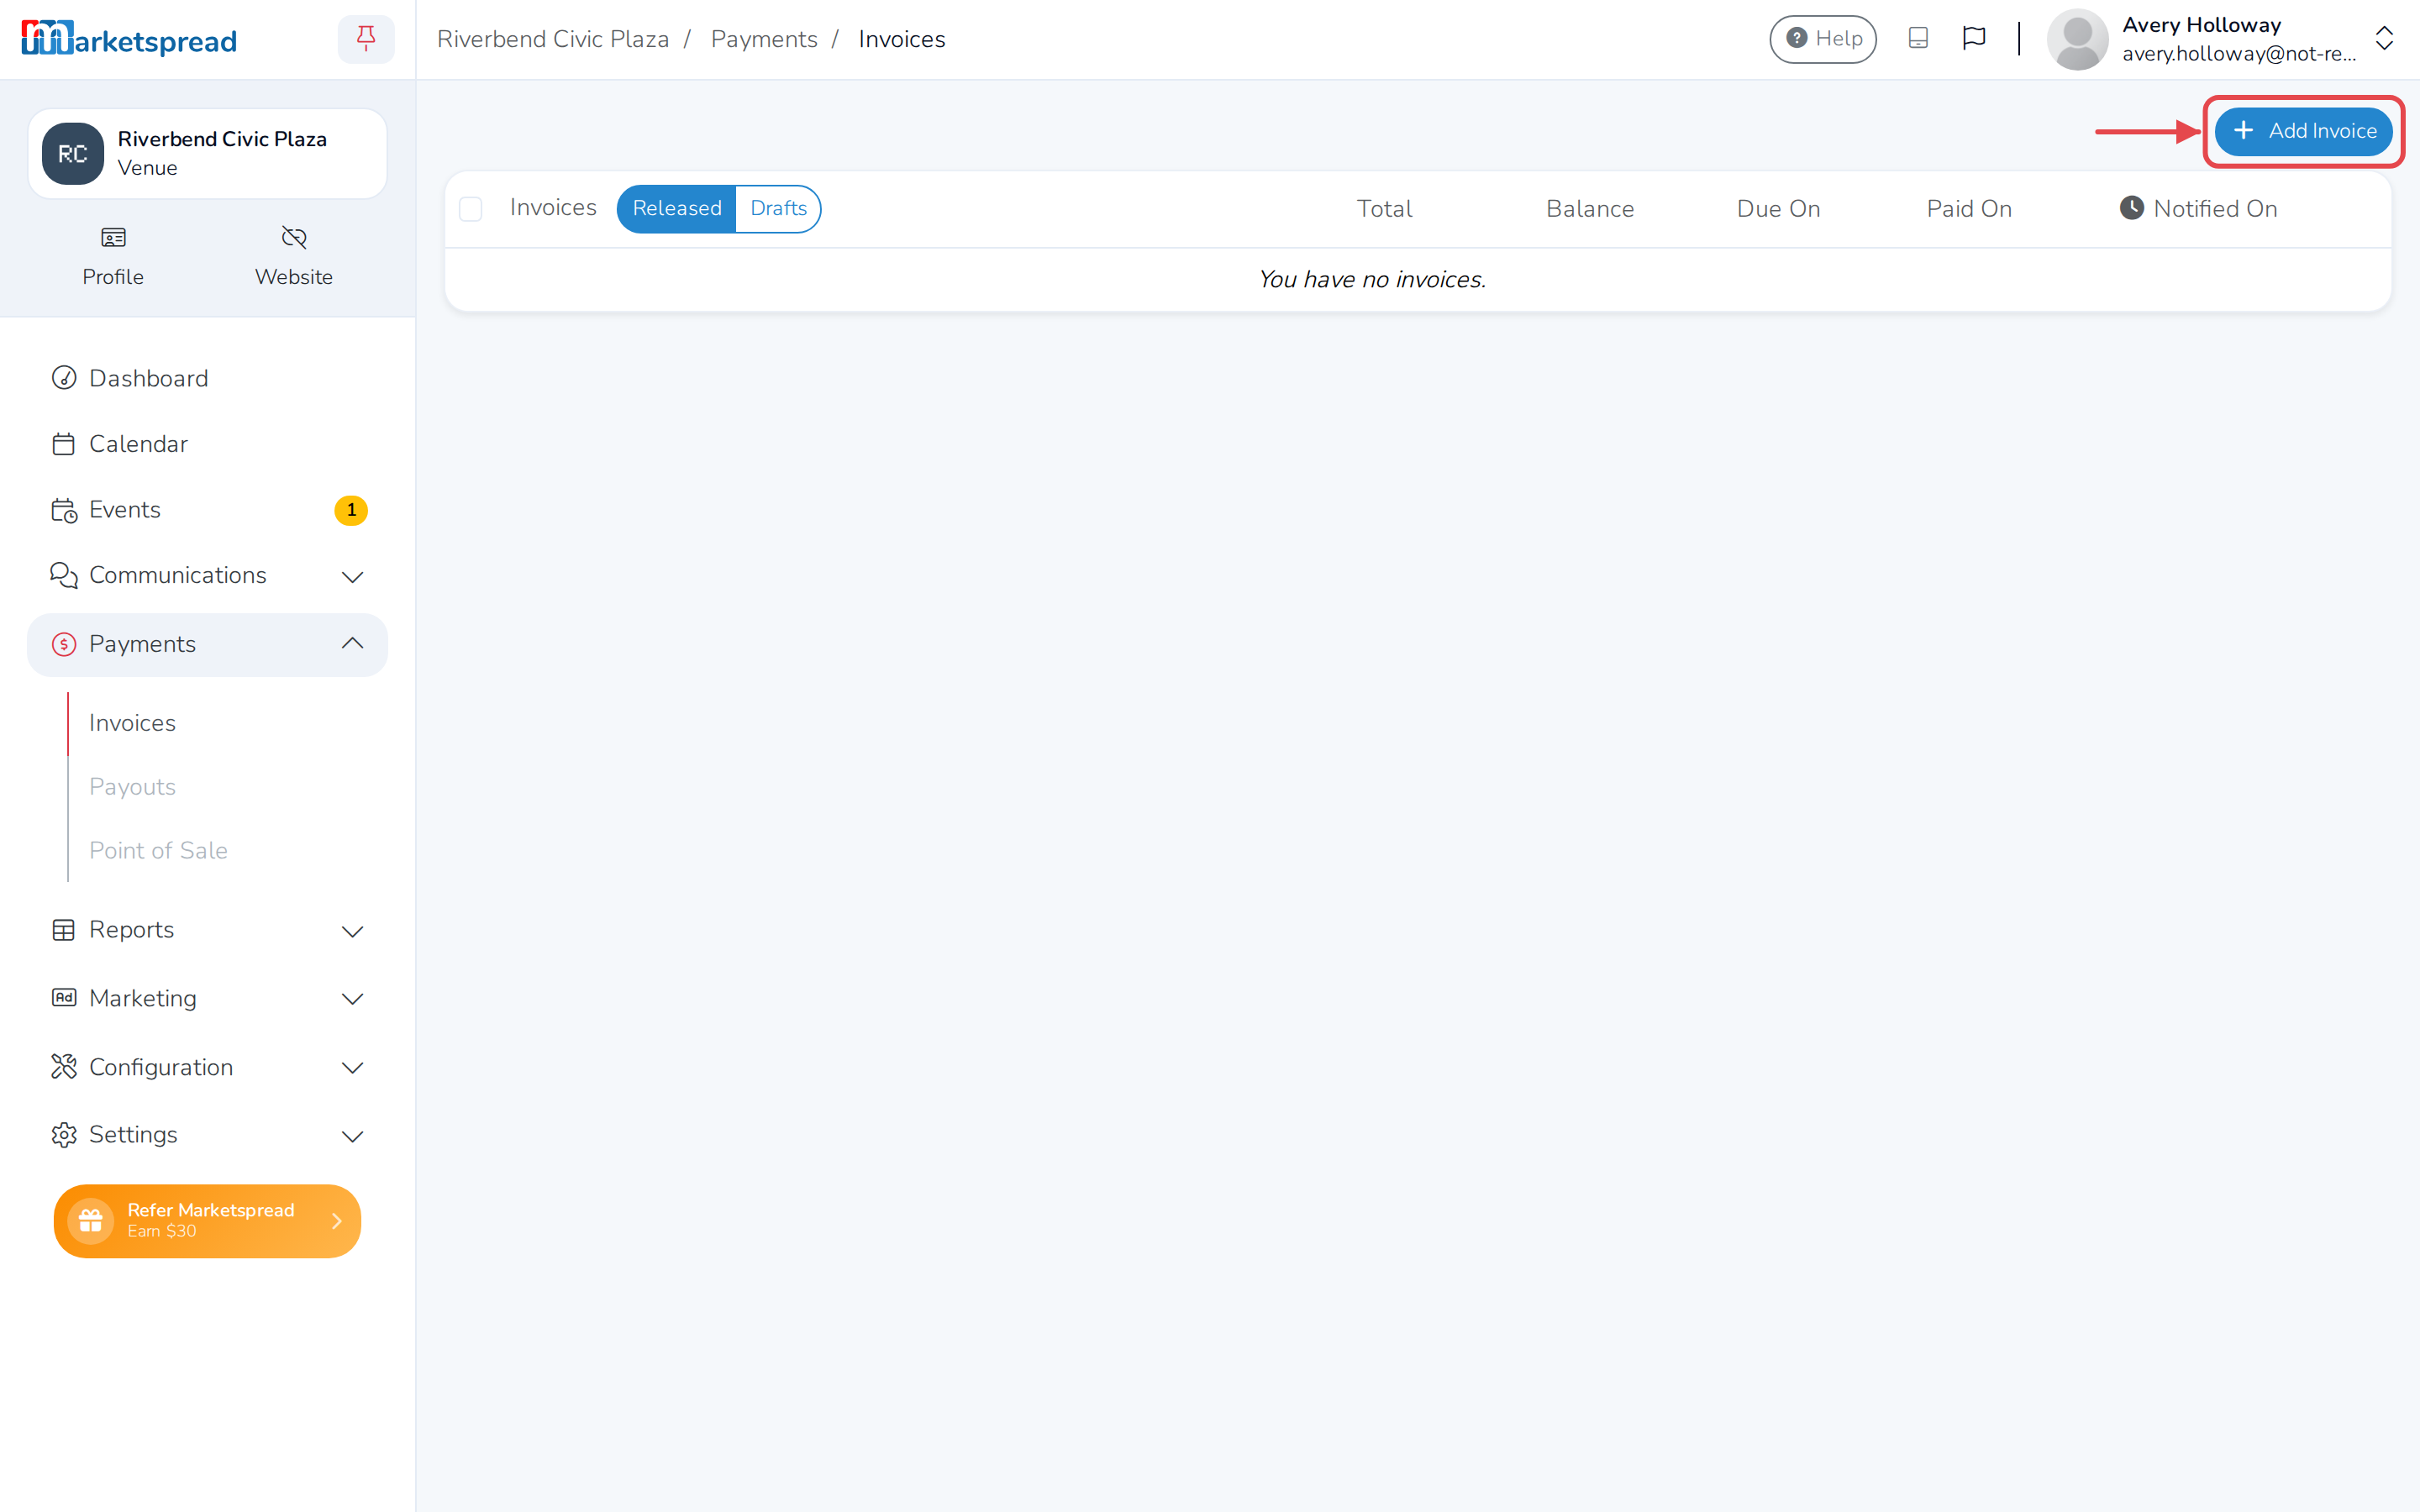
Click Add Invoice.
-
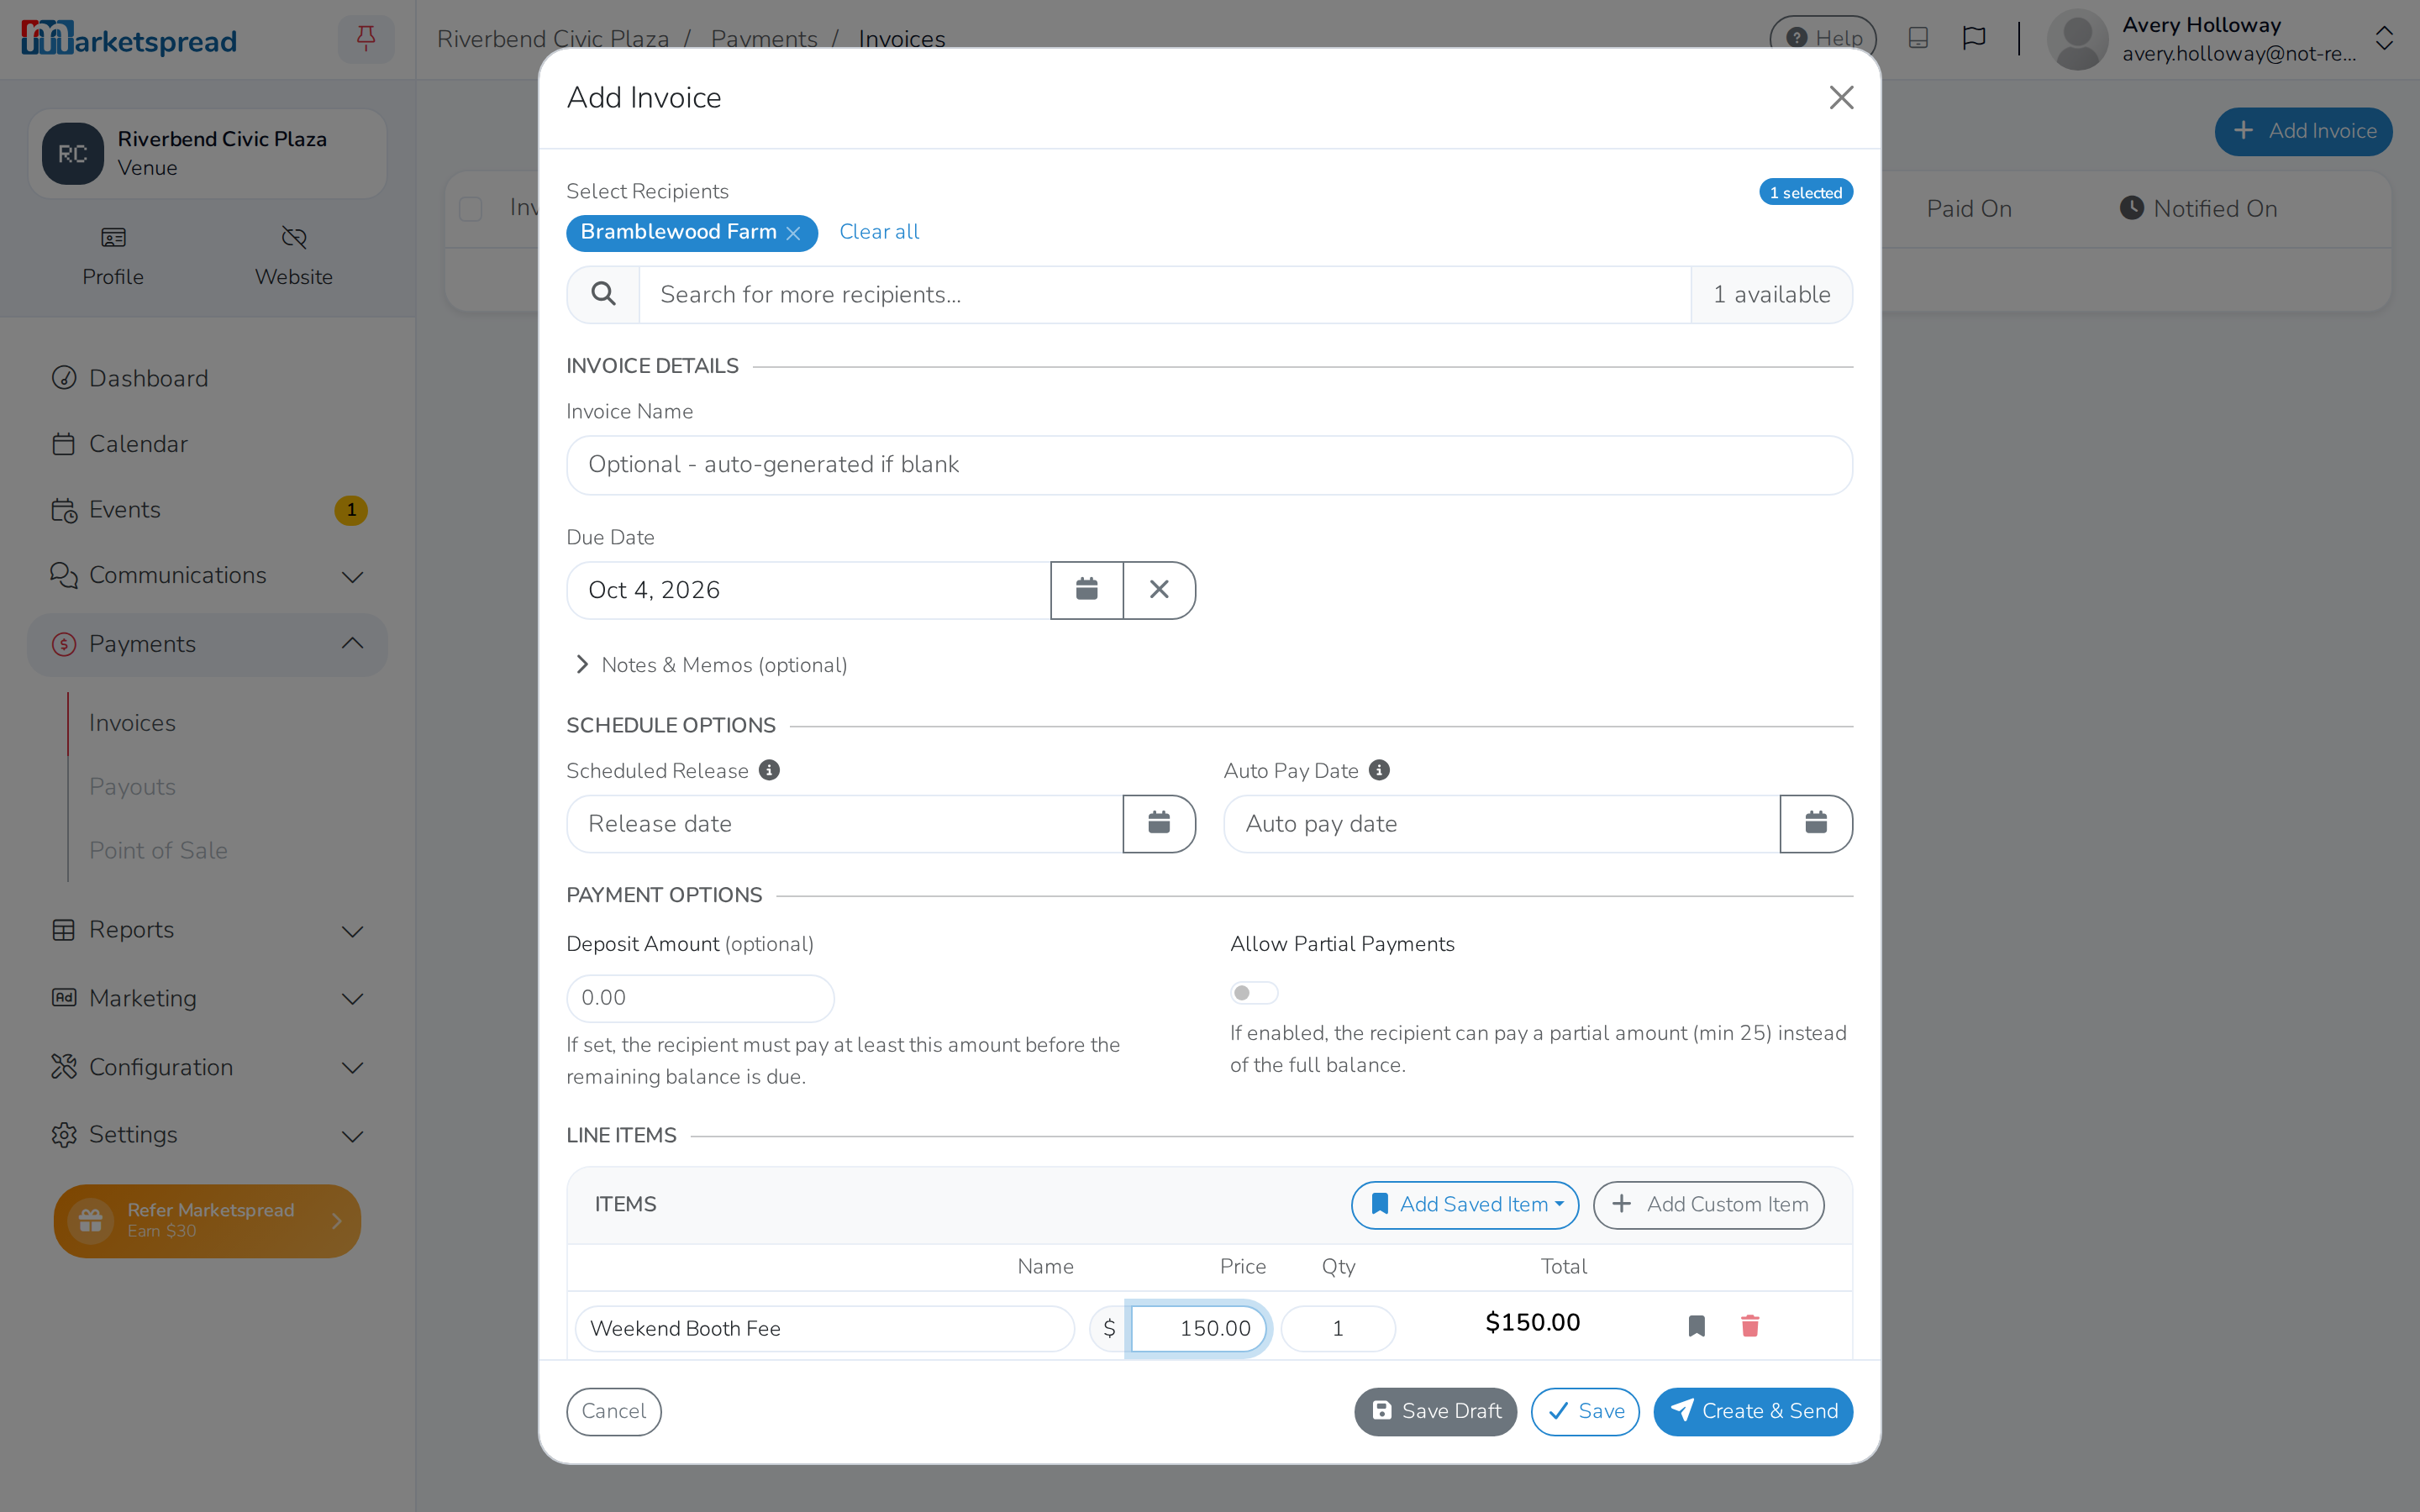
Under Select Recipients, search for the customer and click their name to select them.
-
Fill in the first item's Name, Price and Qty.
-
To charge for something else, click Add Custom Item and fill that in too, or click Add Saved Item to reuse one you've saved before.
-
Click Create & Send.
The customer gets an email telling them they have a new invoice, with a link to pay it.
Save an invoice without sending it
- Follow the steps above, but click Save instead of Create & Send.
The customer isn't notified. You can send it later from the invoice.
Check what's on an invoice
- Click Payments in the left-hand menu, then click Invoices.
- Click the invoice you want to check.
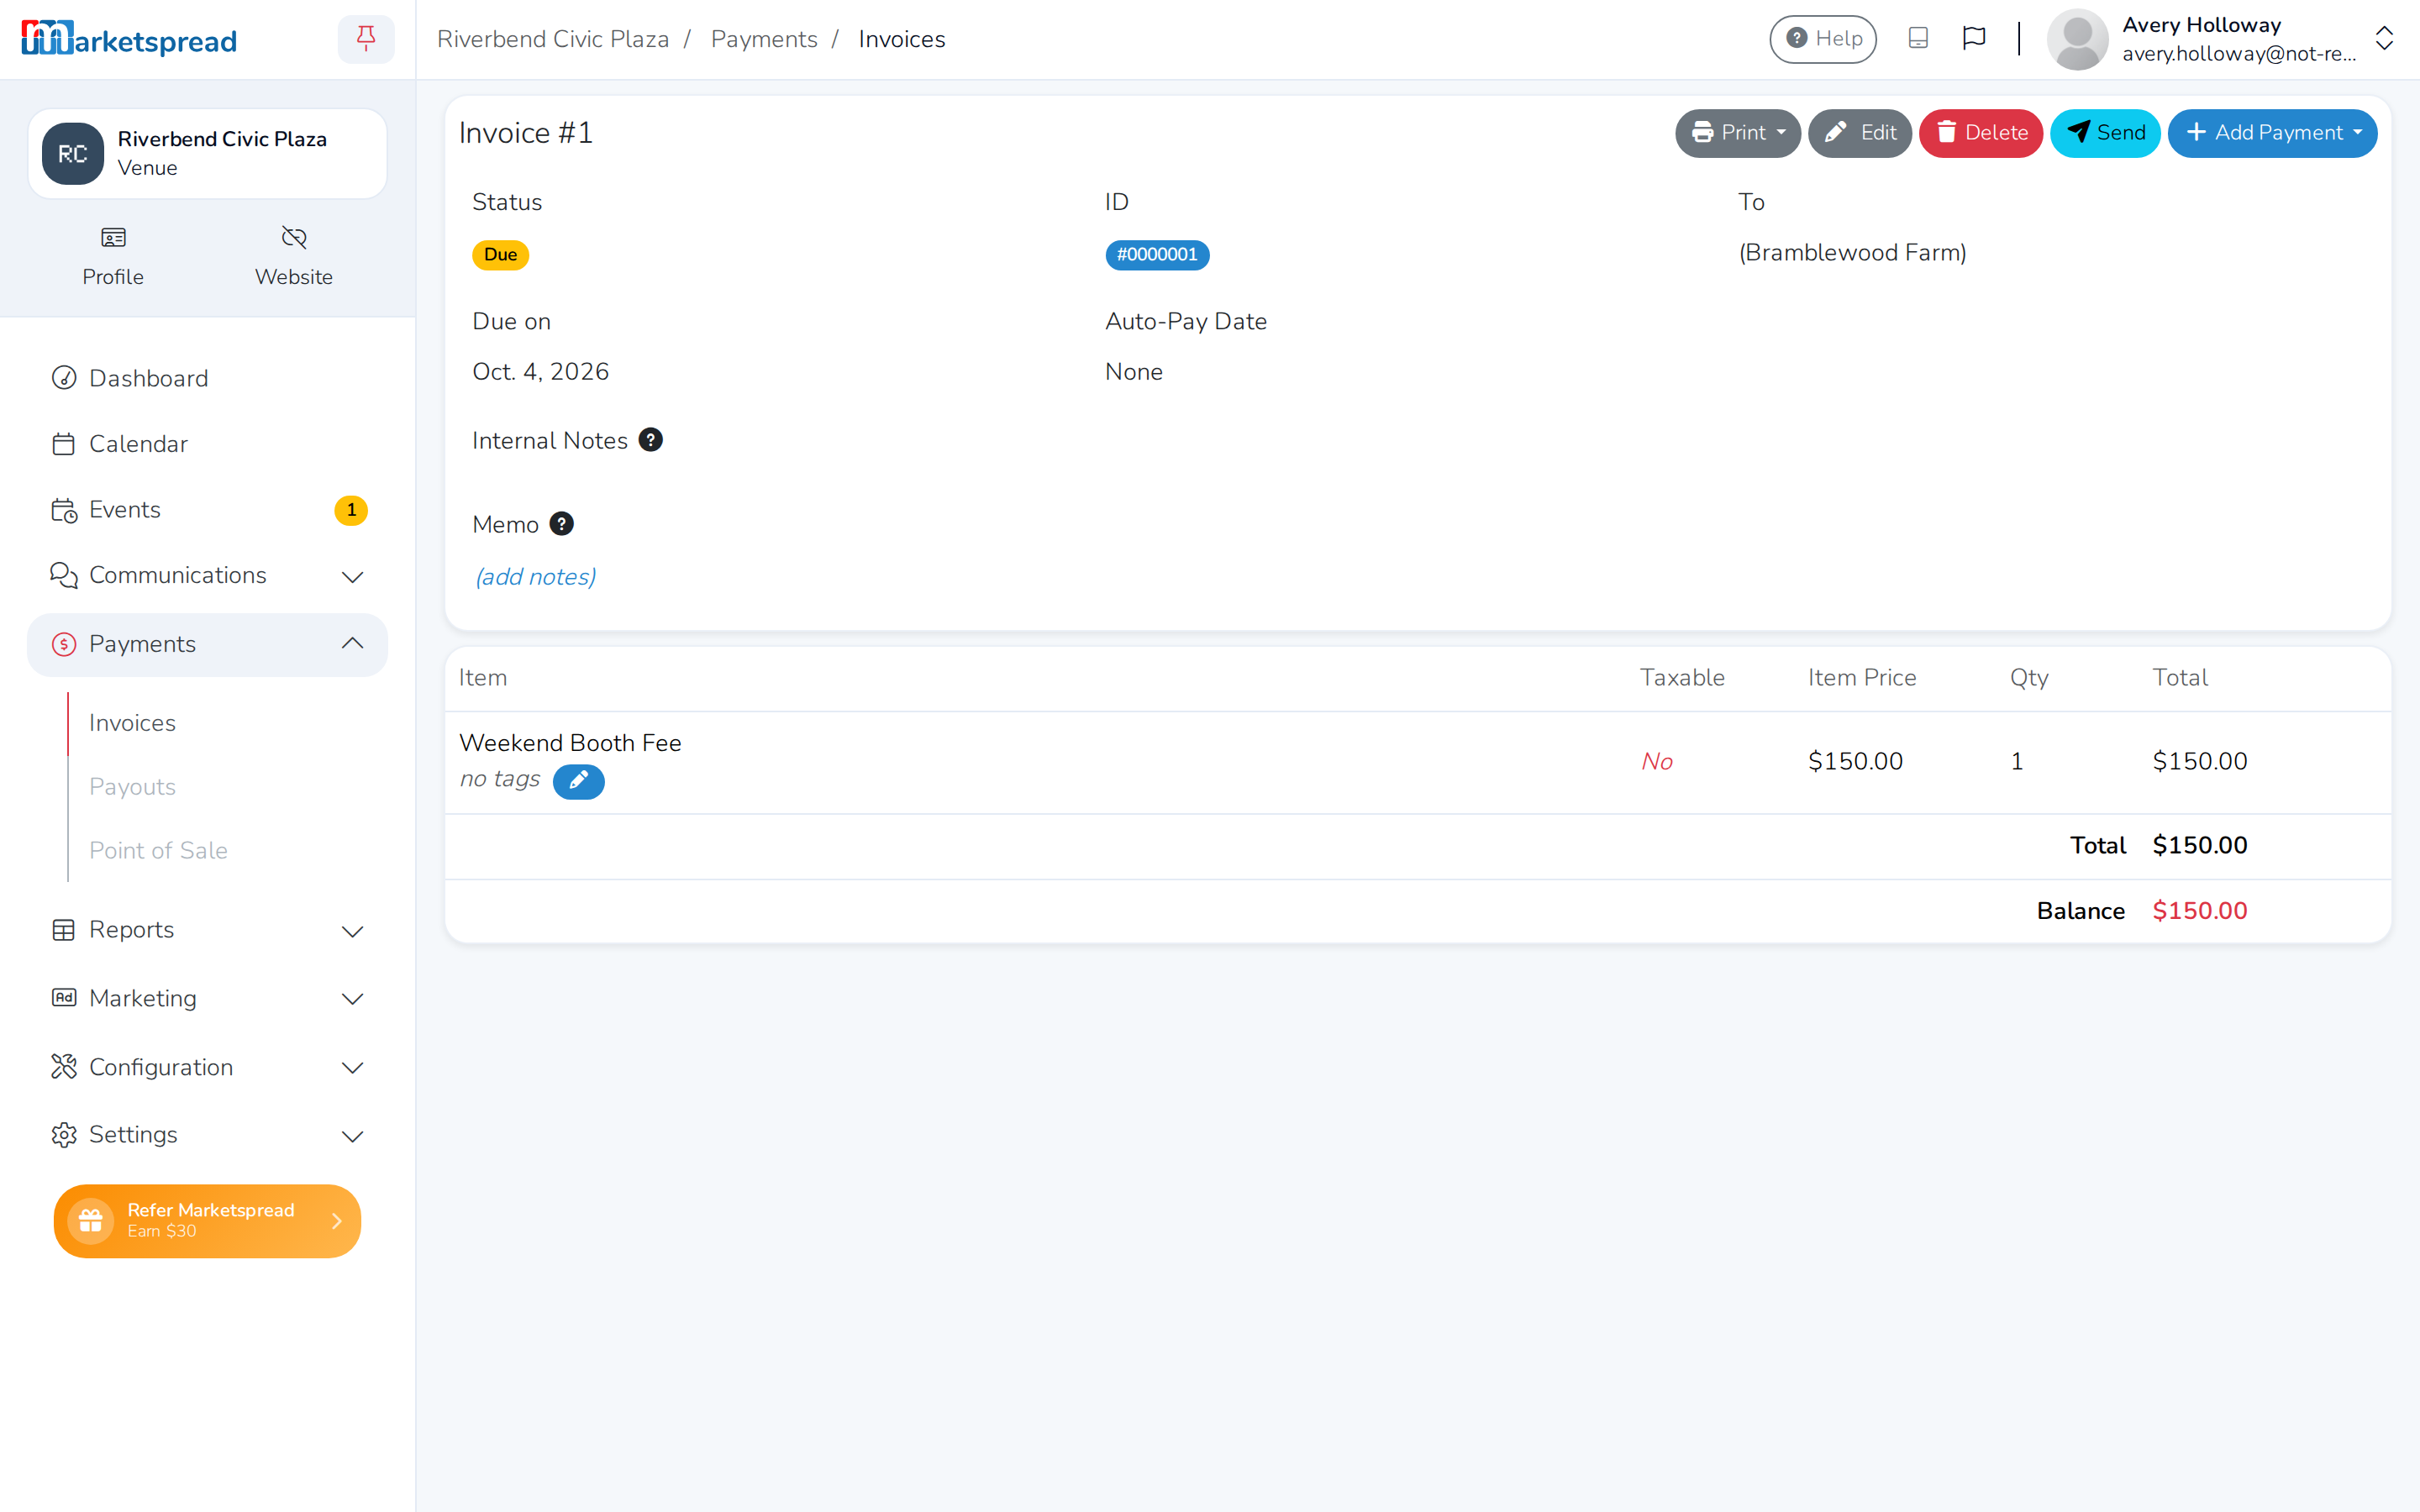
The invoice shows its Status — Draft, Due, Past due or Paid — who it's To, and when it's Due on. It also lists each item you're charging for. At the bottom, its Total and Balance show what's still owed, and update as the customer pays.
Resend an invoice, or edit it
- Open the invoice.
- To change it, click Edit, make your changes, then click Save & Send. Click Save instead if you don't want to notify the customer.
- To send the same invoice again, click Resend, then confirm.
Good to know
You can only invoice someone who's applied to book your venue before. To invoice against a particular booking — and to ask for a deposit rather than the full amount — use the booking's Quote/Invoice tab instead.