


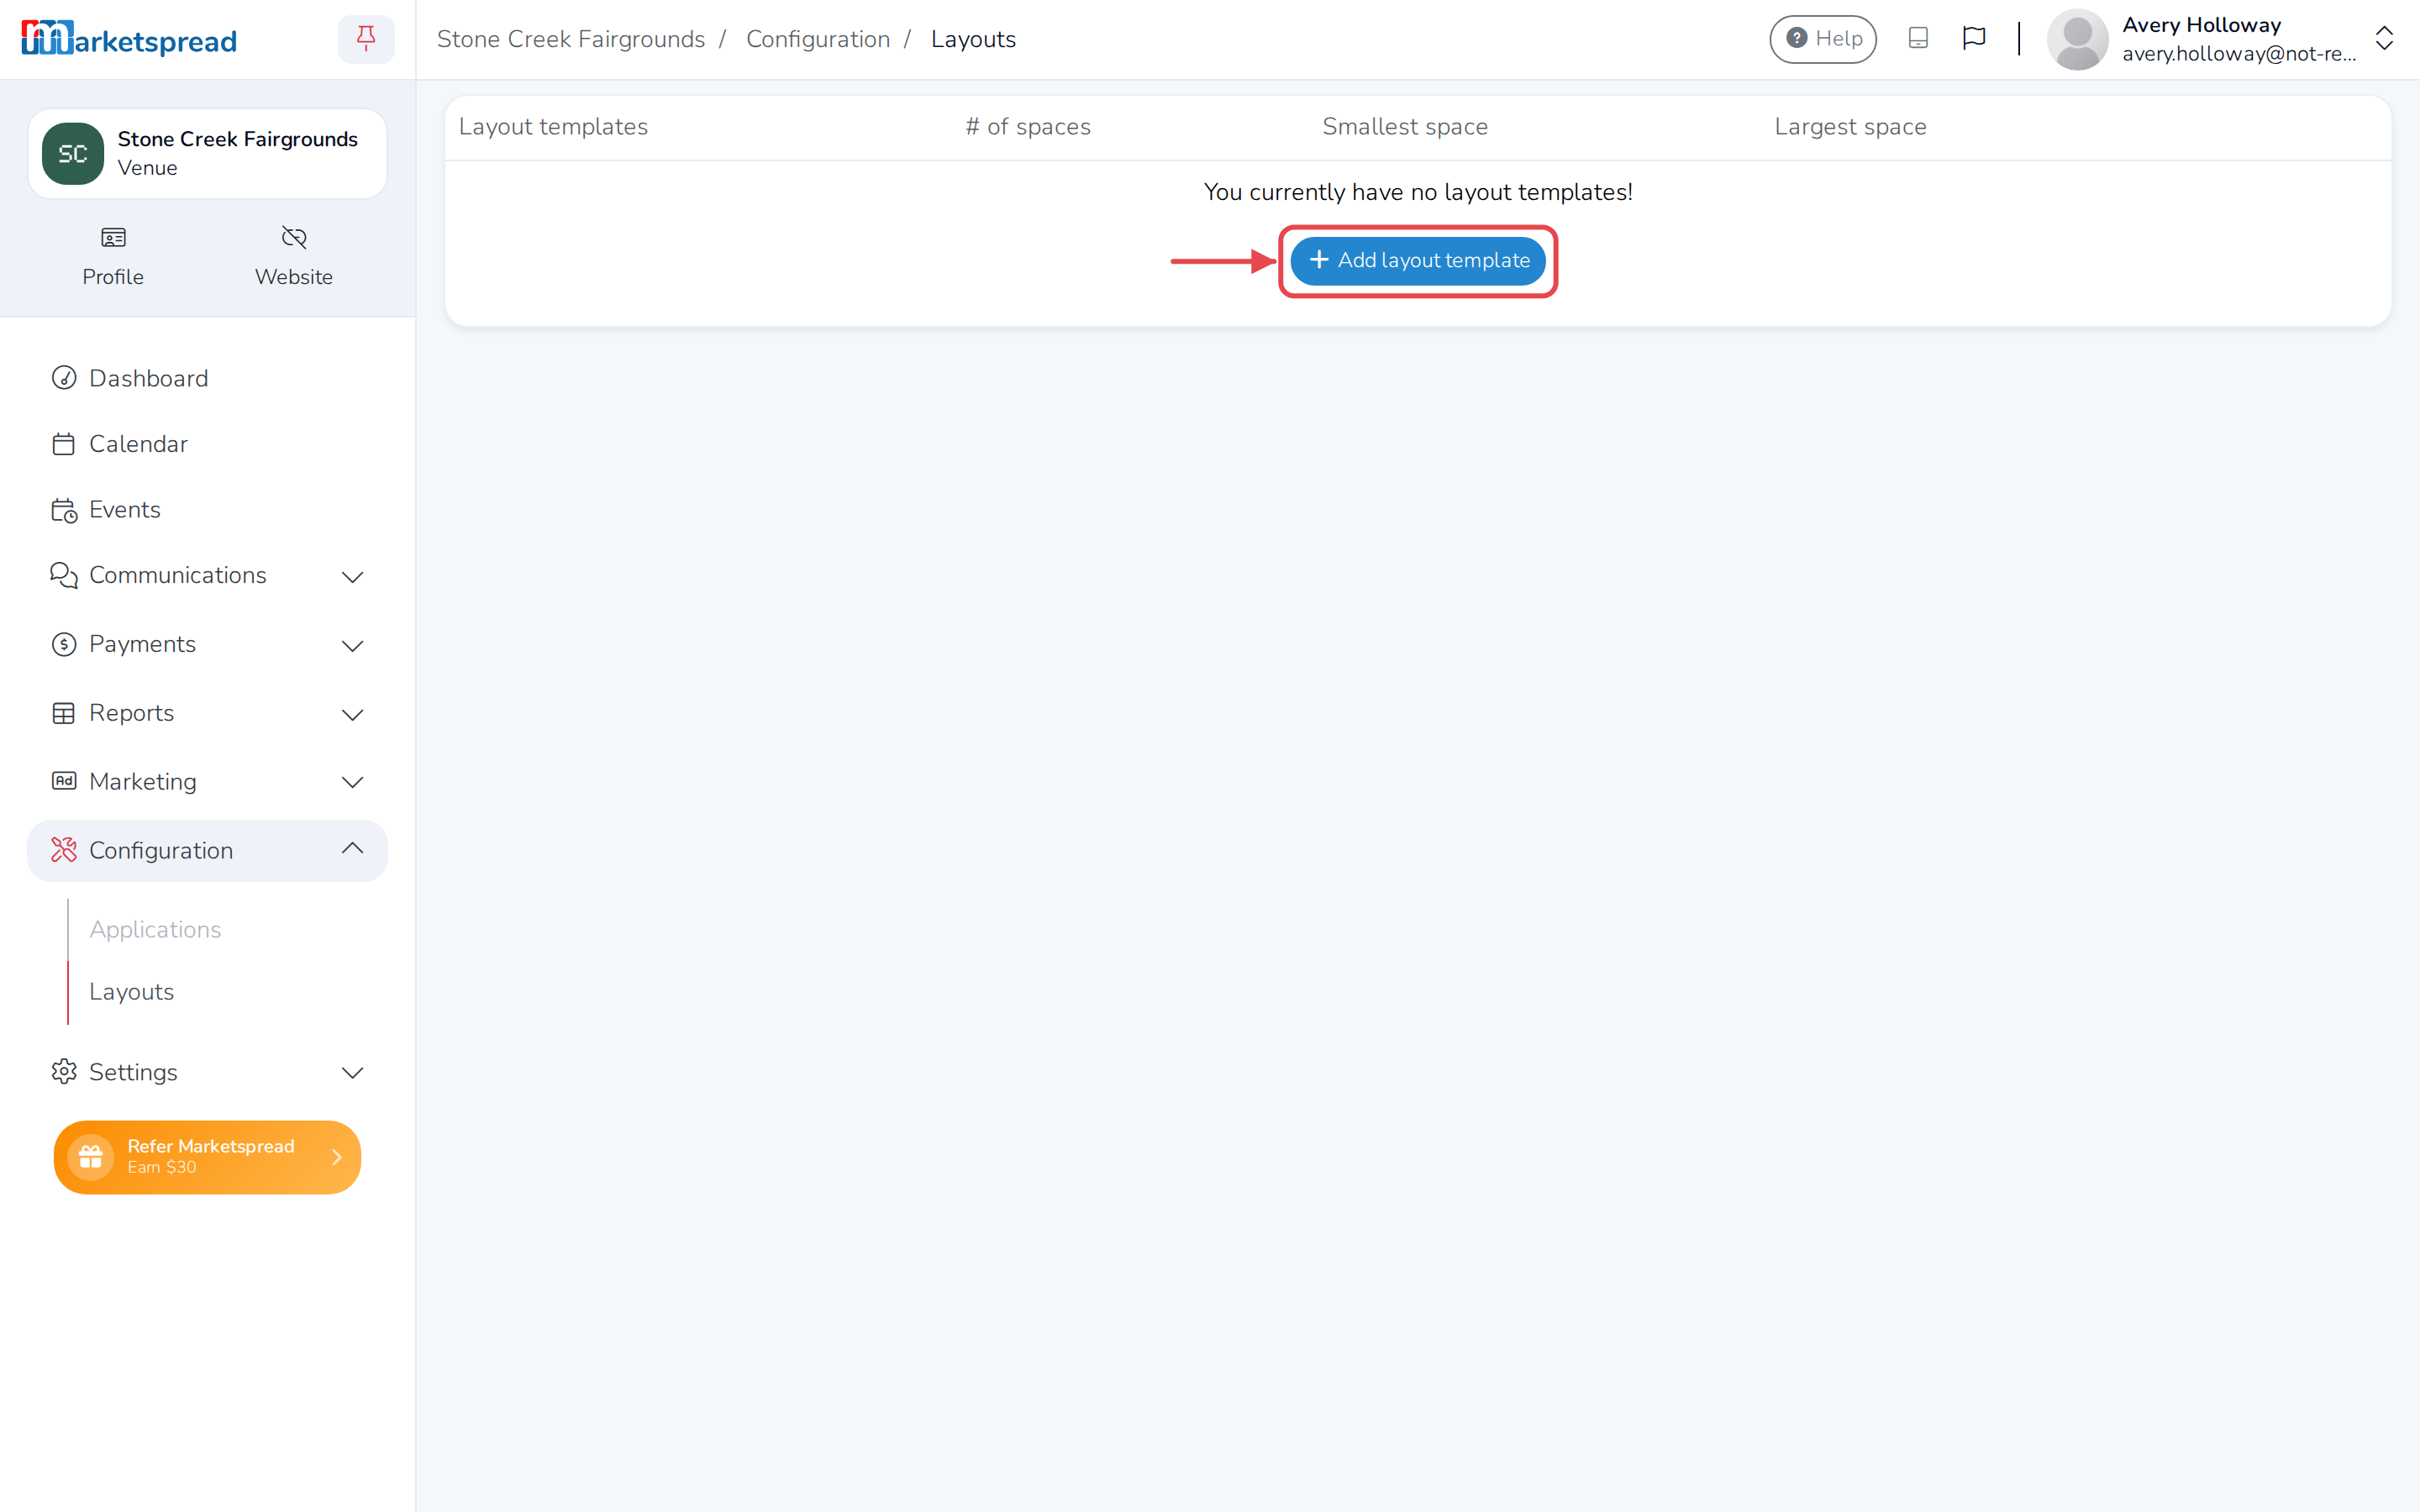
The layout editor is where you draw your venue's floor plan and add the spaces customers book — a room, a pavilion, a vendor stall. Open it from your venue dashboard's Layouts page: click Add layout template to start a new layout, or click Edit next to an existing one. From there you can add a space, move or resize it, fill in its details, or remove it.
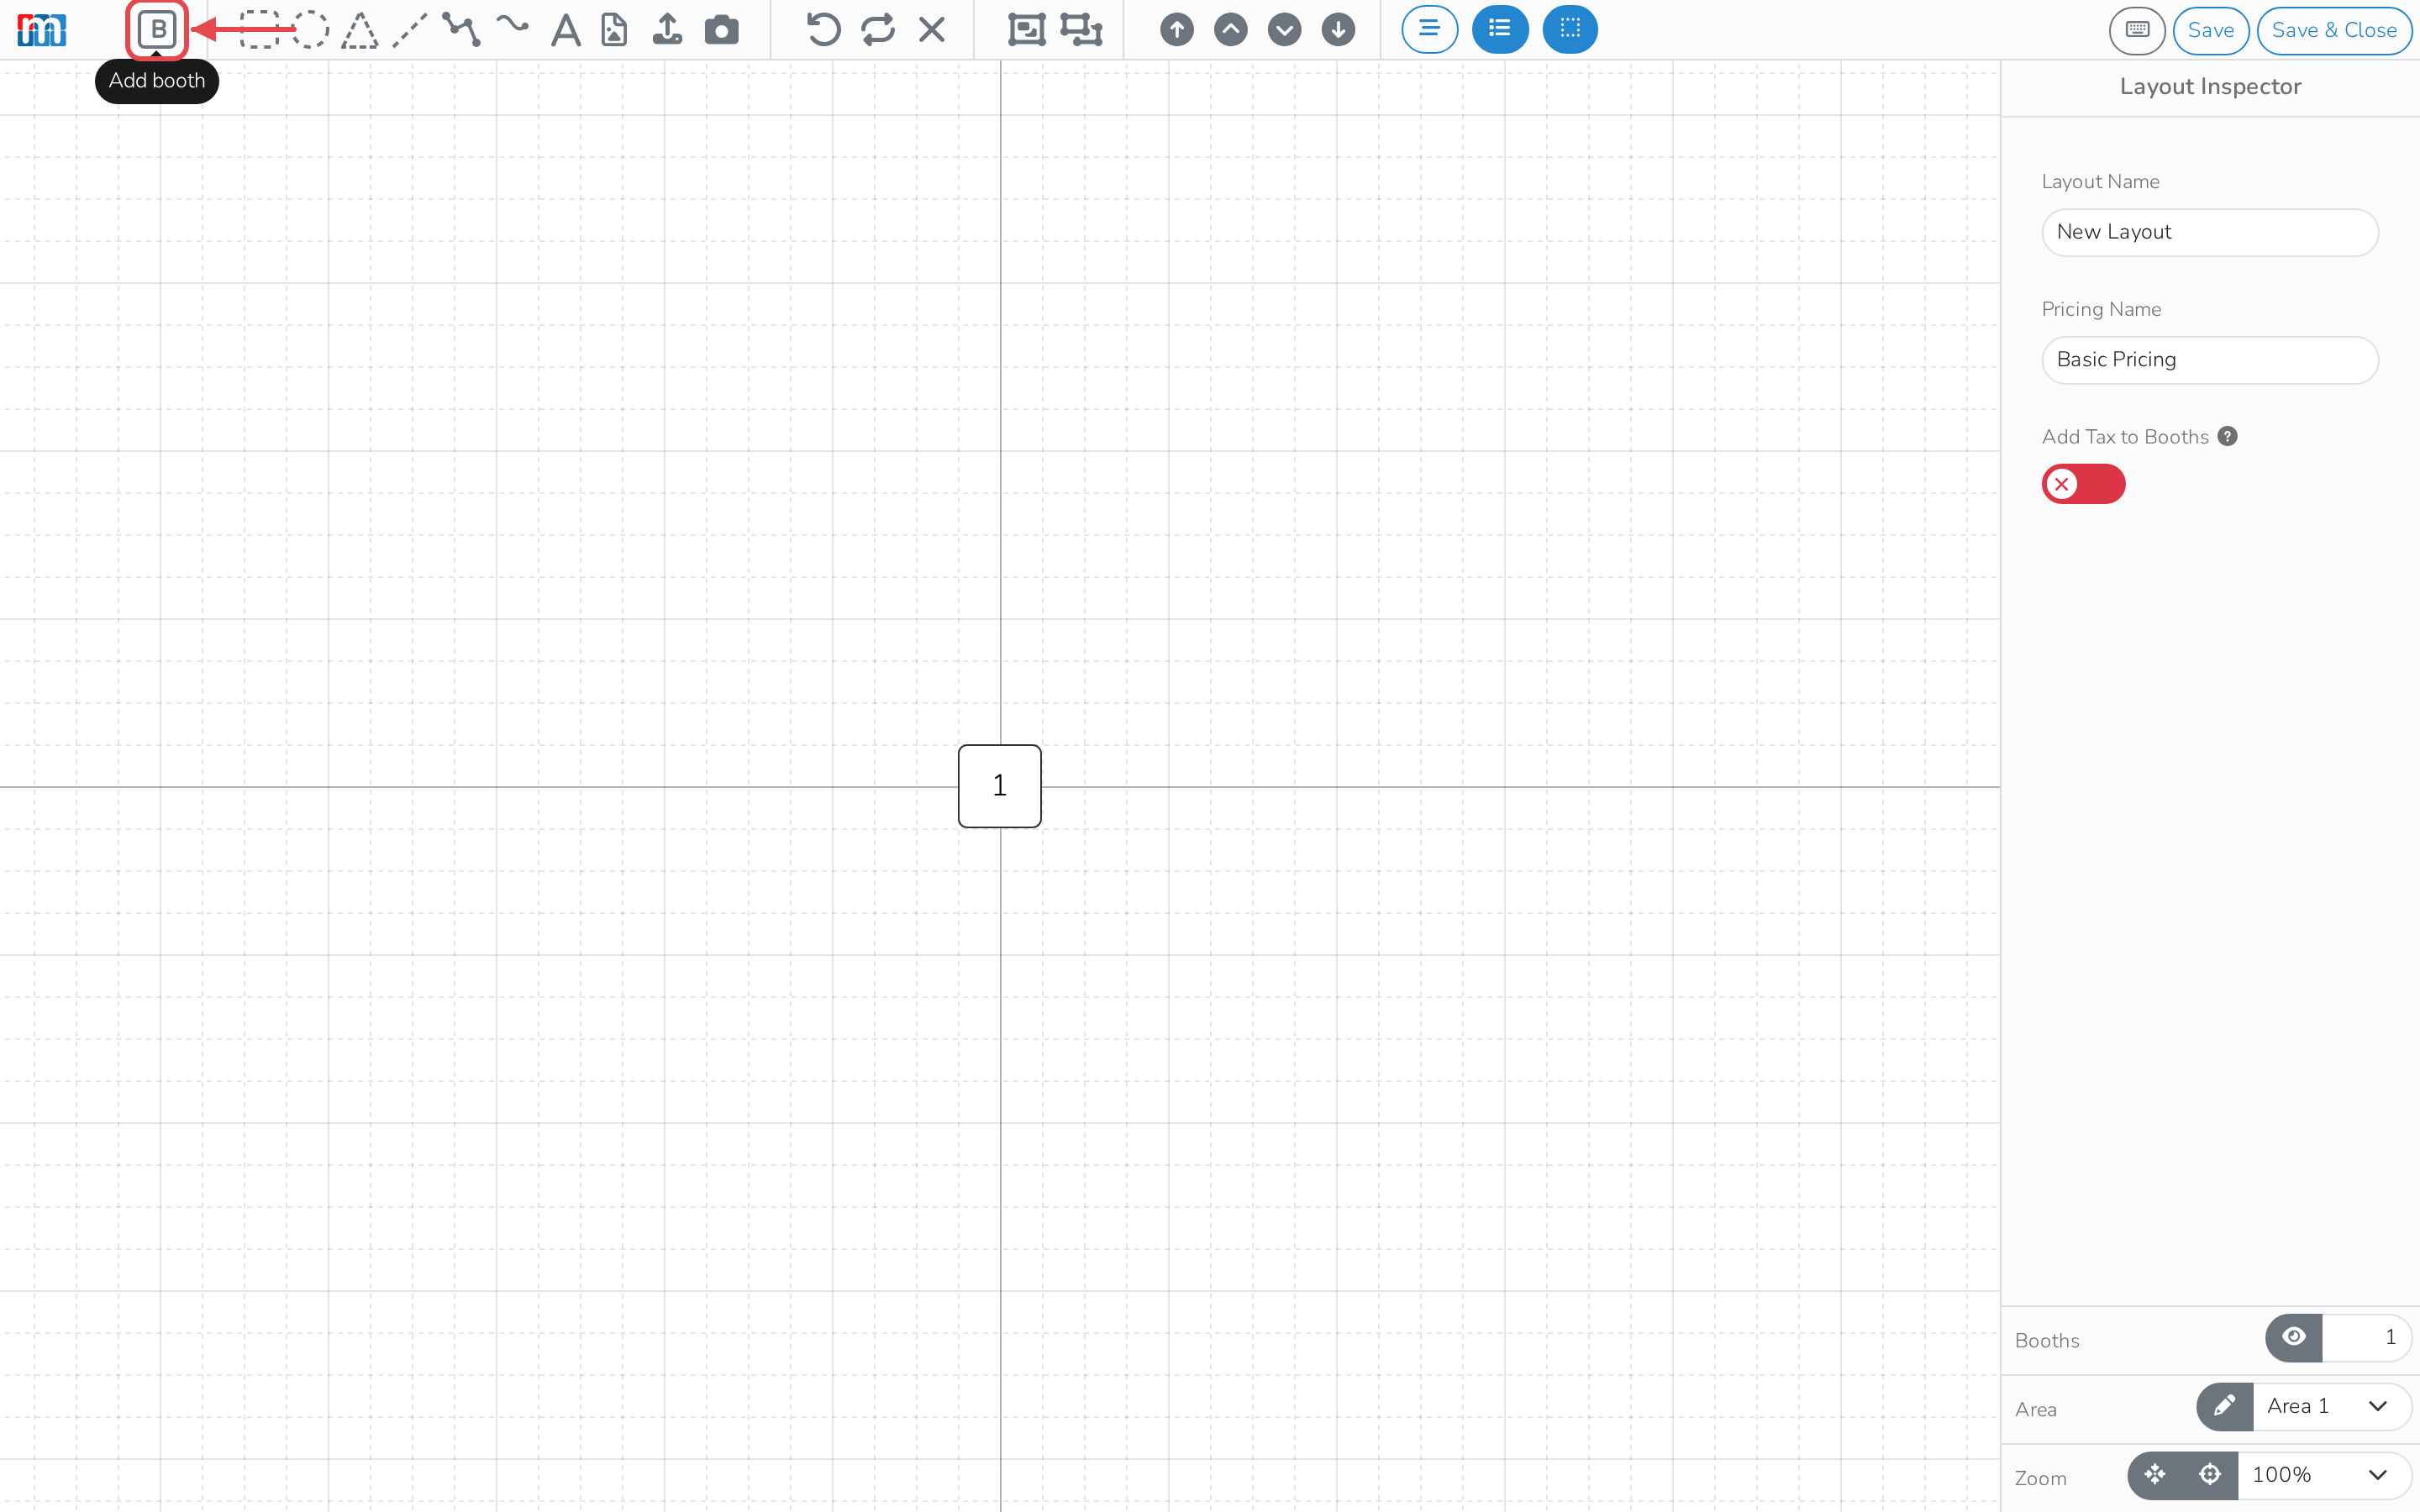
Add a space
- In the toolbar, click Add booth.
- It's added to the middle of the canvas. Drag it to where you want it.
Move or resize a space
- Click the space to select it.
- Drag it to reposition it, or drag a corner handle to resize it.
Edit a space's details
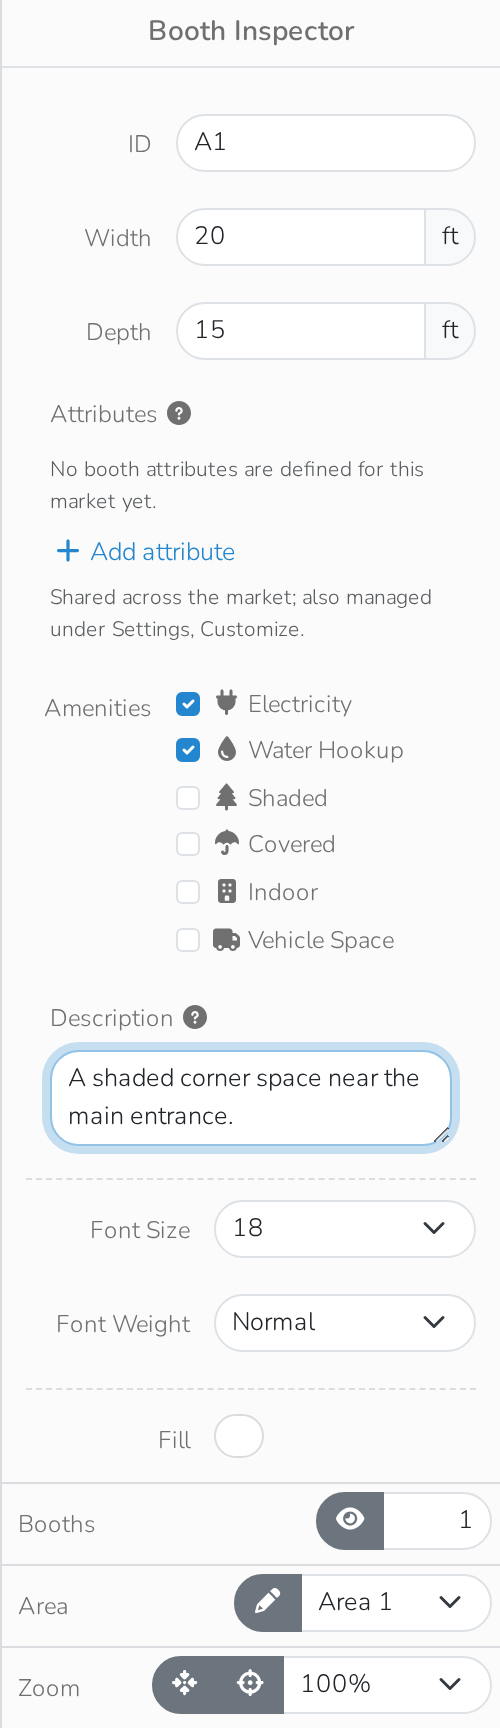
- Click the space to select it. The panel on the right now shows Booth Inspector.
- Type a name or number into ID.
- Set Width and Depth, in feet.
- Turn on any Amenities it has: Electricity, Water Hookup, Shaded, Covered, Indoor or Vehicle Space.
- Add a Description — customers see this when they're choosing the space to book.
- To add a photo, drag one into Attached Images, or click browse.
Delete a space
- Click the space to select it.
- In the toolbar, click Delete.
Good to know
Nothing is saved until you click Save or Save & Close — the second one saves your changes first, so you won't lose them.