


Markets can ask you for two kinds of things on your Documents page: something to
sign or agree to, and something to upload. This article covers uploading and
replacing your own documents. Open your vendor dashboard and click Documents
in the left-hand navigation to get there.
From here you can:
- Upload a document a market has requested
- Replace a document you've already uploaded
Upload a document
-
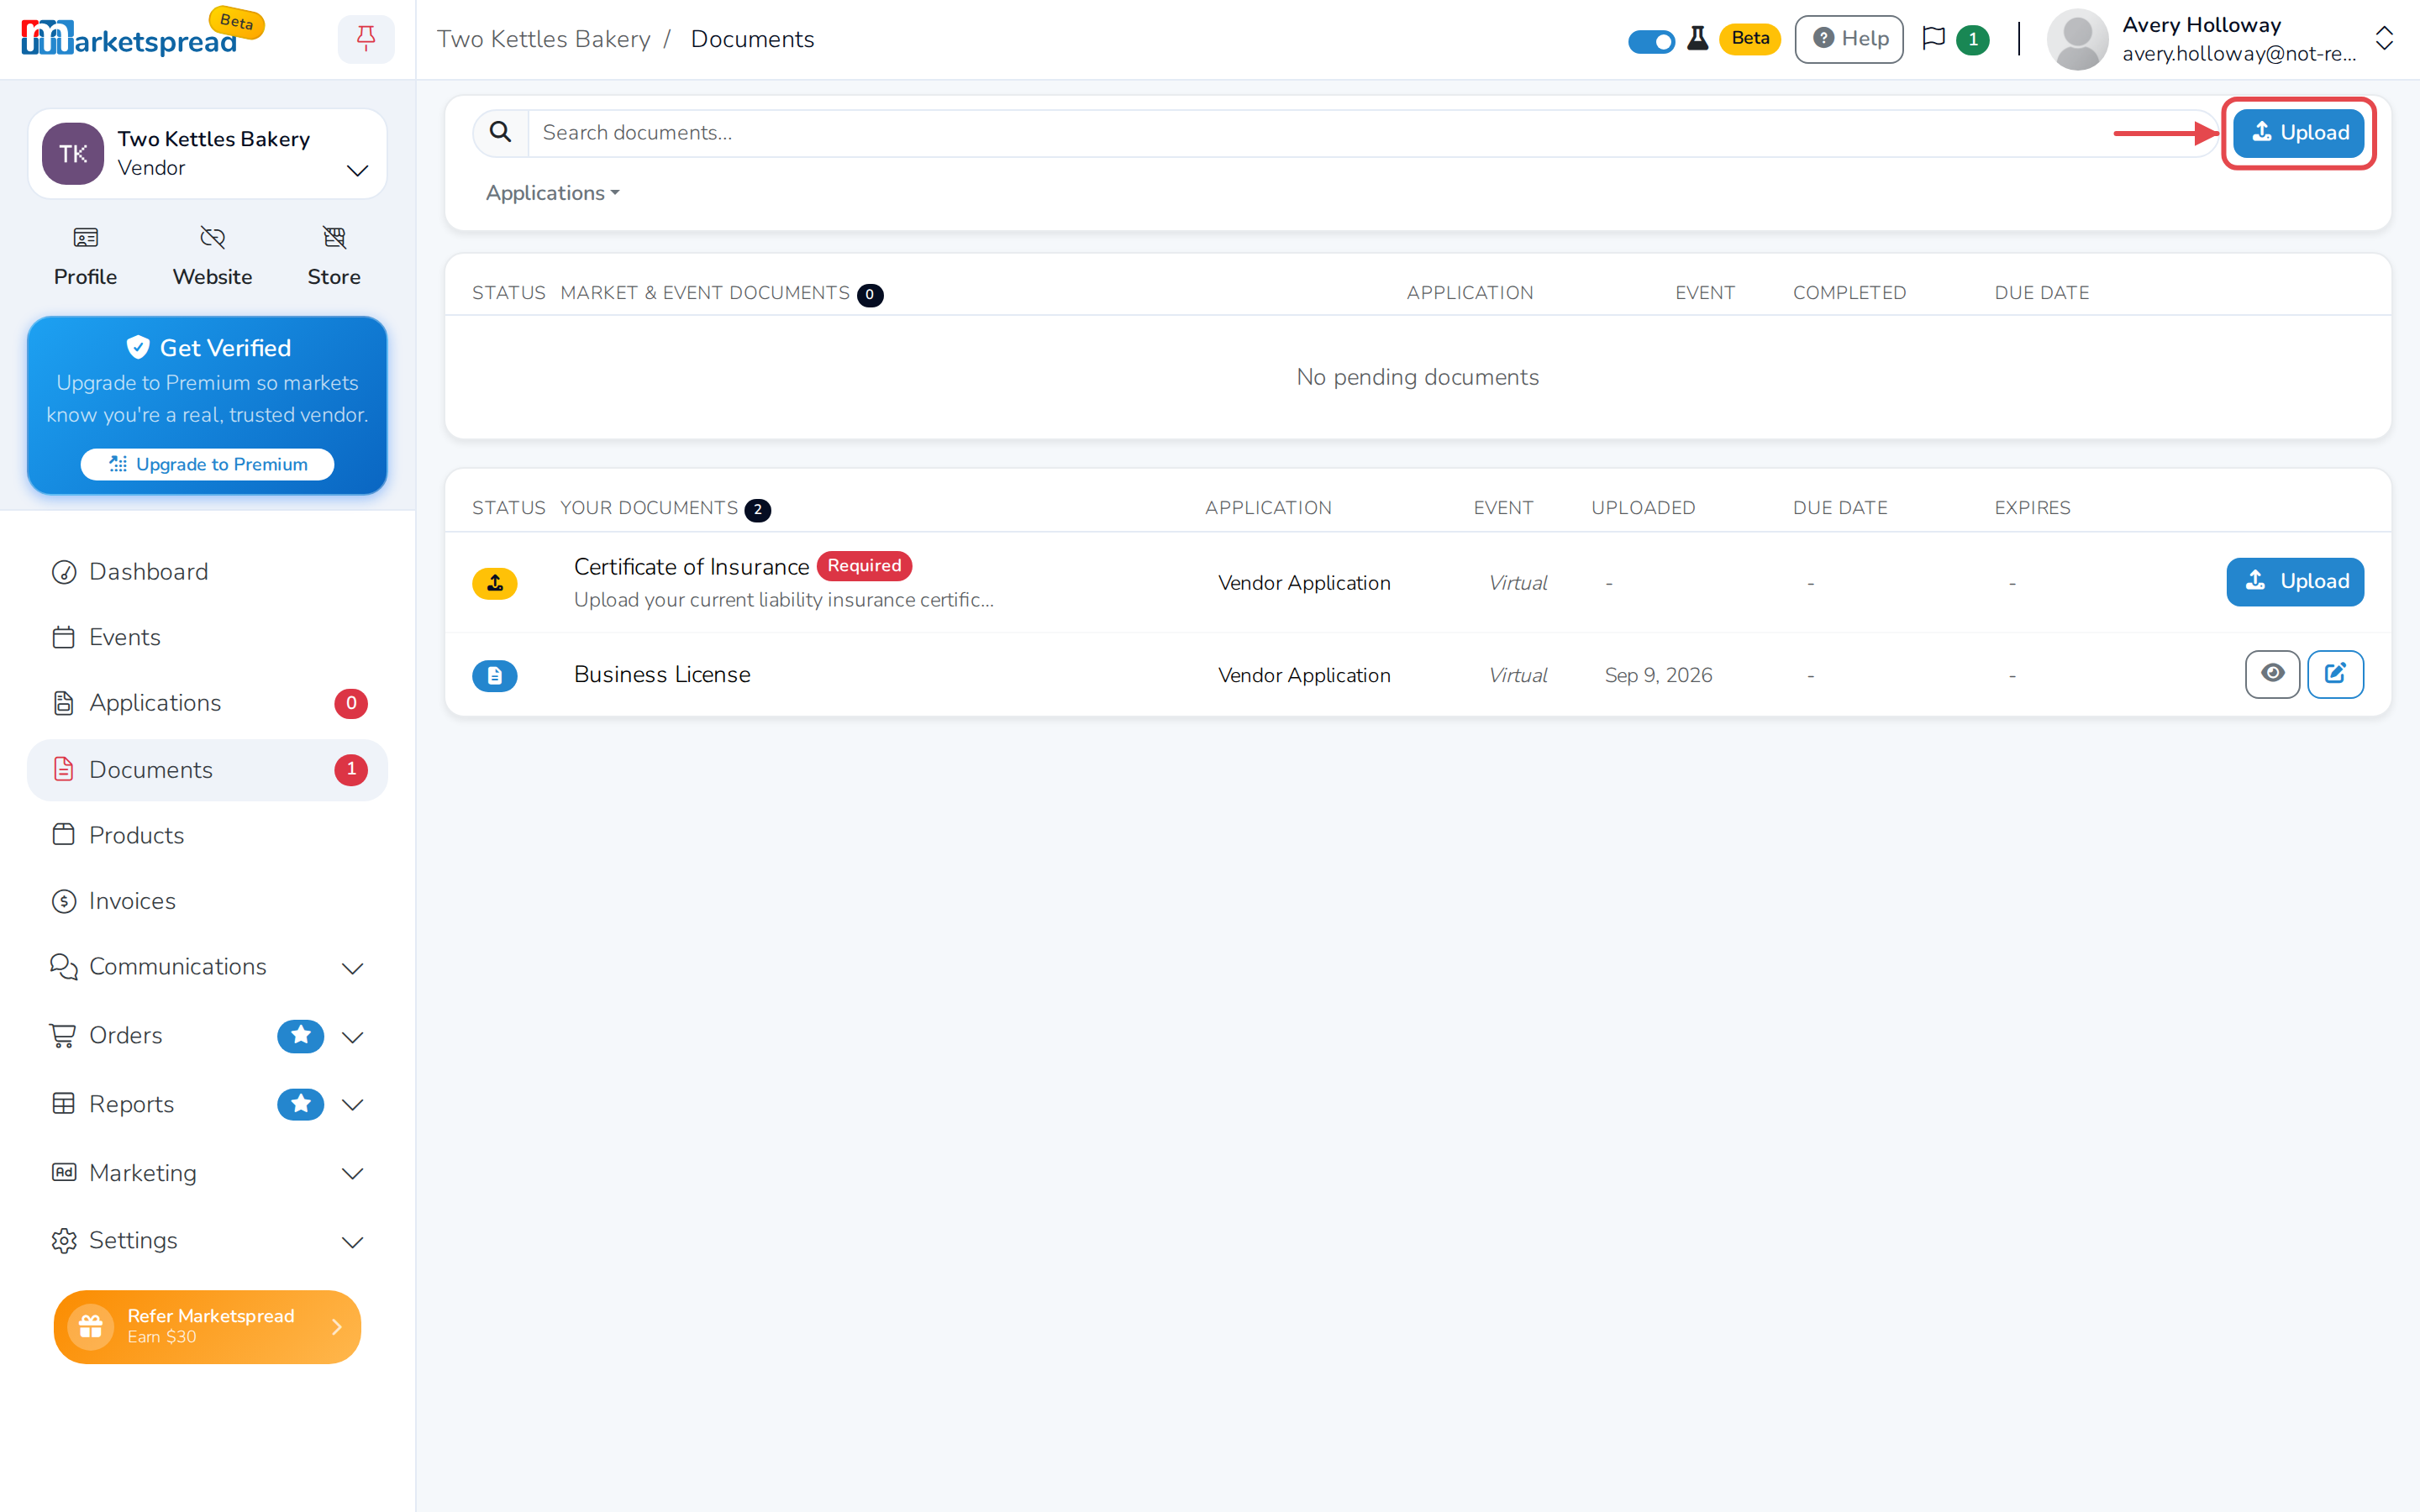
Open Documents in your left-hand navigation.
-
Click Upload.
-
Choose the application this document is for under Select Application, then
click Next.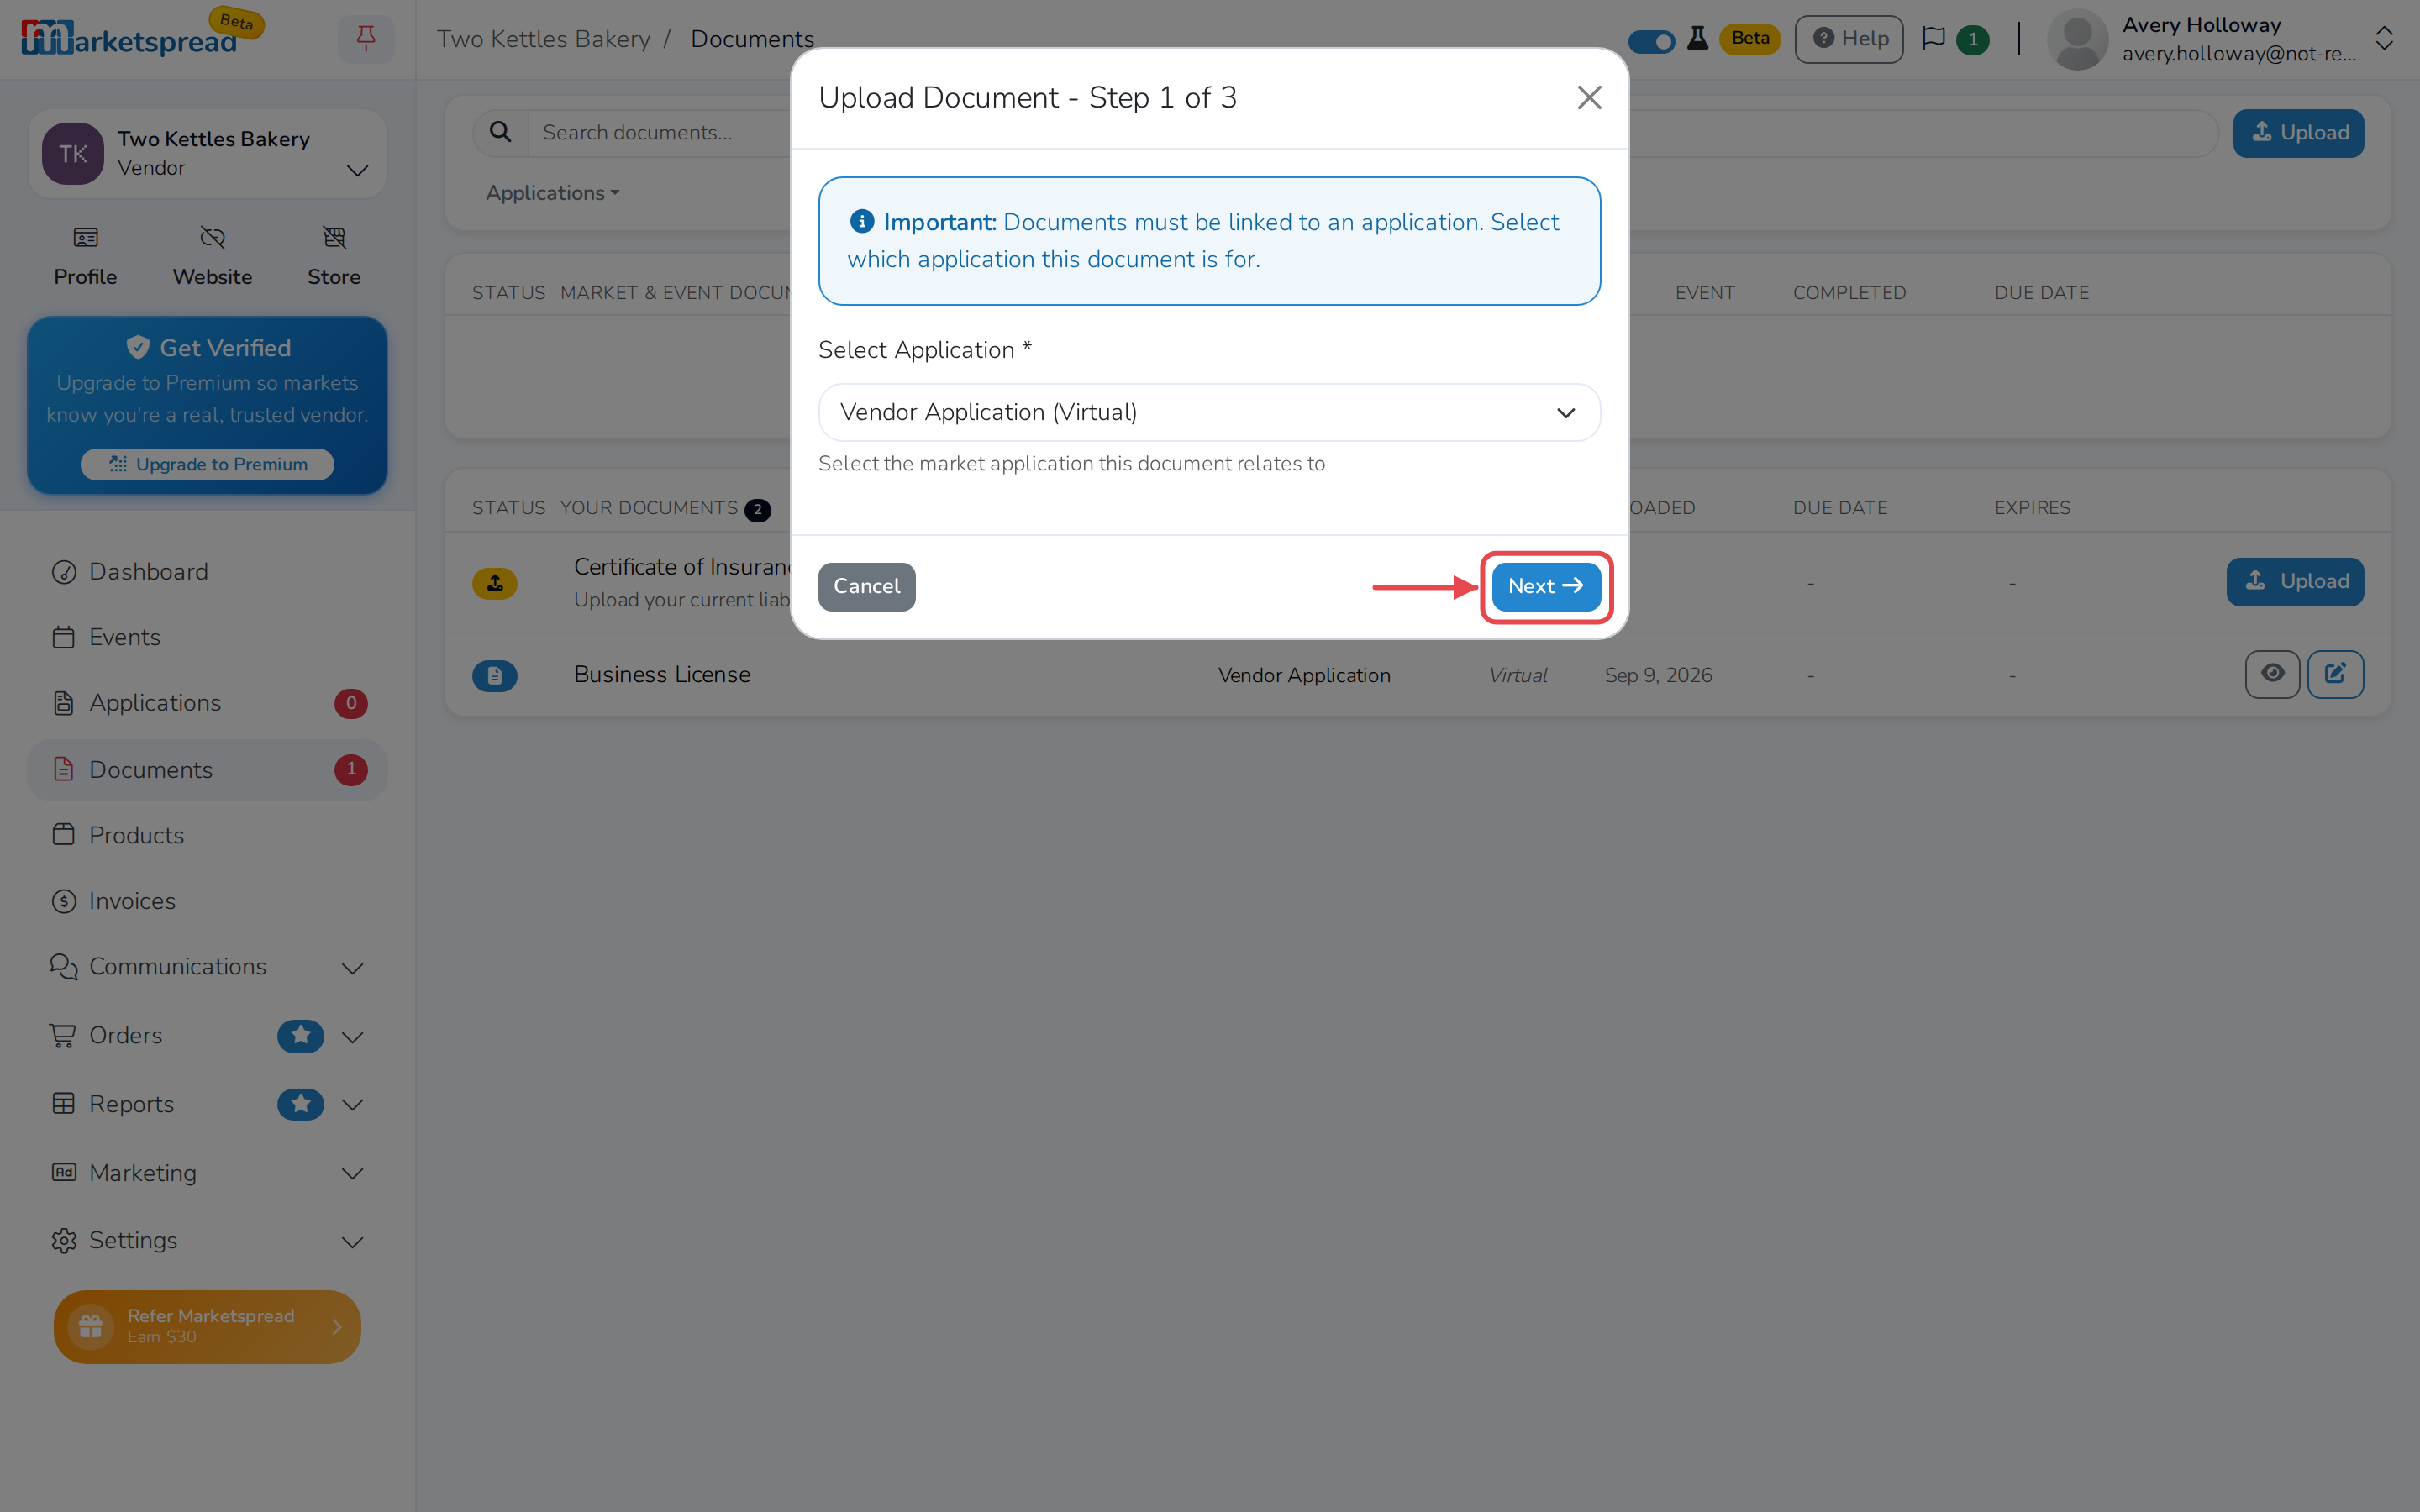
-
If the market has requested specific documents for that application, choose
which one you're providing under Document Type, then click Next. -
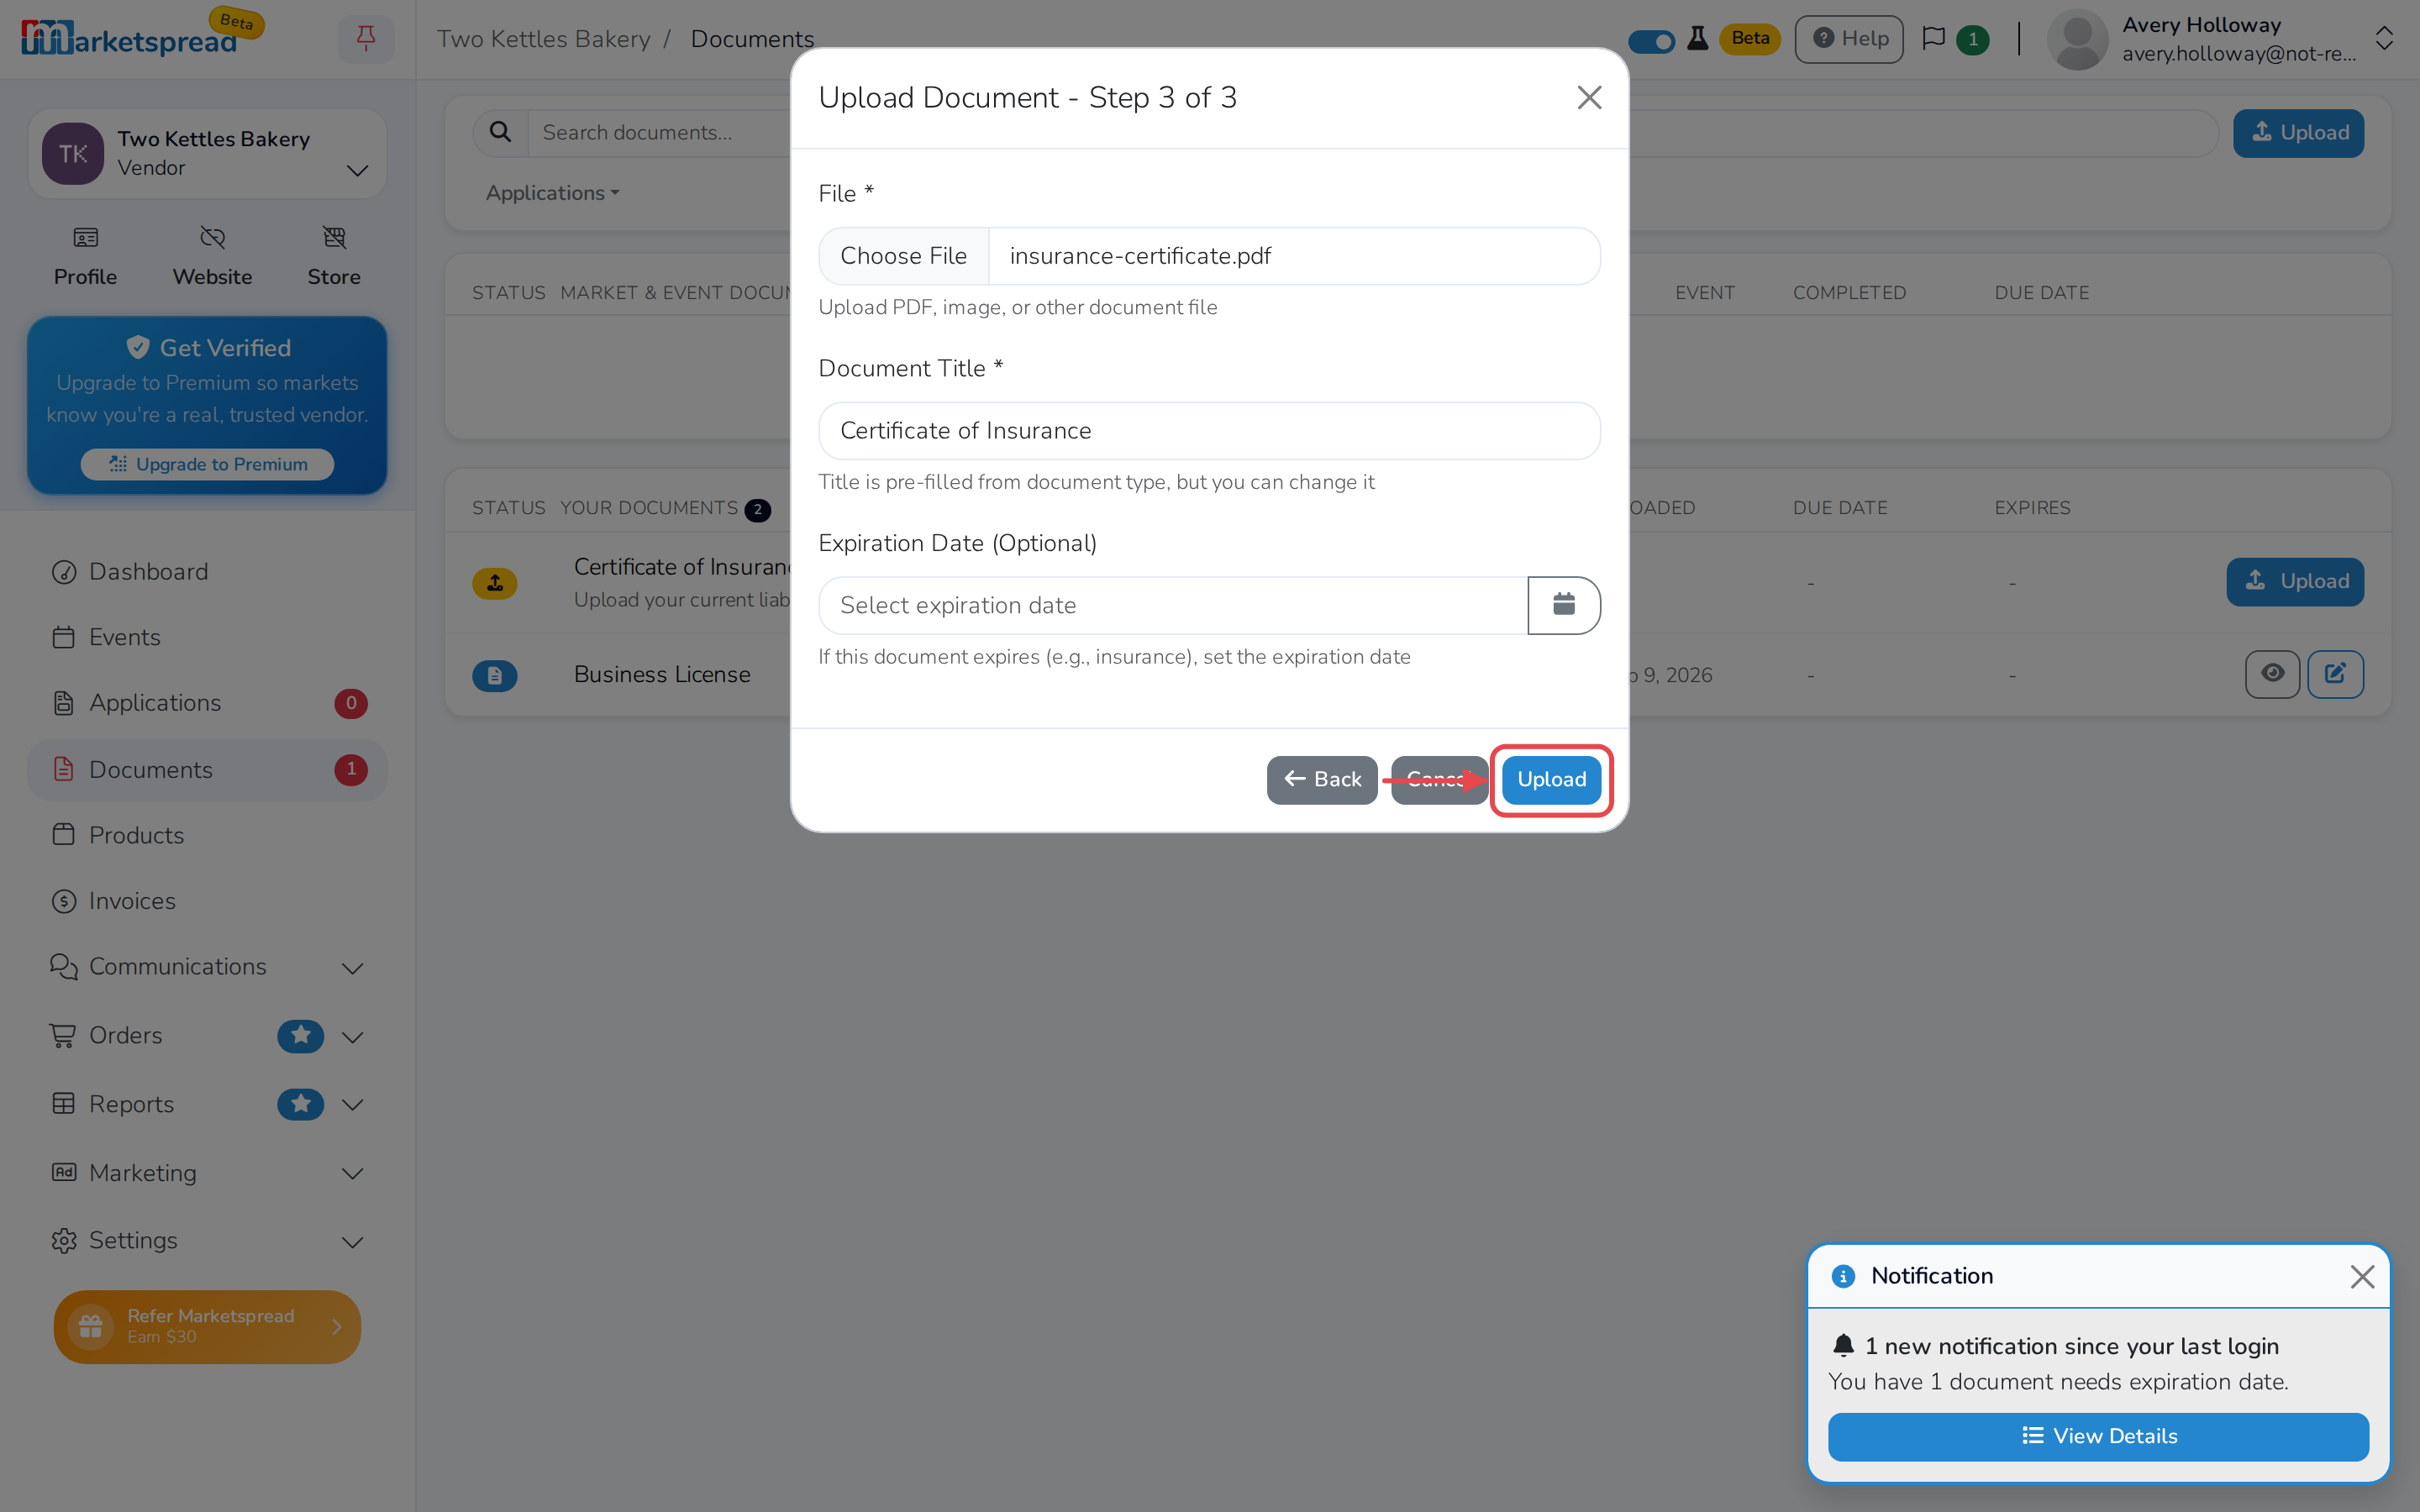
Under File, choose the document from your device.
-
Enter a Document Title.
-
If the document expires — an insurance certificate, for example — set an
Expiration Date. -
Click Upload.
Tip
If the document is already listed under Your Documents, click Upload
on that row instead. It skips straight to choosing your file.
Replace a document
-
Open Documents in your left-hand navigation.
-
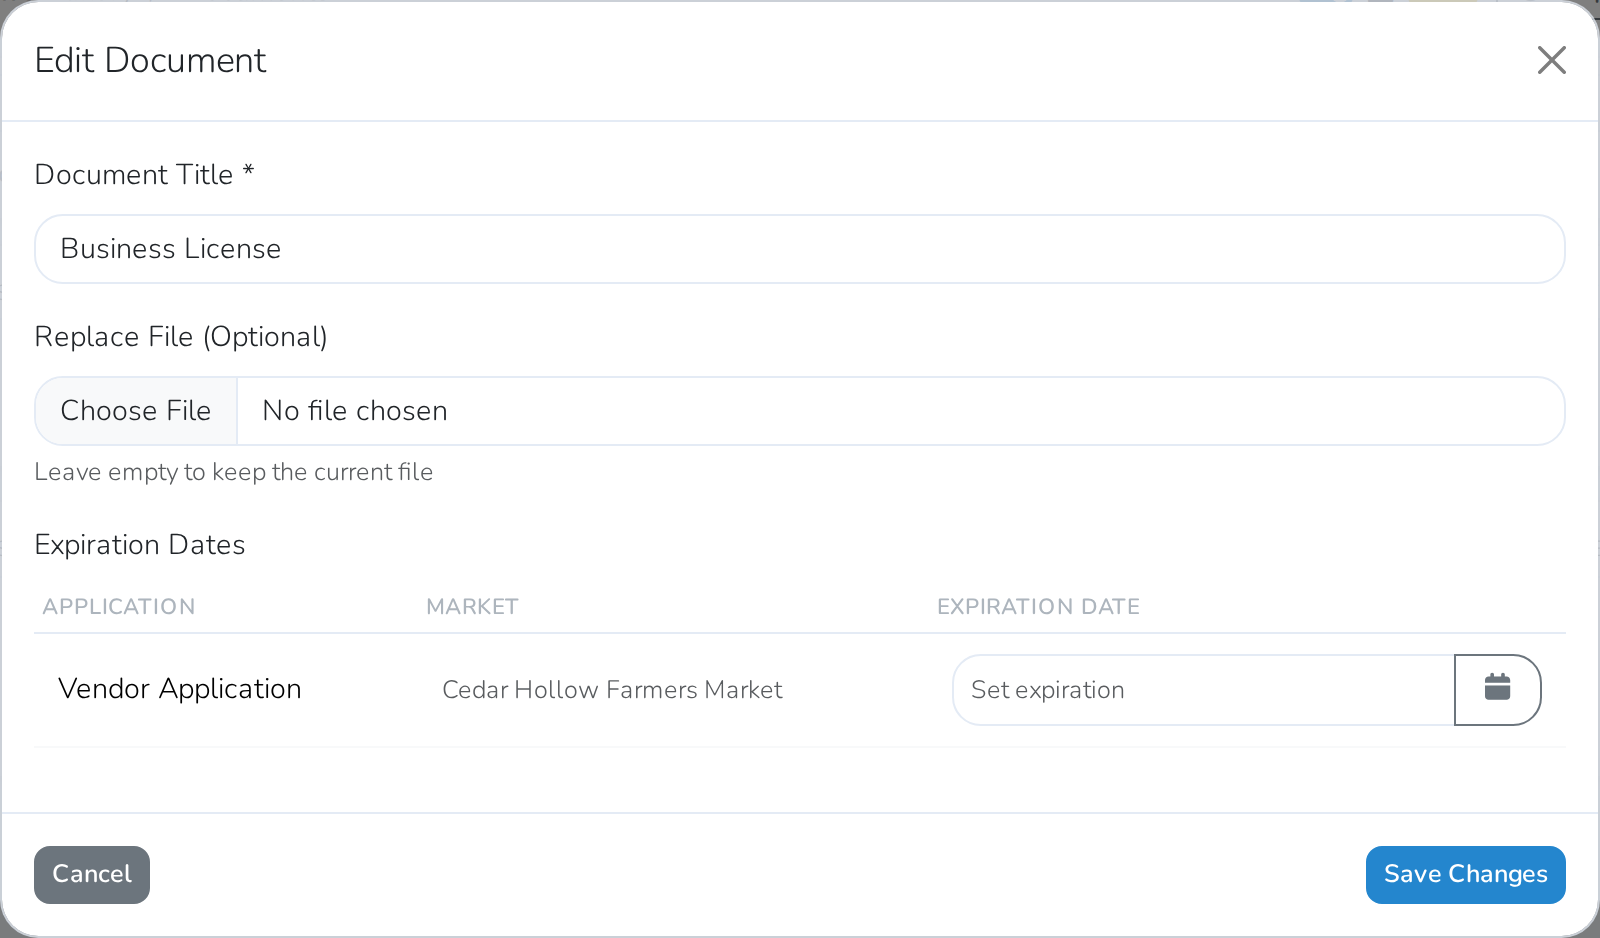
Under Your Documents, find the document and click the pencil icon next to it.
-
Update the Document Title, if it's changed.
-
Under Replace File, choose the new file. Leave it blank to keep the current one.
-
If the document has an expiration date on file, update it.
-
Click Save Changes.