


Point of Sale is the app you sell through in person. It runs on a phone or
tablet, takes cash and cards, and shares your products, customers and orders
with everything else in your account.
Install it and sign in
Search your app store for Marketspread Point of Sale. It runs on Apple and
Android.
On first launch it asks for two permissions:
- Bluetooth, to reach a card reader or receipt printer.
- Notifications, so it can tell you when an online order arrives.
Sign in with your Marketspread account. If you signed up through Google,
Facebook or Apple, use those buttons rather than a username.
You need approval before you can take cards
Sign-in is not enough. Your account has to be approved to accept card
payments first.
Turn on Premium
Premium lets you take cards at the booth, sell online with pickup and
delivery, and get top billing in search. You need it to ring up a sale —
without it, Checkout stops you and asks you to upgrade.
Open the menu at the top left, then Settings, then Premium. Tap
Upgrade, then Pay $18 for the year to turn it on.
Ring up a sale
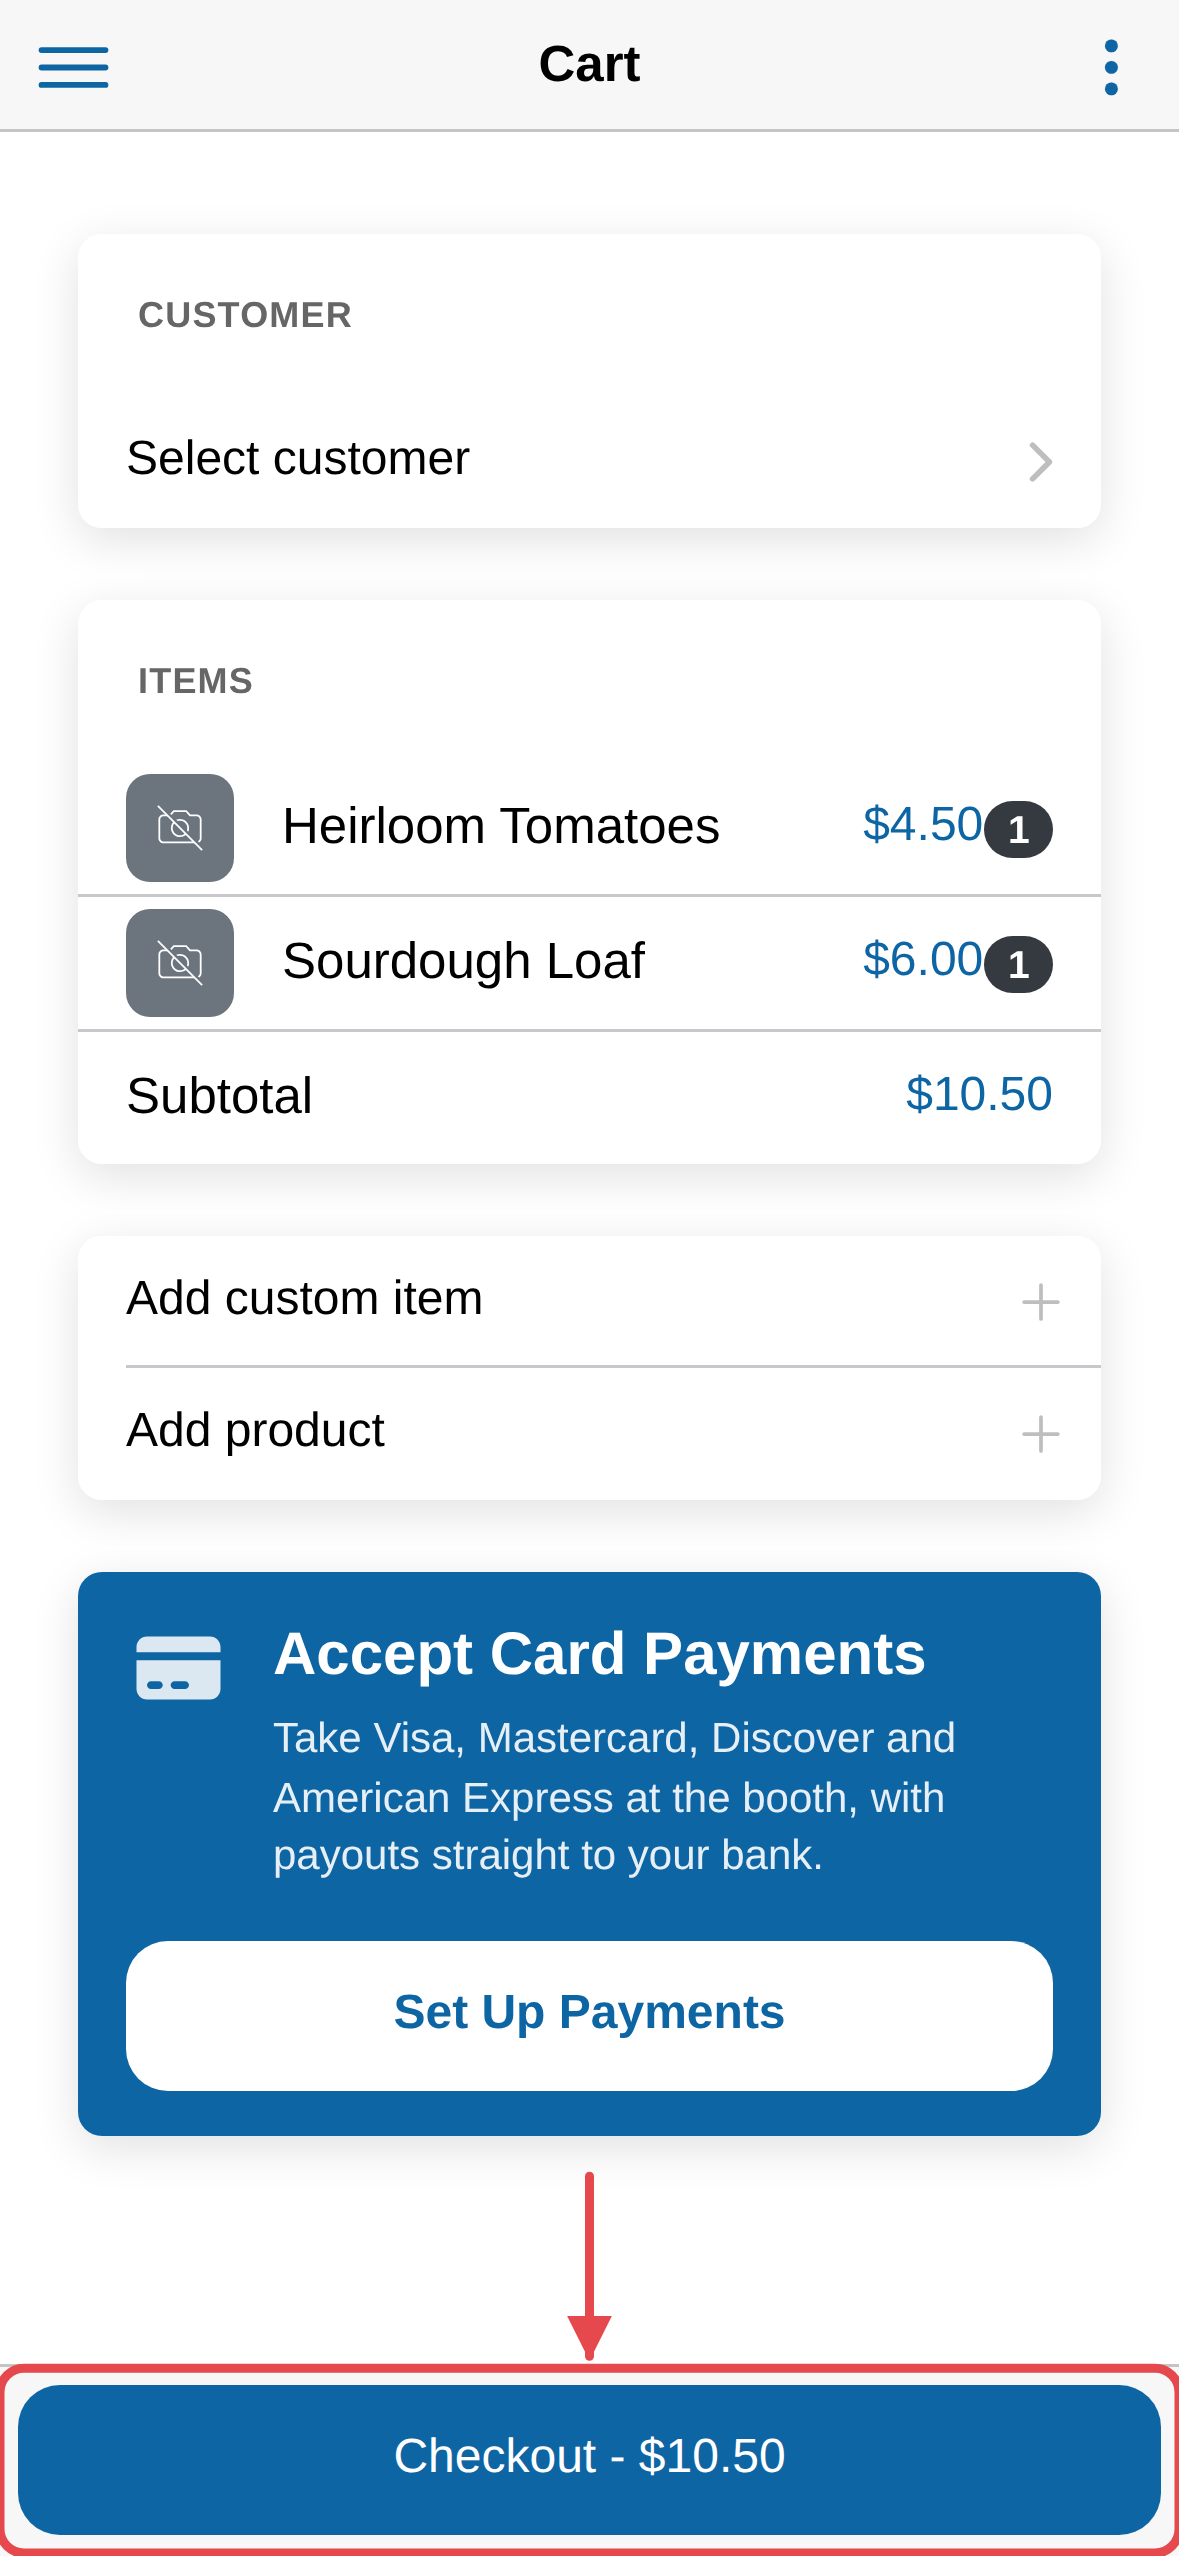
The app opens on the cart.
-
Tap Add product to add something from your product list, or
Add custom item for anything that isn't in it. -
Tap an item in the cart to change its quantity.
-
Tap Checkout.
-
Choose Credit card, Audio Card Reader, Credit card (manual
entry), Cash, or Check.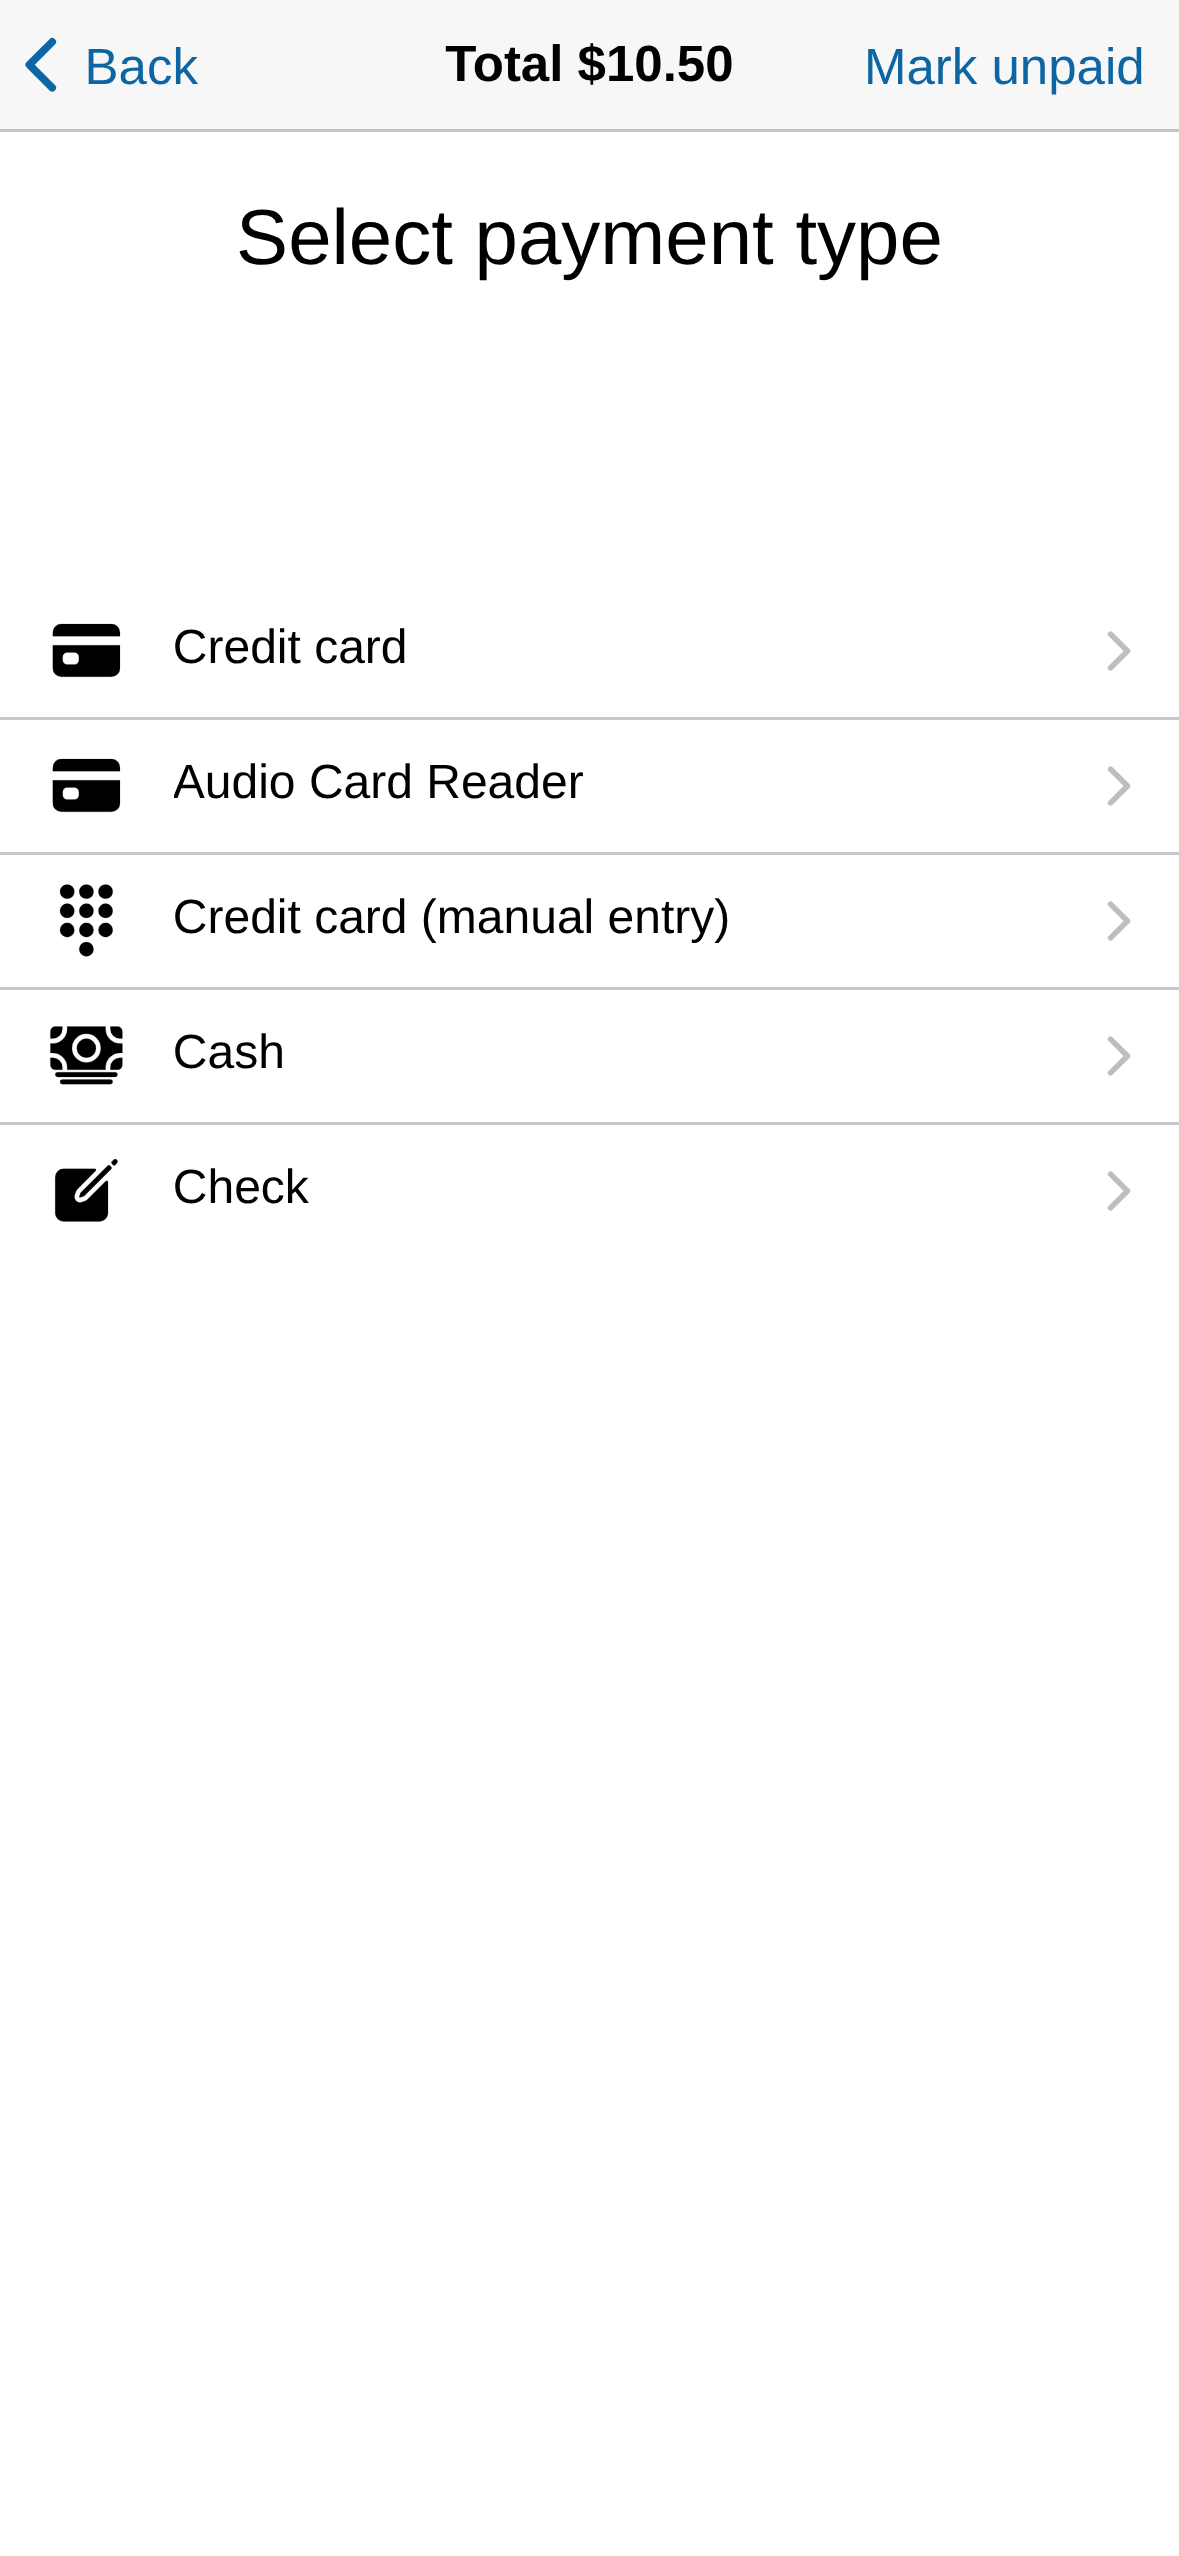
Paying in cash gives you quick buttons for common amounts, and works out the
change due.
Then tap Print receipt or Email receipt. Printed receipts carry a QR
code that pulls the order straight back up.
Printing needs a receipt printer
You have to connect a receipt printer first. See Connect a printer
below.
To start over, tap the menu at the top right, then Empty cart.
Pin what you sell most
On a tablet, tap Pin quick pick to keep your busiest products one tap
away. Press and hold a pinned product to remove it.
Add the customer
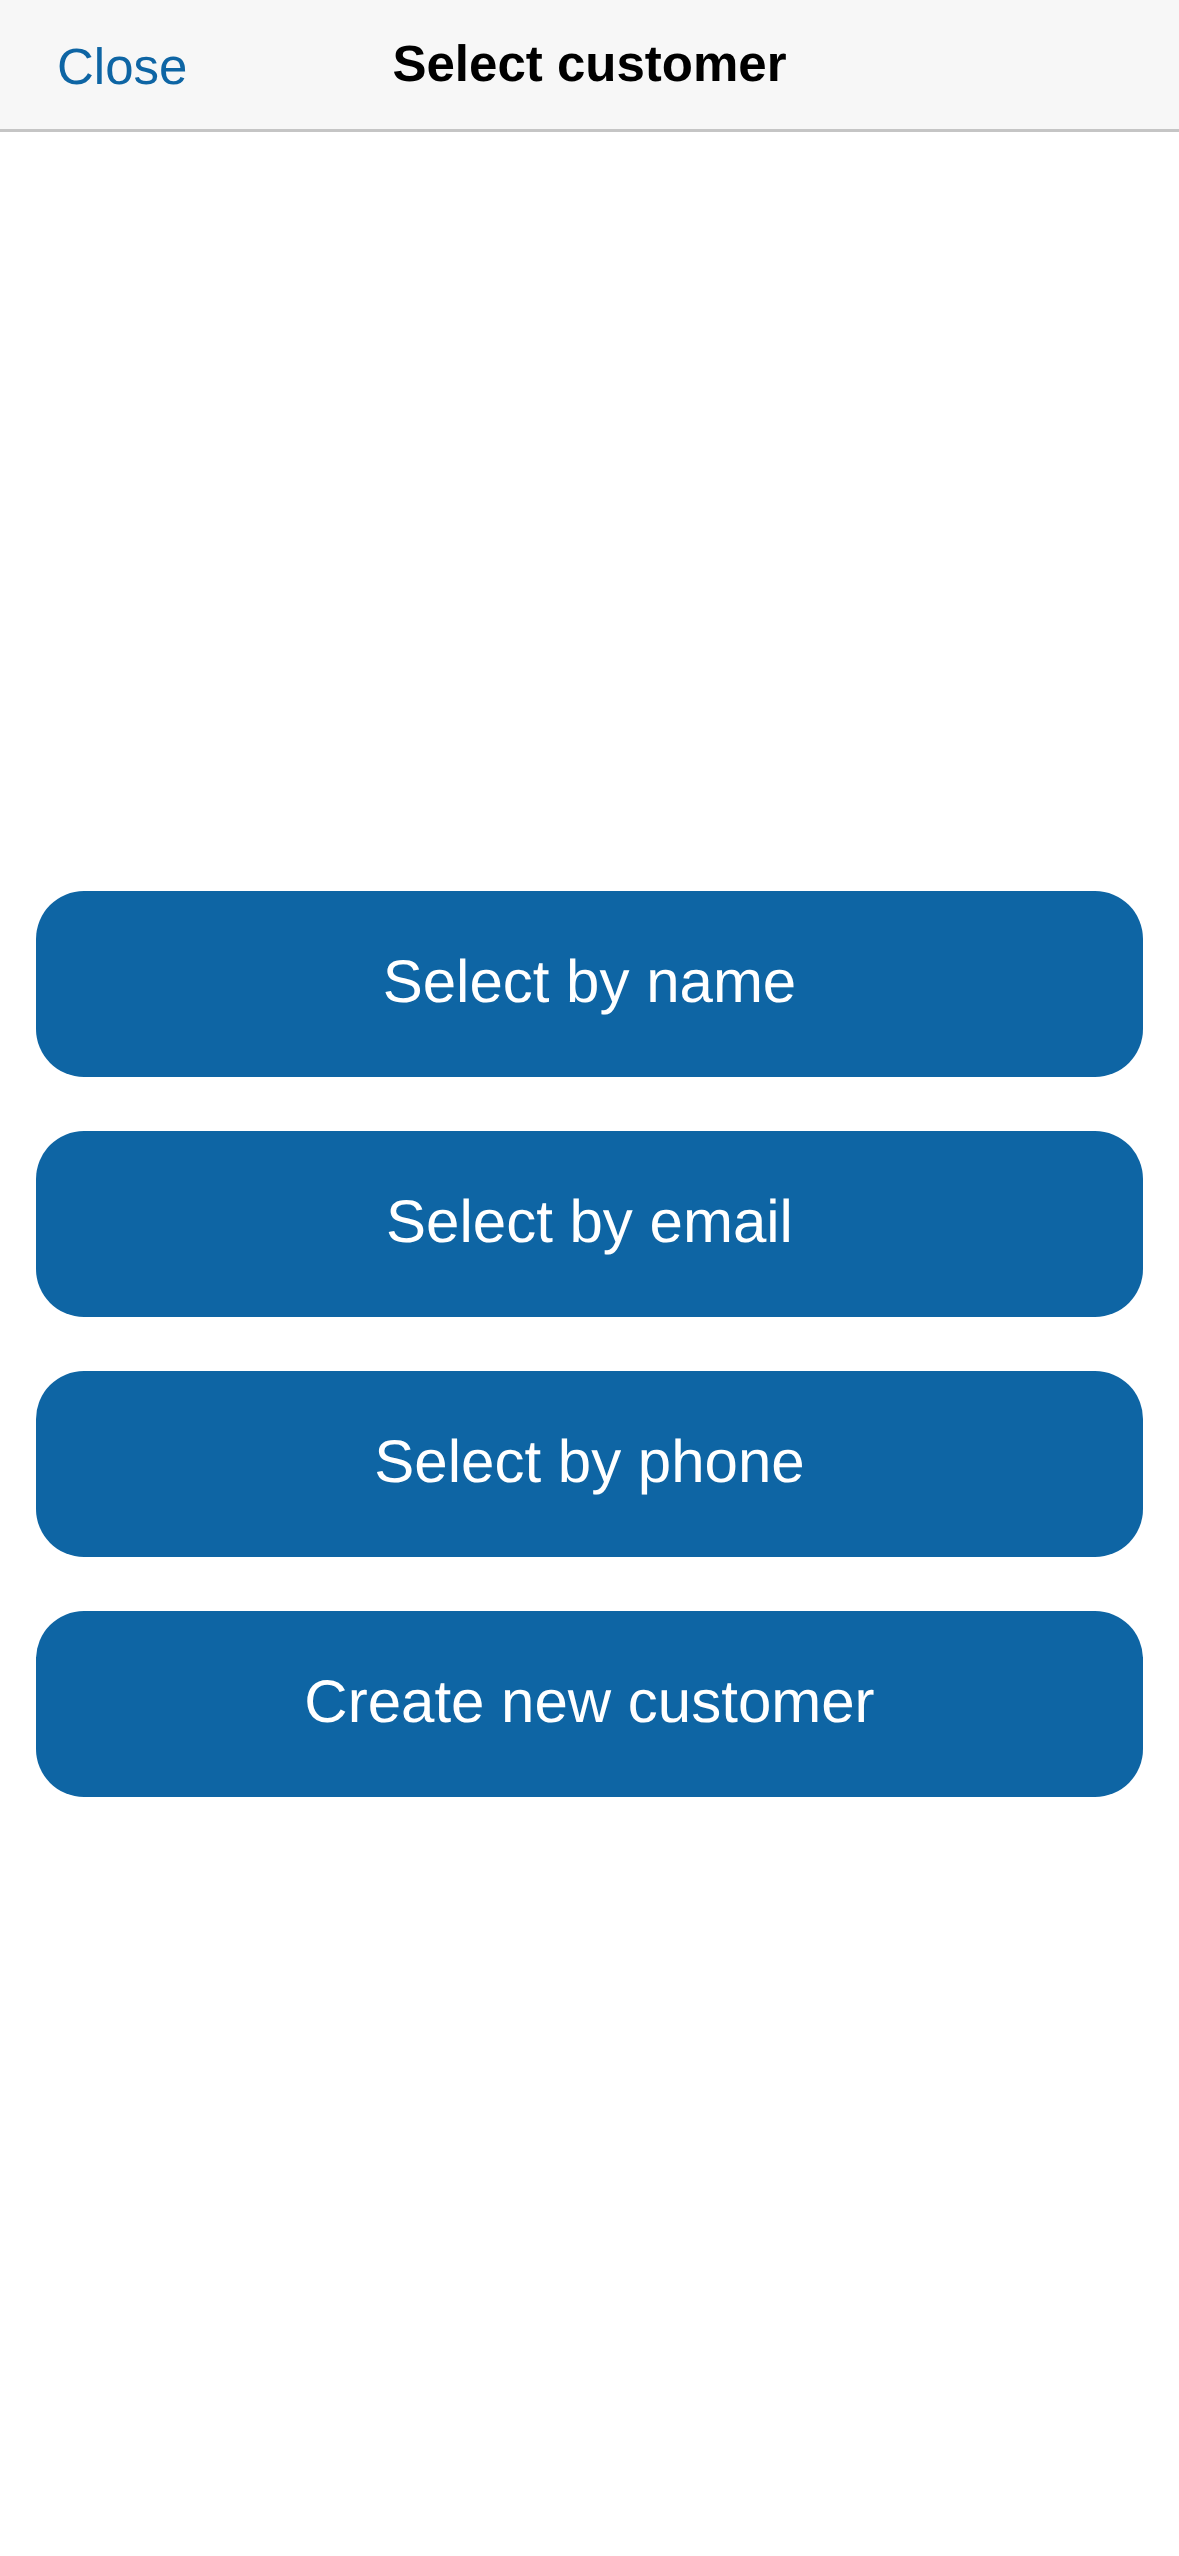
Tap Select customer, above the cart, to attach one before checkout.
Choose Select by name, Select by email or Select by phone to find
somebody you have served before, or tap Create new customer and enter
their name, email and phone number.
Connect a card reader
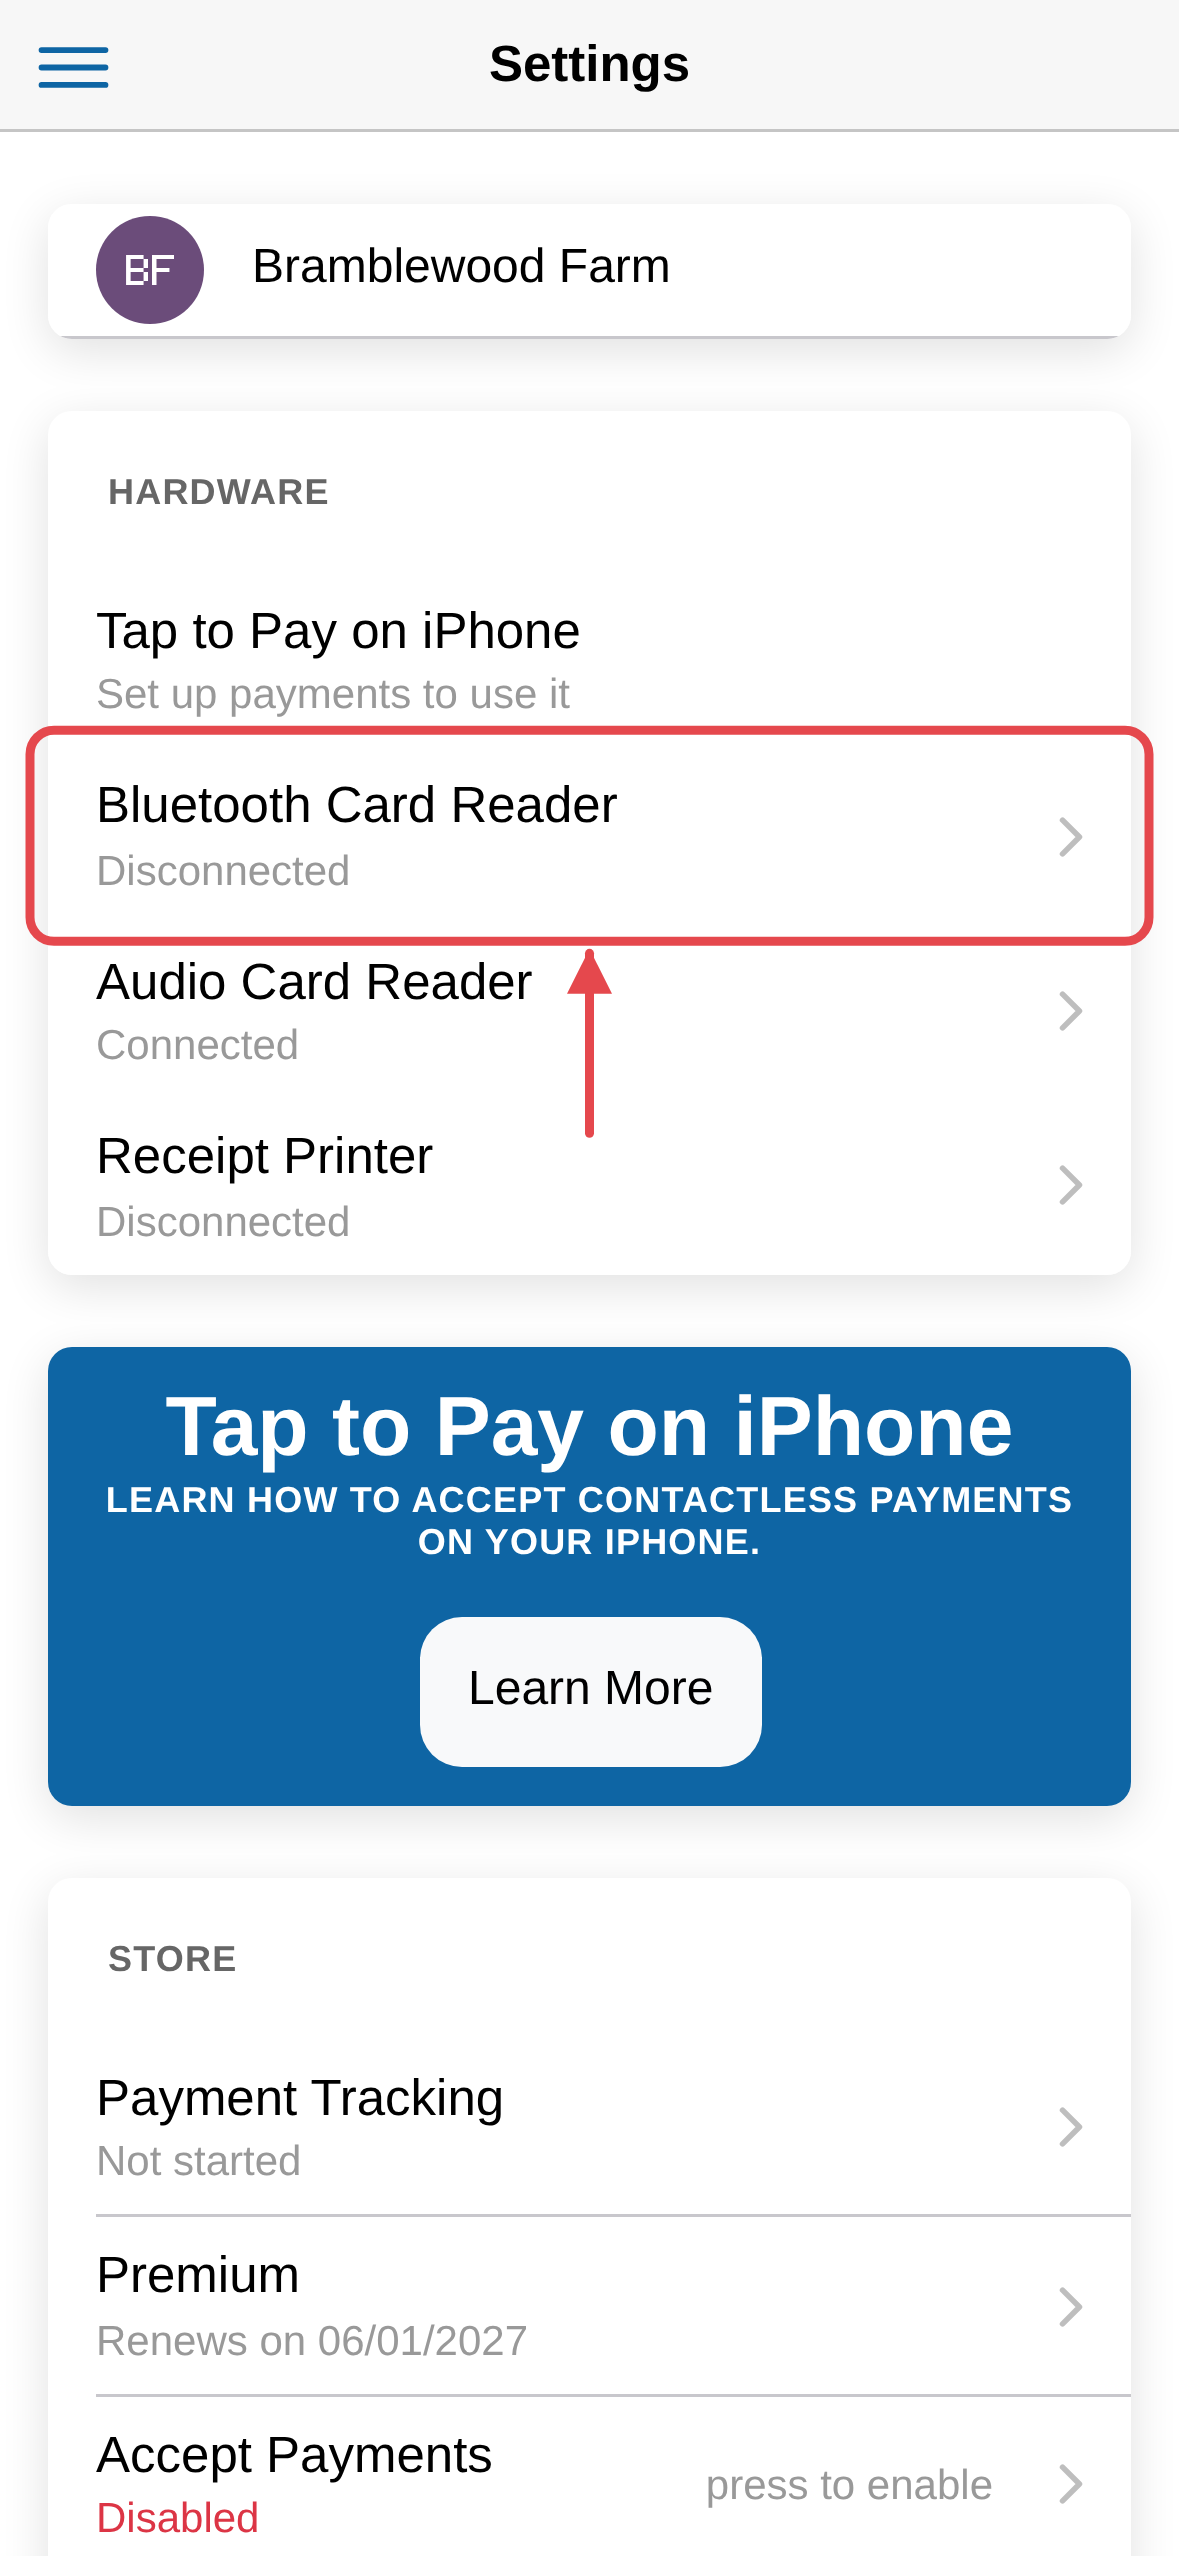
Open the menu at the top left, then Settings. On a supported iPhone,
Tap to Pay on iPhone is listed first under Hardware — it takes a
contactless card with nothing to plug in or pair, once your account is
approved to accept cards. Below it are three devices you connect:
Bluetooth Card Reader, Audio Card Reader, and Receipt Printer.
-
Tap Bluetooth Card Reader.
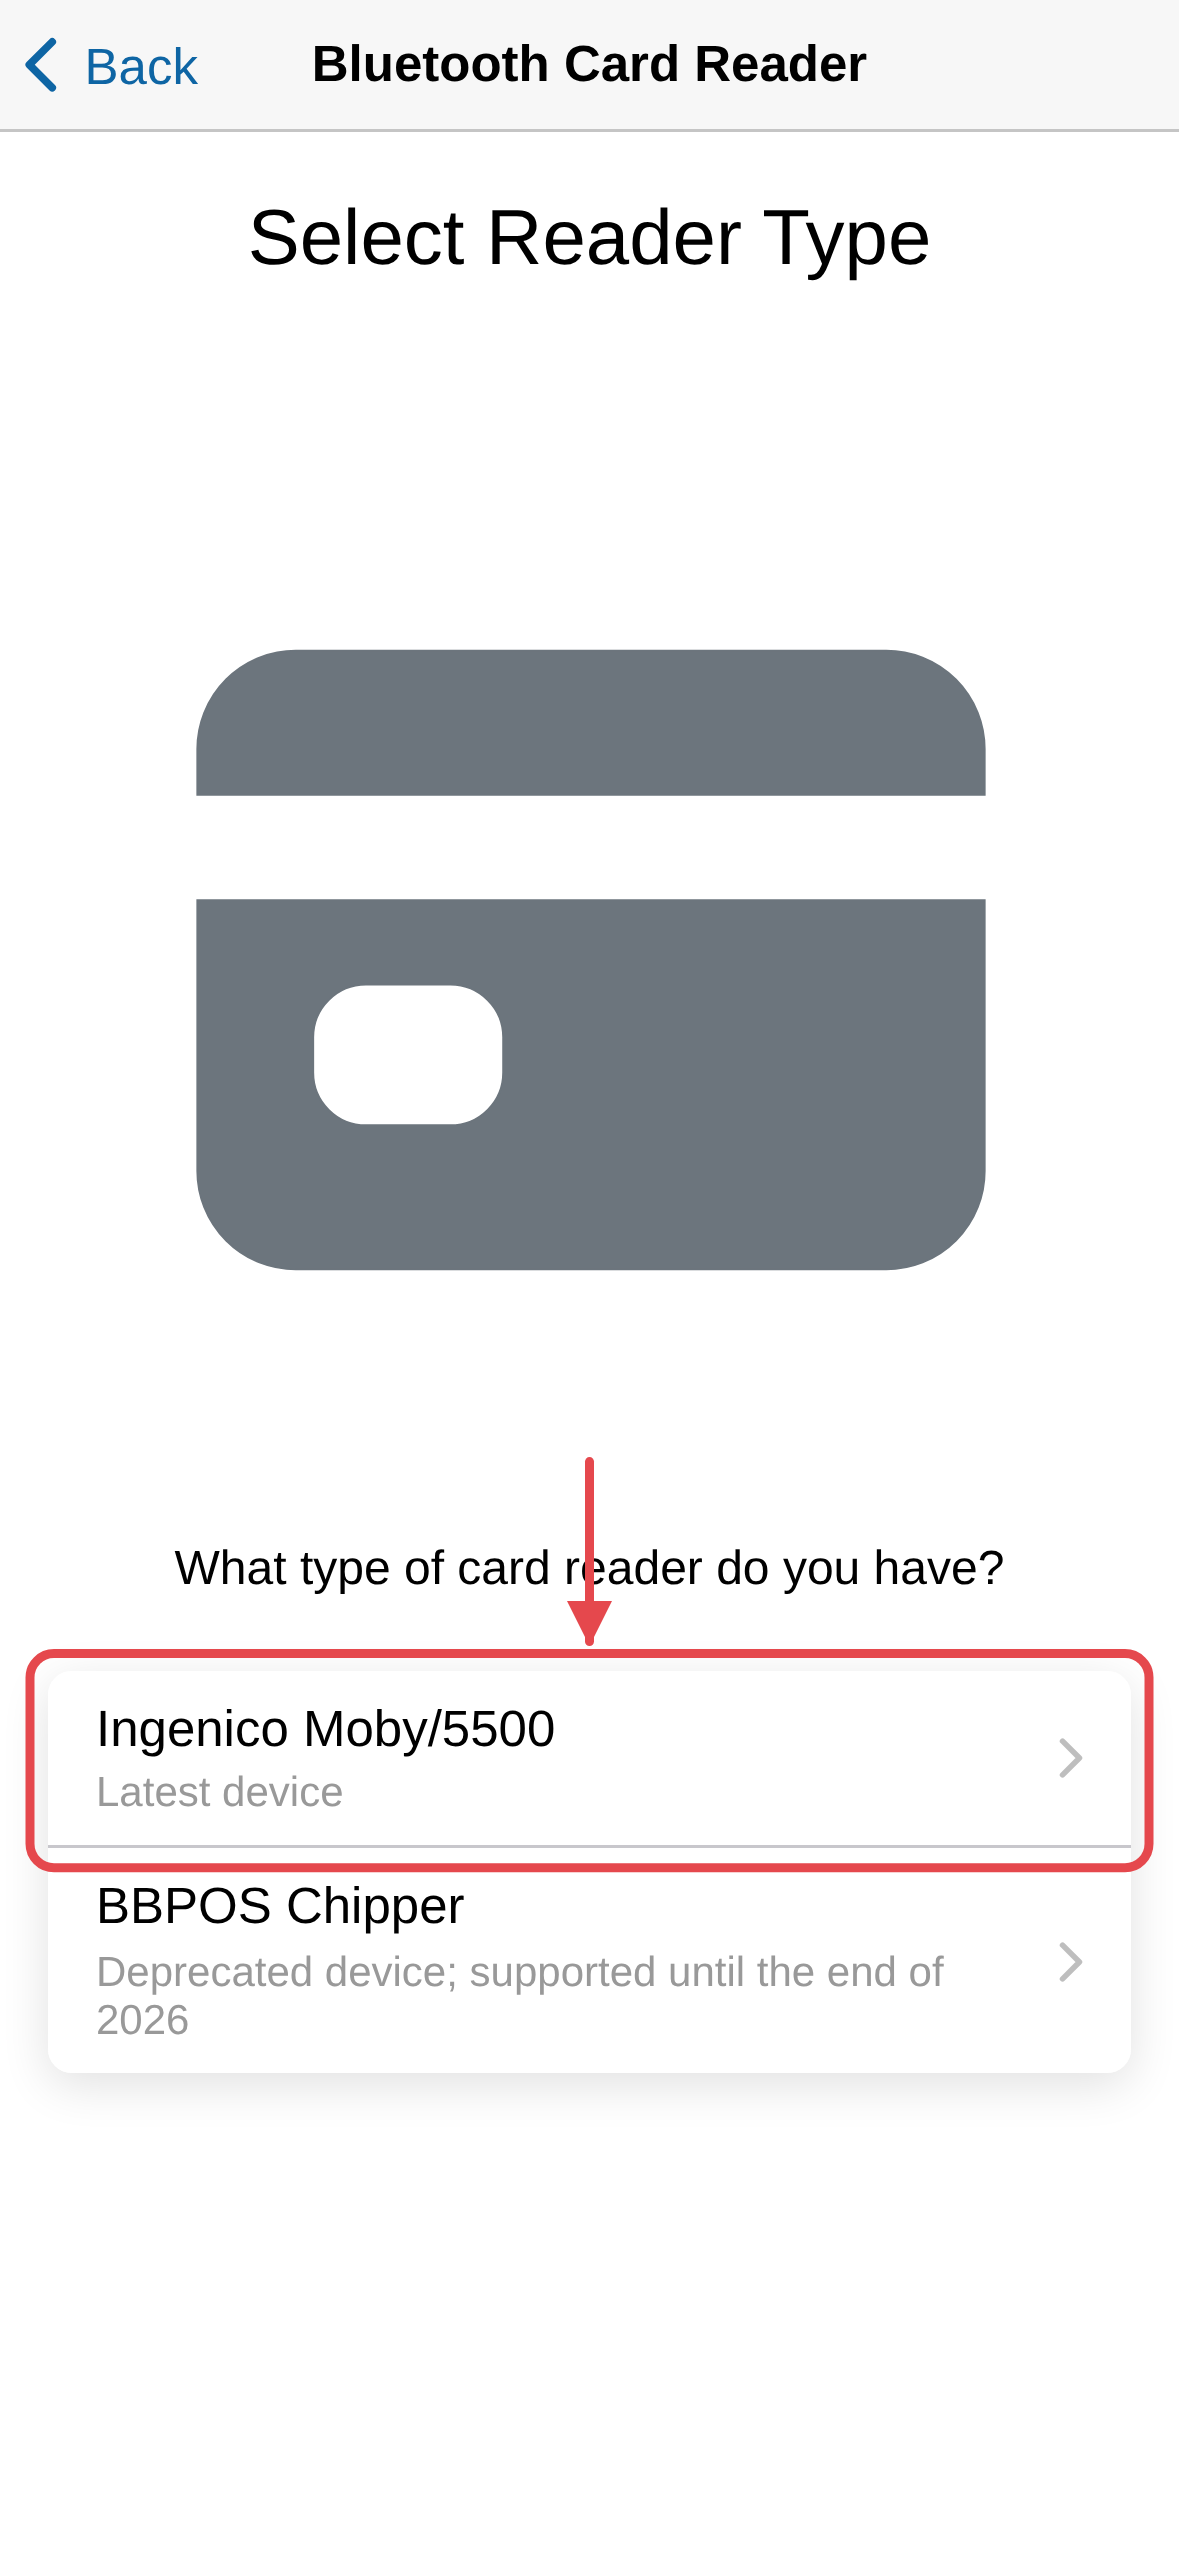
-
Choose your reader — Ingenico Moby/5500 or BBPOS Chipper.
-
Make sure it's on with its light blinking blue while it searches, then tap
its name once it appears in the list.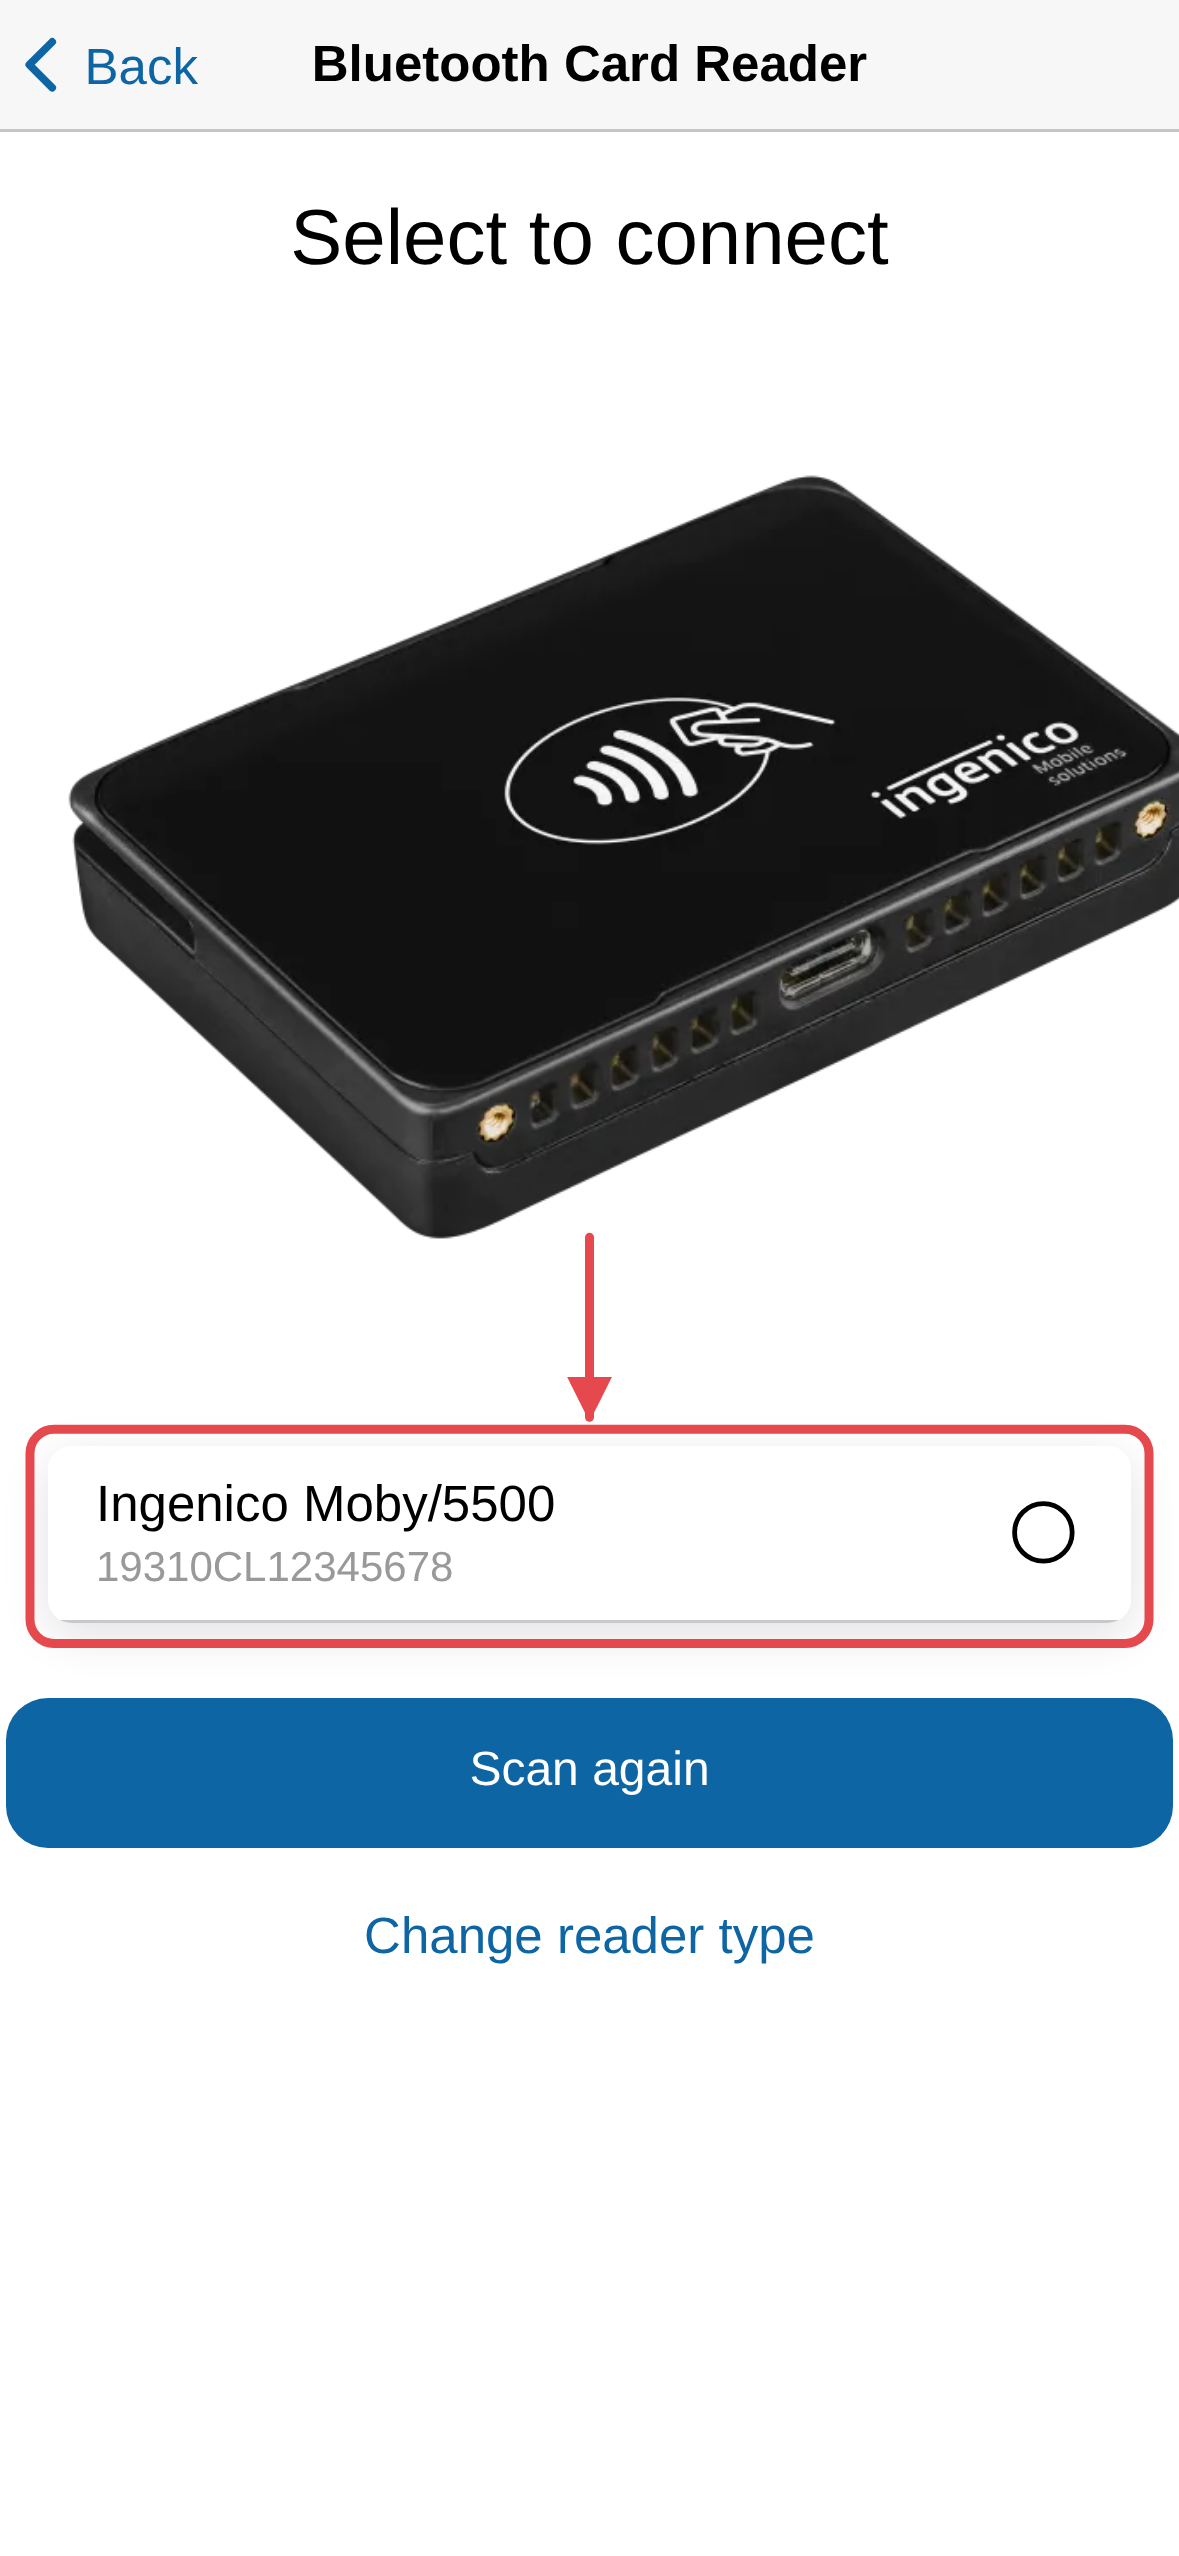
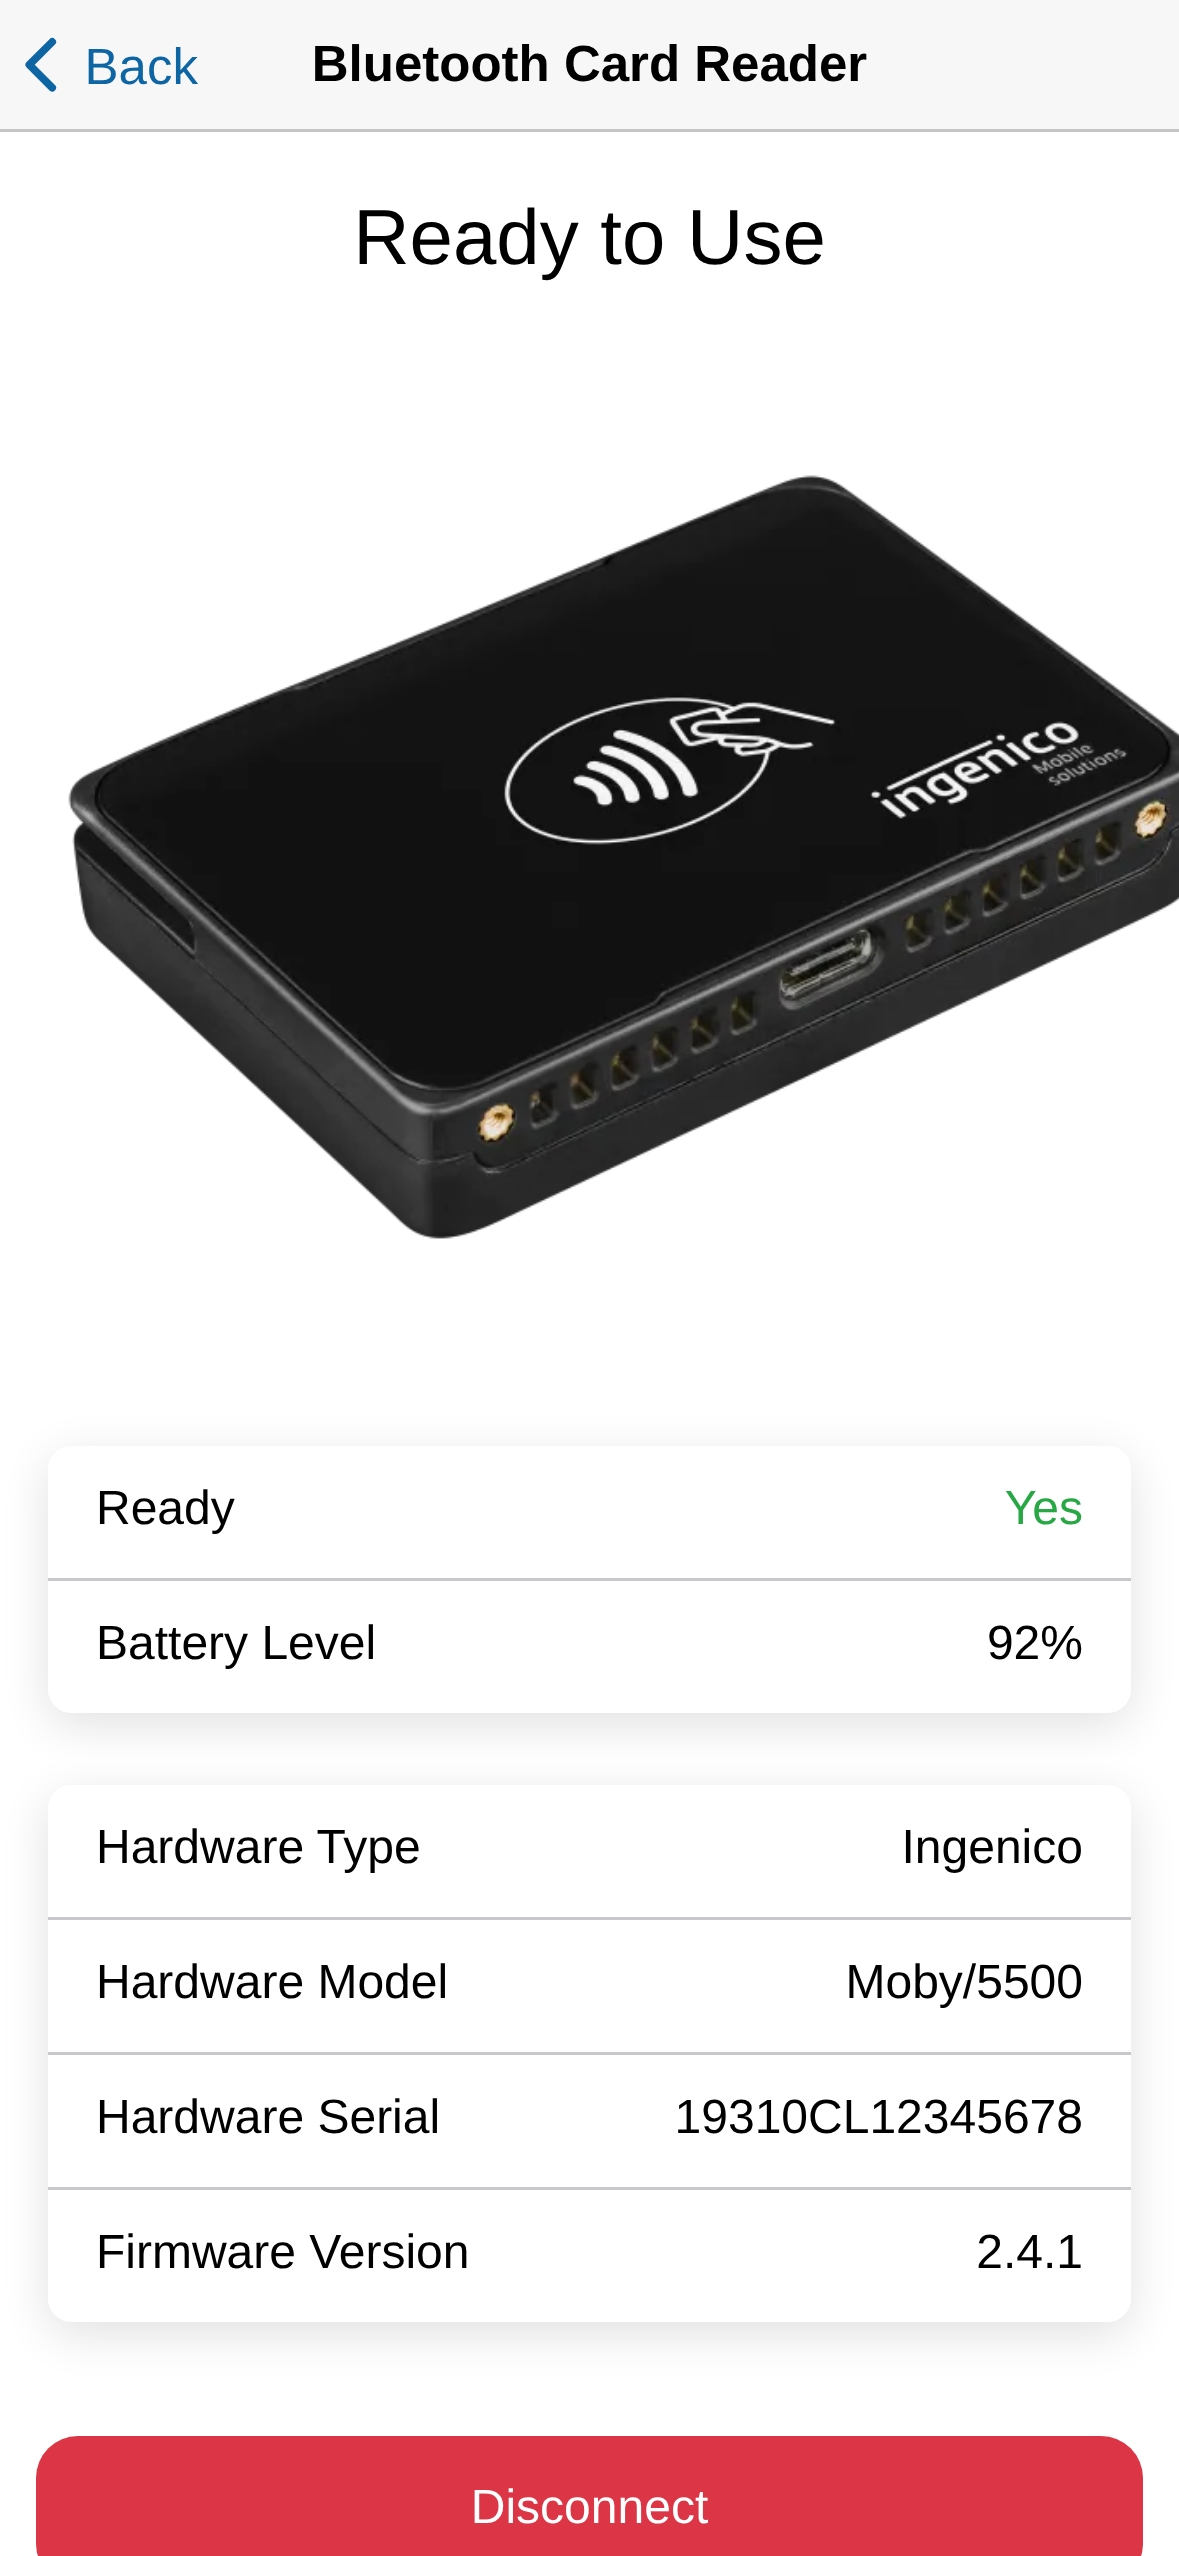
Once it connects, it shows Ready to Use with its battery level and
firmware version.
The Audio Card Reader plugs into the headphone jack instead of pairing
over Bluetooth.
Connect a printer
Open the menu at the top left, then Settings, then Receipt Printer
under Hardware. It connects the same way as a card reader, without
choosing a type first.
-
Make sure it's on and nearby while the app searches, then tap its name
once it appears in the list.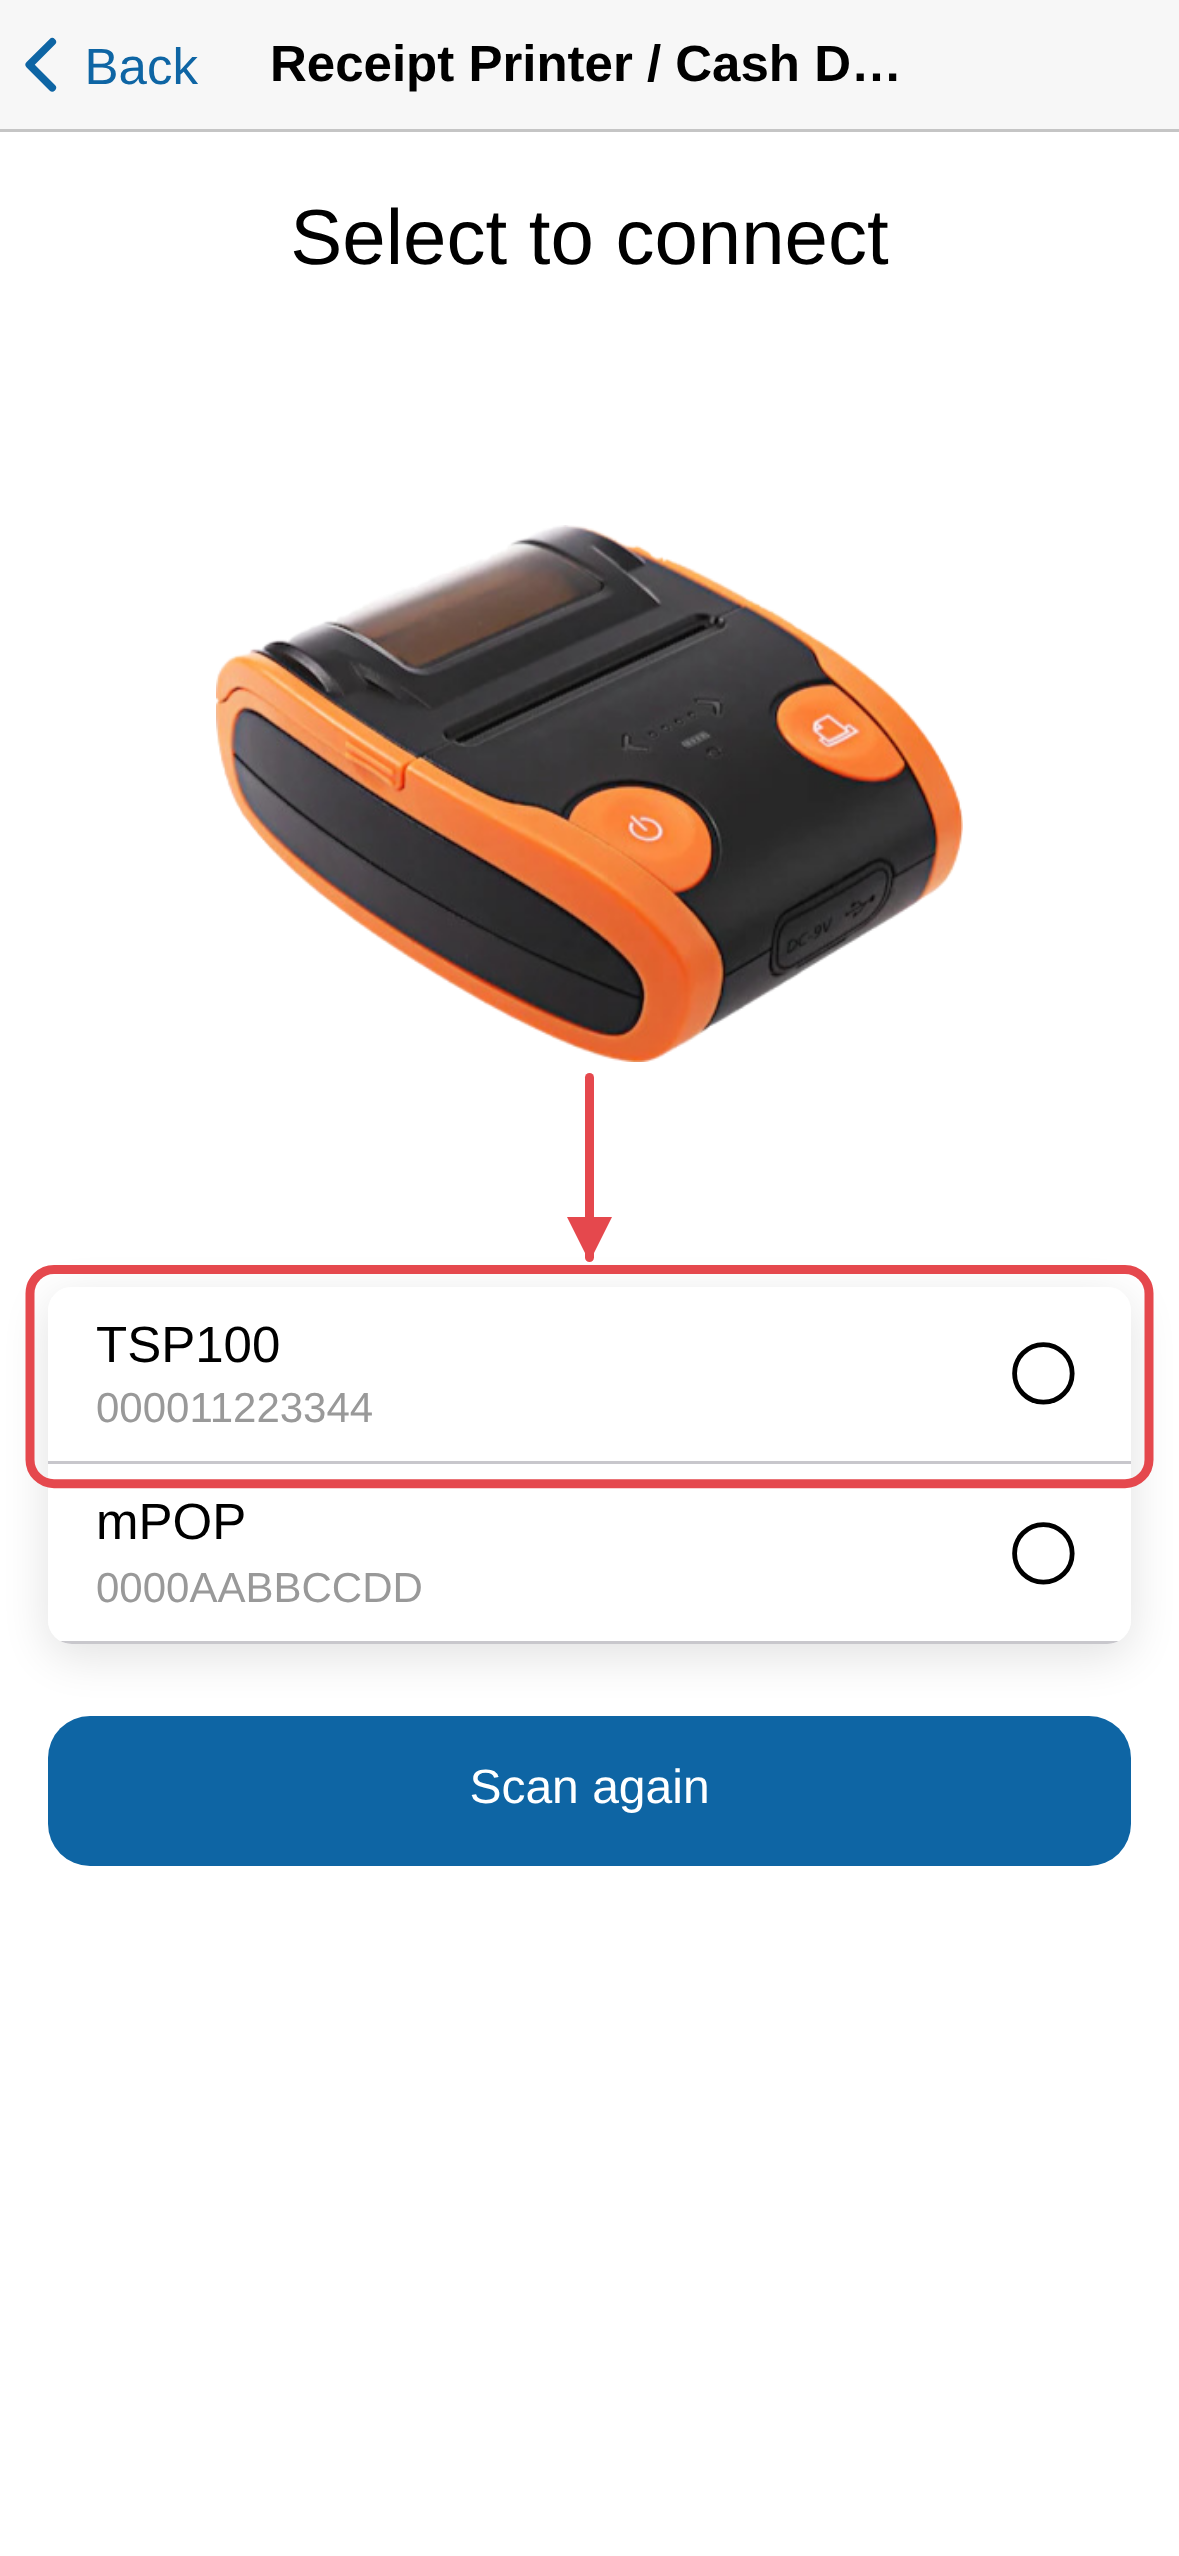
-
Once it's paired, tap Print Test to check it, or Open Cash Drawer
if one is wired to it.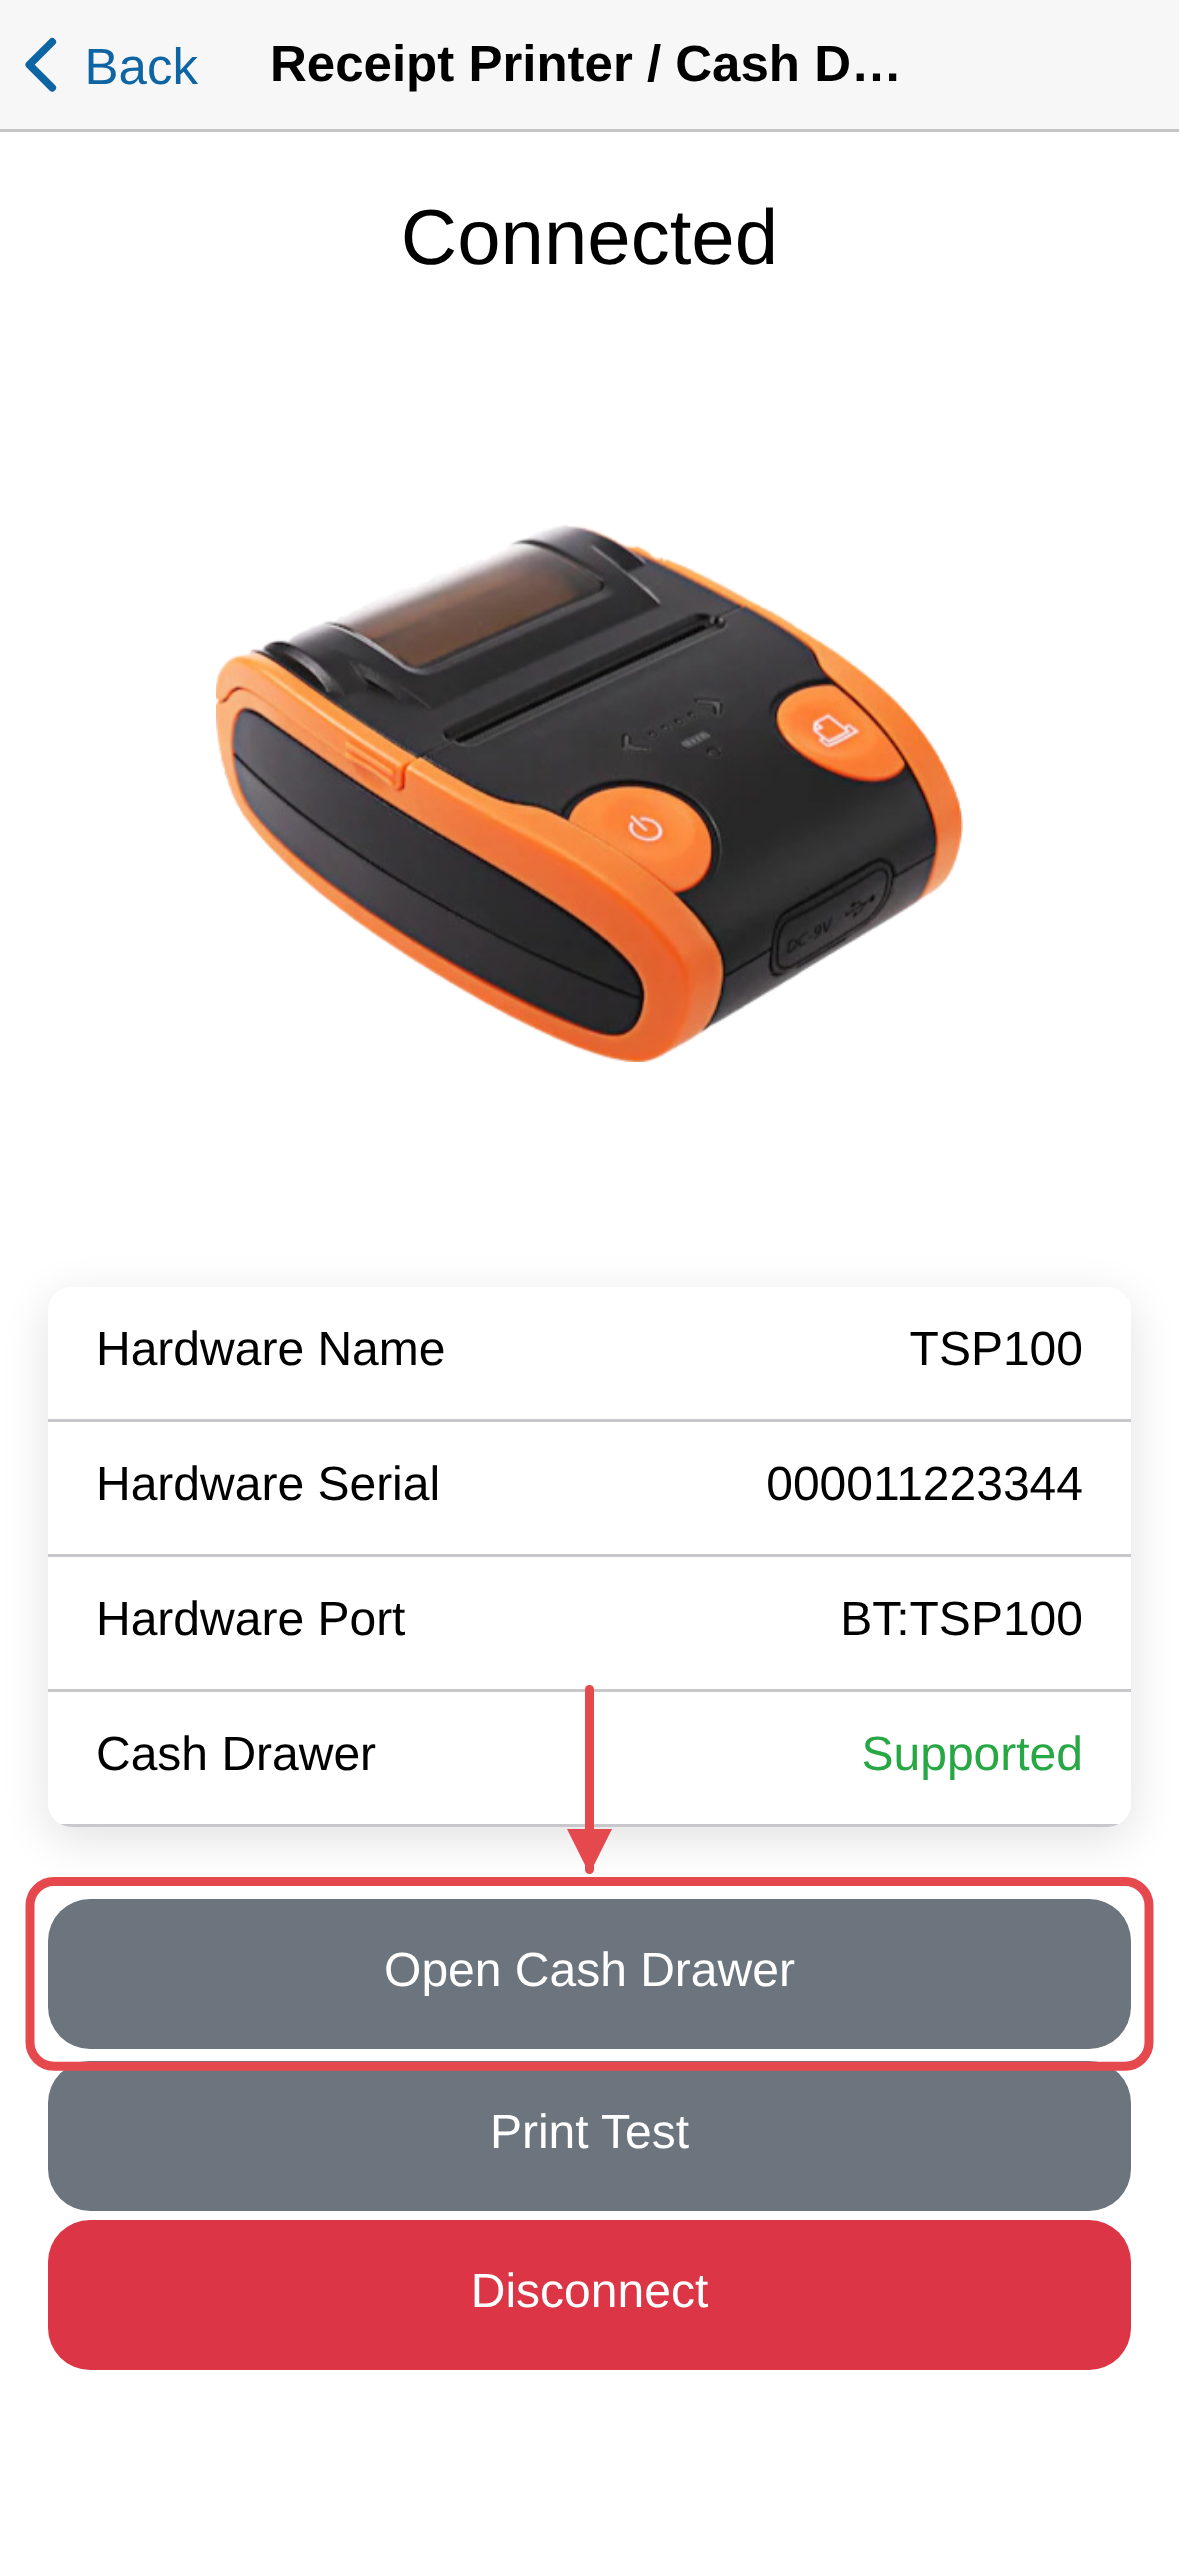
What else is in Settings
- Payment Tracking — count your float in at the start of the day and out at
the end. Tap Add cash or Remove cash as you go, and End tracking
session when you finish. - Your premium subscription and card payment approval.
- Your online store settings, and any market stores you sell in.
- Your default tax state and rate. A product taxed differently carries its own
rate.
Products, orders and customers
Each has its own page in the menu, with a search box at the top.
- Products — tap Filter by categories or Filter by inventory to
narrow the list, tap a product to edit it, or Create a new one.
Creating a product here lets you photograph it with the phone camera. - Orders — tap Filter by status or Filter by delivery type to
narrow the list. Open an order to see the receipt, refund it, or leave a
comment for the customer. - Customers — tap anybody to see what they have bought before.
Online orders come to you
With an online store on, a new order raises a notification on your phone.
Tap it to open the order and accept or decline it.