


What is RBAC?
RBAC stands for Role-Based Access Control. It's a system that determines what each user can see and do within Marketspread based on their assigned role.
Why it matters
RBAC helps your organization by:
- Security - Users only access what they need, reducing risk of accidental changes
- Efficiency - Staff see relevant features without clutter from unused tools
- Compliance - Track who has access to sensitive data like finances
- Delegation - Safely give team members specific responsibilities
How it works
The RBAC system has three key concepts:
| Concept | Description |
|---|---|
| Users | People who log into Marketspread |
| Roles | Collections of permissions (like 'Manager' or 'Accountant') |
| Permissions | Specific actions users can take (like 'view invoices') |
You assign a role to a user, and they receive all the permissions that role contains.
Understanding roles
Marketspread provides four default roles designed for common organizational needs. You can also create custom roles for specific situations.
Custom roles need Premium
Creating your own role needs a premium subscription. Contact support to turn it on for your organization. Custom roles are also a new feature and still being refined, so expect some rough edges.
You can't change or delete the four default roles below, but a custom role you create is yours to edit or remove.
Administrator
Full access to everything. Administrators can manage all aspects of the organization including settings, user management, finances, and system configuration.
Best for:
- Organization owners and primary decision-makers
- IT staff responsible for system setup
- Users who need unrestricted access
Manager
Day-to-day operations access. Managers can handle most operational tasks like working with vendors, managing events, and processing invoices. They cannot change system settings or manage forms.
Best for:
- Market managers handling vendor relationships
- Team leads coordinating daily operations
- Staff who need broad operational access
What Managers can't do: Edit organization settings, manage custom forms, activate events, or edit layouts.
Accountant
Financial view-only access. Accountants can view all financial data including invoices, credits, payouts, and disputes. They cannot modify data, ensuring your financial records remain secure.
Best for:
- External bookkeepers and accountants
- Financial auditors
- Compliance officers reviewing transactions
Reporter
Reports-only access. Reporters can view and generate reports but cannot access other system features. This is the most limited default role.
Best for:
- Board members who need periodic reports
- Stakeholders who only need analytics
- Consultants reviewing performance data
Role comparison
| Role | Access Level | Can Edit Data? | Primary Use |
|---|---|---|---|
| Administrator | Full Access | Yes - All | System owners |
| Manager | Most Features | Yes - Operations | Daily operations |
| Accountant | Financial Only | No - View Only | Finance review |
| Reporter | Reports Only | No - View Only | Analytics access |
Understanding permissions
Permissions are the building blocks of roles. Each permission grants the ability to perform a specific action within Marketspread.
How permissions are organized
Each area of Marketspread — like Invoices or Vendor Applications — has its own set of permissions. Viewing invoices, editing vendor information and reviewing vendor applications are each separate permissions within their area.
Permission hierarchy
Some permissions imply others. If you can edit something, you can usually also view it. The hierarchy typically follows:
| Level | Includes | Example |
|---|---|---|
| activate/publish | Edit | Activate events |
| edit/create | View | Edit invoices |
| release/review | View | Release invoices |
| view | Nothing else | View invoices |
This means giving someone the ability to edit invoices automatically lets them view invoices too - you don't need to add both permissions.
Financial permissions
| Area | Controls |
|---|---|
| Invoices | Invoice creation, viewing, editing, payments, refunds |
| Credits | Credit balance viewing and adjustments |
| Payouts | Vendor payout viewing and notifications |
| Disputes | Payment dispute viewing and notifications |
| Orders | E-commerce order management and payments |
Vendor management permissions
| Area | Controls |
|---|---|
| Vendors | Vendor profile viewing, alias, tags, and documents |
| Vendor Applications | Vendor application review and status changes |
| Vendor Events | Placing vendors into events and editing tags |
| Vendor Notes | Internal notes on vendors |
| Vendor Forms | Custom forms shown to vendors |
Events & scheduling permissions
| Area | Controls |
|---|---|
| Events | Event and event series creation and activation |
| Event Days | Individual event day details and attendance |
| Event Day Notes | Notes attached to specific event days |
| Event Day Forms | Forms shown on event days |
| Scheduler | Booth scheduling grid, bookings, and pricing |
| Sales Reporting | Vendor sales report collection and fees |
Forms & content permissions
| Area | Controls |
|---|---|
| Forms | Custom form creation and publishing |
| Surveys | External survey campaigns |
| Posts | Content and blog posts |
| Products | Vendor product catalog |
| Store | Online store management |
Reporting permissions
| Area | Controls |
|---|---|
| Data Reports | Interactive data grid reports |
| HTML Reports | Formatted printable HTML reports |
| Dashboard | Dashboard widgets and views |
System & administration permissions
| Area | Controls |
|---|---|
| Settings | Organization, market, and vendor settings |
| RBAC | Role and permission management |
| Messenger | Organization-wide messaging system |
| Metrics | System metrics and analytics |
| Notifications | Notification preferences and alerts |
| Calendar | Calendar viewing and administration |
| Customers | Customer information management |
| AI Assistant | Who can use the AI assistant, and build reports or forms with it |
Entity-specific permissions
| Area | Controls |
|---|---|
| Applications | Application form setup and activation |
| Layouts | Market/venue layout management |
| Bookings | Venue booking management |
| Members | Association member management |
| Market Applications | Vendor's view of market applications |
Common scenarios
Here are solutions for common access control situations:
"I want to give someone full access"
Solution: Assign the Administrator role.
| Role | Administrator |
| Result | Full access to all features and settings |
"I need a read-only finance user"
Solution: Assign the Accountant role.
| Role | Accountant |
| Result | Can view all financial data, cannot modify anything |
| Permissions | View invoices, credits, payouts and disputes, and run reports |
"I want someone to only manage applications"
Solution: Create a custom role with only application permissions.
| Role Name | Application Reviewer |
| Permissions | View and review vendor applications, view vendors, and view and edit vendor notes |
"I want a manager who can't access finances"
Solution: Create a custom role based on Manager, minus financial permissions.
| Base Role | Copy Manager permissions |
| Remove | Everything under Invoices, Credits, Payouts, Disputes and Orders |
| Result | Full operational access without financial data |
"I want someone to only run reports"
Solution: Assign the Reporter role.
| Role | Reporter |
| Result | Can view and run reports, no other access |
| Permissions | View data reports and HTML reports |
How to manage roles
Adding a team member
-
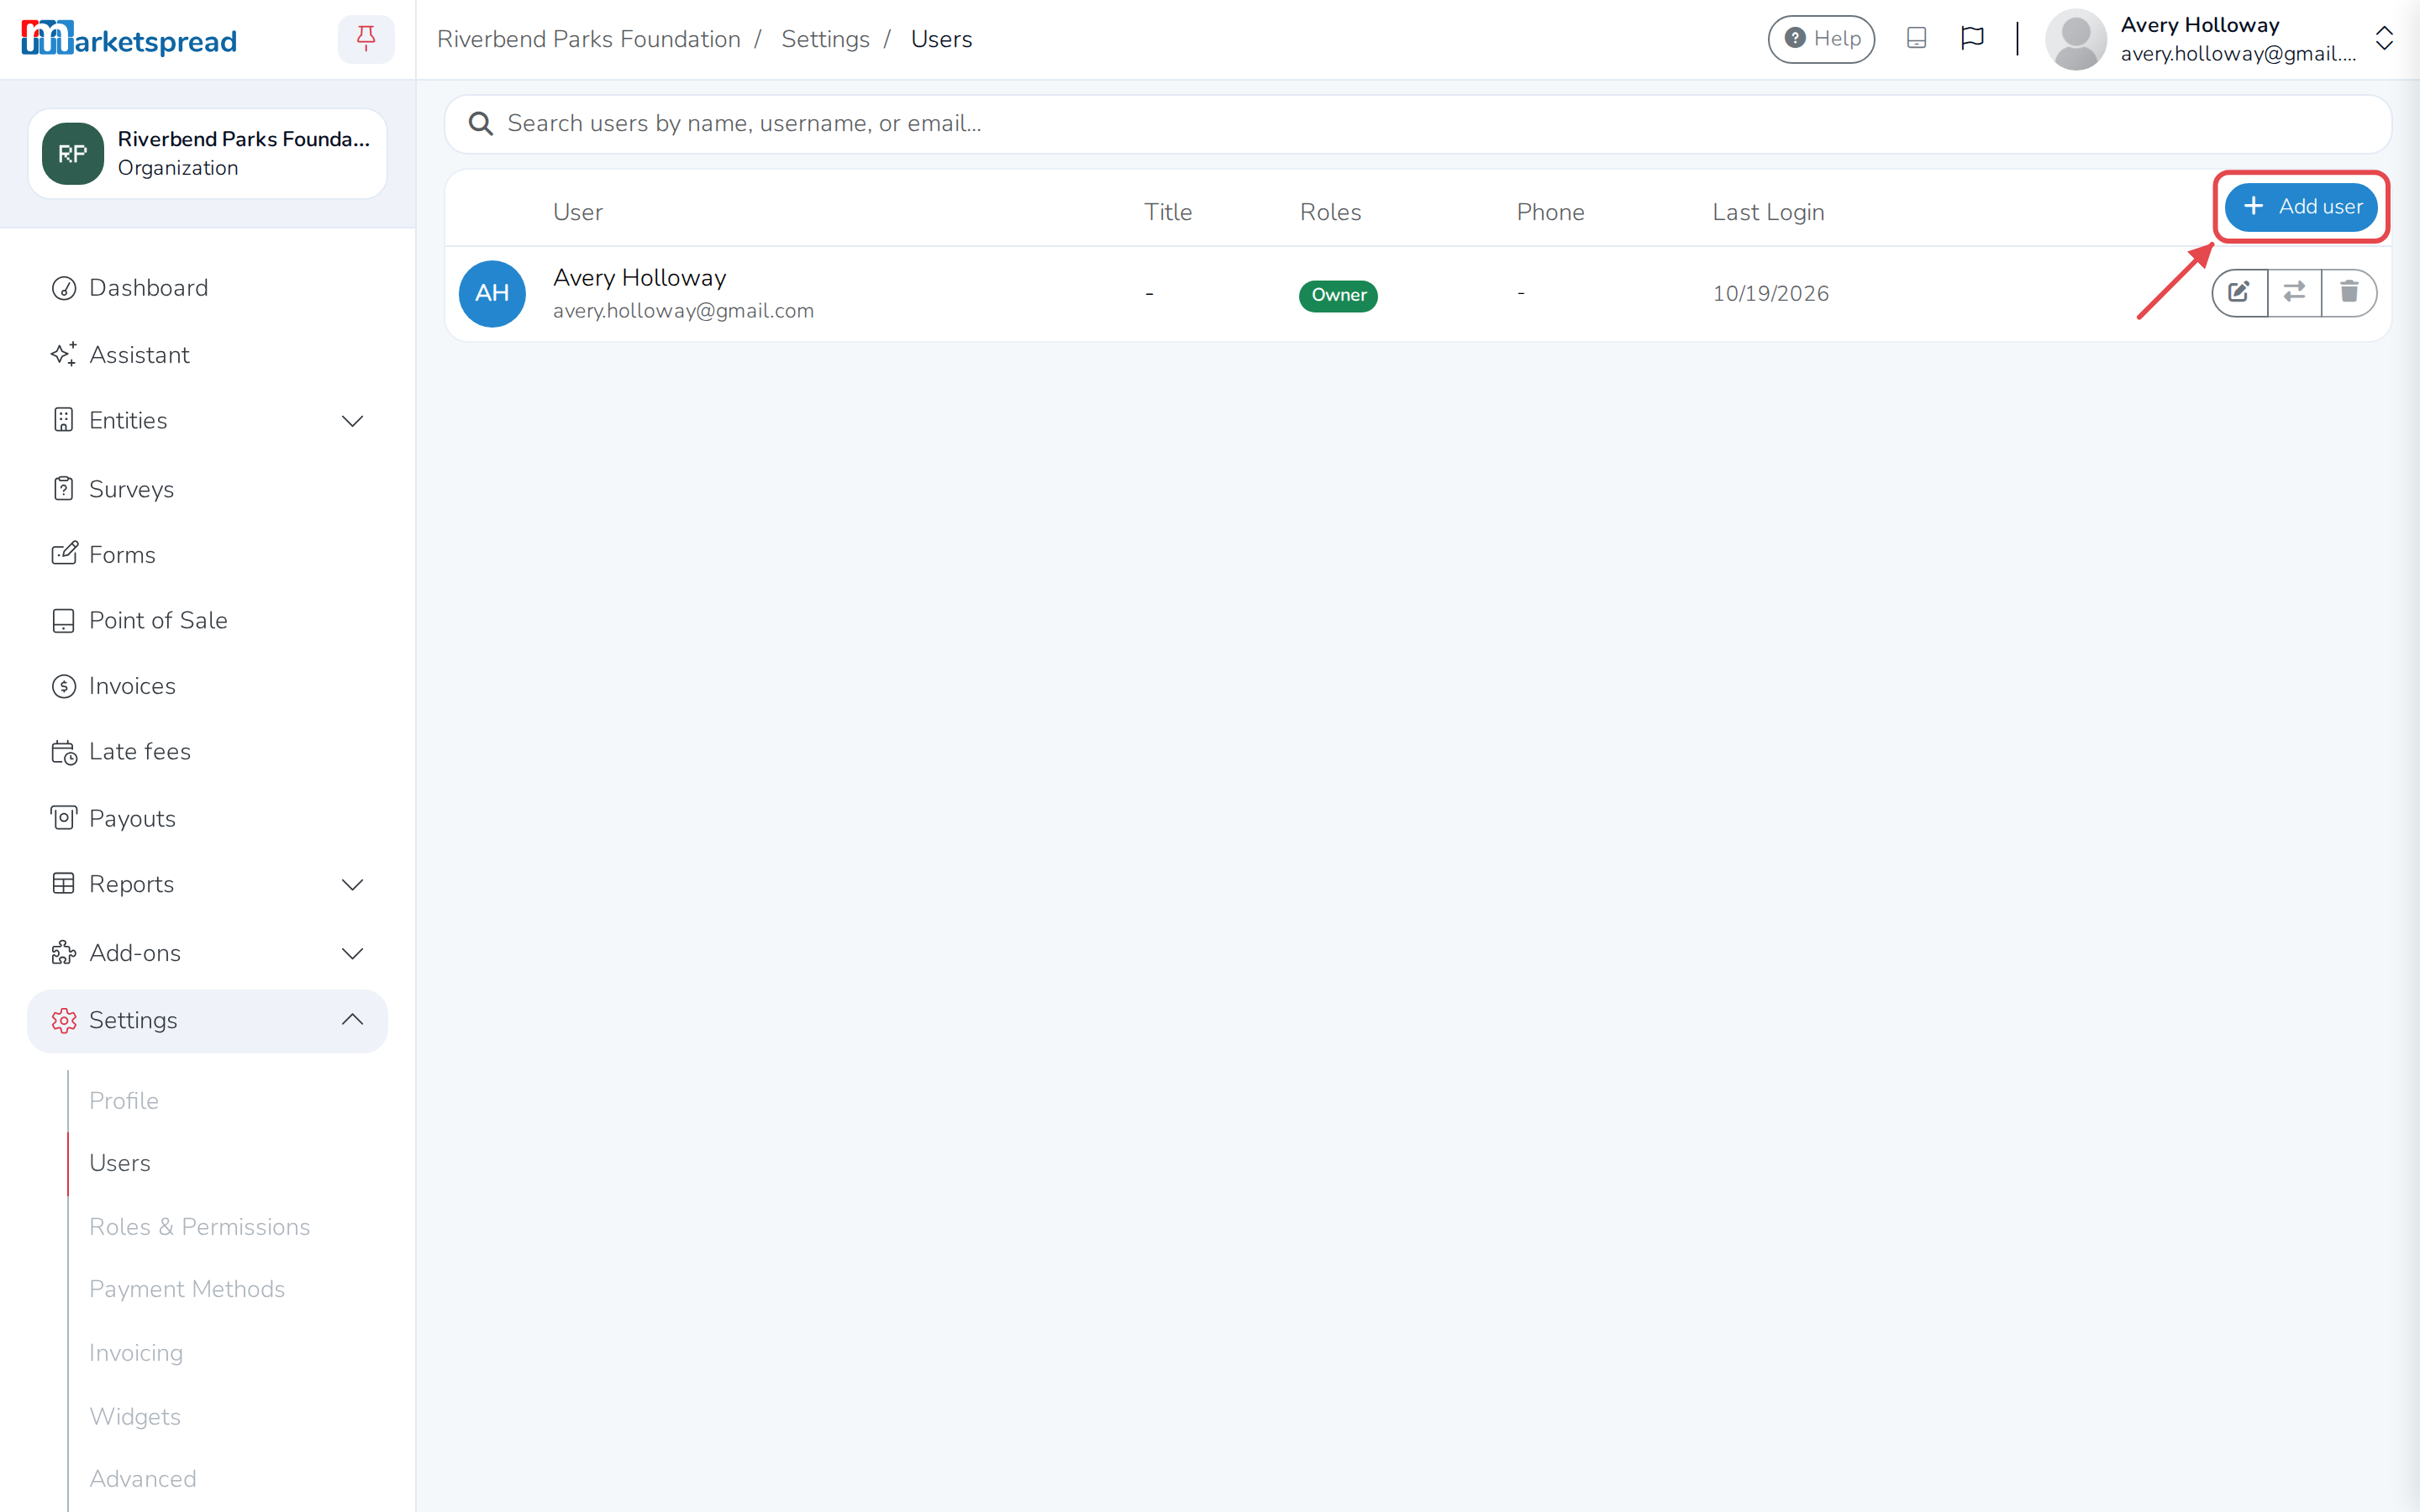
Open Settings, then click Users.
-
Click Add user.
-
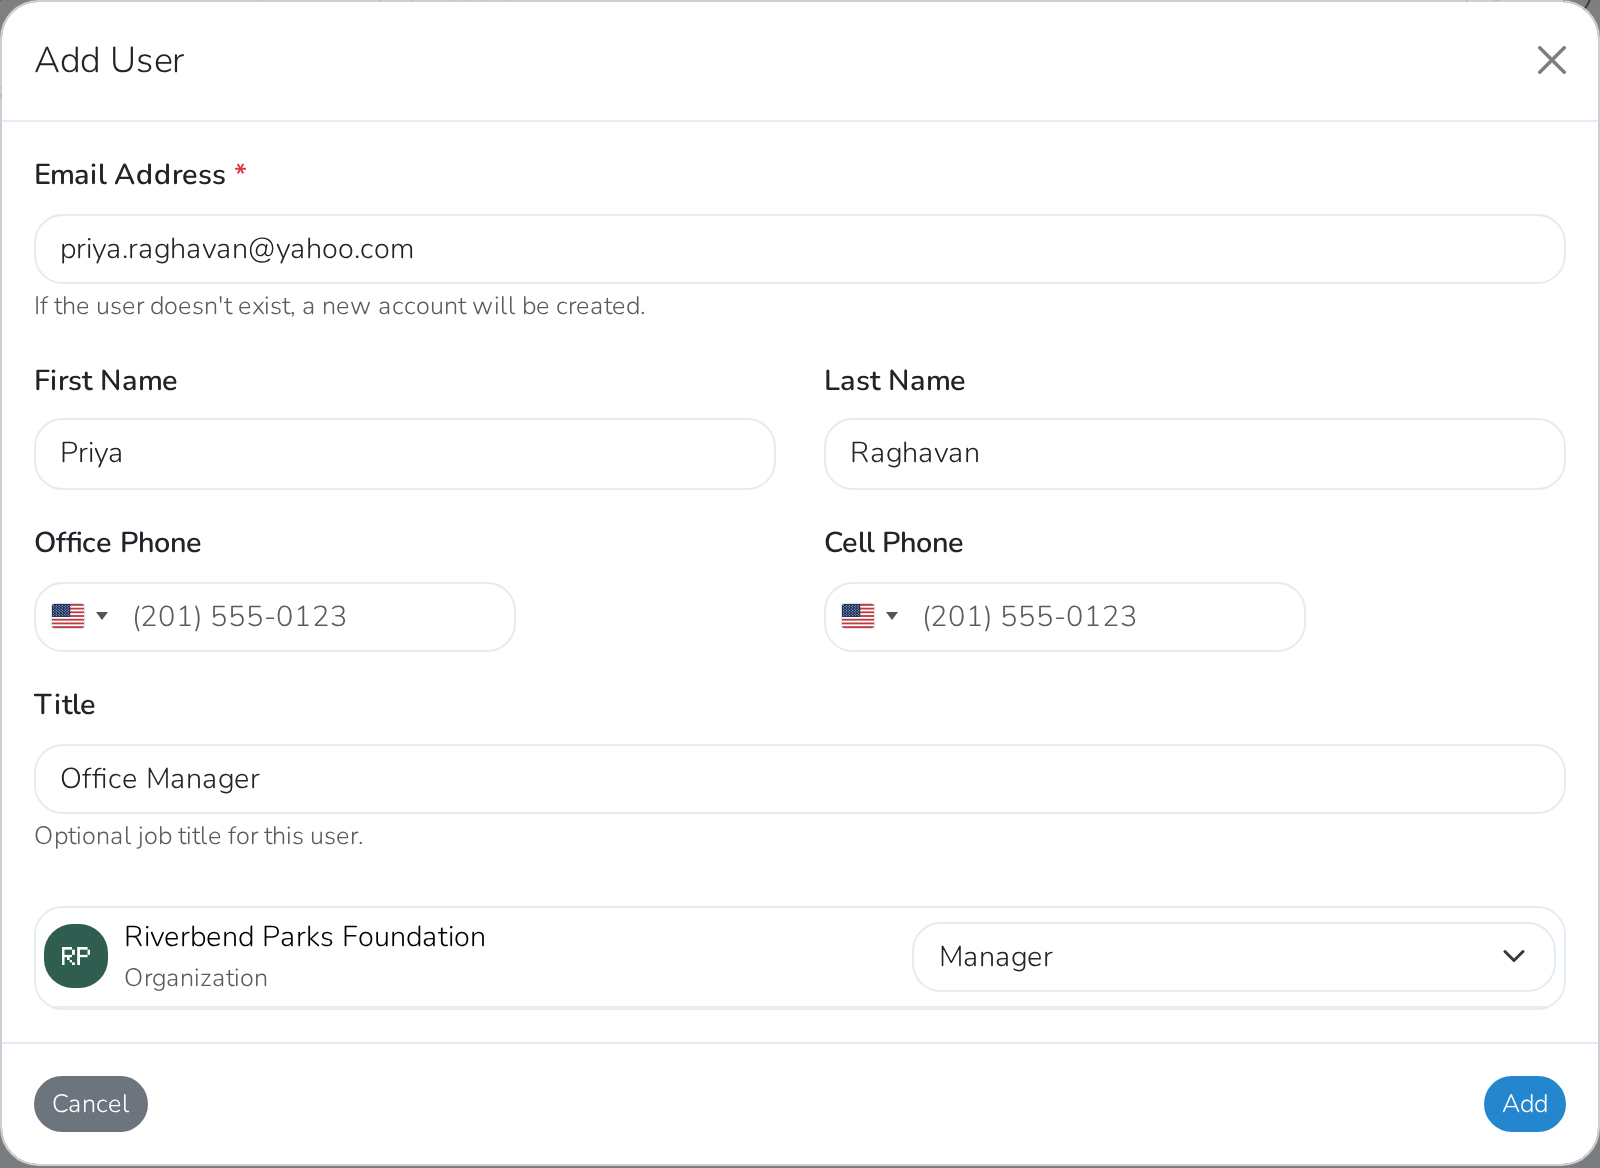
Enter their Email Address. If they don't already have a Marketspread account, one is created for them.
-
Optionally fill in their name, phone numbers and Title.
-
For each market, venue, vendor, association or your organization that you manage, choose a role from the dropdown next to it. Leave it as No role assigned to give them none there.
-
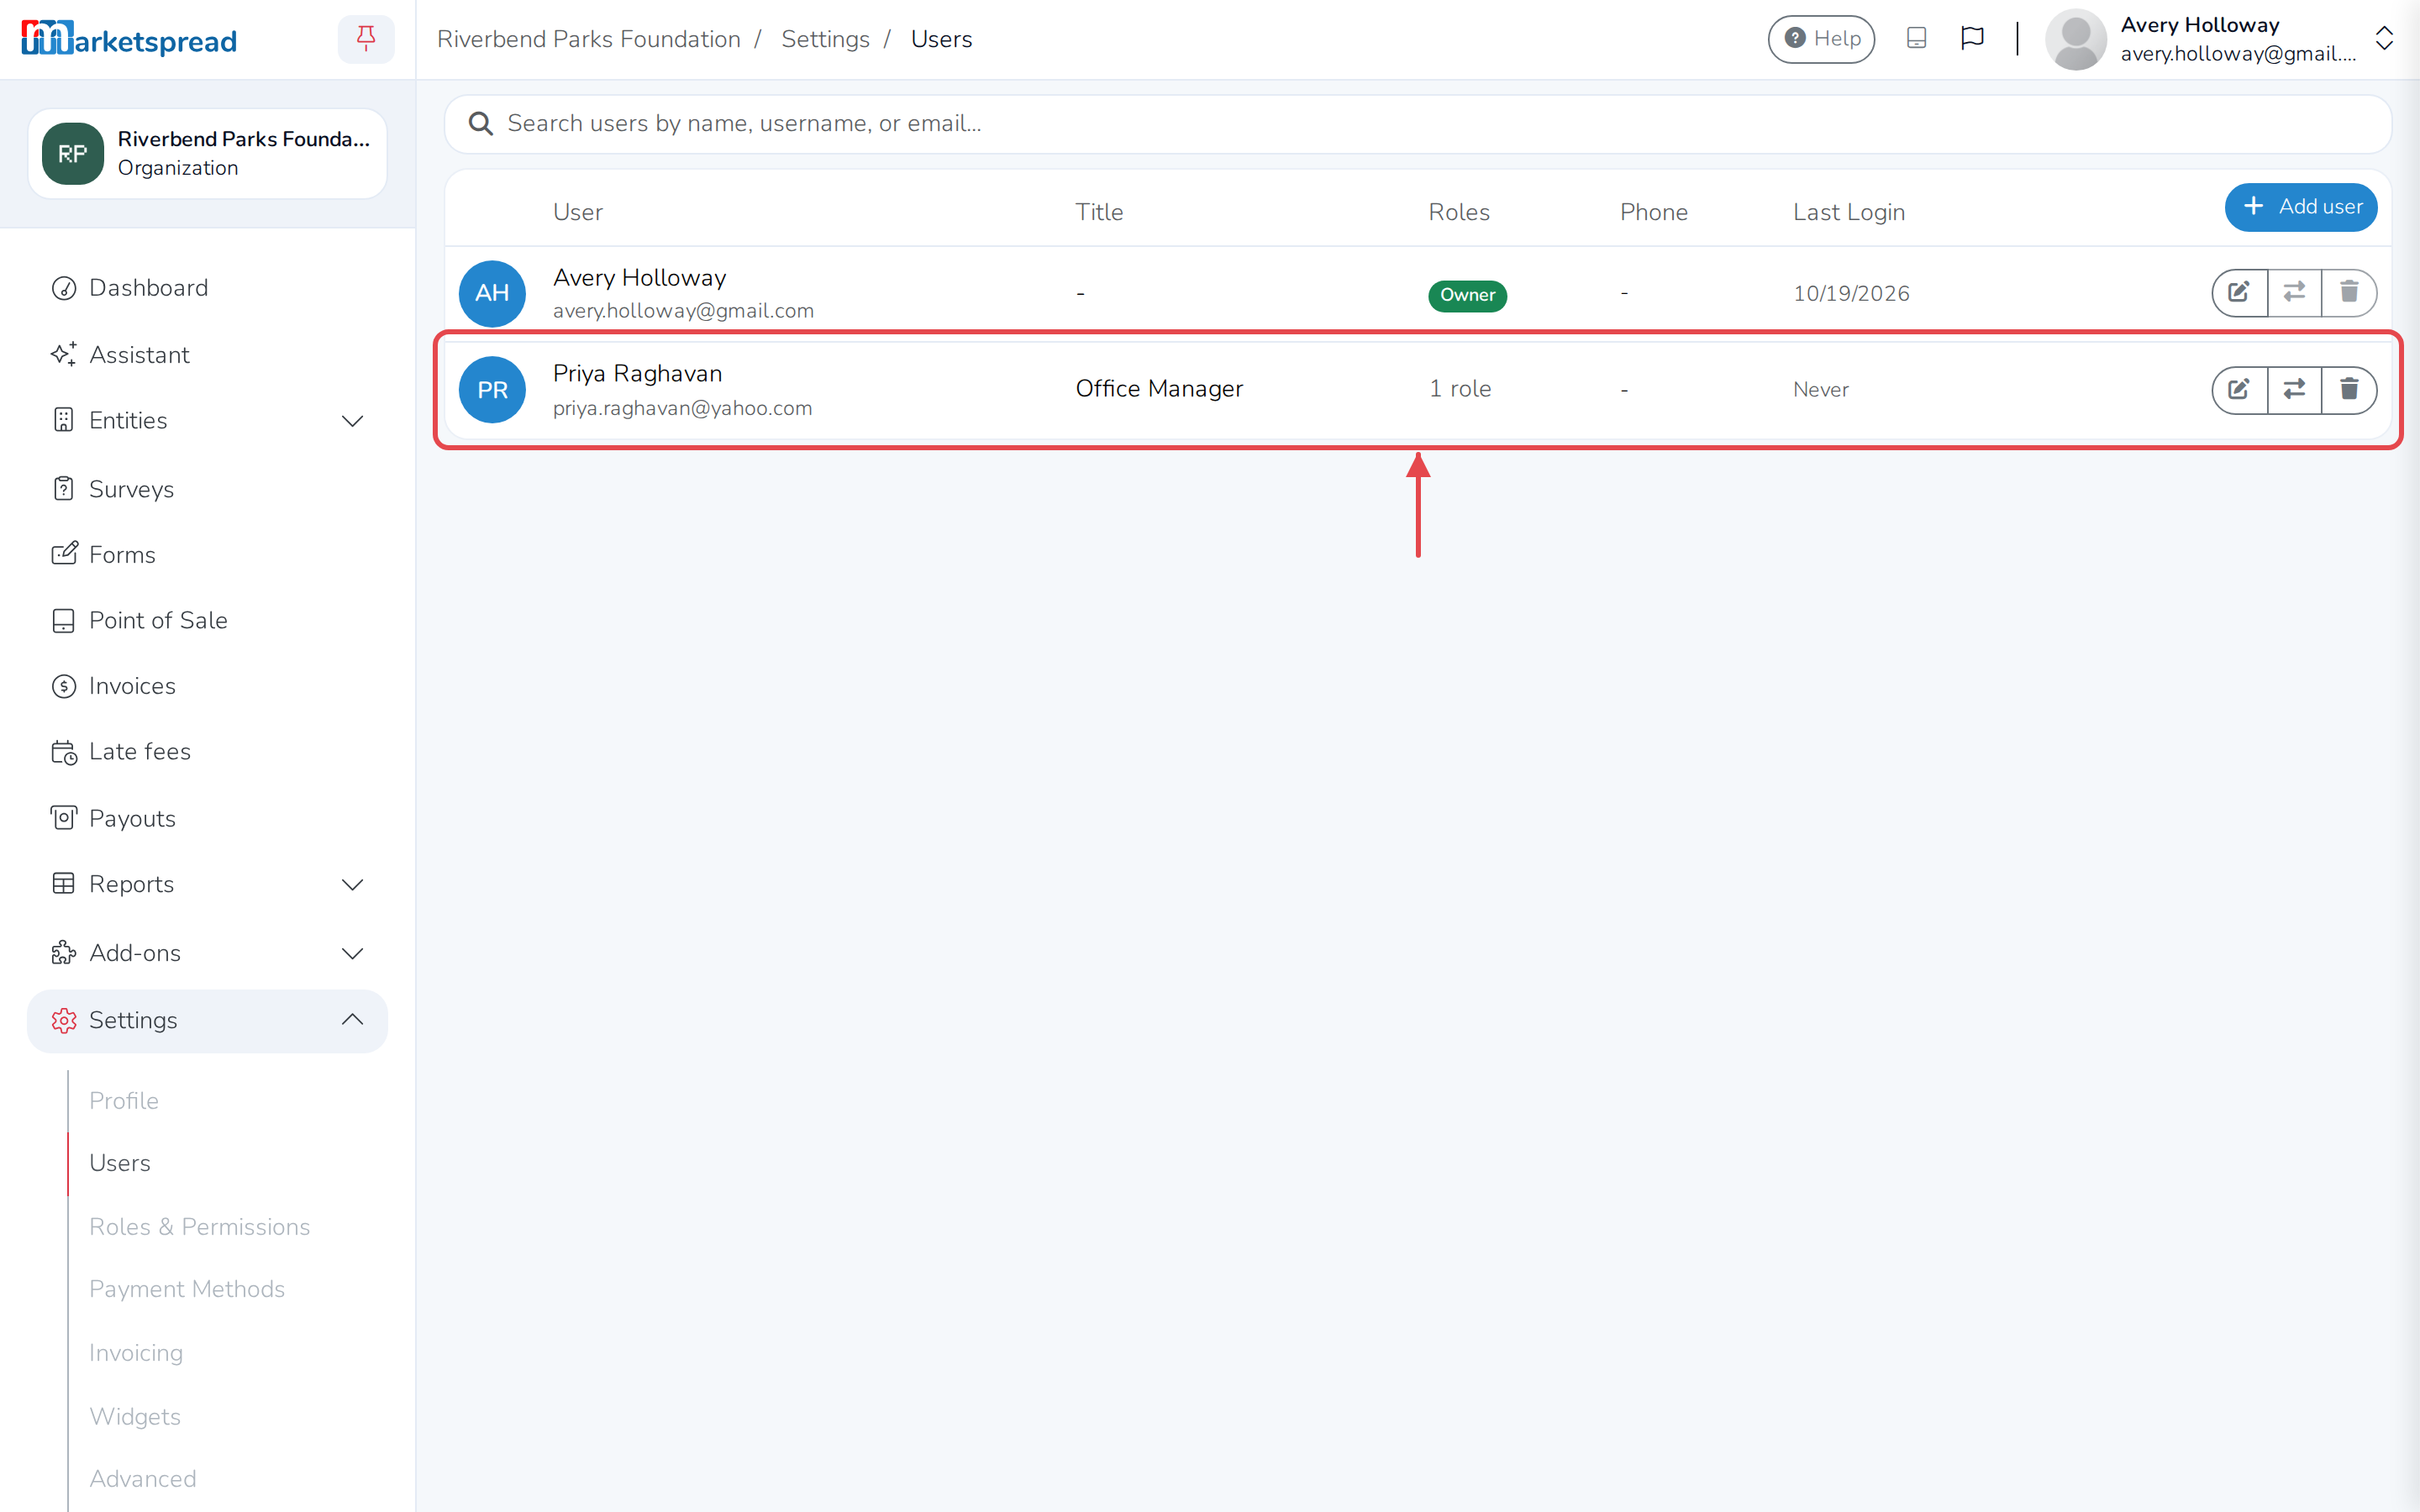
Click Add.
Note
The new user gets an email asking them to set a password before they can sign in.
Creating a custom role
Needs Premium
Only an organization with premium turned on can create custom roles. Trying to add one without it shows a message to contact support instead.
-
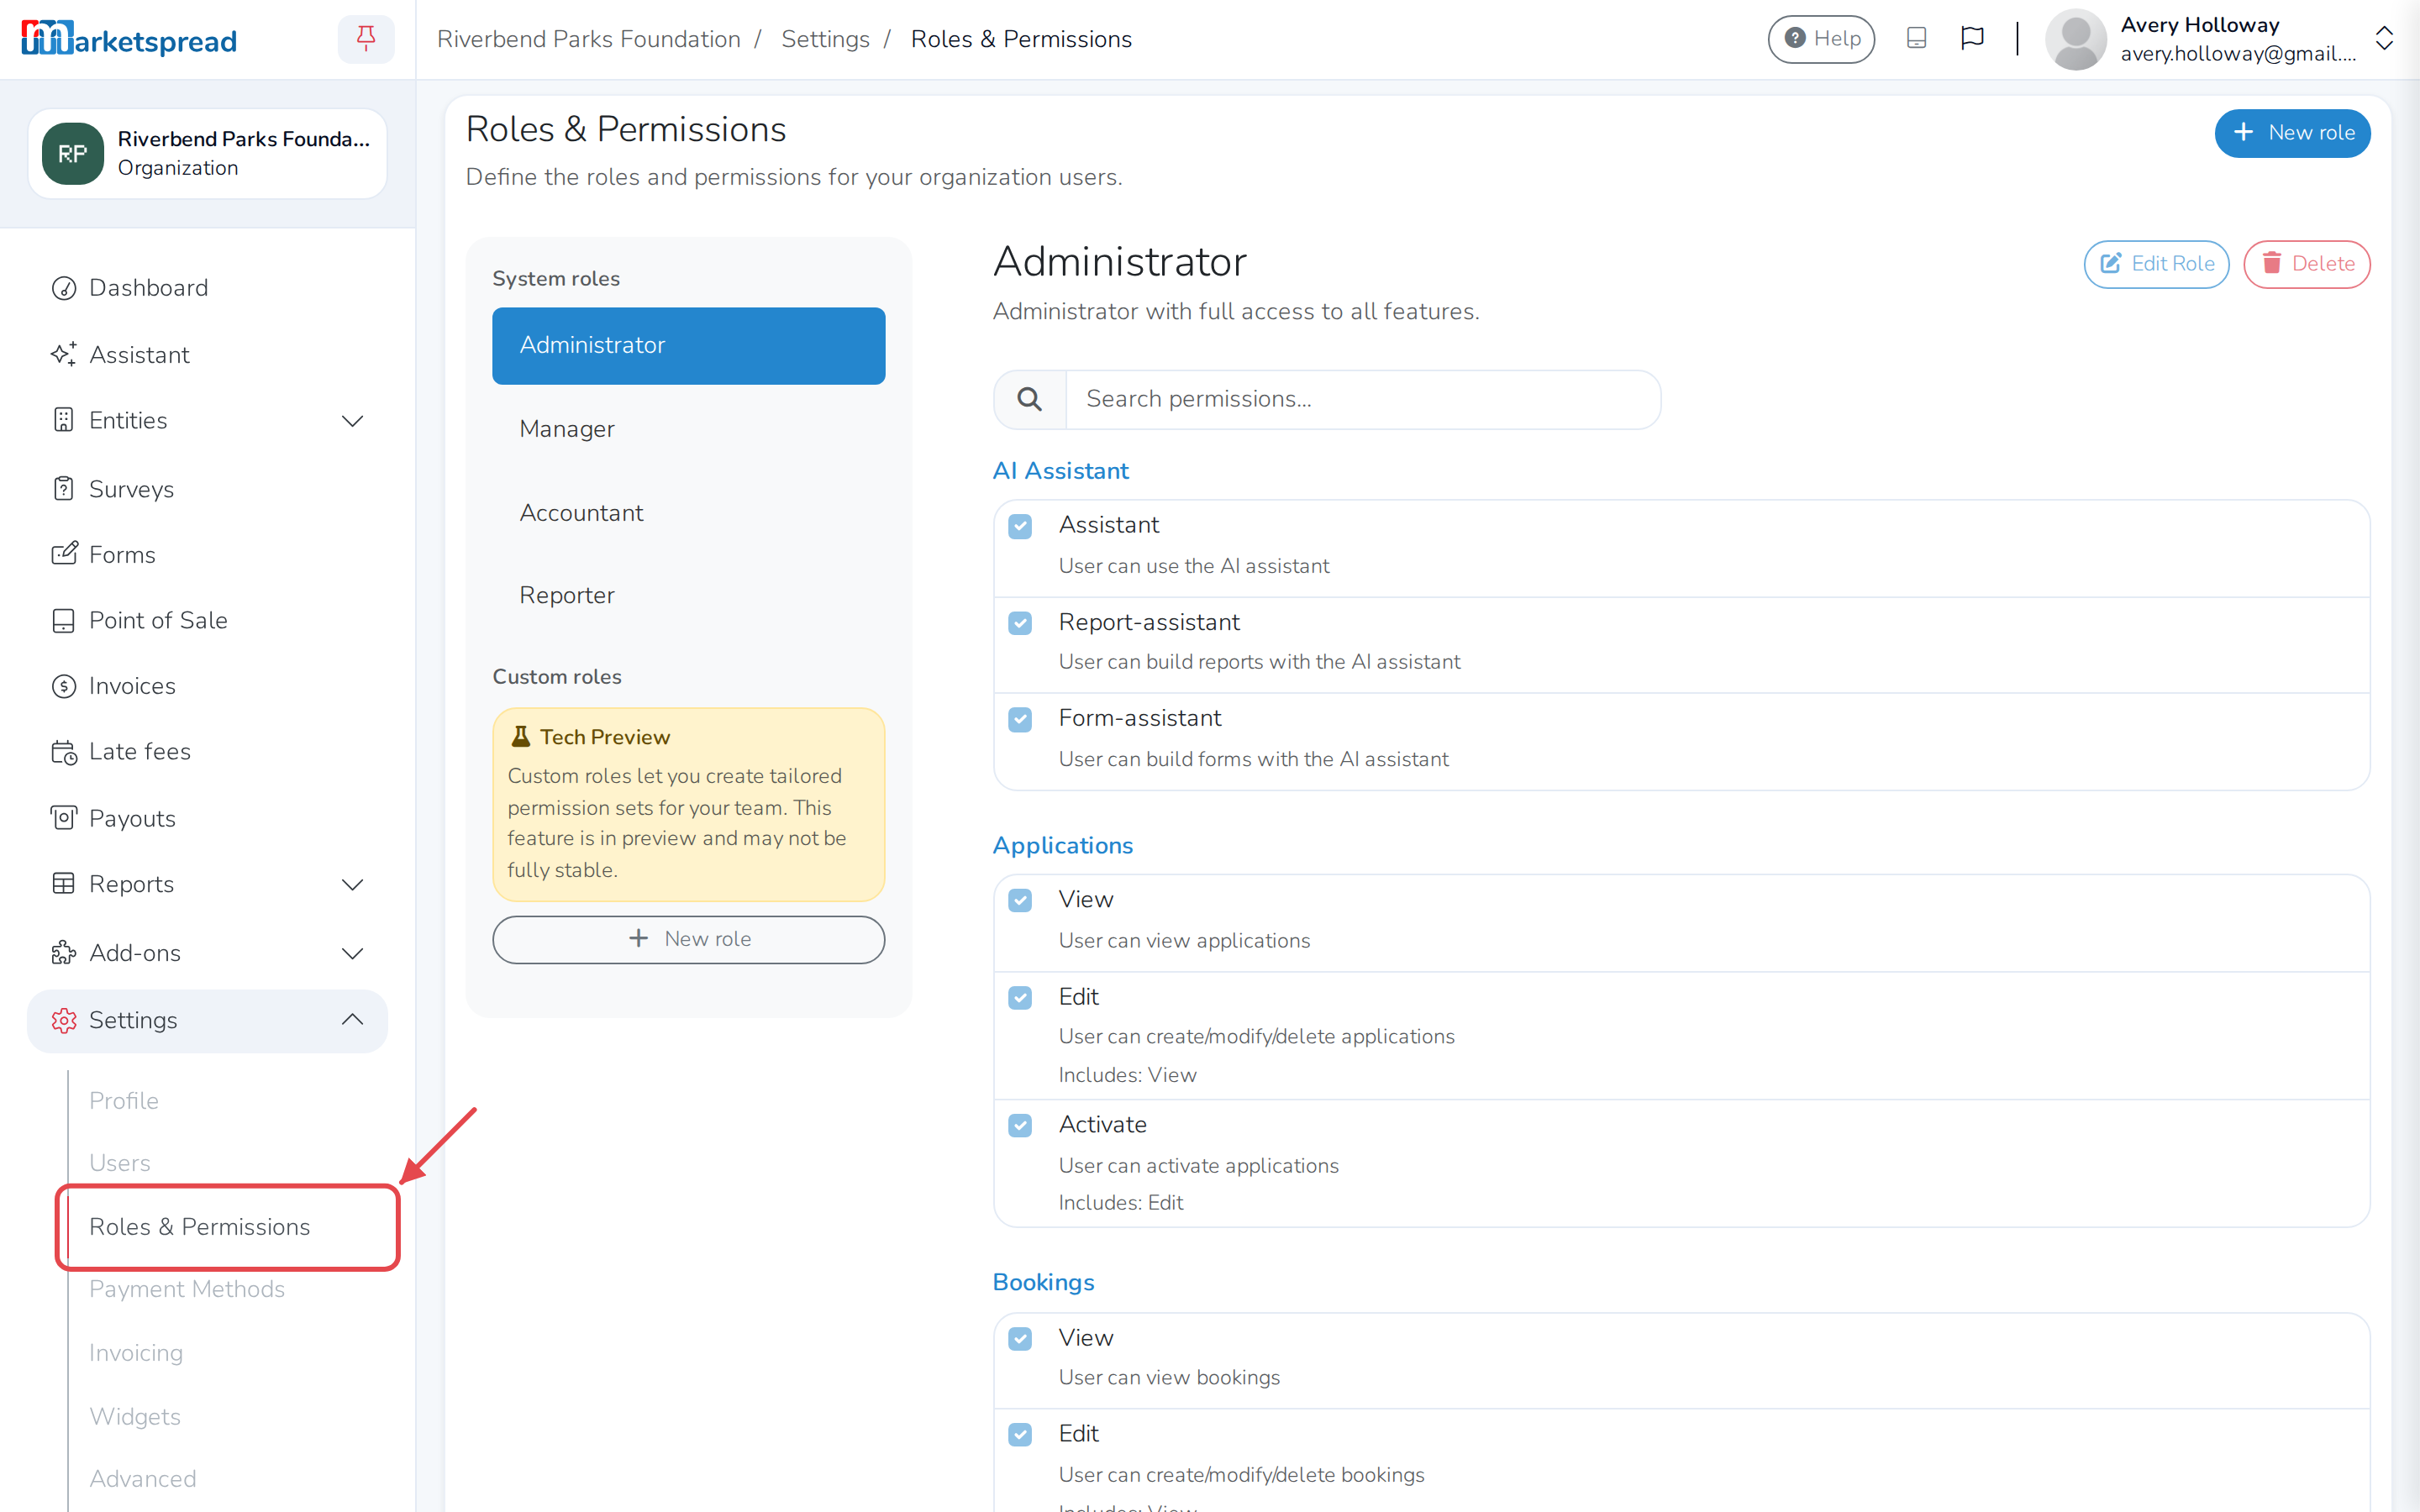
Open Settings, then click Roles & Permissions.
-
Click New role.
-
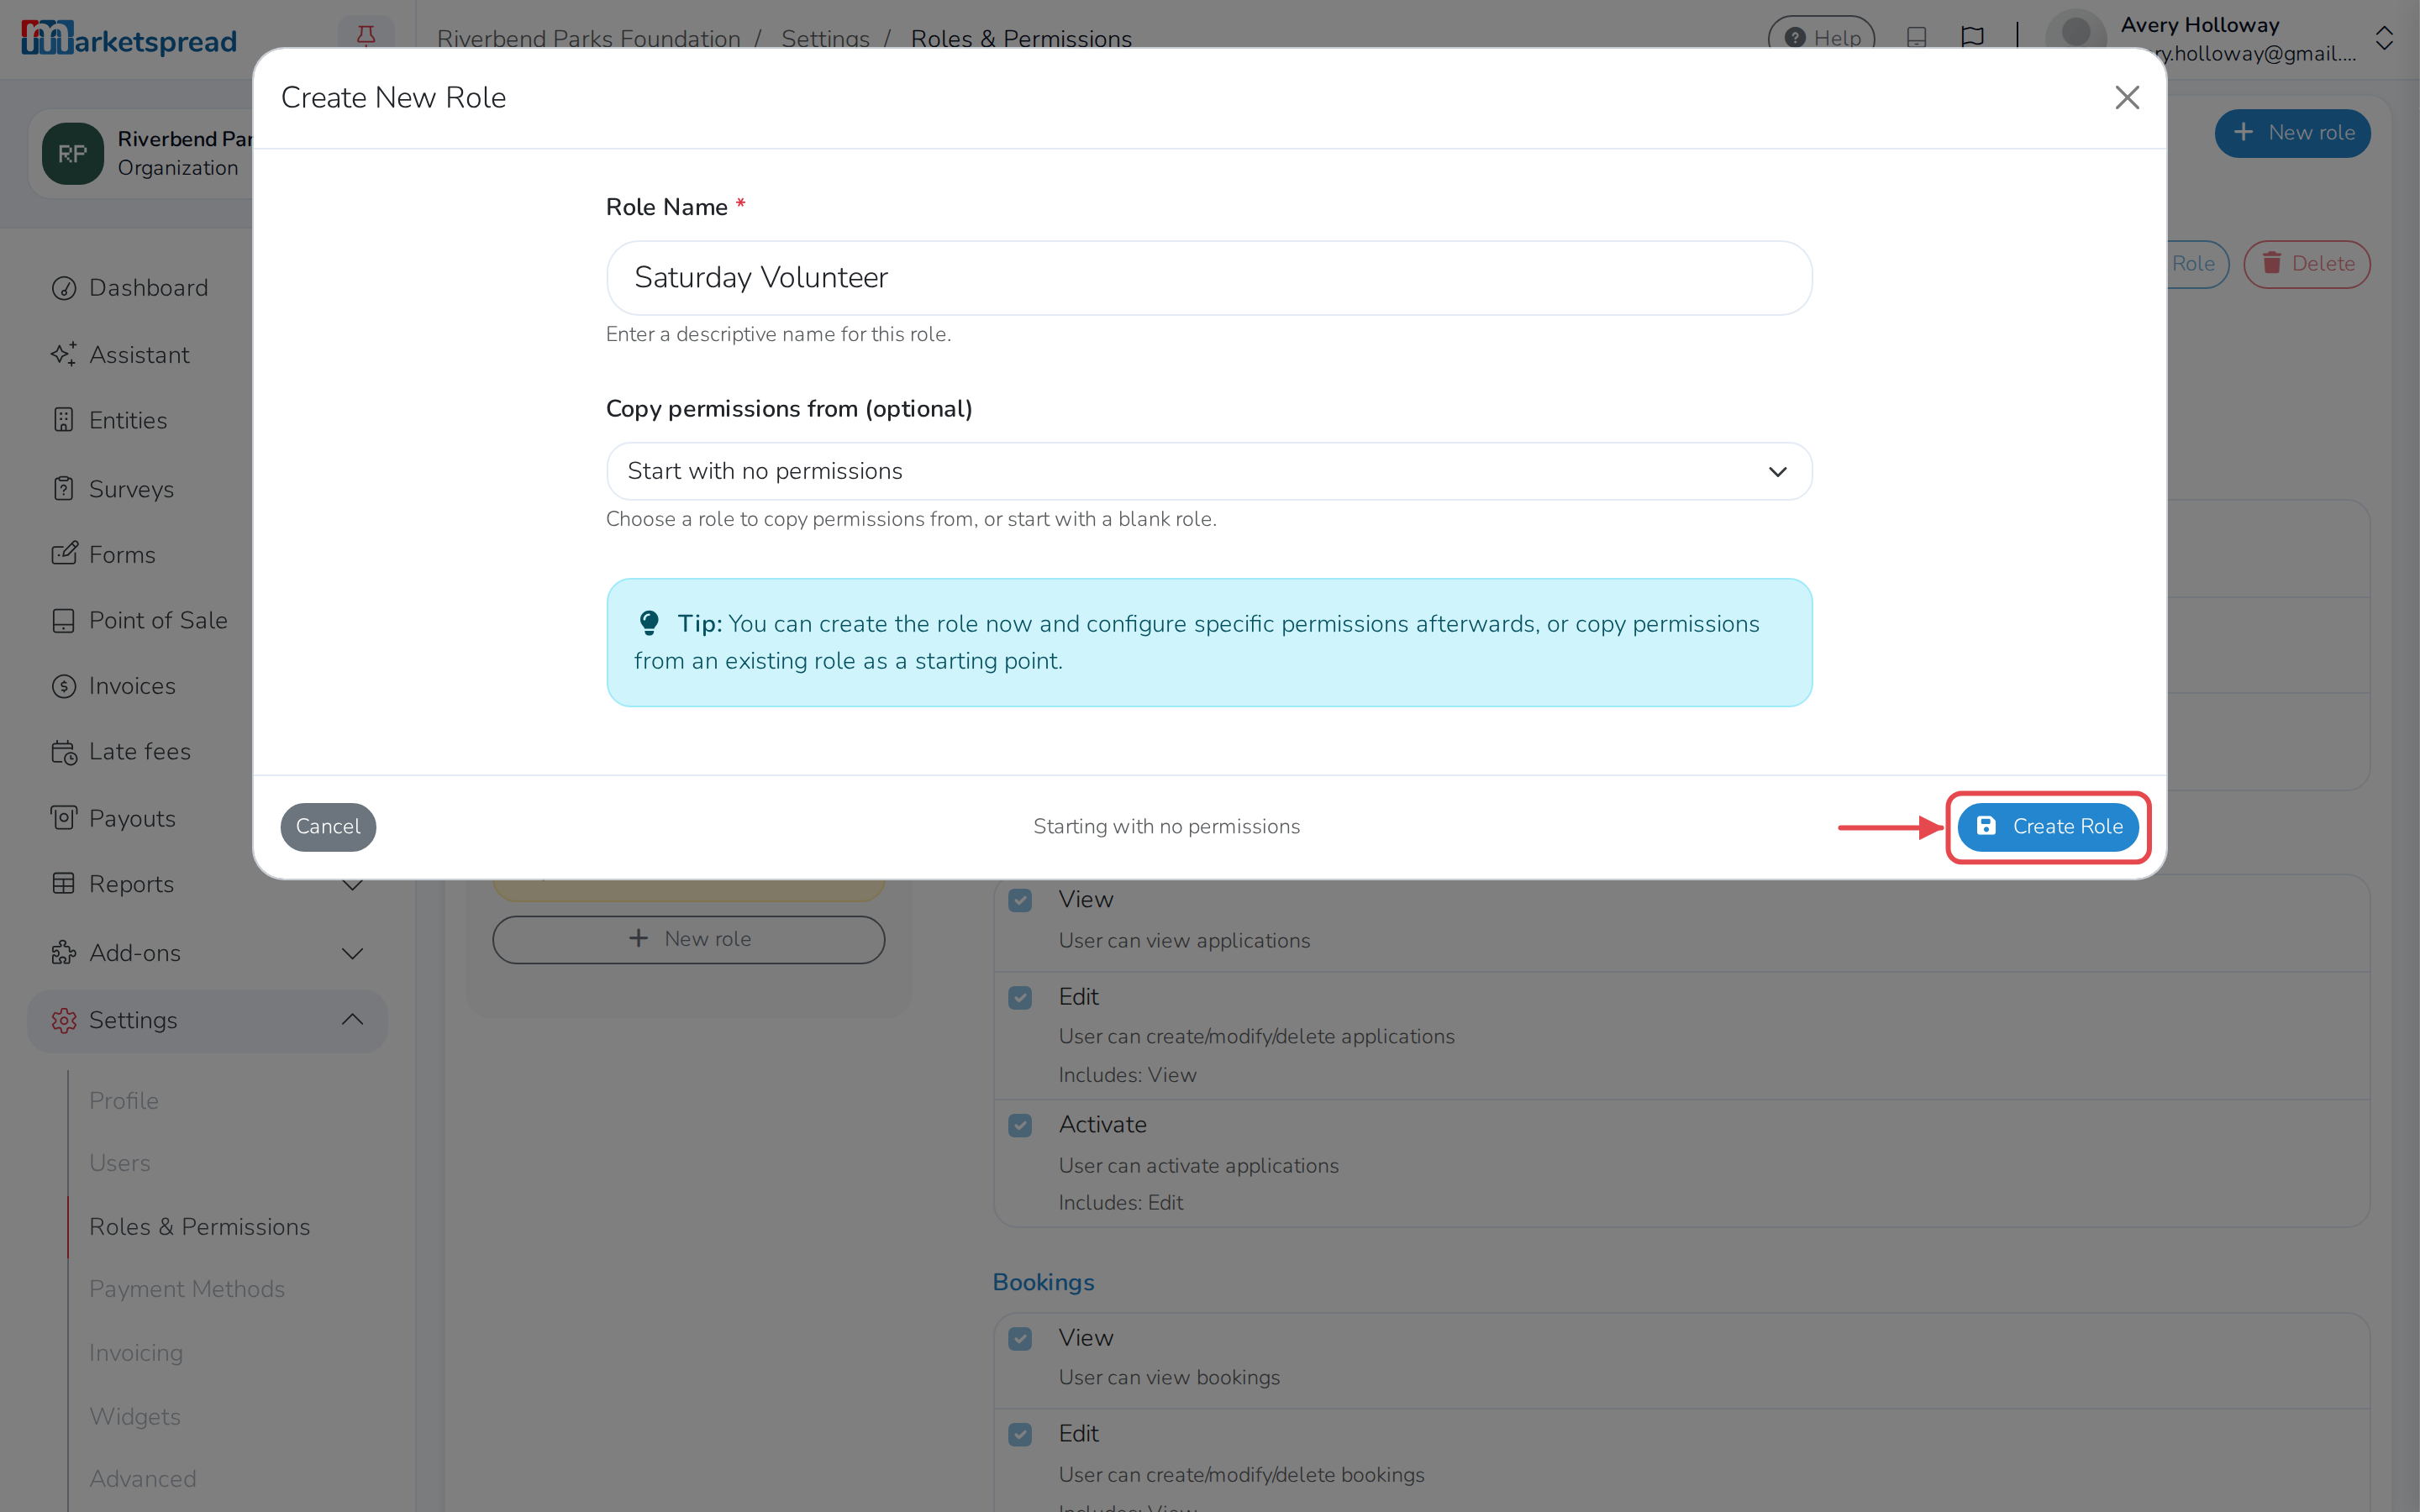
Enter a Role Name.
-
To start from another role's permissions, choose it under Copy permissions from. Otherwise it starts with none.
-
Click Create Role.
-
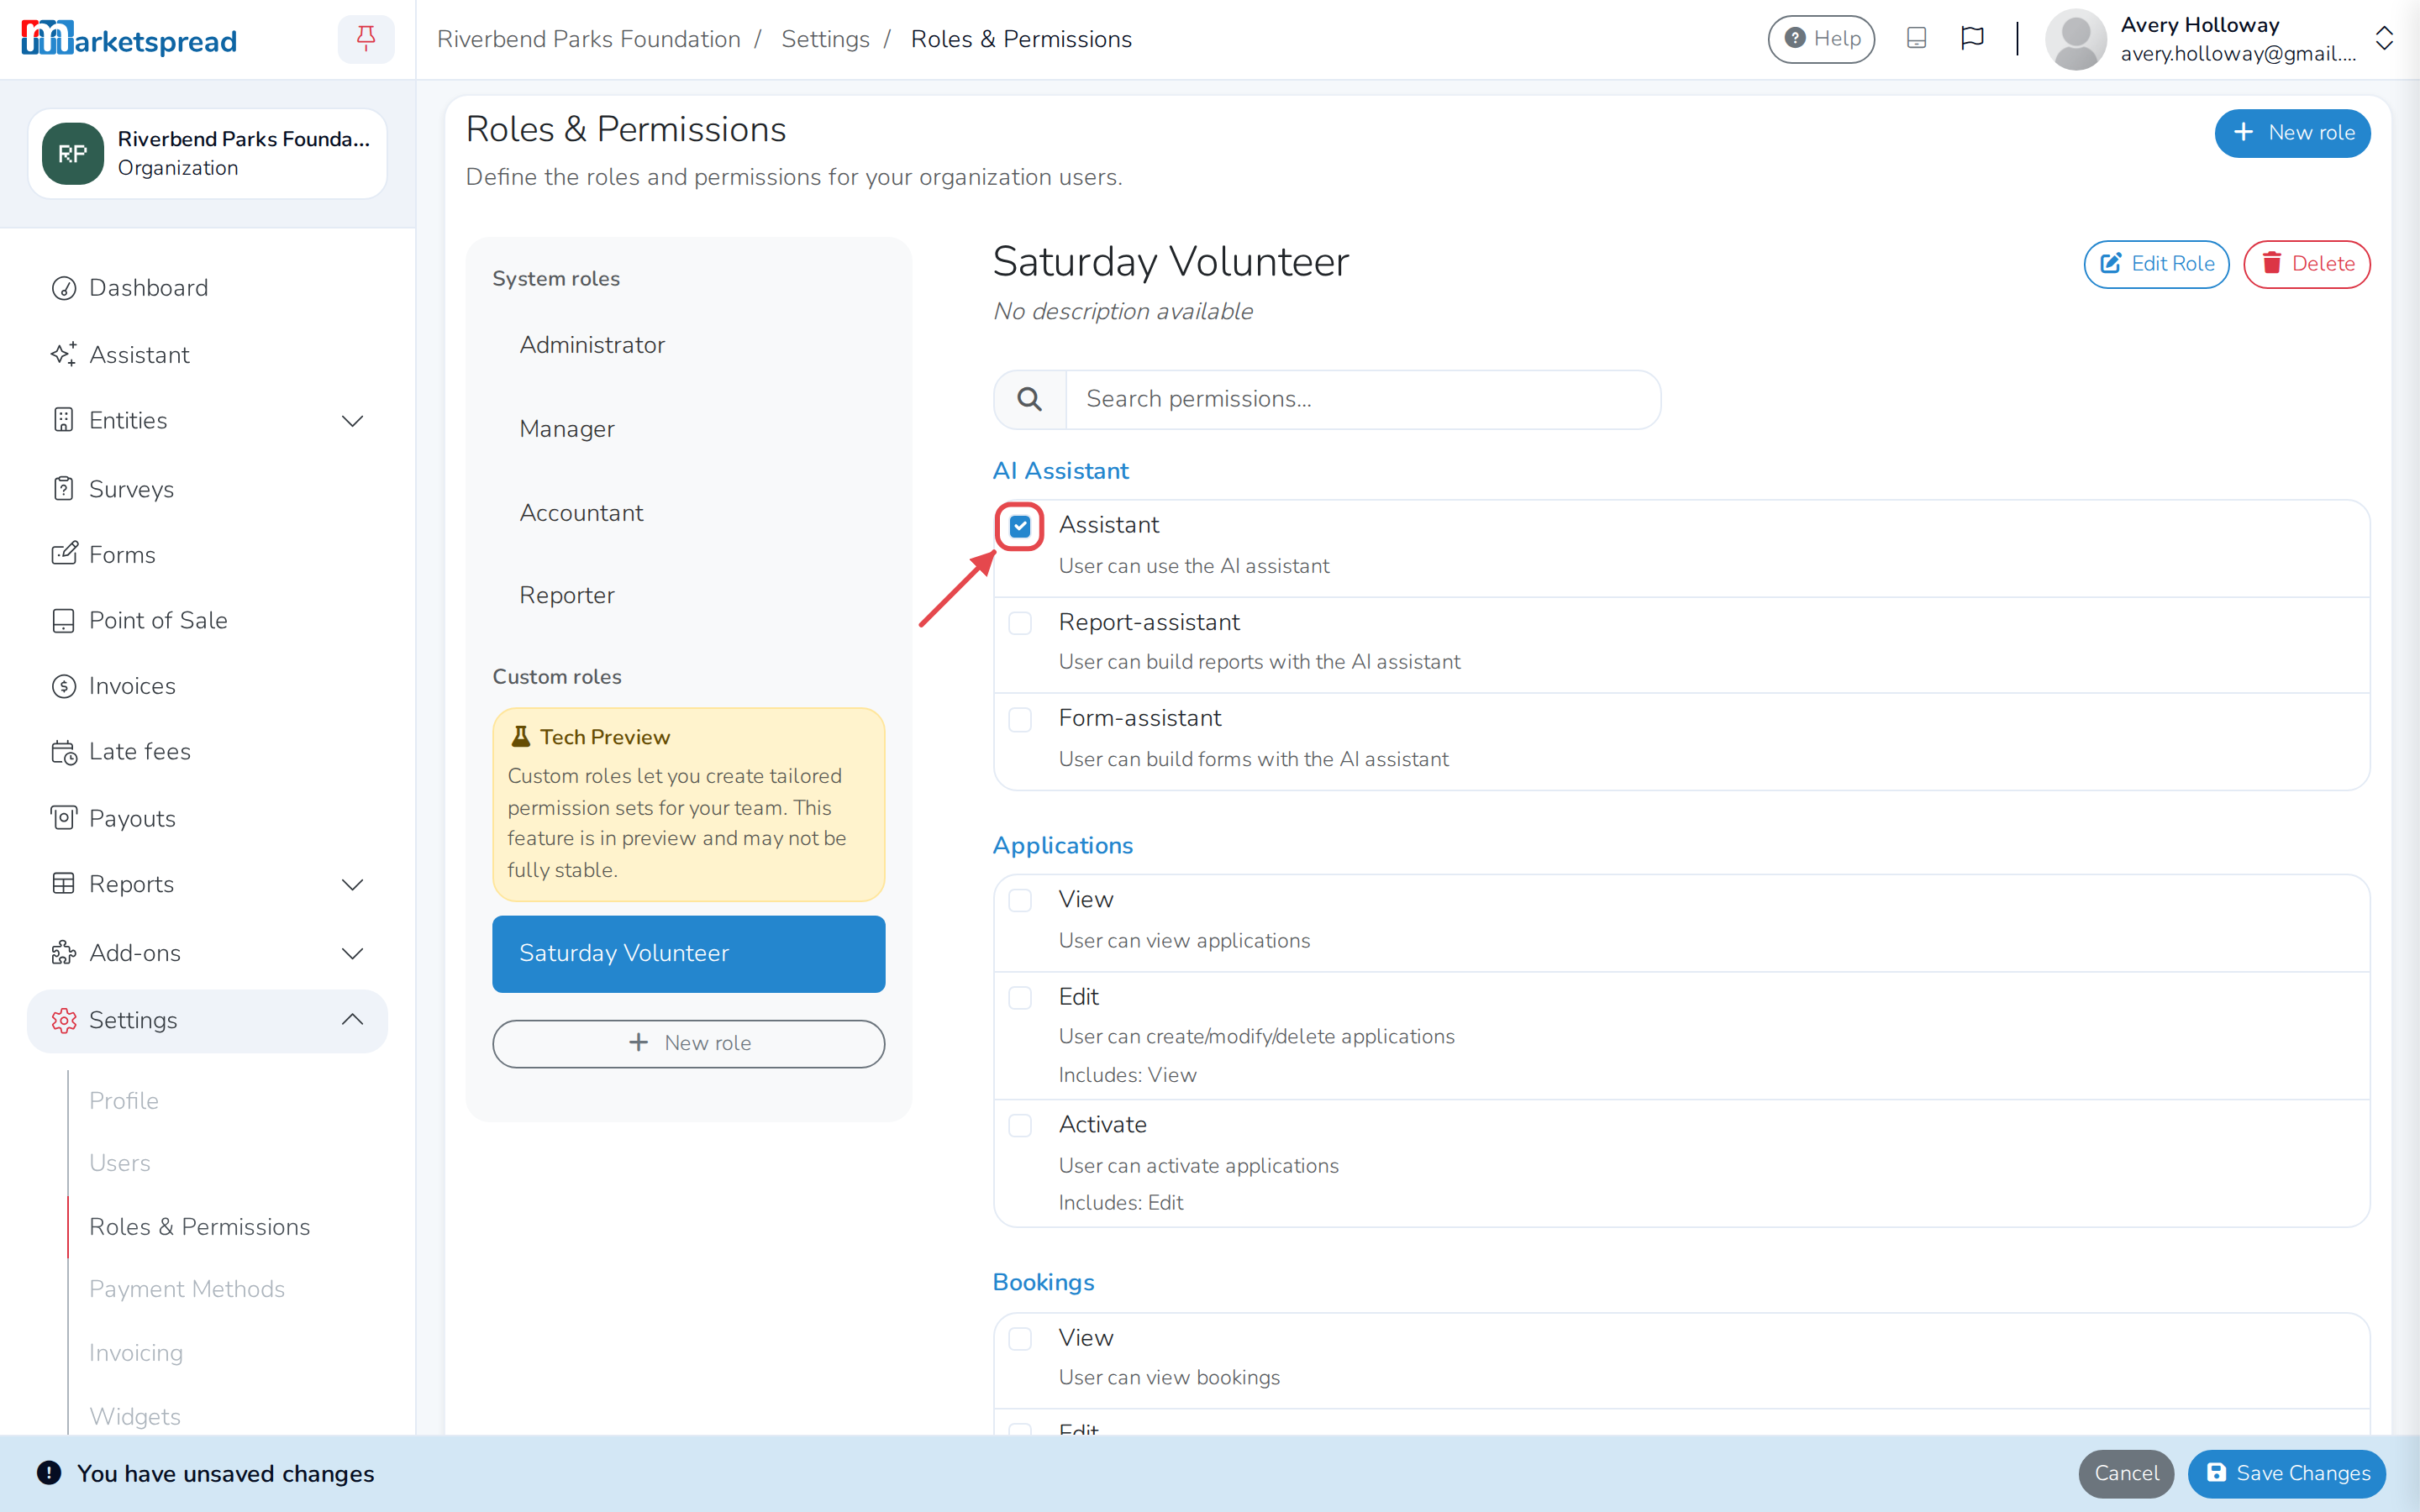
Select your new role from the list on the left, then check the permissions it should have.
-
Click Save Changes.
Note
Edit Role and Delete show next to every role, including the four
default ones — but they're grayed out there, so clicking does nothing.
Modifying existing access
-
Open Settings, then click Users.
-
Click the pencil icon next to the person you want to change.

-
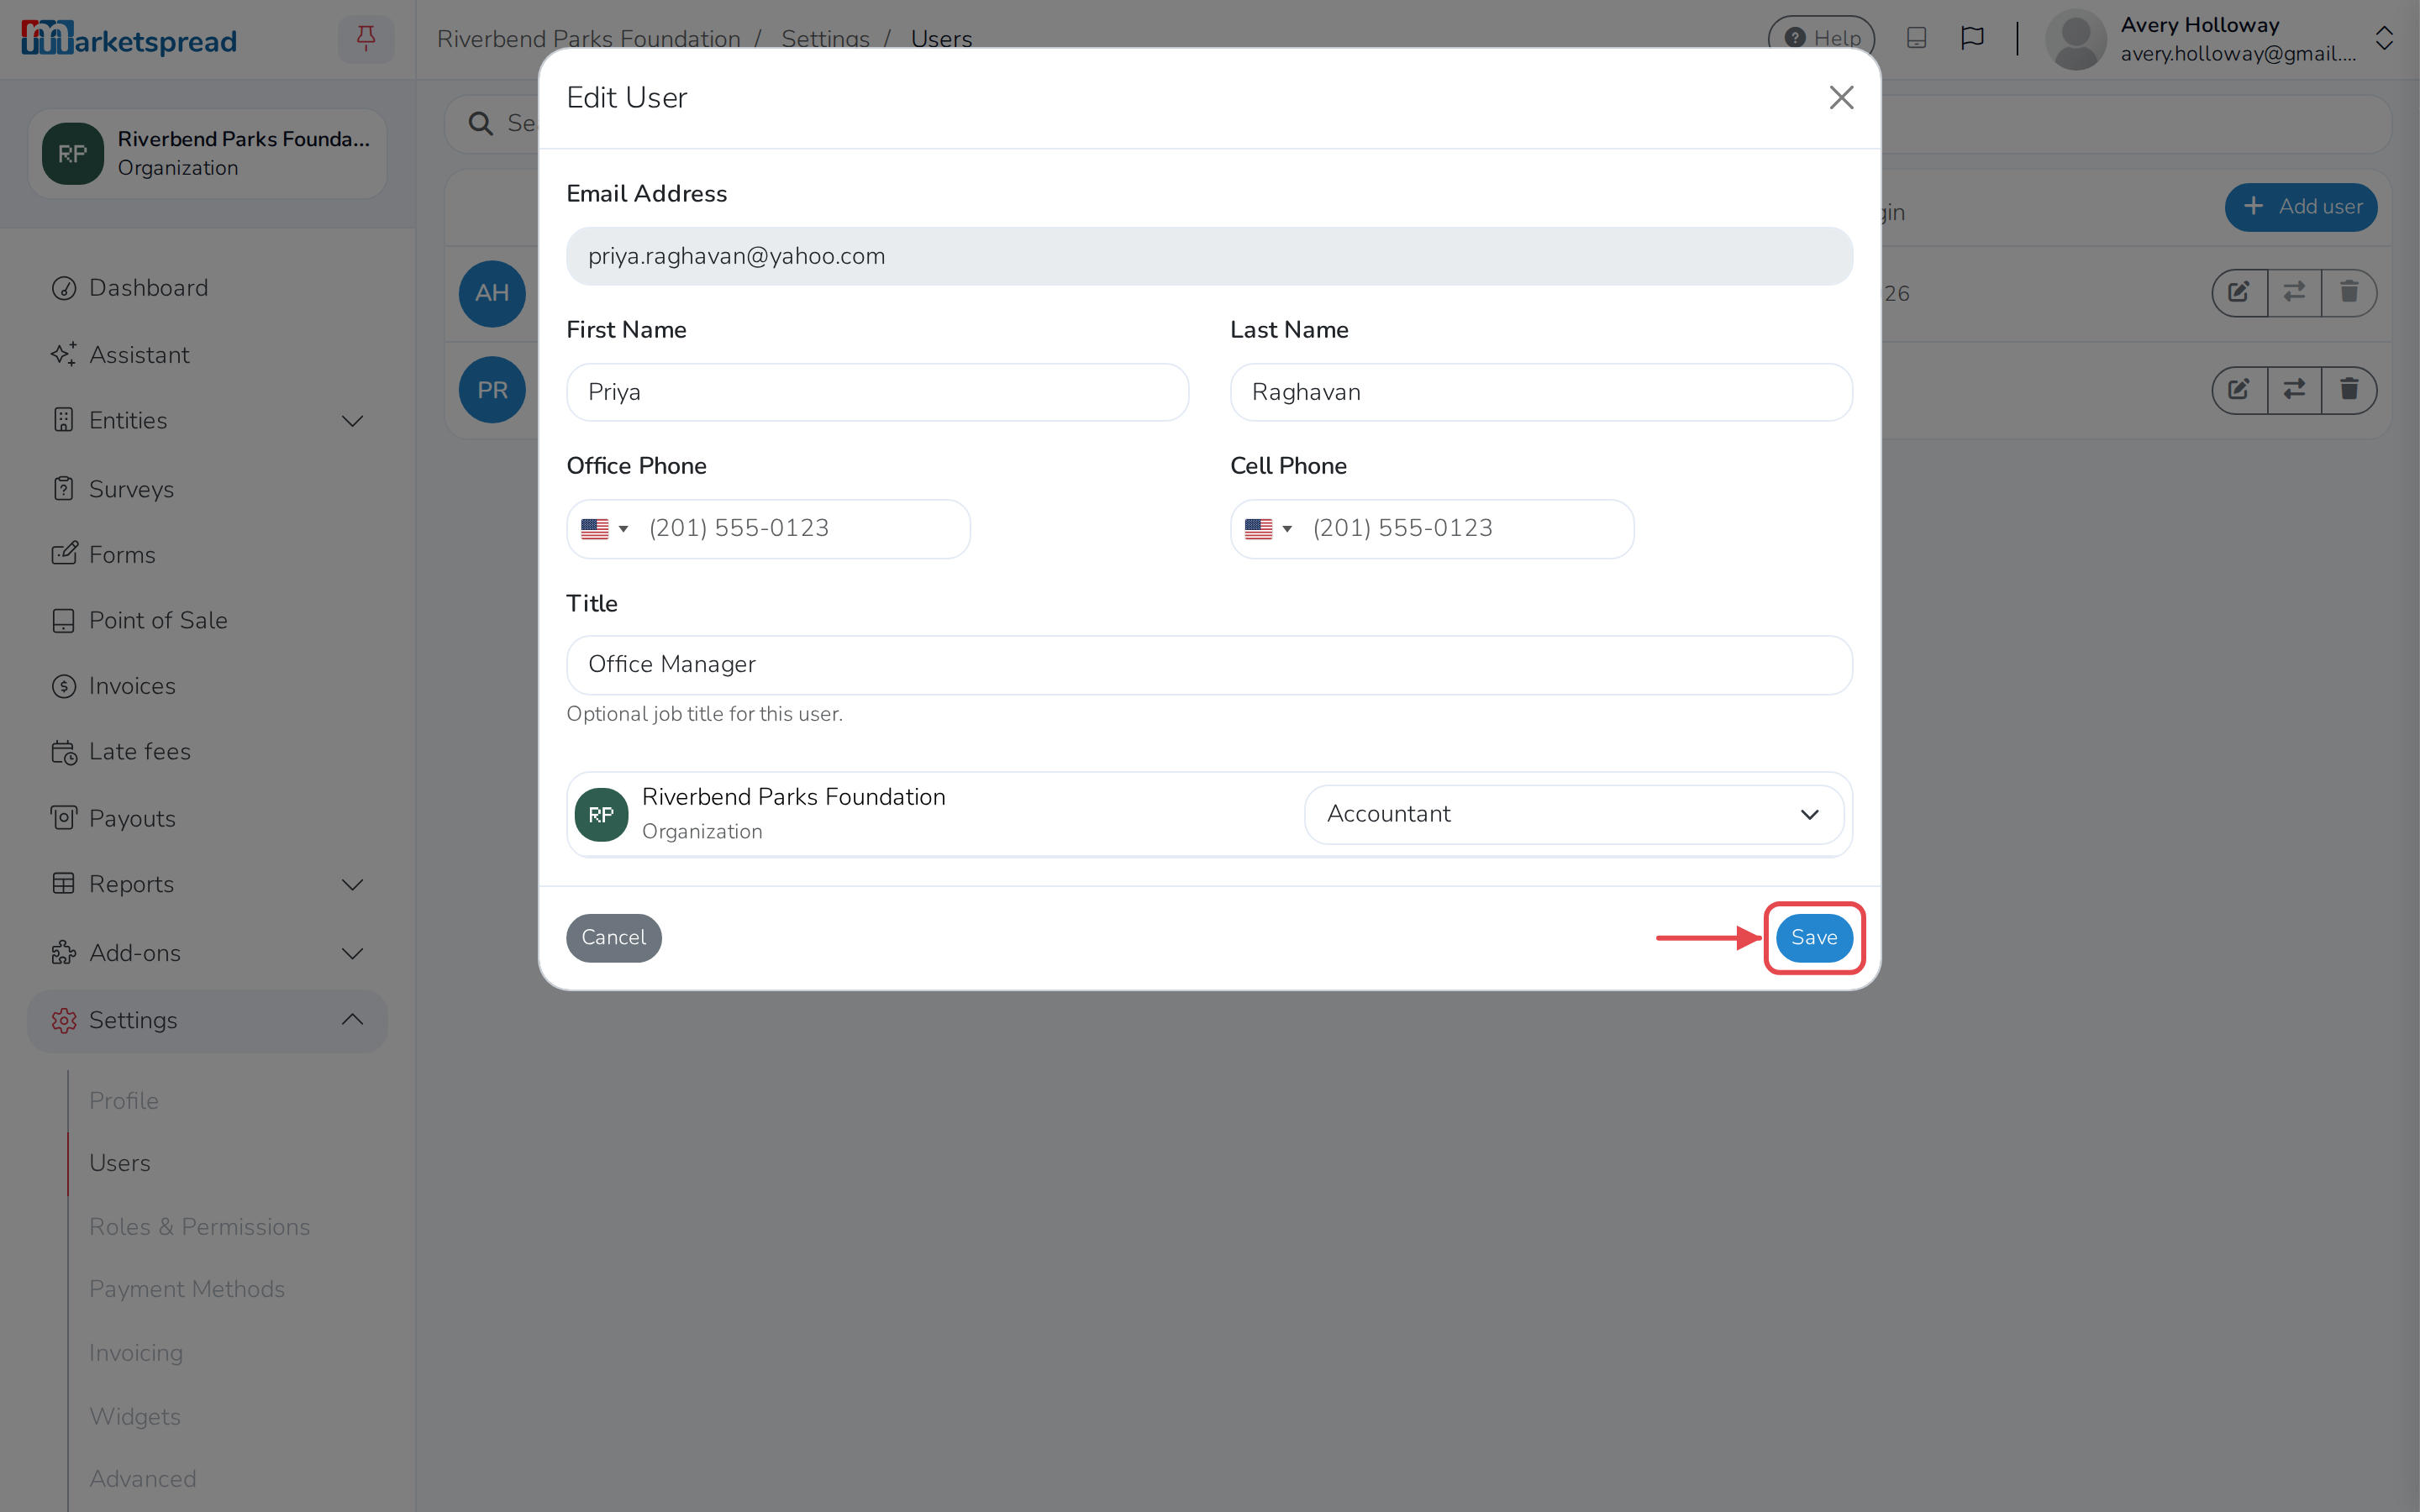
Change their role for any market, venue, vendor, association or your organization. Set it back to No role assigned to take it away.
-
Click Save.
Note
The change takes effect right away — the person does not need to sign out and back in. Once someone has logged in, you can no longer change their name or phone number here — but you can still change their title and role.
Removing access
-
Open Settings, then click Users.
-
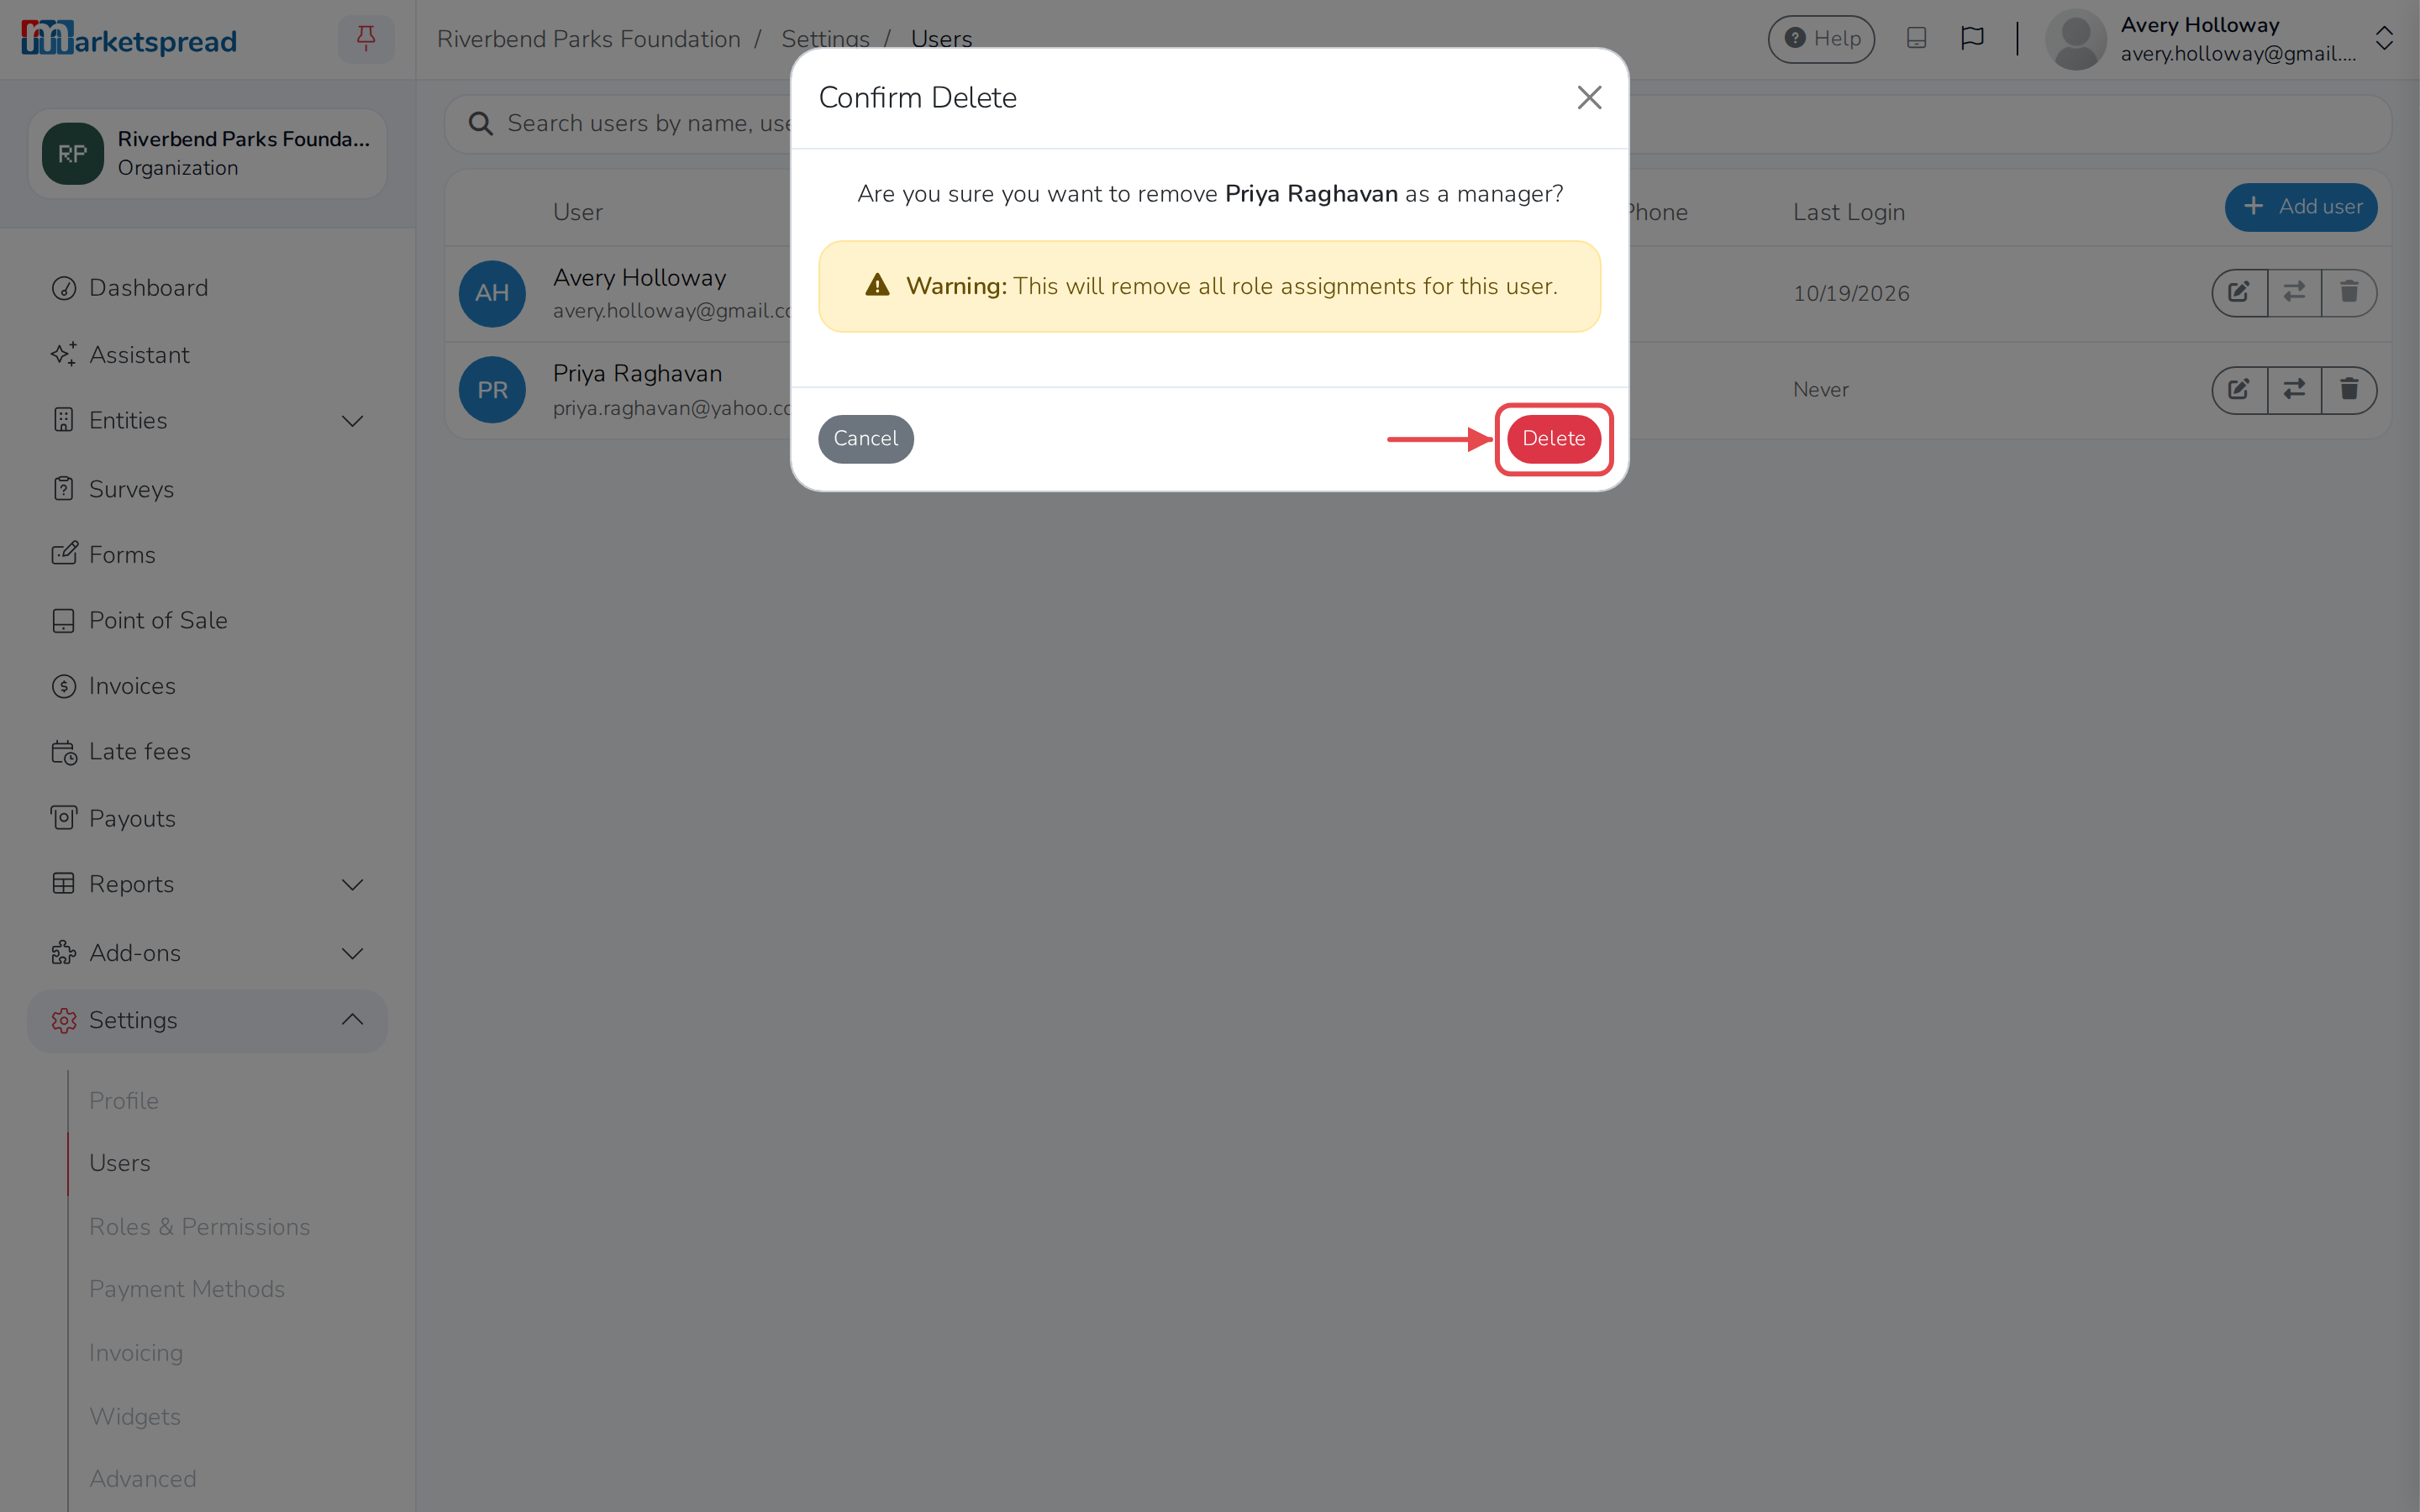
Click the trash icon next to the person you want to remove.

-
Click Delete to confirm.
Warning
This removes all of that person's role assignments too, and they can no longer see your organization's data. The owner of your organization can't be removed this way.
Best practices
Principle of least privilege
Give users only the permissions they need to do their job. This reduces risk and makes it easier to audit who has access to what.
- Start with the most restrictive role that allows them to work
- Add permissions as needed rather than removing them later
Regular access reviews
Periodically review who has access to your organization:
- Quarterly review all team members and their roles
- Remove access for people who no longer need it
- Downgrade permissions for users who have more than they need
- Document why custom roles were created
Role documentation
Keep track of custom roles and why they exist:
- Name custom roles descriptively (e.g., 'Saturday Volunteer' not 'Custom Role 1')
- Note who uses each custom role
- Review custom roles periodically to see if they're still needed
Security tips
- Limit Administrators - Only organization owners should have full admin access
- Use Accountant for auditors - Read-only financial access prevents changes
- Separate duties - The person creating invoices shouldn't also approve payments
- Offboard promptly - Remove access the same day someone leaves
- Review after incidents - If something goes wrong, check if permissions contributed
Quick reference
Default roles summary
| Role | Financial | Vendors | Events | Settings | Reports |
|---|---|---|---|---|---|
| Administrator | Full | Full | Full | Full | Full |
| Manager | Full | Full | View/Edit | View Only | Full |
| Accountant | View Only | None | None | None | View |
| Reporter | None | None | None | None | View |
Permission actions
| Action | Meaning |
|---|---|
| View | Can see the data but not change it |
| Edit | Can modify existing items (usually includes View) |
| Release | Can release draft invoices for payment |
| Review | Can review and change application status |
| Place | Can assign vendors to events or applications |
| Publish | Can publish forms to make them active |
| Activate | Can activate events or applications |
| Add-payment | Can record payments on invoices |
| Refund | Can process refunds |
| Notify | Receives email notifications for this area |
Permission groups by category
Financial:
Invoices, Credits, Payouts, Disputes, Orders
Vendor Management:
Vendors, Vendor Applications, Vendor Events, Vendor Notes, Vendor Forms
Events & Scheduling:
Events, Event Days, Event Day Notes, Event Day Forms, Scheduler, Sales Reporting
Content & Forms:
Forms, Surveys, Posts, Products, Store
Reporting:
Data Reports, HTML Reports, Dashboard
System:
Settings, RBAC, Messenger, Metrics, Notifications, Calendar, Customers, AI Assistant