

Overview
Marketspread makes it easy to create, manage and take payment against vendor fees. Generally speaking, there are three ways to create invoices.
Application and Approval Invoices
Invoices automatically created as part of an application submission or application approval. Unless you are running a single, short lived event these invoices are usually not used for vendor attendance / booth fees.
Manual Invoices
Invoices created manually to cover any use case where an invoice needs to be created. The main disadvantage to manual invoicing is that, while you can have pre-created line items, these invoices are not automated in any way. Also, while they can be linked to event days they are not linked to Scheduler and thus for booth bookings manual invoices can feel disconnected.
Automatic Booking and Rental Invoices
Creating A Manual Invoice
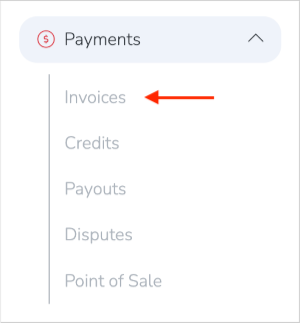
The most basic way to invoice vendors is with Manual Invoicing. From your Dashboard, expand Payments and then click Invoices in the left hand toolbar.
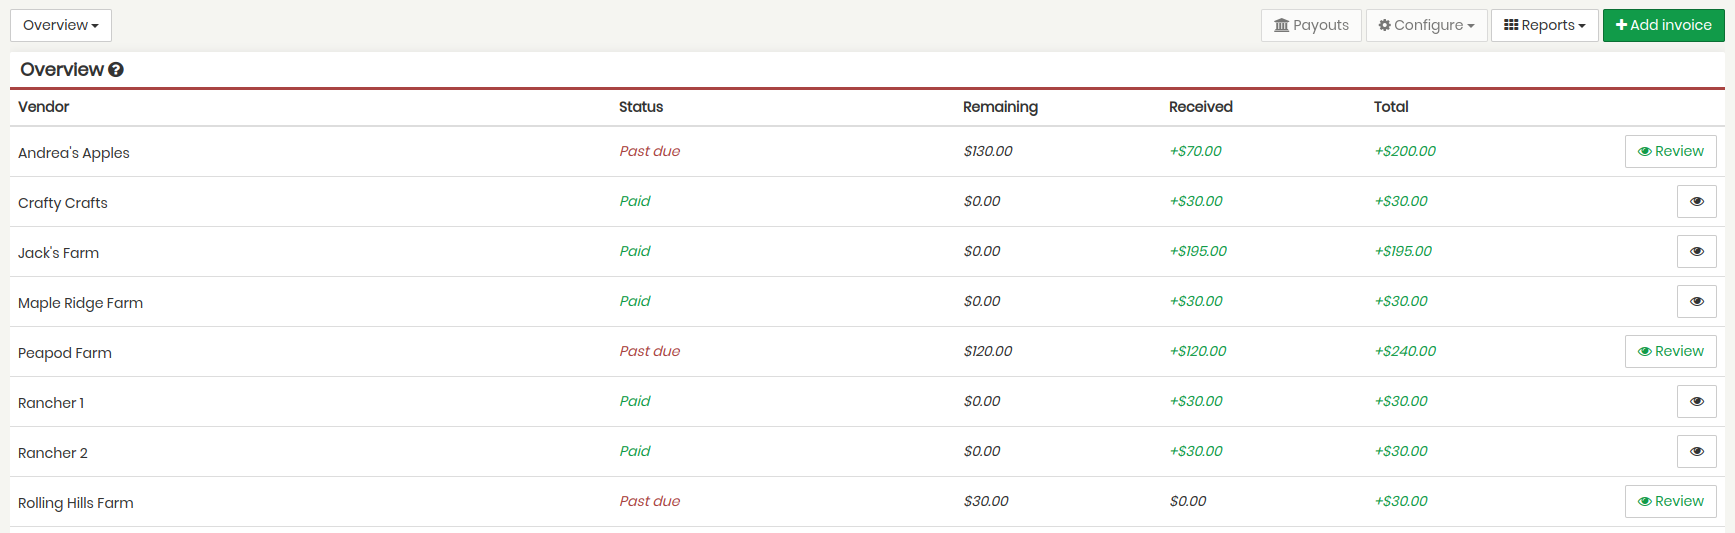
Here you will see a list of all existing vendors with invoices.
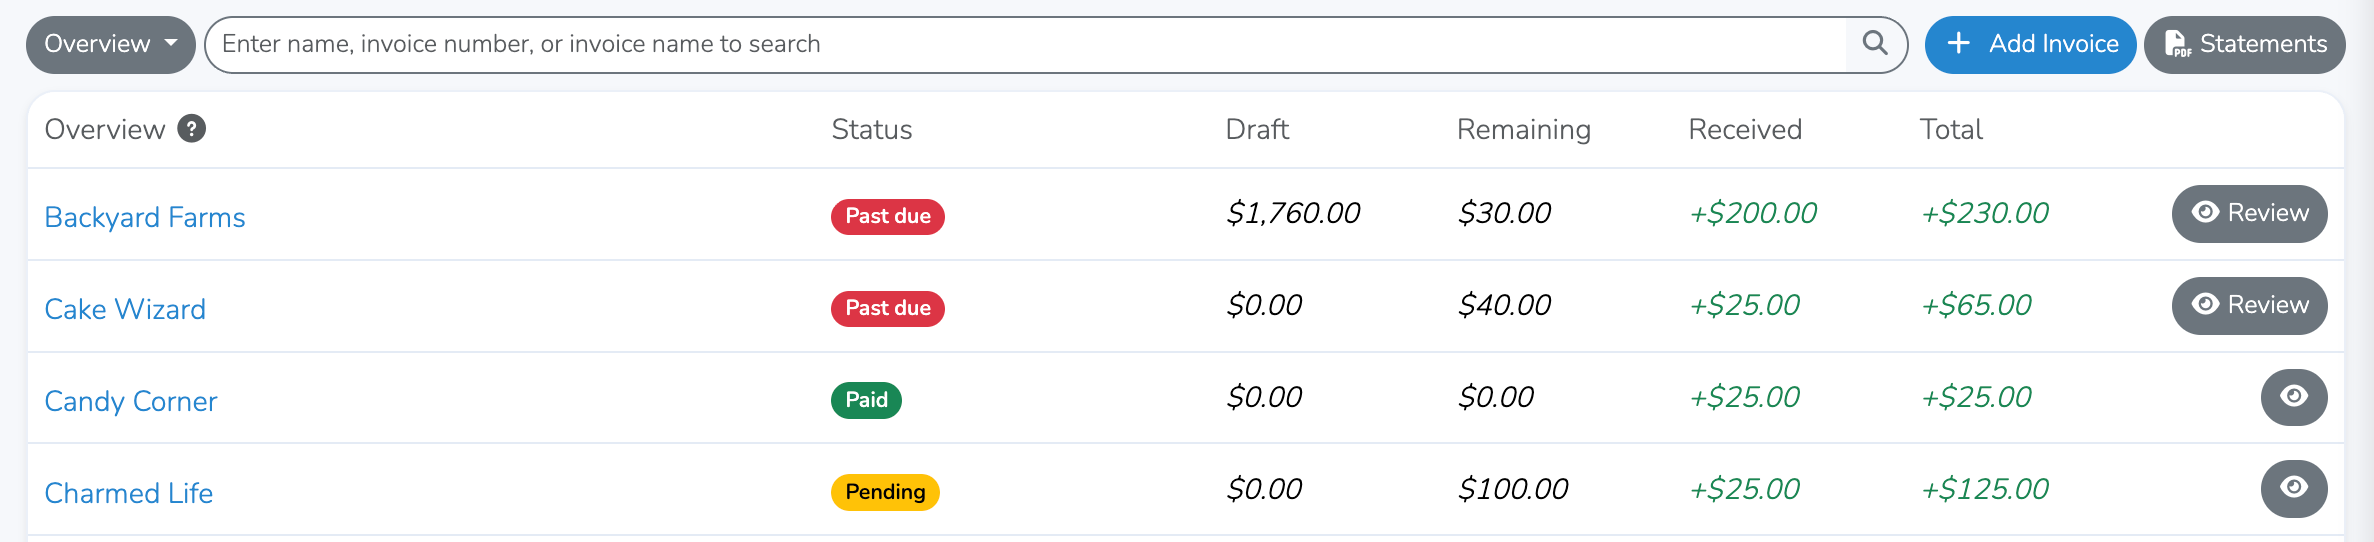
To create an invoice from scratch click the blue +Add Invoice button at the top right.

Clicking +Add Invoice will open the invoice creator window. Select the Vendor the invoice pertains to, and input all of the necessary information to create the invoice.
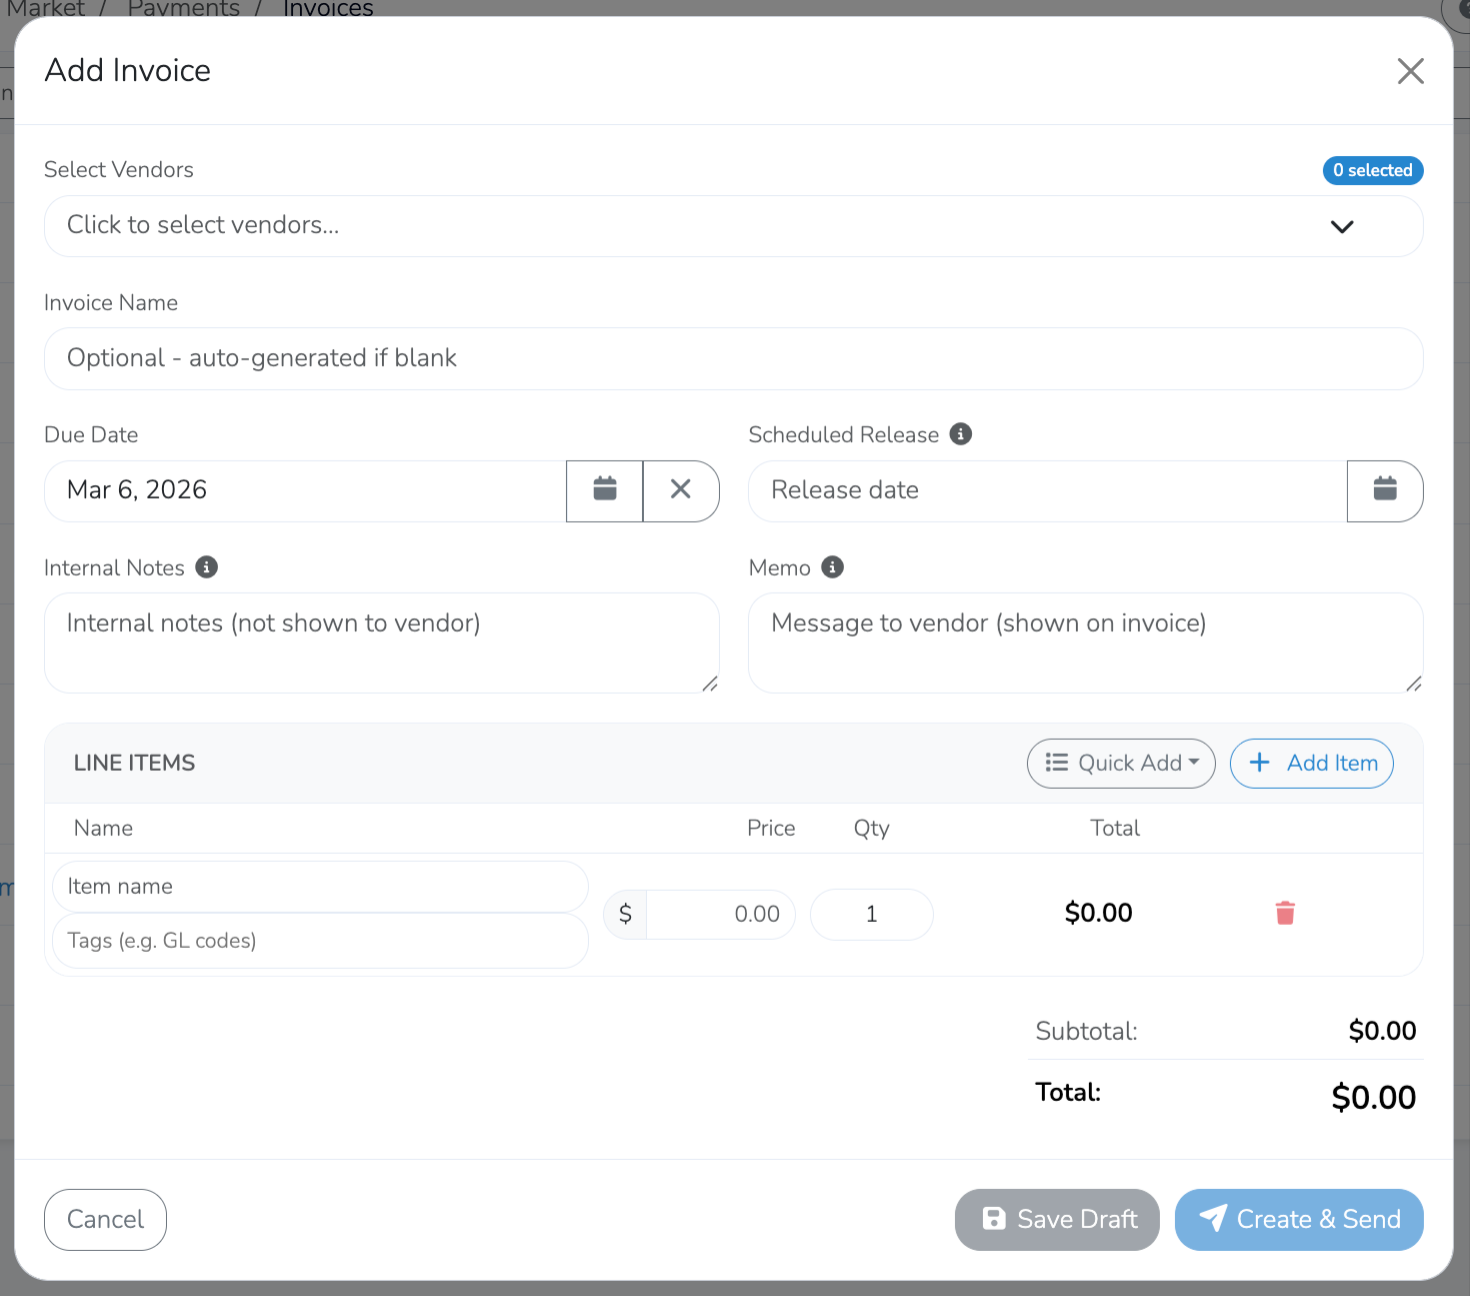
In the create invoice window above you can add as many line items as needed. These can be manually added items (+ Add Item button) or pre-created items (Quick Add button).
Note
Quick Add items are defined in your global invoice configuration settings (Settings -> Invoicing > Invoice Items).
Below is an example of an invoice create window that has been filled in with the following:
- Vendor Name
- Invoice Name
- Due Date
- Release Date
- Internal Note
- Memo
- Invoice Line Items
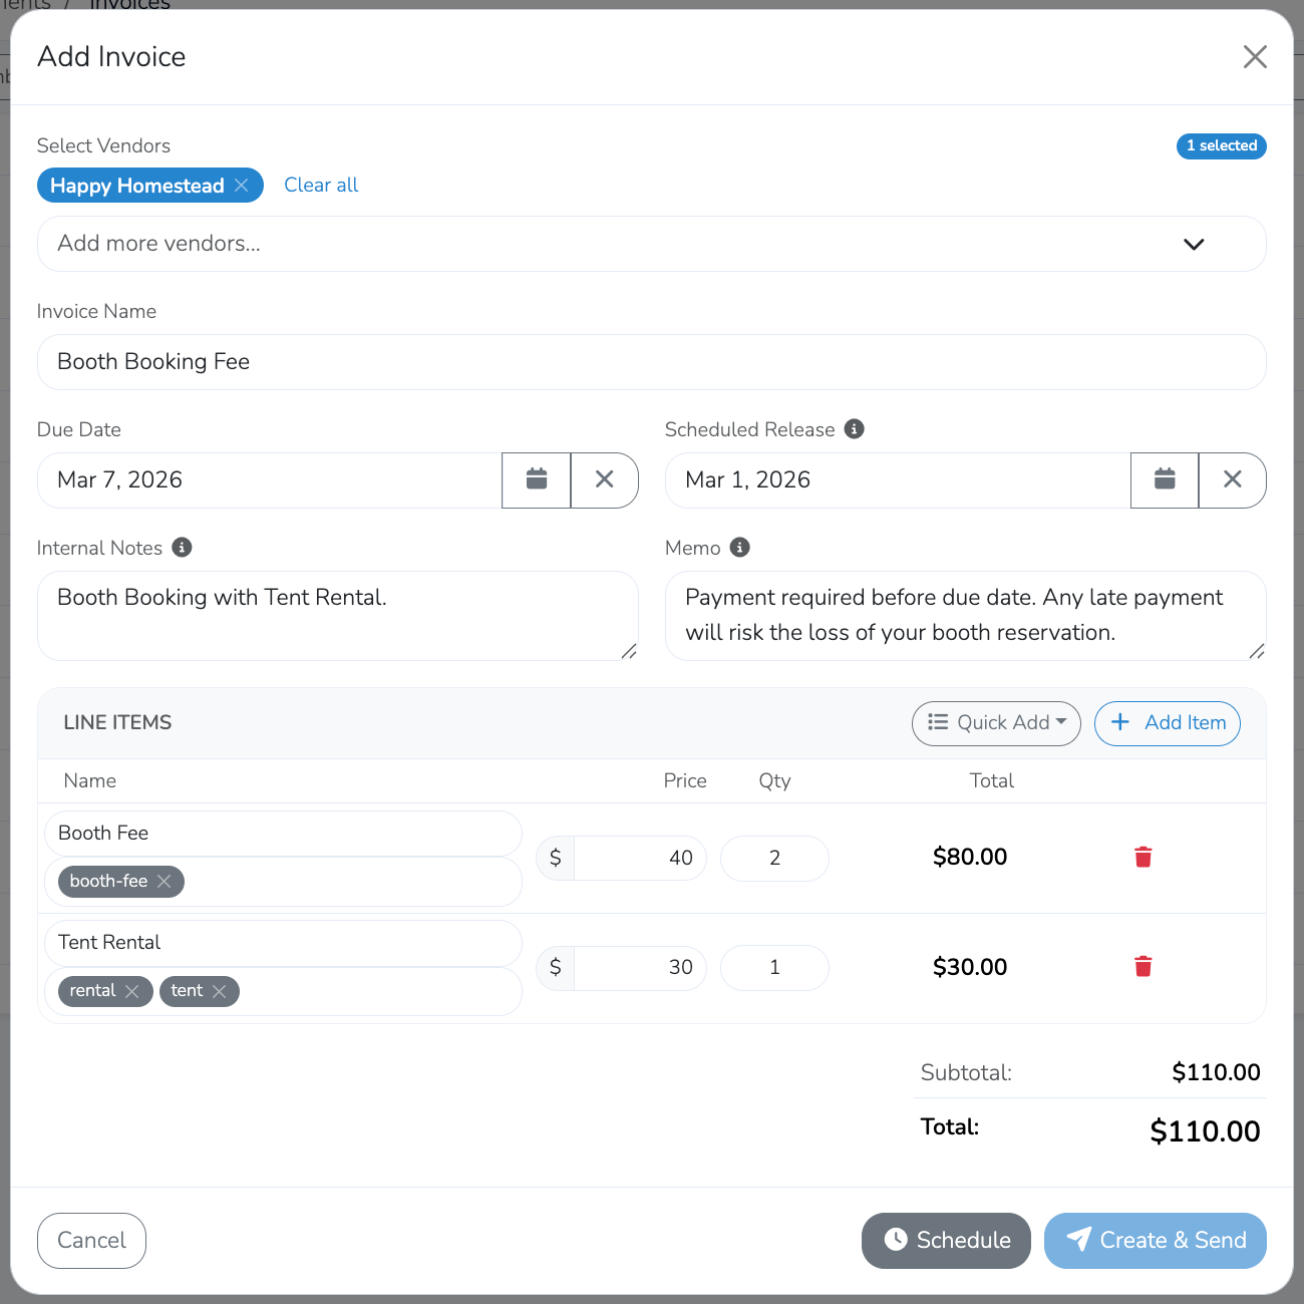
Note
In the example above the "Create & Send" button is greyed out since the invoice was created with a scheduled release date. If no scheduled release date was set it would the "Create & Send" button would be available and the "Schedule" button would be greyed out.
Edit an Invoice
Now let's edit an invoice. We'll select this Vendor: Peapod Farm. We can view individual invoices, export invoices, or create an invoice for this Vendor. In the next screen, we're going to click (>) to VIEW invoice #: FS0011971 for NOVEMBER 17, 2018.

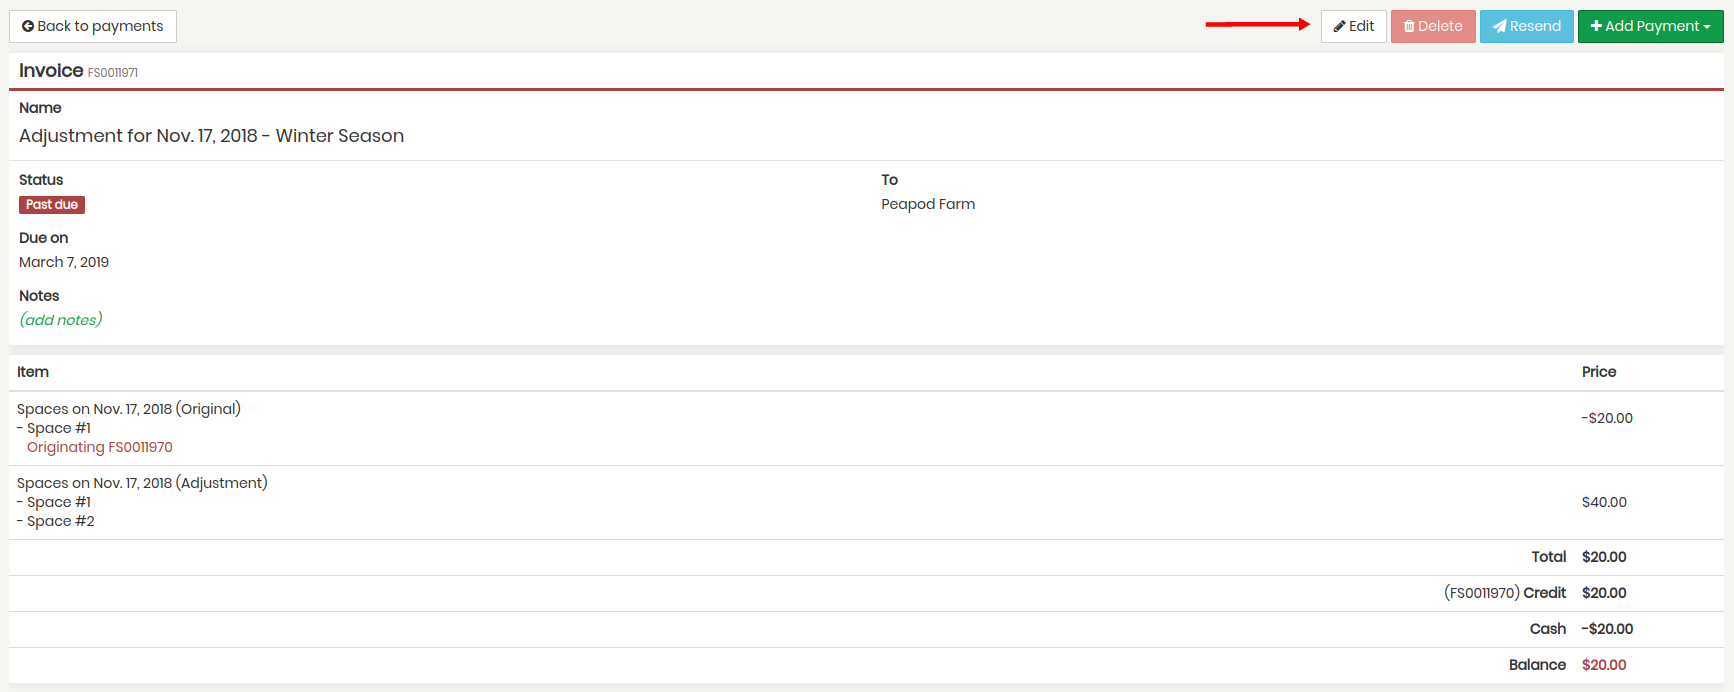
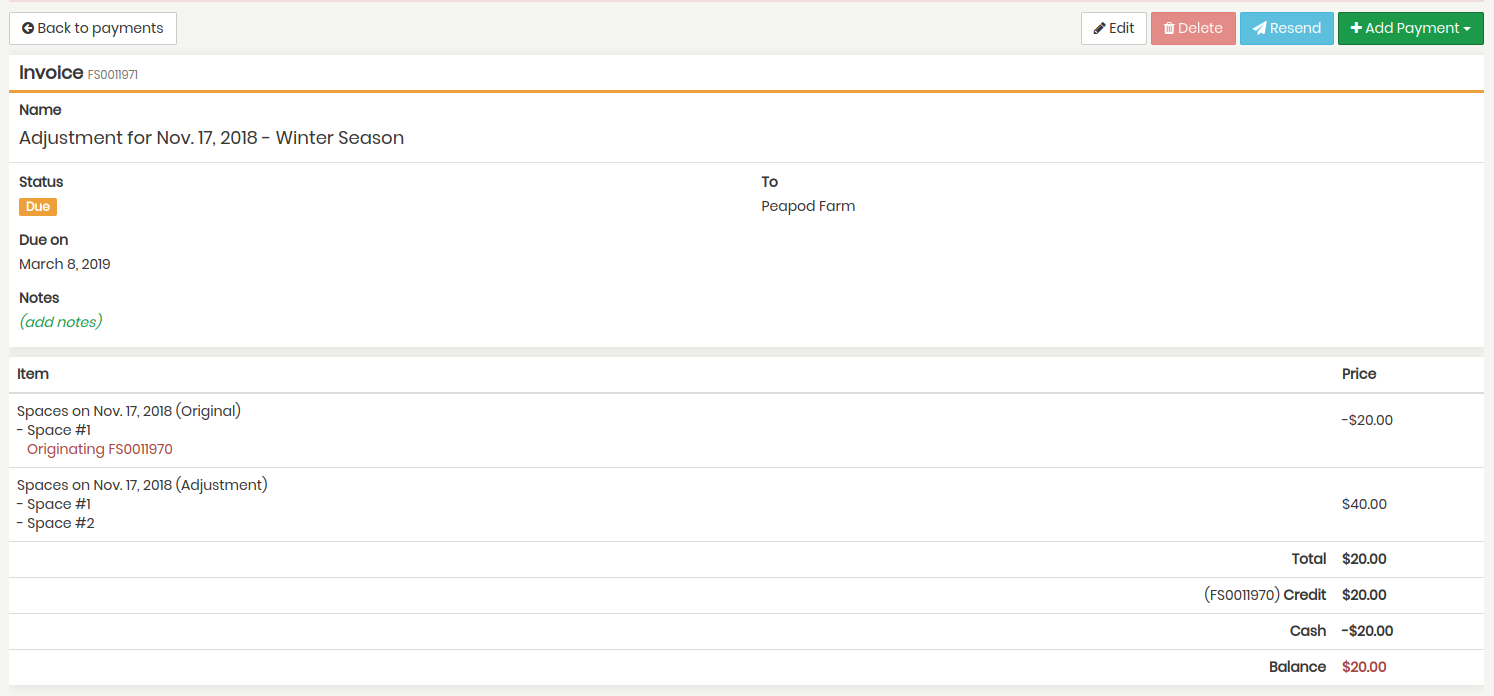
We are now viewing Peapod Farm's invoice #: FS0011971 for NOVEMBER 17, 2018. Notice we have a couple of options in the top right corner. You can edit, delete, resend, or +add payment.Delete and Resend do just as they suggest. Let's click EDIT to make adjustments to this invoice.
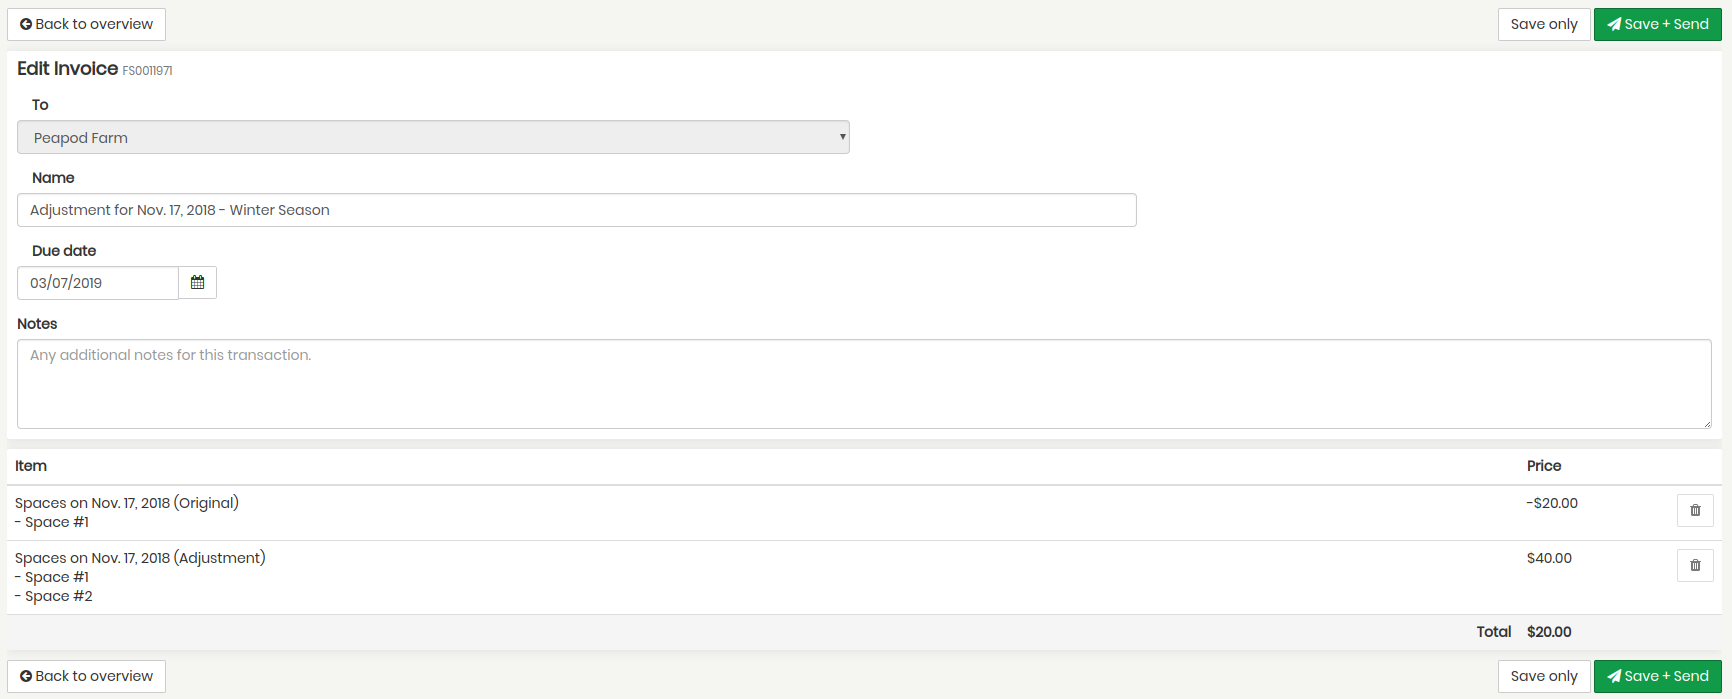
We can make adjustments to this invoice here. You have the option to save your edits or to save and send the invoice to the vendor. We'll save it for now and return to the previous screen.
Back to the options for Peapod Farm's invoice #: FS0011971 for NOVEMBER 17, 2018. This time, let's add a payment by clicking +Add Payment.
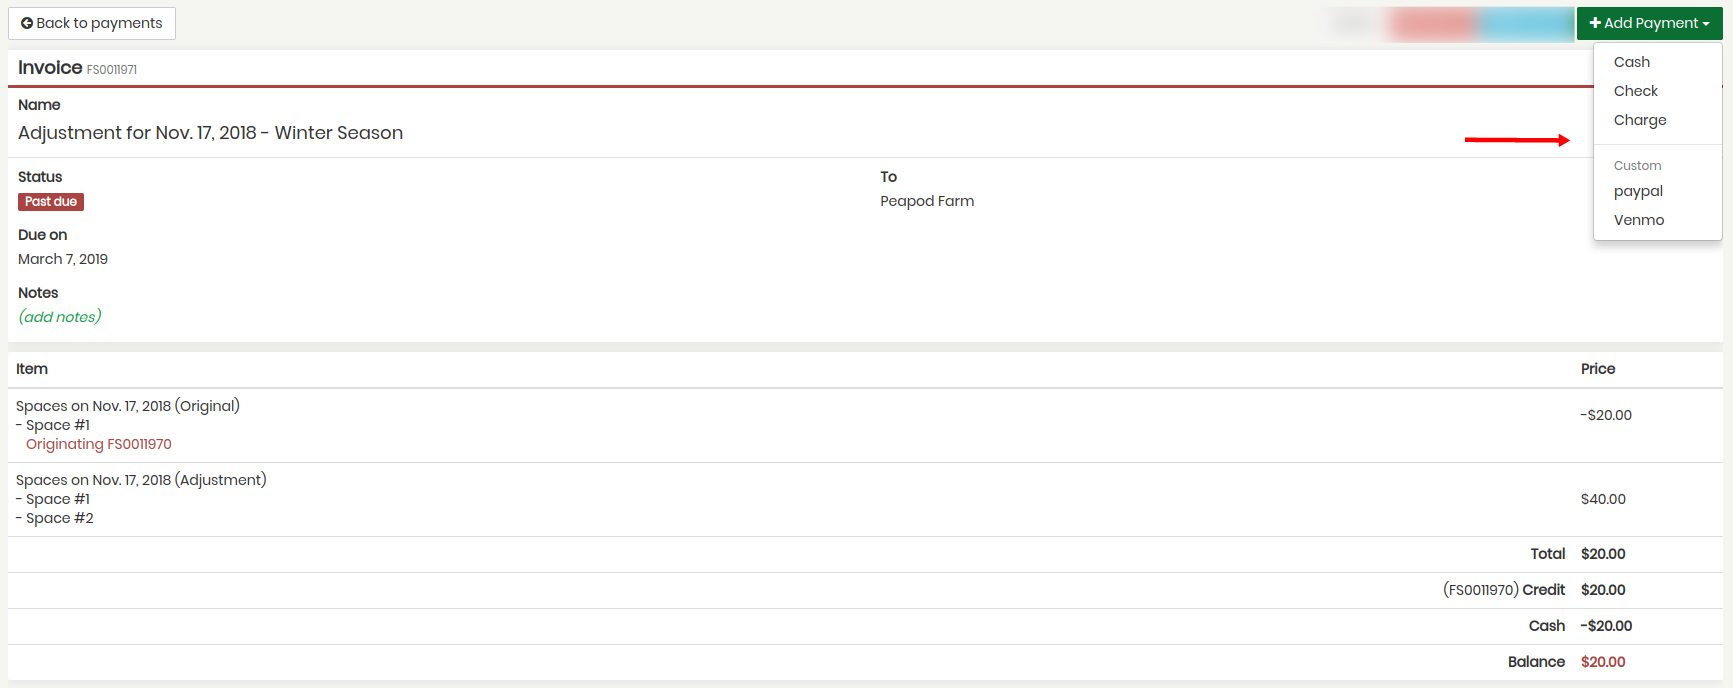
To mark paid by Cash, click Cash from the dropdown options. The screen below will populate for you to make the necessary payment amounts and remember to click Add Payment.

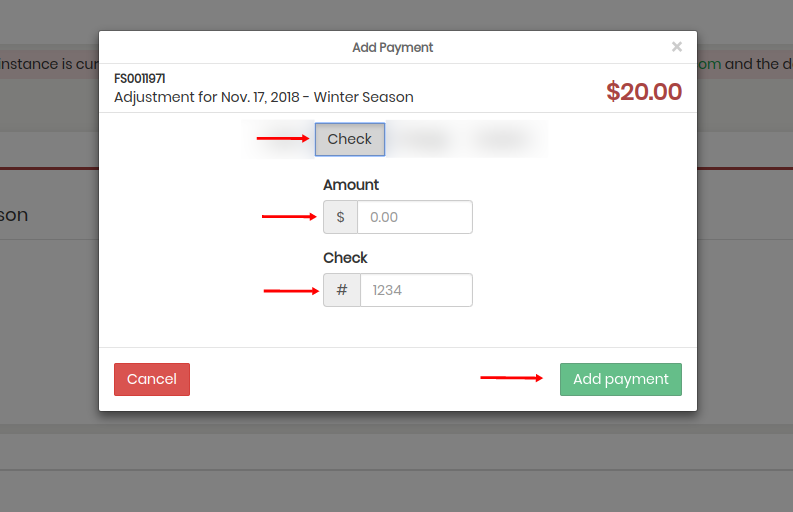
To mark paid by Check, click Check from the dropdown options. The screen below will populate for you to make the necessary payment amounts and remember to hit Add Payment.
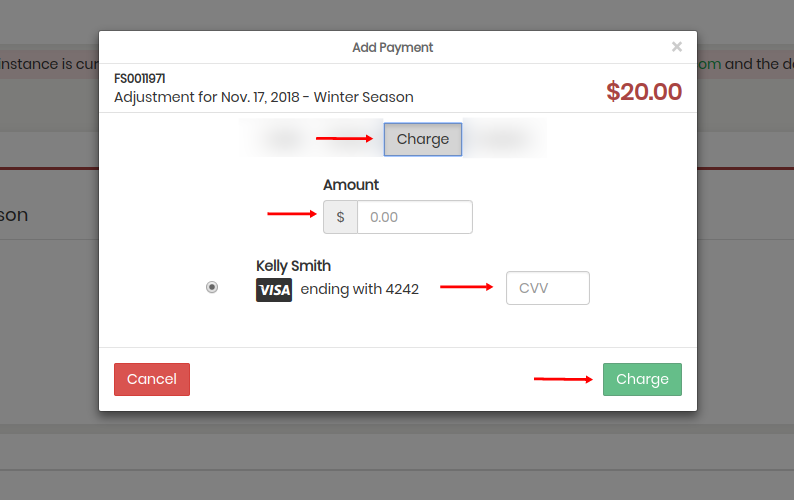
To mark paid by Credit Card, click Charge from the dropdown options. The screen below will populate for you to make the necessary payment amounts and remember to hit Add Payment.
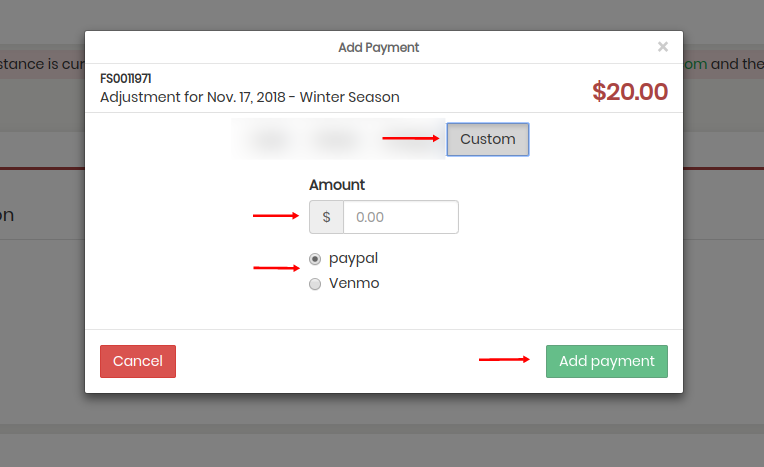
To mark paid by Custom, click Custom from the dropdown options. The screen below will populate for you to make the necessary payment amounts and remember to hit Add Payment.
Congratulations! You just manually created an invoice! Repeat these steps for manual invoices in the future. Keep reading to learn about Exporting a Vendor's current invoices. Ready to learn about invoicing via Scheduler? Jump down to the next section Invoice via Scheduler.
Export a Vendors Invoices
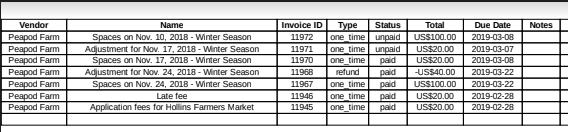
Let's export Peapod Farm's current invoices so we can review them. Click Market Dashboard > Invoices > Select Vendor: Peapod Farm (from the dropdown box). Click Export.
Note, once downloaded, you will have to format the information to your liking.
Invoice via Scheduler
From the Market Dashboard, click Scheduler.

In Scheduler, a market manager can complete many of the daily tasks that are needed at the market on that particular market day. Please note this guide is about Invoicing in Scheduler. Reference Support Article: **Scheduler Overview**to learn how to use Scheduler.
Invoice Legend
The dots in the bottom right corner refer to a vendor's status on an invoice. Use these dots to quickly and easily see which vendors owe you money for a particular market day.
No Dot No invoice has been created yet (not pictured here)
Yellow Dot The vendor needs an invoice created
Blue Dot The vendor has made a partial payment or still owes the whole balance on an invoice
Green Dot The vendor has paid their invoice in full and has no balance.
Red Dot The vendor is past due on their invoice.
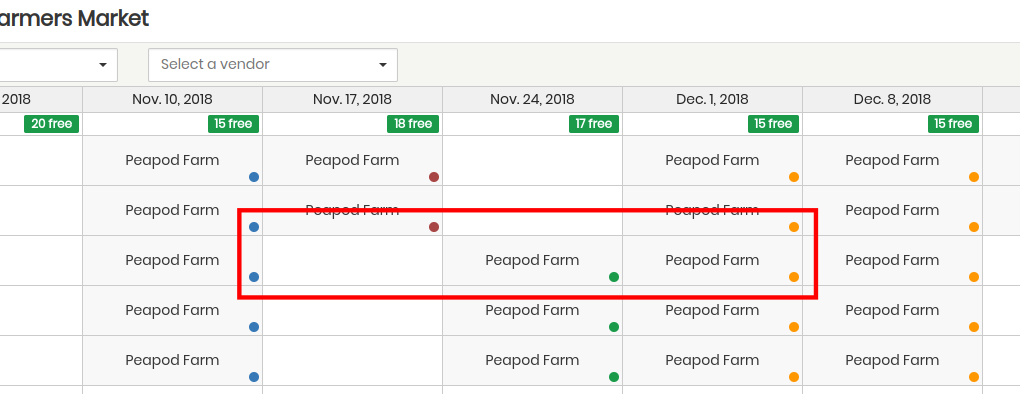
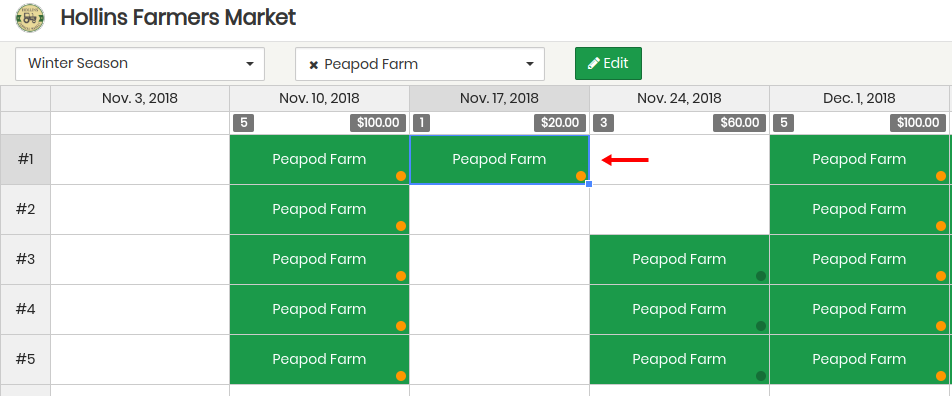
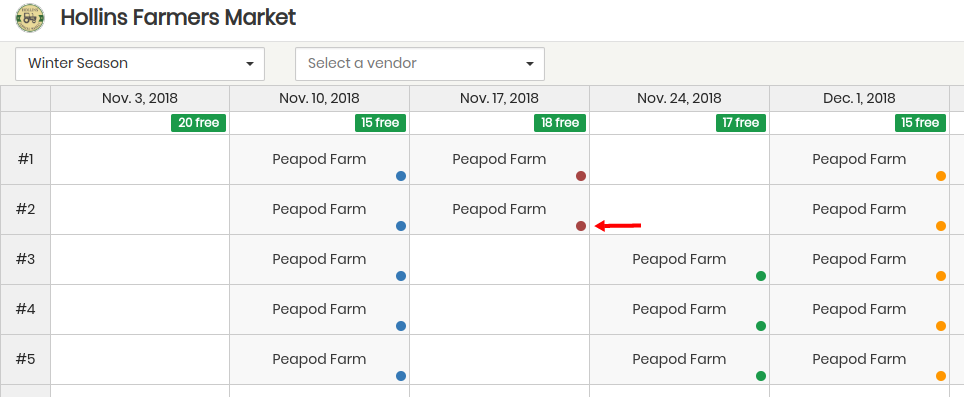
Next, let's say we have just assigned Peapod Farm to stall #1 on November 17, 2018. The yellow dot lets us know this vendor needs an invoice created.
To create an invoice in Scheduler...
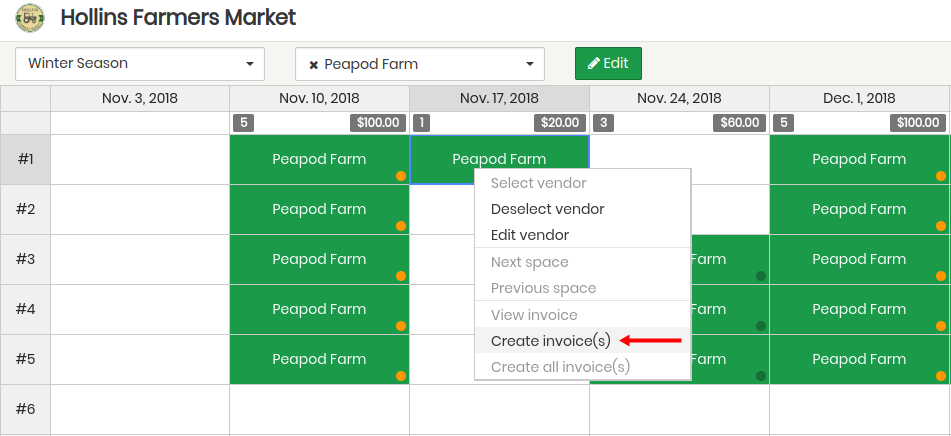
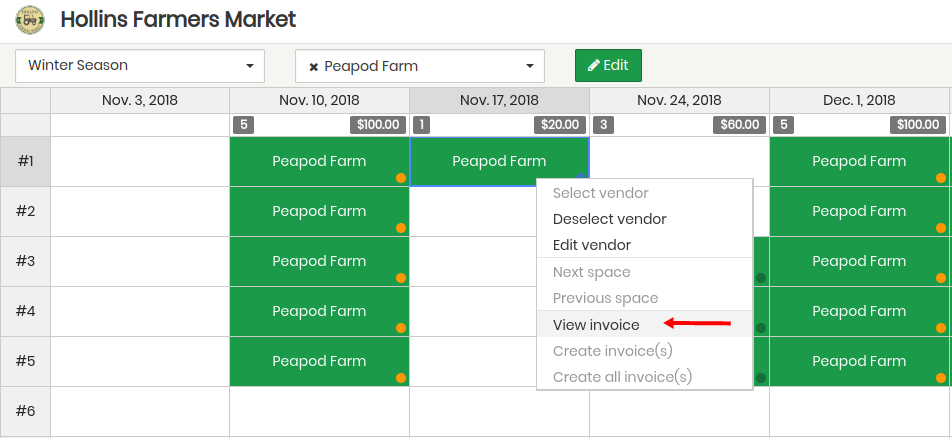
From a desktop/laptop: Right click or control click on the Vendor Name pertaining to the Market Day and Stall Number and select Create invoice(s).
From a mobile/tablet device: Hold your finger down over the Vendor Name pertaining to the Market Day and Stall Number. Select Create invoice(s). It might take a few seconds for the dropbox to populate.
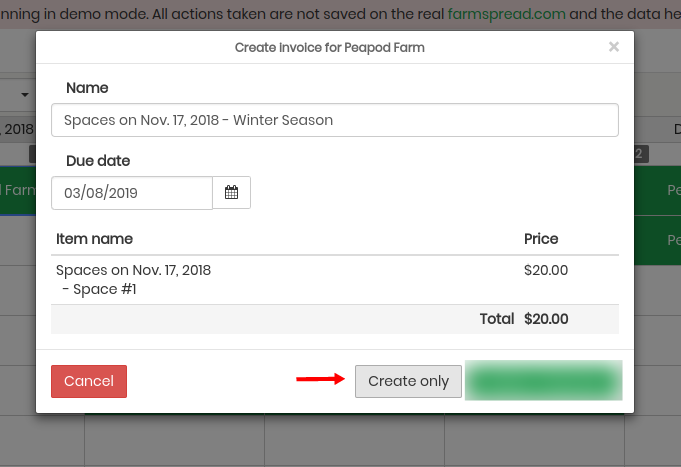
When creating an invoice, you have two options; Create or Create + Pay. Review the information is correct to complete the invoice. Here we're going to Create Only.
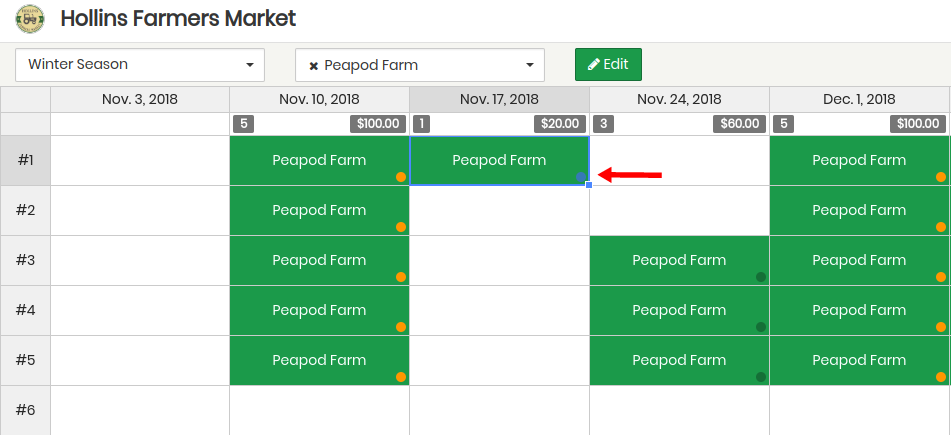
Now we can see a blue dot, reflecting the invoice has been created and this vendor still owes the market money. Note, to show Scheduler in grayscale, in the top right corner of Scheduler click exit then click Scheduler from your Market Dashboard.
Let's say we created an invoice and now we want to review it. We follow the same steps as before, right click or hold down the vendor stall assignment for that particular day, select View Invoice.
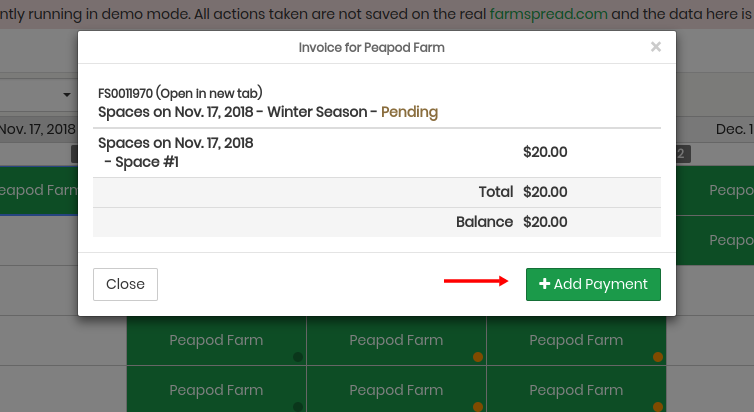
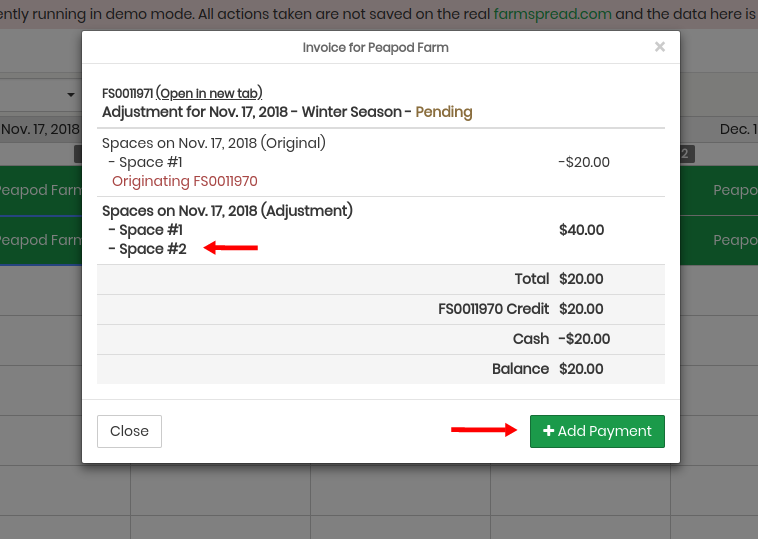
Here, we can review the invoice as well as make a payment. When you're standing at the vendor booth on market day you can quickly complete this invoice by clicking +Add Payment.
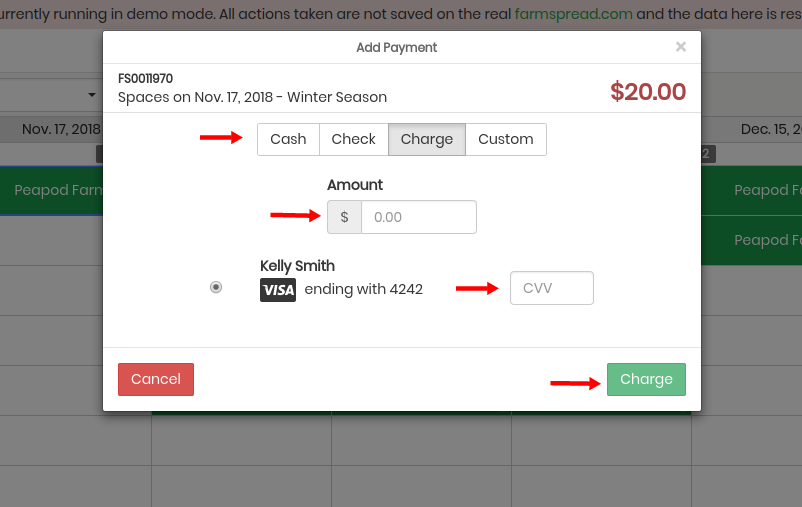
When we hit +Add Payment, the box below will populate. Here we have different payments options based on what we have chosen in our Market Settings. In this example, the vendor is paying with their credit card on file. All that needs to be done is to enter the dollar amount we want to charge (partial or full amount), the CVV and hit Charge. The vendor does receive an email and a notification on their Vendor Dashboard of this action.
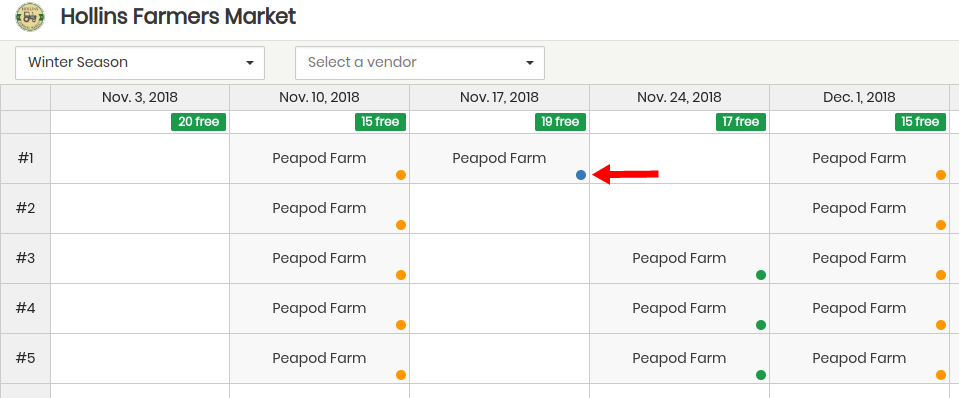
In this example we made a partial payment. When we go back to our season view, we can see a Blue Dot now appears to reflect a partial payment.
Congratulations! You just made a partial payment on an invoice via Scheduler! Keep reading to learn about adding a stall to a vendors invoice.
Adding a Stall to a Vendor's Invoice
In this example, we have added one additional stall for Vendor: Peapod Farm. Now we need to update their invoice to reflect the additional stall. Follow the steps from above to View Invoice, notice the system will automatically do the math for you to calculate how much the Vendor now owes. Click +Add Payment to update the invoice with appropriate payment method and dollar amount. When done, hit Charge or Add Payment whichever is appropriate for the payment method.
If the Vendor doesn't want to pay, no problem. You've updated their invoice to reflect the additional stall and now you're waiting on them to pay. If payment is not received in time, Scheduler will reflect the Vendor is past due on their invoice with a Red Dot in the bottom right corner of their stall assignment(s), pictured below.
Congratulations! You just added a stall to a vendors invoice!
We've created an invoice in Scheduler, how do we find it later?
Now when we exit out of Scheduler, we can view all invoices we've created under the Invoices tab (Market Dashboard > Invoices).
In this example below, we've selected the invoice for Peapod Farm on November 17, 2018 (Market Dashboard > Invoices > Select Vendor: Peapod Farm > November 17, 2018).
To handle the invoice outside of Scheduler, follow the steps from Manual Invoices to proceed with editing, deleting, resending, and adding payment to the invoice.
Congratulations! You now know two ways to create and manage your vendor invoices!
Other Articles you might find helpful: Price Override. To learn about more features in Farmspread, check out our Support Articles: https://farmspread.com/support/dQuireleformdautlnk