

Accepting and Assigning vendors and exhibitors booths is a tightly integrated process. Below we review the process from start to finish.
In order to help market managers who would like to assign vendors to particular event days before they are ready to commit to actual stall assignments, Marketspread supports vendor staging. This feature is essentially a way to keep per-day lists of vendors that are tagged as attending for the day but not yet assigned a stall. Vendor staging is very nicely integrated into your vendor acceptance and scheduling process as follows:
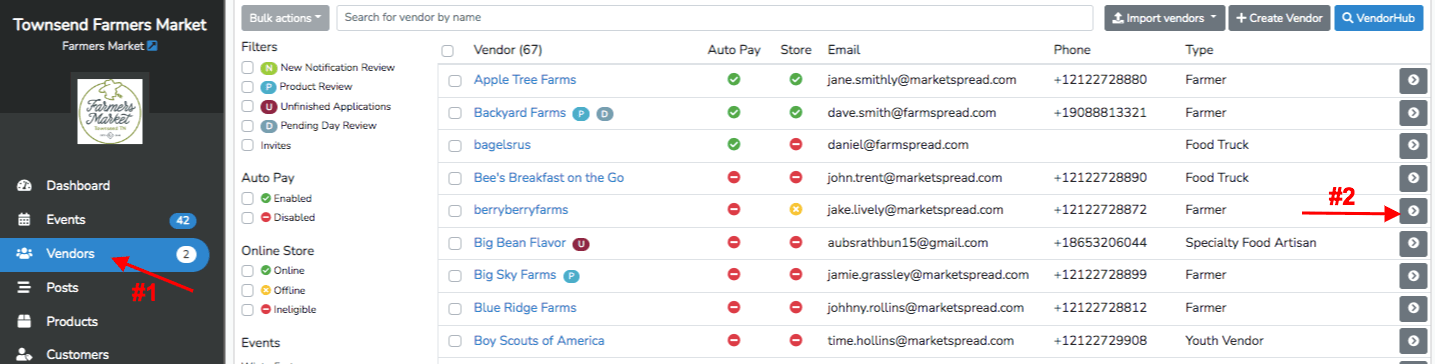
First, go to Vendors in the navigation bar on the left side of your Dashboard (#1) and click the grey arrow button to the right of the vendor you wish to edit (#2) as seen below:
Next, scroll down and choose the event you would like to stage the vendor for. Click on the grey arrow button to the right of the vendor you would like to stage, next to the Scheduler button.

From there you will be taken to the Vendor's Event Application view. If you scroll down on this page you will see a list of all available days for the season. When the vendor has not been assigned any stalls, their status will be set to "pending". Under the Status column header you will see a list that includes the status for the vendor for each day. From the dropdown menu next to each day you can select the vendor status for that day by choosing "Waitlist," "Accepted," "Rejected," or "Not Attending."

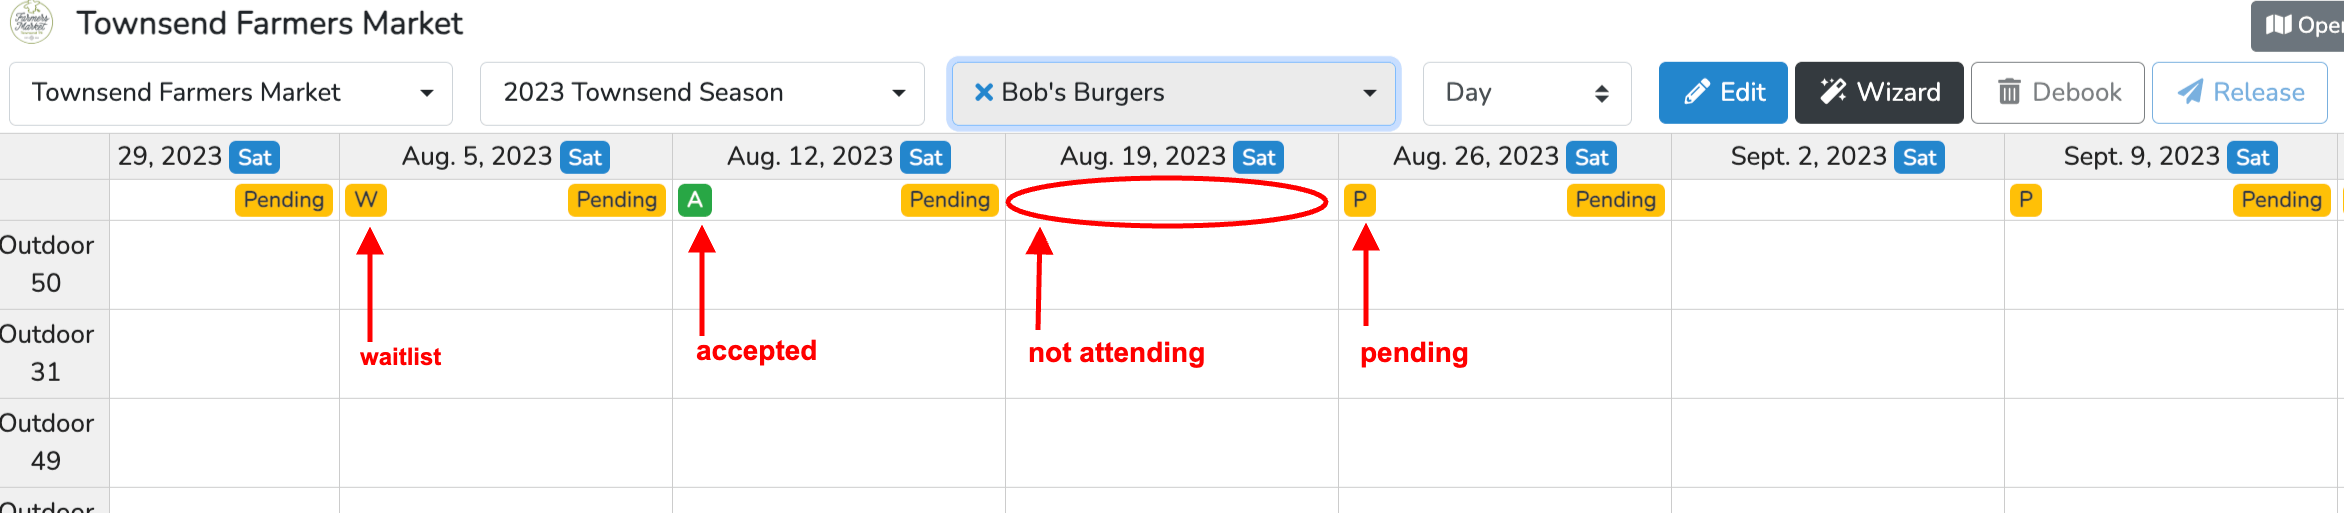
If we looked at Scheduler for the vendor in that event you would notice all of the per day settings reflected in your Scheduler view:
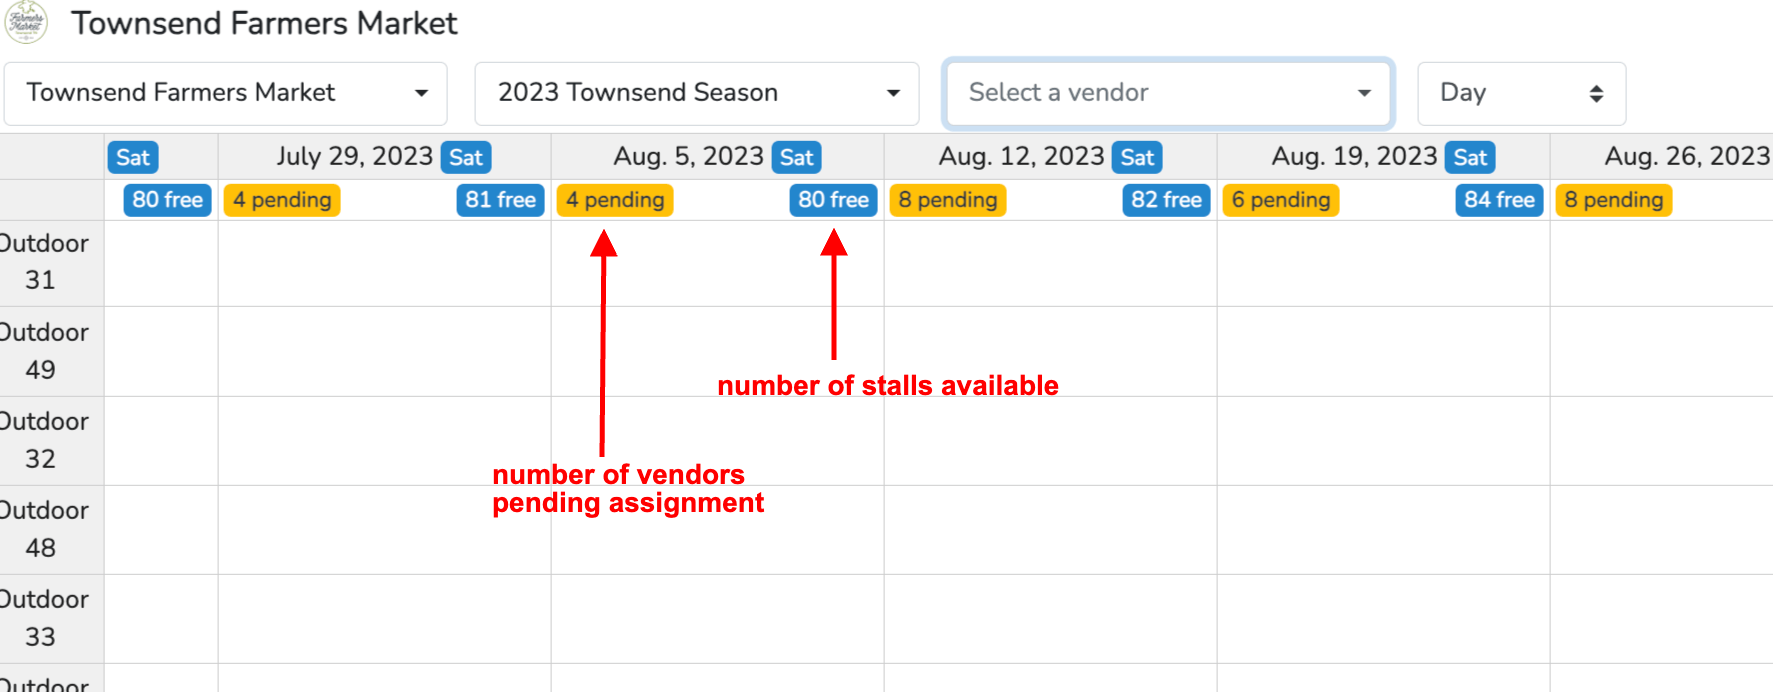
If you unselect a vendor from the vendor dropdown, the view will change to show the per day status of all vendors which additional information in the per-day status cell. In the example below, for Aug. 5you will see that there are 4 pending vendors for that day and a total count of free stalls (80 free).
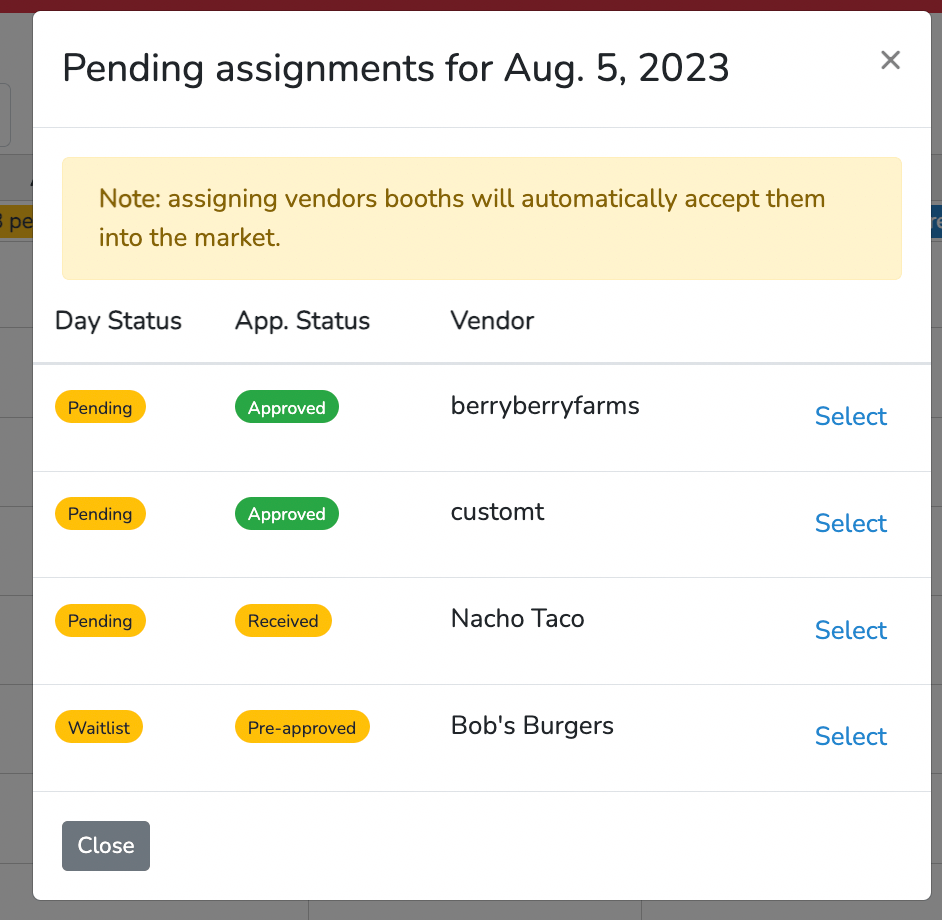
Clicking on the yellow 1 pending bubblewill present you with the list of vendors awaiting stall assignments for the day and their day and application status. Each vendor in the list will have a green Select link next to it. Clicking on the link will automatically select that vendor in Scheduler so you can edit and make the necessary day stall assignments.
Once each vendor in the staging list is assigned their status is updated and they are removed from the list.