Create a New Product
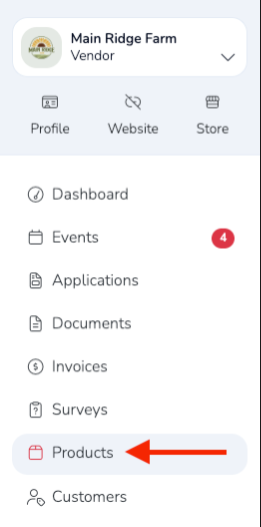
From your Vendor Dashboard, click Products in the left-hand navigation menu.
This will open your Products page. To create a new product, click the blue + Create button in the top-right corner.
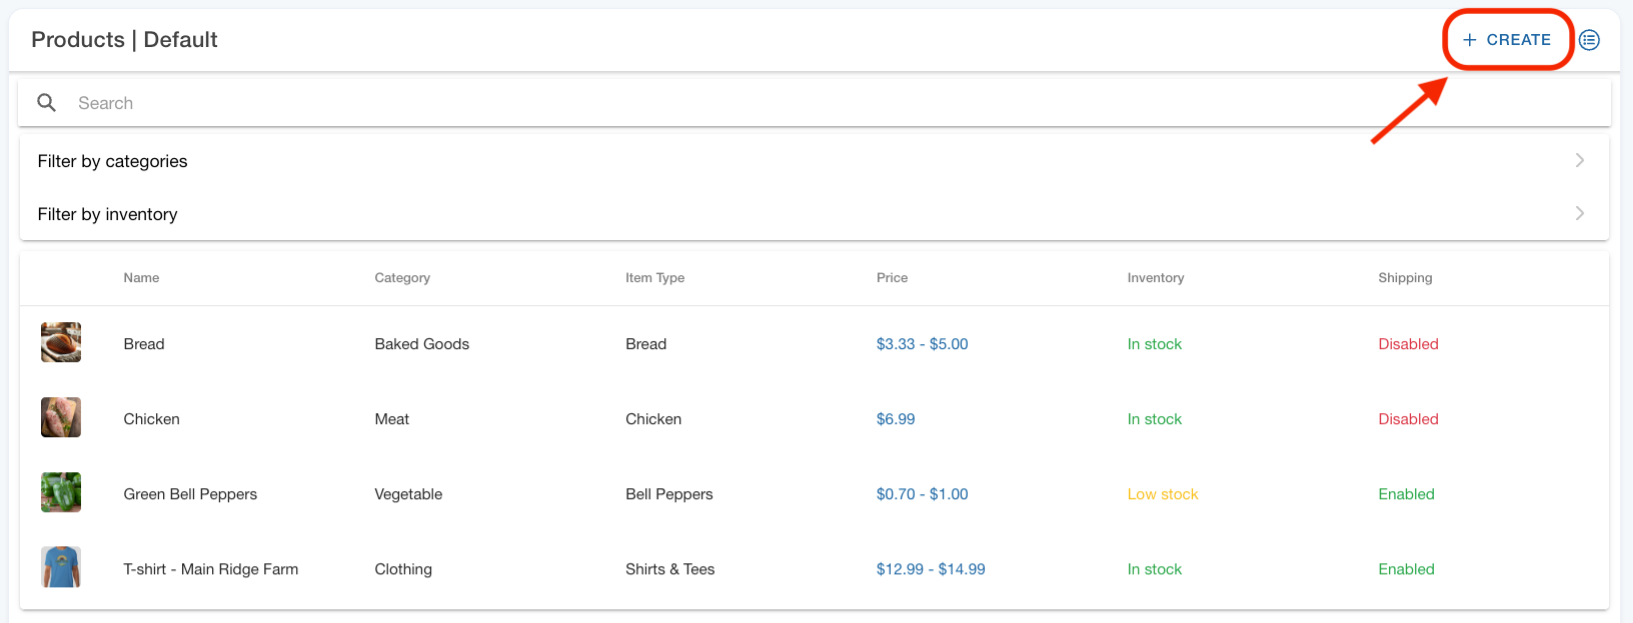
You will be taken to the product details page, where you can create and configure your product.

Product Basics
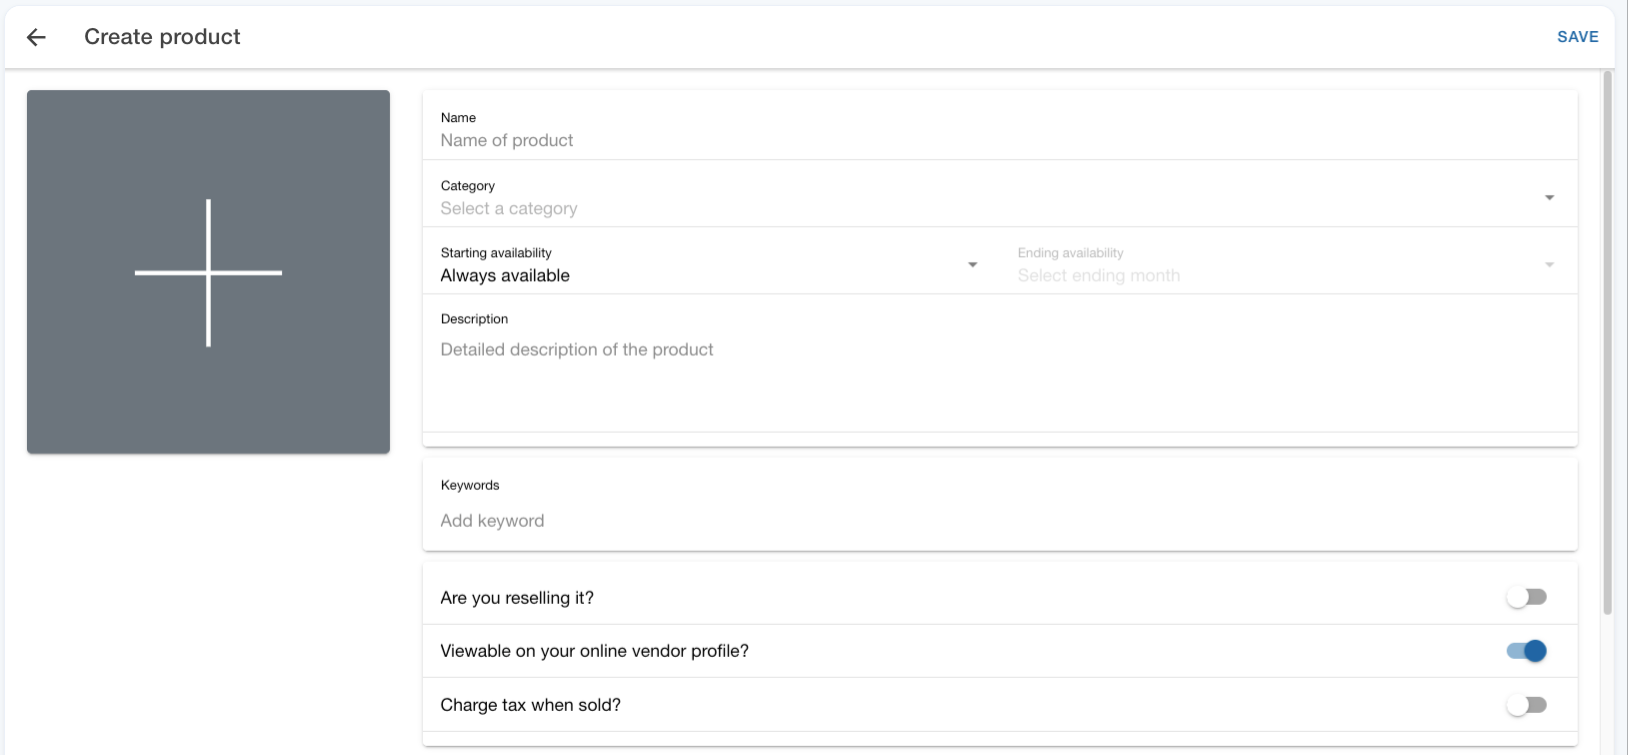
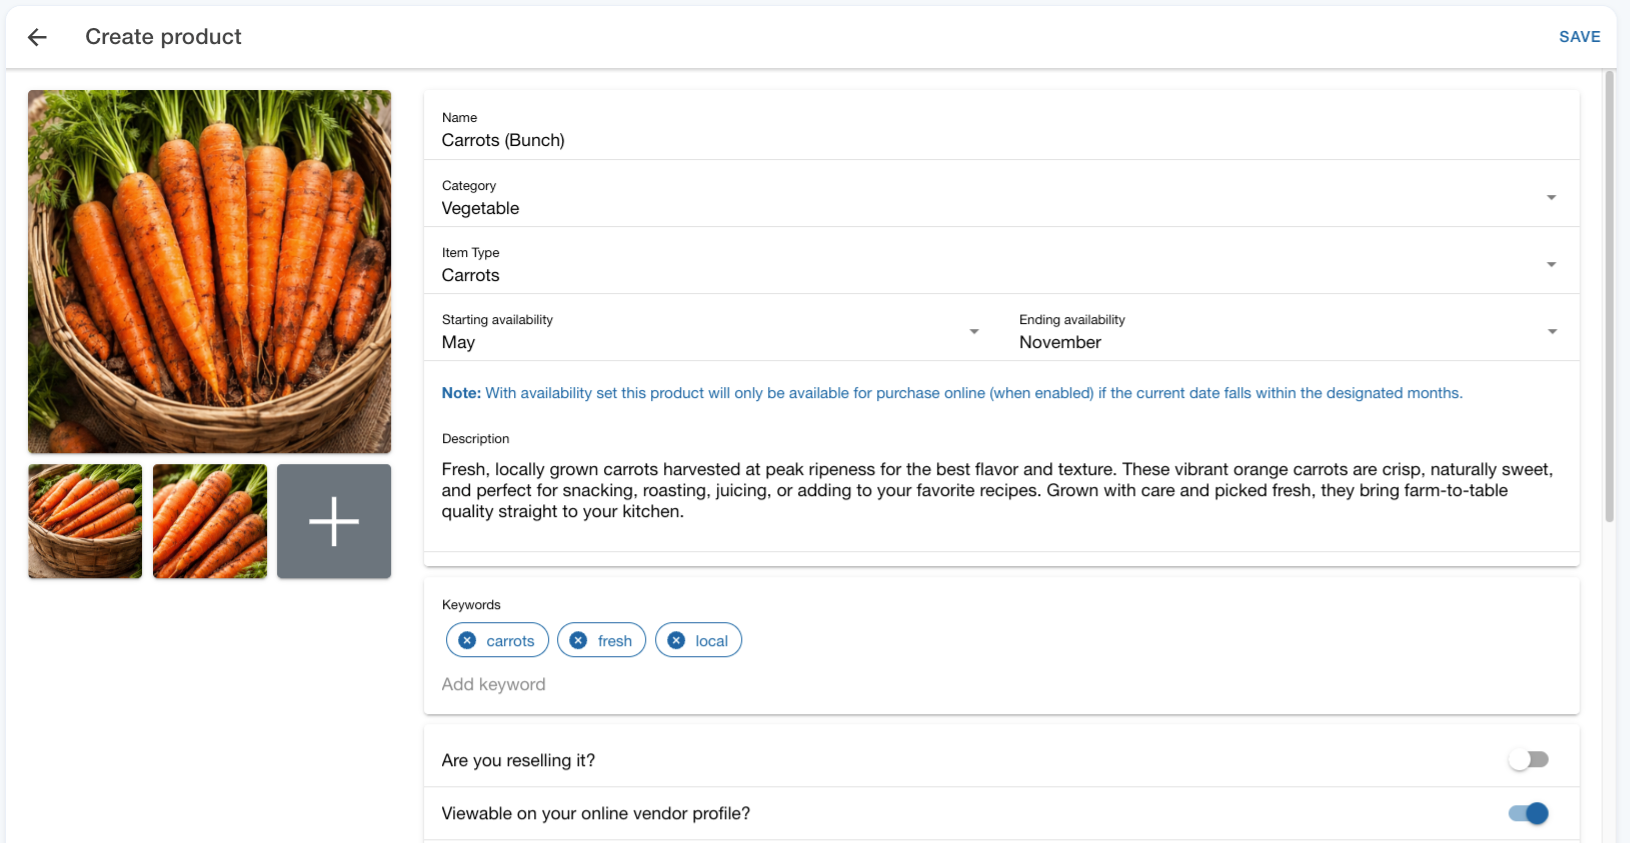
When creating a product, complete the following fields:
- Product name
- Product category
- Product type
- Availability range, or leave it as always available
- Description
- Optional keywords to improve searchability
You can also choose whether the product:
- is being sold as a resale item
- should be visible on your online vendor profile
- should have tax applied when sold
- Set your default tax rate under Settings → Tax
- should use a custom tax rate when sold
Use a custom tax rate only if the product’s tax rate is different from your standard tax rate.
Photos
You can upload as many product photos as you would like by clicking the gray square with the + sign to the left of the product name.
A window will open where you can select the photo you want to upload. After uploading the image, you can adjust it using the cropping tool in the uploaded photo window.
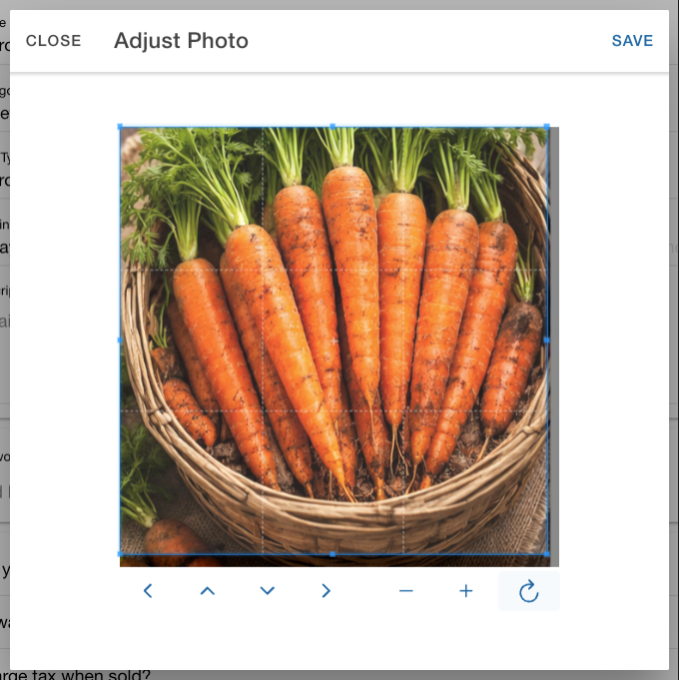
To delete a photo or change which photo is featured, click the photo. A window will appear with options to either set it as the featured photo or delete it.
Below is an example of this section completed with photos added.
Once you have uploaded the photos you want to include, you can move on to the Configurations section.
Product Configurations
Next, you can define product configurations and pricing.
Note
If you want to sell products using the Point of Sale mobile app for Apple or Android, product configurations are required.
To create a configuration:
- Enter a configuration name
- Keeping "Default" is fine if you only want one configuration
- Select the measurement type: Count, Weight, or Volume
- Under Publish type, choose whether the product should be Selectable online or In-person only. If you choose Selectable online, it will also be available for in-person sales with our POS app.
- If you would like to track inventory through the POS app, turn the toggle switch on.
- If inventory tracking is enabled, enter the current inventory available
- Enter the price and number of units for the configuration
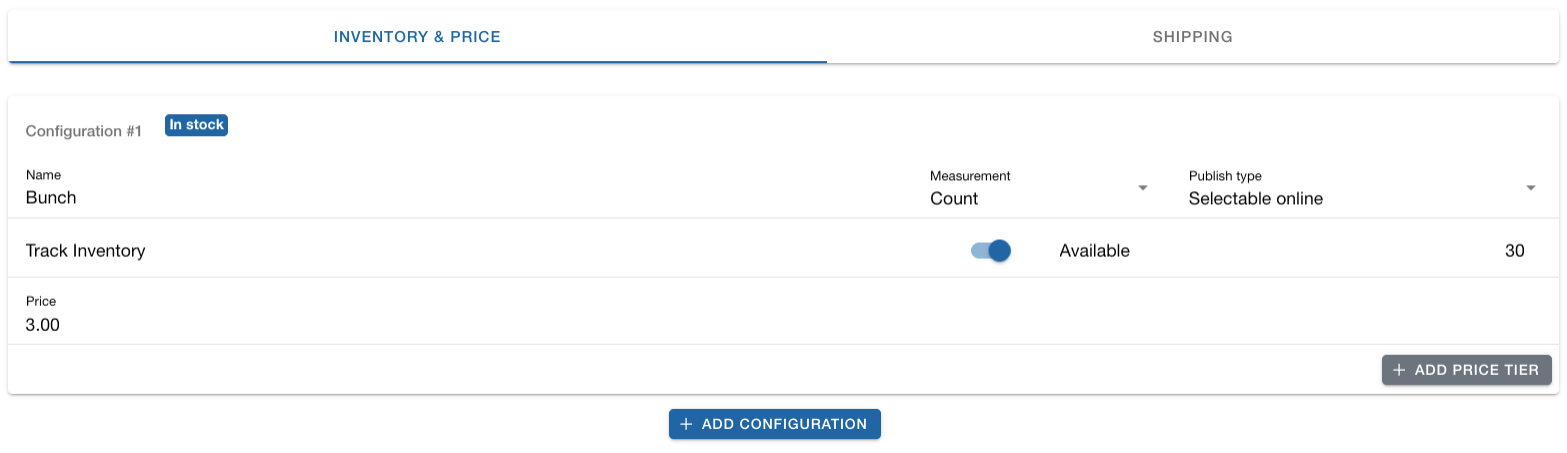
If you want to add another configuration, click the blue + Add Configuration button.
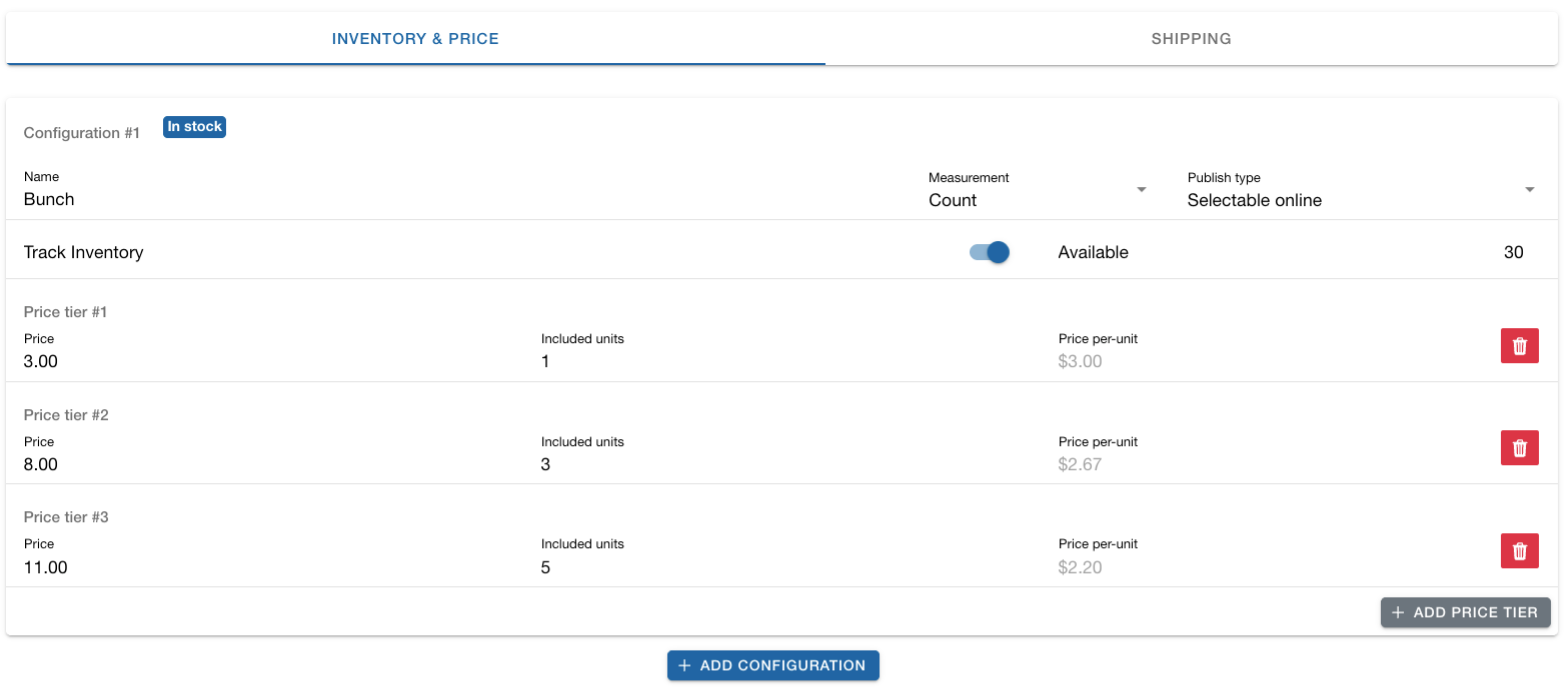
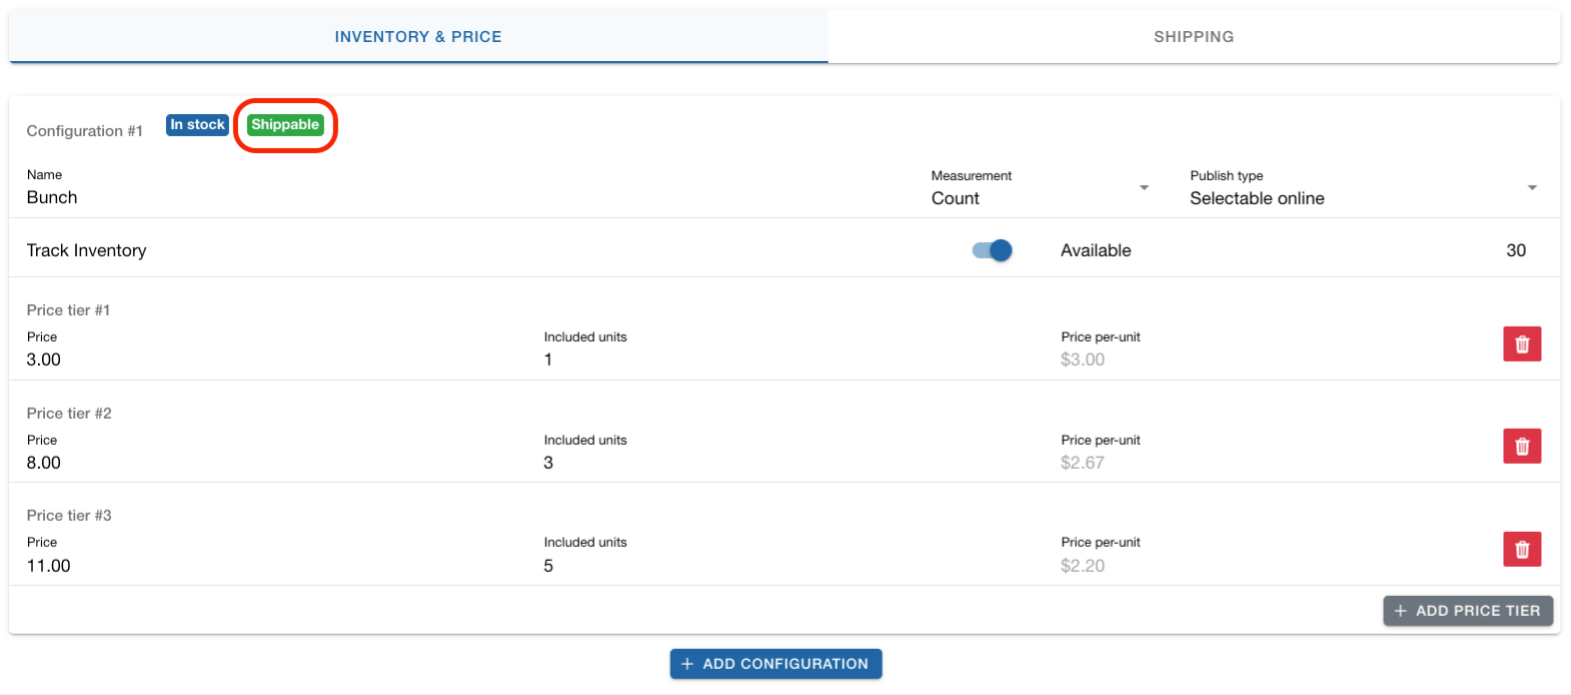
Price Tiers
Price tiers allow you to offer discounts for larger quantities. This can help increase order size, provide better value to customers, and reduce the need for manual price adjustments in the Point of Sale app.
To add a price tier to a product, click the gray + Add Price Tier button in the configuration section.
Then enter the price and quantity for the tier. The system will automatically calculate the price per unit.
Shipping
If your online store is enabled and the product can be shipped, click the Shipping tab next to Inventory & Price.
Turn on the shipping toggle to allow customers to select shipping at checkout in your online store.

When you return to the Inventory & Price tab, the product will be marked as Shippable.
Important
Be sure to click the blue Save button at the top-right corner when you are finished.If you leave the product page without saving, any unsaved changes will be lost.

Once your new product is saved, you will be redirected to the main Products page, where you will see the new listing.
Update a Product
You can update a product at any time.
From your Products page, select the product you want to update. Make your changes on the product details page, then click the blue Save button in the top-right corner.
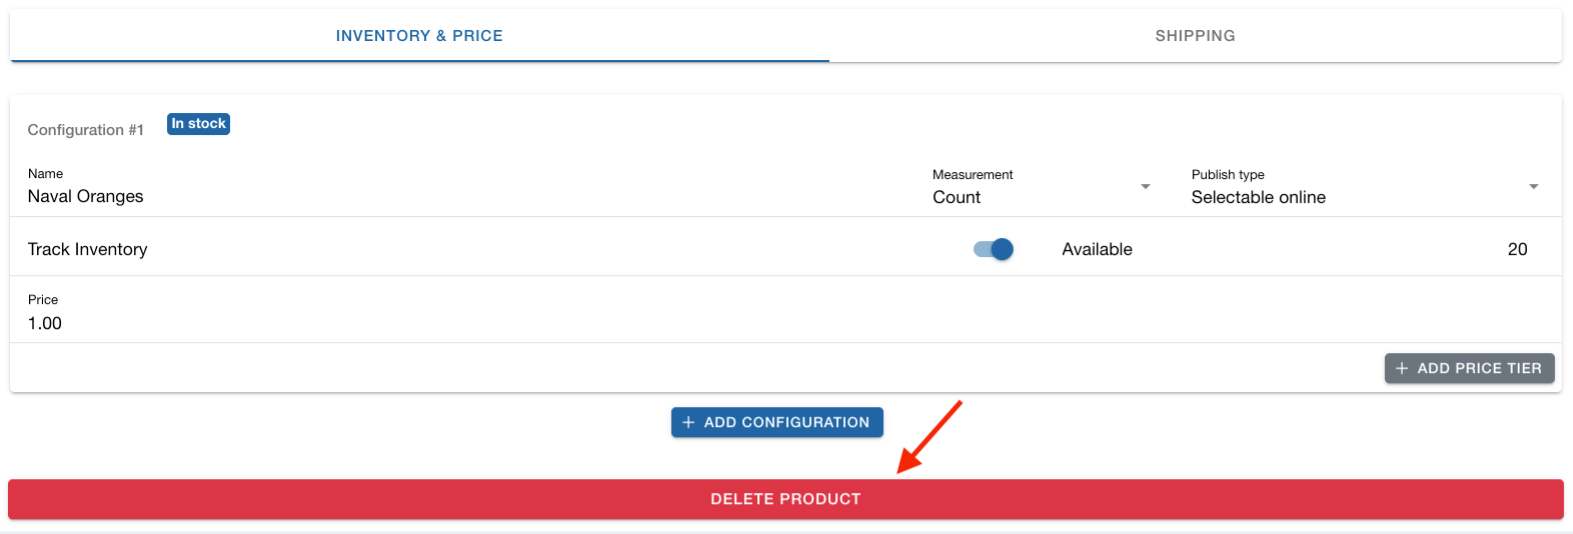
Delete a Product
To delete a product, go to your Products page and select the product you want to remove.
On the product details page, scroll to the bottom and click the red Delete Product button.
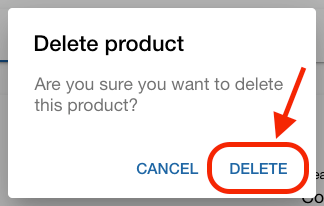
A confirmation window will appear asking if you want to delete the product. To continue, click the blue Delete button in the bottom-right corner.
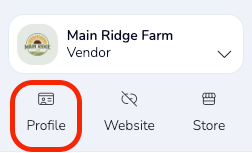
Viewing Product Listings on Your Public Profile
To view your public profile, click Profile below your vendor name in the dashboard. Your product listings can also be viewed there by customers and market managers.
On your public profile, scroll down to view the products currently shown online.
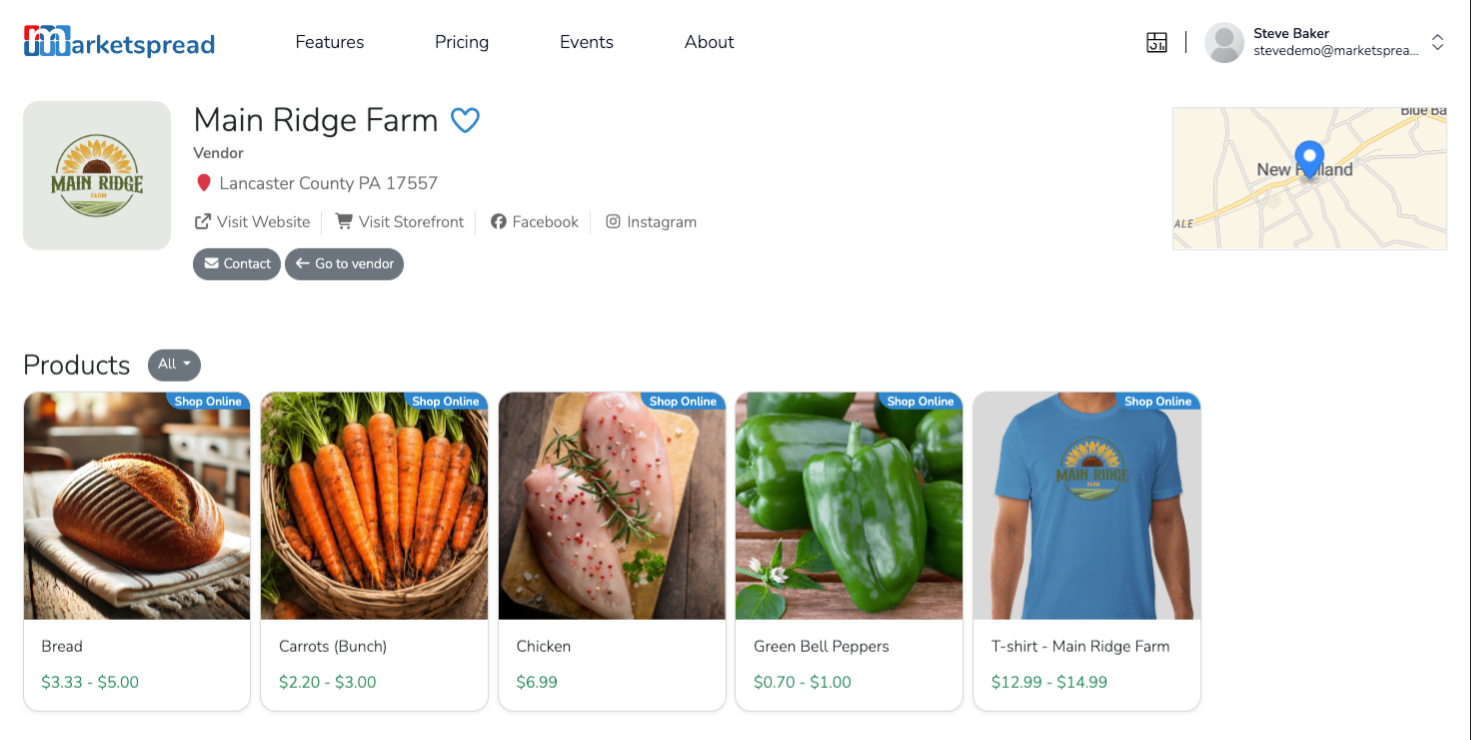
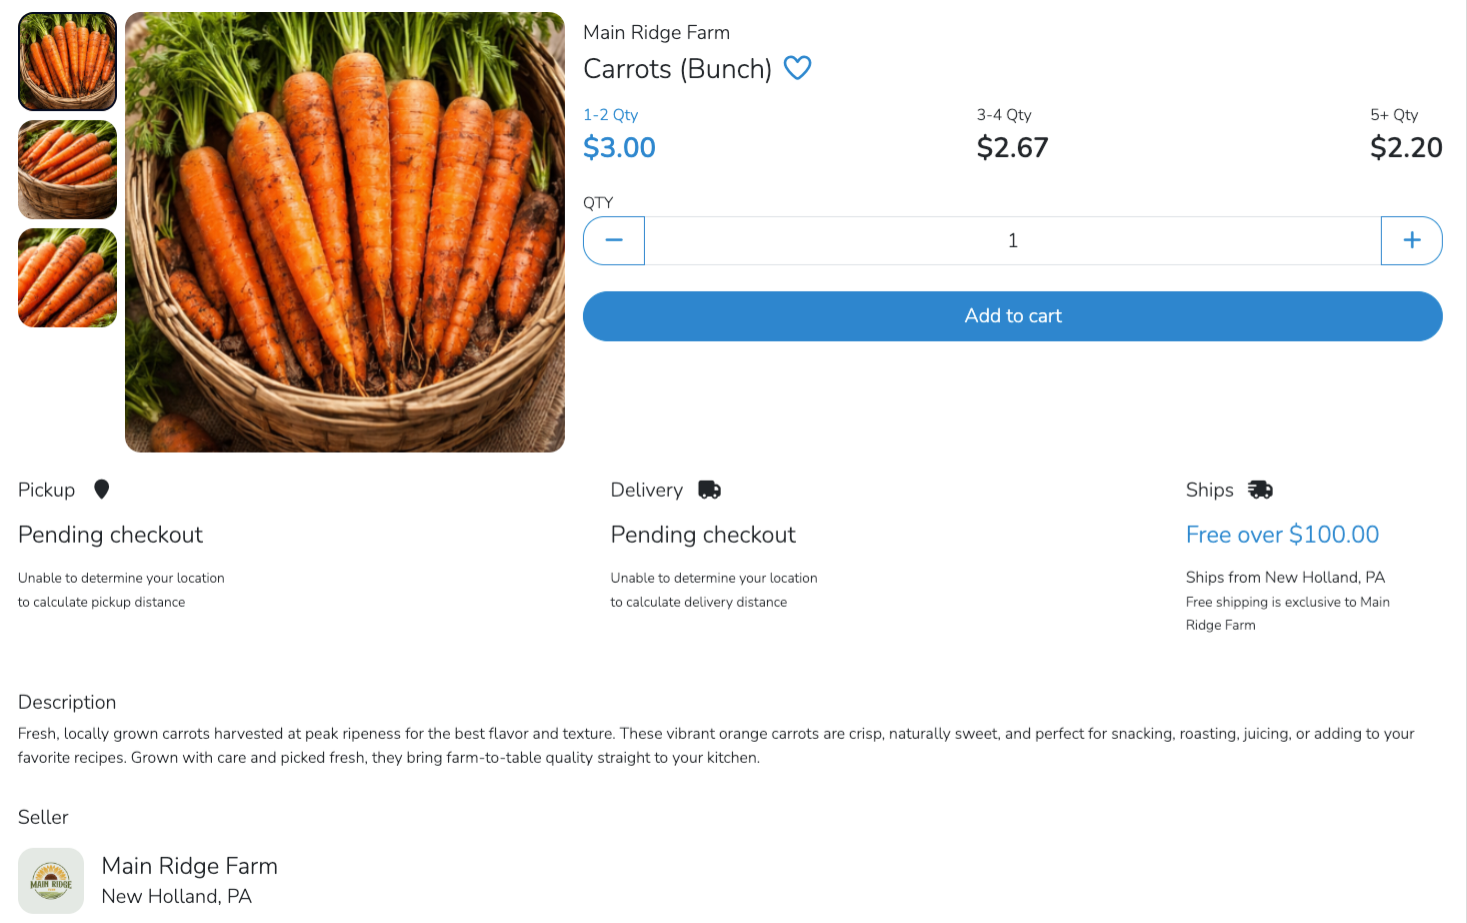
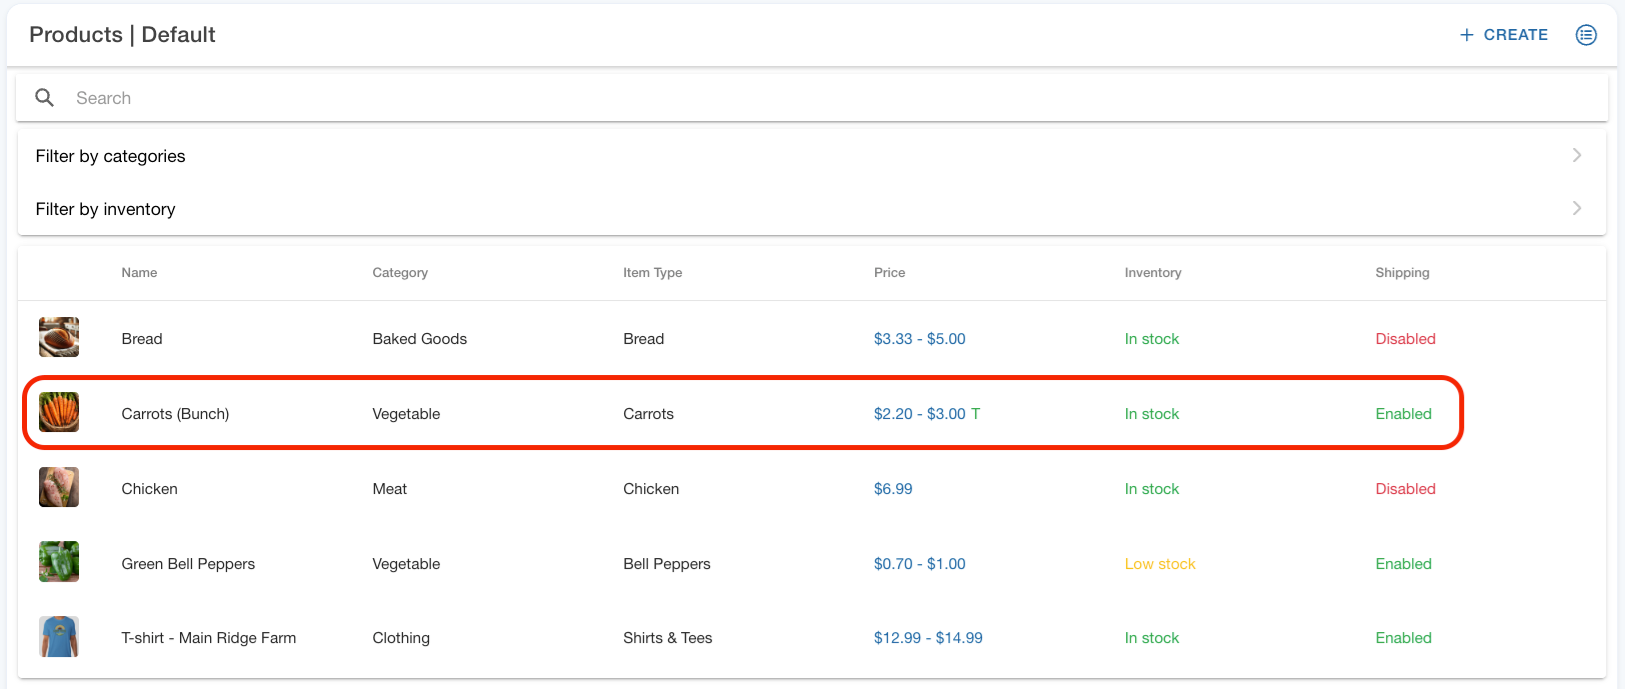
Click the product to view its details. The example below shows the carrots we just created.