

Applications in Marketspread support a wide variety of use cases and can be configured to fit almost any market or event.
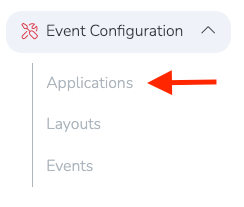
To get started, go to Event Configuration → Applications from the left-hand navigation menu.
From there, you can create any number of application templates. An application template is an application that is not directly linked to an event or event season.
To create a new template, click the + Add template button in the top-right corner.

Creating your Application template
Application Name
The Application Name is for internal reference only. It is visible to your market or event team, but not to the public or vendors (example below).

Insurance Settings
When enabled, vendors will see information about Insurance Canopy (Marketspread's trusted insurance partner) during the application process and can request a quote.

Vendor Types and Categories
Application Vendor Types and Categories control which types of vendors can apply and which requirements, such as documents and questions, each type will see in the application.
Vendor Types

Your global list of available vendor types and categories is managed under: Settings → Customizations
This is the pool of vendor types and categories you can use in your application. Marketspread provides a default set, but you can add, remove, or replace them as needed.
Please refer to our article on How to create custom Vendor Types if you would like to make changes.
Vendor Categories
By default, applications do not include any categories from the global pool.
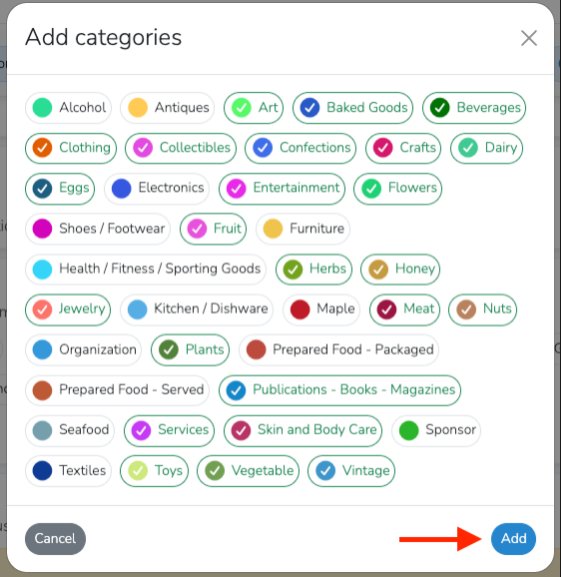
To add categories, click the blue + Add Categories button.

Then select the categories you want to include and click the blue Add button. Selected categories will appear with a green highlight and checkmark.
After adding categories, they will appear in the main Vendor Categories panel.

To remove a category, click the red Remove button, select the categories you want to remove, then click Remove again to confirm.

Application Help - Point of Contact
Use the Application Help section to define who vendors should contact with questions about the application (only employees that have been given access to the account can be chosen).

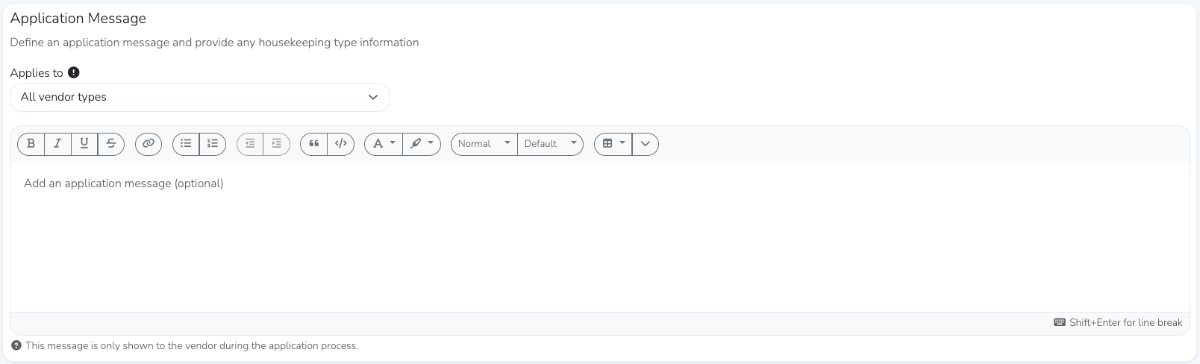
Application Message
The Application Message gives you space to share information that is not covered elsewhere in the application.
You can create:
- a message for all vendor types
- a message for a specific vendor type
Use the Applies To selector to choose whether the message should apply to all vendors or only a selected vendor type.
This section is commonly used for:
- welcome messages
- application instructions
- fee information
- general housekeeping details
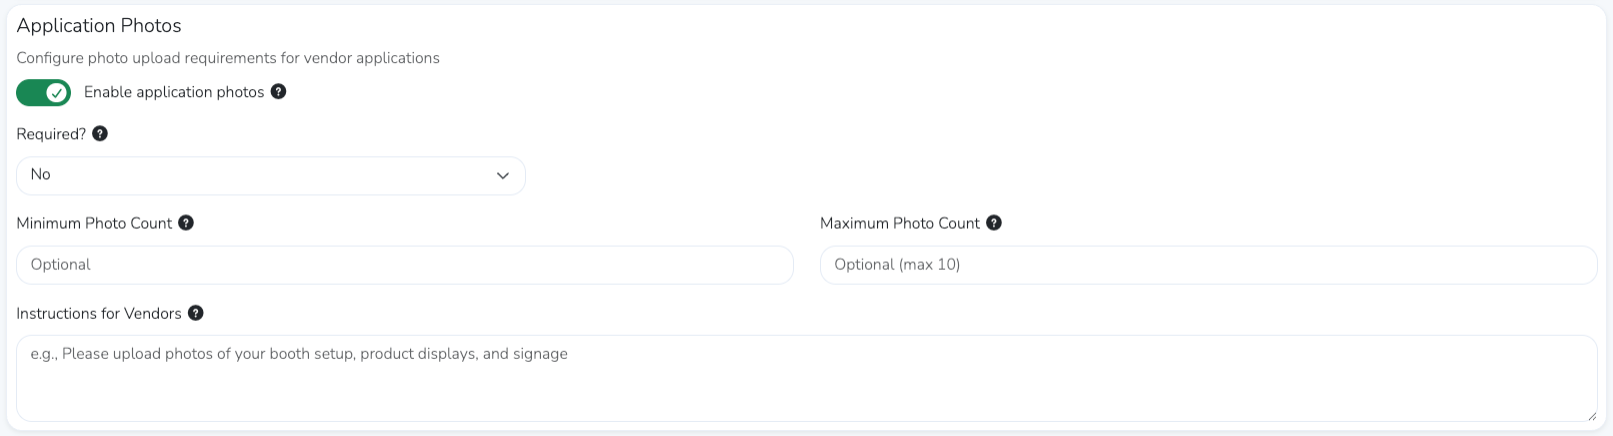
Application Photos
If you want to allow or require vendors to upload photos of their booth setup, product displays, or signage as part of the application, enable this feature and provide any necessary instructions.
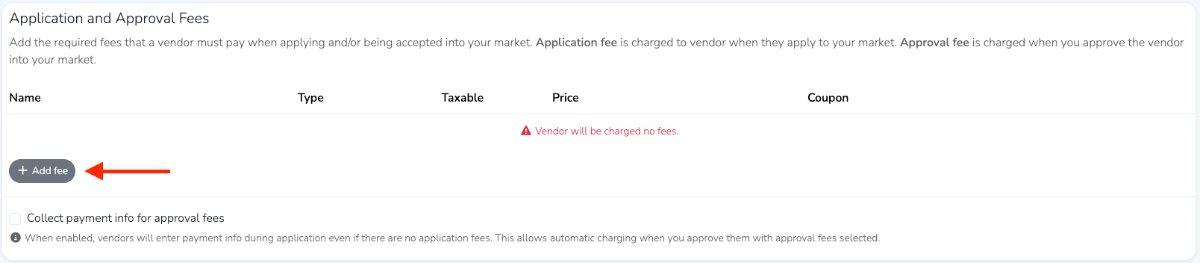
Application and Approval Fees
Applications can include two types of automatic invoicing:
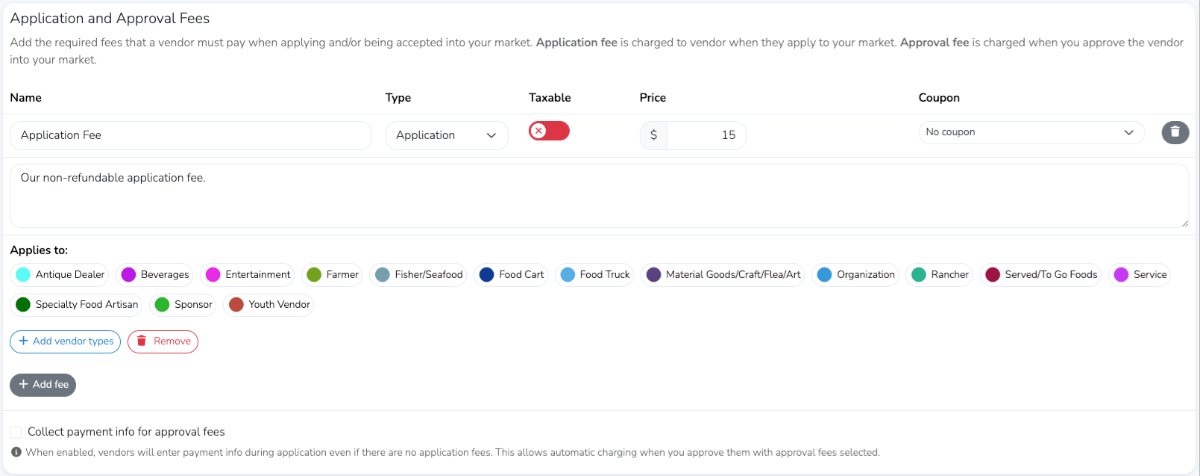
Application Fees
An Application Fee automatically creates an invoice when a vendor submits an application.
You can create as many application fees as needed. If credit card payments are enabled, vendors will be charged when they submit the application. If they pay by cash or check, the invoice will still be created so you can reconcile payment later.
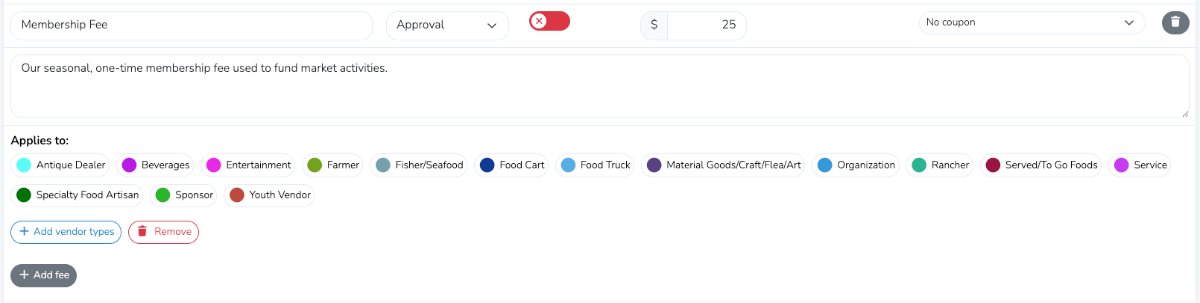
Approval Fees
An Approval Fee automatically creates an invoice when an application is approved.
You can create as many approval fees as needed. If approval fees are configured, you will be shown a list of available fees when approving an application and can choose which one to apply.
To add an application fee or approval fee, click the gray + Add Fee button.
For each fee, you can choose which vendor types should see that fee. Vendor types not selected will not see it in the application.
Note
You can configure as many application fees and approval fees as needed, or none at all.
Below is an example of an Application Fee.
Below is an example of a Membership Fee.
For more information, see the Configuring Vendor Fees Guide.
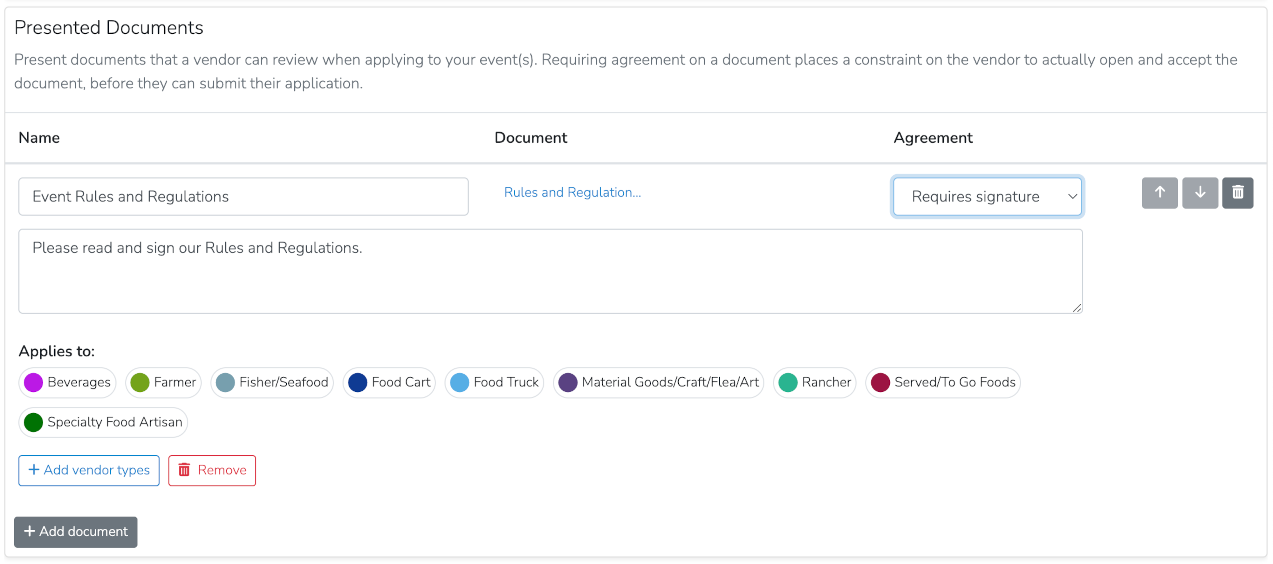
Presented Documents
Presented Documents are documents you want vendors or exhibitors to read as part of the application.
You can require agreement by selecting Yes under Required Agreement. Applications can include multiple presented documents.
To add a document, click the gray + Add Document button.

There are four types of presented documents:
- No Agreement – informational only
- Requires Agreement – must be opened and agreed to
- Optional Signature – digital signature is available, but not required
- Requires Signature – digital signature and other entered text are required
For each presented document, you can choose which vendor types should see it. Vendor types not selected will not see that document.
Below is an example of a required presented document.
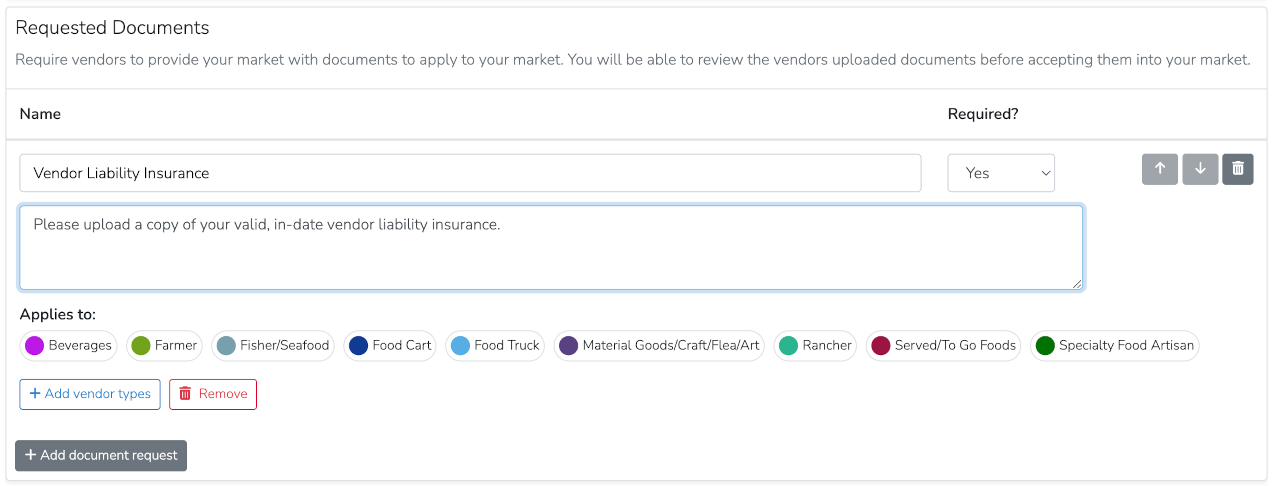
Requested Documents
Requested Documents are files the applicant must upload with their submission.
You can make a requested document required by selecting Yes under Required? You can also control which vendor or exhibitor types the requirement applies to.
To add a requested document, click the gray + Add Document Request button.

For each requested document, select which vendor types should see it. Vendor types not selected will not see that requirement.
Below is an example of a requested document.
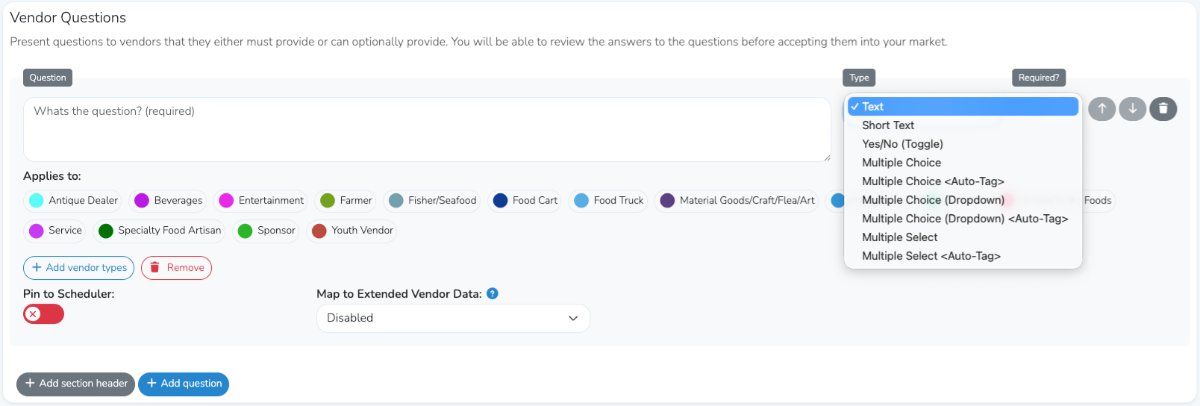
Vendor Questions
The Vendor Questions section allows you to create as many section headers and application questions as needed.

Add a Section Header
To help organize your questions, click + Add Section Header.
For each section header, select which vendor types should see it. Vendor types not selected will not see that section.
Add a Question
To add an application question, click the blue + Add Question button.
Supported question types include:
- Text – large text answer box
- Short Text – short text answer box
- Yes/No (Toggle) – yes/no toggle
- Multiple Choice – one answer can be selected
- Multiple Choice (Auto-Tag) – answer is converted to a tag that is automatically added to the vendor inside of the event they are applying to.
- Multiple Choice (Dropdown) – one answer selected from a dropdown
- Multiple Choice (Dropdown and Auto-Tag) – answer is converted to a tag that is automatically added to the vendor inside of the event they are applying to.
- Multiple Select – multiple answers can be selected
- Multiple Select (Auto-Tag) – multiple answers can be selected and answer(s) are converted to tags that are automatically added to the vendor inside of the event they are applying to.
Then:
- enter your question in the Question field
- select the Question Type
- choose whether the question is Required
- select which vendor types should see the question under Applies To
Note
-
Auto-Tag Questions Some multiple choice questions can automatically assign a vendor tag based on the selected answer. This can help with search, categorization, and workflow management.
-
Pin to Scheduler If a question relates to scheduling or booth booking, such as number of booths, booth location, or amenities, enabling Pin to Scheduler will display the question and answer in Scheduler.
-
Map to Extended Vendor Data If a question collects important information you want available outside the application, you can map it to an Extended Vendor Data key. This makes the data available in the vendor record and searchable across the platform.To learn more, see the related support video on Extended Vendor Data.
Save Your Application
When you are finished creating your application, click the blue Save Application button at the bottom of the page.

From here please refer to our support document on Linking Applications Between Events.