Use this guide to help you if you've used Farmspread/Marketspread for a previous event and are ready to start planning for your next event.
Make sure you have completed your new Application and Layout, then proceed to the first Events tab in the left side panel. If you want vendors that were previously accepted into an event, to be automatically accepted into this event- first check out this tutorial here: https://marketspread.com/learning/article/1110/events-sharing-applications/
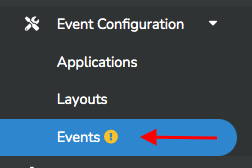
In the left side panel, click Event Configuration then Eventsto get started.

Here you'll see any current event(s), and you can simply click +Add event to start prepping for your next event.

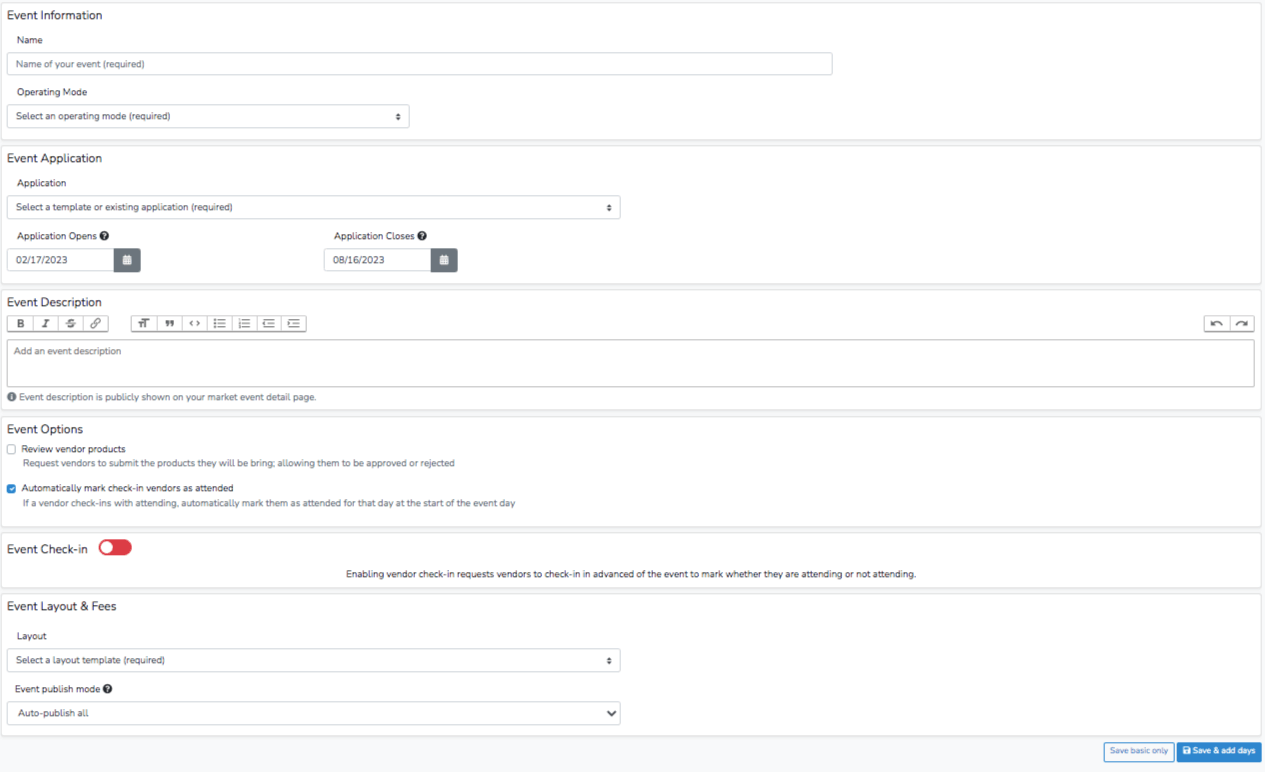
Next, fill out your settings as needed. When you're finished, click Save & add days in the bottom right corner to continue creating your event. This button will take you through controlling various additional setting for your event.

Once you have completed defining the settings for your event and they are saved, click on the Activate tab.

When you click Activate, the system will ask for your payment preference:
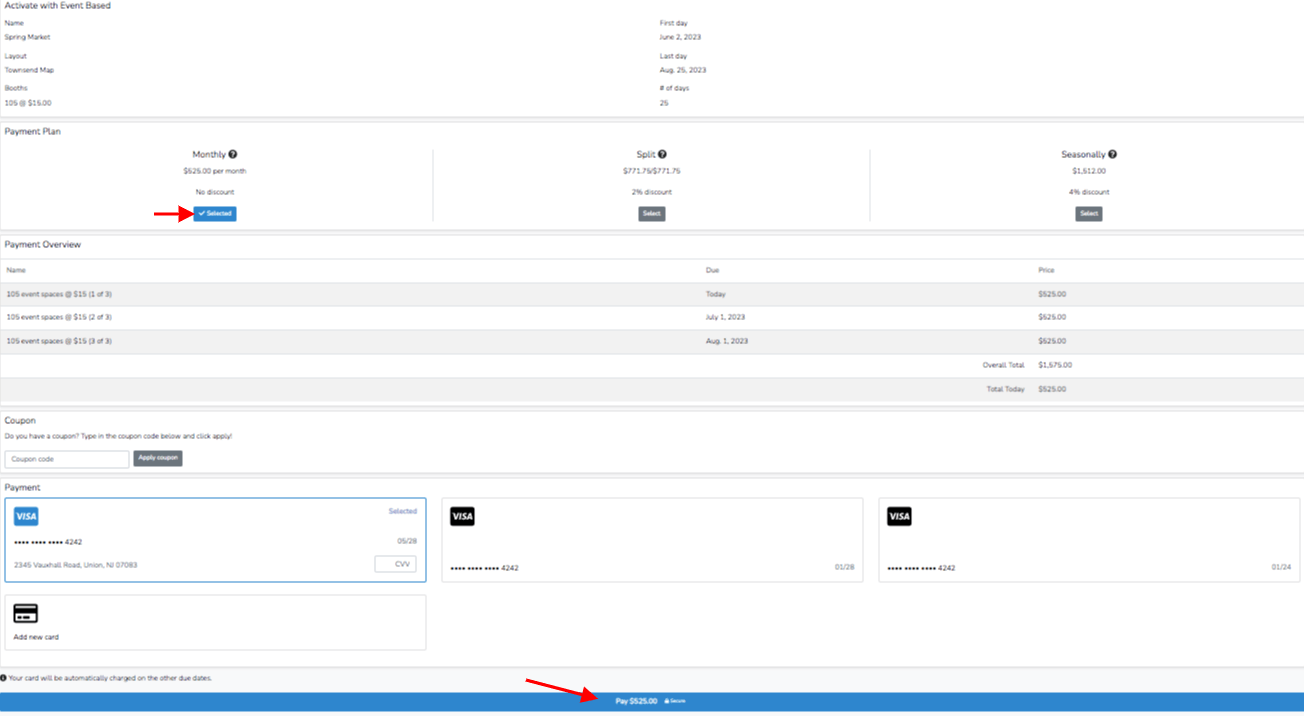
The Market Based option allows the market to purchase the next event.
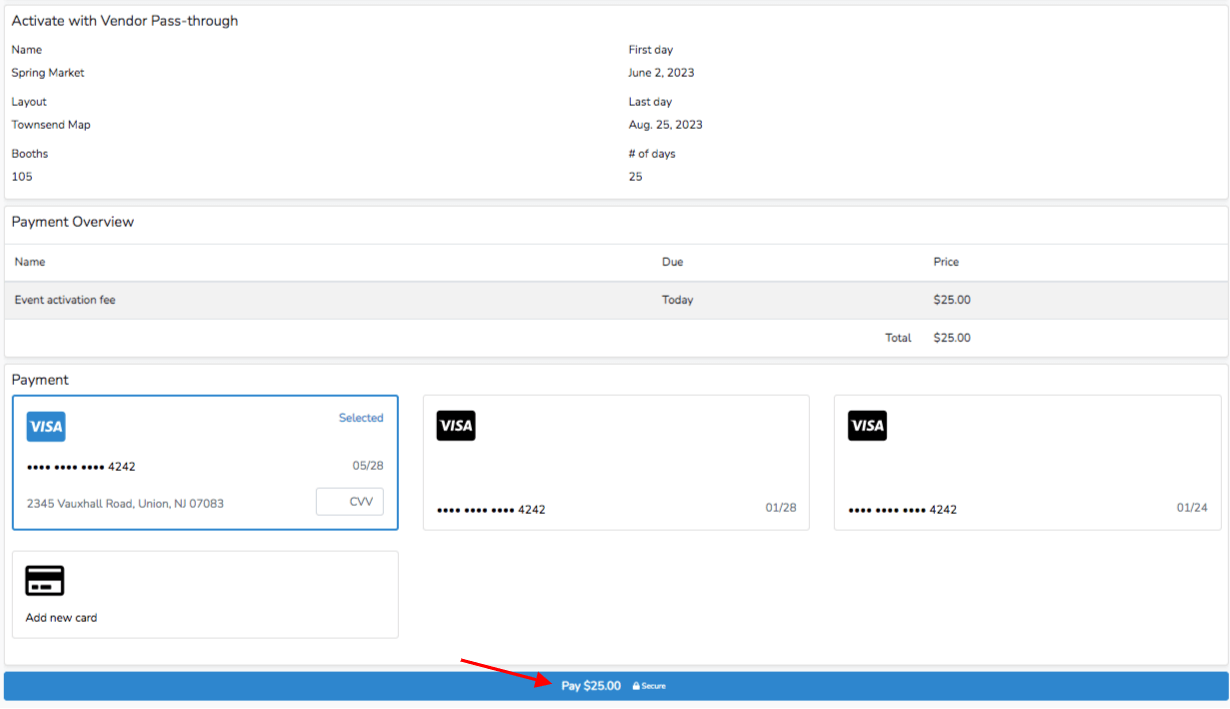
The Vendor Pass-through option allows the market to pass the cost onto the vendors and simply pay an activation fee so the market can start accepting vendors for the new event.

The Market Based option allows a market to pay a few different ways: monthly, split into two payments or pay in full for a discount. Choose one and then click the blue Pay button at the bottom to finish.

The Vendor Pass-through option reviews the activation fee. Simply click the blue Pay button at the bottom to finish.

Congratulations! You've activated your next event! Now you're ready to invite vendors/exhibitors.
Other articles you might find helpful:
How to find and invite vendors to your market


