

Messenger is Marketspread's built-in communication tool for sending bulk email and SMS text messages to your contacts. Whether you need to notify vendors about an upcoming market day, remind customers of a special event, or schedule a campaign weeks in advance, Messenger handles it all from one place.
This guide covers the essentials: navigating the interface, managing contacts, composing messages, using tags for targeted messaging, and scheduling campaigns.
Getting Started
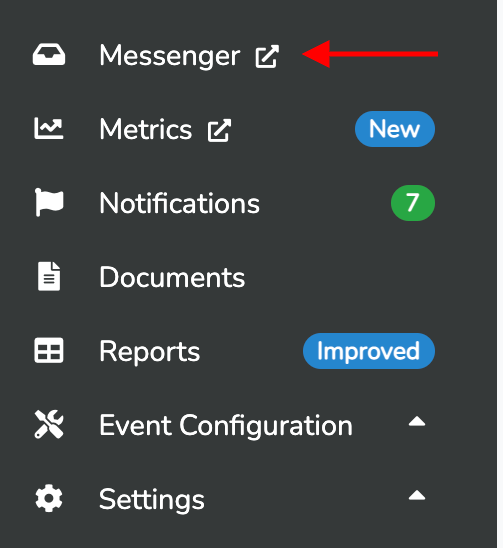
To open Messenger, click the Messenger link in the left-hand navigation menu of your dashboard. Messenger opens in a new browser tab.
To confirm which account you are using, look for the account icon in the top-right corner. The initials shown represent the currently active account.

The Messenger Interface
Email and SMS Toggle
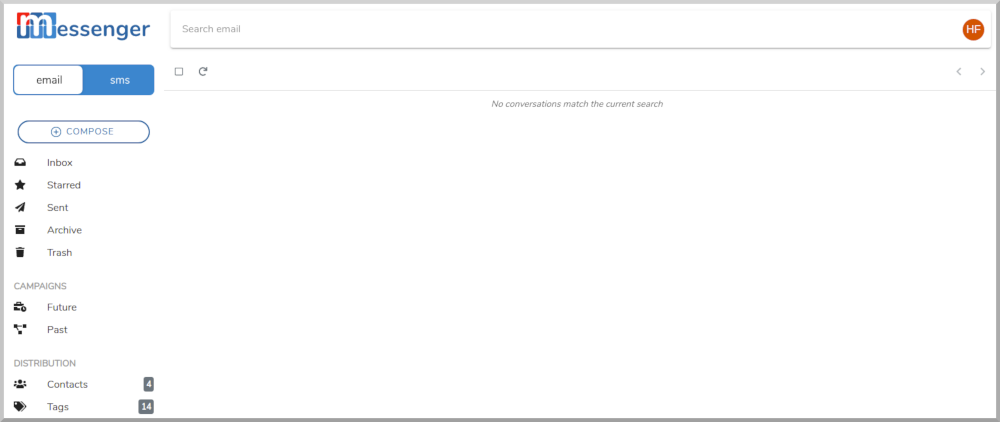
Messenger supports both Email and SMS Text messaging in a single interface. Use the message type toggle near the top of the screen to switch between them. The highlighted option indicates the currently selected type.

The selected message type controls what you see throughout Messenger. When Email is selected, your folders show only email conversations. When SMS is selected, your folders show only text message conversations.
Message Folders
Just like a standard email client, Messenger organizes your messages into folders:
- Inbox -- All incoming messages arrive here by default
- Starred -- Messages you have marked with a star for quick access
- Sent -- All messages you have sent
- Archive -- Messages you have archived to keep your inbox clean
- Trash -- Deleted messages awaiting permanent removal

Campaigns
Below the standard folders, the Campaigns section provides two views:
- Future -- Scheduled messages that have not been sent yet
- Past -- Previously sent campaign messages

Contacts
Your contacts are listed under Contacts in the Distribution section at the bottom of the left sidebar.

Managing Contacts
Creating a Contact
- Click the Contacts link in the left sidebar.

- Click the + Add Contact button.

- Fill in the contact form. You can enter multiple email addresses and phone numbers for a single contact.

- Click the Save button in the top right.

Your new contact now appears in the contacts list. The list shows the contact's available channels (Email, SMS), assigned tags, and edit/delete options.

Subscription Status
All contacts used for marketing or advertisement messages must be marked as Subscribed. Messenger enforces this to comply with messaging regulations.
- Contacts created through the embedded SMS Signup Widget or a direct signup (such as a QR code flyer) are automatically subscribed.
- Contacts created manually must have their subscription status toggled on -- but only if you have the contact's express permission to send them marketing material.
Toggle the Subscribed status in the contact form:

Subscription Compliance
Only mark a contact as subscribed if they have given you explicit permission to receive marketing messages. Transactional messages (order confirmations, event updates based on an existing relationship) can be sent to unsubscribed contacts.
Adding Tags to Contacts
Tags help you organize contacts into groups for targeted messaging. By default, new contacts (that are not vendor contacts automatically created by the system) receive a customer tag.
To add a custom tag, type the tag name in the Tags field and press Enter. You can add as many tags as you need. Custom tags are especially useful for creating refined distribution lists, such as "VIP" or "sponsors."

Automatic Vendor Tags
Vendors who sign up for your market are automatically synced to Messenger as contacts. The system creates hierarchical tags based on market name, season, vendor type, category, and application status -- so you can target messages precisely without manual setup.
Sending an Email
- Make sure Email is selected in the message type toggle.
- Click the (+) Compose button in the top left.

- The compose window opens:

Advertisement vs. Transactional
Before composing your message, select the correct message type using the Advertisement / Transactional toggle.
Transactional messages are sent based on an existing business relationship or a reasonable expectation that the recipient will receive the message. Examples include event reminders for registered vendors or order confirmations. Messenger allows sending transactional messages to unsubscribed contacts -- use this option carefully and only for genuinely transactional content.
Advertisement messages promote products, services, or events and are generally unsolicited. These can only be sent to subscribed contacts. Messenger will block advertisement messages to unsubscribed contacts.
Adding Recipients
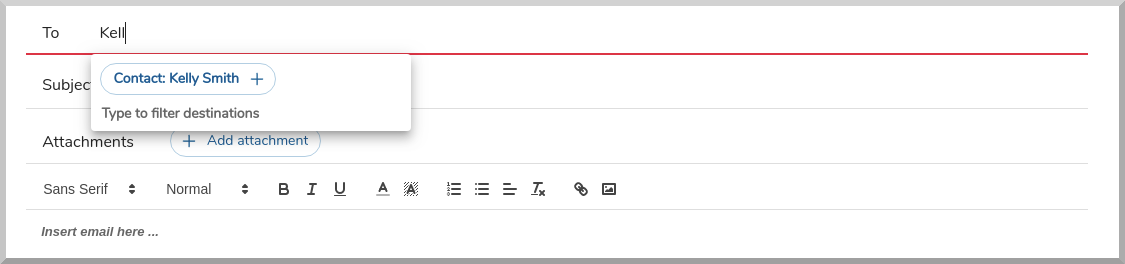
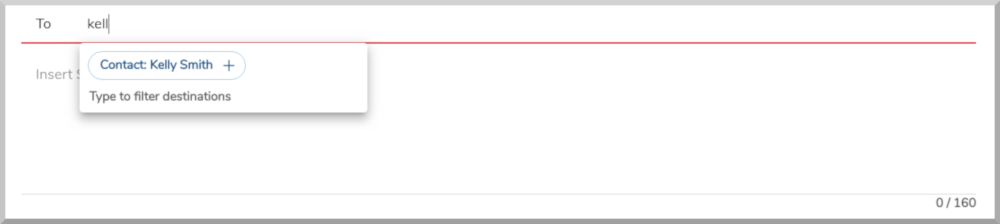
In the To field, start typing the name of a contact or tag. Messenger provides autocomplete suggestions. Click a suggestion to add it.
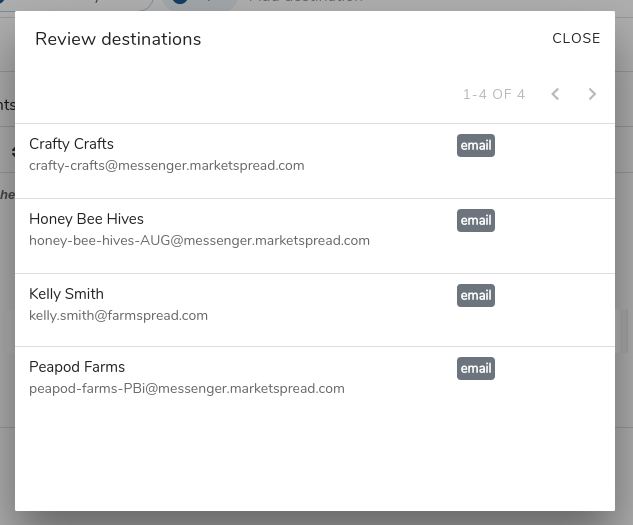
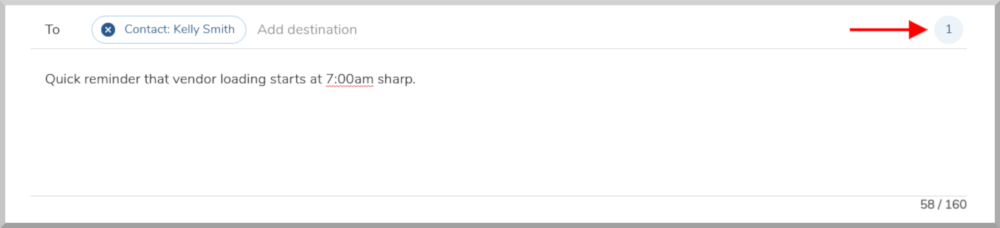
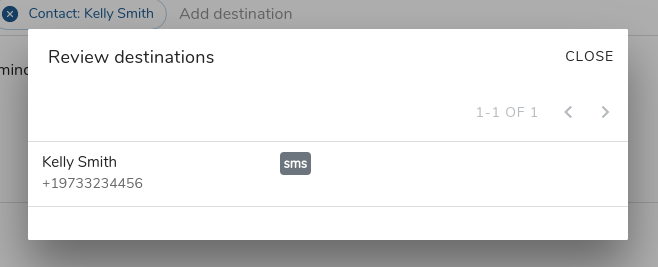
After adding a recipient, a number appears to the right showing the total count of individual recipients. A single tag can represent many contacts, so this indicator helps you understand the actual reach of your message.

Click the count indicator to see the full list of recipients:
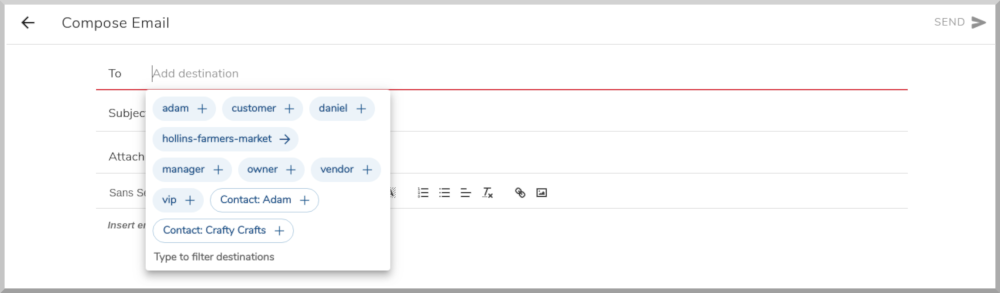
Using Tags as Destinations
Tags let you quickly target large groups. When you click in the To field, you see a list of available tags. Tags ending with + are final destinations you can select immediately. Tags ending with -> have additional levels you can drill into.
Example: Targeting Vendors by Status
- Select your market name (e.g., hollins-farmers-market ->).

- Choose a season (e.g., summer-season-2020 ->). You can also select all + to include every contact in the market.

- Drill down further by by-type, by-category, or by-status.

- Select a final tag such as applied + to complete your selection.

Since tag paths can be long, they are shortened by default in the compose field. Hover over a tag to see its full path.
Composing and Sending
Write your subject line and message body, then click the Send icon (blue arrow) at the top or bottom right.

Check the Sent folder to confirm your message was delivered.

Here is how the email appears to the recipient:

Sending an SMS Text Message
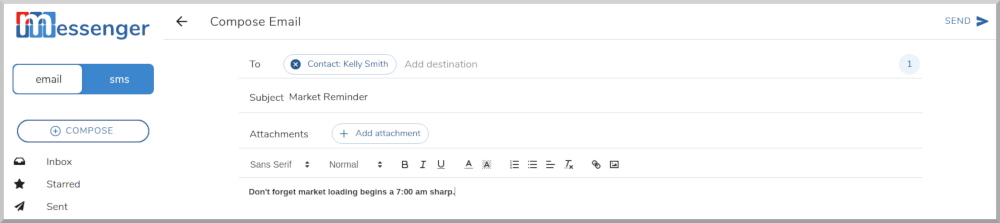
- Select SMS in the message type toggle.
- Click the (+) Compose button.

- Add recipients by typing a contact name or tag in the To field.
- Click the recipient count indicator to verify your audience.
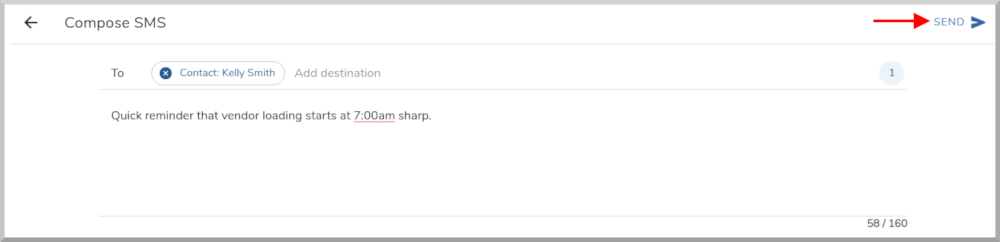
- Write your message. The character counter at the bottom right tracks usage against the 160-character SMS limit.

- Click the Send icon at the top right.

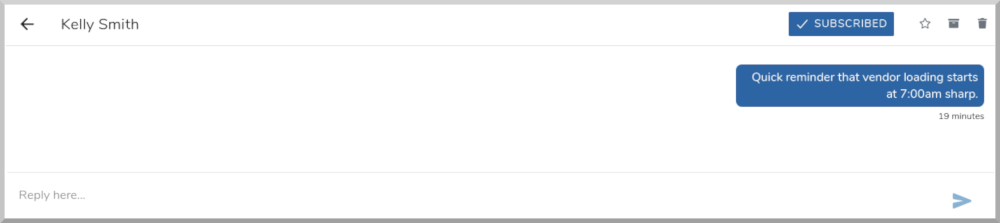
Check the Sent folder to view your message. Clicking on it opens an interactive SMS console that mirrors a mobile messaging experience.
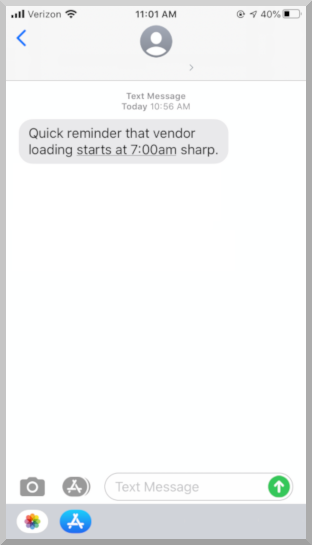
Here is the text as it appears on the recipient's phone:
Scheduling a Campaign
Campaigns let you schedule email and SMS messages to be sent at a specific future date and time.

Creating a Campaign
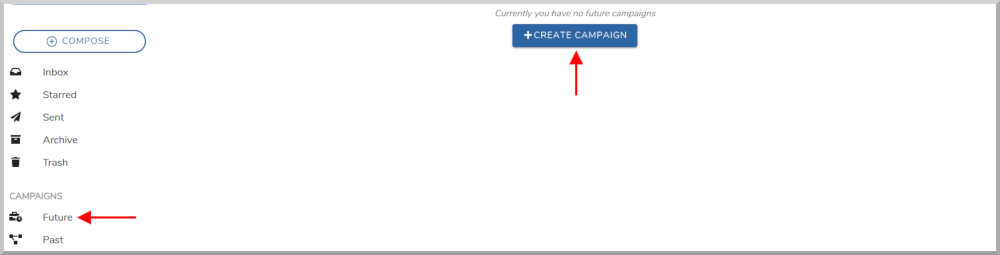
- Click Future under Campaigns in the left sidebar.
- Click the + Create Campaign button.
A campaign has five sections: Name, Destinations, Email, SMS, and Schedule.
- Name your campaign for easy tracking (e.g., "July 4th Reminder").

- Set your Destinations by adding contacts and tags.


- Create your message content. A campaign can include an Email, an SMS, or both.


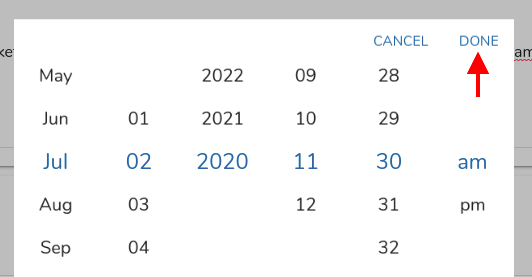
- Set the schedule by clicking + Add Schedule and choosing the date and time.


- Click the Save button in the top right.

Monitoring Campaigns
View upcoming scheduled campaigns under Future and previously sent campaigns under Past.


Composing from Contacts or Tags
In addition to the compose window, you can start a message directly from the Contacts or Tags list. Select one or more contacts or tags and use the compose action to pre-populate recipients.


Quick Messaging from the Vendor List
If you manage a market, you can send messages directly from the Vendors list in your market dashboard. Select one or more vendors, then use the Email Vendors or SMS Vendors action from the dropdown menu. This opens Messenger with those vendors pre-populated as recipients, saving you the step of manually searching for contacts.
SMS Signup Widget and Flyers
Messenger includes tools to help your customers subscribe to text notifications:
- SMS Signup Widget -- An embeddable pop-up widget you can add to your website. Visitors text a short code to your assigned SMS number and are automatically subscribed. The widget embed code is available on your Messenger plan settings page.
- Printable Flyer -- A branded, print-ready flyer with a QR code and instructions for texting your SMS number. Customers scan the QR code or text "INFO" to your number to subscribe. Click the Flyer button on the Messenger settings page to generate and print it.
Messenger Plans
Messenger offers several plan tiers to fit your needs. All plans include 1,000 free emails per month.
| Plan | Emails | SMS Messages | Monthly Cost |
|---|---|---|---|
| Free | 1,000 | 0 | $0 |
| Starter | 3,000 | 1,500 | $30 |
| Plus | 6,000 | 4,000 | $60 |
| Premium | 10,000 | 7,000 | $105 |
SMS Requires a Paid Plan
SMS messaging is not available on the Free plan. Upgrade to Starter or above to get an assigned SMS number and send text messages.
To view or change your plan, go to your dashboard Settings and select Messenger. From there you can see your current usage, modify your plan, and update your payment method.
Automatic Contact Sync
One of Messenger's most powerful features is automatic contact synchronization. You do not need to manually add your vendors, association members, or customers -- the system keeps Messenger in sync with your account data.
- Vendors who sign up for your market are automatically added as Messenger contacts with tags for their market, season, vendor type, category, and application status.
- Association members are synced with tags for their member type and custom tags.
- Store customers and venue customers are synced as contacts when they place orders or make bookings.
- Managers on your account are synced as contacts with a "manager" tag.
These auto-synced contacts and their tags update whenever the underlying data changes, so your distribution lists stay current without any extra work.
Tips for Effective Messaging
- Use tags to segment your audience. Instead of messaging everyone, target specific groups like vendors in a particular season, vendors with a specific application status, or customers from a certain source.
- Schedule campaigns ahead of time. Use the campaign feature to prepare weekly market reminders, seasonal announcements, or holiday promotions in advance.
- Respect subscription rules. Only send advertisement messages to subscribed contacts. Use transactional messages for order-related or event-related communications where there is an existing relationship.
- Check recipient counts before sending. Click the count indicator in the To field to verify exactly who will receive your message.
- Print flyers for in-person events. Use the built-in flyer generator to create QR-code-enabled handouts that help customers subscribe to your SMS notifications on the spot.