

Enabling Event Sales Reporting
Step 1: Open the Event
From your market dashboard, click: Event Configuration → Events in the left-hand navigation menu. Next, locate the event you want to enable Sales Reporting for and click the overview arrow on the far right of the event listing.

Step 2: Enable Sales Reporting
Select the Sales Reporting tab. Then click the blue Enable sales reporting button.

Step 3: Review the Sales Reporting Settings
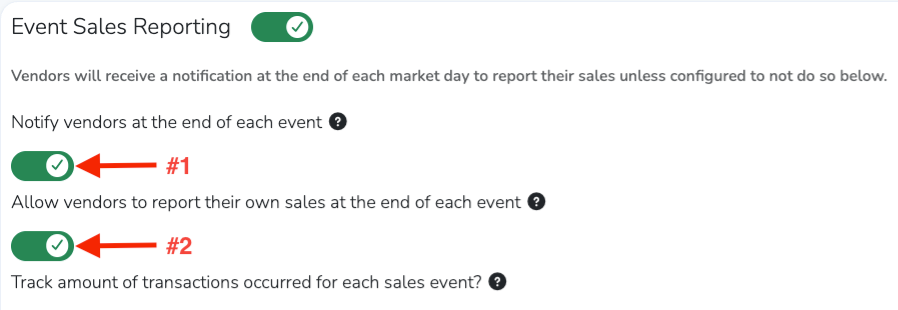
After clicking Enable sales reporting, you will be redirected to the Sales Reporting page. The Event Sales Reporting toggle will automatically turned on (the heading will appear green).
The following settings will also be enabled automatically:
- Notify vendors at the end of each event - keep this enabled if you want Marketspread to send vendors an email after each market day with a link to report their sales.
- Allow vendors to report their own sales at the end of each event - keep this enabled if you want vendors to submit their sales reports directly through the platform after each event.
Configuring Event Sales Reporting
Once Sales Reporting has been enabled, you can configure how sales are tracked and how vendors are charged.
Track the Number of Transactions
If you would like Marketspread to track the number of transactions that occur during each event, turn on the Track number of transactions toggle.

Choose How Vendors Are Charged
Next, select how you would like vendors to be charged based on their reported sales.
Option 1: Charge a Percentage of Sales
If you want vendors to pay a percentage of their sales to the market, enable the Charge a percentage of sales toggle.
Once this option is enabled, additional fields will appear allowing you to configure:
- Sales Percentage - the percentage of sales vendors will be charged
- Minimum Fee – the minimum amount a vendor will be charged
- Maximum Fee – the maximum amount a vendor will be charged

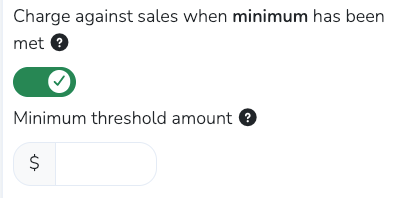
You may also set a minimum sales threshold before the percentage charge applies. Once a vendor exceeds this threshold, the full sales amount will be used to calculate the invoice.
Option 2: Charge Using a Sliding Scale
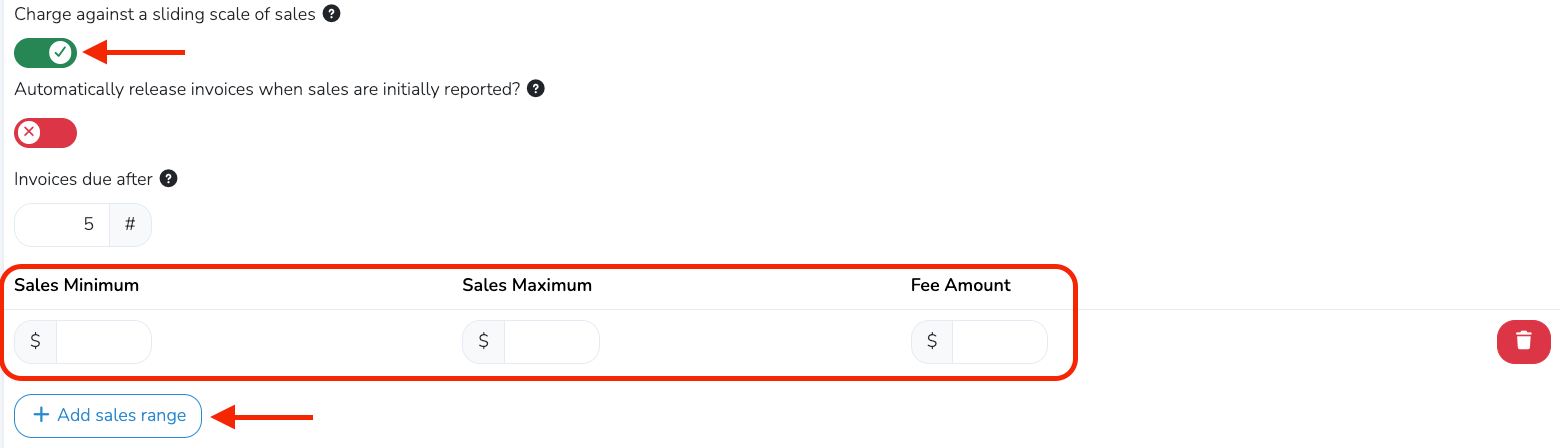
If you would prefer vendors to pay a flat fee based on a range of sales amounts,, enable the Charge against a sliding scale of sales toggle.
After enabling this option, click the + Add sales range button and define your sales ranges by entering:
- Sales Minimum
- Sales Maximum
- Fee Amount
Each range represents the fee vendors will be charged if their reported sales fall within that range.
To create additional ranges, click + Add sales range again and repeat the process.
When you enable either the Charge a percentage of sales or Charge against a sliding scale of sales toggle, additional settings will appear.
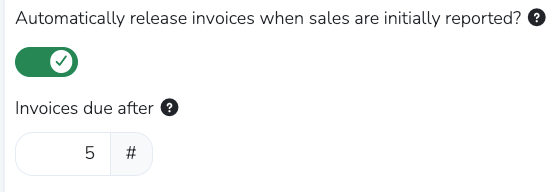
If you would like invoices to be created automatically after vendors report their sales, turn on the Automatically release invoices when sales are initially reported? toggle.
Note
Leave this disabled if you want to review or modify invoices before they are released and vendors are notified.
You can also set when those invoices will be due using the Invoices due after field. Enter the number of days after the event that invoices should be due.
Lastly, you can select specific vendors or vendor types that will not be required to report sales by using the dropdown menus for those fields.

Selecting Which Currencies to Include
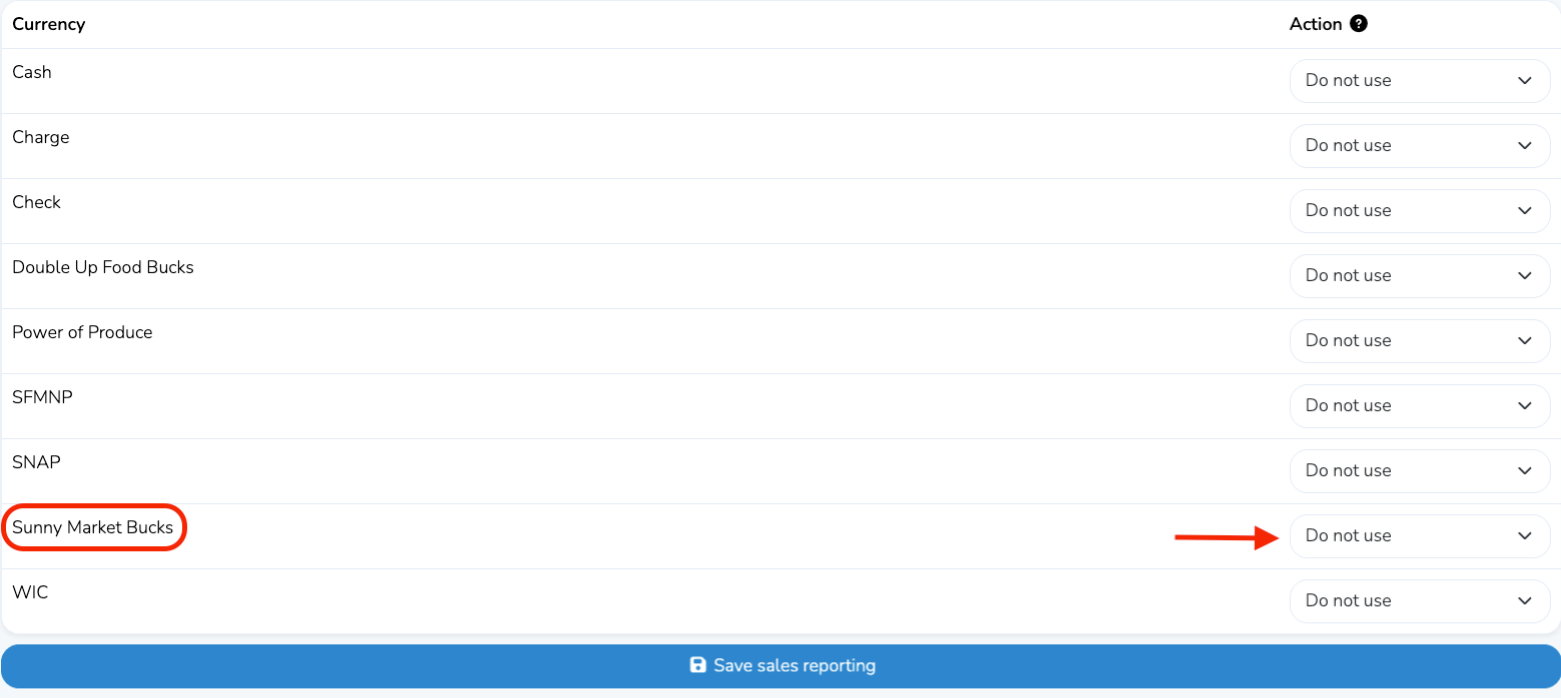
After you have finished setting up your market’s Sales Reporting, scroll down to select which currencies you want included.
For each currency, you can choose one of the following options:
- Do not use - This currency will not be shown to vendors when they are asked to report their sales.
- Chargeable - This currency will be included when calculating vendor fees if you charge a percentage of sales.
- Reimbursable - Used for items such as Market Bucks, where the market reimburses the vendor for the reported amount.
- Chargeable + Reimbursable - This currency is included when calculating vendor fees based on a percentage of sales, and the reported amount is also reimbursed by the market.
- Report Only - This currency is recorded for reporting purposes only. No fees or reimbursements are calculated.
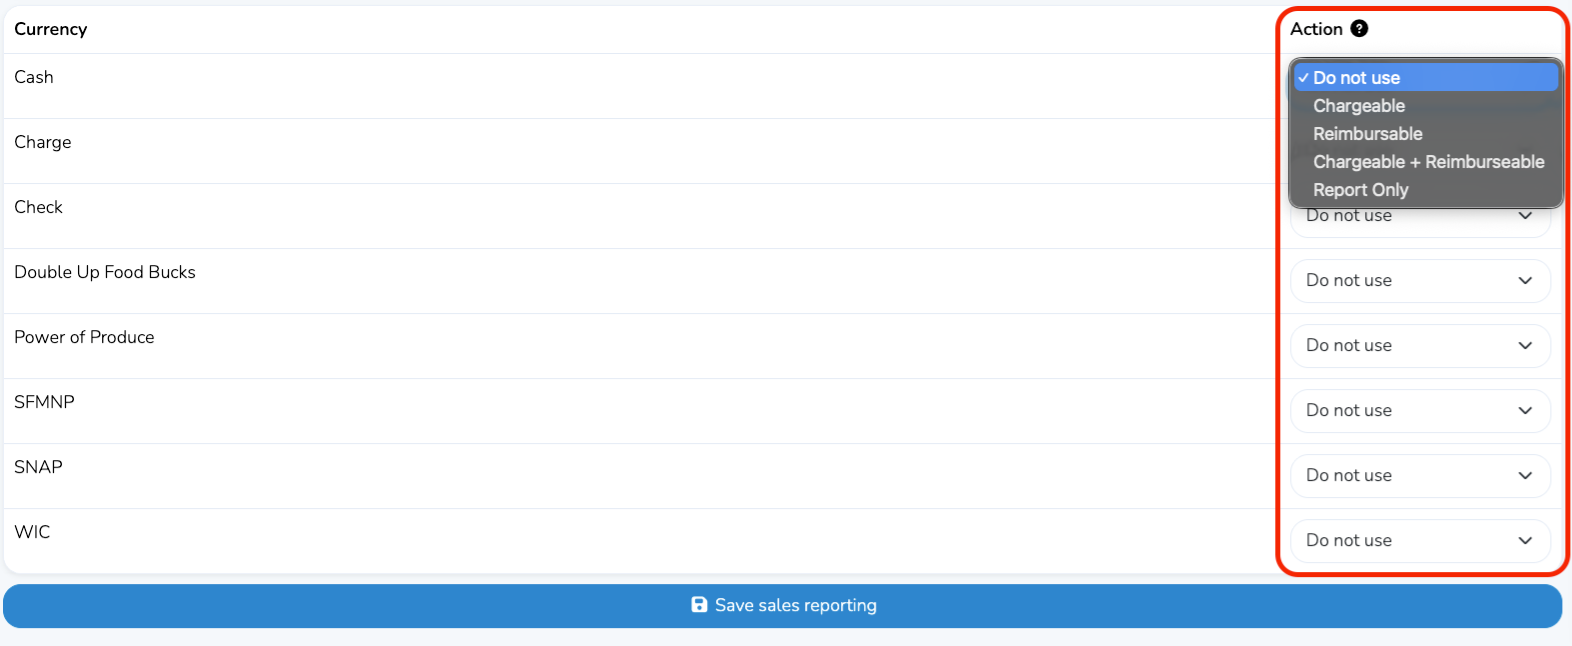
Click the Save sales reporting button at the bottom of the page when you are finished.
Editing or Adding Currencies
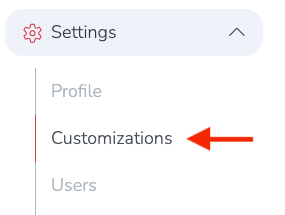
To edit or add currencies specific to your market or region, go to Settings → Customizations in the left-hand navigation menu.
Scroll to the Currencies section of the Customizations page.
Edit a currency type
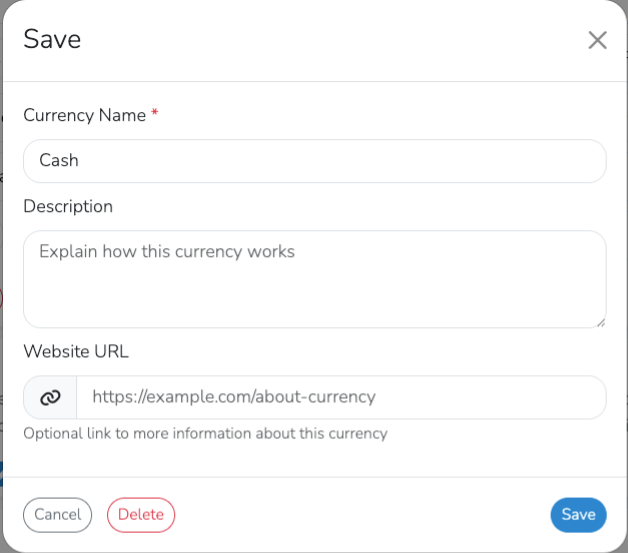
To edit an existing currency, click the currency type in the field.

Here you can rename the currency, add a description, or link to an external URL.
Add a new currency
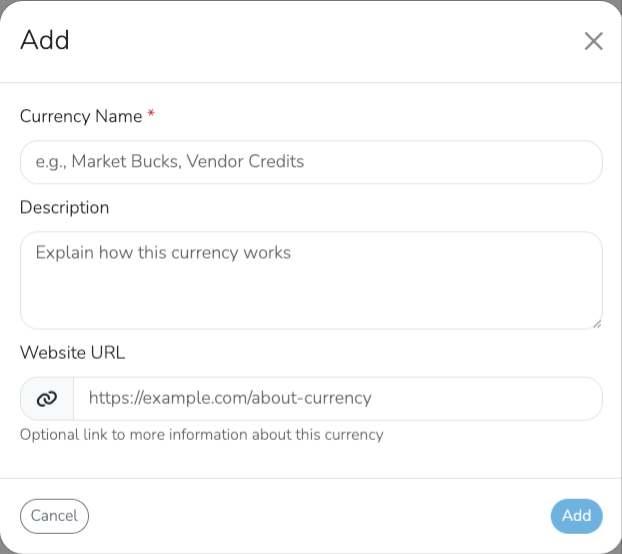
To add a new currency, click on the + Add currency button at the bottom left of the Currencies section.

Then enter a name for the currency and optionally add a description or external URL.
In this example, we created a currency called Sunny Market Bucks. To edit or remove this custom currency, click the currency type in the field.

After adding a new currency, it will appear in the Event Sales Reporting section of your event configuration.
To access this section, go to Event Configuration → Events in the left-hand navigation menu of your dashboard. Then click the overview arrow to the right of the event you would like to edit.
Next, select the Sales Reporting tab. Then click the pencil icon if you would like to include the added currency when calculating vendor fees.

Scroll down and choose how the currency should be used if you want it included when calculating vendor fees based on a percentage of sales or a sliding scale of sales. Then click Save sales reporting after making your selection.
Reporting Vendor Sales with Currencies
At the end of each event, vendors automatically receive an email reminder with a link to enter their daily sales in Marketspread.
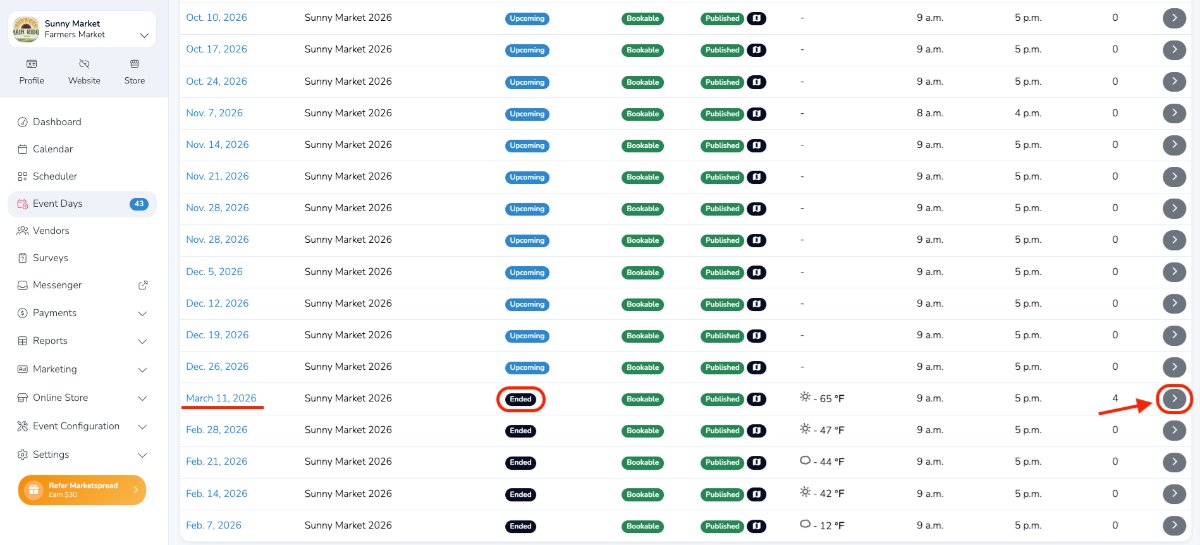
If you need to enter sales on a vendor’s behalf, go to Event Days from the left-hand navigation menu. Then scroll to the event date you need to report sales for. The event day status must be "Ended". Click the overview arrow to open the event day.
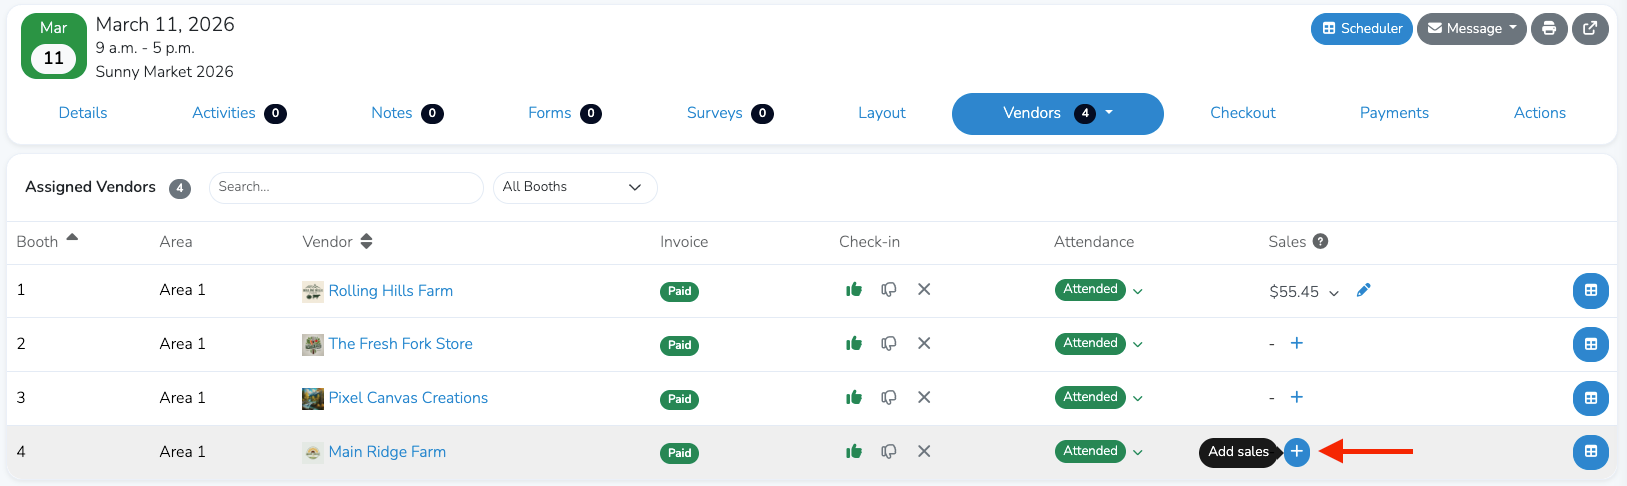
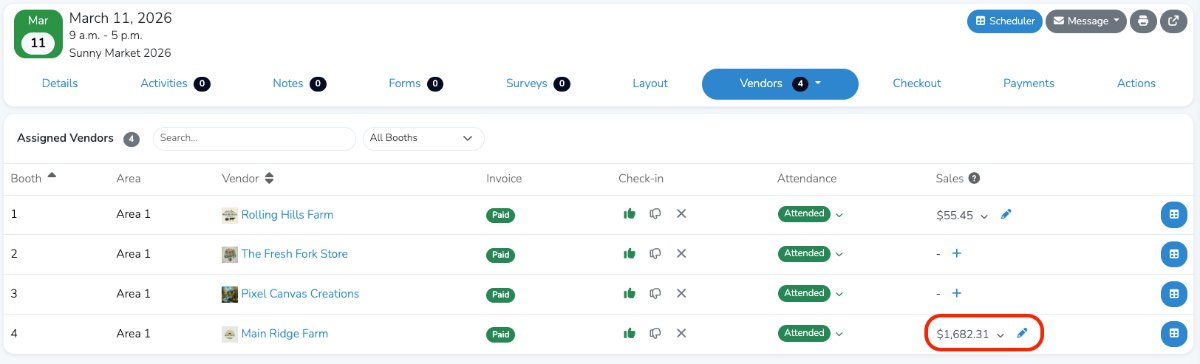
On the event day details page, select the Vendors tab from the top menu.
Then find the vendor you want to report sales for. In this example, we will report sales for Main Ridge Farm.
Note
The vendor must be marked as Attended in order to track sales. If they are not marked as attended, use the status dropdown in the Attendance field to update their status.
When you are ready to report sales, click the blue plus icon in the Sales section for that vendor.
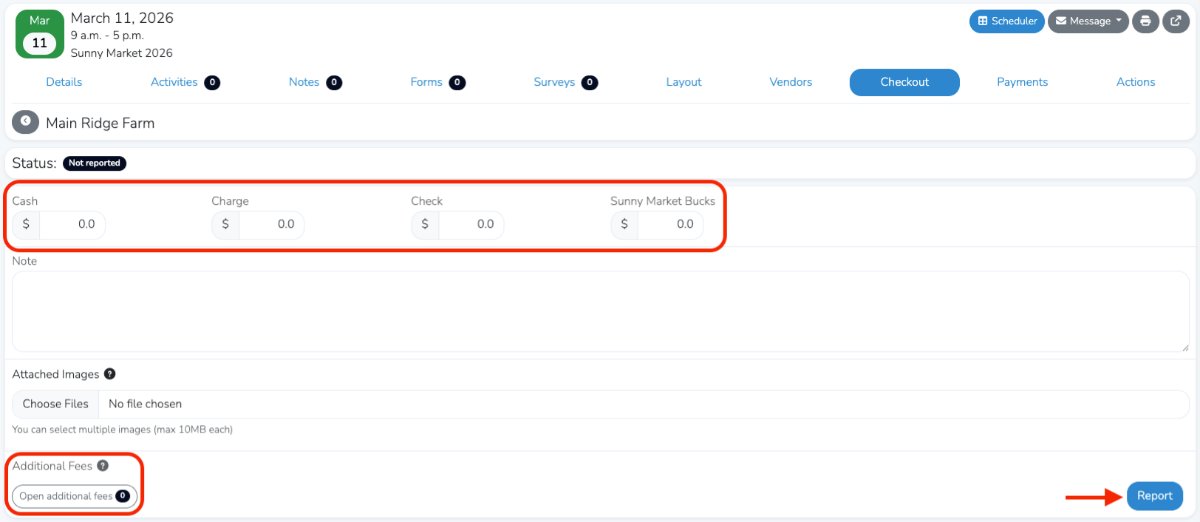
On the Checkout page that appears, enter the vendor’s sales information. Be sure to enter 0 in any fields that do not apply. You can also add a note for reference and apply any additional fees to the invoice by selecting from the available options.
When you are finished, click the blue Report button in the bottom-right corner.
After the sales have been reported, return to the Vendors tab to confirm that sales were recorded for the vendor. If needed, you can update the reported sales by clicking the pencil icon next to the sales figure.
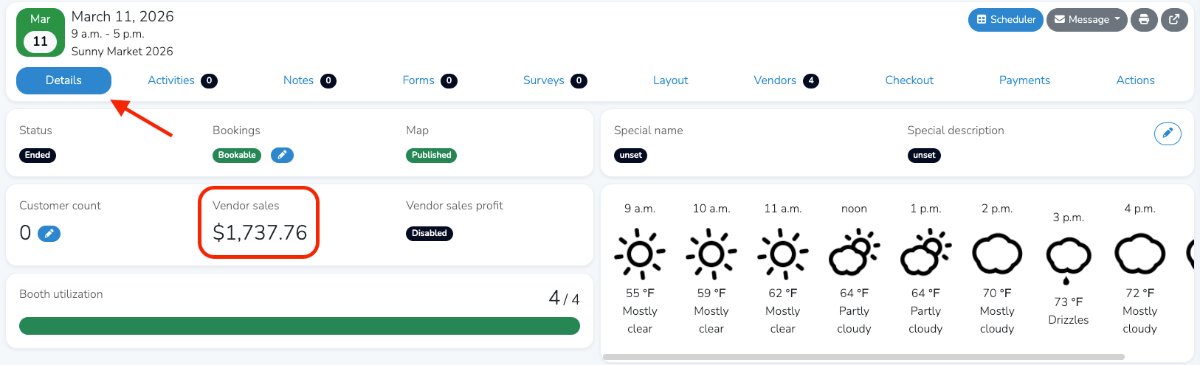
To view the vendor sales totals for that day, click the Details tab from the top menu.
To learn how to create advanced sales currency reports that can be exported to a spreadsheet, see the linked support article.