

First, log in to your user account at marketspread.com.
Market Creation Options
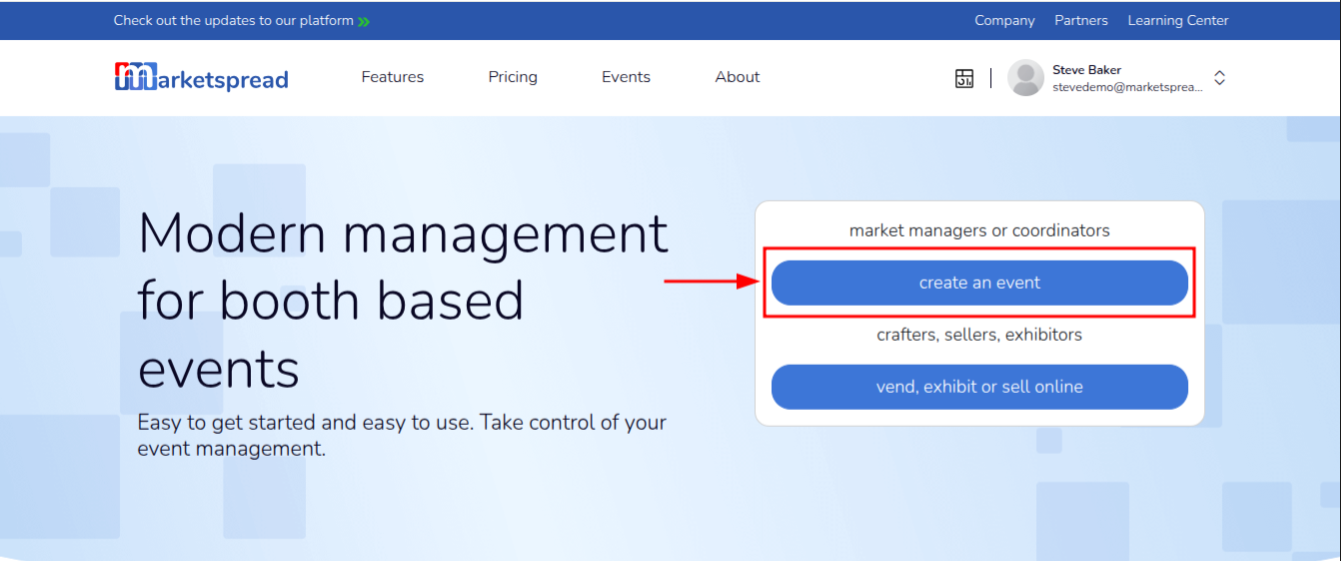
There are two ways to create a market account after logging in to your user account.
If this is your first time creating a market account, click the blue create an event button shown below.
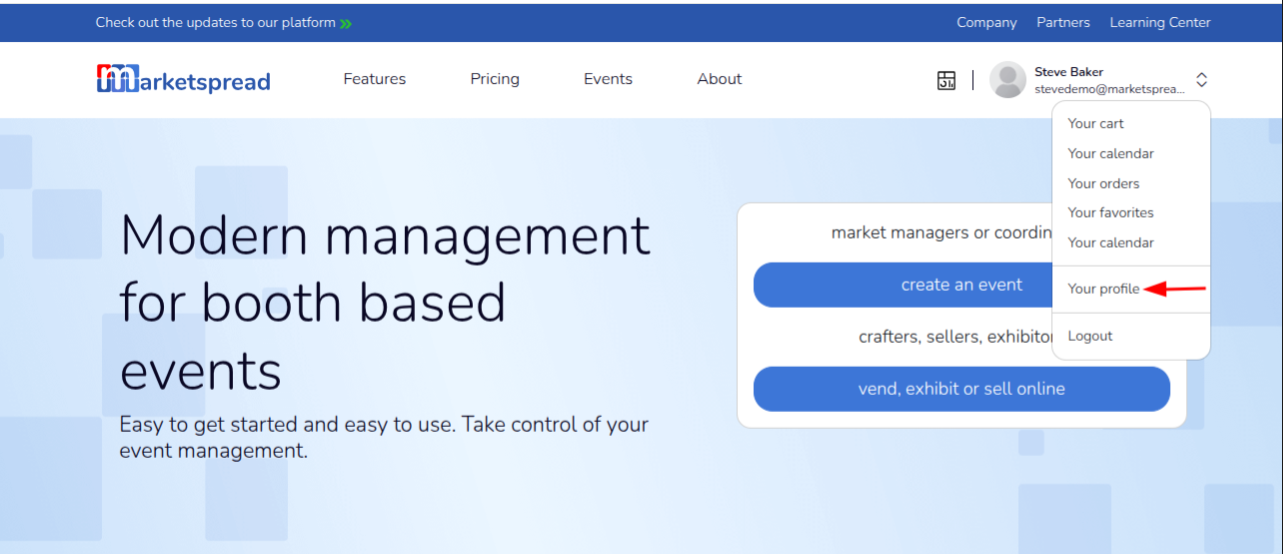
If you have already created an organization or currently manage a market account, you can create another market account by clicking your user name in the top-right corner of the screen and selecting Your Profile, as shown below.
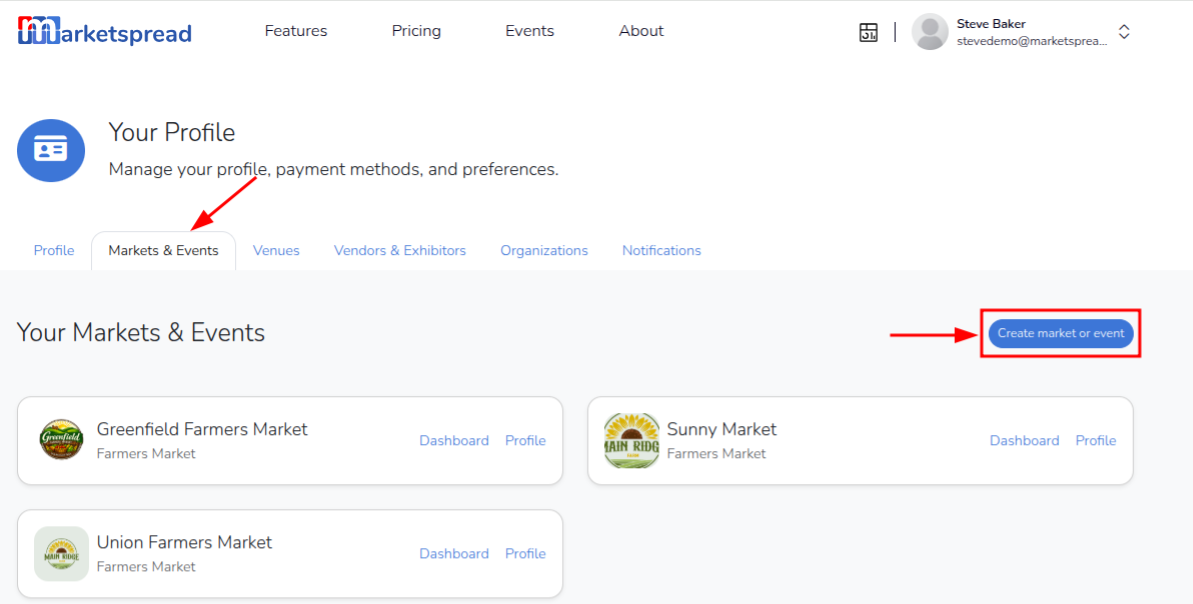
This will take you to your user profile page. From there, click the Markets & Events tab, then click the blue Create market or event button on the right side of the screen.
Create Your Market
After completing either of the steps above, you will be taken to the Create your market or event page, where you can enter information about your market.
Note
Throughout this page, some fields are marked Required and others are marked Optional. If you leave optional fields blank, you can always add that information later by going to: Settings → Profile in your market dashboard.
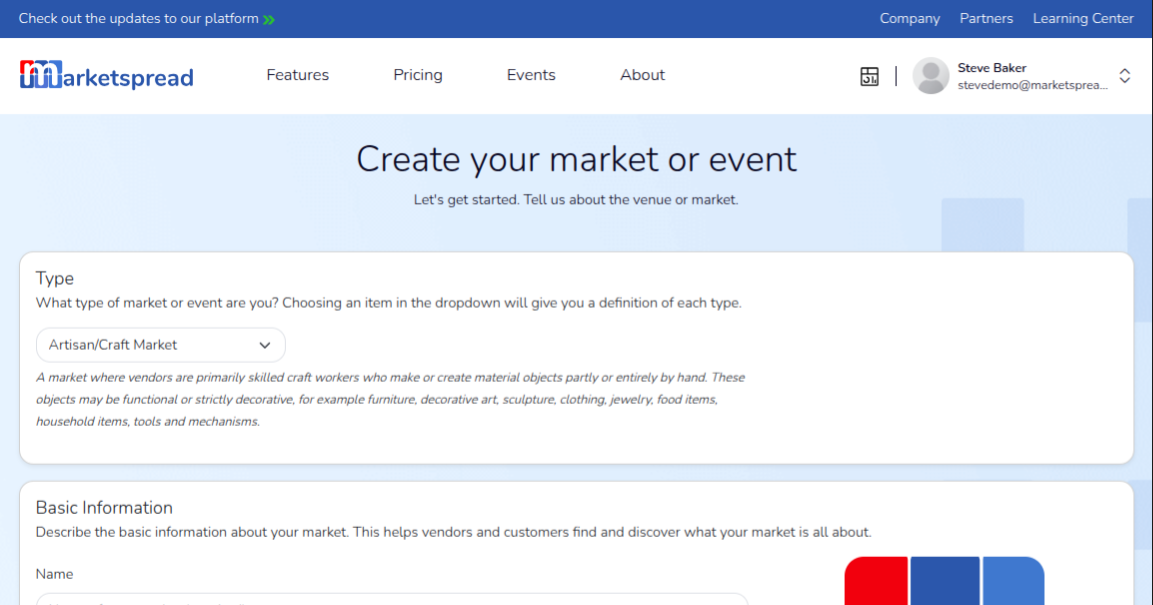
Market Type
Under the Type section, click the dropdown and select the type of market you are creating.
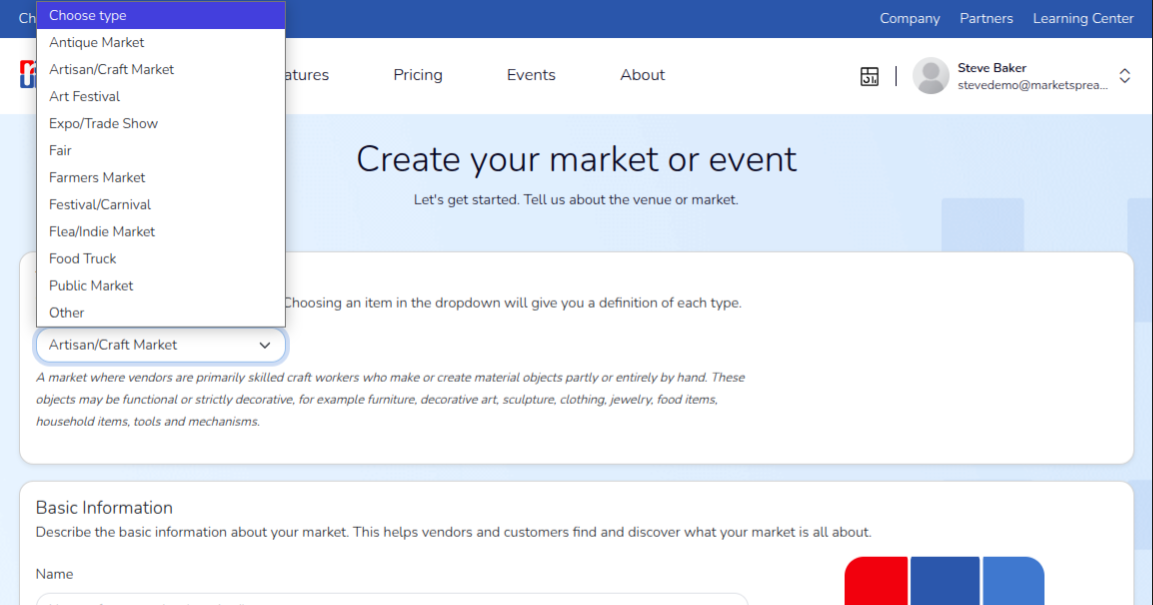
A description of the selected market type will appear below the dropdown.
Once you have selected a market type, continue to the Basic Information section.
Basic Information
In this section, enter basic information about your market, including:
- market name
- website URL
- social media accounts
- market description
- accessibility information
You can also upload your market logo here. If needed, you can add a logo later by going to: Settings → Profile in your market dashboard.
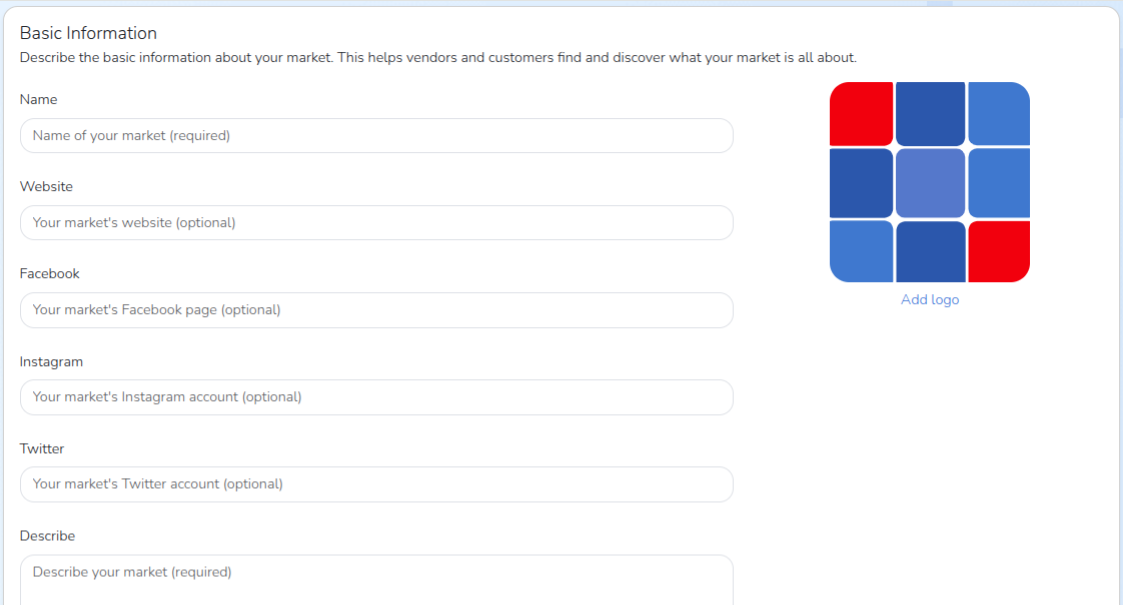

After completing the required fields, continue to the next section.
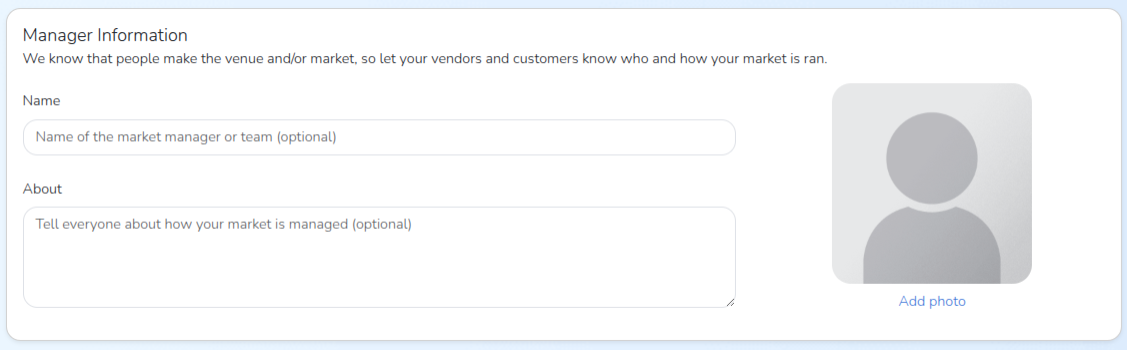
Manager Information
This section is optional and can also be completed later.
Here you can provide information about your market manager, including:
- name
- photo
- a short description
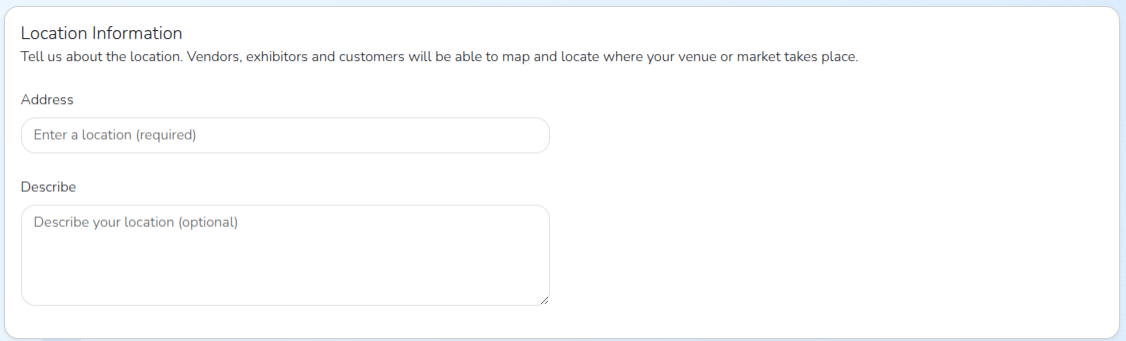
Location Information
In this section, enter the address of your market.
You can also add location details, such as nearby landmarks, parking instructions, or other helpful directions.
Contact Information
In this section, provide contact information that vendors and customers can use to reach you.
Address information is required. After entering your address, the field may appear outlined in red, as shown below.
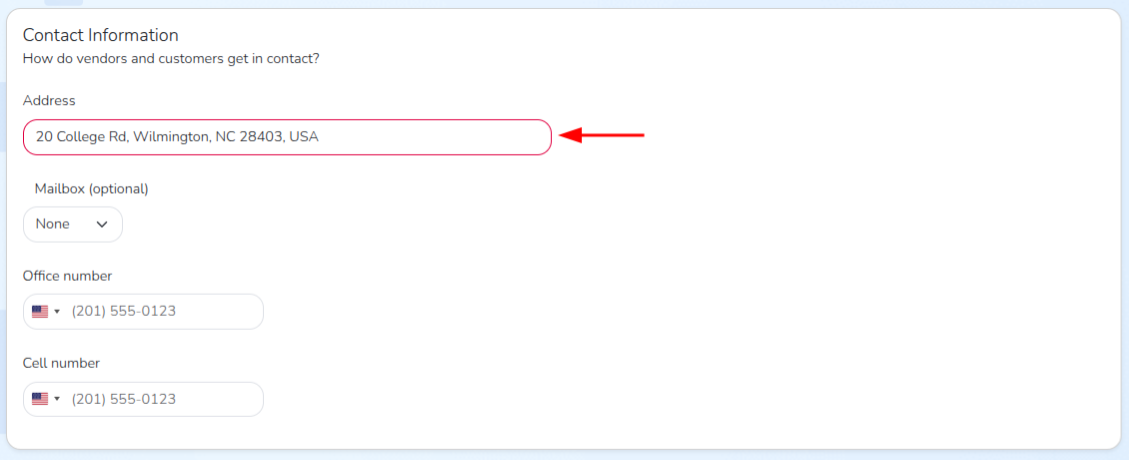
If this happens, click inside the field and select the correct address from the dropdown list of suggested matches.
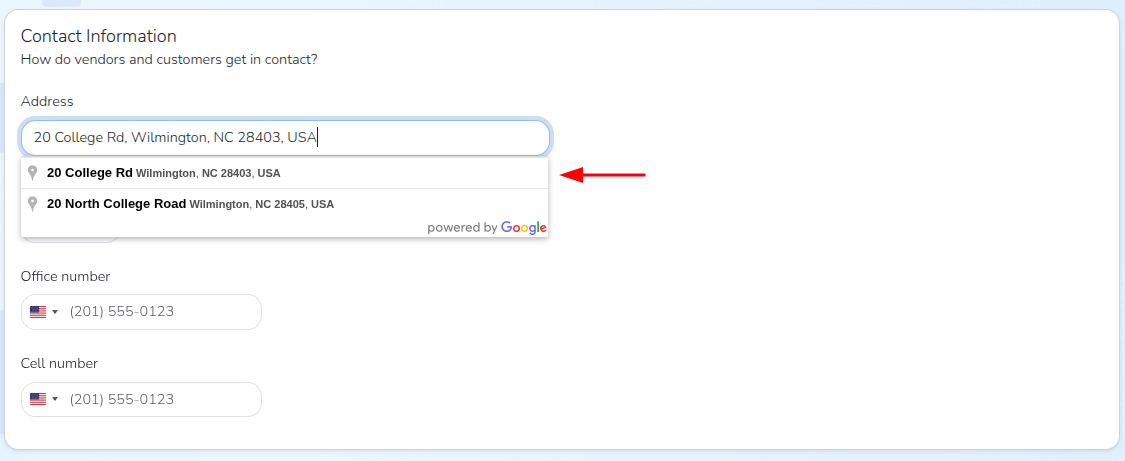
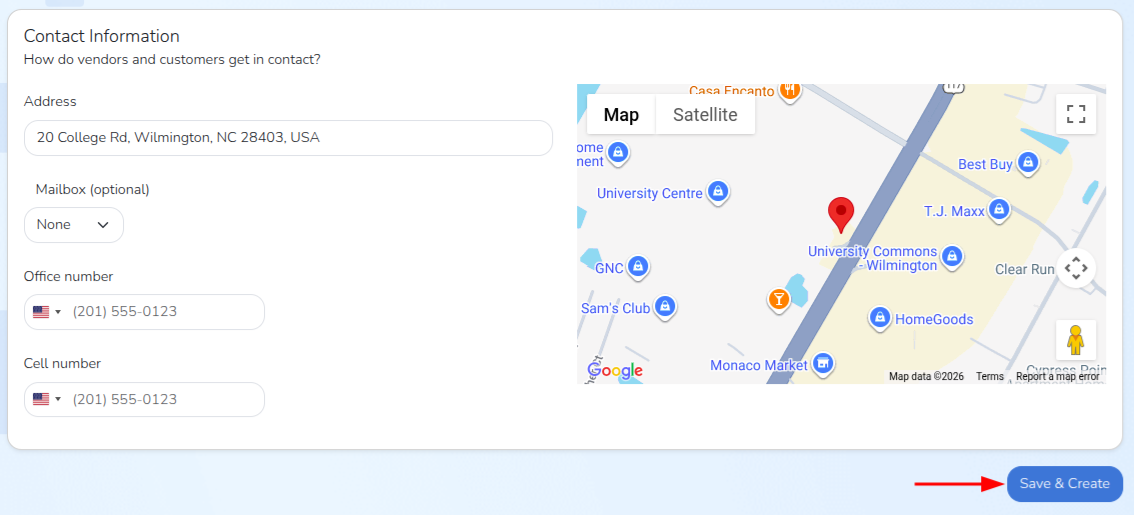
Once you select a valid address, the red outline will disappear and a map of your location will appear to the right of the field.
Save and Create
When you are ready, click the blue Save & Create button in the bottom-right corner of the screen.
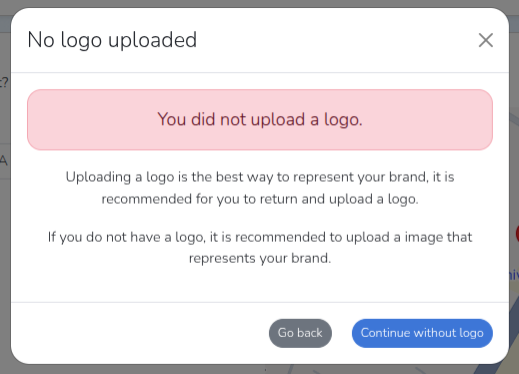
If you did not upload a market logo in the Basic Information section, a pop-up window will appear. You can either click the gray Go Back button or click the blue Continue without logo button.
If you choose to continue without a logo, you can upload one later at any time.
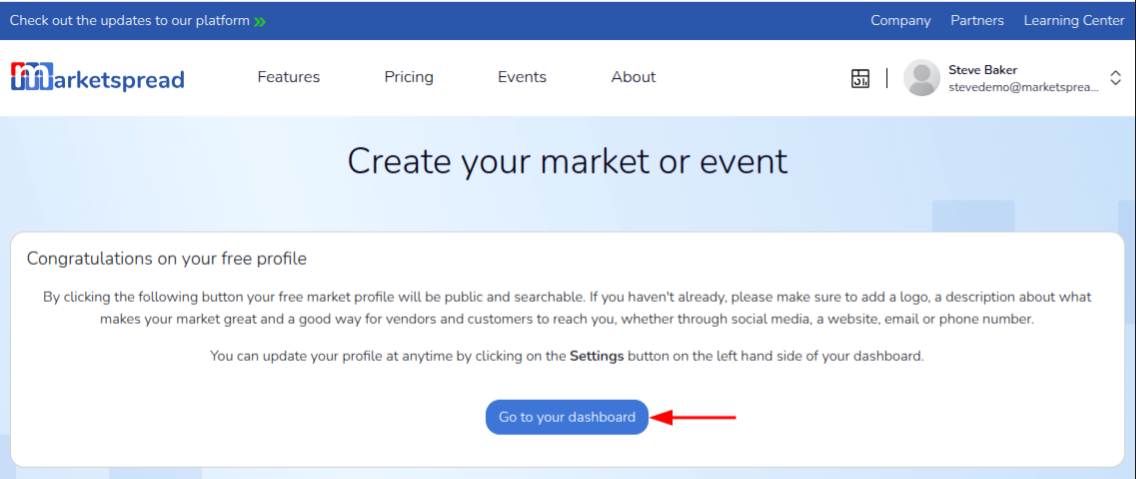
After uploading a logo or continuing without one, you will be redirected to the Congratulations on your free profile page. Click the blue Go to your dashboard button to access your new market account.
Below is an example of a new market account dashboard after completing the steps above.
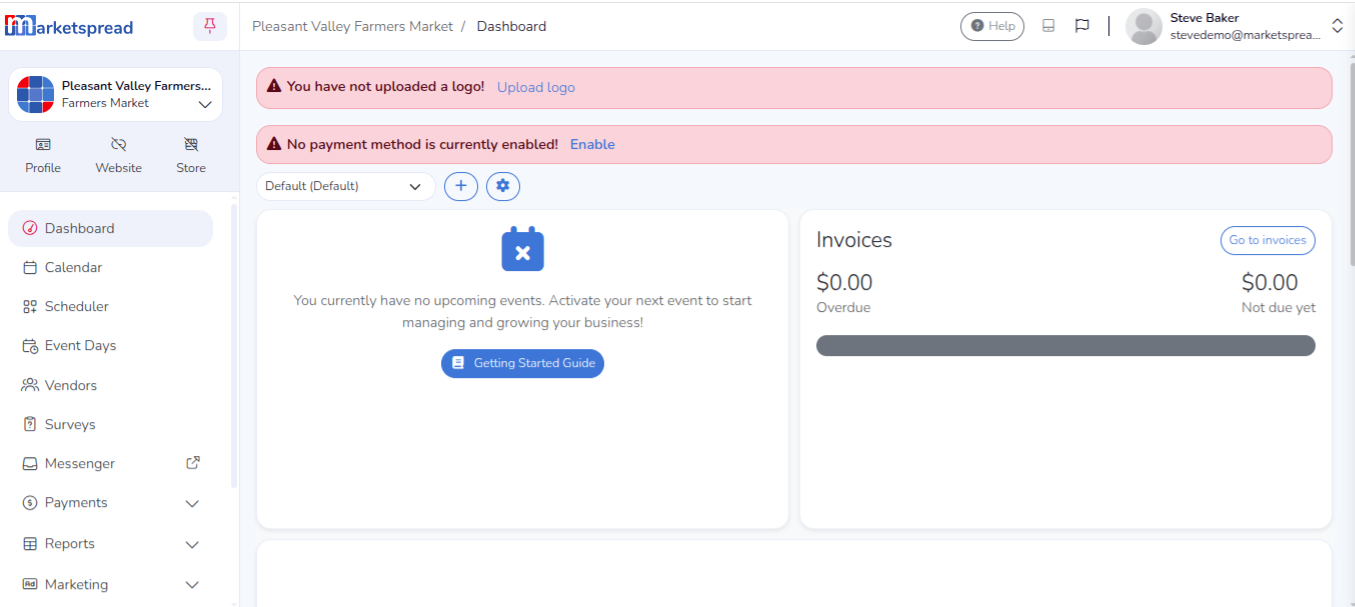
From there, you can continue setting up your account. The New Market / Event Checklist provided during onboarding is a helpful resource for next steps.