Venue Workflow Overview
Venue bookings have the following steps
- Event Registration
- Venue Application
- Quoting
- Contracting
- Invoicing
- Final Booking
While there is not a strict ordering of the steps above, the following is the basic workflow
- Register an Event
- Fill out the Venue Application
- Issue a Quote for approval
- Issue a Contract
- Issue an Invoice (or deposit)
- Mark the event as booked
If event is registered by the event organizer online the registration form and the application are automatically combined into one step
Invoices can be issued at any time. You can have as many invoices as you would like and can issue an invoice as a deposit by naming it as such.
Tracking Venue Workflow Items
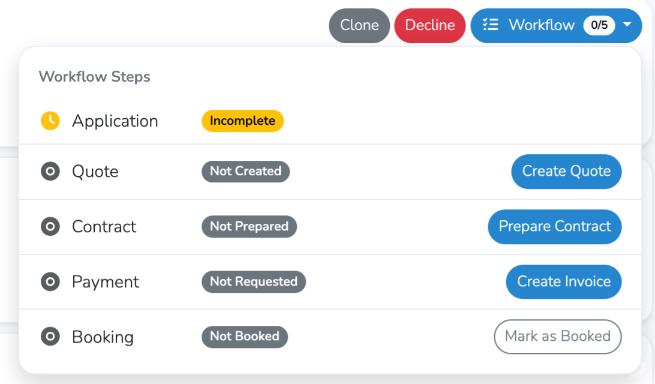
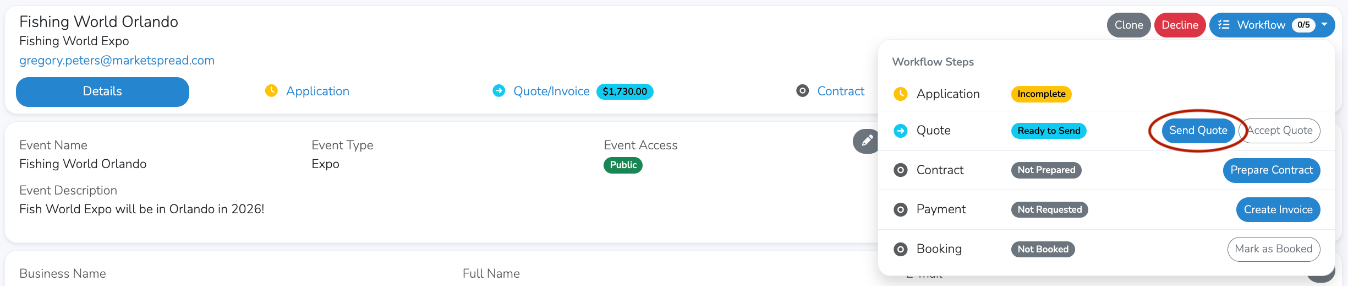
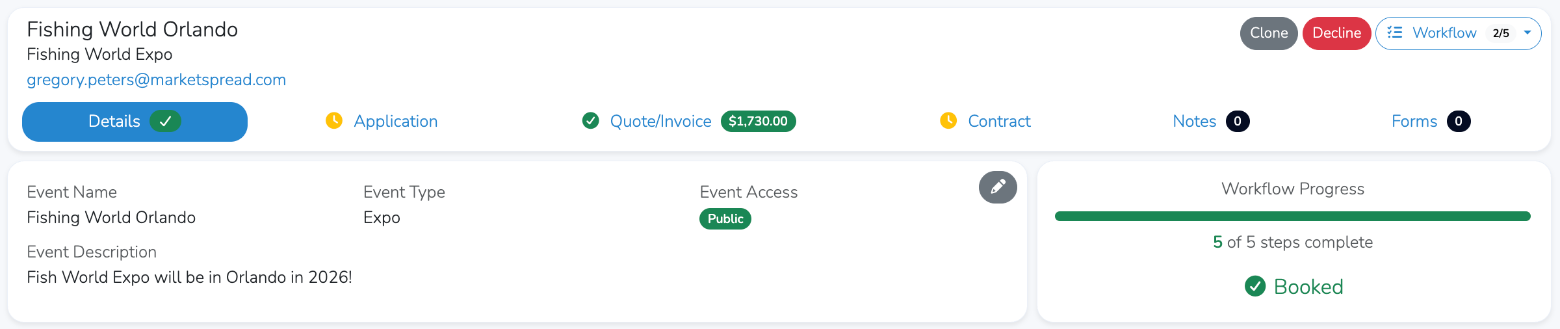
You can track the steps in your venue workflow with the workflow tab as shown below
Accessing the workflow tracker

Monitoring and Initiating steps in the workflow.
Note
None of the available workflow items are required to mark an event booked although the most value for the platform comes when most, if not all, workflow items are used...
Register an Event
This can be done manually by the venue manager via their Dashboard or by an event manager via your Online Application.
Manual Event Registration
If done via your Dashboard it is split into two sections
- The base Event Registration
- The Application (available once the registration form above is complete)


Online Customer Event Registration
If done via a customer registering a new event request online both steps 1 and 2 above are combined into one form for the customer.
Note
In the case where you are manually creating a new customer for an event booking you have the option to send them an invite to finish their account. That way they can log on to their dashboard and see their event booking status. This is found under the event “Details” tab.

Quote Creation
Once you have a basic event registration complete you can create a quote.

The quote can be created with Terms, Internal Notes and an external Memo. The Quote is not an invoice, it is used to confirm pricing with your event manager and to track invoices against.
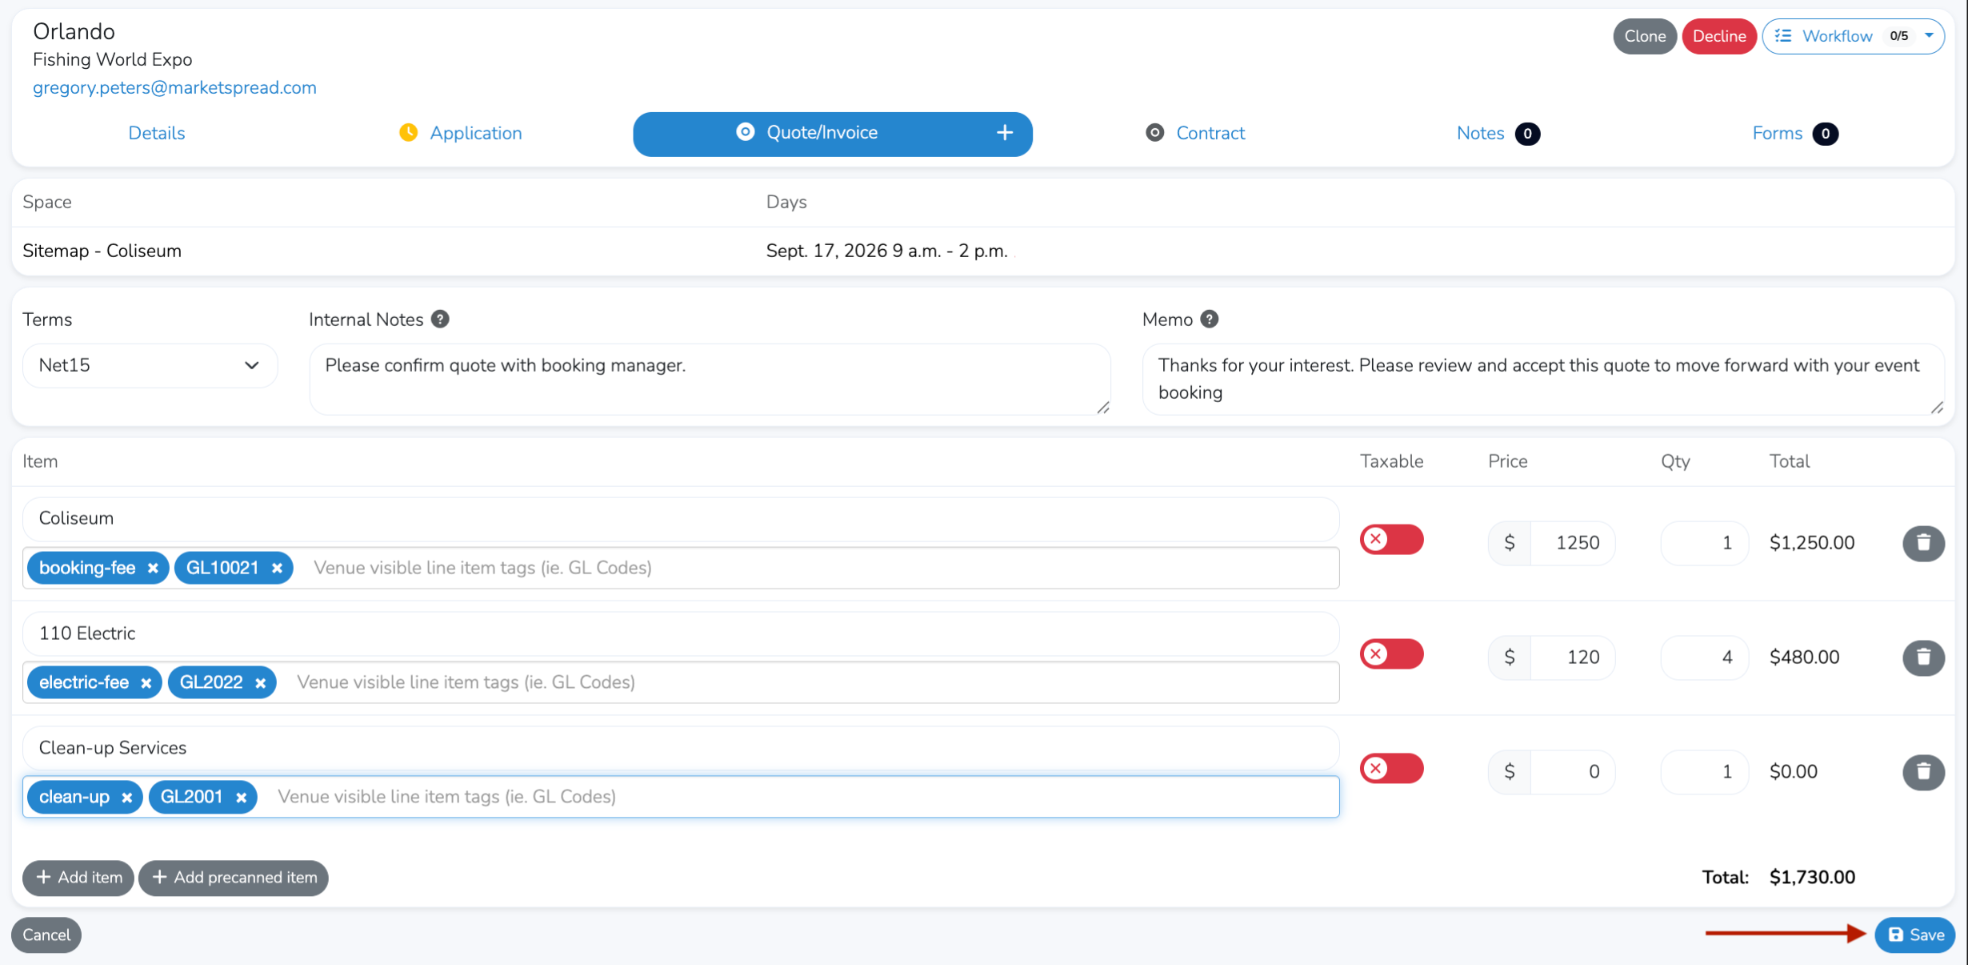
Once the quote is saved you can send it to the event manager for their review and approval.

Quote Approval
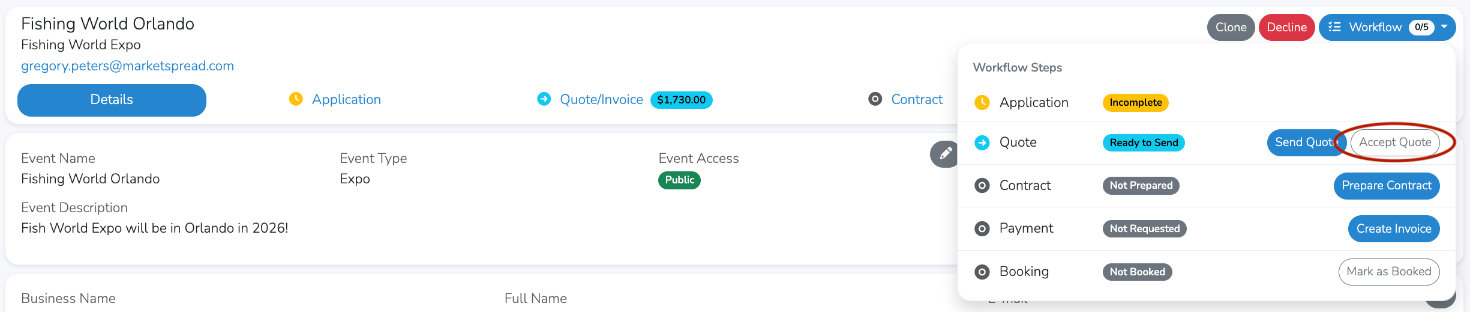
Once a quote is sent it can be approved. This can be forced by the venue manager or accepted by the event manager (person registering the event).
Venue Manager Quote Approval
Event Manager (requestor) Quote Approval
On the Event Manager's side, they can accept the Quote in their dashboard

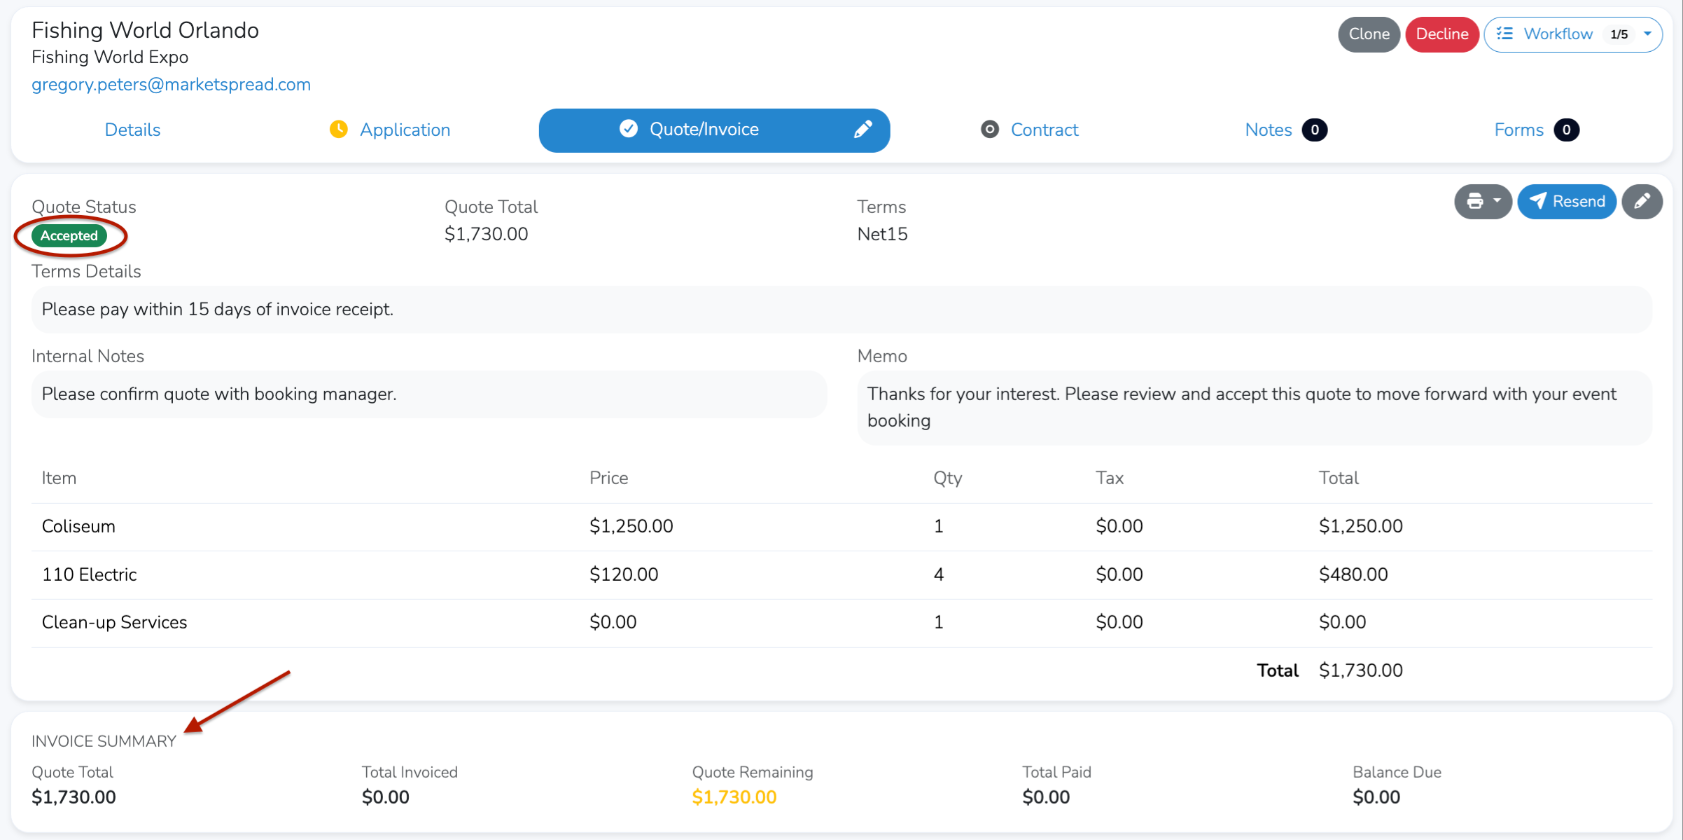
Once accepted, you will see the event Quote Status update to "Accepted". You will also then see an Invoice Summary.
Note
Now that the quote is accepted there is an “Invoice Summary” This panel will track all invoices related to the quote. In the next section we will explore how this relates to issuing and taking payment for a deposit.
Deposits and Invoices
A deposit is treated like any other invoice and can be created by going to “Quotes/Invoices”

At the bottom click the blue “+ Add Invoice" button

In the Add Invoice window
- name the invoice, in this case “Deposit”
- Add a due date and optional Scheduled Release Date
- Add any internal Notes and Memos
- Add the fees associated with the invoice, in this case a $500 deposit
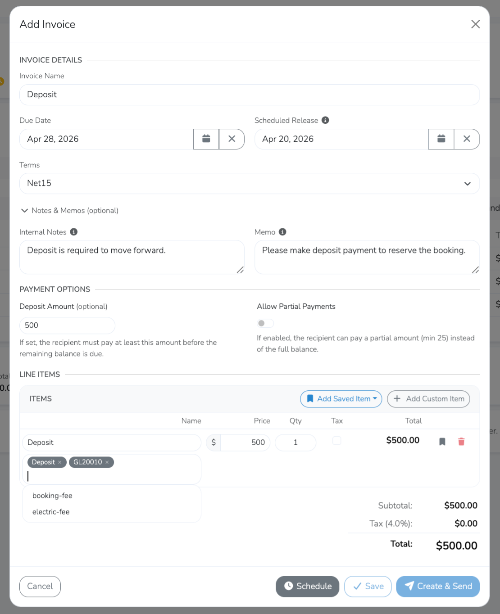
If you set scheduled release for the invoice click the grey "Schedule" button at the bottom. Otherwise, to send it right away click on the blue "Create and Send" button.
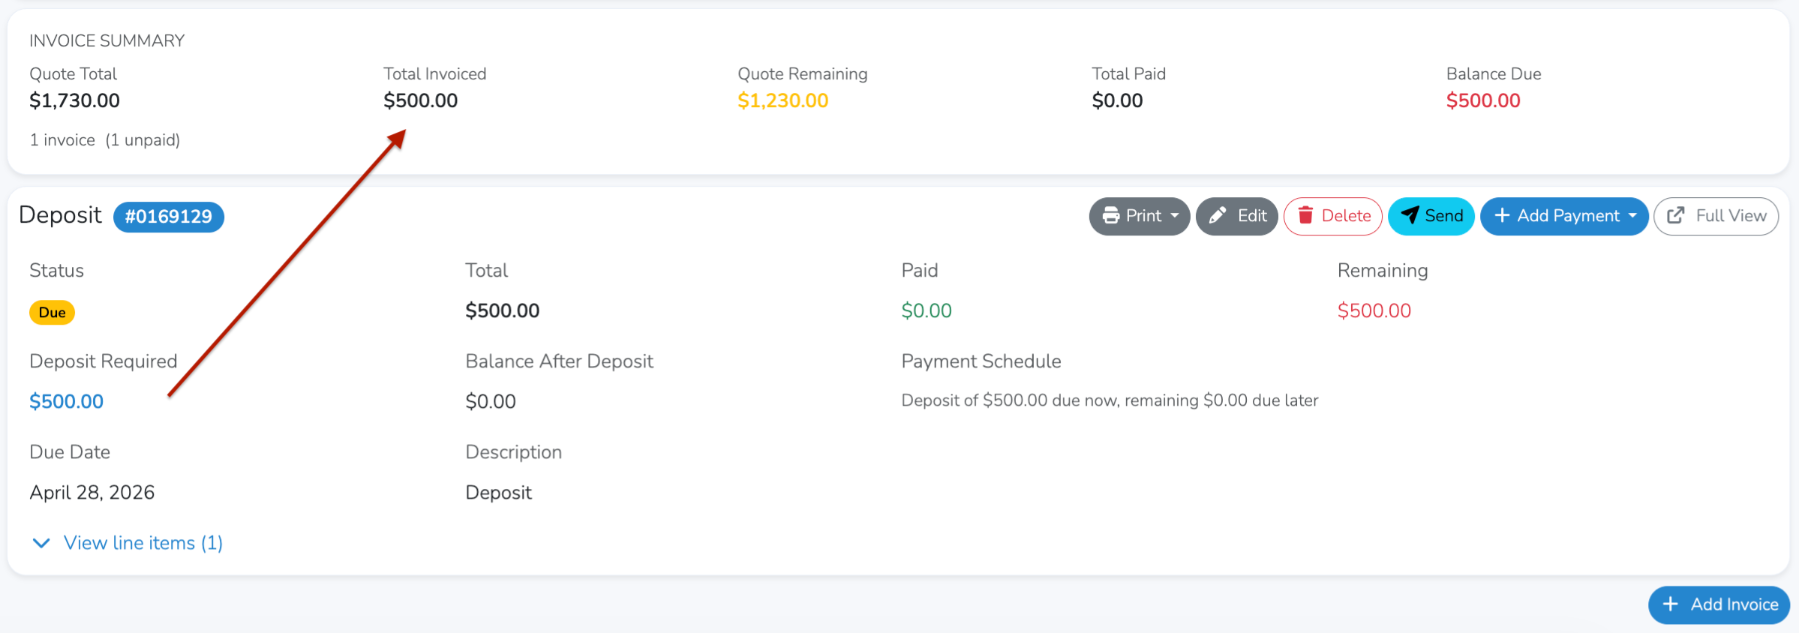
After creating the invoice, it will be added to the bottom of the “Quotes/Invoices” tab. Notice how it tracks the invoices in the Invoice summary against the Quoted amount. You can create as many invoices as you would like and set them to release on any schedule. The Invoice Summary will include the roll-up of all created invoices.
Contract Management
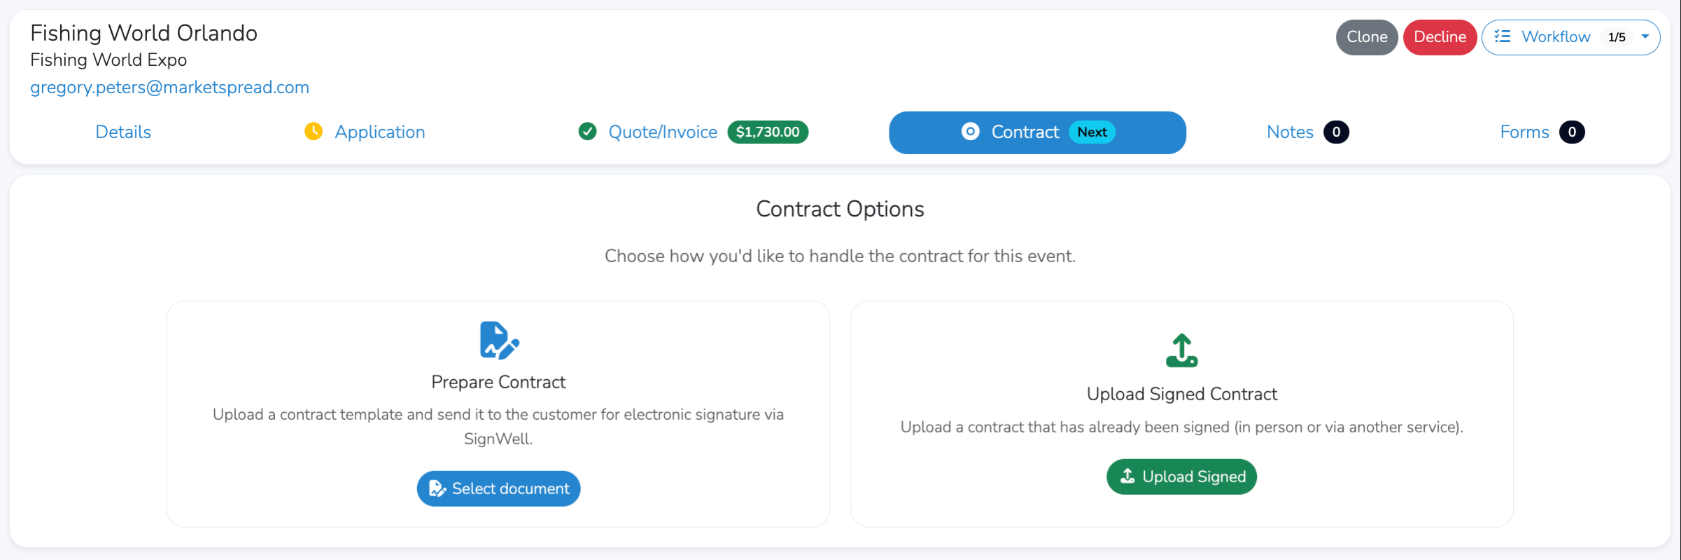
Your Booking Contract
There are two options for a contract, uploading an already signed contract and preparing a contract for digital signature.
To prepare a contract for digital signature select the blue “Select document” button in the “Prepare Contract” panel.
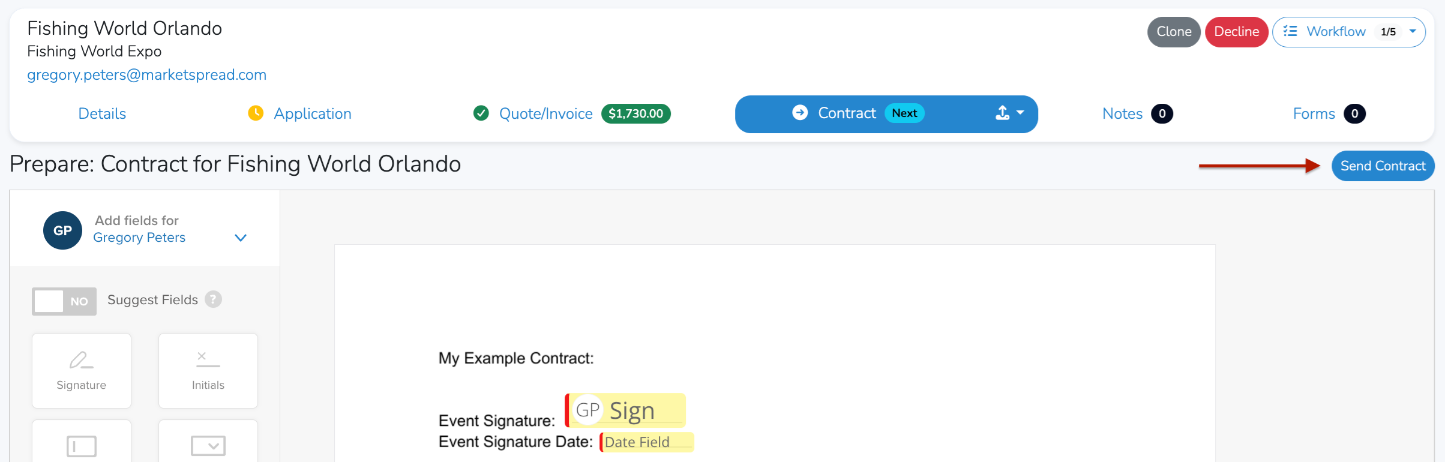
Preparing a Contract For Signature
The contract prepare button will allow you to add as many signers as you would like along with any other contract input fields, whether checkboxes, text boxes or other.
Note
To learn more about preparing documents for signature, including adding additional signers please reference our Preparing Documents for Signature support article.
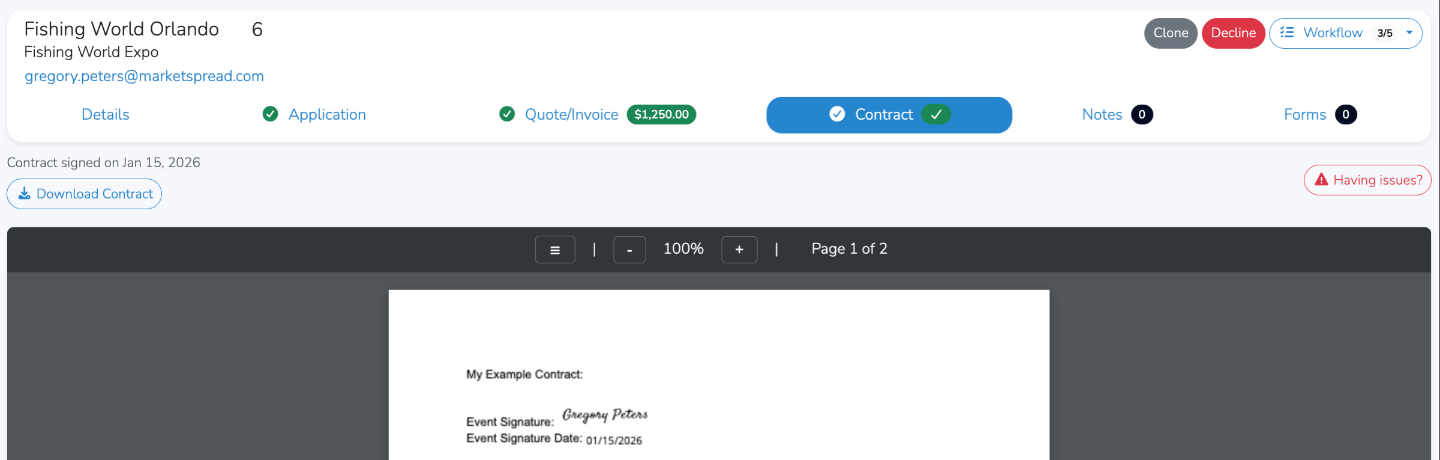
Tracking signature progress
Once the contract is sent you can easily track the signing process. In this example we have two signers but you can have as many as you would like and will be able to track the progress of all signers here. As the signers sign the contract their names will change from gray to green.

Once the contract is fully signed you (and all signers) can download it.
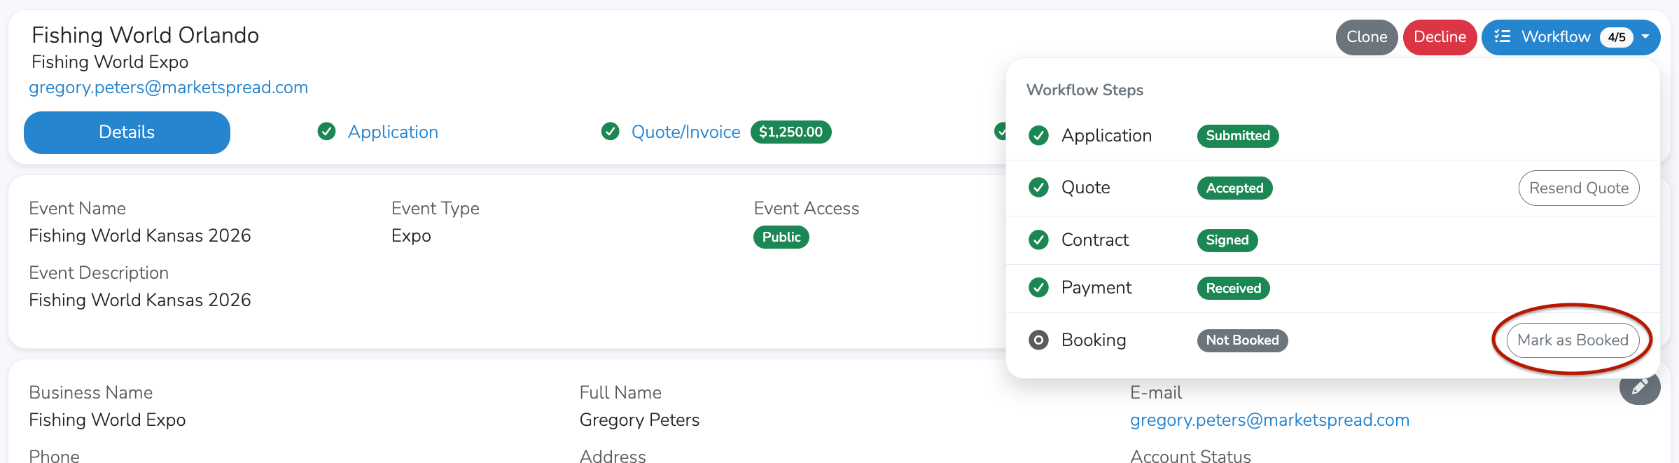
Finalizing an Event Booking
Booking an event will put it on your booking calendar as fully booked. It is generally used as the indicator that an agreement has been reached and payment details agreed on. While you can book any registered event at any time it is usually saved for after
- your quote is approved
- your contract is signed
- some payment (deposit) is taken
To mark an event as booked, click on the workflow button at the top right and click the “Mark as Booked” button.
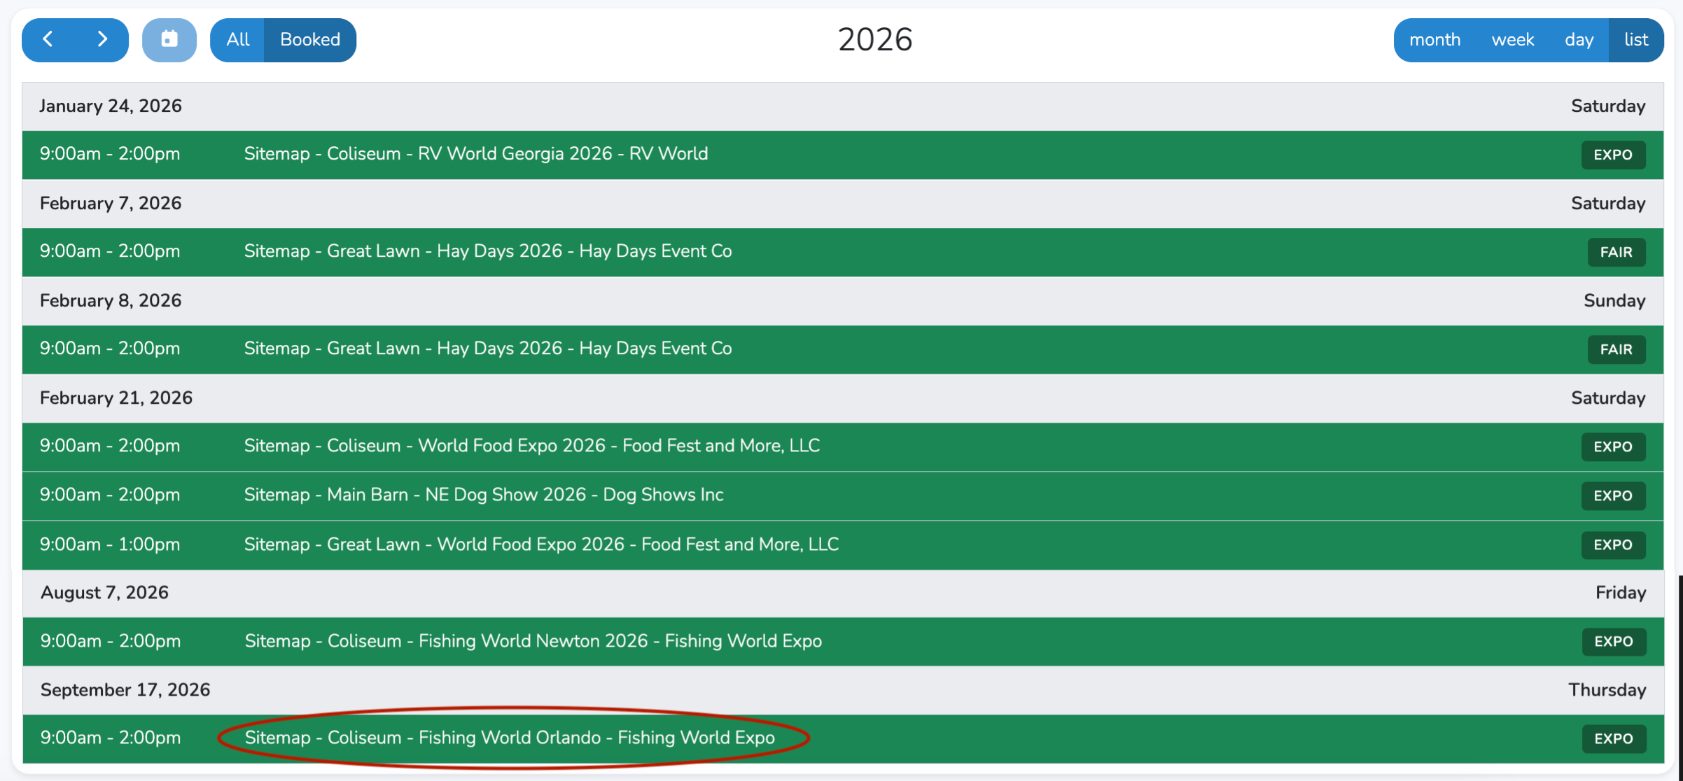
Once booked it will show as such in your event details.
And in your event calendar.