

If you have multiple markets or events under your account that you would like a single application for you will need to create a Virtual Market. A Virtual Market is a market that only includes an application. It does not have a map or event configuaration (set of defined event dates).
For the example in this support article lets assume you have an organization that manages 2 farmers markets at two different locations.
Creating a single application configuration
Go to your account profile by clicking on your account avatar at the top right.

Then select Markets & Venues. Here you should see a list of all your markets and event. If you have not already created your markets or events you can do that now or after you create your virtual market.

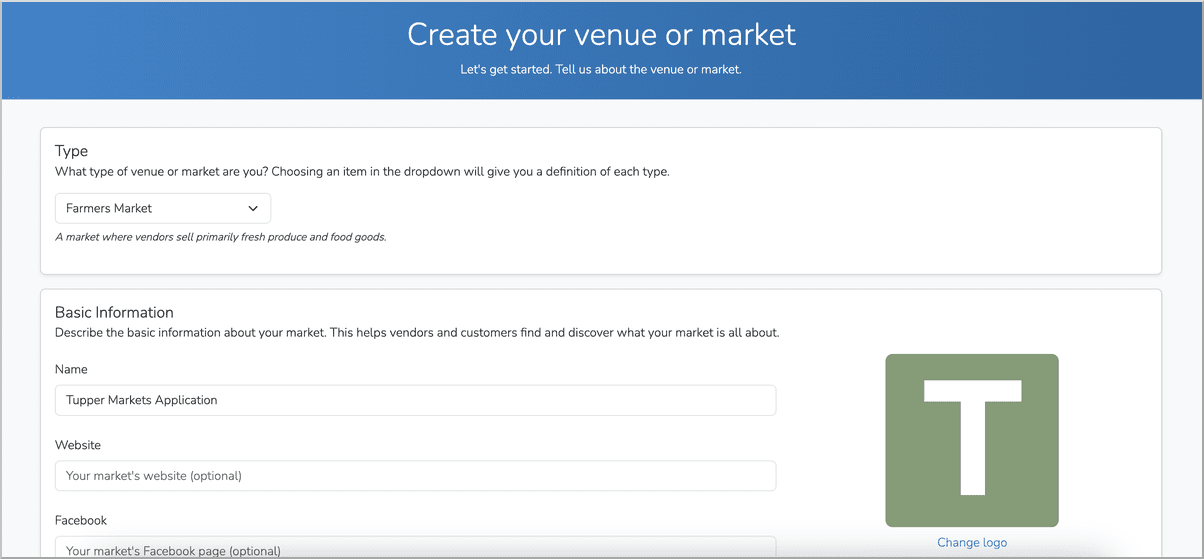
To create your Virtual Market for your single application click on the blue Create Market button.

Then create your market by adding all the revelant details. A couple of quick notes:
- Give your virtual market a name that informs your vendors it is where they access your application. In this example we called it, "Tupper Markets Application"
- You will be asked to enter your address. Since the market is virtual you can just enter the town/city and state. You do not need a full address.
After you create the market profile, go to Settings->Profile in your dashboard.

There, find the Virtual Only option and set it to Yes. By default it will be No.

Your market or event will now be set as a Virtual Only. You will see this label under your market or event name. You will also see that Event Configurations has been removed leaving only Applications.

Next, create your application.

One recommendation is to add a question asking which of your markets the vendor is interested in participating in. Create this question as type Mulitple Select

After your application is complete you can activate it. This will allow vendors to apply to it.

Managing single application vendor acceptance
With a single application you have a couple of options on how to accept vendors. These are described below.
Vendor Acceptance Scenario 1
The first scenario is to have vendors apply to your top level application then upon acceptance, route them to each individual market's application. This can be done manually via an email, application comment, or in a more automated fashion by creating a custom "Accepted" status reply.
Vendor Acceptance Scenario 2
The second scenario is to have vendors apply to your top level application, then upon acceptance manually place them into the other markets as "Accepted". This is the shortest and least involved scenario.
To learn more about single application vendor acceptance workflows, please reference the support video linked below:
https://placeholder.marketspread