

Marketpress is our fully integrated, website hosting service that allows you to quickly enable your personal website.
Activating your Marketspress Website
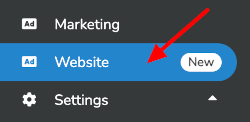
To get started, go to Website in your dashboard's lefthand toolbar (see below).
Then, select the plan that best fits your needs. We offer the following three plans, shown in the image below. For the purposes of this support walkthrough, we will keep the Yearly option selected. To change the selection, simply click on one of the other grey SELECT buttons.

After selecting your plan, scroll down to the panel titled Configure Your Subdomain(see below).
Every Marketpress account includes a configurable "marketpress.site" web address. This is the address that your customers can find your webpage. If you have a fully custom domain name, we will show you how to configure that later in this article.

By default, the address will be your vendor name with any spaces replaced with dashes "-." You can update this part of the website address to anything you would like. For example, you can remove the dashes (see below).

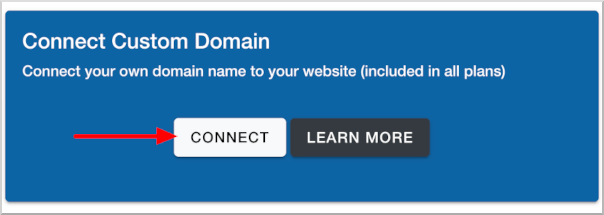
If you have your own domain name, regardless of where you bought it (godaddy, google, etc.) you can direct it to your Marketpress website as well. Note that a custom domain is not a requirement. You can continue to use your Marketpress website with only your "marketpress.site."
To point your personal domain name, click on the CONNECT button in the Connect Custom Domain panel (see below).
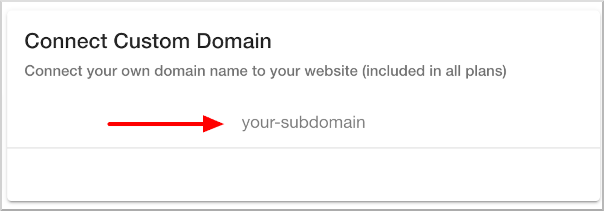
This will open a domain address field for you to enter your custom domain (see below).
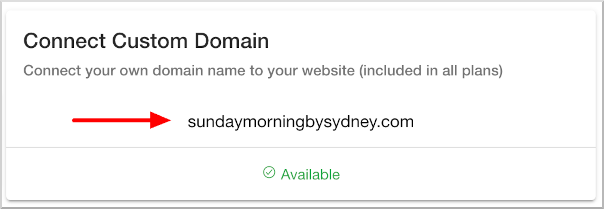
In this example, we will assume we have the domain "sundaymorningbysydney.com," and we will enter it as required (see below).
To activate your site, scroll to the bottom of the page, and enter your Credit Card details (see below).
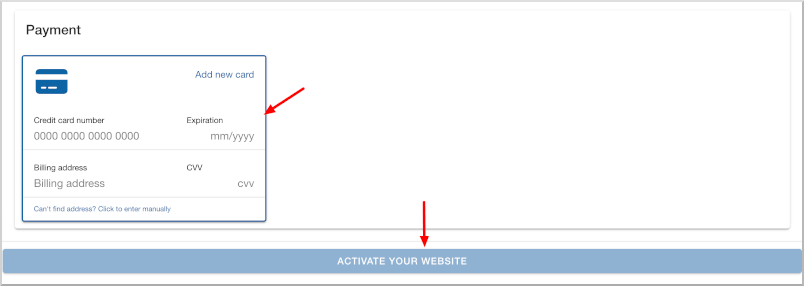
The ACTIVATE YOUR WEBSITE button will be unselectable until your Credit Card details are correctly entered (see below).
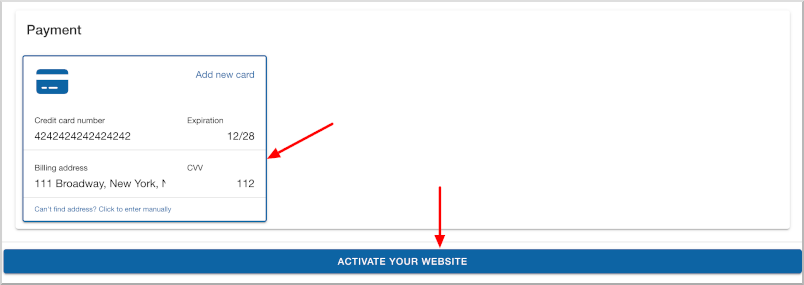
To complete the activation, click the button.
Selecting your Website Template
After activating your website, you will be presented with the website editor login credentials (see below).
Please store these in a secure way, but don't worry if you forget them. A new password can easily be created at any time.
The next thing you will do is go to your website editor to select your website template. To do this, simply click the GO TO ADMIN button.

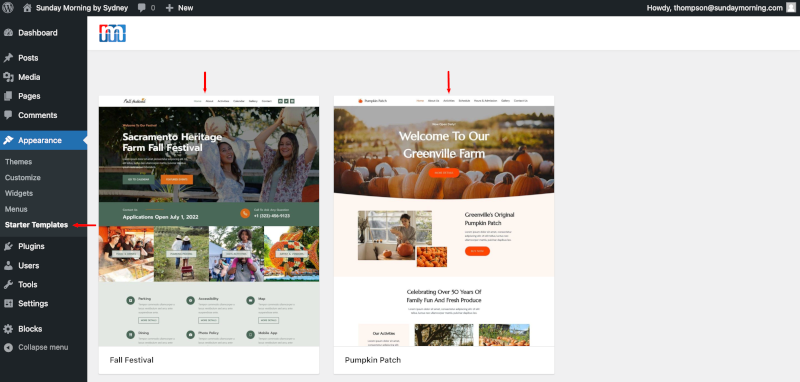
In the website editor, you will want to access Starter Templates from the lefthand toolbar (see below).
Currently, we offer two templates:
Fall Festival - designed for markets and events
Pumpkin Patch - designed for farmers, food vendors, and any other small business type
(We also have access to make available other templates from the list here - if you would like to use one of these additional templates please email us at [email protected])
To choose a template, click on it in the main window.
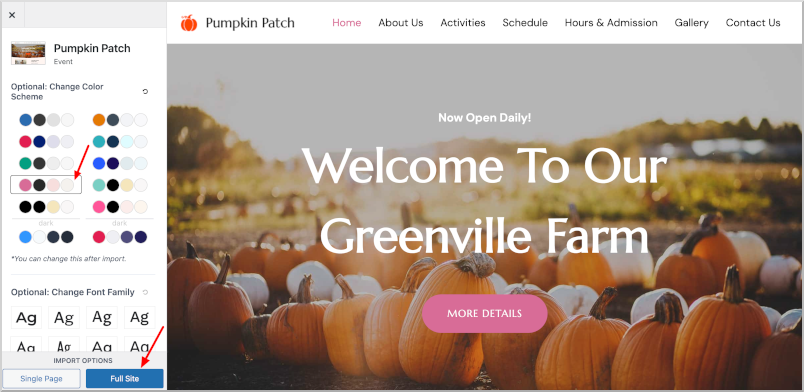
After selecting the template, you will be presented with a template preview and some basic theme options on the left. In this example we have updated the default color scheme (orange) to one with a pink color set.
You can also update the default font here as well. Note that all defaults can be updated post import as well.
When you are ready to start the full import click the blue Full Site button at the bottom left.
The import will present you with a pop-up model progress window. Note: importing can sometimes take a while to complete.
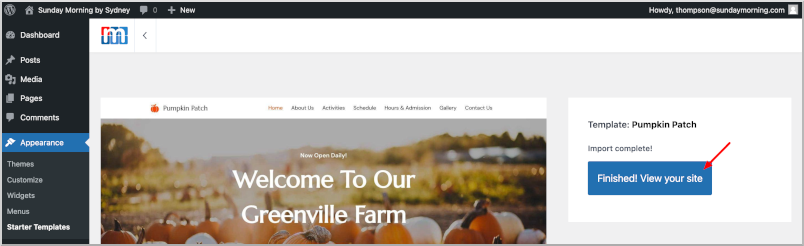
Once the import has finished, you will be presented with the your new websites top landing page in the Marketpress editor. From here, you can start to modify the template with text and images for your market, event or business.
If you require assistnace with updating the template to meet your design needs please email us at [email protected]. We have designers available to assist.
