
May 18, 2020
This article will share some tips to help you make your vendor profile look its best. A strong profile will encourage market managers to let you sell at their market, and entice customers to seek you out. As you set up your vendor profile, keep in mind your profile is used not only to apply to sell at a market, but customers visiting that market will view your profile to learn about your business. Don't use your profile solely to communicate to a market, use it to sell yourself to the world.
Be sure to set the name of your vendor as your commonly known name, not as your LLC or necessarily your legal name. Your vendor name listed should be the name you want your customers to know you by.
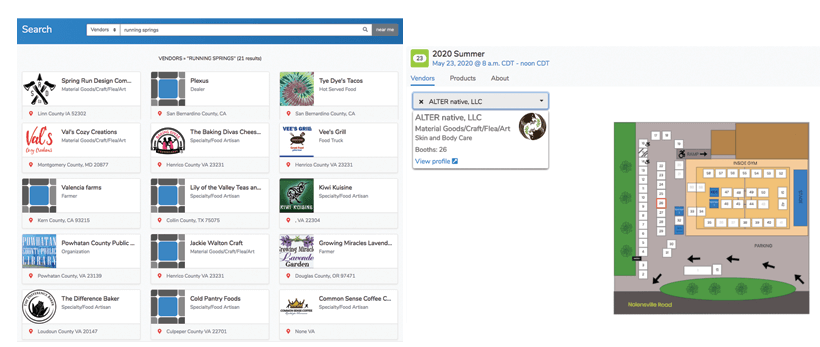
The first step toward creating a memorable vendor profile is adding a logo. In the pictures below, you see the results for a vendor search for a particular market and then a market event-day page. On each of these pages, the vendors with personalized logos stand out from the ones that use the default vendor logo. For a customer, seeing a market page that at-a-glance shows a colorful variety of vendors, is very enticing. This can really draw more customers to the markets where you will be selling. Also, once they get to the physical market, they will easily be able to find your booth since they can recognize your logo. If you do not have a logo, an easy substitution is a photo of yourself or of one of your products.
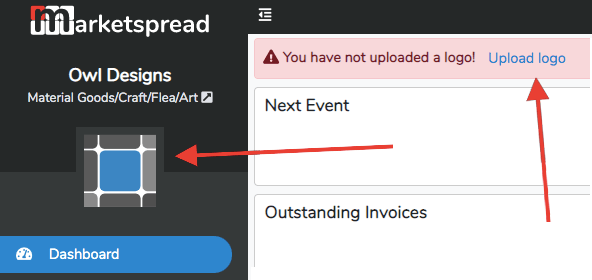
Adding a logo is easy. Log in and click on your dashboard. You have 2 options. Either click "Upload logo" Which will bring up a small windor where you can upload your PNG logo file. Or, in the upper left corner of your screen, click on the temporary logo under your vendor name, which allows you to preview your vendor profile.
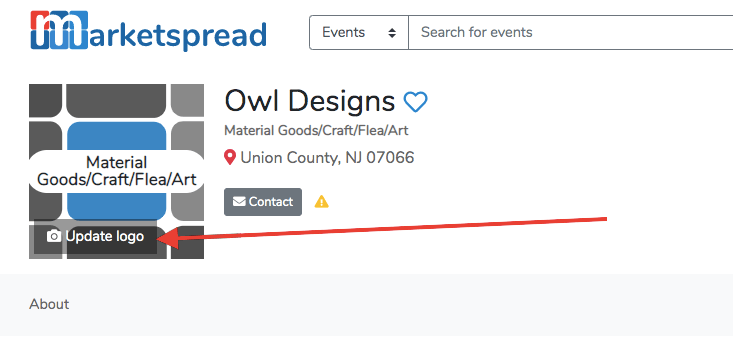
On this page, roll your mouse over the default logo, and you will see the button “Update logo” appear. Click on this to upload a logo.
Again, if you do not have a logo, a good option is to upload an image of a product here. Or even a photo of the vendor owner, or of several employees. Any image that is unique to you and your products would be great and differentiate you from other vendors. Having a logo makes your vendor profile look professional and polished.
A description is where you can really begin to sell yourself to event attendees. People want to hear your story and get a preview of who they will be visiting at the event. Use this space to give some history on your business and products.
From your vendor dashboard, click on “settings” on the left hand side of the screen.
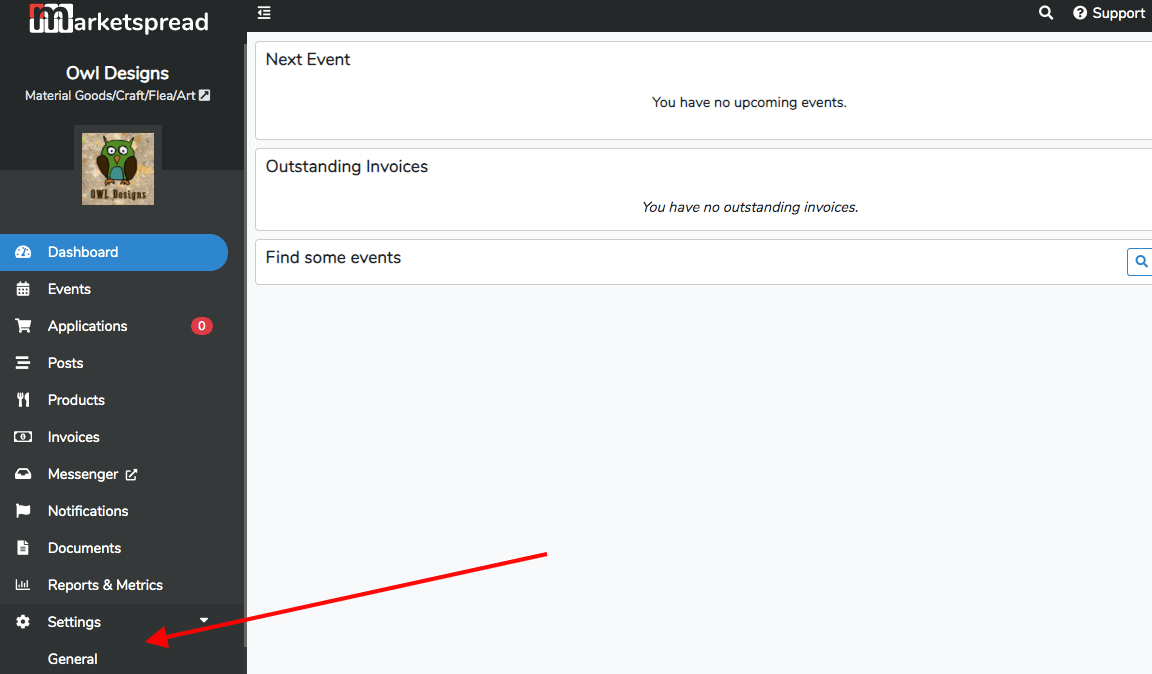
Scroll down and click on pencil icon in the section “biography.”
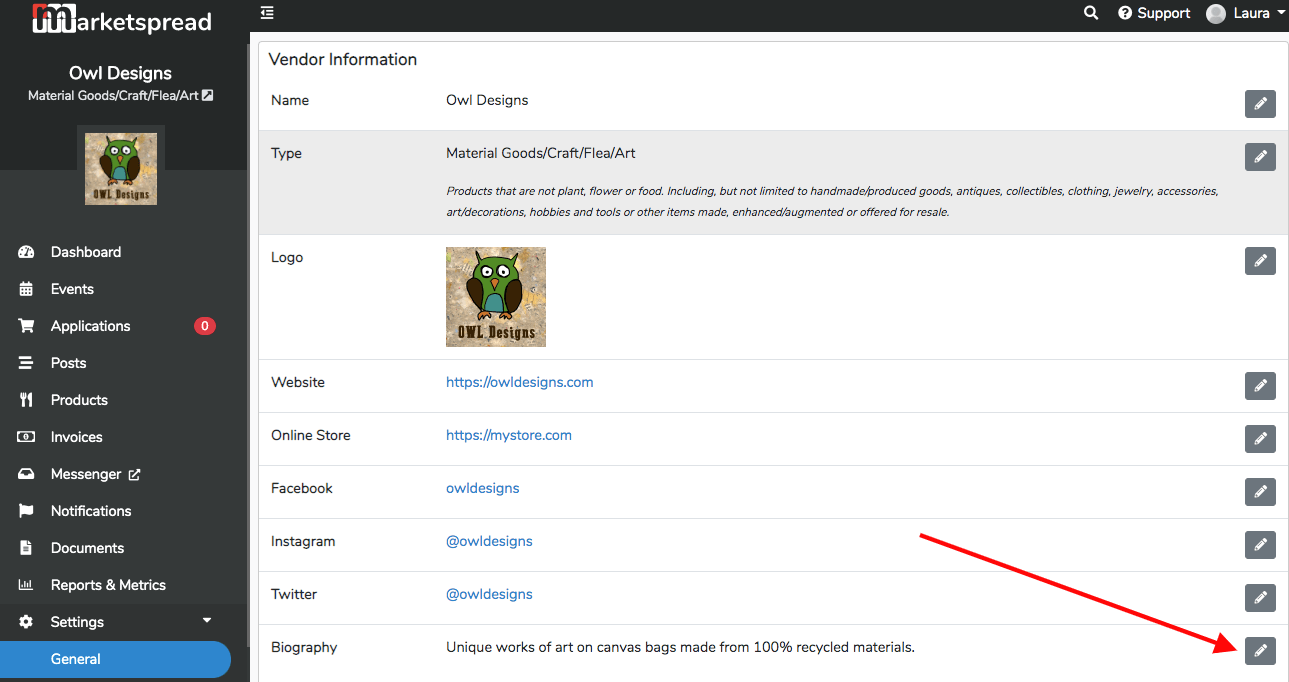
This will open up the biography box, and allow you to give more details about who you are, how your products are made, and where your products are sold. Your customers WANT to hear your story! Again, keep in mind both market managers and customers are going to be reading this verbiage. Don't use this space to communicate to a market. You want to address any audience.
If you scroll down on the settings page, you can see where you can highlight your production practices. This section may not apply to your vendor-type. If not, just skip.

In this area, you can add “tags” to label yourself with some common product practices, such as non-gmo. Or you can use the space to describe how you create or grow your products. You can also identify yourself as Certified with CNG, the AGA or USDA Organic. These labels are verified by their respective organizations, so please be sure you are up to date with your certifications if you choose these labels. Again, customers shop at local markets because they want to know what they are getting! Be proud to give them the details about all of your hard work. You can easily come back and edit this section as time goes on and you make changes and develop your products and practices.
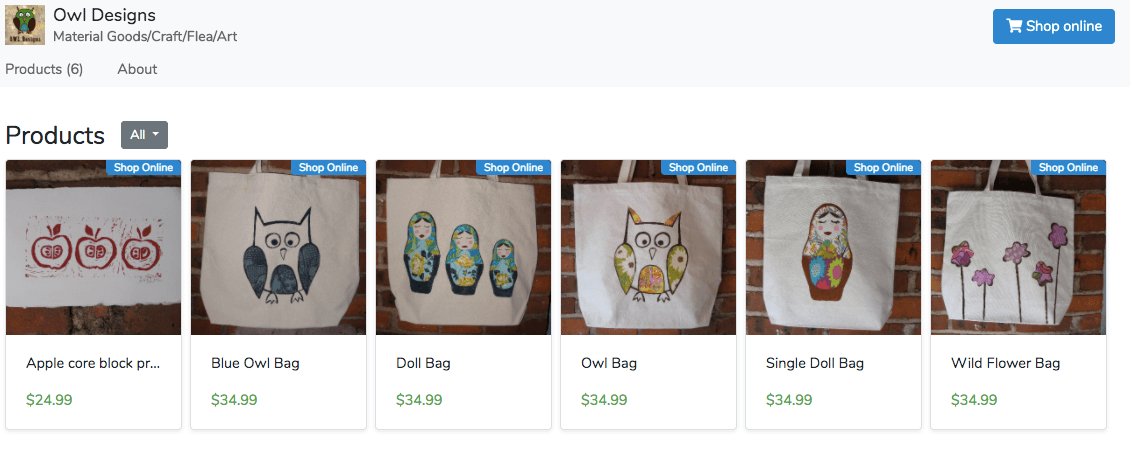
To really complete your vendor profile, add some products to highlight what you will be selling at your local market. You do not have to add every product, but enough to give market managers and market goers an idea of what they can expect at your vendor booth. This can help market managers evaluate if they want to invite you to participate in their market, or, if you are already accepted into a market, it can help advertise to customers what you will be selling. Market managers may require this step. This can draw more shoppers to your market! Products are aggregated to the market profile so they help advertise you at the market as a whole and make the market look healthier. Product listings also help with SEO (search engine optimization). This means that local customers searching for the products you sell, are more likely to find you.
When you add your products, be sure to add a separate product listing for each actual product. For example, don’t use just one product listing and call it “baked goods.” Instead, add a product for wheat bread, another for rolls, etc etc. Overgeneralizing will hurt your SEO.
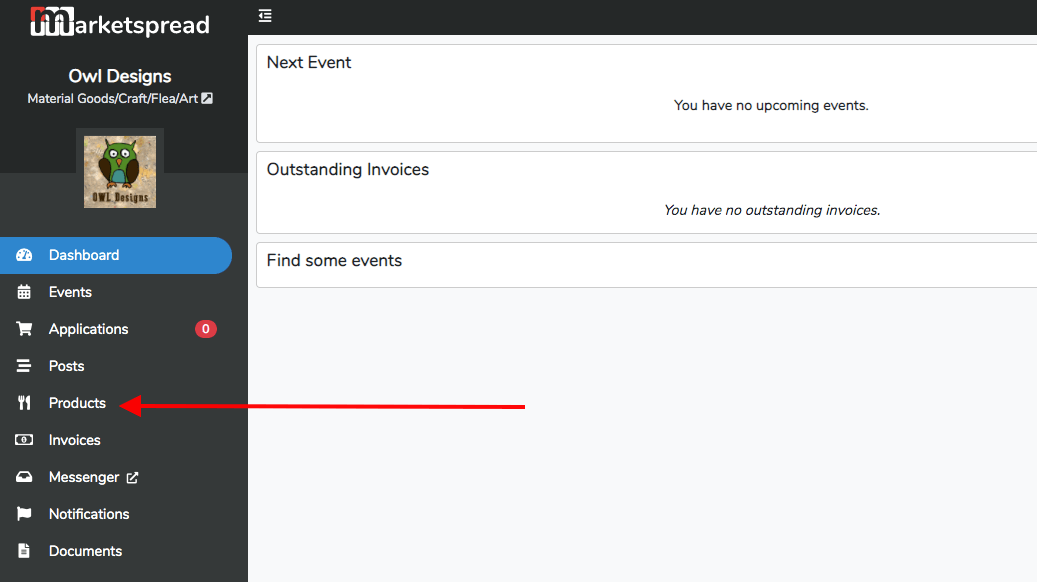
To add a product, from your vendor dashboard, click “products”
Then click "add product" in the uppper right hand corner.
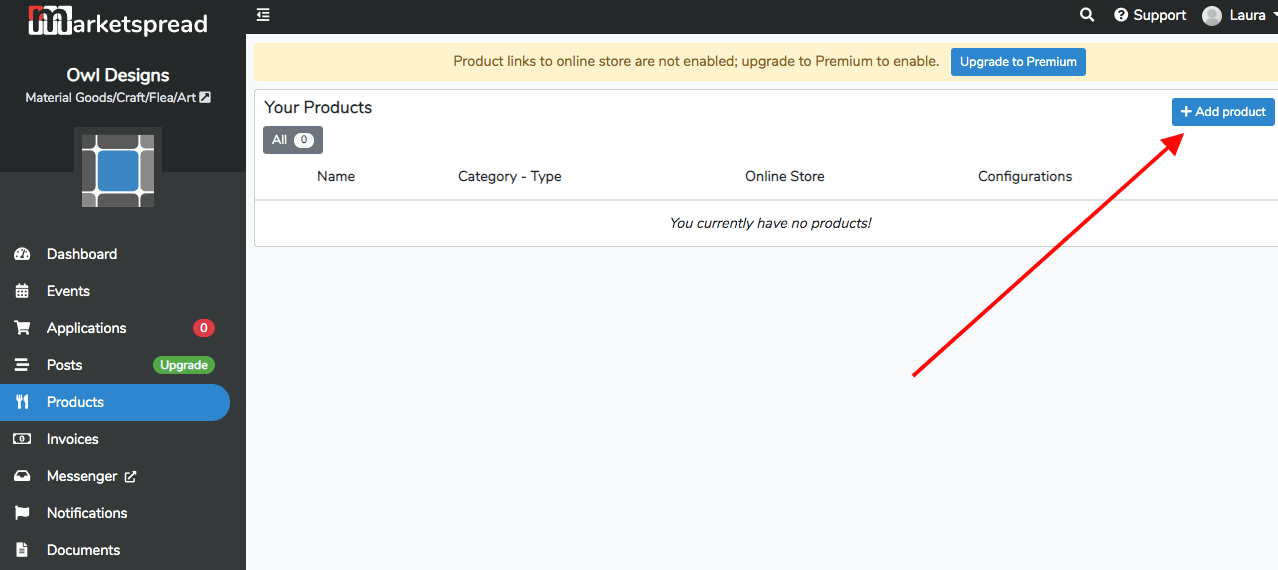
Fill in the fields as they apply to your product, and add images. Again, you should only add one actual product at a time. This way each product is individually searchable, and your profile will show a full assortment of items, rather than one product image. The better the product description the stronger the product's online presence and the more likely someone will find it.
Optional Premium Features
You can also advertise your online store and link products directly to your online store.
This may seem like a lot to do at once, but you can always go back to edit your vendor profile to add details and additional products and images. Also be sure to keep your profile updated as your change and enhance your products. These tips will help you create a robust profile to attract market managers and shoppers, and increase sales!